Embed Size (px)
DESCRIPTION
Building big arms
Citation preview

SPECIAL BIG ARMS eREPORT
Neural One-Day Blitz System “Add ½ Inch in One Day”
By
Dennis B. Weis “The Yukon Hercules”
Distributed by www.dennisbweis.com
© 2001 Dennis B. Weis
2
PLEASE NOTE:
The information contained in this eReport is provided for the reader’s use as a guide for improving arm size and strength. Nothing herein should be construed as medical advice, and the exercises, high-intensity micro workouts, restorative modalities, and nutritional systems of body care information contained in this report should NOT be taken as a substitute for medical advice. Not all of the workouts and practices in this report are suitable for everyone. The reader should consult a licensed primary care physician before attempting the types of workouts and practices recommended herein. Weight training poses a significant risk of injury, and the reader should take due care to use proper equipment and exercise in a safe training environment. All recommendations contained in this eReport are made without guarantee on the part of the author and/or publisher who, as a result, disclaim any and all liability in connection with the use of this information.
© 2001 Dennis B. Weis
All rights reserved including the right of reproduction in whole or part in any form except for brief quotations embodied in reviews and articles or by prior written consent of the author and/or distributor.
3
Jump Start Super-Arm Growth in 24 Hours!
Want To Add A Half-Inch To Your Arms In One Day? Well… if you’ve grown despondent at your temporary inability to produce fresh new muscle growth in your arms, give it another try with The Radical Muscle Blitz System for Rapid Arm Growth described in this gigantic Special Big Arms eReport. Bodybuilders the world over are always on the lookout for new and innovative “high-intensity” training techniques that will stimulate fresh new muscle growth in the shortest time possible. This is especially true for a muscle group that hasn’t been responding as quickly as you would like and is, in fact, spoiling the natural symmetry of your physique. When muscle growth and development stop beyond the norm, certain select specialization techniques are often implemented to stimulate a new burst of the muscle growth curve. There are several time-proven methods by which to specialize on any lagging body part that is in a static state of development. One of the most distinctive methods is the Neural One-Day Blitz System, researched and developed by Jay Schroeder, director of the UltraFit International Training and Research Facility in Mesa, Arizona. I learned about it from Jay some time back. Jay credits Peary Rader with the discovery and development of the original One-Day Program of Specialization back in the 1940’s and 50’s. Jay simply incorporated Russian methodology (techniques for restoration and recovery as well as applied principles of speed and super-compensation) to the One-Day Blitz that Peary Rader had already prepared decades ago (Ref: The Rader Master Bodybuilding and Weight Gaining System). Jay calls this the Neural (Nerve Force) One-Day Blitz System. It is aptly named because it stimulates the nerve & blood pathways (neuro-muscular system) to the upper arms through a carefully planned Power 1 & 2-Rep System of multiple maximum single and double rep sets. The innovative Power 1 & 2-Rep System is the key factor that facilitates neuromuscular response of such magnitude that the body parts (ARMS) have no other choice except to respond permanently and adapt in response to the training effect of more hypertrophy of fast-twitch muscle fibers. Also, when doing single and double rep sets, there is less of an accumulated buildup of lactic acid that occurs when doing other one-day blitz workouts where 4 or more reps are executed per set. How is the Power 1 & 2-Rep System accomplished for sub-par muscle group such as the arm? It is done through a dispersal of very brief, brutal, and super-intense micro-training sessions (called Time Compression Workouts) on

4
carefully selected even and odd hours and half-hours during a 12-hour day (for example, 10:00 AM to 10:00 PM). Since society requires you to earn a living to pay rent and buy food, etc., the traits of training protocol for Neural One-Day Blitz System is best accomplished on a scheduled day off from your job, such as a weekend or vacation time. The bottom line for making this system of training work for you is to schedule a whole day completely devoted to uninterrupted training at either a commercial health club or equipped home gym. You go to the gym in the morning and don’t leave until the evening. You’ll need someone to assist you on certain training methodics, so it would be great if you and a training partner do this program together. The comprehensive Neural One-Day Blitz System (NODBS), although radical, has been battle tested successfully in the trenches of some of the most hardcore gyms in the world. The NODBS consists of 16 Stepping Stones that help give you an extra edge in the fight for big arms. With the 16 Stepping Stones you will create the weapons you need mentally and physically to win the Big Arms race. Here’s a detailed look at each one.
16 Stepping Stones #1. The Week Prior Your last scheduled training session for one or more muscle groups should conclude two days prior to performing the NODBS. For example, assuming that you are going to do the neural blitz training session on a Saturday, all normal training sessions should be concluded by Wednesday. The training sessions during this week should be of medium intensity loads of 72%-84% of your current un-fatigued one-rep maximums and high to very high volume. German Volume Training (GVT) is an excellent workout choice. Pick ten exercises to work the total body and do ten sets of each exercise (you choose either a compound or isolationary exercise depending on your wants and needs), ten reps per set. Rest – pauses of 20 seconds (minimum) to 60 seconds (maximum) should be taken between each training set of a selected exercise. Use a fixed poundage (no pyramids) for all ten sets if possible. If not, reduce the poundage no more than 5-10 pounds every two to five sets. Other options include 8 sets of 8 reps and 6 sets of 6 reps. Rest – pauses of 15 seconds (for increased muscularity) or 30-45 seconds (for muscle mass increase) should be taken between each training set of a selected exercise. Finally, do not begin your first regular training session feeder workouts until Tuesday and Wednesday of the following week, again using medium intensity loads and high volume as recommended above, but for only one-week period.

5
Then go back to your previous training protocol, whatever that may be. One of my favorites is "The Titan Training System" (log onto: www.otsdirect.com to read about it). #2. Rest and Recovery Do not work out two days prior to or after the NODBS. Rest is of vital importance. Try to get at least 8 hours of quality sleep at night, but probably not more than 9 hours, as you may wake up feeling sluggish. Relaxation is equally as important as sleep. It is agreed by many of the experts in the iron game that three hours of total relaxation is equivalent to a full nights sleep. The non-workout days of R&R will provide you with adequate physical and mental (muscles and central nervous system) preparation to adapt to the neural blitz training session. #3. Use a Tape Measure An excellent system of feedback for monitoring arm growth is a non-shrinkable nylon tape measure. So on Friday have a training partner take a cold measurement of each arm (don’t pump up the arms with any type of bodyweight-only or free weight exercises). This is accomplished by first doing a front double bicep pose. Here are some pointers to remember when doing this pose:
• To begin, raise the arms out from the side in a semicircular motion to a point where they are slightly higher than the shoulders at the fully extended position.
• Twist your wrists so that your palms face the ceiling. Now make a fist and
bend it upward at the wrist, contracting the forearms flexors as you do so.
• Simultaneously bend (flex) the arms at the elbow joint, contracting the forearms and biceps fully until there is a 30-40 degree angle between them.
• At this point the elbows and biceps are slightly higher than the deltoids,
and the forearms are slightly beyond a parallel position with the fists, approximately 6 inches from the top of the shoulders.
• Squeeze and contract the biceps even harder so that they bounce into a
ball of rock-hard muscle, etched from living steel.
• Hold this pose while a training partner places a nylon measuring tape snugly (but not tightly) around the largest circumference point of each arm.

6
The tape should be at a right angle to the humerus bone of the upper arm and not slanted.
• If you don’t have another person around who can take your arm
measurements, you can do it yourself. Simply do a front single bicep pose and then make a transition by horizontally adducting (moving) the upper arm to the front. Your upper arm will form a 90-degree angle with the front of your body (chest). To better grasp the concept of adducting the upper arm, imagine performing the Pec Deck (Pectoral Flye) exercise with one arm and moving it to the front of your body. After you have adducted the upper arm, then it’s just a matter of taking an arm measurement using your non-posed arm to do so.
#4. 12 Hours Prior On Friday evening, avoid “sleep debt” by making it a point to retire to bed by 9:30 or 10:00 PM. so that you can get at least 8 hours of sleep, but never more than 9, as you will become sluggish. The suggested bedtime of 9:30 or 10:00 PM works quite well for individuals who have an 8-5 job weekdays with weekends off. For those of you who work a second (swing) or third (graveyard) shift or split shift (1/2 day, 1/ 2 swing, etc.), adjust the scheduling of the NODBS accordingly. There are four stages of sleep that recur on a regular pattern throughout the night. The most important is stage 4, REM (rapid eye movement) sleep that occurs every hour and a half and accounts for 25% of total sleep time. The first four hours of sleep are vital; because it is during this time that a substance called GH (growth hormone) is released from the pituitary gland. Growth hormone is essential for protein synthesis and growth and repair of muscle tissue. There are 7 things you can do to ensure that you get 8 hours of quality sleep, especially on the night before the upcoming 12-hour Neural Blitz. First, AVOID caffeinated beverages, ephedra, caffeine, aspirin (E/C/A) fat burning combos 5-7 hours prior to bedtime. Second, AVOID alcoholic beverages as well. Three to five glasses can really interfere with “pattern sleeping”. Third, make sure that your last couple of meals of the day contain a protein source high in the amino acid tryptophan (good for relaxation and inducing sleep). Turkey and milk products are good sources. Fourth, REDUCE any anxiety-producing stress that might occur, especially before bedtime. Don’t get involved in any tasks that require deep concentration.
7
This includes but is not limited to personal finances, problem relationships, or other personal conflicts. It is a good idea to shut off the phone, TV, etc.
Now you are ready to institute some behavior-calming techniques such as light reading, listening to low-energy music (e.g., “The Memory of Trees” or “2002 Land of Forever”). A nice warm shower can be quite relaxing. While you are in the shower, you can consciously think about how much the accomplishment of a 1/2 – inch gain on the upper arm will mean to you. You can also think about this during your daily showers the week prior to the NODBS. Fifth, melatonin, which is produced in the pineal gland of the brain, will improve sleep patterns. Take 1-3 mg a half-hour before bedtime. Sixth, deep relaxation techniques such as medication and progressive relaxation using “mind-muscle” machine are essential for managing stress, which can keep you awake at night. Listening to Frank Zane’s sleep sound audio tape at bedtime is another beneficial relaxation tool. If you are interested in exploring the “mind-muscle” machine and the sleep sound audiotape, go to your PC and click on www.frankzane.com. Other things you can do to upgrade your quality of sleep include making sure that your bedroom window is open so that you can breathe a free and uninterrupted supply of cool air (but keep your bedroom as pitch black and noise-proof as possible). Avoid a severe draft, a freezing atmosphere, or a hot bedroom. Keep the temperature in your bedroom (and other rooms of the house) as much as possible between 60 and 70 degrees. With regard to your bed, make sure your mattress is an ideal sleep surface. It should distribute your weight evenly, and in doing so, reduce stress on the shoulders, hips, and legs. The spine should remain in a neural position without sagging, whether you sleep on your back, stomach, or side. Use a light pillow for head support. Be sure to set your alarm clock so that you awaken by 6:00 AM.
#5. 4 Hours Prior
The New Dawn Rises On Yet Another Tomorrow. Its 6:00 AM on Saturday morning and time to get out of bed. Don’t suffer from 3-D symptoms—get up immediately upon awakening! If you delay-defer-dawdle, you are weakening your will power. Take a shower and a shave, etc., and then have a hearty breakfast. Here are some options for breakfast: The first option consist of fresh strawberries (if in season) topped with certified raw cream and a dash of raw honey, 4-5 fertile eggs (good for stimulating the central nervous system for the upcoming workout) scrambled in raw butter and 1-2 slices of flourless whole grain bread (toasted) with a pat of butter.
8
A second option is a big bowl of sliced bananas, ½ cup of chopped dates, ½ cup of raisins and un-sulfurated figs, honey, and certified raw cream. Mix all the ingredients together. A third option would be to include one of the following:
• Whole Brown Rice. About 5 minutes before 2 cups of rice are finished cooking, stir in ½ cup of raisins and ½ cup of cream. Serve with a liberal supply of honey and wheat germ flakes stirred through.
• Cooked Oatmeal (regular whole-grain, not quick oats, is a Ted Arcidi
favorite). About 5 minutes before 2 cups of oatmeal are finished cooking, blend in ½ cup of diced pitted dates and 1 cup of cream. Serve as above, with honey and wheat germ flakes stirred together. Spice up the oatmeal with nutmeg or cinnamon.
Tip: Mix a heaping tablespoon of chocolate MET-Rx or Biotest Grow!
meal replacement powder in the oatmeal to boost the protein content. You can also add fresh fruits such as peach, apple, banana, pear slices, or coconut. Or add fresh berries and chopped nuts such as pecans and walnuts to cooked oatmeal (or other grains). Oatmeal is a great pre-workout meal and source of carbohydrates if eaten at least one hour before training. [Bill Pearl (www.billpearl.com), Clarence Bass (www.cbass.com), sell protein-fortified oatmeal.]
Other random breakfast options could include a meal replacement product such as MET-Rx, Myoplex Plus (available in convenient ready-to-drink shakes), NutriForce, etc. Don’t forget to take supplements (vitamin/mineral packs, C, creatine, glucosamine, glutamine, etc.). #6. Body Core Temperature It is important that you allow four hours to pass from the time you arise (6:00 AM) prior to beginning the first of 19 micro-neural blitz training sessions (at 10:00 AM). The reasoning behind the four-hour time lapse beginning from the time you arise until your first micro-training session is that it will allow your body core temperature to reach a level high enough to speed up the chemical reactions that are involved in muscular contraction. The Russians use a simplistic method of determining body core temperature by taking rectal temps every 4-5 hours throughout the day and then plot the readings on a graph to get the highest temps based on the time of day. The colder a muscle is, the greater its viscosity and the more it resists change in shape. This is called internal friction. The old expression about being “as slow
9
as molasses in January” is an excellent example. When molasses is warm, it has a low viscosity and flows freely; but the colder it gets, the thicker it becomes and the more it resists change of shape. Your muscles are affected in a like manner. Body core temperature plays a vital role in muscle building with the profound effect that it will have on your strength and stamina during the neural blitz training sessions. I suggest that, prior to your first micro-training session at 10:00 A.M., you being with 5-10 minutes of “high octane” aerobic work (to break a sweat), such as stationary cycling, Versaclimber, X-Country Skier (Nordic Track), stair stepper, or rope skipping (start with a slow cadence and work up to a relatively brisk pace the last minute or so); then do some PNF (Proprioceptive Neuromuscular Facilitation) stretching, hold each stretch for 6-8 seconds, for 3-4 reps for the biceps and triceps. Now go on and do one or two specific warm-up sets, 3-5 reps (in full exercise range of motion), using 60-70% of the maximum poundage required for a particular methodic. Rest 1.5-2 minutes between sets. Specific warm-up sets will not only assist a rise in body core temperature but will also teach the muscles the exercise range of motion and that the weight will be heavy. I would advise not doing high reps (8 and above) when doing specific warm-up sets, because doing so builds up pH and lactic acid levels in the blood and as a result the brain cannot recruit high threshold muscle fibers necessary to the success of the neural blitz micro-training sessions. Do aerobic work, PNF stretching, and specific warm-up sets at the 10:00 AM, 4:00 and 8:00 PM sessions only. In conclusion, as important as body core temperature is for getting the most from your big arms program, atmospheric temperature and humidity are important as well. Make sure that the room temperature is not below normal. Some individuals have been known to go to opposite extremes regarding atmospheric temperatures. For example, Boyer Coe, former AAU Mr. America, NABBA Mr. Universe (four times), Mr. World (five times), and IFBB Mr. Olympia competitor, used to train in the gym with the air conditioning off. This was when he was living in the state of Louisiana and training during the hot summer months. I, on the other hand, living in Alaska, used to train (for bodybuilding and powerlifting competitions) during the cold winter months in an unheated building. I remember well many times when the atmospheric temperature was 5 degrees above zero. Make your body core and room temperature work for you, not against you. Use internal and external temperatures to help you build bigger – better – stronger arms faster.
10
#7. Core Growth Exercises Choose two mass building compound exercises for the arms. Two of the best, in my opinion, are the Classic Standing Two-Hands Barbell Curl (for the biceps) and the Standing EZ-Bar French Press (for the triceps). These exercises offer a high level of NMA (neuro-muscular activation) or stimulation that will result in a greater opportunity for arm growth. (See Addendum for explicit exercise mastery descriptions.) #8. Super-Intense 19 Time-Compression Workouts Even Hours (10 AM, Noon, 2 PM, 4 PM, 6, 8, 10 PM) Exercise A-1: Classic Standing Two-Hands Barbell Curl Exercise A-2: Standing EZ-Bar French Press Percent Training: Load a poundage on each barbell that is 90%+ of your current un-fatigued maximum single effort (MSE) for each of the selected exercises (A-1 and A-2). For example, if your best MSE in the Classic Standing Two-Hands Barbell Curl is 100 pounds, and I say use 90%+ of that, the poundage will be 90 pounds (.90 x 100 = 90). Always round odd poundages off to the nearest five-pound interval; e.g., 43.6 would be rounded to 45, whereas 42.1 would be moved to 40. Methodics: Single rep sets – Perform as many single reps as possible to positive (concentric) failure. Rest – pause no more than 20 seconds between each single rep (set). Become a master of training by using perfect from and motion (never jerky) and with total concentration. (Note: A ¾ rep doesn’t count.) Even Half-Hours (10:30 AM, 12:30 PM, 4:30 and 8:30 PM). Exercises A1 and A2. Percentage Training: Use a poundage that is 85%+ of your MSE. Methodics: Explosive pause reps – Perform 3 sets x 2 reps. E-X-P-L-O-D-E upward during the concentric (positive) or upward phase of the lift, lower and pause for a slow 3-second count (upon completion) of the eccentric phase (negative) stretch contraction. Begin the next rep. Rest – pause one minute between each set and no more.

11
Odd Hours (11 AM, 1 PM, 5 PM, 9 PM). Exercises A1 and A2. Percentage Training: Use the 85%+ poundage that you used during the Even Half-Hour segments. Methodics: Rebound reps – Perform 5 sets x 2 reps. Rebounds are done just prior to the completion of the eccentric (negative) stretch contraction phase of each rep. IMMEDIATELY without pause (called turnarounds) reverse the direction of the movement back into the positive phase. Rest-pause 1 minute between each set. Odd Half-Hours (11:30 AM, 1:30 PM, 5:30 & 9:30 PM). Exercises A1 and A2. Percentage Training: Use a percentage that is 70% of your MSE. Methodics: Manual overspeed – Perform 5 sets x 2 reps. To perform the manual overspeed technique requires the assistance of a good training partner. The starting point for the first rep begins in the eccentric (negative) stretch contraction position (begin exercise A1 in the normal start position for the curl and A2 down behind the head). Pause in this position for a 1-second count (called the Dynamic Iso-System, then E-X-P-L-O-D-E the bar upwards in the concentric (positive) phase of the rep. A training partner (facing you) places his hand evenly under the bar in between your hands and helps you accelerate the bar as fast as possible to completion of the upward curling (exercise A1) phase and assists you from behind on the extension (exercise A2) phase. The upward phase should take a half to one second to complete. Perform the negative (lowering the bar) as you would normally, usually 2 times slower than the positive phase. For example, if it takes you two seconds to complete the upward curling phase, it should take four seconds to lower the bar down to the initial start position. Rest – pause 1.5 minutes between sets. Helpful Tips
• Using a separate bar for each exercise (straight bar for curls and EZ-bar for extensions) will help in that you won’t have to change poundages constantly from one exercise to the other.
• You can perform the exercises (A1 and A2) in straight set fashion where
you do all the required sets of a particular methodic for the biceps, then move on to the triceps.
12
Or… • You can do the exercises in antagonistic (opposite sectors of a muscle
group) super-set style; that is, when exercise A1 is completed, immediately begin doing A2. Upon completion of A2, take a rest – pause of 20 seconds to 1.5 minutes, depending upon the particular methodic being employed. Repeat A1 followed by A2 and so on for the number of sets required in the selected methodic.
• Be sure ALWAYS to stretch (self or partner assisted) after each set of
exercises A1 and A2. Hold each stretch for 10-20 seconds. Never force a stretch, and never hold it if you begin to feel pain or cramping.
• During the time grids between the completed even/odd, hour/half-hour
super intense time-compression workouts, lounge around and rest as much as possible. Remember, you still have to stay motivated and psyched for the upcoming time-compression workout (refer to Stepping Stone #12 beginning on page 20).
[Throughout the day of the NODBS, your aggressive energy and strength levels (both Physical and psychological) may vary during any one or more of the super-intense 10 time-compression workouts. Add just the under underlying percentage-based poundages (ramp up or down) accordingly to meet the precision-chosen sets and reps of a particular methodic(s).] #9. Physical & Mechanical Restorative Modalities To really open up the muscle growth zone (where it feels like growth hormone has been poured over the already opened pores of the awakened and alert muscle fibers) in a muscle such as the arms, it is important to employ the elements of Physical and Mechanical Restorative Modalities during and after (post-workout) the NODBS or any other exercise protocol for that matter. The following modalities are used to accelerate the necessary physical, chemical, and metabolic responses in the body, so necessary for the release and reduction of toxic metabolites and residual fatigue. Doing so will allow for the maximum recovery of the muscles and central nervous system. This is a good time to examine some of these restorative modalities.
13
A. Physical Restorative Modalities
• Ice Therapy. Prior to the beginning of each even- hour single rep methodic of the NODBS, place a bag of ice on your abdomen for a 3-minute period of time. The strategy in using the ice pack is that it causes the body to panic as it restricts blood flow back to the heart. This in turn releases adrenaline (fight or flight syndrome), which allows the opportunity to lift heavier weights (5-7% heavier) with greater speed. This will prove to be invaluable when doing the single rep methodics.
• Analgesic Balm Massage. To achieve an increase of hyper-circulation in
the arms, apply a liberal coat of analgesic balm (e.g., Ben Gay Arthritis Formula, Mineral Ice, Nicoflex, Sports Care Muscle Rub, Tiger Balm, White Flower Balm, etc.) and massage into each arm for a 2-2 ½ minute period of time approximately 5 minutes prior to each odd-hour rebound reps methodic micro workout. Rub the analgesic balm crème into the arms with a light, moderate, or deep stroking (effleurage) or kneading (petrossage) action, and always toward the heart. This can be done self-assisted or partner-assisted. Another option you have in lieu of the analgesic balm is to use a vibrator massage unit (Mechanical Restorative Modality) for a one-minute period of time on each arm.
• Cryokinetic Ice Massage. “Cryokinetics” means combining cold treatment
with exercise movement. Cryokinetic ice massage is performed as follows: Apply a thin coat of baby oil to the arm muscles. This will reduce the shock effect of first contact with the ice. Begin the massage by applying ice directly to the muscles, and begin moving it over the skin surface with overlapping circular motions. In the case of an elongated muscle such as the biceps/ triceps, simply move the ice up and down the length of the involved muscle rather than in circular motions.
Ice massage each arm for about 2 minutes after the completion of an odd
half-hour manual over-speed methodic micro-workout. Ice massage before and after a daily workout session can be continued from 8-10 minutes (3 times per day, etc.) Or until the muscles goes numb. Be careful not to get frostbite. Ice massage seems to promote more fresh blood to the muscle area. For smaller muscles (biceps, triceps, calves), ice cubes and ice sticks are helpful. For larger muscles such as the abdominals, thighs, etc., use ice blocks or ice bags.
• Post (Micro) Workout Massage. Upon the completion of each even/odd
hour and half-hour micro-workout, you will have some time to rest before the next training session. This would be an excellent opportunity to get a few minutes worth of superficial massage on the arms followed by some fascial stretching. Perhaps you can con your training partner and/or spouse (girlfriend) to help you out in this regard.
14
• Sport Recovery Massage. Certified massage therapist-assisted, partial and/or full body massage manipulations are a terrific way to go to assure maximum recovery. The massage sessions can last anywhere from 5 minutes to as much as 60 minutes, depending on the type of massage and size of the bodybuilder. For example, partial body massages are most dependent upon a particular workout intensity. Light training requires 5-10 minutes of massage; medium, 10-15 minutes; hard, 15-20 minutes; maximal training requires 20-25 minutes of partial body massage.
On the other hand, for a full body massage to be most effective, individual bodyweight is the main criterion: 135 pounds or less requires 40 minutes of deep massage; 136-150 pounds, 50 minutes; 151-200 pounds, 60 minutes; and for bodybuilders muscles out at 200 pounds and beyond, 60-plus minutes of total body massage are required. Two other Physical Restorative Modalities worth briefly mentioning are:
• Fascial Stretching. This is a series of unique self-and/or partner-assisted
stretches that help open up the muscle growth zone. Scope and space do not allow for a more explicit description. Health for Life (HFL) sells an excellent Syner-Stretch manual and companion video; visit www.healthforlife.com for information.
• Fascial Planing. Popularized by super bodybuilding and nutrition expert
John Parrillo, this is an ultra-advanced method of stretching fascia through partner-assisted manipulation. Visit www.parrillo.com for more details.
B. Mechanical Restorative Modalities
• Power Walking. This form of aerobic exercise is best done during the
days prior to or after the NODBS to improve circulation and help in the removal of residual metabolites. The basic concept of power walking is to walk as fast as you can (within 60-85% of working target heart rate), take as many long strides as possible, rhythmically breathing in and out 3 times in cadence with the strides. Time, distance traveled, degree of incline of walking terrain, and amount of resistance (weight belt, wrist and ankle weights, approximately 20% of bodyweight) carried are 3 more factors that contribute to power walking success.
Other popular endurance activities may include aerobics, cycling
(mountain or stationary), jogging, jumping rope (heavy rope), mini- trampoline, skating (roller-blading), skiing (cross country, Nordic Track), stair climbing, swimming, treadmill (running in place), Versa Climber, etc. Perform the selected activity 3 times a week (on alternate days from workouts) for 20-40 minutes. Be sure to include a 5 minute warm-up and 5
15
minute cool-down.
Tip: Interchange these endurance activities from session to session. • Hydrotherapy Showers. Using a pulsating shower head, alternate cold
(50-55 degree F) and hot (115 degree F.) showers in the following sequence: Cold>Hot>Cold>Hot>Cold (cold, 30 seconds; hot, 2 minutes)
Each series concludes with the cold shower. Do 4 to 6 series (don’t allow the head to get wet). Another method is to take a warm shower for 15 minutes and conclude with a cold shower for 1-2 minutes. This was a favorite post-recovery modality of the late IFBB bodybuilding superstar Chuck Sipes.
• Electro Muscle Stimulators (EMS). Electrotherapy of this type is simple
micro-currents of an alternating frequency of 10-15 pps @ 30 microamps, daily. This is a form of strengthening the muscles, while at the same time increasing circulation and speeding up the recovery process of the muscles and central nervous system.
• Sauna (Dry Heat). Used once or twice weekly, the sauna is an excellent
modality for increasing circulation and assisting in the removal of irritant lactic acids and residual metabolic intermediates.
Sauna Tips
Here are 7 tips for getting the most expedient use of the sauna:
1. Take a warm shower (100-110 degrees F.) Prior to entering the sauna.
Don’t get your head wet, and be sure to towel dry immediately after showering.
2. To help prevent dizziness in the sauna, wrap a cool, damp towel around
your head.
3. Take a dry towel to sit on when you enter the sauna. Sit on the bottom level of the sauna for 2-3 minutes to acclimate your body to the temperature (165-175 degree F.). After 2-3 minutes, move to a higher level. The temperature here will be between 195-205 degrees F., so avoid moving around. Lie on your back if possible, and remain calm. Above all, NEVER exercise in the sauna.
4. Stay in the sauna for 6-10 minutes maximum, then leave the sauna and
quickly take a cool shower (50-55 degrees F.) For 20-40 seconds, and then take a warm shower (about 100 degrees F.) For 1-2 minutes.
16
Alternate the cool shower with the warm shower sequences for 3-4 more series.
Remember, don’t get your head wet. Towel off and take a 15-minute break before reentering the sauna. This is a good time to rehydrate the body. Slowly drink 8-12 ounce glass of cool juice or electrolyte drink. Implement this practice for 1-2 hours post-sauna use as well.
5. Re-enter the sauna, following tips 1-4 previously outlined. 6. NEVER enter a sauna while intoxicated, overly fatigued, or physically sick.
ALWAYS follow the protocol of spending 6-10 minutes in the sauna and then leaving to follow the cool-to-warm shower series, etc.
7. Here’s a tip I hadn’t heard about previously. Former IFBB Mr. Olympia
Larry D. Scott says that, if a person can spend some time in a dry heat sauna prior to working out and up to 3-4 more times during the workout, growth hormone release increases by a factor of 18. Larry recommends staying in the sauna just long enough to get warm and leaving before breaking a sweat.
Some other Mechanical Restorative Modalities are:
• Pulsed Ultrasound. This modality is quite effective for improving muscle
tonus when used for 8-15 minutes, pulsed in a 1:4 ratio at .8-1.0 watts/cm and at a frequency of 1.0 MHZ.
• Jacuzzi/Tanning Beds. These modalities are instrumental in aiding in the
two-level recovery from a maximum overload on a muscle group.
• And finally!! Here’s a $1,000 vitamin secret that complements the Physical and Mechanical Restorative Modalities:
• One of the most effective remedies for decreasing post-workout soreness
(after the NODBS) is to consume 500 mg of Vitamin C (with bioflavonoids) prior to the workout and 400 mg immediately upon completion of the workout. While this works great, there is yet another remedy that works very well within the confines of regular exercise protocol, and it is what I consider to be worth $1000.
What’s the secret? Mega dose of Vitamin C. In other words, consume 500 mg of Vitamin C each hour for 3 hours prior to scheduled workout, and then repeat the mega dosage for 3 hours after completing the workout.
17
• And yet another effective remedy for decreasing post-workout soreness is to take 1-2 grams of Vitamin C along with 250-500 mg. of aspirin (but not if you have a peptic ulcer) immediately following workout.
This concludes the rather extensive commentary on the modalities that can be used to accelerate immediate and (extended) post-recovery of the muscles and central nervous system. #10. Eat for Strength and Explosive Performance! Joe Weider once said, “eating is a sacred adventure.” It is therefore important to eat three moderate meals a day during the NODBS, but don’t overstuff yourself. The first major meal, breakfast, is eaten at home (see Stepping Stone #5) prior to leaving for the gym. Eat the second major meal (lunch) around 2:00 PM, and the third major meal (supper) at 6:00 P.M. The 2:00 PM. and 6:00 PM meals are eaten immediately upon completion of the even-hour neural blitz micro-training session. Then, DO NOT train for 2 hours until the next even hour (4:00 P.M. and 8:00 P.M. respectively). Realize that these times can vary depending upon what time you wake up, eat, and begin the NODBS. More than likely, lunch and supper will be eaten at the gym (unless you are training at your own home gym), so prepare the foods (bananas, cheese slices, oatmeal, papaya spears, whole wheat pasta, egg whites, sweet potatoes/yams, steamed brown rice, low-sodium water packed tuna, skinless chicken and turkey breasts, watermelon, flank steak, lean ground and roast beef, etc.) ahead of time at home. Poached egg whites (prepared ahead of time) topped with a cup of unsweetened frozen or fresh strawberries (when in season) is an excellent protein dessert. You can add a teaspoon of fructose if you wish. Pack the food items and plenty of low-sodium ice cold and/or distilled water in a cooler and lug it to the gym. It is important to know that a loss of as little as 3% of your bodyweight in water can cause a 15% decrease in performance. Therefore, during the 12-hour NODBS, I recommend a judicious hydration, via water, prior to, during, and after the workout(s). Drink at least 2 pints prior to the workouts, then 3-6 ounces every 15 minutes thereafter from 10:00 A.M. to 10:00 P.M. After the final micro workout at 10:00 PM, drink at least a pint of water for each pound of water weight lost. Very cold water is best (40-50 degrees F.). A lot of bodybuilders add ½ teaspoon of lime and/or fresh (not reconstituted) lemon juice to the water. Include a sugar substitute to taste, if you wish.

18
Iced coffee is a nice treat once in awhile: 8 ounces of decaffeinated coffee with one teaspoon powdered skim milk and a pinch of cinnamon, on the rocks. As mentioned in a previous report, some individuals drink up to six-and-a-half 32-ounce bottles of ice water a day, but not if there is a kidney disorder or you are taking diuretics. Tip: Fill 2-liter water jugs halfway with distilled (not spring) water and store in the freezer Friday night. The following morning, fill the other half of the jugs with water. Place the jugs in the cooler with food items. The half-frozen water jugs will keep food cold and also provide plenty of cold water to drink during the day of the NODBS. With a little luck, perhaps the gym where you will be training will have a decent food and juice bar and you won’t have to bother with as much prior food preparation. For more thoughtful nutritional planning, visit www.davedraper.com (click on Weekly Columns). Also please refer to the Addendum following this eReport for a couple of dial-in recipes. #11. Hourly Protein Pump (feeding) From 7:00 AM on, and after each even and odd hour neural blitz micro-training session, take in 15 grams of complete protein source if your lean bodyweight is under 198 pounds. If you are over 198 pounds, take in 23 grams of a complete protein source. A nice “grab-and-go” protein source is the Bodybuilder’s Sandwich. Take a slice of cold roast beef and roll it up in a slice of low-sodium provolone cheese. It is satisfying and easy to digest. Other suggested protein sources may include defatted Argentinian desiccated liver capsules, pure egg white amino acid capsules, whey protein, and the meal replacement products mentioned previously. The late Vince Gironda, the iron guru, used to suggest taking 2-3 defatted desiccated liver capsules and 2-3 branch chain amino acid capsules every 3 hours daily for two weeks. He cited examples of many bodybuilders putting on an inch of fresh, new muscle on their upper arms when doing so. I have known some bodybuilders to take 2-3 desiccated liver and amino acid capsules every hour plus one soft- or hard-boiled egg every hour as well. (See Addendum for a special secret egg technique/recipe.)

19
#12. MIND POWER DOCTRINE of an Iron Warrior
There is an old adage that says, "Think big, act big, to get big." It is therefore very important to learn about mind doctrine management if you want to become bigger and stronger. The mind power doctrine of an iron warrior can be broken down into three simple but inseparable factors: Belief, Vision, and Method. Belief is the degree of self-confidence (trust) a person has in himself or herself. The difference between an iron warrior bodybuilding champion and others is the size of his or her belief. A mediocre bodybuilder might express his belief like this: "I'd like to be an iron warrior bodybuilding champion some time, maybe, if it's not too hard." Lee Haney, eight-time Mr. Olympia, puts it this way: "I want to be a champion. That's what I see Lee Haney as, a Champion. There's nothing wrong with having a healthy ego. That's why there are sheep and there are shepherds." Notice the difference between the two beliefs? Vision is the appropriate and attainable short- and long-term goals. Adding 1/2 inch to the arms in one day is a short-term goal. Method is the process used to fulfill the vision. For example, the process for fulfilling the vision of adding 1/2 inch to the arms in one day can be achieved by following the advice in this SPECIAL BIG ARMS eReport. It is important that you begin thinking like an iron warrior bodybuilding champion by adopting the mind power doctrine of Belief, Vision, and Method. Doing this will help you access the reservoir of untapped strength within your body. This is vital, especially if you are into the advanced stages of, say, German Volume Training, where the program becomes such a bully that you may begin to experience self-imposed limitations of frustration, doubt, and indecision. You may even begin to question your energy, endurance, sanity, and willingness to carry a program such as German Volume Training to its completion.
20
Such self-imposed limitations are indeed major barriers of the subconscious mind and, as a result, can cause temporary lapses of mental concentration. It is abso-lutely paramount that you let go of disruptive influences such as frustration, doubt, and indecision and focus on the light of total awareness or laser concentration (metaphysical) needed to complete a program such as German Volume Training or others. Bill Pearl, a multi-Mr. Universe, has stated at a number of his super-seminars that "you can't take anything negative you are doing in the sport of bodybuilding and turn it into positive results. It won't work." He goes on to say that "You must condition your subconscious mind to think that you are getting bigger and training with more intensity and your body will respond accordingly." To condition the subconscious mind in the manner that Bill Pearl described requires the implementation of a couple of self-actualization resources. First, begin reprogramming your subconscious mind with some very precise, measurable, and powerful motivational affirmations. Here are some examples: Mentally or audibly with full force and conviction, say (to yourself): "I will train each occurring set of a select exercise (call out the name of the exercise) with focused intensity." "I will conquer and dominate each set with an unchained will to triumph and succeed." "I will prevail in the moment and take myself to absolute physical levels that surpass and rival previous ones." I will conquer and dominate every single rep of the upcoming set and get progressively stronger while doing so." "I will masterfully succeed in the gym." "My upper arms will grow bigger by ½ inch." "Today I will perform the most intelligent, rigorous, and locked-in priority workout of my life." Notice the emphasized words in each of the motivational affirmations. They are called "trigger words" and serve as a mental stimulus to unite the muscle fibers in your being to respond to their fullest potential. You can choose other trigger words and specific and concise positive reinforcement phrases if you wish.
21
Specific and concise positive reinforcement phrases (motivational affirmations) should personally reflect an unchained power and commanding dominance to master the direction of your thoughts. Here are some examples:
• Weak reinforcement - Make my legs stronger.
• Specific/concise reinforcement - to squat 400 pounds slightly below parallel with perfect form for a triple. • Weak reinforcement - to eat better or really zone in on my diet starting next week.
• Specific/concise reinforcement - to consume no more than 3,000 calories a day with a ratio of calorie intake to be 40% complete protein, 50% complex carbs, and 10% unsaturated fats, beginning next Monday morning.
• Weak reinforcement - to lose weight.
• Specific/concise reinforcement - to weigh 210 pounds and have 10% bodyfat or lower.
• Weak reinforcement - to get my bench press up.
• Specific/concise reinforcement - to increase my maximum single effort in the flat bench press from 300 to 300 pounds in the next 10 to 12 weeks.
Specific/concise reinforcements are measurable, meaning that two independent people should be able to agree within acceptable limits that the reinforcements occurred or did not occur. Weak reinforcements are less defined and much more difficult to measure in terms of results. The motivational affirmations or reinforcements that I have been discussing are an important power of the mind power doctrine. The subconscious mind cannot distinguish between what is real and what is not. You must therefore, with a commanding dominance, deeply, fully, thoroughly, and completely convince your subconscious mind of your belief in the motivational affirmations. Only then can you create your own realities. So, with a burning inner conviction, emotionally, with all of the force, all of the drive, and all of the desire (desire is the font of will power) that you are capable of feeling, mentally or verbally repeat 10-15 times your favorite precise, measurable, and powerful motivational affirmations. As you continue to repeat these phrases, you will begin to feel absolute sensations of unchained power flowing, pulsing, and surging through you both mentally and physically.
22
The second Self-Actualization Resource is mental imagery-rehearsal of any training protocol you are currently following (e.g., German Volume, Titan Training System, etc.). It is said that what the mind can conceive and believe, the body can achieve. And so it is with this thought that I'll begin with an explanation of mental imagery-rehearsal by borrowing some of the commanding and dominant insights and expressions of mind doctrine techniques that many world champion bodybuilders use to access peak performance in the gym. Mental imagery-rehearsal and its application to the iron athlete is a thoughtful and intelligent two-stage event consisting of pre-workout and one-set interval preparation. Here's a brief look at each.
Stage I: Pre-Workout Imagery Rehearsal
Simply stated, you will mentally visualize (like seeing a series of pictures on a movie screen), by bringing images into the mind, all the simple and complex elements associated with the forthcoming workout. About 15 to 30 minutes prior to your workout, go to a place of solitude (void of ringing telephones, ticking clocks, people talking, and bright lights). Sit in a comfortable chair. Close your eyes and begin slowly and deeply to breathe in and out through your nose and begin to relax (called relaxed breathing). Now, begin mentally to empty your mind of all thoughts that do not pertain to the workout. Don't let intruding thoughts attract your attention. This could be any thought such as what you did yesterday, what you are going to be doing after the workout. Sometimes a remark that someone made that you didn't particularly like will pop back into your head, but don't let it. Drive away the nagging negative voice from the dungeon of your subconscious mind that might be telling you to skip your workout for one reason or another. Mentally see yourself well rested, recovered, and stronger from your last workout a couple of days ago. As you continue to progress into a relaxed state, visualize the collective atmosphere of the training energy in the gym that is being generated by the other iron warriors. Feel this sensation and how it gives you a special power to dominate the heavy iron. Become a master of training by mentally reproducing the tracking patterns of the exercises rep for rep, set for set. Repeat this process several times in your mind. Finally, see yourself at the conclusion of the workout with a bone-deep, growth-producing, vein-choked pump in the muscles of the upper arms.

23
When the mental pictures and related sensations that you expect to see are clear and vivid in the mirror of your mind, open your eyes. Your should now have an unyielding commitment, intense desire, determined persistence, and powerful will to succeed moving, flowing, pulsing, and surging through your entire being. It's time then to get up out of the chair and step into the hardcore trenches of the gym.
Stage II: One-Set Mental Imagery-Rehearsal
This stage of mental imagery-rehearsal is conducted approximately 10-15 seconds prior to each set of a prescribed exercise methodic. While standing or sitting, however you feel most comfortable, close your eyes and take in and exhale short breaths of air as you mentally prepare (with selective focus) for the moment at hand. You must go to that place in your consciousness where there is no pain, no negative influences, no fear, a state of mind where only positive forces dwell. Your mind must be time-locked (cohesive) with the muscles in order to do battle with the heavy iron. Begin by picturing in your mind's eye the bench, the bar, the plates. Imagine this so intensely that you can smell the sweat, feel the knurling on the bar, hear the plates rattle, and so forth. If you are going to be performing the classic standing two-hands barbell curl, for example, recreate all of the exercise mastery techniques that are necessary for the successful completion of each gut-wrenching rep of the set. The more organized and detailed you can make this ritual of mentally focusing in one-set intervals, the better chance you will have for training to the outer limits of muscular size and strength. Here's another way to explain it. Think of how organized and detailed the ritual of mental imagery-rehearsal would be if it related to making love to a beautiful woman. The details are never slippery or vague. They're always clear and vivid. As the magnitude of mental imagery-rehearsal for the upcoming set becomes more and more vivid, you will begin to feel torrents of unleashed fury and your heart will beat in a manner that reflects your ability to dominate and prevail in the moment. Open your eyes. You are now 100% mentally focused and psyched. Go for it! It's time to lift the HEAVY IRON! Tip: During your workout, play your own favorite high-energy music to trigger strong energy responses.
24
Closing Thoughts
I have explained the mind power doctrine of an iron warrior in very general and broad terms. This is thoughtfully done, because accessing peak performance is highly individual. To awaken the sleeping giant within, I suggest you visit the following websites for more information on mental training:
• www.skiplacour.com • www.ironmind.com • www.naturalstrength.com • www.leelabrada.com • www.frankzane.com
Develop the positive mental attitude of a champion Iron Warrior by thinking BIG and thinking SUCCESS. Never give in. Conceive, Believe, Achieve your goals and dreams. Commence positive action. Do this and your muscle size and strength can't help but grow, Grow, Grow!!! #13. Exaggerated Measurements At the conclusion of the 12-hour NODBS, measure your arms. Generally the arms will be literally pumped beyond belief, and they may show an exaggerated measurement of as much as ¾ of an inch. Realistically, the initial burst of peak muscle growth pump will usually result in a ½ inch permanent gain, and likewise a ½ inch pump gain will usually result in a permanent gain of at least ¼-inch to as much as 3/8-inch the next morning (Sunday). This is terrific progress considering you probably haven’t made this much progress in the previous months of brutally hard arm workouts. #14. Two Days After DO NOT workout at all on Sunday and Monday. Aggressively begin to utilize the appropriate Physical and Mechanical Restorative Modalities to accelerate the complete recovery process of the localized muscles, biceps/triceps, and the central nervous system. #15. Resuming Total Body Workouts Refer to #1. The Week Prior, on page 4 and in the Addendum, pg. 30 “A Quick Review” #17 for the training protocol.

25
#16. Frequency of the Neural One-Day Blitz System The Neural One-Day Blitz System is just that, a 24-hour system. After one day, the muscle gains generally stop. Some pro bodybuilders have gone so far as to use modifications of the blitz system described in this report. The modifications include training two days in a row rather than just one, and they will use two different core “growth” exercises such as the Supinated Dumbbell Incline Curl (biceps) and EZ-Bar Close-Grip Bench Press or perhaps the Parallel Bar (Vertical) Dips for triceps (exercise descriptions not included in this eReport). The 19 time compression workouts remain the same. This is the extreme rather than the norm. Generally most bodybuilders will use the NODBS system two times a year at the most and on a different muscle group such as the calves. See Bonus Section at the end of this eReport. Summary The NODBS seems to encourage upper arm growth for a number of reasons. The first reason is that each even and odd hour and half-hour methodic training session takes only approximately 15-20 minutes. This accumulated work time will allow you to demonstrate a very acute level of the mind-to-muscle link during each and every set of the selected exercise. Another advantage of these brief, brutal, and intense micro-training sessions is that the body gets almost an equal amount of accumulated rest to work—more in a couple of cases during the 12- hour session. The second reason the neural blitz system works so efficiently is that, conceivably, you are performing 100+ sets for the arms, and that’s 3 or 4 (or perhaps 10) times the amount of sets they are used to, and they have no other option but to grow closer to their genetic limits. I realize that a lot of bodybuilders train in what is termed scientific theory, and they may conclude that the NODBS won’t work and is nothing but fancy. Of course, they are welcome to their personal opinion. Practical experience through Jay Schroeder’s extensive research and development of this rather unique training methodic has proven it will work, perhaps not on all but on most bodybuilders. Jay is the first to admit that the Neural (as he prefers to call it) One-Day Blitz System is not new, but is a great improvement on the original. How? Prior traits of training protocol are assessed from individual to individual. These assessments include exercises (compound and isolationary), order sequence of the exercises, average training loads, volume, rest periods, and frequency of training per week and month. Other assessments are taken into serious consideration as well, including actual physical performance of each exercise, kinetic sense of the body, restoration knowledge and use, emotional training and control, as well as the development of the “will”.
26
Jay then analyzes the various traits just mentioned and from this is able to custom design an individual (not group) NODBS for just about any muscle group desired, which in turn allows the bodybuilder to achieve maximal neural and muscle adaptation. If you want to train like a champion and become a champion, then I suggest you consider contacting Jay Schroeder for more information on his unique One-To-One Blitz, conditioning, speed, and strength programs. You can e-mail him at [email protected]. You have to fight for massive arms!!! There is a lot of explicitly calculated information in this Special Big Arms eReport, “Add ½ Inch in 1 Day.” Read and then reread this radical one-day-only upper arm development program to obtain the most benefit from it.

27
ADDENDUM
A Quick Review of NODBS Exercise Mastery Descriptions
28
SPECIAL BIG ARMS REPORT
NEURAL ONE-DAY BLITZ SYSTEM (NODBS)
A Quick Review
Equipment Needed
Barbells (straight bar and EZ-Bar) Nylon tape measure Athletic adhesive tape Magnesium carbonate chalk Analgesic balm Ice packs & cubes Vibrator massage unit (optional)
#1. The Week Prior (to NODBS) Workout the first 3 days of the week. Day one: chest & back Day two: legs & abs Day three: arms and shoulders German Volume Training (or GVT) is one of my favorites. DO NOT workout at all two days prior to the NODBS. #2. The Evening Prior (to NODBS) With a nylon measuring tape, take a cold-arm(s) girth measurement. Eat a meal that will induce sleep. Retire to bed early (9:30-10 PM) so that you get 8 hours of sound sleep. #3. The Morning of the NODBS Arise at 6:00 AM. Take a shower and eat a hearty breakfast. From 6:00 A.M. to 10:00 AM, your body’s core temperature will rise. #4. Begin the NODBS at 10:00 AM. During a 12-hour time grid from 10:00 AM to 10:00 PM, perform a brief, brutal, and intense time compression workout for the biceps and triceps (see #6, 7, 9, 10 below).

29
#5. Ice Pack Therapy Prior to the beginning of each even hour schedule, apply an ice pack on the abdomen for a 3-minute time period. The rationale for this has been previously explained. # 6. Even Hour Schedule (10 AM, Noon, 2 PM, 4,6,8,10 PM) Core “Growth” Exercises: A1- Classic Standing Two-Hands Barbell Curl; A2 - Standing EZ Bar French Press. #7. Even Half-Hour Schedule (10:30 AM, 12:30 PM, 4:30 PM, & 8:30 PM) #8. Analgesic Balm Massage Approximately 5 minutes prior to the beginning of each odd hour schedule, apply a liberal amount of an analgesic balm to each arm. Vigorously massage the ointment into first one arm, then the other, for about 2-2 ½ minutes each. A certified masseuse can teach you a variety of different massage strokes for better overall results. Another option is to use a vibrator massage unit on each arm for one minute each. #9. Odd Hour Schedule (11:00 AM, 1:00 PM, 5:00 PM, 9:00 PM)
# 10. Odd Half-Hour Schedule (11:30 AM, 1:30 PM, 5:30 PM, 9:30 PM)
Core “Growth” Exercises A1 & A2. Perform 5 sets x 2 reps (consecutive) with 70% MSE. Perform in Manual Overspeed style. Repeat-pause 1.5 minutes between each set.
# 11. Cryokinetic Ice Massage Upon completion of each odd half-hour schedule, perform the ice massage protocol (as described previously) for 2-2 ½ minutes each. #12. Eat for Strength and Explosive Performance! Breakfast at approximately 6:15 AM, lunch 2:15 PM, and supper 6:15 PM. The PM meals are eaten after completion of the even-hour workouts.

30
#13. Hourly Protein Pump (feeding) After each even and odd hour “time compression” micro-workout session, consume (depending on your lean bodyweight) 15 to 23 grams of a complete protein source.
#14. Elapsed Time between Micro Workouts When you are not eating, applying ice, etc., use these times to recuperate and at the same time internally refocus your training behavior for the next upcoming micro-workout sessions using the mental techniques discussed in “The Mind Power Doctrine of an Iron Warrior” (pages 19-24). #15. Upon Completion of the NODBS (approximately 10:20 PM) While the upper arms still have a vein-choked pump, assume a double or single front bicep pose. Measure the girth of each arm with a nylon measuring tape.
#16. Two Days After DO NOT workout at all on Sunday and Monday. Refer to page 25 #14. Two Days After.
#17. Resuming Total Body Workouts
On Tuesday, Thursday, and Saturday, begin *German Volume Training (GVT) as suggested on page 4 (see #1. The Week Prior). Rest on Sunday, and then at the beginning of the next week, begin a 12-week cycle of OTS Titan Training System protocol (log onto: www.otsdirect.com for details). [*Note: Doing a total body workout in GVT style may compromise the energy and recovery ability of many bodybuilders. The least compromising alternative is to train major and minor muscle groups on different training days. For example, Day 1: quads, calves forearms. Day 2: pecs, back, abs. Day 3: delts, biceps triceps.] Finally, use the NODBS one day out of every 180 days, or 2 times per training year at most.

31
ARMS: EXERCISE MASTERY DESCRIPTIONS
A1: Classic Standing Two- Hands Barbell Curl
(Technique-Emphasis)
For this exercise and the four methodics it employs, I suggest using a straight, standard Olympic bar and/or a conventional 1 ¼ inch diameter chrome vanadium or stainless steel bar with a smoothly revolving (swivel) sleeve. You can use a conventional exercise bar without a swivel sleeve positioned between the inside collars. But your poundages will be slightly lower than with a bar having a swivel sleeve, which facilitates the curling movement more efficiently.
I personally do not suggest using an EZ-bar unless you
experience wrist and/or elbow pain (in the ulna) or are in rehab from an arm injury. If you are in rehab, I would not suggest attempting the ½ Inch in 1 day methodic. The reason I don’t recommend the EZ-bar has to do with the angle orientation of the hands when gripping the bent angles of the bar. The hands are not quite facing upward, and this takes away from some of the biceps action as compared to the straight bar, where the hands are supinated (palms facing up) during the curling movement.
There are, of course, a couple of ways that many bodybuilders
position a barbell prior to the performance of the Classic Standing

32
Two-Hands Barbell Curl. The first is simply placing it on the floor, and when ready, lift it up and begin curling. The other is to center the barbell on the end of a securely anchored exercise bench. Granted, this will save a few unites of energy in distance lifted prior to the beginning of each set of curls. The problem with the bar placement is that the weights on each end of the bar are suspended in space with no underlying support, with the exception of the center of the bar, which is in contact with the bench. The end result sometimes is a bent bar, which can and does impede the upward curling process as it twists out of your grip.
The bar can always be bent back to its original shape. This is
accomplished by positioning the bed at its highest point and then placing a piece of wood (e.g., 2x4) on the center of it and repeatedly hitting the wood with the edge of a heavy barbell plate until the bar again revolves true.
Rather than placing the barbell on the end of a bench, purchase
some concrete bond beam blocks from your local hardware store.
Arrange them in two stacks as a support structure under the weights on each end of the bar. The concrete bond beam blocks should be elevated (stacked) so that the bar crosses just below the knees. The exactness of this is dictated by your height, the number of blocks used, and the diameter of the barbell plates. You can use 2 x 12’s cut to 2 feet in length in favor of the concrete bond beam blocks, or use a combination of both.
All the equipment is now in place; it is now time to begin your
physical preparation for the Classic Standing Two-Hands Barbell Curl.
Begin by wrapping the extreme ends of the fingers with some
Johnson & Johnson “Coach” athletic adhesive tape. Next, apply a liberal amount of magnesium carbonate chalk (call Crain’s Muscle World, 1-800-272-0051, to place an order) to the palms and fingers. Wrapping the fingers with adhesive tape and applying chalk will ensure a more secure grip on the bar as well as keeping it from rolling down the fingers.
Step forward between the two stacks of concrete bond beam
blocks (or wooden planks) to the center of the barbell so that it almost touches the upper thighs.

33
Feet: ~ Space feet at least 15 inches apart (heel to heel) (if you are of
average height) and parallel to each other. Adjust the foot spacing if you are shorter or taller than average.
~ Be sure that the shoes you wear have a sole that is flat (same
height) from heel to toe. Shoes with elevated heels can put you at a 5-10 pound loss in exercise poundages used. Elevated heels tilt the upper torso forward from a natural vertical plane, and this in turn causes a faulty leverage for curling. This applies to curling maximum poundages only and not to select cosmetic bodybuilding techniques.
Back: ~ Keep the back flat (arched in) and tensed. ~ Back is concaved in the middle. Trapezius: ~ Muscles are taut. Chest: ~ Inhale the deepest possible breath into the lungs. Doing this is
called Vital Capacity. ~ Hold the chest high so that the lower rib cage fans outward. Abdominals: ~ Keep them tensed. Hip, Knee, & Ankle Joint Action: ~ From an upright (vertical) position, simultaneously and with fluidity:
Bend the legs slightly, push the hips back (glutes project to the rear), incline the upper torso forward and ahead of the barbell.
Arms: ~ Extended (locked out).
34
~ Grasp the bar with an under-grip – that is, with the palms facing forward. Wrap the thumbs over the top of the bar and the fingers in the opposite direction (under and around the bar).
~ Make sure the bar is as high into the meaty palms of the hands
(toward the wrists) as possible. This will almost occur naturally. Hand-Spaced Grip: ~ Approximately shoulder width with each hand the same distance
from the corresponding end of the barbell. ~ If the hand spacing is off even as little as ½ inch, it can throw extra
strain on one arm or the other, and this may in turn result in failure of the last rep in a double rep set.
~ It is a good idea to wrap the bar with some adhesive tape to
indicate the exact placement for each hand. This will help eliminate any repositioning of the hands on the bar that might have otherwise occurred.
Grip the Bar: ~ As tightly as possible. Try to crush the bar. This is one of the best-
kept secrets of bodybuilding for squeezing a couple of extra reps at the end of a conventional set of curls.
~ Crushing the bar is a concept that Pavel Tsatsouline discusses in
detail in his book and video series, “Power To The People!” and his video series entitled “Rapid Response: The SWAT Strength & Conditioning Program.” You can click on the website www.dragondoor.com from more information on Pavel’s book and videos.
Lifting the Barbell: ~ The body mechanics for the upward movement (short pull) are
done in exactly the reverse manner described previously (hips, knee & ankle joint action).
~ With the arms straight and taut, slowly and smoothly begin to pull
on the bar. Don’t “yank” on it. ~ The legs will begin to extend; forcefully extend the hips forward
while moving the upper torso back to a vertical posture.

35
~ The completion of the upward movement is when the shoulders and hips are aligned and the bar is at arm’s length across the front of the thighs. Exhale the air out of your lungs.
Pre-Curl Body Posture: ~ The legs are completely extended with the knees locked. ~ There shouldn’t be much if any forward, backward, sideways of the
body or sloping of the shoulders from one side or the other. ~ The arms should be fully extended with the hands in line with the
wrists and forearms (I call this wrist tension). Keeping the arms fully extended prior to the actual curl creates a very strong stretch reflex in the biceps muscles, which results in a stronger muscle contraction. If the arms are bent even slightly prior to curling, it will negate biceps strength.
~ The upper arms should be tight against the sides of the rib cage
with the elbows locked above the hip bones and aligned under the shoulders.
~ Don’t allow the elbows to flare out from the sides, as this can create
a faulty leverage and put a strain on the elbows. ~ Head position is an important element of body mechanics. Position
your head so that your line of vision is at a 45 degree angle to the floor. Do this and you will overcome the tendency to bend backwards at the halfway point of the upward curling phase.
Curling the Barbell: ~ Inhale a deep breath of air through your mouth into your lungs.
Hold it from the commencement (start) of the curl. Always breathe through the mouth, as the nose simply is not equipped to take in or expel large amounts of air in a short space of time.
~ Flex (bend) at the elbow joint while “tensing” the biceps muscles
and begin moving the barbell in a semicircular motion or wide arc forward and upward toward the shoulders or neck.
~ As the forearms move slightly beyond the horizontal plane (this is
where the upper and lower arms form a 90 degree angle), slowly and forcefully begin to expel the air out of your lungs. This will assist you in bypassing the sticking point of the upward phase of the curl.
36
~ Another thing you can do to improve your leverage factor for bypassing the sticking point (at the horizontal plane) is to flex (bend) at the wrist and curl the hands upward so that they precede the wrists. Imagine doing a barbell wrist curl with the palms up.
Elbow Orientation: ~ At the halfway point in the upward movement of the curl, the elbows
will begin to move forward and upward, thus allowing the powerful deltoid muscles to get involved in the curling action.
~ There are different options regarding elbow orientation. The late
Vince Gironda, “The Iron Guru”, felt that, when the elbows came forward and upward, it would diffuse maximum resistance because the barbell wasn’t being lifted against gravity. Vince and others such as John Parrillo (nutrition and training guru) felt that, when the elbows were as vertical as possible (humerous bone kept aligned with the body) and motionless, there was more of and isolationary effect on the bicep belly. Vince also believed (and proved) that dropping the shoulders down and pulled back further added to the isolationary effect.
~ Having said that, I must mention that Joe Bucci, a former Mr. World
title winner, had an upper arm that measured as much as 21 inches in circumference. A part of his success in achieving this monster arm measurement had to do with elbow orientation when doing curling movements. He would raise or push his elbows upward to a parallel position to the floor near the completion of the lifting segment of the curl. Joe felt that this contributed to one of the most dramatic tension curves ever. An added benefit to pushing the elbows was that he created a rather unusual peak and separation between the biceps and deltoids.
~ For the methodics required in this Special Big Arms eReport, I’m
going to suggest that you allow your elbows to move forward and upward (naturally), perhaps striking a balance somewhere in between the suggestions of the Gironda/Parrillo camp and Joe Bucci.
Curling to Completion: ~ Complete the curling of the barbell in a semicircular motion (wide
arc upward) to the shoulders. As the curls near completion, the palms will be facing inward at approximately shoulder level. The forearms should cover the upper arm (biceps).

37
Lowering the Barbell: ~ Lower the barbell down, under control, by moving the elbows down
and back to the sides of the body. In a synchronized manner, begin to straighten (extend) the lower arm until you feel the triceps “lock out” at the bottom of the curl. If you can imagine yourself locking out in the bottom position of the Reverse-Grip Triceps Extension on a lat machine, you will understand the feeling (kinesthetic sense) I just described for the triceps lockout in the curl. Get set to launch into the next rep(s) of the assigned methodic.
Rep Speed: ~ Curl the barbell in a free and easy manner unless otherwise
indicated in the methodics described in this Special Big Arms eReport.
A2: EZ-Bar French Press
(Technique-Emphasis) Load an EZ-bar with the appropriate amount of poundage to
accommodate the particular even/odd hour/half-hour methodic.
38
Feet: ~ While standing in front of the loaded barbell, assume a shoulder-
width or slightly wider foot placement. Both of your feet should be parallel to each other with the area of balance on the balls of your feet so that you will be able to grip the floor better for overall balance.
Back: ~ Keep the back flat (arched in) and tensed. ~ Back is concaved in the middle. Trapezius: ~ Muscles are taut. Chest: ~ Inhale the deepest possible breath into the lungs. Doing this is
called the Vital Capacity. ~ Hold the chest high so that the lower rib cage fans outward. Abdominals: ~ Keep them tensed. Hip, Knee, & Ankle Joint Action: ~ From an upright (vertical) postion, simultaneously and with fluidity:
Bend your knees slightly and at the same time bend forward at the hip joint (pushing the hips back), moving the upper torso slightly forward so that the shoulders are above or ahead of the EZ-bar. Remember to keep the back flat and tensed.
Arms: ~ Extended (soft lock). ~ Take a narrow overhand, semi-pronated overgrip on the angled or
cambered curve (closest to the center) of the EZ-Bar. The over-grip is where the fingers are wrapped over the top of the bar and the thumbs in the opposite direction (under the bar).
39
Hand Position Recap: ~ The palms of your hands will be semi-pronated almost to face the
floor. ~ There will be an approximate 6-inch spacing between the index
fingers on the bar, and the little fingers will be closer to the floor than the thumbs.
Lifting the Barbell (to the start position): ~ Part 1 – With the arms straight and out, and gripping the bar as
tightly as possible, begin slowly and smoothly to pull on the bar. Don’t “yank” on it.
~ As the bar begins to move upward (vertically) off the floor,
simultaneously begin to extend (straighten) your legs, move the hips forward, and the chest/shoulders upward and back.
~ Keep the EZ-bar close to the body, and when it reaches a point just
above the knee level, begin to bend the arms (leading with the elbows – move them away from the body). The mechanics of action will appear similar to arm action of an upright rowing motion. Remember to keep an upward pulling pressure on the bar.
~ With speed (upward acceleration), continue pulling the EZ-bar as
high as possible (to the low sternum of the chest). When the bar reaches this point (low sternum), re-bend the knees (no more than a quarter-squat motion), dipping the body like you’re going to sit in a chair (called “chair reaction”).
~ Simultaneously thrust and rotate the elbows upwards and the
forearms/hands back. This pulling action will allow you to catch (rack) the EZ-bar across the front of your shoulders/clavicles. Many Olympic lifters can execute the thrust and rotate sequence as quickly as .04 of a second.
~ Extend your legs to a hard-lock position. ~ Part II – With the bar racked in towards the throat, begin to
push/press it directly upwards to an arms-fully extended position overhead.
~ When pressing, be sure the elbows are out to the side and spread
apart. ~ Bow the body into the weight (as you push/press).
40
~ Get your head under the bar. ~ Body balance is on the balls of the feet ~ EXHALE! Start Position Posture: ~ Viewing the starting position (from top to bottom), for the A2: EZ-
Bar French Press.
Wrist tension – The hands should be in a neutral position (knuckles facing the ceiling) and in line with the forearms. Don’t let the hands bend back into extension because it can cause inflammation and soreness in the inner elbows (medial epicondyle) near the bony area. Without a doubt, inflammation and soreness can cause even the best of exercises to suddenly become, as Dave Draper says, “the mean-faced Reaper of Injury and Pain.” Maintain proper wrist tension!
Arms, Shoulders, & Hips – Should be in alignment under the bar to
support the weight. The shoulders are squared and facing forward. Traps – Taut. Back – Flat and tensed. Chest – held high. Abs –
tensed. Legs – Completely extended, knees locked (some bodybuilders prefer a soft lock in knees). Feet – Shoulder width apart or wider and parallel to each other.
Lowering the Barbell: ~ Inhale a deep breath of air through your mouth, into your lungs.
Hold the air in from the commencement (start) of the EZ-Bar French Press.
~ Now, in a very controlled and precise manner, start flexing
(bending) at the elbow joints and begin to lower the EZ-bar downward and backward in a semicircular arc behind your head.
Elbow Orientation: ~ As the forearms begin to fold downward, make a conscious effort to
keep the elbows high (pointing toward the ceiling) and in line with your shoulders (or at least as straight up and down as your shoulder joint flexibility will allow). The elbows should be parallel (equal distance apart) to each other as this will help relieve elbow strain somewhat.
41
Continue Lowering the Barbell: ~ Continue lowering (forearms folding downward) the EZ-bar down
behind the head to the “bottom-stretch position.” This is achieved when the forearms reach a parallel to the floor position or slightly beyond, until you feel a good stretch contraction in the triceps.
Extending the Bar Upward: ~ Begin smoothly, with the powerful trip-hammer action of your
triceps, pressing the EZ-bar by extending (unfolding) the forearms upward (from the bottom-stretch position) in a semicircle to an overhead, arms-locked position. It is important always to fully extend the forearms at the top end of the movement, with poised deliberation, so that they are in line with the upper arm. Doing this will shorten the anconeus (a small muscle located at the elbow joint) and maximally contract the long head of the triceps.
~ Exhale forcefully the air from your lungs approximately two thirds of
the way to the overhead arms-extended position. ~ Inhale another breath of air and continue performing to completion
the next rep(s) of the assigned methodic. Rep Speed: ~ Lower the EZ-bar behind your head with you in control of its
descent. Don’t lower it too quickly; you could end up irritating your elbows.
~ Relative to the above suggestions, don’t go so heavy that your form
(technique-emphasis) deteriorates. ~ Generally, lowering the bar to the bottom-stretch position should
take twice as long as extending the EZ-bar back to lockout overhead. An example would be to lower the bar at a 4-second count and extend it up in 2 seconds.
The Standing EZ-Bar French Press can be executed effectively in other ways:
Lying (supine) – This variation is usually done on a flat exercise bench. A safer means would be to lie on the floor, the advantage being a spotter or helper is not generally needed. Other ways are Seated Upright (back supported), Inclined (45 degrees), Declined and Kneeling.
42
I have personally used all four variations, but there is one that I found to be the most effective. I would sit on the floor with mid/lower back supported against the end of the secured flat exercise bench, legs outstretched. A training partner would straddle the bench from behind me and hand me the loaded bar at the required start position for a particular training methodic. If you lack flexibility in your shoulders you will find it to your advantage to forego the Standing, Seated (on a bench of floor), and kneeling postures in favor of Lying and Inclined (45 degrees) EZ-bar French Press. As Dave Draper (author of the book Brother Iron, Sister Steel - see www.davedraper.com on the Internet), the blond bomber, has said on many occasions, “tendonitis prowls”. If at any time you experience soreness in the inner elbow (medial epicondyle) and/or outer elbow (lateral epicondyle), initiate Cryokinetic Ice Massage (Physical Restoration Modality) mentioned in this Special Big Arms eReport. Perform the Standing EZ-Bar French Press as described, and the triceps can’t help but swell with incredible thickness and power. For those of you wondering about the rationale for using and EZ-bar instead of a conventional straight bar, it is simply this: Many bodybuilders prefer to use the EZ-bar for extension movements because it gives more comfort by providing dramatic pain relief in the wrists and lessens torque in the elbows, within any variation of the EZ-Bar French Press. .

43
Bonus Section Super Calves!
One-Step High-Protein Meal (G.L.O.P.) Doc Tilney’s Muscle-Building Nut Loaf Rheo H. Blair’s Egg Technique/Recipe
Barbell Curl Strength Chart 9 Hour Modified “Arm Blitz”
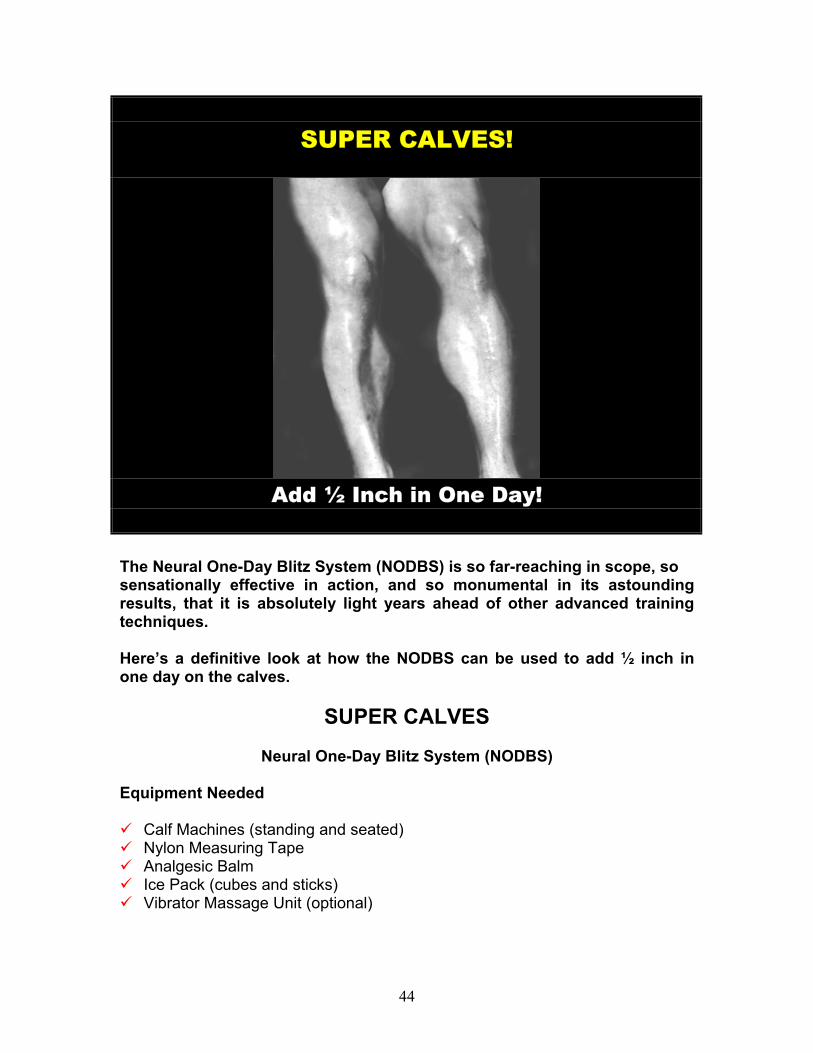
44
SUPER CALVES!
Add ½ Inch in One Day!
The Neural One-Day Blitz System (NODBS) is so far-reaching in scope, so sensationally effective in action, and so monumental in its astounding results, that it is absolutely light years ahead of other advanced training techniques. Here’s a definitive look at how the NODBS can be used to add ½ inch in one day on the calves.
SUPER CALVES
Neural One-Day Blitz System (NODBS)
Equipment Needed
Calf Machines (standing and seated) Nylon Measuring Tape Analgesic Balm Ice Pack (cubes and sticks) Vibrator Massage Unit (optional)
45
16 Guidelines
#1. The week prior (to NODBS) Workout the first three days of the week using medium-intensity training loads (72-84% of a current maximum single effort) and high to very high volume of sets and reps. You can use the programs mentioned in the Special Big Arms eReport, or you can go to your PC and click on www.davedraper.com for some stimulated strategies regarding high-volume training. Don’t workout at all two days (Thursday/Friday) prior to the NODBS.
#2. The evening prior (to NODBS) Use a non-shrinkable nylon tape measure and take a cold (non-pumped) measurement of each calf girth at the largest part with the leg straight but relaxed. Eat a meal that will induce sleep. Retire to bed early (9:30-10 P.M.) To ensure getting 8 hours of sound sleep. Refer to pages 6, and 7. #3. The morning of the NODBS Read pages 7 and 8. #4. Begin the NODBS at 10:00 AM Read #4, A Quick Review, but apply it to the calves. #5. Ice Pack therapy Refer to page 13 (A. Physical Restorative Modalities). #6. Even hour Schedule 10:00 AM, Noon, 2:00 PM, 4, 6, 8, 10 PM): Core “Growth” Exercises. C1: Standing Calf Machine Heel Thrusts C2: Seated Calf Machine “Flexed-Knee” Heel Thrusts The methodics include performing multiple Single Rep Sets of each individual exercise while using 90%+ of a maximum single effort (MSE). Rest- pause 20 seconds between each single rep set (e.g., 1r>20 sec rest, etc.). Terminate doing the one-rep sets only when the full exercise range of movement in the upward phase of the rep begins to fail (½ or ¾ reps).
46
#7. Even half-hour schedule 10:30 AM, 12:30 PM, 4:30 & 8:30 PM.: Core Growth Exercises C1 and C2. Perform 3 sets x 2 reps (consecutively) with 85%+ MSE. Perform explosive pause reps (refer to page 11 Even Half-Hour Methodics, for a description). Rest 1 minute between sets. #8. Analgesic balm massage Refer to page 13 (A. Physical Restorative Modalities) for the application procedure. #9. Odd hour schedule 11:00 AM, 1:00 P.M., 5:00 PM, 9:00 PM: Core Growth Exercises C1 & C2. Perform 5 sets x 2 reps (consecutive) with 85%+ MSE. Perform Rebound Reps (refer to page 11 Odd Hour Methodics, for a detailed description). Rest one minute between each set.
#10. Odd half-hour schedule 11:30 AM, 1:30 PM, 5:30 PM, 9:30 PM: Core Growth Exercises C1 & C2. Perform 5 sets x 2 reps (consecutive) with 70% MSE. Perform in Manual Overspeed style. To perform the Manual Overspeed technique for C1: Standing Calf Machine Heel Thrusts and C2: Seated Calf Machine Flexed-Knee Heel Thrusts requires the assistance of a training partner. The starting point for the first rep of each of these exercises (B1 and B2) begins in the eccentric (negative) stretch contraction. Your heels will be lower than the top of the foot block. Pause in this stretch position for a one-second count (called the Dynamic Iso System), then explode upwards in the concentric (positive) phase until you feel the instep of your feet shift forward into total bone support at the top (peak) contraction of the heel raise. On the C1: Standing Calf Machine Heel Thrust (develops the fast-twitch gastronomies muscles), a training partner assists you from behind by accelerating the yoke movement arm up as fast as possible. This should take .5 to 1 second to complete. Another option is to have the training partner cup each of his hands under your heels and accelerate the upwards movement of the heels by lifting them. On the C2: Seated Calf Machine Flexed-Knee Heel Thrusts (develops the slow twitch soleus muscles), a training partner simply lifts up on the plate-loaded end of the lever arm.
47
Rest-pause 1.5 minutes between each of the 5 sets for the B1 and B2 exercises. #11. Cryokinetic Ice massage – Refer to page 13 #12. Eating for strength and explosive performance – Refer to pages 17-18 #13. Hourly protein pump (feeding) – Refer to page 18 #14. Elapsed time between micro workouts – Refer to page 30 #15. Upon completion of the NODBS Approximately 10:20 PM: While the calves still have a blood-gorged pump, like IFBB pro bodybuilder Lee Priest, quickly measure each calf with a nylon tape measure. #16. Two Days After DO NOT workout at all on Sunday and Monday. Aggressively begin to utilize the appropriate Physical and Mechanical Restorative Modalities to accelerate the complete recovery process of the localized muscles, biceps/triceps, and the central nervous system.
#17. Resuming Total Body Workouts
On Tuesday, Thursday, and Saturday, begin *German Volume Training (GVT) as suggested on page 4 (Ref: #1. The Week Prior). Rest on Sunday, and then at the beginning of the next week, begin a 12-week cycle of OTS Titan Training System protocol (log onto: www.otsdirect.com for details). [*Note: Doing a total body workout in GVT style may compromise the energy and recovery ability of many bodybuilders. The least compromising alternative is to train major and minor muscle groups on different training days. For example, Day 1: quads, calves forearms. Day 2: pecs, back, abs. Day 3: delts, biceps triceps.] Finally, use the NODBS one day out of every 180 days, or 2 times per training year at most.
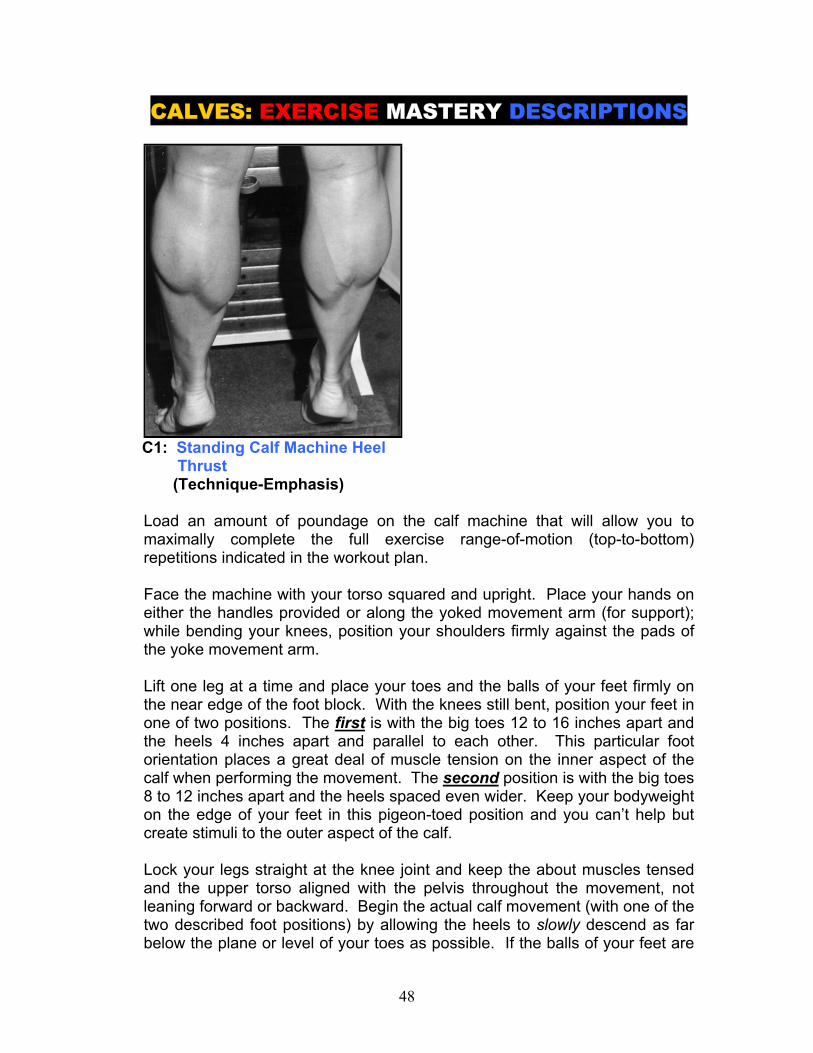
48
CALVES: EXERCISE MASTERY DESCRIPTIONS
C1: Standing Calf Machine Heel Thrust (Technique-Emphasis)
Load an amount of poundage on the calf machine that will allow you to maximally complete the full exercise range-of-motion (top-to-bottom) repetitions indicated in the workout plan. Face the machine with your torso squared and upright. Place your hands on either the handles provided or along the yoked movement arm (for support); while bending your knees, position your shoulders firmly against the pads of the yoke movement arm. Lift one leg at a time and place your toes and the balls of your feet firmly on the near edge of the foot block. With the knees still bent, position your feet in one of two positions. The first is with the big toes 12 to 16 inches apart and the heels 4 inches apart and parallel to each other. This particular foot orientation places a great deal of muscle tension on the inner aspect of the calf when performing the movement. The second position is with the big toes 8 to 12 inches apart and the heels spaced even wider. Keep your bodyweight on the edge of your feet in this pigeon-toed position and you can’t help but create stimuli to the outer aspect of the calf. Lock your legs straight at the knee joint and keep the about muscles tensed and the upper torso aligned with the pelvis throughout the movement, not leaning forward or backward. Begin the actual calf movement (with one of the two described foot positions) by allowing the heels to slowly descend as far below the plane or level of your toes as possible. If the balls of your feet are
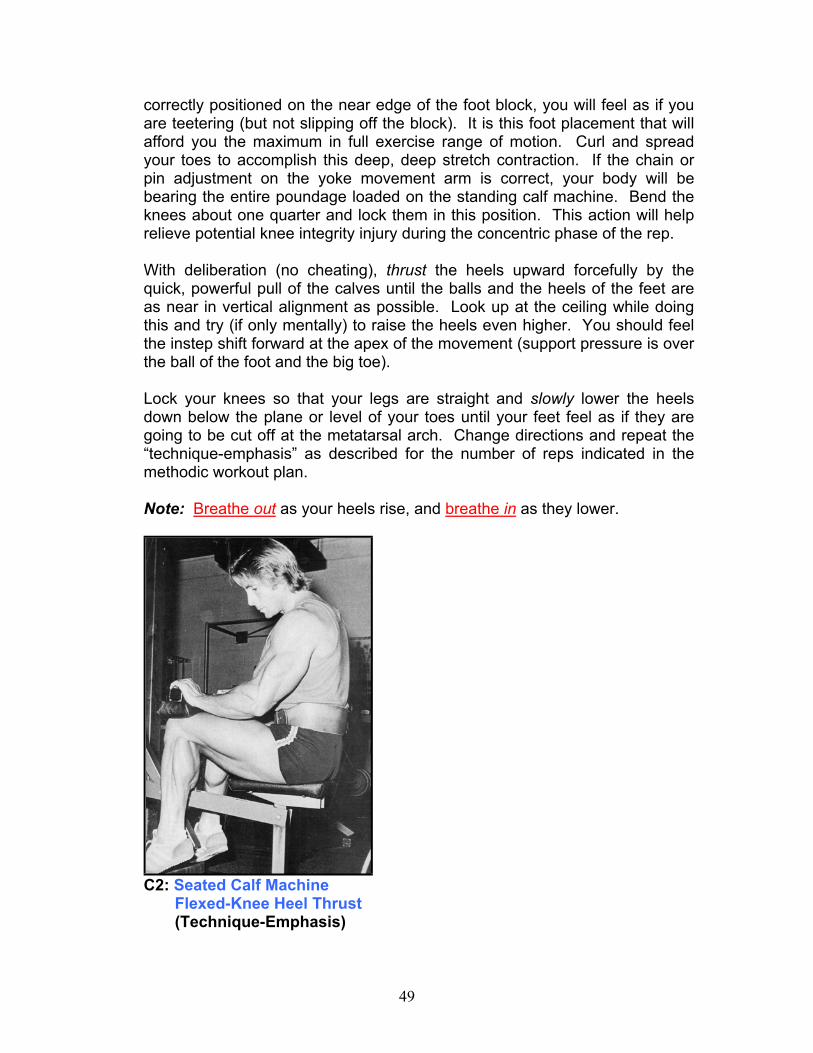
49
correctly positioned on the near edge of the foot block, you will feel as if you are teetering (but not slipping off the block). It is this foot placement that will afford you the maximum in full exercise range of motion. Curl and spread your toes to accomplish this deep, deep stretch contraction. If the chain or pin adjustment on the yoke movement arm is correct, your body will be bearing the entire poundage loaded on the standing calf machine. Bend the knees about one quarter and lock them in this position. This action will help relieve potential knee integrity injury during the concentric phase of the rep. With deliberation (no cheating), thrust the heels upward forcefully by the quick, powerful pull of the calves until the balls and the heels of the feet are as near in vertical alignment as possible. Look up at the ceiling while doing this and try (if only mentally) to raise the heels even higher. You should feel the instep shift forward at the apex of the movement (support pressure is over the ball of the foot and the big toe). Lock your knees so that your legs are straight and slowly lower the heels down below the plane or level of your toes until your feet feel as if they are going to be cut off at the metatarsal arch. Change directions and repeat the “technique-emphasis” as described for the number of reps indicated in the methodic workout plan. Note: Breathe out as your heels rise, and breathe in as they lower.
C2: Seated Calf Machine Flexed-Knee Heel Thrust (Technique-Emphasis)
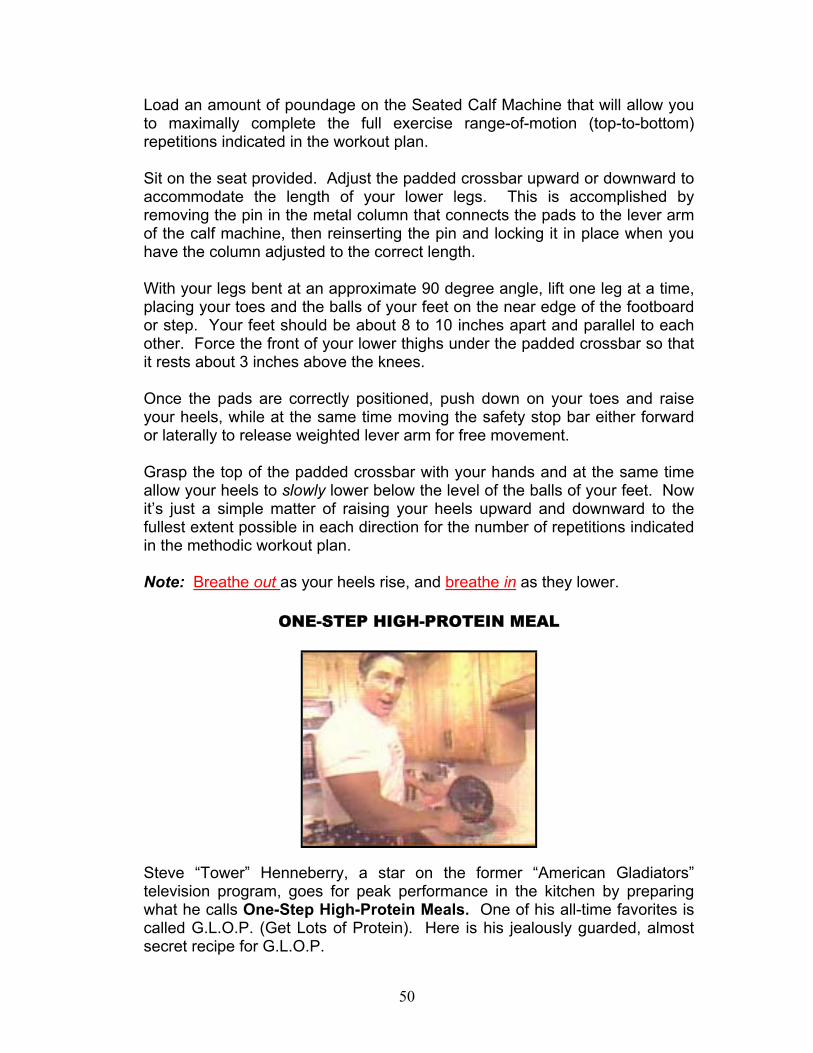
50
Load an amount of poundage on the Seated Calf Machine that will allow you to maximally complete the full exercise range-of-motion (top-to-bottom) repetitions indicated in the workout plan. Sit on the seat provided. Adjust the padded crossbar upward or downward to accommodate the length of your lower legs. This is accomplished by removing the pin in the metal column that connects the pads to the lever arm of the calf machine, then reinserting the pin and locking it in place when you have the column adjusted to the correct length. With your legs bent at an approximate 90 degree angle, lift one leg at a time, placing your toes and the balls of your feet on the near edge of the footboard or step. Your feet should be about 8 to 10 inches apart and parallel to each other. Force the front of your lower thighs under the padded crossbar so that it rests about 3 inches above the knees. Once the pads are correctly positioned, push down on your toes and raise your heels, while at the same time moving the safety stop bar either forward or laterally to release weighted lever arm for free movement. Grasp the top of the padded crossbar with your hands and at the same time allow your heels to slowly lower below the level of the balls of your feet. Now it’s just a simple matter of raising your heels upward and downward to the fullest extent possible in each direction for the number of repetitions indicated in the methodic workout plan. Note: Breathe out as your heels rise, and breathe in as they lower.
ONE-STEP HIGH-PROTEIN MEAL
Steve “Tower” Henneberry, a star on the former “American Gladiators” television program, goes for peak performance in the kitchen by preparing what he calls One-Step High-Protein Meals. One of his all-time favorites is called G.L.O.P. (Get Lots of Protein). Here is his jealously guarded, almost secret recipe for G.L.O.P.
51
Ingredients: 16 oz. fat-free ground turkey breast 1 boil-in-bag (Kraft, Success, Uncle Ben’s) instant long-grain brown rice packages 16 oz. jar picante sauce (mild, medium, or hot) 8 oz. low-fat cottage cheese (small curd) Non-stick cooking spray (optional) Instructions: • Preheat range-top element on medium/medium high for 5 minutes. • Grease the inside of an unheated large non-stick skillet with a quick
application of non-stick cooking spray.
• Put the ground turkey meat into the skillet and fry on medium/medium high, stirring occasionally with a wooden spoon, until the meat is uniformly golden brown (no longer pink). Don’t overcook the meat; it can lose moisture and become rubbery.
• About a minute or so before the meat is finished browning, stir in the
picante sauce. Turn the heat to a low setting and let the meat simmer so that it picks up the flavor of the sauce.
• While the ground turkey is cooking, prepare tow boil-in-bag brown rice
packages according to range top or microwave instructions. Time the cooking of the rice to coincide with the turkey.
• Remove the skillet from the range top when the meat is finished browning,
and scoop the contents into a large Pyrex-type glass bowl. Next add the cooked rice, then the cottage cheese, and stir the ingredients lightly with the wooden spoon (don’t overstir).
• If the G.L.O.P. isn’t going to be eaten immediately, you can store it in a
plastic container with lid in the refrigerator overnight.
Helpful Hints: • G.L.O.P. tastes as good cold as when just cooked, so put a container of it
in your cooler and eat it as a meal at 2:00 or 6:00 PM, or more sparingly at an Hourly Protein Pump (Feeding) during the NODBS.
• While you are waiting for the turkey and rice to finish cooking, make up a
Muscle Shake. Pour 16 ounces of cold distilled water (not spring or ionized) into a blender. Add one packet of MET-Rx original vanilla drink
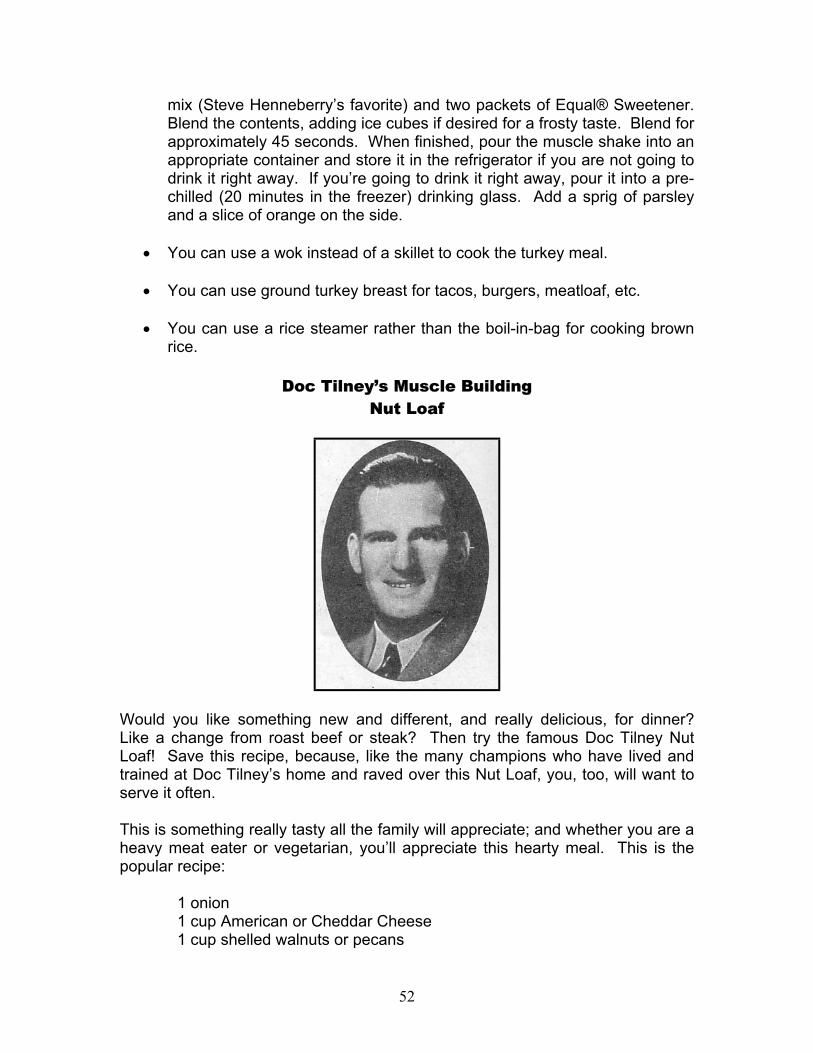
52
mix (Steve Henneberry’s favorite) and two packets of Equal® Sweetener. Blend the contents, adding ice cubes if desired for a frosty taste. Blend for approximately 45 seconds. When finished, pour the muscle shake into an appropriate container and store it in the refrigerator if you are not going to drink it right away. If you’re going to drink it right away, pour it into a pre-chilled (20 minutes in the freezer) drinking glass. Add a sprig of parsley and a slice of orange on the side.
• You can use a wok instead of a skillet to cook the turkey meal.
• You can use ground turkey breast for tacos, burgers, meatloaf, etc.
• You can use a rice steamer rather than the boil-in-bag for cooking brown
rice.
Doc Tilney’s Muscle Building Nut Loaf
Would you like something new and different, and really delicious, for dinner? Like a change from roast beef or steak? Then try the famous Doc Tilney Nut Loaf! Save this recipe, because, like the many champions who have lived and trained at Doc Tilney’s home and raved over this Nut Loaf, you, too, will want to serve it often. This is something really tasty all the family will appreciate; and whether you are a heavy meat eater or vegetarian, you’ll appreciate this hearty meal. This is the popular recipe: 1 onion 1 cup American or Cheddar Cheese 1 cup shelled walnuts or pecans
53
2 cups whole wheat, pumpernickel or rye bread crumbs (or a package of Pepperidge Farm Stuffing) 1 can Campbell’s tomato soup 1 egg Milk – sufficient to make a thick batter Put the onion, then the cheese, then the nuts, and finally the bread crumbs through a food grinder (or meat grinder), in that order. Mix these in a bowl with the can of tomato soup, egg, and then add sufficient milk to make a smooth batter. Place in a glass baking dish. Then cut thin slices of cheese and place these over the top of the mixture. Bake in a moderate oven, about 400 degrees, from 45 minutes to an hour until it’s nice golden brown. Place Idaho baking potatoes also in the oven alongside the loaf so they can be cooking at the same time. Open a package of frozen peas, french-cut string beans, or broccoli, and cook till tender on top of the stove to serve with the loaf and potatoes. Have an apple, a pear, some grapes for dessert, and you have a hearty and nourishing dinner. It’s easy to prepare, easy to eat. If you add too much milk, the loaf will be soft inside. If you have the oven too hot, it will make a thick crust on top and bottom. Recipe serves four or five persons. Most folks find this so delicious, especially the bodybuilders, they will demand second and third helpings. In that case, double up on the ingredients so as to have enough. If there is any leftover, it’s very nice served cold. Split the baked potatoes, one for each person, and instead of butter, add 2 tablespoons of peanut oil for those who wish to gain muscular weight. If desired, you can serve an assorted raw vegetable salad with this meal. You’ll be interested to know that bodybuilding champions such as John Grimek, Reg Park, Charles Atlas and all the other champions who have been at Doc Tilney’s home have enjoyed this nut loaf. So many bodybuilders have asked for this recipe; now you have it! Keep it handy or type it onto a 3x5 card. This nut loaf is a terrific high-protein muscle-building entrée.
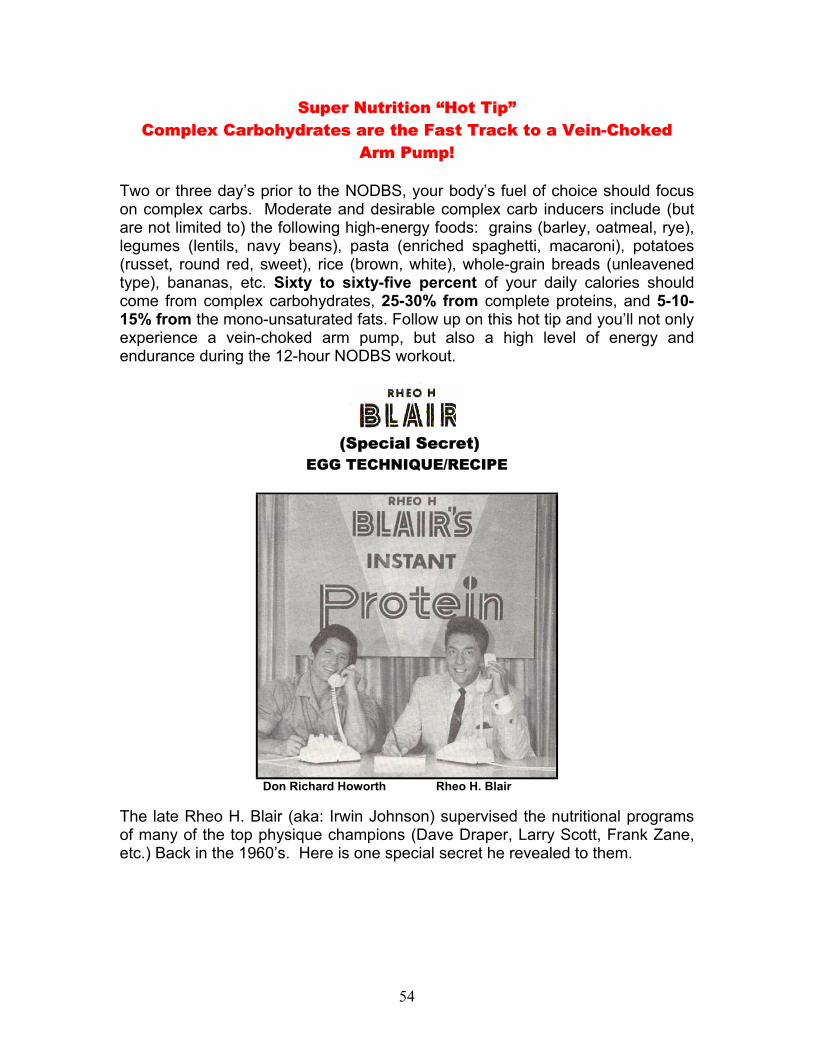
54
Super Nutrition “Hot Tip” Complex Carbohydrates are the Fast Track to a Vein-Choked
Arm Pump!
Two or three day’s prior to the NODBS, your body’s fuel of choice should focus on complex carbs. Moderate and desirable complex carb inducers include (but are not limited to) the following high-energy foods: grains (barley, oatmeal, rye), legumes (lentils, navy beans), pasta (enriched spaghetti, macaroni), potatoes (russet, round red, sweet), rice (brown, white), whole-grain breads (unleavened type), bananas, etc. Sixty to sixty-five percent of your daily calories should come from complex carbohydrates, 25-30% from complete proteins, and 5-10-15% from the mono-unsaturated fats. Follow up on this hot tip and you’ll not only experience a vein-choked arm pump, but also a high level of energy and endurance during the 12-hour NODBS workout.
(Special Secret)
EGG TECHNIQUE/RECIPE
Don Richard Howorth Rheo H. Blair The late Rheo H. Blair (aka: Irwin Johnson) supervised the nutritional programs of many of the top physique champions (Dave Draper, Larry Scott, Frank Zane, etc.) Back in the 1960’s. Here is one special secret he revealed to them.

55
Blair’s Technique for Making Undenatured Hard-Cooked Eggs
www.lanaseggwhites.com
Eggs are the most perfect protein food, but they are also a delicacy and fragile. The sustained high heat applied during customary hard boiling of eggs tends to denature (downgrade) their protein value. This method of cooking eggs at a temperature considerably below the boiling point of water helps to preserve the food value of eggs, and it certainly makes them more excitingly tasteful. Using a candy (confectioner’s) thermometer (found at hardware or supermarket), heat water in a cooking vessel to 180-185 degrees F. Put eggs in this water and hold for 25 minutes at this temperature. They’re cooked, not boiled. Here’s an extra special secret: Punch a small hole (an ice pick will do) in the large end of each egg before cooking and add two teaspoons of table salt and a tablespoon of vinegar to the water to make the eggs easier to shell. When shelled, these eggs can be eaten as they are, or they can be cut in half and eaten with just a few drops of tasty wine vinegar on each open-faced egg yolk. Make them into deviled eggs by mashing the yolks with a little vinegar, mustard, and sour cream, then returning the mixture to the empty whites. Sprinkle a little paprika over the top or garnish with small pieces of pimento or olive for the fancy touch. Keep these delicious eggs in the refrigerator for handy snacks – plain, deviled, or pickled. To your health!
Rheo Blair’s Pickled Egg Recipe Prepare one dozen undenatured, hard-cooked eggs, shells removed (see above instructions). Place six of the cooked and shelled eggs in a jar large enough to hold a little more than the entire dozen eggs. Add two or three beets and one-half cupful of the liquid from a can of beets (not pickled beets, to much sugar).
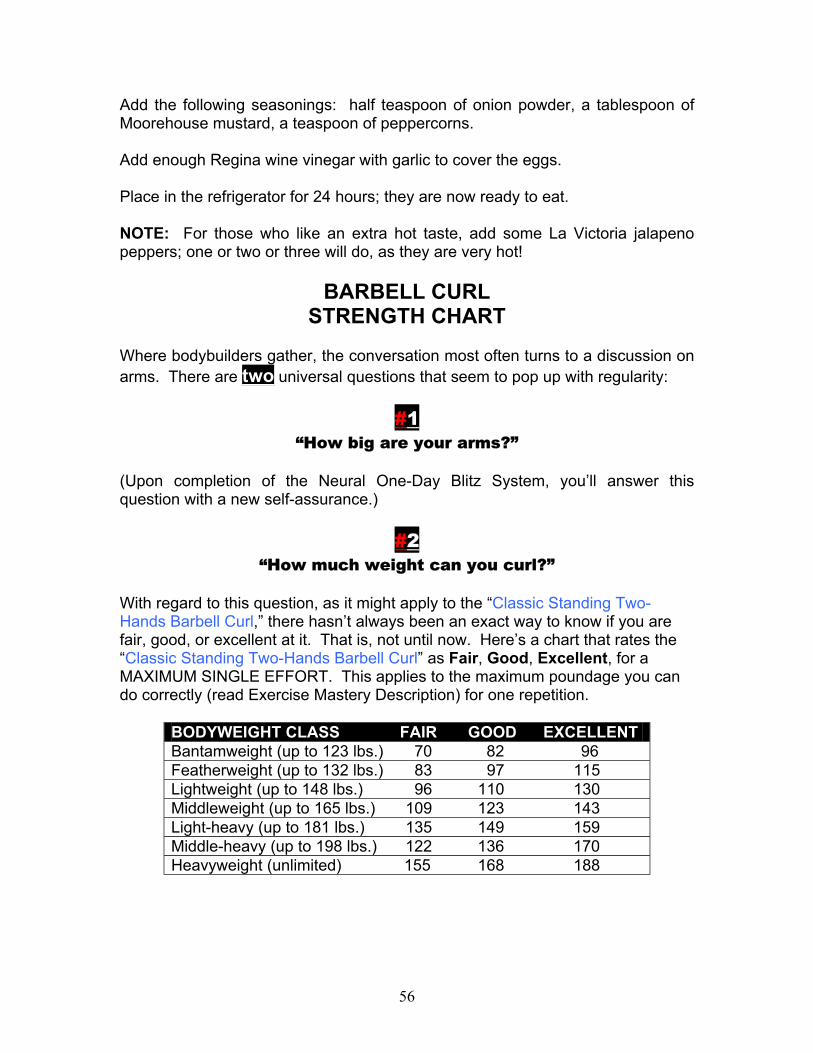
56
Add the following seasonings: half teaspoon of onion powder, a tablespoon of Moorehouse mustard, a teaspoon of peppercorns. Add enough Regina wine vinegar with garlic to cover the eggs. Place in the refrigerator for 24 hours; they are now ready to eat. NOTE: For those who like an extra hot taste, add some La Victoria jalapeno peppers; one or two or three will do, as they are very hot!
BARBELL CURL STRENGTH CHART
Where bodybuilders gather, the conversation most often turns to a discussion on arms. There are two universal questions that seem to pop up with regularity:
#1 “How big are your arms?”
(Upon completion of the Neural One-Day Blitz System, you’ll answer this question with a new self-assurance.)
#2 “How much weight can you curl?”
With regard to this question, as it might apply to the “Classic Standing Two-Hands Barbell Curl,” there hasn’t always been an exact way to know if you are fair, good, or excellent at it. That is, not until now. Here’s a chart that rates the “Classic Standing Two-Hands Barbell Curl” as Fair, Good, Excellent, for a MAXIMUM SINGLE EFFORT. This applies to the maximum poundage you can do correctly (read Exercise Mastery Description) for one repetition.
BODYWEIGHT CLASS FAIR GOOD EXCELLENT Bantamweight (up to 123 lbs.) 70 82 96 Featherweight (up to 132 lbs.) 83 97 115 Lightweight (up to 148 lbs.) 96 110 130 Middleweight (up to 165 lbs.) 109 123 143 Light-heavy (up to 181 lbs.) 135 149 159 Middle-heavy (up to 198 lbs.) 122 136 170 Heavyweight (unlimited) 155 168 188

57
9 Hour Modified One-Day “Arm Blitz”
The 12 hour Neural One-Day Blitz System (presented at the beginning of this eReport) is based on a neuro-muscular system stimulus for arm growth, using poundage that is very close to a maximum single effort of the exercise employed. Some bodybuilders for one reason or another may not be able to follow Stepping Stone - # 8. Super-Intense 19 Time-Compression Workouts (Ref: Pg. 10). Here then is an alternative which I call it the 9 Hour Modified One-Day “Arm Blitz”. It employs a blood volume approach, performing Maxi-Pump Reps (where four or more repetitions are executed in all sets) rather than the neuro-muscular system training stimulus in which the Power 1 & 2-Rep System is employed. You take your first workout at 9:00 AM and perform three supersets with barbells. At 9:30 AM you do two supersets with dumbbells. Every even and odd hour you continue to do a 3 *supersets methodic of barbell movements, and every even and odd half-hour you exercise with the dumbbells for a 2 **supersets methodic. The last workout will occur at 5:30 PM.
Each of these mini-workouts will take
approximately 4-7 minutes to complete.
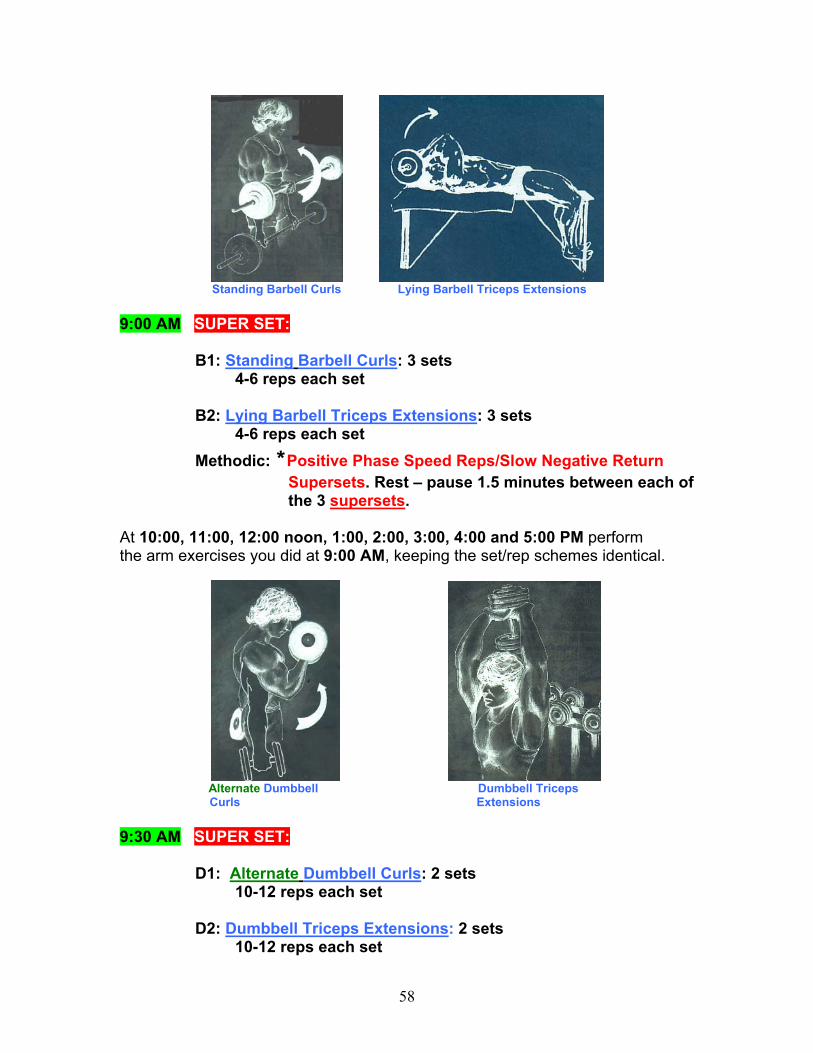
58
Standing Barbell Curls Lying Barbell Triceps Extensions 9:00 AM SUPER SET: B1: Standing Barbell Curls: 3 sets 4-6 reps each set B2: Lying Barbell Triceps Extensions: 3 sets 4-6 reps each set Methodic: *Positive Phase Speed Reps/Slow Negative Return Supersets. Rest – pause 1.5 minutes between each of the 3 supersets. At 10:00, 11:00, 12:00 noon, 1:00, 2:00, 3:00, 4:00 and 5:00 PM perform the arm exercises you did at 9:00 AM, keeping the set/rep schemes identical.
Alternate Dumbbell Dumbbell Triceps Curls Extensions 9:30 AM SUPER SET: D1: Alternate Dumbbell Curls: 2 sets 10-12 reps each set D2: Dumbbell Triceps Extensions: 2 sets 10-12 reps each set
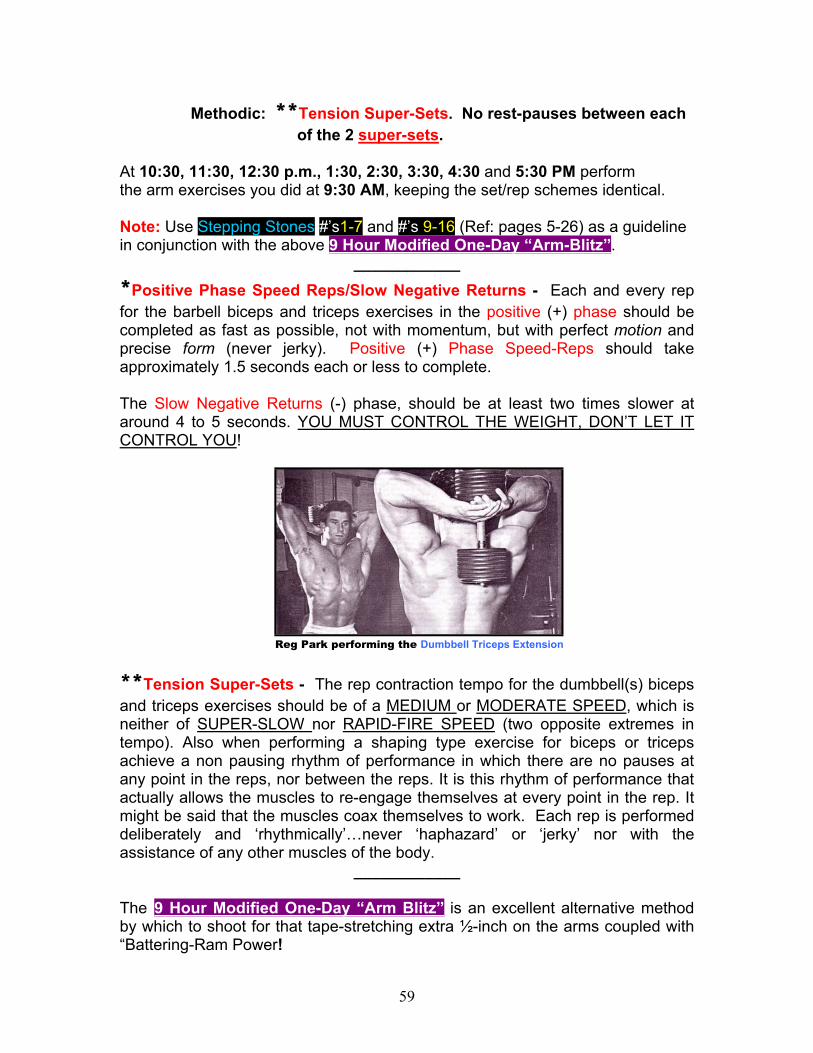
59
Methodic: **Tension Super-Sets. No rest-pauses between each of the 2 super-sets. At 10:30, 11:30, 12:30 p.m., 1:30, 2:30, 3:30, 4:30 and 5:30 PM perform the arm exercises you did at 9:30 AM, keeping the set/rep schemes identical.
Note: Use Stepping Stones #’s1-7 and #’s 9-16 (Ref: pages 5-26) as a guideline in conjunction with the above 9 Hour Modified One-Day “Arm-Blitz”.
____________ *Positive Phase Speed Reps/Slow Negative Returns - Each and every rep for the barbell biceps and triceps exercises in the positive (+) phase should be completed as fast as possible, not with momentum, but with perfect motion and precise form (never jerky). Positive (+) Phase Speed-Reps should take approximately 1.5 seconds each or less to complete. The Slow Negative Returns (-) phase, should be at least two times slower at around 4 to 5 seconds. YOU MUST CONTROL THE WEIGHT, DON’T LET IT CONTROL YOU!
Reg Park performing the Dumbbell Triceps Extension
**Tension Super-Sets - The rep contraction tempo for the dumbbell(s) biceps and triceps exercises should be of a MEDIUM or MODERATE SPEED, which is neither of SUPER-SLOW nor RAPID-FIRE SPEED (two opposite extremes in tempo). Also when performing a shaping type exercise for biceps or triceps achieve a non pausing rhythm of performance in which there are no pauses at any point in the reps, nor between the reps. It is this rhythm of performance that actually allows the muscles to re-engage themselves at every point in the rep. It might be said that the muscles coax themselves to work. Each rep is performed deliberately and ‘rhythmically’…never ‘haphazard’ or ‘jerky’ nor with the assistance of any other muscles of the body.
____________ The 9 Hour Modified One-Day “Arm Blitz” is an excellent alternative method by which to shoot for that tape-stretching extra ½-inch on the arms coupled with “Battering-Ram Power!

60
Many more quality eReports and audiocassettes on bodybuilding and strength training will be published and produced in the near future. These eReports and audio cassettes will be filled with result-producing (almost “secret”) information. Be sure to watch for them at: