Embed Size (px)
DESCRIPTION
Here's a guide for those who have decided to install Arch linux. It tells you what to do so that the daunting task would be a bit swifter and less painful.
Citation preview
Summary
Provides a highlydetailed, explanatoryguide to installing,configuring and usinga full-featured ArchLinux system.
Related
Category:Accessibility
Installation Guide
Network InstallationGuide
Install from SSH
GeneralRecommendations
GeneralTroubleshooting
Beginners' GuideFrom ArchWiki
Tip: This guide is also available in multiple pages rather than one large copy. If you wouldrather read it that way, please start here.
This document will guide you through the process of installingArch Linux using the Arch Install Scripts (https://github.com/falconindy/arch-install-scripts) . Before installing, you are advisedto skim over the FAQ.
The community-maintained ArchWiki is the primary resource thatshould be consulted if issues arise. The IRC Channel(irc://irc.freenode.net/#archlinux) and the forums(https://bbs.archlinux.org/) are also excellent resources if ananswer cannot be found elsewhere. In accordance with the ArchWay, you are encouraged to type man command to read the man pageof any command you are unfamiliar with.
Contents
1 Preparation1.1 System requirements1.2 Burn or write the latest installation medium
1.2.1 Installing over the network1.2.2 Installing on a virtual machine
1.3 Boot the installation medium1.3.1 Testing if you are booted into UEFI mode1.3.2 Troubleshooting boot problems
2 Installation2.1 Change the language2.2 Establish an internet connection
2.2.1 Wired2.2.2 Wireless2.2.3 Analog modem, ISDN or PPPoE DSL2.2.4 Behind a proxy server
2.3 Prepare the storage drive2.3.1 Choose a partition table type2.3.2 Partitioning tool2.3.3 Partition scheme2.3.4 Considerations for dualbooting withwindows2.3.5 Example
2.3.5.1 Using cgdisk to create GPT partitions2.3.5.2 Using fdisk to create MBR partitions
Beginners' Guide - ArchWiki https://wiki.archlinux.org/index.php/Beginners'_Guide
1 of 33 07/31/2013 04:28 AM

2.3.6 Create filesystems2.4 Mount the partitions2.5 Select a mirror2.6 Install the base system2.7 Generate an fstab2.8 Chroot and configure the base system
2.8.1 Locale2.8.2 Console font and keymap2.8.3 Time zone2.8.4 Hardware clock2.8.5 Kernel modules2.8.6 Hostname
2.9 Configure the network2.9.1 Wired
2.9.1.1 Dynamic IP2.9.1.2 Static IP
2.9.2 Wireless2.9.2.1 Adding wireless networks2.9.2.2 Connect automatically to knownnetworks
2.9.3 Analog modem, ISDN or PPPoE DSL2.10 Create an initial ramdisk environment2.11 Set the root password2.12 Install and configure a bootloader
2.12.1 For BIOS motherboards2.12.1.1 Syslinux2.12.1.2 GRUB
2.12.2 For UEFI motherboards2.12.2.1 EFISTUB2.12.2.2 Gummiboot2.12.2.3 GRUB
2.13 Unmount the partitions and reboot3 Post-installation
3.1 User management3.2 Package management3.3 Service management3.4 Sound3.5 Graphical User Interface
3.5.1 Install X3.5.2 Install a video driver3.5.3 Install input drivers3.5.4 Configure X3.5.5 Test X
3.5.5.1 Troubleshooting3.5.6 Fonts3.5.7 Choose and install a graphical interface
4 Appendix
Beginners' Guide - ArchWiki https://wiki.archlinux.org/index.php/Beginners'_Guide
2 of 33 07/31/2013 04:28 AM
Preparation
Note: If you wish to install from an existing GNU/Linux distribution, please see thisarticle. This can be useful particularly if you plan to install Arch via VNC or SSH remotely.Users seeking to perform the Arch Linux installation remotely via an SSH connectionshould read Install from SSH for additional tips.
System requirements
Arch Linux should run on any i686 compatible machine with a minimum of 64 MB RAM. Abasic installation with all packages from the base (https://www.archlinux.org/groups/i686/base/)group should take about 500 MB of disk space. If you are working with limited space, thiscan be trimmed down considerably, but you will have to know what you're doing.
Burn or write the latest installation medium
The latest release of the installation media can be obtained from the Download(https://archlinux.org/download/) page. Note that the single ISO image supports both 32and 64-bit architectures. A new ISO image is released about once every month and it ishighly recommended to always use the latest ISO image.
Burn the ISO image on a CD or DVD with your preferred software.
Note: The quality of optical drives and the discs themselves varies greatly. Generally,using a slow burn speed is recommended for reliable burns. If you are experiencingunexpected behaviour from the disc, try burning at the lowest speed supported byyour burner.
Or you can write the ISO image to a USB stick. For detailed instructions, see USBInstallation Media.
Installing over the network
Instead of writing the boot media to a disc or USB stick, you may alternatively boot the .isoimage over the network. This works well when you already have a server set up. Please seethis article for more information, and then continue to Boot the installation medium.
Installing on a virtual machine
Installing on a virtual machine is a good way to become familiar with Arch Linux and itsinstallation procedure without leaving your current operating system and repartitioning thestorage drive. It will also let you keep this Beginners' Guide open in your browserthroughout the installation. Some users may find it beneficial to have an independent ArchLinux system on a virtual drive, for testing purposes.
Examples of virtualization software are VirtualBox, VMware, QEMU, Xen, Varch, Parallels.
The exact procedure for preparing a virtual machine depends on the software, but willgenerally follow these steps:
Beginners' Guide - ArchWiki https://wiki.archlinux.org/index.php/Beginners'_Guide
3 of 33 07/31/2013 04:28 AM
Create the virtual disk image that will host the operating system.1.Properly configure the virtual machine parameters.2.Boot the downloaded ISO image with a virtual CD drive.3.Continue with Boot the installation medium.4.
The following articles may be helpful:
Arch Linux as VirtualBox guestArch Linux as VirtualBox guest on a physical driveArch Linux as VMware guestMoving an existing install into (or out of) a virtual machine
Boot the installation medium
First, you may have to change the boot order in your computer's BIOS. To do this, you haveto press a key (usually Delete , F1 , F2 , F11 or F12 ) during the POST phase. Then, select"Boot Arch Linux" from the menu and press Enter in order to begin with the installation.
Once you have booted into the live environment, your shell is Zsh; this will provide youadvanced Tab completion, and other features as part of the grml config (http://grml.org/zsh/) .
Testing if you are booted into UEFI mode
In case you have a UEFI motherboard and UEFI Boot mode is enabled (and is preferredover BIOS/Legacy mode), the CD/USB will automatically launch Arch Linux kernel(EFISTUB via Gummiboot Boot Manager). To test if you have booted into UEFI mode checkif directory /sys/firmware/efi has been created:
# ls -1 /sys/firmware/efi
Troubleshooting boot problems
If you are using an Intel video chipset and the screen goes blank during the bootprocess, the problem is likely an issue with Kernel Mode Setting. A possibleworkaround may be achieved by rebooting and pressing e over the entry that you aretrying to boot (i686 or x86_64). At the end of the string type nomodeset and press Enter .Alternatively, try video=SVIDEO-1:d which, if it works, will not disable kernel modesetting. You can also try i915.modeset=0 . See the Intel article for more information.
If the screen does not go blank and the boot process gets stuck while trying to load thekernel, press Tab while hovering over the menu entry, type acpi=off at the end of thestring and press Enter .
Installation
You are now presented with a shell prompt, automatically logged in as root.
Beginners' Guide - ArchWiki https://wiki.archlinux.org/index.php/Beginners'_Guide
4 of 33 07/31/2013 04:28 AM

Change the language
Tip: These are optional for the majority of users. Useful only if you plan on writing in yourown language in any of the configuration files, if you use diacritical marks in the Wi-Fipassword, or if you would like to receive system messages (e.g. possible errors) in yourown language.
By default, the keyboard layout is set to us . If you have a non-US keyboard layout, run:
# loadkeys layout
...where layout can be fr , uk , dvorak , be-latin1 , etc. See here for a comprehensive list.
The font should also be changed, because most languages use more glyphs than the 26letter English alphabet. Otherwise some foreign characters may show up as white squaresor as other symbols. Note that the name is case-sensitive, so please type it exactly as yousee it:
# setfont Lat2-Terminus16
By default, the language is set to English (US). If you would like to change the language forthe install process (German, in this example), remove the # in front of the locale(http://www.greendesktiny.com/support/knowledgebase_detail.php?ref=EUH-483) you wantfrom /etc/locale.gen , along with English (US). Please choose the UTF-8 entry.
Use Ctrl+X to exit, and when prompted to save changes, press Y and Enter to use the samefilename.
# nano /etc/locale.gen
en_US.UTF-8 UTF-8de_DE.UTF-8 UTF-8
# locale-gen# export LANG=de_DE.UTF-8
Remember, LAlt+LShift activates and deactivates the keymap.
Establish an internet connection
Warning: As of v197, udev no longer assigns network interface names according to thewlanX and ethX naming scheme. If you are coming from a different distribution or arereinstalling Arch and not aware of the new interface naming style, please do not assumethat your wireless interface is named wlan0, or that your wired interface is named eth0.You can use the command ip link to discover the names of your interfaces.
The dhcpcd network daemon starts automatically during boot and it will attempt to start awired connection. Try to ping a server to see if a connection was established. For example,
Beginners' Guide - ArchWiki https://wiki.archlinux.org/index.php/Beginners'_Guide
5 of 33 07/31/2013 04:28 AM
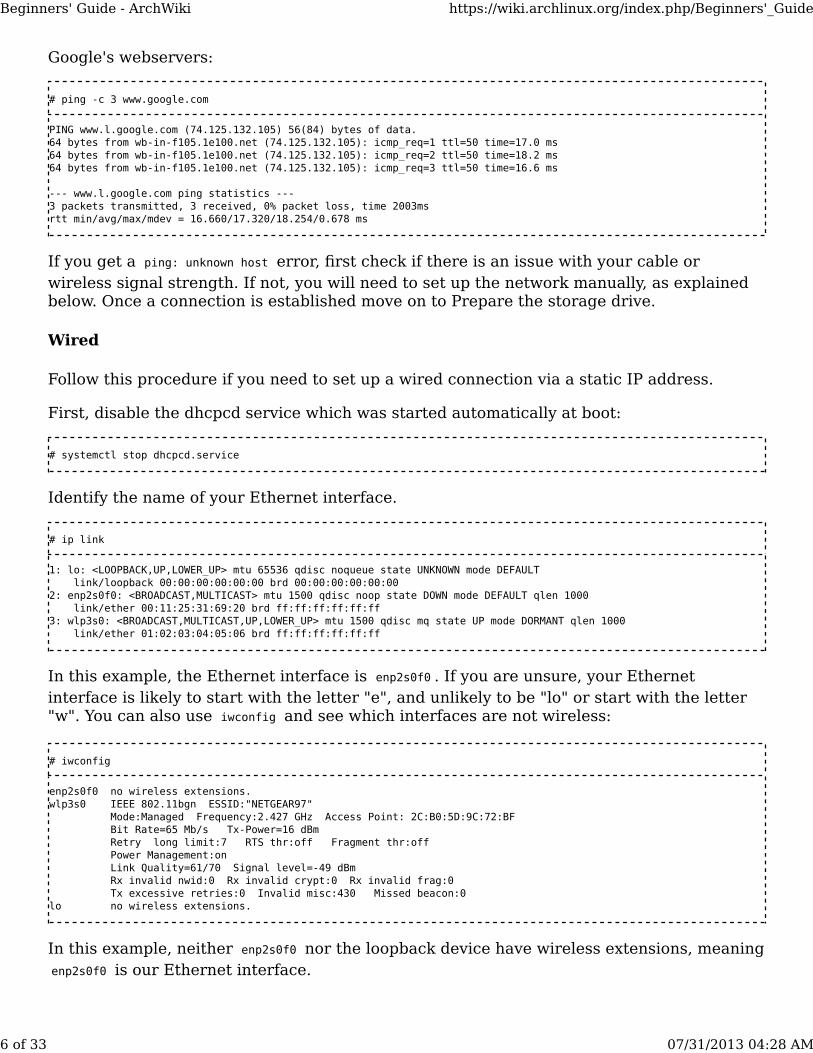
Google's webservers:
# ping -c 3 www.google.com
PING www.l.google.com (74.125.132.105) 56(84) bytes of data.64 bytes from wb-in-f105.1e100.net (74.125.132.105): icmp_req=1 ttl=50 time=17.0 ms64 bytes from wb-in-f105.1e100.net (74.125.132.105): icmp_req=2 ttl=50 time=18.2 ms64 bytes from wb-in-f105.1e100.net (74.125.132.105): icmp_req=3 ttl=50 time=16.6 ms
--- www.l.google.com ping statistics ---3 packets transmitted, 3 received, 0% packet loss, time 2003msrtt min/avg/max/mdev = 16.660/17.320/18.254/0.678 ms
If you get a ping: unknown host error, first check if there is an issue with your cable orwireless signal strength. If not, you will need to set up the network manually, as explainedbelow. Once a connection is established move on to Prepare the storage drive.
Wired
Follow this procedure if you need to set up a wired connection via a static IP address.
First, disable the dhcpcd service which was started automatically at boot:
# systemctl stop dhcpcd.service
Identify the name of your Ethernet interface.
# ip link
1: lo: <LOOPBACK,UP,LOWER_UP> mtu 65536 qdisc noqueue state UNKNOWN mode DEFAULT link/loopback 00:00:00:00:00:00 brd 00:00:00:00:00:002: enp2s0f0: <BROADCAST,MULTICAST> mtu 1500 qdisc noop state DOWN mode DEFAULT qlen 1000 link/ether 00:11:25:31:69:20 brd ff:ff:ff:ff:ff:ff3: wlp3s0: <BROADCAST,MULTICAST,UP,LOWER_UP> mtu 1500 qdisc mq state UP mode DORMANT qlen 1000 link/ether 01:02:03:04:05:06 brd ff:ff:ff:ff:ff:ff
In this example, the Ethernet interface is enp2s0f0 . If you are unsure, your Ethernetinterface is likely to start with the letter "e", and unlikely to be "lo" or start with the letter"w". You can also use iwconfig and see which interfaces are not wireless:
# iwconfig
enp2s0f0 no wireless extensions.wlp3s0 IEEE 802.11bgn ESSID:"NETGEAR97" Mode:Managed Frequency:2.427 GHz Access Point: 2C:B0:5D:9C:72:BF Bit Rate=65 Mb/s Tx-Power=16 dBm Retry long limit:7 RTS thr:off Fragment thr:off Power Management:on Link Quality=61/70 Signal level=-49 dBm Rx invalid nwid:0 Rx invalid crypt:0 Rx invalid frag:0 Tx excessive retries:0 Invalid misc:430 Missed beacon:0lo no wireless extensions.
In this example, neither enp2s0f0 nor the loopback device have wireless extensions, meaningenp2s0f0 is our Ethernet interface.
Beginners' Guide - ArchWiki https://wiki.archlinux.org/index.php/Beginners'_Guide
6 of 33 07/31/2013 04:28 AM

You also need to know these settings:
Static IP address.Subnet mask.Gateway's IP address.Name servers' (DNS) IP addresses.Domain name (unless you are on a local LAN, in which case you can make it up).
Activate the connected Ethernet interface (e.g. enp2s0f0 ):
# ip link set enp2s0f0 up
Add the address:
# ip addr add ip_address/subnetmask dev interface_name
For example:
# ip addr add 192.168.1.2/24 dev enp2s0f0
For more options, run man ip .
Add your gateway like this, substituting your own gateway's IP address:
# ip route add default via ip_address
For example:
# ip route add default via 192.168.1.1
Edit resolv.conf , substituting your name servers' IP addresses and your local domain name:
# nano /etc/resolv.conf
nameserver 61.23.173.5nameserver 61.95.849.8search example.com
Note: Currently, you may include a maximum of three nameserver lines. In order toovercome this limitation, you can use a locally caching nameserver like Dnsmasq.
You should now have a working network connection. If you do not, check the detailedNetwork Configuration page.
Wireless
Follow this procedure if you need wireless connectivity (Wi-Fi) during the installationprocess.
Beginners' Guide - ArchWiki https://wiki.archlinux.org/index.php/Beginners'_Guide
7 of 33 07/31/2013 04:28 AM
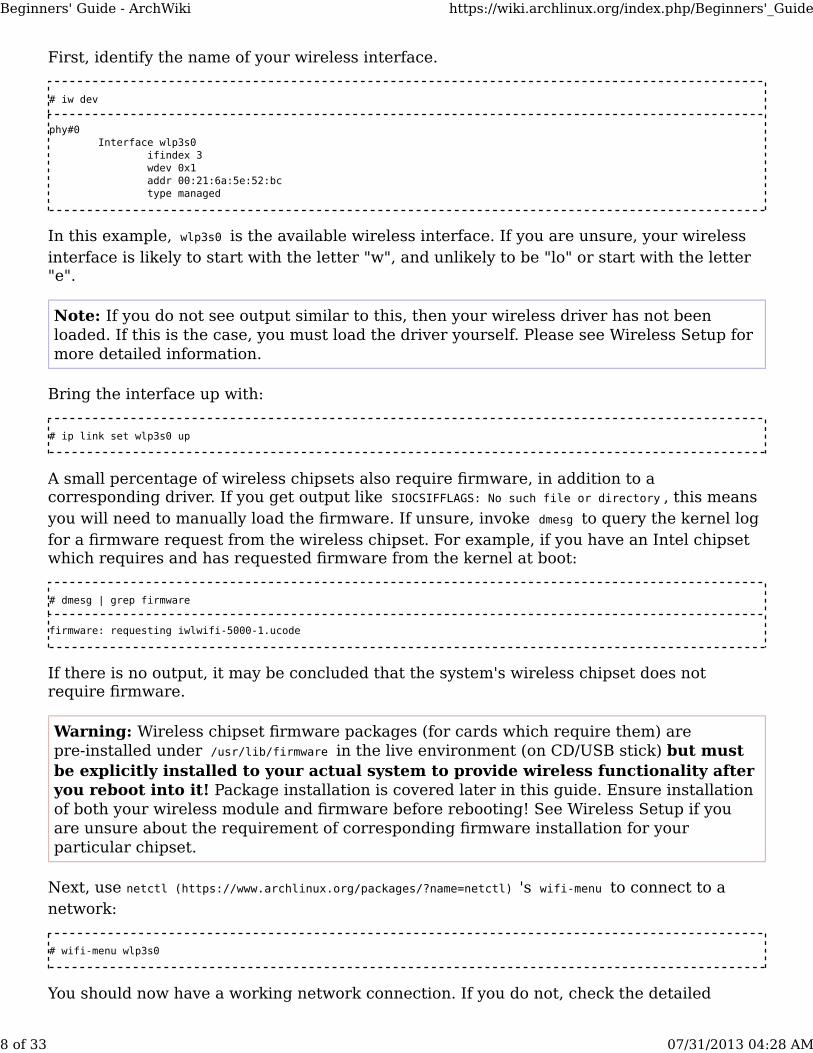
First, identify the name of your wireless interface.
# iw dev
phy#0 Interface wlp3s0 ifindex 3 wdev 0x1 addr 00:21:6a:5e:52:bc type managed
In this example, wlp3s0 is the available wireless interface. If you are unsure, your wirelessinterface is likely to start with the letter "w", and unlikely to be "lo" or start with the letter"e".
Note: If you do not see output similar to this, then your wireless driver has not beenloaded. If this is the case, you must load the driver yourself. Please see Wireless Setup formore detailed information.
Bring the interface up with:
# ip link set wlp3s0 up
A small percentage of wireless chipsets also require firmware, in addition to acorresponding driver. If you get output like SIOCSIFFLAGS: No such file or directory , this meansyou will need to manually load the firmware. If unsure, invoke dmesg to query the kernel logfor a firmware request from the wireless chipset. For example, if you have an Intel chipsetwhich requires and has requested firmware from the kernel at boot:
# dmesg | grep firmware
firmware: requesting iwlwifi-5000-1.ucode
If there is no output, it may be concluded that the system's wireless chipset does notrequire firmware.
Warning: Wireless chipset firmware packages (for cards which require them) arepre-installed under /usr/lib/firmware in the live environment (on CD/USB stick) but mustbe explicitly installed to your actual system to provide wireless functionality afteryou reboot into it! Package installation is covered later in this guide. Ensure installationof both your wireless module and firmware before rebooting! See Wireless Setup if youare unsure about the requirement of corresponding firmware installation for yourparticular chipset.
Next, use netctl (https://www.archlinux.org/packages/?name=netctl) 's wifi-menu to connect to anetwork:
# wifi-menu wlp3s0
You should now have a working network connection. If you do not, check the detailed
Beginners' Guide - ArchWiki https://wiki.archlinux.org/index.php/Beginners'_Guide
8 of 33 07/31/2013 04:28 AM
Wireless Setup page.
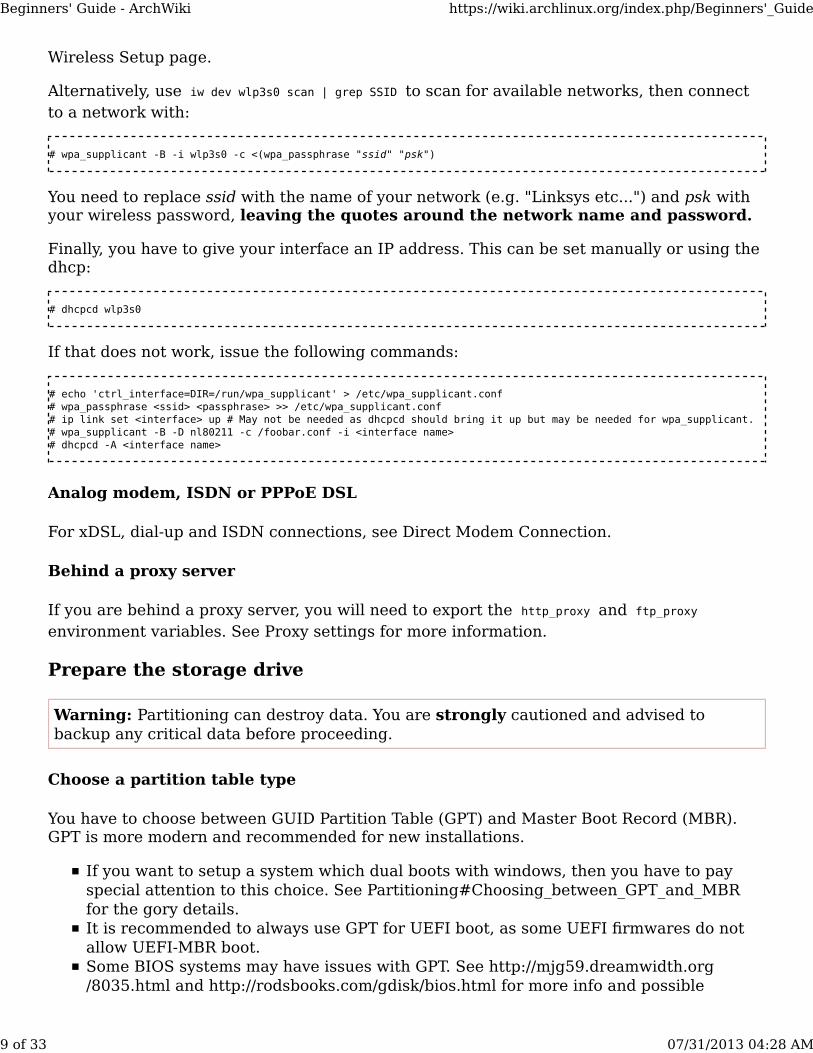
Alternatively, use iw dev wlp3s0 scan | grep SSID to scan for available networks, then connectto a network with:
# wpa_supplicant -B -i wlp3s0 -c <(wpa_passphrase "ssid" "psk")
You need to replace ssid with the name of your network (e.g. "Linksys etc...") and psk withyour wireless password, leaving the quotes around the network name and password.
Finally, you have to give your interface an IP address. This can be set manually or using thedhcp:
# dhcpcd wlp3s0
If that does not work, issue the following commands:
# echo 'ctrl_interface=DIR=/run/wpa_supplicant' > /etc/wpa_supplicant.conf# wpa_passphrase <ssid> <passphrase> >> /etc/wpa_supplicant.conf# ip link set <interface> up # May not be needed as dhcpcd should bring it up but may be needed for wpa_supplicant.# wpa_supplicant -B -D nl80211 -c /foobar.conf -i <interface name># dhcpcd -A <interface name>
Analog modem, ISDN or PPPoE DSL
For xDSL, dial-up and ISDN connections, see Direct Modem Connection.
Behind a proxy server
If you are behind a proxy server, you will need to export the http_proxy and ftp_proxyenvironment variables. See Proxy settings for more information.
Prepare the storage drive
Warning: Partitioning can destroy data. You are strongly cautioned and advised tobackup any critical data before proceeding.
Choose a partition table type
You have to choose between GUID Partition Table (GPT) and Master Boot Record (MBR).GPT is more modern and recommended for new installations.
If you want to setup a system which dual boots with windows, then you have to payspecial attention to this choice. See Partitioning#Choosing_between_GPT_and_MBRfor the gory details.It is recommended to always use GPT for UEFI boot, as some UEFI firmwares do notallow UEFI-MBR boot.Some BIOS systems may have issues with GPT. See http://mjg59.dreamwidth.org/8035.html and http://rodsbooks.com/gdisk/bios.html for more info and possible
Beginners' Guide - ArchWiki https://wiki.archlinux.org/index.php/Beginners'_Guide
9 of 33 07/31/2013 04:28 AM
workarounds.
Note: If you are installing to a USB flash key, see Installing Arch Linux on a USB key.
Partitioning tool
Absolute beginners are encouraged to use a graphical partitioning tool. GParted(http://gparted.sourceforge.net/download.php) is a good example, and is provided as a "live"CD (http://gparted.sourceforge.net/livecd.php) . It is also included on live CDs of most Linuxdistributions such as Ubuntu and Linux Mint. A drive should first be partitioned and thepartitions should be formatted with a file system before rebooting.
Tip: When using Gparted, selecting the option to create a new partition table gives an"msdos" partition table by default. If you are intending to follow the advice to create aGPT partition table then you need to choose "Advanced" and then select "gpt" from thedrop-down menu.
While gparted may be easier to use, if you just want to create a few partitions on a new diskyou can get the job done quickly by just using one of the fdisk variants which are includedon the install medium. There are short usage instructions for both gdisk and fdisk.
Partition scheme
You can decide into how many partitions the disk should be split, and for which directoryeach partition should be used in the system. The mapping from partitions to directories(frequently called 'mount points') is the Partition scheme. The simplest, and not a badchoice, is to make just one huge / partition. Another popular choice is to have a / and a/home partition.
Additional required partitions:
If you have a UEFI motherboard, you will need to create an extra UEFI SystemPartition.If you have a BIOS motherboard (or plan on booting in BIOS compatibility mode) andyou want to setup GRUB on a GPT-partitioned drive, you will need to create an extraBIOS Boot Partition of size 1007 KiB and EF02 type code. Syslinux does not need one.
See Swap for details if you wish to set up a swap partition or swap file. A swap file is easierto resize than a partition and can be created at any point after installation, but cannot beused with a Btrfs filesystem.
Considerations for dualbooting with windows
If you have an existing OS installation, please keep in mind that if you where to just write acompletely new partition table to disk then all the data which was previously on disk wouldbe lost.
The recommended way to setup a linux/windows dual booting system is to first install
Beginners' Guide - ArchWiki https://wiki.archlinux.org/index.php/Beginners'_Guide
10 of 33 07/31/2013 04:28 AM
windows, only using part of the disk for its partitions. When you have finished the windowssetup, boot into the linux install environment where you can create additional partitions forlinux while leaving the existing windows partitions untouched.
Some newer computers come pre-installed with Windows 8 which will be using SecureBoot. Arch Linux currently does not support Secure Boot, but some Windows 8 installationshave been seen not to boot if Secure Boot is turned off in the BIOS. In some cases it isnecessary to turn off both Secure Boot as well as Fastboot in the BIOS options in order toallow Windows 8 to boot without Secure Boot. However there are potential security risks inturning off Secure Boot for booting up Windows 8. Therefore, it may be a better option tokeep the Windows 8 install intact and have an independent hard drive for the Linux install -which can then be partitioned from scratch using a GPT partition table. Once that is done,creating several ext4/FAT32/swap partitions on the second drive may be a better wayforward if the computer has two drives available. This is often not easy or possible on asmall laptop. Currently, Secure Boot is still not in a fully stable state for reliable operation,even for Linux distributions that support it.
If you have already created your partitions, proceed to Create filesystems.
Otherwise, see the following example.
Example
The Arch Linux install media includes the following partitioning tools: fdisk , gdisk , cfdisk ,cgdisk , parted .
Tip: Use the lsblk command to list the hard disks attached to your system, along with thesizes of their existing partitions. This will help you to be confident you are partitioning theright disk.
The example system will contain a 15 GB root partition, and a home partition for theremaining space. Choose either MBR or GPT. Do not choose both!
It should be emphasized that partitioning is a personal choice and that this example is onlyfor illustrative purposes. See Partitioning.
Using cgdisk to create GPT partitions
# cgdisk /dev/sda
Root
Choose New (or press N ) – Enter for the first sector (2048) – type in 15G – Enter for thedefault hex code (8300) – Enter for a blank partition name.
Home
Press the down arrow a couple of times to move to the larger free space area.Choose New (or press N ) – Enter for the first sector – Enter to use the rest of the drive
Beginners' Guide - ArchWiki https://wiki.archlinux.org/index.php/Beginners'_Guide
11 of 33 07/31/2013 04:28 AM
(or you could type in the desired size; for example 30G ) – Enter for the default hex code(8300) – Enter for a blank partition name.
Here is what it should look like:
Part. # Size Partition Type Partition Name---------------------------------------------------------------- 1007.0 KiB free space 1 15.0 GiB Linux filesystem 2 123.45 GiB Linux filesystem
Double check and make sure that you are happy with the partition sizes as well as thepartition table layout before continuing.
If you would like to start over, you can simply select Quit (or press Q ) to exit without savingchanges and then restart cgdisk.
If you are satisfied, choose Write (or press Shift+W ) to finalize and to write the partitiontable to the drive. Type yes and choose Quit (or press Q ) to exit without making any morechanges.
Using fdisk to create MBR partitions
Note: There is also cfdisk, which is similar in UI to cgdisk, but it currently does notautomatically align the first partition properly. That is why the classic fdisk tool is usedhere.
Launch fdisk with:
# fdisk /dev/sda
Create the first partition:
Command (m for help): type n and press Enter1.Partition type: Select (default p): press Enter2.Partition number (1-4, default 1): press Enter3.First sector (2048-209715199, default 2048): press Enter4.Last sector, +sectors or +size{K,M,G} (2048-209715199....., default 209715199): type +15G andpress Enter
5.
Then create a second partition:
Command (m for help): type n and press Enter1.Partition type: Select (default p): press Enter2.Partition number (1-4, default 2): press Enter3.First sector (31459328-209715199, default 31459328): press Enter4.Last sector, +sectors or +size{K,M,G} (31459328-209715199....., default 209715199): press Enter5.
Now preview the new partition table:
Beginners' Guide - ArchWiki https://wiki.archlinux.org/index.php/Beginners'_Guide
12 of 33 07/31/2013 04:28 AM
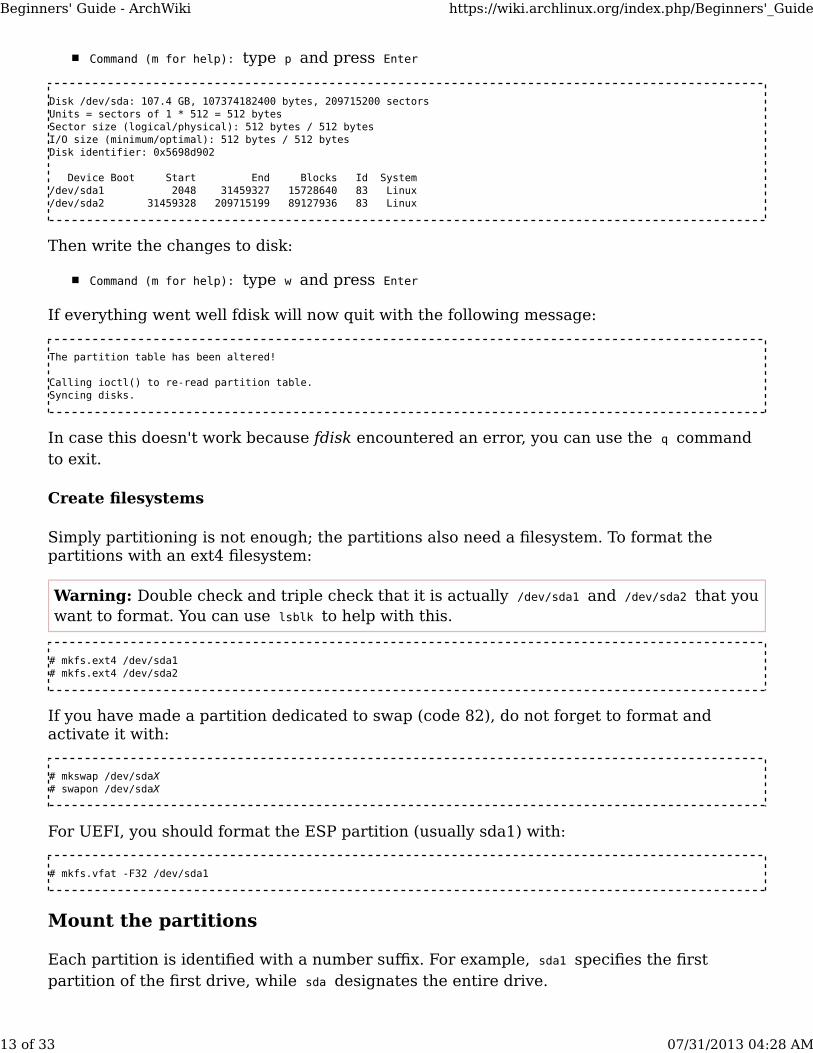
Command (m for help): type p and press Enter
Disk /dev/sda: 107.4 GB, 107374182400 bytes, 209715200 sectorsUnits = sectors of 1 * 512 = 512 bytesSector size (logical/physical): 512 bytes / 512 bytesI/O size (minimum/optimal): 512 bytes / 512 bytesDisk identifier: 0x5698d902
Device Boot Start End Blocks Id System/dev/sda1 2048 31459327 15728640 83 Linux/dev/sda2 31459328 209715199 89127936 83 Linux
Then write the changes to disk:
Command (m for help): type w and press Enter
If everything went well fdisk will now quit with the following message:
The partition table has been altered!
Calling ioctl() to re-read partition table.Syncing disks.
In case this doesn't work because fdisk encountered an error, you can use the q commandto exit.
Create filesystems
Simply partitioning is not enough; the partitions also need a filesystem. To format thepartitions with an ext4 filesystem:
Warning: Double check and triple check that it is actually /dev/sda1 and /dev/sda2 that youwant to format. You can use lsblk to help with this.
# mkfs.ext4 /dev/sda1# mkfs.ext4 /dev/sda2
If you have made a partition dedicated to swap (code 82), do not forget to format andactivate it with:
# mkswap /dev/sdaX# swapon /dev/sdaX
For UEFI, you should format the ESP partition (usually sda1) with:
# mkfs.vfat -F32 /dev/sda1
Mount the partitions
Each partition is identified with a number suffix. For example, sda1 specifies the firstpartition of the first drive, while sda designates the entire drive.
Beginners' Guide - ArchWiki https://wiki.archlinux.org/index.php/Beginners'_Guide
13 of 33 07/31/2013 04:28 AM
To display the current partition layout:
# lsblk /dev/sda
Note: Do not mount more than one partition to the same directory. And pay attention,because the mounting order is important.
First, mount the root partition on /mnt . Following the example above (yours may bedifferent), it would be:
# mount /dev/sda1 /mnt
Then mount the home partition and any other separate partition ( /boot , /var , etc), if youhave any:
# mkdir /mnt/home# mount /dev/sda2 /mnt/home
In case you have a UEFI motherboard, mount the UEFI partition:
# mkdir -p /mnt/boot# mount /dev/sdaX /mnt/boot
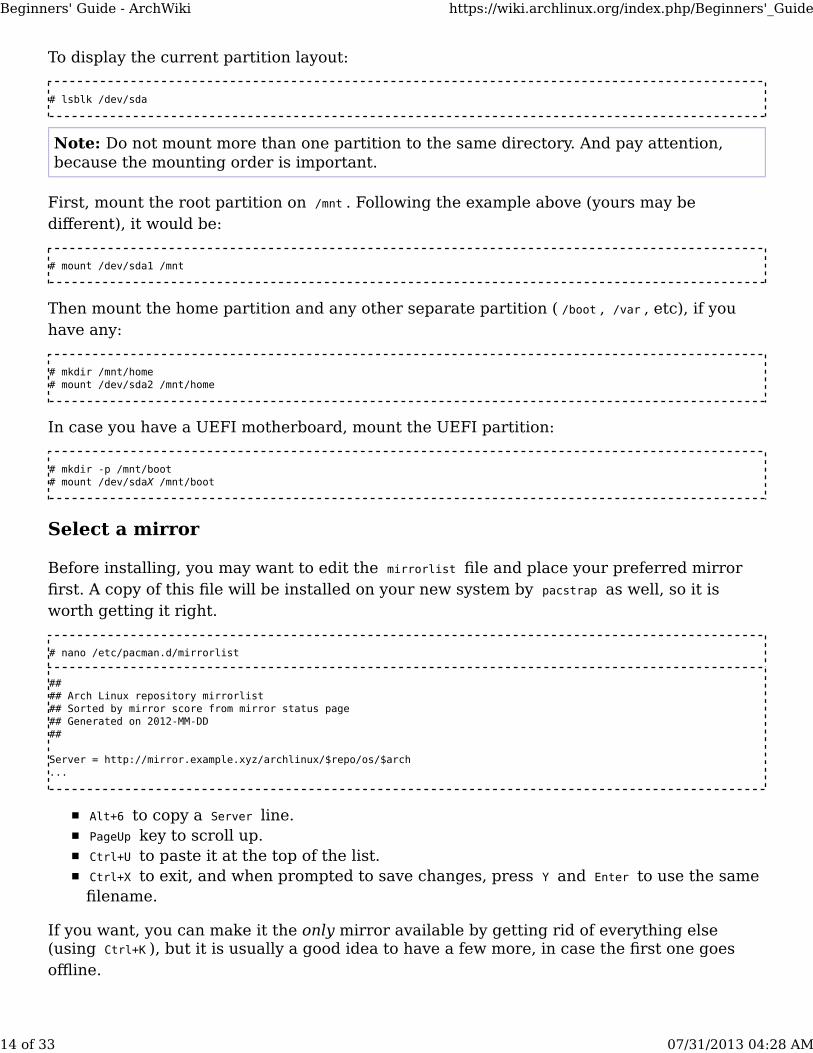
Select a mirror
Before installing, you may want to edit the mirrorlist file and place your preferred mirrorfirst. A copy of this file will be installed on your new system by pacstrap as well, so it isworth getting it right.
# nano /etc/pacman.d/mirrorlist
#### Arch Linux repository mirrorlist## Sorted by mirror score from mirror status page## Generated on 2012-MM-DD##
Server = http://mirror.example.xyz/archlinux/$repo/os/$arch...
Alt+6 to copy a Server line.PageUp key to scroll up.Ctrl+U to paste it at the top of the list.Ctrl+X to exit, and when prompted to save changes, press Y and Enter to use the samefilename.
If you want, you can make it the only mirror available by getting rid of everything else(using Ctrl+K ), but it is usually a good idea to have a few more, in case the first one goesoffline.
Beginners' Guide - ArchWiki https://wiki.archlinux.org/index.php/Beginners'_Guide
14 of 33 07/31/2013 04:28 AM
Tip:
Use the Mirrorlist Generator (https://www.archlinux.org/mirrorlist/) to get anupdated list for your country. HTTP mirrors are faster than FTP, because ofsomething called keepalive. With FTP, pacman has to send out a signal each time itdownloads a package, resulting in a brief pause. For other ways to generate a mirrorlist, see Sorting mirrors and Reflector.Arch Linux MirrorStatus (https://archlinux.org/mirrors/status/) reports variousaspects about the mirrors such as network problems with mirrors, data collectionproblems, the last time mirrors have been synced, etc.
Note:
Whenever in the future you change your list of mirrors, always remember to forcepacman to refresh all package lists with pacman -Syy . This is considered to be goodpractice and will avoid possible headaches. See Mirrors for more information.If you are using an older installation medium, your mirrorlist might be outdated,which might lead to problems when updating Arch Linux (see FS#22510(https://bugs.archlinux.org/task/22510) ). Therefore it is advised to obtain the latestmirror information as described above.Some issues have been reported in the Arch Linux forums (https://bbs.archlinux.org/)regarding network problems that prevent pacman from updating/synchronizingrepositories (see [1] (https://bbs.archlinux.org/viewtopic.php?id=68944) and [2](https://bbs.archlinux.org/viewtopic.php?id=65728) ). When installing Arch Linuxnatively, these issues have been resolved by replacing the default pacman filedownloader with an alternative (see Improve Pacman Performance for more details).When installing Arch Linux as a guest OS in VirtualBox, this issue has also beenaddressed by using "Host interface" instead of "NAT" in the machine properties.
Install the base system
The base system is installed using the pacstrap (https://github.com/falconindy/arch-install-scripts/blob/master/pacstrap.in) script.
The -i switch can be omitted if you wish to install every package from the base groupwithout prompting.
# pacstrap -i /mnt base
Note:
If pacman fails to verify your packages, check the system time with cal . If the systemdate is invalid (e.g. it shows the year 2010), signing keys will be considered expired(or invalid), signature checks on packages will fail and installation will beinterrupted. Make sure to correct the system time, either by doing so manually orwith the ntp (https://www.archlinux.org/packages/?name=ntp) client, and retry running thepacstrap command. Refer to Time page for more information on correcting system
Beginners' Guide - ArchWiki https://wiki.archlinux.org/index.php/Beginners'_Guide
15 of 33 07/31/2013 04:28 AM
time.If pacman complains that error: failed to commit transaction (invalid or corrupted package), run the following command:
# pacman-key --init && pacman-key --populate archlinux
This will give you a basic Arch system. Other packages can be installed later using pacman.
Generate an fstab
Generate an fstab file with the following command. UUIDs will be used because they havecertain advantages (see fstab#Identifying filesystems). If you would prefer to use labelsinstead, replace the -U option with -L .
# genfstab -U -p /mnt >> /mnt/etc/fstab# nano /mnt/etc/fstab
Warning: The fstab file should always be checked after generating it. If you encountererrors running genfstab or later in the install process, do not run genfstab again; just editthe fstab file.
A few considerations:
The last field determines the order in which partitions are checked at start up: use 1for the (non- btrfs ) root partition, which should be checked first; 2 for all otherpartitions you want checked at start up; and 0 means 'do not check' (see fstab#Fielddefinitions).All btrfs partitions should have 0 for this field. Normally, you will also want your swappartition to have 0 .
Chroot and configure the base system
Next, we chroot into our newly installed system:
# arch-chroot /mnt
Note: Use arch-chroot /mnt /bin/bash to chroot into a bash shell.
At this stage of the installation, you will configure the primary configuration files of yourArch Linux base system. These can either be created if they do not exist, or edited if youwish to change the defaults.
Closely following and understanding these steps is of key importance to ensure a properlyconfigured system.
Locale
Beginners' Guide - ArchWiki https://wiki.archlinux.org/index.php/Beginners'_Guide
16 of 33 07/31/2013 04:28 AM
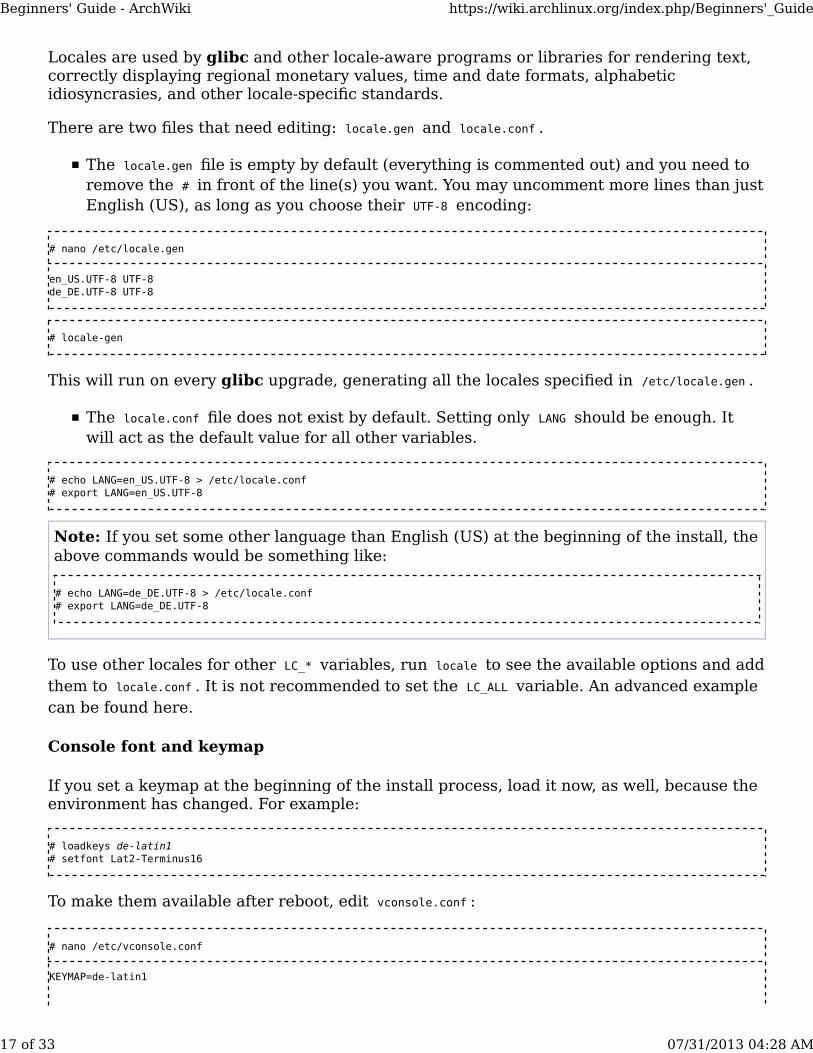
Locales are used by glibc and other locale-aware programs or libraries for rendering text,correctly displaying regional monetary values, time and date formats, alphabeticidiosyncrasies, and other locale-specific standards.
There are two files that need editing: locale.gen and locale.conf .
The locale.gen file is empty by default (everything is commented out) and you need toremove the # in front of the line(s) you want. You may uncomment more lines than justEnglish (US), as long as you choose their UTF-8 encoding:
# nano /etc/locale.gen
en_US.UTF-8 UTF-8de_DE.UTF-8 UTF-8
# locale-gen
This will run on every glibc upgrade, generating all the locales specified in /etc/locale.gen .
The locale.conf file does not exist by default. Setting only LANG should be enough. Itwill act as the default value for all other variables.
# echo LANG=en_US.UTF-8 > /etc/locale.conf# export LANG=en_US.UTF-8
Note: If you set some other language than English (US) at the beginning of the install, theabove commands would be something like:
# echo LANG=de_DE.UTF-8 > /etc/locale.conf# export LANG=de_DE.UTF-8
To use other locales for other LC_* variables, run locale to see the available options and addthem to locale.conf . It is not recommended to set the LC_ALL variable. An advanced examplecan be found here.
Console font and keymap
If you set a keymap at the beginning of the install process, load it now, as well, because theenvironment has changed. For example:
# loadkeys de-latin1# setfont Lat2-Terminus16
To make them available after reboot, edit vconsole.conf :
# nano /etc/vconsole.conf
KEYMAP=de-latin1
Beginners' Guide - ArchWiki https://wiki.archlinux.org/index.php/Beginners'_Guide
17 of 33 07/31/2013 04:28 AM
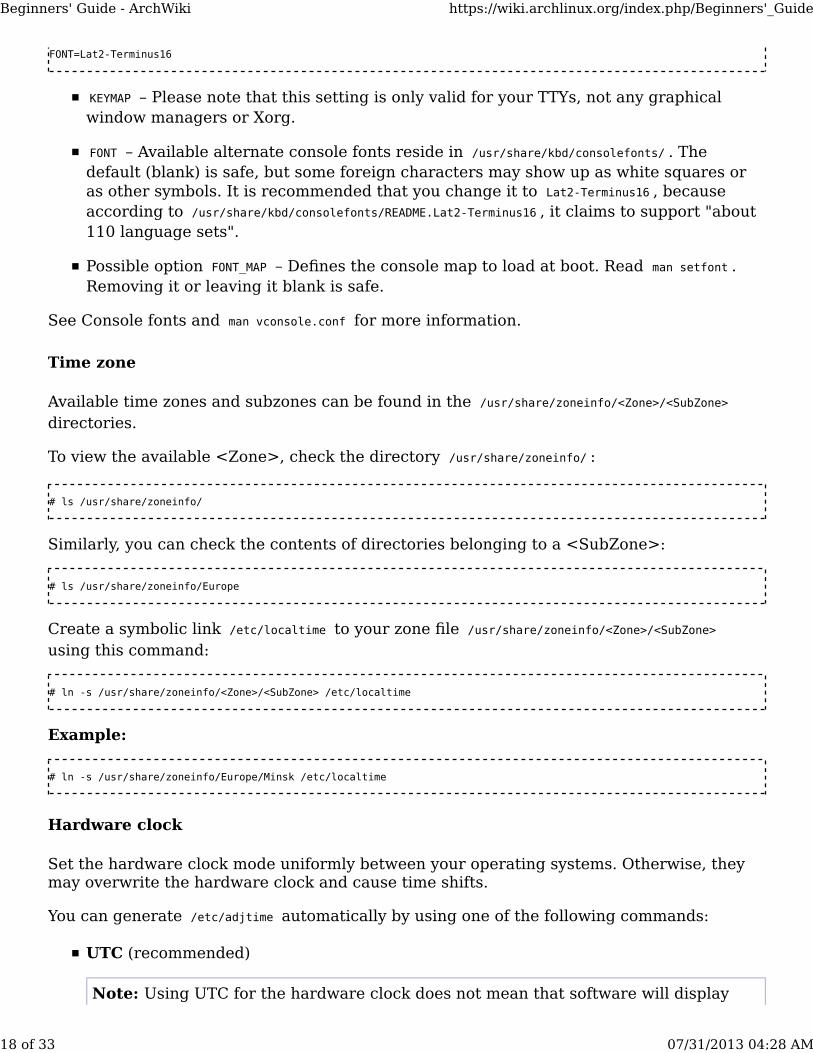
FONT=Lat2-Terminus16
KEYMAP – Please note that this setting is only valid for your TTYs, not any graphicalwindow managers or Xorg.
FONT – Available alternate console fonts reside in /usr/share/kbd/consolefonts/ . Thedefault (blank) is safe, but some foreign characters may show up as white squares oras other symbols. It is recommended that you change it to Lat2-Terminus16 , becauseaccording to /usr/share/kbd/consolefonts/README.Lat2-Terminus16 , it claims to support "about110 language sets".
Possible option FONT_MAP – Defines the console map to load at boot. Read man setfont .Removing it or leaving it blank is safe.
See Console fonts and man vconsole.conf for more information.
Time zone
Available time zones and subzones can be found in the /usr/share/zoneinfo/<Zone>/<SubZone>directories.
To view the available <Zone>, check the directory /usr/share/zoneinfo/ :
# ls /usr/share/zoneinfo/
Similarly, you can check the contents of directories belonging to a <SubZone>:
# ls /usr/share/zoneinfo/Europe
Create a symbolic link /etc/localtime to your zone file /usr/share/zoneinfo/<Zone>/<SubZone>using this command:
# ln -s /usr/share/zoneinfo/<Zone>/<SubZone> /etc/localtime
Example:
# ln -s /usr/share/zoneinfo/Europe/Minsk /etc/localtime
Hardware clock
Set the hardware clock mode uniformly between your operating systems. Otherwise, theymay overwrite the hardware clock and cause time shifts.
You can generate /etc/adjtime automatically by using one of the following commands:
UTC (recommended)
Note: Using UTC for the hardware clock does not mean that software will display
Beginners' Guide - ArchWiki https://wiki.archlinux.org/index.php/Beginners'_Guide
18 of 33 07/31/2013 04:28 AM
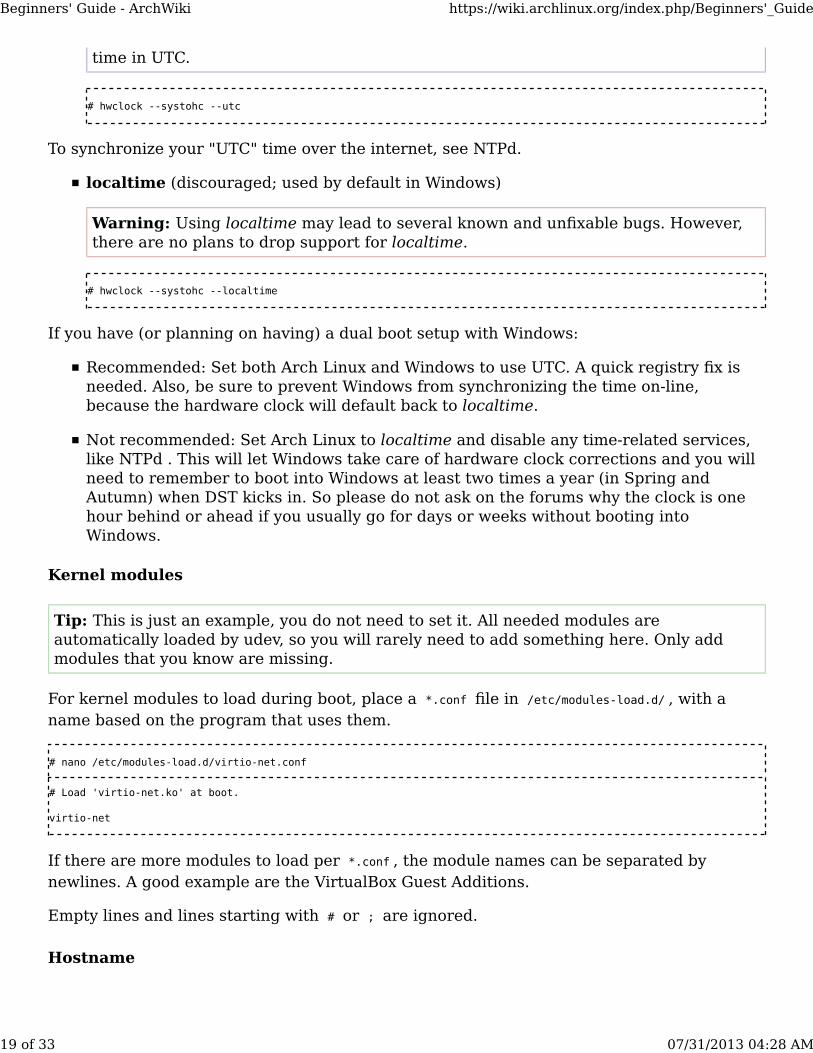
time in UTC.
# hwclock --systohc --utc
To synchronize your "UTC" time over the internet, see NTPd.
localtime (discouraged; used by default in Windows)
Warning: Using localtime may lead to several known and unfixable bugs. However,there are no plans to drop support for localtime.
# hwclock --systohc --localtime
If you have (or planning on having) a dual boot setup with Windows:
Recommended: Set both Arch Linux and Windows to use UTC. A quick registry fix isneeded. Also, be sure to prevent Windows from synchronizing the time on-line,because the hardware clock will default back to localtime.
Not recommended: Set Arch Linux to localtime and disable any time-related services,like NTPd . This will let Windows take care of hardware clock corrections and you willneed to remember to boot into Windows at least two times a year (in Spring andAutumn) when DST kicks in. So please do not ask on the forums why the clock is onehour behind or ahead if you usually go for days or weeks without booting intoWindows.
Kernel modules
Tip: This is just an example, you do not need to set it. All needed modules areautomatically loaded by udev, so you will rarely need to add something here. Only addmodules that you know are missing.
For kernel modules to load during boot, place a *.conf file in /etc/modules-load.d/ , with aname based on the program that uses them.
# nano /etc/modules-load.d/virtio-net.conf
# Load 'virtio-net.ko' at boot.
virtio-net
If there are more modules to load per *.conf , the module names can be separated bynewlines. A good example are the VirtualBox Guest Additions.
Empty lines and lines starting with # or ; are ignored.
Hostname
Beginners' Guide - ArchWiki https://wiki.archlinux.org/index.php/Beginners'_Guide
19 of 33 07/31/2013 04:28 AM
Set the hostname to your liking (e.g. arch):
# echo myhostname > /etc/hostname
Note: There is no need to edit /etc/hosts .
Configure the network
You need to configure the network again, but this time for your newly installedenvironment. The procedure and prerequisites are very similar to the one described above,except we are going to make it persistent and automatically run at boot.
Note:
For more in-depth information on network configration, visit Network Configurationand Wireless Setup.If you would like to use the old interface naming scheme (ie. eth* and wlan*) you canaccomplish this by creating an empty file at /etc/udev/rules.d/80-net-name-slot.ruleswhich will mask the file of the same name located under /usr/lib/udev/rules.d(alternatively, instead of an empty file, using a symlink to /dev/null is also anacceptable masking method).
Wired
Dynamic IP
Using dhcpcd
If you only use a single fixed wired network connection, you do not need a networkmanagement service and can simply enable the dhcpcd service:
# systemctl enable dhcpcd.service
Note: If it doesn't work, use: # systemctl enable dhcpcd@interface_name.service
Using netctl
Copy a sample profile from /etc/netctl/examples to /etc/netctl :
# cd /etc/netctl# cp examples/ethernet-dhcp my-network
Edit the profile as needed (modify Interface ):
# nano my-network
Beginners' Guide - ArchWiki https://wiki.archlinux.org/index.php/Beginners'_Guide
20 of 33 07/31/2013 04:28 AM
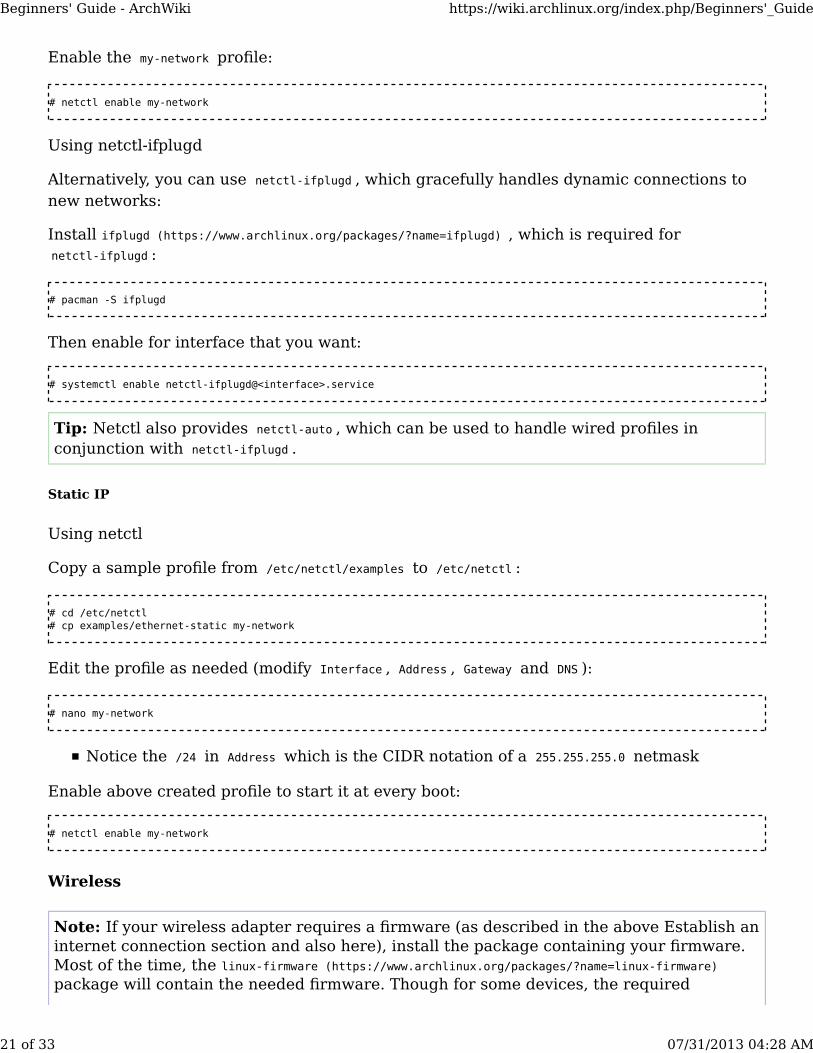
Enable the my-network profile:
# netctl enable my-network
Using netctl-ifplugd
Alternatively, you can use netctl-ifplugd , which gracefully handles dynamic connections tonew networks:
Install ifplugd (https://www.archlinux.org/packages/?name=ifplugd) , which is required fornetctl-ifplugd :
# pacman -S ifplugd
Then enable for interface that you want:
# systemctl enable netctl-ifplugd@<interface>.service
Tip: Netctl also provides netctl-auto , which can be used to handle wired profiles inconjunction with netctl-ifplugd .
Static IP
Using netctl
Copy a sample profile from /etc/netctl/examples to /etc/netctl :
# cd /etc/netctl# cp examples/ethernet-static my-network
Edit the profile as needed (modify Interface , Address , Gateway and DNS ):
# nano my-network
Notice the /24 in Address which is the CIDR notation of a 255.255.255.0 netmask
Enable above created profile to start it at every boot:
# netctl enable my-network
Wireless
Note: If your wireless adapter requires a firmware (as described in the above Establish aninternet connection section and also here), install the package containing your firmware.Most of the time, the linux-firmware (https://www.archlinux.org/packages/?name=linux-firmware)package will contain the needed firmware. Though for some devices, the required
Beginners' Guide - ArchWiki https://wiki.archlinux.org/index.php/Beginners'_Guide
21 of 33 07/31/2013 04:28 AM

firmware might be in its own package. For example:
# pacman -S zd1211-firmware
See Wireless Setup for more info.
Install iw (https://www.archlinux.org/packages/?name=iw) , wpa_supplicant (https://www.archlinux.org/packages/?name=wpa_supplicant) and wpa_actiond (https://www.archlinux.org/packages/?name=wpa_actiond)which you will need to connect to a network:
# pacman -S iw wpa_supplicant wpa_actiond
Adding wireless networks
Using wifi-menu
Install dialog (https://www.archlinux.org/packages/?name=dialog) , which is required for wifi-menu :
# pacman -S dialog
After finishing the rest of this installation and rebooting, you can connect to the networkwith wifi-menu interface_name (where interface_name is the interface of your wireless chipset).
# wifi-menu interface_name
Warning: This must be done *after* your reboot when you are no longer chrooted. Theprocess spawned by this command will conflict with the one you have running outside ofthe chroot. Alternatively, you could just configure a network profile manually using thefollowing templates so that you do not have to worry about using wifi-menu at all.
Using manual netctl profiles
Copy a network profile from /etc/netctl/examples to /etc/netctl :
# cd /etc/netctl# cp examples/wireless-wpa my-network
Edit the profile as needed (modify Interface , ESSID and Key ):
# nano my-network
Connect automatically to known networks
Enable the netctl-auto service, which will connect to known networks and gracefully handleroaming and disconnects:
Beginners' Guide - ArchWiki https://wiki.archlinux.org/index.php/Beginners'_Guide
22 of 33 07/31/2013 04:28 AM
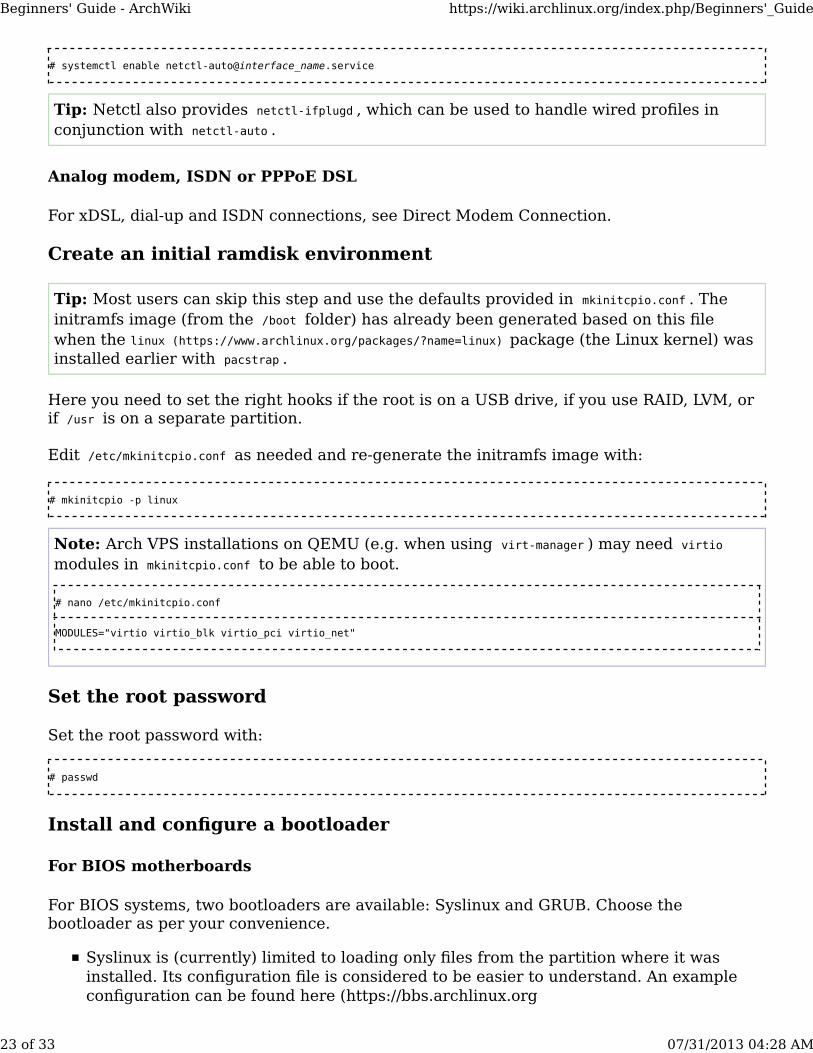
# systemctl enable netctl-auto@interface_name.service
Tip: Netctl also provides netctl-ifplugd , which can be used to handle wired profiles inconjunction with netctl-auto .
Analog modem, ISDN or PPPoE DSL
For xDSL, dial-up and ISDN connections, see Direct Modem Connection.
Create an initial ramdisk environment
Tip: Most users can skip this step and use the defaults provided in mkinitcpio.conf . Theinitramfs image (from the /boot folder) has already been generated based on this filewhen the linux (https://www.archlinux.org/packages/?name=linux) package (the Linux kernel) wasinstalled earlier with pacstrap .
Here you need to set the right hooks if the root is on a USB drive, if you use RAID, LVM, orif /usr is on a separate partition.
Edit /etc/mkinitcpio.conf as needed and re-generate the initramfs image with:
# mkinitcpio -p linux
Note: Arch VPS installations on QEMU (e.g. when using virt-manager ) may need virtiomodules in mkinitcpio.conf to be able to boot.
# nano /etc/mkinitcpio.conf
MODULES="virtio virtio_blk virtio_pci virtio_net"
Set the root password
Set the root password with:
# passwd
Install and configure a bootloader
For BIOS motherboards
For BIOS systems, two bootloaders are available: Syslinux and GRUB. Choose thebootloader as per your convenience.
Syslinux is (currently) limited to loading only files from the partition where it wasinstalled. Its configuration file is considered to be easier to understand. An exampleconfiguration can be found here (https://bbs.archlinux.org
Beginners' Guide - ArchWiki https://wiki.archlinux.org/index.php/Beginners'_Guide
23 of 33 07/31/2013 04:28 AM
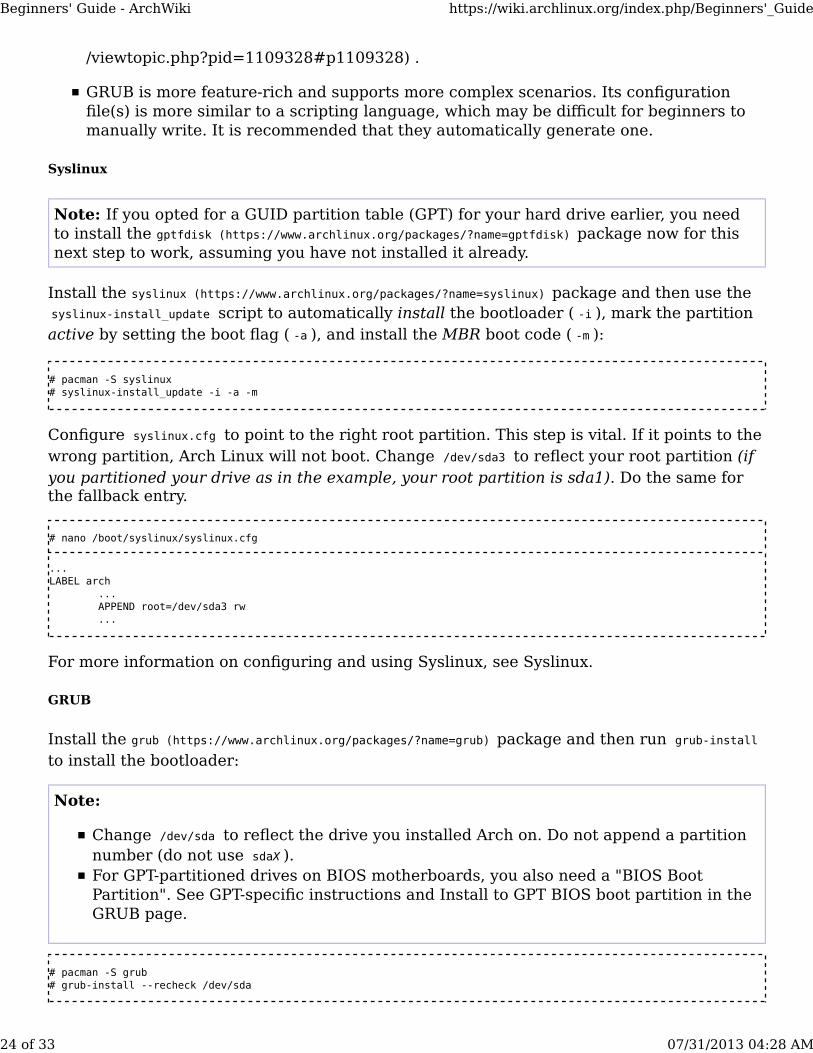
/viewtopic.php?pid=1109328#p1109328) .
GRUB is more feature-rich and supports more complex scenarios. Its configurationfile(s) is more similar to a scripting language, which may be difficult for beginners tomanually write. It is recommended that they automatically generate one.
Syslinux
Note: If you opted for a GUID partition table (GPT) for your hard drive earlier, you needto install the gptfdisk (https://www.archlinux.org/packages/?name=gptfdisk) package now for thisnext step to work, assuming you have not installed it already.
Install the syslinux (https://www.archlinux.org/packages/?name=syslinux) package and then use thesyslinux-install_update script to automatically install the bootloader ( -i ), mark the partitionactive by setting the boot flag ( -a ), and install the MBR boot code ( -m ):
# pacman -S syslinux# syslinux-install_update -i -a -m
Configure syslinux.cfg to point to the right root partition. This step is vital. If it points to thewrong partition, Arch Linux will not boot. Change /dev/sda3 to reflect your root partition (ifyou partitioned your drive as in the example, your root partition is sda1). Do the same forthe fallback entry.
# nano /boot/syslinux/syslinux.cfg
...LABEL arch ... APPEND root=/dev/sda3 rw ...
For more information on configuring and using Syslinux, see Syslinux.
GRUB
Install the grub (https://www.archlinux.org/packages/?name=grub) package and then run grub-installto install the bootloader:
Note:
Change /dev/sda to reflect the drive you installed Arch on. Do not append a partitionnumber (do not use sdaX ).For GPT-partitioned drives on BIOS motherboards, you also need a "BIOS BootPartition". See GPT-specific instructions and Install to GPT BIOS boot partition in theGRUB page.
# pacman -S grub# grub-install --recheck /dev/sda
Beginners' Guide - ArchWiki https://wiki.archlinux.org/index.php/Beginners'_Guide
24 of 33 07/31/2013 04:28 AM
Note: If it is an installation on virtualbox as guest, while running grub-install command asin above, you might get an error like "/usr/sbin/grub-bios-setup: warning: this GPTpartition label contains no BIOS Boot Partition; embedding won't be possible". Executingparted -s /dev/sda set 1 bios_grub on and then retrying grub-install should solve the problem.
While using a manually created grub.cfg is absolutely fine, it is recommended thatbeginners automatically generate one:
Tip: To automatically search for other operating systems on your computer, installos-prober (https://www.archlinux.org/packages/?name=os-prober) ( pacman -S os-prober ) before runningthe next command.
# grub-mkconfig -o /boot/grub/grub.cfg
For more information on configuring and using GRUB, see GRUB.
For UEFI motherboards
For UEFI systems, several options are available. A complete list of options is available atUEFI Bootloaders. You may find that some options work while others do not. Otherwise,choose one as per your convenience. Here, we give two of the possibilities as examples:
Boot the Linux kernel directly using EFISTUB.gummiboot is a simple boot manager, useful if you are dual booting. rEFInd is anotheralternative.GRUB is a more complete bootloader, usefull if you run into problems with the othertwo options.
Note: For UEFI boot, the drive needs to be GPT-partitioned and an UEFI System Partition(512 MiB or larger, type EF00 , formatted with FAT32) must be present. For the followingexamples, this partition must be mounted on /boot . If you have followed this guide fromthe beginning, you have already done all of these.
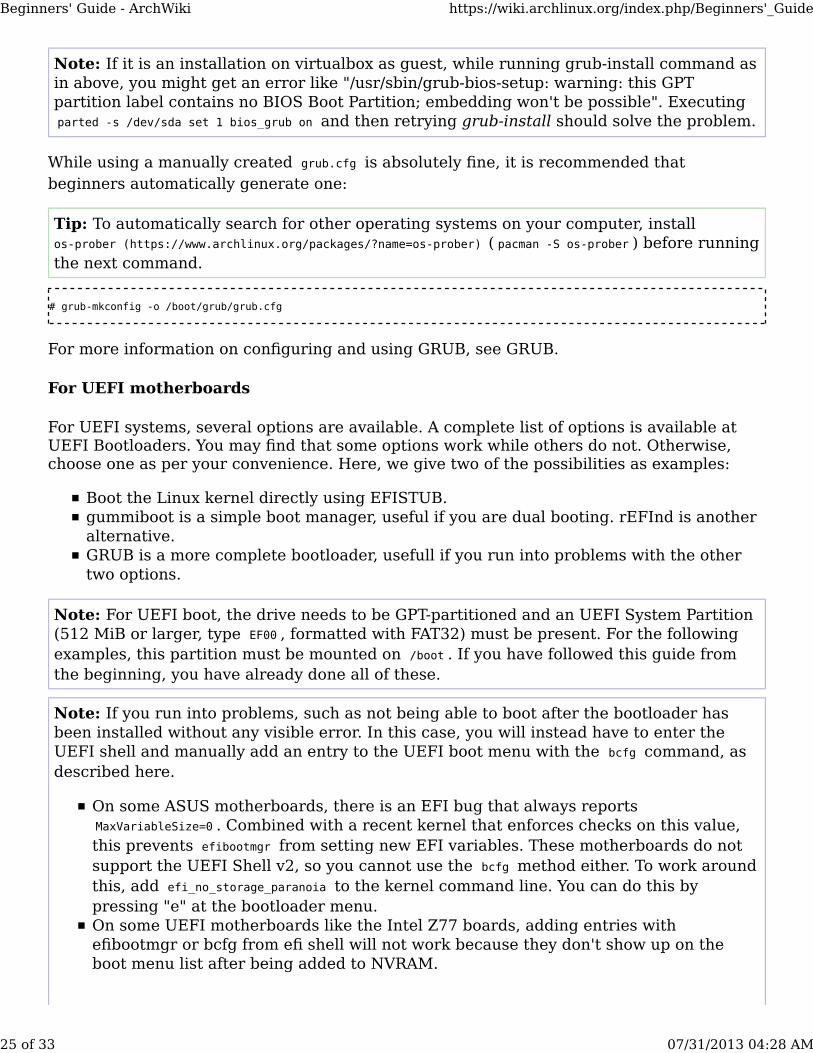
Note: If you run into problems, such as not being able to boot after the bootloader hasbeen installed without any visible error. In this case, you will instead have to enter theUEFI shell and manually add an entry to the UEFI boot menu with the bcfg command, asdescribed here.
On some ASUS motherboards, there is an EFI bug that always reportsMaxVariableSize=0 . Combined with a recent kernel that enforces checks on this value,this prevents efibootmgr from setting new EFI variables. These motherboards do notsupport the UEFI Shell v2, so you cannot use the bcfg method either. To work aroundthis, add efi_no_storage_paranoia to the kernel command line. You can do this bypressing "e" at the bootloader menu.On some UEFI motherboards like the Intel Z77 boards, adding entries withefibootmgr or bcfg from efi shell will not work because they don't show up on theboot menu list after being added to NVRAM.
Beginners' Guide - ArchWiki https://wiki.archlinux.org/index.php/Beginners'_Guide
25 of 33 07/31/2013 04:28 AM
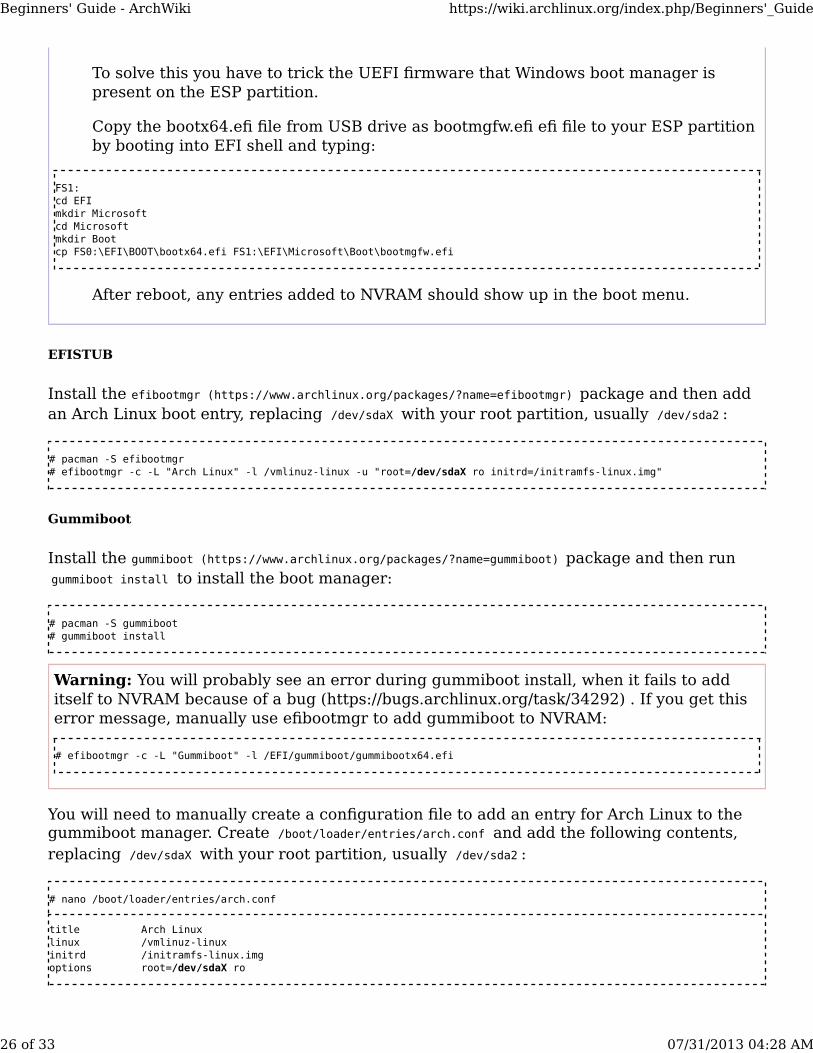
To solve this you have to trick the UEFI firmware that Windows boot manager ispresent on the ESP partition.
Copy the bootx64.efi file from USB drive as bootmgfw.efi efi file to your ESP partitionby booting into EFI shell and typing:
FS1:cd EFImkdir Microsoftcd Microsoftmkdir Bootcp FS0:\EFI\BOOT\bootx64.efi FS1:\EFI\Microsoft\Boot\bootmgfw.efi
After reboot, any entries added to NVRAM should show up in the boot menu.
EFISTUB
Install the efibootmgr (https://www.archlinux.org/packages/?name=efibootmgr) package and then addan Arch Linux boot entry, replacing /dev/sdaX with your root partition, usually /dev/sda2 :
# pacman -S efibootmgr# efibootmgr -c -L "Arch Linux" -l /vmlinuz-linux -u "root=/dev/sdaX ro initrd=/initramfs-linux.img"
Gummiboot
Install the gummiboot (https://www.archlinux.org/packages/?name=gummiboot) package and then rungummiboot install to install the boot manager:
# pacman -S gummiboot# gummiboot install
Warning: You will probably see an error during gummiboot install, when it fails to additself to NVRAM because of a bug (https://bugs.archlinux.org/task/34292) . If you get thiserror message, manually use efibootmgr to add gummiboot to NVRAM:
# efibootmgr -c -L "Gummiboot" -l /EFI/gummiboot/gummibootx64.efi
You will need to manually create a configuration file to add an entry for Arch Linux to thegummiboot manager. Create /boot/loader/entries/arch.conf and add the following contents,replacing /dev/sdaX with your root partition, usually /dev/sda2 :
# nano /boot/loader/entries/arch.conf
title Arch Linuxlinux /vmlinuz-linuxinitrd /initramfs-linux.imgoptions root=/dev/sdaX ro
Beginners' Guide - ArchWiki https://wiki.archlinux.org/index.php/Beginners'_Guide
26 of 33 07/31/2013 04:28 AM
For more information on configuring and using gummiboot, see gummiboot.
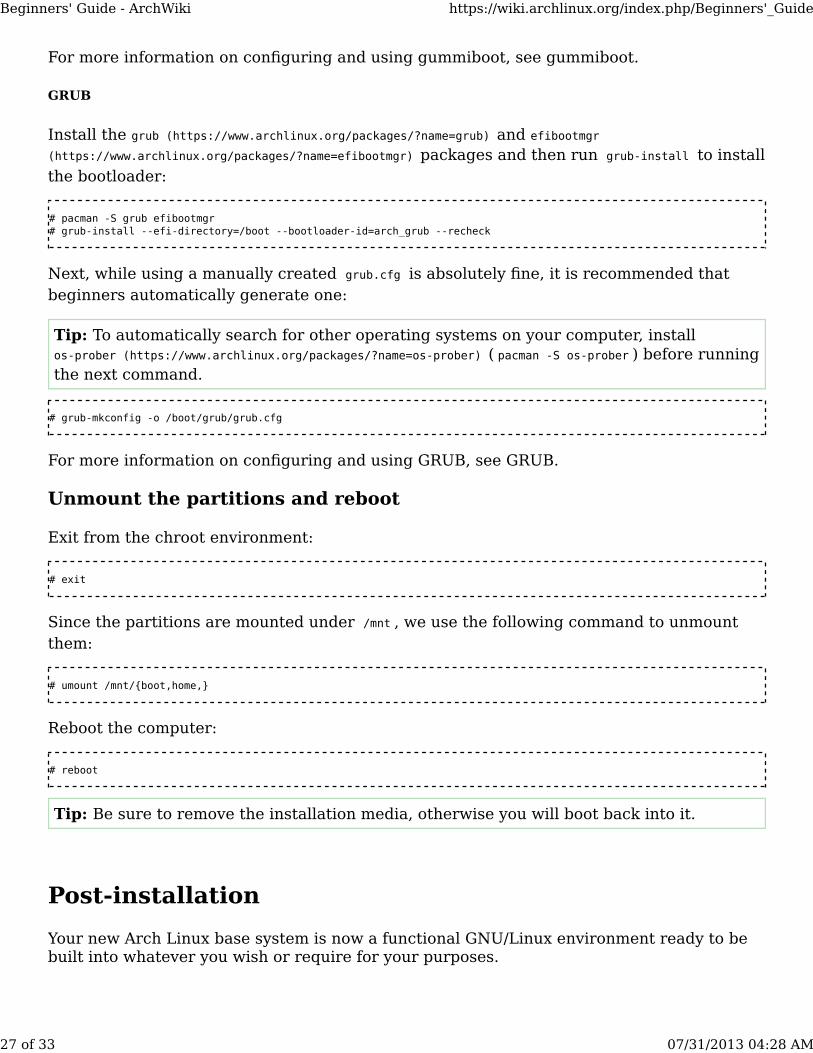
GRUB
Install the grub (https://www.archlinux.org/packages/?name=grub) and efibootmgr(https://www.archlinux.org/packages/?name=efibootmgr) packages and then run grub-install to installthe bootloader:
# pacman -S grub efibootmgr# grub-install --efi-directory=/boot --bootloader-id=arch_grub --recheck
Next, while using a manually created grub.cfg is absolutely fine, it is recommended thatbeginners automatically generate one:
Tip: To automatically search for other operating systems on your computer, installos-prober (https://www.archlinux.org/packages/?name=os-prober) ( pacman -S os-prober ) before runningthe next command.
# grub-mkconfig -o /boot/grub/grub.cfg
For more information on configuring and using GRUB, see GRUB.
Unmount the partitions and reboot
Exit from the chroot environment:
# exit
Since the partitions are mounted under /mnt , we use the following command to unmountthem:
# umount /mnt/{boot,home,}
Reboot the computer:
# reboot
Tip: Be sure to remove the installation media, otherwise you will boot back into it.
Post-installation
Your new Arch Linux base system is now a functional GNU/Linux environment ready to bebuilt into whatever you wish or require for your purposes.
Beginners' Guide - ArchWiki https://wiki.archlinux.org/index.php/Beginners'_Guide
27 of 33 07/31/2013 04:28 AM
User management
Add any user accounts you require besides root, as described in User management. It is notgood practice to use the root account for regular use, or expose it via SSH on a server. Theroot account should only be used for administrative tasks.
Package management
Pacman is the Arch Linux package manager. See pacman and FAQ#Package Managementfor answers regarding installing, updating, and managing packages.
Because of The Arch Way#Code-correctness over convenience it is imperative to keep up todate with changes in Arch Linux that require manual intervention before upgrading yoursystem. Check the front page Arch news (https://www.archlinux.org/) and subscribe to thearch-announce mailing list (https://mailman.archlinux.org/mailman/listinfo/arch-announce/). Alternatively, you may find it useful to subscribe to this RSS feed(https://www.archlinux.org/feeds/news/) or follow @archlinux (https://twitter.com/archlinux)on Twitter.
If you installed Arch Linux x86_64, you may want to enable the [multilib] repository if youplan on using 32-bit applications.
See Official Repositories for details about the purpose of each repository.
Service management
Arch Linux uses systemd as init, which is a system and service manager for Linux. Formaintaining your Arch Linux installation, it is a good idea to learn the basics about it.Interaction with systemd is done through the systemctl command. Read systemd#Basicsystemctl usage for more information.
Sound
ALSA usually works out-of-the-box. It just needs to be unmuted. Install alsa-utils(https://www.archlinux.org/packages/?name=alsa-utils) (which contains alsamixer ) and follow theseinstructions.
ALSA is included with the kernel and it is recommended. If it does not work, OSS is a viablealternative. If you have advanced audio requirements, take a look at Sound system for anoverview of various articles.
Graphical User Interface
Install X
The X Window System (commonly X11, or X) is a networking and display protocol whichprovides windowing on bitmap displays. It provides the standard toolkit and protocol tobuild graphical user interfaces (GUIs).
To install the base Xorg packages:
Beginners' Guide - ArchWiki https://wiki.archlinux.org/index.php/Beginners'_Guide
28 of 33 07/31/2013 04:28 AM
# pacman -S xorg-server xorg-server-utils xorg-xinit
Install mesa for 3D support:
# pacman -S mesa
Install a video driver
Note: If you installed Arch as a VirtualBox guest, you do not need to install a video driver.See Arch Linux guests for installing and setting up Guest Additions, and jump to theconfiguration part below.
The Linux kernel includes open-source video drivers and support for hardware acceleratedframebuffers. However, userland support is required for OpenGL and 2D acceleration inX11.
If you do not know which video chipset is available on your machine, run:
$ lspci | grep VGA
For a complete list of open-source video drivers, search the package database:
$ pacman -Ss xf86-video | less
The vesa driver is a generic mode-setting driver that will work with almost every GPU, butwill not provide any 2D or 3D acceleration. If a better driver cannot be found or fails toload, Xorg will fall back to vesa. To install it:
# pacman -S xf86-video-vesa
In order for video acceleration to work, and often to expose all the modes that the GPU canset, a proper video driver is required:
Beginners' Guide - ArchWiki https://wiki.archlinux.org/index.php/Beginners'_Guide
29 of 33 07/31/2013 04:28 AM
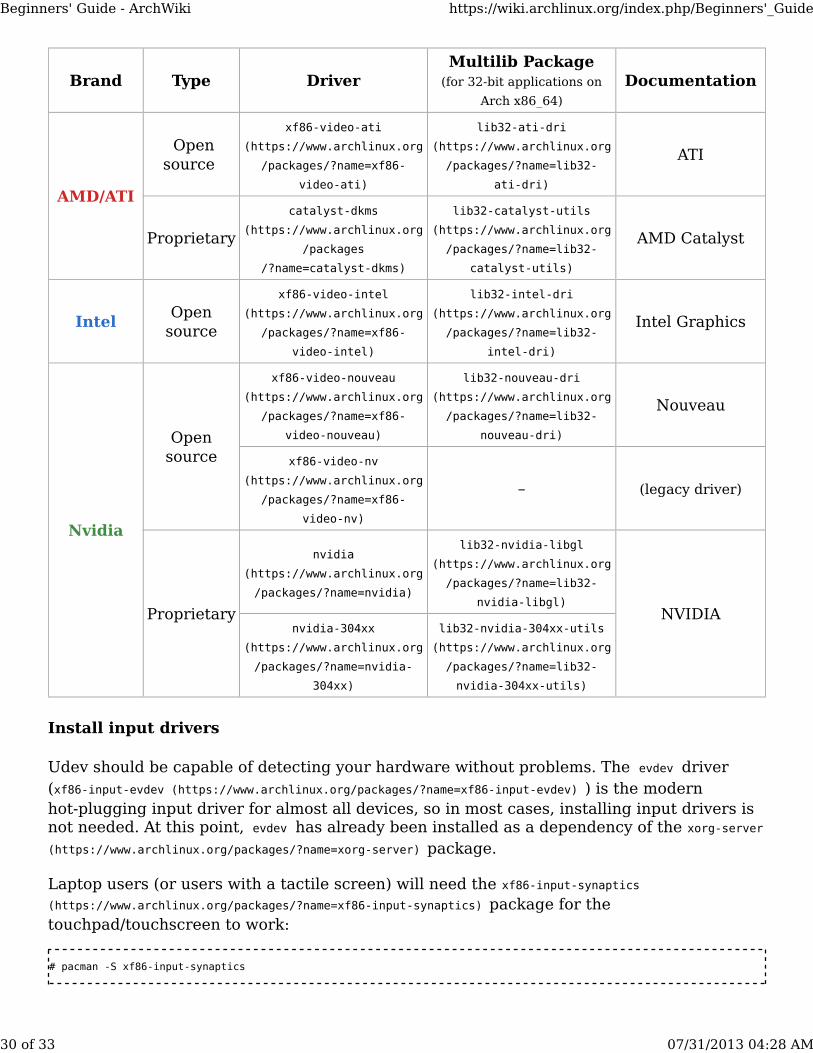
Brand Type DriverMultilib Package
(for 32-bit applications on
Arch x86_64)
Documentation
AMD/ATI
Opensource
xf86-video-ati
(https://www.archlinux.org
/packages/?name=xf86-
video-ati)
lib32-ati-dri
(https://www.archlinux.org
/packages/?name=lib32-
ati-dri)
ATI
Proprietary
catalyst-dkms
(https://www.archlinux.org
/packages
/?name=catalyst-dkms)
lib32-catalyst-utils
(https://www.archlinux.org
/packages/?name=lib32-
catalyst-utils)
AMD Catalyst
IntelOpen
source
xf86-video-intel
(https://www.archlinux.org
/packages/?name=xf86-
video-intel)
lib32-intel-dri
(https://www.archlinux.org
/packages/?name=lib32-
intel-dri)
Intel Graphics
Nvidia
Opensource
xf86-video-nouveau
(https://www.archlinux.org
/packages/?name=xf86-
video-nouveau)
lib32-nouveau-dri
(https://www.archlinux.org
/packages/?name=lib32-
nouveau-dri)
Nouveau
xf86-video-nv
(https://www.archlinux.org
/packages/?name=xf86-
video-nv)
– (legacy driver)
Proprietary
nvidia
(https://www.archlinux.org
/packages/?name=nvidia)
lib32-nvidia-libgl
(https://www.archlinux.org
/packages/?name=lib32-
nvidia-libgl)NVIDIA
nvidia-304xx
(https://www.archlinux.org
/packages/?name=nvidia-
304xx)
lib32-nvidia-304xx-utils
(https://www.archlinux.org
/packages/?name=lib32-
nvidia-304xx-utils)
Install input drivers
Udev should be capable of detecting your hardware without problems. The evdev driver(xf86-input-evdev (https://www.archlinux.org/packages/?name=xf86-input-evdev) ) is the modernhot-plugging input driver for almost all devices, so in most cases, installing input drivers isnot needed. At this point, evdev has already been installed as a dependency of the xorg-server(https://www.archlinux.org/packages/?name=xorg-server) package.
Laptop users (or users with a tactile screen) will need the xf86-input-synaptics(https://www.archlinux.org/packages/?name=xf86-input-synaptics) package for thetouchpad/touchscreen to work:
# pacman -S xf86-input-synaptics
Beginners' Guide - ArchWiki https://wiki.archlinux.org/index.php/Beginners'_Guide
30 of 33 07/31/2013 04:28 AM
For instructions on fine tuning or troubleshooting touchpad issues, see the TouchpadSynaptics article.
Configure X
Warning: Proprietary drivers usually require a reboot after installation. See NVIDIA orAMD Catalyst for details.
Xorg features auto-detection and therefore can function without an xorg.conf . If you stillwish to manually configure X Server, please see the Xorg wiki page.
Here you may set a keyboard layout if you do not use a standard US keyboard.
Note: The XkbLayout key may differ from the keymap code you used with the loadkeyscommand. A list of many keyboard layouts and variants can be found in/usr/share/X11/xkb/rules/base.lst (after the line beginning with ! layout ). For instance, thelayout gb corresponds to "English (UK)", whereas for the console it was loadkeys uk .
Test X
Tip: These steps are optional. Test if you are installing Arch Linux for the first time, or ifyou are installing on new and unfamiliar hardware.
Note: If your input devices are not working during this test, install the needed driverfrom the xorg-drivers (https://www.archlinux.org/groups/i686/xorg-drivers/) group, and try again.For a complete list of available input drivers, invoke a pacman search (press Q to exit):
$ pacman -Ss xf86-input | less
You only need xf86-input-keyboard (https://www.archlinux.org/packages/?name=xf86-input-keyboard) orxf86-input-mouse (https://www.archlinux.org/packages/?name=xf86-input-mouse) if you plan ondisabling hot-plugging, otherwise, evdev will act as the input driver (recommended).
Install the default environment:
# pacman -S xorg-twm xorg-xclock xterm
If Xorg was installed before creating the non-root user, there will be a template .xinitrc filein your home directory that needs to be either deleted or commented out. Simply deleting itwill cause X to run with the default environment installed above.
$ rm ~/.xinitrc
Note: X must always be run on the same tty where the login occurred, to preserve thelogind session. This is handled by the default /etc/X11/xinit/xserverrc .
To start the (test) Xorg session, run:
Beginners' Guide - ArchWiki https://wiki.archlinux.org/index.php/Beginners'_Guide
31 of 33 07/31/2013 04:28 AM
$ startx
A few movable windows should show up, and your mouse should work. Once you aresatisfied that X installation was a success, you may exit out of X by issuing the exitcommand into the prompts until you return to the console.
$ exit
If the screen goes black, you may still attempt to switch to a different virtual console (e.g.Ctrl+Alt+F2 ), and blindly log in as root. You can do this by typing "root" (press Enter aftertyping it) and entering the root password (again, press Enter after typing it).
You may also attempt to kill the X server with:
# pkill X
If this does not work, reboot blindly with:
# reboot
Troubleshooting
If a problem occurs, look for errors in Xorg.0.log . Be on the lookout for any lines beginningwith (EE) which represent errors, and also (WW) which are warnings that could indicateother issues.
$ grep EE /var/log/Xorg.0.log
If you are still having trouble after consulting the Xorg article and need assistance via theArch Linux forums or the IRC channel, be sure to install and use wgetpaste(https://www.archlinux.org/packages/?name=wgetpaste) by providing the links from:
# pacman -S wgetpaste$ wgetpaste ~/.xinitrc$ wgetpaste /etc/X11/xorg.conf$ wgetpaste /var/log/Xorg.0.log
Note: Please provide all pertinent information (hardware, driver information, etc) whenasking for assistance.
Fonts
You may wish to install a set of TrueType fonts, as only unscalable bitmap fonts areincluded by default. DejaVu is a set of high quality, general-purpose fonts with goodUnicode coverage:
Beginners' Guide - ArchWiki https://wiki.archlinux.org/index.php/Beginners'_Guide
32 of 33 07/31/2013 04:28 AM
# pacman -S ttf-dejavu
Refer to Font Configuration for how to configure font rendering and Fonts for fontsuggestions and installation instructions.
Choose and install a graphical interface
The X Window System provides the basic framework for building a graphical user interface(GUI).
Note: Choosing your DE or WM is a very subjective and personal decision. Choose thebest environment for your needs. You can also build your own DE with just a WM and theapplications of your choice.
Window Managers (WM) control the placement and appearance of applicationwindows in conjunction with the X Window System.
Desktop Environments (DE) work atop and in conjunction with X, to provide acompletely functional and dynamic GUI. A DE typically provides a window manager,icons, applets, windows, toolbars, folders, wallpapers, a suite of applications andabilities like drag and drop.
Instead of starting X manually with startx from xorg-xinit (https://www.archlinux.org/packages/?name=xorg-xinit) , see Display Manager for instructions on using a display manager, or seeStart X at Login for using an existing virtual terminal as an equivalent to a display manager.
Appendix
For a list of applications that may be of interest, see List of Applications.
See General Recommendations for post-installation tutorials like setting up a touchpad orfont rendering.
Retrieved from "https://wiki.archlinux.org/index.php?title=Beginners%27_Guide&oldid=264494"Categories: About Arch Getting and installing Arch
This page was last modified on 27 June 2013, at 17:45.Content is available under GNU Free Documentation License 1.3 or later.
Beginners' Guide - ArchWiki https://wiki.archlinux.org/index.php/Beginners'_Guide
33 of 33 07/31/2013 04:28 AM


![Linux administration 5nd [a beginners guide]](https://img.pdfslide.us/doc/110x75/554bd3a5b4c905706a8b4e95/linux-administration-5nd-a-beginners-guide.jpg)