Embed Size (px)
Citation preview
8/23/2019 1
BearWeb Advisor Assisted Student Registration Instructions
BearWeb is the self-service portal for students to register for classes and access other student information.
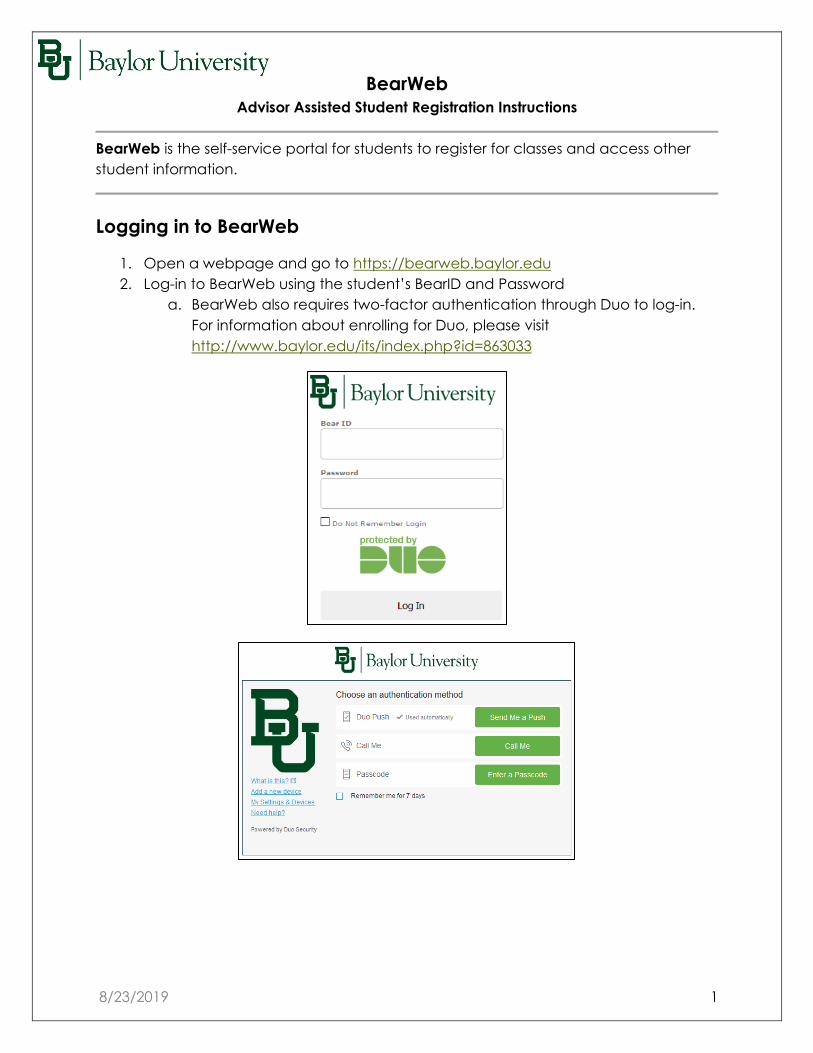
Logging in to BearWeb
1. Open a webpage and go to https://bearweb.baylor.edu 2. Log-in to BearWeb using the student’s BearID and Password
a. BearWeb also requires two-factor authentication through Duo to log-in. For information about enrolling for Duo, please visit http://www.baylor.edu/its/index.php?id=863033
8/23/2019 2
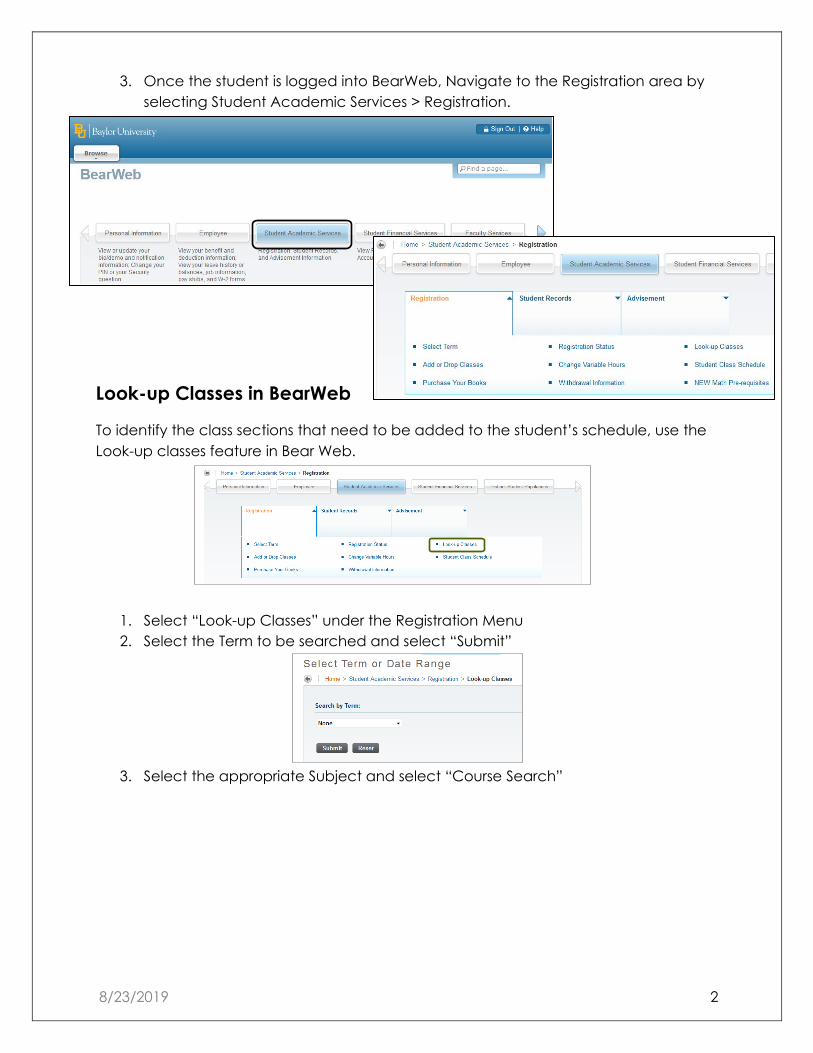
3. Once the student is logged into BearWeb, Navigate to the Registration area by selecting Student Academic Services > Registration.
Look-up Classes in BearWeb
To identify the class sections that need to be added to the student’s schedule, use the Look-up classes feature in Bear Web.
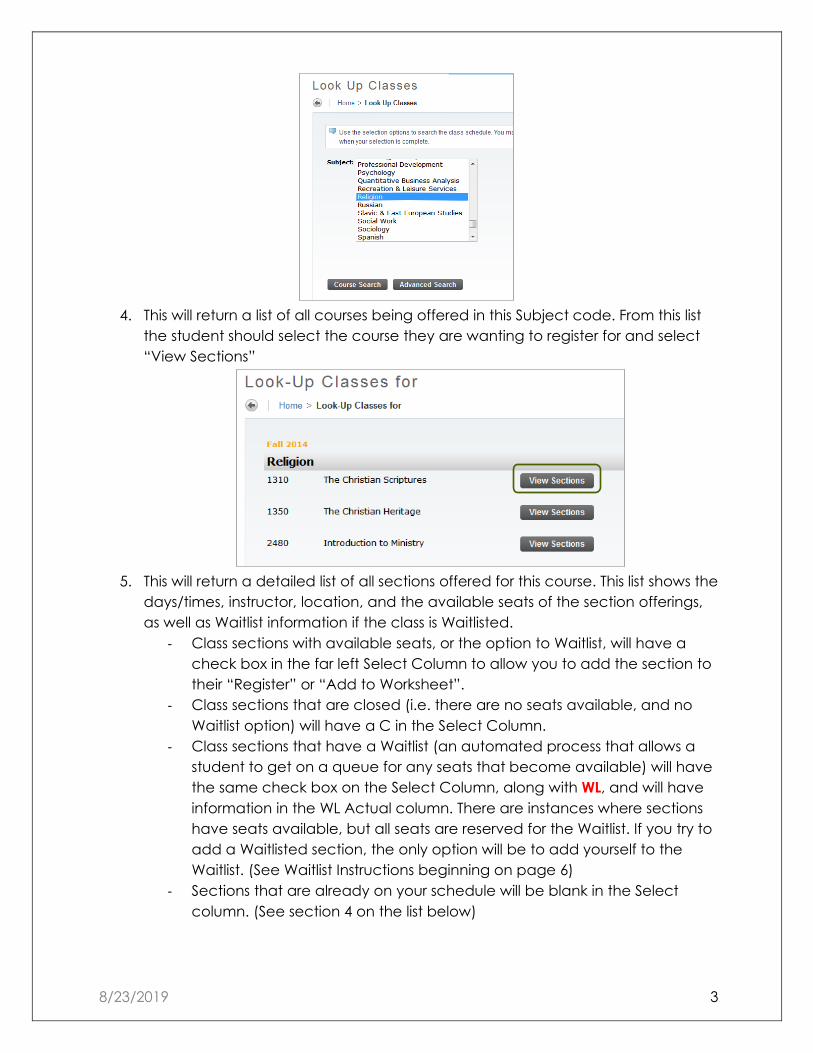
1. Select “Look-up Classes” under the Registration Menu 2. Select the Term to be searched and select “Submit”
3. Select the appropriate Subject and select “Course Search”
8/23/2019 3
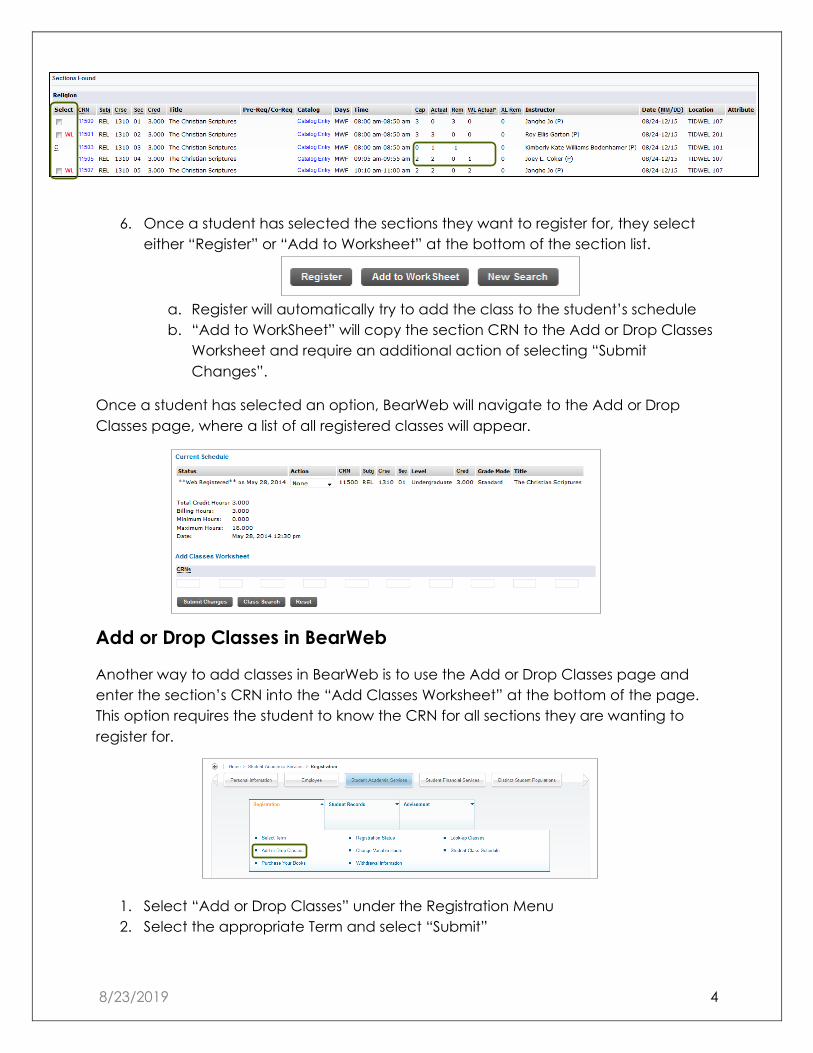
4. This will return a list of all courses being offered in this Subject code. From this list
the student should select the course they are wanting to register for and select “View Sections”
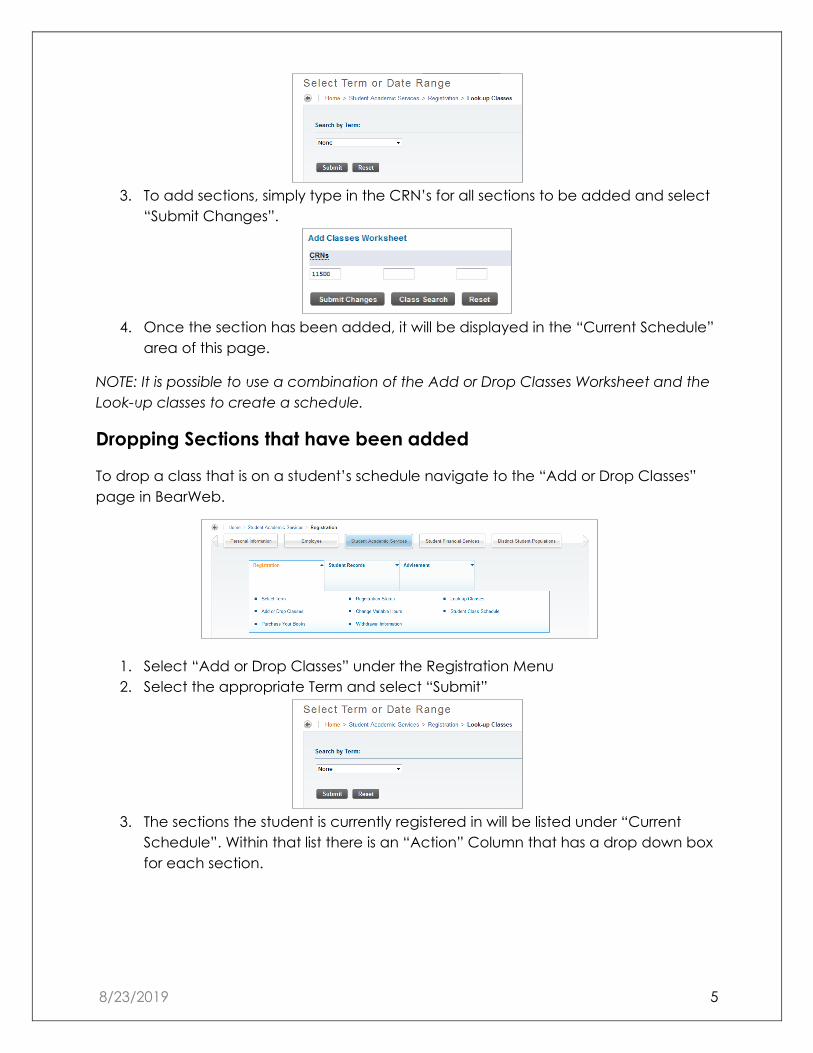
5. This will return a detailed list of all sections offered for this course. This list shows the
days/times, instructor, location, and the available seats of the section offerings, as well as Waitlist information if the class is Waitlisted.
- Class sections with available seats, or the option to Waitlist, will have a check box in the far left Select Column to allow you to add the section to their “Register” or “Add to Worksheet”.
- Class sections that are closed (i.e. there are no seats available, and no Waitlist option) will have a C in the Select Column.
- Class sections that have a Waitlist (an automated process that allows a student to get on a queue for any seats that become available) will have the same check box on the Select Column, along with WL, and will have information in the WL Actual column. There are instances where sections have seats available, but all seats are reserved for the Waitlist. If you try to add a Waitlisted section, the only option will be to add yourself to the Waitlist. (See Waitlist Instructions beginning on page 6)
- Sections that are already on your schedule will be blank in the Select column. (See section 4 on the list below)
8/23/2019 4
6. Once a student has selected the sections they want to register for, they select
either “Register” or “Add to Worksheet” at the bottom of the section list.
a. Register will automatically try to add the class to the student’s schedule b. “Add to WorkSheet” will copy the section CRN to the Add or Drop Classes
Worksheet and require an additional action of selecting “Submit Changes”.
Once a student has selected an option, BearWeb will navigate to the Add or Drop Classes page, where a list of all registered classes will appear.
Add or Drop Classes in BearWeb
Another way to add classes in BearWeb is to use the Add or Drop Classes page and enter the section’s CRN into the “Add Classes Worksheet” at the bottom of the page. This option requires the student to know the CRN for all sections they are wanting to register for.
1. Select “Add or Drop Classes” under the Registration Menu 2. Select the appropriate Term and select “Submit”
8/23/2019 5
3. To add sections, simply type in the CRN’s for all sections to be added and select
“Submit Changes”.
4. Once the section has been added, it will be displayed in the “Current Schedule”
area of this page.
NOTE: It is possible to use a combination of the Add or Drop Classes Worksheet and the Look-up classes to create a schedule.
Dropping Sections that have been added
To drop a class that is on a student’s schedule navigate to the “Add or Drop Classes” page in BearWeb.
1. Select “Add or Drop Classes” under the Registration Menu 2. Select the appropriate Term and select “Submit”
3. The sections the student is currently registered in will be listed under “Current
Schedule”. Within that list there is an “Action” Column that has a drop down box for each section.
8/23/2019 6
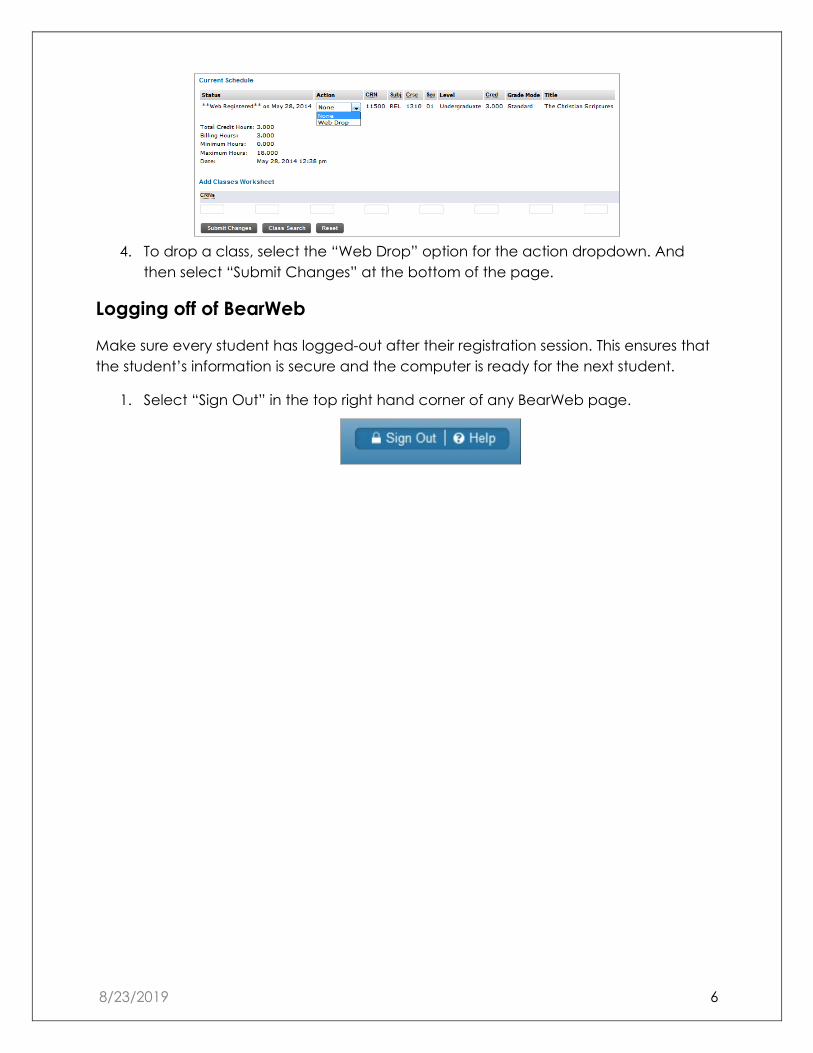
4. To drop a class, select the “Web Drop” option for the action dropdown. And
then select “Submit Changes” at the bottom of the page.
Logging off of BearWeb
Make sure every student has logged-out after their registration session. This ensures that the student’s information is secure and the computer is ready for the next student.
1. Select “Sign Out” in the top right hand corner of any BearWeb page.
8/23/2019 7
Waitlist Student Registration Instructions
Waitlisting is currently being piloted at Baylor on a variety of courses throughout the university. Class sections with an available Waitlist are designated on the Schedule of Classes in the Students Waitlisted field (N/A means a Waitlist is NOT available). To use the Waitlist a student must meet all prerequisites and restrictions for the class section.
How to use the Waitlist – Basic Steps
1. Select the section with an active Waitlist that you would like to add to your schedule from the Look-up Classes page in BearWeb (Log-in > Student Academic Services > Registration > Look-up Classes) OR Navigate to the “Add or Drop Classes” page in BearWeb and add the CRN for the Waitlisted section into the worksheet. (Log-in > Student Academic Services > Registration > Add or Drop Classes)
2. Select “Submit Changes”. 3. If a class section is closed and a Waitlist is available, you will receive a
Registration Error and have the option to add yourself to the Waitlist for the class section. Select “Waitlisted” from the Action dropdown and select “Submit changes”.
4. You are now added to the Waitlist for the class section.
Waitlist Conflict checking A student can Waitlist for class sections that…
A student cannot Waitlist for class sections that…
- Have a Time Conflict with another Registered or Waitlisted class section
- Are a duplicate course with another Registered or Waitlisted class section
General Guidelines Waitlisting…
- is on a first-come, first-serve basis - is available through the last day BearWeb registration is open - does not guarantee a seat in the class section or mean you are registered for
the class - does not count toward enrolled hours for Financial Aid purposes - holds a spot in a queue should a seat become available - checks for registration errors (pre-requisites, etc.)before adding the Waitlist - sends an automatic email notification to your BAYLOR email account when
seats become available - 24 Hour expiration after email notification
o Does NOT automatically enroll you into the class section
8/23/2019 8
Detailed Waitlist Instructions
If a class section is closed and has the Waitlist option, a student may add themselves to the first-come, first-serve Waitlist.
Waitlisting will be available to students up to the last day BearWeb registration is open (midnight on the 5th Class day). After that day, all Waitlists are cleared and standard requirements and practices are in place.
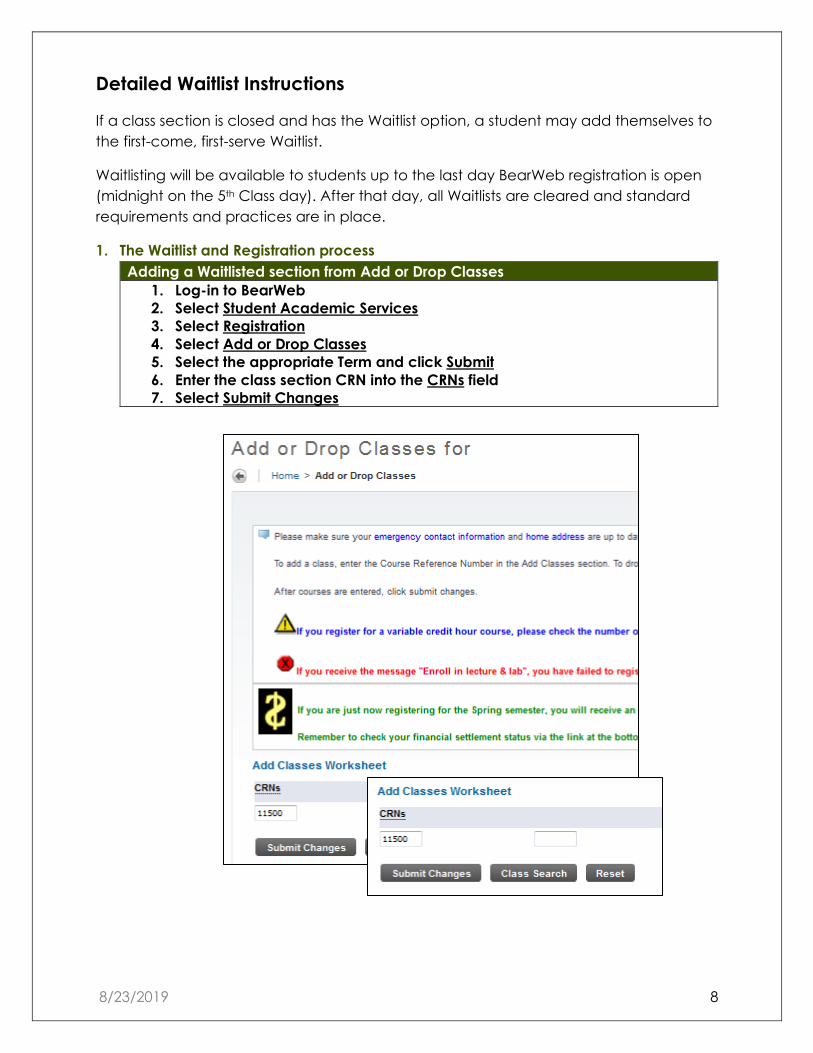
1. The Waitlist and Registration process Adding a Waitlisted section from Add or Drop Classes
1. Log-in to BearWeb 2. Select Student Academic Services 3. Select Registration 4. Select Add or Drop Classes 5. Select the appropriate Term and click Submit 6. Enter the class section CRN into the CRNs field 7. Select Submit Changes
Enter CRN, then select Submit Changes
8/23/2019 9
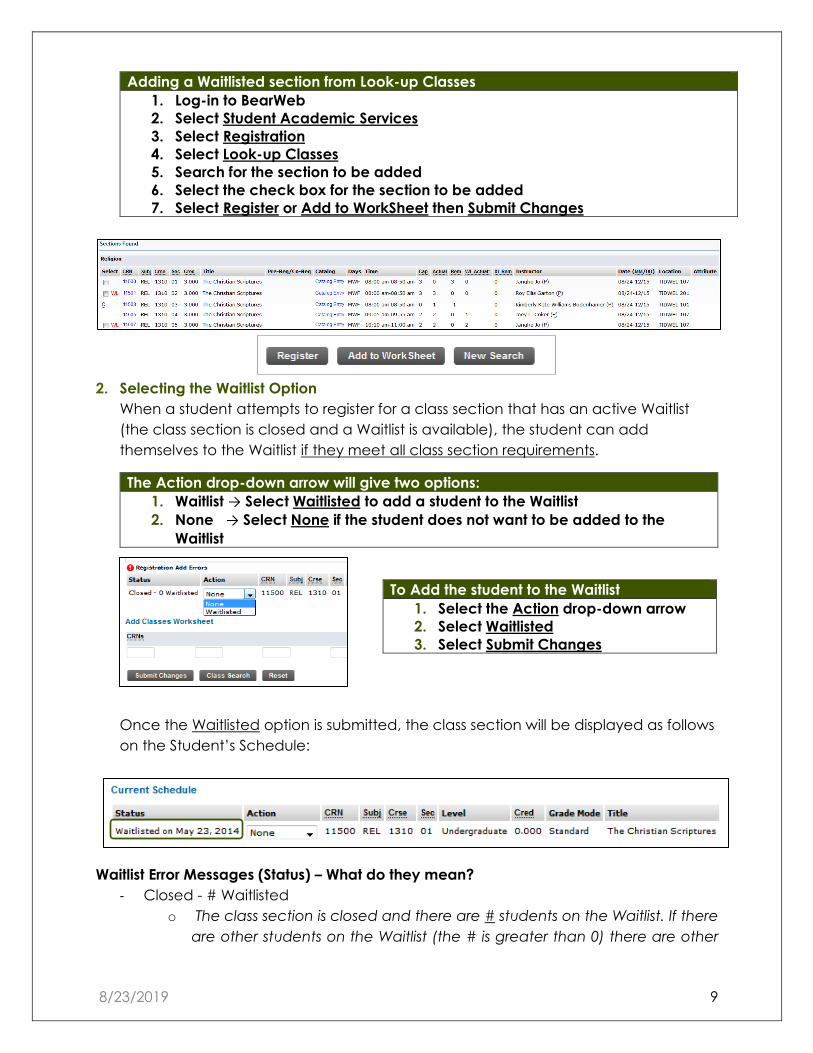
Adding a Waitlisted section from Look-up Classes 1. Log-in to BearWeb 2. Select Student Academic Services 3. Select Registration 4. Select Look-up Classes 5. Search for the section to be added 6. Select the check box for the section to be added 7. Select Register or Add to WorkSheet then Submit Changes
2. Selecting the Waitlist Option
When a student attempts to register for a class section that has an active Waitlist (the class section is closed and a Waitlist is available), the student can add themselves to the Waitlist if they meet all class section requirements.
The Action drop-down arrow will give two options: 1. Waitlist → Select Waitlisted to add a student to the Waitlist 2. None → Select None if the student does not want to be added to the
Waitlist
To Add the student to the Waitlist
1. Select the Action drop-down arrow 2. Select Waitlisted 3. Select Submit Changes
Once the Waitlisted option is submitted, the class section will be displayed as follows on the Student’s Schedule:
Waitlist Error Messages (Status) – What do they mean? - Closed - # Waitlisted
o The class section is closed and there are # students on the Waitlist. If there are other students on the Waitlist (the # is greater than 0) there are other
8/23/2019 10
students that would have the opportunity to add the class section before the current student.
- Open – Reserved for Waitlist o The class section has seats available (the Actual Enrollment is less than the
Max Enrollment) but there is an active Waitlist, and the available seats are being offered to students currently on the Waitlist.
Reminder: Not all class sections will have the option of Waitlisting. The normal registration process remains the same for those class sections.
3. Waitlist Notification
Once a seat becomes available in a class section with an active Waitlist, an automatic notification will be sent to the first student on the Waitlist.
The student has 24 Hours to act on the notification.
**All Email notifications will be sent to the student’s Baylor email account. **
Once a student receives the email notification, they will have the option to add the Waitlisted class section to their schedule. The email notification DOES NOT mean the student is automatically registered into the class section. If the student does not take any action to register or drop the course within 24 hours of receiving the notification, they will be removed from the Waitlist and the next student on the Waitlist will receive a notification. Viewing Waitlist Position: Once a student is on the Waitlist, the student can view their Waitlist position on their Student Detail Schedule in BearWeb (Log-in > Student Academic Services > Registration > Student Class Schedule > Detail Schedule)
Registration Restrictions will prevent the student from adding themselves to the Waitlist. If a Registration Error Message (Pre-requisite, Departmental Approval, etc.) is displayed, follow the normal registration procedures.
8/23/2019 11
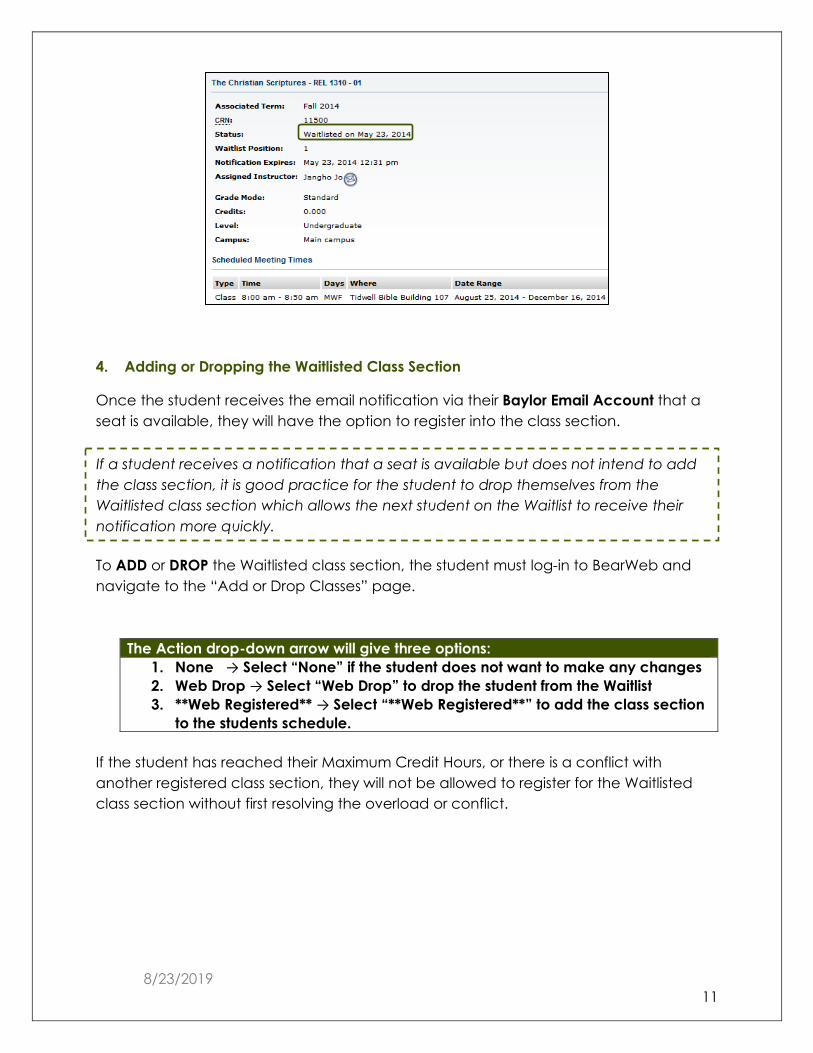
4. Adding or Dropping the Waitlisted Class Section
Once the student receives the email notification via their Baylor Email Account that a seat is available, they will have the option to register into the class section. To ADD or DROP the Waitlisted class section, the student must log-in to BearWeb and navigate to the “Add or Drop Classes” page.
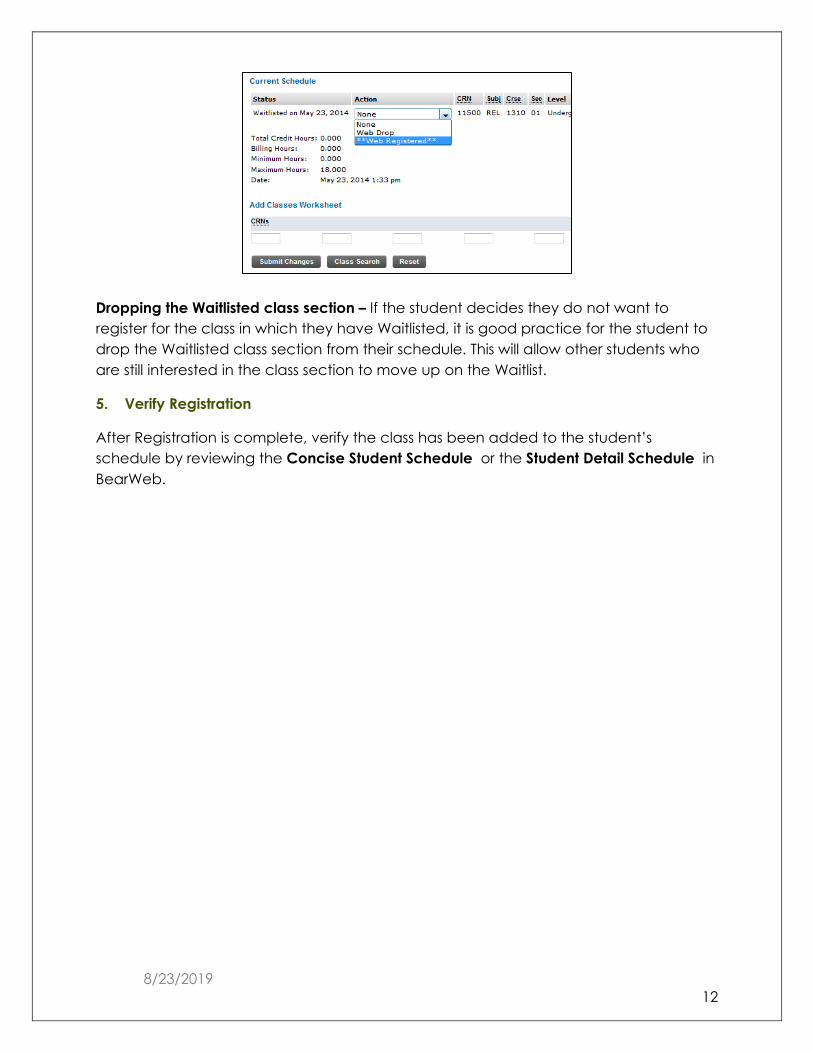
The Action drop-down arrow will give three options: 1. None → Select “None” if the student does not want to make any changes 2. Web Drop → Select “Web Drop” to drop the student from the Waitlist 3. **Web Registered** → Select “**Web Registered**” to add the class section
to the students schedule. If the student has reached their Maximum Credit Hours, or there is a conflict with another registered class section, they will not be allowed to register for the Waitlisted class section without first resolving the overload or conflict.
If a student receives a notification that a seat is available but does not intend to add the class section, it is good practice for the student to drop themselves from the Waitlisted class section which allows the next student on the Waitlist to receive their notification more quickly.
8/23/2019 12
Dropping the Waitlisted class section – If the student decides they do not want to register for the class in which they have Waitlisted, it is good practice for the student to drop the Waitlisted class section from their schedule. This will allow other students who are still interested in the class section to move up on the Waitlist.
5. Verify Registration
After Registration is complete, verify the class has been added to the student’s schedule by reviewing the Concise Student Schedule or the Student Detail Schedule in BearWeb.