Embed Size (px)
Citation preview
User’s Guide to the Beamer Class, Version 0.81
Till [email protected]
October 13, 2003
Contents
1 Introduction 2
2 Workflow 32.1 Step Zero: Know the Time Constraints . . . . . . . . . . . . . . . . . . . . . . . . . . . . . . . 42.2 Step One: Setup the Files . . . . . . . . . . . . . . . . . . . . . . . . . . . . . . . . . . . . . . 42.3 Step Two: Structure You Presentation . . . . . . . . . . . . . . . . . . . . . . . . . . . . . . . 42.4 Step Three: Creating a PDF or PostScript File . . . . . . . . . . . . . . . . . . . . . . . . . . 4
2.4.1 Creating PDF . . . . . . . . . . . . . . . . . . . . . . . . . . . . . . . . . . . . . . . . . 52.4.2 Creating PostScript . . . . . . . . . . . . . . . . . . . . . . . . . . . . . . . . . . . . . 5
2.5 Step Four: Create Frames . . . . . . . . . . . . . . . . . . . . . . . . . . . . . . . . . . . . . . 62.5.1 Guidelines on What to Put on a Frame . . . . . . . . . . . . . . . . . . . . . . . . . . 62.5.2 Guidelines on Text . . . . . . . . . . . . . . . . . . . . . . . . . . . . . . . . . . . . . . 62.5.3 Guidelines on Graphics . . . . . . . . . . . . . . . . . . . . . . . . . . . . . . . . . . . 72.5.4 Guidelines on Colors . . . . . . . . . . . . . . . . . . . . . . . . . . . . . . . . . . . . . 72.5.5 Guidelines on Animations and Special Effects . . . . . . . . . . . . . . . . . . . . . . . 7
2.6 Step Five: Test Your Presentation . . . . . . . . . . . . . . . . . . . . . . . . . . . . . . . . . 72.7 Step Six: Optionally Create a Handout . . . . . . . . . . . . . . . . . . . . . . . . . . . . . . . 8
3 Frames and Overlays 83.1 Frame Titles . . . . . . . . . . . . . . . . . . . . . . . . . . . . . . . . . . . . . . . . . . . . . 83.2 Commands with Overlay Specifications . . . . . . . . . . . . . . . . . . . . . . . . . . . . . . . 83.3 Environments with Overlay Specifications . . . . . . . . . . . . . . . . . . . . . . . . . . . . . 113.4 Restricting the Slides of a Frame . . . . . . . . . . . . . . . . . . . . . . . . . . . . . . . . . . 123.5 Dynamically Changing Text . . . . . . . . . . . . . . . . . . . . . . . . . . . . . . . . . . . . . 123.6 Making Commands and Environments Overlay-Specification-Aware . . . . . . . . . . . . . . . 133.7 Frames and Verbatim Commands . . . . . . . . . . . . . . . . . . . . . . . . . . . . . . . . . . 15
4 Structurizing the Text 164.1 Lists . . . . . . . . . . . . . . . . . . . . . . . . . . . . . . . . . . . . . . . . . . . . . . . . . . 164.2 Sections and Subsections . . . . . . . . . . . . . . . . . . . . . . . . . . . . . . . . . . . . . . . 184.3 Table of Contents . . . . . . . . . . . . . . . . . . . . . . . . . . . . . . . . . . . . . . . . . . . 184.4 Title Page . . . . . . . . . . . . . . . . . . . . . . . . . . . . . . . . . . . . . . . . . . . . . . . 194.5 Columns . . . . . . . . . . . . . . . . . . . . . . . . . . . . . . . . . . . . . . . . . . . . . . . . 204.6 Bibliography . . . . . . . . . . . . . . . . . . . . . . . . . . . . . . . . . . . . . . . . . . . . . 204.7 Predefined Environments and Commands . . . . . . . . . . . . . . . . . . . . . . . . . . . . . 22
1
5 Graphics, Animations, and Special Effects 235.1 Graphics . . . . . . . . . . . . . . . . . . . . . . . . . . . . . . . . . . . . . . . . . . . . . . . . 23
5.1.1 Including External Graphic Files . . . . . . . . . . . . . . . . . . . . . . . . . . . . . . 235.1.2 Inlining Graphic Commands . . . . . . . . . . . . . . . . . . . . . . . . . . . . . . . . . 24
5.2 Animations . . . . . . . . . . . . . . . . . . . . . . . . . . . . . . . . . . . . . . . . . . . . . . 245.3 Slide Transitions . . . . . . . . . . . . . . . . . . . . . . . . . . . . . . . . . . . . . . . . . . . 25
6 Creating Handouts, Transparencies, and Notes 276.1 Creating Handouts . . . . . . . . . . . . . . . . . . . . . . . . . . . . . . . . . . . . . . . . . . 276.2 Creating Transparencies . . . . . . . . . . . . . . . . . . . . . . . . . . . . . . . . . . . . . . . 286.3 Adding Notes . . . . . . . . . . . . . . . . . . . . . . . . . . . . . . . . . . . . . . . . . . . . . 28
7 Customization 297.1 Fonts . . . . . . . . . . . . . . . . . . . . . . . . . . . . . . . . . . . . . . . . . . . . . . . . . . 297.2 Margins and Sizes . . . . . . . . . . . . . . . . . . . . . . . . . . . . . . . . . . . . . . . . . . 307.3 Class Options . . . . . . . . . . . . . . . . . . . . . . . . . . . . . . . . . . . . . . . . . . . . . 307.4 Themes . . . . . . . . . . . . . . . . . . . . . . . . . . . . . . . . . . . . . . . . . . . . . . . . 317.5 Predefined Templates . . . . . . . . . . . . . . . . . . . . . . . . . . . . . . . . . . . . . . . . 33
7.5.1 Backgrounds . . . . . . . . . . . . . . . . . . . . . . . . . . . . . . . . . . . . . . . . . 347.5.2 Head and Foot Lines . . . . . . . . . . . . . . . . . . . . . . . . . . . . . . . . . . . . . 347.5.3 Itemizing . . . . . . . . . . . . . . . . . . . . . . . . . . . . . . . . . . . . . . . . . . . 357.5.4 Bibliography . . . . . . . . . . . . . . . . . . . . . . . . . . . . . . . . . . . . . . . . . 357.5.5 Navigation Bars . . . . . . . . . . . . . . . . . . . . . . . . . . . . . . . . . . . . . . . 35
7.6 Changing Templates . . . . . . . . . . . . . . . . . . . . . . . . . . . . . . . . . . . . . . . . . 357.6.1 Title Page . . . . . . . . . . . . . . . . . . . . . . . . . . . . . . . . . . . . . . . . . . . 367.6.2 Background . . . . . . . . . . . . . . . . . . . . . . . . . . . . . . . . . . . . . . . . . . 367.6.3 Table of Contents . . . . . . . . . . . . . . . . . . . . . . . . . . . . . . . . . . . . . . 367.6.4 Frame Titles . . . . . . . . . . . . . . . . . . . . . . . . . . . . . . . . . . . . . . . . . 377.6.5 Headlines, Footlines, and Footnotes . . . . . . . . . . . . . . . . . . . . . . . . . . . . 377.6.6 Navigation Bars . . . . . . . . . . . . . . . . . . . . . . . . . . . . . . . . . . . . . . . 387.6.7 Hilighting Commands . . . . . . . . . . . . . . . . . . . . . . . . . . . . . . . . . . . . 397.6.8 Block Environments . . . . . . . . . . . . . . . . . . . . . . . . . . . . . . . . . . . . . 397.6.9 Lists (Itemizations, Enumerations, Descriptions) . . . . . . . . . . . . . . . . . . . . . 407.6.10 Bibliography . . . . . . . . . . . . . . . . . . . . . . . . . . . . . . . . . . . . . . . . . 41
7.7 Template Inserts . . . . . . . . . . . . . . . . . . . . . . . . . . . . . . . . . . . . . . . . . . . 42
1 Introduction
This user’s guide explains the functionality of the beamer class. It is a LATEX class that allows you tocreate a beamer presentation. It can also be used to create slides. It behaves similarly to other packages likeprosper, but has the advantage that it works together directly with pdflatex, but also with dvips.
To use the beamer class, proceed as follows:
1. Specify beamer as document class instead of article.
2. Structure your LATEX text using section and subsection commands.
3. Place the text of the individual slides inside frame commands.
4. Run pdflatex on the text (or latex, dvips, and ps2pdf).
The beamer class has several useful features: You don’t need any external programs to use it other thanpdflatex, but it works also with dvips. You can easily and intuitively create sophisticated overlays. Finally,you can easily change the whole slide theme or only parts of it. The following code shows a typical usage ofthe class.
2
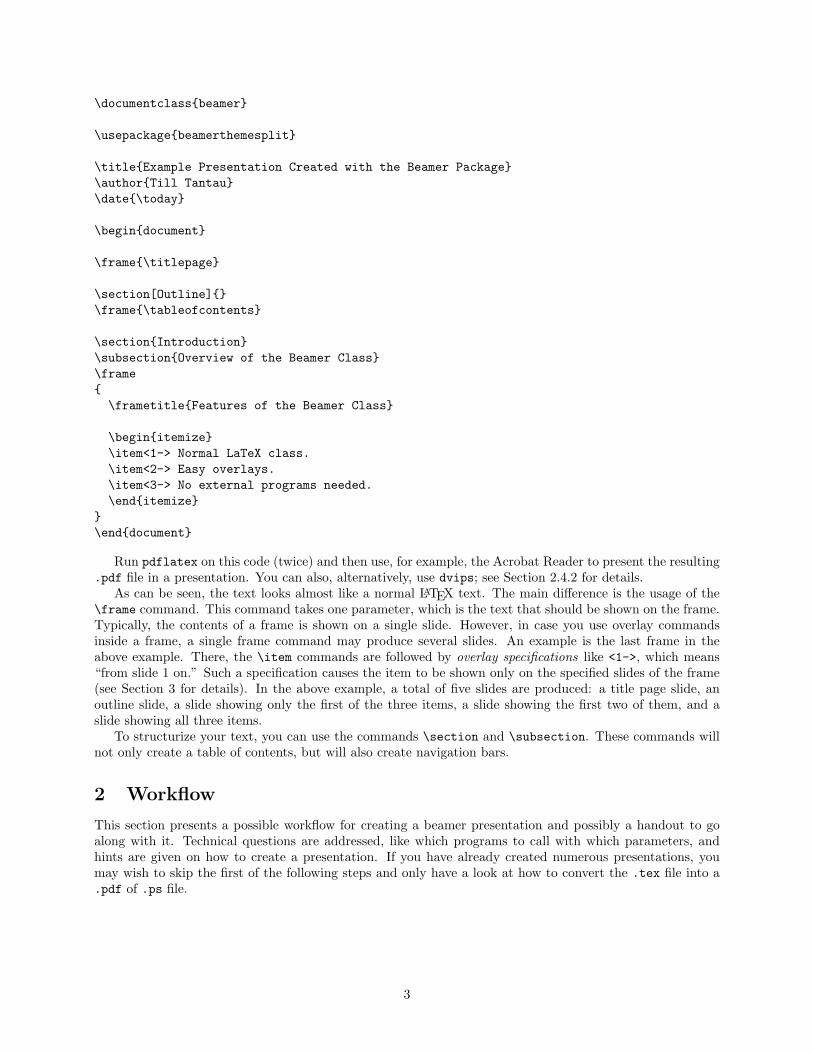
\documentclass{beamer}
\usepackage{beamerthemesplit}
\title{Example Presentation Created with the Beamer Package}\author{Till Tantau}\date{\today}
\begin{document}
\frame{\titlepage}
\section[Outline]{}\frame{\tableofcontents}
\section{Introduction}\subsection{Overview of the Beamer Class}\frame{\frametitle{Features of the Beamer Class}
\begin{itemize}\item<1-> Normal LaTeX class.\item<2-> Easy overlays.\item<3-> No external programs needed.\end{itemize}
}\end{document}
Run pdflatex on this code (twice) and then use, for example, the Acrobat Reader to present the resulting.pdf file in a presentation. You can also, alternatively, use dvips; see Section 2.4.2 for details.
As can be seen, the text looks almost like a normal LATEX text. The main difference is the usage of the\frame command. This command takes one parameter, which is the text that should be shown on the frame.Typically, the contents of a frame is shown on a single slide. However, in case you use overlay commandsinside a frame, a single frame command may produce several slides. An example is the last frame in theabove example. There, the \item commands are followed by overlay specifications like <1->, which means“from slide 1 on.” Such a specification causes the item to be shown only on the specified slides of the frame(see Section 3 for details). In the above example, a total of five slides are produced: a title page slide, anoutline slide, a slide showing only the first of the three items, a slide showing the first two of them, and aslide showing all three items.
To structurize your text, you can use the commands \section and \subsection. These commands willnot only create a table of contents, but will also create navigation bars.
2 Workflow
This section presents a possible workflow for creating a beamer presentation and possibly a handout to goalong with it. Technical questions are addressed, like which programs to call with which parameters, andhints are given on how to create a presentation. If you have already created numerous presentations, youmay wish to skip the first of the following steps and only have a look at how to convert the .tex file into a.pdf of .ps file.
3

2.1 Step Zero: Know the Time Constraints
When you start to create a presentation, the very first thing you should worry about is the amount of timeyou have for your presentation. Depending on the occasion, this can be anything between 2 minutes and twohours. A simple rule for the number of frames is that you should have at most one frame per minute.
In most situations, you will have less time for your presentation that you would like. Do not try to squeezemore into a presentation than time allows for. No matter how important some detail seems to you, it isbetter to leave it out, but get the main message across, than getting neither the main message nor the detailacross.
In many situations, a quick appraisal of how much time you have will show that you won’t be able tomention certain details. Knowing this can save you hours of work on preparing slides that you would haveto remove later anyway.
2.2 Step One: Setup the Files
It is advisable that you create a folder for each presentation. Even though your presentation will usually residein a single file, TEX produces so many extra files that things can easily get very confusing otherwise. Thefolder’s name should ideally start with the date of your talk in ISO format (like 2003-12-25 for a Christmastalk), followed by some reminder text of what the talk is all about. Putting the date at the front in thisformat causes your presentation folders to be listed nicely when you have several of them residing in onedirectory. If you use an extra directory for each presentation, you can call your main file main.tex.
To create an initial main.tex file for your talk, copy an existing file (like the file beamerexample.tex thatcomes along with the contribution) and delete everything that is not going to be part of your talk. Adjustthe \author{} and other fields as appropriate.
2.3 Step Two: Structure You Presentation
With the time constraints in mind, make a mental inventory of the things you can reasonably talk aboutwithin the time available. Then categorize the inventory into sections and subsections. Put \section{} and\subsection{} commands into the (more or less empty) main file. Do not create any frames until you havea first working version of a possible table of contents. Do not feel afraid to change it later on as you work onthe talk.
You should not use more than four sections and not less than two. Even four sections are usually toomuch, unless they follow a very easy pattern. Five and more sections are simply too hard to remember forthe audience. After all, when you present the table of contents, the audience will not yet really be able tograsp the importance and relevance of the different sections and will most likely have forgotten them by thetime you reach them.
Ideally, a table of contents should be understandable by itself. In particular, it should be comprehensiblebefore someone has heard your talk. Keep section and subsection titles self-explaining.
Both the sections and the subsections should follow a logical pattern. Begin with an explanation of whatyour talk is all about. (Do not assume that everyone knows this. The Ignorant Audience Law states: Theaudience always knows less than you think it should know, even if you take the Ignorant Audience Law intoaccount.) Then explain what you or someone else has found out concerning the subject matter. Alwaysconclude your talk with a summary that repeats the main message of the talk in a short and simple way.People pay most attention at the beginning and at the end of talks. The summary is your “second chance”to get across a message.
2.4 Step Three: Creating a PDF or PostScript File
Once a first version of the structure is finished, you should create a first PDF or PostScript file of your (stillempty) talk. This file will only contain the title page and the table of contents. The file might look like this:
\documentclass{beamer}% This is the file main.tex
4
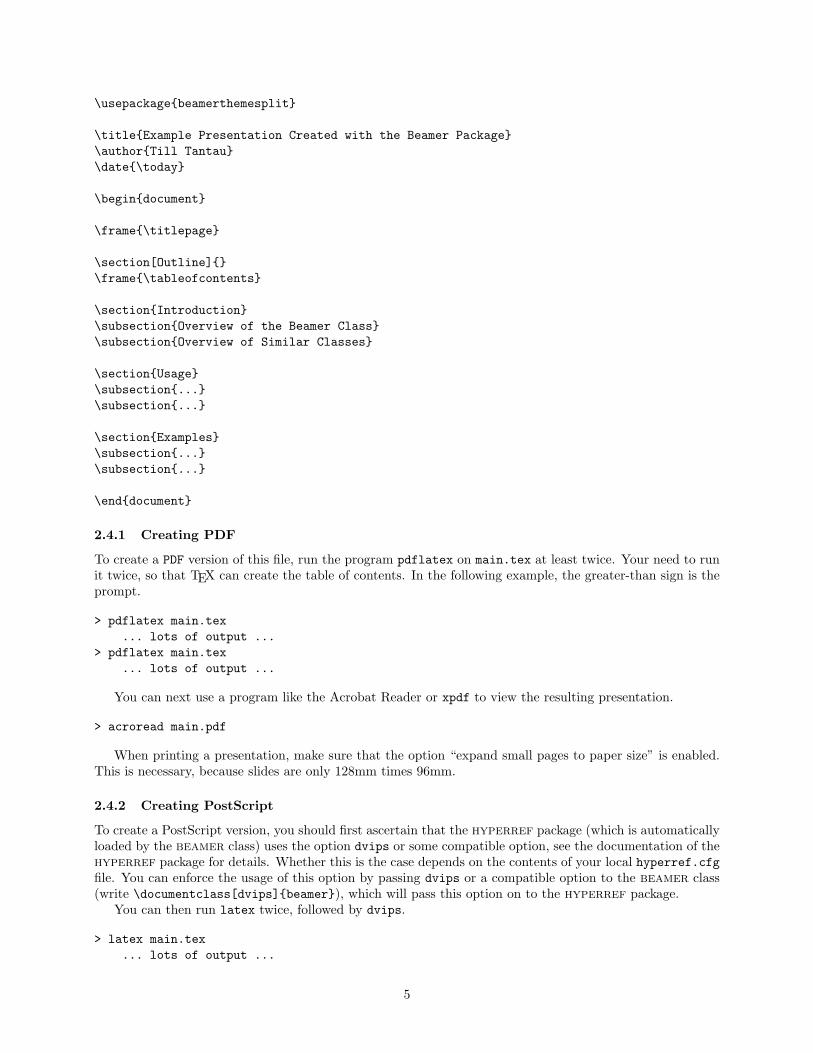
\usepackage{beamerthemesplit}
\title{Example Presentation Created with the Beamer Package}\author{Till Tantau}\date{\today}
\begin{document}
\frame{\titlepage}
\section[Outline]{}\frame{\tableofcontents}
\section{Introduction}\subsection{Overview of the Beamer Class}\subsection{Overview of Similar Classes}
\section{Usage}\subsection{...}\subsection{...}
\section{Examples}\subsection{...}\subsection{...}
\end{document}
2.4.1 Creating PDF
To create a PDF version of this file, run the program pdflatex on main.tex at least twice. Your need to runit twice, so that TEX can create the table of contents. In the following example, the greater-than sign is theprompt.
> pdflatex main.tex... lots of output ...
> pdflatex main.tex... lots of output ...
You can next use a program like the Acrobat Reader or xpdf to view the resulting presentation.
> acroread main.pdf
When printing a presentation, make sure that the option “expand small pages to paper size” is enabled.This is necessary, because slides are only 128mm times 96mm.
2.4.2 Creating PostScript
To create a PostScript version, you should first ascertain that the hyperref package (which is automaticallyloaded by the beamer class) uses the option dvips or some compatible option, see the documentation of thehyperref package for details. Whether this is the case depends on the contents of your local hyperref.cfgfile. You can enforce the usage of this option by passing dvips or a compatible option to the beamer class(write \documentclass[dvips]{beamer}), which will pass this option on to the hyperref package.
You can then run latex twice, followed by dvips.
> latex main.tex... lots of output ...
5
> latex main.tex... lots of output ...
> dvips -P pdf main.dvi
The option (-P pdf) tells dvips to use Type 1 outline fonts instead of the usual Type 3 bitmap fonts.You may wish to omit this option if there is a problem with it.
If you wish each slide to completely fill a letter-sized page, use the following commands instead:
> dvips -P pdf -tletter main.dvi -o main.temp.ps> psnup -1 -W128mm -H96mm -pletter main.temp.ps main.ps
For A4-sized paper, use:
> dvips -P pdf -ta4 main.dvi -o main.temp.ps> psnup -1 -W128mm -H96mm -pa4 main.temp.ps main.ps
In order to create a white margin around the whole page (which is sometimes useful for printing), addthe option -m 1cm to the options of psnup.
To put two or four slides on one page, use -2, respectively -4 instead of -1 as the first parameter forpsnup. In this case, you may wish to add the option -b 1cm to add a bit of space around the individualslides.
You can convert a PostScript file to a pdf file using
> ps2pdf main.ps main.pdf
2.5 Step Four: Create Frames
Once the table of contents looks satisfactory, start creating frames for your presentation. In the following,some guidelines that I stick to are given on what to put on slides and what not to put. You can certainlyignore any of these guideline, but you should be aware of it when you ignore a rule and you should be ableto justify it to yourself.
2.5.1 Guidelines on What to Put on a Frame
• A frame with too little on it is better than a frame with too much on it.
• Do not assume that everyone in the audience is an expert on the subject matter. (Remember theIgnorant Audience Law.) Even if the people listening to you should be experts, they may last haveheard about things you consider obvious several years ago. You should always have the time for a quickreminder of what exactly a “semantical complexity class” or an “ω-complete partial ordering” is.
• Never put anything on a slide that you are not going to explain during the talk, not even to impressanyone with how complicated your subject matter really is. However, you may explain things that arenot on a slide.
• Keep it simple. Typically, your audience will see a slide for less than 50 seconds. They will not havethe time to puzzle through long sentences or complicated formulas.
2.5.2 Guidelines on Text
• Put a title on each frame. The title explains the contents of the frame to people who did not follow alldetails on the slide.
• Ideally, titles on consecutive frames should “tell a story” all by themselves.
• Never use a smaller font size to “squeeze more on a frame.”
• Prefer enumerations and itemize environments over plain text. Do not use long sentences.
• Text and numbers in figures should have the same size as normal text. Illegible numbers on axes usuallyruin a chart and its message.
6
2.5.3 Guidelines on Graphics
• Put (at least) one graphic on each slide, whenever possible. Visualizations help an audience enormously.
• Usually, place graphics to the left of the text. (Use the columns environment.)
• Graphics should have the same typographic parameters as the text: Use the same fonts (at the samesize) in graphics as in the main text. A small dot in a graphic should have exactly the same size as asmall dot in a text. The line width should be the same as the stroke width used in creating the glyphsof the font. For example, an 11pt non-bold Computer Modern font has a stroke width of 0.4pt.
• While bitmap graphics, like photos, can be much more colorful than the rest of the text, vector graphicsshould follow the same “color logic” as the main text (like black = normal lines, red = hilighted parts,green = examples, blue = structure).
• Like text, you should explain everything that is shown on a graphic. Unexplained details make the au-dience puzzle whether this was something important that they have missed. Be careful when importinggraphics from a paper or some other source. They usually have much more detail than you will be ableto explain.
For technical hints on how to create graphics, see Section 5.1.
2.5.4 Guidelines on Colors
• Use colors sparsely. The prepared themes are already quite colorful (blue = structure, red = alert,green = example). If you add more colors, you should have a very good reason.
• Be careful when using bright colors on white background, especially when using green. What looks goodon your monitor may look bad during a presentation due to the different ways monitors, beamers, andprinters reproduce colors. Add lots of black to pure colors when you use them on bright backgrounds.
• Maximize contrast. Normal text should be black on white or at least something very dark on somethingvery bright. Never do things like “light green text on not-so-light green background.”
• Background shadings decrease the legibility without increasing the information content. Do not add abackground shading just because it “somehow looks nicer.”
• Inverse video (bright text on dark background) can be a problem during presentations in bright en-vironments since only a small percentage of the presentation area is light up by the beamer. Inversevideo is harder to reproduce on printouts and on transparencies.
2.5.5 Guidelines on Animations and Special Effects
• Use animations to explain the dynamics of systems, algorithms, etc.
• Do not use animations just to attract the attention of your audience. This often distracts attentionaway from the main topic of the slide.
• Do not use distracting special effects like “dissolving” slides unless you have a very good reason forusing them. If you use them, use them sparsely.
2.6 Step Five: Test Your Presentation
Always test your presentation. For this, you should vocalize or subvocalize your talk in a quite environment.Typically, this will show that your talk is too long. You should then remove parts of the presentation, suchthat it fits into the allotted time slot. Do not attempt to talk faster in order to squeeze the talk into thegiven amount of time. You are almost sure to loose your audience this way.
Do not try to create the “perfect” presentation immediately. Rather, test and retest the talk and modifyit as needed.
7

2.7 Step Six: Optionally Create a Handout
Once your talk is fixed, you can create a handout, if this seems appropriate. For this, use the class optionhandout as explained in Section 6.1. Typically, you might wish to put several handout slides on one page.See Section 2.4.2 on how to do this.
3 Frames and Overlays
A presentation consists of a series of frames. Each frame consists of a series of slides. You create a frameusing the command \frame. This command takes one parameter, namely the contents of the frame. All ofthis text that is not tagged by overlay specifications is shown on all slides of the frame.
3.1 Frame Titles
Each frame typically has an individual frame title, which is shown prominently at the top of the frame. Thistitle is created using the command \frametitle.
Command frametitle
Parameters:
1. a title for the frame.
Example: \frametitle{A Frame Title is Important.}
3.2 Commands with Overlay Specifications
The number of slides in a frame is calculated automatically from the overlay specifications inside the frame,but see below for how to specify this number explicitly. The number is chosen to be the maximum numbermentioned in any overlay specification. An overlay specification is a comma-separated list of slides and ranges.Ranges are specified like this: 2-5, which means slide two through to five. The start or the beginning of arange can be omitted. For example, 3- means “slides three, four, five, and so on” and -5 means the sameas 1-5. A complicated example is -3,6-8,10,12-15, which selected the slides 1, 2, 3, 6, 7, 8, 10, 12, 13, 14,and 15.
Overlay specifications can be written behind certain commands. If such an overlay specification is present,the command will only “take effect” on the specified slides. What exactly “take effect” means depends onthe command. Consider the following example.
\frame{\textbf{This line is bold on all three slides.}\textbf<2>{This line is bold only on the second slide.}\textbf<3>{This line is bold only on the third slide.}
}
For the command \textbf, the overlay specification causes the text to be set in boldface only on thespecified slides. On all other slides, the text is set in a normal font.
You cannot add an overlay specification to every command, but only to those listed below. However, itis quite easy to redefine a command such that it becomes “overlay specification aware.”
For the following commands, adding an overlay specification causes the command to be simply ignoredon slides that are not included in the specification: \textbf, \textit, \textsl, \textrm, \textsf, \color,\alert, \structure. If a command takes several arguments, like \color, the specification directly followsthe command as in the following example.
8
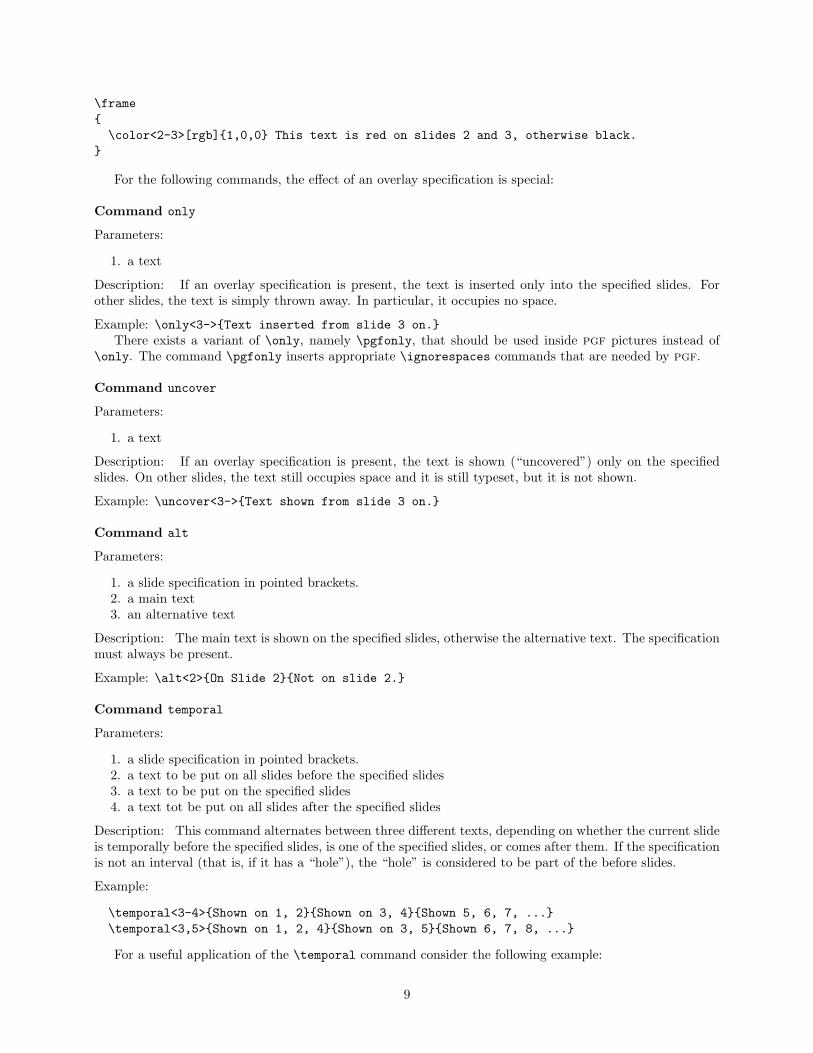
\frame{\color<2-3>[rgb]{1,0,0} This text is red on slides 2 and 3, otherwise black.
}
For the following commands, the effect of an overlay specification is special:
Command only
Parameters:
1. a text
Description: If an overlay specification is present, the text is inserted only into the specified slides. Forother slides, the text is simply thrown away. In particular, it occupies no space.
Example: \only<3->{Text inserted from slide 3 on.}There exists a variant of \only, namely \pgfonly, that should be used inside pgf pictures instead of
\only. The command \pgfonly inserts appropriate \ignorespaces commands that are needed by pgf.
Command uncover
Parameters:
1. a text
Description: If an overlay specification is present, the text is shown (“uncovered”) only on the specifiedslides. On other slides, the text still occupies space and it is still typeset, but it is not shown.
Example: \uncover<3->{Text shown from slide 3 on.}
Command alt
Parameters:
1. a slide specification in pointed brackets.2. a main text3. an alternative text
Description: The main text is shown on the specified slides, otherwise the alternative text. The specificationmust always be present.
Example: \alt<2>{On Slide 2}{Not on slide 2.}
Command temporal
Parameters:
1. a slide specification in pointed brackets.2. a text to be put on all slides before the specified slides3. a text to be put on the specified slides4. a text tot be put on all slides after the specified slides
Description: This command alternates between three different texts, depending on whether the current slideis temporally before the specified slides, is one of the specified slides, or comes after them. If the specificationis not an interval (that is, if it has a “hole”), the “hole” is considered to be part of the before slides.
Example:
\temporal<3-4>{Shown on 1, 2}{Shown on 3, 4}{Shown 5, 6, 7, ...}\temporal<3,5>{Shown on 1, 2, 4}{Shown on 3, 5}{Shown 6, 7, 8, ...}
For a useful application of the \temporal command consider the following example:
9

\def\colorize<#1>{%\temporal<#1>{\color{structureshaded}}{\color{black}}{\color{shaded}}}
\frame{\begin{itemize}\colorize<1> \item First item.\colorize<2> \item Second item.\colorize<3> \item Third item.\colorize<4> \item Fourth item.
\end{itemize}}
Command item
Description: Adding an overlay specification to an item in a list causes this item to be uncovered only on thespecified slides. This is useful for creating lists that are uncovered piecewise. Note that you are not requiredto stick to an order in which items are uncovered.
Example:
\frame{\begin{itemize}\item<1-> First point, shown on all slides.\item<2-> Second point, shown on slide 2 and later.\item<2-> Third point, also shown on slide 2 and later.\item<3-> Fourth point, shown on slide 3.\end{itemize}
}
\frame{\begin{enumerate}\item<3->[0.] A zeroth point, shown at the very end.\item<1-> The first an main point.\item<2-> The second point.\end{enumerate}
}
In the following concluding example, a list is uncovered item-wise. The last uncovered item is furthermorehilighted.
\frame{The advantages of the beamer class are\begin{enumerate}\item<1-> \alert<1>{It is easy to use.}\item<2-> \alert<2>{It is easy to extend.}\item<3-> \alert<3>{It works together with \texttt{pdflatex}.}\item<4-> \alert<4>{It has nice overlays.}\end{enumerate}
}
10
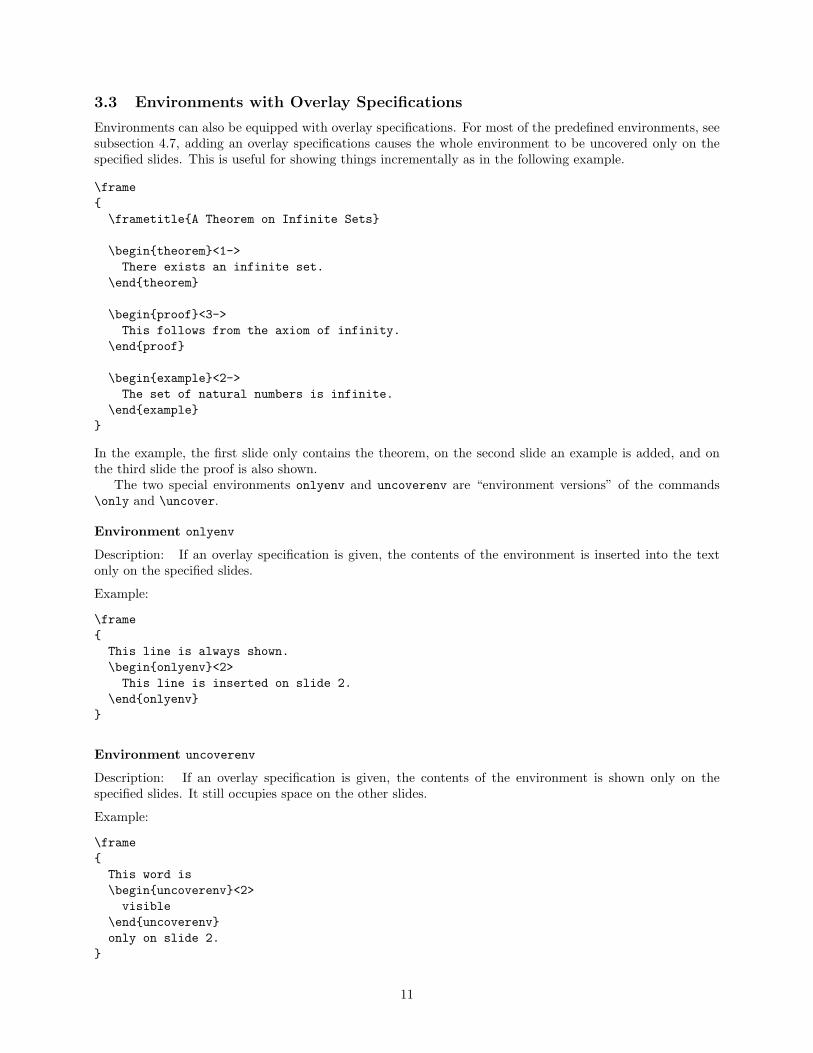
3.3 Environments with Overlay Specifications
Environments can also be equipped with overlay specifications. For most of the predefined environments, seesubsection 4.7, adding an overlay specifications causes the whole environment to be uncovered only on thespecified slides. This is useful for showing things incrementally as in the following example.
\frame{\frametitle{A Theorem on Infinite Sets}
\begin{theorem}<1->There exists an infinite set.
\end{theorem}
\begin{proof}<3->This follows from the axiom of infinity.
\end{proof}
\begin{example}<2->The set of natural numbers is infinite.
\end{example}}
In the example, the first slide only contains the theorem, on the second slide an example is added, and onthe third slide the proof is also shown.
The two special environments onlyenv and uncoverenv are “environment versions” of the commands\only and \uncover.
Environment onlyenv
Description: If an overlay specification is given, the contents of the environment is inserted into the textonly on the specified slides.
Example:
\frame{This line is always shown.\begin{onlyenv}<2>This line is inserted on slide 2.
\end{onlyenv}}
Environment uncoverenv
Description: If an overlay specification is given, the contents of the environment is shown only on thespecified slides. It still occupies space on the other slides.
Example:
\frame{This word is\begin{uncoverenv}<2>visible
\end{uncoverenv}only on slide 2.
}
11
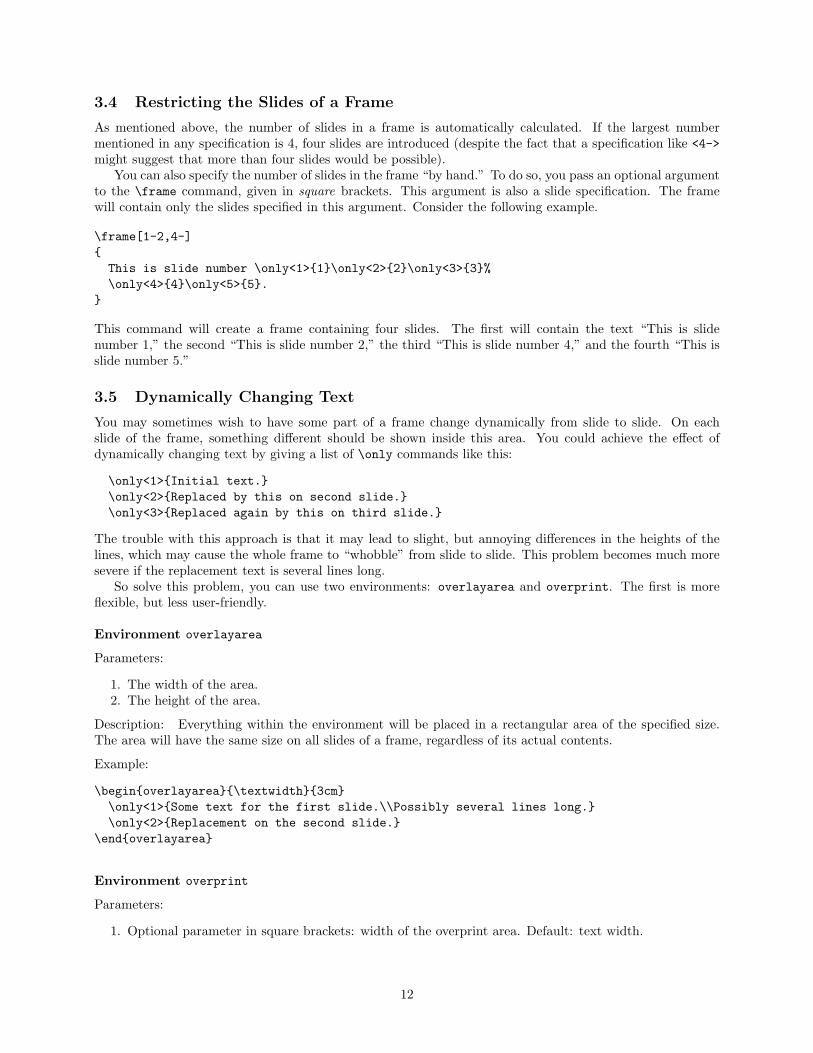
3.4 Restricting the Slides of a Frame
As mentioned above, the number of slides in a frame is automatically calculated. If the largest numbermentioned in any specification is 4, four slides are introduced (despite the fact that a specification like <4->might suggest that more than four slides would be possible).
You can also specify the number of slides in the frame “by hand.” To do so, you pass an optional argumentto the \frame command, given in square brackets. This argument is also a slide specification. The framewill contain only the slides specified in this argument. Consider the following example.
\frame[1-2,4-]{This is slide number \only<1>{1}\only<2>{2}\only<3>{3}%\only<4>{4}\only<5>{5}.
}
This command will create a frame containing four slides. The first will contain the text “This is slidenumber 1,” the second “This is slide number 2,” the third “This is slide number 4,” and the fourth “This isslide number 5.”
3.5 Dynamically Changing Text
You may sometimes wish to have some part of a frame change dynamically from slide to slide. On eachslide of the frame, something different should be shown inside this area. You could achieve the effect ofdynamically changing text by giving a list of \only commands like this:
\only<1>{Initial text.}\only<2>{Replaced by this on second slide.}\only<3>{Replaced again by this on third slide.}
The trouble with this approach is that it may lead to slight, but annoying differences in the heights of thelines, which may cause the whole frame to “whobble” from slide to slide. This problem becomes much moresevere if the replacement text is several lines long.
So solve this problem, you can use two environments: overlayarea and overprint. The first is moreflexible, but less user-friendly.
Environment overlayarea
Parameters:
1. The width of the area.2. The height of the area.
Description: Everything within the environment will be placed in a rectangular area of the specified size.The area will have the same size on all slides of a frame, regardless of its actual contents.
Example:
\begin{overlayarea}{\textwidth}{3cm}\only<1>{Some text for the first slide.\\Possibly several lines long.}\only<2>{Replacement on the second slide.}
\end{overlayarea}
Environment overprint
Parameters:
1. Optional parameter in square brackets: width of the overprint area. Default: text width.
12
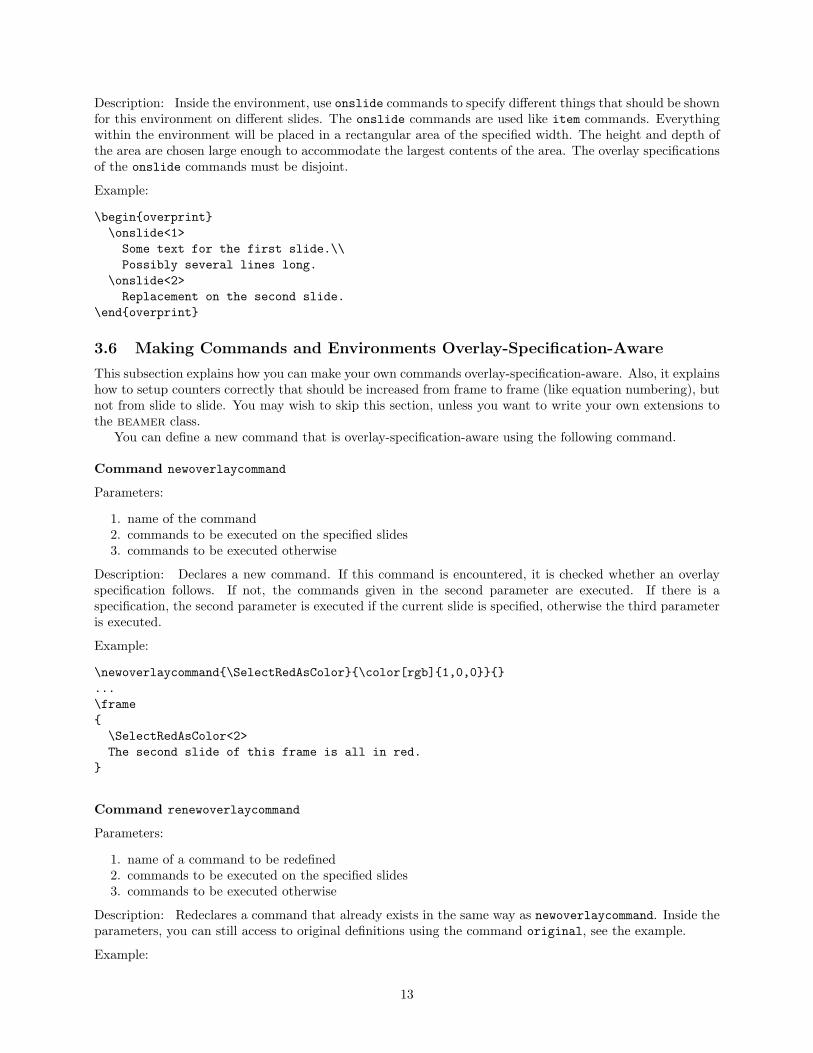
Description: Inside the environment, use onslide commands to specify different things that should be shownfor this environment on different slides. The onslide commands are used like item commands. Everythingwithin the environment will be placed in a rectangular area of the specified width. The height and depth ofthe area are chosen large enough to accommodate the largest contents of the area. The overlay specificationsof the onslide commands must be disjoint.
Example:
\begin{overprint}\onslide<1>
Some text for the first slide.\\Possibly several lines long.
\onslide<2>Replacement on the second slide.
\end{overprint}
3.6 Making Commands and Environments Overlay-Specification-Aware
This subsection explains how you can make your own commands overlay-specification-aware. Also, it explainshow to setup counters correctly that should be increased from frame to frame (like equation numbering), butnot from slide to slide. You may wish to skip this section, unless you want to write your own extensions tothe beamer class.
You can define a new command that is overlay-specification-aware using the following command.
Command newoverlaycommand
Parameters:
1. name of the command2. commands to be executed on the specified slides3. commands to be executed otherwise
Description: Declares a new command. If this command is encountered, it is checked whether an overlayspecification follows. If not, the commands given in the second parameter are executed. If there is aspecification, the second parameter is executed if the current slide is specified, otherwise the third parameteris executed.
Example:
\newoverlaycommand{\SelectRedAsColor}{\color[rgb]{1,0,0}}{}...\frame{\SelectRedAsColor<2>The second slide of this frame is all in red.
}
Command renewoverlaycommand
Parameters:
1. name of a command to be redefined2. commands to be executed on the specified slides3. commands to be executed otherwise
Description: Redeclares a command that already exists in the same way as newoverlaycommand. Inside theparameters, you can still access to original definitions using the command original, see the example.
Example:
13
\renewoverlaycommand{\tiny}{\original{\tiny}}{}...\frame{\tiny<2>This text is tiny on slide 2.
}
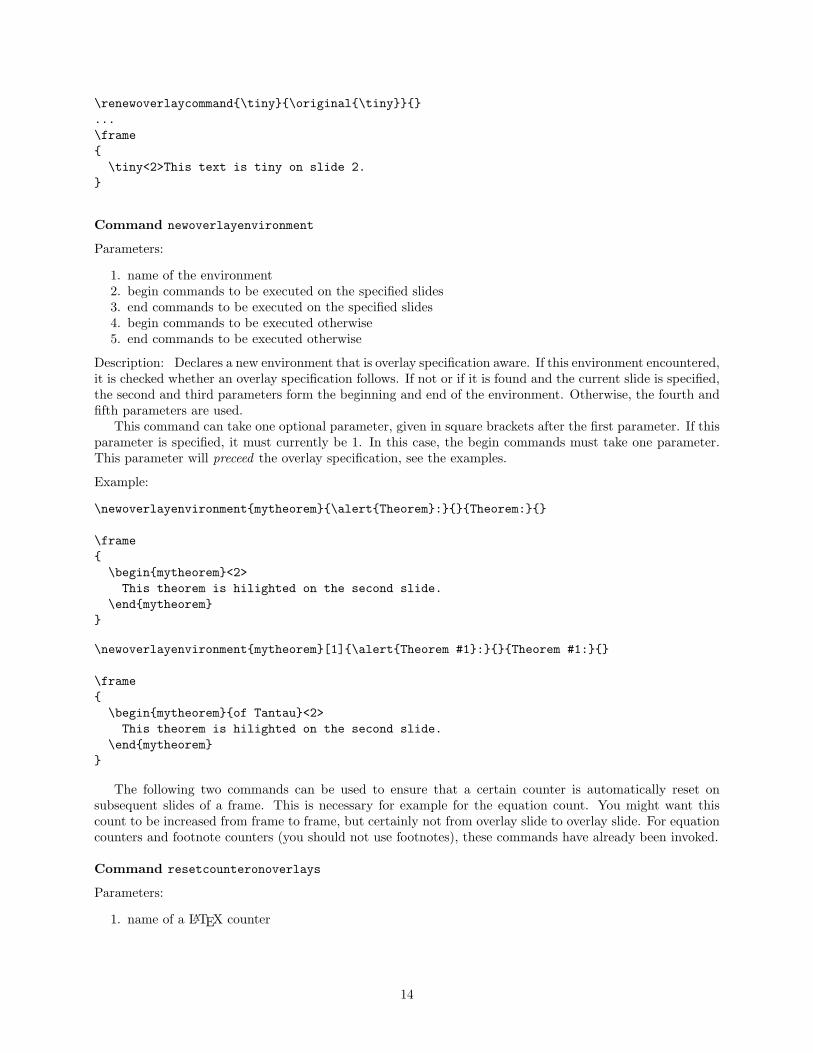
Command newoverlayenvironment
Parameters:
1. name of the environment2. begin commands to be executed on the specified slides3. end commands to be executed on the specified slides4. begin commands to be executed otherwise5. end commands to be executed otherwise
Description: Declares a new environment that is overlay specification aware. If this environment encountered,it is checked whether an overlay specification follows. If not or if it is found and the current slide is specified,the second and third parameters form the beginning and end of the environment. Otherwise, the fourth andfifth parameters are used.
This command can take one optional parameter, given in square brackets after the first parameter. If thisparameter is specified, it must currently be 1. In this case, the begin commands must take one parameter.This parameter will preceed the overlay specification, see the examples.
Example:
\newoverlayenvironment{mytheorem}{\alert{Theorem}:}{}{Theorem:}{}
\frame{\begin{mytheorem}<2>This theorem is hilighted on the second slide.
\end{mytheorem}}
\newoverlayenvironment{mytheorem}[1]{\alert{Theorem #1}:}{}{Theorem #1:}{}
\frame{\begin{mytheorem}{of Tantau}<2>This theorem is hilighted on the second slide.
\end{mytheorem}}
The following two commands can be used to ensure that a certain counter is automatically reset onsubsequent slides of a frame. This is necessary for example for the equation count. You might want thiscount to be increased from frame to frame, but certainly not from overlay slide to overlay slide. For equationcounters and footnote counters (you should not use footnotes), these commands have already been invoked.
Command resetcounteronoverlays
Parameters:
1. name of a LATEX counter
14
Description: After you have invoked this command, the value of the specified counter will be the same onall slides of every frame.
Example: \resetcounteronoverlays{equation}
Command resetcountonoverlays
Parameters:
1. name of a TEX count register
Description: The same as resetcounteronoverlays, except that this command should be used with countsthat have been created using the TEX primitive newcount instead of LATEX’s definecounter.
Example:
\newcount\mycount\resetcountonoverlays{mycount}
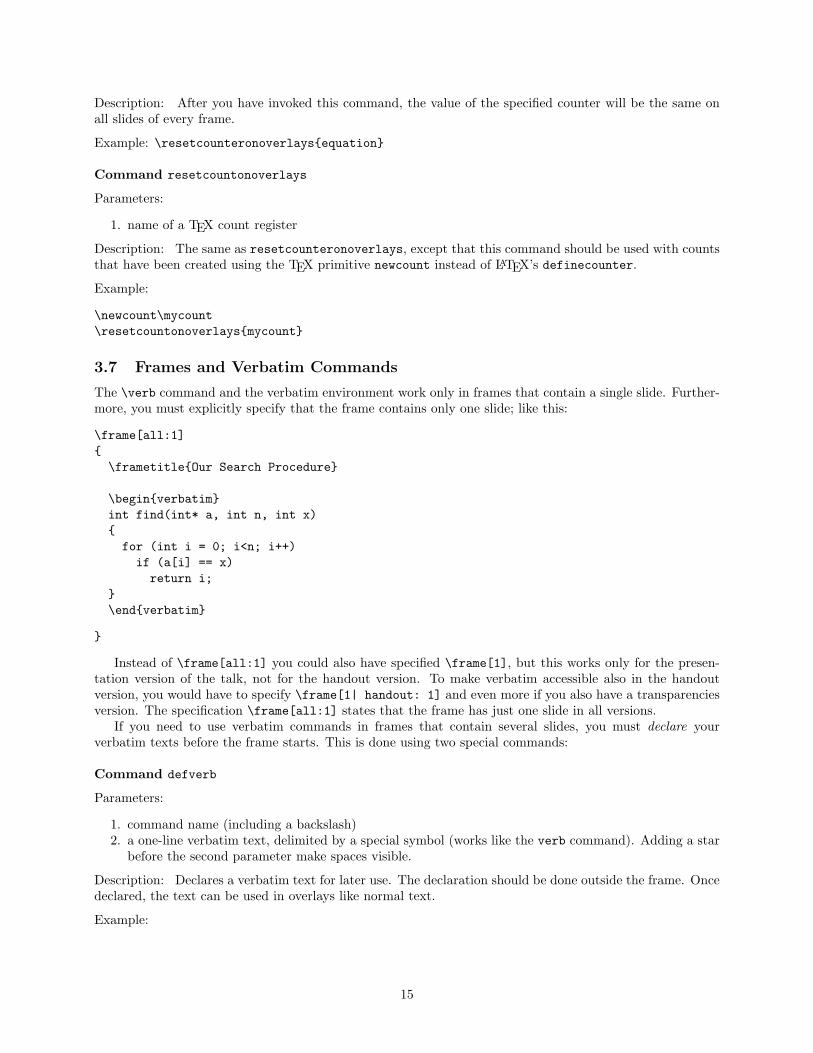
3.7 Frames and Verbatim Commands
The \verb command and the verbatim environment work only in frames that contain a single slide. Further-more, you must explicitly specify that the frame contains only one slide; like this:
\frame[all:1]{\frametitle{Our Search Procedure}
\begin{verbatim}int find(int* a, int n, int x){for (int i = 0; i<n; i++)if (a[i] == x)return i;
}\end{verbatim}
}
Instead of \frame[all:1] you could also have specified \frame[1], but this works only for the presen-tation version of the talk, not for the handout version. To make verbatim accessible also in the handoutversion, you would have to specify \frame[1| handout: 1] and even more if you also have a transparenciesversion. The specification \frame[all:1] states that the frame has just one slide in all versions.
If you need to use verbatim commands in frames that contain several slides, you must declare yourverbatim texts before the frame starts. This is done using two special commands:
Command defverb
Parameters:
1. command name (including a backslash)2. a one-line verbatim text, delimited by a special symbol (works like the verb command). Adding a star
before the second parameter make spaces visible.
Description: Declares a verbatim text for later use. The declaration should be done outside the frame. Oncedeclared, the text can be used in overlays like normal text.
Example:
15
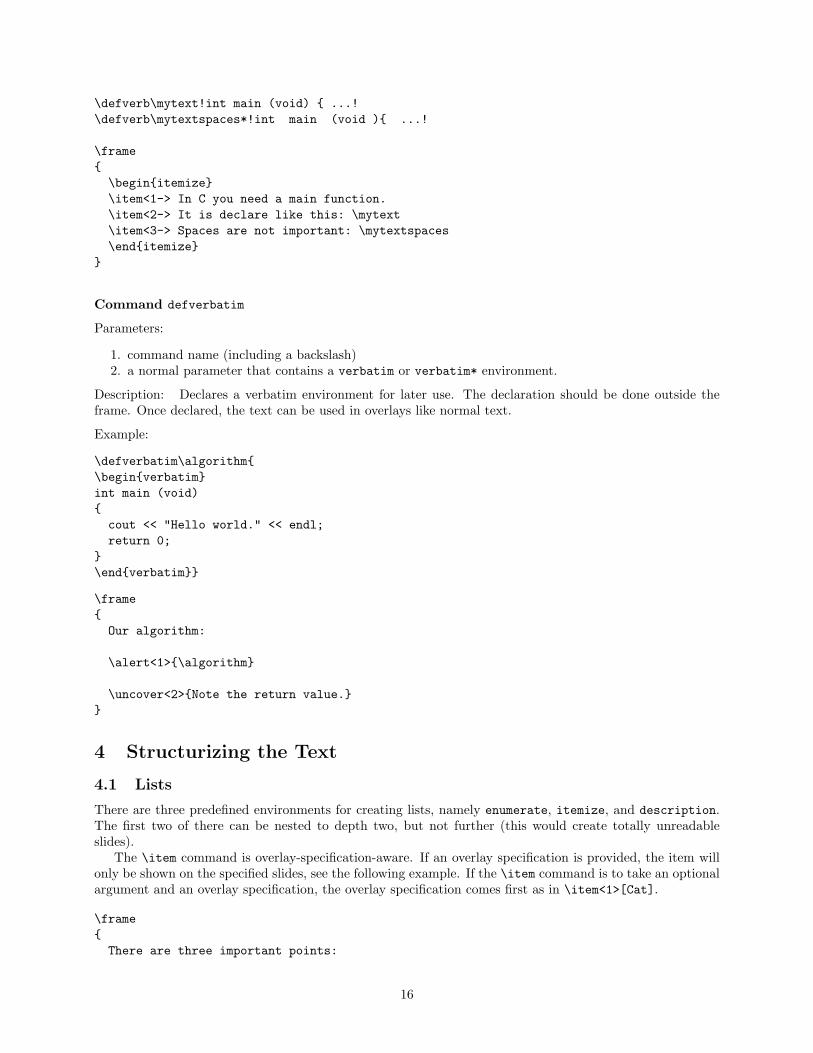
\defverb\mytext!int main (void) { ...!\defverb\mytextspaces*!int main (void ){ ...!
\frame{\begin{itemize}\item<1-> In C you need a main function.\item<2-> It is declare like this: \mytext\item<3-> Spaces are not important: \mytextspaces\end{itemize}
}
Command defverbatim
Parameters:
1. command name (including a backslash)2. a normal parameter that contains a verbatim or verbatim* environment.
Description: Declares a verbatim environment for later use. The declaration should be done outside theframe. Once declared, the text can be used in overlays like normal text.
Example:
\defverbatim\algorithm{\begin{verbatim}int main (void){cout << "Hello world." << endl;return 0;
}\end{verbatim}}
\frame{Our algorithm:
\alert<1>{\algorithm}
\uncover<2>{Note the return value.}}
4 Structurizing the Text
4.1 Lists
There are three predefined environments for creating lists, namely enumerate, itemize, and description.The first two of there can be nested to depth two, but not further (this would create totally unreadableslides).
The \item command is overlay-specification-aware. If an overlay specification is provided, the item willonly be shown on the specified slides, see the following example. If the \item command is to take an optionalargument and an overlay specification, the overlay specification comes first as in \item<1>[Cat].
\frame{There are three important points:
16
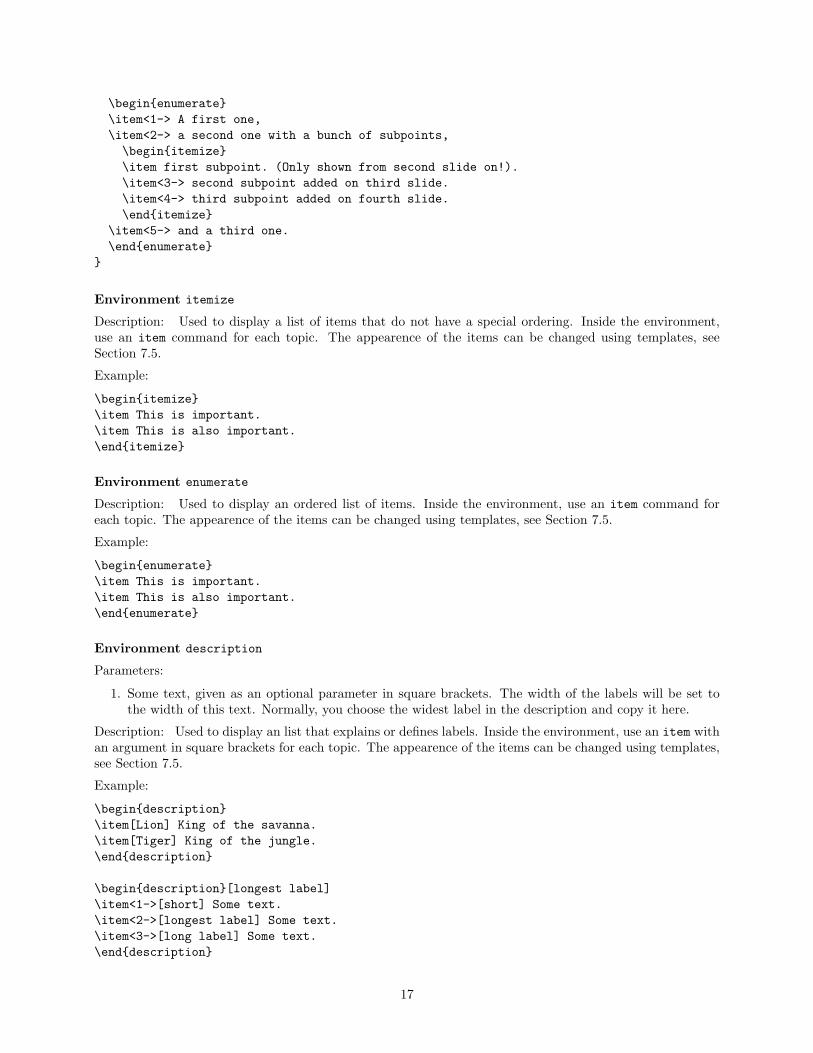
\begin{enumerate}\item<1-> A first one,\item<2-> a second one with a bunch of subpoints,\begin{itemize}\item first subpoint. (Only shown from second slide on!).\item<3-> second subpoint added on third slide.\item<4-> third subpoint added on fourth slide.\end{itemize}
\item<5-> and a third one.\end{enumerate}
}
Environment itemize
Description: Used to display a list of items that do not have a special ordering. Inside the environment,use an item command for each topic. The appearence of the items can be changed using templates, seeSection 7.5.
Example:
\begin{itemize}\item This is important.\item This is also important.\end{itemize}
Environment enumerate
Description: Used to display an ordered list of items. Inside the environment, use an item command foreach topic. The appearence of the items can be changed using templates, see Section 7.5.
Example:
\begin{enumerate}\item This is important.\item This is also important.\end{enumerate}
Environment description
Parameters:
1. Some text, given as an optional parameter in square brackets. The width of the labels will be set tothe width of this text. Normally, you choose the widest label in the description and copy it here.
Description: Used to display an list that explains or defines labels. Inside the environment, use an item withan argument in square brackets for each topic. The appearence of the items can be changed using templates,see Section 7.5.
Example:
\begin{description}\item[Lion] King of the savanna.\item[Tiger] King of the jungle.\end{description}
\begin{description}[longest label]\item<1->[short] Some text.\item<2->[longest label] Some text.\item<3->[long label] Some text.\end{description}
17
4.2 Sections and Subsections
You can structurize your text using the commands \section and \subsection. Unlike standard LATEX,these commands will not create a heading at the position where you use them. Rather, they will add anentry to the table of contents and also to the navigation bars.
In order to create a line break in the table of contents (usually not a good idea), you can use the command\breakhere. Note that the standard command \\ does not work.
Command section
Parameters:
1. (optional, in square brackets) text to be shown in horizontal navigation bars2. text to be shown in the table of contents; if empty, no entry is created.
Description: Starts a section. No heading is created, the section name is only shown in the table of contentsand in the navigation bar. If the main parameter is empty, but the parameter in square brackets is not, anavigation entry is created, but no entry in the table of contents. This is useful for sections like a “table ofcontents section.”
Example: \section[Summary]{Summary of Main Results} or \section[Outline]{}
Command subsection
Parameters:
1. (optional, in square brackets) text to be shown in horizontal navigation bars2. text to be shown in the table of contents; if empty, no entry is created.
Description: Starts a subsection. No heading is created, the subsection name is only shown in the table ofcontents and in the navigation bar. If the main parameter is empty, but the parameter in square brackets isnot, a navigation entry is created, but no entry in the table of contents.
Example: \subsection{Some Subsection}
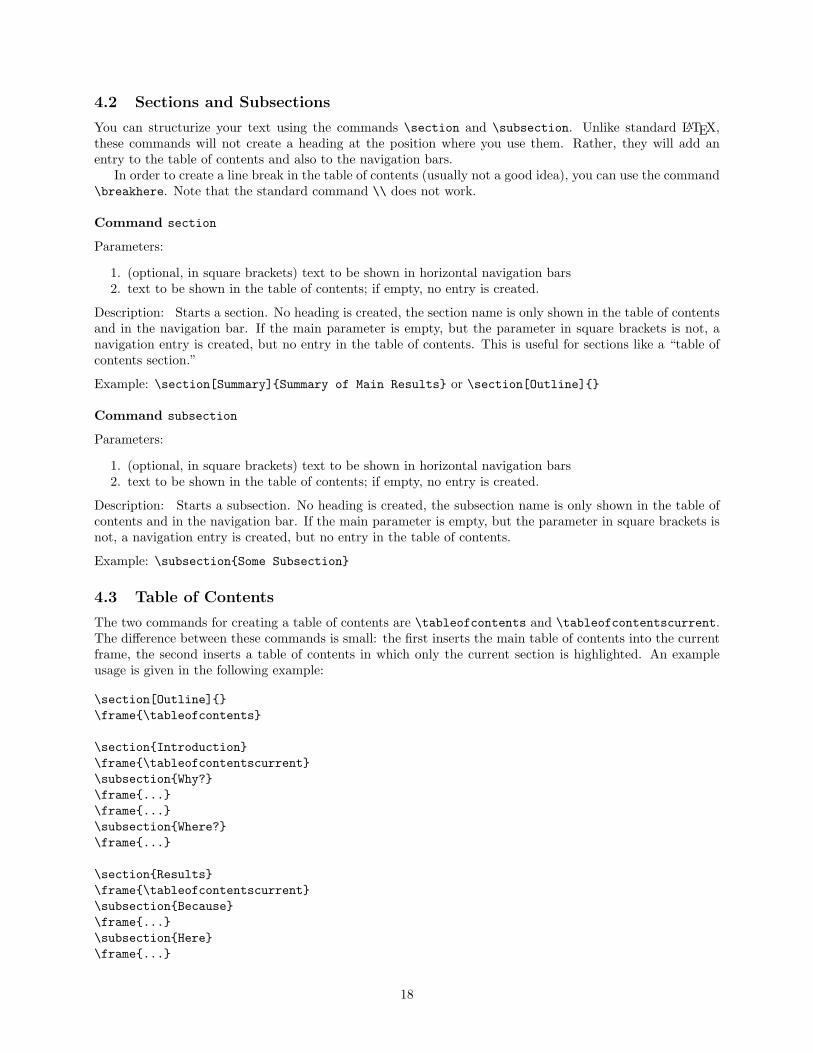
4.3 Table of Contents
The two commands for creating a table of contents are \tableofcontents and \tableofcontentscurrent.The difference between these commands is small: the first inserts the main table of contents into the currentframe, the second inserts a table of contents in which only the current section is highlighted. An exampleusage is given in the following example:
\section[Outline]{}\frame{\tableofcontents}
\section{Introduction}\frame{\tableofcontentscurrent}\subsection{Why?}\frame{...}\frame{...}\subsection{Where?}\frame{...}
\section{Results}\frame{\tableofcontentscurrent}\subsection{Because}\frame{...}\subsection{Here}\frame{...}
18
4.4 Title Page
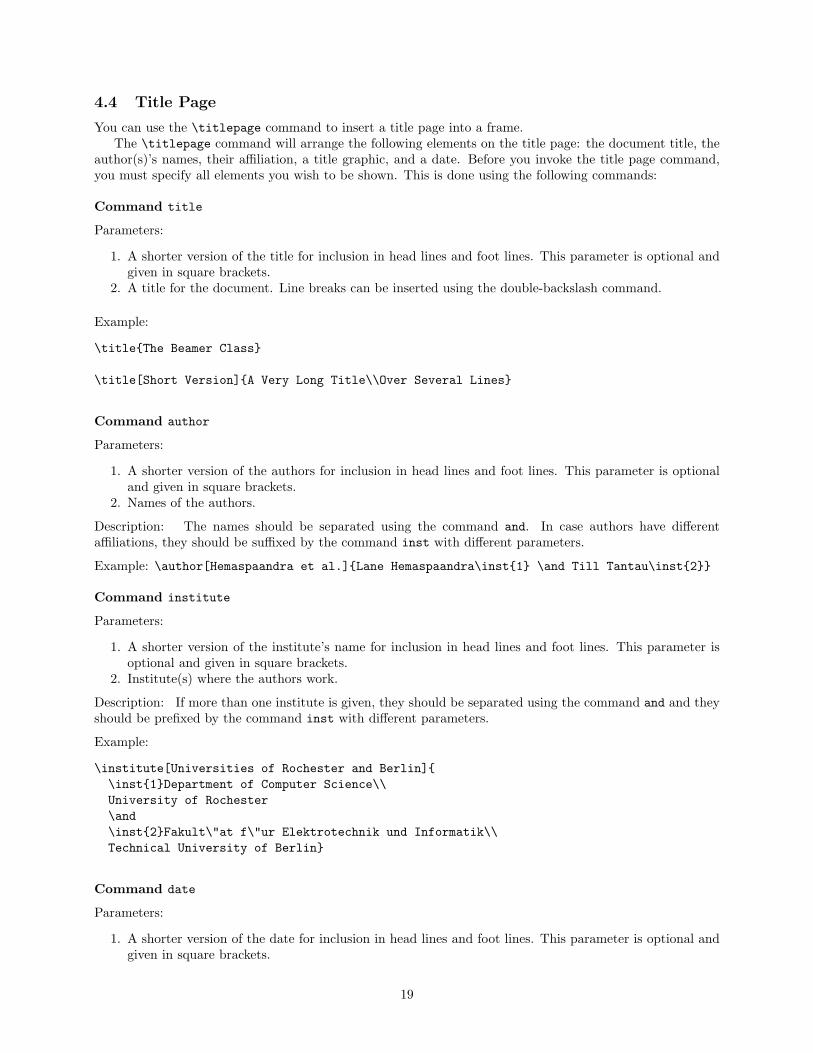
You can use the \titlepage command to insert a title page into a frame.The \titlepage command will arrange the following elements on the title page: the document title, the
author(s)’s names, their affiliation, a title graphic, and a date. Before you invoke the title page command,you must specify all elements you wish to be shown. This is done using the following commands:
Command title
Parameters:
1. A shorter version of the title for inclusion in head lines and foot lines. This parameter is optional andgiven in square brackets.
2. A title for the document. Line breaks can be inserted using the double-backslash command.
Example:
\title{The Beamer Class}
\title[Short Version]{A Very Long Title\\Over Several Lines}
Command author
Parameters:
1. A shorter version of the authors for inclusion in head lines and foot lines. This parameter is optionaland given in square brackets.
2. Names of the authors.
Description: The names should be separated using the command and. In case authors have differentaffiliations, they should be suffixed by the command inst with different parameters.
Example: \author[Hemaspaandra et al.]{Lane Hemaspaandra\inst{1} \and Till Tantau\inst{2}}
Command institute
Parameters:
1. A shorter version of the institute’s name for inclusion in head lines and foot lines. This parameter isoptional and given in square brackets.
2. Institute(s) where the authors work.
Description: If more than one institute is given, they should be separated using the command and and theyshould be prefixed by the command inst with different parameters.
Example:
\institute[Universities of Rochester and Berlin]{\inst{1}Department of Computer Science\\University of Rochester\and\inst{2}Fakult\"at f\"ur Elektrotechnik und Informatik\\Technical University of Berlin}
Command date
Parameters:
1. A shorter version of the date for inclusion in head lines and foot lines. This parameter is optional andgiven in square brackets.
19
2. A text to be shown as date or occasion at which the talk was held.
Example: \date{\today} or \date[STACS 2003]{STACS Conference, 2003}.
Command titlegraphic
Parameters:
1. A text to be shown as title graphic. Typically, a picture environment is used as text.
Example: \titlegraphic{\pgfuseimage{titlegraphic}}
4.5 Columns
Three environments are used to create columns on a slide. Columns are especially useful for placing a graphicnext to a description/explanation. The main environment for creating columns is called columns. Inside thisenvironment, you can place several column environments. Each will create a new column.
Environment columns
Description: A multi-column area. Inside the environment you should place only column environments.
Example:
\begin{columns}\begin{column}{5cm}First column.
\end{column}\begin{column}{5cm}Second column.
\end{column}\end{columns}
Environment columnsonlytextwidth
Description: This command has the same effect as columns, except that the columns will not occupy thewhole page width, but only the text width.
Environment column
Parameters:
1. The width of the column.
Description: Creates a single column of the specified width. The column is centered vertically relative tothe other columns.
4.6 Bibliography
You can use the bibliography environment and the \cite commands of LATEX in a beamer presentation.However, there are a few things to keep in mind:
• It is a bad idea to present a long bibliography in a beamer presentation. Present only very few references.
• Present references only if they are intended as “further reading,” for example at the end of a lecture.
• Using the \cite commands can be confusing since the audience has little chance of remembering thecitations. If you cite the references, always cite them with full author name and year like “[Tantau,2003]” instead of something like “[2,4]” or “[Tan01,NT02]”.
20

Keeping the above warnings in mind, proceed as follows to create the bibliography:For a beamer presentation, you will typically have to typeset your bibliography items partly “by hand.”
Nevertheless, you can use bibtex to create a “first approximation” of the bibliography. Copy the content ofthe file main.bbl into your presentation. If you are not familiar with bibtex, you may wish to consult itsdocumentation. It is a powerful tool for creating high-quality citations.
Using bibtex or just your editor, you place your bibliographic references into an environment calledthebibliography. This (standard LATEX) environment takes one parameter, which should be the longestbibitem label in the following list of bibliographic entries.
Environment thebibliography
Parameters:
1. Text of the longest label. Inside the environment, use one bibitem command for each reference.
Description: Inserts a bibliography into the current frame. Must be placed inside a frame. If the bibli-ography does not fit on one frame, you should split it (create a new frame and a second thebibliographyenvironment). Even better, you should reconsider whether it is a good idea to present so many references.
Example:
\frame{\frametitle{For Further Reading}
\begin{thebibliography}{Dijkstra, 1982}\bibitem[Solomaa, 1973]{Solomaa1973}A.~Salomaa.\newblock {\em Formal Languages}.\newblock Academic Press, 1973.
\bibitem[Dijkstra, 1982]{Dijkstra1982}E.~Dijkstra.\newblock Smoothsort, an alternative for sorting in situ.\newblock {\em Science of Computer Programming}, 1(3):223--233, 1982.
\end{thebibliography}}
The parameter of the thebibliography environment is used to determine the indent of the list. However,several templates for the typesetting of the bibliography (see Section 7.5.4) ignore this parameter since theyreplace the references by a symbol.
Inside the thebibliography environment, use a (standard LATEX) \bibitem command for each referenceitem. Inside each item, use a (standard LATEX) \newblock command to separate the authors’s names, thetitle, the book/journal reference, and any notes. Each of these commands may introduce a new line or coloror other formatting, as specified by the template for bibliographies.
Command bibitem
Parameters:
1. The text to be inserted into the text when the item is cited in the presentation (optional in squarebrackets). For a beamer presentation, this should usually be as long as possible.
2. A label to be used with the cite commands.
Description: Adds a reference item to the bibliography. Use newblock commands to separate the authors’snames, the title, the book/journal reference, and any notes.
Example:
21
\bibitem[Dijkstra, 1982]{Dijkstra1982}E.~Dijkstra.\newblock Smoothsort, an alternative for sorting in situ.\newblock {\em Science of Computer Programming}, 1(3):223--233, 1982.
Note that, unlike normal LATEX, the default template for the bibliography does not repeat the citation text(like “[Dijkstra, 1982]”) before each item in the bibliography. Instead, a cute, small article symbol is drawn.The rationale is that the audience will not be able to remember any abbreviated citation texts till the end ofthe talk. If you really insist on using abbreviations, you can use the command beamertemplatetextbibitemsto restore the default bevahior, see also Section 7.5.4.
4.7 Predefined Environments and Commands
The beamer class predefines a number of useful environments and commands. Using these commands makesis easy to change the appearance of a document by changing the theme.
Command alert
Parameters:
1. a text to be hilighted.
Description: The given text is hilighted, typically be coloring the text red. If an overlay specification isgiven, the command only has an effect on the specified slides.
Example: This is \alert{important}.
Command structure
Parameters:
1. a text to be marked as part of the structure of the text.
Description: The given text is marked as part of the structure, typically be coloring the text in the structurecolor. If an overlay specification is given, the command only has an effect on the specified slides.
Example: \structure{Paragraph Heading.}
Environment block
Parameters:
1. a block title
Description: Inserts a block, like a definition or a theorem, with a title. If an overlay specification is given,the block is shown only on the specified slides. In the example, the definition is shown only from slide 3onwards.
Example:
\begin{block}{Definition}<3->A \alert{set} consists of elements.
\end{block}
Environment alertblock
Parameters:
1. a block title
22
Description: Inserts a block whose title is hilighted. If an overlay specification is given, the block is shownonly on the specified slides.
Example:
\begin{alertblock}{Wrong Theorem}$1=2$.
\end{alertblock}
Environment exampleblock
Parameters:
1. a block title
Description: Inserts a block that is supposed to be an example. If an overlay specification is given, the blockis shown only on the specified slides.
Example:
\begin{exampleblock}{Example}The set $\{1,2,3,5\}$ has four elements.
\end{exampleblock}
Predefined English block environments, that is, block environments with fixed title, are: Theorem, Proof,Corollary, Fact, Example, and Examples. You can also use these environments with a lowercase first letter,the result is the same. The following German block environments are also predefined: Problem, Loesung,Definition, Satz, Beweis, Folgerung, Lemma, Fakt, Beispiel, and Beispiele. See the following examplefor their usage
\frame{\frametitle{A Theorem on Infinite Sets}
\begin{theorem}<1->There exists an infinite set.
\end{theorem}
\begin{proof}<2->This follows from the axiom of infinity.
\end{proof}
\begin{example}<3->The set of natural numbers is infinite.
\end{example}}
5 Graphics, Animations, and Special Effects
5.1 Graphics
Graphics can often convey concepts or ideas much more efficiently than text: A picture can say more thana thousand words. (Although, sometimes a word can say more than a thousand pictures.) In the following,the advantages and disadvantages of different possible ways of creating graphics for beamer presentations arediscussed.
23
5.1.1 Including External Graphic Files
One way of creating graphics for a presentation is to use an external program, like xfig or the Gimp. Theseprograms have an option to export a graphic files in a format that can then be inserted into the presentation.
The main advantage is:
• You can use a powerful program to create a high-quality graphic.
The main disadvantages are:
• You have to worry about many files. Typically there are at least two for each presentation, namely theprogram’s graphic data file and the exported graphic file in a format that can be read by TEX.
• Changing the graphic using the program does not automatically change the graphic in the presentation.Rather, you must reexport the graphic and rerun LATEX.
• It may be difficult to get the line width, fonts, and font sizes right.
• Creating formulas as part of graphics is often difficult or impossible.
In principle, you can use all the standard LATEX commands for inserting graphics, like the command\includegraphic. However, it may be advisable to use the special commands from the pgf package insteadfor this particular purpose. The reason is that \includegraphic will put a copy of the graphic into the fileupon each invocation. In particular, if a frame includes a graphic and shows this graphic on ten slides, thenten copies of the possibly large graphic file will be inserted into the presentation file. This can result in hugefiles.
The pgf package offers a solution to this (but, currently, only if you use pdflatex): There, you mustfirst declare every graphic. Once you have done this, you can use the graphic as often as you want and thegraphic data will be put only once into the .pdf file. Furthermore, if you use latex instead of pdflatex,the pgf package will automatically search for a graphic file with the extension .eps instead of the extensionsappropriate for pdflatex.
The pgf commands are used as follows: To declare an image, you write, somewhere early in your file,
\pgfdeclareimage{icon}{9pt}{10pt}{iconfile}
The first parameter is a string by which you can refer to the image later on. The second two parameters arethe width and height of the image, although one (but not both) can be omitted in which case the missingvalue is computed automatically such that the image’s aspect ratio remains correct. The last parameter isthe graphic file name without the extension. Depending on whether a pdf or a PostScript file is created,the package will try appropriate extensions automatically (.eps for normal LATEX, .png, .jpg, and .pdf forpdflatex).
To use a previously declared image, just write
\pgfuseimage{icon}
For more details, consult the pgf User Manual.
5.1.2 Inlining Graphic Commands
A different way of creating graphics is to insert graphic drawing commands directly into your LATEX file.There are numerous packages that help you do this. They have various degrees of sophistication. Inlininggraphics suffers from none of the disadvantages mentioned above for including external graphic files, but themain disadvantage is that it is often hard to use these packages. In some sense, you “program” your graphics,which requires a bit of practice.
When choosing a graphic package, there are a few things to keep in mind:
• Many packages produce poor quality graphics. This is especially true of the standard picture envi-ronment of LATEX.
• Powerful packages that produce high-quality graphics often do not work together with pdflatex.
24
• The most powerful and easiest-to-use package around, namely pstricks, does not work together withpdflatex and this is a fundamental problem. Due to the fundamental differences between pdf andPostScript, it is not possible to write a “pdflatex backend for pstricks.”
A solution to the above problem (though not necessarily the best) is to use the pgf package. It produceshigh-quality graphics and works together with pdflatex, but also with normal latex. It is not as powerfulas pstricks (as pointed out above, this is because of rather fundamental reasons) and not as easy to use,but it should be sufficient in most cases.
5.2 Animations
There are two ways of creating animations. One way is to use the overlay commands of the beamer packageto create a series of slides that, when shown in rapid succession, present an animation. This is a flexibleapproach, but such animations will typically be rather static since it will take at least one second to advancefrom one slide to the next. This approach is mostly useful for animations where you want to explain each“picture” of the animation.
A second way is to include an animation generated using some external program (like a renderer) andto then use the capabilities of the presentation program (like the Acrobat Reader) to show the animation.Unfortunately, currently there is no portable way of doing this and even the Acrobat Reader does not supportthis feature on all platforms.
5.3 Slide Transitions
pdf in general, and the Acrobat Reader in particular, offer a standardized way of defining slide transitions.Such a transition is a visual effect that is used to show the slide. For example, instead of just showing theslide immediately, whatever was shown before might slowly “dissolve” and be replaced by the slide’s content.
Slide transitions should be used with great care. Most of the time, they only distract. However, theycan be useful in a limited number of situations: For example, you might show a young boy on a slide andmight wish to dissolve this slide into slide showing a grown man instead. In this case, the dissolving givesthe audience visual feedback that the young boy “slowly becomes” the man.
There are a number of commands that can be used to specify what effect should be used when the currentslide is presented. Consider the following example:
\frame{\pgfuseimage{youngboy}
}\frame{\transdissolve\pgfuseimage{man}
}
The command \transdissolve causes the slide of the second frame to be shown in a “dissolved way.” Notethat the dissolving is a property of the second frame, not of the first one. We could have placed the commandanywhere on the frame.
The transition commands are overlay-specification-aware. We could collapse the two frames into oneframe like this:
\frame{\only<1>{\pgfuseimage{youngboy}}\only<2>{\pgfuseimage{man}}\transdissolve<2>
}
This states that on the first slide the young boy should be shown, on the second slide the old man should beshown, and when the second slide is shown, it should be shown in a “dissolved way.”
In the following, the different commands for creating transitional effects are listed.
25
Command transblindshorizontal
Description: Show the slide as if horizontal blinds where pulled away.
Example: \transblindshorizontal
Command transblindsvertical
Description: Show the slide as if vertical blinds where pulled away.
Example: \transblindsvertical<2,3>
Command transboxin
Description: Show the slide by moving to the center from all four sides.
Example: \transboxin<1>
Command transboxout
Description: Show the slide by showing more and more of a rectangular area that is centered on the slidecenter.
Example: \transboxout
Command transdissolve
Description: Show the slide by slowly dissolving what was shown before.
Example: \transdissolve
Command transglitter
Parameters:
1. a degree (must be a multiple of 90).
Description: Show the slide with a glitter effect that sweeps in the specified direction.
Example: \transglitter<2-3>{90}
Command transsplitverticalin
Description: Show the slide by sweeping two vertical lines from the sides inward.
Example: \transsplitverticalin
Command transsplitverticalout
Description: Show the slide by sweeping two vertical lines from the center outward.
Example: \transsplitverticalout
Command transsplithorizontalin
Description: Show the slide by sweeping two horizontal lines from the sides inward.
Example: \transsplithorizontalin
Command transsplithorizontalout
Description: Show the slide by sweeping two horizontal lines from the center outward.
Example: \transsplithorizontalout
Command transwipe
Parameters:
1. a degree (must be a multiple of 90).
Description: Show the slide by sweeping a single line in the specified direction, thereby “wiping out” theprevious contents.
Example: \transwipe{90}
26
6 Creating Handouts, Transparencies, and Notes
The beamer package offers different ways of creating special versions of your talk that can be used in differentcontexts. You can easily create a handout version of the presentation that can be distributed to the audience.You can also create a version that is more suitable for a presentation using an overhead projector. Finally,you can add notes for yourself that help you remember what to say for specific slides. All of these versionscoexist in your main file. They are created by specifying different class options and rerunning TEX on themain file.
6.1 Creating Handouts
A handout is a version of a presentation that is printed on paper and handed out to the audience before orafter the talk. (See Section 2.4.2 for how to place numerous frames on one pages, which is very useful forhandouts.) For the handout you typically want to produce as few slides as possible per frame. In particular,you do not want to print a new slide for each slide of a frame. Rather, only the “last” slide should be printed.
In order to create a handout, specify the class option handout. If you do not specify anything else, thiswill cause all overlay specifications to be suppressed. For most cases this will create exactly the desired result.
In some cases, you may want a more complex behaviour. For example, if you use many \only commandsto draw an animation. In this case, suppressing all overlay specifications is not such a good idea, since thiswill cause all steps of the animation to be shown at the same time. In some cases this is not desirable. Also,it might be desirable to suppress some \alert commands that apply only to specific slides in the handout.
For a fine-grained control of what is shown on a handout, you can use alternate overlay specifications.They specify which slides of a frame should be shown for a special version, for example for the handoutversion. An alternate overlay specification is written alongside the normal overlay specification inside thepointed brackets. It is separated from the normal specification by a vertical bar and a space. The version towhich the alternate specification applies is written first, followed by a colon. Here is an example:
\only<1-3,5-9| handout:2-3,5>{Text}
This specification says: “Normally, insert the text on slides 1–3 and 5–9. For the handout version, insertthe text only on slides 2, 3, and 5.” If no alternate overlay specification is given for handouts, the defaultis “always.” This causes the desirable effect that if you do not specify anything, the overlay specification iseffectively suppressed for the handout.
An especially useful specification is the following:
\only<3| handout:0>{Not shown on handout.}
Since there is no zeroth slide, the text is not shown. Likewise, \alert<3| handout:0>{Text} will not alertthe text on a handout.
You can also use an alternate overlay specification for the optional argument of the frame command asin the following example.
\frame[1-| handout:0]{Text...}
This causes the frame to be suppressed in the handout version. Also, you can restrict the presentation suchthat only specific slides of the frame are shown on the handout:
\frame[1-| handout:4-5]{Text...}
It is also possible to give only an alternate overlay specification. For example, \alert<handout:0>{...}causes the text to be always hilighted during the presentation, but never on the handout version. Likewise,\frame[handout:0]{...} causes the frame to be suppressed for the handout.
Finally, note that it is possible to give more than one alternate overlay specification and in any order.For example, the following specification states that the text should be inserted on the first three slides in thepresentation, in the first two slides of the transparency version, and not at all in the handout.
\only<trans:1-2| 1-3| handout:0>{Text}
27
If you wish to give the same specification in all versions, you can do so by specifying all: as the version.For example,
\frame[all:1-2]{blah...
}
ensures that the frame has two slides in all versions.
6.2 Creating Transparencies
The main aim of the beamer class is to create presentations for beamers. However, it is often useful toprint transparencies as backup, in case the hardware fails. A transparencies version of a talk often has lessslides than the main version, since it takes more time to switch slides, but it may have more slides than thehandout version. For example, while in a handout an animation might be condensed to a single slide, youmight wish to print several slides for the transparency version.
You can use the same mechanism as for creating handouts: Specify trans as a class option and addalternate transparency specifications for the trans version as needed. An elaborated example of differentoverlay specifications for the presentation, the handout, and the transparencies can be found in the filebeamerexample.tex.
6.3 Adding Notes
You can add notes to your slides using the command \note. A note is a reminder to yourself of what youshould say or should keep in mind when presenting a frame. The \note command should be given after theframe to which the note applies. Here is a typical example.
\frame{\begin{itemize}\item<1-> Eggs\item<2-> Plants\item<3-> Animals\end{itemize}
}\note{Tell joke about eggs.}
The note command will create a new page that contains your text plus some information that should makeit easier to match the note to the frame while talking.
Since you normally do not wish the notes to be part of your presentation, you must explicitly specifythe class option notes to include notes. If this option is not specified, notes are suppressed. If you specifynotesonly instead of notes, only notes will be included and all normal frames are parsed, but not displayed.This is useful for printing the notes.
Command note
Parameters:
1. a note text.
Description: Creates a note page. Should be given right after a frame.
Example: \note{Talk no more than 1 minute.}
Command noteitems
Parameters:
1. a list of item commands.
28

Description: Just like the note command, except that an itemize environment is setup inside the note.
Example:
\frame{Bla bla...}\noteitems{\item Stress the importance.\item Use no more than 2 minutes.}
7 Customization
7.1 Fonts
By default, the beamer class uses the Computer Modern sans-serif fonts for typesetting a presentation. TheComputer Modern font family is the original font family designed by Donald Knuth himself for the TEXprogram. A sans-serif font is a font in which the letters do not have serifs (from Frensh sans, which means“without”). Serifs are the little hooks at the ending of the strokes that make up a letter. The font you arecurrently reading is a serif font. By comparison, this text is in a sans-serif font.
The choice Computer Modern sans-serif had the following reasons:
• The Computer Modern family has a very large of symbols available that go well together.
• Sans-serif fonts are (generally considered to be) easier to read when used in a presentation. In lowresolution rendering, serifs decrease the legibility of a font.
While these reasons are pretty good, you still might wish to change the font:
• The Computer Modern fonts are a bit boring if you have seen them too often. Using another font (butnot Times!) can give a fresh look.
• Other fonts, especially Times, are sometime rendered better since they seem to have better internalhinting.
• A presentation typeset in a serif font creates a conservative impression, which might be exactly whatyou wish to create.
There are two ways of changing the document font: First, you must decide whether the text should betypeset in sans serif or in serif. To choose this, use either the class option sans or serif. By default, sans isselected, so you do not need to specify this. Furthermore, you can specify one of the two options mathsansor mathserif. These options override the overall sans-serif/serif choice for math text.
Second, you can independently switch the document font. To do so, you should use one of the preparedpackages of LATEX’s font mechanism. For example, to change to Times/Helvetica, simply add
\usepackage{times}
in your preamble. Note that if you do not specify serif as a class option, Helvetica (not Times) will beselected as the text font.
There may be many other fonts available on your installation. Typically, at least some of the followingpackages should be available: avant, bookman, chancery, charter, euler, helvet, mathtime, mathptm,newcent, palatino, pifont, times, utopia.
If you use times together with the serif option, you may wish to include also the package mathptm. Ifyou use the mathtime package (you have to buy some of the fonts), you also need to specify the serif option.
29
7.2 Margins and Sizes
The “paper size” of a beamer presentation is fixed to 128mm times 96mm. The aspect ratio of this size is4:3, which is exactly what most beamers offer these days. It is the job of the presentation program (likeacroread) to display the slides at full screen size. The main advantage of using a small “paper size” is thatyou can use all your normal fonts at their natural sizes. In particular, inserting a graphic with 11pt labelswill result in reasonably sized labels during the presentation.
You should refrain from changing the “paper size.” However, you can change the size of the left and rightmargins, which default to 1cm. To change them, use the command \geometry. For example, to set the leftmargin to 0.5cm and the right margin to 0.25cm, use
\geometry{left=0.5cm,right=0.25cm}
somewhere in the preamble. You can also specify the margins differently, see the documentation of thegeometry package for details on the different ways.
7.3 Class Options
Class options are listed right behind the command \documentclass in square brackets. Class options, seethe following list, govern certain global behaviors of the presentation.
Class Option notes
Description: Include notes in the output file. Normally, notes are not included.
Class Option notesonly
Description: Include only the notes in the output file. Useful for printing them.
Class Option handout
Description: Create a version that uses the handout overlay specifications. See subsection 6.1.
Class Option trans
Description: Create a version that uses the trans overlay specifications. See subsection 6.2.
Class Option hidesubsections
Description: Suppresses the subsections in the main table of contents. This is useful if you do not wish toshow too many details when presenting the talk outline. However, the subsections of the current subsectionwill still be shown when using the command tableofcontentscurrent.
Class Option shadesubsections
Description: Show the subsections in the main table of contents in a shaded way. This is useful if you wishto show, but do not wish to talk about them when presenting the talk outline.
Class Option inrow
Description: All small frame representation in the navigation bars for a single section are shown alongsideeach other. Normally, the representation for different subsections are shown in different lines.
Class Option blue, red, grey, brown
Description: These options change the main color of the navigation and title bars to the given colors. Othercolors can be setup using the command themecolor, which takes three parameters: a red, a green, and ablue value as floating point numbers between 0 (black) and 1 (highest intensity).
Class Option sans
30
Description: Use a sans-serif font during the presentation. (Default.)
Class Option serif
Description: Use a serif font during the presentation.
Class Option mathsans
Description: Override the math font to be a sans-serif font.
Class Option mathserif
Description: Override the math font to be a serif font.
7.4 Themes
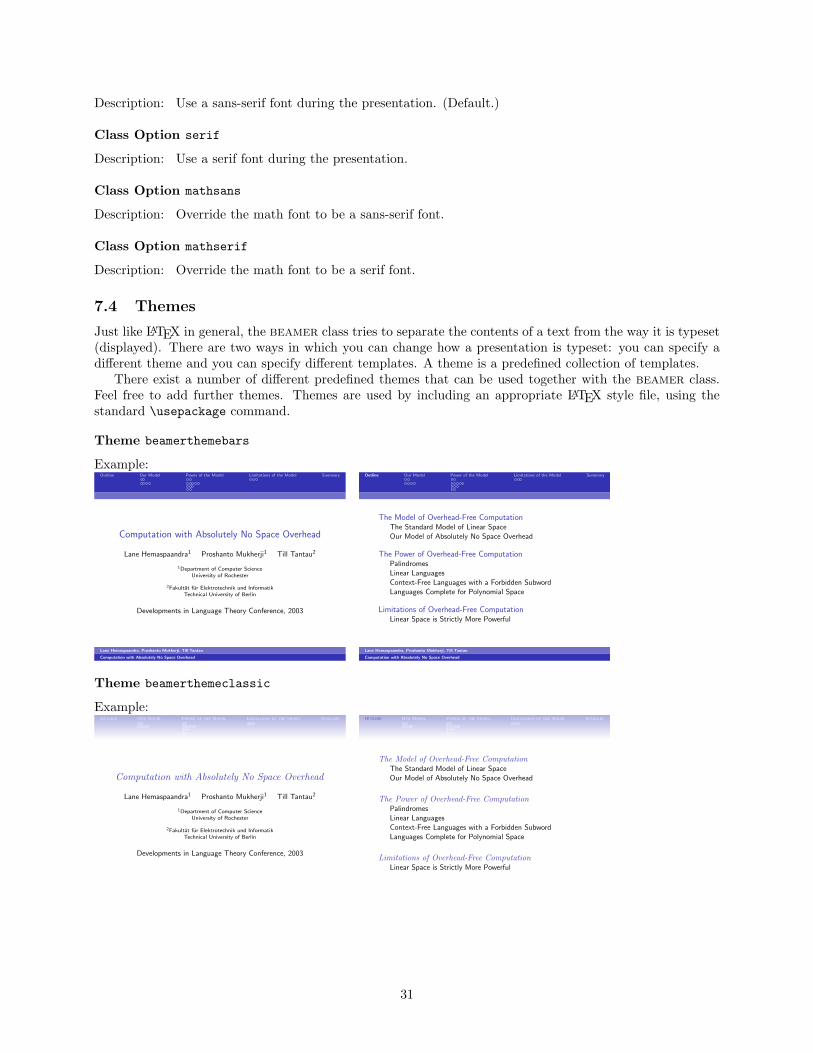
Just like LATEX in general, the beamer class tries to separate the contents of a text from the way it is typeset(displayed). There are two ways in which you can change how a presentation is typeset: you can specify adifferent theme and you can specify different templates. A theme is a predefined collection of templates.
There exist a number of different predefined themes that can be used together with the beamer class.Feel free to add further themes. Themes are used by including an appropriate LATEX style file, using thestandard \usepackage command.
Theme beamerthemebars
Example:Outline Our Model Power of the Model Limitations of the Model Summary
Computation with Absolutely No Space Overhead
Lane Hemaspaandra1 Proshanto Mukherji1 Till Tantau2
1Department of Computer ScienceUniversity of Rochester
2Fakultat fur Elektrotechnik und InformatikTechnical University of Berlin
Developments in Language Theory Conference, 2003
Lane Hemaspaandra, Proshanto Mukherji, Till Tantau
Computation with Absolutely No Space Overhead
Outline Our Model Power of the Model Limitations of the Model Summary
The Model of Overhead-Free ComputationThe Standard Model of Linear SpaceOur Model of Absolutely No Space Overhead
The Power of Overhead-Free ComputationPalindromesLinear LanguagesContext-Free Languages with a Forbidden SubwordLanguages Complete for Polynomial Space
Limitations of Overhead-Free ComputationLinear Space is Strictly More Powerful
Lane Hemaspaandra, Proshanto Mukherji, Till Tantau
Computation with Absolutely No Space Overhead
Theme beamerthemeclassic
Example:Outline Our Model Power of the Model Limitations of the Model Summary
Computation with Absolutely No Space Overhead
Lane Hemaspaandra1 Proshanto Mukherji1 Till Tantau2
1Department of Computer ScienceUniversity of Rochester
2Fakultat fur Elektrotechnik und InformatikTechnical University of Berlin
Developments in Language Theory Conference, 2003
Outline Our Model Power of the Model Limitations of the Model Summary
The Model of Overhead-Free ComputationThe Standard Model of Linear SpaceOur Model of Absolutely No Space Overhead
The Power of Overhead-Free ComputationPalindromesLinear LanguagesContext-Free Languages with a Forbidden SubwordLanguages Complete for Polynomial Space
Limitations of Overhead-Free ComputationLinear Space is Strictly More Powerful
31
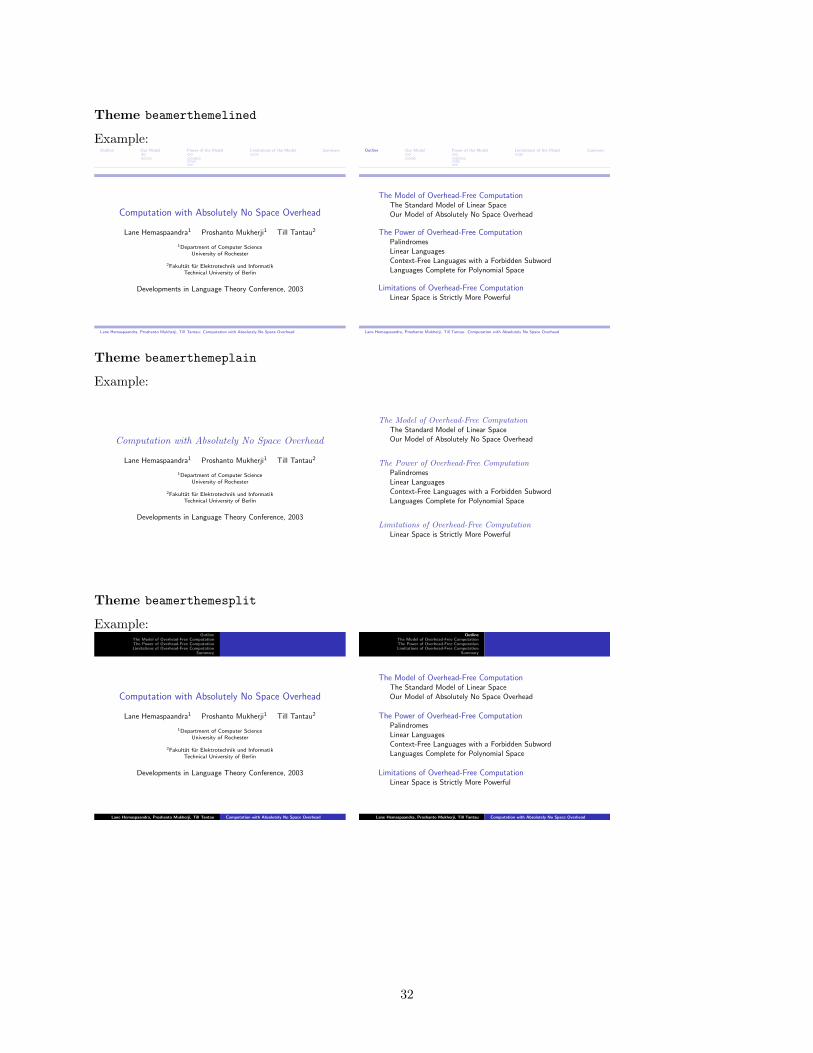
Theme beamerthemelined
Example:Outline Our Model Power of the Model Limitations of the Model Summary
Computation with Absolutely No Space Overhead
Lane Hemaspaandra1 Proshanto Mukherji1 Till Tantau2
1Department of Computer ScienceUniversity of Rochester
2Fakultat fur Elektrotechnik und InformatikTechnical University of Berlin
Developments in Language Theory Conference, 2003
Lane Hemaspaandra, Proshanto Mukherji, Till Tantau: Computation with Absolutely No Space Overhead
Outline Our Model Power of the Model Limitations of the Model Summary
The Model of Overhead-Free ComputationThe Standard Model of Linear SpaceOur Model of Absolutely No Space Overhead
The Power of Overhead-Free ComputationPalindromesLinear LanguagesContext-Free Languages with a Forbidden SubwordLanguages Complete for Polynomial Space
Limitations of Overhead-Free ComputationLinear Space is Strictly More Powerful
Lane Hemaspaandra, Proshanto Mukherji, Till Tantau: Computation with Absolutely No Space Overhead
Theme beamerthemeplain
Example:
Computation with Absolutely No Space Overhead
Lane Hemaspaandra1 Proshanto Mukherji1 Till Tantau2
1Department of Computer ScienceUniversity of Rochester
2Fakultat fur Elektrotechnik und InformatikTechnical University of Berlin
Developments in Language Theory Conference, 2003
The Model of Overhead-Free ComputationThe Standard Model of Linear SpaceOur Model of Absolutely No Space Overhead
The Power of Overhead-Free ComputationPalindromesLinear LanguagesContext-Free Languages with a Forbidden SubwordLanguages Complete for Polynomial Space
Limitations of Overhead-Free ComputationLinear Space is Strictly More Powerful
Theme beamerthemesplit
Example:Outline
The Model of Overhead-Free ComputationThe Power of Overhead-Free ComputationLimitations of Overhead-Free Computation
Summary
Computation with Absolutely No Space Overhead
Lane Hemaspaandra1 Proshanto Mukherji1 Till Tantau2
1Department of Computer ScienceUniversity of Rochester
2Fakultat fur Elektrotechnik und InformatikTechnical University of Berlin
Developments in Language Theory Conference, 2003
Lane Hemaspaandra, Proshanto Mukherji, Till Tantau Computation with Absolutely No Space Overhead
OutlineThe Model of Overhead-Free ComputationThe Power of Overhead-Free ComputationLimitations of Overhead-Free Computation
Summary
The Model of Overhead-Free ComputationThe Standard Model of Linear SpaceOur Model of Absolutely No Space Overhead
The Power of Overhead-Free ComputationPalindromesLinear LanguagesContext-Free Languages with a Forbidden SubwordLanguages Complete for Polynomial Space
Limitations of Overhead-Free ComputationLinear Space is Strictly More Powerful
Lane Hemaspaandra, Proshanto Mukherji, Till Tantau Computation with Absolutely No Space Overhead
32
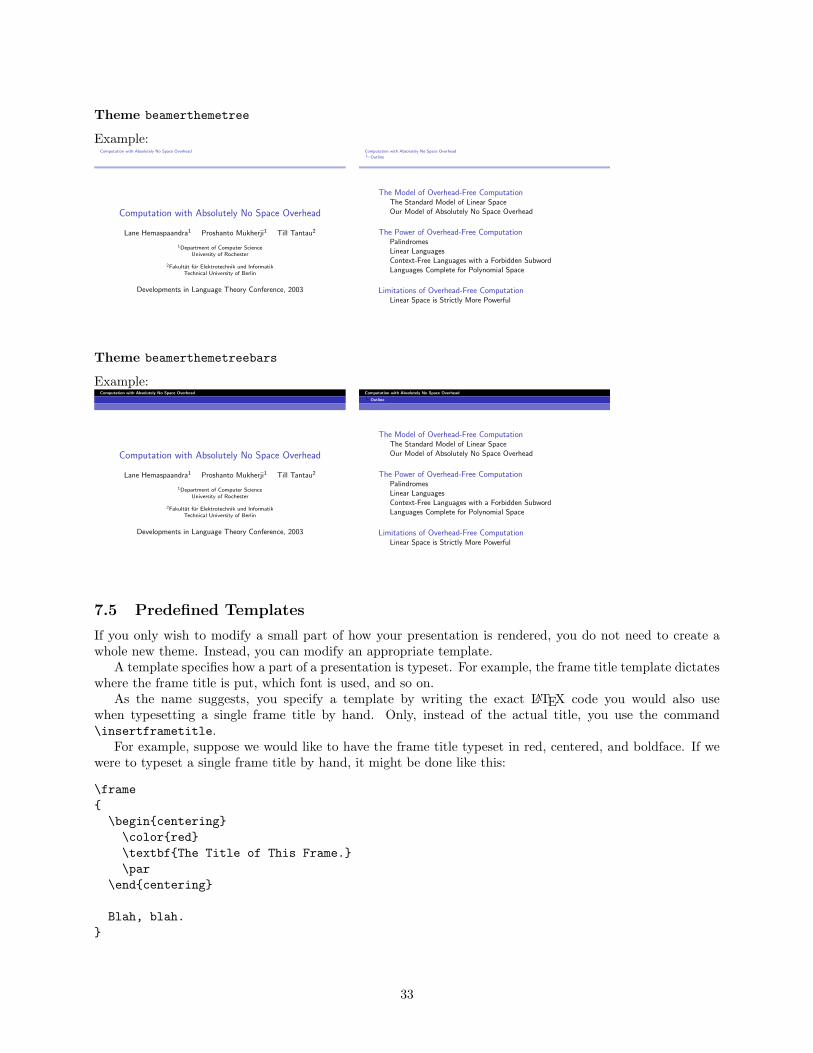
Theme beamerthemetree
Example:Computation with Absolutely No Space Overhead
Computation with Absolutely No Space Overhead
Lane Hemaspaandra1 Proshanto Mukherji1 Till Tantau2
1Department of Computer ScienceUniversity of Rochester
2Fakultat fur Elektrotechnik und InformatikTechnical University of Berlin
Developments in Language Theory Conference, 2003
Computation with Absolutely No Space Overhead
Outline
The Model of Overhead-Free ComputationThe Standard Model of Linear SpaceOur Model of Absolutely No Space Overhead
The Power of Overhead-Free ComputationPalindromesLinear LanguagesContext-Free Languages with a Forbidden SubwordLanguages Complete for Polynomial Space
Limitations of Overhead-Free ComputationLinear Space is Strictly More Powerful
Theme beamerthemetreebars
Example:Computation with Absolutely No Space Overhead
Computation with Absolutely No Space Overhead
Lane Hemaspaandra1 Proshanto Mukherji1 Till Tantau2
1Department of Computer ScienceUniversity of Rochester
2Fakultat fur Elektrotechnik und InformatikTechnical University of Berlin
Developments in Language Theory Conference, 2003
Computation with Absolutely No Space Overhead
Outline
The Model of Overhead-Free ComputationThe Standard Model of Linear SpaceOur Model of Absolutely No Space Overhead
The Power of Overhead-Free ComputationPalindromesLinear LanguagesContext-Free Languages with a Forbidden SubwordLanguages Complete for Polynomial Space
Limitations of Overhead-Free ComputationLinear Space is Strictly More Powerful
7.5 Predefined Templates
If you only wish to modify a small part of how your presentation is rendered, you do not need to create awhole new theme. Instead, you can modify an appropriate template.
A template specifies how a part of a presentation is typeset. For example, the frame title template dictateswhere the frame title is put, which font is used, and so on.
As the name suggests, you specify a template by writing the exact LATEX code you would also usewhen typesetting a single frame title by hand. Only, instead of the actual title, you use the command\insertframetitle.
For example, suppose we would like to have the frame title typeset in red, centered, and boldface. If wewere to typeset a single frame title by hand, it might be done like this:
\frame{\begin{centering}\color{red}\textbf{The Title of This Frame.}\par
\end{centering}
Blah, blah.}
33
In order to typeset the frame title in this way on all slides, we can change the frame title template asfollows:
\useframetitletemplate{\begin{centering}\color{red}\textbf{\insertframetitle}\par
\end{centering}}
We can then use the following code to get the desired effect:
\frame{\frametitle{The Title of This Frame.}
Blah, blah.}
When rendering the frame, the beamer class will use the code of the frame title template to typeset theframe title and it will replace every occurrence of \insertframetitle by the current frame title.
In the next subsection predefined commands are listed that change one or more templates. In the twosubsequent subsection, complete listings of all templates are given and the different \insertxxxx commandsare explained.
7.5.1 Backgrounds
Just as there exist predefined themes, there exist predefined templates. They are defined in the packagebeamertemplates. Calling one of the following commands will change a template in a predefined way. Usingthem, you can use, for example, your favorite theme together with a predefined background.
Command beamertemplateshadingbackground
Parameters:
1. A comma-separated rgb triple specifying the color at the page bottom.2. A comma-separated rgb triple specifying the color at the top of the page.
Description: Installs a vertically shaded background such that the specified bottom color changes smoothlyto the specified top color. Use with care: Background shadings are often distracting! However, avery light shading with warm colors can make a presentation more lively.
Example:
\beamertemplateshadingbackground{1,0.9,0.9}{0.9,0.9,1}% Bottom is light red, top is light blue
Command beamertemplategridbackground
Description: Installs a light grid as background.
7.5.2 Head and Foot Lines
Command beamertemplateheadempty
Description: Makes the head line empty.
Command beamertemplatefootempty
34
Description: Makes the foot line empty.
Command beamertemplatefootpagenumber
Description: Shows only the page number in the foot line.
7.5.3 Itemizing
Command beamertemplatedotitem
Description: Changes the symbols shown in an itemize environment to dots.
Command beamertemplateballitem
Description: Changes the symbols shown in an itemize environment to small plastic balls.
7.5.4 Bibliography
Command beamertemplatetextbibitems
Description: Shows the citation text in front of references in a bibliography instead of a small symbol.
Command beamertemplatearrowbibitems
Description: Changes the symbol before references in a bibliography to a small arrow.
Command beamertemplatebookbibitems
Description: Changes the symbol before references in a bibliography to a small book icon.
Command beamertemplatearticlebibitems
Description: Changes the symbol before references in a bibliography to a small article icon. (Default)
7.5.5 Navigation Bars
Command beamertemplateboxminiframe
Description: Changes the symbols in a navigation bar used to represent a frame to a small box.
Command beamertemplateticksminiframe
Description: Changes the symbols in a navigation bar used to represent a frame to a small vertical bar ofvarying length.
7.6 Changing Templates
In the following, all commands that change a template are listed. Inside these commands, you should usethe \insertxxxx commands listed in the next subsection.
35
7.6.1 Title Page
Command usetitlepagetemplate
Parameters:
1. a template for the title page
Example:
\usetitlepagetemplate{\vbox{}\vfill\begin{centering}\Large\structure{\inserttitle}\vskip1em\par\normalsize\insertauthortitle\vskip1em\par{\scriptsize\insertinstitute\par}\par\vskip1em\insertdate\par\vskip1.5em\inserttitlegraphic
\end{centering}\vfill
}
7.6.2 Background
Command usebackgroundtemplate
Parameters:
1. a template for the page background
Example:
\usebackgroundtemplate{%\color{red}%\vrule height\paperheight width\paperwidth%
}
7.6.3 Table of Contents
Command usetemplatetocsection
Parameters:
1. a template for a section name in the table of contents.2. a template for a grayed section name in the table of contents.
Example:
\usetemplatetocsection{\color{structure}\inserttocsection}{\color{structureshaded}\inserttocsection}
Command usetemplatetocsubsection
Parameters:
36
1. a template for a subsection name in the table of contents.2. a template for a grayed subsection name in the table of contents.
Example:
\usetemplatetocsubsection{\leavevmode\leftskip=1.5em\color{black}\inserttocsubsection\par}{\leavevmode\leftskip=1.5em\color{shaded}\inserttocsubsection\par}
7.6.4 Frame Titles
Command useframetitletemplate
Parameters:
1. a template for the frame title
Example:
\useframetitletemplate{%\begin{centering}\structure{\textbf{\insertframetitle}}\par
\end{centering}}
7.6.5 Headlines, Footlines, and Footnotes
Command usefoottemplate
Parameters:
1. a template for the foot line
Example:
\usefoottemplate{\hfil\tiny{\color{shaded}\insertpagenumber}}
or
\usefoottemplate{%\vbox{%\tinycolouredline{structuremedium}%{\color{white}\textbf{\insertshortauthor\hfill\insertshortinstitute}}%
\tinycolouredline{structure}%{\color{white}\textbf{\insertshorttitle}\hfill}%
}}
Command useheadtemplate
Parameters:
1. a template for the head line
Example:
37
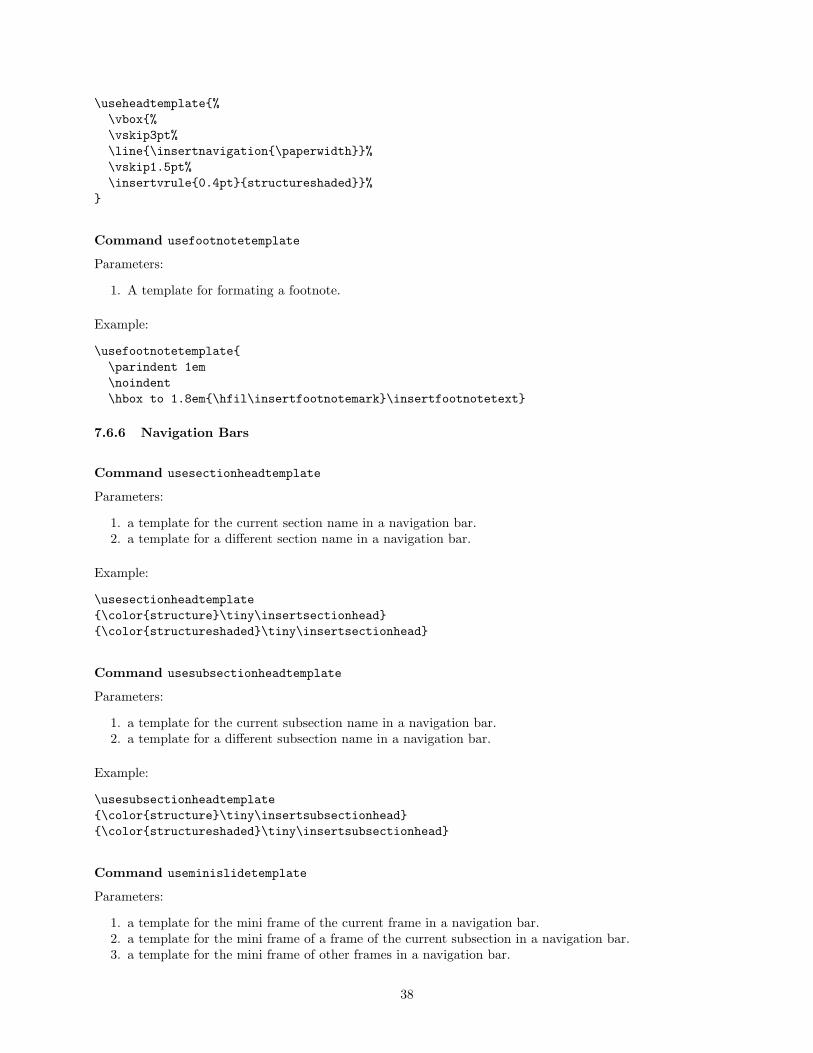
\useheadtemplate{%\vbox{%\vskip3pt%\line{\insertnavigation{\paperwidth}}%\vskip1.5pt%\insertvrule{0.4pt}{structureshaded}}%
}
Command usefootnotetemplate
Parameters:
1. A template for formating a footnote.
Example:
\usefootnotetemplate{\parindent 1em\noindent\hbox to 1.8em{\hfil\insertfootnotemark}\insertfootnotetext}
7.6.6 Navigation Bars
Command usesectionheadtemplate
Parameters:
1. a template for the current section name in a navigation bar.2. a template for a different section name in a navigation bar.
Example:
\usesectionheadtemplate{\color{structure}\tiny\insertsectionhead}{\color{structureshaded}\tiny\insertsectionhead}
Command usesubsectionheadtemplate
Parameters:
1. a template for the current subsection name in a navigation bar.2. a template for a different subsection name in a navigation bar.
Example:
\usesubsectionheadtemplate{\color{structure}\tiny\insertsubsectionhead}{\color{structureshaded}\tiny\insertsubsectionhead}
Command useminislidetemplate
Parameters:
1. a template for the mini frame of the current frame in a navigation bar.2. a template for the mini frame of a frame of the current subsection in a navigation bar.3. a template for the mini frame of other frames in a navigation bar.
38
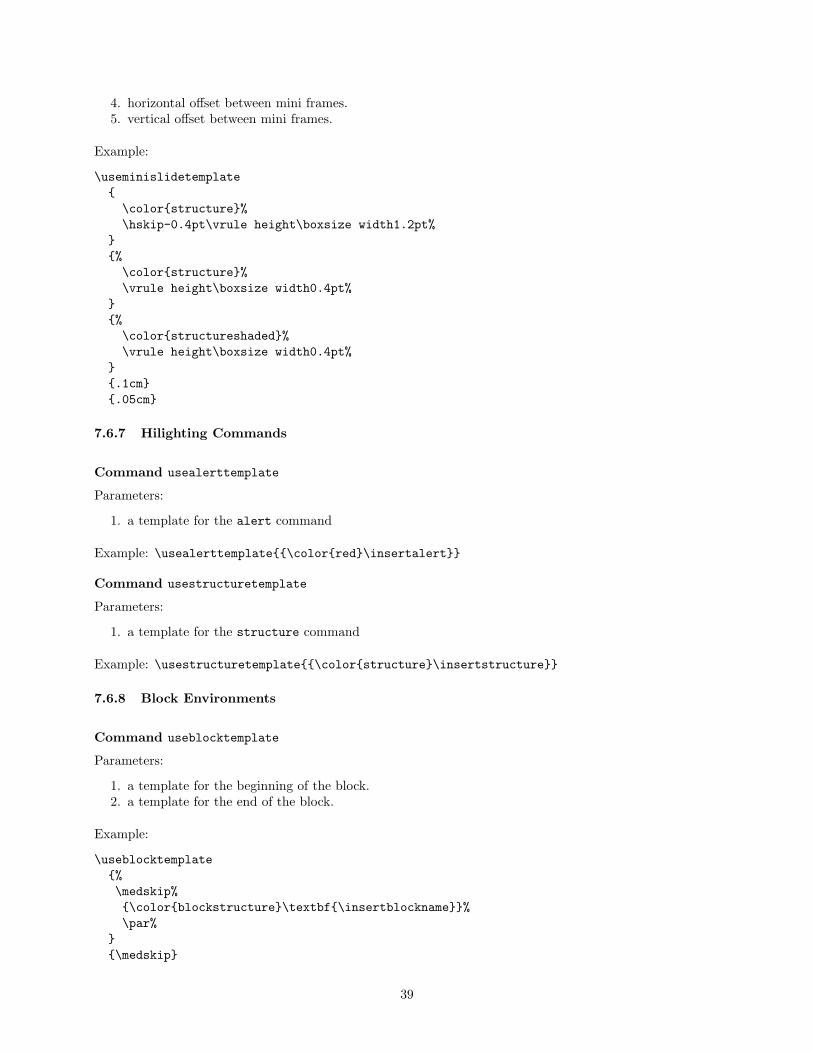
4. horizontal offset between mini frames.5. vertical offset between mini frames.
Example:
\useminislidetemplate{
\color{structure}%\hskip-0.4pt\vrule height\boxsize width1.2pt%
}{%
\color{structure}%\vrule height\boxsize width0.4pt%
}{%
\color{structureshaded}%\vrule height\boxsize width0.4pt%
}{.1cm}{.05cm}
7.6.7 Hilighting Commands
Command usealerttemplate
Parameters:
1. a template for the alert command
Example: \usealerttemplate{{\color{red}\insertalert}}
Command usestructuretemplate
Parameters:
1. a template for the structure command
Example: \usestructuretemplate{{\color{structure}\insertstructure}}
7.6.8 Block Environments
Command useblocktemplate
Parameters:
1. a template for the beginning of the block.2. a template for the end of the block.
Example:
\useblocktemplate{%\medskip%{\color{blockstructure}\textbf{\insertblockname}}%\par%
}{\medskip}
39
Command usealertblocktemplate
Parameters:
1. a template for the beginning of the block.2. a template for the end of the block.
Example:
\usealertblocktemplate{%\medskip{\alert{\textbf{\insertblockname}}}%
\par}{\medskip}
Command useexampleblocktemplate
Parameters:
1. a template for the beginning of the block.2. a template for the end of the block.
Example:
\useexampleblocktemplate{%\medskip\begingroup\color{darkgreen}{\textbf{\insertblockname}}\par}
{%\endgroup\medskip
}
7.6.9 Lists (Itemizations, Enumerations, Descriptions)
Command useenumerateitemtemplate
Parameters:
1. a template for the default item in the top level of an enumeration.
Example: \useenumerateitemtemplate{\insertenumlabel}
Command useitemizeitemtemplate
Parameters:
1. a template for the default item in the top level of an itemize list.
Example: \useitemizeitemtemplate{\pgfuseimage{mybullet}}
Command usesubitemizeitemtemplate
Parameters:
1. a template for the default item in the second level of an itemize list.
40
Example: \usesubitemizeitemtemplate{\pgfuseimage{mysubbullet}}
Command useitemizetemplate
Parameters:
1. a template for the beginning a top-level itemize list.2. a template for the end of a top-level itemize list.
Example: \useitemizetemplate{}{}
Command usesubitemizetemplate
Parameters:
1. a template for the beginning a second-level itemize list.2. a template for the end of a second-level itemize list.
Example: \usesubitemizetemplate{\begin{small}}{\end{small}}
Command useenumeratetemplate
Parameters:
1. a template for the beginning a top-level enumeration.2. a template for the end of a top-level enumeration.
Example: \useenumeratetemplate{}{}
Command usesubenumerateitemtemplate
Parameters:
1. a template for the default item in the second level of an enumeration.
Example: \usesubenumerateitemtemplate{\insertenumlabel-\insertsubenumlabel}
Command usesubenumeratetemplate
Parameters:
1. a template for the beginning a second-level enumeration.2. a template for the end of a second-level enumeration.
Example: \usesubenumeratetemplate{\begin{small}}{\end{small}}
Command usedescriptiontemplate
Parameters:
1. A template for the default item in a description. Use insertdescriptionitem to insert the currentitem text.
2. A default width for the default item, if no other width is specified; the width labelsep is automaticallyadded to this parameter.
Example: \usedescriptionitemtemplate{\color{structure}\insertdescriptionitem}{2cm}
41
7.6.10 Bibliography
Command usebibitemtemplate
Parameters:
1. a template for the citation text before the entry. (The “label” of the item.)
Description: Use insertbiblabel to insert the label text.
Example: \usebibitemtemplate{\color{structure}\insertbiblabel}
Command usebibliographyblocktemplate
Parameters:
1. a template to be inserted before the first block of the entry (the first block is all text before the firstoccurrence of a newblock command).
2. a template to be inserted before the second block (the text between the first and second occurrence ofnewblock)
3. a template to be inserted before the third block4. a template to be inserted before all other blocks
Description: The templates are inserted before the blocks and you do not have access to the blocks themselvesvia insert commands. In the following example, the first par commands ensure that the author, the title,and the journal are put on different lines. The color commands cause the author (first block) to be typesetusing the theme color, the second block (title of the paper) to be typeset in black, and all other lines to betypeset in a washed-out version of the theme color.
Example:
\usebibliographyblocktemplate{\color{structure}}{\par\color{black}}{\par\color{structuremedium}}{\par\color{structuremedium}}
7.7 Template Inserts
In the following, an alphabetical list of the different \insertxxxx commands is given. These commands areused inside templates.
Command insertalert
Description: Inserts the current alerted text into a template.
Command insertauthor
Description: Inserts the one-line version of the author names into a template.
Command insertauthortitle
Description: Inserts a version of the author names into a template that is useful for the title page.
Command insertbiblabel
Description: Inserts the current citation label into a template.
Command insertblockname
Description: Inserts the name of the current block into a template.
42
Command insertdate
Description: Inserts the date into a template.
Command insertdescriptionitem
Description: Inserts the current item of a description environment into a template.
Command insertenumlabel
Description: Inserts the current number of the top-level enumeration (as an Arabic number) into a template.
Command insertfootnotemark
Description: Inserts the current footnote mark (like a raised number) into a template.
Command insertfootnotetext
Description: Inserts the current footnote text into a template.
Command insertframetitle
Description: Inserts the current frame title into a template.
Command insertinstitute
Description: Inserts the institute into a template.
Command insertlogo
Description: Inserts the logo(s) into a template.
Command insertnavigation
Parameters:
1. a width
Description: Inserts a horizontal navigation bar of the given width into a template. The bar lists the sectionsand below them mini frames for each frame in that section.
Command insertpagenumber
Description: Inserts the current page number into a template.
Command insertsection
Description: Inserts the current section into a template.
Command insertsectionnavigation
Parameters:
1. a width
Description: Inserts a vertical navigation bar containing all sections, with the current section hilighted.
Command insertshortauthor
Description: Inserts the short version of the author into a template.
Command insertshortdate
Description: Inserts the short version of the date into a template.
43
Command insertshortinstitute
Description: Inserts the short version of the institute into a template.
Command insertshorttitle
Description: Inserts the short version of the document title into a template.
Command insertstructure
Description: Inserts the current structure text into a template.
Command insertsubenumlabel
Description: Inserts the current number of the second-level enumeration (as an Arabic number) into atemplate.
Command insertsubsectionnavigation
Parameters:
1. a width
Description: Inserts a vertical navigation bar containing all subsections of the current section, with thecurrent subsection hilighted.
Command insertsubsection
Description: Inserts the current subsection into a template.
Command inserttitle
Description: Inserts a version of the document title into a template that is useful for the title page.
Command inserttitlegraphic
Description: Inserts the title graphic into a template.
Command inserttocsection
Description: Inserts the version of the current section name into a template that is useful for the table ofcontents.
Command inserttocsubsection
Description: Inserts the version of the current subsection name into a template that is useful for the tableof contents.
Command insertvrule
Parameters:
1. a color2. a thickness
Description: Inserts a rule of the given color and thickness into a template.
44


