Embed Size (px)
Citation preview
D a t a M a n a g e r S e t u p
08.15.2011 page 1
BDI-2 Data Manager™
Set-Up
The Riverside Publishing Company
3800 Golf Road, Suite 200 • Rolling Meadows, IL 60008 Phone 800.323.9540 • Web www.riversidepublishing.com
D a t a M a n a g e r S e t u p
08.15.2011 page 2
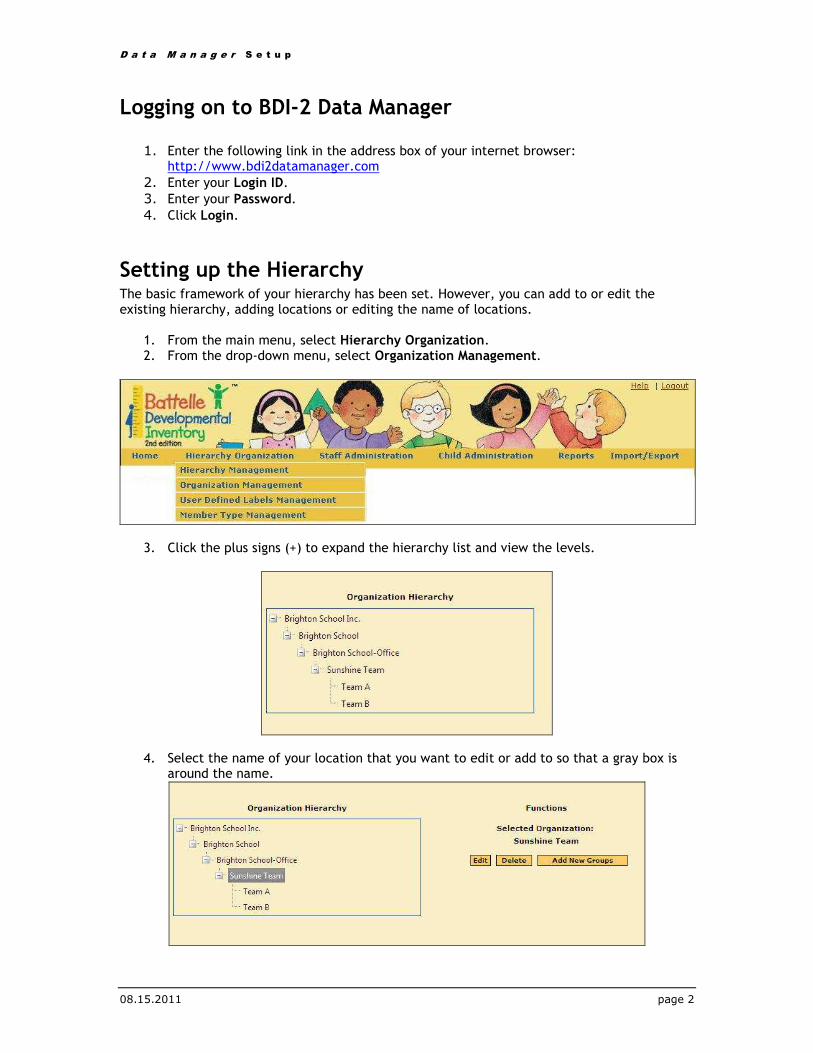
Logging on to BDI-2 Data Manager
1. Enter the following link in the address box of your internet browser: http://www.bdi2datamanager.com
2. Enter your Login ID.
3. Enter your Password. 4. Click Login.
Setting up the Hierarchy The basic framework of your hierarchy has been set. However, you can add to or edit the existing hierarchy, adding locations or editing the name of locations.
1. From the main menu, select Hierarchy Organization. 2. From the drop-down menu, select Organization Management.
3. Click the plus signs (+) to expand the hierarchy list and view the levels.
4. Select the name of your location that you want to edit or add to so that a gray box is around the name.
D a t a M a n a g e r S e t u p
08.15.2011 page 3
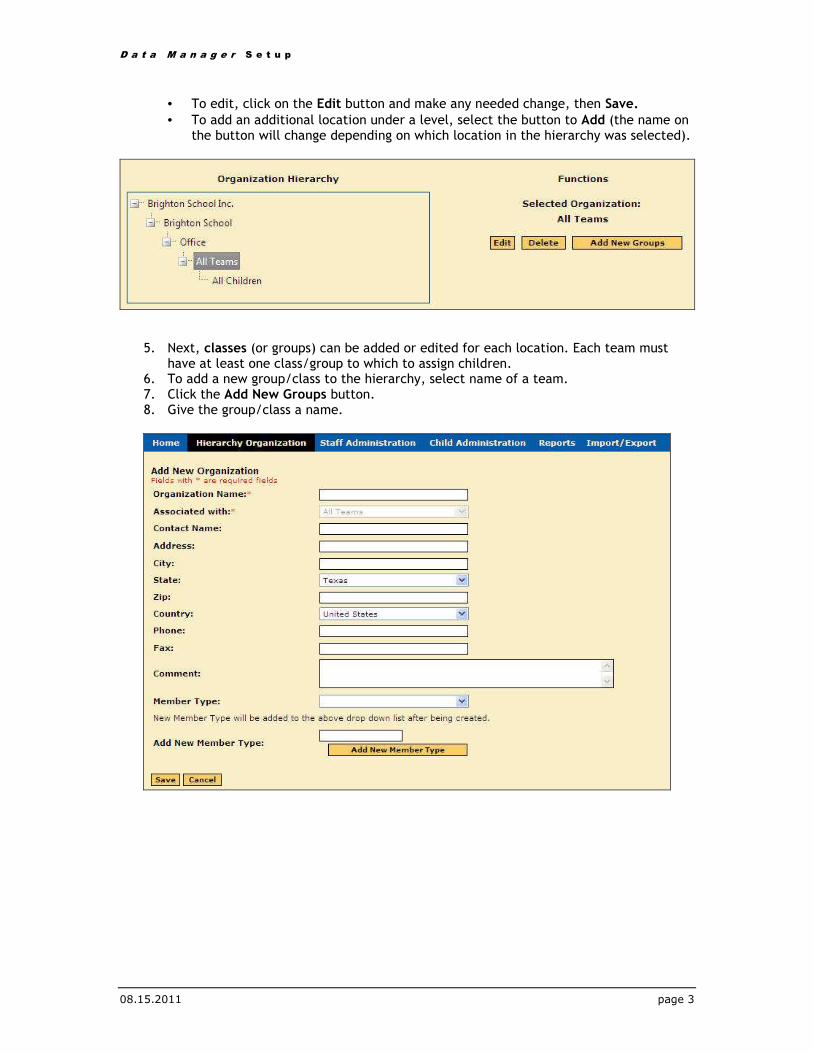
• To edit, click on the Edit button and make any needed change, then Save.
• To add an additional location under a level, select the button to Add (the name on the button will change depending on which location in the hierarchy was selected).
5. Next, classes (or groups) can be added or edited for each location. Each team must
have at least one class/group to which to assign children. 6. To add a new group/class to the hierarchy, select name of a team. 7. Click the Add New Groups button. 8. Give the group/class a name.
D a t a M a n a g e r S e t u p
08.15.2011 page 4
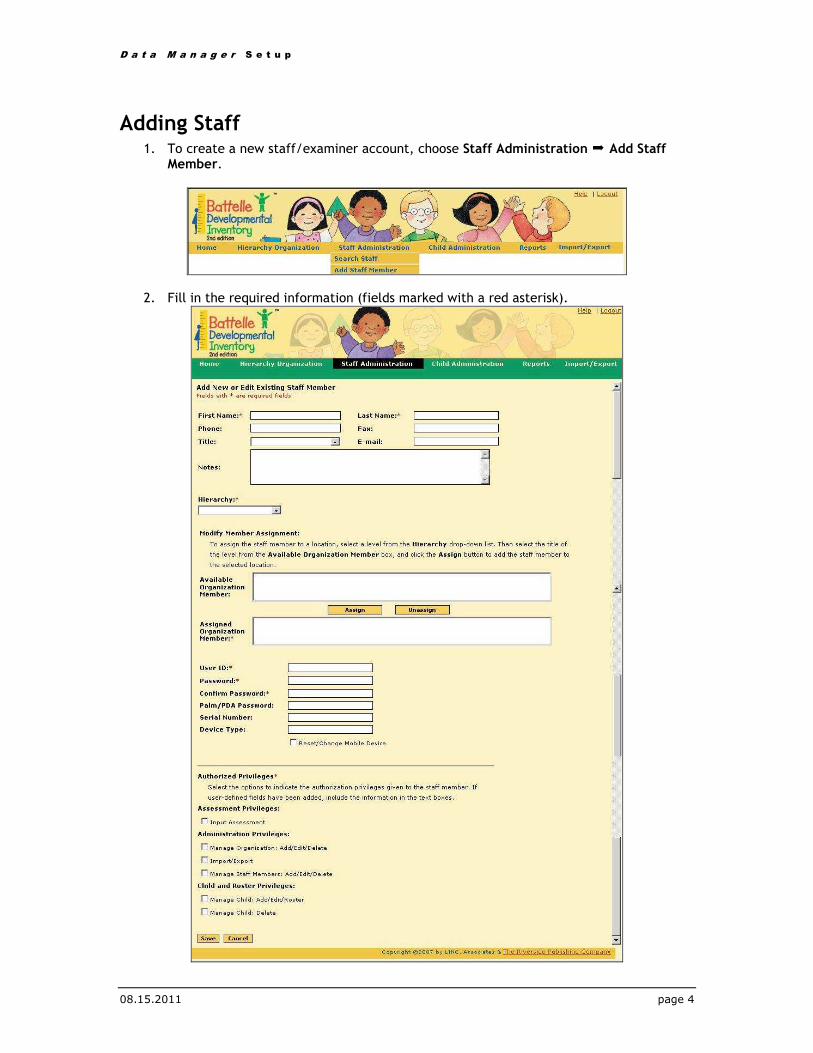
Adding Staff 1. To create a new staff/examiner account, choose Staff Administration � Add Staff
Member.
2. Fill in the required information (fields marked with a red asterisk).
D a t a M a n a g e r S e t u p
08.15.2011 page 5
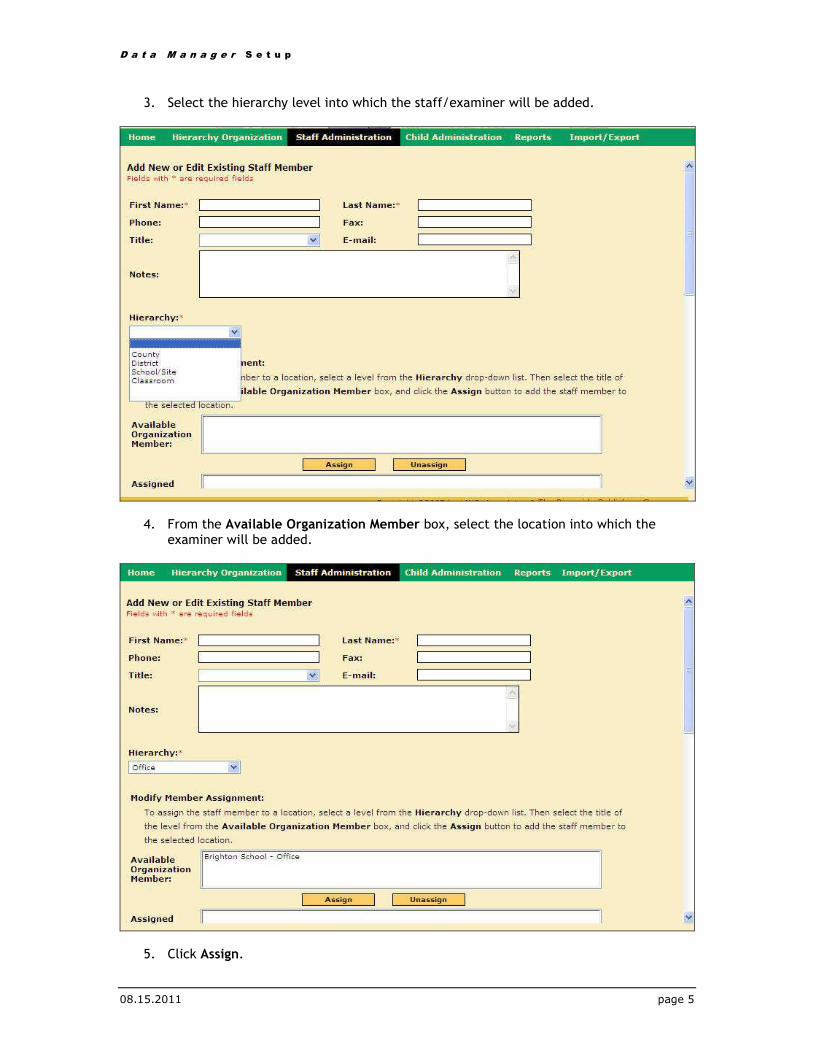
3. Select the hierarchy level into which the staff/examiner will be added.
4. From the Available Organization Member box, select the location into which the examiner will be added.
5. Click Assign.
D a t a M a n a g e r S e t u p
08.15.2011 page 6
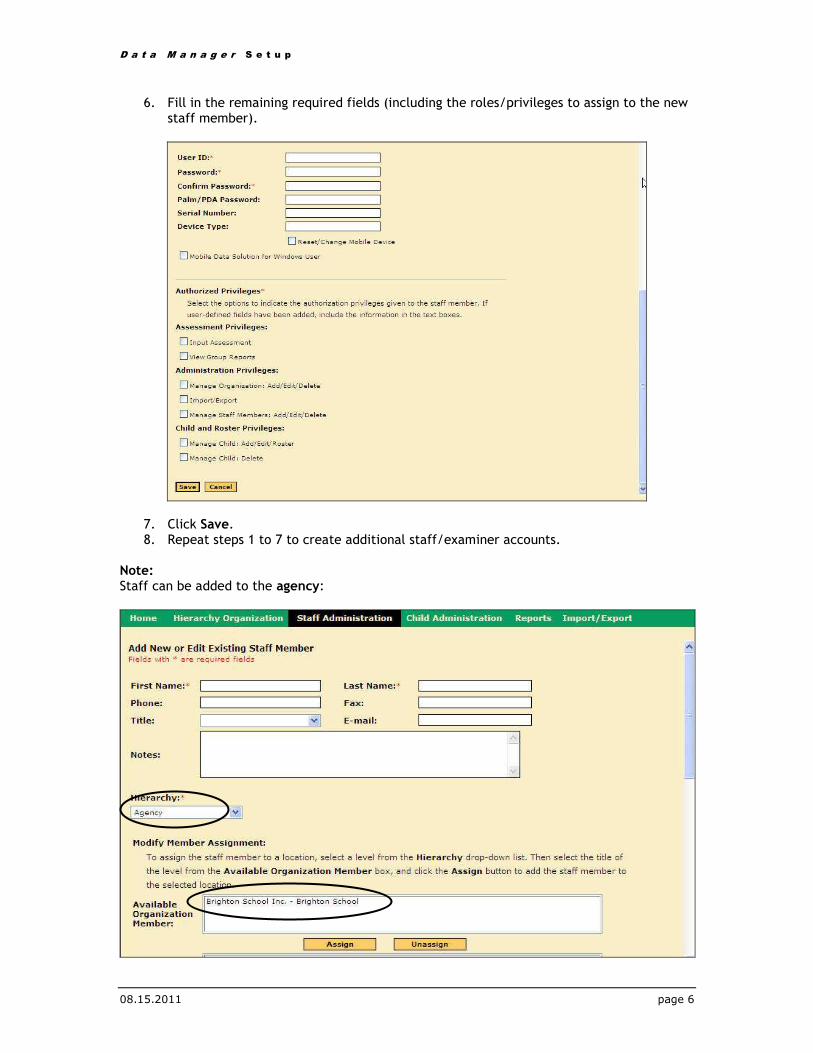
6. Fill in the remaining required fields (including the roles/privileges to assign to the new staff member).
7. Click Save. 8. Repeat steps 1 to 7 to create additional staff/examiner accounts.
Note: Staff can be added to the agency:
D a t a M a n a g e r S e t u p
08.15.2011 page 7
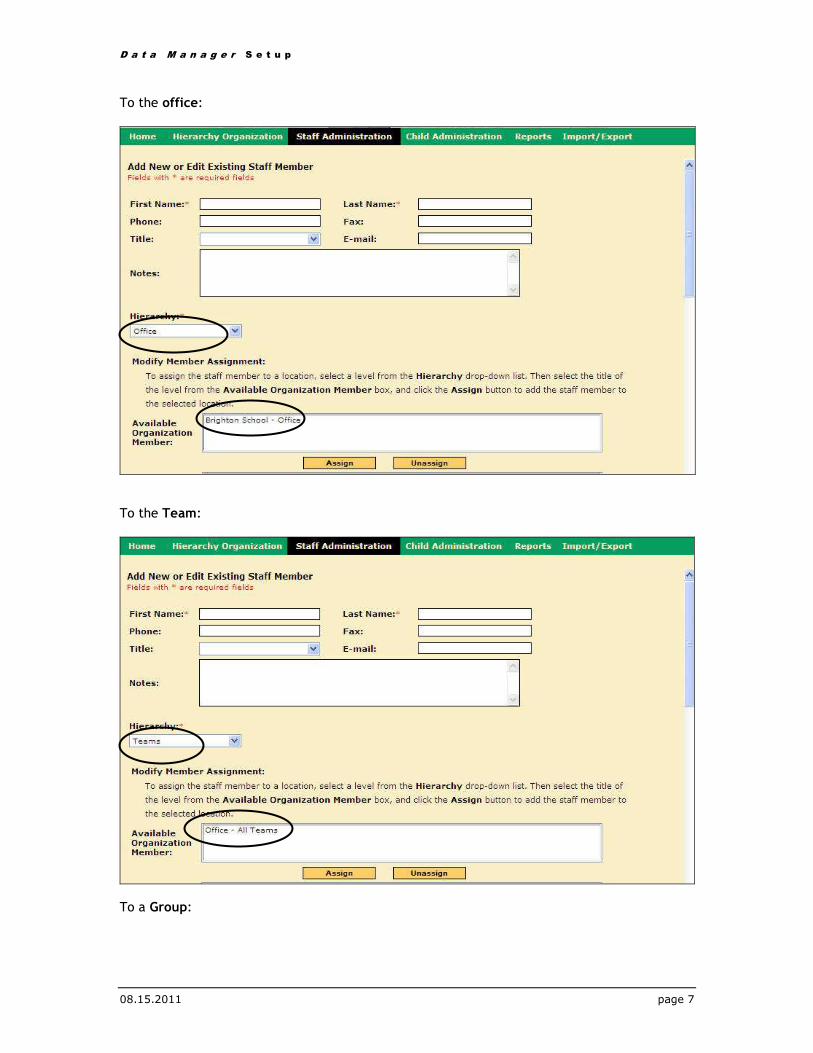
To the office:
To the Team:
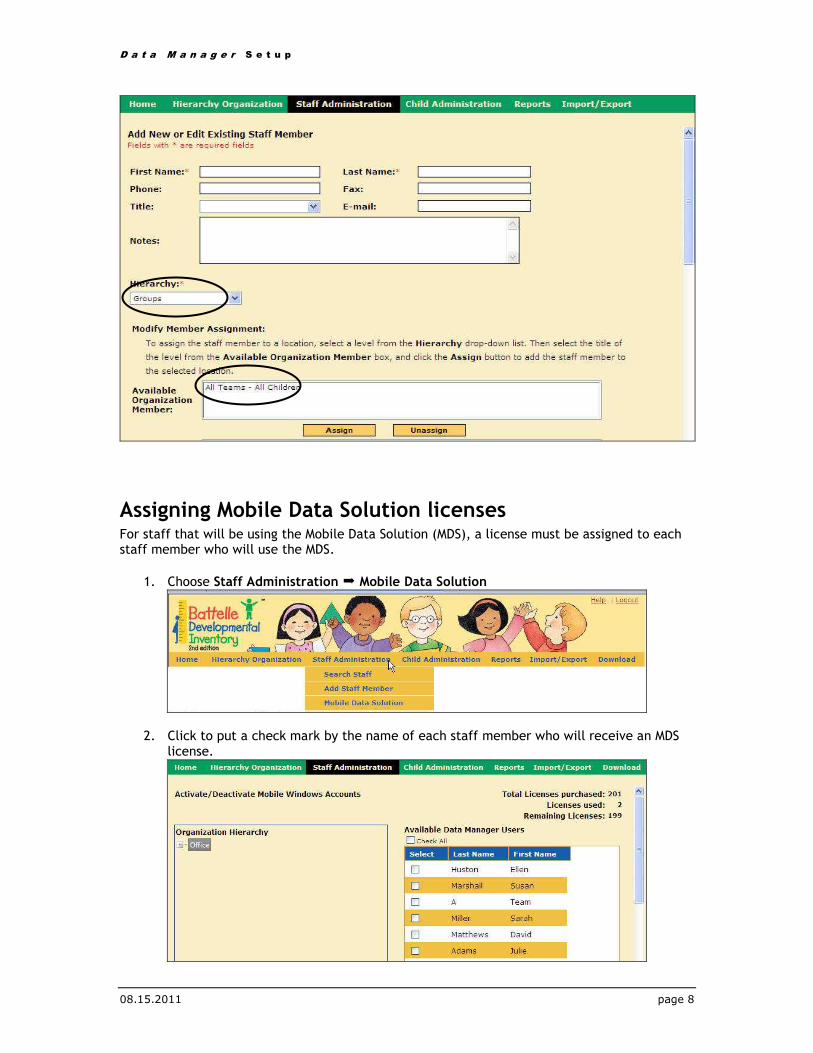
To a Group:
D a t a M a n a g e r S e t u p
08.15.2011 page 8
Assigning Mobile Data Solution licenses For staff that will be using the Mobile Data Solution (MDS), a license must be assigned to each staff member who will use the MDS.
1. Choose Staff Administration � Mobile Data Solution
2. Click to put a check mark by the name of each staff member who will receive an MDS license.
D a t a M a n a g e r S e t u p
08.15.2011 page 9
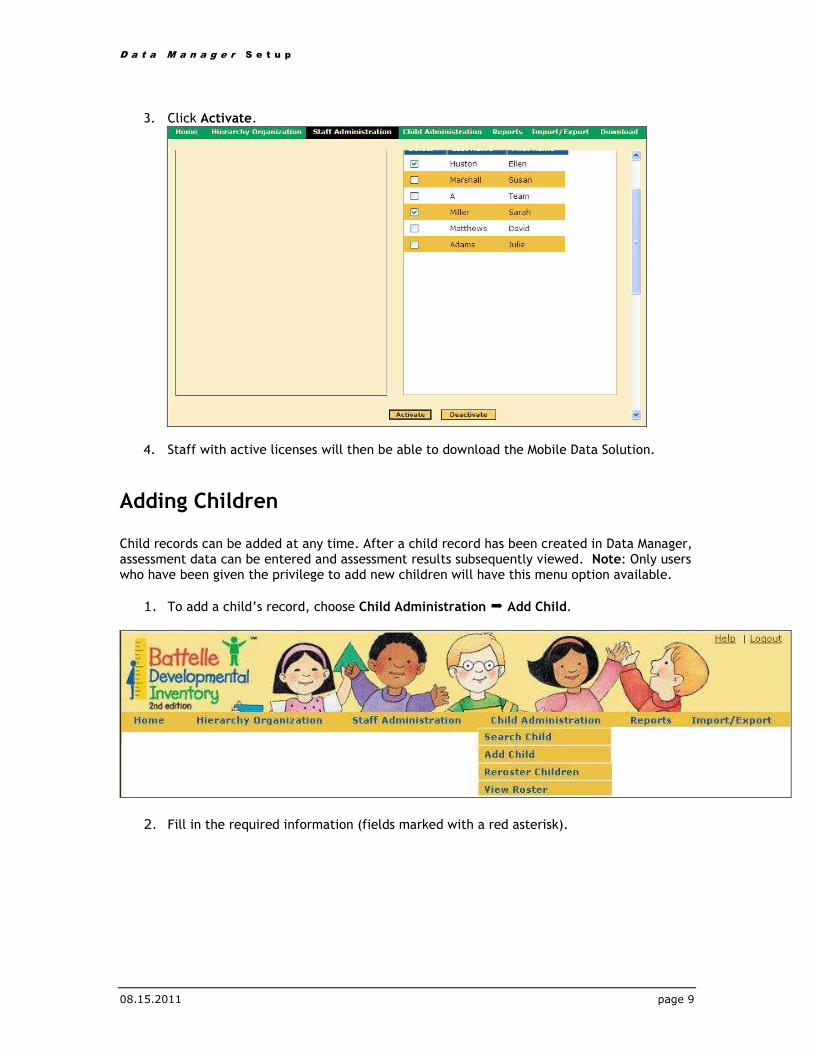
3. Click Activate.
4. Staff with active licenses will then be able to download the Mobile Data Solution.
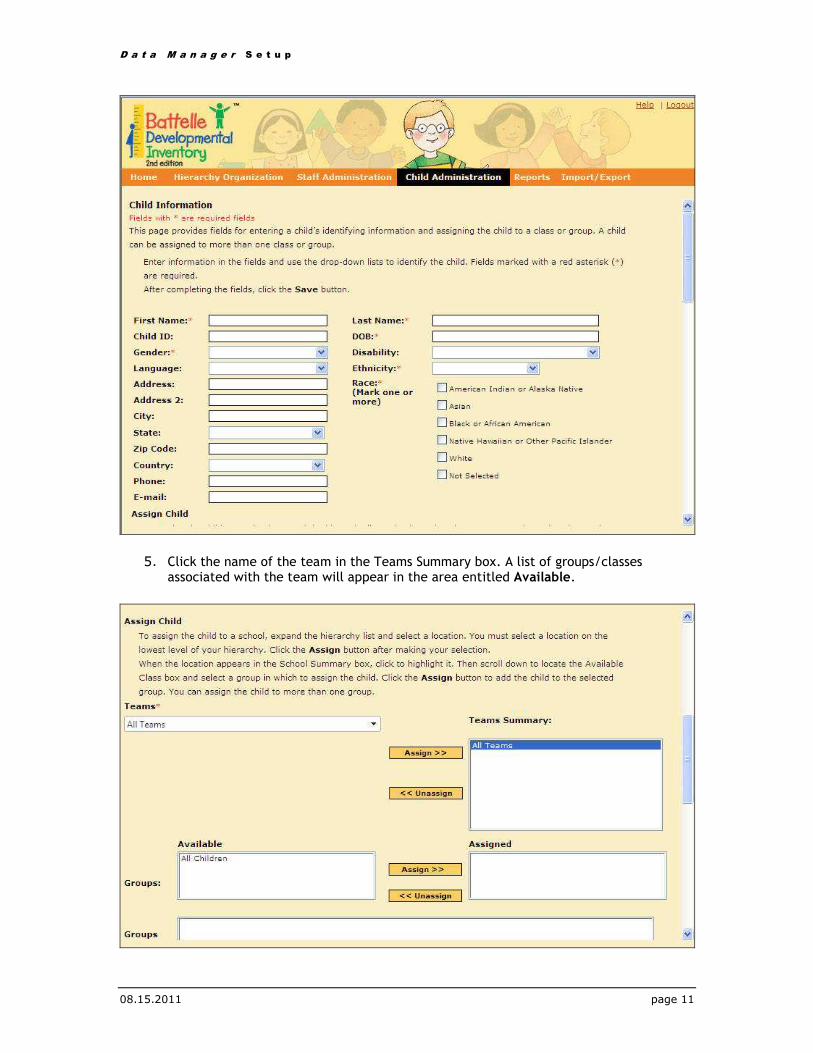
Adding Children Child records can be added at any time. After a child record has been created in Data Manager, assessment data can be entered and assessment results subsequently viewed. Note: Only users who have been given the privilege to add new children will have this menu option available.
1. To add a child’s record, choose Child Administration � Add Child.
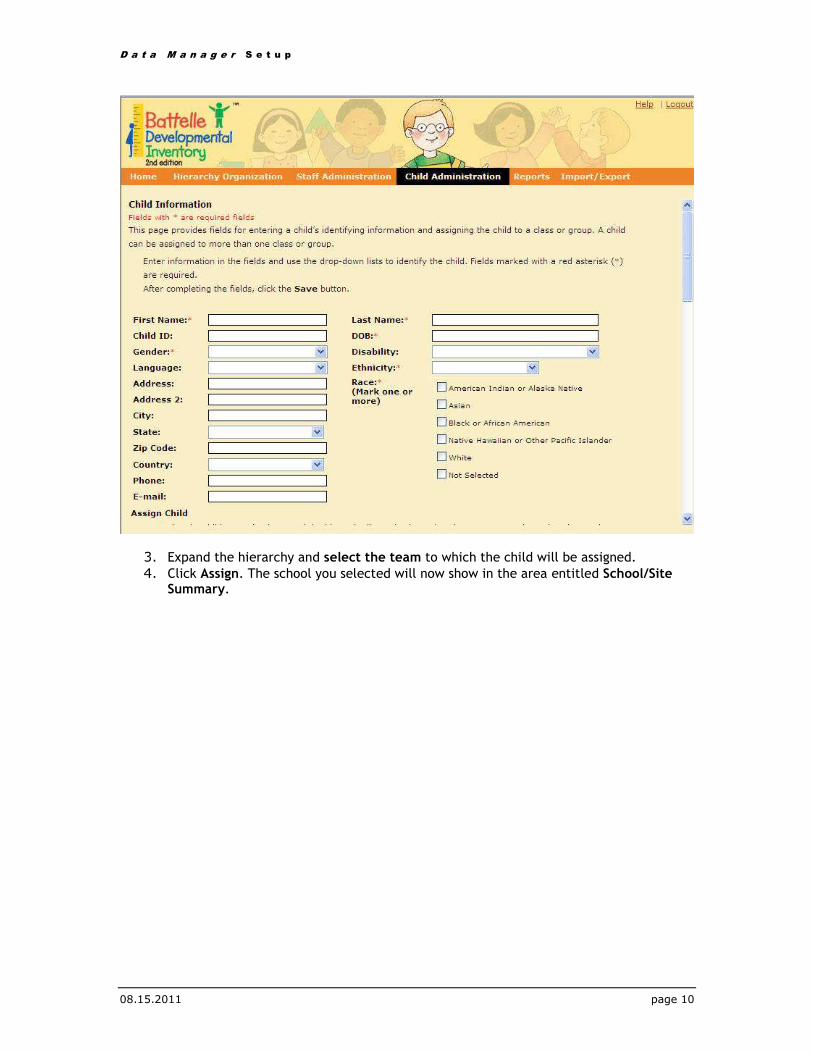
2. Fill in the required information (fields marked with a red asterisk).
D a t a M a n a g e r S e t u p
08.15.2011 page 10
3. Expand the hierarchy and select the team to which the child will be assigned. 4. Click Assign. The school you selected will now show in the area entitled School/Site
Summary.
D a t a M a n a g e r S e t u p
08.15.2011 page 11
5. Click the name of the team in the Teams Summary box. A list of groups/classes associated with the team will appear in the area entitled Available.
D a t a M a n a g e r S e t u p
08.15.2011 page 12
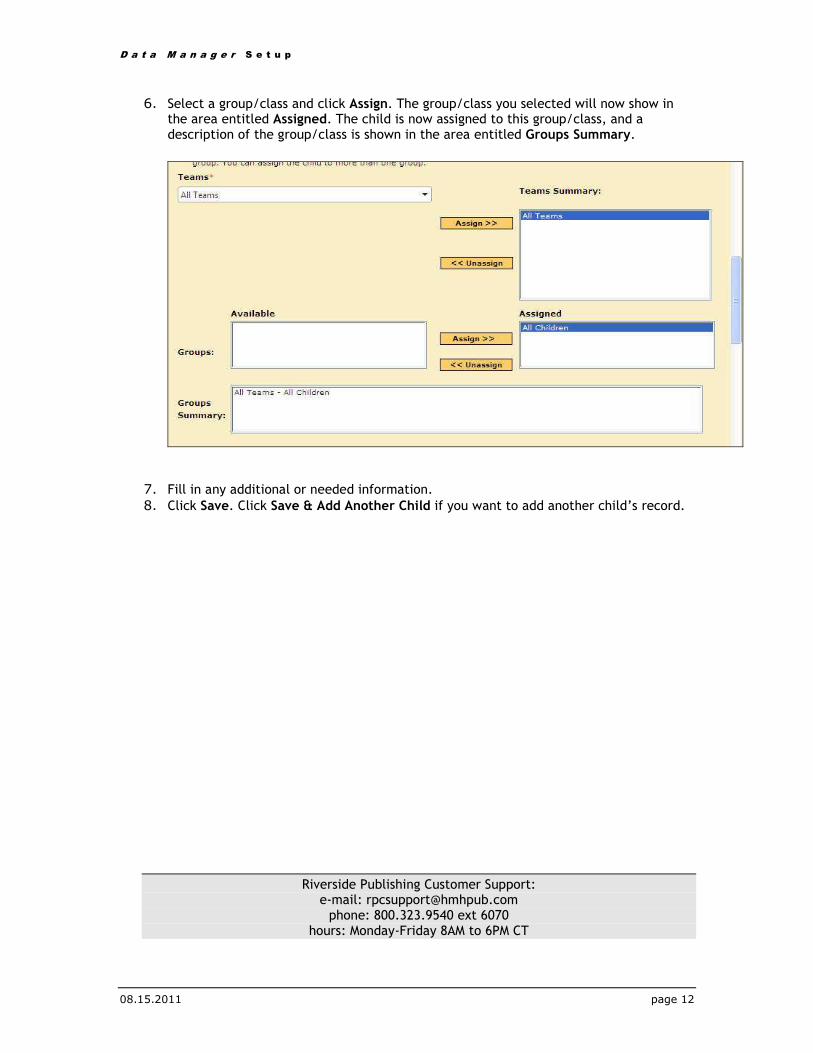
6. Select a group/class and click Assign. The group/class you selected will now show in the area entitled Assigned. The child is now assigned to this group/class, and a description of the group/class is shown in the area entitled Groups Summary.
7. Fill in any additional or needed information. 8. Click Save. Click Save & Add Another Child if you want to add another child’s record.
Riverside Publishing Customer Support: e-mail: [email protected] phone: 800.323.9540 ext 6070
hours: Monday-Friday 8AM to 6PM CT