Embed Size (px)
Citation preview

Bass Line Pro
Bass Line ProTable of ContentsIntroduction......................................................................................................................................5About this manual............................................................................................................................5System requirements........................................................................................................................6Installation PC..................................................................................................................................6Installation Mac OS X..................................................................................................................... 6Conventions and definitions............................................................................................................ 7Architecture......................................................................................................................................7
Signal routing...........................................................................................................................8Control Voltage (CV) ............................................................................................................. 9Filter selection..........................................................................................................................9
Making control settings....................................................................................................................9Floating display......................................................................................................................10Making fine adjustments........................................................................................................11Default value..........................................................................................................................11
Making a patch connection............................................................................................................ 11Patch socket menu..................................................................................................................11
Loading and saving patches........................................................................................................... 12Using the Aux input.......................................................................................................................12Control section...............................................................................................................................13
Options Menu.........................................................................................................................14Pattern menu ......................................................................................................................... 16Pattern selector.......................................................................................................................17Pattern write protect button....................................................................................................17Pattern lock button................................................................................................................. 17Tempo control........................................................................................................................17MIDI panel.............................................................................................................................18
Patch Info dialog............................................................................................................................18Preferences dialog..........................................................................................................................19
Oscillators.............................................................................................................................. 19Filter Mode.............................................................................................................................20Global Visual Setup............................................................................................................... 20General...................................................................................................................................20
Advanced Randomizer...................................................................................................................21Pattern.................................................................................................................................... 21Density................................................................................................................................... 21Root........................................................................................................................................21Mode...................................................................................................................................... 22
Synthesizer section.........................................................................................................................23Output and shaper.................................................................................................................. 23Voltage Controlled Oscillator (VCO) ...................................................................................24Glide time knob .....................................................................................................................24Trigger and Gate time settings...............................................................................................24Mixer......................................................................................................................................25Modulation Generator (MG)..................................................................................................25
2

Bass Line ProNoise Generator (NG)............................................................................................................26Operations .............................................................................................................................26CV sockets............................................................................................................................. 27Main controls......................................................................................................................... 27Tune....................................................................................................................................... 27Cutoff..................................................................................................................................... 27Resonance.............................................................................................................................. 28Envelope Modulation.............................................................................................................28VCF Tracking........................................................................................................................ 28Accent ................................................................................................................................... 28Accent circuit settings............................................................................................................28Envelope generators (EG) .....................................................................................................29Volume Envelope Generator (VEG).....................................................................................29Main Envelope Generator (MEG) ........................................................................................ 29Stereo delay Unit (DLY)........................................................................................................30
Voltage Processors.........................................................................................................................31Envelope follower..................................................................................................................31Attenuator 1........................................................................................................................... 31Attenuator 2........................................................................................................................... 31Inverters................................................................................................................................. 32
Pattern section................................................................................................................................33Pattern clear button................................................................................................................ 33Run/Stop button..................................................................................................................... 33Auto Advance selector...........................................................................................................33Steps and prescale selector.....................................................................................................34Keyboard................................................................................................................................34Step selectors......................................................................................................................... 34Next/Back step selector..........................................................................................................35Sequencer CV outputs............................................................................................................35
Using Pattern Mode....................................................................................................................... 36Pattern Sequencing.................................................................................................................36Pattern Sequencing without retrigger.....................................................................................36Getting the ‘303’ sound......................................................................................................... 37
Using Note Mode...........................................................................................................................37Monophonic Operation.......................................................................................................... 37Polyphonic Operation............................................................................................................ 38Sequencer in Note mode........................................................................................................ 38Getting the ‘303’ sound in Note mode...................................................................................38
MIDI CC........................................................................................................................................ 38MIDI Learn ........................................................................................................................... 38
Automation of Controls................................................................................................................. 39MIDI Implementation.................................................................................................................... 39
Channels.................................................................................................................................39Notes...................................................................................................................................... 39Velocity..................................................................................................................................39Controllers..............................................................................................................................39
3

Bass Line ProPitch Bend..............................................................................................................................39Pedal hold...............................................................................................................................40Channel pressure (Monophonic after touch)..........................................................................40Program Change.....................................................................................................................40Bank Select............................................................................................................................ 40
Importing Rebirth RB-338 Patterns...............................................................................................40Freebee/Text pattern format...........................................................................................................40Programs/Banks............................................................................................................................. 41Copying Patterns between Instances..............................................................................................41Tutorials......................................................................................................................................... 42
Tutorial 1 – Inverting the filter envelope...............................................................................42Tutorial 2 – Using MG as third VCO.................................................................................... 42Tutorial 3 – Delayed LFO......................................................................................................42Tutorial 4 – FM Bell.............................................................................................................. 43Tutorial 5 – Chorus effect......................................................................................................43Tutorial 6 – 909 Kick.............................................................................................................44Tutorial 7 – Compressor........................................................................................................ 44Tutorial 8 – Auto Filter..........................................................................................................45Tutorial 9 – Velocity Sensitive Envelopes.............................................................................45Tutorial 10 – Getting the '303' sound.....................................................................................45
Thanks............................................................................................................................................46Appendix: Patch socket list............................................................................................................47Appendix: Skin interface format....................................................................................................49Appendix: Specifications...............................................................................................................50
4

Bass Line Pro
Introduction
Thank you for using AudioRealism Bass Line Pro!
Bass Line Pro is a monophonic/polyphonic semi-modular synthesizer plug-in with an integrated pattern sequencer. While the unique sound of the Bass Line is well known and has become a standard in the music industry, the Pro version builds on its strengths and extends on them to reach new sonic possibilities without losing any of its original expression.
Some of the most eye and ear catching features are:
• Intuitive patch cord interface which allows freedom in modulation routing.• Extensive range on oscillators and filters.• Audio rate modulation.• Oscillators can be swept from bass up to treble ceiling while retaining low aliasing and
without any other digital artefacts.• The modulation generator can be used as a third oscillator while routed to multiple
destinations.• A stereo delay unit with modulatable delay times for interesting and atmospheric sounds.• With 32 notes polyphony it becomes powerful general purpose virtual analog synthesizer.
About this manual
This manual assumes you have some knowledge about subtractive analog type synthesizers, so it does not go into depth about certain concepts as how waveforms are constructed or how control voltage (CV) works in detail. There are plenty of resources on the Internet for information about the craft of sound synthesis, for instance try googling for 'Subtractive synthesis'.
5

Bass Line Pro
System requirements• Windows 2000/XP: P4 1 GHz, 256 Meg RAM or equivalent• Mac OS X 10.3.9: G4 1 GHz, 256 Mb RAM or equivalent • About 20Mb of hard drive space
Installation PC
Locate the executable Install_BassLinePro.exe and run.The installer will suggest a path to install the plug-in into. If the path is correct, click <Install> else browse to the path where you keep your VST plug-ins and then click <Install>.After starting the plug-in, enter the registration information that you received
Installation Mac OS X
Locate and unzip the executable in Install_BassLinePro_Vst.zip or Install_BassLinePro_AU.zip depending which one you have received.The installer will suggest a path to install the plug-in into.After starting the plug-in, enter the registration information that you received.
Currently the Audio Unit version is only supported for OS X 10.3.9 and higher.
Some hosts need to rescan the plug-ins directory to make the new plug-ins visible from the host. Consult your host documentation. In case of problems, please contact [email protected].
6

Bass Line Pro
Conventions and definitions
1. AudioRealism Bass Line Pro is often referred to as ABL Pro in this document.2. A MIDI note/event is an entity that is sent from the host to the plug-in.3. A step is an entity that the sequencer uses. It contains information about pitch, slide,
accent and gate.4. A pattern consists of a number of steps (1-64).5. A program consists of synth settings (like cutoff freq., resonance, waveform etc.)6. A state contains the modes (like MIDI and sync) of the plug-in, the step number and
configuration information.7. A patch consists of a program, 128 patterns and the current state. 8. The configuration file Config.ini contains information about how the plug-in should be
initialized on start up.9. The file MIDICC.ini contains information about the assigned MIDICCs and is saved
automatically when the plug-in closes.
The screenshots are from the PC version of ABL Pro. The Mac versions appearance in dialog may differ but the contents should be the same.
Architecture
The architecture of ABL Pro is of traditional subtractive type split into a number of modules: It has two voltage controlled oscillators (VCOs), one voltage controlled filter (VCF) and one voltage controlled amplifier (VCA). The VCF and VCA are each controlled by a designated envelope generator (MEG and VEG respectively). The modulation generator (MG) can be routed several destinations simultaneously. All modules can be controlled by the digital sequencer. ABL Pro emulates each of these modules down to component level where even effects as hysteresis are taken into account
7

Bass Line Pro
Basic signal path, multiple voices
There are two types of signals: Audio and Control Voltage (CV). In the diagram above all audio signals are represented by horizontal arrows and the CVs by vertical arrows. Starting from left with audio signals we see that the oscillators VCO1 and VCO2 are mixed and fed into a shaper. The mixer takes input from the shaper, noise generator (NG), aux input and optionally the modulation generator (when used as an audio source). The signal continues to pass through the filter (VCF) and then into the VCA. The output is taken and fed into a Delay unit that mixes the output of all voices.
Looking at the CV signals we can see that the modulation generator (MG) can be fed into most modules while the envelope generators (MEG and VEG) are more specialized. The sequencer (SEQ) has four signals (Note CV, Gate, Accent, Slide) which control the synthesizer. When ABL Pro is in Note mode the sequencer signals are disconnected from the synthesizer but may be manually routed.
Note: This is an overview schematic of the default control routing. Individual patching allows either to override the internal routings or to create additional CV routings.
Signal routing
The audio signals in ABL Pro are hard-wired. You cannot change how audio is routed other than by using the controls on the panel. The control signals have some flexibility. There is a default control signal routing but this can be overridden in some cases and in other cases these add to the hard-wired routing (as in both the hard-wired and custom routing both have effect at the same time).
VCO1 VCO2 NG AUX
VCF
VCA
MEG VEG
MG
MIXER SHAPER
VCO1 VCO2 NG AUX
VCF
VCA
MEG VEG
MG
MIXER SHAPER
VCO1 VCO2 NG AUX
VCF
VCA
MEG VEG
MG
MIXER SHAPER
Voices
DE L A Y
S E Q
8

Bass Line ProControl Voltage (CV)
ABL Pro makes use of a bipolar control voltage system. This means control voltages can both be positive and negative. Usually these stay within the -1..1V range but this is of little concern to the user. For frequency type of inputs this usually means 1V/octave and for amplitude inputs this means volume (0 being completely silent, 1 maximum loudness, and -1 maximum loudness phase inverted).
It is often not desired to phase invert a signal, so a Bias output in the Attenuator is provided which helps to keep the signal in 0..1 range (see Voltage processor - Attenuator 1).
Filter selection
ABL Pro has three different filter selections. The default filter is the 24dBSO/octave, which designates a self oscillating 24dB/octave filter.
• 24dBSO/octave – Self oscillating filter. Designed to work well in most synthesized patches. This filter contains non linearities which cause overtones when high resonance is used. It has a similar sound to the '202' or overdriven '303' filter. However the tracking has been improved to cover most of the keyboard range.
• 24dBSO/octave 2x oversampled – An oversampled version of the above filter. Has greater range, and tracking is improved. It also colors the signal less when using maximum cutoff and minimum resonance. This makes this filter ideal for processing external signals. It also has some better properties when extreme modulations are being used. This filter consumes more cpu than the standard 24dBSO/octave filter.
• 18dB/octave – Legacy filter which does not self oscillate. It has less good tracking capabilities although puts less strain on the cpu. This filter is best for sounds that need low to medium resonance, or if the traditional squelch is sought for.
Making control settings
The main interface of ABL Pro consists of knobs, buttons, switches and digit displays.
9

Bass Line Pro
• Knobs – Knobs are turned in a linear fashion, that is click and drag mouse up/down or right/left.
• Buttons – A button goes down on a mouse click and pops back up on release.• Switches – The switches have two or more states that can be alternated between by
clicking the switch and dragging in the direction of the preferred state.• Digit displays – Display a value but also accept changes by clicking and dragging the
mouse up and down. Some digit displays also have a double arrow button that allow you to change the value with one unit at a time.
• Light emitting diodes (LED) – Either light or not depending on the state of the function it represents.
Floating display
The floating display shows the current parameter with its value and unit, or the source and destination sockets when making a patch connection. In MIDI Learn mode the floating display will show the current assigned CC for the parameter instead of a value.
Common units used to present a value:
10

Bass Line Pro• Time unit: millisecond (ms) – one thousand of a second, seconds (s).• Amount: percentage (example 55%).• Frequency: Hertz (Hz) – number of cycles per second.• Tuning: semitones – In standard tuning 12 semitones is one octave (doubling of
frequency).
Making fine adjustments
Finer settings can be made for knob controls by dragging the mouse right or left instead of up or down. For even finer settings use the <Shift> key while dragging.
Default value
A knob can be reset to its center value by pressing <Ctrl> (or <Apple> on Mac) and clicking on the knob.
Making a patch connection
There are two ways to make a routing connection:• Selecting a socket and dragging the cable to a second socket• Right clicking on a socket and selecting a source/destination
An input can only be connected to an output or vice verse. Multiple connections from one output to several inputs can be made (Y splitting the signal).
Patch cables connected to a socket can be removed by pressing <Shift> and clicking the socket or by right clicking and selecting Disconnect from the context menu.
Patch socket menu
The patch socket menu displays all available sources and destinations for a certain socket. It also displays the sockets function and if its an input (left arrow ) or output (right arrow ). Existing connections to other sockets are marked with a star (*).
11

Bass Line Pro
Loading and saving patches
Loading and saving patches is done with the Patch menu, which is located in the upper left (under the Bass Line Pro logo). It is useful to store patches in subdirectories because they will automatically become sorted that way.
If a track that contains ABL Pro instances is saved from the host, all used patches will be saved along with the song, embedded in the song file and detached from ABL Pro's sound banks on your hard drive, thus preventing that subsequent changes of sounds or sound banks can affect your saved work.
Using the Aux input
ABL Pro comes in two versions: The standard synth version and the FX version. Both versions can process external audio although some hosts only allow synths to act as a sound source while others do not make a difference.
Regardless if you are using the synth or FX version of ABL Pro the aux input must be enabled via the Options menu or the AUX quick button. Unless the aux input is enabled no audio will pass through to ABL Pro.
The special 2x oversampled filter is designed to perform on aux signals. While this filter consumes more cpu power it has better properties for dealing with external audio. For example, there is only subtle coloring of the external audio when cutoff is fully clockwise and resonance is zero. Since there is no way of predicting the input to ABL Pro the oversampled filter also performs better on “hot” inputs.
If ABL Pro is inserted into a stereo track the right and left input channels will be mixed into a mono aux signal.
12

Bass Line Pro
Control section
Patch menu
The patch menu consists of three buttons (from left to right): Previous patch, Patch menu and Next patch.
The previous/next patch buttons select the respective patch in the current directory. The current directory can be changed by holding down <Shift> while clicking on one of the buttons. Note: ABL Pro can only switch between directories when they reside in the root, to access sub directories you must select them via the patch menu.
Clicking on the Patch name will bring up the patch menu, which looks like this:
The menu entries are:
• Open Patch – Brings up the open patch dialog.• Save Patch – Saves the current patch to the current directory and name.• Save Patch As – Brings up the save patch dialog.• Auto Run/Stop – If a patch is saved with the sequencer running (Run/Stop LED
flashing) then the sequences may automatically start when Auto Run/Stop is On. If a directory contains a number of sequenced patches it might help turning this on so that the sequences may quickly be auditioned and browsed.
• Current directory – Sub menu that shows all the patches in the current directory. This is a shortcut to the current directory.
Below these entries the actual directories and patches are listed.
13

Bass Line Pro
Options Menu
Pushing the button brings up the options menu.
• Activate MIDI Learn – Activate or deactivate MIDI learn.• Hide Patch Cables – Show or hide the patch cables. Some hosts allow the key
combination <Ctrl>+L to hide/show the cables.• Enable Aux Input – Enables the aux input..• Filter: 24dBSO/octave – Toggles between filter types.• Load MIDICC map - Brings up a file selector where a MIDICC map can be loaded.• Save MIDICC map - Saves the MIDI controller map to a file.• View Configuration files - This will open the configuration files via a text editor.• Select Skin - Brings up a dialog where a new skin can be selected. Note: All skins end
with the extension .skn.• Set Default Skin - Brings back the standard skin.• Show Patch Info - Shows the patch info dialog.• Set Preferences – Brings up the preferences dialog.• About ABL Pro / Registration - Presents registration and information about the plug-in.• Visit www.audiorealism.se – Takes you to the webpage.
Option quickbuttons
14

Bass Line Pro
The quickbuttons are a quick way to access common functions that are found in the options menu and preferences dialog:
• Cables – Show or hide the patch cables.• Info – Shows the Patch Info dialog.• MIDI Learn – Activate or deactivate MIDI learn.• Filter – Switch to next filter.• Aux - Enable or disable Aux signal processing.
Panic button
The panic button will stop all sound and reset all voices. This is useful when a patch gets out of hand or ABL Pro is eating too much cpu cycles and you quickly need to regain control.
Note mode selector
The Note mode selector selects if ABL Pro is operating in Monophonic or Polyphonic mode (see Note Mode)
Sync mode selector
The sync mode switch has two settings: Internal and Host. To change the settings click on the switch and slide the mouse in the direction you wish to set the switch.
• In Internal sync mode it is possible to set the tempo between 50 and 250 BPM • In Host sync mode the tempo control has no effect as the tempo is read from the host,
and cannot be altered from ABL.
Pattern/Note mode selector
The pattern/note mode switch selects the way ABL Pro responds to MIDI. It also has some effect on the hard-wired routings under the ’lid’.
15

Bass Line Pro
• In Pattern mode patterns are selected from MIDI notes. Each MIDI note corresponds to one pattern, with the lowest possible note being pattern 0 (zero) and the highest note being pattern 127. A note on message will start a pattern and a note off message will stop the pattern. In this mode the envelopes are triggered by the sequencer and the sequencer CV outputs are automatically routed to the VCO, EG’s, Glide and Accent modules.
• In Note mode notes are played directly from the MIDI notes and the internal sequencer is disconnected by default. The EG’s are triggered by note on and off events and the oscillators and filter will track to the MIDI note.
Pattern menu
The pattern menu is used to alter the current pattern using following functions:
• Copy – Copies the pattern to the copy buffer• Paste – Pastes the copy buffer over the current pattern
Note: Copy and Paste can be used between different ABL Pro instances
• Transpose +12 - Transposes the pattern up 12 semitones (one octave).• Tranpose -12 - Transposes the pattern down 12 semitones (one octave).• Transpose +1 - Transposes the pattern up 1 semitone.• Transpose -1- Transposes pattern down 1 semitone.
Note: An attempt to transpose out of range will set the notes to the highest/lowest pitch that is possible.
• Expand pattern – Makes the pattern twice as long by inserting a blank step between each step.
• Shrink pattern – Makes the pattern half as long by removing a step between each step• Duplicate steps – Steps are repeated to fill the entire pattern.
• Shift Left - Shifts pattern one step to the left.• Shift Right - Shifts pattern one step to the right.
Note: The shift functions only affect the steps within the pattern length and work circularly.
• All notes off - Sets all notes to rests.• All accents off - Turns off all accents.• All slides off - Turns off all slides.
16
Bass Line Pro• Randomize all - Randomizes everything (pitch, transpose, accent, slide and time mode). • Randomize pitches - Randomizes only the pitches.• Alter pattern - Shuffles the order of the steps without changing the notes.• Advanced Random - Brings up the Advanced Randomizer dialog.
• Import pattern - Import (Freebee) pattern from text format.• Export pattern - Export pattern to text format.• Import Rebirth 338 patterns - Imports Rebirth patterns into ABL Pro patterns 0-63
Pattern selector
Click the arrows to change the pattern in increments, or click on the digits and drag the mouse up or down to scroll patterns.
Pattern write protect button
The pattern can be write protected. When write protected changes to the pattern via the pattern section cannot be made. Its useful to activate write protect before saving a patch with a pattern that you are happy with to avoid it becoming overwritten later. It is also useful to have the write protection enabled when auditioning patches via the GUI keyboard.
Pattern lock button
The pattern lock button will prevent ABL Pro from changing patterns via MIDI. ABL Pro will only respond to the start/stop events of the note when lock is activated. This is useful when the patch only contains one pattern and should be activated before saving the patch.
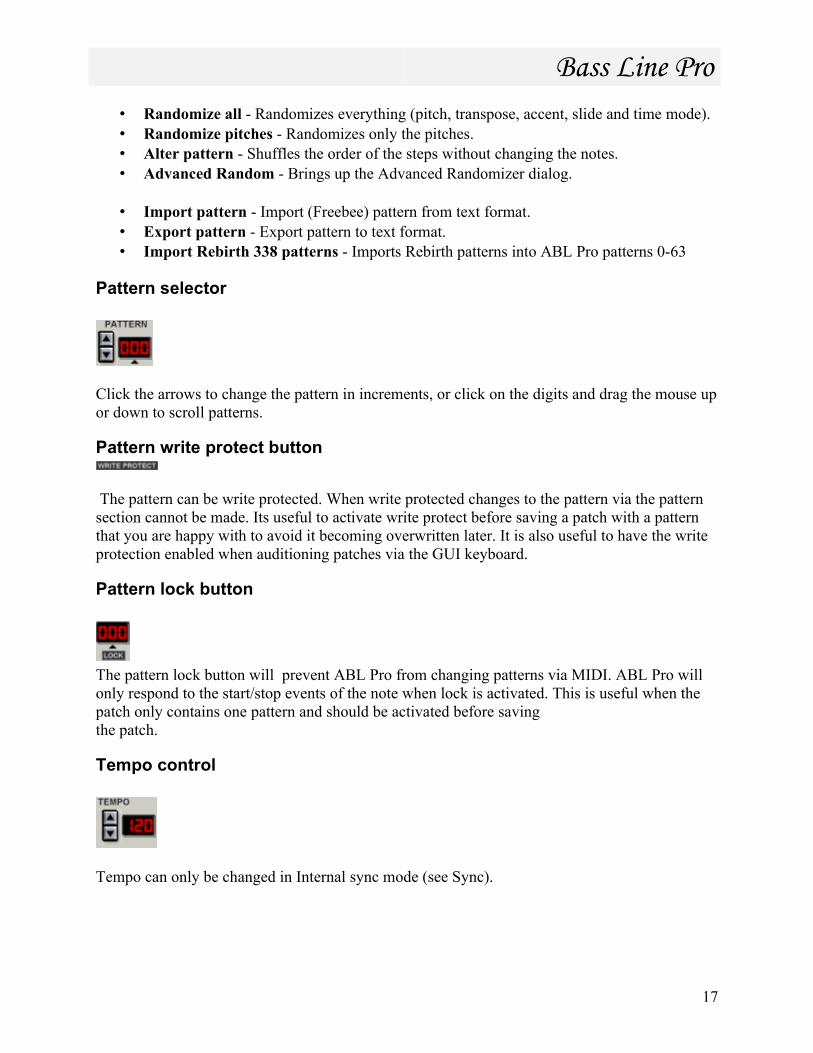
Tempo control
Tempo can only be changed in Internal sync mode (see Sync).
17

Bass Line ProMIDI panel
The MIDI in LED will light whenever ABL Pro receives a MIDI event. The MIDI panel contains four CV outputs: Note, Velocity, Mod Wheel and Channel Pressure.
Patch Info dialog
The Patch Info dialog is brought up by selecting Patch Info from the Options menu, or by pressing the Info quick button.
The Patch Info can be used to store notes about the patch, and it can hold about 1000 characters of text. The check box selects whether the dialog should appear automatically when a patch is loaded. The Info quick button will lighten when patch info is available.
Note: The patch info dialog will only appear automatically when the patch is loaded from the Open Patch dialog to avoid disrupting the user when using the Patch browser.
18

Bass Line Pro
Preferences dialog
The preferences dialog can be used to set ABL Pro’s configuration settings. The dialog is divided into four groups: Oscillators, Filter Mode, Global Visual Setup and General settings. The settings can be saved as default settings so that next time you start ABL Pro your preferences will be recalled. Some settings are always saved automatically, for instance the Global Visual Set-up selections.
• Restore Default – Restores the current default setting from the hard drive.• Set As Default – Saves the current settings to the hard drive. They will be recalled
automatically the next time ABL Pro is run.• Cancel – Roll back any settings since the dialog was brought up.• OK – Accept the new settings.
Oscillators
The oscillators tuning can be either be standard (equal tempered), or a custom tuning can be loaded by pushing the select button.
The Aliasing free oscillators check box sets the oscillator model that ABL Pro uses. By default this box is checked. Unchecking this box will cause a change to the oscillators timbre and some aliasing will become present on high frequency notes. However, it will save some cpu, so if you
19

Bass Line Proare having performance problems you might want to have this box unchecked while doing sound design and only check it once the final results are to be rendered.
Note: ABL Pro currently does not ship with any tuning files – these will be made available later on-line via www.audiorealism.se.
Filter Mode
The filter mode can be changed from the dialog as well as from the main panel. For a more detailed description of the filter modes see Filter Modes.
Global Visual Setup
These settings are always saved when ABL Pro’s GUI is closed.
• Cable shadows – The cable shadows can be turned off to make the cables less obstructing for the view.
• Antialiasing – If you are experiencing display problems with the cables present or having performance problems related to the graphics display, try turning anti aliasing off.
• Show cables – Unchecking this box may give an extra performance boost.• Floating display – The floating display shows the current value for the parameter that is
being changed. It can be hidden by unchecking this box.• Sticky controls – Some controls (like VCO-1 and 2 tuning) stick to certain positions, like
the center value (0 semitones). This can be turned off if so desired.• Cable tension - Controls the amount of curvature the cables will have in the display.
Moving the slider to the left will increase tension while moving it to the right will reduce tension.
• Set Default Skin – Sets the default skin.
General
• Max Polyphony – The maximum number of voices can be changed, with 32 voices maximum. If you are using a limited computer you may want to keep the number of voices low (for example 6 voices), else ABL Pro might cause clicks or pops or cause the host to go out of sync.
• Bend Range – The pitch bend range can be set between 0 and 24 semitones (2 octaves).• Sync to host – When this is activated ABL Pro’s tempo will automatically be set to
match the host’s.• Confirm pattern clear – If the Clear button in the Pattern section is hit then a dialog will
appear asking you to confirm the clear.
20

Bass Line Pro
Advanced Randomizer
The advanced randomizer is a useful tool for creating and modifying patterns. The dialog is divided into four groups: Pattern, Density, Root and Mode.
Pattern
The length of the pattern can be set with the slider. The high and low octaves for the operations are set with the spin controls.
Density
Density is the number of events per property (note, gate, slide and accent) that will occure while randomizing. For example: if density is set to three then only three events in the whole pattern will be set. If a density of zero is selected then 0 events will occur for that property (for example, all gates can be turned off). The checkboxes select which of the properties will be affected by the operation,
Root
One of the twelve root keys can be set for the pattern.
21

Bass Line Pro
Mode
One of the seven scales can be selected. Notes will be picked randomly out of each scale unless Fix scale is checked. In that case the scale will be written chronologically from the Root note up to the highest note in the scale, cyclically.
The reset button will set the dialog to the default state. The Go button will run the randomizer. Successive presses to the Go button will repeat the randomization process. To exit the dialog press Done.
22

Bass Line Pro
Synthesizer section
Output and shaper
The output panel has three controls: Boost, Shape and Master Volume.
• Boost – Controls the amount of bass boost of the two oscillators• Shape – Applies a wave shaper to the mix of the two oscillators• Volume – Controls the master output volume
Note: High volume settings can cause clipping. The effective volume is dependant on the patch, so the volume may be higher or lower than depicted by the volume display.
23

Bass Line Pro
Voltage Controlled Oscillator (VCO)
ABL Pro has two voltage-controlled oscillators. The oscillators are identical in every aspect except that VCO-1 has sync output and VCO-2 sync input and the FM function differ between the oscillators. The sync relationship is controlled on the Sync and Ring panel. Each oscillator has five waveforms: sawtooth, square wave, pulse, triangle and sinus. Sawtooth, square wave and pulse are harmonically rich waveforms, while triangle and sinus contain less harmonics thus sounding softer.
• Waveform selector – Selects the waveform for the oscillator.• Pulse Width (PW) knob - Controls the basic pulse width for the pulse waveform, with a
duty cycle of 0-100%. Note: Setting a duty cycle of 0% or 100% can produce no sound since the pulse becomes too narrow to be audible.
• Range selector – Sets the scaling of the oscillator, 16’ (lowest), 8’ (middle) or 4’ (highest).
• Tuning knob - The tuning knob has a wide range of 96 semi tones (-48 to +48 semi tones, or 4 octaves below to 4 octaves above center range).
• Frequency Modulation (FM) knob – On VCO-1 the FM knob controls the amount of filter modulation of the VCF. On VCO-2 it controls the amount of frequency modulation of VCO-2 from VCO-1.
The oscillator module has two CV inputs: Frequency CV Input and PW CV Input.
Glide time knob
The glide time setting controls the speed of a glide circuit with 1 ms minimum to 1 s maximum glide time. The glide circuit is either activated by the sequencer (in Pattern mode) or by overlapping notes (in Note mode).
Trigger and Gate time settings
24

Bass Line Pro
• Gate time knob - The gate time setting sets the gate time of the sequencer as a percentage of the total step time (with varies with tempo). The LED above the gate will light when the gate is active.
Trigger controls how the envelopes (MEG and VEG) are triggered when ABL Pro is in Note mode.
• Single – The envelopes are triggered at the start of a new note and not retriggered until all keys are released.
• Multi – The envelopes are triggered every time a new note is struck.
Mixer
The mixer has four sources and thus four control knobs: VCO-1, VCO-2, Noise and Aux.
It also has two balance CV inputs: VCO-1/2 balance CV and Noise/AUX balance CV’.These balance inputs can be used to automate the mixing balance of each pair of sources via CV. When the CV is high then the left sources (VCO-1 and Noise) will be audible, when the CV is low then the right sources are heard (VCO-2 and Aux).
Modulation Generator (MG)
The modulation generator has five waveforms and five hard wired destinations. The waveforms are: sawtooth, square wave, triangle, sample&hold and decay envelope. The destinations are: VCO-1 Frequency, VCO-2 frequency, VCF frequency, VCA amount, and VCO-1 pulse width.
25

Bass Line ProThe frequency range of the MG is 0.1Hz to 1638.4Hz, although it can go higher with external CV modulation.
• Waveform Selector – Selects the waveform for the modulation generator.• Frequency – Sets the frequency or the BPM rate. The MG rate can be tempo synced by
clicking the FREQ label which will then flip to BPM.• Amount – Sets the amount of modulation output. Note: This also affects the volume if
the MG is used as an audio output.• Retrig - When the retrigger selector is active the MG will reset its cycle when a trigger
signal is received. The source of the trigger signal either comes from MIDI or the Sequencer depending on if ABL Pro is in Note or Pattern mode
• Audio - The audio selector may be used to audition the MG. This can be used as an additional free running audio oscillator.
The MG has one CV output and two inputs, MG CV Output, MG Freq CV and MG Amount CV.
Note: When using custom CV routing to one of the five destinations the MG's hardwired connection will be overridden.
Noise Generator (NG)
The noise generator produces Gaussian noise. The approximate color of the noise can be varied between red and white. There is one Noise color CV input. The resulting noise color depends on a combination of the knob color setting and the CV input.
Operations
The operations module can combine the oscillators in two ways: Ring modulation (1 x 2) and sync (2→1).
• Ring modulation between VCO-1 and 2 is performed and routed to VCO-1 in the mixer. Ring modulation is sometimes referred to as Amplitude modulation in other documents.
• Sync synchronizes VCO-2 to VCO-1 (when VCO-1 starts a new cycle, so will VCO-2) and routes the output to VCO-2 in the mixer.
26

Bass Line ProCV sockets
The three CV jacks are (from top to bottom): Shaper CV, VCF CV and VCA CV.
• Shaper CV Input - Bipolar shaper input which controls the amount of wave shaping that is applied to the VCOs. Note: When the Shaper Amount Knob is set to zero CV modulations will have no effect.
• VCF CV Input - The VCF CV input is particularly useful because it allows to modulate the VCF frequency over the whole spectral range (unlike the MG VCF Destination which only covers one octave above and below the filter frequency). For the filter to increase its frequency one semitone the CV needs to rise 1/8th of a unit. Attenuator 1/8 outputs come particularly in handy for converting MIDI CV output to track the VCF accurately.
• VCA CV Input – Bipolar input to the VCA which controls the amplitude of the audio signal. When the CV is negative the VCA will make the sound softer, when it is positive it will make the sound louder.
Note: Connecting a gated signal (from example the Sequencer CV outputs) directly to the VCA or VCF CV inputs can cause click sounds. If this is not desired use the Attenuator 2 – Lag output to smooth the gate signals.
Main controls
The main synthesizer settings comprise of Tune, Cut-off, Resonance, Envelope Modulation, VCF Tracking, and Accent.
Tune
The tuning control has a two octave range. ABL Pro’s default tuning is set to A-220Hz. The tuning control only affects the oscillators, it does not affect the tuning of the MG.
Cutoff
The cut-off control sets the basic frequency of the VCF. The filter is a low pass meaning all frequencies above the cut-off frequency will be attenuated. Depending on filter mode the attenuation is 18dB/octave or 24dB/octave.
27

Bass Line ProResonance
The resonance knob has two functions: It emphasizes frequencies around the cut-off point, and it affects the envelope of the accent circuit. Increasing the resonance will make the accent sound softer.
Envelope Modulation
Envelope modulation determines how much the main envelope generator (MEG) should modulate the filter frequency around the basic cut-off point. Envelope modulation is bipolar, thus it modulates the cut-off positively and negatively with the basic cut-off as center point.
VCF Tracking
The VCF Tracking knob enables the VCF filter frequency to track the sequencer note CV. The center position of the knob corresponds to 100% tracking which means a increase of one semitone in note CV will increase filter frequency with one semitone. The maximum amount of VCF tracking is 200%.
Note: The tracking is not accurate over the whole range of the filter. For more accurate filter tracking use the VCF CV input socket (see CV Sockets).
Accent
The accent control sets the amount of accent for those steps which have accent programmed on them. Turning the knob clockwise increases the effect of accents. The effect of the accent is also determined by the Accent circuit settings.
Accent circuit settings
When an accent is activated the MEG decay time is overridden with the accent decay time. The accent circuit can be activated in three ways: from the sequencer, the accent manual button or the Accent trigger input.
• Accent Decay – The decay time of the MEG envelope when accent is activated.• Accent Volume – The amount of VCA modulation is controlled by the Accent Volume
knob (Acc. Vol).• Accent Manual button – The Accent Manual button will activate the accent circuit for
as long as the button is held down.
28

Bass Line ProThe accent circuit has one Accent Trigger input which can be used to trigger an accent when the input rises above a threshold (0.5V). The accent LED will light when the input exceeds the threshold or if the accent manual button is pressed.
Tip: The Accent trigger input can be used to monitor signals via the accent LED as it light when input rises over the threshold.
Envelope generators (EG)
ABL Pro has two standard ADSR type envelope generators. They are identical except one is hard-wired to the VCA and the other one to the VCF and Accent circuit. The EGs are triggered either by the sequencer (in Pattern mode) or by MIDI (with a Note on event). The LED will flash when the EG receives a trigger signal.
• Attack – The time it takes for the voltage to reach its maximum value. If the envelope generator has some remaining voltage left over from a previous sweep the attack time may become shortened (for example, if the EG is retriggered while in release stage).
• Decay – This determines the time required for the voltage to drop to the sustain level. Turning the knob clockwise will increase decay time, while turning counter-clockwise will shorten the decay time.
• Sustain – This determines the level the voltage will drop to at the end of the decay time.• Release – This sets the time needed for the voltage to reach zero.
The envelope generators have two sockets:
• Amount CV Input – The amount (maximum peak) of the envelope generator can be modulated by using this input.
• Envelope CV Output – Momentary output of the EG.
Volume Envelope Generator (VEG)
The volume envelope generator mainly affects volume.
Main Envelope Generator (MEG)
29

Bass Line ProThe main envelope generator has two functions: it modulates the filter and drives the accent circuit.
Stereo delay Unit (DLY)
The stereo delay unit is global to all voices. It has adjustable amount, feedback, left and right delay times which can be tempo synced. The output of the delay is routed back into the input via feedback.
To activate tempo sync click the TIME label, which will then flip to BPM. The Delay time is then related to the number of steps in the pattern and affected by the current tempo. For example, BPM*4 means the delay will sound after 4 steps.
The LED will light when the delay is activated. It can be switched off by setting the amount knob to minimum position.
The delay controls are:
• Amount – The amount of delay to be mixed in. • Feedback – Higher feedback increases the number of echoes. • Left and Right Time – The delay times for the left and right channels of the delay.
There are two CV inputs (one for each channel) which can be used to modulate the delay times. The delay times can be modulated between minimum and the delay setting currently depicted by the knobs.
Note: There is only one global delay unit the delay inputs are connected only to the first ABL Pro voice (i.e. only the first voice will be able to modulate the delay lines).
30

Bass Line Pro
Voltage Processors
ABL Pro has a number of voltage processors which are used to shape control signals.
Envelope follower
The envelope follower operates on the aux audio input when ABL Pro is used as an insert effect. It has a single CV output that tracks the envelope of the aux signal. The envelope follower can be used to produce typical auto filter type of effects, or compressor and limiter effects. There are two trimmers that control the shape of the envelope: Attack Time and Release Time.
• Attack – The rising time of the envelope is set by the upper trimmer.• Release – The release time is set by the lower trimmer.
Attenuator 1
Attenuator 1 has one input and four outputs. The first two outputs scale the input to 1/8th or 1/2nd
(halves) respectively. The other two are variable outputs with trimmers. The first variable output is a simple variable attenuator and the second one outputs a biased voltage.
• Attenuator 1 Input – The input accepts any signal.• Attenuator 1 1/8 Output – The the input scaled by 1/8. This is can be used directly with
the VCF CV Input to get a semitone tuned frequency.• Attenuator 1 1/2 Output – The input scaled by ½.• Attenuator 1 3/4 Output – The input scaled by ¾ (default). The output scale can be
changed with the trimmer.• Attenuator 1 Bias Output – The biased output has a -1.0..1.0V range with the trimmer
in counter-clockwise position and 0.5..1.5V in clockwise position. With bias trimmer centered at 0.5 the output is 0..1V which is useful for amplitude type of signals.
Attenuator 2
Like Attenuator 1 except the last output (farthest to right) is a variable lag output that can be used to ”smooth” the input signal with variable amounts.
• Attenuator 2 Input – The input accepts any signal.
31

Bass Line Pro• Attenuator 2 1/8 Output – The the input scaled by 1/8. • Attenuator 2 1/2 Output – The input scaled by ½.• Attenuator 2 3/4 Output – The input scaled by ¾ (default). The output scale can be
changed with the trimmer.• Attenuator 2 Lag Output – The lag output with time constant controlled by trimmer.
The time constant can be between 0.1ms minimum to 54.6s maximum.
Inverters
The inverters flip their input signals upside down. For example this can be used to invert the signal from the envelope generators or the MG.
Note: Inverting signals may not always produce the result you expect. The inverters invert the signal around zero, while in some cases you would like to invert the signal while preserving the sign (also known as unipolar inversion, or TTL inversion). TTL inversion can be achieved by using the Attenuator 1 Bias Output with trimmer set at appropiate amount in conjunction with the inverter.
32

Bass Line Pro
Pattern section
The pattern section is used to enter patterns into ABL Pro’s sequencer. A pattern can be between 1 to 64 steps long and has one of four timings assigned to it. Each step has a designated pitch and five modifiers: Gate, Slide, Accent, transpose Up and transpose Down.
The pitch range that can be accessed from sequencer is 5 octaves, however it is possible to transpose a pattern outside that range with the pattern transpose functions.
Pattern clear button
Clears the pattern. All pitches are set to middle C and the gates are set to on.
Run/Stop button
The Run/Stop starts and stops the internal sequencer. When the sequencer is running the LED will flash.
Auto Advance selector
33

Bass Line ProWhen auto advance is on, entering a pitch from the pitch keyboard will automatically advance the step indicator to the next step. Turning off the auto advance will reset step indicator to the first step.
Steps and prescale selector
The steps control is used to set the number of steps in the pattern. Click the arrows to increment or decrement the number of steps, or click on the digits and drag the mouse up or down to scroll.
The prescale control allows you to change the timing of the pattern. The selections are 1/16, 1/32, 1/8 Triplet and 1/16 Triplet.
Keyboard
The pitch keyboard is used to enter pitches into the pattern. The LED (above or under the key) which is lit represents the pitch of the current step. If note is out of range of what can be displayed with the pitch leds then no leds will be lit.
Step selectors
Each step in the sequencer has five modifiers which can be set with the selectors:
• Gate – Whether the gate is on or off • Slide – Slide is activated on the step• Acc – An accent is programmed on the step
34

Bass Line Pro• Up – The pitch is transposed up one octave• Down – The pitch is transposed down one octave
Next/Back step selector
The digits indicate which step is currently being edited. Clicking the Next button advances to the next step. If the position is already on or beyond the last step the indicator will return to the first step. The step can also be selected by clicking on the digits and dragging the mouse up or down.
Sequencer CV outputs
The sequencer CV outputs are (from left to right): Note CV out, Gate out and Accent out.
• Note CV out – The Note CV socket reflects the programmed pitch of the step.• Gate out – Gated signal that is high when a gate is active, else low.• Accent out – Gated signal that is high when accent is active, else low.
The CV Outputs are always active whether ABL Pro is in Note or Pattern mode.
35

Bass Line Pro
Using Pattern Mode
Each MIDI note (0-127) corresponds to an ABL Pro pattern. Note on messages start playback of the pattern, and note off message stops playback. MIDI velocity information is not used in this mode.
Note: The pattern can be locked to prevent any pattern changes from MIDI by using the Pattern Lock button (see Quick buttons – Pattern lock button).
Pattern Sequencing
Pattern sequencing is done by using the draw/pen tool (or similar) in the host sequencer. Simply draw in the keyboard grid/matrix view how long each pattern should play.
Example:
Pattern sequencing
Assume all patterns are 16 steps long. Since the notes are not overlapping, the sequencer will retrigger and each pattern will play back steps 1-4.
Pattern Sequencing without retrigger
It is possible to cut off a pattern in the middle by using overlapping notes.
Example:
Pattern sequencing: Overlapping notes
In this situation the C2 note is never released. Since C#, D and D# overlap this note the sequencer will not retrigger and this will play back pattern C steps 1-4, C# steps 5-8, D steps 9-12 and D# steps 13-16. This opens up possibilities to create new interesting patterns from those in ABL Pro’s memory.
There are two things to keep in mind when using overlapping patterns:A re-trigger of the sequencer occurs when a note on event is received, and no pattern is currently playing. If more than two patterns are overlapped then ABL Pro will return to the highest pattern when a note off message is received. A good rule is to never use more than two overlapping patterns to avoid confusion.
36

Bass Line ProWhen switching from a pattern with greater number of steps to a shorter one (example going from 16 step pattern to a 4 step) the internal sequencer will start on the remaining step. Example: if ABL Pro is on step 13 and switches to a 4 step pattern, the first step played in the new pattern will be 2, since the remainder of 13/4 is 1 (the second step counting from zero).
Getting the ‘303’ sound
ABL Pro greatly supersedes the feature set of the traditional 303. However it has its heritage in the 303 architecture, and can produce many of its sounds. Here are some pointers on how to create those sounds:
• Use the 18dB filter and aliasing free oscillators.• Use only saw and square waveforms on VCO-1.• Set Release Times of MEG and VEG to 10ms.• Keep Gate Time around 50%.• Set Accent Decay to 30 ms and Accent Volume to 100%• Set VCF Track to 40%
Cutoff, Resonance, Env Mod, Accent and Decay knobs can now be tweaked as wished.
Note: Certain components like the accent circuit and filters in ABL Pro differ from those in ABL, so for strictly authentic 303 sounds use standard ABL.
Using Note Mode
When ABL Pro is in Note mode it acts as a normal MIDI device and the internal sequencer is disabled. MIDI velocity information is not hard-wired in any way but the MIDI Velocity CV socket on the MIDI panel can be utilized to create velocity sensitive patches.
Example of programming in Note mode
There are two playing modes when in Note mode: Monophonic and Polyphonic.
Monophonic Operation
In Monophonic mode only one voice is used. In this mode a patch may be played either with Single or Multiple triggering. With single triggering the envelopes are only triggered once: at the start of the note. They may only retrigger when all keys have been released. With multiple
37

Bass Line Protriggering the envelopes may be retriggered with the depressing and releasing of subsequent keys while holding down the first. The glide time knob determines the time of the pitch transition that occures between two notes if more than one key is depressed. To summarize:
• Pressing a second key while holding down the first will cause a glide to the new key, possibly retriggering the envelopes. The rate of the glide is determined by the Glide Time knob.
• Releasing a key will while another key is still pressed down will cause a glide the held key, and possibly retriggering the envelopes.
In Monophonic mode the Hold Pedal MIDI messages are ignored.
Polyphonic Operation
In Polyphonic mode the number of voices that can sound is determined by the Max Polyphony slider in the Preferences dialog.
Glides cannot be activated in this mode, the glide time and trigger settings have no effect.
In polyphonic mode ABL Pro responds to Hold MIDI messages, which is useful for playing pad type sounds.
Sequencer in Note mode
In Note mode the internal link to the sequencer is disabled. The sequencer will not have any effect on the sound, however you can still utilize the sequencer via the CV/Gate sockets on the sequencer's panel. If the sequencer's Note CV output is connected to the oscillators' frequency CV inputs, sequencer pitch and MIDI pitch will be added, thus allowing to transpose sequences from the keyboard.
Getting the ‘303’ sound in Note mode
Producing bass lines that sound accurate require use of many staccato notes. This can be done by using 32nd grid resolution in the host sequencer and making sure that each note is one half 16th
long. This approximates the standard gate time which is about 55% of the total note and needed for accurate 303 emulation.
MIDI CC
ABL Pro can be controlled externally with any MIDI CC controller. When the plug-in initializes, the controller map is read from the hard drive (the file MIDICC.ini which resides in the same directory that the plug-in is installed into).
MIDI Learn
38

Bass Line ProABL Pro has a learn function which enables the use of any external controller.
1. Activate MIDI learn in the Option menu or via the quick button.2. Select a control on ABL Pro’s panel and adjust it a bit.3. Turn the MIDI controller you want to assign to that control. You should see the control
on screen moving accordingly.4. Continue with all controls that you wish to assign.5. Deactivate MIDI learn in the Option Menu or via the quick button.6. (Optional)Save the controller map by selecting Save MIDICC in the Option menu.
When ABL Pro is closed (for instance when removing the plug-in from your mix, or closing the host sequencer) the controller map is automatically saved. Next time you load ABL Pro it will recall the settings you have made.
Automation of Controls
Each of the synthesizer controls can be automated by the host. Consult the hosts’ documentation on how to do this. Pattern interface buttons and control settings cannot be automated.
MIDI Implementation
ABL Pro responds to a number of standard MIDI messages. If nothing is noted about a specific message then ABL Pro does not support it.
Channels
ABL Pro receives messages on MIDI channels 1 to 16.
Notes
MIDI notes 0-124 are received.
Velocity
MIDI velocity is received but only has effect when routed from the MIDI Velocity CV socket to the desired destination.
Controllers
All standard MIDI controllers are supported via the MIDI learn feature. Controller value 64 is defined to represent the center- or 0-value of bipolar parameters like for example VCO-1-tuning
Pitch Bend
39

Bass Line ProPitch bend is handled with 14-bit accuracy. The bend range can be set between 0 and 24 semitones.
Pedal hold
ABL Pro responds to pedal hold when in polyphonic mode.
Channel pressure (Monophonic after touch)
Channel pressure is received and routed to the MIDI Channel Pressure socket.
Program Change
ABL Pro responds to Program Change messages. A Program Change message selects a patch within the currently active directory in the Patch browser.
Bank Select
ABL Pro interprets Bank Select messages as a chronological index into the patch menu. For example: If your third subdirectory is called Bank003 and ABL Pro receives a Bank Select message with value 2 (third counting from zero) then it will set the current directory to Bank003.
Note: A patch is only loaded after receiving both a Bank Select and Program Change message.
Importing Rebirth RB-338 Patterns
Rebirth RB-338 Patterns are imported to ABL Pro according to following scheme:
Rebirth Synth/Bank ABL Pro patternSynth 1 – Bank A 0-7Synth 1 – Bank B 8-15Synth 1 – Bank C 16-23Synth 1 – Bank D 24-31Synth 2 – Bank A 32-39Synth 2 – Bank B 40-47Synth 2 – Bank C 48-55Synth 2 – Bank D 56-63
Patterns 64-127 are not affected by this operation. When importing the settings of the ABL Pro controls are set to match those of Rebirth 338 Synth 1. Tempo, volume and distortion controls are not affected.
Freebee/Text pattern format
40

Bass Line ProThe import/export text format can be used to share patterns on-line via forums or email.The structure is as following: Four fields per line. Pitch, Gate, Slide and Accent which are delimited by white space.
• The pitch is represented in a tracker-fashion, example c-3 or g#4 and must be three characters wide.
• The gate is 1(one) for note on or 0(zero) for note off.• The slide is 1 for slide on or 0 for no slide.• The accent is 1 for accent or 0 for no accent.
The number of steps in the pattern is determined by the number of lines, so make sure to remove any preceding or trailing empty lines.
Programs/Banks
Patterns and patch settings are saved with the bank. When you reopen your project ABL will continue in the exact state that you saved the project in.
Copying Patterns between Instances
Each instance of ABL Pro has its own memory. In order to copy patterns from one instance to another, you need to either:
• Copy/Paste works directly between instances.• Export the pattern using the Export function in the Pattern menu, then import the pattern
into the other instance.• Save the .fxb bank from the host sequencer, then Load the .fxb into the other instance.
Note: There is no error checking on import so improper patterns might result in garbage when imported into ABL Pro.
41

Bass Line Pro
Tutorials
To follow each of these tutorials start with the Init Note Patch (found under Templates/Init Patch in the Patch menu).
The tutorial patches can be found under the Tutorials directory in the Patch menu.
Tutorial 1 – Inverting the filter envelope
1. Connect MEG Env CV Out to Inverter 2 Input2. Connect Inverter 2 Output to VCF CV Input3. Raise cutoff frequency to maximum4. Set Env mod to minimum
Tutorial 2 – Using MG as third VCO
The MG can be used a third VCO. However by default it will not track your keyboard. To do this we can make use of the MG CV Input.
1. Connect MIDI Note CV to MG Freq CV2. Activate Audio on the MG3. Set MG Amount to 100%4. Set MG Freq to approximately 164.77Hz
The MG will now sound detuned to VCO-1.
Tutorial 3 – Delayed LFO
Certain analog synthesizers have a Delayed LFO feature which fades in the LFO a time after a depressing a key. ABL Pro can be set up to do this by connecting an envelope generator to the MG Amount CV.
1. Connect VCF Env CV Out to MG Amount CV2. Set MG Waveform to Triangle3. Set MG Frequency to approximately 10Hz4. Enable MG Destination: VCO25. Set Mixer VCO-2 Level to 100%6. Set MEG Attack to 1.5 seconds and Decay to 4.0 seconds
42
Bass Line Pro
Tutorial 4 – FM Bell
Bell type sounds are generated by rapid (audio rate) modulation of oscillator frequency and amplitude.
1. Connect MG CV Output to VCO-1 and 2 CV Input2. Set VCO-1 Range to 4’ and Tune to +31.10 Semitones3. Set VCO-2 Range to 4’ and Tune to +17.60 Semitones4. Set MG Waveform to Triangle5. Set MG Frequency to approximately 415 Hz and MG Amount to 100%6. Enable MG Destination: VCA7. Enable Ring 1x2 (on the Sync panel)8. Set Mixer VCO-2 Level to 100%9. Set VEG Release 6.7 seconds10. Set MEG Release 2.7 seconds
Play keyboard in low to middle range.
Tutorial 5 – Chorus effect
The chorus effect is achieved by having two nearly identical voices play or sing the same thing. In synthesis chorus is often accomplished by using the same voice but delayed by a variable amount to simulate modulations. ABL Pro can use its delay unit in conjunction with the modulation generator to construct a chorus effect.
1. Set ABL Pro in Poly mode2. Connect MG CV Output to Inverter 2 Input3. Connect Inverter 2 Output to Delay time Left and Right4. Set MG Waveform to Triangle5. Set MG Frequency to 0.7Hz and Amount to 10%6. Set Delay Amount to 80%7. Set Delay Left and Right times to 43 and 41 ms respectively
Play some chords. If the Delay Amount is increased then a flanged type of sound will appear. Try playing with the delay times and MG Amount knob.
43

Bass Line Pro
Tutorial 6 – 909 Kick
The 909 is a famous drum machine which has a characteristic kick drum. ABL Pro can mimic these kicks by using the self oscillating filter with the modulation generator. A drum patch is typically untuned so we will use the MG which doesn’t track the keyboard by default.
1. Set the Mixer VCO-1 and 2 to minimum positions (0%)2. Set MG Waveform to Decay, with Frequency to 345Hz and Amount to 50%3. Activate Retrig and Audio on the MG4. Activate MG destination: VCF5. Set Cutoff to 250Hz, Resonance to 100% and Env.Mod to 35%6. Set VEG Attack to minimum, Sustain to 100% and Release to 60 ms7. Set MEG Attack to minimum, Decay to 80 ms, Sustain to 33% and Release to 2.0 s
Tutorial 7 – Compressor
A compressor evens out the volume of its input by detecting the amplitude envelope of the sound and pushing down the peaks of that envelope. The Aux Envelope Follower analyzes the volume progression of an incoming signal and creates a correspondent envelope. To achieve a compression effect, the resulting envelope can be used to attenuate the peaks of the Aux signal as shown in the following steps:
1. Enable AUX Input in ABL Pro via the AUX quick button2. Select the 24dBSO 2x oversampled filter3. Connect AUX Envelope Follower to Inverter 1 Input4. Connect Inverter 1 Output to VEG Env Amount5. Set Mixer VCO-1 and 2 to minimum, and AUX to 100%6. Set VEG Attack to 0% and Sustain to 100%7. Set Cutoff to 100% and Env Mod to 0%
When you hit and hold a key down you should hear the aux sound streaming through ABL Pro. Adjust the AUX Envelope Follower Trimmers until you find satisfying results, typically Attack will be around 2 ms and Release around 400 ms.
44

Bass Line Pro
Tutorial 8 – Auto Filter
Popular Auto Filter effects can be achieved by connecting the AUX Envelope Follower to the VCF CV Input.
Start with steps 1-6 of Tutorial 7.
7. Connect AUX Envelope Follower to VCF CV Input8. Set Cutoff to 0% and Env Mod to 0%
Hit and hold down a key, you should hear the filter reacting to the aux input. Try increasing the resonance.
If the modulation level is too high you can insert an Attenuator between the AUX Envelope Follower and the VCF CV Input. Using the Lag output of Attenuator 2 can smooth the envelope even further.
Tutorial 9 – Velocity Sensitive Envelopes
ABL Pro does not respond to MIDI velocity by default. However the MIDI Velocity CV socket makes it possible to create velocity sensitive patches. This example shows you how to make a velocity sensitive patch.
1. Connect MIDI Velocity CV to VCF Env Amount and VCA Env Amount2. Set filter Cutoff to 25%, Resonance to 75% and Env Mod to maximum. 3. Set ABL Pro to Polyphonic mode.
Each voice will respond to the velocity of each key.
Tutorial 10 – Getting the '303' sound
See Using Pattern Mode - Getting the ‘303’ sound.
Tutorial 11 – FM Operator
The Second VCO can be switched to become an FM operator by clicking the 'FM' label which will then switch to 'Mod'.
45

Bass Line Pro
Thanks
Thanks go to the following individuals for their support and suggestions (no order):
Ronny PriesRobert E.Björn VaynerMaxx ClasterYannick BonnefoyKai TracidMathias MärkerDave SmithSjoerd M. van GeffenJuha-Matti HilpinenJoshua KeeganRory DowKlaus - Dieter PollackDr. Stefan TripplerV. Ala-HärkönenLars-Erik JohanssonMarc te VruchteDavid Deschuyteneer Karel Bassez
and all of you who have supported ABL, thus making this possible.
46

Bass Line Pro
Appendix: Patch socket list
Each patch socket is connected to a module. A socket can either be input or output and has a designated type. The types are:
• Bipolar: The socket accepts or outputs a bipolar signal (-1..1V).• Unipolar: The socket accepts or outputs a unipolar signal (0..1V).• Trigger: The socket accepts any signal but will only trigger when the voltage rises over a
certain threshold (0.5V).• Gate: The socket outputs either 0 or 1V.• Dynamic Gate: The socket outputs either 0 or a constant value between 0 and 1V.
A rule of thumb is that typically Amplitude signals are unipolar (scaled by amount) while Frequency are bipolar (modulated by amount).
Sockets of one type can be connected to another type. In fact, interesting but unexpected results can be achieved by mixing the types.
47

Bass Line Pro
Socket name Configuration TypeVCO-1 CV Input Input BipolarVCO-2 CV Input Input BipolarVCO-1/2 Balance CV Input BipolarNoise/Aux Balance CV Input BipolarMG CV Output Output BipolarShaper CV Input BipolarAccent trigger Input TriggerVCA Env amount Input UnipolarVCF Env amount Input UnipolarDelay time left Input UnipolarDelay time right Input UnipolarSeq Gate CV Out Output GateSeq Note CV Out Output BipolarSeq Accent CV Out Output GateMIDI Note CV Output BipolarMIDI Velocity CV Output Dynamic gateMG Freq CV Input BipolarMG Amount CV Input UnipolarVCA Env CV Out Output -VCF Env CV Out Output -Envelope Follower Output UnipolarAttenuator 1 Input Input BipolarAttenuator 1 1/8 Out Output -Attenuator 1 ½ Out Output -Attenuator 1 ¾ Out Output -Inverter 1 Input Input BipolarInverter 1 Output Output -Inverter 2 Input Input BipolarInverter 2 Output Output -Attenuator 2 Input Input BipolarAttenuator 2 1/8 Out Output -Attenuator 2 ½ Out Output -Attenuator 2 ¾ Out Output -Attenuator 2 Lag Out Output -VCF CV Input Input BipolarVCA CV Input Input UnipolarVCO-1 PW CV Input BipolarVCO-2 PW CV Input BipolarNoise CV Input BipolarMod Wheel Output BipolarAttn. 1 Unipolar out Output UnipolarChannel Pressure Output Unipolar
Note: The output type of certain sockets is determined by the input type.
48

Bass Line ProAppendix: Skin interface format
The appearance of ABL Pro can be altered by the user using the skin interface.
A skin is a set of bitmaps and a text file describing the locations and size of the bitmaps. Each control or button of ABL Pro’s interface can have a unique bitmap. Animation frames are stacked vertically in the bitmaps. The skin interface supports transparency masking by allocating one color to be the transparent color. There is currently no alpha support for skins.
The Skin interface format is made up of lines in text format:Tag “filename”, X,Y,Width,Height
• Tag is the predefined identifier for the control or property. • Filename must be enclosed in quotation marks (“). • Filenames are always relative to the directory in which the plug-in resides. Only
Windows .bmp bitmaps are supported.• X,Y is the offset into the plug-in window where the control should be drawn (for
BACKGROUND this must be 0,0).• Width, Height is the displayed region in the window (i.e. NOT the actual size of the
bitmap, as the number of images of the bitmap is calculated by taking bitmap size and dividing by Height).
Example (one line out of a skin):BACKGROUND "AblPro\background16.bmp",0, 0, 724,526
In case a skin becomes broken for some reason and the user cannot access the Gui, the solution is to locate the Gui.ini or AuGui.ini file and simply removing this file. This will set the original skin. Another way of restoring ABL Pro is to reinstall the software.
Note: There should be no comma (,) between the Tag and Filename!
49

Bass Line Pro
Appendix: Specifications
Plug-In• PC: Standard VST instrument plug-in• Mac OS X: VST or Audio Unit• Sample rates supported: 44.1kHz, 48kHz and 96kHz
Synth specifications: • 2 Voltage controlled oscillators with 5 waveforms (saw,square,pulse,triangle,sinus)• 1 Modulation Generator with 4 waveforms and 1 curve (saw,square,triangle,s&h,decay) -
can also be used as 3rd VCO• 1 Mixer with VCO1, VCO2, Noise and Aux levels and Mix level CV• 1 Voltage controlled filter with self oscillation and keyboard tracking• 1 Ring Modulator• 1 Sync Oscillator• 1 Noise Generator - adjustable from white to red noise• 2 ADSR Envelope Generators• 1 Envelope Follower for Aux signals• 1 Voltage controlled amplifier• 1 Accent Unit with accent trigger input and manual button• Stereo delay with modulatable delay times• 2 Attenuators with multiple outputs - one with bias and one with lag output • 2 Inverters• Aux input for processing external signals
Sequencer specifications:
• 64 steps x 128 patterns • Effects per step: Accent, Slide, Transpose up & down • Prescale per pattern: 1/16, 1/32, 1/16T and 1/8T• Tempo range: 25-250 BPM or 1-500 BPM in Host sync mode• CV/Gate output• Accent trigger output
Synthesis engine:• Aliasing free 64-bit internal processing• Tone generator: 7 Octaves range • Five waveforms (Sawtooth, Square, Pulse, Triangle, Sinus wave)• Filter type: Low pass resonant• Filter range: 0-22kHz resonance frequency• Filter slope: 18 or 24dB/octave
Rebirth RB-338 is a product of Propellerhead Software, Sweden
50

Bass Line ProVST plug-in Interface Technology by Steinberg Soft- und Hardware GmbH.The Audio Units logo and the Audio Units symbol are trademarks of Apple Computer Inc
51