Embed Size (px)
Citation preview
Customer Document
www.CloudCheckr.com 1
Azure Self-Hosted Documentation
TABLE OF CONTENTS
Install Virtual Machine ....................................................................................................... 2
Create a Virtual Machine .......................................................................................................................................... 2
Attach A Data Disk .................................................................................................................................................. 10
Customer Document
www.CloudCheckr.com 2
INSTALL VIRTUAL MACHINE
Create a Virtual Machine
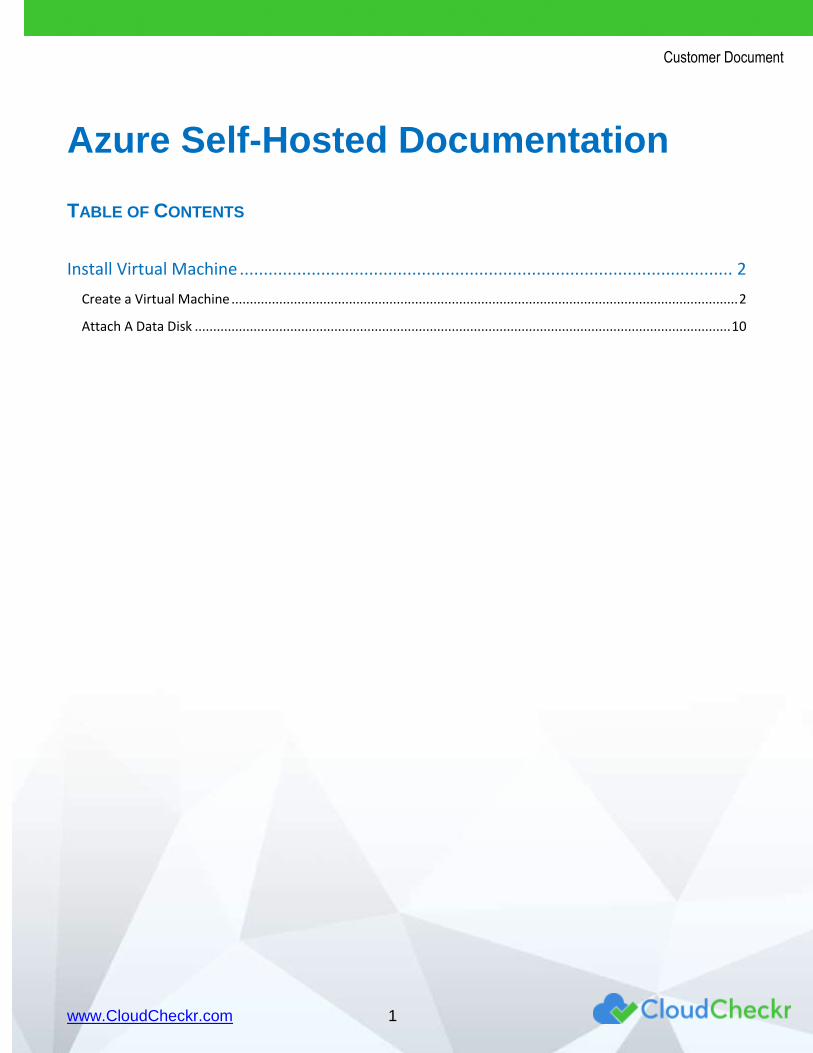
1. In the Azure portal, go to the left navigation pane and select Virtual machines.
The Virtual machines pane opens to the right of the left navigation pane.
Customer Document
www.CloudCheckr.com 3
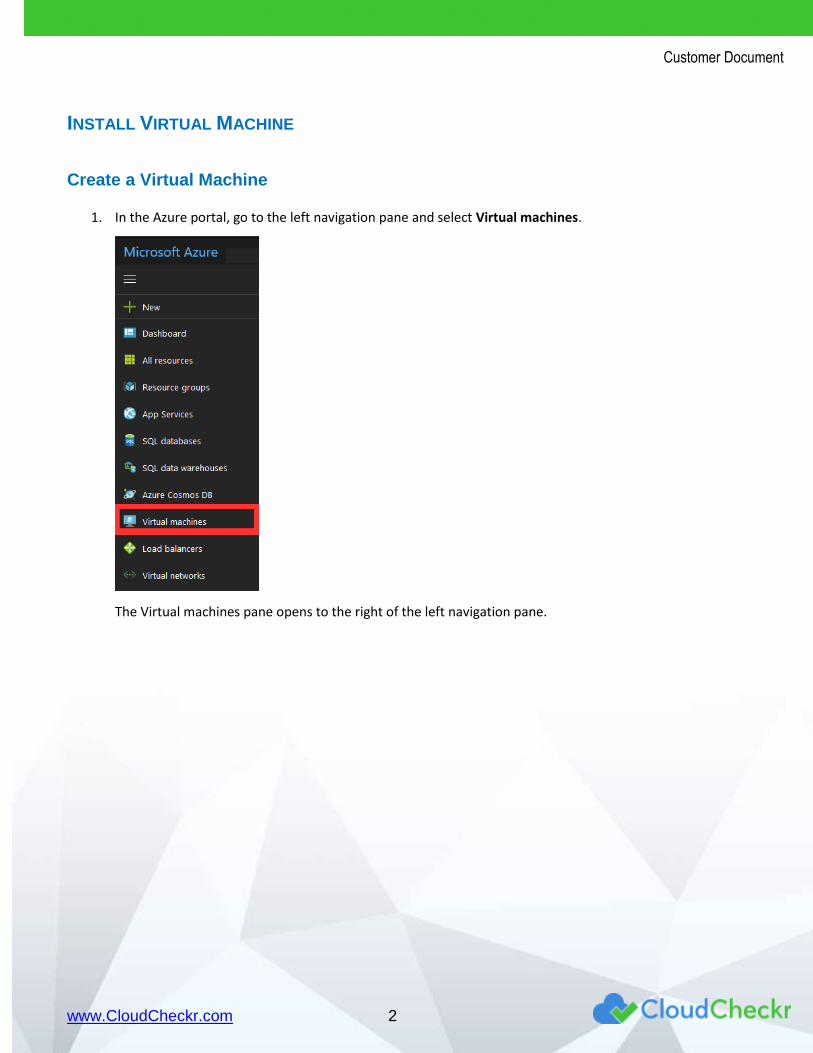
2. Click + Add.
3. Select CloudCheckr as the virtual machine image.
4. Select Resource Manager as the deployment model.
5. Click Create.
Customer Document
www.CloudCheckr.com 4
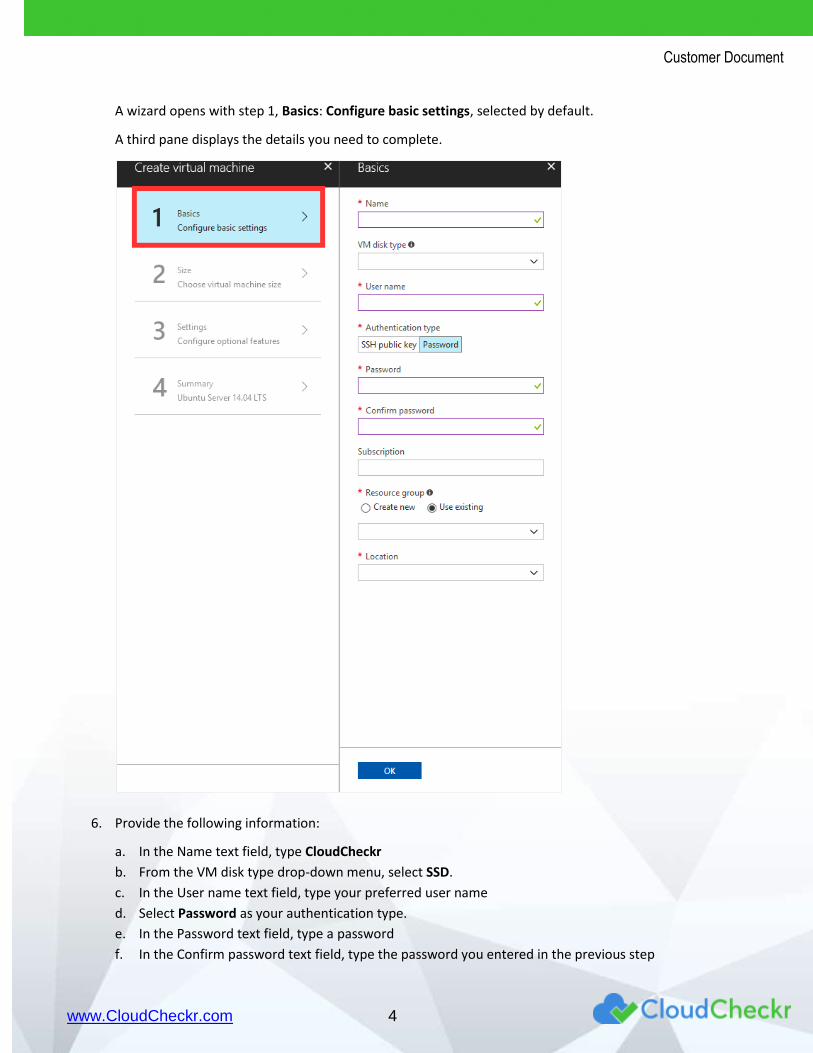
A wizard opens with step 1, Basics: Configure basic settings, selected by default.
A third pane displays the details you need to complete.
6. Provide the following information:
a. In the Name text field, type CloudCheckr
b. From the VM disk type drop-down menu, select SSD.
c. In the User name text field, type your preferred user name
d. Select Password as your authentication type.
e. In the Password text field, type a password
f. In the Confirm password text field, type the password you entered in the previous step
Customer Document
www.CloudCheckr.com 5
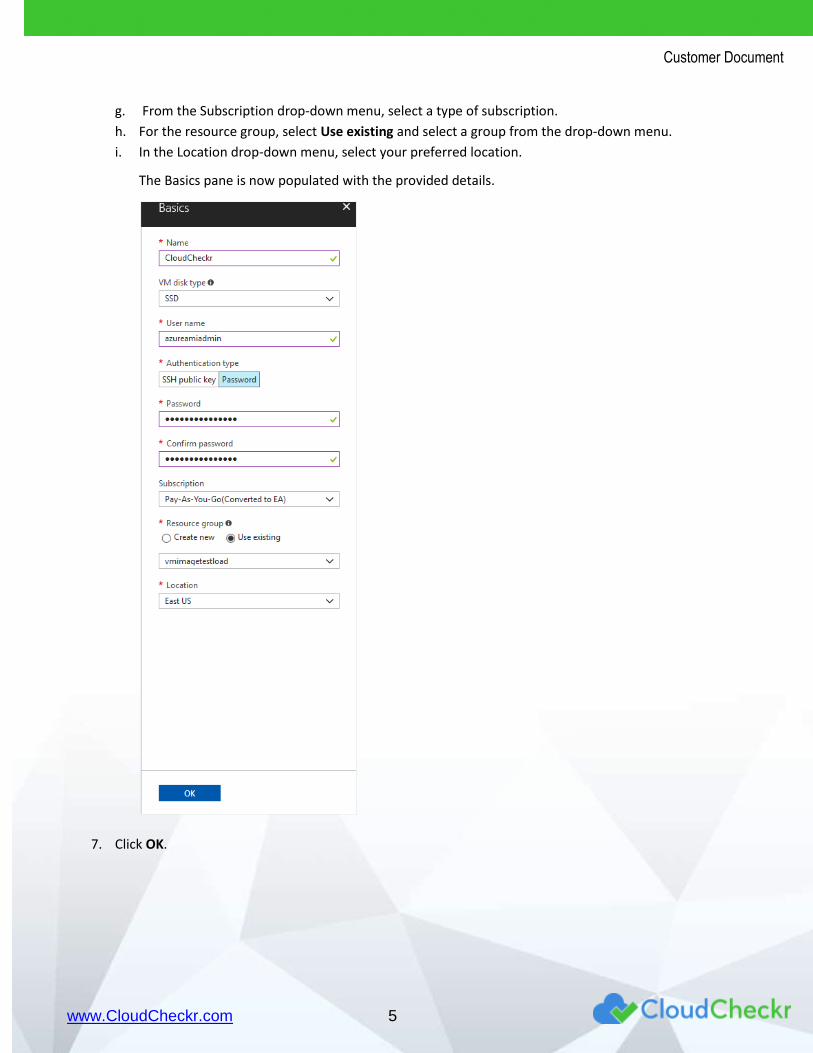
g. From the Subscription drop-down menu, select a type of subscription.
h. For the resource group, select Use existing and select a group from the drop-down menu.
i. In the Location drop-down menu, select your preferred location.
The Basics pane is now populated with the provided details.
7. Click OK.
Customer Document
www.CloudCheckr.com 6
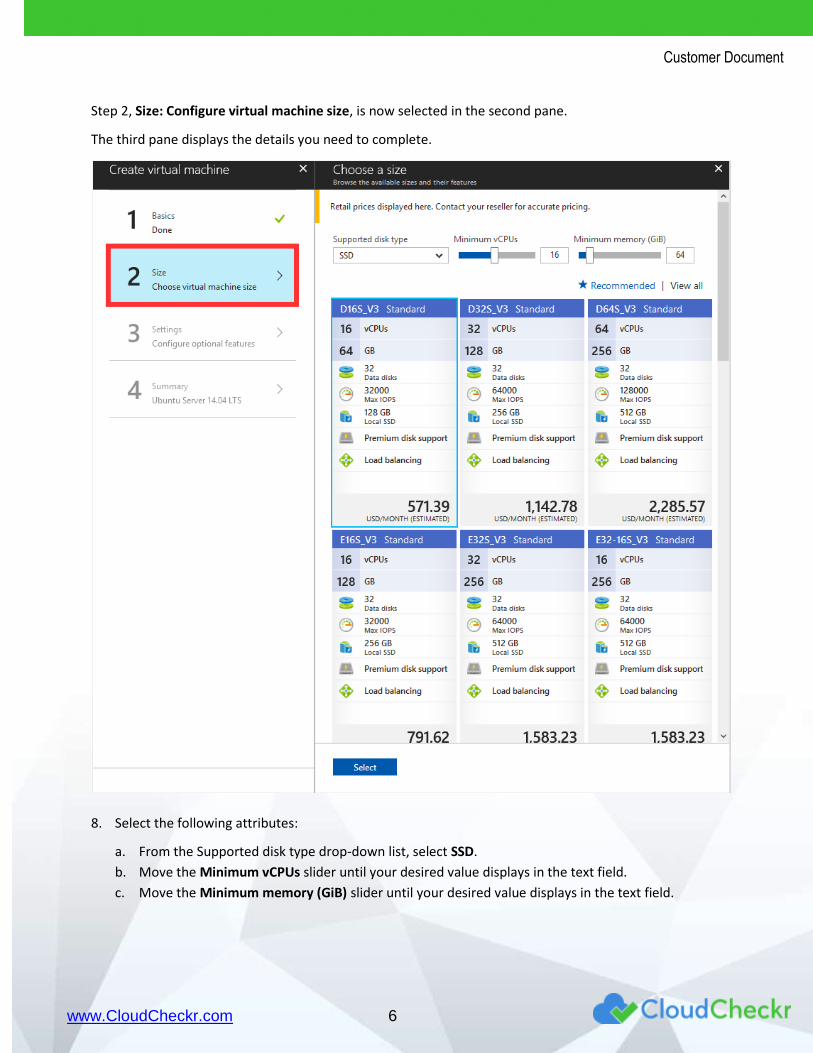
Step 2, Size: Configure virtual machine size, is now selected in the second pane.
The third pane displays the details you need to complete.
8. Select the following attributes:
a. From the Supported disk type drop-down list, select SSD.
b. Move the Minimum vCPUs slider until your desired value displays in the text field.
c. Move the Minimum memory (GiB) slider until your desired value displays in the text field.
Customer Document
www.CloudCheckr.com 7
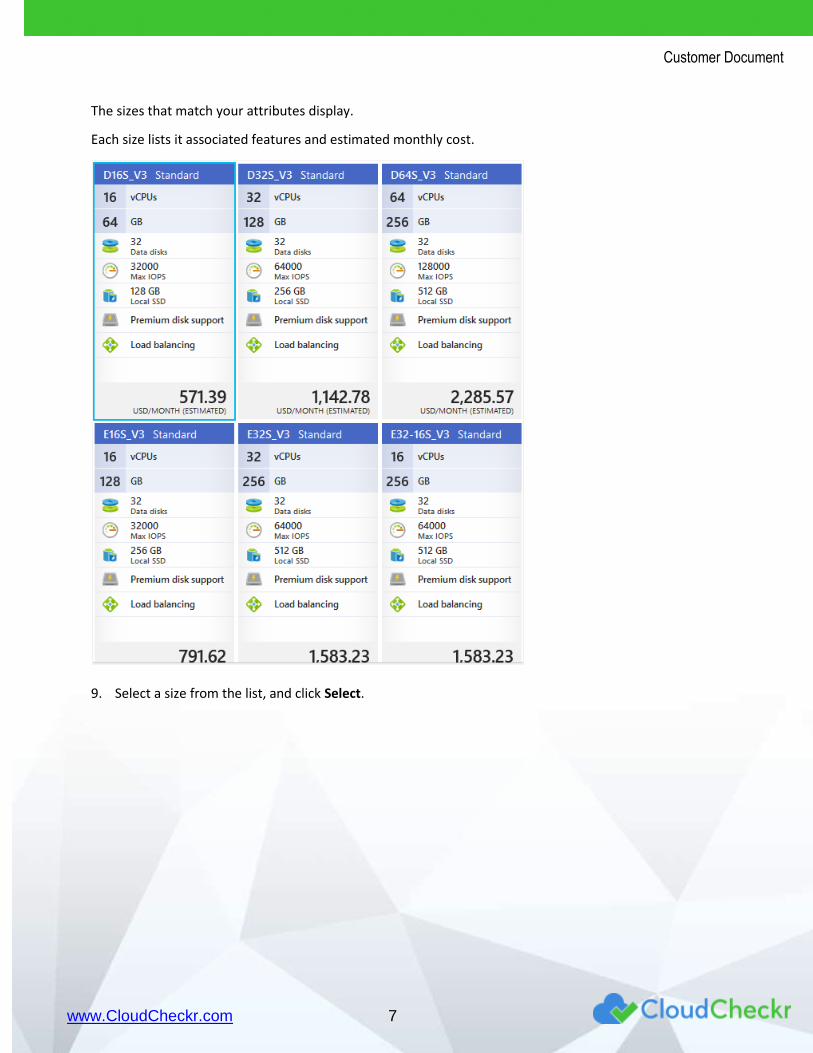
The sizes that match your attributes display.
Each size lists it associated features and estimated monthly cost.
9. Select a size from the list, and click Select.
Customer Document
www.CloudCheckr.com 8
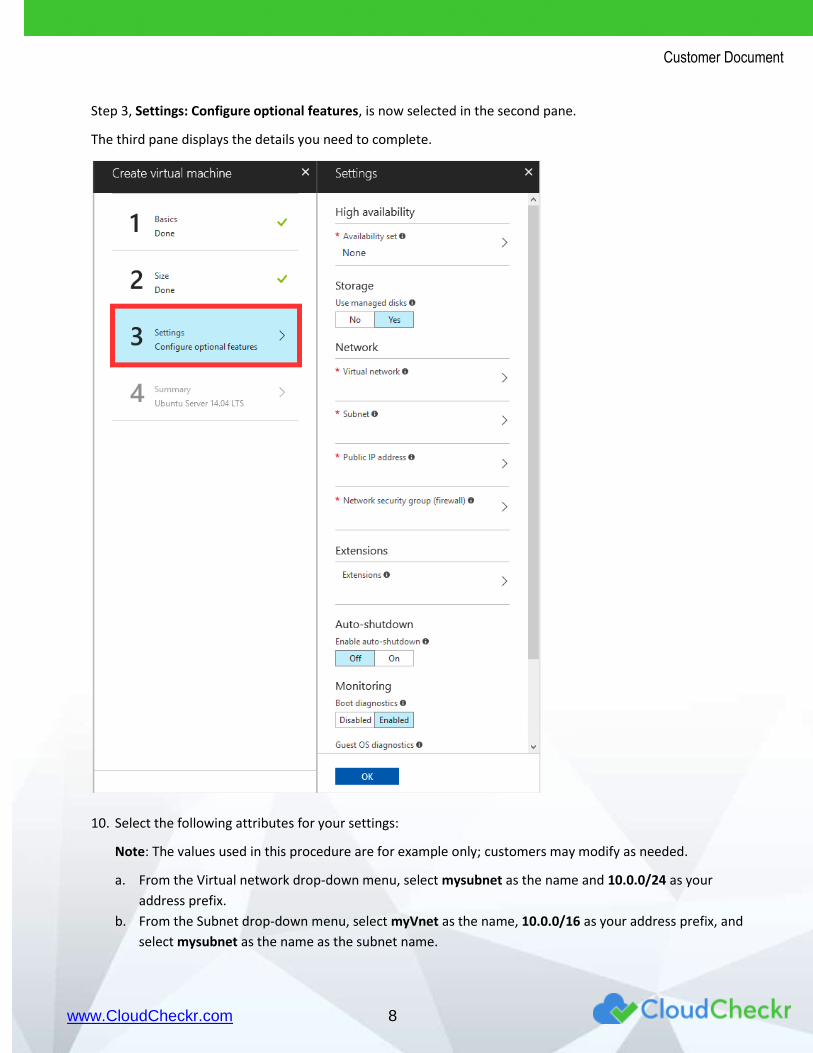
Step 3, Settings: Configure optional features, is now selected in the second pane.
The third pane displays the details you need to complete.
10. Select the following attributes for your settings:
Note: The values used in this procedure are for example only; customers may modify as needed.
a. From the Virtual network drop-down menu, select mysubnet as the name and 10.0.0/24 as your
address prefix.
b. From the Subnet drop-down menu, select myVnet as the name, 10.0.0/16 as your address prefix, and
select mysubnet as the name as the subnet name.
Customer Document
www.CloudCheckr.com 9
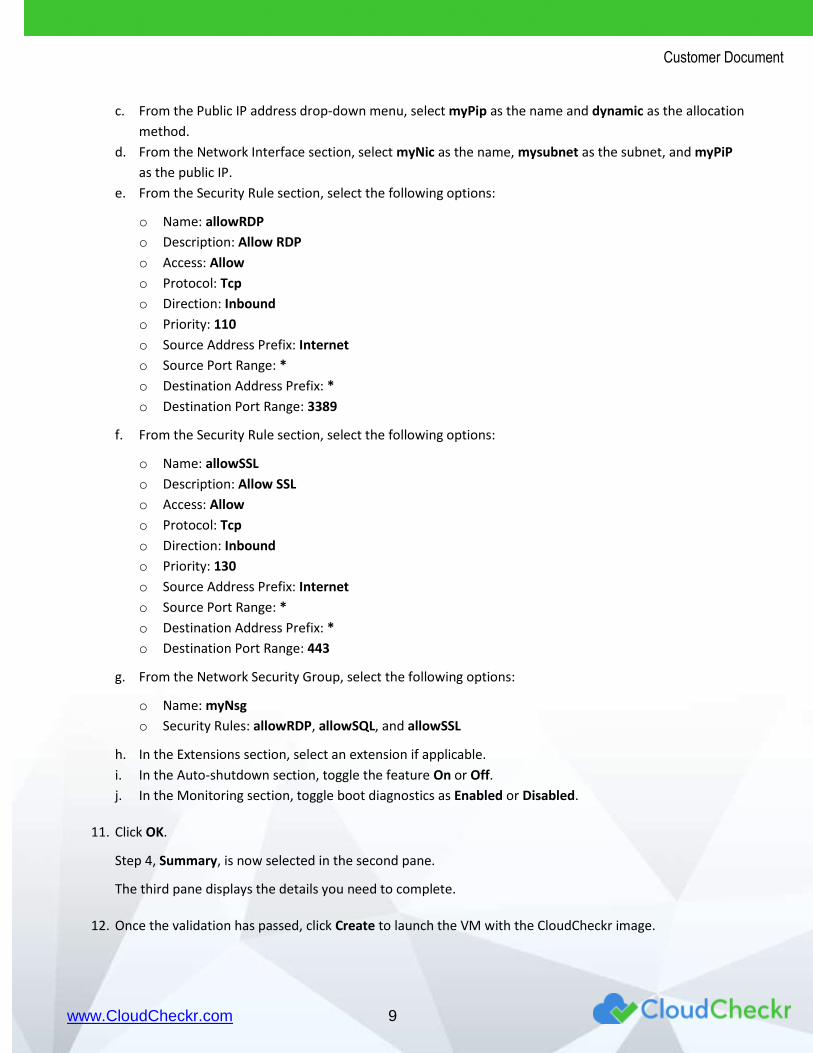
c. From the Public IP address drop-down menu, select myPip as the name and dynamic as the allocation
method.
d. From the Network Interface section, select myNic as the name, mysubnet as the subnet, and myPiP
as the public IP.
e. From the Security Rule section, select the following options:
o Name: allowRDP
o Description: Allow RDP
o Access: Allow
o Protocol: Tcp
o Direction: Inbound
o Priority: 110
o Source Address Prefix: Internet
o Source Port Range: *
o Destination Address Prefix: *
o Destination Port Range: 3389
f. From the Security Rule section, select the following options:
o Name: allowSSL
o Description: Allow SSL
o Access: Allow
o Protocol: Tcp
o Direction: Inbound
o Priority: 130
o Source Address Prefix: Internet
o Source Port Range: *
o Destination Address Prefix: *
o Destination Port Range: 443
g. From the Network Security Group, select the following options:
o Name: myNsg
o Security Rules: allowRDP, allowSQL, and allowSSL
h. In the Extensions section, select an extension if applicable.
i. In the Auto-shutdown section, toggle the feature On or Off.
j. In the Monitoring section, toggle boot diagnostics as Enabled or Disabled.
11. Click OK.
Step 4, Summary, is now selected in the second pane.
The third pane displays the details you need to complete.
12. Once the validation has passed, click Create to launch the VM with the CloudCheckr image.
Customer Document
www.CloudCheckr.com 10
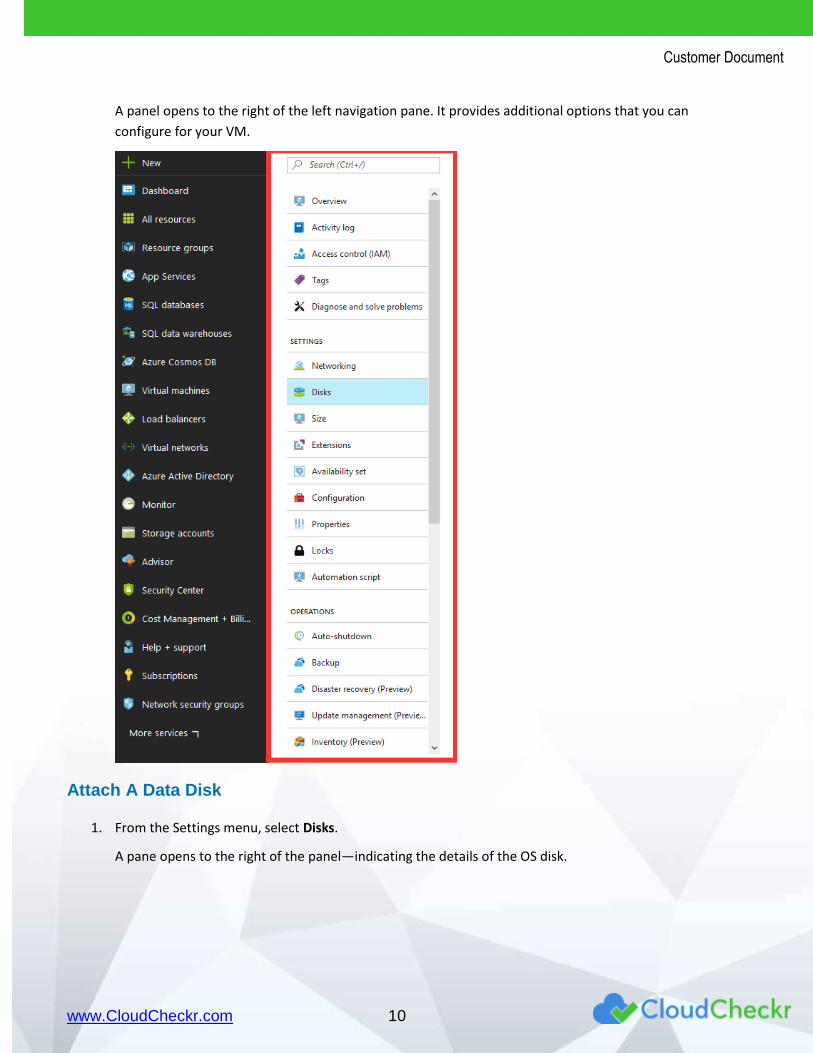
A panel opens to the right of the left navigation pane. It provides additional options that you can
configure for your VM.
Attach A Data Disk
1. From the Settings menu, select Disks.
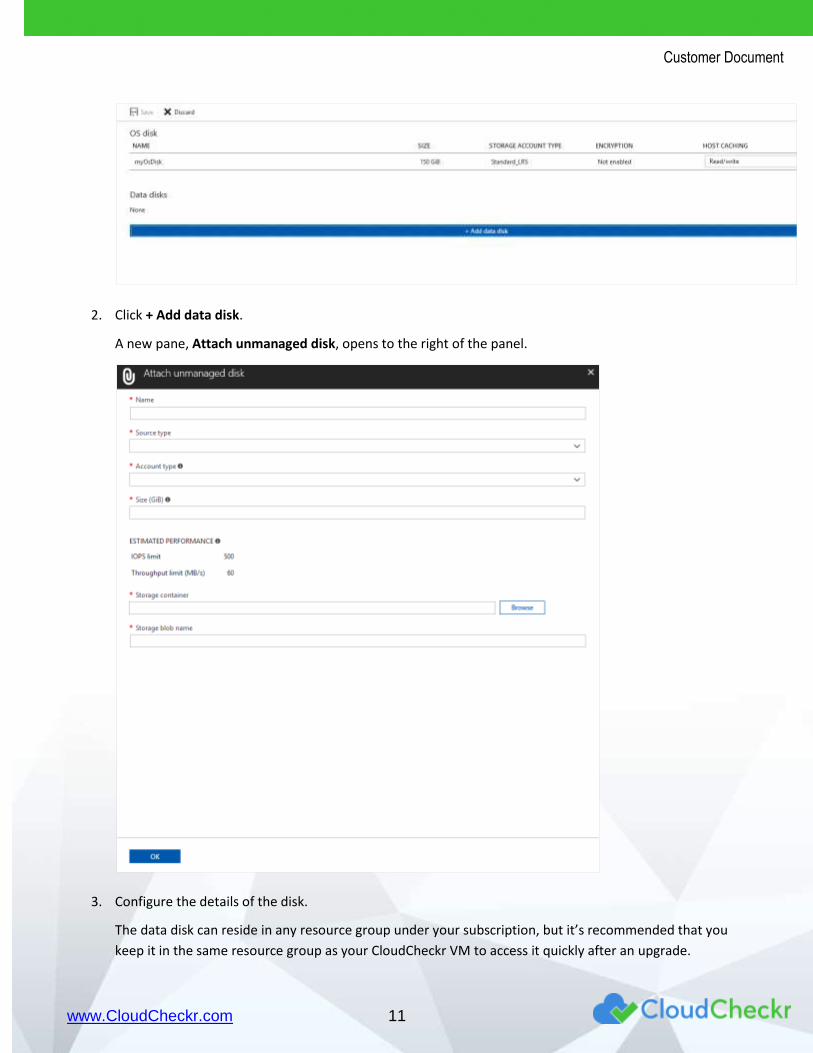
A pane opens to the right of the panel—indicating the details of the OS disk.
Customer Document
www.CloudCheckr.com 11
2. Click + Add data disk.
A new pane, Attach unmanaged disk, opens to the right of the panel.
3. Configure the details of the disk.
The data disk can reside in any resource group under your subscription, but it’s recommended that you
keep it in the same resource group as your CloudCheckr VM to access it quickly after an upgrade.
Customer Document
www.CloudCheckr.com 12
Note: The values used in this procedure are for example only; customers may modify as needed.
a. In the Name text field, type testimage-20180116-09-933
b. In the Source type drop-down menu, select New (empty disk).
c. In the Account type drop-down menu, select Standard (HDD).
d. In the Size (GiB) text field, type 1023
Note: Disk should be larger than 500 GiBs.
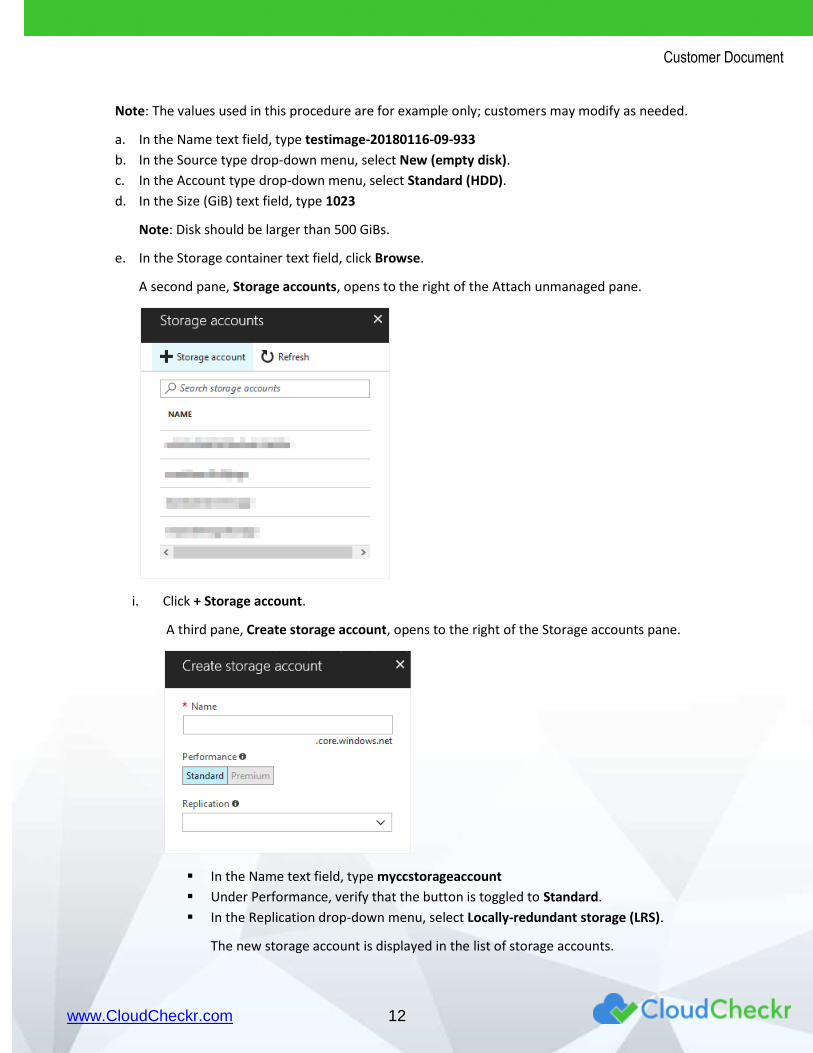
e. In the Storage container text field, click Browse.
A second pane, Storage accounts, opens to the right of the Attach unmanaged pane.
i. Click + Storage account.
A third pane, Create storage account, opens to the right of the Storage accounts pane.
▪ In the Name text field, type myccstorageaccount
▪ Under Performance, verify that the button is toggled to Standard.
▪ In the Replication drop-down menu, select Locally-redundant storage (LRS).
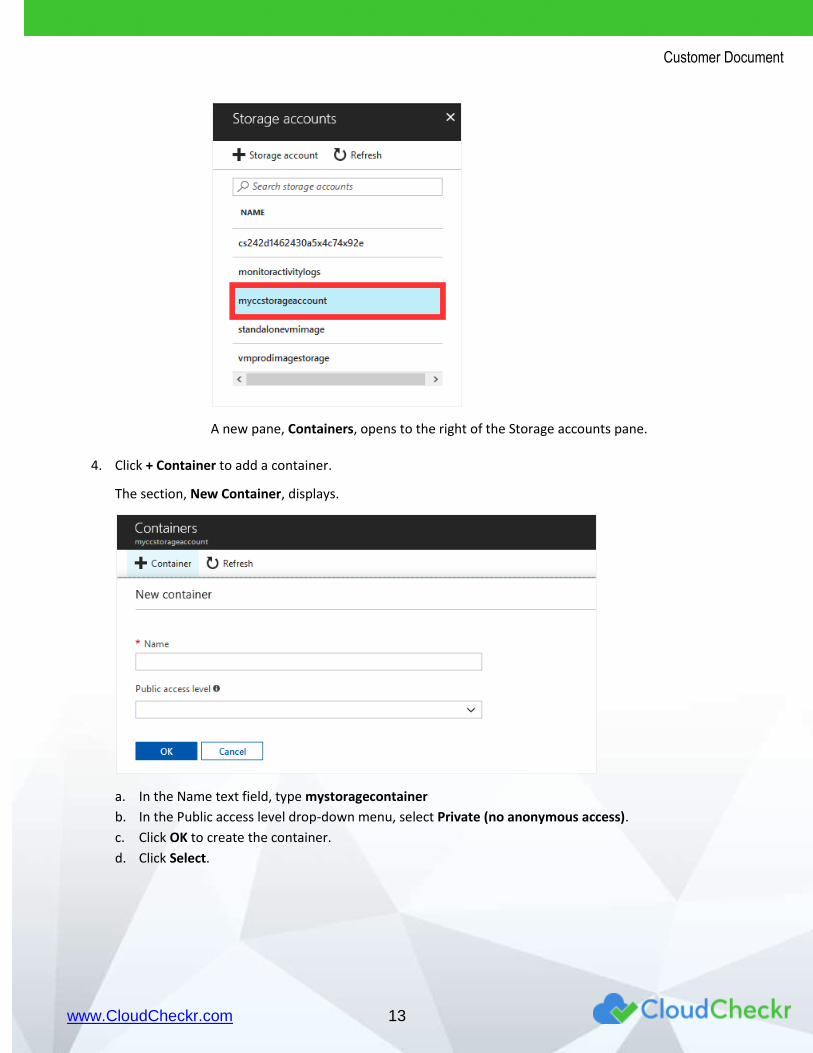
The new storage account is displayed in the list of storage accounts.
Customer Document
www.CloudCheckr.com 13
A new pane, Containers, opens to the right of the Storage accounts pane.
4. Click + Container to add a container.
The section, New Container, displays.
a. In the Name text field, type mystoragecontainer
b. In the Public access level drop-down menu, select Private (no anonymous access).
c. Click OK to create the container.
d. Click Select.
Customer Document
www.CloudCheckr.com 14
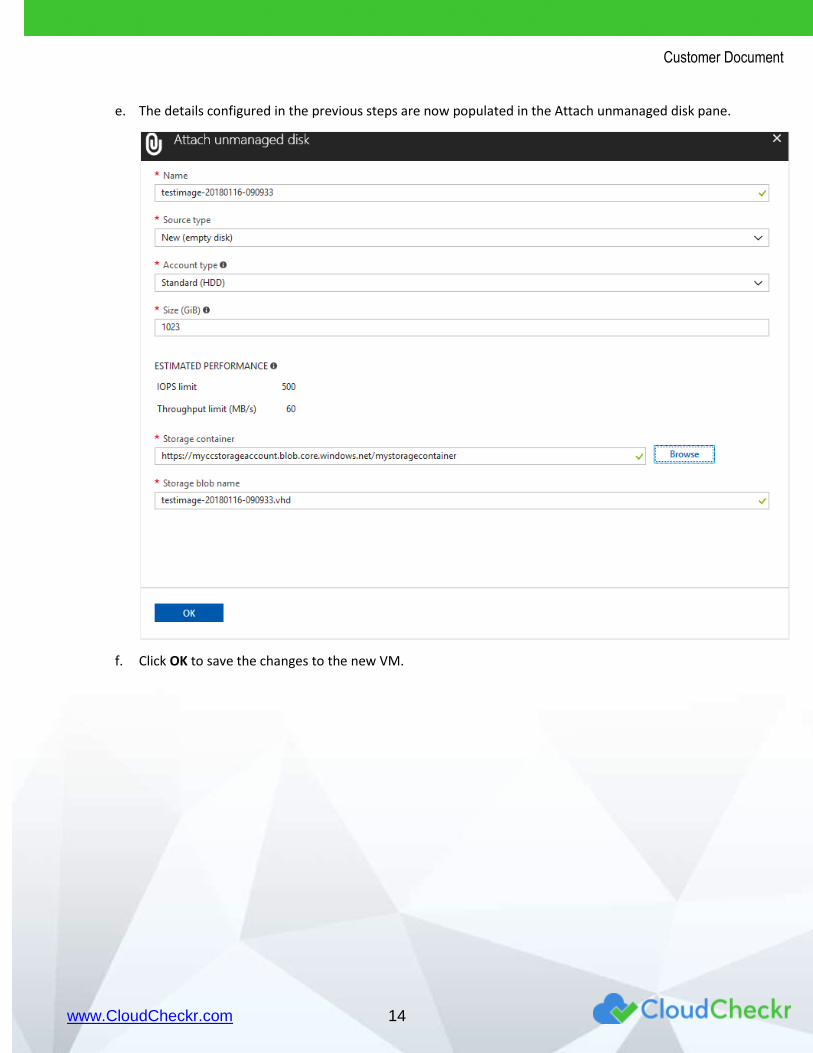
e. The details configured in the previous steps are now populated in the Attach unmanaged disk pane.
f. Click OK to save the changes to the new VM.
Customer Document
www.CloudCheckr.com 15
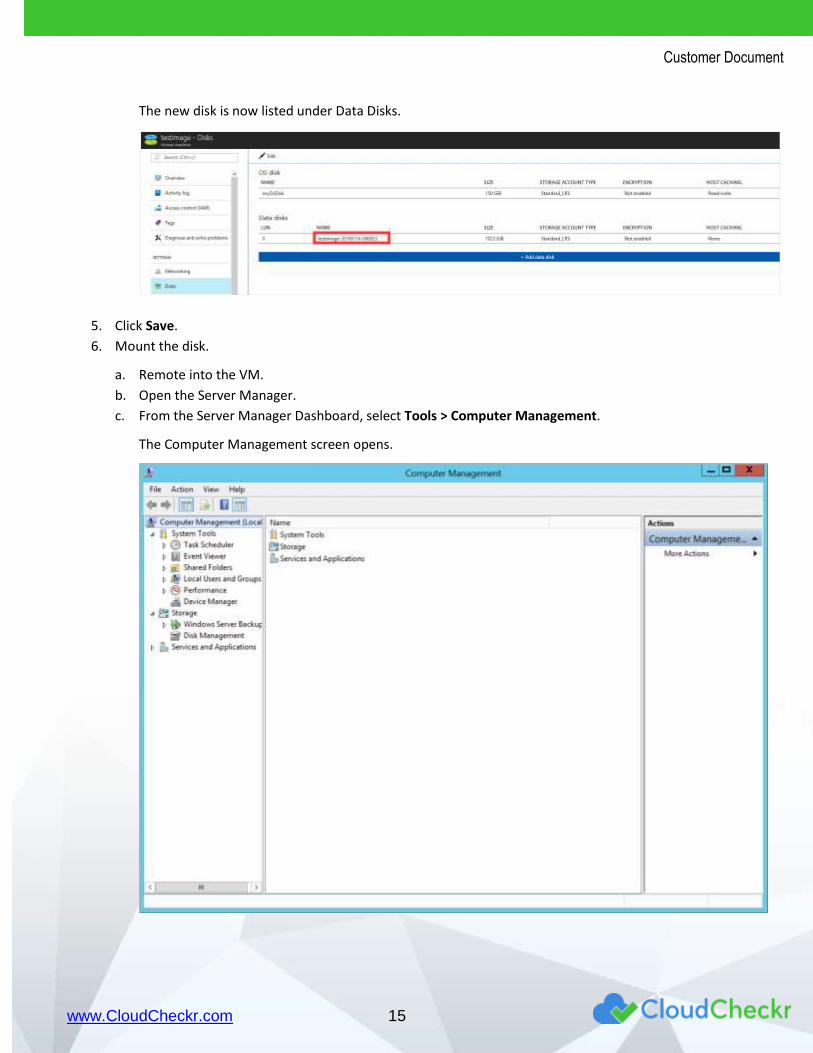
The new disk is now listed under Data Disks.
5. Click Save.
6. Mount the disk.
a. Remote into the VM.
b. Open the Server Manager.
c. From the Server Manager Dashboard, select Tools > Computer Management.
The Computer Management screen opens.
Customer Document
www.CloudCheckr.com 16
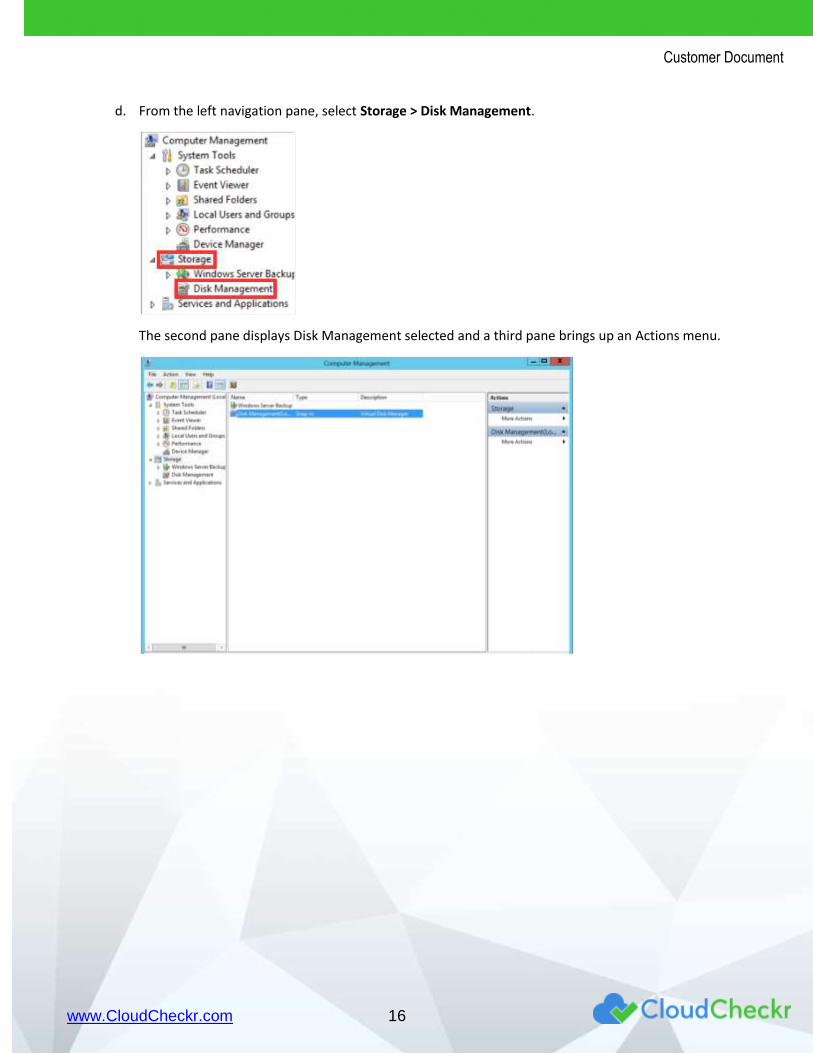
d. From the left navigation pane, select Storage > Disk Management.
The second pane displays Disk Management selected and a third pane brings up an Actions menu.
Customer Document
www.CloudCheckr.com 17
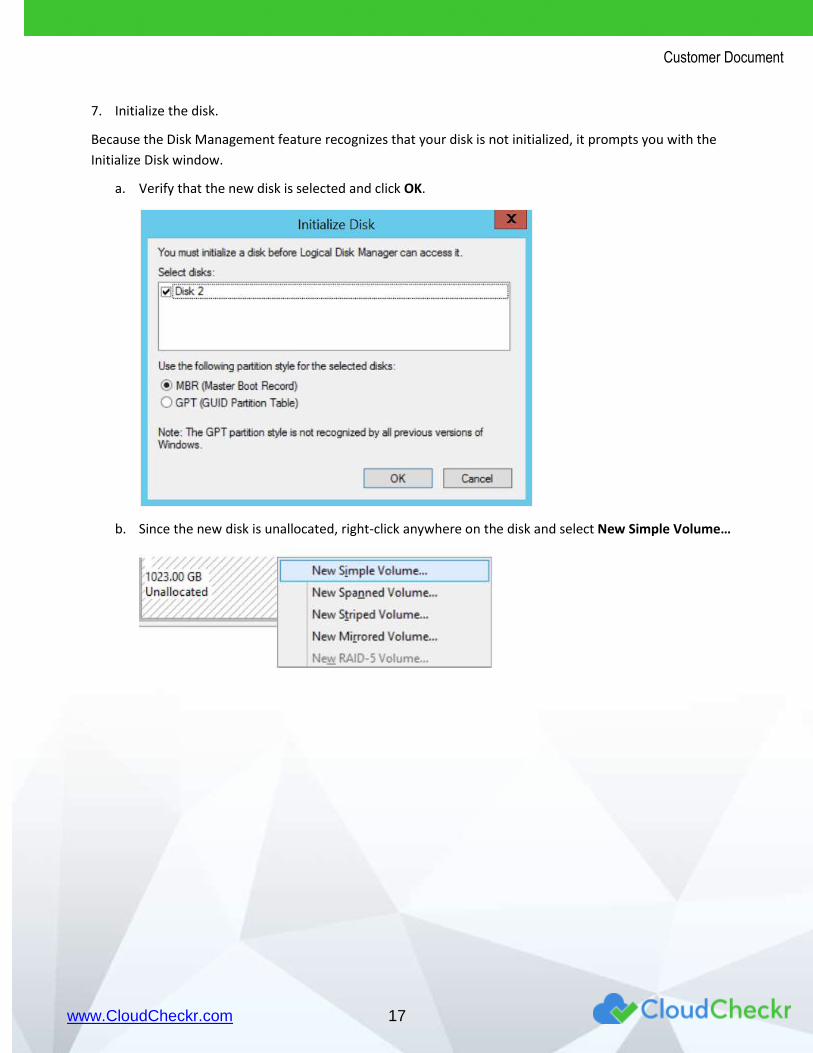
7. Initialize the disk.
Because the Disk Management feature recognizes that your disk is not initialized, it prompts you with the
Initialize Disk window.
a. Verify that the new disk is selected and click OK.
b. Since the new disk is unallocated, right-click anywhere on the disk and select New Simple Volume…
Customer Document
www.CloudCheckr.com 18
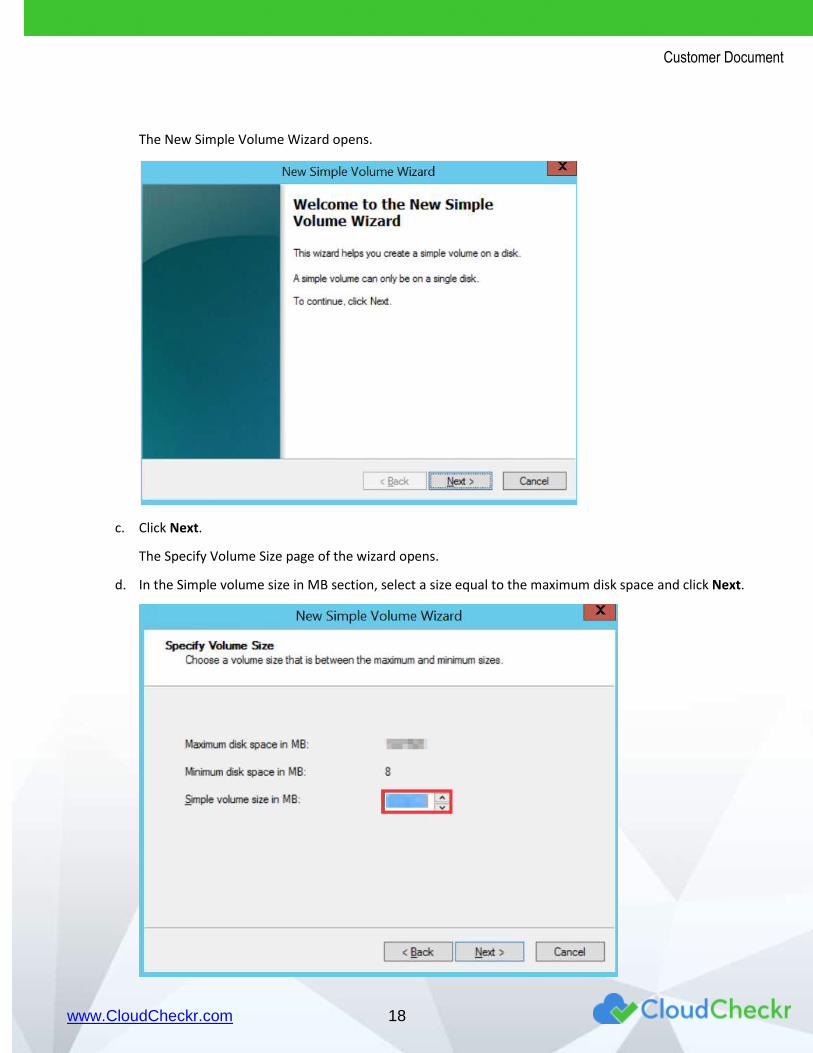
The New Simple Volume Wizard opens.
c. Click Next.
The Specify Volume Size page of the wizard opens.
d. In the Simple volume size in MB section, select a size equal to the maximum disk space and click Next.
Customer Document
www.CloudCheckr.com 19
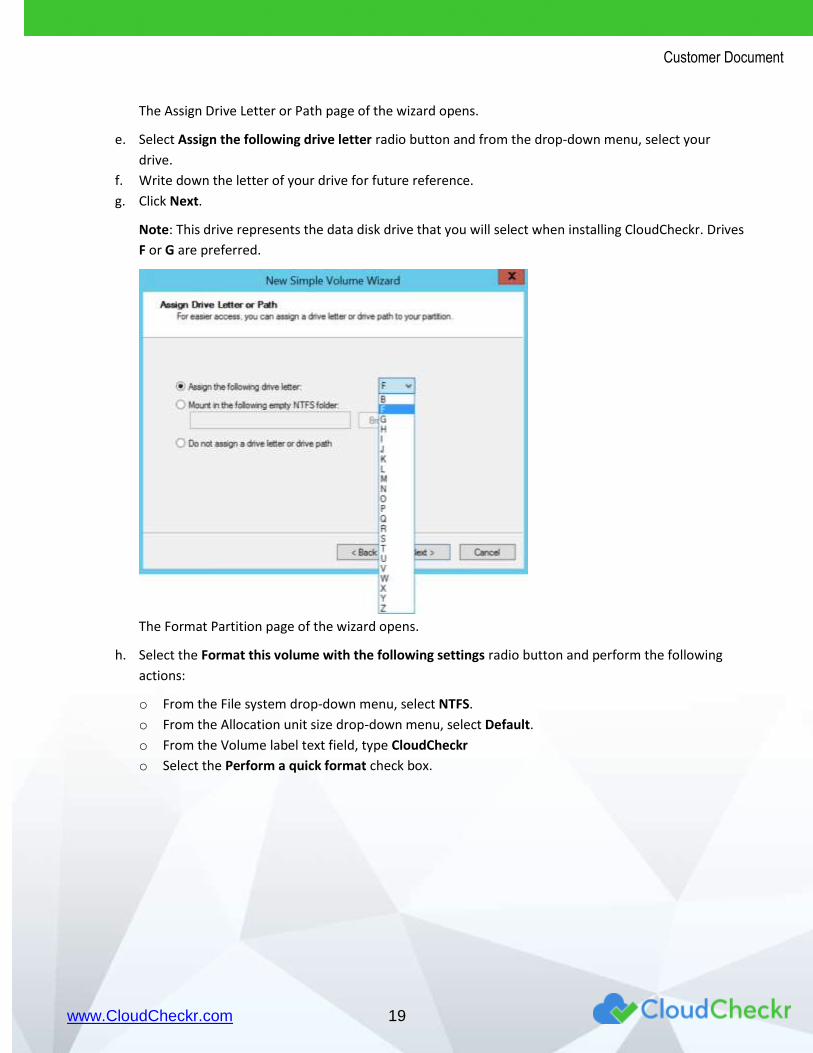
The Assign Drive Letter or Path page of the wizard opens.
e. Select Assign the following drive letter radio button and from the drop-down menu, select your
drive.
f. Write down the letter of your drive for future reference.
g. Click Next.
Note: This drive represents the data disk drive that you will select when installing CloudCheckr. Drives
F or G are preferred.
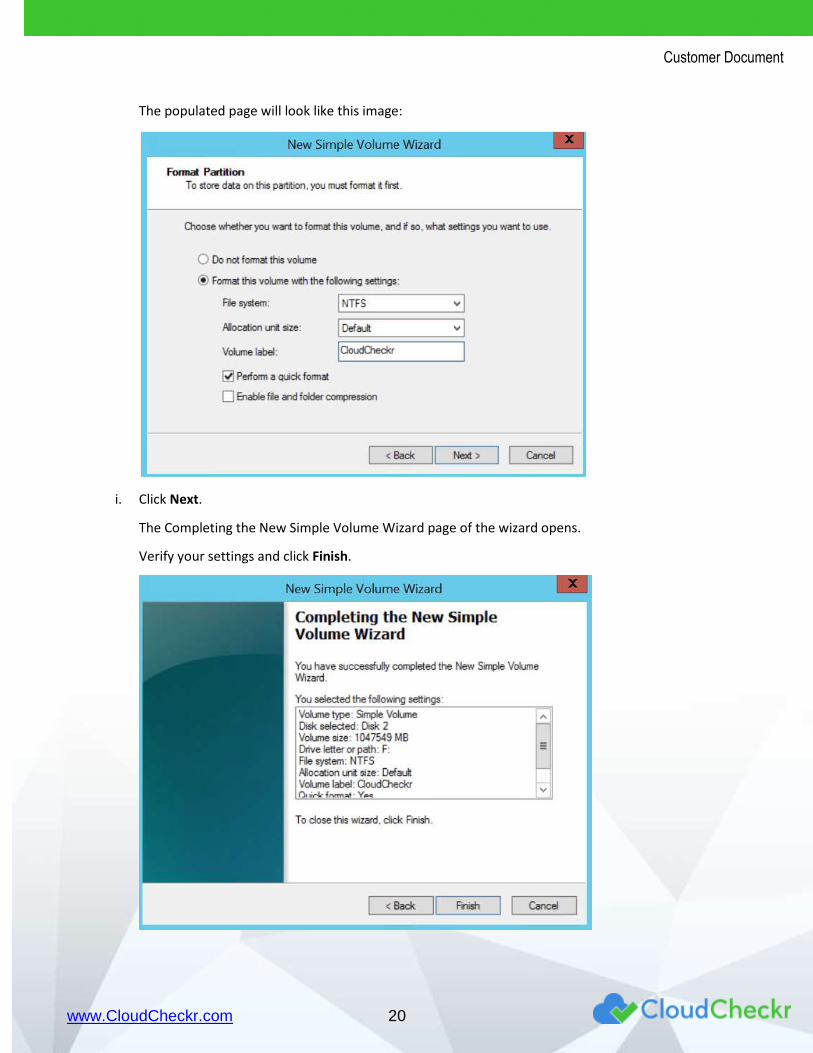
The Format Partition page of the wizard opens.
h. Select the Format this volume with the following settings radio button and perform the following
actions:
o From the File system drop-down menu, select NTFS.
o From the Allocation unit size drop-down menu, select Default.
o From the Volume label text field, type CloudCheckr
o Select the Perform a quick format check box.
Customer Document
www.CloudCheckr.com 20
The populated page will look like this image:
i. Click Next.
The Completing the New Simple Volume Wizard page of the wizard opens.
Verify your settings and click Finish.
Customer Document
www.CloudCheckr.com 21
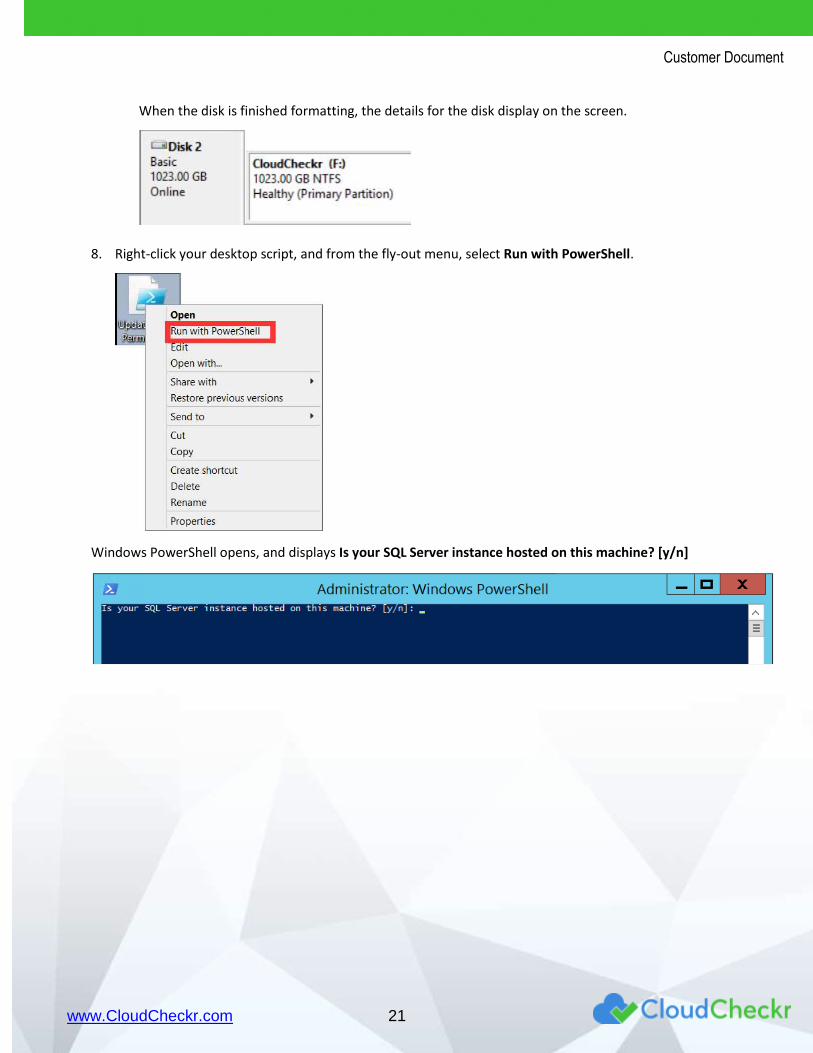
When the disk is finished formatting, the details for the disk display on the screen.
8. Right-click your desktop script, and from the fly-out menu, select Run with PowerShell.
Windows PowerShell opens, and displays Is your SQL Server instance hosted on this machine? [y/n]
Customer Document
www.CloudCheckr.com 22
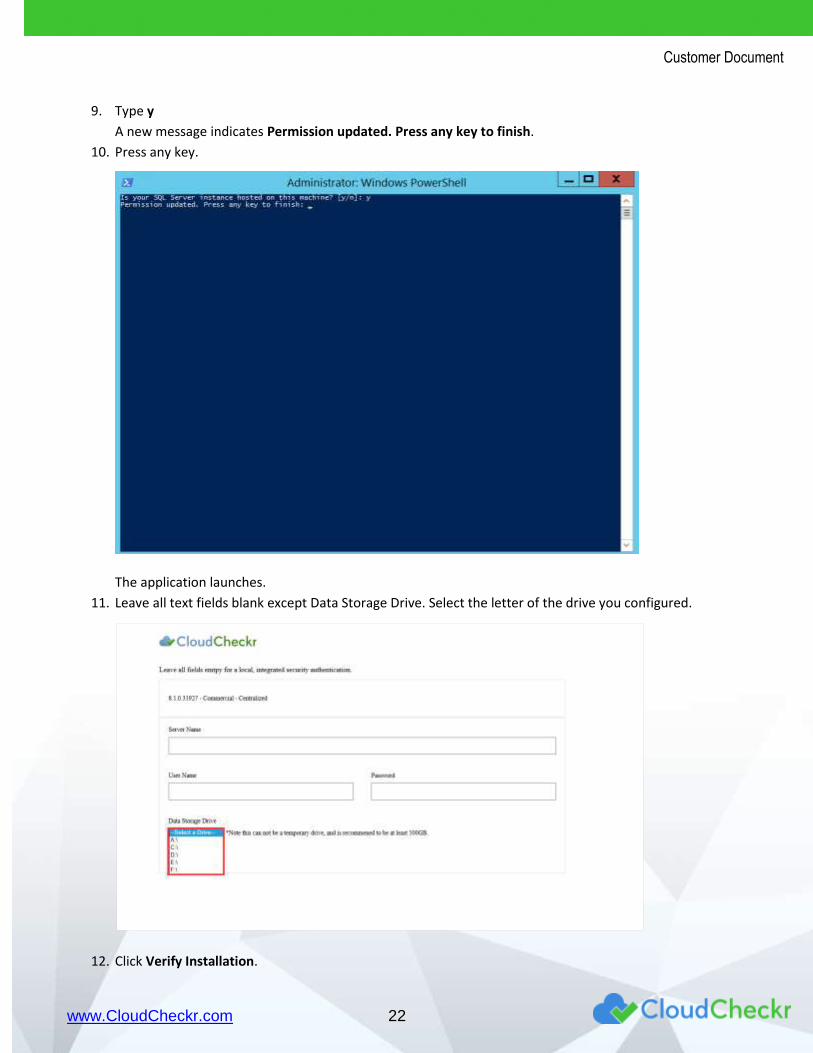
9. Type y
A new message indicates Permission updated. Press any key to finish.
10. Press any key.
The application launches.
11. Leave all text fields blank except Data Storage Drive. Select the letter of the drive you configured.
12. Click Verify Installation.