Embed Size (px)
Citation preview
AWS Management ConsoleGetting Started Guide
Version 1.0
AWS Management Console Getting Started Guide
AWS Management Console: Getting Started GuideCopyright © 2018 Amazon Web Services, Inc. and/or its affiliates. All rights reserved.
Amazon's trademarks and trade dress may not be used in connection with any product or service that is not Amazon's, in any mannerthat is likely to cause confusion among customers, or in any manner that disparages or discredits Amazon. All other trademarks notowned by Amazon are the property of their respective owners, who may or may not be affiliated with, connected to, or sponsored byAmazon.
AWS Management Console Getting Started Guide
Table of ContentsWorking with the AWS Management Console .... . . . . . . . . . . . . . . . . . . . . . . . . . . . . . . . . . . . . . . . . . . . . . . . . . . . . . . . . . . . . . . . . . . . . . . . . . . . . . . . . . . . . 1
What Is the AWS Management Console? .... . . . . . . . . . . . . . . . . . . . . . . . . . . . . . . . . . . . . . . . . . . . . . . . . . . . . . . . . . . . . . . . . . . . . . . . . . . . . . . . . . . . 1Getting Started with a Service .... . . . . . . . . . . . . . . . . . . . . . . . . . . . . . . . . . . . . . . . . . . . . . . . . . . . . . . . . . . . . . . . . . . . . . . . . . . . . . . . . . . . . . . . . . . . . . . . . . 1Adding and Removing Shortcuts ... . . . . . . . . . . . . . . . . . . . . . . . . . . . . . . . . . . . . . . . . . . . . . . . . . . . . . . . . . . . . . . . . . . . . . . . . . . . . . . . . . . . . . . . . . . . . . . . 2Selecting a Region .... . . . . . . . . . . . . . . . . . . . . . . . . . . . . . . . . . . . . . . . . . . . . . . . . . . . . . . . . . . . . . . . . . . . . . . . . . . . . . . . . . . . . . . . . . . . . . . . . . . . . . . . . . . . . . . . . . 2Changing Your Password .... . . . . . . . . . . . . . . . . . . . . . . . . . . . . . . . . . . . . . . . . . . . . . . . . . . . . . . . . . . . . . . . . . . . . . . . . . . . . . . . . . . . . . . . . . . . . . . . . . . . . . . . . . 2Getting Billing Information .... . . . . . . . . . . . . . . . . . . . . . . . . . . . . . . . . . . . . . . . . . . . . . . . . . . . . . . . . . . . . . . . . . . . . . . . . . . . . . . . . . . . . . . . . . . . . . . . . . . . . . . 3Using the Device of Your Choice .... . . . . . . . . . . . . . . . . . . . . . . . . . . . . . . . . . . . . . . . . . . . . . . . . . . . . . . . . . . . . . . . . . . . . . . . . . . . . . . . . . . . . . . . . . . . . . . 3Troubleshooting .... . . . . . . . . . . . . . . . . . . . . . . . . . . . . . . . . . . . . . . . . . . . . . . . . . . . . . . . . . . . . . . . . . . . . . . . . . . . . . . . . . . . . . . . . . . . . . . . . . . . . . . . . . . . . . . . . . . . . . 4
Fix Page Load Issues with Internet Explorer 11 .... . . . . . . . . . . . . . . . . . . . . . . . . . . . . . . . . . . . . . . . . . . . . . . . . . . . . . . . . . . . . . . . . . . 4Working with Resource Groups .... . . . . . . . . . . . . . . . . . . . . . . . . . . . . . . . . . . . . . . . . . . . . . . . . . . . . . . . . . . . . . . . . . . . . . . . . . . . . . . . . . . . . . . . . . . . . . . . . . . . . . . . . 5
What Are Resource Groups? .... . . . . . . . . . . . . . . . . . . . . . . . . . . . . . . . . . . . . . . . . . . . . . . . . . . . . . . . . . . . . . . . . . . . . . . . . . . . . . . . . . . . . . . . . . . . . . . . . . . . . . 5How Resource Groups Work .... . . . . . . . . . . . . . . . . . . . . . . . . . . . . . . . . . . . . . . . . . . . . . . . . . . . . . . . . . . . . . . . . . . . . . . . . . . . . . . . . . . . . . . . . . . . . 7How Tagging Works .... . . . . . . . . . . . . . . . . . . . . . . . . . . . . . . . . . . . . . . . . . . . . . . . . . . . . . . . . . . . . . . . . . . . . . . . . . . . . . . . . . . . . . . . . . . . . . . . . . . . . . . . 7
Obtaining Permissions .... . . . . . . . . . . . . . . . . . . . . . . . . . . . . . . . . . . . . . . . . . . . . . . . . . . . . . . . . . . . . . . . . . . . . . . . . . . . . . . . . . . . . . . . . . . . . . . . . . . . . . . . . . . . . 7Permissions for Individual Services .... . . . . . . . . . . . . . . . . . . . . . . . . . . . . . . . . . . . . . . . . . . . . . . . . . . . . . . . . . . . . . . . . . . . . . . . . . . . . . . . . . . . 8Granting Permissions for Using Resource Groups and Tag Editor ... . . . . . . . . . . . . . . . . . . . . . . . . . . . . . . . . . . . . . . . . . . . . 8
Creating a Resource Group .... . . . . . . . . . . . . . . . . . . . . . . . . . . . . . . . . . . . . . . . . . . . . . . . . . . . . . . . . . . . . . . . . . . . . . . . . . . . . . . . . . . . . . . . . . . . . . . . . . . . . 10Supported Resources .... . . . . . . . . . . . . . . . . . . . . . . . . . . . . . . . . . . . . . . . . . . . . . . . . . . . . . . . . . . . . . . . . . . . . . . . . . . . . . . . . . . . . . . . . . . . . . . . . . . . . . . . . . . . . 12
Supported Resources for Resource Groups (Console) ... . . . . . . . . . . . . . . . . . . . . . . . . . . . . . . . . . . . . . . . . . . . . . . . . . . . . . . . . . . 12Supported Resources for Tag Editor Tagging (Console) ... . . . . . . . . . . . . . . . . . . . . . . . . . . . . . . . . . . . . . . . . . . . . . . . . . . . . . . . 13
Accessing a Resource Group .... . . . . . . . . . . . . . . . . . . . . . . . . . . . . . . . . . . . . . . . . . . . . . . . . . . . . . . . . . . . . . . . . . . . . . . . . . . . . . . . . . . . . . . . . . . . . . . . . . . . 14Managing Resources .... . . . . . . . . . . . . . . . . . . . . . . . . . . . . . . . . . . . . . . . . . . . . . . . . . . . . . . . . . . . . . . . . . . . . . . . . . . . . . . . . . . . . . . . . . . . . . . . . . . . . . . . . . . . . . 15
Getting Information About a Resource .... . . . . . . . . . . . . . . . . . . . . . . . . . . . . . . . . . . . . . . . . . . . . . . . . . . . . . . . . . . . . . . . . . . . . . . . . . . . . 15Taking Action on a Resource .... . . . . . . . . . . . . . . . . . . . . . . . . . . . . . . . . . . . . . . . . . . . . . . . . . . . . . . . . . . . . . . . . . . . . . . . . . . . . . . . . . . . . . . . . . . 16
Managing Resource Groups .... . . . . . . . . . . . . . . . . . . . . . . . . . . . . . . . . . . . . . . . . . . . . . . . . . . . . . . . . . . . . . . . . . . . . . . . . . . . . . . . . . . . . . . . . . . . . . . . . . . . . 16Modifying What Resources Are in a Group .... . . . . . . . . . . . . . . . . . . . . . . . . . . . . . . . . . . . . . . . . . . . . . . . . . . . . . . . . . . . . . . . . . . . . . . . 16Customizing Your Resource Group Display .... . . . . . . . . . . . . . . . . . . . . . . . . . . . . . . . . . . . . . . . . . . . . . . . . . . . . . . . . . . . . . . . . . . . . . . . 17Updating Your Resource Group Display .... . . . . . . . . . . . . . . . . . . . . . . . . . . . . . . . . . . . . . . . . . . . . . . . . . . . . . . . . . . . . . . . . . . . . . . . . . . . 17Sharing a Resource Group .... . . . . . . . . . . . . . . . . . . . . . . . . . . . . . . . . . . . . . . . . . . . . . . . . . . . . . . . . . . . . . . . . . . . . . . . . . . . . . . . . . . . . . . . . . . . . . 18Deleting a Resource Group .... . . . . . . . . . . . . . . . . . . . . . . . . . . . . . . . . . . . . . . . . . . . . . . . . . . . . . . . . . . . . . . . . . . . . . . . . . . . . . . . . . . . . . . . . . . . . 18
Working with Tag Editor ... . . . . . . . . . . . . . . . . . . . . . . . . . . . . . . . . . . . . . . . . . . . . . . . . . . . . . . . . . . . . . . . . . . . . . . . . . . . . . . . . . . . . . . . . . . . . . . . . . . . . . . . . . . . . . . . . 19Obtaining Permissions .... . . . . . . . . . . . . . . . . . . . . . . . . . . . . . . . . . . . . . . . . . . . . . . . . . . . . . . . . . . . . . . . . . . . . . . . . . . . . . . . . . . . . . . . . . . . . . . . . . . . . . . . . . . 19Searching for Resources to Tag .... . . . . . . . . . . . . . . . . . . . . . . . . . . . . . . . . . . . . . . . . . . . . . . . . . . . . . . . . . . . . . . . . . . . . . . . . . . . . . . . . . . . . . . . . . . . . . . 19Finding Untagged Resources .... . . . . . . . . . . . . . . . . . . . . . . . . . . . . . . . . . . . . . . . . . . . . . . . . . . . . . . . . . . . . . . . . . . . . . . . . . . . . . . . . . . . . . . . . . . . . . . . . . . 20Customizing Tag Search Results ... . . . . . . . . . . . . . . . . . . . . . . . . . . . . . . . . . . . . . . . . . . . . . . . . . . . . . . . . . . . . . . . . . . . . . . . . . . . . . . . . . . . . . . . . . . . . . . 21Tagging Resources .... . . . . . . . . . . . . . . . . . . . . . . . . . . . . . . . . . . . . . . . . . . . . . . . . . . . . . . . . . . . . . . . . . . . . . . . . . . . . . . . . . . . . . . . . . . . . . . . . . . . . . . . . . . . . . . . . 22Scenario: Implementing a New Tagging Strategy .... . . . . . . . . . . . . . . . . . . . . . . . . . . . . . . . . . . . . . . . . . . . . . . . . . . . . . . . . . . . . . . . . . . . . . . 23
AWS Glossary .... . . . . . . . . . . . . . . . . . . . . . . . . . . . . . . . . . . . . . . . . . . . . . . . . . . . . . . . . . . . . . . . . . . . . . . . . . . . . . . . . . . . . . . . . . . . . . . . . . . . . . . . . . . . . . . . . . . . . . . . . . . . . . . 25
Version 1.0iii
AWS Management Console Getting Started GuideWhat Is the AWS Management Console?
Working with the AWS ManagementConsole
Welcome to the AWS Management Console. This guide provides a short introduction to working with theconsole. To learn how to work with individual services in the console, see AWS Documentation.
Topics
• What Is the AWS Management Console? (p. 1)
• Getting Started with a Service (p. 1)
• Adding and Removing Shortcuts (p. 2)
• Selecting a Region (p. 2)
• Changing Your Password (p. 2)
• Getting Billing Information (p. 3)
• Using the Device of Your Choice (p. 3)
• Troubleshooting (p. 4)
What Is the AWS Management Console?The AWS Management Console is a web application that comprises and refers to a broad collection ofservice consoles for managing Amazon Web Services. When you first sign in, you see the console homepage.
The home page provides access to each service console as well as an intuitive user interface for exploringAWS and getting helpful tips. Among other things, the individual service consoles offer tools forworking with Amazon S3 buckets, launching and connecting to Amazon EC2 instances, setting AmazonCloudWatch alarms, and getting information about your account and about billing.
Getting Started with a ServiceThe AWS Management Console provides multiple ways for navigating to individual service consoles.
To open a console for a service
Do one of the following:
• Type the name of the service in the search box. Then choose the service that you want from the list ofsearch results.
• Choose one of your recently visited services under the search box.
• Choose Services to open a full list of services. On the upper right of the page, choose Group to see theservices listed by category or choose A–Z to see an alphabetical listing. Then choose the service thatyou want.
Version 1.01
AWS Management Console Getting Started GuideAdding and Removing Shortcuts
Adding and Removing ShortcutsYou can add shortcuts for the consoles that you use most.
To add a shortcut
1. On the navigation bar, choose the pushpin icon.2. Drag a service from the menu to the navigation bar.
You can add more shortcuts and drop them onto the navigation bar in any order that you want.
To remove a shortcut
1. On the navigation bar, choose the pushpin icon.2. Drag the shortcut off the navigation bar.
Selecting a RegionFor many services, you can select a region that specifies where your resources are managed. You do notselect a region for the AWS Management Console or for some services, such as IAM.
To select a region
1. In the AWS Management Console, choose a service (p. 1) to go to that service's console.2. In the navigation bar, choose the name of the currently selected region.
When you select a region, that region becomes the default in the console.
NoteIf you have created AWS resources, but you don’t see those resources in the console, the consolemight be displaying resources from a different region. Some resources (such as EC2 instances)are created in a specific region. To see them, use the region selector to choose the region inwhich the resources were created.
Changing Your PasswordIf you are an account owner, you can change your AWS account password from the AWS ManagementConsole.
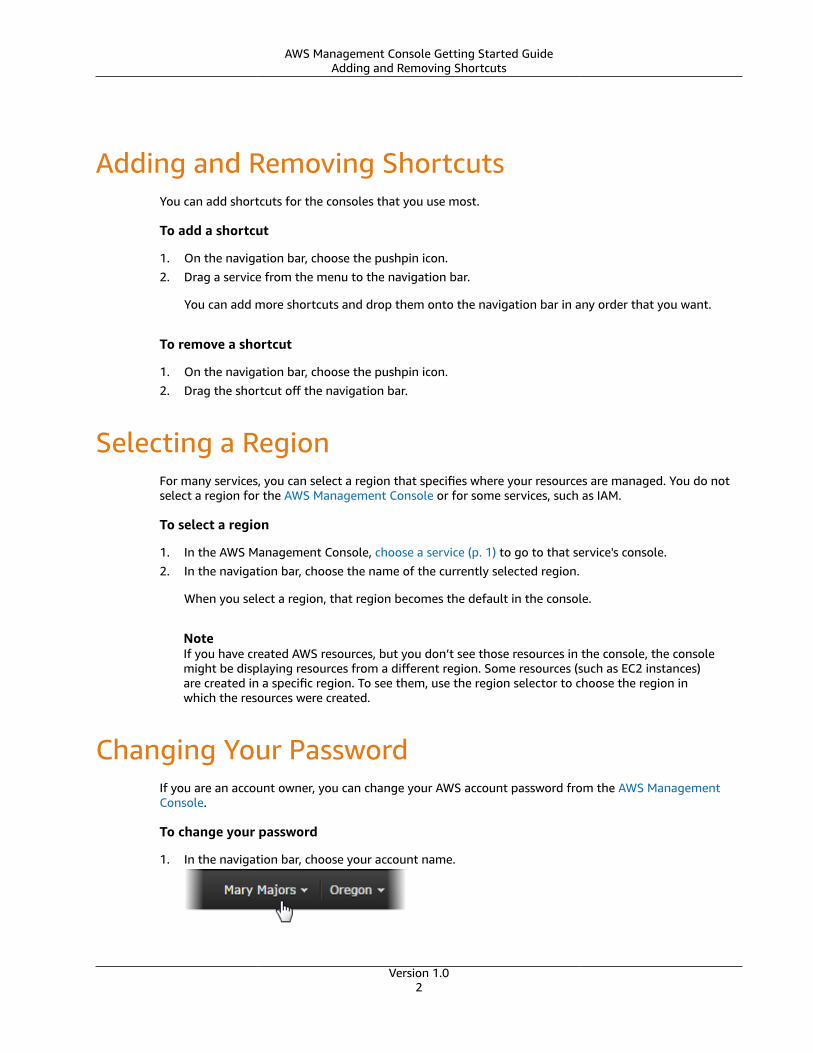
To change your password
1. In the navigation bar, choose your account name.
Version 1.02
AWS Management Console Getting Started GuideGetting Billing Information
2. Choose Security Credentials.
3. The page you see varies with the type of account that you used to sign in. Follow the consoleinstructions to get to the page for changing your password.
4. Type your current password once and your new password twice.
The new password must be at least eight characters long and must include a symbol, a number, anuppercase letter, and a lowercase letter.
5. When you've completed the password form, choose Change Password or Save changes.
Getting Billing InformationIf you have the necessary permissions, you can get information about your AWS charges from theconsole.
To get your billing information
1. In the navigation bar, choose your account name.
2. Choose My Billing Dashboard.
3. Use the AWS Billing and Cost Management dashboard to find a summary and a breakdown of yourmonthly spending. To learn more, see the AWS Billing and Cost Management User Guide.
Using the Device of Your ChoiceThe AWS Management Console has been designed to work on tablets as well as other kinds of devices:
• Horizontal and vertical space is maximized to show more on your screen.
• Buttons and selectors are larger for a better touch experience.
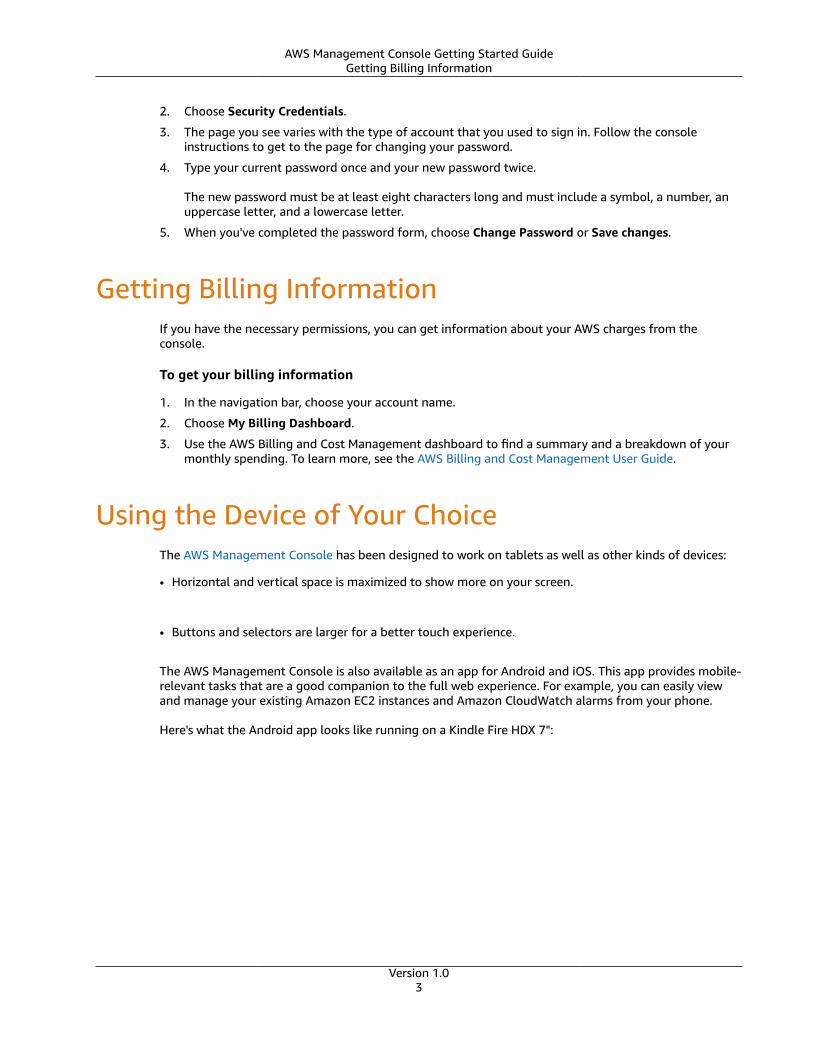
The AWS Management Console is also available as an app for Android and iOS. This app provides mobile-relevant tasks that are a good companion to the full web experience. For example, you can easily viewand manage your existing Amazon EC2 instances and Amazon CloudWatch alarms from your phone.
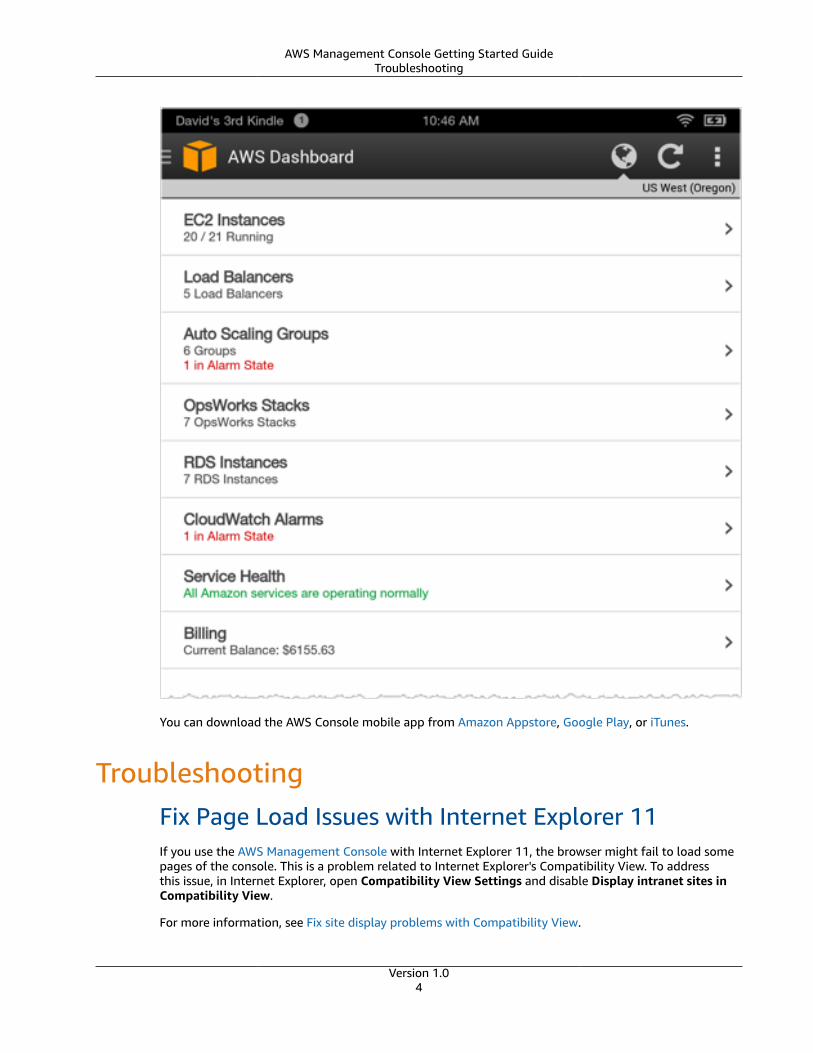
Here's what the Android app looks like running on a Kindle Fire HDX 7":
Version 1.03
AWS Management Console Getting Started GuideTroubleshooting
You can download the AWS Console mobile app from Amazon Appstore, Google Play, or iTunes.
TroubleshootingFix Page Load Issues with Internet Explorer 11If you use the AWS Management Console with Internet Explorer 11, the browser might fail to load somepages of the console. This is a problem related to Internet Explorer's Compatibility View. To addressthis issue, in Internet Explorer, open Compatibility View Settings and disable Display intranet sites inCompatibility View.
For more information, see Fix site display problems with Compatibility View.
Version 1.04
AWS Management Console Getting Started GuideWhat Are Resource Groups?
Working with Resource GroupsNoteThis content describes legacy Resource Groups. For information about the new AWS ResourceGroups service, see the AWS Resource Groups User Guide.
You can maximize your effectiveness with AWS offerings by working with resource groups. This guideprovides a short introduction to creating and managing resource groups in the AWS ManagementConsole. To learn more about the AWS Management Console in general, see Working with the AWSManagement Console (p. 1).
To work with resource groups
1. Sign in to the AWS Management Console.
2. On the navigation bar, choose Resource Groups.
3. Choose the name of an existing resource group or choose Create a Resource Group.
Topics
• What Are Resource Groups? (p. 5)
• Obtaining Permissions for Resource Groups and Tag Editor (p. 7)
• Creating a Resource Group (p. 10)
• Supported Resources (p. 12)
• Accessing a Resource Group (p. 14)
• Managing Resources (p. 15)
• Managing Resource Groups (p. 16)
What Are Resource Groups?NoteThis content describes legacy Resource Groups. For information about the new AWS ResourceGroups service, see the AWS Resource Groups User Guide.
In AWS, a resource is an entity that you can work with. Examples include an Amazon EC2 instance, anAWS CloudFormation stack, and an Amazon S3 bucket. If you work with multiple resources, you mightfind it useful to manage them as a group rather than move from one AWS service to another for eachtask.
Resource Groups helps you do just that. By default, the AWS Management Console is organized byAWS service. But with the Resource Groups tool, you can create a custom console that organizes andconsolidates information based on your project and the resources that you use. If you manage resourcesin multiple regions, you can create a resource group to view resources from different regions on the samepage.
Resource Groups can display metrics, alarms, and configuration details. If you need more detailedinformation or you want to change a setting for a given resource, choosing a link takes you to the pageyou need.
Version 1.05
AWS Management Console Getting Started GuideWhat Are Resource Groups?
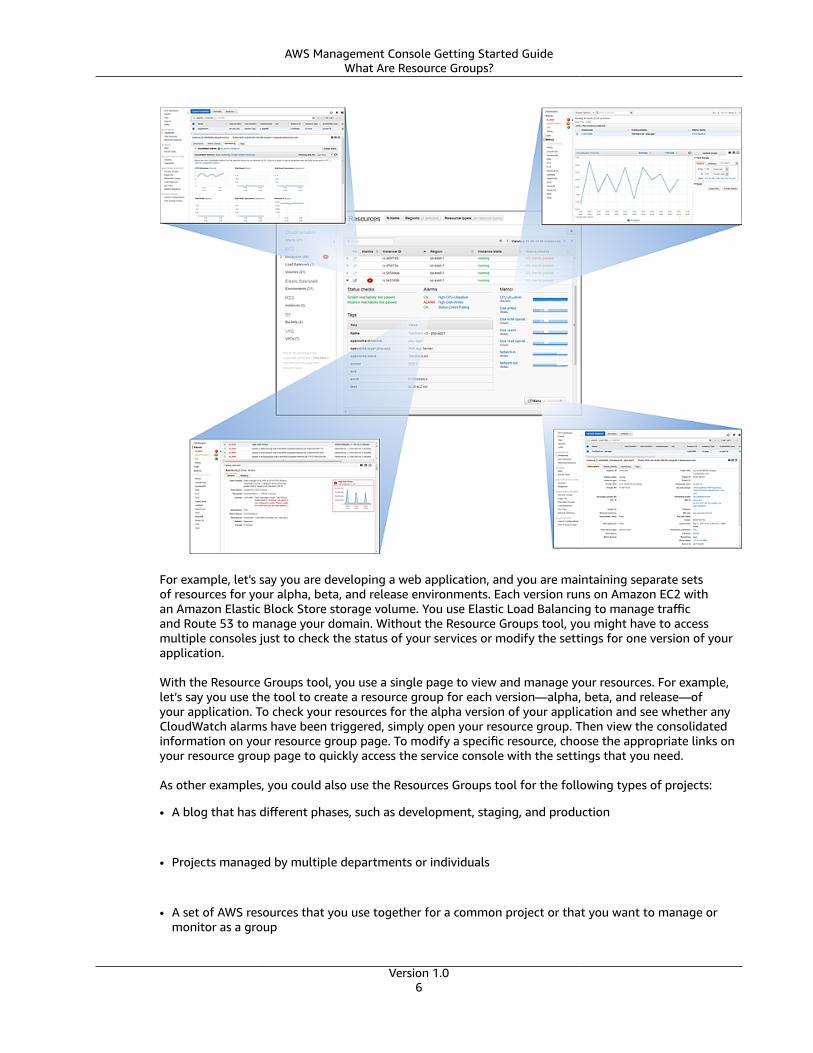
For example, let's say you are developing a web application, and you are maintaining separate setsof resources for your alpha, beta, and release environments. Each version runs on Amazon EC2 withan Amazon Elastic Block Store storage volume. You use Elastic Load Balancing to manage trafficand Route 53 to manage your domain. Without the Resource Groups tool, you might have to accessmultiple consoles just to check the status of your services or modify the settings for one version of yourapplication.
With the Resource Groups tool, you use a single page to view and manage your resources. For example,let’s say you use the tool to create a resource group for each version—alpha, beta, and release—ofyour application. To check your resources for the alpha version of your application and see whether anyCloudWatch alarms have been triggered, simply open your resource group. Then view the consolidatedinformation on your resource group page. To modify a specific resource, choose the appropriate links onyour resource group page to quickly access the service console with the settings that you need.
As other examples, you could also use the Resources Groups tool for the following types of projects:
• A blog that has different phases, such as development, staging, and production
• Projects managed by multiple departments or individuals
• A set of AWS resources that you use together for a common project or that you want to manage ormonitor as a group
Version 1.06
AWS Management Console Getting Started GuideHow Resource Groups Work
How Resource Groups WorkA resource group is a collection of resources that share one or more tags or portions of tags. To create aresource group, you simply identify the tags that contain the items that members of the group shouldhave in common.
If you or your administrator uses the AWS Identity and Access Management (IAM) service to createmultiple users in the same account, those users have their own individual resource groups. These groupsare not visible to other users. However, each user can share a resource group with others in the sameaccount by sharing a URL, which lets another user create a resource group with the same parameters. Forinformation about creating IAM users, see Creating an IAM User in the IAM User Guide. For informationabout sharing resources, see Sharing a Resource Group (p. 18).
The tags themselves function like properties of a resource, so they are shared across the entire account.That way, users in a department can draw from a common vocabulary (tags) within the departmentor account to create resource groups that are meaningful to their roles and responsibilities. Having acommon pool of tags also means that when users share a resource group (p. 18), they don't have toworry about missing or conflicting tag information.
How Tagging WorksTags are words or phrases that act as metadata for organizing your AWS resources. With most AWSresources, you have the option of adding tags when you create the resource, whether it's an Amazon EC2instance, an Amazon S3 bucket, or other resource. However, you can also add tags to multiple resourcesat once by using Tag Editor. You simply search for resources of various types and then add, remove, orreplace tags for the resources in your search results.
For more information about Tag Editor, see Working with Tag Editor (p. 19) in this guide. For moreinformation about tagging, see Tag Basics in the Amazon EC2 User Guide for Linux Instances.
Obtaining Permissions for Resource Groups andTag Editor
NoteThis content describes legacy Resource Groups. For information about the new AWS ResourceGroups service, see the AWS Resource Groups User Guide. The managed policies that areused for legacy Resource Groups, ResourceGroupsandTagEditorFullAccess andResourceGroupsandTagEditorReadOnlyAccess do not grant access to the new AWSResource Groups service.
To make full use of Resource Groups and Tag Editor, you might need additional permissions to tagresources or to see a resource's tag keys and values. These permissions fall into two categories:
• Permissions for individual services so that you can tag resources from those services and include themin resource groups
• Permissions that are required to use the Resource Groups and Tag Editor consoles
If you need additional permissions, contact your administrator and request the permissions that youneed.
If you are an administrator, you can provide permissions for your users by creating policies throughthe AWS Identity and Access Management (AWS IAM) service. You first create IAM users or groups, andthen apply the policies with the permissions that they need. For general information about creating andattaching IAM policies, see Working with Policies.
Version 1.07

AWS Management Console Getting Started GuidePermissions for Individual Services
Permissions for Individual ServicesImportantThis section describes permissions required for individual services if you want to tag resourcesfrom those services' consoles and APIs and include them in resource groups.
As explained in How Resource Groups Work (p. 7), each resource group represents a collection ofresources that share one or more tag keys or values. In order to add tags to a resource, you need thenecessary permissions for the service that the resource belongs to. For example, if you want to tagAmazon EC2 instances, your administrator must give you permissions to the tagging actions in thatservice's API, such as those listed in the Amazon EC2 user guide.
In addition, to make full use of the Resource Groups feature, you need other permissions that allowyou to access a service's console and interact with the resources there. For examples of such policies forAmazon EC2, see Example Policies for Working in the Amazon EC2 Console in the Amazon EC2 User Guidefor Linux Instances.
Granting Permissions for Using Resource Groups andTag Editor
ImportantThis section describes permissions that are required if you want to tag resources via the theResource Groups and Tag Editor consoles and Resource Groups Tagging APIs.If you want to tag resources that belong to AWS services from those services' individual consolesor APIs, see the above section - Permissions for Individual Services.
If you’re an administrator, you can grant permissions to others to use Resource Groups and Tag Editor. Todo that, you create and attach IAM policies to users, groups, or roles. For information about creating andworking with users, groups, and roles, see Identities (Users, Groups, and Roles) in the IAM User Guide. Toattach a policy for Resources Groups and Tag Editor, see the following procedures.
Using AWS Managed Policies for Resource Groups and TagEditorThe easiest way to attach a policy is to use one of the AWS managed policies found in the AWSManagement Console. It provides a full-access policy as well as a read-only policy for the ResourceGroups and Tag Editor services. For more information about managed IAM policies, see Managed Policiesand Inline Policies in the IAM User Guide.
To attach a Resource Groups and Tag Editor policy to an IAM user or group
1. Sign in to the AWS Management Console and open the IAM console at https://console.aws.amazon.com/iam/.
2. In the navigation pane, choose Policies.3. In the Filter: Policy Type search box, start typing ResourceGroupsandTagEditor to display the
Resource Groups and Tag Editor policies.4. Select the check box next to the policy that you want:
• ResourceGroupsandTagEditorReadOnlyAccess allows users to access and use Resource Groupsand Tag Editor but does not allow them to edit tags in the Tag Editor.
• ResourceGroupsandTagEditorFullAccess allows users complete use of all Resource Groups and
Tag Editor features.5. Choose Policy Actions, and then choose Attach.
Version 1.08
AWS Management Console Getting Started GuideGranting Permissions for UsingResource Groups and Tag Editor
6. Select the check box next to the name of each user or group that you want the policy to apply to,and then choose Attach policy.
Creating Your Own IAM Policies for Resource Groups and TagEditorIf the built-in IAM policies (known as AWS managed policies) for Resource Groups and Tag Editor do notmeet your needs, you can create your own. For information about creating IAM policies, see Overview ofIAM Policies. Then use the following examples of IAM policies as a guide to creating the policies that youneed.
The tag:getResources permission is required to list resources that share a particular tag, such aswhen viewing a Resource Group or searching for resources in Tag Editor. You could grant this permissionby using a policy like the following:
{ "Version" : "2012-10-17", "Statement" : [{ "Effect" : "Allow", "Action" : "tag:GetResources", "Resource" : "*" }] }
Additional permissions are required to get full use of the Resource Groups and Tag Editors consoles. Thetag:getTagKeys and tag:getTagValues permissions allow you to see existing tag keys and valuesfor resources in your account. You can grant both permissions by using a policy like the following:
{ "Version" : "2012-10-17", "Statement" : [{ "Effect" : "Allow", "Action" : [ "tag:GetTagKeys", "tag:GetTagValues" ], "Resource" : "*" }] }
To use these consoles to add and remove tags, you need the permissions in the following policy:
{ "Version" : "2012-10-17", "Statement" : [{ "Effect" : "Allow", "Action" : [ "tag:AddResourceTags", "tag:RemoveResourceTags", "tag:TagResources", "tag:UntagResources" ], "Resource" : "*" }] }
Finally, the following policy ensures that users have access to all features of Resource Groups and TagEditor.
Version 1.09
AWS Management Console Getting Started GuideCreating a Resource Group
{ "Version" : "2012-10-17", "Statement" : [{ "Effect" : "Allow", "Action" : "tag:*", "Resource" : "*" }] }
Creating a Resource GroupNoteThis content describes legacy Resource Groups. For information about the new AWS ResourceGroups service, see the AWS Resource Groups User Guide.
To create a resource group, you start by tagging your resources (if you have not already done so). Next,you create a view of resources that have common tags or common strings in those tags. You can createyour own custom tags or use tags created by others in your same account. You also can use the tagsthat AWS automatically creates, such as the stack name in AWS CloudFormation. To use Tag Editor toadd, remove, and manage tags, see Working with Tag Editor (p. 19). For a list of ways to tag resourceswithin their respective services, see Applying Tags.
Every tag consists of a key and a value. In search engine terms, adding values is like searching for themwith the OR operator (all items found are included). But adding keys is like searching for them with AND(only items with all keys are included). As a result, adding more values to each tag key that you specifycan increase the size of your resource group, but adding more keys might reduce the group size.
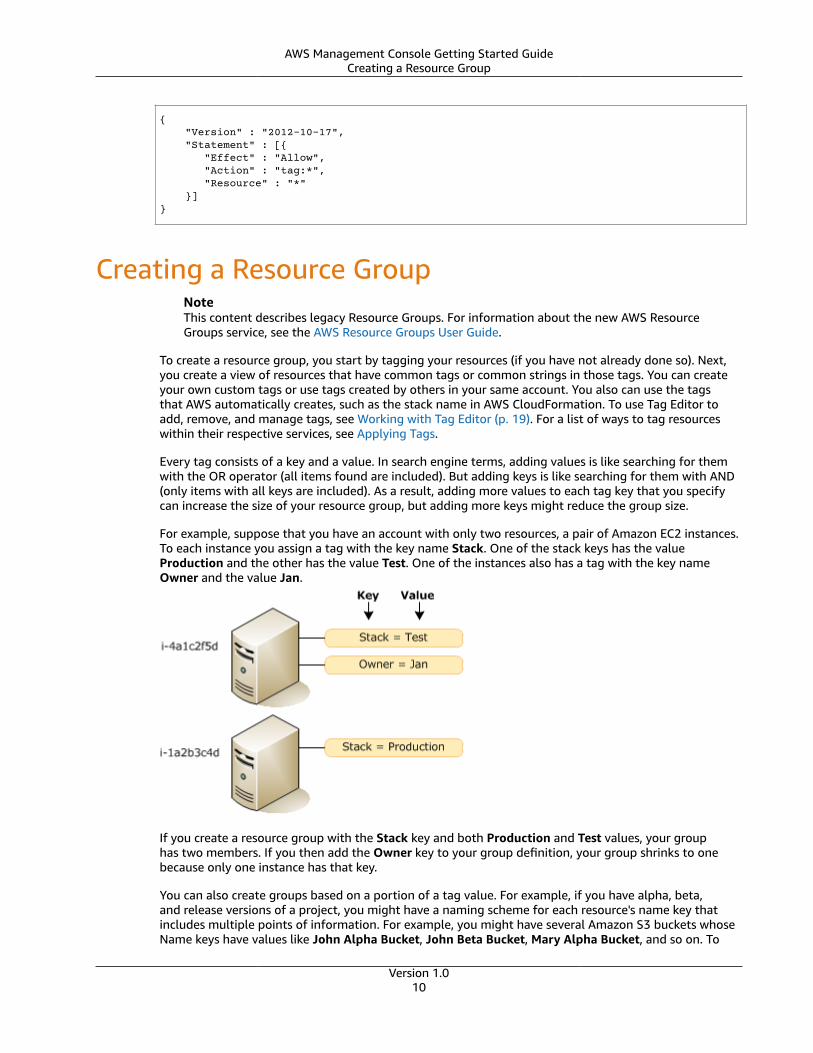
For example, suppose that you have an account with only two resources, a pair of Amazon EC2 instances.To each instance you assign a tag with the key name Stack. One of the stack keys has the valueProduction and the other has the value Test. One of the instances also has a tag with the key nameOwner and the value Jan.
If you create a resource group with the Stack key and both Production and Test values, your grouphas two members. If you then add the Owner key to your group definition, your group shrinks to onebecause only one instance has that key.
You can also create groups based on a portion of a tag value. For example, if you have alpha, beta,and release versions of a project, you might have a naming scheme for each resource's name key thatincludes multiple points of information. For example, you might have several Amazon S3 buckets whoseName keys have values like John Alpha Bucket, John Beta Bucket, Mary Alpha Bucket, and so on. To
Version 1.010
AWS Management Console Getting Started GuideCreating a Resource Group
create a resource group for your alpha version, you would specify only tags whose value includes Alpha.Or you could create a group of all buckets by specifying that the tag value include Bucket.
Not every AWS resource can be included in a resource group. For a list of currently supported resources,see Supported Resources (p. 12).
To create a resource group, you begin by searching for tags or tag strings that your group has incommon. You perform this search either on the Create a resource group page or with Tag Editor.
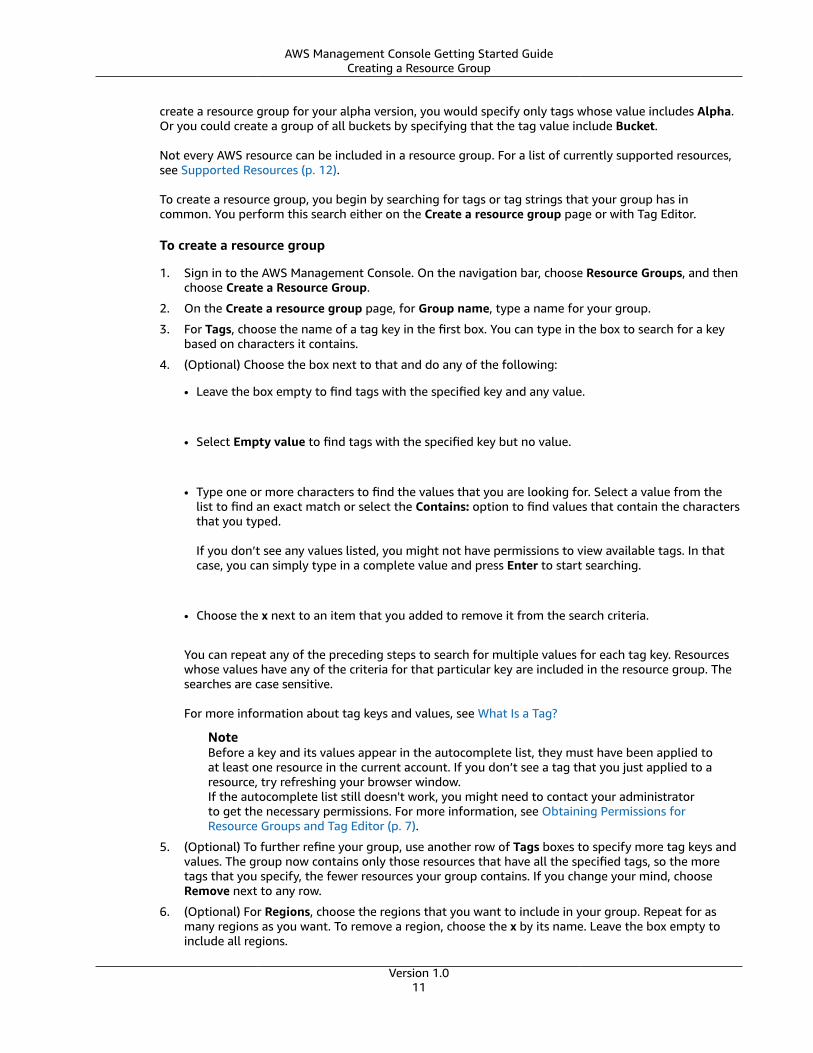
To create a resource group
1. Sign in to the AWS Management Console. On the navigation bar, choose Resource Groups, and thenchoose Create a Resource Group.
2. On the Create a resource group page, for Group name, type a name for your group.
3. For Tags, choose the name of a tag key in the first box. You can type in the box to search for a keybased on characters it contains.
4. (Optional) Choose the box next to that and do any of the following:
• Leave the box empty to find tags with the specified key and any value.
• Select Empty value to find tags with the specified key but no value.
• Type one or more characters to find the values that you are looking for. Select a value from thelist to find an exact match or select the Contains: option to find values that contain the charactersthat you typed.
If you don’t see any values listed, you might not have permissions to view available tags. In thatcase, you can simply type in a complete value and press Enter to start searching.
• Choose the x next to an item that you added to remove it from the search criteria.
You can repeat any of the preceding steps to search for multiple values for each tag key. Resourceswhose values have any of the criteria for that particular key are included in the resource group. Thesearches are case sensitive.
For more information about tag keys and values, see What Is a Tag?
NoteBefore a key and its values appear in the autocomplete list, they must have been applied toat least one resource in the current account. If you don’t see a tag that you just applied to aresource, try refreshing your browser window.If the autocomplete list still doesn't work, you might need to contact your administratorto get the necessary permissions. For more information, see Obtaining Permissions forResource Groups and Tag Editor (p. 7).
5. (Optional) To further refine your group, use another row of Tags boxes to specify more tag keys andvalues. The group now contains only those resources that have all the specified tags, so the moretags that you specify, the fewer resources your group contains. If you change your mind, chooseRemove next to any row.
6. (Optional) For Regions, choose the regions that you want to include in your group. Repeat for asmany regions as you want. To remove a region, choose the x by its name. Leave the box empty toinclude all regions.
Version 1.011
AWS Management Console Getting Started GuideSupported Resources
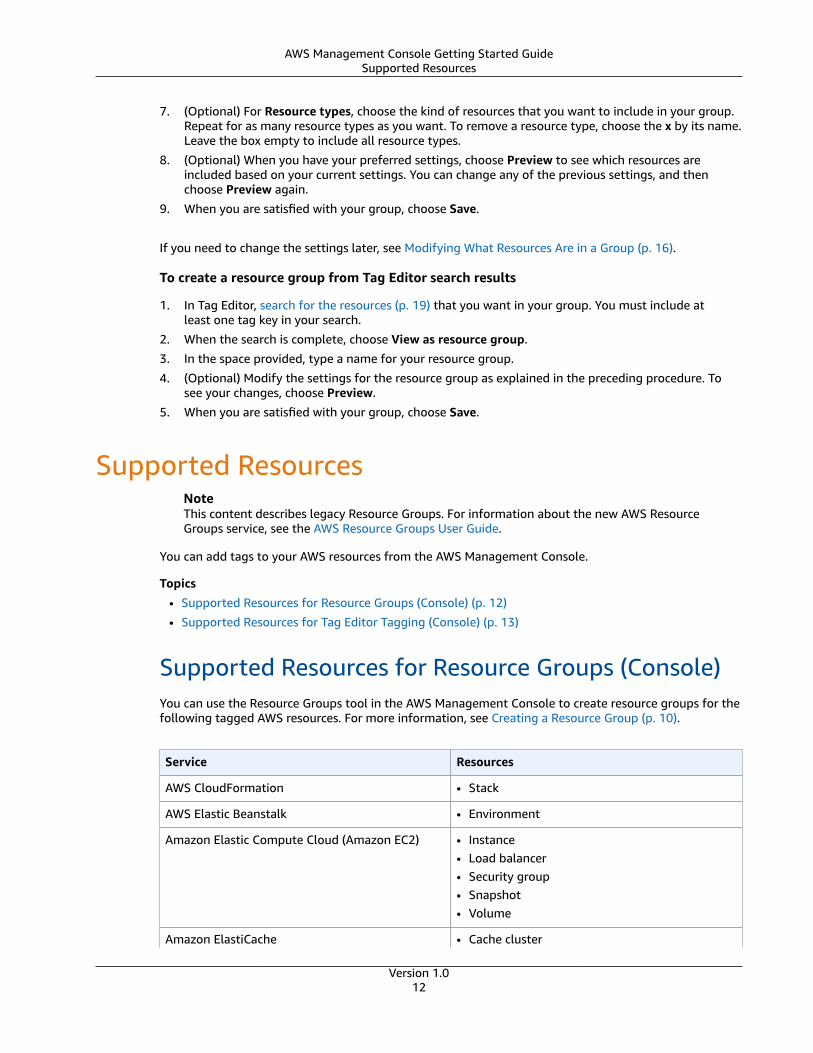
7. (Optional) For Resource types, choose the kind of resources that you want to include in your group.Repeat for as many resource types as you want. To remove a resource type, choose the x by its name.Leave the box empty to include all resource types.
8. (Optional) When you have your preferred settings, choose Preview to see which resources areincluded based on your current settings. You can change any of the previous settings, and thenchoose Preview again.
9. When you are satisfied with your group, choose Save.
If you need to change the settings later, see Modifying What Resources Are in a Group (p. 16).
To create a resource group from Tag Editor search results
1. In Tag Editor, search for the resources (p. 19) that you want in your group. You must include atleast one tag key in your search.
2. When the search is complete, choose View as resource group.
3. In the space provided, type a name for your resource group.
4. (Optional) Modify the settings for the resource group as explained in the preceding procedure. Tosee your changes, choose Preview.
5. When you are satisfied with your group, choose Save.
Supported ResourcesNoteThis content describes legacy Resource Groups. For information about the new AWS ResourceGroups service, see the AWS Resource Groups User Guide.
You can add tags to your AWS resources from the AWS Management Console.
Topics
• Supported Resources for Resource Groups (Console) (p. 12)
• Supported Resources for Tag Editor Tagging (Console) (p. 13)
Supported Resources for Resource Groups (Console)You can use the Resource Groups tool in the AWS Management Console to create resource groups for thefollowing tagged AWS resources. For more information, see Creating a Resource Group (p. 10).
Service Resources
AWS CloudFormation • Stack
AWS Elastic Beanstalk • Environment
Amazon Elastic Compute Cloud (Amazon EC2) • Instance• Load balancer• Security group• Snapshot• Volume
Amazon ElastiCache • Cache cluster
Version 1.012
AWS Management Console Getting Started GuideSupported Resources for Tag Editor Tagging (Console)
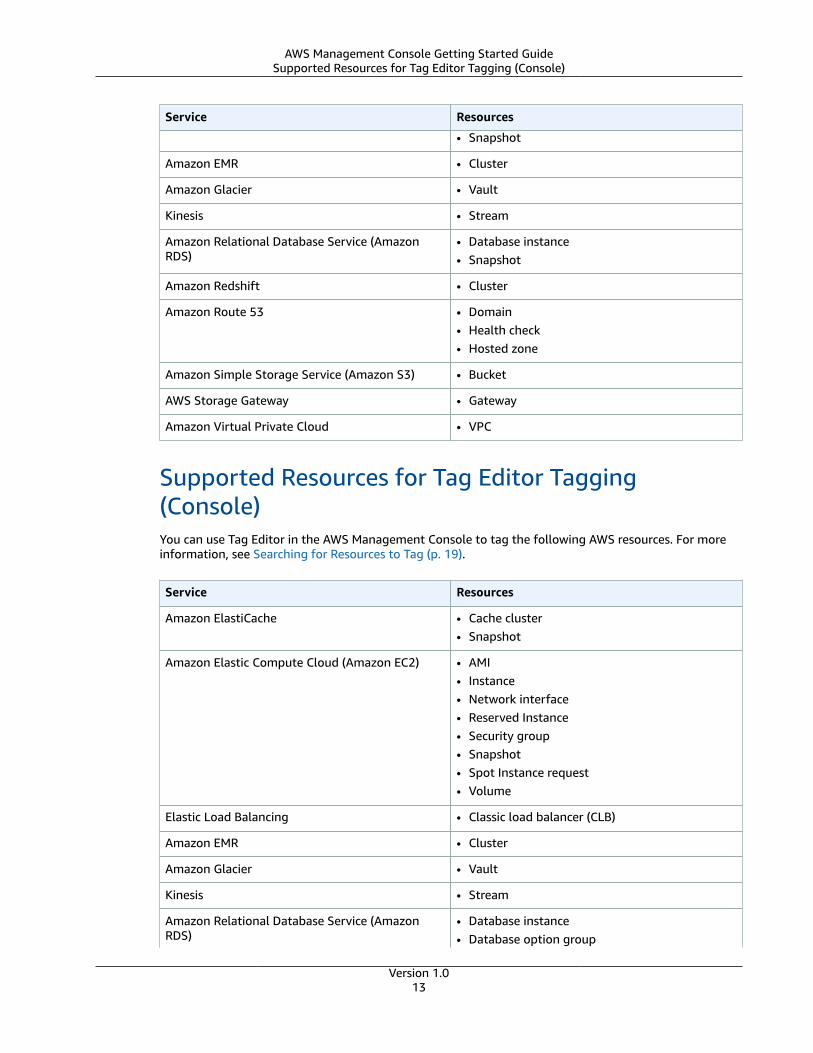
Service Resources
• Snapshot
Amazon EMR • Cluster
Amazon Glacier • Vault
Kinesis • Stream
Amazon Relational Database Service (AmazonRDS)
• Database instance• Snapshot
Amazon Redshift • Cluster
Amazon Route 53 • Domain• Health check• Hosted zone
Amazon Simple Storage Service (Amazon S3) • Bucket
AWS Storage Gateway • Gateway
Amazon Virtual Private Cloud • VPC
Supported Resources for Tag Editor Tagging(Console)You can use Tag Editor in the AWS Management Console to tag the following AWS resources. For moreinformation, see Searching for Resources to Tag (p. 19).
Service Resources
Amazon ElastiCache • Cache cluster• Snapshot
Amazon Elastic Compute Cloud (Amazon EC2) • AMI• Instance• Network interface• Reserved Instance• Security group• Snapshot• Spot Instance request• Volume
Elastic Load Balancing • Classic load balancer (CLB)
Amazon EMR • Cluster
Amazon Glacier • Vault
Kinesis • Stream
Amazon Relational Database Service (AmazonRDS)
• Database instance• Database option group
Version 1.013
AWS Management Console Getting Started GuideAccessing a Resource Group
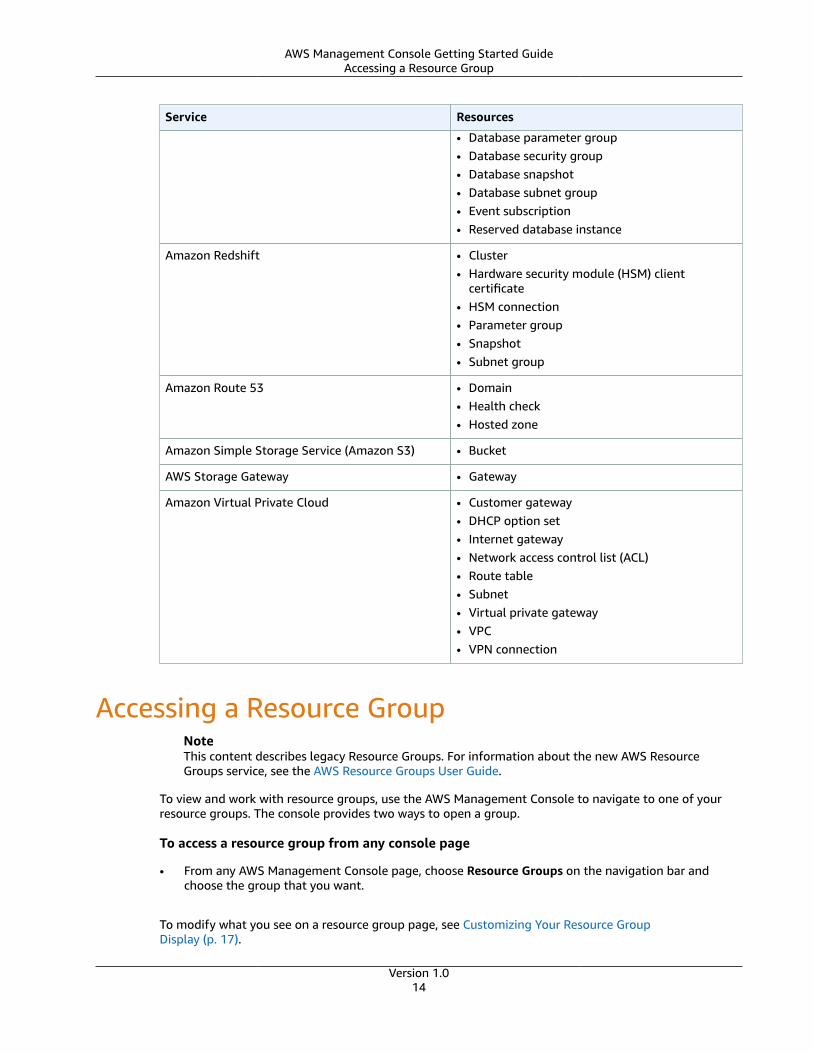
Service Resources
• Database parameter group• Database security group• Database snapshot• Database subnet group• Event subscription• Reserved database instance
Amazon Redshift • Cluster• Hardware security module (HSM) client
certificate• HSM connection• Parameter group• Snapshot• Subnet group
Amazon Route 53 • Domain• Health check• Hosted zone
Amazon Simple Storage Service (Amazon S3) • Bucket
AWS Storage Gateway • Gateway
Amazon Virtual Private Cloud • Customer gateway• DHCP option set• Internet gateway• Network access control list (ACL)• Route table• Subnet• Virtual private gateway• VPC• VPN connection
Accessing a Resource GroupNoteThis content describes legacy Resource Groups. For information about the new AWS ResourceGroups service, see the AWS Resource Groups User Guide.
To view and work with resource groups, use the AWS Management Console to navigate to one of yourresource groups. The console provides two ways to open a group.
To access a resource group from any console page
• From any AWS Management Console page, choose Resource Groups on the navigation bar andchoose the group that you want.
To modify what you see on a resource group page, see Customizing Your Resource GroupDisplay (p. 17).
Version 1.014
AWS Management Console Getting Started GuideManaging Resources
Managing ResourcesNoteThis content describes legacy Resource Groups. For information about the new AWS ResourceGroups service, see the AWS Resource Groups User Guide.
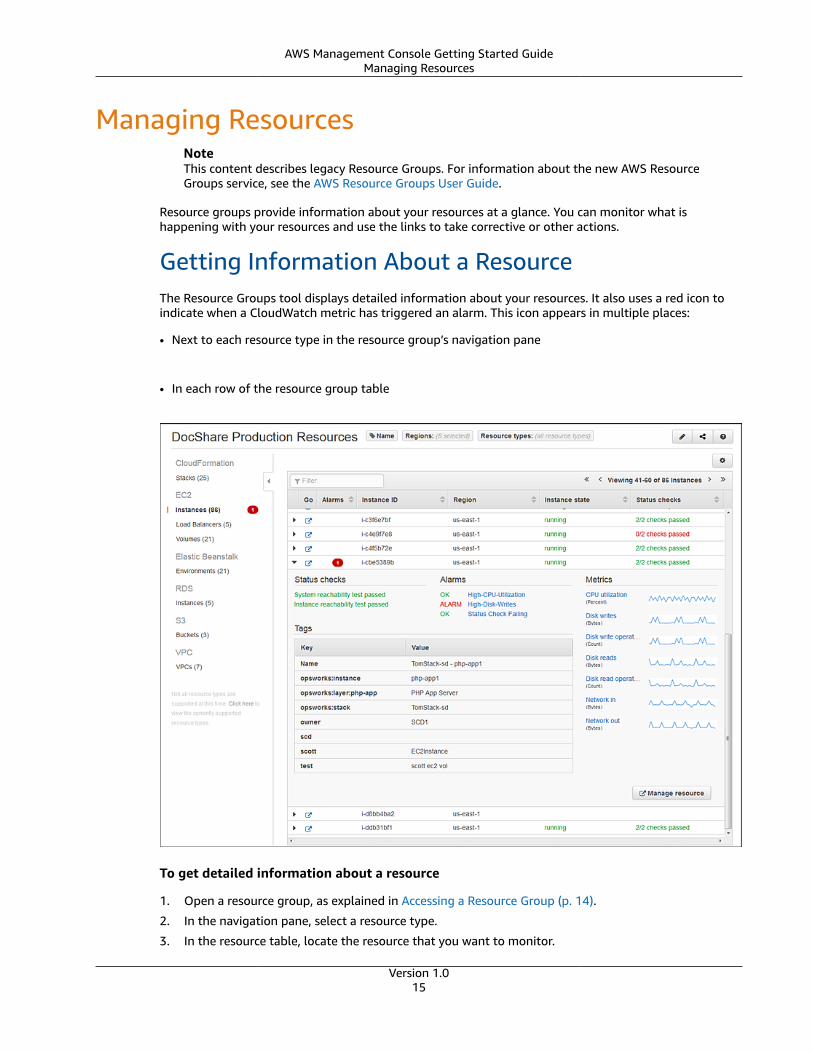
Resource groups provide information about your resources at a glance. You can monitor what ishappening with your resources and use the links to take corrective or other actions.
Getting Information About a ResourceThe Resource Groups tool displays detailed information about your resources. It also uses a red icon toindicate when a CloudWatch metric has triggered an alarm. This icon appears in multiple places:
• Next to each resource type in the resource group’s navigation pane
• In each row of the resource group table
To get detailed information about a resource
1. Open a resource group, as explained in Accessing a Resource Group (p. 14).
2. In the navigation pane, select a resource type.
3. In the resource table, locate the resource that you want to monitor.
Version 1.015
AWS Management Console Getting Started GuideTaking Action on a Resource
TipTo simplify locating a resource, filter and otherwise customize the table of resources, asexplained in Customizing Your Resource Group Display (p. 17).
4. Choose the triangle icon to expand the row for a resource to get more information.
Taking Action on a ResourceYou might need to act on the information that you see in the resource group table. For example, if anAmazon EC2 instance has triggered an alarm, you might want to go to the CloudWatch console for moredetails. Or you might need to go to the Amazon EC2 console to correct a problem. Resource Groupsmakes it easy to get to the controls that you need quickly.
To take action on a resource
1. Display details for the selected resource, as explained in Getting Information About aResource (p. 15).
2. Do one of the following:
• To go to the console that controls the resource, choose the blue icon ( ) in the resource’s tablerow, or choose Manage resource in the details pane.
• To take action on a CloudWatch alarm, choose the link for the alarm to open the CloudWatch
console.
Managing Resource GroupsNoteThis content describes legacy Resource Groups. For information about the new AWS ResourceGroups service, see the AWS Resource Groups User Guide.
At any time you can modify the settings of your resource groups to change what resources appear. Youcan also customize the display so that you can see the information that you need most.
Topics• Modifying What Resources Are in a Group (p. 16)• Customizing Your Resource Group Display (p. 17)• Updating Your Resource Group Display (p. 17)• Sharing a Resource Group (p. 18)• Deleting a Resource Group (p. 18)
Modifying What Resources Are in a GroupIf you need to change what resources the group includes or other group settings, you can do so at anytime.
To modify the composition of a resource group
1. Open an existing resource group, as explained in Accessing a Resource Group (p. 14).2.
In the resource group page, choose the pencil icon ( ).
Version 1.016
AWS Management Console Getting Started GuideCustomizing Your Resource Group Display
3. Modify any of the settings (name, resource types, regions, tags) and choose Preview. Repeat untilyou are satisfied with your group. Then choose Save.
Customizing Your Resource Group DisplayYou can change the appearance of your resource group to show the information that you need most.
To customize the data displayed in a resource group page
1. Select and open a group, as explained in Accessing a Resource Group (p. 14).2. Do any of the following:
• To determine which type of resource is displayed, choose the resource type in the navigation pane.
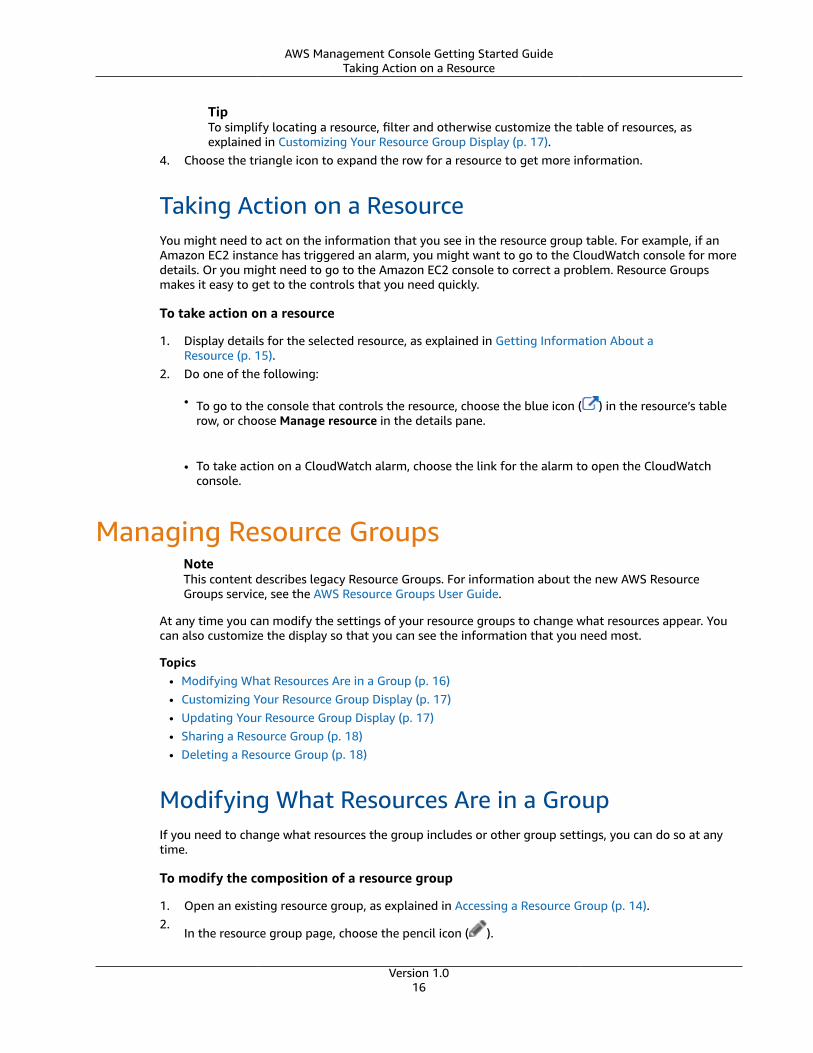
• To limit the display to resources containing a keyword, type the keyword in the filter box above
the table. For example, you could type stopped to see all stopped instances or us-east-2 to seeonly instances for that region.
• To sort the list by any column, choose the column heading name. To reverse the sort order, choose
the name again.
• To change the width of a table column, drag the divider between the column headings.
• To customize what columns appear in the table, choose the cog icon ( ) above the table and
select or deselect the type of data that appears. You can add or remove columns for the types ofinformation available for a resource (listed under Properties) or for individual tags (listed underTag Keys).
Selecting or deselecting an item in the list toggles a corresponding table column. To search forand limit what items appear in the list, type a full or partial keyword or words in the box at thetop.
Updating Your Resource Group DisplayAs you create or remove resources or apply or modify the tags your resources use, you might need toupdate the information that you see on a resource group page.
Version 1.017

AWS Management Console Getting Started GuideSharing a Resource Group
To update the information displayed on a resource group page
• Choose the refresh icon ( ) before the list of resources.
Sharing a Resource GroupIf your account consists of multiple IAM users, each of those users has his own resource groups, whichare not visible to other users. However, each user can share the settings that make up a resource groupwith other users in the same account. The share feature creates a URL that takes a user to the CreateResource Group page with the settings already entered in the form. The recipients can then save a newresource group for their own use.
For information on creating users, see Creating an IAM User in IAM User Guide.
To share a resource group
1. Select and open a group, as explained in Accessing a Resource Group (p. 14).2. Choose the share icon above the resource table.
3. Copy the URL that appears on the page, and send it to other users in your AWS account.
Deleting a Resource GroupYou can permanently remove any resource groups that you no longer need.
To delete a resource group
1. Select and open a group, as explained in Accessing a Resource Group (p. 14).2.
On the resource group page, choose the pencil icon ( ) next to the group name.3. Choose Delete and then OK to confirm.
NoteDeleting a resource group has no effect on the resources within the group.
Version 1.018
AWS Management Console Getting Started GuideObtaining Permissions
Working with Tag EditorTags are words or phrases that act as metadata for identifying and organizing your AWS resources. Thetag limit varies with the resource, but most can have up to 50 tags. Each tag consists of a key and avalue. For more about tagging, see Using Cost Allocation Tags in the AWS Billing and Cost ManagementUser Guide.
You can add tags to resources when you create the resource or add, change, or remove those tags oneresource at a time within each resource’s console. To add to multiple resources at once, you need to useTag Editor. With Tag Editor, you search for the resources that you want to tag, and then add, remove, oredit tags for the resources in your search results.
To start Tag Editor
1. Sign in to the AWS Management Console.2. On the navigation bar, choose Resource Groups, and then choose Tag Editor.
Not all resources can have tags applied. To see if a resource supports tagging, consult the documentationfor that resource's service.
Topics• Obtaining Permissions for Tagging (p. 19)• Searching for Resources to Tag (p. 19)• Finding Untagged Resources (p. 20)• Customizing Tag Search Results (p. 21)• Tagging Resources (p. 22)• Scenario: Implementing a New Tagging Strategy (p. 23)
Obtaining Permissions for TaggingTo make full use of Resource Groups and Tag Editor, you might need additional permissions to tagresources or to see a resource's tag keys and values. For more information, see Obtaining Permissions forResource Groups and Tag Editor (p. 7)
Searching for Resources to TagWith Tag Editor, you can locate all the resources that are available for tagging. For more information, seeSupported Resources for Tag Editor Tagging (Console) (p. 13).
To search for resources to tag
1. Sign in to the AWS Management Console, choose Resource Groups, and then choose Tag Editor.2. For Regions, choose the regions that you want to search in. Repeat for as many regions as you want.
To remove a region, choose the x by its name.3. For Resource types, choose the kind of resources that you want to locate. Repeat for as many
resource types as you want. To remove a region or resource type, choose the x by its name. To searchfor all resource types or all regions, select All resource types.
Version 1.019
AWS Management Console Getting Started GuideFinding Untagged Resources
4. (Optional) To limit your search to resources that already have certain tag keys or values, in the firstTags box choose the name of a tag key. Type in the box to search for a key based on characters thatit contains.
5. (Optional) In the next Tags box, do any of the following:
• Leave the box empty to search for all resources with the specified key and any value.
• Select Not tagged to search for resources that do not have the specified tag key.
• Select Empty value to search for resources that have the specified tag key but no value.
• Type one or more characters to find resources with the values that you are looking for. Select
a value from the list to find an exact match or select the Contains: option to find values thatcontain the characters that you typed.
If you don’t see any values listed, you might not have permissions to view available tags. In thatcase, you can simply type in a complete value and press Enter to start searching.
• Choose the x next to an item that you added to remove it from the search criteria.
You can add multiple values for each tag key. Doing so potentially increases the number of resourcesin the search results because the results include resources tagged with any of the selected values.The search is case sensitive.
NoteBefore a key and its values appear in this list, they must have been applied to at least oneresource in the current account. If you don’t see a tag that you just applied to a resource, tryrefreshing your browser window.
6. (Optional) To further refine your group, continue using the Tags boxes at the bottom to specifymore tag keys and values. The search results contain only those resources that have all the specifiedtags, so the more tags you specify, the fewer resources Tag Editor finds.
7. When you have the settings that you want, choose Find resources.
TipTo create a legacy resource group based on these search results, choose View as resourcegroup. Note that this does not create or save a new group in AWS Resource Groups. For moreinformation, see To create a resource group from Tag Editor search results (p. 12).
Finding Untagged ResourcesYou might find it useful to know what resources in your account have yet to be tagged. You might alsowant to know what resources have tag keys but no tag values. You can use Tag Editor to find theseresources.
1. Sign into the AWS Management Console and open Tag Editor at https://resources.console.aws.amazon.com/r/tags.
2. For Regions, select the regions that you want to include.3. For Resource types, select the resource types that you want to search for.4. For Tags, select a tag key that you want to apply to resources that do not already have it.
Version 1.020
AWS Management Console Getting Started GuideCustomizing Tag Search Results
5. In the next box, do either or both of the following, depending on your goal:
• Choose Not tagged to find resources with no tags.
• Choose Empty value to find resources that are tagged with your specified key but that have notag value.
6. Choose Find Resources to have Tag Editor find all such resources and list them at the bottom of thepage.
7. (Optional) Use any of the methods discussed in Tagging Resources (p. 22) to add tags to theresources in the search results.
Customizing Tag Search ResultsAfter completing a search, you can sort and filter the results of your tag search to find the tags andresources that you need to work with.
To customize tag search results
Do any of the following:
• To limit the display to resources that contain a keyword, type the keyword in the filter box above thetable. For example, you could type elasticbeanstalk to see all resources whose ID indicates thatthey are associated with the Elastic Beanstalk service.
• To sort the list by any column, choose the column heading name. To reverse the sort order, choose thename again.
• To change the width of a table column, drag the divider between the column headings.
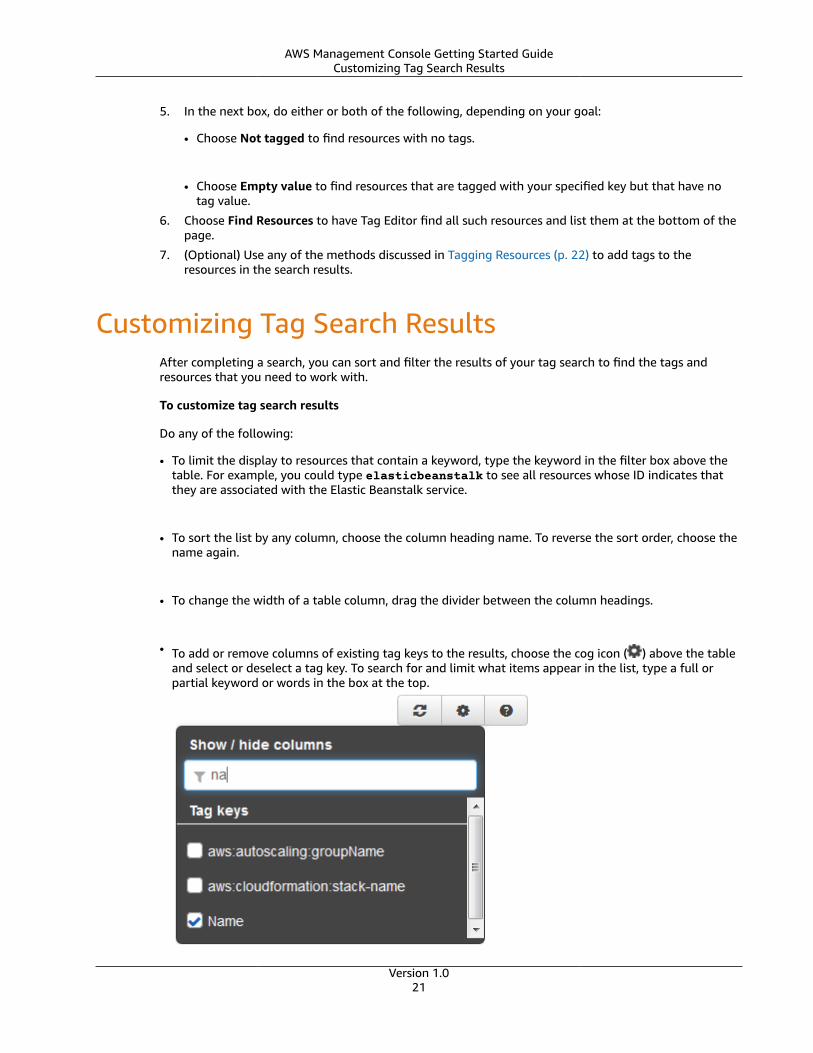
• To add or remove columns of existing tag keys to the results, choose the cog icon ( ) above the tableand select or deselect a tag key. To search for and limit what items appear in the list, type a full orpartial keyword or words in the box at the top.
Version 1.021

AWS Management Console Getting Started GuideTagging Resources
Tagging ResourcesAfter you have located the resources (p. 19) that you want to tag, you can add, remove, or edit thetags for all or some of your search results as a group.
To apply a new tag to one or more resources, you begin by creating a tag key.
To create a tag key
1. Search for the resources (p. 19) whose tags you want to manage.
2. Choose Create a new tag key.
3. Type the name of your new key, and then choose Add key. Repeat for as many tag keys as you wantto create.
NoteThe new tag key does not actually exist until a value for the new key is applied to aresource. A tag does not exist unless it is applied to a resource.
To edit or apply tags for a single resource
1. Search for the resources (p. 19) whose tags you want to manage.
2. Customize the search results (p. 21) table to make it easy to find the resource that you want.
3. Do any of the following:
•To add a tag to a resource, choose the + ( ) icon, type a value, and choose the check mark icon( ). You can apply a tag to a resource without specifying a value.
•To edit the tag value of a resource, choose the pencil icon ( ) by its value and edit the value.Choose the check mark icon or press Enter.
• To remove an existing tag value, choose the X icon ( ) next to the value.
• To apply an existing tag key, choose the cog icon ( ) and select the key that you want, asexplained in Customizing Tag Search Results (p. 21). Then choose the + icon in the column forthat key, type a new value, and either choose the check mark icon or press Enter.
• To modify a resource’s tag in its own console, choose the blue icon ( ). Then use the settings inthat console to edit or apply tags.
To edit or apply tags for multiple resources
1. Search for the resources (p. 19) whose tags you want to manage.
2. Customize the search results (p. 21) table to make it easy to find the resource that you want.
3. Select the check box for each resource whose tags you want to modify. To manage tags for all theresources in the list, select the check box in the column heading row.
4. Choose Edit tags for selected. Modify the keys or values, and then choose Apply changes.Version 1.0
22

AWS Management Console Getting Started GuideScenario: Implementing a New Tagging Strategy
5. Repeat the preceding step as needed.
Scenario: Implementing a New Tagging StrategyConsider a situation where you have a medium to large working environment with multiple resourcesused by various employees. You decide to use tagging to help you organize and get better oversight ofyour account’s resources. But how to proceed when there are dozens of resources to tag? Fortunately,Tag Editor can simplify the process.
1. Make a plan.
Before you begin, sketch out a plan of the tag keys and values that will help you organize yourresources. For example, you might want all resources to have tag keys like Project, Cost Center, andEnvironment. Remember, too, that each resource cannot have more than 50 tags.
2. Open Tag Editor.
Sign into the AWS Management Console and open Tag Editor at https://resources.console.aws.amazon.com/r/tags.
3. Find all resources in your account.
For Regions, select all regions that apply. For Resource types, select All resource types. Leave bothTags boxes empty. Then choose Find resources. For more information, see Searching for Resourcesto Tag (p. 19).
4. Select all the found resources.
The Tag Editor search results appear at the bottom of the page. When the list shows the resourcesthat you want to tag, select the top check box to select all resources. Choose Edit tags for selected.
5. Apply tag keys with empty elements.
In Add/edit tags, under Add tags, in the space provided, type the key name that you want to add,such as Project. Repeat for your other new keys, such as Cost Center and Environment.Choose Apply changes.
TipIf any of your selected resources have reached the maximum of 50 tags, a message warnsyou before you choose Apply changes. You can pause the pointer over the number ofaffected resources in the message to see a pop-up list of the specific resources.
6. Add values for each tag key.
The next step is to add tag values that will help you distinguish individual resources that share tagkeys. There are a couple of ways to do this depending on whether you plan on adding the samevalues to many resources or just a few.
a. Bulk add values.
Start by selecting the check box at the top of the table again to clear all the check boxes. Thenselect individual check boxes for just those resources that need a specific tag value.
Choose Edit tags for selected. In Add/edit tags, under Applied tags, type a new value in theValue column next to a tag key. For example, you might add a billing code in the value for theCost Center key or type Production for the Environment key.
Note that if the Value column shows Multiple values, you can still type in a new value.However, your new value will replace all the key’s existing values for the selected resources.
When you’re done, choose Apply changes.
Version 1.023
AWS Management Console Getting Started GuideScenario: Implementing a New Tagging Strategy
b. Add individual tag values.
If you want each resource to have its own unique value, you can edit tag values right in thesearch results table. Start by choosing the cog icon above the table and selecting the checkboxes for your new keys. To continue our example, you might select the check boxes for Project,Cost Center, and Environment. This makes your keys appear as columns in the search resultstable.
For a given resource, locate the column that displays the tag key whose value you want to edit.Choose the pencil icon, and then type the new value in the box. Press Enter to complete theediting.
7. Repeat Step 6 for other resources in your list.
Version 1.024
AWS Management Console Getting Started Guide
AWS GlossaryFor the latest AWS terminology, see the AWS Glossary in the AWS General Reference.
Version 1.025