Embed Size (px)
Citation preview

A u t o m a t i n g D ie D e s i g n t o B e n e f i t t h e E n t i r e S h o p
Bill Schwartz, Wisconsin Metal Parts
May 28, 2015
A b o u t W is c o n s in M e t a l P a rts , In c .
• Started out in 1988 as a die design firm named Die Concepts, Inc.
• Grew into a tool and die shop that also did custom machining
• Started doing metal stamping in the late 90s
• Started doing metal fabrication in the 2000s
• Changed name to Wisconsin Metal Parts, Inc. in 2010
M y b a c k g r o u n d :
• Started tool and die apprenticeship in 1979 and worked as a tool and die maker on the bench for almost 20 years
• Started doing part-time die design on the board in the early 90s
• Switched to 2D AutoCAD in late 90s and designing full-time
• Started using a directly modeling 3D die design software package in 2003 along with one other die designer
S w i t c h i n g t o P a r a m e t r i c D ie D e s ig n
• Started using SOLIDWORKS 1-1/2 years ago in November, 2013
• After designing 8 or 10 dies using SOLIDWORKS, added Logopress3 just under a year ago in July, 2014
S O L I D W O R K S P a r a m e t r ic B e n e f i t s in G e n e ra l
• Changes are much, much easier due to the history tree and the fact that things are linked between the parts, assemblies and drawings –so once you develop an understanding of the relationships involved it helps you to design much faster
• Strip layouts that are done at the quoting stage can be used once the job is received
• You can use most brands of CAM software to work with the files that are generated by SOLIDWORKS
• Everyone coming out of technical college in our area is trained in SOLIDWORKS
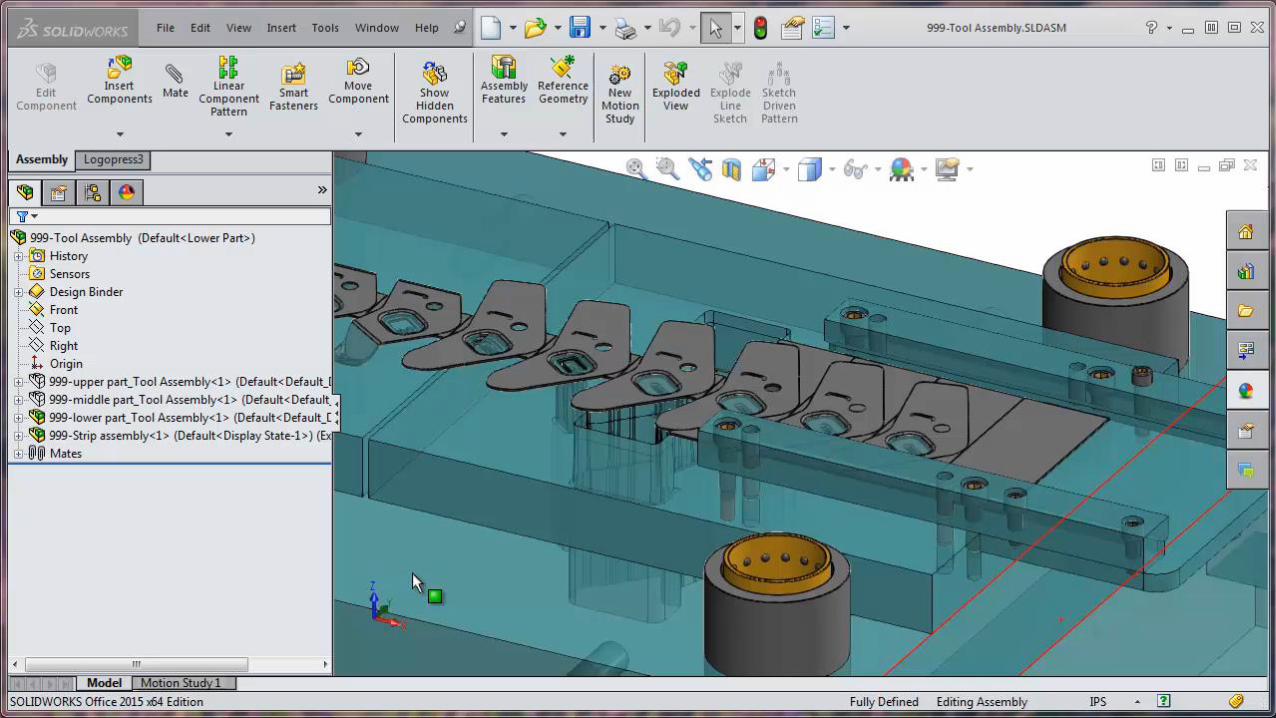
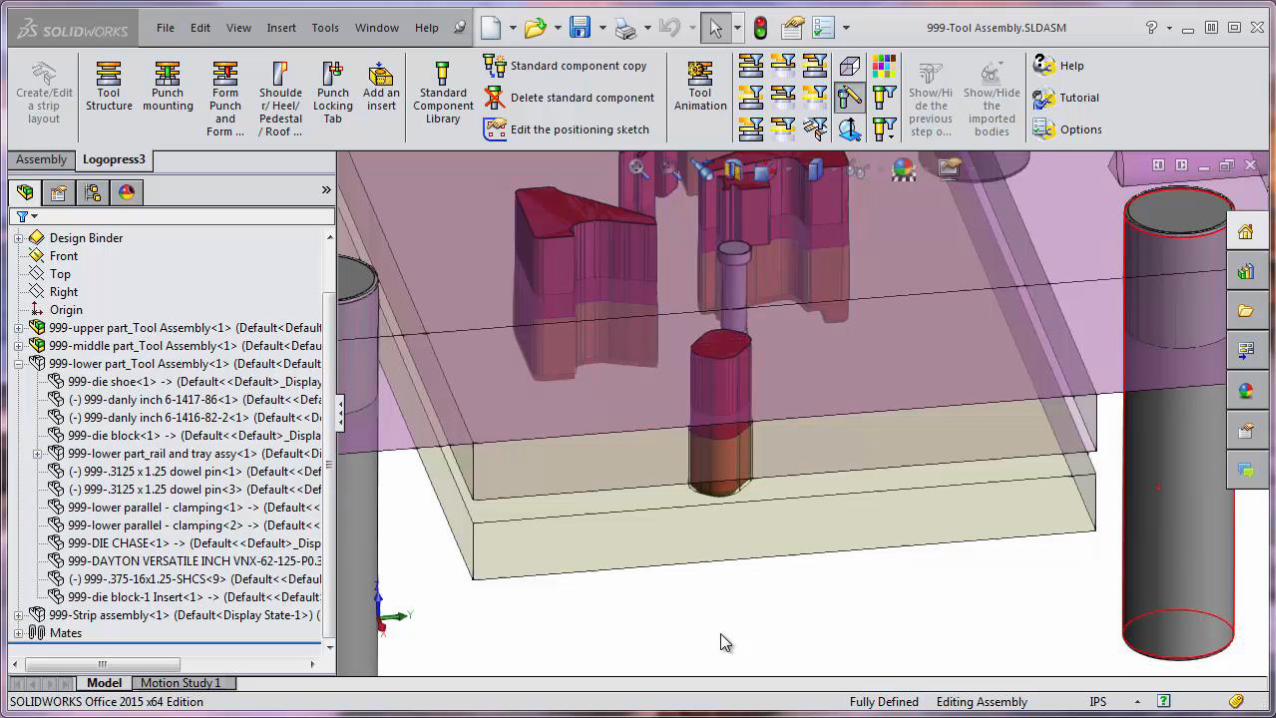
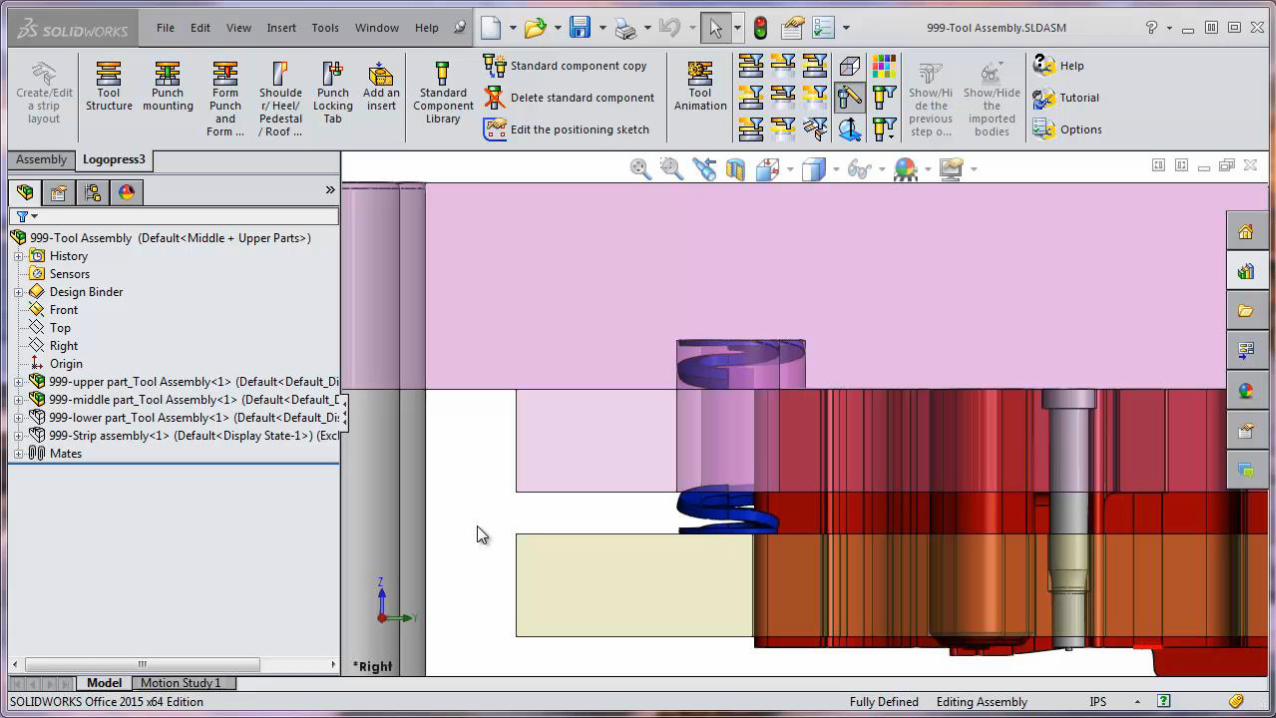
• Makes adding mundane tasks such as adding screws, springs, nitrogen, pierce punches and other standard components much faster and more efficient, partially because all holes are automatically added at the same time
• Allows you to edit standard components extremely quickly and because of the parametrics, everything involved, including 2D drawings are updated automatically
• Watch video #1 (next slide) for SHCS insertion and then also #2 for changing 1/4-20 Socket Head Cap Screws to 3/8-16 (when switching to the next slide, move your mouse to the bottom to press play)


V e r y C o m p le t e S t a n d a r d C o m p o n e n t L ib ra ry
• Watch video #4 (the next slide) to see coil spring insertion and note that force and deflection is displayed, along with total force of all springs and also center of the load is displayed
• Then watch video #5 to see coil springs deleted and nitrogen gas springs added, along with their clamping screws
• One of the most important and impressive tools in Logopress3 is the Logopress3 Tool Animation and Dynamic Interference Detection command
• This tool requires minimal input from the die designer to set it up
• Many tool animations can be done in a matter of a few minutes and the most complex ones (several cams and cam releases) may take up to an hour of setup time
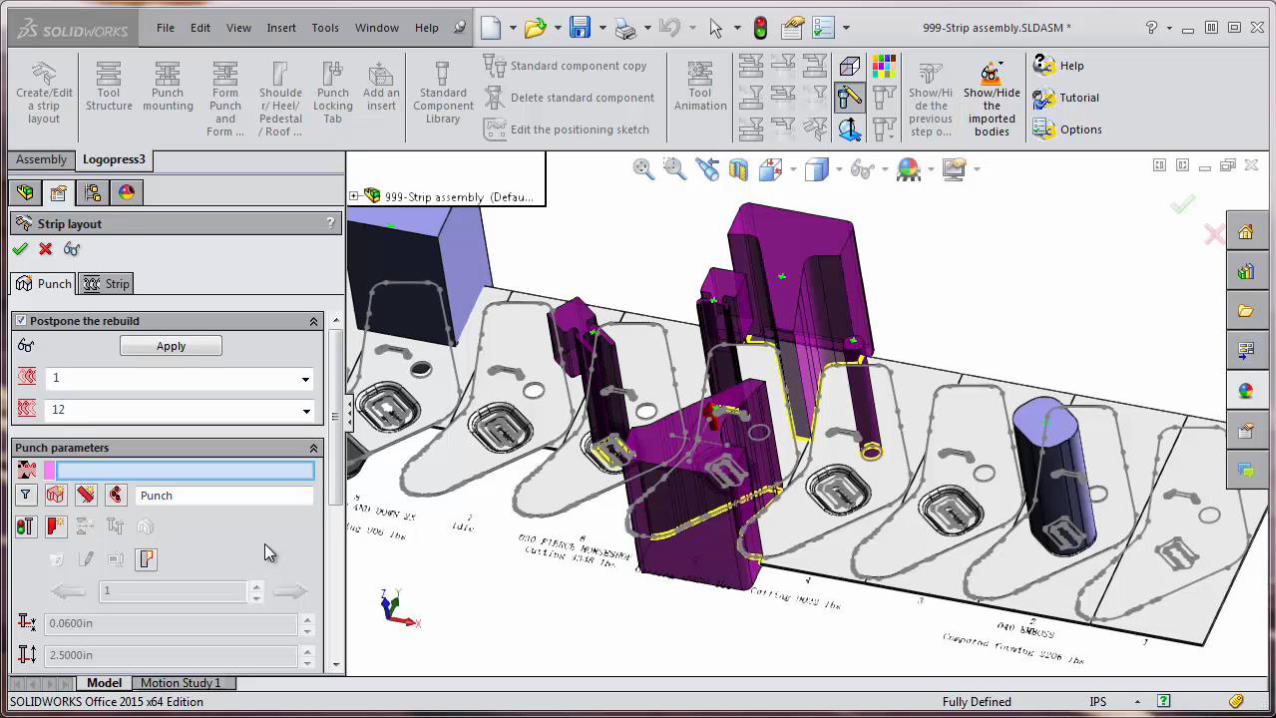
• Another great tool is the Logopress3 filters toolbar that allow you to instantly filter the various parts of the die such as toggle the strip on or off, show die side only, show only punch side and strippers, etc.
-O u t D ie
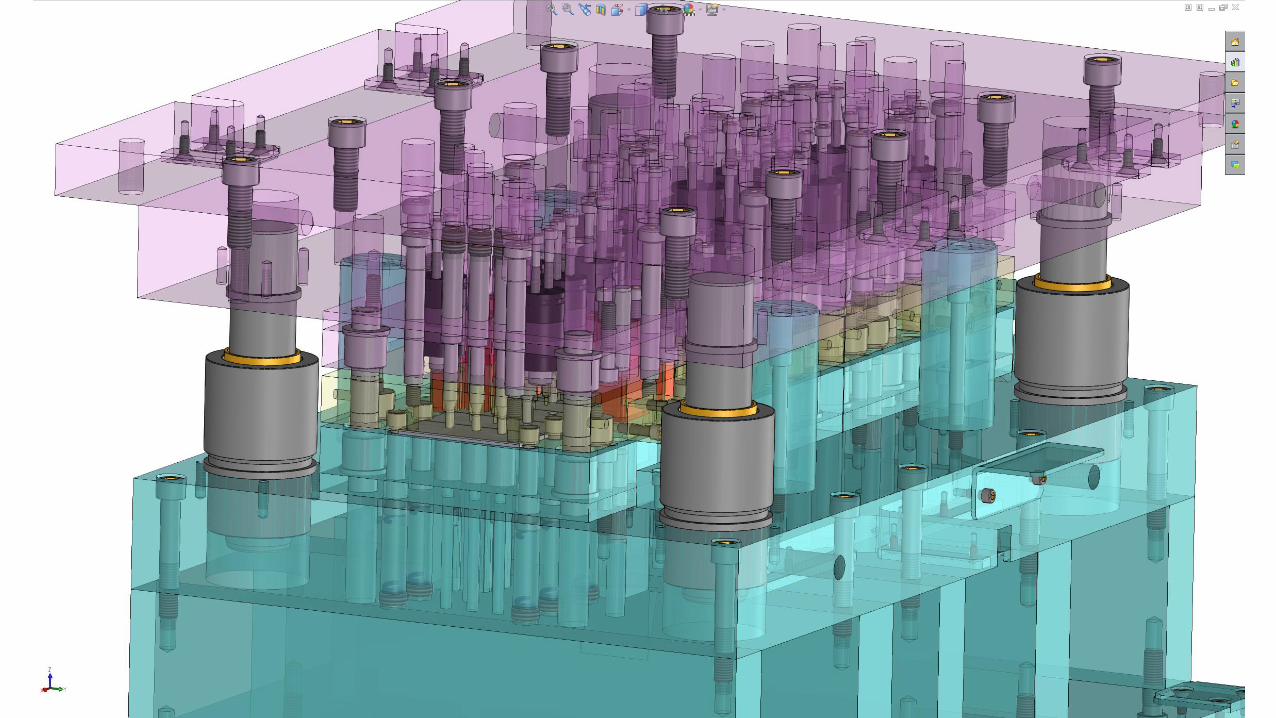
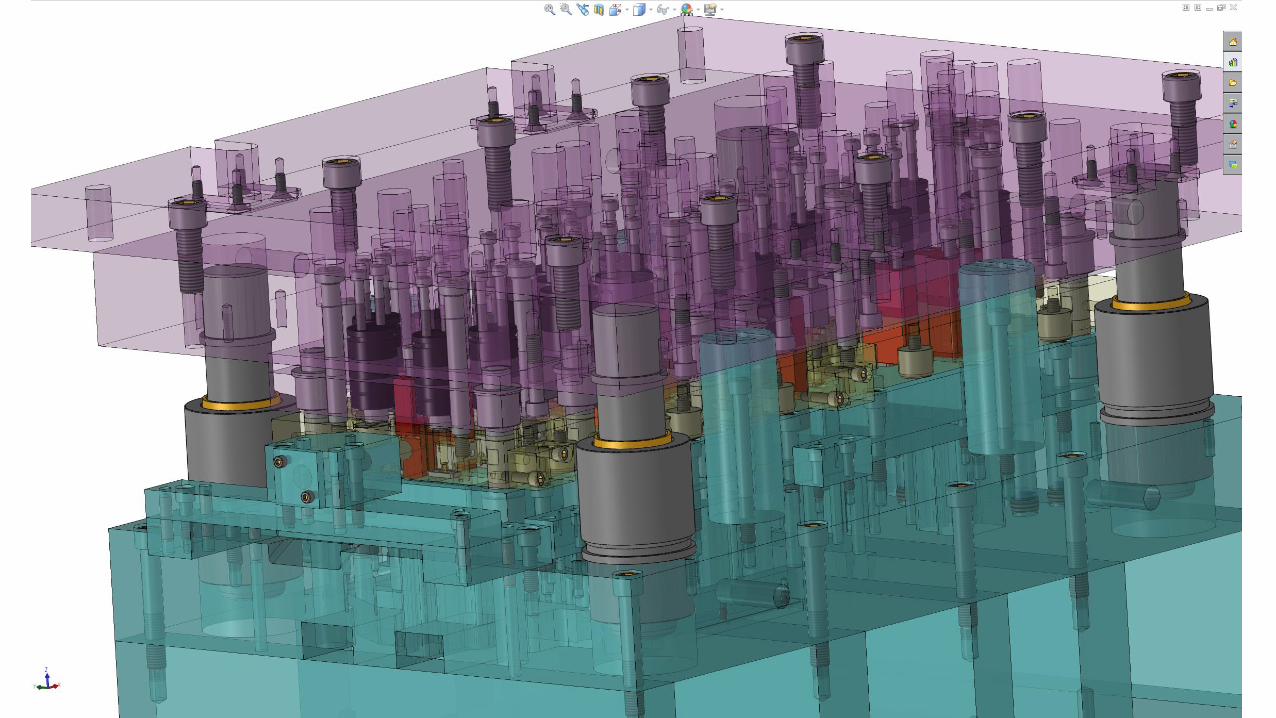
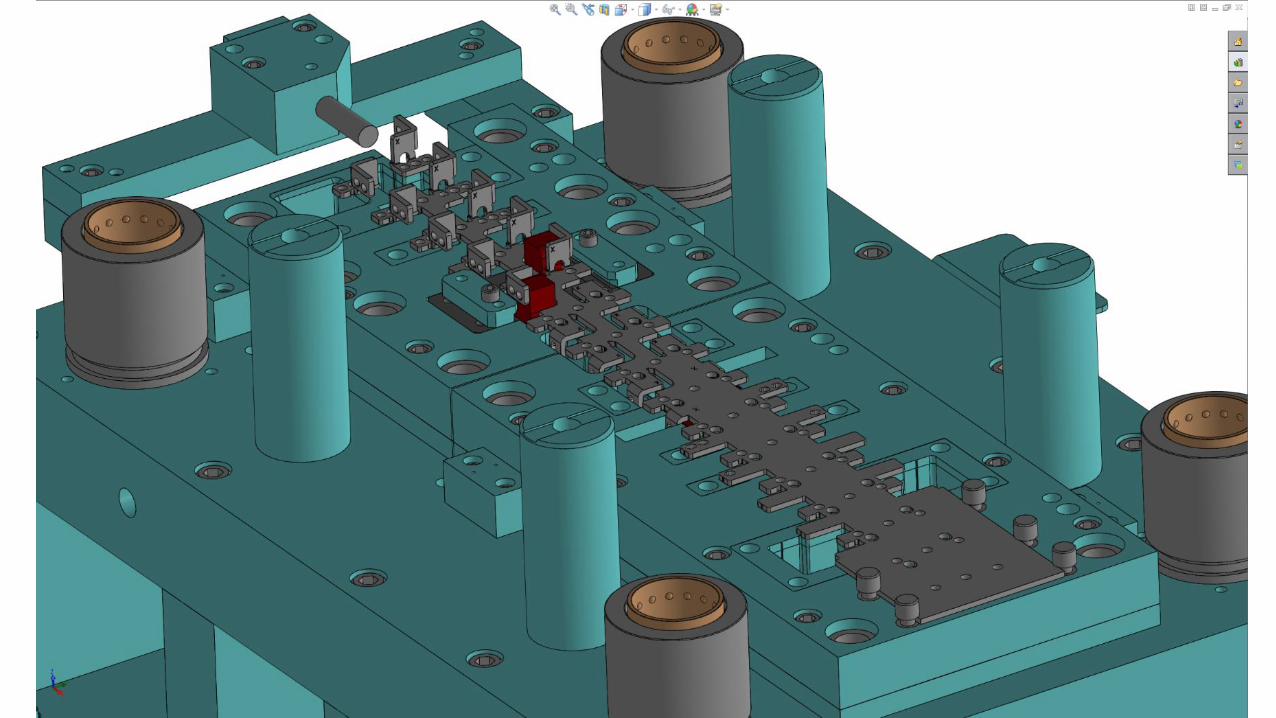
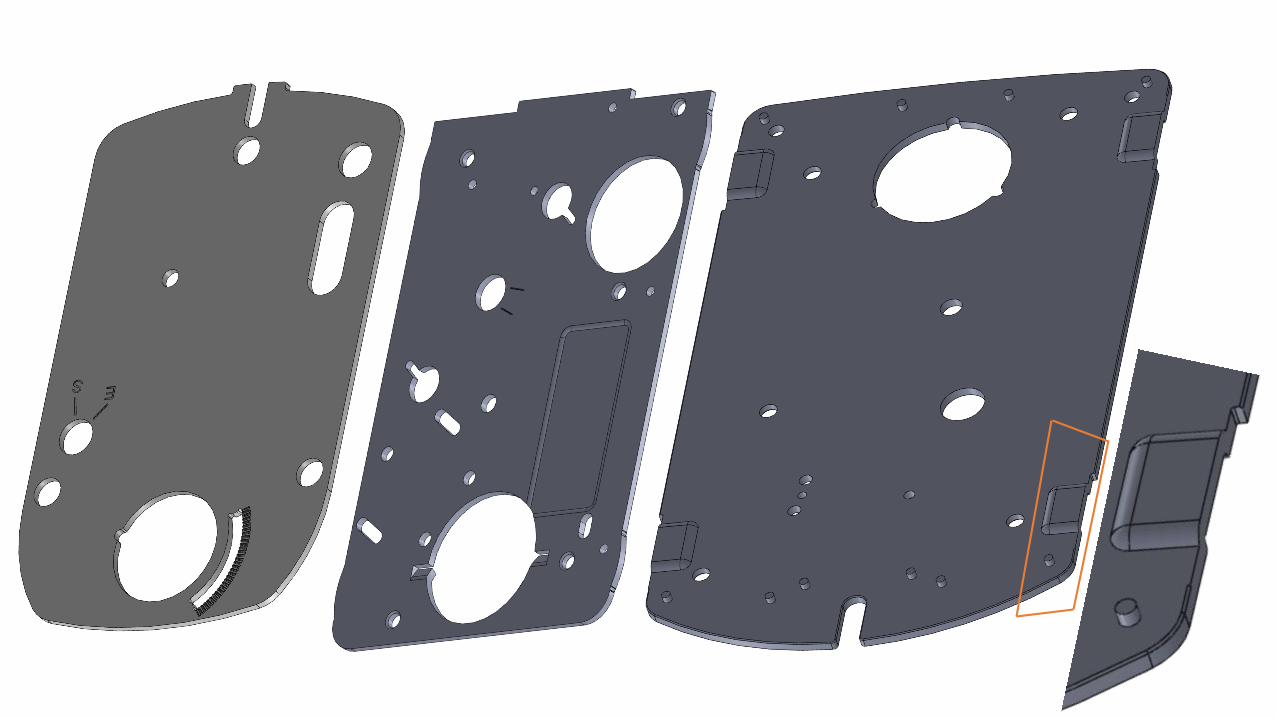
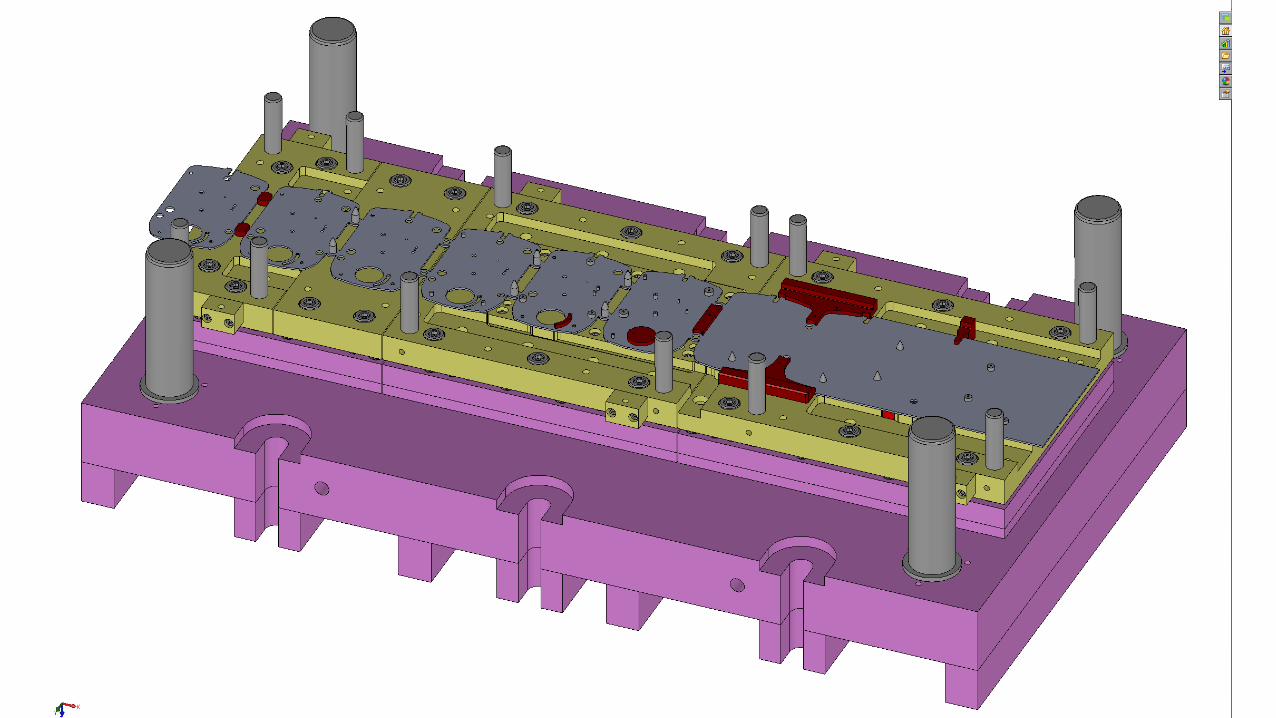
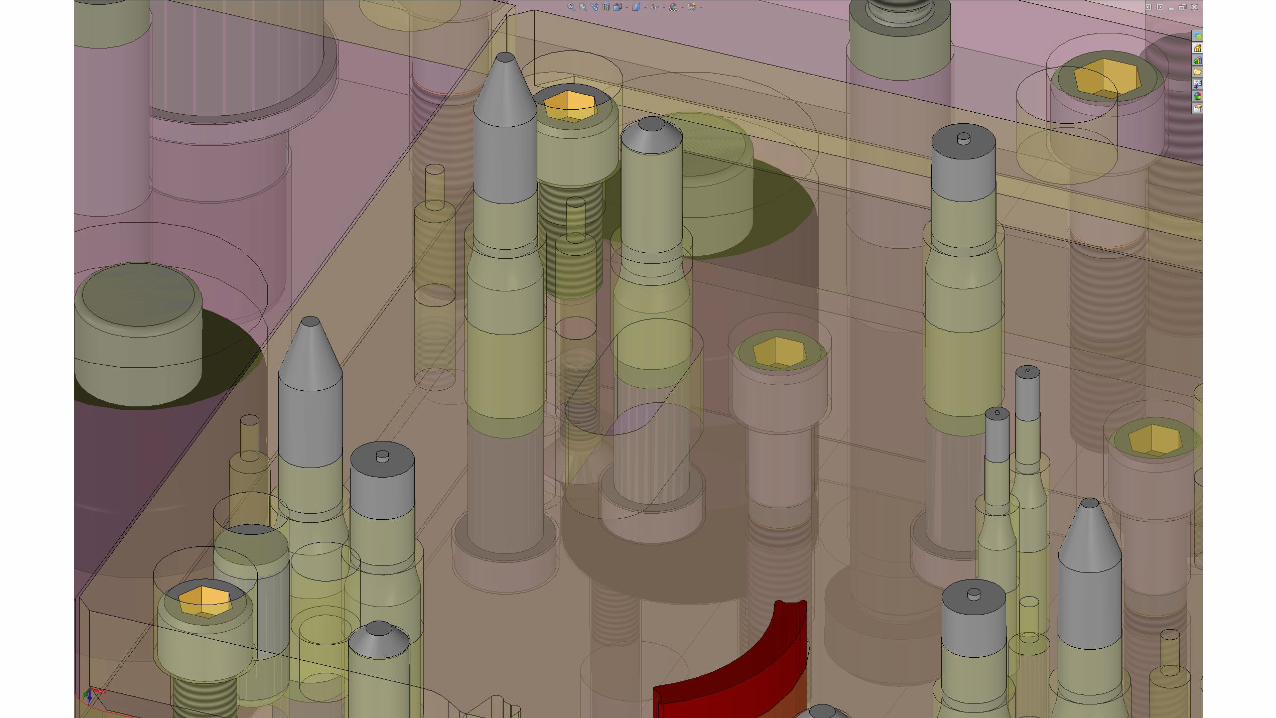
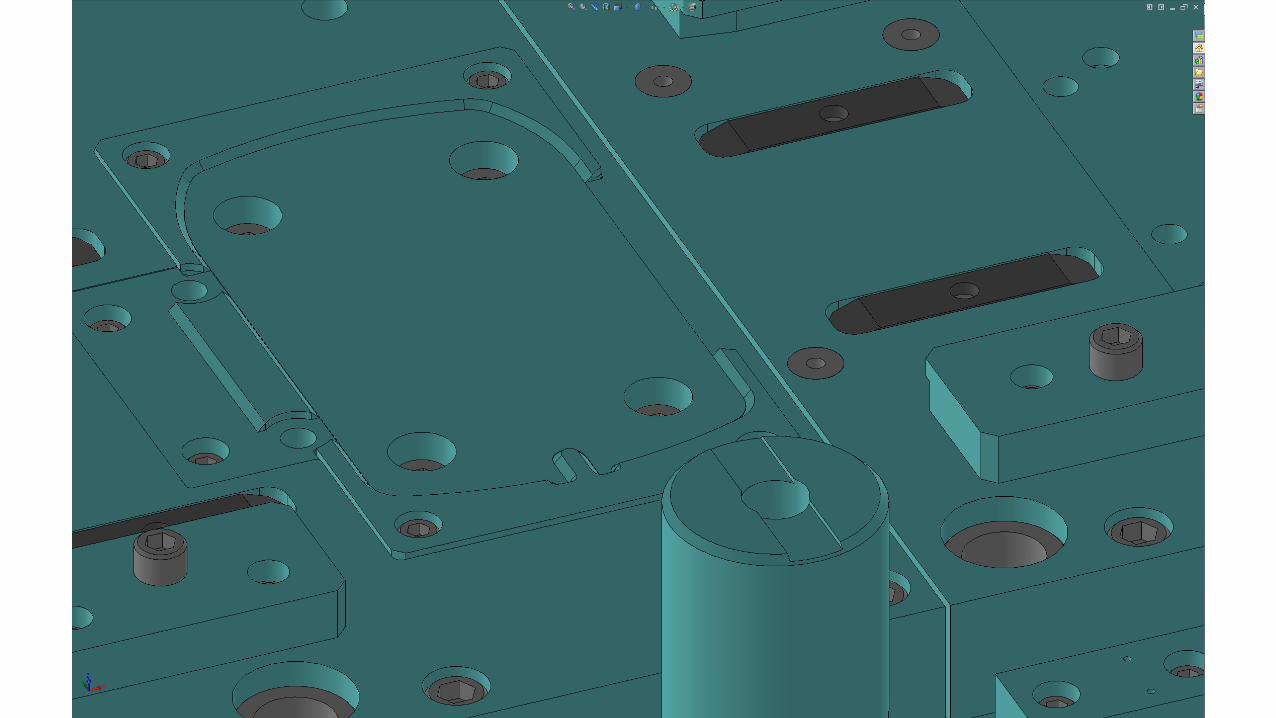
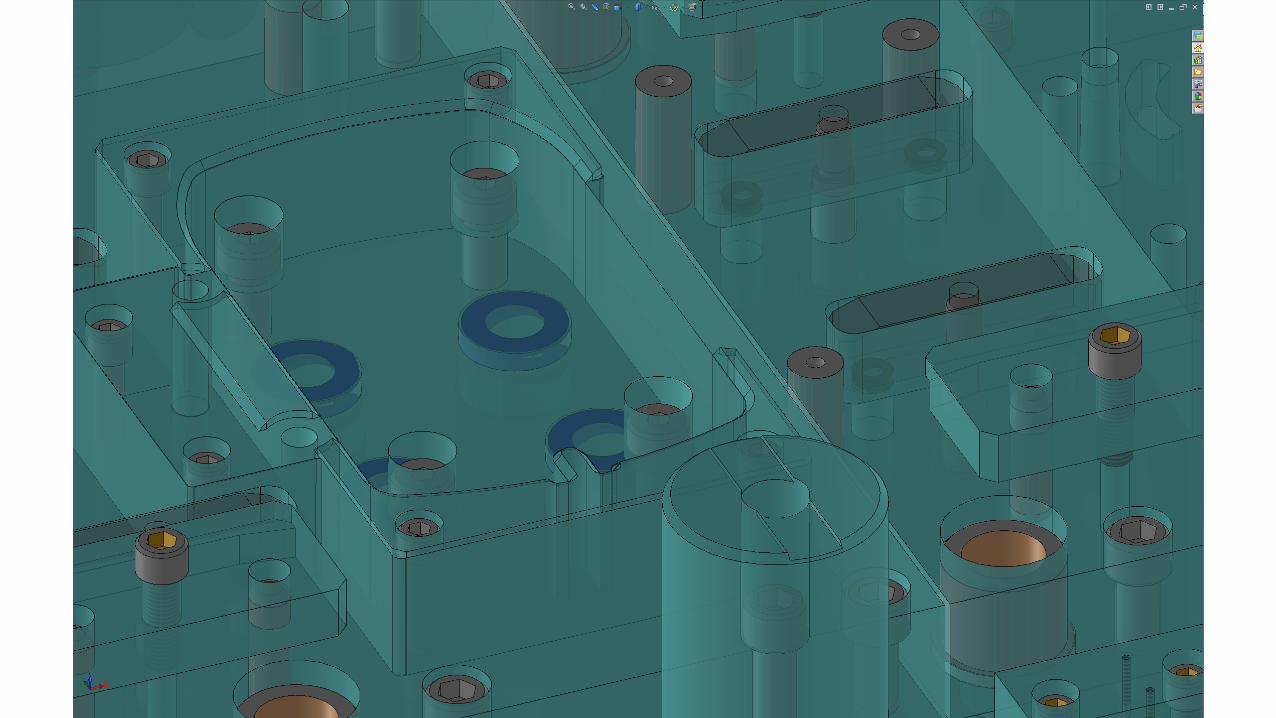
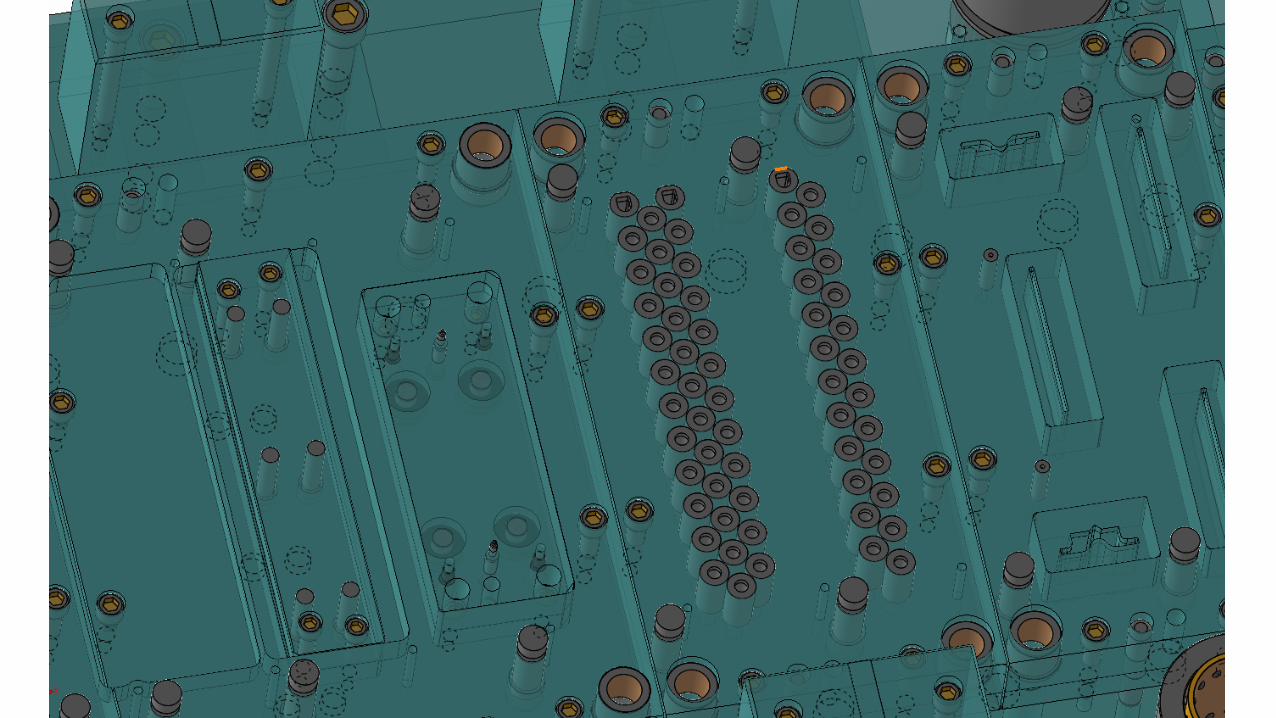
• I called Matt at Accurate Die Design, Inc. a few months after Logopress3 training because I had a question about the BOM (bill of materials) on a die I had started designing the morning before my call. Matt did a GoToMeeting with me and then asked me if he could take some screenshots of the die to show Ray after finding out that I’d just started it the day before. Here are some screenshots of that die as well as a photograph, and we also have a strip to show you.
• This design was fully modeled and ready for final review in 2 days
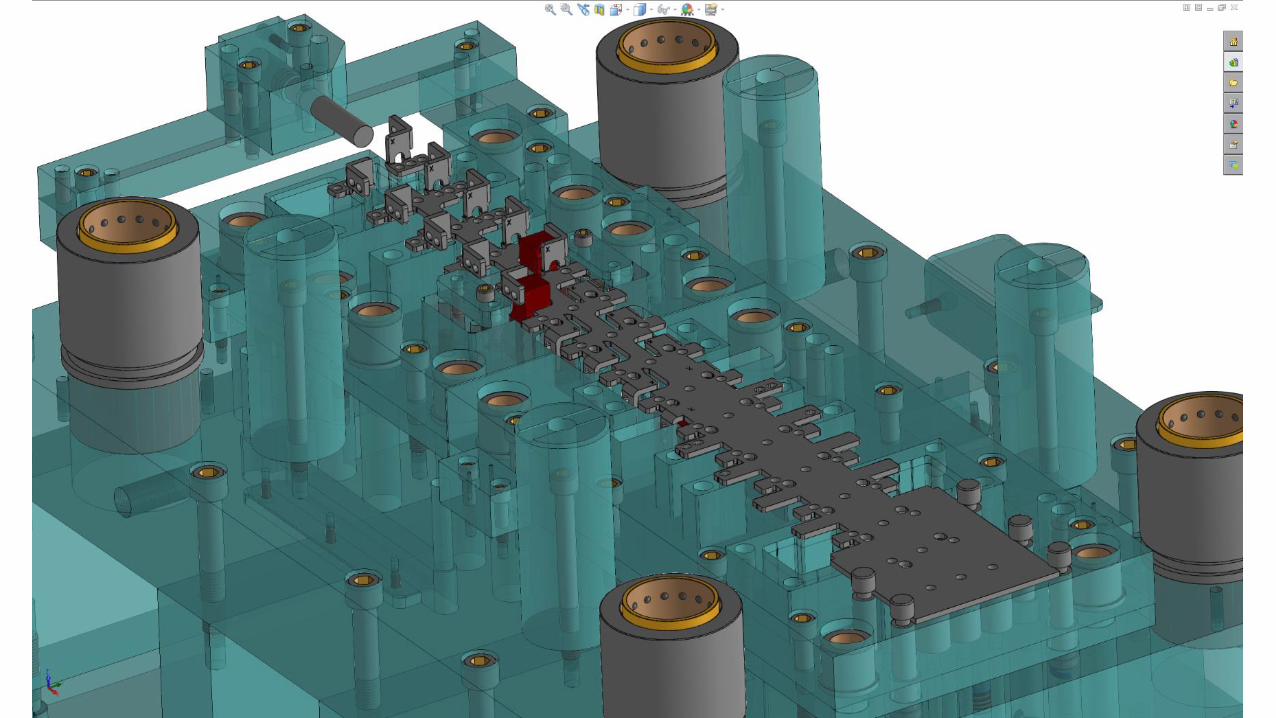
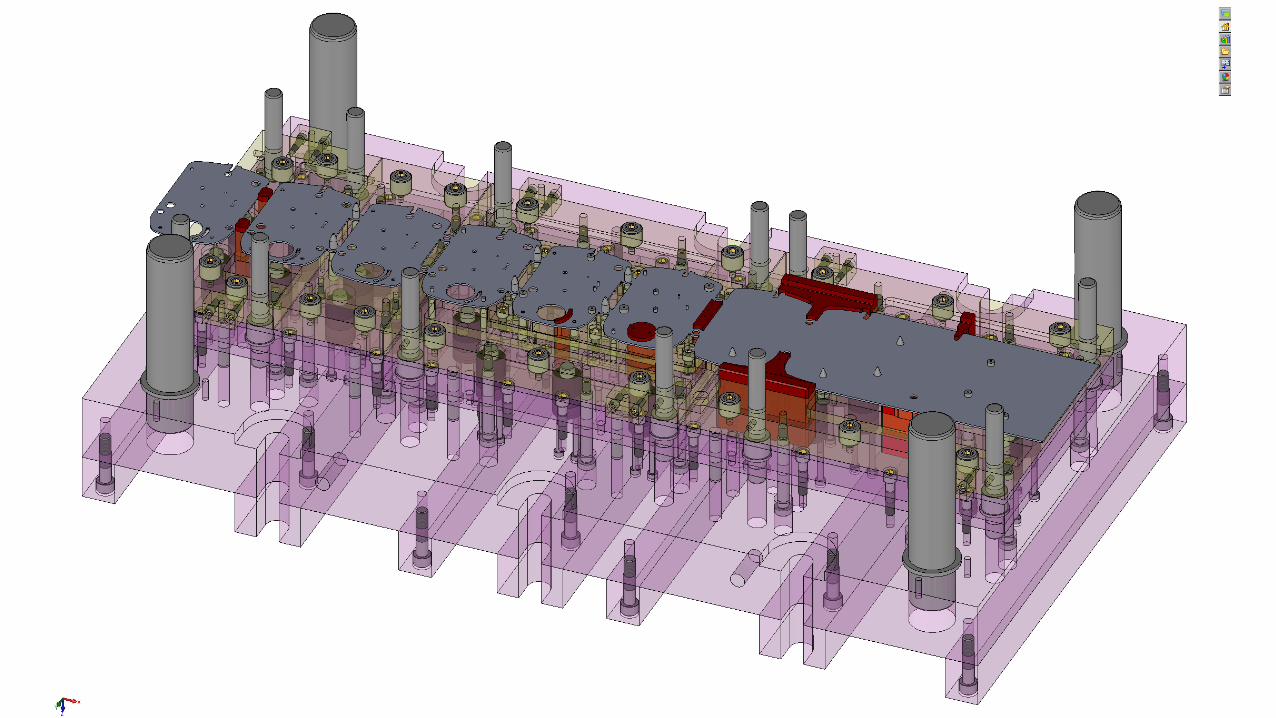
T r a n s p a r e n t V e r s u s O p a q u e ( S o lid )
• I used to design in opaque/solid colors with my other direct modeling 3D die design software, as well as with SOLIDWORKS. But with Logopress3, I’ve found that designing in transparent allows me to see my design much more clearly and helps eliminate mistakes because I can see them inside the die
• Design reviews by folks that have not designed the die from day one are better done with an opaque/solid colored model
• Logopresss3 provides a tool called “Assembly Color/Transparency” to instantly turn the entire model from transparent to opaque for a better and faster understanding of the die design by new viewers


• Logopress3 automates the die design process with many tools that make mundane tasks simple and quick, such as punch mismatches that can be added in a matter of seconds as you will see in the next video
• Just a few of the other tools that Logopress3 provides include:
• A tool to add 4 different types of form punches in a matter of seconds
• A tool to add shoulders, heels, shear angles and pedestals to punches
• When I first used the Logopress3 command “Save as with new project name”, I said “This is like cheating!”
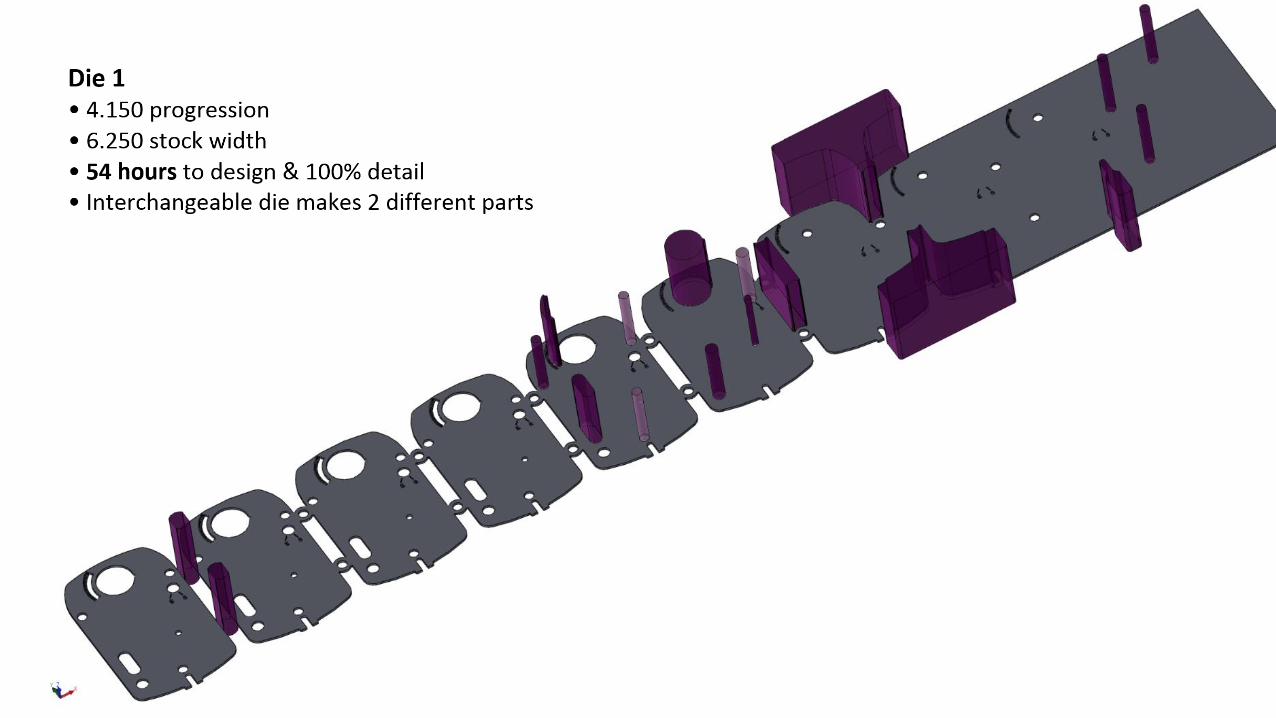
• We recently had a set of 3 dies to design that made 4 different parts and all of them had some similarities, even though each of the 3 dies would have a different progression and stock width
• After designing the first die I was asked how long it would be before I’d be ready for a design review for the second die. I ended up starting the second die at 10:30 am and being ready for a deign review at 1:30
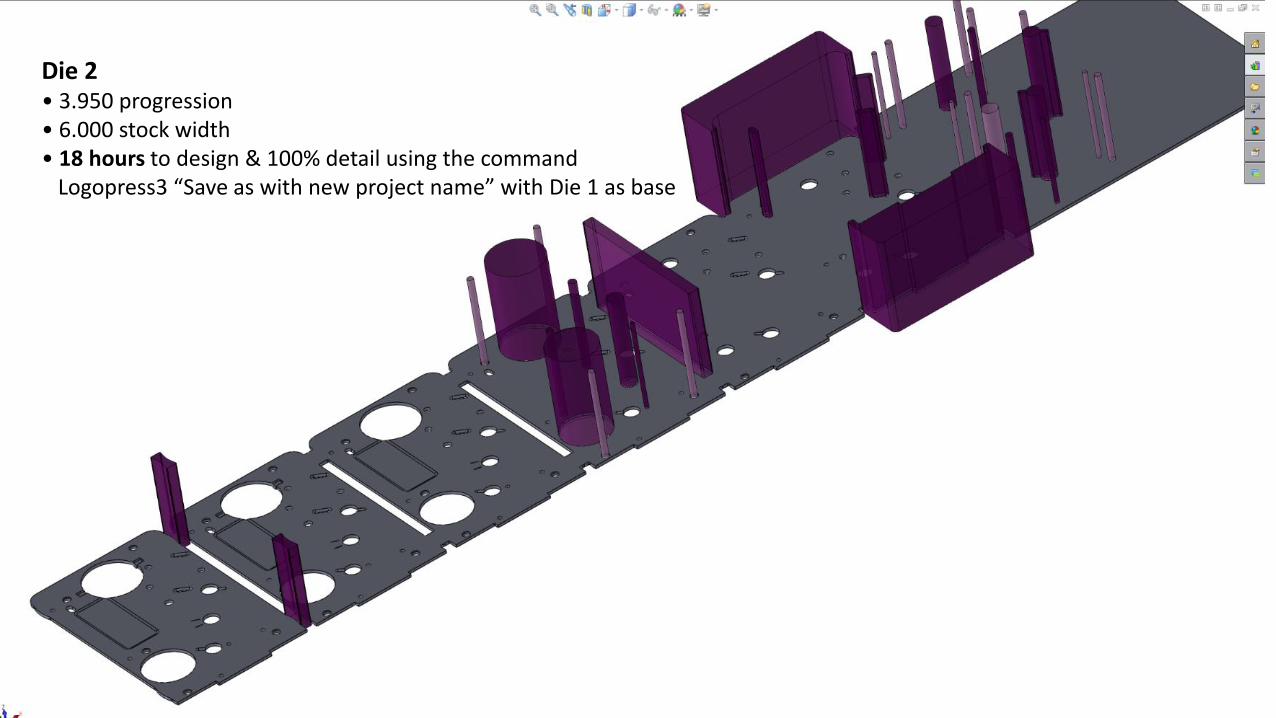
Die 2• 3.950 progression• 6.000 stock width• 18 hours to design & 100% detail using the command
Logopress3 “Save as with new project name” with Die 1 as base
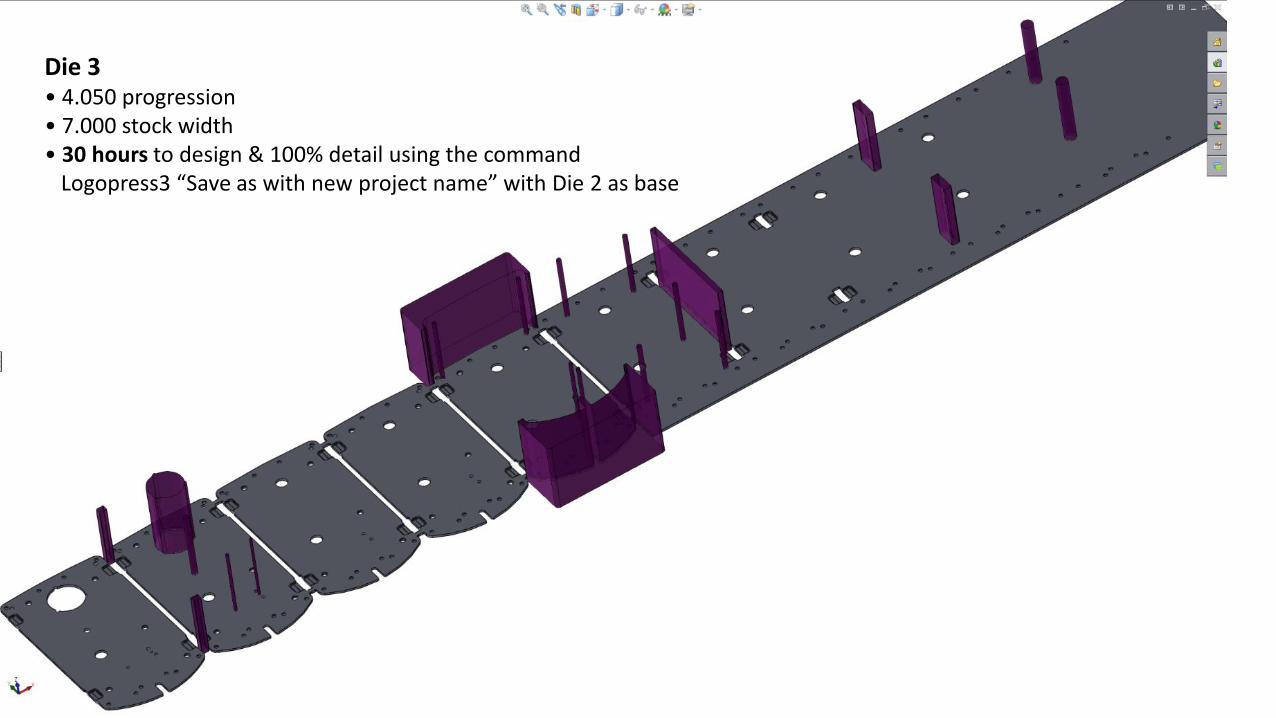
Die 3• 4.050 progression• 7.000 stock width• 30 hours to design & 100% detail using the command
Logopress3 “Save as with new project name” with Die 2 as base

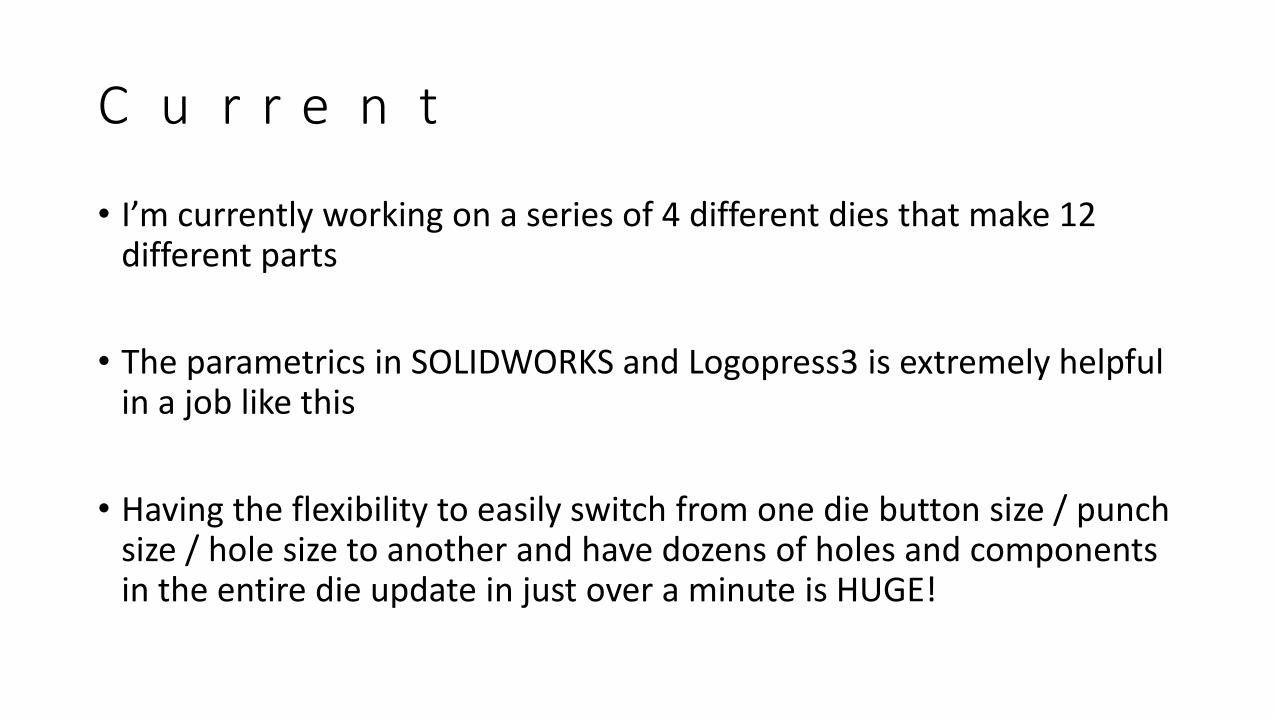
C u r r e n t P r o je c t
• I’m currently working on a series of 4 different dies that make 12 different parts
• The parametrics in SOLIDWORKS and Logopress3 is extremely helpful in a job like this
• Having the flexibility to easily switch from one die button size / punch size / hole size to another and have dozens of holes and components in the entire die update in just over a minute is HUGE!
• 2D drawings in SOLIDWORKS are much better than the 2D drawings in the previous 3D die design software that I used, and Logopress3 takes 2D drawings from SOLIDWORKS and puts them on a new level
• Detailing only takes a matter of a few days on the largest die designs
• Detailing is approximately 20% of the modeling time on large designs
• Having every component on its own sheet and in its own file is great
Detailing (cont’d)
• Just a few of the enhanced (beyond what SOLIDWORKS is capable of) 2D drawing and detailing tools in Logopress3 include:
• very complete “tool and die” hole tables
• a BOM (bill of materials) that includes the ability to “lock down” detail numbers so that I can order materials early in the design phase without worrying about that detail number changing later
• wire EDM holes
• Logopress3 smart ordinate dimensioning
• title blocks that are automatically and fully populated
• balloons that can be sorted in an orderly fashion
• Design time is greatly reduced
• Practically no mistakes are made due to human error
• Changes (and there are always changes) are very easy to make
• Able to reuse entire designs for new designs cutting design time in half or more
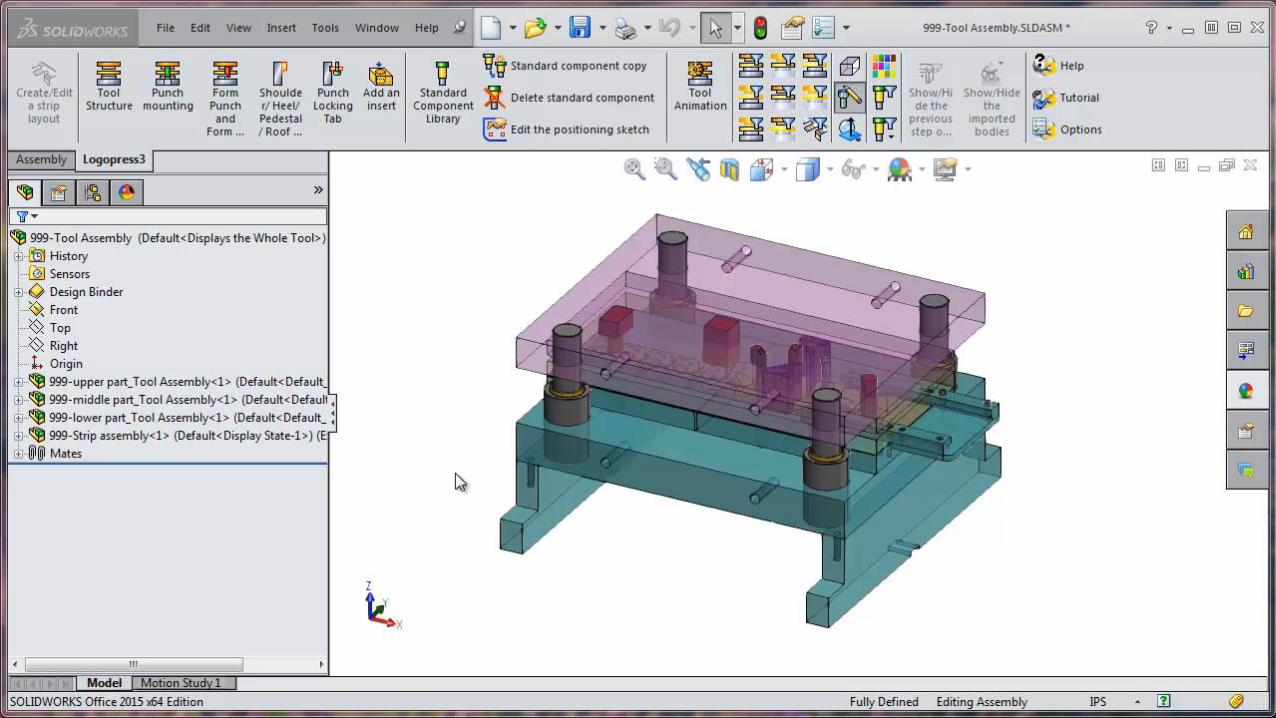
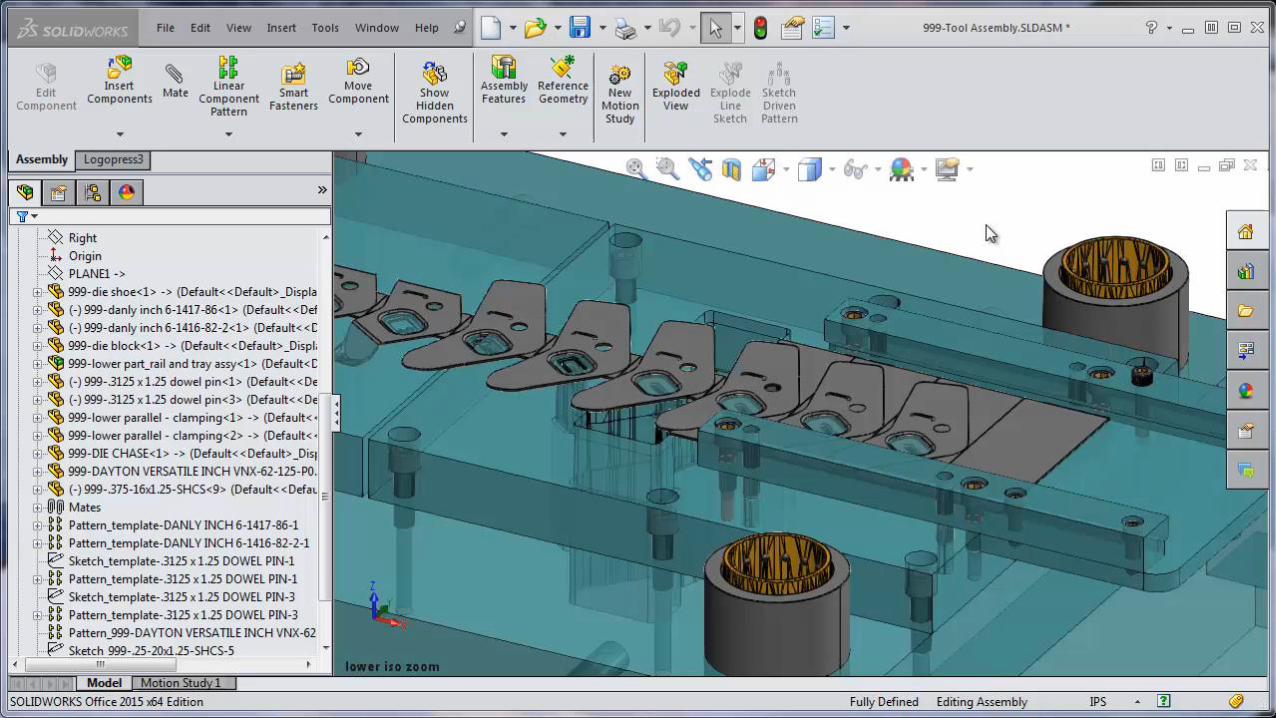
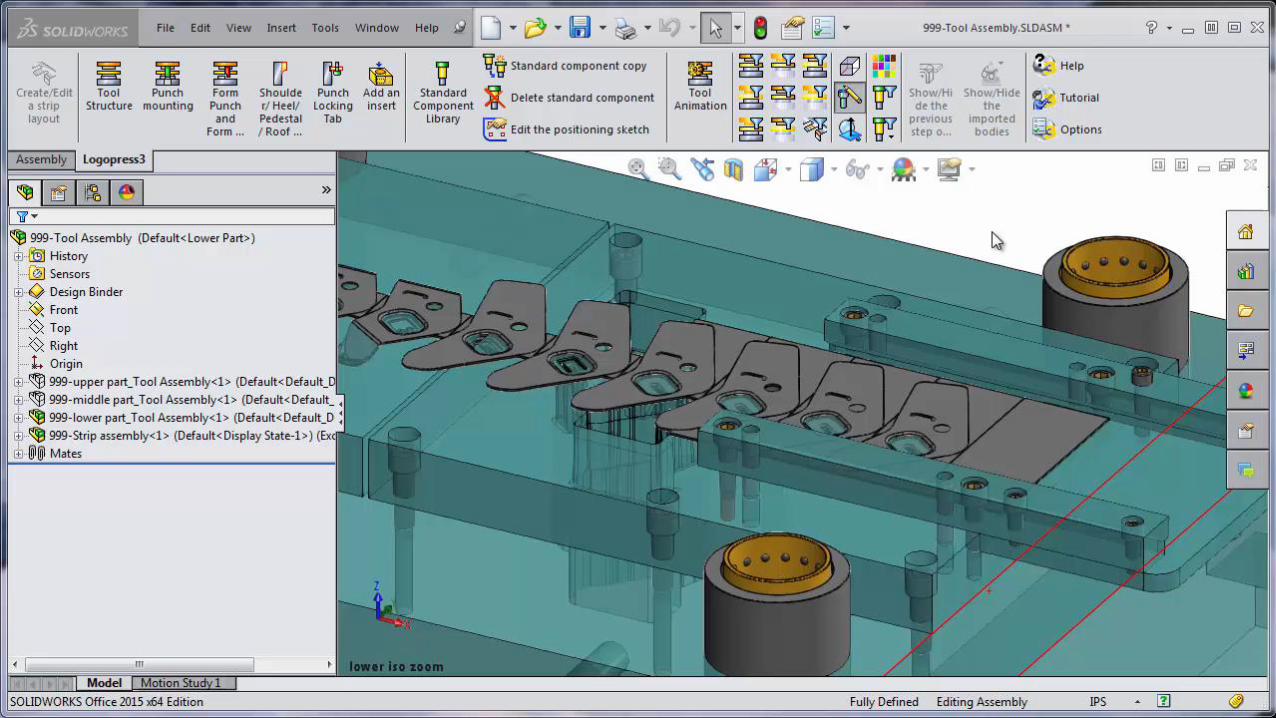
• Watch the next 3 bonus videos to see:
• 1) Mounting a punch, including cutting all openings with proper clearances in all plates simultaneously and automatically
• 2) Moving that punch from one station to the next station and showing how not only the model automatically updates but so does the drawing
• 3) Adding a die insert and using multiple features of Logopress3 “Sketch fillet management” to change the chamfers that were offset from the insert to the die opening to radii instead of chamfers, and also use the round mismatch tool for undercutting the sharp corner…

T H A N K Y O U !