Embed Size (px)
Citation preview

Attend Events
Version 0.9.x
Contents
1 Introduction 31.1 Features . . . . . . . . . . . . . . . . . . . . . . . . . . . . . . . . 31.2 JEvents Integration . . . . . . . . . . . . . . . . . . . . . . . . . . 4
2 Installation and Set-Up 52.1 Installation . . . . . . . . . . . . . . . . . . . . . . . . . . . . . . 52.2 Adding a New Front-End Menu Item . . . . . . . . . . . . . . . . 5
3 Configuration 73.1 Configuration Manager . . . . . . . . . . . . . . . . . . . . . . . . 73.2 Component Configuration . . . . . . . . . . . . . . . . . . . . . . 8
3.2.1 Registration Control . . . . . . . . . . . . . . . . . . . . . 83.2.2 Front-End Control . . . . . . . . . . . . . . . . . . . . . . 93.2.3 Date and Time Formatting . . . . . . . . . . . . . . . . . 103.2.4 Integration with Other Components . . . . . . . . . . . . 103.2.5 Payment Gateways . . . . . . . . . . . . . . . . . . . . . . 113.2.6 Currency and Formatting . . . . . . . . . . . . . . . . . . 123.2.7 Automated Emails . . . . . . . . . . . . . . . . . . . . . . 123.2.8 Version Checking . . . . . . . . . . . . . . . . . . . . . . . 13
3.3 Defaults Configuration . . . . . . . . . . . . . . . . . . . . . . . . 13
4 Sessions 144.1 Session Manager . . . . . . . . . . . . . . . . . . . . . . . . . . . 144.2 Session Editor . . . . . . . . . . . . . . . . . . . . . . . . . . . . . 14
4.2.1 Session Details . . . . . . . . . . . . . . . . . . . . . . . . 144.2.2 Publishing Tab . . . . . . . . . . . . . . . . . . . . . . . . 144.2.3 Registration Period . . . . . . . . . . . . . . . . . . . . . . 154.2.4 Venue . . . . . . . . . . . . . . . . . . . . . . . . . . . . . 154.2.5 Additional Registration Information . . . . . . . . . . . . 154.2.6 Session Fees . . . . . . . . . . . . . . . . . . . . . . . . . . 154.2.7 Payment Options . . . . . . . . . . . . . . . . . . . . . . . 154.2.8 Guest Comments . . . . . . . . . . . . . . . . . . . . . . . 164.2.9 Confirmation Page . . . . . . . . . . . . . . . . . . . . . . 164.2.10 Confirmation Email . . . . . . . . . . . . . . . . . . . . . 16
1
4.2.11 Cancellation Page . . . . . . . . . . . . . . . . . . . . . . 164.2.12 Cancellation Email . . . . . . . . . . . . . . . . . . . . . . 164.2.13 Reminder Email . . . . . . . . . . . . . . . . . . . . . . . 164.2.14 Notification Email . . . . . . . . . . . . . . . . . . . . . . 16
5 Venues 17
6 Registrations 186.1 Registration Manager . . . . . . . . . . . . . . . . . . . . . . . . 186.2 Registration Editor . . . . . . . . . . . . . . . . . . . . . . . . . . 186.3 Exporting . . . . . . . . . . . . . . . . . . . . . . . . . . . . . . . 18
7 Transactions 207.1 Transaction Manager . . . . . . . . . . . . . . . . . . . . . . . . . 207.2 Transaction Editor . . . . . . . . . . . . . . . . . . . . . . . . . . 20
8 Templates 218.1 Template Manager . . . . . . . . . . . . . . . . . . . . . . . . . . 218.2 Template Editor . . . . . . . . . . . . . . . . . . . . . . . . . . . 228.3 patTemplate Variables . . . . . . . . . . . . . . . . . . . . . . . . 22
Appendices 24
A Using formLib 25
B JEvents Integration 27
C Attend Events Module 29
D Upgrading 30
2
Chapter 1
Introduction
Attend Events is a Joomla! 1.0.x component for managing event registration.This manual has been written for a novice Joomla user, and assumes the readeris somewhat familiar with basic Joomla concepts (such as the difference betweenfront-end and back-end), as well as navigating the administration interface.
Finally, before proceeding any further, some terminology needs to be straight-ened out. For historical reasons, the “events” managed by Attend Events arecalled sessions. I suppose the component should have been called Attend Ses-sions to avoid this confusion, but it isn’t. And if it were, come to think of it,that probably would have raised more questions!
1.1 Features
Attend Events includes a variety of features to handle many different registrationscenarios. Each of these can be enabled or disabled to suit your needs. A briefsynopsis of features is listed here. More detailed descriptions can be found in§ 3.
• Create registration forms unique to each session using a WYSIWYG formmanagement tool
• Associate fees with each session. These can be mandatory or optional(depending on the user’s responses to questions in the registration form).
• Allow users to leave comments which are displayed on the session’s detailspage.
• Create templated email messages and web pages (unique to each session, ifyou want) to communicate with the user through the registration process.
• Track any payments that are received for each registration.
• Use a PayPal business account to receive payments and have them auto-matically tracked by Attend Events.
3
• Manage a list of frequently used venues, so that you don’t have to specifythe location of the session each time.
• Specify a capacity for your session. Attend Events will automatically markthe session as ‘Full’ when no additional spaces are available.
• Integrate with the Community Builder componet so that the registrationform is automatically filled-out for registered users of your Joomla site(based on information in their CB profile).
1.2 JEvents Integration
Although Attend Events can function entirely on its own, many users find ituseful to augment the functionality of Attend Events with JEvents (anotherJoomla component). Some popular reasons for doing so are:
• Having your events displayed using a calendar interface (instead of a list)
• Having your events grouped by category
• Managing registration to multiple sub-events that are part of a largerevent, such as workshops at a conference
Integration with JEvents is carried out using either a module or plugin (orboth), depending on your needs. The necessary set-up details are covered inAppendix B.
4
Chapter 2
Installation and Set-Up
The instructions here assume you do not have a copy of Events Sessions or a pre-vious copy of Attend Events installed. Upgrade instructions are in Appendix D.
2.1 Installation
Installation is performed using the Joomla! component installer:
1. Navigate to the Component Installer in the back-end administration.Menu: Installers → Components
2. In the “Upload Package File” section of the page, click the “Choose File”button and navigate to the copy of the joomla com attend events 09x.zipfile on your computer.
3. Click the “Upload File & Install” button.
4. After a successful installation, click the “[Continue]” link.
2.2 Adding a New Front-End Menu Item
If your are running Attend Events as a stand-alone product—i.e., you are notintegrating with JEvents (see Appendix B)—youll probably want to create amenu item in the front-end so users of your site can see a list of availablesessions1:
1. Navigate to the appropriate Menu Manager menu in the back-end admin-istration under which the link to this component should be displayed.Menu: Menu → mainmenu
2. Click the “New” button on the toolbar.1Alternatively, you can use the Attend Events module (see Appendix C)
5
3. In the “Components” section, click “component” (or click its radio buttonand then the “Next” button on the toolbar).
4. Enter the text to display as this menu item in the “Name” field, and select“Attend Events” in the “Component” list. Make sure the “Published”attribute is set to “Yes”, and select an appropriate “Access Level”.
5. Click “Save” on the toolbar.
6
Chapter 3
Configuration
Attend Events has a number of additional features to supplement the core task ofcollecting registrations. However, in most applications, not all of these featuresare required. To keep the user interface as simple as possible, features whichhave been disabled are normally not visible on the main interface pages of AttendEvents (like the page for creating a session).
Modifying someconfigurationparameters (such asintegration withCommunity Builder)may require refreshing(edit and save) existingsessions for changes totake effect.
Changes to any defaultvalue settings will onlytake effect when newsessions are created.
Since the initial configuration of features which are enabled and disabledmay not be suitable for your needs, you should double check the configurationof Attend Events before proceeding to create a session.
3.1 Configuration Manager
For simplicity, the configuration of Attend Events is handled over several differ-ent pages—each pages contains several parameters1 grouped around a particulartheme. The Configuration Manager is used to navigate between these differentsections.
1. Navigate to Configuration Manager.Menu: Components → Attend Events → Configuration
In addition to enabling and disabling features, Attend Events also allowsyou to control the default state for certain elements when creating a new ses-sion. For clarity, the Configuration Manager page is divided into two areas.The upper box (labelled ‘Component’) handles enabling and disabling features.The lower box (labelled ‘Defaults’) handles what the default communicationmessages (email and HTML pages) and form layouts will be when new sessionsare created.
1Some parameters may appear disabled. This happens for parameters which depend oncertain features being enable, and these features are currently disabled. Usually, a warningicon will be appear next to the disabled parameter explaining why the parameter is disabledand/or what feature needs to be enable for this parameter to become configurable.
7
3.2 Component Configuration
3.2.1 Registration Control
Display Name and Email Fields for Registered Users
The minimum information that needs to be collected for every session attendeeis a name and email address. When guests try to register for a session, thesefields are mandatory, since no personal information about them is availablein advance. However, registered users have already entered this informationwhen registering for your site. If the name and email address fields are shownfor registered users: (1) the default values of these fields will be based on theinformation contained in the Joomla database, and (2) registered users will beable to modify this information. If you want to ensure that contact informationis consistent with your Joomla users database, you can disable showing thesefields to registered users.
Allow Multiple Registrants Per Transaction
You can control whether each registration transaction—i.e., submitting a reg-istration form—is restricted to including a single individual only. If multipleattendees are allowed per transaction, the first registrant is denoted the pri-mary registrant, and all others secondary registrants. When multiple registrantsare allowed, the registration form on the front-end incorporates a tabbed inter-face, with each tab containing a registration form for each individual2 (thereare buttons to add and delete attendees as required).
Capacity Management
Capacity management adds an additional maximum number of registrationsproperty to each of your sessions3. As people register for the session, AttendEvents will automatically track the number of available spaces remaining. Ifno spaces remain, the session’s status is changed to full, registrations are nolonger accepted, and the session is excluded from listing in the front-end (seeSection 3.2.2).
Allow Cancellation
In some circumstances, you may want to give your guests an opportunity tocancel their registration. This must be done before the registration period closes(§ 4.2.3).
2When enabled, the WYSIWYG form tool (see Appendix A) will contain an additionalApplies To property (possible values are group and individual). Properties specified as groupappear on the primary registrant’s form only. Properties specified as individual appear oneach registration form.
3Even if capacity management is enabled, you can still mark sessions as having unlimitedcapacity by setting the maximum number of registrations to zero (0).
8
Allow Comments
Similar to eViteTM, Attend Events can collect comments from people duringthe registration process. You can make these comments visible to other usersthrough the Front-End Configuration Manager.
3.2.2 Front-End Control
Start Listing Sessions
Controls which sessions are included in the front-end listing by requiring a spe-cific temporal milestone to have taken place.
Stop Listing Sessions
Controls which sessions are included in the front-end listing by requiring a spe-cific temporal milestone to not have taken place.
List Sessions that are Full
If capacity management is enabled, sessions which are full will not be includedin the front-end listing (since there are no more spaces available). If you chooseto include sessions that are full in the front-end listing, an error message stating‘no more spaces are available’ will appear in place of the registration form whenviewing the details of the session.
Display Footer in Front-End
Toggles whether Attend Events’ credits footer should be displayed in the front-end.
Show Registration Numbers
Toggles whether a session’s capacity details (maximum number of registrations,number of available registrations, etc.) should appear in the front-end.
Display List of ‘Already Registered’ Users
Toggles whether the list of current registrants should be displayed on the ses-sion’s details page4.
Show Comments
If comments are enabled (§ 3.2.1), this option controls whether each registrant’scomments should appear along with their name.
4If Attend Events is configured to integrate with Community Builder (§ 3.2.4) and theShow Avatar option is selected, each registrant’s avatar will be displayed along with theirname.
9
Link to Google Maps
Toggles whether the text ‘map’ should appear next to a venue’s location infor-mation, which links to Google Maps.
3.2.3 Date and Time Formatting
Attend Events provides a limited set of built-in time and date formats, whichcan be chosen from the pop-up menu beside each parameter (see below fordescriptions of each parameter). The last option in each list is always Other,which allows the user to specify an alternative format not available from theother list items. When Other is selected, a text input box will appear underthe pop-up menu. Users can then specify their own format string (see the PHPdocumentation on strftime()5 for details about time and date format strings).
Date Format (short)
The short date format is primarily used when data is viewed in table format.
Date Format (long)
The long date format is primarily used for displaying the registration periodand session duration on the front-end page showing the details of a session.
Time Format
The time format is used throughout the component, in both the front-end andback-end pages.
3.2.4 Integration with Other Components
Attend Events automatically checks whether the third-party components JEvents,Community Builder and JCron are installed on your Joomla! system. If thesecomponents are not detected, the integration options will be disabled.
JEvents
Controls whether Attend Events should integrate with JEvents (see Appendix B).
Community Builder
Attend Events integrates with Community Builder so that form fields can beautomatically filled out for registered users. If enabled, the form editing tools(see Appendix A) provide an additional Associated Community Builder Fieldproperty for each field. When a registered users is presented with a registrationform, Attend Events pulls any necessary data from their profile and uses this
5http://www.php.net/strftime
10
to fill out the fields. Option based fields, such as radio or select lists, willfall-back on their default configuration if the users profile does not containsuitable information. Show Avatar Toggles whether the approved avatars inCommunity Builder should be displayed on pages generated by Attend Events.
JCron
Attend Events uses JCron for scheduling reminder emails (§ 4.2.13). In additionto configuring Attend Events to integrate with JCron, you need to ensure thatJCron has added appropriate hook code to the front-end template of your site6:
1. Navigate to the JCron Configuration Page in the back-end administration.Menu: Components → JCron → Configuration
2. Click the “Enable CRON RUN” button. The page should reload, and thebutton should now read “Disable CRON RUN”.
3.2.5 Payment Gateways
At this writing, Attend Events only supports PayPal and Manual paymentgateways. The manual gateway has no configuration parameters, so it does notappear on this screen.
PayPal Mode
Determines with which PayPal server Attend Events should interface. Thesandbox server is used for testing the transaction process with simulated bankaccounts, credit cards, etc. The live server will conduct real transactions.
Default PayPal Account
The email address of the PayPal account which should receive payments. Youcan override this when creating a PayPal payment option on a session’s detailspage.
Activity Log
PayPal transactions are recorded to a text file log (primarrily for handling er-rors). The path to the directory in which the file should be saved must bewriteable by Joomla. In addition, for security, the file should lie outside yoursite’s web serving tree.
6These guidelines were written with respect to JCron 1.2. Check the documentation in-cluded in your copy of JCron for additional notes or changes.
11
3.2.6 Currency and Formatting
Attend Events allows you to control in what currency transactions should beconducted, as well as how currency values should be formatted. Unlike otherconfiguration parameters, these can not be overridden by a session.
Currency
The currency in which transactions should be conducted. Only PayPal sup-ported currencies are shown.
Currency Symbol
The currency symbol which should be appended to the amount when displayedin web pages and emails.
Symbol Placement
Determines whether the symbol appears before or after the amount.
Decimal Symbol
The symbol used to represent the decimal place.
Decimal Places
The number of digits to include after the decimal place. Must be a naturalnumber—i.e., zero (0) or greater.
Thousands Separator
The symbol used to divide columns to the left of the decimal in groups of three.
3.2.7 Automated Emails
Attend Events can send certain emails automatically:
Confirmation Email
Sent to the attendee when the submitted registration form is successfully pro-cessed. An email is also sent when the registration is successfully updated.
Cancellation Email
Sent to the attendee when their request to cancel their registration is successfullyprocessed.
12
Notificaiton Email
Sent to the event host whenever a new registration is received, or an existingregistration is updated or cancelled.
Reminder Email
Sent to all attendees a certain amount of time before the session starts.
3.2.8 Version Checking
You can enable Attend Events to automatically check for updates. If this isenabled, the program will check with Joomla! Forge once a week for any updates.If your version of Attend Events becomes outdated, you will see a warning iconnext to the version information in the back-end footer.
3.3 Defaults Configuration
Attend Events has a large set of parameters to configure when creating a session(§ 4.2). In some scenarios, the values for these parameters may remain thesame, regardless of session details, such as the fields in the registration form,or the confirmation message emailed to attendees after registering. To avoidre-entering the desired values for each parameter when creating a new session,the Configuration Manager allows you to control the default values of theseparameters.
13
Chapter 4
Sessions
4.1 Session Manager
The session manager is used to navigate through a large collection of AttendEvents sessions. You can apply filters to certain session properties (like venue,host, status, etc.) as well as searching for a partial session name (using thesearch box). When you change a particular search or filter parameter, the pagewill automatically reload to display the new results. You can change the sortingorder uses the arrows next to each column heading. Click on the currentlyselected arrow (coloured orange), which change the sorting direction.
4.2 Session Editor
The page for editing a session is quite long, and has been broken up into multiplesections for clarity. Some sections, such as Session Details, are mandatory,while others are option. In addition, the number of optional sections which aredisplayed depends on how the component is configured (see the Configurationsection for details).
4.2.1 Session Details
Every session must have a title and duration specified. The start time needs tooccur before the end time. An optional description can be entered as well.
4.2.2 Publishing Tab
The publishing tab determines whether the session should be published, whatuser access level is required to view the session’s details page on the front-end,and who published the session (the host). You can optionally specify an aliasfor the host if you don’t want the host’s name to appear on the front-end. Thelower half of the publishing tab lists properties about the session that can’t be
14
changed directly. These correspond to the id of this session as stored in thedatabase, and the status of the session.
4.2.3 Registration Period
The registration period controls the time interval during which people can reg-ister for this session.
4.2.4 Venue
Venues created with the Venue Manager will appear in the pop-up menu forCommon Venues. If you’d prefer to enter information for a venue which doesnot appear in this list, select ’Other:’ and enter the venue information in thefields below.
4.2.5 Additional Registration Information
Attend Events automatically creates a registration form that prompts attendeesto enter their name and email address. If you would like to augment this formto collect additional information, you can do so here using the WYSIWYG formcreation tool (see Appendix A).
4.2.6 Session Fees
Similar to the additional registration information form except each field (orselectable option) has an amount attribute. When combined with the appliesto property, a variety of pricing structures can be created. For instance, ansession fee that is a fixed per person costs can be accomplished by creating amandatory fee which applies to every individual.
4.2.7 Payment Options
The Payment Options form allows registrants to choose how to pay the sessionfees. As such, this form is limited to a single field, and includes the followingadditional field properties:
Gateway The gateway for the transaction. Currently, only manual and PayPalare supported.
Instructions Text which is displayed to the user on the confirmation page,informing them about the payment process. For manual transactions, thisnormally includes details about how payment is to be received—i.e., at thedoor, cheque in the mail, etc. For PayPal transactions, a default messageinforming that the registration process is being redirected to PayPal, andwill return back to the site afterwards is included.
15

4.2.8 Guest Comments
This form is limited to a single field.
4.2.9 Confirmation Page
The confirmation page is displayed to the registrant after they register (or mod-ify their registration) to a session.
4.2.10 Confirmation Email
The confirmation email is sent to the registrant after they register (or modifytheir registration) to a session.
4.2.11 Cancellation Page
The cancellation page is displayed to the registrant after they request theirregistration to be cancelled in the front-end.
4.2.12 Cancellation Email
The cancellation email is sent to the registrant after they request their registra-tion to be cancelled in the front-end.
4.2.13 Reminder Email
JCron requires aJoomla! page to beaccessed to trigger anypending events.Therefore, to ensurereminder emails aresent, you’ll need toload at least oneJoomla! page on yoursite after the send timehas passed.
Reminder emails are sent to all registered attendees before the session starts.The time at which these emails are sent is determined by the Amount of Noticefield, which specifies the time by as the number of hours before the sessionstarts.
4.2.14 Notification Email
The notification email is set to the session host whenever a registration is added,modified or cancelled.
16

Chapter 5
Venues
17

Chapter 6
Registrations
6.1 Registration Manager
The registration manager is used to navigate through a the collection of regis-trations received by Attend Events. You can apply filters to certain properties,as well as searching for a partial attendee name (using the search box). Whenyou change a particular search or filter parameter, the page will automaticallyreload to display the new results. You can change the sorting order uses thearrows next to each column heading. Click on the currently selected arrow(coloured orange), which change the sorting direction.
If at least one sessionhas been defined, the’New’ icon will appearin your RegistrationManager ’s toolbar,allowing you to createregistrations. Youmust select a sessionfrom the session filterbefore trying to createa registration.
6.2 Registration Editor
6.3 Exporting
The Registration Manager also provides a simple export function would shouldsuffice for most applications. You can specify which registrations should beexported by either: (1) specify search and/or filter parameters, or (2) clickingthe checkboxes on the left hand side of the screen. Once you have specifiedwhich records you want to export, click the ’Export’ button on the toolbar.
The ’Export Manager’ page should now appear, providing you with severaloptions about how the data should be exported. Currently, two formats aresupported: Comma Separated Values (CSV) and HTML. Specify a name forfile which will contain the exported data. If you do not append a suitableextension (’.csv’ or ’.html’), Attend Events will add one for you.
You control which fields should be included in the export process (and theirorder) by dragging field labels between the two lists. The list on the left-handside of the screen (’Fields Available for Exporting’) will not be exported, whilethe list on the right (’Fields Being Exported’) will. Simply drag fields from onelist to the other, and/or drag elements within the list to reorder them.
18

When you have finished configuring the export parameters, click the ’Ex-port’ button on the toolbar. The file containing your exported data should beautomatically downloaded by your browser.
19
Chapter 7
Transactions
7.1 Transaction Manager
7.2 Transaction Editor
Transaction ID This is the identity code used to identify the transaction foryour particular implementation. For manual transactions, this might cor-respond to a cheque or invoice number.
Registration ID The registration to which this transaction belongs.
Amount The amount of the transaction.
Timestamp The time at which the transaction was conducted.
Description An additional text string to associate with the transaction if thetransaction id is not sufficient for identifying the transaction.
20
Chapter 8
Templates
Attend Events incorporates the templating engine patTemplate to generatepages for its front-end. As with the response email and page templates, variablecontent1 (such as the session’s title) is inserted into the page template using setnotation brackets.
8.1 Template Manager
Currently, five templates are included with the Attend Events component. De-pending on what plugins and/or modules you have installed on your system, youmay have additional templates listed. To edit a template, select the appropriateradio button and click the ’Edit HTML’ button on the toolbar.
List of Sessions This is the default page generated by Attend Events for thefront end. It presents the user with a list of sessions.
Details of Session This template governs the overall layout of a specific ses-sion’s page – i.e., after clicking on a particular session in the list of sessionson the entry page.
Details of Venue This template is inserted into the Details of Session pageand controls how the venue information is displayed.
Registration Form This template is inserted into the Details of Session pageand controls how the registration form appears.
List of Registered Attendees This template is inserted into the Details ofSession page and controls how the list of People Already Registered ap-pears.
1The documentation on variables available in each page is not yet complete, so you’ll haveto use the initial template configuration as a starting point.
21

8.2 Template Editor
Attend Events uses the same interface as Joomla for editing templates. A plaintext editor is used to modify the contents of the file. When saving, you havethe option to make the file unwriteable (or temporarily override the unwriteablestatus if necessary).
8.3 patTemplate Variables
SESSION TITLE The title of the session.
SESSION TEXT The description of the session.
SESSION UP RAW The date and time at which the session starts, unfor-matted.
SESSION UP SHORT The date on which the session starts, formatted us-ing the short format.
SESSION UP LONG The date and time at which the session starts, format-ted using the long format.
SESSION DOWN RAW The date and time at which the session ends, un-formatted.
SESSION DOWN SHORT The date on which the session ends, formattedusing the short format.
SESSION DOWN LONG The date and time at which the session ends,formatted using the long format.
SESSION DURATION The duration of the session, formatted using thelong format.
SESSION REGISTRATION UP RAW The date and time on which theregistration period starts, unformatted.
SESSION REGISTRATION UP SHORT The date on which the regis-tration period starts, formatted using the short format.
SESSION REGISTRATION UP LONG The date and time at which theregistration period starts, formatted using the long format.
SESSION REGISTRATION DOWN RAW The date and time on whichthe registration period ends, unformatted.
SESSION REGISTRATION DOWN SHORT The date on which the reg-istration period ends, formatted using the short format.
SESSION REGISTRATION DOWN LONG The date and time at whichthe registration period ends, formatted using the long format.
22
SESSION REGSTRATION DURATION The duration of the registra-tion period, formatted using the long format.
SESSION HOST The name of the person hosting this session.
SESSION ACCESS The required user access level for registering for thissession.
SESSION PUBLISHED Text indicating whether the session is published ornot.
SESSION CAPACITY The maximum number of registrations that can beaccepted for a session.
SESSION BOOKED The number registrations received so far.
SESSION FRACTION BOOKED Returns the number of registrations re-ceived so far relative to the total number of available registrations.
SESSION AVAILABLE The number of available registrations remaining.
SESSION FRACTION AVAILABLE Returns the number of available reg-istrations remaining relative to the total number of available registrations.
SESSION STATUS Text indicating whether the session is: new, open, full,or closed.
SESSION URL The url to the session’s details page.
SESSION VENUE TITLE The title of the venue at which the session isbeing held.
SESSION VENUE ADDRESS The address of the venue at which the ses-sion is being held.
SESSION VENUE CITY The city of the venue at which the session is beingheld.
SESSION VENUE STATE The state of the venue at which the session isbeing held.
SESSION VENUE POSTALCODE The postal code of the venue at whichthe session is being held.
SESSION VENUE COUNTRY The country of the venue at which the ses-sion is being held.
SESSION VENUE URL The url to the webpage of the venue at which thesession is being held.
SESSION VENUE MAP URL The url for finding the venue using GoogleMaps.
23
REGISTRATION NAME The name of the registrant.
REGISTRATION EMAIL The email address of the registrant.
REGISTRATION DATE RAW The date and time at which the registra-tion was made, unformatted.
REGISTRATION DATE RAW The date and time at which the registra-tion was made, unformatted.
REGISTRATION DATE SHORT The date on which the registration wasmade, formatted using the shot format.
REGISTRATION DATE LONG The date and time at which the registra-tion was made, formatted using the long format.
REGISTRATION CANCELLATION DATE RAW The date and timeat which the registration was cancelled, unformatted.
REGISTRATION CANCELLATION DATE SHORT The date on whichthe registration was cancelled, formatted using the shot format.
REGISTRATION CANCELLATION DATE LONG The date and timeat which the registration was cancelled, formatted using the long format.
REGISTRATION QUANTITY The total number of people contained inthis registration.
REGISTRATION VIEWED Text indicating whether the registration hasbeen viewed.
REGISTRATION BALANCE The outstanding balance of the registration,formatted using the currency configuration settings.
REGISTRATION URL The url to access the saved registration via thefront-end.
REGISTRATION AVATAR The avatar image of the registrant. (Onlyavailable when integrated with Community Builder)
24
Appendix A
Using formLib
Attend Events uses a WYSIWYG form creation tool throughout the component.The operational specifics may change slightly between various instances in thecomponent, but the general operation is described here.
A preview of the form is shown on the left-hand side of the screen1. Fieldscan be re-arranged by dragging them up or down. Clicking on a field willdisplay its list of properties on the right-hand side of the screen, as well as aDelete button to the right of the preview for deleting the field. Fields have avariety of properties, which are grouped for ease-of-use.
General
Field Type The type of HTML form element that should be used.
Field Label The text displayed next to the form element for describing it.
Default Value The default value for the field when the form is loaded.
Tooltip The text that should be displayed as a pop-up in the front-end provid-ing additional instructions about how to provide correct information forthe field.
Input Control
Required Controls whether the field requires a response from the user. Doesnot check if the user has modified the default value, so you maywant to make default values empty.
Access Level Controls whether this field should visible on the registrationform, depending on a user’s user level.
1Due to CSS limitations, the alignment of the label relative to the field is not reliable inthese field previews
25
Applies To Controls whether this field applies to the entire group or to eachindividual in the group. Fields applying to the group only appear on thefirst registration form. Multiple registrations per transaction mustbe enabled for this property to be available.
Associated Community Builder Field Tells Attend Events which Commu-nity Builder Profile field to use as a default for this field when a registereduser loads the form.
Options A list of possible options for field types that require a response byselecting one or more choices from a list of options. The order of theoptions can be re-arranged by dragging the options up or down the list.Each option contains its own Access Level attribute. Default Value isdetermined by configuring the Default State of each option.
Appearance
Label Style CSS code to be applied to the label.
Element Style CSS code to be applied to the form element.
26

Appendix B
JEvents Integration
Integration with JEvents is accomplished by associated JEvents events withAttend Events sessions. An appropriate analogy for this relationship is theworkshop–conference model: Events in JEvents correspond to conferences (whichmay span multiple days and take place in a large venue), and sessions in AttendEvents would correspond to workshops at a particular conference (where eachworkshop can have its own timeslot and detailed venue information, such asspecific rooms in a conference centre).
This model may seem too complex for some users. Fortunately, AttendEvents handles the special case when a JEvent event should have the exactsame details as an Attend Events session — i.e., only one session is associatedwith an event.
For proper operation,JEvents should have atleast one eventcategory defined beforetrying to integrate withAttend Events.
Integration with JEvents requires installing additional software on your Joomlasite. Most users will probably want to install the Attend Events-JEvents Brigeplugin, but in some circumstances, users may prefer the interface of the AttendEvents module (Appendix C).
Once the additional software is installed, you’ll need to configure AttendEvents to integrate with JEvents (§ 3.2.4), and specify which sessions should beassociated with which events (§ B)
Attend Events–JEvents Bridge Plugin
The Attend Events–JEvents Bridge plugin modifies the front-end interface ofJEvents. In its basic configuration, the plugin will display ’Sessions’ on thedetails page of an event, followed by a list of links to associated sessions. Thespecifics of what text is displayed (and how) can be modified using the TemplateManager (§ 8). The plugin can also redirect links in the JEvents calendar orlist views directly to Attend Events for events which have only a single sessionassociated with them.
27
Installation
1. Navigate to the Mambots Installer in the back-end administration.Menu: Installers → Mambots
2. In the “Upload Package File” section of the page, click the “Choose File”button and navigate to the copy of the joomla botAttendEventsJEventsBridge.zipfile on your computer.
3. Click the “Upload File & Install” button.
4. After a successful installation, click the “[Continue]” link.
Set-Up
1. Navigate to the Mambot Manager in the back-end administration.Menu: Mambots → Site Mambots
2. Click on the Attend Events - JEvents Bridge link.
3. Set the Published attribute to Yes
4. Configure the Redirect parameter depending on how you’d like the pluginto handle JEvents events which have only a single Attend Events sessionassociated with them. If Redirect is set to Yes, links in the JEvents in-terface will point to the associated session detail page in Attend Events.Otherwise, the regular JEvent event details page is shown, and a link tothe individual session will appear in the Sessions list.
Associating Sessions with Events
Once Attend Events has been configured to integrate with JEvents (§ 3.2.4),a JEvents tab will appear in the attributes section on the session editor page(§ 4.2). The pop-up menu for Associated JEvents Event will determine whichevent this session is associated with:
None This session should not be linked to any event.
Existing The non-repeating event to which this session should be associatedcan be selected from the pop-up menu that appears immediately below.
New Tells Attend Events to create a new JEvents event with the same details asthis session when creating this session. Only available when creatinga new session.
28

Appendix C
Attend Events Module
29
Appendix D
Upgrading
The necessary upgrade steps depend on what version of Attend Events you areupgrading from:
Version 0.8.x
1. Backup your database using phpMyAdmin or some other SQL utility.
2. Navigate to Joomla!’s component uninstaller.Menu: Installers → Components
3. Click the radio element next to Attend Events in the Installed Componentssection and then the Uninstall button on the toolbar.
4. Install Attend Events 0.9.x (§ 2).
5. After a successful installation, immediately configure whether Attend Eventsshould integrate with Community Builder (§ 3.2.4).
6. Sessions now have several new properties, so you edit each session to ensurethat the default values for new properties are acceptable, and then savethe session.
Version 0.9.x
1. Backup your database using phpMyAdmin or some other SQL utility.
2. Navigate to Attend Events’ About page.Menu: Component → Attend Events → Credits
3. Click the Upgrade button on the toolbar.Attend Events will now copy your template and configuration files to/administator/backups/com attend events and configure the Joomla!
30
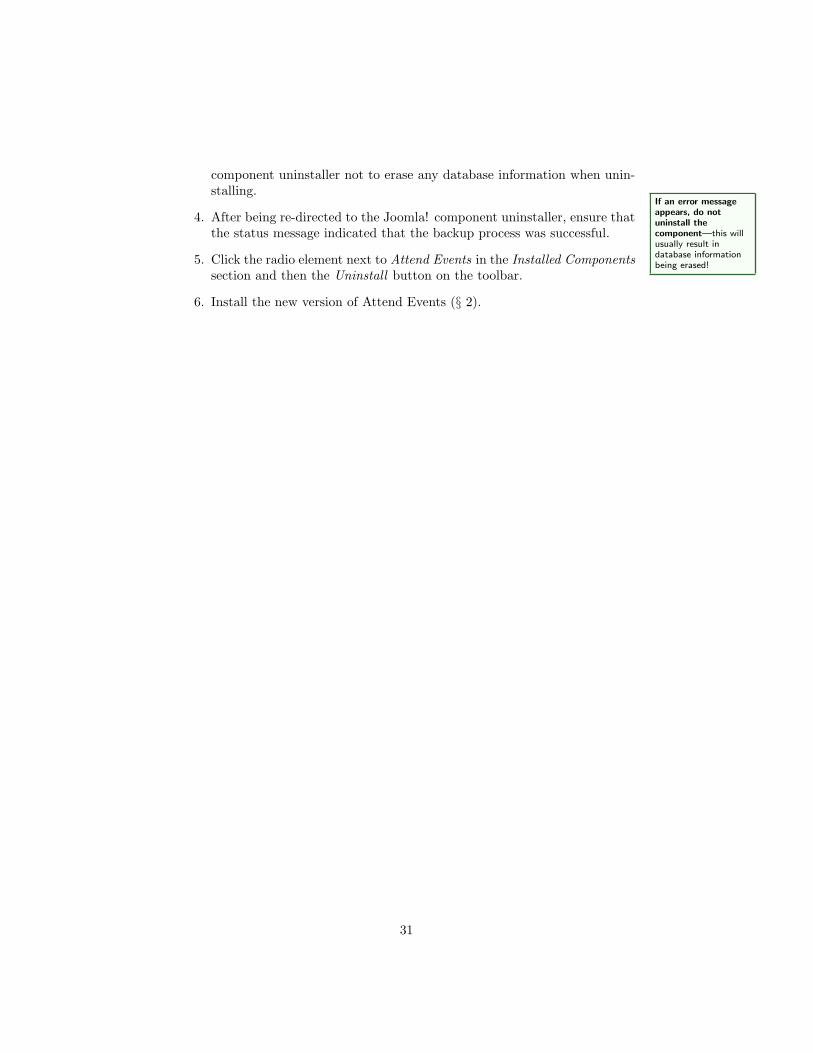
component uninstaller not to erase any database information when unin-stalling.
4. After being re-directed to the Joomla! component uninstaller, ensure thatthe status message indicated that the backup process was successful.
If an error messageappears, do notuninstall thecomponent—this willusually result indatabase informationbeing erased!5. Click the radio element next to Attend Events in the Installed Components
section and then the Uninstall button on the toolbar.
6. Install the new version of Attend Events (§ 2).
31