Embed Size (px)
Citation preview
February 2007 page 1
As A Clam!
by Andy nAbreski
How to Procure Tasty Shellfish
-Part One
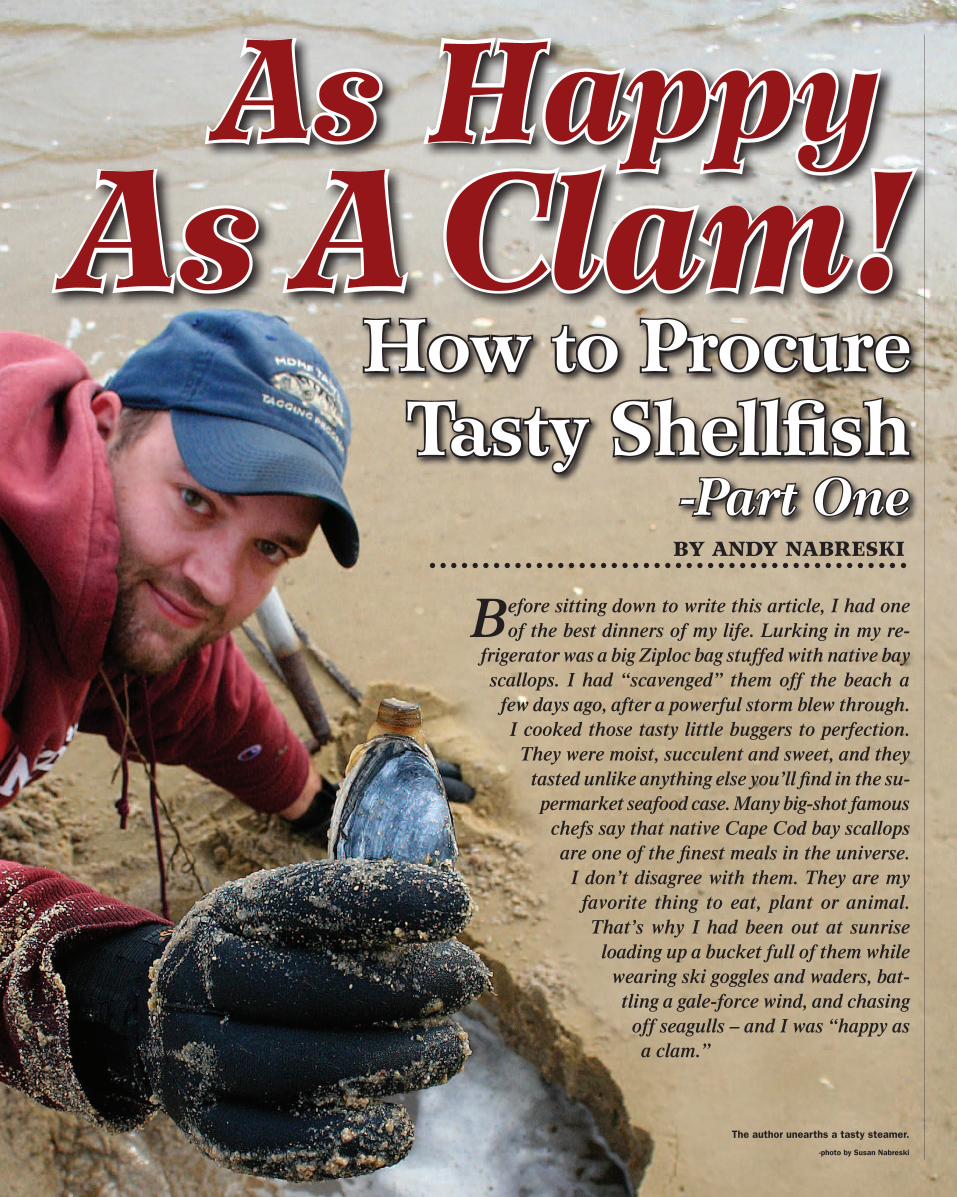
Before sitting down to write this article, I had one of the best dinners of my life. Lurking in my re-
frigerator was a big Ziploc bag stuffed with native bay scallops. I had “scavenged” them off the beach a
few days ago, after a powerful storm blew through. I cooked those tasty little buggers to perfection.
They were moist, succulent and sweet, and they tasted unlike anything else you’ll find in the su-permarket seafood case. Many big-shot famous
chefs say that native Cape Cod bay scallops are one of the finest meals in the universe.
I don’t disagree with them. They are my favorite thing to eat, plant or animal. That’s why I had been out at sunrise
loading up a bucket full of them while wearing ski goggles and waders, bat-tling a gale-force wind, and chasing
off seagulls – and I was “happy as a clam.”
The author unearths a tasty steamer.
-photo by Susan Nabreski
As Happy
page 2
If you live near the coast of New England, you have a major food source in your backyard. Our local waters host many forms of shellfish that can be classified as delicacies, and with a little knowledge and determination, you can go out and harvest as many as you could possibly need. Shellfishing is a great way to get outdoors and take in the glories of the natural world. You’ll get some valuable exercise, and best of all you’ll get many rewarding meals consisting of delicious food you found and gathered yourself.
In this two-part article, I will start you on your way to becoming an accomplished shell-fisherman. We’ll start with quahogs and softshell clams (steamers), both of which you can, and should, gather throughout the winter. Next month I will cover bay scallops and oysters. All of these things are delicious and fun to catch, and it’s a great excuse to get out of the house during the off-season.
The first thing you’re going to need is a shellfish license. Regulations vary, so always consult with your local shellfish warden or their office to determine which areas in your town are open. Shellfish beds are generally managed throughout the year, and areas open and close depending on the health of the stocks. Generally, a shellfishing license is very affordable, and the cost is easily covered after a couple of trips.
Next up, you’re going to need some gear. I highly recommend going to a local shop and buying all the gear in one visit. While you’re there, right before you lay your money down, pick the brain of the person selling you the gear about the local shellfishing hotspots. You should get some info, but in most cases you’ll have to do a little legwork and ask around. It’s very much like fishing. If you have a good spot, you don’t tell anyone. The best spots are those you find yourself, and it will take some effort.
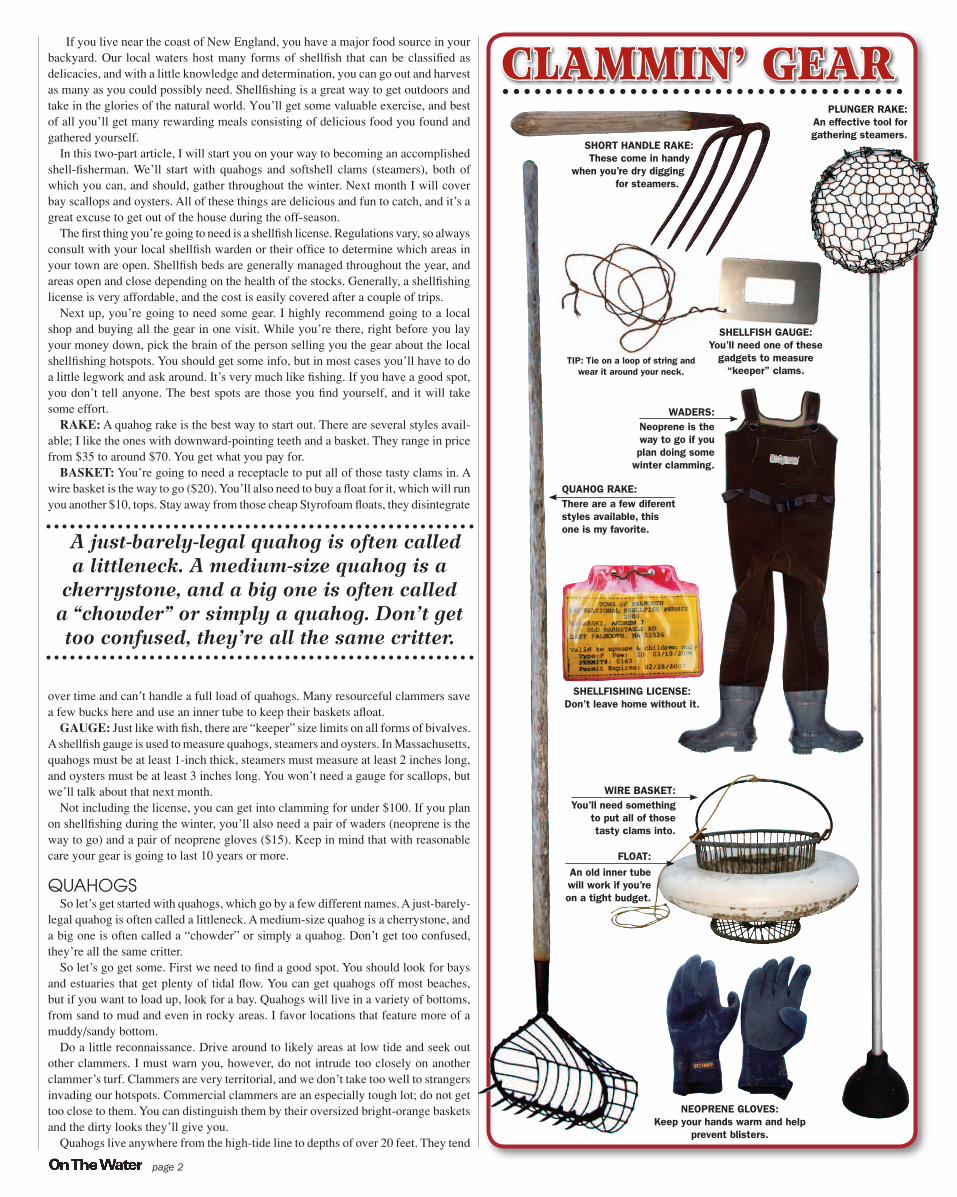
RAKE: A quahog rake is the best way to start out. There are several styles avail-able; I like the ones with downward-pointing teeth and a basket. They range in price from $35 to around $70. You get what you pay for.
BASKET: You’re going to need a receptacle to put all of those tasty clams in. A wire basket is the way to go ($20). You’ll also need to buy a float for it, which will run you another $10, tops. Stay away from those cheap Styrofoam floats, they disintegrate
over time and can’t handle a full load of quahogs. Many resourceful clammers save a few bucks here and use an inner tube to keep their baskets afloat.
GAUGE: Just like with fish, there are “keeper” size limits on all forms of bivalves. A shellfish gauge is used to measure quahogs, steamers and oysters. In Massachusetts, quahogs must be at least 1-inch thick, steamers must measure at least 2 inches long, and oysters must be at least 3 inches long. You won’t need a gauge for scallops, but we’ll talk about that next month.
Not including the license, you can get into clamming for under $100. If you plan on shellfishing during the winter, you’ll also need a pair of waders (neoprene is the way to go) and a pair of neoprene gloves ($15). Keep in mind that with reasonable care your gear is going to last 10 years or more.
QUAHOGSSo let’s get started with quahogs, which go by a few different names. A just-barely-
legal quahog is often called a littleneck. A medium-size quahog is a cherrystone, and a big one is often called a “chowder” or simply a quahog. Don’t get too confused, they’re all the same critter.
So let’s go get some. First we need to find a good spot. You should look for bays and estuaries that get plenty of tidal flow. You can get quahogs off most beaches, but if you want to load up, look for a bay. Quahogs will live in a variety of bottoms, from sand to mud and even in rocky areas. I favor locations that feature more of a muddy/sandy bottom.
Do a little reconnaissance. Drive around to likely areas at low tide and seek out other clammers. I must warn you, however, do not intrude too closely on another clammer’s turf. Clammers are very territorial, and we don’t take too well to strangers invading our hotspots. Commercial clammers are an especially tough lot; do not get too close to them. You can distinguish them by their oversized bright-orange baskets and the dirty looks they’ll give you.
Quahogs live anywhere from the high-tide line to depths of over 20 feet. They tend
A just-barely-legal quahog is often called a littleneck. A medium-size quahog is a
cherrystone, and a big one is often called a “chowder” or simply a quahog. Don’t get too confused, they’re all the same critter.
CLAMMin’ GeAr
SHORT HANDLE RAKE:These come in handy
when you’re dry digging for steamers.
SHELLFISH GAUGE:You’ll need one of these
gadgets to measure “keeper” clams.
PLUNGER RAKE:An effective tool for gathering steamers.
WADERS:Neoprene is the way to go if you plan doing some
winter clamming.
QUAHOG RAKE:There are a few diferent styles available, this one is my favorite.
WIRE BASKET:You’ll need something
to put all of those tasty clams into.
FLOAT:
An old inner tube will work if you’re on a tight budget.
NEOPRENE GLOVES:Keep your hands warm and help
prevent blisters.
SHELLFISHING LICENSE:Don’t leave home without it.
TIP: Tie on a loop of string and wear it around your neck.

February 2007 page 3
to congregate along the shoreline, however, and I like to target them in areas from the low-tide mark out to about 3 feet deep (at low tide). Pay attention to the sea floor as you are looking about. Once you start finding quahogs, take note of the bottom type, and look for other similar areas.
Take your rake and start scraping the bottom. The teeth on the rake should penetrate at least an inch into the bottom. It’s kind of like raking leaves. Quahogs don’t live very deep; in fact, many can be found just under the surface of the bottom. When your metal rake hits one of their hard shells, it transmits a distinct feeling that, after time, you will instantly know as a quahog and not a rock. When you feel that “thump,” really start digging and try to get the teeth of the rake under the quahog. Pull the rake toward you, flip it, give it a shake and pull up your treasure!
As easy as it sounds, there is a bit of skill involved. It will take some time to master the art of quahog raking, but once you are there you will be blessed with abundant quahogs. As a general rule of thumb, if you are averaging two ‘hogs per rake, you’re doing great. If it takes more than 4 rakes to get one quahog, start looking for another spot. Sometimes moving 10 feet can be the difference between loading up quickly and going home with just a few quahogs. Once you find a good spot, don’t stray too far. Shellfish beds don’t regenerate that quickly, so once a clammer goes in and clears out a particular loca-tion, it’s slim pickings until next year. Be persistent, cover some ground, and you’ll find a sweet spot.
While raking for quahogs is perhaps the most productive technique, there are other “low tech” methods that can fill your basket. During the warm summer months, you’ll see “summer clammers” gathering quahogs using nothing more than their hands and feet. All you need is a bathing suit (and a license). Simply walk around a clam bed wiggling your toes into the bottom until you feel something solid, then start digging with your hands. With a bit of luck, you’ll come up with a clam, not an ornery crab.
STEAMERSLet’s move on to the next clam on our list, the steamer, also known as the softshell
clam. Where I’m from on Cape Cod, many people refer to steamers simply as “clams.” If you tell someone you are going clamming, they assume you will return with a bas-ketful of softshell clams. Around here you refer to gathering quahogs as “quahoging” and gathering steamers as “clamming.” But I like to use the term “clamming” to mean
gathering any type of shellfish, and since I’m writing this article, from here on out a softshell clam will be referred to as a steamer.
Finding steamers is going to be a bit tougher than capturing a quahog. It’s a bit more work, and if you want to load up, you’ll need some additional gear. There are basically two ways to uncover steamers, dry digging and plunging. First we’ll look at plunging.
“What are you doing with that big toilet plunger?” the tourist asked.“Getting my dinner,” I replied, noting the look of disgust on her face.I have no idea who invented the plunger method, but whoever it was, was a genius.
Basically, you use a toilet plunger attached to a 6-foot pole – with a basket on the opposite end – to “plunge” a hole in the bottom and then sift through the debris. You can buy one at a local tackle shop, or if you are frugal you can make one. Plunging for clams may or may not be legal where you live so be sure to check the regulations.
Steamers live deeper in the sea floor than quahogs, generally around 6 to 12 inches down. Their fragile shells make them difficult to gather with a rake, which will tend to shatter them. By using a plung-er, you can create a deep hole and avoid crushing their shells. Here’s how to do it.
I’ll start out looking for steamers in sandy areas between the high-tide mark to just below the low-tide mark. If you are plunging for steamers, it is often best to head out in the middle of the dropping tide. This allows you to work the proper zone, and the moving current will help
flush the sand and mud out of the holes you make.Look for small holes in the bottom. These are telltale signs that steamers are lurk-
ing below. Start out in a spot that has a concentration of these holes. Begin by using the plunger end of the pole. It’s similar to plunging a toilet, except you don’t want the plunger head to make direct contact with the bottom. Even though it’s made of rubber, it can still crush a steamer. Try to stop the downward momentum just before you make contact with the bottom. The plunger will begin forming a hole in the bot-tom. Go fast and furious on the first go-around, since the steamers are going to be at least 6 inches down. Once you get a decent hole started, flip the rake around and start sifting through the debris in the hole you created. You’ll be amazed with the stuff you sift up – old shells, crabs, crazy-looking worms and other things. Don’t be surprised if you get a few quahogs in the top layer. Keep repeating the process of plunging and sifting. It usually takes a few minutes to get down into the zone. After awhile you will begin to develop a feel for it, and when you dislodge a steamer you will be able
Plunging for steamers is a productive way to fill your basket. Start by creating a hole in the bottom with the plunger (left). Once you get down about 6 inches, flip the rake around and use the basket to sift through the debris in the hole. With any luck, the plunging will dislodge a few steamers, and you’ll be able to scoop them right up (right).
-pho
to b
y Sus
an N
abre
ski
-pho
to b
y Sus
an N
abre
ski
Legend has it that the cornmeal makes the steamers spit out any sand. Some old-timers
tell me that the cornmeal makes no differ-ence, and simply soaking the steamers in seawater is sufficient. I’m as stubborn as
any old-timer, so I always add the cornmeal; it’s cheap, and my clams are rarely sandy.

page 4
basket with quahogs and steamers. I encourage everyone to go out and try shellfishing. You will get up close and personal with the amazing ecosystem that lives beneath the sea, you will get outdoors and get some exercise, and you will gather enough food to make a meal fit for a king.
If you would like to learn even more about clamming, pick up a copy of The Compleat Clamer by Christopher Reaske. It is a comprehensive book that will make you a true Zen-Clam-meister. You can purchase this fine book for a reasonable fee at www.onthewater.com.
Next month we will cover gathering bay scallops and oysters (yum!) and I’ll tell you what to do with all this delicious seafood once you’ve found it!
Go get ‘em!
Dry digging is another proven method for gathering steamers. A short handle rake will make the job easier, but if you don’t have one, you can get away with
just using your hands. A pair of neoprene gloves come in handy.
to feel it. Beware of plunging and sifting too vigorously. Steamers are fragile and precious, so you don’t want to grind them up in the hole. Once you get down deep enough and start coming up with steamers, start working the edges of the hole. Going down deeper isn’t going to get you more clams, since they all live at approximately the same depth. Often when I find a good spot, I plunge a trough along the bottom, always moving onward as I plunge.
DRY DIGGINGAnother technique for gathering steamers is dry digging. It’s pretty basic, and almost
prehistoric. A short-handled rake is a good way to start out, but if you don’t have one you can simply use your hands. I like to wear a pair of neoprene gloves when I’m dry digging. You never know what you’re going to come across; there are things like broken shells, sharp rocks and pieces of glass buried in the bottom.
Head out at low tide and look for sandy areas. Walk along the low-tide line and look for tiny holes in the sand. These are a clue that steamers live below, and if mini-geysers shoot up as you walk along, you can be sure you’re in the right area. If you have a short-handled rake, plunge it into the sand several inches past a hole. Pull a big clump of sand up and sift through it. There might be a clam in there. Once you have a good hole started, use your hands to start digging around. The hole will start to fill with water, which is OK because it makes digging easier. As you start to develop a nice hole, the sides will begin to cave in. Keep a sharp lookout, as you will usually see the neck of the steamers extending up through the sand. When you spot the neck, start digging it out, trying to get underneath it. Grab it gently, and slowly pull it out.
One quick note on dry digging is that by law in the state of Massachusetts, it must be above 32 degrees (air temperature) to dry-dig clams. The reason for this is that if you dig in freezing conditions, you will end up killing any undersized clams that are exposed to the air.
Many people will complain that they don’t like eating steamers because they’re too “sandy.” Nine out of ten times, a sandy clam is the result of improper care. Steamers live in sand, and if you want a nice meal, you need to get the sand out of them. It’s essential to “flush” steamers before you eat them. I bring a 20-gallon Igloo cooler along when I go clamming. When I’ve gotten my share of clams, I’ll fill the cooler half-full with sea water and put all of the steamers in there. The cooler serves two purposes: it keeps the steamers at the same water temperature they were captured in, and the lid prevents water from spilling all over my truck. When I get home I’ll add in half a cup of corn meal to the seawater. Legend has it that the cornmeal makes the steamers spit out any sand. Some old-timers tell me that the cornmeal makes no dif-ference, and simply soaking the steamers in seawater is sufficient. I’m as stubborn as any old-timer, so I always add the cornmeal; it’s cheap, and my clams are rarely sandy.
Another often-overlooked step in clam-care is the importance of scrubbing. With both steamers and quahogs, I always vigorously scrub all clams with a scrungy-sponge before cooking them. All clams have nooks and crannies that attract and hold sand. Scrub them off! All that sand will come out when the clams are cooked, so get rid of it before throwing them in the pot. It’s amazing how much crud comes off their shells when you scrub them.
So there you have it. If you paid attention, you are well on your way to filling a
We know where the fish are.Get hooked up with the most comprehensive, accurate
and reliable local fishing reports on the web.
Updated every Thursday • 100% FREE • www.OnTheWater.com/fishing-forecast


![[PPT]Clam Dissection · Web viewDissection of the Clam Venus mercenaria * copyright cmassengale * * * * * * copyright cmassengale Resource * * * * * * * * * * * * * * * * * * * * *](https://img.pdfslide.us/doc/110x75/5aa6232f7f8b9a7c1a8e5555/pptclam-dissection-viewdissection-of-the-clam-venus-mercenaria-copyright-cmassengale.jpg)