Embed Size (px)
Citation preview
ART 8 Summer 2017
WRITERS Barbara Hirten Melissa Williams SUPERVISOR Cheryl Fontana
CENT
Assistan
BELTRAL
BOA
D
Marion John Fe Janet G
CENTR
Assi
nt Superinte
LLMOR HIGH
ARD OF201
Dr. Nancy Nina Lan
n Blane errara Goller
RAL AD
John DSuperint
Dr. MDeputy
Katistant Supe
Michaendent for C
N
RE-MEH SCHO
F EDUC17-2018
Kaplan, P
nci, Vice Pr
S W
DMINI
DeTommtendent of S
Mara Bollet
Superinten
te Freemanerintendent f
ael HarringCurriculum
ERRICOOL D
CATIO8
President resident
Steven EnWendy Ga
Gina Pis
ISTRAT
maso Schools
ttieri ndent
n for Busines
gton m, Instructio
CK DISTRI
ON
nella argiulo skin
TION
ss
on & Assess
ICT
sment
2

3
8th Grade Art Course Overview
The Visual Arts Program at the Bellmore-Merrick Central High School District
plays an essential part in our students’ education. Our goal is to provide a learning
environment in which students explore, create and develop skills that contribute to
the growth of a fully rounded person by way of the visual arts. Students will
develop critical thinking and problem solving skills. Our ongoing theme will be to
create a creative, safe and caring environment where students can develop an
appreciation of art through authentic hands-on experiences. We will continue to
nurture and encourage creative expression as we uncover the value that art has in
our 21st century lives.
This is a curriculum guide for 8th grade, consisting of 40 weeks of instruction
every other day. The 8th grade students’ experience provides an opportunity to
explore and develop their technical skills as a continuation from 7th grade. The
experience is based on student participation in teacher suggested lessons. The
student learns through content instruction and hands on experience. This guide
contains an outline of instruction, objectives and student activities as a framework
for teaching 8th grade art. Lessons can be used to combine more than one
curriculum goal.
4
Content / Skills
Units of Instruction-
Drawing - Observational/Drawings o Review Principles of Design o Contour line o Analyze form/create 3-D o Tone/Shading o Texture
Color and Light o Review color theories o Optical mixing o Creating depth and space
Anatomy o Portrait proportion o Skeleton o Figure Drawing
Design o Review the Principles of Design o Illustration o One point perspective o To create individual works of art
Sketchbook H.W. o Ideas and Suggestions

5
Assessment o Final Project o Student curriculum questionnaire
Rubrics

6
Unit: Drawing/Observational appx. 6 weeks
Unit Content
In this unit students will draw realistic subject matter of different objects from observation exactly as they appear. They will learn how to create the illusion of three dimensional objects and depth and space.
Good drawing is one of the artist’s basic tools. It is the result of disciplined selective seeing, of keen observation and analysis of relationships, and essential constructions. Ongoing practice is required to master this basic skill.
Unit Goals
To review the Principles of Design To demonstrate the use of Contour Line To use Shading to show Form To explore the properties of light To illustrate texture

7
Title: Cross Hatching Chair Drawing Grade: 8 TIME: 7-14 Periods Goal: To create a composition with chairs or stools using texture as a means to shade. Objectives:
At the conclusion of this lesson students will be able to: Draw a realistic contour drawing of a chair. Create a good composition. Experiment with a range of cross-hatching and stipple techniques.
Motivation: Demonstration on the different techniques of shading with crosshatching. Worksheet. Show students work.
Content: Contour drawing. Texture Composition
Procedure: After observing the chairs, students will be able to move around the classroom to establish their “best” composition. Once that is established students will draw a preliminary sketch on study paper. Once they are satisfied with the drawing they will be given a large sheet of tinted pastel paper. Students will draw their composition on the paper with their pencil. Then with their flair or sharpie markers they will begin looking for their darks and lights on the chair. Paying close attention to texture and composition, they will also be given a piece of white conte to add in highlights. Materials/Resources: Extra Credit: Students can 2b pencil recreate the same style Erasers @ home with any object Study paper and draw it in their sketchbook. Pastel tinted paper Sharpie/Flair White Conte
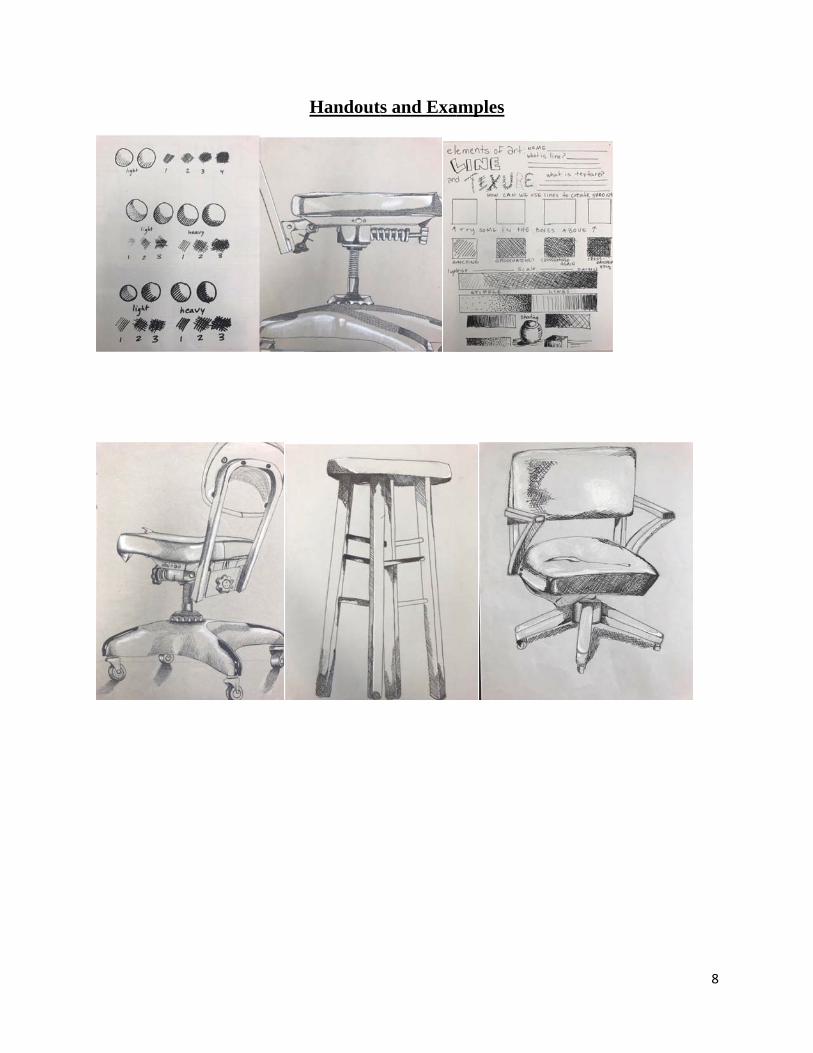
Handouts and Exaamples
8

9
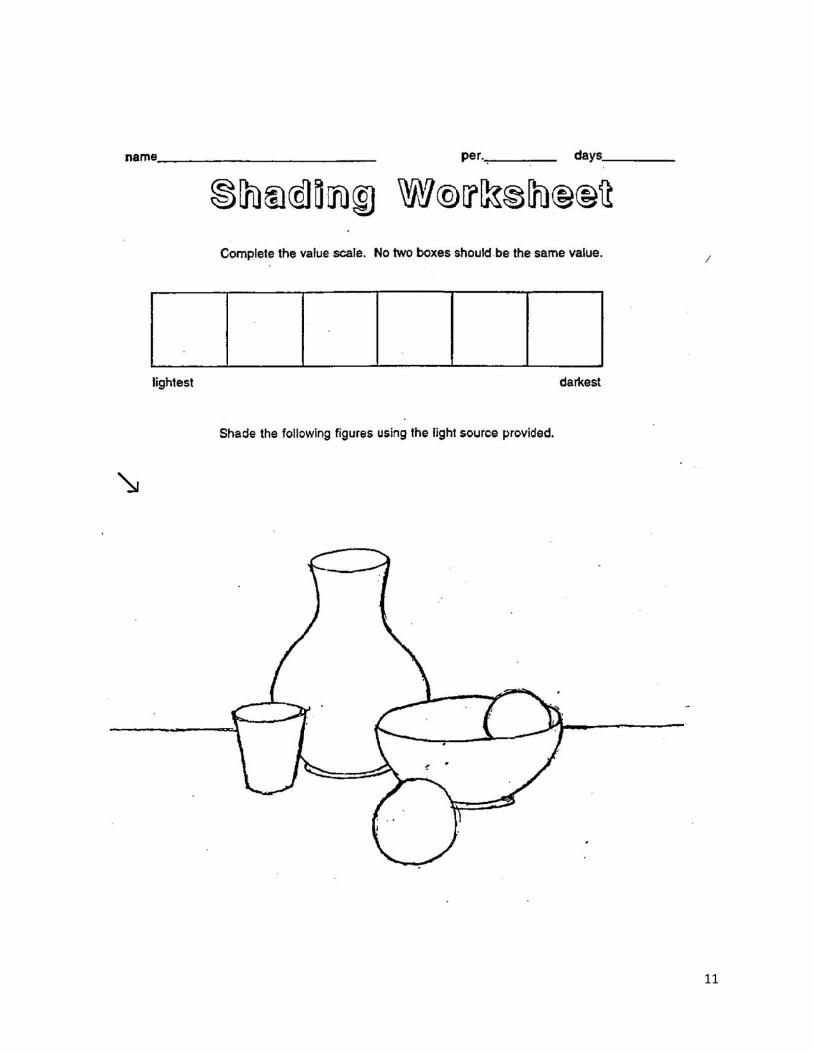
Lesson/Project: Students will learn the basic elements of shading and apply them to a contour drawing. Time: 10 Periods Goals: Students will use contour line, perspective, diminishing size, light and value to show depth and space. Learning Objectives:
To observe objects, their forms, shapes and angles To use a contour line to create an observational drawing of an object To learn how to create the illusion of three-dimension and volume To understand the meaning of shading and light source To apply methods of shading to create tone on a contour line drawing To develop confidence with using an object of choice
Motivation:
To discuss that the key to successful drawing is to really look, see and observe
To have discussions defining contour line, volume and tone To have a discussion on light and tonal values To demonstrate how to properly create a contour line drawing To demonstrate how to create tone by shading
Materials: 2-B, 4-B and 6-B drawing pencils, a unique,safe and shiny object, white paper and eraser Process:
Students will first create a contour line drawing of their object Students will make corrections on the drawing before they add tone Students will gradually shade in a variety of shadow tones as they create the
illusion of three-dimensional volume Evaluation: Did the students understand the concept of shading? Did they give an object form and volume? Homework: To find a unique, meaningful, safe and shiny object to draw

AdvancCan exepaper cr
ced Studenecute the sareating hig
nts: ame goals
ghlights or by having gray paper
a choice or and addin
of using whng both ton
hite pencil ne and high
on black hlights.
10
11

12
Lesson/Project: Contour Line Drawing Of Two Sneakers. Time: 5 Periods Goals: By creating contour line drawings of two sneakers, the students will learn the true art of drawing with their eyes. Students will be able to understand and use perspective, diminishing size, and color to show depth. Learning Objectives:
To learn the key to observational drawings is to look, see and observe. To observe objects, their forms, shapes, and angles. To learn the characteristic of contour line. To create the illusion of depth and space. To render the contours of an object. To gain confidence by drawing an object they used in 7th grade and are
familiar with. Materials: White paper, 2B drawing pencil, eraser, pair of sneakers. Motivation:
To have a review discussion on the meaning of contour line and how contour exhibits continuous line and is delicate and slow going, also how contour shows the edges only, and is rendered from dark to light
Students will get a hand out on contour line drawing, which explains the characteristics of contour line drawing as well as some new vocabulary. Review with the students that the key to drawing is seeing and observing, and to have patience.
To discuss that the further away an object is the lighter the object is becomes.
Then show the students some visuals of previous students work as well as some examples from artists.
Process:
First the students will set up their sneakers in front of them in an interesting set up.
Students will begin to draw the contour of their sneakers. While students are drawing the teacher will remind students to observe the
relationship of each sneaker to the other as they execute it on the paper.

13
The finishing touch will be for the students to create the illusion of depth and space.
Evaluation: Ask the students questions on the creation of depth and space, so that you can clearly see if the understood the project. Did their work reflect an understanding of the objectives. Were the students comfortable with the technique of drawing in contour, as well as observing and drawing what they see?

14

15
Unit: Color and Light appx. 20 weeks
Unit Content
In this unit students will develop an understanding of color theories and expand on those learned in 7th grade. Students will infuse these theories using a variety of mediums, techniques and subject matters. Individual approach and interpretation is encouraged.
Unit Goals
To review Color Theories and apply to drawing experiences
To use any medium to apply color to drawing techniques To learn Color-Blending techniques To explore the properties of light To explore the fusion of Optical Mixing

16
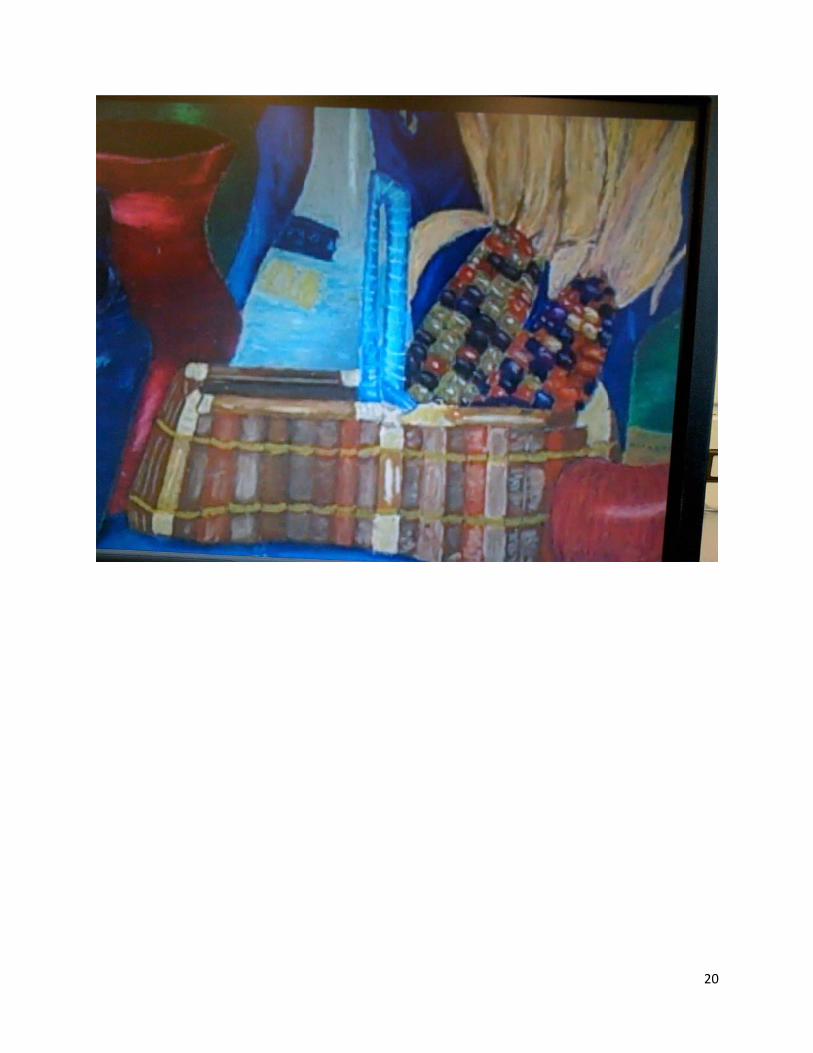
Project: Still Life -Creating the Illusion of Depth and Space with Color Time: Step 1: 5 Periods
Step 2: 12 Periods
Goals: To continue the illustration of depth and space with the use of oil pastels to create volume, values and capture color. Learning Objectives:
Students will observe objects, their forms, shape and angles. Students will create the illusion of depth and space along with understanding
proportions. Students will learn the devices to create the illusion of depth and space:
overlap, color, size, placement, value, perspective, details and texture. Students will use oil pastels to create color, texture and shadows and
highlights. Students will gain confidence in really “seeing” and analyzing form.
Students will develop and understanding of still life drawing by viewing art of Paul Cezanne and new modern artists.
Motivation:
To have a class discussion on the devices of creating the illusion of depth and space: overlap, color, size, placement, value, perspective, details and texture
The class will have a quick discussion on the visual characteristics of oil pastels and color.
Discussion will include a review on: 1. The look and application process of oil pastels and technique. 2. Mixing and building of colors to get the correct shade.3. Using the complimentary colors (instead of black) to create shadow on the object. 4. Using white to create the highlights.
Demonstration on the application of pastels by teacher. Visuals : Examples of artists and student work will be displayed in the
classroom as references. Students will also see visuals of teacher examples to look at from the demonstration done on color application in their previous class.
Materials: Still life objects: bottles, vases, flowers, knick knacks, drapery…, various colors of drawing paper, 2B pencils, eraser and oil pastels.

17
Procedure: Step 1:
Students will select their choice of point of view. They will create a contour line drawing using the devices learned to create
three-dimensional objects and the illusion of depth and space: color, tone, size, overlap, placement, perspective, details...
Step 2: Some students with still be working on their contour drawing and others will
be starting the color application using oil pastels to create depth, space, values, texture and volume.
Evaluation: During the class period the teacher will individually work with students on their contour drawings giving suggestions to strengthen their drawings by reinforcing the techniques that create realism. The teacher will then be assisting and monitoring students work on part 2 of the lesson; adding color. Homework: To create a sketchbook journal entry of a still life composition set up of personal objects.

18

19
20

21
Lesson/Project: To Create a Tropical Scene in PhotoRealism by Implementing Color blending Techniques. Time: 20-25 Periods Goals: To understand the meaning of the style of art called photo-realism. Learning Objectives:
To review the concept of realism. To create the illusion of three-dimensional space. To apply the techniques of color-blending. To reinforce contour line drawing. To problem solve by students creating their own artwork. To use higher order thinking skills by making decisions as they work. To see things with the eye like a camera lens. To capture a moment in time.
Motivation:
To play “Real or Photo-Real” with students as a visual example. To illicit a class discussion on the history and meaning of photorealism. To list the elements and devices to create photorealism. To have a review discussion on creating the illusion of depth and space. To
demonstrate to the class the technique of color-blending. To show visual examples of students work and the artists.
Materials: Computer and smartboard to view the game on photorealism, homework assignment of a photo of a “close-up” view of a tropical scene, 12” x 18” bristol paper, “Prismacolor” colored pencils, 2-B drawing pencil
Procedure: Students will find a photo of a “close-up”/ “zoomed-in” view of a tropical
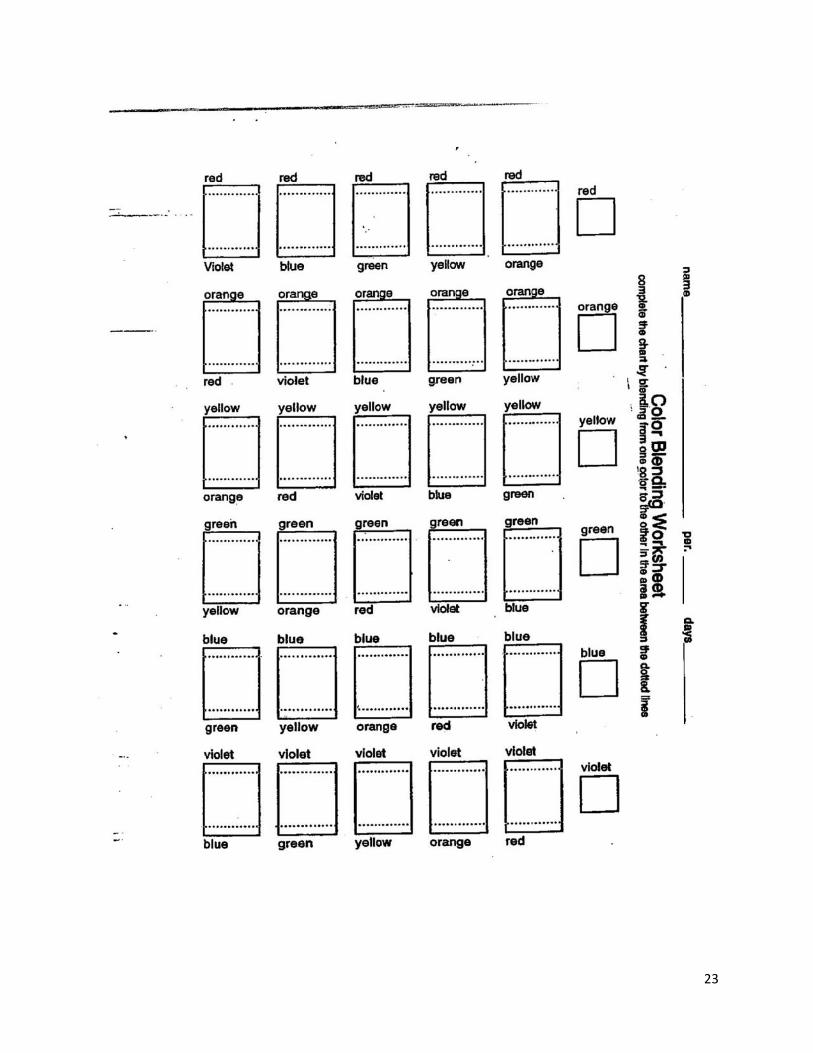
scene for homework. Students practice the color-blending technique on a practice
worksheet. Students proportion their drawing paper to their photos. Students first sketch their photo image onto their drawing paper with pencil
in contour line. Students add color in the next step following the ideas of photorealism and
using the techniques of color-blending.
22
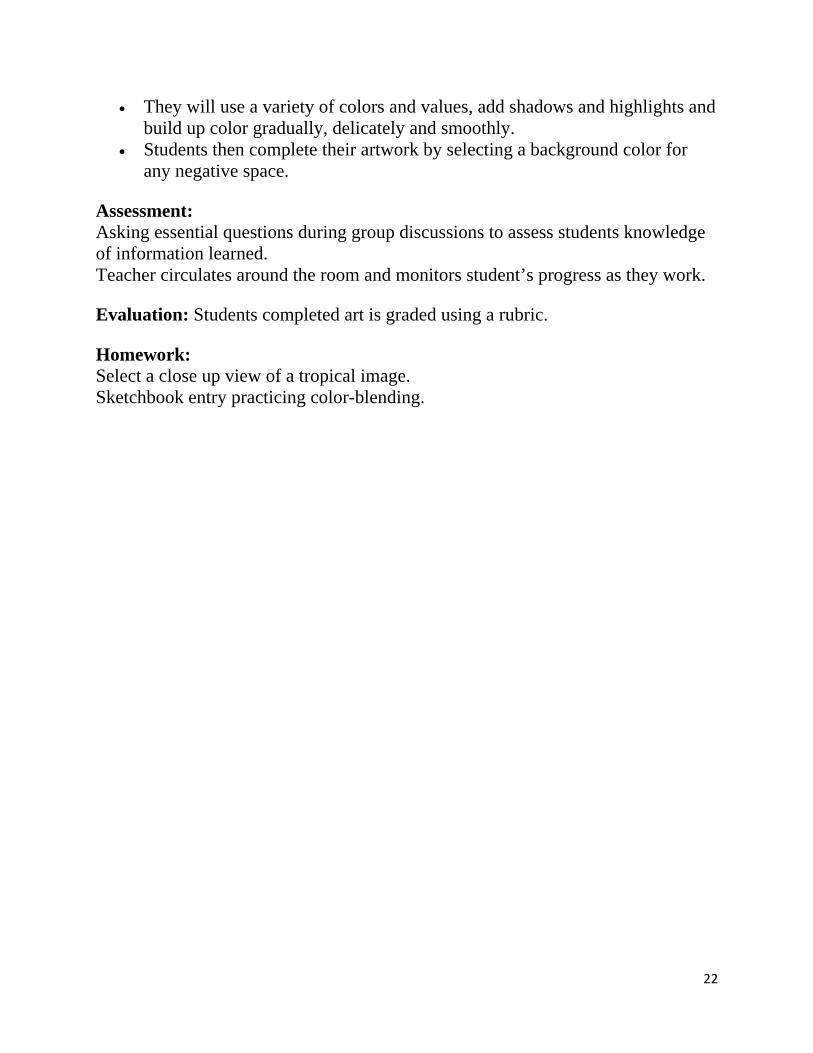
They will use a variety of colors and values, add shadows and highlights and build up color gradually, delicately and smoothly.
Students then complete their artwork by selecting a background color for any negative space.
Assessment: Asking essential questions during group discussions to assess students knowledge of information learned. Teacher circulates around the room and monitors student’s progress as they work. Evaluation: Students completed art is graded using a rubric. Homework: Select a close up view of a tropical image. Sketchbook entry practicing color-blending.
23

24

25

26
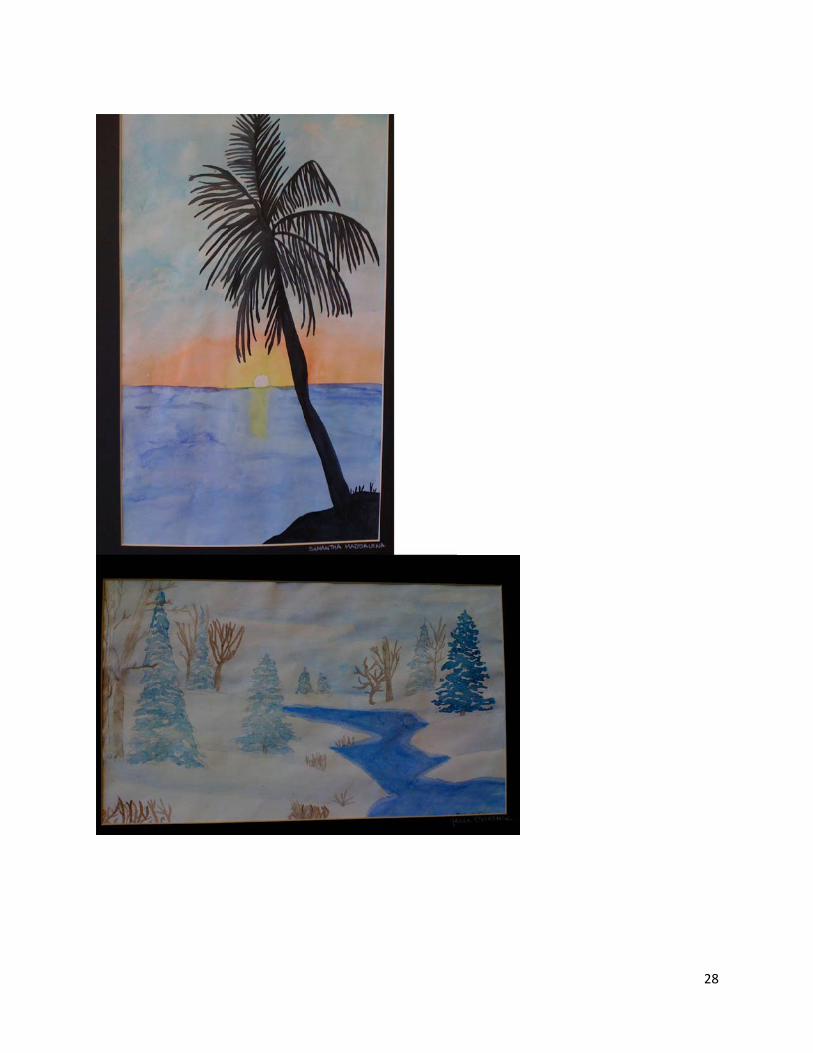
Lesson/Project: Utilizing the Techniques of Watercolor Students will Create Landscapes. Time: 7-10 Periods Goals: Eighth graders at this age can use perspective, and color to show depth. Students are now able to apply art techniques to depict texture and mood. They are now also paying attention to details. Learning Objectives:
To learn the techniques of the medium watercolor To understand how to use nature to create a painting To create the transparency quality of watercolor To apply the textures of nature with watercolor To feel comfortable and confident with their new medium To look at natural landscape from an artistic perspective To create depth and space and the illusion of realism.
Materials: Pencil, watercolor paper, watercolor paints, water-cup, brushes, paper towels, sponge, landscape photo. Motivation:
While showing students some pictures of landscapes have a discussion on how they would create certain qualities such as snow, rocks etc.
The students will be provided with a demonstration on the tools and techniques of watercolor, which are:
1. How to create transparent qualities 2. How to create the spray of an ocean, the snow on trees,the cracks of rocks...
They will then view visuals of other student’s work
Process: Students are asked to bring in a photo of a landscape or seascape as a
homework assignment After the student’s view the demonstration, they will sketch a contour line
drawing of their photo landscape in pencil. Once their drawing is approved, they will then add color with watercolor
paints creating the qualities of nature.
27
Evaluation: Did the students enjoy the medium of watercolor? Where they able to create accurate landscapes? Did they create texture, and transparency with the watercolor? Did they enjoy recreating nature with the new medium? Homework: Select a landscape photo or take your own photo. Sketchbook entry: Look out your window and draw a landscape.
28

29
Lesson/Project: IMPRESSIONISM Time: 15-20 Periods Goals: After introducing impressionism as a major art movement students while re-create impressionistic paintings of a landscape or seascape. Learning Objectives:
To introduce impressionism as a major art movement To present Impressionism as a study of color and optical mixing To express mood through the use of color in drawing To identify with artwork from different cultures and time periods by
implementing specific common characteristics. Motivation:
To view a slide presentation on impressionist artists - multimedia computer presentation on impressionism
To define Impressionism: (im prehen izem)n. [often I-] a theory and school of painting exemplified chiefly by Monet, Pissarro, and Sisley, but also by Manet, Renoir, etc., whose chief aim is to capture a momentary glimpse of a subject, esp. to reproduce the changing effects of light by applying paint to canvas in short strokes of pure color. • optical mixing- colors mixing in the eye rather than on the palette or on the canvas
To have discussion of optical mixing Practice worksheet on optical mixing as used by the Impressionists To display prints of famous impressionist artist’s work im*pres*sion*ism
Process: Students will view the presentation on Impressionism Teacher demonstration and discussion of the impressionist style and optical mixing The color worksheet will then be completed to reinforce the concepts discussed Students will choose a landscape or seascape to reproduce in oil pastels Students will first do a contour line drawing of the painting on pastel paper Students will then begin the process of laying color on top of one another in the Impressionist style Materials: Landscape or seascape photo, 2-B pencil, oil pastels, color pastel paper Evaluation: Did the students work reflect an understanding of the objectives targeted? Did they enjoy creating an impressionist painting? Do they have a better understanding of the movement known as Impressionism?
30
Homework: Select a landscape or seascape photo

31

32
Unit: Introduction to Anatomy appx. 10 weeks
Unit Content
In this unit students will develop the ability to observe and graphically represent the human face and figure as it appears. The figure and head are a basic recurring theme in art and an understanding of its proportions is a fundamental standard to all advanced sequential art classes.
Unit Goals
To gain an understanding of Proportion of a portrait and the figure
To learn the skeletal structure of the figure To analyze form

33
Lesson/Project: To Create a Portrait by Learning the Proper Proportions of the Human Head and Face. Time: 5-6 Periods Goals: Students will learn the proper proportions of the human head and face students and will be able to properly draw and create portraits realistically. Learning Objectives:
To understand the proportional scale of the human face To render the facial features and pay attention to details as well as
proportion To interpret the meaning and application of symmetry To produce a realistic portrait from a photo of a person To feel confident in drawing the human face To have a better understand of the proportional scale of the human face
Materials: Photo (magazine) portrait of a person’s face, sketch paper, pencils, eraser Motivation:
There will be a discussion on the definition of proportion. The students will be introduced with a teacher demonstration to the proper
proportions of the face and they will learn the formula to measuring the face. Then have a demonstration on drawing each facial feature. Key questions: What feature is in the center of the face? Ask the students how they would
measure out the distance between each feature? The students will receive a handout on the proportional scale.
Process: The students will begin sketching their portraits concentrating on the proper
proportions and the rendering of the facial features. Then after portraits are graded and corrected students will be ready to begin
Step 2, adding tone with colored pencils and pastels. Evaluation: Did the students understand the proportional scale, as well as how to apply it to their portrait? Did they understand the importance of symmetry? Were the objectives met? Have they enjoyed creating a realistic portrait As a class have they reflected an understanding of all the concepts taught?
34
Homework: Select a photo of a portrait (preferably a random person) Sketchbook homework: Create a portrait using the proper proportions. You can then be creative such as expressionistic...

35
36
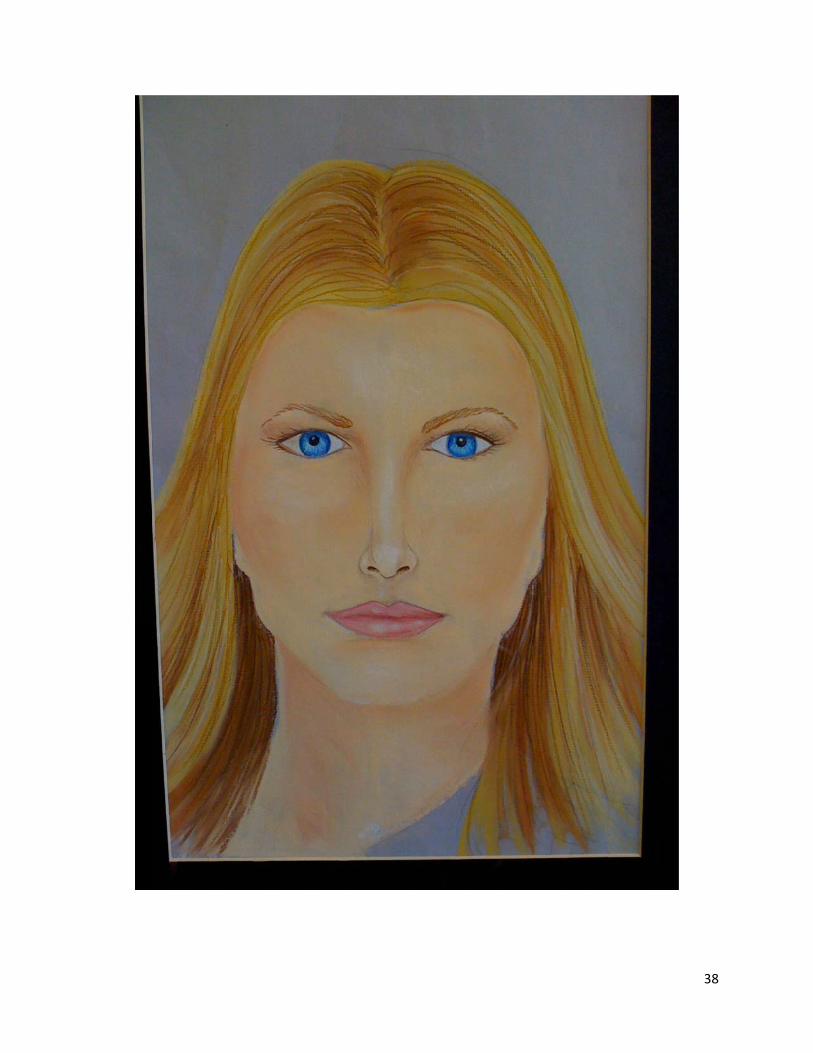
Lesson/Project: Students will properly render the color tones and textures of each facial feature. Time: 20-25 Periods Goals: Students will now after learning the proper proportions of the human face pay close attention to color, texture and details. Learning Objectives:
To understand and create the characteristics of each facial feature. To render properly the colors of each facial feature.
To create the tones and highlights of each facial feature. To create the proper textures of each facial feature. To have a better understanding of all the qualities that apply to the face.
Materials: Portrait photo, portrait drawing of the proportional scale, chalk pastels, prismacolor pencils Motivation:
Students will be asked to look around and share what qualities, colors and textures they notice about each feature.
To have a discussion and demonstration on how to create each feature starting from the flesh, eyes, nose, mouth, and then the hair. Students will view and critique visuals of the artist Chuck Close and visuals of completed portraits of students work from previous years.
Materials: Portrait photo, portrait drawing of the proportional scale, chalk pastels, prismacolor pencils Process: The teacher will demonstrate how to create each feature. Approximately three class periods are allotted between demonstrations for students to work.
Flesh demonstration: Use chalk pastels to create the flesh color and soft texture. Add shadows and highlights to create volume explaining that the skin is wrapped around a three dimensional skull.
Eye demonstration: Using Prisma colored pencils create the iris color by color blending different values. Create the illusion of the wet texture by adding white shiny highlights. Add color into the pupils, whites of the eye, and tear duct. Discuss that although the eyelid overlaps part of the iris, the pupil must be centered to the entire iris. Create shadows around the eye and eyelid.

37
Nose demonstration: Using colored pencils create the illusion that the nose is three dimensional by building up surrounding shadows and highlights. Create the nostrils to reflect that they are openings not objects.
Mouth demonstration: Using colored pencils create the color by first placing an under layer of peach or flesh. Then apply the color. Create two lips by using shadows to separate them. Add shiny highlights to create the illusion of wetness.
Hair demonstration: First create a layer of mixed color tones as an undertone and to block the paper color. Next create the hair texture using a variety of colors with colored pencils. Discuss that the texture is created by the application and the way the pencil strokes are drawn. Include a demonstration on eyelashes, eyebrows and facial hair at this time too.
Evaluation: Do students show an understanding of the special qualities, color and textures of each facial feature? Did the students create the illusion of three-dimensional forms? Do the portraits look realistic? Homework: Students will create a practice portrait in sketchbooks
38

39

40

41

42

Time: 2I paint
STEP Oquestion
Rememareas foblendintext.
What makes yWhat is the mWhat do you What are youWho influencWhat has beeHow have yoHave you stay
20-25 Periot self-portra
ONE: Brainns. Answer
mber, we wior color. Eg techniqu
you unique? Diffemost important thin
like to do in your u looking forward tces you most in lifen your best experiu changed? yed the same? Do
8t
8th GRA
ods aits becaus
nstorm somethem in you
ill be usingExamples: ue that we u
SELerent from any otheng in your life righspare time? to most in the next
fe? ience so far this ye
oes a certain color
th Grad
ADE SELF
se I am so best. –
e ideas for your sketchboo
you a
g 2b-4b penEyes, Hairused in the
LF EXPLORATIOer person? ht now?
t couple of years?
ear?
remind you of you
de Self P
F PORTRA
often alon– Frida Kh
our assignmeok and draw are thinking.
ncils for yor, Backgroue last photo
ON QUESTIONS:
urself? Or an emot
Portrait
AIT PROJE
ne, becausealo
ent by answesome image
our face anund. We w
o realism p
tion?
ECT
e I am the p
ering a few oery that come
nd you canwill use the
project. You
person I kn
of the followes to mind w
n choose 3 e same colu can also
43
now
wing while
lor add

Studennt Exammple of SSelf Porttrait
44
45
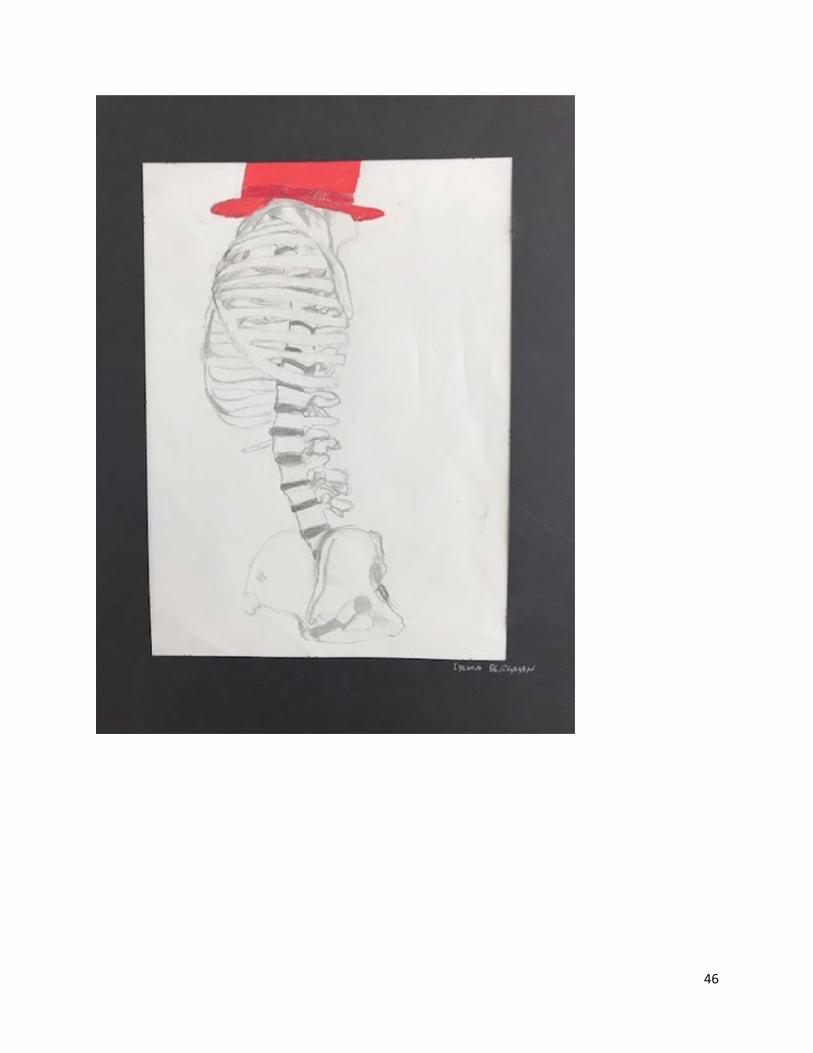
8th Grade Skeleton Lesson
Time: 5-8 Periods Goal: Draw a section of a skeleton and render it with pencils. Learning Objectives:
The student will use observational skills to draw a section of the skeleton model. The student will demonstrate principles (unity, contrast, proportion, and balance) and elements (line,
form, shape, and value) of art. Students will create a line drawing
Motivation/Do Now Activity: Students will choose a part of the skeleton that they would like to draw. They will use their knowledge of the principles of design to decide upon a good composition. Supplies: · Paper · Eraser · 2b, 4b Pencils · Skeleton Procedure: Step 1 The skeletons models will be set up on the table in a certain position. The student will choose the section they wish to draw. The student will use a pencil to create the initial line drawing. Step 2 The student will shade the bones as it is observed. H.W. To draw another part of the skeleton in their sketchbook. Assessment:
Rubric in classroom What areas of your project could you improve in? What does a skeleton mean to you?
46

47
Lesson: To Create Gesture Drawings of the Human Figure Time: 1-2 Periods Goals: To capture and record movement which is the most important factor of the human figure. Learning Objectives:
To become familiar with the human body To provide an opportunity to draw the figure from life To quickly express the movement and action of the figure To eliminate all nonessential details To introduce the proportions of the human figure To create a fun lesson for students
Motivation:
To have a discussion about the qualities of the human figure: movement To define gesture drawing as quick scribbly sketches that capture the
movement and pose of the figure that do not have edges or details To have a discussion comparing contour line to gesture drawing To engage students in fun as they take turns at posing To show visual examples of gesture drawings
Process:
Have students take turns and pose in action poses Other students will capture the movement as they create gesture drawings Students will be timed to two minutes per pose They must work quickly, ignoring details and outline and they must draw
only movements of the poses
Materials: Charcoal pencils or 6-B pencils, large 18” x 24” sheets of paper, student models Evaluation: Do the completed drawing exercises show evidence of movement?

48

49
Unit: Design appx. 4 weeks
Unit Content
In this unit students will continue to draw upon their knowledge of the principles of design and the elements of art. The quality of the artwork is dependent upon this knowledge of them and the application of color theory. Individual approach and interpretation are essential to all creative effort, but an understanding and use of basic design qualities are necessary to all successful art experiences.
Unit Goals
To reinforce the Elements of Design and The Principles of Design
To use their knowledge of the principles of design to create creative, individual works of art.
To create a design using patterns or a Zentangle.

50
Title: Found Poetry and Art - How can we fuse art and poetry to create a work of art? How can we uncover these creations from discarded items? Time: 4-8 class periods Goals: -To have an understanding of the writing style of blackout poetry. -To create an original artwork that includes a central theme. -To have students problem solve by creating their own poem and artwork from the given materials. -To utilize the elements of art they have previously learned. Learning Objectives: -To create a piece of artwork based on a core idea or central theme. -To demonstrate to students that they can construct poetry everyday. -To create a found poem by choosing poetic words or phrases on a book page. -To use discarded books as an art resource. -For students to experiment with poetic form and language in an enjoyable, artistic way. -To merge the content areas of art and language arts. Motivation: Students will observe a powerpoint slideshow and a short YouTube video on Found art/poetry. Students will discuss the history of blackout poetry and read through the handout. Students will observe past students work to give them inspiration for their own pieces. Materials: Laptop and projector to view powerpoint and video: -https://youtu.be/w1SWKSzO50c Discarded books. Watercolor paper or Bristol to paste page on. Glue, pencils, color pencils, markers, sharpies and acrylic paint. H-B drawing pencil. Found Poetry History Handout Access to Found Art and Poetry Pinterest Board - https://www.pinterest.com/hirten/found-art-and-poetry/

51
Procedure: 1. Find a page from a discarded book that looks good with several appealing, descriptive words. 2. Xacto it out from the book along the edge. 3. Now, take a pencil and begin to circle descriptive, interesting words and try to compile them to create a poem. About 12-20 words are sufficient. 3. Using a paintbrush and mixture of Elmer’s glue and water, lay down some glue onto watercolor paper to paste down your page. 4. Think about the word that represents the core idea of your poem. At least one word should give the student a good visual image to create from. 5. Paint or color over the un-circled words with your graphic representation of the core idea. 6. Once you have the background image, colors laid down, begin to add more detail. Square off or circle your final poem in sharpie so that it stands out. 7. Write your “core idea” word in Sharpie on your final page. Create thick to thin lines by overlapping the Sharpie lines that you want to be thicker. Formative Assessment: Throughout the lesson, the teacher will observe the student’s and how they are working and responding. By the end of the first class, students should have begun to create their poems and hand in a paper with a few brainstormed ideas. The teacher will use these to assess their understanding of the project. Summative Assessment of Learning/Evaluation/Marking Using a rubric, students will self-assess. Final page included a poem or story of approximately 12-20 words. 20 Points The painted or color design added meaning to the poem 20 Points One word or a phrase was written in hand-drawn letters and it represented the core idea of the poem 20 Points One is able to recognize poetic words and/or phrases in text and create a poem that makes sense. 20 Points Students were enthused, invested and used their time wisely 20 Points

52
FOUND POETRY HISTORY 250 years Caleb Whitford 1760- One of the first creators of altered found poems. Caleb Whitford who was a neighbor Benjamin Franklin in created short poems or saying from the newspaper. The newspaper was a recent invention and the columns were very skinny. Caleb read across the columns instead of reading them top to bottom. Creating funny combinations of words that he would use to crack up his friends. Eventually he published a broadsheet of them. Tristan Tzara 1896- A poet and performance artist form the Dada movement in Paris, went onstage one evening and began cutting up a newspaper. He then placed all the pieces in a hat and randomly began selecting words and reading them aloud as a poem. Brion Gysin 1958- A painter who was kicked out of the Surrealist movement. He stumbled upon this Dada technique of combining words one day while preparing a canvas. Brion Gysin accidentally cut through the canvas and into a stack of newspapers. The way newspaper strips floated and the words fit together, gave him the idea of how to make poetry. He titled these works as Cut-Ups William Burroughs 1958- An American novelist who became interested in Brion Gysin cut-up method after seeing his artwork in Paris. Burroughs then ventured into a nonlinear style of writing. Using words and phrase slicing them up into new sentences. His first publication of the sort was titled Naked Lunch, which became notorious across literary circles in Europe and the United States. Tom Phillips 1970- An English artist who has been creating a forty-year project of found poetry art titled The Humument. After reading a Paris Review interview of William Burroughs, Phillips was inspired to give found poetry a try. He put his artistic spin on it. Phillips began by using a Victorian book called A Human Document creating artwork in its pages.

Stude
nt Examp
ples
53

54

55
Title: Intro to Linear (1 point perspective) 8th grade Time: 4-6 Periods Goals:
For students to be able to draw a horizon line, vanishing point, shapes and converging lines using a pencil and ruler.
For students to eventually to be able to create a piece of artwork based on this concept.
For students to be able to illustrate 3-D forms on a 2-D plane using a vanishing point.
Learning Objectives: For students to understand the basics of one point perspective such as
Vanishing point, Horizon line & Converging lines. To have students identify vanishing point, horizon line and converging lines
are on a photograph or painting. Motivation:
Students will watch a Smart board exercise on one point perspective. Students will take a short ‘field trip’ outside the classroom to view one-point
perspective first hand.
Materials: Pencils, rulers and handouts. Procedure: Assessment: At the conclusion of the period or for homework, depending on time, students will be given a paper with different photographs of landscapes & cityscapes. Here they will need to identify horizon line, vanishing point and converging lines using colored pencils.

56

57
Zentangle Design
Time: 4 -8 Periods
Goal: For students to develop an understanding how line can be used to
create artwork and design. To have students increase their level of comfort by making deliberate,
interpretative strokes with a pencil/marker on paper. To will build self-confidence in each student. For students to recognize repetitive patterns in everyday life, including the
natural world, art and architecture, clothing etc.
Objectives: To create an abstract or non-objective design using the zentangle method. • Students will make controlled marks on their paper. • Students will be open and willing to try an experience that may be outside their comfort zone.
Motivation: Students will watch a short video about Zentangles Demonstration of different styles and types of Zentangles. Students artwork samples
Materials:
Instructional video or YouTube channel HB pencils Black Flairs Drawing paper
Procedure:
1. Students will watch a short video on zentangles. 2. Demonstration of how to begin and shade their Zentangle. 3. Point out that creating and completing a repetitive pattern is a strategy for
relaxation. 4. Critique on different types of patterns. 5. Students will then begin to create their own unique zentangle designs.
58
Alternatives for Special Needs Students: 1. Give students with impaired motor skills varied paper and pen & pencil sizes
that are appropriate. 2. Students with difficulty following verbal directions can be given written
directions on a card.

Studen
nt Exampples
59

Can be a challengge for porttrait lessonn and zenta
angle lessoon
60

61
Onomatopoeia Pop Art Completion time: 5 sessions; 40 minutes per session Goals:
Learn about the Pop Art Movement and Pop Artist Roy Lichtenstein Define the literary element Onomatopoeia
Objective: Create a piece of art inspired by the Pop Art movement using an onomatopoeia Materials: 9 x 18 drawing paper 9 x 18 sheets of blue, yellow, and red construction paper Old dictionaries Sharpie Markers Glue/Pencils Procedure: Day 1:
Introduce students to Pop Art and Artist Roy Lichtenstein What types of things do you notice about his art? Primary Colors Dots/Benday Dots Action/Action Words Introduce students to the literary term onomatopoeia, define onomatopoeia
and give examples of words that make sounds such as buzz, ka-ching, slurp, boom, buzz, bing, pow, etc.
Give students comic book and split them into groups. As a group have them pick out as many onomatopoeia words as they can and write them down in five minutes. Share with the class.
Students will be given old dictionaries to collage a 9 x18 sheet if drawing paper. Teacher will model ripping and collaging technique.
Day 2 and 3 Review the word onomatopoeia and its meaning. Students will finish gluing
white paper with dictionary pages. Once done set aside and dry. Students will choose the word they wish to create in the pop art style. The
teacher will demonstrate how the written word should contain characteristics of itself. For example, the word splash should be very rounded where the word buzz would be jagged.

62
Students should choose the color they would like to create the word in and outline the word in pencil. One the design is finalized students will outline and add boldness to the outline in sharpie.
Day 4 and 5 Students will cut collaged dictionary page to enhance their word such as a
jagged, rounded, big or small edge, etc. Students will finish their pop art word and cut that out. Students will choose
another primary color to mount this word on. Both pieces will then be mounted to the third primary color that has not been used.
Students may then enhance the outside of their word with splatters, lightening bolts, star bursts etc.
When all pieces are done as a class we will critique the work. Assessment: • Students can verbalize what the word onomatopoeia means •Students have created a work of art that resembles the Pop Art Style using the Primary Colors * Students participate in a class critique about the successful/unsuccessful works of art
63
Sketchbooks
The purpose of having sketchbooks is to offer an opportunity to practice and build confidence as well as providing an avenue to inspire creativity.
The sketchbook is a required weekly homework assignment. Students should spend 20-30 minutes of effort for each entry. The teacher may provide ideas and suggestions or required drawings as well as some free drawings to offer choices that students may want to explore.
Sketchbooks are graded on effort and creativity each marking period.
64
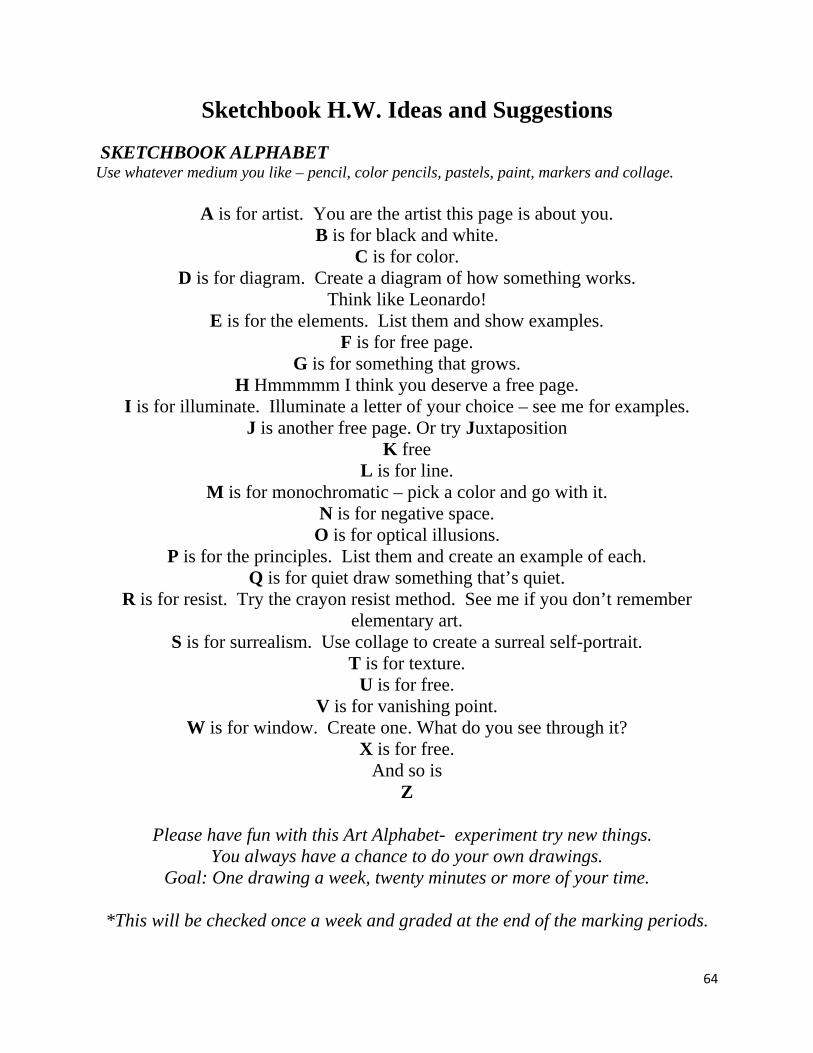
Sketchbook H.W. Ideas and Suggestions SKETCHBOOK ALPHABET Use whatever medium you like – pencil, color pencils, pastels, paint, markers and collage.
A is for artist. You are the artist this page is about you.
B is for black and white. C is for color.
D is for diagram. Create a diagram of how something works. Think like Leonardo!
E is for the elements. List them and show examples. F is for free page.
G is for something that grows. H Hmmmmm I think you deserve a free page.
I is for illuminate. Illuminate a letter of your choice – see me for examples. J is another free page. Or try Juxtaposition
K free L is for line.
M is for monochromatic – pick a color and go with it. N is for negative space.
O is for optical illusions. P is for the principles. List them and create an example of each.
Q is for quiet draw something that’s quiet. R is for resist. Try the crayon resist method. See me if you don’t remember
elementary art. S is for surrealism. Use collage to create a surreal self-portrait.
T is for texture. U is for free.
V is for vanishing point. W is for window. Create one. What do you see through it?
X is for free. And so is
Z
Please have fun with this Art Alphabet- experiment try new things. You always have a chance to do your own drawings.
Goal: One drawing a week, twenty minutes or more of your time.
*This will be checked once a week and graded at the end of the marking periods.

65

66
Name_________________________________ Date___________ Pd.____
Art 8 Final Project
The final project should reflect your training in the visual arts in both 7 & 8 grade. It should
display knowledge of the basic principles of design as well as a mastery of the materials that you
choose. The subject and style of your project is completely up to you. You should choose
something you enjoy doing or something you always wanted to do. The materials or media is
your choice as well. Evaluation of the project is based on the following criteria:
Project Criteria:
A written statement of intent.
The subject you have chosen. The medium you will use to create the project. The reason you chose your choice of subject and materials. At least 15 hours of work time. Working in class and at home. Teacher checks periodically. The style – does it represent what you have learned this year? Is the subject matter appropriate? Medium – pencils, colored pencils, watercolor, oil pastels, crosshatch with black flair, sculpture, etc. Craftsmanship – How well the project is executed. Were the materials used well and is the chosen material appropriate for the project? This is due at the next class. . GOOD LUCK!
67
68
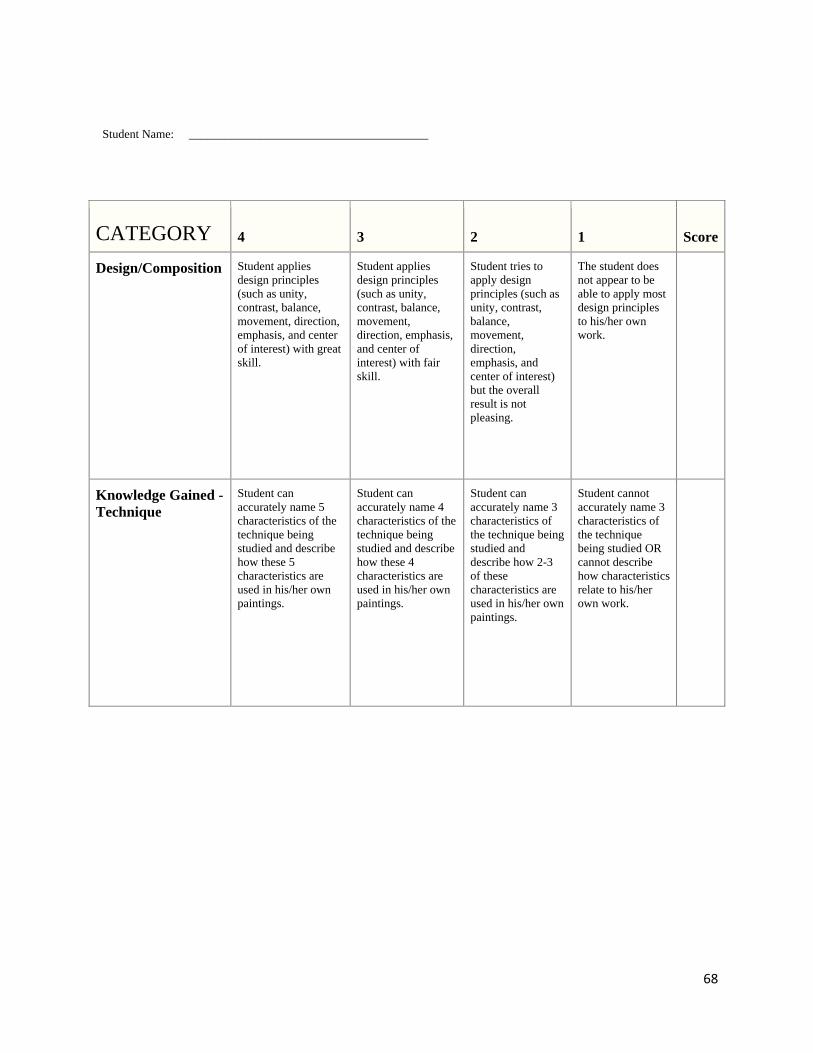
Student Name: ________________________________________
CATEGORY 4 3 2 1 Score
Design/Composition Student applies design principles (such as unity, contrast, balance, movement, direction, emphasis, and center of interest) with great skill.
Student applies design principles (such as unity, contrast, balance, movement, direction, emphasis, and center of interest) with fair skill.
Student tries to apply design principles (such as unity, contrast, balance, movement, direction, emphasis, and center of interest) but the overall result is not pleasing.
The student does not appear to be able to apply most design principles to his/her own work.
Knowledge Gained - Technique
Student can accurately name 5 characteristics of the technique being studied and describe how these 5 characteristics are used in his/her own paintings.
Student can accurately name 4 characteristics of the technique being studied and describe how these 4 characteristics are used in his/her own paintings.
Student can accurately name 3 characteristics of the technique being studied and describe how 2-3 of these characteristics are used in his/her own paintings.
Student cannot accurately name 3 characteristics of the technique being studied OR cannot describe how characteristics relate to his/her own work.
69
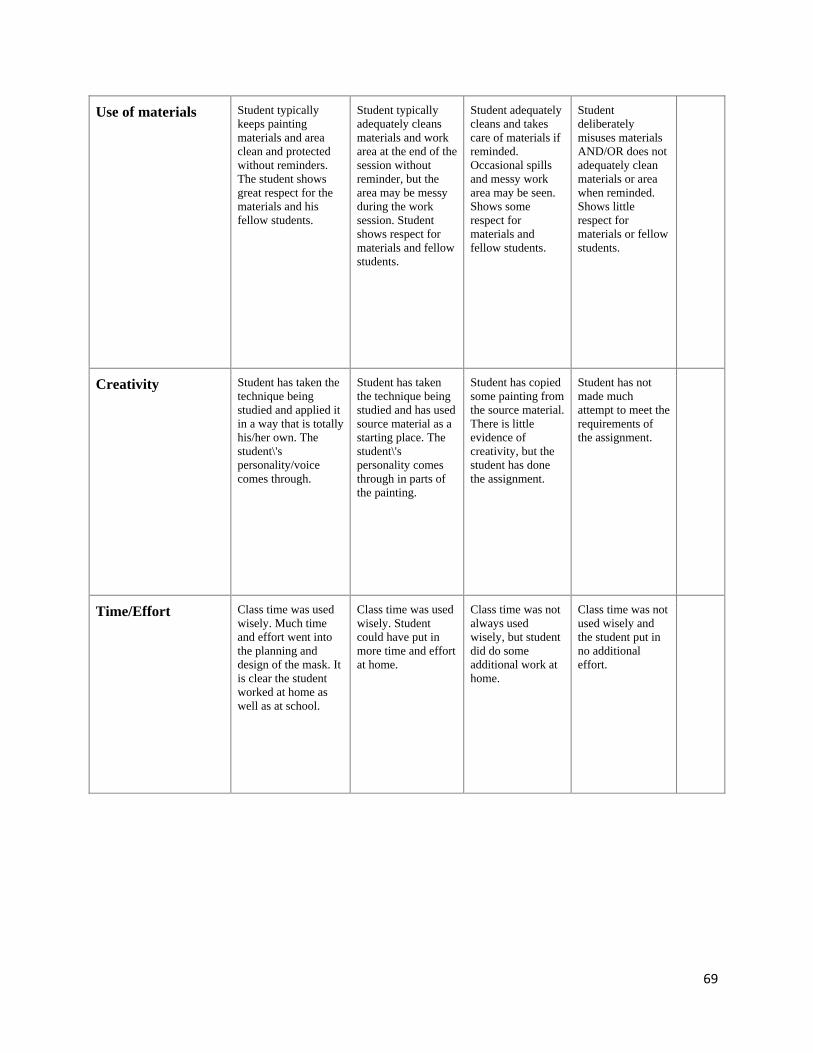
Use of materials Student typically keeps painting materials and area clean and protected without reminders. The student shows great respect for the materials and his fellow students.
Student typically adequately cleans materials and work area at the end of the session without reminder, but the area may be messy during the work session. Student shows respect for materials and fellow students.
Student adequately cleans and takes care of materials if reminded. Occasional spills and messy work area may be seen. Shows some respect for materials and fellow students.
Student deliberately misuses materials AND/OR does not adequately clean materials or area when reminded. Shows little respect for materials or fellow students.
Creativity Student has taken the technique being studied and applied it in a way that is totally his/her own. The student\'s personality/voice comes through.
Student has taken the technique being studied and has used source material as a starting place. The student\'s personality comes through in parts of the painting.
Student has copied some painting from the source material. There is little evidence of creativity, but the student has done the assignment.
Student has not made much attempt to meet the requirements of the assignment.
Time/Effort Class time was used wisely. Much time and effort went into the planning and design of the mask. It is clear the student worked at home as well as at school.
Class time was used wisely. Student could have put in more time and effort at home.
Class time was not always used wisely, but student did do some additional work at home.
Class time was not used wisely and the student put in no additional effort.