Embed Size (px)
Citation preview

Arduino
James D Emery
edited: 11/22/2012
Contents
1 Getting Started Book 3
2 Downloading and Running Software 3
3 Craig Berscheight Arduino Servo Class 3
4 Arduino Cookbook 3
5 H-Bridge 5
6 Arduino Class, April 2012 5
7 PID (Proportional Integral Derivative Controller) 5
8 Programs 68.1 The Arduino ”Hello World” Program, Blink.ino . . . . . . . . 68.2 Cycling LEDs, Finding a Bug, cylon bug.ino . . . . . . . . . . 68.3 Stopping LEDs With a Buttoncylon button.ino, . . . . . . . . 88.4 Control by Reading Serial, cylon serial toggle.ino . . . . . . . 108.5 Debouncing the Button, cylon button toggle.ino . . . . . . . . 128.6 Analog Input, analoginput.ino . . . . . . . . . . . . . . . . . . 148.7 Reading a Potentiometer Voltage on an Analog Pin, analogin-
putmap.ino . . . . . . . . . . . . . . . . . . . . . . . . . . . . 158.8 Servo Motor, Reading Analog, Writing Digital, Using Map
and the Servo Library: knob2.ino . . . . . . . . . . . . . . . . 16
1

9 Stepper Motors 18
10 Types of Stepper Motors 1810.1 Unipolar Motors . . . . . . . . . . . . . . . . . . . . . . . . . 1810.2 Bipolar Motors . . . . . . . . . . . . . . . . . . . . . . . . . . 19
11 Jason Babcock on Reverse Engineering the Stepper WirePinouts 20
12 Stepper Motor Control, LadyAda Motor Schield 20
13 Lady Ada Motor Control Schield Program 20
14 The Microcontroller Used in the Arduino is the Atmel, ATA128 21
15 Servos, (Servomechanisms) 22
16 The Pololu Stepper Motor Driver 22
17 Texas Instruments Chip for Driving Stepper Motors 23
18 Futaba S3003 Servo 23
19 Hitec Servo HS-311 23
20 A Stepper Motor From an HP Scanner Disassembly 24
21 Wire Size for Arduino Pins 24
22 Driving an FET 24
23 Driving a Relay 25
24 The Secrets of the Arduino PWM 25
25 Writing Data From the Arduino Board to a File on YourComputer 25
26 Fritzing Design Application 26
27 Processing Programming Language 26
2

28 List of Examples from Arduino Site 26
29 Bibliography 29
1 Getting Started Book
Getting Started With Arduino, Massimo Banzi, Make Makezine.com,O’Reilly Publications. Banzi is the creator of the Arduino.
2 Downloading and Running Software
Downloading software: arduino-0018.dmg, for mac. The image file is mountedas a disk. You can start the software, but it will vanish after use. So dragfolder the to the application folder. Load a sketch (a program source file),an example in servos, change the sketch program for different angles. Con-tinuous rotation servos, rc servos, can be run with an 555 timer, pulse widthmodulation. Upload a sketch to the Arduino through the USB cable, blinkinglight.
3 Craig Berscheight Arduino Servo Class
The class lasted 4 weeks, 1 session per week. I attended sessions 1, and 4. Iwas in San Francisco for the others, so the class must have been in February2010. The classes were on Friday nights in the cave. I purchased a servomotor from a hobby store on north oak. We must have run the servo sketchexample that came with the software.
4 Arduino Cookbook
http://arduino.cc/Main/Software
http://www.7-zip.org/
3

ARDUINO
RST
AREF
A0
A1
A2
A3
A4
A5
GRD
D0
D1
D2
D3
D4
D5
D6
D7
D8
D9
D10
D11
D12
D13 VIN 5V 3V3
Figure 1: The pins of the Arduino. On the right are the digital pins, on theleft the analog pins. Some of the digital pins can write PWM (Pulse WidthModulation), which is a signal of about 960 Hz, with a variable duty cycle.So the average voltage can vary between 0 and 5 volts.
4

5 H-Bridge
An H-Bridge is a switch used to reverse the direction of a DC motor bychanging the current direction, or to change the current direction in a coil.It is called an H-bridge because the switch circuit diagram looks like the letter”H” with the horizontal center edge being the location of the motor, and eachof the legs and arms of the ”H”, being switches. These could be mechanicalswitches, or say FETs, for electronic controlled switching. In driving somestepper motors, the phases are changed by sending current to different statorwindings, and also by changing current direction in such windings, to changesay a North pole to a south pole. This direction changing is often doneby electronic drivers circuits, which is often an IC which incorporates anH-bridge.
6 Arduino Class, April 2012
There will be introductory classes on Arduino at the Hammer Space, 440 E63rd street, in April. There is no charge, except for possible materials, andnonmembers are welcome I think:
Jestin Stoffel and Josh Bookout:Arduino: Class labStarting Saturday April 7, 14, 21 and 28 10am to 2pm.
Arduino books I have:Getting Started With Arduino O’Reilly publications, first edition
2008.There is a 2nd edition published September 2011.Joshua Noble, Programming Interactivity: A Designer’s Guide to
Processing Arduino, and Open Frameworks O’Reilly, 2009.The following book is good:Arduino Cookbook by Michael Margolis (Dec 30, 2011)There are probably tutorials on the internet.
7 PID (Proportional Integral Derivative Con-
troller)
See Jim Emery Robotics.
5

8 Programs
8.1 The Arduino ”Hello World” Program, Blink.ino
/*
Blink
Turns on an LED on for one second, then off for one second, repeatedly.
This example code is in the public domain.
*/
void setup()
// initialize the digital pin as an output.
// Pin 13 has an LED connected on most Arduino boards:
pinMode(13, OUTPUT);
void loop()
digitalWrite(13, HIGH); // set the LED on
delay(100); // wait for a second
digitalWrite(13, LOW); // set the LED off
delay(1000); // wait for a second
8.2 Cycling LEDs, Finding a Bug, cylon bug.ino
This program lights a set of five LEDs with the positive legs of the LEDsconnected to arduino pins 2 through 6. There is a single resistor connectedto the negative legs of all the LEDs. The program lights the first LED, waitsfor 50 milliseconds, then lights LED 2, and so on. When the last LED atpin 6 is lit, the variable dir changes sign so that pin 5 is the next led, andso on. There is a bug in the program which is illustrated by using the serialwrite which is viewable by clicking the button on the far right of the toolbar.The bug is in the initial value for dir which is 1. When the loop starts thecurPin is 2, so pin 2 is set high and all other pins low. But in checkingthe direction the first time the direction is switched because the current pin
6

equals the start pin. So the direction becomes -1. But then the next value ofthe current pin will be 1, and after that 0,-1,-2,-3 ... , so the current pin willnever be in the range 2 to 6, and the LEDs will not light. To correct the bugset the initial value of dir not to 1, but to -1. I am told that cylons are somescience fiction characters with a scanning laser beam in their forheads. Thisexample sequentially lights a set of LEDs, which apparently is supposed torecall the Cylon scanning.
// cylon_bug.ino
const int startPin = 2;
const int endPin = 6;
int curPin;
int dir;
void setup()
// set up serial
Serial.begin(9600);
// initialize the pin modes
for(int i = startPin; i <= endPin; i++)
pinMode(i, OUTPUT);
// initialize the current pin and the direction
curPin = 2;
dir = 1;
void loop()
Serial.println(curPin);
// write to all the pins, the current will be set HIGH
for(int i = startPin; i <= endPin; i++)
digitalWrite(i, (curPin == i) ? HIGH : LOW);
// check if the direction needs to be switched
if(curPin == endPin || curPin == startPin)
dir = dir * -1;
7

// advance to the next pin
curPin += dir;
// wait
delay(50);
8.3 Stopping LEDs With a Buttoncylon button.ino,
This program stops or starts the LED switching with a button. When thebuttonpin, which is pin 12, is high, the LED cycling is on. When low thecycling is off. The button is a switch connecting the 5 volt supply voltage onthe arduino to pin 12. When depressed there is 5 volts at pin 12. when notdepressed, pin 12 is connected to ground through a resistor R. The resistorpulls down the voltage to pin 12 to ground, when the button is up.
const int startPin = 2;
const int endPin = 6;
const int buttonPin = 12;
int curPin;
int dir;
int buttonState;
void setup()
// set up serial
Serial.begin(9600);
// initialize the pin modes
for(int i = startPin; i <= endPin; i++)
pinMode(i, OUTPUT);
pinMode(buttonPin, INPUT);
// initialize variables
8

RST
AREF
A0
A1
A2
A3
A4
A5
GRD
D0
D1
D2
D3
D4
D5
D6
D7
D8
D9
D10
D11
D12
D13 VIN 5V 3V3
300
ARDUINO
3.3k
Figure 2: This program stops or starts the LED switching with a button.When the buttonpin, which is pin 12, is high, the LED cycling is on. Whenlow the cycling is off. The button is a switch connecting the 5 volt supplyvoltage on the arduino to pin 12. When depressed there is 5 volts at pin 12.when not depressed, pin 12 is connected to ground through a resistor R.
9

curPin = 2;
dir = -1;
buttonState = LOW;
void loop()
buttonState = digitalRead(buttonPin);
if(buttonState == HIGH)
cylon();
void cylon()
Serial.println(curPin);
// write to all the pins, the current will be set HIGH
for(int i = startPin; i <= endPin; i++)
digitalWrite(i, (curPin == i) ? HIGH : LOW);
// check if the direction needs to be switched
if(curPin == endPin || curPin == startPin)
dir = dir * -1;
// advance to the next pin
curPin += dir;
// wait
delay(50);
8.4 Control by Reading Serial, cylon serial toggle.ino
Opening the serial monitor, the LED cycling is controlled by typing a ’t’ inthe monitor window.
10

const int startPin = 2;
const int endPin = 6;
int curPin;
int dir;
boolean active;
void setup()
// set up serial
Serial.begin(9600);
// initialize the pin modes
for(int i = startPin; i <= endPin; i++)
pinMode(i, OUTPUT);
// initialize the current pin and the direction
curPin = 2;
dir = -1;
active = false;
void loop()
if(Serial.available())
if(Serial.read()== ’t’)
active = !active;
if(active)
cylon();
void cylon()
Serial.println(curPin);
// write to all the pins, the current will be set HIGH
for(int i = startPin; i <= endPin; i++)
11

digitalWrite(i, (curPin == i) ? HIGH : LOW);
// check if the direction needs to be switched
if(curPin == endPin || curPin == startPin)
dir = dir * -1;
// advance to the next pin
curPin += dir;
// wait
delay(50);
8.5 Debouncing the Button, cylon button toggle.ino
const int startPin = 2;
const int endPin = 6;
const int buttonPin = 12;
int curPin;
int dir;
boolean active;
int buttonState;
int debounceButtonState;
int prevButtonState;
long lastDebounceTime = 0;
long debounceDelay = 50;
void setup()
// set up serial
Serial.begin(9600);
// initialize the pin modes
for(int i = startPin; i <= endPin; i++)
pinMode(i, OUTPUT);
12

pinMode(buttonPin, INPUT);
// initialize the current pin and the direction
curPin = 2;
dir = -1;
active = false;
buttonState = LOW;
debounceButtonState = LOW;
prevButtonState = LOW;
void loop()
// read the state of the switch into a local variable:
int reading = digitalRead(buttonPin);
// check to see if you just pressed the button
// (i.e. the input went from LOW to HIGH), and you’ve waited
// long enough since the last press to ignore any noise:
// If the switch changed, due to noise or pressing:
if (reading != debounceButtonState)
// reset the debouncing timer
lastDebounceTime = millis();
if ((millis() - lastDebounceTime) > debounceDelay)
// whatever the reading is at, it’s been there for longer
// than the debounce delay, so take it as the actual current state:
buttonState = reading;
debounceButtonState = reading;
if(buttonState == HIGH && prevButtonState == LOW)
active = !active;
prevButtonState = buttonState;
13

if(active)
cylon();
void cylon()
Serial.println(curPin);
// write to all the pins, the current will be set HIGH
for(int i = startPin; i <= endPin; i++)
digitalWrite(i, (curPin == i) ? HIGH : LOW);
// check if the direction needs to be switched
if(curPin == endPin || curPin == startPin)
dir = dir * -1;
// advance to the next pin
curPin += dir;
// wait
delay(50);
8.6 Analog Input, analoginput.ino
/*
Analog Input
Demonstrates analog input by reading an analog sensor on analog pin 0 and
turning on and off a light emitting diode(LED) connected to digital pin 13.
The amount of time the LED will be on and off depends on
the value obtained by analogRead().
The circuit:
* Potentiometer attached to analog input 0
* center pin of the potentiometer to the analog pin
* one side pin (either one) to ground
* the other side pin to +5V
* LED anode (long leg) attached to digital output 13
* LED cathode (short leg) attached to ground
14

* Note: because most Arduinos have a built-in LED attached
to pin 13 on the board, the LED is optional.
Created by David Cuartielles
modified 30 Aug 2011
By Tom Igoe
This example code is in the public domain.
http://arduino.cc/en/Tutorial/AnalogInput
*/
int sensorPin = A0; // select the input pin for the potentiometer
int ledPin = 13; // select the pin for the LED
int sensorValue = 0; // variable to store the value coming from the sensor
void setup()
// declare the ledPin as an OUTPUT:
pinMode(ledPin, OUTPUT);
void loop()
// read the value from the sensor:
sensorValue = analogRead(sensorPin);
// turn the ledPin on
digitalWrite(ledPin, HIGH);
// stop the program for <sensorValue> milliseconds:
delay(sensorValue);
// turn the ledPin off:
digitalWrite(ledPin, LOW);
// stop the program for for <sensorValue> milliseconds:
delay(sensorValue);
8.7 Reading a Potentiometer Voltage on an Analog
Pin, analoginputmap.ino
This is a variation of the previous program using map rather than delay.
/*
file: analoginputmap.ino
Analog Input
Demonstrates analog input by reading an analog sensor on analog pin 0 and
turning on and off a light emitting diode(LED) connected to digital pin 13.
The amount of time the LED will be on and off depends on
the value obtained by analogRead().
The circuit:
* Potentiometer attached to analog input 0
* center pin of the potentiometer to the analog pin
* one side pin (either one) to ground
15

* the other side pin to +5V
* LED anode (long leg) attached to digital output 13
* LED cathode (short leg) attached to ground
* Note: because most Arduinos have a built-in LED attached
to pin 13 on the board, the LED is optional.
Created by David Cuartielles
modified 30 Aug 2011
By Tom Igoe
This example code is in the public domain.
http://arduino.cc/en/Tutorial/AnalogInput
*/
int sensorPin = A0; // select the input pin for the potentiometer
int ledPin = 9; // select the pin for the LED
int sensorValue = 0; // variable to store the value coming from the sensor
void setup()
Serial.begin(9600);
void loop()
// read the value from the sensor:
sensorValue = analogRead(sensorPin);
// turn the ledPin on
//digitalWrite(ledPin, HIGH);
// stop the program for <sensorValue> milliseconds:
//delay(sensorValue);
// turn the ledPin off:
int outvalue = map(sensorValue, 0,1023,0,255);
Serial.println(outvalue);
analogWrite(ledPin, outvalue);
// stop the program for for <sensorValue> milliseconds:
//delay(sensorValue);
8.8 Servo Motor, Reading Analog, Writing Digital,Using Map and the Servo Library: knob2.ino
// Controlling a servo position using a potentiometer (variable resistor)
// by Michal Rinott <http://people.interaction-ivrea.it/m.rinott>
#include <Servo.h>
Servo myservo; // create servo object to control a servo
int potpin = 0; // analog pin used to connect the potentiometer
int val; // variable to read the value from the analog pin
void setup()
16

Servo
RST
AREF
A0
A1
A2
A3
A4
A5
GRD
D0
D1
D2
D3
D4
D5
D6
D7
D8
D9
D10
D11
D12
D13 VIN 5V 3V3
ARDUINO
Black
Red
White10K
Figure 3: Arduino servo motor example. By adjusting the potentiometer,analog pin 0 is set to a voltage between 0 and 5 volts. This set an angle onthe servo motor. The motor used is a Futaba.
17

myservo.attach(9); // attaches the servo on pin 9 to the servo object
void loop()
val = analogRead(potpin); // reads the value of the potentiometer (value between 0 and 1023)
val = map(val, 0, 1023, 0, 179); // scale it to use it with the servo (value between 0 and 180)
myservo.write(val); // sets the servo position according to the scaled value
delay(15); // waits for the servo to get there
9 Stepper Motors
Stepper motors have a set of toothed stator poles around the circumference.The rotor also has similar teeth, but with a slightly smaller pitch. The teethof each stator pole is offset by a small angle. When the stator winding isenergised the teeth of the stator pole and the rotor try to line up to minimizethe magnetic energy, which produces a force and resulting motor torque.When this winding is deenergised and a neighboring winding energized, therotor rotates a small angle to line up the teeth with the newly energized pole.
10 Types of Stepper Motors
Unipolar, Bipolar.
10.1 Unipolar Motors
A unipolar stepper motor has one winding with center tap per phase. Eachsection of windings is switched on for each direction of magnetic field. Sincein this arrangement a magnetic pole can be reversed without switching thedirection of current, the commutation circuit can be made very simple (e.g.a single transistor) for each winding. Typically, given a phase, the centertap of each winding is made common: giving three leads per phase and sixleads for a typical two phase motor. Often, these two phase commons areinternally joined, so the motor has only five leads.
A microcontroller or stepper motor controller can be used to activate thedrive transistors in the right order, and this ease of operation makes unipolar
18

motors popular with hobbyists; they are probably the cheapest way to getprecise angular movements. Unipolar stepper motor coils
(For the experimenter, the windings can be identified by touching theterminal wires together in PM motors. If the terminals of a coil are con-nected, the shaft becomes harder to turn. one way to distinguish the centertap (common wire) from a coil-end wire is by measuring the resistance. Re-sistance between common wire and coil-end wire is always half of what itis between coil-end and coil-end wires. This is because there is twice thelength of coil between the ends and only half from center (common wire) tothe end.) A quick way to determine if the stepper motor is working is toshort circuit every two pairs and try turning the shaft, whenever a higherthan normal resistance is felt, it indicates that the circuit to the particularwinding is closed and that the phase is working.
10.2 Bipolar Motors
Bipolar motors have a single winding per phase. The current in a windingneeds to be reversed in order to reverse a magnetic pole, so the drivingcircuit must be more complicated, typically with an H-bridge arrangement(however there are several off the shelf driver chips available to make this asimple affair). There are two leads per phase, none are common.
Static friction effects using an H-bridge have been observed with certaindrive topologies.[2]
Dithering the stepper signal at a higher frequency than the motor canrespond to will reduce this ”static friction” effect.
Because windings are better utilized, they are more powerful than aunipolar motor of the same weight. This is due to the physical space oc-cupied by the windings. A unipolar motor has twice the amount of wire inthe same space, but only half used at any point in time, hence is 50
An 8-lead stepper is wound like a unipolar stepper, but the leads are notjoined to common internally to the motor. This kind of motor can be wiredin several configurations:Unipolar.Bipolar with series windings. This gives higher inductance but lowercurrent per winding.Bipolar with parallel windings. This requires higher current but canperform better as the winding inductance is reduced.
19

Bipolar with a single winding per phase. This method will run themotor on only half the available windings, which will reduce the availablelow speed torque but require less current.
11 Jason Babcock on Reverse Engineering the
Stepper Wire Pinouts
Make a table with wire colors along the top and left edge. Check resistanceof the wire pairs and put in table.
http://www.jasonbabcock.com/computing/breadboard/unipolar/index.html
12 Stepper Motor Control, LadyAda Motor
Schield
http://www.ladyada.net/make/mshield/use.html
13 Lady Ada Motor Control Schield Program
#include <AFMotor.h>
AF_Stepper motor(48, 2);
void setup()
Serial.begin(9600); // set up Serial library at 9600 bps
Serial.println("Stepper test!");
motor.setSpeed(10); // 10 rpm
motor.step(100, FORWARD, SINGLE);
motor.release();
delay(1000);
void loop()
motor.step(100, FORWARD, SINGLE);
motor.step(100, BACKWARD, SINGLE);
motor.step(100, FORWARD, DOUBLE);
motor.step(100, BACKWARD, DOUBLE);
20

motor.step(100, FORWARD, INTERLEAVE);
motor.step(100, BACKWARD, INTERLEAVE);
motor.step(100, FORWARD, MICROSTEP);
motor.step(100, BACKWARD, MICROSTEP);
If you want two stepper motors to step at once you’ll need to write somethinglike this:
void doublestep (int steps, int direction, int style)
while (steps--)
motor1.step(1, direction, style);
motor2.step(1, direction, style);
Arduino motor/stepper/servo control - How to use
http://www.ladyada.net/make/mshield/use.html
14 The Microcontroller Used in the Arduino
is the Atmel, ATA128
The high-performance, low-power Atmel 8-bit AVR RISC-based microcon-troller combines 128KB of programmable flash memory, 4KB SRAM, a 4KBEEPROM, an 8-channel 10-bit A/D converter, and a JTAG interface for on-chip debugging. The device supports throughput of 16 MIPS at 16 MHz andoperates between 4.5-5.5 volts.
By executing instructions in a single clock cycle, the device achievesthroughputs approaching 1 MIPS per MHz, balancing power consumptionand processing speed.Flash (Kbytes): 128 KbytesPin Count: 64Max. Operating Frequency: 16 MHzCPU: 8-bit AVRnumber of Touch Channels: 16Hardware QTouch Acquisition: NoMax I/O Pins: 53
21

15 Servos, (Servomechanisms)
Hobby servoes rotate to an angle defined by the pulse width of a PWM signal.So they rotate up to 180 degrees. If the the pulse width is say 50 percent,then the rotation angle is 90 degrees. This is done in the servo by comparingthe voltage induced by the pulse width to a voltage of a potentiometer insideof the servo, which is connected to the shaft. So it is a closed loop control,adjusting until this condition is met.
16 The Pololu Stepper Motor Driver
Pololu Robotics and Electronics. A4983 Stepper Motor Driver Carrier.
http://www.pololu.com/catalog/product/1201
OverviewThis product is a carrier board or breakout board for Allegros A4983
DMOS Microstepping Driver with Translator; we therefore recommend care-ful reading of the A4983 datasheet (368k pdf) before using this product. Thisstepper motor driver lets you control one bipolar stepper motor at up to 2A output current per coil (see the Power Dissipation Considerations sectionbelow for more information). Here are some of the drivers key features:(1)Simple step and direction control interface(2)Five different step resolutions: full-step, half-step, quarter-step, eighth-step, and sixteenth-step(3)Adjustable current control lets you set the maximum current output witha potentiometer, which lets you use voltages above your stepper motors ratedvoltage to achieve higher step rates(4)Intelligent chopping control that automatically selects the correct currentdecay mode (fast decay or slow decay)(5)Over-temperature thermal shutdown, under-voltage lockout, and crossover-current protection
Like nearly all our other carrier boards, this product ships with all surface-mount componentsincluding the A4983 driver ICinstalled as shown in theproduct picture.
We also sell a larger version of the A4983 carrier that has reverse powerprotection on the main power input and built-in 5 V and 3.3 V voltage
22

regulators that eliminate the need for separate logic and motor supplies.Included hardware
The A4983 stepper motor driver carrier comes with one 116-pin break-away 0.1” male header. The headers can be soldered in for use with solderlessbreadboards or 0.1” female connectors. You can also solder your motor leadsand other connections directly to the board.
This board has been replaced by the newer A4988 stepper motor drivercarrier, which is a drop-in replacement with additional integrated protection.
17 Texas Instruments Chip for Driving Step-
per Motors
Terry Fredrich
SN754410
http://www.ti.com/lit/ds/symlink/sn754410.pdf
Local file: c:\je\pdf\sn754410.pdf
18 Futaba S3003 Servo
Speed .23 sec/60 deg (at4.8V)Speed .19 sec/60 deg (at6.0V)Torque 44.4 oz-in (at4.8V)Torque 56.9 oz-in (at6.0V)Wires white - control, red +5 Volts, and black -5 Volts.
19 Hitec Servo HS-311
This servo was used in the April 2011 classes given by Josh Bookout andJeston Stoffel and was purchased at Hobby Haven.
23

20 A Stepper Motor From an HP Scanner
Disassembly
The stepper motor has number STH-39DH26-02, and its properties accordingto the label on the motor are:
Bipolar, 1.8 deg /step 4.1Ω, see page 63 notebook April 2012, for table.By making a table of wire colors and measuring the resistance between
pairs we determined that the wires for the two windings are:Pair 1, brown and pink, pair 2 yellow and red.
21 Wire Size for Arduino Pins
The wire size that fits the Erduino pins is 22 gauge = .644 mm diameter.The 24 gauge wire with diameter .511 mm is too small.
22 Driving an FET
See page 71 of Getting Started With Arduino and document
arduinomosfetdriver.pdf
Some FETs:IRF510, IRF520, IRFP250. The IRF510 can not handle much current,
the IRFP250 can handle a large current. The latter is rated as a maximumof 32 Amps.
An n-channel MOSFET is somewhat similar to a vacuum tube triode withthe identification of the gate with the vacuum tube grid, the source with thecathode, and the drain with the plate. So if the gate is made positive, theFET turns on like a switch, and current flows from the positive drain to thenegative source. So the gate has high impedance and may be driven from adigital pin of the arduino, where one might select a pair of resistors to actas a potentiometer to set the positive voltage on the gate between 0 and 5volts.
The plot of current vs voltage for a given gate voltage is more or lesslinear. The higher the gate voltage the steeper the slope. The slope isI/V = 1/R or the reciprocal of an effective gate to source resistance R in theMOSFET. So As the drain to source voltage increases saturation is reached
24

where the current becomes constant, so the slope decreases to zero as thedrain to source voltage goes to infinity. So the resistance R goes to infinity.Since the power lost as heat is I2R heating of the FET goes to infinity andthe FET will be destroyed. Operating even at moderate voltages requires aheat sink.
For a breadbord test circuit using the IRF510, see pages 64-65 of theapril-may notes of 2012. Powers a 12 volt lightbulb using a 9 vold dc supplybrick and also the arduino notebook for the class.
23 Driving a Relay
If a relay is driven directly, from a digital pin, the relay coil should draw lessthan 40 mA at 5 volts, because this is the maximum current that an Arduinocan supply.
24 The Secrets of the Arduino PWM
The ATmega168P/328P chip runs at 16MHz. The chip supplies everal PWMsignals. The standard frequency is
ν =16 × 106
(16)(256)= 976.5625Hz.
This can be changed in several ways. Reference:
C:\je\pdf\SecretsOfArduinoPWM.pdf
http://arduino.cc/en/Tutorial/SecretsOfArduinoPWM
25 Writing Data From the Arduino Board to
a File on Your Computer
This can be done by establishing serial communication to the Arduino witha terminal program, or reading serial data with a program you write. Seethe Arduino Forum, or my local file
25

ArduArduinowritetextfile.pdf
26 Fritzing Design Application
Fritzing is an open source software initiative to support designers and artistsready to move from physical prototyping to actual product. It was developedat the University of Applied Sciences of Potsdam.
The software is created in the spirit of Processing and Arduino and allowsa designer, artist, researcher, or hobbyist to document their Arduino-basedprototype and create a PCB layout for manufacturing. The complementarywebsite helps to share and discuss drafts and experiences as well as to reducemanufacturing costs. In other words, they make electronic items from yourdesign.
Fritzing can be seen as an Electronic design automation (EDA) tool fornon-engineers: the input metaphor is inspired by the environment of de-signers (the breadboard-based prototype), the output is offering nearly nooptions and is focused on accessible means of production.
27 Processing Programming Language
”Processing is an open source programming language and integrated develop-ment environment (IDE) built for the electronic arts and visual design com-munities with the purpose of teaching the basics of computer programming ina visual context, and to serve as the foundation for electronic sketchbooks.The project was initiated in 2001 by Casey Reas and Benjamin Fry, both for-merly of the Aesthetics and Computation Group at the MIT Media Lab. Oneof the stated aims of Processing is to act as a tool to get non-programmersstarted with programming, through the instant gratification of visual feedback.The language builds on the Java language, but uses a simplified syntax andgraphics programming model.”
For more information, see the complete Wikipedia Article, and the bookby Josua Noble called Programming Interactivity.
28 List of Examples from Arduino Site
Examples
26

http://arduino.cc/en/Tutorial/HomePage
See the foundations page for in-depth description of core concepts of theArduino hardware and software; the hacking page for information on extend-ing and modifying the Arduino hardware and software; and the links pagefor other documentation.
Note: these examples are written for Arduino 1.0 and later. Certainfunctions may not work in earlier versions. For best results, download thelatest version.
Here’s a style guide that helps with writing examples for beginners.Core Functions
Simple programs that demonstrate basic Arduino commands. These areincluded with the Arduino environment; to open them, click the Open buttonon the toolbar and look in the examples folder.1.Basics
BareMinimum: The bare minimum of code needed to start an Arduinosketch.
Blink: Turn an LED on and off.DigitalReadSerial: Read a switch, print the state out to the Arduino
Serial Monitor.AnalogReadSerial: Read a potentiometer, print it’s state out to the Ar-
duino Serial Monitor.Fade: Demonstrates the use of analog output to fade an LED.
2.DigitalBlink Without Delay: blinking an LED without using the delay() func-
tion.Button: use a pushbutton to control an LED.Debounce: read a pushbutton, filtering noise.Button State Change: counting the number of button pushes.Tone: play a melody with a Piezo speaker.Pitch follower: play a pitch on a piezo speaker depending on an analog
input.Simple Keyboard: a three-key musical keyboard using force sensors and
a piezo speaker.Tone4: play tones on multiple speakers sequentially using the tone() com-
mand.3.Analog
27

AnalogInOutSerial: read an analog input pin, map the result, and thenuse that data to dim or brighten an LED.
Analog Input: use a potentiometer to control the blinking of an LED.AnalogWriteMega: fade 12 LEDs on and off, one by one, using an Arduino
Mega board.Calibration: define a maximum and minimum for expected analog sensor
values.Fading: use an analog output (PWM pin) to fade an LED.Smoothing: smooth multiple readings of an analog input.
4.CommunicationThese examples include code that allows the Arduino to talk to Processing
sketches running on the computer. For more information or to downloadProcessing, see processing.org. There are also Max//MSP patches that cancommunicate with each Arduino sketch as well. For more on Max//MSP seeCycling 74. For Pd patches that can communicate with these sketches, seeScott Fitzgerald’s examples.
ASCII Table: demonstrates Arduino’s advanced serial output functions.Dimmer: move the mouse to change the brightness of an LED.Graph: send data to the computer and graph it in Processing.Physical Pixel: turn a LED on and off by sending data to your Arduino
from Processing or Max/MSP.Virtual Color Mixer: send multiple variables from Arduino to your com-
puter and read them in Processing or Max/MSP.Serial Call Response: send multiple vairables using a call-and-response
(handshaking) method.Serial Call Response ASCII: send multiple variables using a call-and-
response (handshaking) method, and ASCII-encode the values before send-ing.
SerialEvent: Demonstrates the use of SerialEvent().Serial input (Switch (case) Statement): how to take different actions
based on characters received by the serial port.MIDI: send MIDI note messages serially.MultiSerialMega: use two of the serial ports available on the Arduino
Mega.5.Control Structures
If Statement (Conditional): how to use an if statement to change outputconditions based on changing input conditions.
For Loop: controlling multiple LEDs with a for loop and.
28

Array: a variation on the For Loop example that demonstrates how touse an array.
While Loop: how to use a while loop to calibrate a sensor while a buttonis being read.
Switch Case: how to choose between a discrete number of values. Equiv-alent to multiple If statements. This example shows how to divide a sensor’srange into a set of four bands and to take four different actions dependingon which band the result is in.
Switch Case 2: a second switch-case example, showing how to take dif-ferent actions based in characters received in the serial port.6.Sensors
ADXL3xx: read an ADXL3xx accelerometer. Knock: detect knocks witha piezo element. Memsic2125 : two-axis acceleromoter. Ping: detectingobjects with an ultrasonic range finder.7.Display
Examples of basic display controlLED Bar Graph: how to make an LED bar graph.Row Column Scanning: how to control an 8x8 matrix of LEDs.
8.StringsStringAdditionOperator: add strings together in a variety of ways.StringAppendOperator: append data to strings.StringCaseChanges: change the case of a string.StringCharacters: get/set the value of a specific character in a string.StringComparisonOperators: compare strings alphabetically.StringConstructors: how to initialize string objects.StringIndexOf: look for the first/last instance of a character in a string.StringLength and StringLengthTrim: get and trim the length of a string.StringReplace: replace individual characters in a string.StringStartsWithEndsWith: check which characters/substrings a given
string starts or ends with.StringSubstring: look for ”phrases” within a given string.
29 Bibliography
[1] Banzi Massimo, Getting Started With Arduino, 2011, 2nd Edition.
29
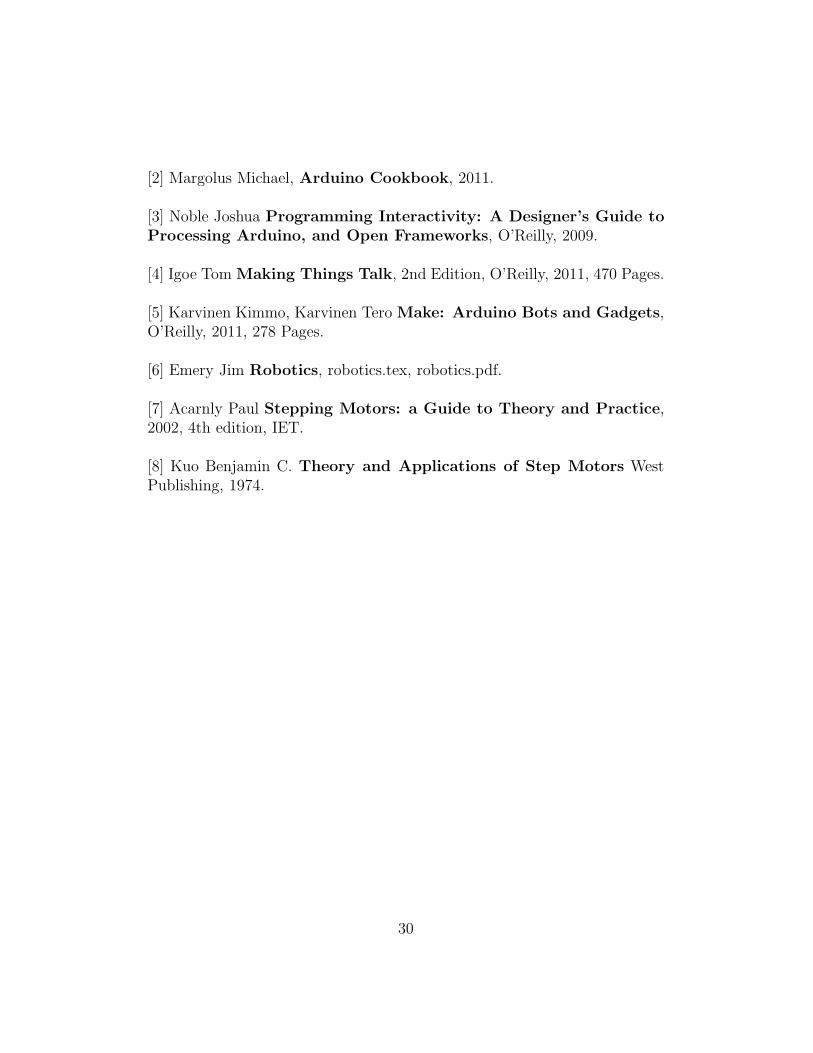
[2] Margolus Michael, Arduino Cookbook, 2011.
[3] Noble Joshua Programming Interactivity: A Designer’s Guide toProcessing Arduino, and Open Frameworks, O’Reilly, 2009.
[4] Igoe Tom Making Things Talk, 2nd Edition, O’Reilly, 2011, 470 Pages.
[5] Karvinen Kimmo, Karvinen Tero Make: Arduino Bots and Gadgets,O’Reilly, 2011, 278 Pages.
[6] Emery Jim Robotics, robotics.tex, robotics.pdf.
[7] Acarnly Paul Stepping Motors: a Guide to Theory and Practice,2002, 4th edition, IET.
[8] Kuo Benjamin C. Theory and Applications of Step Motors WestPublishing, 1974.
30