Embed Size (px)
Citation preview

Animator V2 for DAZ Studio
Reference Manual
1 Overview ................................................................................................................................. 3
2 Installation ............................................................................................................................... 4
3 What’s new in version 2......................................................................................................... 5
4 Getting Started......................................................................................................................... 6
4.1 Features ............................................................................................................................ 6
4.2 Startup .............................................................................................................................. 7
5 The Timeline Control .............................................................................................................. 8
5.1 The Animator Operation Mode ...................................................................................... 10
5.2 Recording Keyframes..................................................................................................... 10
6 The Keyframe Editor............................................................................................................. 12
6.1 The navigation pane ....................................................................................................... 12
6.2 The keyframe display ..................................................................................................... 14
6.3 Creating and modifying keyframes ................................................................................ 15
6.3 Selecting frames ............................................................................................................. 16
6.4 Working with the Clipboard........................................................................................... 17
7 The Layer Editor ................................................................................................................... 18
8 Animator and aniMate........................................................................................................... 20
9 Animator and Lip Sync ......................................................................................................... 21
10 The Graph View .................................................................................................................. 22
11 Generating Movies .............................................................................................................. 23
1 Overview
Animator is a plugin for DAZ Studio that allows creation of layered, keyframe-based
animation sets. Animator has several tools that allow creation, modification and fine-tuning of
keyframe-based parameter dial changes.
It perfectly integrates into DAZ Studio and even existing scenes. Animator includes a
powerful keyframe editor with different kinds of keyframe interpolation methods (constant,
linear and 2 kinds of spline interpolation) and a layer manager that even supports incremental
and stacked layers. Animator supports all valid DAZ Studio parameters of a scene for
animation creation including morph dials. Parameter changes can be displayed as a
graph or within the keyframe editor. Animator includes a powerful timeline control that can
be used to quickly navigate through the frames of the scene. Additionally it even allows
retiming animation frames and the creation of AVI video files from the animation timeline.
Animator seamlessly integrates into DAZ Studio - simply install the plugin and it will be
available in each DAZ studio scene even existing scenes! All extensions are completely
transparent to the user and saved with the scene file. Users without the plugin can still replay
the animation sets produced with Animator since Animator uses the normal DAZ Studio
timeline.

2 Installation
Use the supplied setup program to install this product. Optionally you can copy the
“Animator.dll" file manually to your DAZ Studio PlugIn folder (e.g. C:\Program
Files\DAZ\Studio\PlugIns).
To uninstall this application, use the windows software control panel or remove the file
"Animator.dll" from the DAZ Studio PlugIn folder (e.g. C:\Program
Files\DAZ\Studio\PlugIns).
3 What’s new in version 2
Animator V2 includes a lot of enhancements and bugfixes compared to V1. The most
important changes are:
• Animator Operation Mode: Animator now includes a operation mode (Disabled,
Preview or Record). See chaper 5.1 for details.
• Better cooperation with the ‘aniMate’ plugin: See chapter 8 for details
• Selection if keyframes: Animator now allows selection of multiple keyframes by
dragging a selection rectangle. See chapter 6.3 for details.
• Clipboard operations for keyframes: Animator now supports different clipboard
operations when working with keyframe-sets. See chapter 6.4 for details.
4 Getting Started
4.1 Features
Animator allows you to animate figures and properties. Animator is a keyframe based
animation tool, that means the animation workflow at its simplest is as follows:
1. Decide how many frames your animation should have. One way of calculating the
total frame count is to divide the desired length of your animation (in seconds) by the
frame rate (frames per second).
2. Place the current frame indicator at the first frame of your animation and create a
starting pose.
3. Choose the desired next keyframe and create the desired pose.
4. Repeat step 3 until your animation is complete
Animator uses the poses at the keyframes to interpolate inbetween values until the next
keyframe, thus creating a keyframe based animation. Animator fills the gaps between the
keyframes using different interpolation methods, creating the illusion of motion.
Animator has several animation tools:
• The timeline control: The timeline control allows you to navigate through the
keyframes and to quickly preview your work. Please refer to chapter 4 for more
information about the timeline control.
• The keyframe editor: The keyframe editor allows you to inspect keyframe values as
well as creation of new keyframes and modification of existing frames. Please refer to
chapter 5 for more information about the keyframe editor.
• The layer editor: The layer editor allows you to create layered animation. Each layer
has its own set of keyframes. Layers can be combined, allowing you to create more
complex animations. Please refer to chapter 6 for more information about the layer
editor.
• The graph view: The graph view displays animation values over time. Please refer to
chapter 7 for more information about the graph view.
• Movie Generation: The movie tab allows you to export your animation as movie
(AVI video) files. Please refer to chapter 8 for more information about movie
generation.
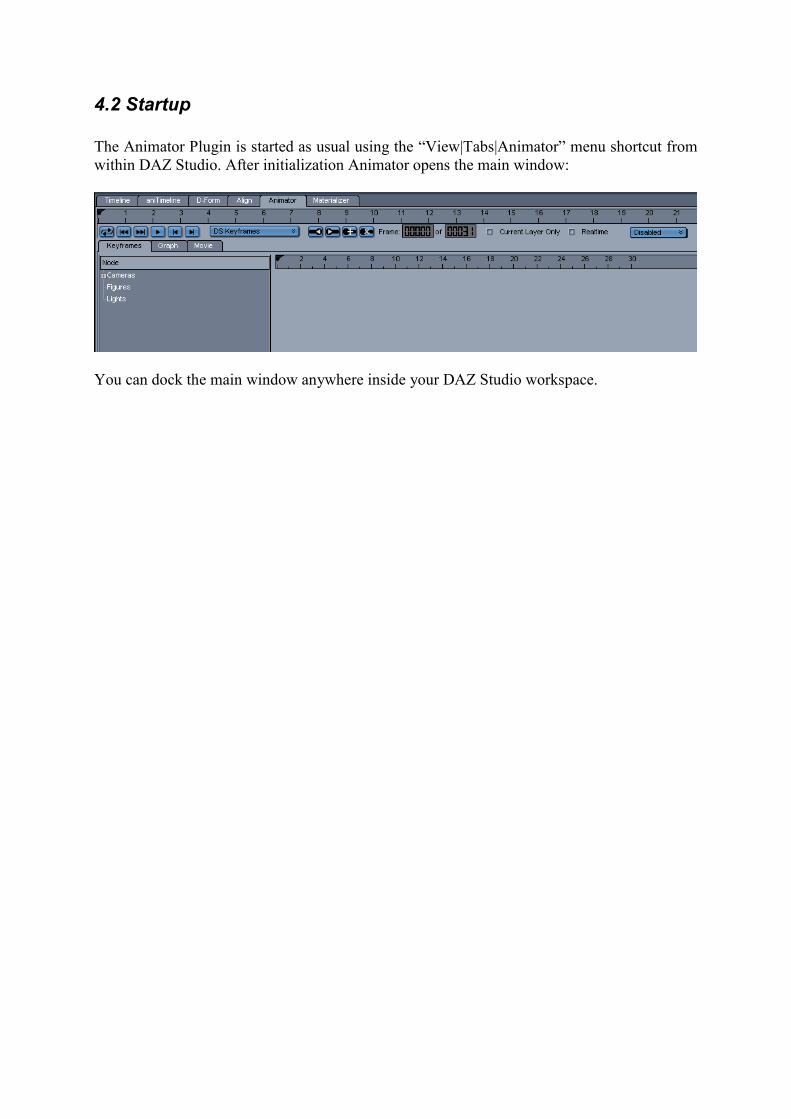
4.2 Startup
The Animator Plugin is started as usual using the “View|Tabs|Animator” menu shortcut from
within DAZ Studio. After initialization Animator opens the main window:
You can dock the main window anywhere inside your DAZ Studio workspace.
5 The Timeline Control
Animator includes an advanced timeline control that allows stepping through
frames/keyframes as well as:
• looped playback
• adding/removing keyframes
• direct access to current frame and total number of frames
• direct access to current animation layer (see chapter 6)
• option to skip animation frames for fast playback
• option to playback only the active animation layer
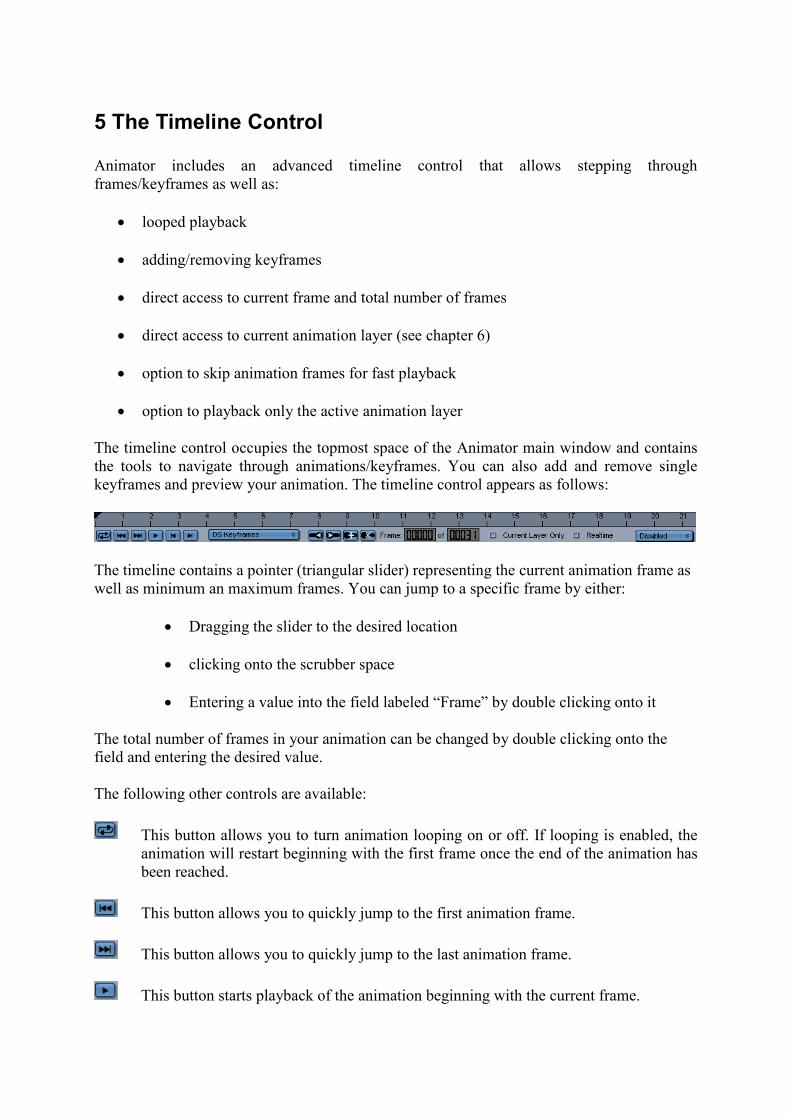
The timeline control occupies the topmost space of the Animator main window and contains
the tools to navigate through animations/keyframes. You can also add and remove single
keyframes and preview your animation. The timeline control appears as follows:
The timeline contains a pointer (triangular slider) representing the current animation frame as
well as minimum an maximum frames. You can jump to a specific frame by either:
• Dragging the slider to the desired location
• clicking onto the scrubber space
• Entering a value into the field labeled “Frame” by double clicking onto it
The total number of frames in your animation can be changed by double clicking onto the
field and entering the desired value.
The following other controls are available:
This button allows you to turn animation looping on or off. If looping is enabled, the
animation will restart beginning with the first frame once the end of the animation has
been reached.
This button allows you to quickly jump to the first animation frame.
This button allows you to quickly jump to the last animation frame.
This button starts playback of the animation beginning with the current frame.
This button steps back the animation by one frame.
This button steps forward the animation by one frame.
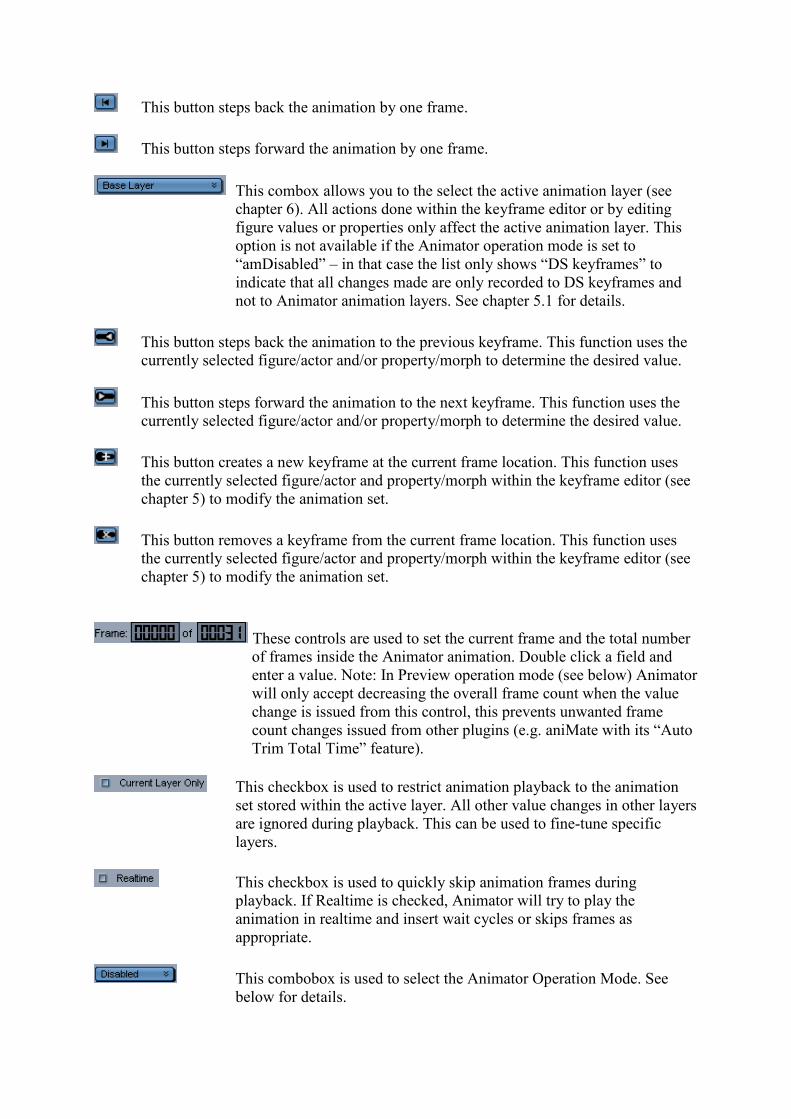
This combox allows you to the select the active animation layer (see
chapter 6). All actions done within the keyframe editor or by editing
figure values or properties only affect the active animation layer. This
option is not available if the Animator operation mode is set to
“amDisabled” – in that case the list only shows “DS keyframes” to
indicate that all changes made are only recorded to DS keyframes and
not to Animator animation layers. See chapter 5.1 for details.
This button steps back the animation to the previous keyframe. This function uses the
currently selected figure/actor and/or property/morph to determine the desired value.
This button steps forward the animation to the next keyframe. This function uses the
currently selected figure/actor and/or property/morph to determine the desired value.
This button creates a new keyframe at the current frame location. This function uses
the currently selected figure/actor and property/morph within the keyframe editor (see
chapter 5) to modify the animation set.
This button removes a keyframe from the current frame location. This function uses
the currently selected figure/actor and property/morph within the keyframe editor (see
chapter 5) to modify the animation set.
These controls are used to set the current frame and the total number
of frames inside the Animator animation. Double click a field and
enter a value. Note: In Preview operation mode (see below) Animator
will only accept decreasing the overall frame count when the value
change is issued from this control, this prevents unwanted frame
count changes issued from other plugins (e.g. aniMate with its “Auto
Trim Total Time” feature).
This checkbox is used to restrict animation playback to the animation
set stored within the active layer. All other value changes in other layers
are ignored during playback. This can be used to fine-tune specific
layers.
This checkbox is used to quickly skip animation frames during
playback. If Realtime is checked, Animator will try to play the
animation in realtime and insert wait cycles or skips frames as
appropriate.
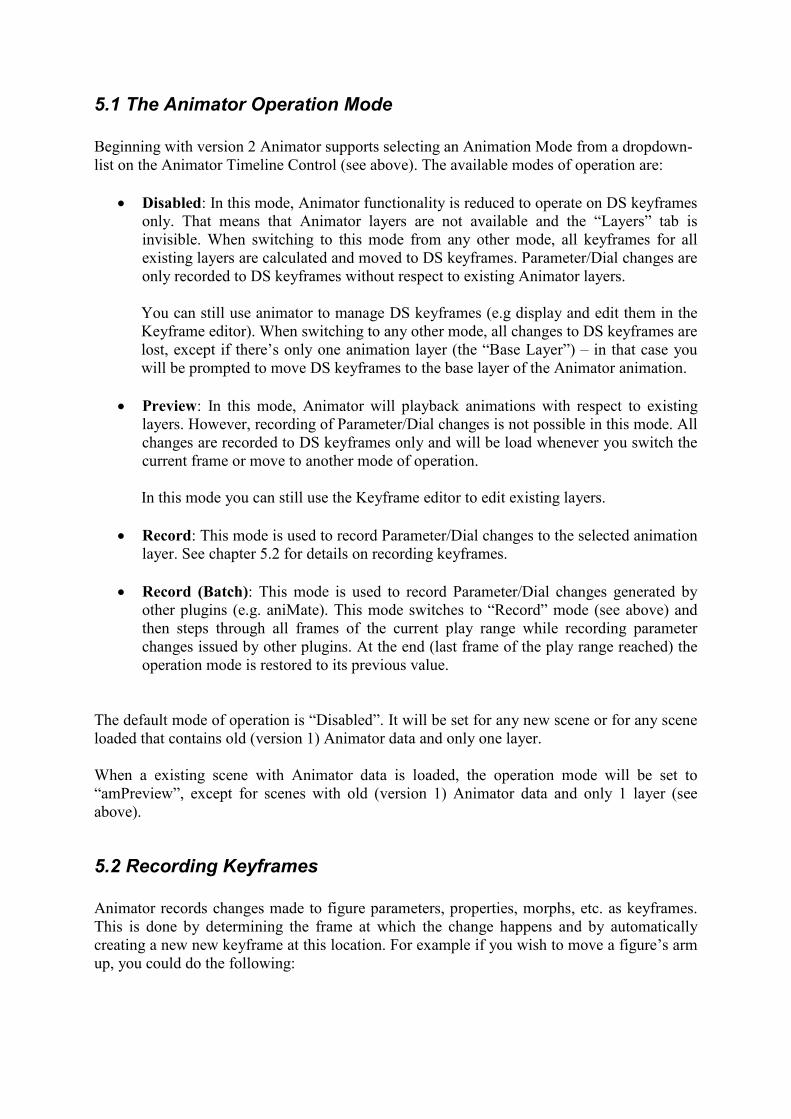
This combobox is used to select the Animator Operation Mode. See
below for details.
5.1 The Animator Operation Mode
Beginning with version 2 Animator supports selecting an Animation Mode from a dropdown-
list on the Animator Timeline Control (see above). The available modes of operation are:
• Disabled: In this mode, Animator functionality is reduced to operate on DS keyframes
only. That means that Animator layers are not available and the “Layers” tab is
invisible. When switching to this mode from any other mode, all keyframes for all
existing layers are calculated and moved to DS keyframes. Parameter/Dial changes are
only recorded to DS keyframes without respect to existing Animator layers.
You can still use animator to manage DS keyframes (e.g display and edit them in the
Keyframe editor). When switching to any other mode, all changes to DS keyframes are
lost, except if there’s only one animation layer (the “Base Layer”) – in that case you
will be prompted to move DS keyframes to the base layer of the Animator animation.
• Preview: In this mode, Animator will playback animations with respect to existing
layers. However, recording of Parameter/Dial changes is not possible in this mode. All
changes are recorded to DS keyframes only and will be load whenever you switch the
current frame or move to another mode of operation.
In this mode you can still use the Keyframe editor to edit existing layers.
• Record: This mode is used to record Parameter/Dial changes to the selected animation
layer. See chapter 5.2 for details on recording keyframes.
• Record (Batch): This mode is used to record Parameter/Dial changes generated by
other plugins (e.g. aniMate). This mode switches to “Record” mode (see above) and
then steps through all frames of the current play range while recording parameter
changes issued by other plugins. At the end (last frame of the play range reached) the
operation mode is restored to its previous value.
The default mode of operation is “Disabled”. It will be set for any new scene or for any scene
loaded that contains old (version 1) Animator data and only one layer.
When a existing scene with Animator data is loaded, the operation mode will be set to
“amPreview”, except for scenes with old (version 1) Animator data and only 1 layer (see
above).
5.2 Recording Keyframes
Animator records changes made to figure parameters, properties, morphs, etc. as keyframes.
This is done by determining the frame at which the change happens and by automatically
creating a new new keyframe at this location. For example if you wish to move a figure’s arm
up, you could do the following:
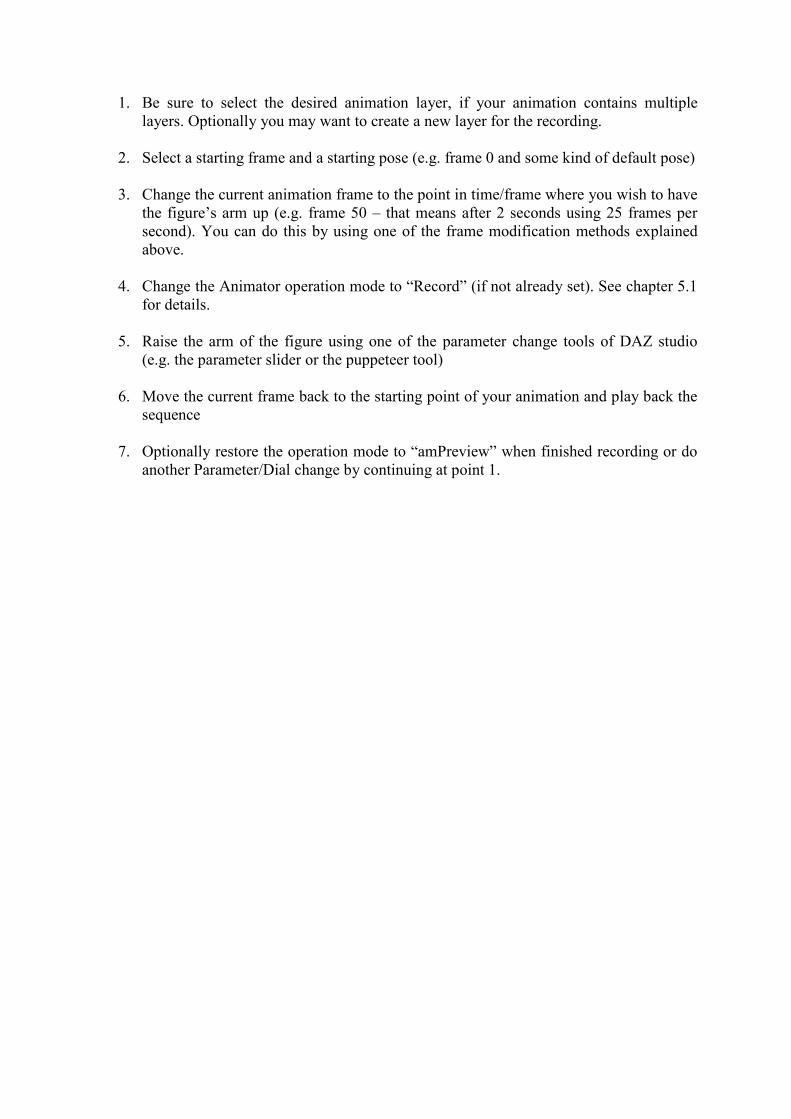
1. Be sure to select the desired animation layer, if your animation contains multiple
layers. Optionally you may want to create a new layer for the recording.
2. Select a starting frame and a starting pose (e.g. frame 0 and some kind of default pose)
3. Change the current animation frame to the point in time/frame where you wish to have
the figure’s arm up (e.g. frame 50 – that means after 2 seconds using 25 frames per
second). You can do this by using one of the frame modification methods explained
above.
4. Change the Animator operation mode to “Record” (if not already set). See chapter 5.1
for details.
5. Raise the arm of the figure using one of the parameter change tools of DAZ studio
(e.g. the parameter slider or the puppeteer tool)
6. Move the current frame back to the starting point of your animation and play back the
sequence
7. Optionally restore the operation mode to “amPreview” when finished recording or do
another Parameter/Dial change by continuing at point 1.
6 The Keyframe Editor
Animator includes a powerful keyframe editor that allows you to set, remove and modify
keyframes with a few mouse clicks. The keyframe editor supports constant, linear and 2
different spline interpolation types. You can animate each DAZ Studio parameter available,
including morph dials. For convenience the editor can display only modified parameter
values.
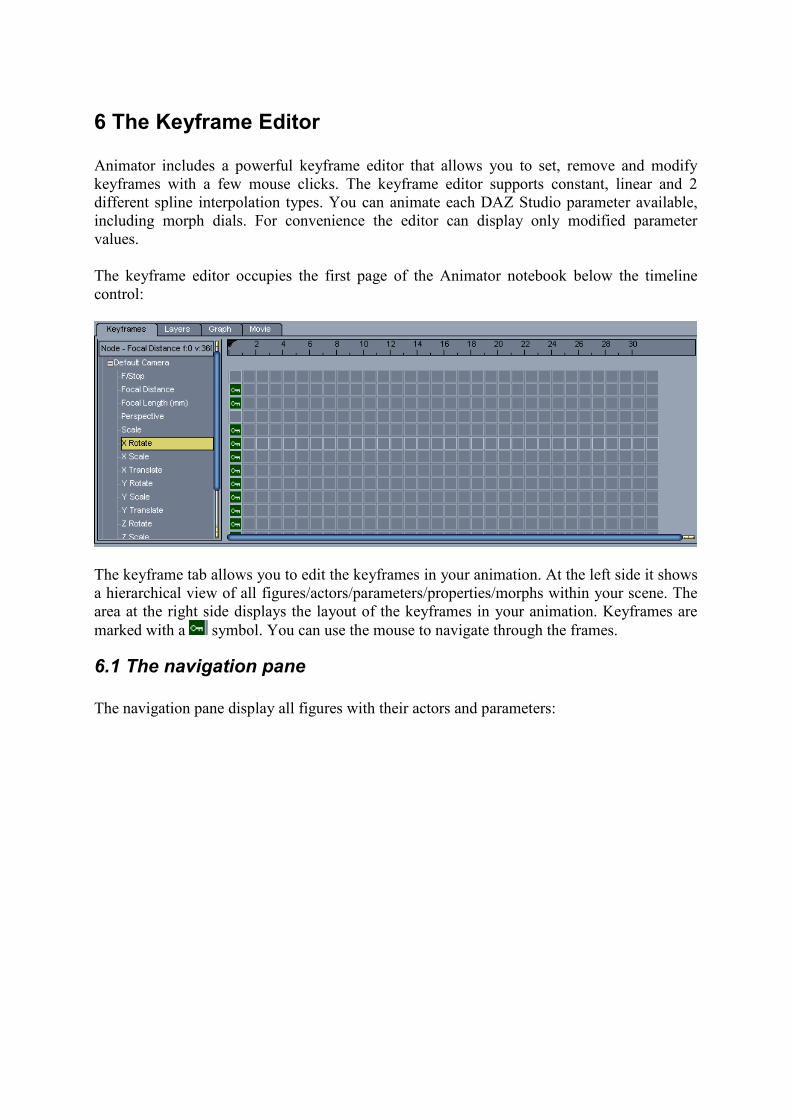
The keyframe editor occupies the first page of the Animator notebook below the timeline
control:
The keyframe tab allows you to edit the keyframes in your animation. At the left side it shows
a hierarchical view of all figures/actors/parameters/properties/morphs within your scene. The
area at the right side displays the layout of the keyframes in your animation. Keyframes are
marked with a symbol. You can use the mouse to navigate through the frames.
6.1 The navigation pane
The navigation pane display all figures with their actors and parameters:
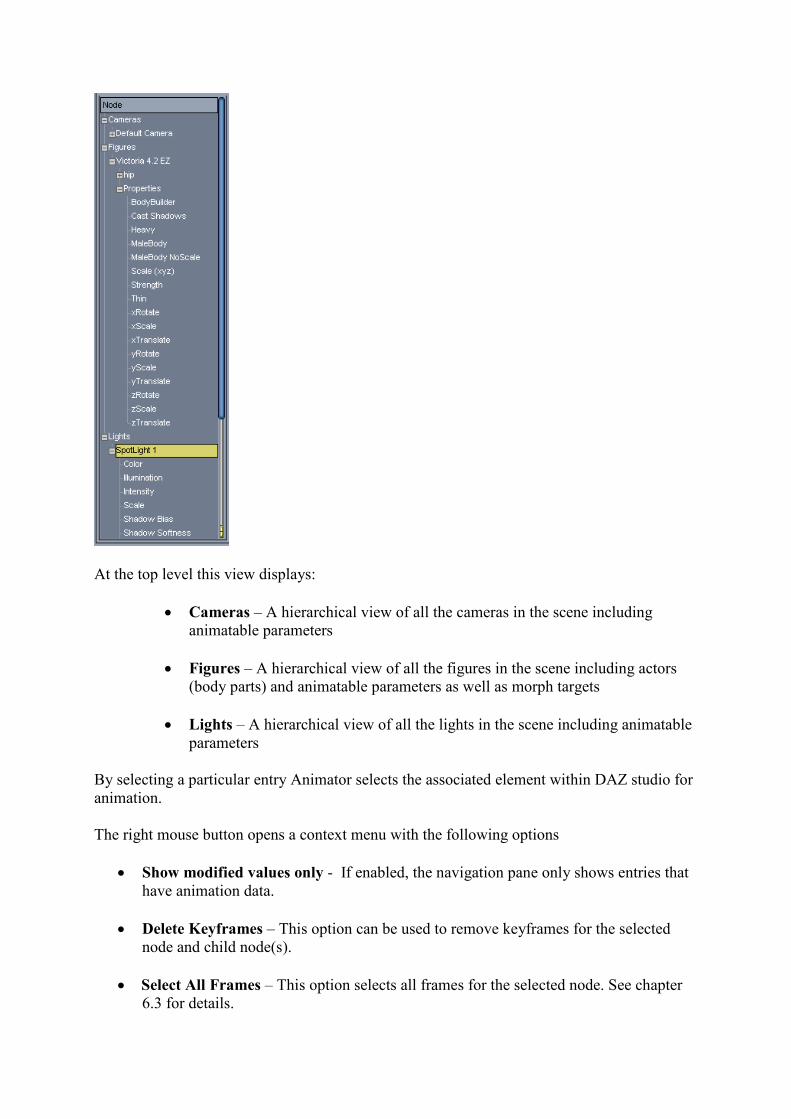
At the top level this view displays:
• Cameras – A hierarchical view of all the cameras in the scene including
animatable parameters
• Figures – A hierarchical view of all the figures in the scene including actors
(body parts) and animatable parameters as well as morph targets
• Lights – A hierarchical view of all the lights in the scene including animatable
parameters
By selecting a particular entry Animator selects the associated element within DAZ studio for
animation.
The right mouse button opens a context menu with the following options
• Show modified values only - If enabled, the navigation pane only shows entries that
have animation data.
• Delete Keyframes – This option can be used to remove keyframes for the selected
node and child node(s).
• Select All Frames – This option selects all frames for the selected node. See chapter
6.3 for details.

• Select Frame Range – This option selects a range of frames. See chapter 6.3 for
details.
6.2 The keyframe display
The lines in the keyframe display correspond to the appropriate entry in the navigation pane,
thus displaying animation/keyframe data for each parameter/morph:
The keyframe display shows all previously created keyframes. It also shows each single frame
of your animation using small boxes. The symbols within the boxes have the following
meaning:
The frame is a key-frame
The frame is interpolated between the previous and next keyframe using spline
interpolation (Hermite Spline or Kochanek-Bartels Spline)
The frame is constant and not affected by interpolation
The frame is interpolated between the previous and next keyframe using linear
interpolation

6.3 Creating and modifying keyframes
To automatically create a keyframe do the following steps:
1. Be sure to select the desired animation layer, if your animation contains multiple
layers. Optionally you may want to create a new layer for the recording.
2. Select the figure and/or body part
3. Move the current frame to the frame where you want to create they keyframe. Note
that additionally to the methods described in chapter 4 you can also move the current
frame by simply using a mouse click inside the keyframe view at the desired location
4. Change the Animator operation mode to “Record” (if not already set). See chapter 5.1
for details.
5. Change the parameter/morph value with a value dial or another DAZ Studio tool (e.g.
puppeteer)
6. Double check the keyframe(s) generated inside the keyframe view. You can set
additional options (e.g. interpolation type) for a keyframe by using the right mouse
button and selecting the appropriate option from the context menu. You can also use
the context menu to remove a particular keyframe
7. Optionally restore the operation mode to “amPreview” when finished recording or do
another Parameter/Dial change by continuing at point 1.
To manually create a keyframe do the following steps:m
1. Select the figure and/or body part
2. Move the current frame to the frame where you want to create they keyframe. Note
that additionally to the methods described in chapter 4 you can also move the current
frame by simply using a mouse click inside the keyframe view at the desired location
3. Right click inside the keyframe view and select “Create keyframe” from the context
menu
4. Double check the keyframe(s) generated inside the keyframe view. You can set
additional options (e.g. interpolation type) for a keyframe by using the right mouse
button and selecting the appropriate option from the context menu. You can also use
the context menu to remove a particular keyframe
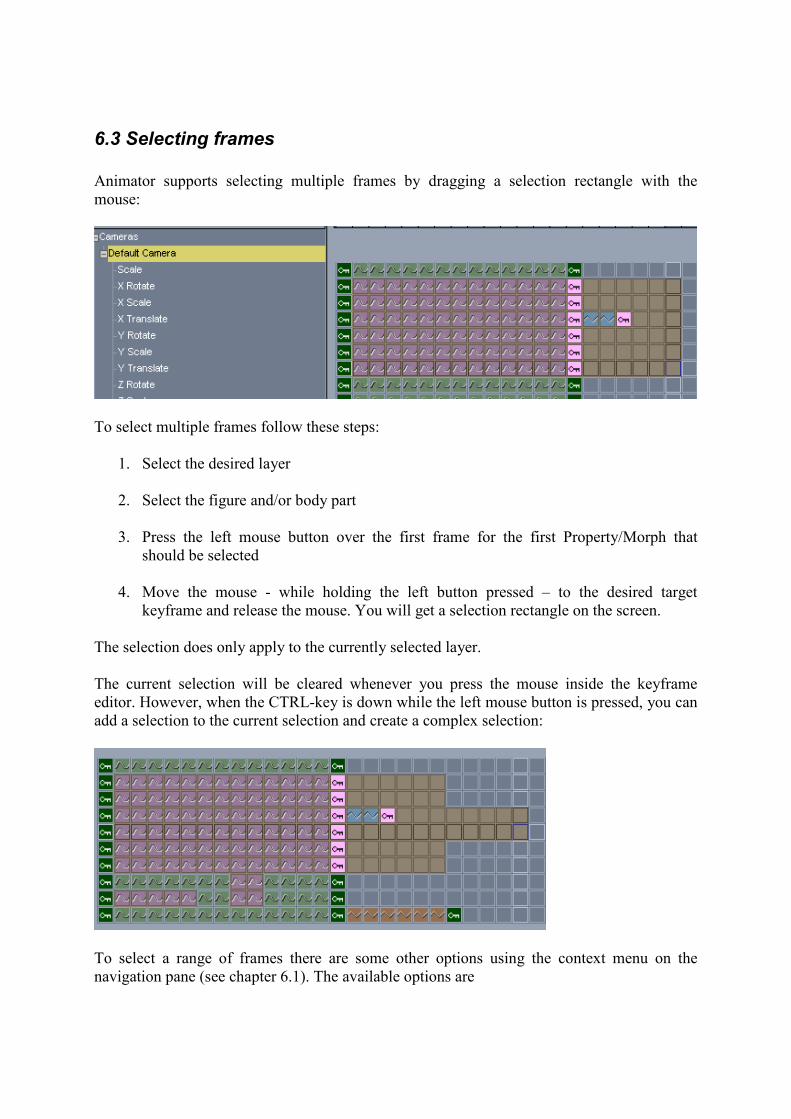
6.3 Selecting frames
Animator supports selecting multiple frames by dragging a selection rectangle with the
mouse:
To select multiple frames follow these steps:
1. Select the desired layer
2. Select the figure and/or body part
3. Press the left mouse button over the first frame for the first Property/Morph that
should be selected
4. Move the mouse - while holding the left button pressed – to the desired target
keyframe and release the mouse. You will get a selection rectangle on the screen.
The selection does only apply to the currently selected layer.
The current selection will be cleared whenever you press the mouse inside the keyframe
editor. However, when the CTRL-key is down while the left mouse button is pressed, you can
add a selection to the current selection and create a complex selection:
To select a range of frames there are some other options using the context menu on the
navigation pane (see chapter 6.1). The available options are

• Select All Frames – This option selects all frames for the selected node
including all sub-nodes. This even works for the topmost nodes (Cameras,
Figures, Lighs), so you can quickly select a complete set of frames
• Select Frame Range – This option selects a frame range. You will be
prompted for the start and end frame. All frames within the given range are
selected including all sub-nodes. This even works for the topmost nodes
(Cameras, Figures, Lighs), so you can quickly select a complete set of frames
Selecting frames is most useful when working with the clipboard (see below). Additionally
you can remove all keyframes from a selection by using the appropriate entry in the context
menu of the keyframe editor – use the right mouse button to open the context menu.
6.4 Working with the Clipboard
Animator supports a bunch of clipboard operations. These operations are available from the
context menu of the keyframe editor – use the right mouse button to open the context menu.
The following operations are available:
• Cut Selected Frames – This option cuts the current selection and moves it to
the clipboard. The selection range is cleared and all subesquent frames are
moved accordingly. This option is only available if there’s a current selection.
See chapter 6.3 on how to select frames.
• Copy Selected Frames – This option copies the selected frames to the
clipboard. This option is only available if there’s a current selection. See
chapter 6.3 on how to select frames.
• Paste Frames (replace) – This pastes the frames in the clipboard at the current
frame. Existing frames are replaced by the data in the clipboard. This option is
only available if there’s data available in the clipboard.
• Paste Frames (add) – This pastes the frames in the clipboard at the current
frame. Each value in the clipboard is added to the current value at the
appropriate frame position. This option is only available if there’s data
available in the clipboard.
• Paste Frames (insert) – This inserts the frames in the clipboard at the current
frame. Subsequent frames are moved accordingly to make room for the frames
pasted. This option is only available if there’s data available in the clipboard.
Additionally the following keyboard commands are available:
• Ctrl-C – Same as “Copy Selected Frames”
• Ctrl-V – Same as “Paste Frames (replace)”
7 The Layer Editor
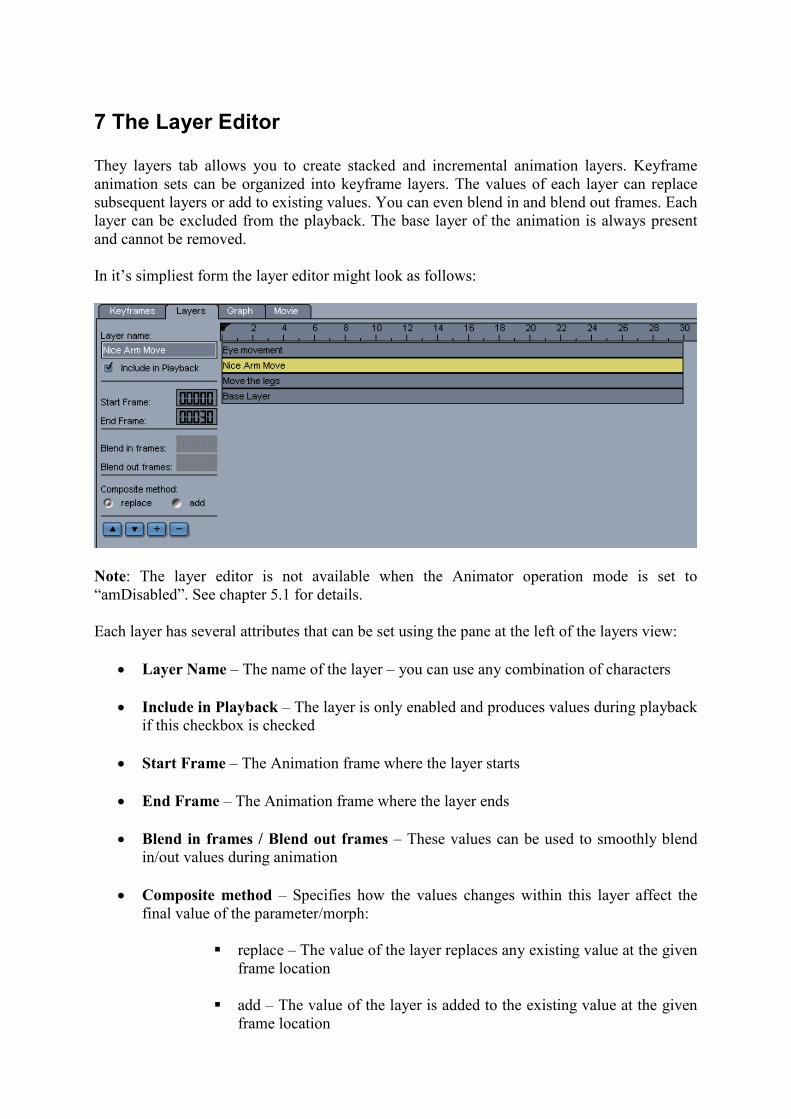
They layers tab allows you to create stacked and incremental animation layers. Keyframe
animation sets can be organized into keyframe layers. The values of each layer can replace
subsequent layers or add to existing values. You can even blend in and blend out frames. Each
layer can be excluded from the playback. The base layer of the animation is always present
and cannot be removed.
In it’s simpliest form the layer editor might look as follows:
Note: The layer editor is not available when the Animator operation mode is set to
“amDisabled”. See chapter 5.1 for details.
Each layer has several attributes that can be set using the pane at the left of the layers view:
• Layer Name – The name of the layer – you can use any combination of characters
• Include in Playback – The layer is only enabled and produces values during playback
if this checkbox is checked
• Start Frame – The Animation frame where the layer starts
• End Frame – The Animation frame where the layer ends
• Blend in frames / Blend out frames – These values can be used to smoothly blend
in/out values during animation
• Composite method – Specifies how the values changes within this layer affect the
final value of the parameter/morph:
� replace – The value of the layer replaces any existing value at the given
frame location
� add – The value of the layer is added to the existing value at the given
frame location
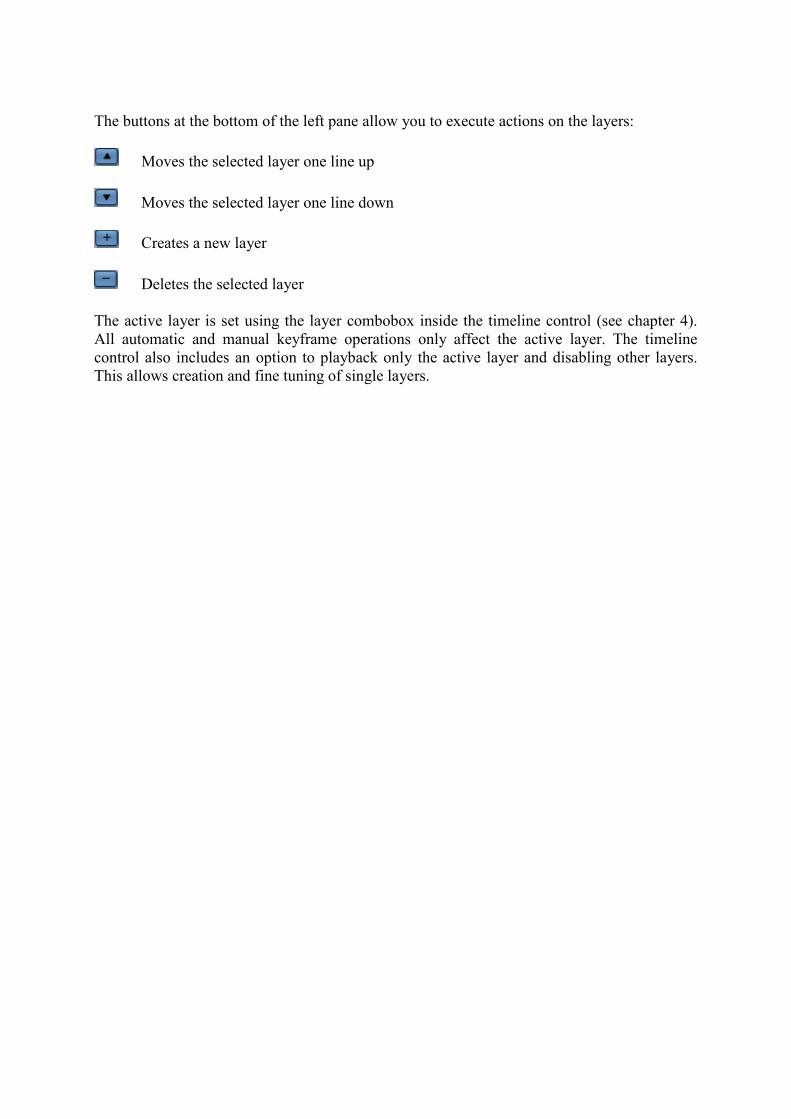
The buttons at the bottom of the left pane allow you to execute actions on the layers:
Moves the selected layer one line up
Moves the selected layer one line down
Creates a new layer
Deletes the selected layer
The active layer is set using the layer combobox inside the timeline control (see chapter 4).
All automatic and manual keyframe operations only affect the active layer. The timeline
control also includes an option to playback only the active layer and disabling other layers.
This allows creation and fine tuning of single layers.
8 Animator and aniMate
Animator version 2 has been enhanced to better cooperate with the “aniMate” plugin available
for DAZ Studio. To work with Animator and aniMate you should be familiar with the
Animator operation modes as explained in chapter 5.1.
Generally you can use aniMate to preview/edit/test animation sequences (called aniBlocks)
and Animator to organize it into layers and optionally fine-tuning. This makes very complex
animations possible.
To create keyframes using aniMate do the following:
1. Be sure to select the desired animation layer, if your animation contains multiple
layers. Optionally you may want to create a new layer for the recording.
2. Change the Animator operation mode to “Preview” (if not already set). See chapter 5.1
for details.
3. Open the aniMate pane and select aniBlocks in the timeline. Arrange and test the
aniblocks as desired. Note: To use the play-button on the aniTimeLine pane, you must
first set the Animator operation mode to “Disabled”, otherwise Animator will override
the aniMate parameter changes.
4. Change the Animator operation mode to “Record (Batch)”. This will bake the aniMate
animation into the selected Animator layer by stepping through each frame of the
current play range and recording aniMate dial changes. When finished the Animator
operation mode is restored to its previous state.
5. Set the Animator operation mode to “Preview” when recording has finished. This is
important because otherwise aniMate will clear the recorded keyframes when
proceeding with the next step
6. Remove the aniBlocks from the aniMate timeline.
7. Optionally:Replay your animation now using only Animator layers and keyframes.
Note: It’s adviceable to disable the “Auto Trim Total Time” entry from the aniMate menu.
This option automatically adjusts overall animation frames and thus may unexpectedly erase
frames in Animator animation layers. Although in Record and Preview mode Animator
protects itself against such changes (you can only reduce overall frames by using the controls
from the Animator pane) it still may have unwanted side effects.
9 Animator and Lip Sync
Animator supports creating keyframes created by the “Lip Sync” plugin included within
standard DAZ Studio installation. In order to create correct keyframes, please follow the steps
below.
To create keyframes using Lip Sync do the following:
8. Be sure to select the desired animation layer, if your animation contains multiple
layers. Optionally you may want to create a new layer for the recording.
9. Move the current frame to frame 0 (first frame). This is important in order for
Animator to record the correct keyframe sequence from Lip Sync
10. Change the Animator operation mode to “Record” (if not already set). See chapter 5.1
for details.
11. Open the Lip Sync pane and load a sound file (if not already done)
12. Press “Analyze” inside Lip Sync
13. The keyframes are now recorded to the selected layer
14. Optionally restore the operation mode to “amPreview” when finished recording
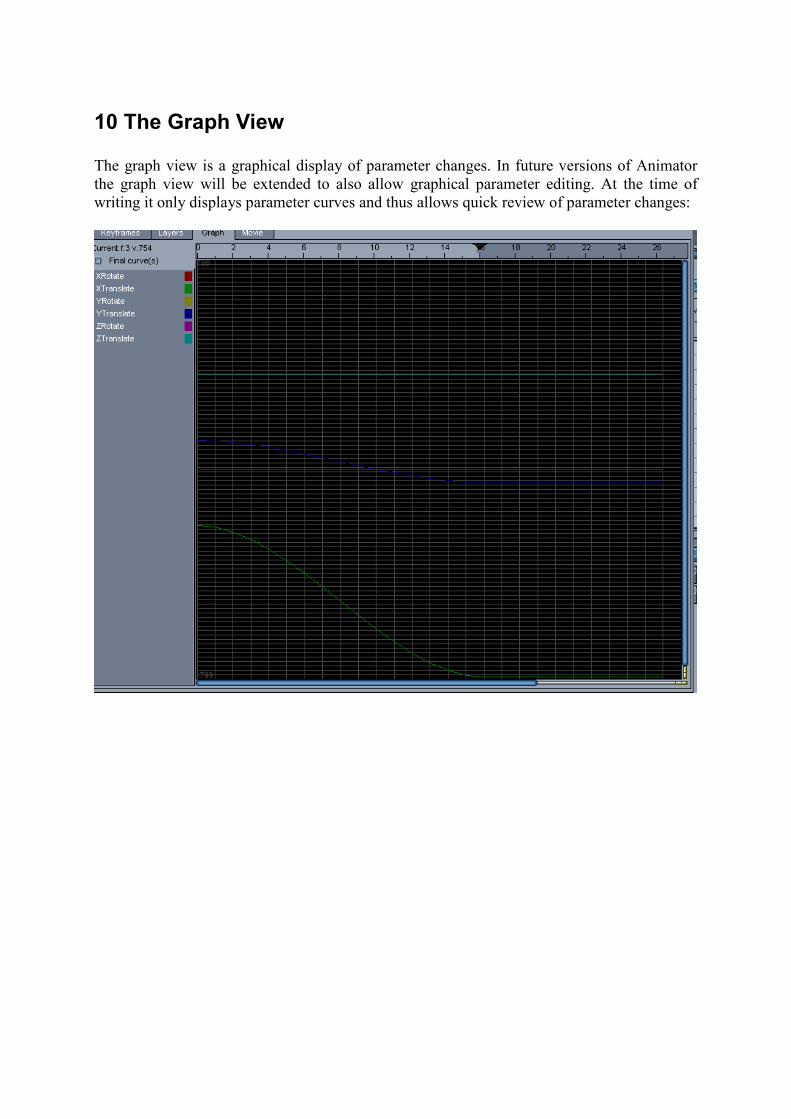
10 The Graph View
The graph view is a graphical display of parameter changes. In future versions of Animator
the graph view will be extended to also allow graphical parameter editing. At the time of
writing it only displays parameter curves and thus allows quick review of parameter changes:
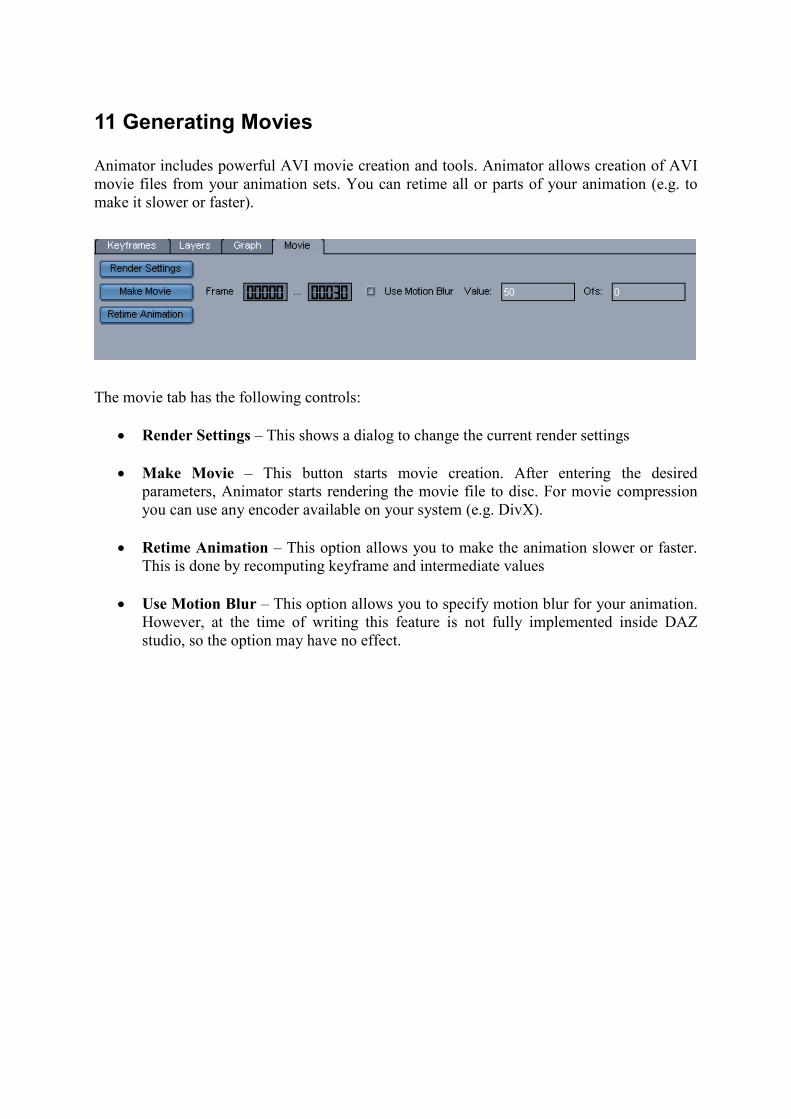
11 Generating Movies
Animator includes powerful AVI movie creation and tools. Animator allows creation of AVI
movie files from your animation sets. You can retime all or parts of your animation (e.g. to
make it slower or faster).
The movie tab has the following controls:
• Render Settings – This shows a dialog to change the current render settings
• Make Movie – This button starts movie creation. After entering the desired
parameters, Animator starts rendering the movie file to disc. For movie compression
you can use any encoder available on your system (e.g. DivX).
• Retime Animation – This option allows you to make the animation slower or faster.
This is done by recomputing keyframe and intermediate values
• Use Motion Blur – This option allows you to specify motion blur for your animation.
However, at the time of writing this feature is not fully implemented inside DAZ
studio, so the option may have no effect.