Embed Size (px)
Citation preview

eircom advantage Analogue Phone User Guide

Specifications subject to change without notice. Facilities described may or may not be supported by your network. eircom advantage is the registered trademark of eircom business systems. This documentation refers to software version 53.708 Revision 1. DM 856
Table of Contents
6. eircom advantage analogue phone user guide ...... 5 6.1 Using analogue phones with the eircom advantage system ............. 5
6.1.1 To Make an External Call on any Available Line ...................................................... 5 6.1.2 To Make an External Call on a Specific Line or Group of Lines ............................... 5 6.1.3 To Make an External Call using Last Number Redial ............................................... 5 6.1.4 To Make an Internal Call to an Extension ................................................................. 5 6.1.5 To Make an Internal Call to a Group of Extensions .................................................. 6 6.1.6 To Make a Call using the Phone Book ..................................................................... 6 6.1.7 To Dial a number from the System wide Common Address Book ........................... 6 6.1.8 To Dial a number from Your Personal Address Book ............................................... 6 6.1.9 To Program an entry in your Personal Address Book .............................................. 7 6.1.10 Call Hold Operation................................................................................................... 7 6.1.11 To place a call on hold .............................................................................................. 7 6.1.12 To retrieve a held call ............................................................................................... 7 6.1.13 To Make an Enquiry call ........................................................................................... 8 6.1.14 To Transfer a Call ..................................................................................................... 8 6.1.15 To Make a Paging Call ............................................................................................. 9 6.1.16 To answer a Paging Call ........................................................................................... 9 6.1.17 To Pick-Up a Call ringing at another Extension ...................................................... 10 6.1.18 To Pick-Off a Call which has been answered by another Extension ...................... 10 6.1.19 To Park a Call ......................................................................................................... 10 6.1.20 To Unpark a Call ..................................................................................................... 11 6.1.21 To Set-up a Conference Call .................................................................................. 11 6.1.22 To intrude on an estabished call ............................................................................. 11 6.1.23 To Enter the Voice Mail Menu ................................................................................ 12 6.1.24 To Divert All Calls ................................................................................................... 13 6.1.25 To Divert On No Answer ......................................................................................... 14 6.1.26 To Divert On Busy................................................................................................... 15 6.1.27 To Open the Door when the Door Phone Rings ..................................................... 15 6.1.28 To Set Do Not Disturb ............................................................................................. 16 6.1.29 To Manually Switch between Day / Night Modes ................................................... 16 6.1.30 To Control your CLI when making External Calls ................................................... 17 6.1.31 To Control your PIN Code ...................................................................................... 18 6.1.32 To Use Roaming Pins ............................................................................................. 19 6.1.33 Dialling Code Table................................................................................................. 20

6. eircom advantage analogue phone user guide In addition to the eircom advantage standard and executive system phones, the user can also connect a normal analogue telephone to the system. This phone can be used to make and receive calls on the system and also access features that are offered by the eircom advantage systems by simply dialling the pre-programmed feature codes.
6.1 Using analogue phones with the eircom advantage system The wide range of features and options offered by the eircom advantage can be accessed from a standard analogue telephone, by dialling the appropriate codes as listed in this guide, and summarised in section 6.1.33 ( the dialling code table) . Some of the features listed require the user to press a Recall (R) key that is included on most analogue phones. The eircom advantage systems are programmed to recognise the Recall functions of most commercially available telephones. For further details contact your eircom business systems technican.
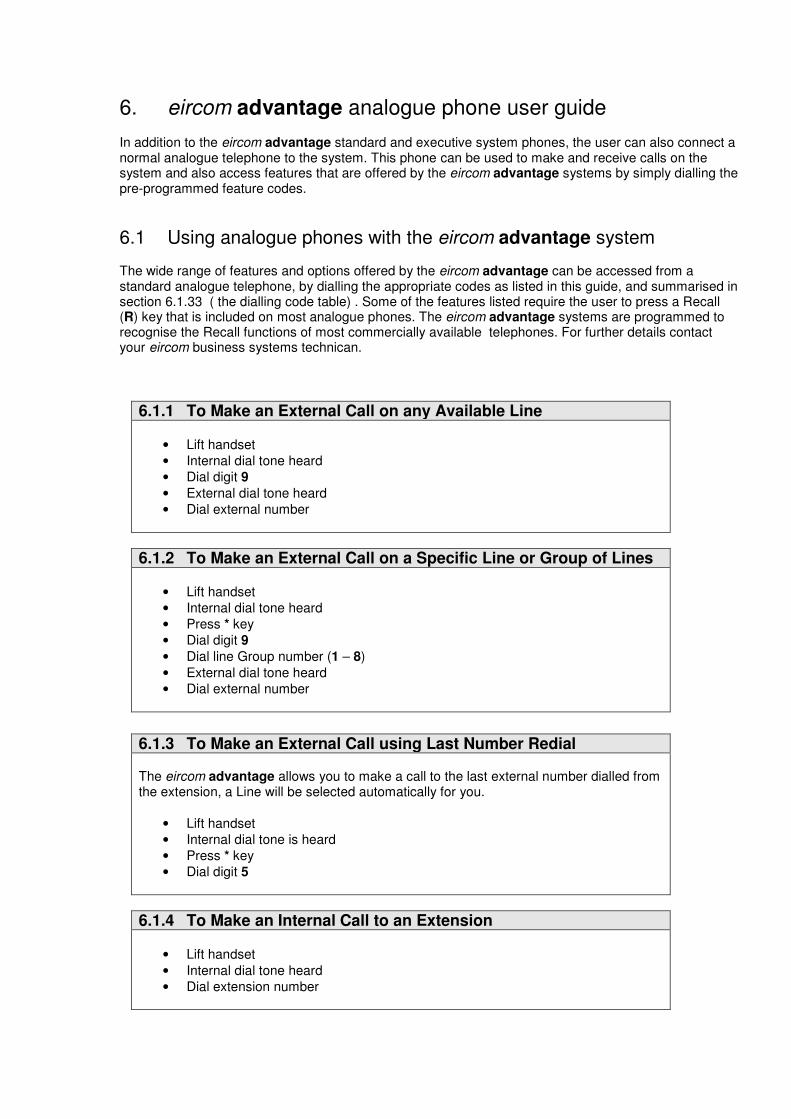
6.1.1 To Make an External Call on any Available Line
• Lift handset
• Internal dial tone heard
• Dial digit 9
• External dial tone heard
• Dial external number
6.1.2 To Make an External Call on a Specific Line or Group of Lines
• Lift handset
• Internal dial tone heard
• Press * key
• Dial digit 9
• Dial line Group number (1 – 8)
• External dial tone heard
• Dial external number
6.1.3 To Make an External Call using Last Number Redial The eircom advantage allows you to make a call to the last external number dialled from the extension, a Line will be selected automatically for you.
• Lift handset
• Internal dial tone is heard
• Press * key
• Dial digit 5
6.1.4 To Make an Internal Call to an Extension
• Lift handset
• Internal dial tone heard
• Dial extension number
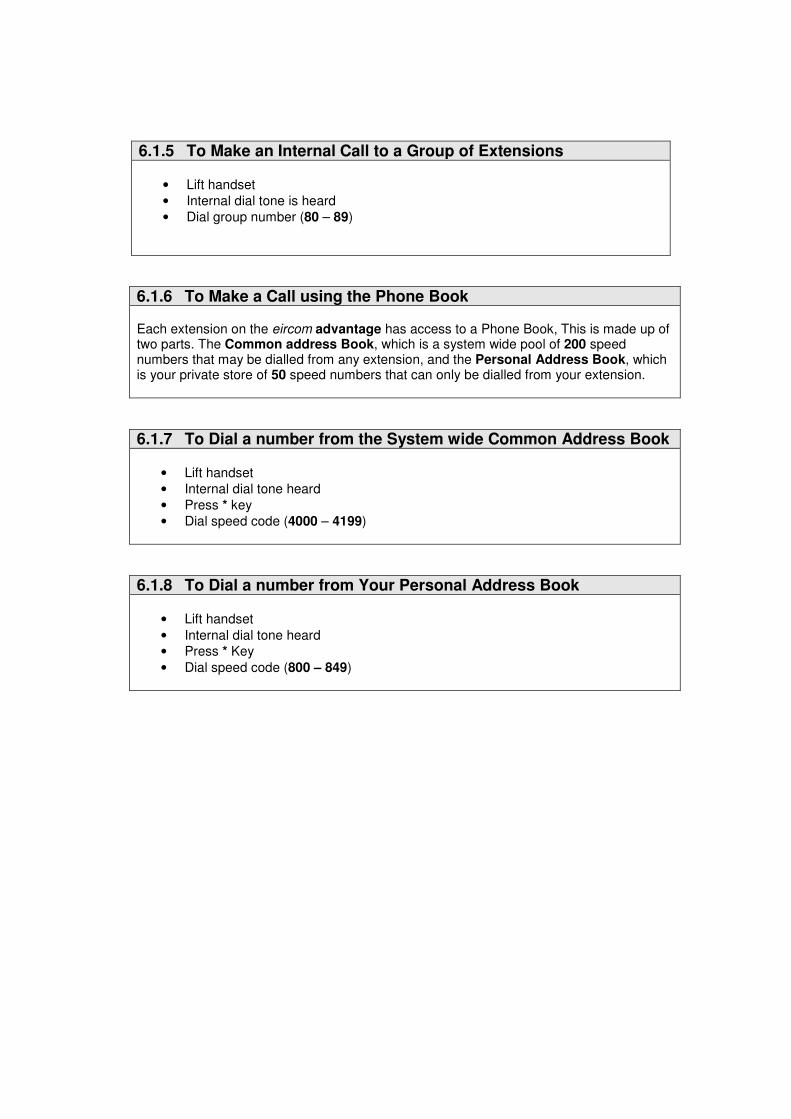
6.1.5 To Make an Internal Call to a Group of Extensions
• Lift handset
• Internal dial tone is heard
• Dial group number (80 – 89)
6.1.6 To Make a Call using the Phone Book Each extension on the eircom advantage has access to a Phone Book, This is made up of two parts. The Common address Book, which is a system wide pool of 200 speed numbers that may be dialled from any extension, and the Personal Address Book, which is your private store of 50 speed numbers that can only be dialled from your extension.
6.1.7 To Dial a number from the System wide Common Address Book
• Lift handset
• Internal dial tone heard
• Press * key
• Dial speed code (4000 – 4199)
6.1.8 To Dial a number from Your Personal Address Book
• Lift handset
• Internal dial tone heard
• Press * Key
• Dial speed code (800 – 849)
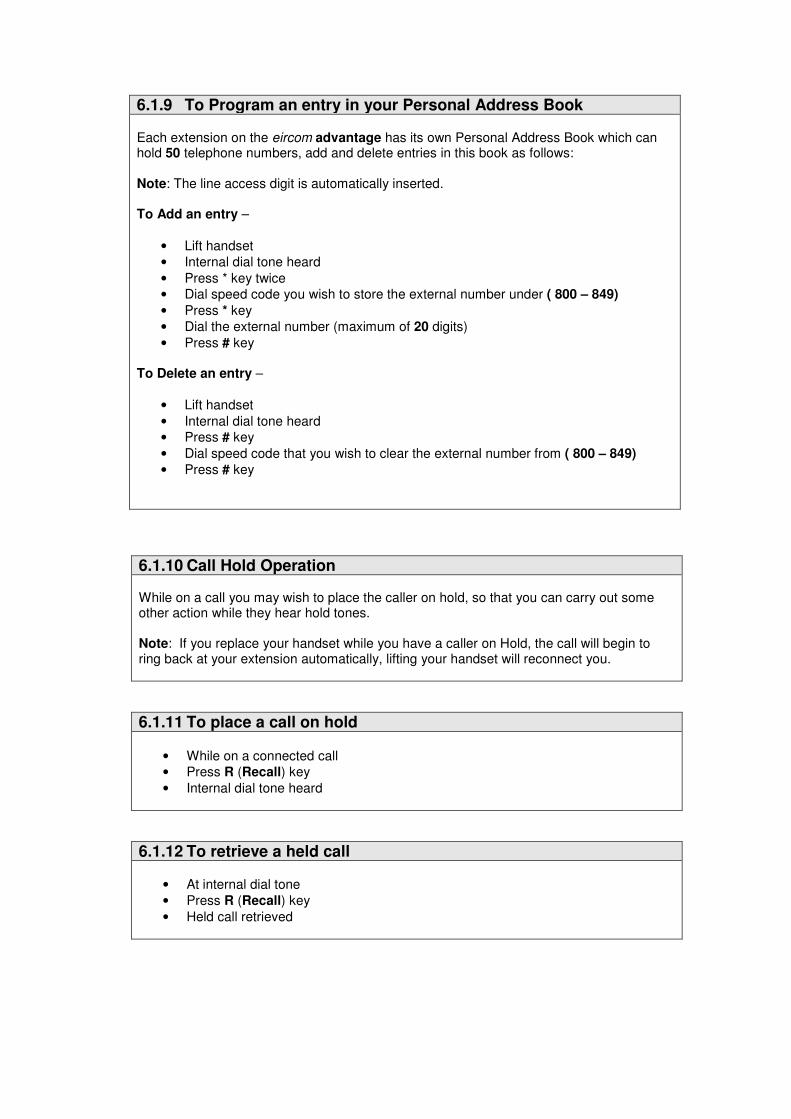
6.1.9 To Program an entry in your Personal Address Book Each extension on the eircom advantage has its own Personal Address Book which can hold 50 telephone numbers, add and delete entries in this book as follows: Note: The line access digit is automatically inserted. To Add an entry –
• Lift handset
• Internal dial tone heard
• Press * key twice
• Dial speed code you wish to store the external number under ( 800 – 849)
• Press * key
• Dial the external number (maximum of 20 digits)
• Press # key To Delete an entry –
• Lift handset
• Internal dial tone heard
• Press # key
• Dial speed code that you wish to clear the external number from ( 800 – 849)
• Press # key
6.1.10 Call Hold Operation
While on a call you may wish to place the caller on hold, so that you can carry out some other action while they hear hold tones. Note: If you replace your handset while you have a caller on Hold, the call will begin to ring back at your extension automatically, lifting your handset will reconnect you.
6.1.11 To place a call on hold
• While on a connected call
• Press R (Recall) key
• Internal dial tone heard
6.1.12 To retrieve a held call
• At internal dial tone
• Press R (Recall) key
• Held call retrieved
6.1.13 To Make an Enquiry call This option allows you to put a caller on hold and enquire with another extension, and once you have finished return to the caller.
• While on a call
• Press R (Recall) key to put call on hold
• Internal dial tone heard
• Dial extension or Group required
• When extension answers – enquire with that extension
• Press R (Recall) twice to return to your held call While on a call you may wish to make an enquiry with another extension, or pass the caller to that extension.
6.1.14 To Transfer a Call
To make an Announced Transfer - This option allows you to transfer a caller to another extension, after the extension has answered and you have announced the caller.
• While on a call
• Press R (Recall) key to put call on hold
• Internal dial tone heard
• Dial extension or Group required
• When extension answers – announce call
• Replace handset to Transfer To Make an Unannounced Transfer - This option allows you to transfer a caller to another extension without waiting for that extension to answer. Note: While hearing ring tone you may Dial #99 and replace handset to transfer to Voice Mail.
• While on a call
• Press R (Recall) key to put call on hold
• Internal dial tone heard
• Dial extension or Group required
• While hearing ring tone – replace handset.
6.1.15 To Make a Paging Call
The eircom advantage allows you to make public address announcements, you may make these announcements over a Public address amplifier connected to the eircom advantage’s PA port, over the speakers of the eircom advantage System phones connected to the system, or a combination of both.
To page through a System Phone -
• Lift handset
• Internal dial tone heard
• Press * key
• Dial digits 77
• Dial extension required To page through the PA port -
• Lift handset
• Internal dial tone heard
• Press * key
• Dial digits 77
• Press # key To make a universal page (all System Phones and the PA Port) -
• Lift handset
• Internal dial tone heard
• Press * key
• Dial digits 77
• Press * key
6.1.16 To answer a Paging Call To answer a universal page
• Lift handset
• Internal dial tone heard
• Press * key
• Dial digits 76
• Press * key To answer a page from an Extension (when you know the extension which is paging) -
• Lift handset
• Internal dial tone heard
• Press * key
• Dial digits 76
• Dial Extension number which is paging
6.1.17 To Pick-Up a Call ringing at another Extension The eircom advantage allows you to answer a call ringing at another extension, without having to go over to that extension telephone. To pick-up a call ringing at another extension -
• Lift handset
• Internal dial tone heard
• Press * key
• Dial digits 71
• Dial extension number of phone ringing
• Call connected To make a universal pick-up (answer a call ringing at any extension) -
• Lift handset
• Internal dial tone heard
• Press * key
• Dial digits 719
• Call connected
6.1.18 To Pick-Off a Call which has been answered by another Extension The eircom advantage allows you to take a call, which has already been answered by another extension, (for example, an answering machine) Note: This option is not enabled by default. To pick up a call already answered by another extension –
• Lift handset
• Internal dial tone heard
• Press * key
• Dial digits 71
• Dial extension number from which call is to be retrieved
• Call connected
6.1.19 To Park a Call The eircom advantage allows you to park a caller (this is a special type of hold, where by the caller is put on hold at the system), so that it can be retrieved from the same or another extension.
• While on a call
• Press R (Recall) key to put call on hold
• Internal dial tone heard
• Press * key
• Dial digits 74
6.1.20 To Unpark a Call To retrieve a parked call (when you know the extension number that parked it) -
• Lift handset
• Internal dial tone heard
• Press * key
• Dial digits 75
• Dial extension number which parked call To retrieve a parked call (when you know the External Line which is parked) -
• Lift handset
• Internal dial tone heard
• Press * key
• Dial digits 9
• Press * key
• Dial Line number, which is parked (i.e. 01, 02, 03 etc.)
6.1.21 To Set-up a Conference Call
The eircom advantage allows you to create a 3-way Conference call, between either -
• 2 external lines + 1 internal extension
• 1 external line + 2 internal extensions
• 3 internal extensions With two calls on hold proceed as follows -
• Internal dial tone is heard
• Press * key
• Dial digits 73
6.1.22 To intrude on an estabished call The eircom advantage allows you to intrude (or barge in on) an extension that is on a call. The extension will be given alert tones to indicate that it is been intruded upon.
• Lift handset
• Internal dial tone heard
• Dial extension number required
• Busy tone is heard
• Dial digits 79
6.1.23 To Enter the Voice Mail Menu The eircom advantage allows each extension to have a personal voice mailbox. Note: The optional voice card needs to be installed for this feature to be available. Note: When there is a new Voice mail message in your mailbox your internal dial tone will change to indicate this, from the normal continues tone to a tone with a gap every two seconds. To access your voice mail –
• Lift handset
• Internal dial tone heard
• Press * key
• Dial digits 99 Follow the voice prompts to retrieve, play, record or delete voice messages, for further information about using Voicemail, consult the eircom advantage voicemail user guide
6.1.24 To Divert All Calls The eircom advantage allows you to set a diversion so that all calls to your extension will no longer ring there, but will ring at the destination you have selected. Note: When you have Divert All set your internal dial tone will change to indicate this, from the normal continues tone to a tone with a gap every two seconds. To Divert All Calls to an Extension or Group -
• Lift handset
• Internal dial code heard
• Press * key
• Dial digits 21
• Press * key
• Dial Extension or Group to which your calls are to be diverted to
• Press # key To Divert All Calls to your Voice Mail –
• Lift handset
• Internal dial tone heard
• Press * key
• Dial digits 21
• Press * key
• Press * key
• Dial digits 99
• Press # key To Divert All Calls to an External Number -
• Lift handset
• Internal dial tone heard
• Press * key
• Dial digits 210
• Press * key
• Enter the external number to which your calls are to be diverted to
• Press # key To Clear Divert All Calls -
• Lift handset
• Internal dial tone heard
• Press # key
• Dial digits 21
• Press #
6.1.25 To Divert On No Answer The eircom advantage allows you to set a diversion so that calls to your extension will ring as normal, but if not answered after a time, will divert to the destination you have selected. To Divert On No Answer to an Extension or Group -
• Lift handset
• Internal dial tone heard
• Press * key
• Dial digits 61
• Press * key
• Dial Extension or Group to which your calls are to be diverted on no answer to
• Press # key To Divert On No Answer to the Voice Mail -
• Lift handset
• Internal dial tone heard
• Press * key
• Dial digits 61
• Press * key
• Press * key
• Dial digits 99
• Press # key To Divert On No Answer to an External Number -
• Lift handset
• Internal dial tone heard
• Press * key
• Dial digits 610
• Press * key
• Enter the external number to which your calls are to be diverted on no answer to
• Press # key To Clear Divert On No Answer -
• Lift handset
• Internal dial tone heard
• Press # key
• Dial digits 61
• Press # key
6.1.26 To Divert On Busy The eircom advantage allows you to set a diversion so that calls to your extension will ring as normal, unless you are already busy on a call in which case they will divert to the destination you have selected. To Divert On Busy to an Extension or Group –
• Lift handset
• Internal dial tone heard
• Press * key
• Dial digits 67
• Press * key
• Dial Extension or Group to which your calls are to be diverted on busy to
• Press # key To Divert On Busy to the Voice Mail -
• Lift handset
• Internal dial tone heard
• Press * key
• Dial digits 67
• Press * key
• Press * key
• Dial digits 99
• Press # key To Clear Divert On Busy -
• Lift handset
• Internal dial tone heard
• Press # key
• Dial digits 67
• Press # key
6.1.27 To Open the Door when the Door Phone Rings The eircom advantage allows you to connect a Door Phone and Door Opening Relay to its ports, so that a visitor to your premises, may press a Door Phone button and extensions within will ring, these extensions may answer this call and talk to the visitor and if they wish, open the door and let them in. When the Door Phone button is pressed, to open the door -
• Lift handset to answer the call
• Talk with visitor
• Replace handset
• Lift handset again
• Internal dial tone heard
• Press * key
• Dial digits 78
6.1.28 To Set Do Not Disturb The eircom advantage allows you to put your extension on Do Not Disturb, so that when a caller rings you, your extension will appear busy. Note: When you have Do Not Disturb set your internal dial tone will change to indicate this, from the normal continues tone to a tone with a gap every two seconds. To Set Do Not Disturb -
• Lift handset
• Internal dial tone heard
• Press * key
• Dial digits 62
• Press # To Clear Do Not Disturb -
• Lift handset
• Internal dial tone heard
• Press # key
• Dial digits 62
• Press #
6.1.29 To Manually Switch between Day / Night Modes The eircom advantage allows you to switch the system between different ringing modes. The system may be set-up to ring one set of extensions when callers ring in during the day and a different set at night. These switching times may be automated within the system, but can also be manually switched from an extension. Note: This option is only available at extensions enabled as Operator Extensions; by default this is Extension 11 only.
• Lift handset
• Internal dial tone heard
• Press * key
• Dial digits 07
• Enter code: 1 = day ringing 2 = night ringing etc
• Press # key
6.1.30 To Control your CLI when making External Calls When you make an External call your CLI (Caller Line Identification) is sent out to the network, so that the person you are call will see it and know who is calling, sometimes you may not wish to do this and the eircom advantage allows you to control this. To Restrict your CLI (Caller Line Identification) when making External Calls -
• Lift handset
• Internal dial tone heard
• Press * key
• Dial digits 30
• Press # key
• This restricts CLI for all subsequent calls To Present CLI (Caller Line Identification) when making External Calls -
• Lift handset
• Internal dial tone heard
• Press * key
• Dial digits 31
• Press # key This allows CLI for all subsequent calls
6.1.31 To Control your PIN Code The eircom advantage allows you to have a PIN code assigned to your extension, this allows you to access services securely, i.e. voicemail Note: By Default all extensions have a PIN code, which is set to 1111 Note: PIN codes must be 4 digits long Note: If you clear your PIN code and do not create a new one, you will not be able to use options that require a PIN code. i.e. accessing Voicemail. To Change your PIN Code -
• Lift handset
• Internal dial tone heard
• Press * key
• Dial digits 70
• Press * key
• Enter your Current PIN code
• Press * key
• Enter Your New PIN code
• Press * key
• Enter Your New PIN code again
• Press # key To Clear your Pin Code -
• Lift handset
• Internal dial tone heard
• Press * key
• Dial digits 70
• Press * key
• Enter Your Current PIN code
• Press # key To Create a PIN Code if you have cleared yours -
• Lift handset
• Internal dial tone heard
• Press * key
• Dial digits 70
• Press * key
• Press * key
• Enter Your New PIN code
• Press * key
• Enter Your New PIN code again
• Press # key
6.1.32 To Use Roaming Pins The eircom advantage allows you with the use of Roaming pins, to make external calls at an extension that would normally be barred from making such calls. You need to have a Roaming account code and PIN, which can be assigned to you by the Administrator. Note: Roaming account codes are 2 digits long and Roaming PIN codes are 4 digits long. To Activate Roaming Pin at an Extension –
• Lift handset
• Internal dial tone heard
• Press * key
• Dial digits 68
• Press * key
• Enter Your Roaming account code
• Press * key
• Enter Your Roaming PIN
• Press # key
To Deactivate Roaming PIN at an Extension -
• Lift handset
• Internal dial tone heard
• Press # key
• Dial digits 68
• Press # key
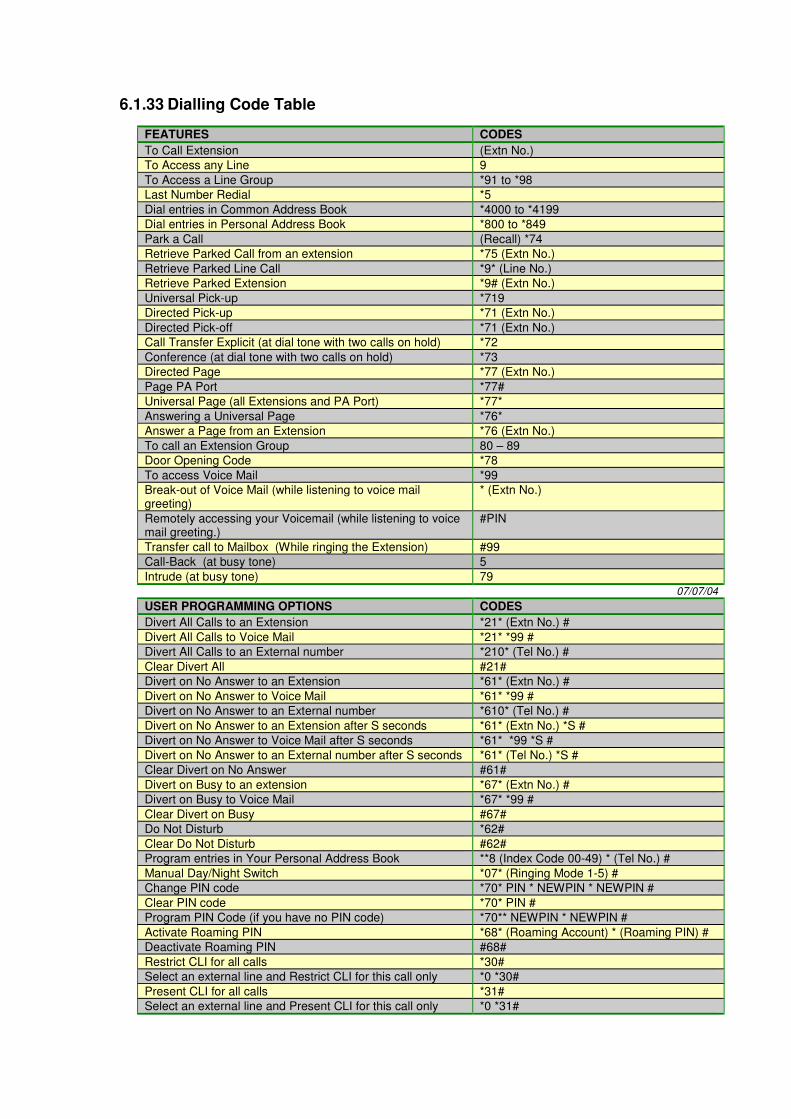
6.1.33 Dialling Code Table
FEATURES CODES
To Call Extension (Extn No.)
To Access any Line 9
To Access a Line Group *91 to *98
Last Number Redial *5
Dial entries in Common Address Book *4000 to *4199
Dial entries in Personal Address Book *800 to *849
Park a Call (Recall) *74
Retrieve Parked Call from an extension *75 (Extn No.)
Retrieve Parked Line Call *9* (Line No.)
Retrieve Parked Extension *9# (Extn No.)
Universal Pick-up *719
Directed Pick-up *71 (Extn No.)
Directed Pick-off *71 (Extn No.)
Call Transfer Explicit (at dial tone with two calls on hold) *72
Conference (at dial tone with two calls on hold) *73
Directed Page *77 (Extn No.)
Page PA Port *77#
Universal Page (all Extensions and PA Port) *77*
Answering a Universal Page *76*
Answer a Page from an Extension *76 (Extn No.)
To call an Extension Group 80 – 89
Door Opening Code *78
To access Voice Mail *99
Break-out of Voice Mail (while listening to voice mail greeting)
* (Extn No.)
Remotely accessing your Voicemail (while listening to voice mail greeting.)
#PIN
Transfer call to Mailbox (While ringing the Extension) #99
Call-Back (at busy tone) 5
Intrude (at busy tone) 79 07/07/04
USER PROGRAMMING OPTIONS CODES
Divert All Calls to an Extension *21* (Extn No.) #
Divert All Calls to Voice Mail *21* *99 #
Divert All Calls to an External number *210* (Tel No.) #
Clear Divert All #21#
Divert on No Answer to an Extension *61* (Extn No.) #
Divert on No Answer to Voice Mail *61* *99 #
Divert on No Answer to an External number *610* (Tel No.) #
Divert on No Answer to an Extension after S seconds *61* (Extn No.) *S #
Divert on No Answer to Voice Mail after S seconds *61* *99 *S #
Divert on No Answer to an External number after S seconds *61* (Tel No.) *S #
Clear Divert on No Answer #61#
Divert on Busy to an extension *67* (Extn No.) #
Divert on Busy to Voice Mail *67* *99 #
Clear Divert on Busy #67#
Do Not Disturb *62#
Clear Do Not Disturb #62#
Program entries in Your Personal Address Book **8 (Index Code 00-49) * (Tel No.) #
Manual Day/Night Switch *07* (Ringing Mode 1-5) #
Change PIN code *70* PIN * NEWPIN * NEWPIN #
Clear PIN code *70* PIN #
Program PIN Code (if you have no PIN code) *70** NEWPIN * NEWPIN #
Activate Roaming PIN *68* (Roaming Account) * (Roaming PIN) #
Deactivate Roaming PIN #68#
Restrict CLI for all calls *30#
Select an external line and Restrict CLI for this call only *0 *30#
Present CLI for all calls *31#
Select an external line and Present CLI for this call only *0 *31#