Embed Size (px)
Citation preview
insight
An industry-specific guidefor your MYOB software
for ServiceBusinesses
2
insightfor for Service Businesses
© MYOB Technology Pty Ltd
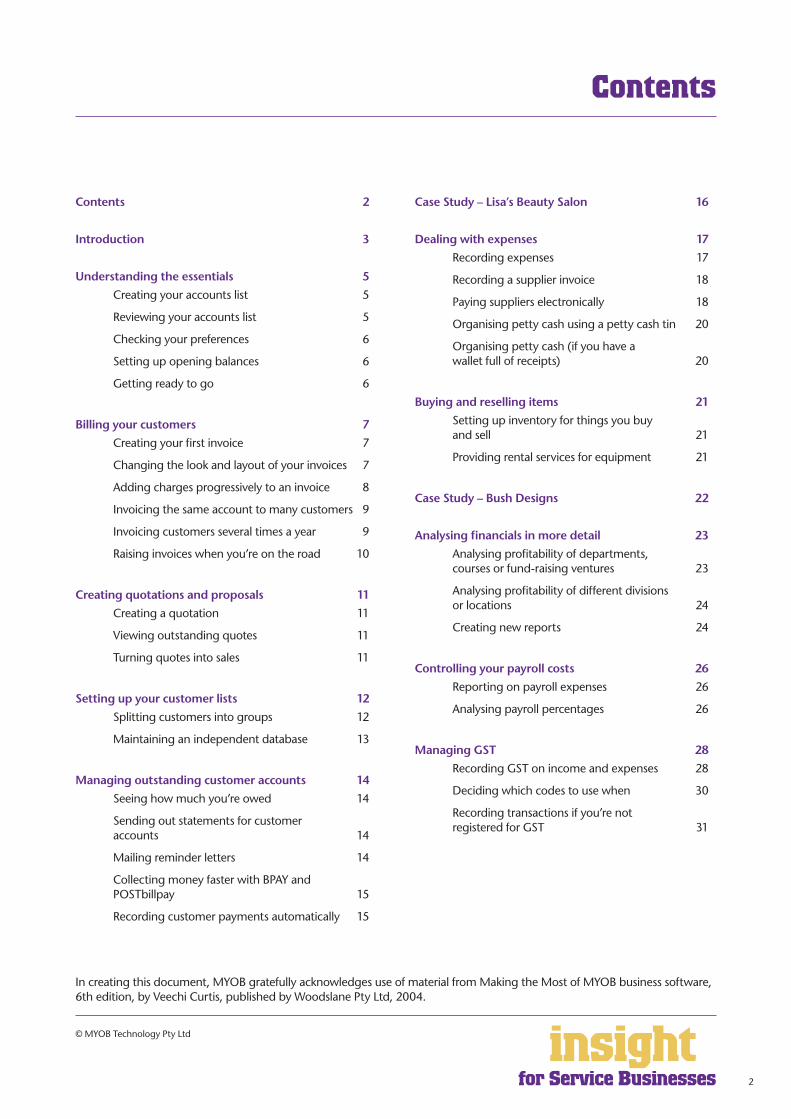
Contents
Contents 2
Introduction 3
Understanding the essentials 5
Creating your accounts list 5
Reviewing your accounts list 5
Checking your preferences 6
Setting up opening balances 6
Getting ready to go 6
Billing your customers 7
Creating your first invoice 7
Changing the look and layout of your invoices 7
Adding charges progressively to an invoice 8
Invoicing the same account to many customers 9
Invoicing customers several times a year 9
Raising invoices when you’re on the road 10
Creating quotations and proposals 11
Creating a quotation 11
Viewing outstanding quotes 11
Turning quotes into sales 11
Setting up your customer lists 12
Splitting customers into groups 12
Maintaining an independent database 13
Managing outstanding customer accounts 14
Seeing how much you’re owed 14
Sending out statements for customer accounts 14
Mailing reminder letters 14
Collecting money faster with BPAY and POSTbillpay 15
Recording customer payments automatically 15
Case Study – Lisa’s Beauty Salon 16
Dealing with expenses 17
Recording expenses 17
Recording a supplier invoice 18
Paying suppliers electronically 18
Organising petty cash using a petty cash tin 20
Organising petty cash (if you have a wallet full of receipts) 20
Buying and reselling items 21
Setting up inventory for things you buy and sell 21
Providing rental services for equipment 21
Case Study – Bush Designs 22
Analysing financials in more detail 23
Analysing profitability of departments, courses or fund-raising ventures 23
Analysing profitability of different divisions or locations 24
Creating new reports 24
Controlling your payroll costs 26
Reporting on payroll expenses 26
Analysing payroll percentages 26
Managing GST 28
Recording GST on income and expenses 28
Deciding which codes to use when 30
Recording transactions if you’re not registered for GST 31
In creating this document, MYOB gratefully acknowledges use of material from Making the Most of MYOB business software, 6th edition, by Veechi Curtis, published by Woodslane Pty Ltd, 2004.
3
insightfor for Service Businesses
© MYOB Technology Pty Ltd
The term “service business” encompasses a wide range of possible businesses, everything from artists to undertakers, hairdressers to pet grooming services, ballooning guides to security guards. However, the principle essential to any service business is that their income is primarily composed of labour charges.
The bookkeeping and accounting requirements for service businesses are relatively straightforward as reporting requirements tend to focus less around profit margins and inventory levels, and more about customer information, sales patterns and creating clear, informative invoices.
In this guide, you’ll find practical answers to the kinds of questions commonly posed by service businesses, along with lots of ideas and tips on the best way to set up MYOB software. You’ll also come across case studies where you can read about real-life service businesses. Browse through these case studies to get the big picture of how MYOB software can work for you.
By the way, if you provide your service in a retail environment (for example an adventure guide company or a hairdresser), you might also like to refer to MYOB Software for Retailers. If you are a professional who charges for your time or if you’re interested in reading more about time billing features, refer also to MYOB Software for Consultants.
Introduction
4
insightfor for Service Businesses
© MYOB Technology Pty Ltd
For service businesses with no employees, either MYOB BusinessBasics (for Windows) or MYOB FirstEdge (for Macs) provide a perfect starting point. Both of these products are designed with the smaller service business in mind: powerful enough to provide all essential reports, but simple enough for even the most inexperienced bookkeeper to understand.
The next step up, MYOB Accounting (for Windows) is the answer if you need advanced financial reports, purchases or inventory control.
If you have employees, then MYOB Accounting Plus, MYOB Premier (for Windows) or MYOB AccountEdge (for Macs) are the most suitable solutions. MYOB Accounting Plus includes payroll, whereas MYOB Premier and MYOB AccountEdge provide multi-user capability, meaning that more than one person can work in the software at a time.
For more information about the MYOB accounting software product range, visit www.myob.com.au/products/ .
Whichever product you choose, if you want to upgrade to another product that’s ‘further up the family tree’, you can do so at any time. You don’t need to buy the new software from scratch; you simply pay an upgrade price.
Choosing your MYOB software
5
insightfor for Service Businesses
© MYOB Technology Pty Ltd
The following five steps are a brief guide to getting started, highlighting important information specific to service businesses.
Creating your accounts listWhen you create the company file for your business, the New Company File Assistant asks you to Build Your Accounts List, giving you the option of starting with a standard list. There are several templates relevant to service businesses — if you can see your business listed, then select it. Otherwise, choose the Service Business (Other) template as your starting point.
The accounts list template provides a sample list of accounts and makes a good starting point. Don’t worry if you can’t find an accounts list that is perfect - you can add, change or delete as many accounts as you like, later on.
Reviewing your accounts listBefore entering your opening balances, you need to adapt your accounts list so that it suits the unique needs of your business.
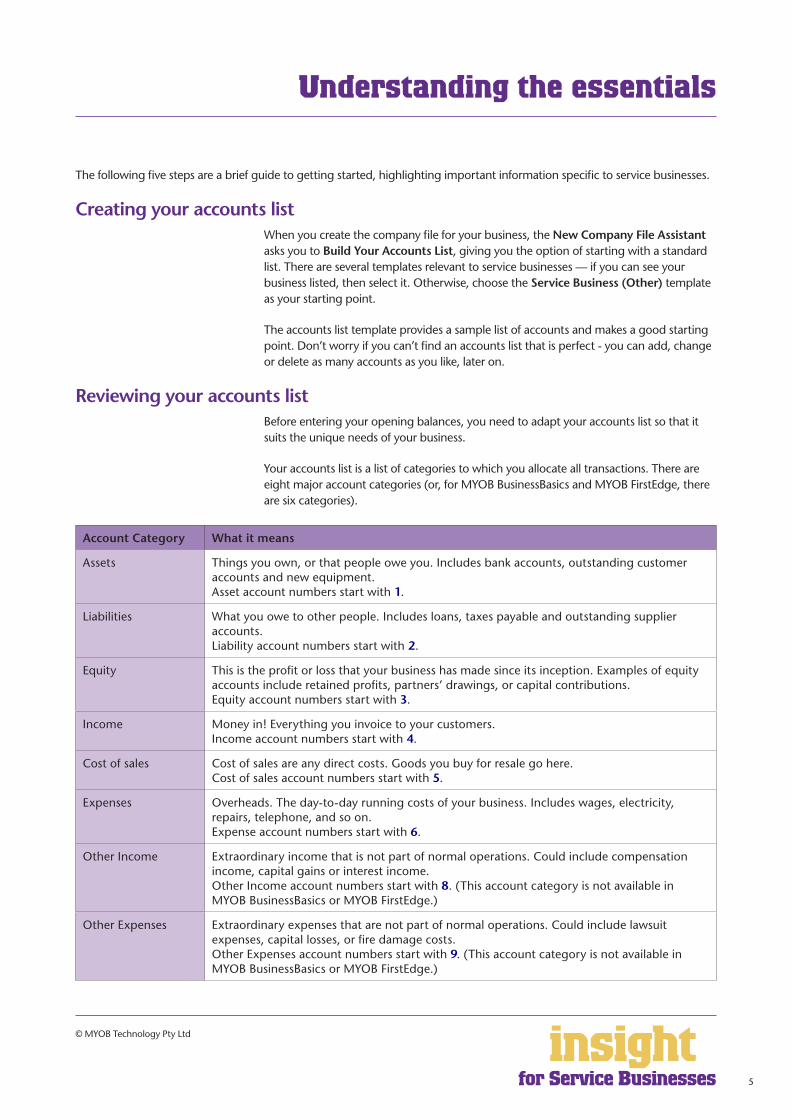
Your accounts list is a list of categories to which you allocate all transactions. There are eight major account categories (or, for MYOB BusinessBasics and MYOB FirstEdge, there are six categories).
Account Category What it means
Assets Things you own, or that people owe you. Includes bank accounts, outstanding customer accounts and new equipment. Asset account numbers start with 1.
Liabilities What you owe to other people. Includes loans, taxes payable and outstanding supplier accounts. Liability account numbers start with 2.
Equity This is the profit or loss that your business has made since its inception. Examples of equity accounts include retained profits, partners’ drawings, or capital contributions. Equity account numbers start with 3.
Income Money in! Everything you invoice to your customers. Income account numbers start with 4.
Cost of sales Cost of sales are any direct costs. Goods you buy for resale go here.Cost of sales account numbers start with 5.
Expenses Overheads. The day-to-day running costs of your business. Includes wages, electricity, repairs, telephone, and so on. Expense account numbers start with 6.
Other Income Extraordinary income that is not part of normal operations. Could include compensation income, capital gains or interest income. Other Income account numbers start with 8. (This account category is not available in MYOB BusinessBasics or MYOB FirstEdge.)
Other Expenses Extraordinary expenses that are not part of normal operations. Could include lawsuit expenses, capital losses, or fire damage costs.Other Expenses account numbers start with 9. (This account category is not available in MYOB BusinessBasics or MYOB FirstEdge.)
Understanding the essentials
6
insightfor for Service Businesses
© MYOB Technology Pty Ltd
Checking your preferencesYou can customise all MYOB software so that it works for your business the way you want it to. You can do everything from changing the appearance of your windows, to automatically requesting a backup prompt each time you quit the program. It all happens via the Preferences window.
To review your preferences, go to the Setup menu, choose Preferences and then explore the various tabs. Remember—your choice of preferences does not commit you to this for ever and ever, for you can change your preferences at any time.
One preference setting is recommended, especially for new users. Make your company file changeable. If you make mistakes, you can correct them, without needing to make complicated reversing journals. To do this, go to the Security tab in the Preferences window. Clear the Transactions CAN’T be Changed; They Must be Reversed checkbox.
Setting up opening balances To enter opening account balances, go to the Setup menu, choose Balances, and then Account Opening Balances. To enter opening balances for outstanding customer accounts, go to the Setup menu, choose Balances, and then Customer Opening Balances.
To enter opening balances for outstanding supplier accounts, go to the Setup menu, choose Balances, and then Supplier Opening Balances. (This feature is not available if you are using MYOB BusinessBasics or MYOB FirstEdge).
To get up and running, you only need to enter opening balances for a few accounts. Bare essentials will probably include your bank account and any customer accounts outstanding. Your opening account figures won’t balance, but this out of balance amount simply goes to the Historical Balancing account. You or your accountant can fix this later.
Getting ready to go Before you start entering transactions, work out how you intend to back up your company file. If your file is going to contain very few transactions, you may be able to fit your backup onto floppy disk. Otherwise, you’ll need to have a CD burner or some other removable media.
You might have been lucky so far, but nobody can guarantee continued immunity to power surges, theft, fire or hard disk failure. If you don’t organise a backup system now, you’ll probably forget about it until it’s too late—and then you’ll be sorry.
Understanding the essentials
7
insightfor for Service Businesses
© MYOB Technology Pty Ltd
The most important part of any service business is the relationships you have with your customers. You’ll need a database for managing customer contact details as well as smart-looking invoices and receipts, and you may need to generate quotes and proposals. Fortunately, MYOB software makes it easy to manage all these things.
Creating your first invoiceTo create your first customer account, go to the Sales command centre and click Enter Sales (or, for MYOB BusinessBasics and MYOB FirstEdge, go to the Sales Register and click New Sale).
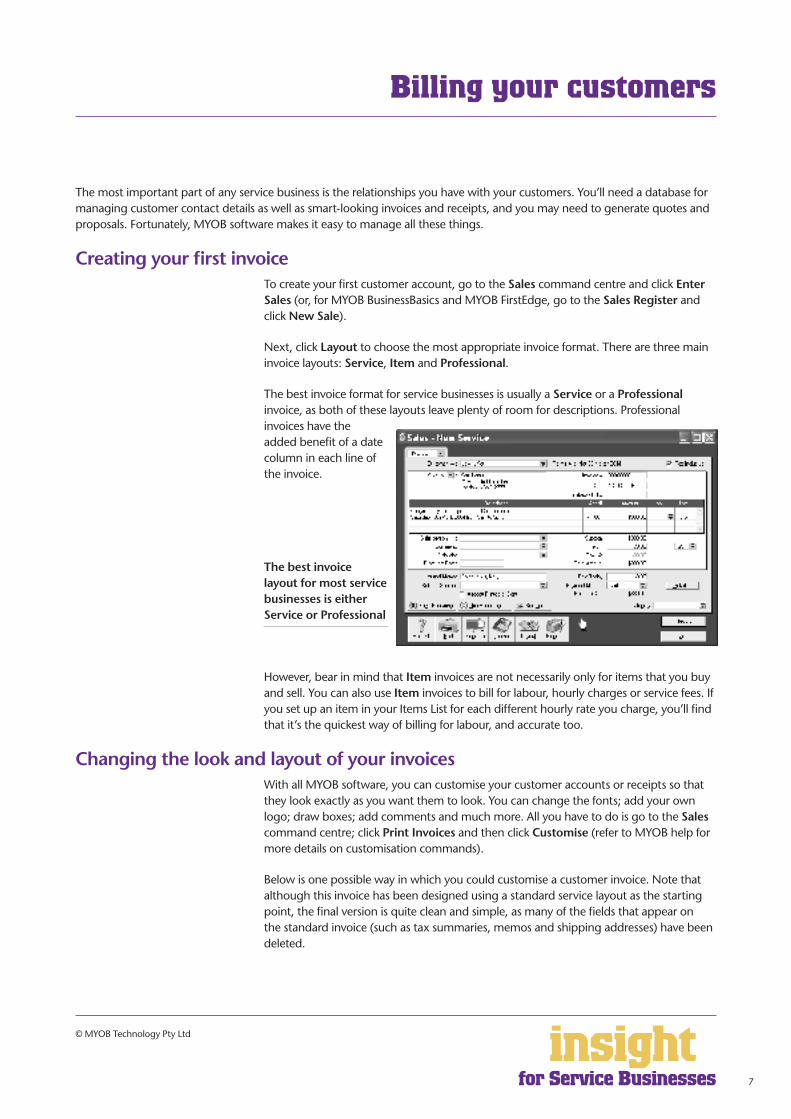
Next, click Layout to choose the most appropriate invoice format. There are three main invoice layouts: Service, Item and Professional.
The best invoice format for service businesses is usually a Service or a Professional invoice, as both of these layouts leave plenty of room for descriptions. Professional invoices have the added benefit of a date column in each line of the invoice.
The best invoice layout for most service businesses is either Service or Professional
However, bear in mind that Item invoices are not necessarily only for items that you buy and sell. You can also use Item invoices to bill for labour, hourly charges or service fees. If you set up an item in your Items List for each different hourly rate you charge, you’ll find that it’s the quickest way of billing for labour, and accurate too.
Changing the look and layout of your invoicesWith all MYOB software, you can customise your customer accounts or receipts so that they look exactly as you want them to look. You can change the fonts; add your own logo; draw boxes; add comments and much more. All you have to do is go to the Sales command centre; click Print Invoices and then click Customise (refer to MYOB help for more details on customisation commands).
Below is one possible way in which you could customise a customer invoice. Note that although this invoice has been designed using a standard service layout as the starting point, the final version is quite clean and simple, as many of the fields that appear on the standard invoice (such as tax summaries, memos and shipping addresses) have been deleted.
Billing your customers
8
insightfor for Service Businesses
© MYOB Technology Pty Ltd
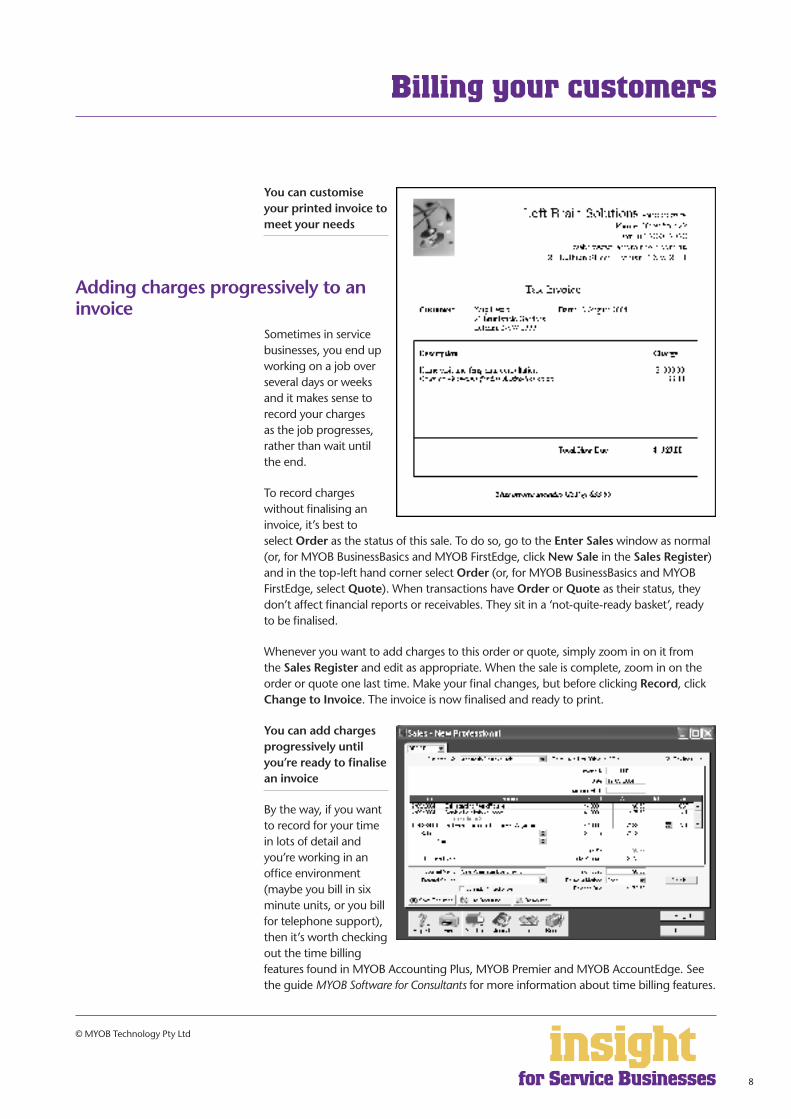
You can customise your printed invoice to meet your needs
Adding charges progressively to an invoice
Sometimes in service businesses, you end up working on a job over several days or weeks and it makes sense to record your charges as the job progresses, rather than wait until the end.
To record charges without finalising an invoice, it’s best to select Order as the status of this sale. To do so, go to the Enter Sales window as normal (or, for MYOB BusinessBasics and MYOB FirstEdge, click New Sale in the Sales Register) and in the top-left hand corner select Order (or, for MYOB BusinessBasics and MYOB FirstEdge, select Quote). When transactions have Order or Quote as their status, they don’t affect financial reports or receivables. They sit in a ‘not-quite-ready basket’, ready to be finalised.
Whenever you want to add charges to this order or quote, simply zoom in on it from the Sales Register and edit as appropriate. When the sale is complete, zoom in on the order or quote one last time. Make your final changes, but before clicking Record, click Change to Invoice. The invoice is now finalised and ready to print.
You can add charges progressively until you’re ready to finalise an invoice
By the way, if you want to record for your time in lots of detail and you’re working in an office environment (maybe you bill in six minute units, or you bill for telephone support), then it’s worth checking out the time billing features found in MYOB Accounting Plus, MYOB Premier and MYOB AccountEdge. See the guide MYOB Software for Consultants for more information about time billing features.
Billing your customers
9
insightfor for Service Businesses
© MYOB Technology Pty Ltd
Invoicing the same account to many customersIf you issue identical accounts to many customers, you can ‘memorise’ these account details to make repetitive billing a fast and easy process.
To do this, create your first customer account. However, when you are ready to record it click Save Recurring, instead of Record. Name this recurring sale appropriately and click Save Template to return to your original customer invoice. Now click Record.
For the second and subsequent invoices, go to create an invoice but click Use Recurring to select your recurring sale. The invoice details will come up automatically and all you need to do is change the customer’s name each time, clicking Record (not Save Recurring) once this is done.
Invoicing customers several times a yearIf you invoice customers the same amount several times a year (perhaps you have a standard fee per visit or an ongoing maintenance fee), you can issue these invoices automatically, whenever they fall due.
To set this system up, you first need to create a recurring invoice for each customer:
1. Create an invoice, but before completing it, click Save Recurring (one of the buttons at the bottom of the invoice).
2. In the dialog box that appears, enter the customer name, and then specify how often you plan to bill this customer using the Frequency drop-down list. Click Save Template.
3. Back on the invoice, click Record.
4. Repeat this process for every customer that you invoice regularly.
Next time these customer accounts fall due, all you have to do is this:
1. Go to the To Do List and then click the Recurring Sales tab. You’ll see each customer’s Name and when their account is Next Due.
2. If any account details have changed from the previous time, click the arrow next to the customer’s name, and enter your changes. Click Record to save these changes and record this sale.
3. For all customers whose account details have not changed, click in the Select column.
4. Click Record to automatically generate accounts for these customers.
5. Go to the Sales command centre and click Print Invoices to print your accounts.
Billing your customers
10
insightfor for Service Businesses
© MYOB Technology Pty Ltd
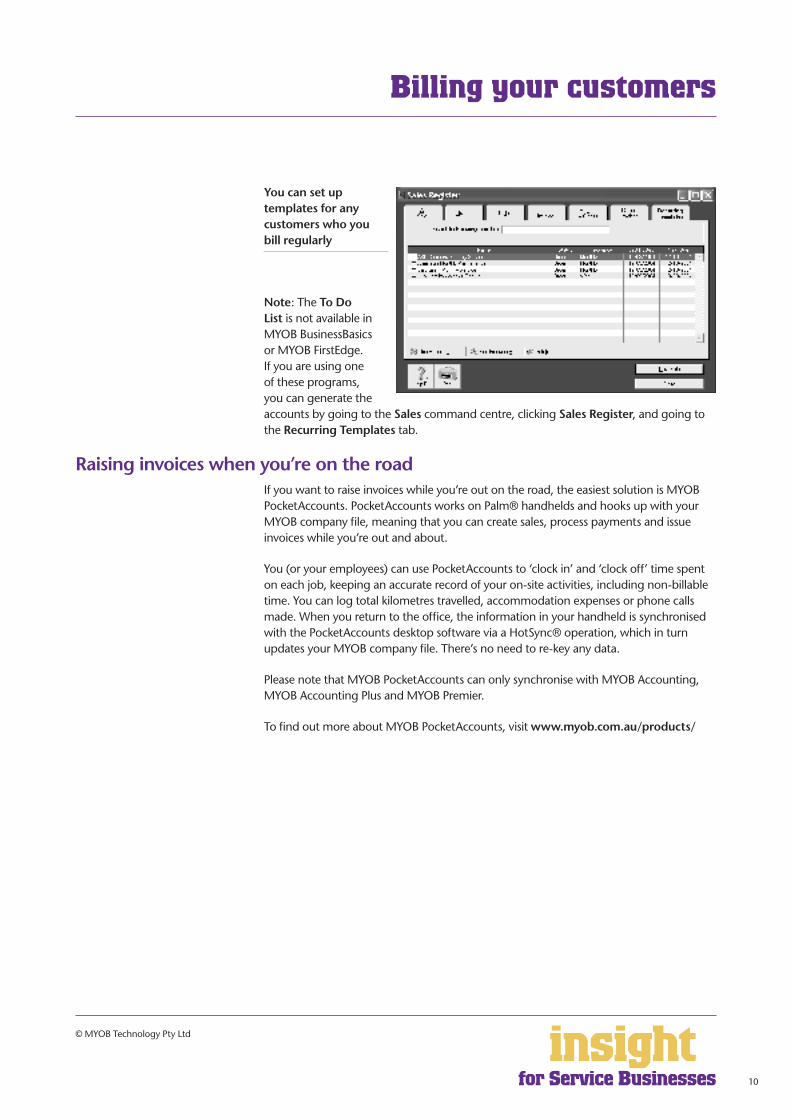
You can set up templates for any customers who you bill regularly
Note: The To Do List is not available in MYOB BusinessBasics or MYOB FirstEdge. If you are using one of these programs, you can generate the accounts by going to the Sales command centre, clicking Sales Register, and going to the Recurring Templates tab.
Raising invoices when you’re on the roadIf you want to raise invoices while you’re out on the road, the easiest solution is MYOB PocketAccounts. PocketAccounts works on Palm® handhelds and hooks up with your MYOB company file, meaning that you can create sales, process payments and issue invoices while you’re out and about.
You (or your employees) can use PocketAccounts to ‘clock in’ and ‘clock off’ time spent on each job, keeping an accurate record of your on-site activities, including non-billable time. You can log total kilometres travelled, accommodation expenses or phone calls made. When you return to the office, the information in your handheld is synchronised with the PocketAccounts desktop software via a HotSync® operation, which in turn updates your MYOB company file. There’s no need to re-key any data.
Please note that MYOB PocketAccounts can only synchronise with MYOB Accounting, MYOB Accounting Plus and MYOB Premier.
To find out more about MYOB PocketAccounts, visit www.myob.com.au/products/
Billing your customers
11
insightfor for Service Businesses
© MYOB Technology Pty Ltd
Many service businesses need to generate quotations or proposals for their customers. With MYOB software, it’s easy to generate quotes and later, if these quotes are accepted, you can change them into invoices with a single click of a button.
Creating a quotationSales can have three different statuses: Quote, Order and Invoice (although orders are not available in MYOB BusinessBasics or FirstEdge). You can select the status in the top-left corner whenever you create a sale.
Quotes are an ideal way to provide estimates to customers without creating a transaction. A quote has no impact on your financial records and can be changed to an invoice at any time.
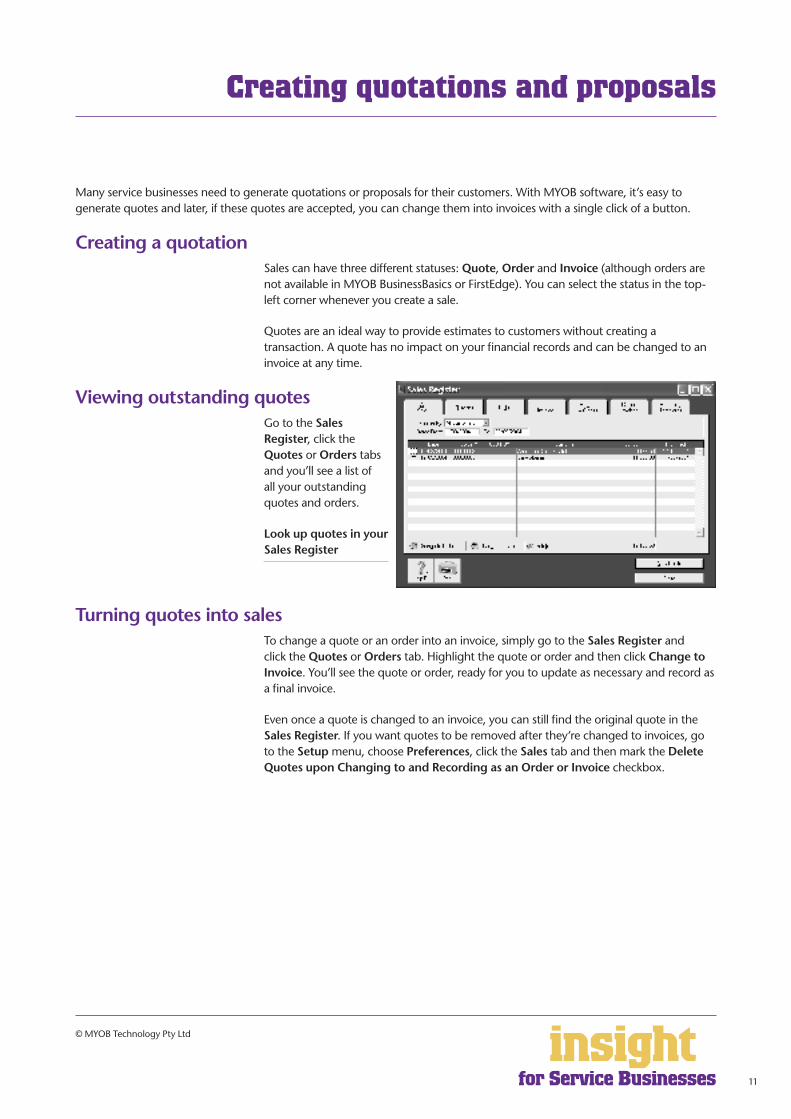
Viewing outstanding quotesGo to the Sales Register, click the Quotes or Orders tabs and you’ll see a list of all your outstanding quotes and orders.
Look up quotes in your Sales Register
Turning quotes into salesTo change a quote or an order into an invoice, simply go to the Sales Register and click the Quotes or Orders tab. Highlight the quote or order and then click Change to Invoice. You’ll see the quote or order, ready for you to update as necessary and record as a final invoice.
Even once a quote is changed to an invoice, you can still find the original quote in the Sales Register. If you want quotes to be removed after they’re changed to invoices, go to the Setup menu, choose Preferences, click the Sales tab and then mark the Delete Quotes upon Changing to and Recording as an Order or Invoice checkbox.
Creating quotations and proposals
12
insightfor for Service Businesses
© MYOB Technology Pty Ltd
MYOB software provides an excellent starting point for most customer databases. Customer cards have room for up to five addresses, three phone numbers, fax number, email, web address, contact name, and the name to whom mail merge letters should be addressed. You can even group customers into pre-defined categories, using custom lists and identifiers.
Splitting customers into groupsIf you go into a customer’s card and click the Card Details tab, you’ll see that you can categorise customers using both custom fields and lists. Custom lists are particularly useful for service businesses as a way of organising customers into groups. You can organise customers in any manner you wish: by location, by age, by gender, by referral source, and so on.
To set up customer groups:
1. First decide how you’re going to group your customers, e.g. by location, by type, by product, etc.
2. Go to the Lists menu, choose Custom List & Field Names, and then choose Customers.
3. Change the descriptions of Custom List #1 (and Custom List #2 and #3 if desired) to indicate the way you’re going to group customers, for example, by changing the name of Custom List #1 to Location. Click OK.
4. Return to the Lists menu, choose Custom Lists (not Custom List & Field Names!) and then choose Customers. Now add the categories that you want to appear in each customer group. For example, within the group of location, you might add entries for Sydney, Brisbane and Melbourne. Click OK.
5. Go to your Cards List, double-click a customer who you want to allocate to a group, and click the Card Details tab. Select the appropriate categorisations from the Custom Lists.
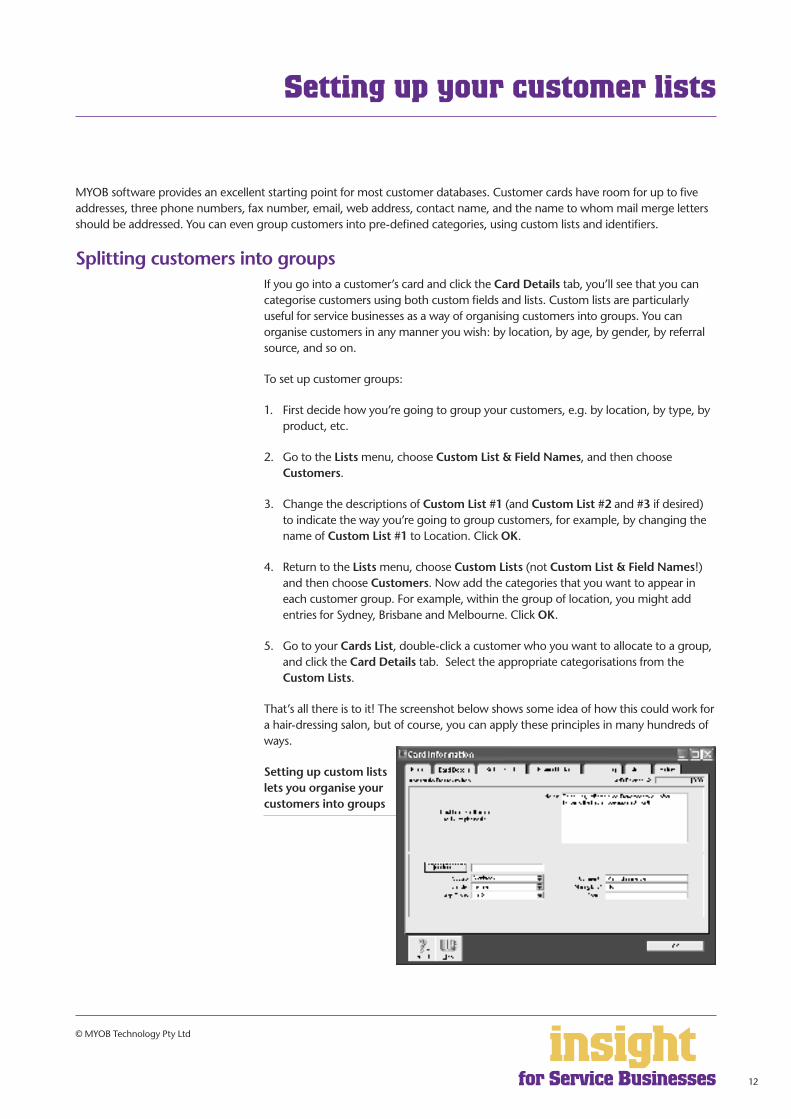
That’s all there is to it! The screenshot below shows some idea of how this could work for a hair-dressing salon, but of course, you can apply these principles in many hundreds of ways.
Setting up custom lists lets you organise your customers into groups
Setting up your customer lists
13
insightfor for Service Businesses
© MYOB Technology Pty Ltd
Maintaining an independent database Sometimes, service businesses need to maintain a lot of very specific information about customers and decide to set up a database separate from their MYOB software. In this scenario, work out how you can best use your MYOB software in conjunction with this database.
• Don’t waste valuable time typing customer details once into your MYOB accounting software and once into an independent database. With the help of MYOB DeveloperPack (see http://d2d.myob.com.au), you can synchronise your MYOB company file with your customer database so that the exchange of information is automated, without the need for anything to be recorded twice. Email [email protected] for more information.
• A simpler approach (although not as good a solution in the long-term as automatic synchronisation) is to export card information from your company file into your database, or vice versa, using the import and export commands located in the File menu.
• If you’re using a standard off-the-shelf software package as your independent database, you may well find that there is already a utility that you can purchase that automatically synchronises information.
• If you want to link ACT! contact manager with your MYOB software, go to www.acttoday.com.au and download the mLink utility.
• To link your MYOB company file with your contacts in Microsoft Outlook, go to www.datapel.com.
Setting up your customer lists
14
insightfor for Service Businesses
© MYOB Technology Pty Ltd
MYOB software has lots of ways to help you manage outstanding customer accounts. You can send out monthly statements, mail out reminder letters automatically, offer customers the ability to pay by BPAY® or credit card and last but not least, see what accounts are outstanding at any time, with a single click of a button.
Seeing how much you’re owedFrom the Sales command centre, click the Analysis down-arrow and choose Receivables from the menu that appears, or for MYOB BusinessBasics and MYOB FirstEdge, simply click Analyse Receivables. You’ll see a summarised Analyse Receivables report, aged as at the current date, showing the names of all customers who owe you money and how overdue they are. You can click the zoom arrows next to any customer’s name to go straight to a detailed breakdown of their outstanding invoices.
Sending out statements for customer accountsTo issue statements for all outstanding fees, simply go to the Sales command centre and click Print Statements. You can choose between Activity or Invoice statements.
An Activity statement displays the opening balance outstanding on customers’ accounts as at any selected date, and lists all transactions (both invoices and payments) from that date up to the current date. An Invoice statement displays all invoices that have anything outstanding on them at the time of printing. It does not include invoices that have been paid in that current period.
To customise your statement layout, click Print Statements and then click Customise.
Mailing reminder lettersNote: This feature is not available in MYOB BusinessBasics or MYOB FirstEdge.
If customers are consistently overdue with paying their account, you can use MYOB software to send automatic reminder letters, the wording of which depends on how overdue the account is.
To do this, go to the To Do List and click the A/R tab. Look at the Overdue column. A positive figure in the Overdue column indicates the number of days that the payment is overdue, and a negative figure indicates the number of days until payment is due.
Click in the Select column against the customers to whom you wish to send reminders, and then click Mail Merge. When prompted, choose a template. The templates COLL_1ST.DOT, COLL_2nd.DOT, COLL_3rd.DOT and COLL_FIN.DOT all refer to account reminder letters. (The first templates COLL_1st.DOT and COLL_2nd.DOT are relatively easygoing; the other templates become increasingly demanding!)
Select a template and click Use Template. Microsoft® Word will then open automatically. Complete your name and title as requested. Click OK and you end up with a single document, each page of which is a separate letter reminding the customers of their overdue accounts.
Managing outstanding customer accounts
15
insightfor for Service Businesses
© MYOB Technology Pty Ltd
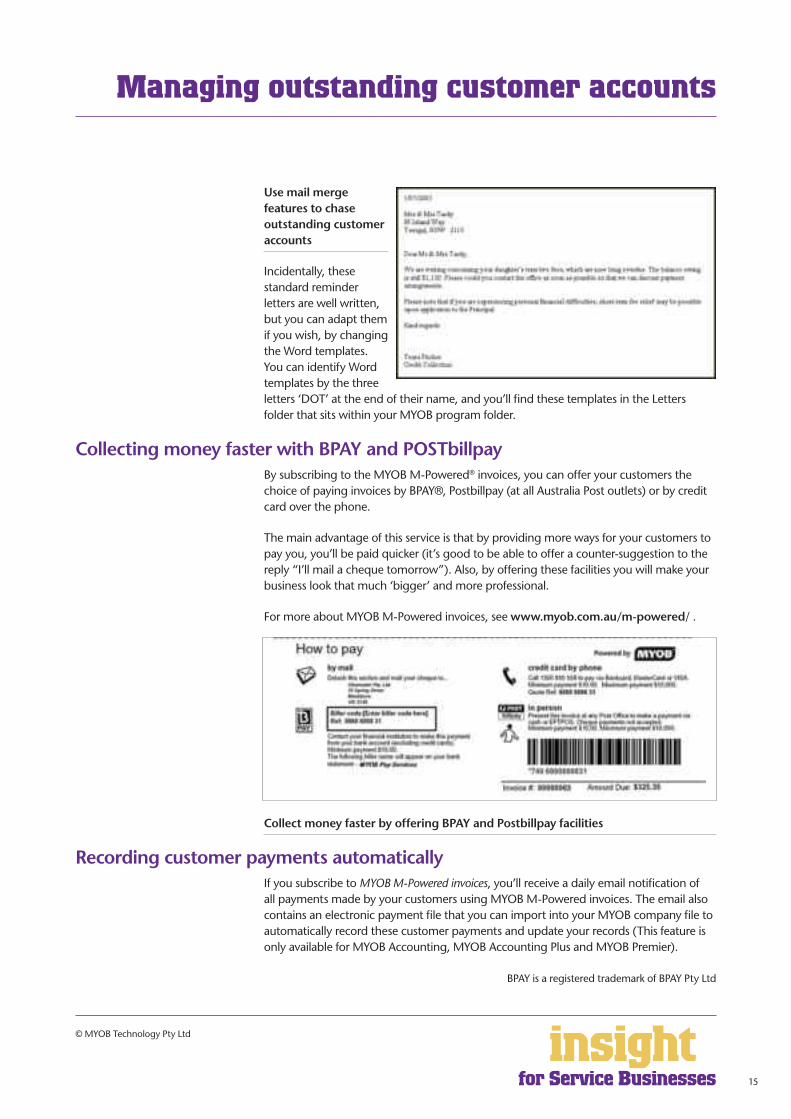
Use mail merge features to chase outstanding customer accounts
Incidentally, these standard reminder letters are well written, but you can adapt them if you wish, by changing the Word templates. You can identify Word templates by the three letters ‘DOT’ at the end of their name, and you’ll find these templates in the Letters folder that sits within your MYOB program folder.
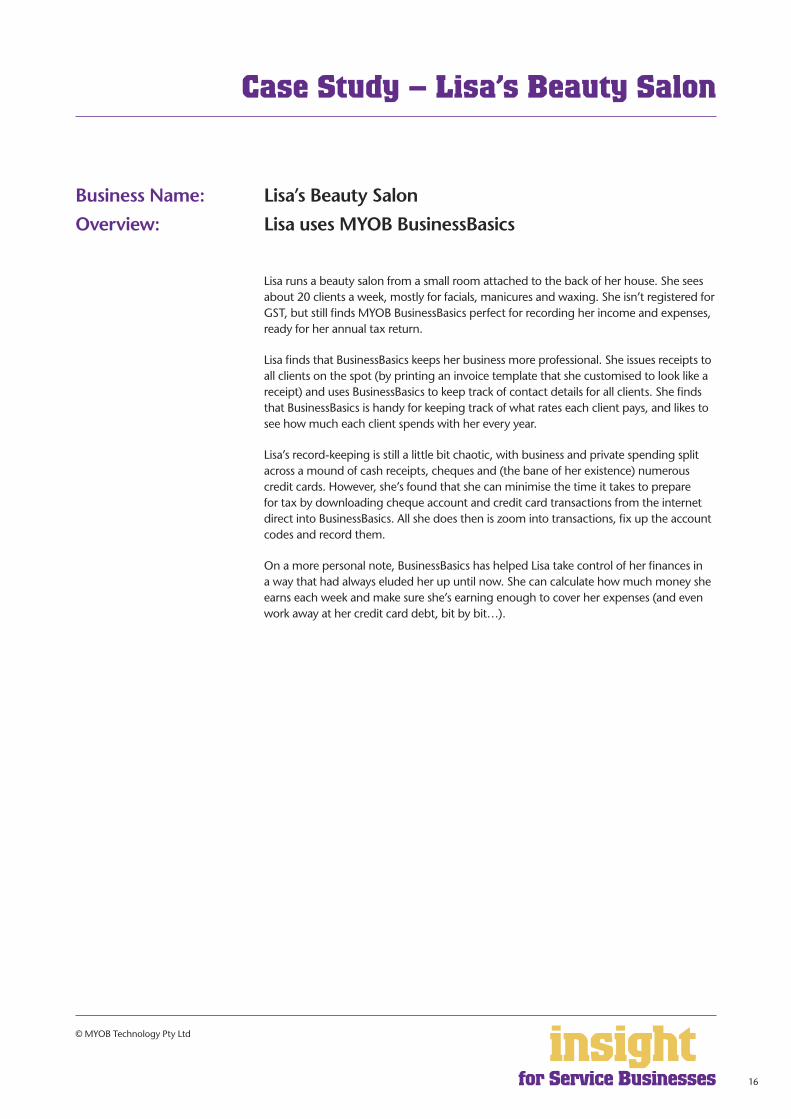
Collecting money faster with BPAY and POSTbillpayBy subscribing to the MYOB M-Powered® invoices, you can offer your customers the choice of paying invoices by BPAY®, Postbillpay (at all Australia Post outlets) or by credit card over the phone.
The main advantage of this service is that by providing more ways for your customers to pay you, you’ll be paid quicker (it’s good to be able to offer a counter-suggestion to the reply “I’ll mail a cheque tomorrow”). Also, by offering these facilities you will make your business look that much ‘bigger’ and more professional.
For more about MYOB M-Powered invoices, see www.myob.com.au/m-powered/ .
Collect money faster by offering BPAY and Postbillpay facilities
Recording customer payments automaticallyIf you subscribe to MYOB M-Powered invoices, you’ll receive a daily email notification of all payments made by your customers using MYOB M-Powered invoices. The email also contains an electronic payment file that you can import into your MYOB company file to automatically record these customer payments and update your records (This feature is only available for MYOB Accounting, MYOB Accounting Plus and MYOB Premier).
BPAY is a registered trademark of BPAY Pty Ltd
Managing outstanding customer accounts
16
insightfor for Service Businesses
© MYOB Technology Pty Ltd
Case Study – Lisa’s Beauty Salon
Business Name: Lisa’s Beauty Salon
Overview: Lisa uses MYOB BusinessBasics
Lisa runs a beauty salon from a small room attached to the back of her house. She sees about 20 clients a week, mostly for facials, manicures and waxing. She isn’t registered for GST, but still finds MYOB BusinessBasics perfect for recording her income and expenses, ready for her annual tax return.
Lisa finds that BusinessBasics keeps her business more professional. She issues receipts to all clients on the spot (by printing an invoice template that she customised to look like a receipt) and uses BusinessBasics to keep track of contact details for all clients. She finds that BusinessBasics is handy for keeping track of what rates each client pays, and likes to see how much each client spends with her every year.
Lisa’s record-keeping is still a little bit chaotic, with business and private spending split across a mound of cash receipts, cheques and (the bane of her existence) numerous credit cards. However, she’s found that she can minimise the time it takes to prepare for tax by downloading cheque account and credit card transactions from the internet direct into BusinessBasics. All she does then is zoom into transactions, fix up the account codes and record them.
On a more personal note, BusinessBasics has helped Lisa take control of her finances in a way that had always eluded her up until now. She can calculate how much money she earns each week and make sure she’s earning enough to cover her expenses (and even work away at her credit card debt, bit by bit…).
17
insightfor for Service Businesses
© MYOB Technology Pty Ltd
The simplest way to record expenses, suitable for most service businesses, is to go to the Banking command centre and click Spend Money (or, for MYOB BusinessBasics and MYOB FirstEdge, go to the Bank Register and select Spend Money as the transaction type).
An alternative way to record expenses, suitable for larger businesses, is to enter all supplier invoices in the Purchases command centre when you receive them. Later, these invoices are paid using the Pay Bills function. (Note that purchases aren’t available in MYOB BusinessBasics or MYOB FirstEdge.) This method works well if you have a substantial amount of accounts to be paid each month and you want to keep tabs on how much you owe, but by its very nature is a more complicated way of working.
Recording expensesTo record an expense,
1. Go to the Banking command centre and click Spend Money. (Or, if you’re using MYOB BusinessBasics or MYOB FirstEdge, go to the Command Centres menu, choose Banking and then Spend Money.)
2. Click the Pay from Account button in the top-left and select your bank account, or, if you plan to make this payment online, click Group with Electronic Payments (not available in MYOB BusinessBasics or MYOB FirstEdge).
3. For cheques, enter the cheque number in the Cheque No. field. For other transactions, such as credit card debits or electronic payments, simply ignore the Cheque No. field.
4. Enter the date and amount, and in the Card field, enter the name of the person you are paying. If you’ve never paid this person before, you’ll see a list of cards, asking you to select one of them. Either double-click on a name to select it from the list or click New to create a new card.
5. Write a brief description in the Memo field, if desired.
6. In the Acct# column, specify which account this expense should go to.
7. Check the Amount is correct. Usually, this amount includes GST, assuming you’ve marked the Tax Inclusive box on the top-right.
8. Fill in the Job column if you want to track expenses by particular projects or cost centres. Otherwise, leave this column blank.
9. If you want to include additional information about this transaction, do so in the additional Memo column that appears next to the Job column.
10. Fill in your Tax code, double-check the tax total (this calculates automatically), then click Record.
Dealing with expenses
18
insightfor for Service Businesses
© MYOB Technology Pty Ltd
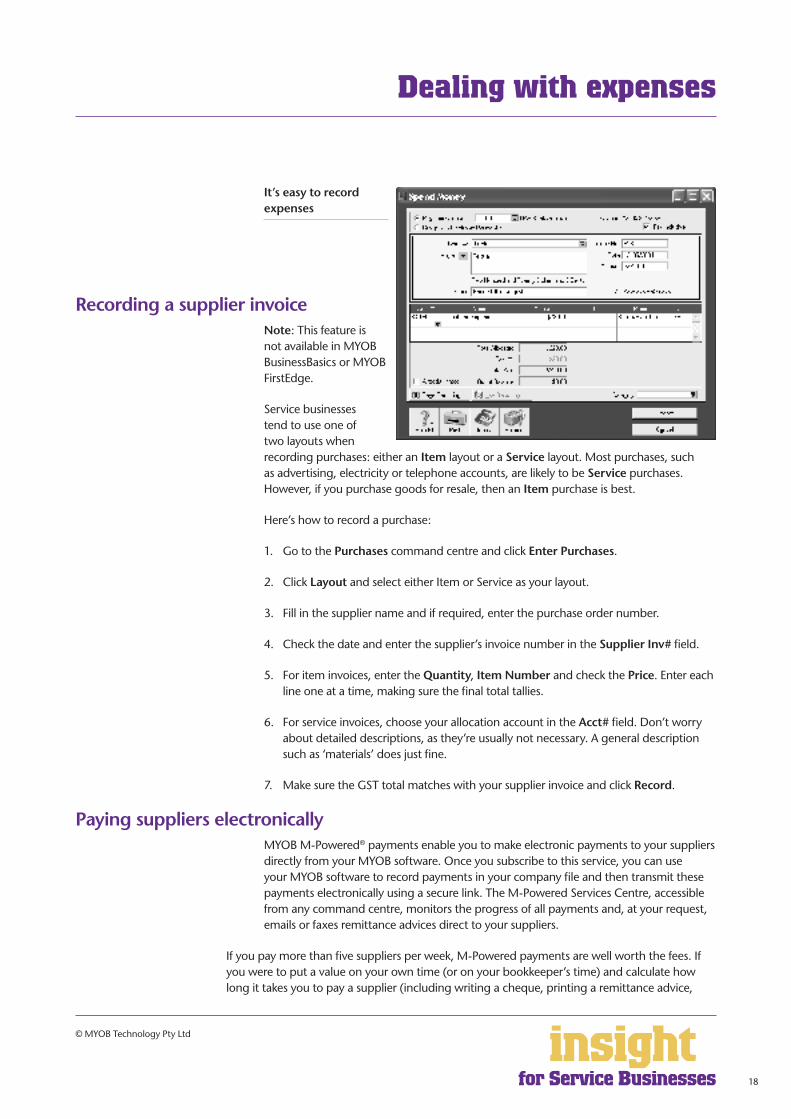
It’s easy to record expenses
Recording a supplier invoiceNote: This feature is not available in MYOB BusinessBasics or MYOB FirstEdge.
Service businesses tend to use one of two layouts when recording purchases: either an Item layout or a Service layout. Most purchases, such as advertising, electricity or telephone accounts, are likely to be Service purchases. However, if you purchase goods for resale, then an Item purchase is best.
Here’s how to record a purchase:
1. Go to the Purchases command centre and click Enter Purchases.
2. Click Layout and select either Item or Service as your layout.
3. Fill in the supplier name and if required, enter the purchase order number.
4. Check the date and enter the supplier’s invoice number in the Supplier Inv# field.
5. For item invoices, enter the Quantity, Item Number and check the Price. Enter each line one at a time, making sure the final total tallies.
6. For service invoices, choose your allocation account in the Acct# field. Don’t worry about detailed descriptions, as they’re usually not necessary. A general description such as ‘materials’ does just fine.
7. Make sure the GST total matches with your supplier invoice and click Record.
Paying suppliers electronicallyMYOB M-Powered® payments enable you to make electronic payments to your suppliers directly from your MYOB software. Once you subscribe to this service, you can use your MYOB software to record payments in your company file and then transmit these payments electronically using a secure link. The M-Powered Services Centre, accessible from any command centre, monitors the progress of all payments and, at your request, emails or faxes remittance advices direct to your suppliers.
If you pay more than five suppliers per week, M-Powered payments are well worth the fees. If you were to put a value on your own time (or on your bookkeeper’s time) and calculate how long it takes you to pay a supplier (including writing a cheque, printing a remittance advice,
Dealing with expenses
19
insightfor for Service Businesses
© MYOB Technology Pty Ltd
writing their address on an envelope, entering the payment into your MYOB company file, and so on) as well as the costs (the envelope, the stamp, the petrol to the post office, etc.), then chances are that paying a supplier is much more expensive than you think.
M-Powered payments offer other benefits too, although these are somewhat less tangible. You can schedule payments to be made at future dates, ensuring that suppliers are paid on time, even when you’re away from the business. Payments are more secure, as you pay directly from your account into your supplier’s account (whereas cheques are more prone to fraud or getting lost in the mail). Finally, the M-Powered Services Centre keeps track of all online payments, including when payments are sent, when they’re processed, if they fail due to insufficient finds, and so on.
To subscribe to M-Powered payments, all you have to do is click the M-Powered Services Centre icon that appears on the bottom-right of every command centre. (Note that M-Powered payments are only available for MYOB Accounting v14, MYOB Accounting Plus v14 and MYOB Premier v8.)
For more information about M-Powered payments, including how to subscribe and current pricing structures, see www.myob.com.au/m-powered/ .
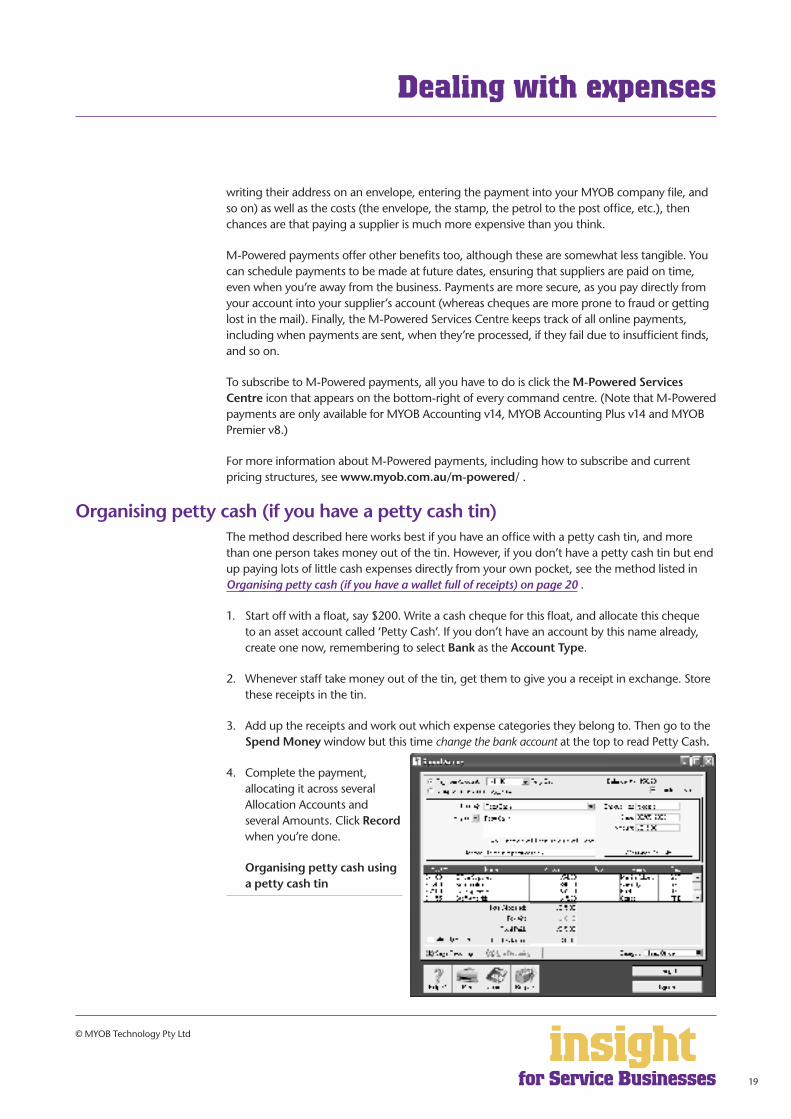
Organising petty cash (if you have a petty cash tin)The method described here works best if you have an office with a petty cash tin, and more than one person takes money out of the tin. However, if you don’t have a petty cash tin but end up paying lots of little cash expenses directly from your own pocket, see the method listed in Organising petty cash (if you have a wallet full of receipts) on page 20 .
1. Start off with a float, say $200. Write a cash cheque for this float, and allocate this cheque to an asset account called ‘Petty Cash’. If you don’t have an account by this name already, create one now, remembering to select Bank as the Account Type.
2. Whenever staff take money out of the tin, get them to give you a receipt in exchange. Store these receipts in the tin.
3. Add up the receipts and work out which expense categories they belong to. Then go to the Spend Money window but this time change the bank account at the top to read Petty Cash.
4. Complete the payment, allocating it across several Allocation Accounts and several Amounts. Click Record when you’re done.
Organising petty cash using a petty cash tin
Dealing with expenses
20
insightfor for Service Businesses
© MYOB Technology Pty Ltd
When funds in the tin get low, write out a cash cheque to top the tin back up to its original float value. For example, if you have a $200 float but there’s only $4.50 left in the tin, write out a cash cheque for $195.50. Allocate this cheque to Petty Cash.
Organising petty cash (if you have a wallet full of receipts)If you don’t have a petty cash tin, but end up paying lots of cash expenses directly from your own pocket, you’ll find the following method works best.
1. Pile these receipts into their various categories and then, with a calculator, add up the value of each pile of receipts. You might end up with $40 worth of receipts for stationery, $50 for postage, $15 for travel and so on.
2. Go to the Spend Money window and select Petty Cash as your bank account in the top left corner.
3. Enter the total value of all these receipts added together as the Amount.
4. Split the transaction across the appropriate expense accounts, writing individual memos on each line, if desired.
Dealing with expenses
21
insightfor for Service Businesses
© MYOB Technology Pty Ltd
If your business buys items for resale to customers, then MYOB software can help streamline sales, customer receipts and ordering. The solution is to set up all items that you buy or sell in the Items List. You can also set up items if you rent out equipment to customers as a service, so that you can track what’s currently out on rental, who’s got what, and how much they need to pay.
Setting up inventory for things you buy and sellMany service businesses buy items for resale to customers (hairdressers buy and sell hair products; training companies buy and sell training materials; landscape gardeners buy and sell plants). MYOB software makes it easy for you to bill customers for these items, as well as tracking the income and expenditure from sales.
The simplest approach is simply to set a description and price for each item in the Items List. When you create these items, mark the I Sell This Item checkbox only (not available in MYOB BusinessBasics or MYOB FirstEdge), and select an income account such as “Income – Plants”. This way you can raise customer invoices easily and efficiently and if desired, generate sales reports for each item sold.
The more complex approach is to keep track of quantities on hand, so that you record every unit bought and sold (not available in MYOB BusinessBasics or MYOB FirstEdge). When you create these items in the Items List, you click I Sell This Item, I Buy This Item and I Inventory This Item. This approach is more time-consuming than simply tracking what you sell, but proves to be an efficient way of monitoring stock levels, generating re-orders and keeping an eye on costs.
Providing rental services for equipmentIf you rent out lots of equipment, you will almost certainly need to maintain an asset register of some description, and possibly also calculate depreciation. MYOB AssetManager Pro is a special program designed to do just this, enabling you to keep organised records of all assets (along with details of location and maintenance schedules), as well as calculating monthly and annual depreciation. (Incidentally, many businesses use MYOB AssetManager Pro for cataloguing all their assets, not just the equipment they rent to customers.)
To find out more about MYOB AssetManager Pro, visit www.myob.com.au/products/ .
Buying and reselling items
22
insightfor for Service Businesses
© MYOB Technology Pty Ltd
Business Name: Bush Designs
Overview: Linda is an architect and designs simple kit homes and timber homes, using recycled materials wherever possible. She has five employees and runs MYOB Accounting Plus.
Linda’s business has been extraordinarily successful. Starting only three years ago working from home, Linda’s kit homes instantly found their niche and before long, she was getting orders from all around Australia.
Linda has been very fortunate in that her brother is an accountant, and he set her up with MYOB Accounting Plus right from the start. Before long, Linda found that MYOB was an essential business tool, not only keeping track of her accounts, tax, GST and payroll but also maintaining a vital reference of customer and supplier names, details and buying history.
To cope with the rapid growth, Linda uses the budget features in MYOB Accounting Plus, sending budgets from MYOB into Excel every month and carefully examining where actual results vary significantly from forecasts. The kit homes require major expenditure up front and so, over time, Linda has adapted her budgets to incorporate movements of cash such as loans and large customer payments, helping her to see in advance when cash is going to run short.
Linda also uses the MYOB software’s job features to divide her business into two cost centres (the kit homes and the individual consultations). She’s discovered that although the kit homes generate by far the most income, the associated expenses tend to blow out. Surprisingly, her modest consulting work is subsidising the kit home part of her business. She is now refining her business model, hoping to make both cost centres profitable within the next 18 months.
Case Study – Bush Designs
23
insightfor for Service Businesses
© MYOB Technology Pty Ltd
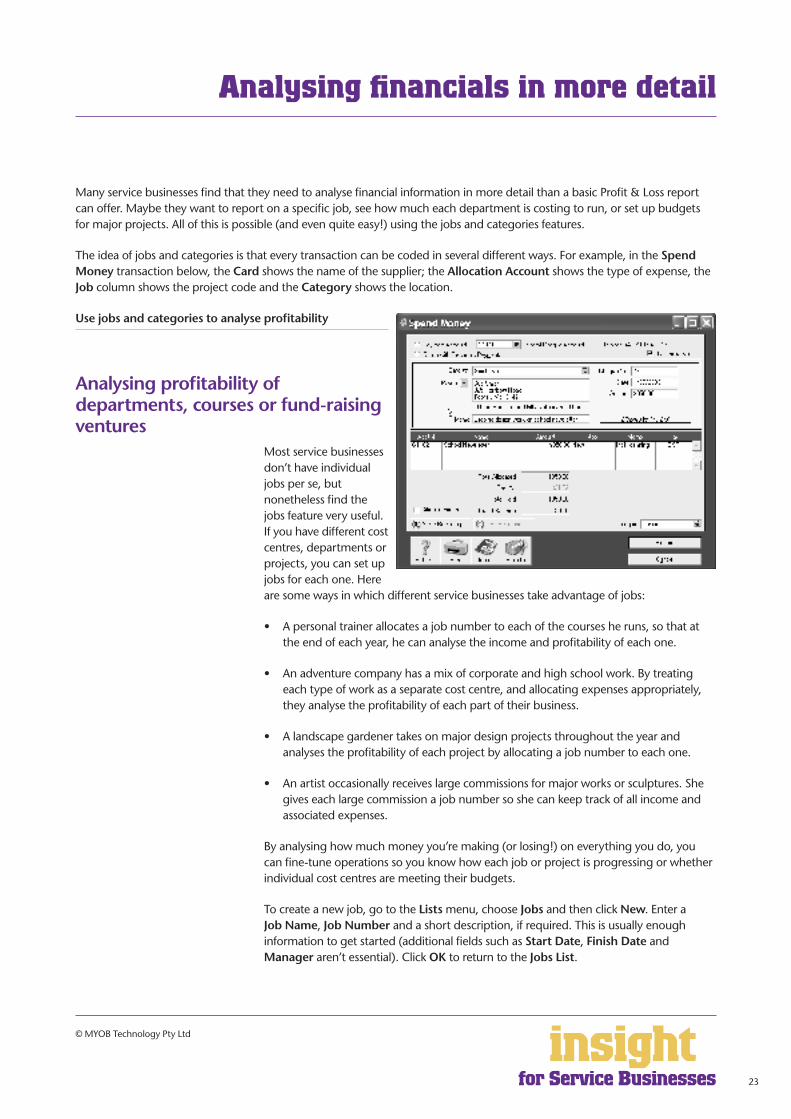
Many service businesses find that they need to analyse financial information in more detail than a basic Profit & Loss report can offer. Maybe they want to report on a specific job, see how much each department is costing to run, or set up budgets for major projects. All of this is possible (and even quite easy!) using the jobs and categories features.
The idea of jobs and categories is that every transaction can be coded in several different ways. For example, in the Spend Money transaction below, the Card shows the name of the supplier; the Allocation Account shows the type of expense, the Job column shows the project code and the Category shows the location.
Use jobs and categories to analyse profitability
Analysing profitability of departments, courses or fund-raising ventures
Most service businesses don’t have individual jobs per se, but nonetheless find the jobs feature very useful. If you have different cost centres, departments or projects, you can set up jobs for each one. Here are some ways in which different service businesses take advantage of jobs:
• A personal trainer allocates a job number to each of the courses he runs, so that at the end of each year, he can analyse the income and profitability of each one.
• An adventure company has a mix of corporate and high school work. By treating each type of work as a separate cost centre, and allocating expenses appropriately, they analyse the profitability of each part of their business.
• A landscape gardener takes on major design projects throughout the year and analyses the profitability of each project by allocating a job number to each one.
• An artist occasionally receives large commissions for major works or sculptures. She gives each large commission a job number so she can keep track of all income and associated expenses.
By analysing how much money you’re making (or losing!) on everything you do, you can fine-tune operations so you know how each job or project is progressing or whether individual cost centres are meeting their budgets.
To create a new job, go to the Lists menu, choose Jobs and then click New. Enter a Job Name, Job Number and a short description, if required. This is usually enough information to get started (additional fields such as Start Date, Finish Date and Manager aren’t essential). Click OK to return to the Jobs List.
Analysing financials in more detail
24
insightfor for Service Businesses
© MYOB Technology Pty Ltd
Analysing profitability of different divisions or locationsCategories (available in MYOB Accounting, MYOB Accounting Plus, MYOB Premier and MYOB AccountEdge only) offer an additional level of analysis and are ideal for tracking the performance of different locations or divisions. For example, an interior design company that has offices in three locations might use categories to track the performance of the business in each location.
If you’re unsure of whether to use categories or jobs for something, bear in mind that you can split a single transaction across several jobs, but you can’t select more than one category for a single transaction.
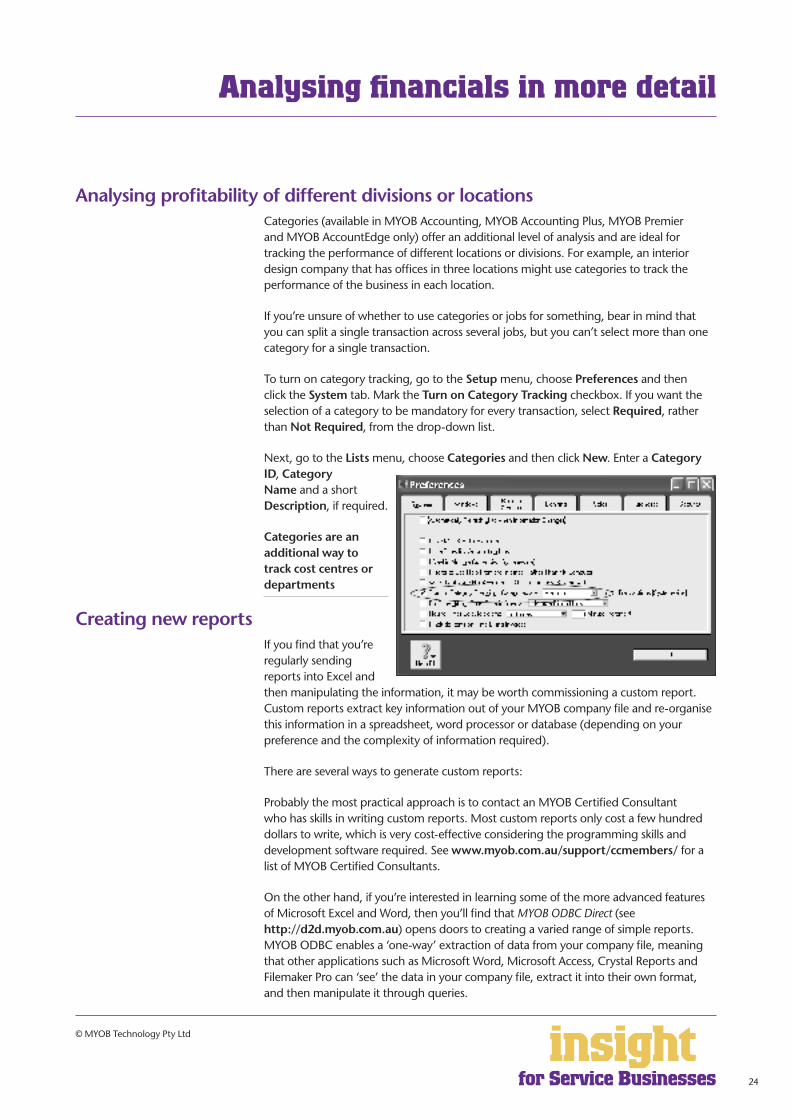
To turn on category tracking, go to the Setup menu, choose Preferences and then click the System tab. Mark the Turn on Category Tracking checkbox. If you want the selection of a category to be mandatory for every transaction, select Required, rather than Not Required, from the drop-down list.
Next, go to the Lists menu, choose Categories and then click New. Enter a Category ID, Category Name and a short Description, if required.
Categories are an additional way to track cost centres or departments
Creating new reportsIf you find that you’re regularly sending reports into Excel and then manipulating the information, it may be worth commissioning a custom report. Custom reports extract key information out of your MYOB company file and re-organise this information in a spreadsheet, word processor or database (depending on your preference and the complexity of information required).
There are several ways to generate custom reports:
Probably the most practical approach is to contact an MYOB Certified Consultant who has skills in writing custom reports. Most custom reports only cost a few hundred dollars to write, which is very cost-effective considering the programming skills and development software required. See www.myob.com.au/support/ccmembers/ for a list of MYOB Certified Consultants.
On the other hand, if you’re interested in learning some of the more advanced features of Microsoft Excel and Word, then you’ll find that MYOB ODBC Direct (see http://d2d.myob.com.au) opens doors to creating a varied range of simple reports. MYOB ODBC enables a ‘one-way’ extraction of data from your company file, meaning that other applications such as Microsoft Word, Microsoft Access, Crystal Reports and Filemaker Pro can ‘see’ the data in your company file, extract it into their own format, and then manipulate it through queries.
Analysing financials in more detail
25
insightfor for Service Businesses
© MYOB Technology Pty Ltd
MYOB ReportWriter (see www.myob.com.au/products/reportwriter) relies on a custom version of ODBC Direct to help you generate your own custom reports, working with the data in your MYOB company file. Although MYOB ReportWriter facilitates the learning process for fledgling programmers, you’ll need some understanding of relational databases and of the MYOB company file structure.
MYOB BusinessAnalyst functions as an intelligent viewer for ReportWriter reports (see www.myob.com.au/products/), meaning that you can enjoy the benefits of custom reports without having to purchase MYOB ReportWriter or DeveloperPack. In a way, BusinessAnalyst is like working with lego: once you have a pile of blocks, you can move them around and manipulate them. Building reports becomes easy, even fun. However, if a new block is needed (a different kind of report, drawing on different data), then you have to ask the ‘factory’ (ReportWriter) to do it for you.
Analysing financials in more detail
26
insightfor for Service Businesses
© MYOB Technology Pty Ltd
One of the most significant expenses for most service businesses is wages. This being the case, it makes sense if you can not only make your weekly payroll process as efficient as possible, but, from a management perspective, generate payroll management reports summarising total spending for each employee and pay category.
MYOB Accounting Plus, MYOB Premier and MYOB AccountEdge all offer integrated payroll management.
Reporting on payroll expenses One of the first ways to analyse payroll totals is to separate wages into lots of categories, rather than reporting it as one lump sum. (This tip assumes that you have MYOB Accounting Plus, MYOB Premier or MYOB AccountEdge and that you’re using the payroll features.)
Start off in the Accounts List window and create separate wage expense accounts for each major wages category in your business. For example, a business might have ‘Admin Wages’, ‘Bookkeeper Wages’, ‘Salesperson Wages’, and ‘Management Wages’. Remember that you can create Header Accounts and Detail Accounts in your Accounts List. Wages can be a Header Account, and the different types of wages can be Detail Accounts underneath.
Next, review the Wages Expense Account in the Wages section of each employee’s card. Change these accounts so they reflect the detailed categories you just created in the Accounts List. For example, you might change the Wages Expense Account for a cleaner from ‘Wages Expense’ to ‘Wages Cleaning’.
Having completed this setup, you’ll find that Profit & Loss reports, Budget reports and Job Profit & Loss reports will all include detailed reporting on wage expenses.
Analysing payroll percentagesOne big advantage of setting up wages accounts in detail is that you can analyse each type of wage expense as a percentage of income. Percentages can be more meaningful than dollar figures, for it is easy to know in your head that your income rose last year and so did your wages bill, but it is not so easy to know in your head whether the wages rose in proportion to your income!
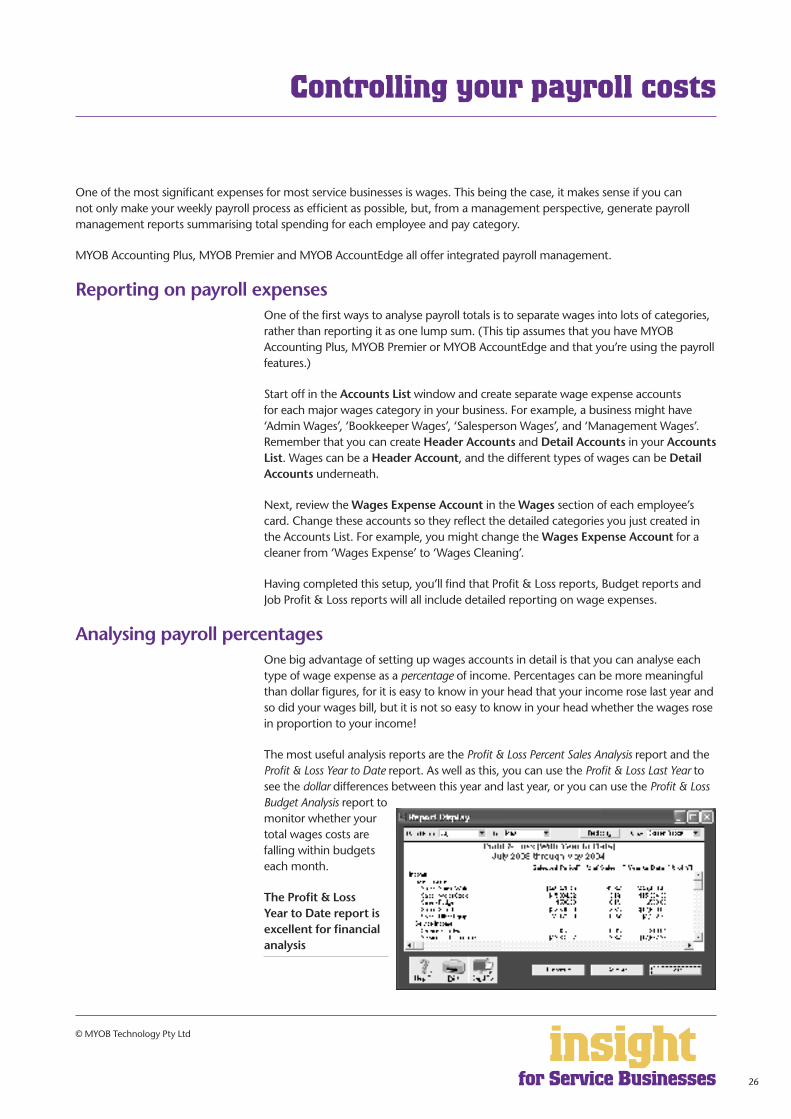
The most useful analysis reports are the Profit & Loss Percent Sales Analysis report and the Profit & Loss Year to Date report. As well as this, you can use the Profit & Loss Last Year to see the dollar differences between this year and last year, or you can use the Profit & Loss Budget Analysis report to monitor whether your total wages costs are falling within budgets each month.
The Profit & Loss Year to Date report is excellent for financial analysis
Controlling your payroll costs
27
insightfor for Service Businesses
© MYOB Technology Pty Ltd
Discuss these percentages with other service businesses similar to yourself, either through your industry association or by visiting www.cchbenchmarking.com.au . This comparison will demonstrate how your business performs when compared to others, and you can monitor this percentage on a monthly and yearly basis. If wages are taking an ever increasing percentage of your income, or if wages costs are much higher than they ought to be for your industry, use this information to evaluate where inefficiencies might be occurring.
Controlling your payroll costs
28
insightfor for Service Businesses
© MYOB Technology Pty Ltd
MYOB software makes accounting for GST about as easy as something so complex could be. So long as you record all your transactions and allocate the right tax code to each one, there’s not a great deal that can go wrong. The main thing to remember is to allocate the right tax code when recording transactions. This done, everything else should fall into place.
Recording GST on income and expensesWhenever you record a transaction, you can choose whether to enter the amount as tax-inclusive or tax-exclusive by marking or clearing the Tax Inclusive checkbox in the top-right corner of every window. (When recording payments or receipts in MYOB BusinessBasics and FirstEdge, you will have to click Split in order to view this option.)
Usually, you’ll find it easiest to mark the Tax Inclusive checkbox and enter all amounts including tax. You’ll find that the GST calculates automatically and you don’t have to go looking up every receipt to double-check the tax total.
Most service businesses find that they only need six tax codes: CAP; FRE; GST; ITS; N-T and QUE.
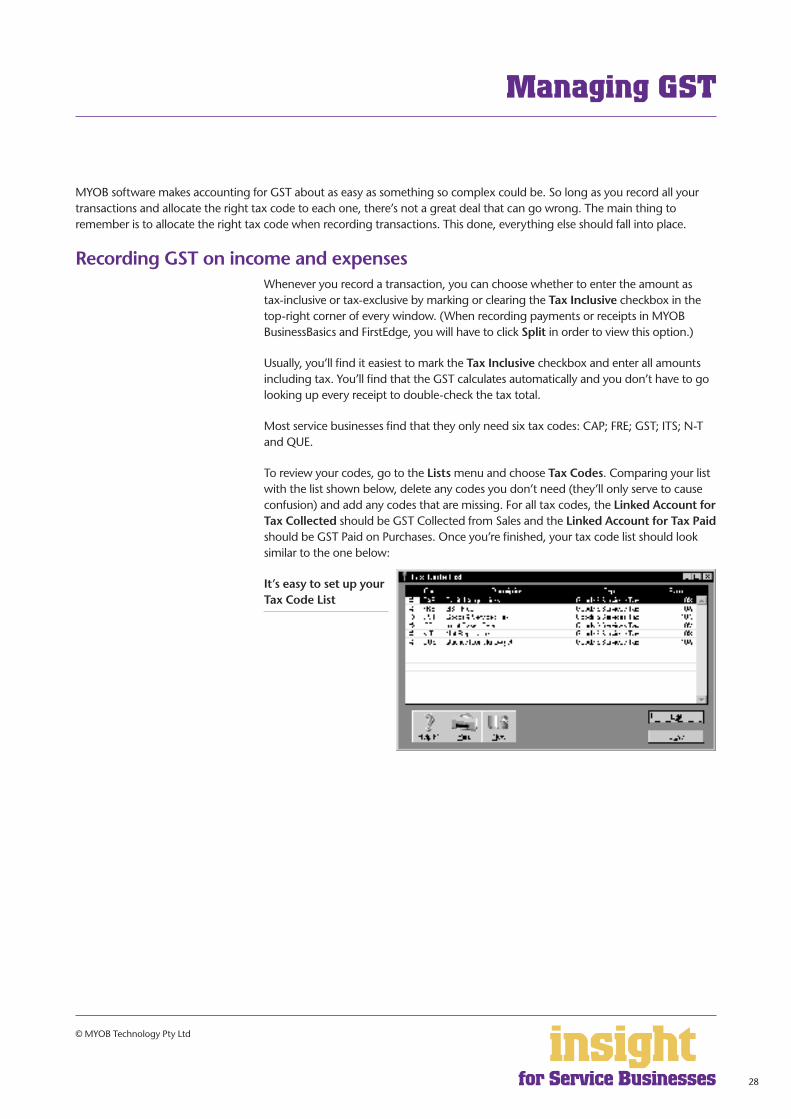
To review your codes, go to the Lists menu and choose Tax Codes. Comparing your list with the list shown below, delete any codes you don’t need (they’ll only serve to cause confusion) and add any codes that are missing. For all tax codes, the Linked Account for Tax Collected should be GST Collected from Sales and the Linked Account for Tax Paid should be GST Paid on Purchases. Once you’re finished, your tax code list should look similar to the one below:
It’s easy to set up your Tax Code List
Managing GST
29
insightfor for Service Businesses
© MYOB Technology Pty Ltd
What do the different codes mean? Here’s an explanation:
CAP (GST on capital acquisitions)
If you are part of the Simplified Tax System (which is the case for most service businesses turning over less than $1 million per year), then you need to report all capital acquisitions (new equipment, furnishings or vehicles) that cost more than $1,000. To do this, you will need to use the CAP tax code when recording these transactions.
If you’re not part of the Simplified Tax System then you may need to report all capital acquisitions (new equipment, furnishings or vehicles) separately on your Business Activity Statement. To do this, you will need to use the CAP code when recording these transactions.
If you’re not sure whether or not you’re part of the Simplified Tax System, or how to handle an asset purchase ask your accountant.
FRE (GST-free goods and services)
Even if you don’t sell any GST-free goods or services, you’re bound to end up purchasing GST-free supplies such as bank charges, donations or government charges. If you employ any subcontractors who have an ABN but aren’t registered for GST, use FRE as the tax code for their payments.
GST (Goods and Services Tax)
GST is the tax code that you’ll use for most sales and purchases.
INP (input-taxed purchase)
Use this code for all expenses that relate to residential property investments (Note: You can’t claim input tax credits for such expenses, therefore the tax rate should be 0%).
ITS (input taxed sale)
Use this code for interest income and rental income from residential property investments.
N-T (not reportable)
Use this code for everything that falls outside the GST net, such as wages; superannuation; loan repayments; bank transfers and personal spending.
QUE (query)
Use the query code whenever you’re not sure what code to use. That way, when you get to the end of the quarter, you can print a report for all transactions coded QUE and ask your accountant or MYOB Certified Consultant to give you a hand choosing the correct codes.
Managing GST
30
insightfor for Service Businesses
© MYOB Technology Pty Ltd
Deciding which codes to use whenOne of the tricky things when first recording income and expenses is to figure out which tax code to use when. Here are tips to help you out, written especially with service businesses in mind:
Income
• Almost all services attract GST and so you select GST as the tax code when invoicing customers.
• Interest income should have ITS as the tax code.
• Personal income which isn’t really income (for example, a family loan, a gift or a tax refund) should have N-T as the tax code.
Expenses
• Most expenses should have GST as the tax code, including things such as advertising, electricity, postage and telephone.
• Capital acquisitions should have CAP as the tax code.
• Donations should have FRE as the tax code, as should almost all bank charges and interest expense. However, watch out, as merchant fees should have GST as the tax code.
• Government charges are almost all GST-free, and include licence renewals, motor vehicle registration, council rates, water rates, land tax and stamp duty.
• Hire purchase and lease payments depend on what you’re paying off, when you bought it and how your accountant intends to treat it. Ask your accountant.
• Insurance is tricky, because almost every insurance policy is a mixture of taxable and tax-free (stamp duty doesn’t have GST on it). Enter QUE as the tax code for insurance expense, then double-check the exact amount of GST on every insurance payment when you record it.
• Milk, tea, coffee and some first aid supplies should have FRE as the tax code.
• 100% private-use expenses should have N-T as the tax code.
• Residential rents should have ITS as the tax code, commercial rent should have GST as the tax code.
• Subcontractors should have GST as the tax code. However, if you employ any subbies who aren’t registered for GST, but have an ABN, record these expenses as FRE.
• Superannuation should have N-T as the tax code.
• Travel within Australia should have GST as the tax code; overseas travel should have FRE as the tax code.
• Wages should have N-T as the tax code.
Managing GST
31
insightfor for Service Businesses
© MYOB Technology Pty Ltd
Managing GST
Recording transactions if you’re not registered for GSTIf you have an ABN, but you aren’t registered for GST (as is the case for many smaller service businesses who turn over less than $50,000 a year), simply enter N-T as the tax code for every transaction. You may find it best in the long-term if you go to your Accounts List and, one by one, double-click each account and change the linked Tax Code to N-T. This way, N-T comes up as the default tax code for all transactions.
Your customers may also find it helpful if you customise your invoice to make it clear that you’re not charging GST. Here’s what to do:
1. Go to the Sales command centre and click Print Invoices. Choose the Invoice Type and select the customised invoice format to use from the Selected Form for Invoices list. Click Customise.
2. Highlight the text field called ‘Tax Invoice’ and press Delete. This removes the words ‘Tax Invoice’ from the standard template.
3. Now click the text tool (the capital T) from the Forms toolbar and then click on the invoice somewhere near the Comment field. A box called Text Field should appear.
4. Double-click this box and enter the words ‘Our business has an ABN but is not registered for GST. Therefore, all prices are GST-free.’ as your Text. Modify the Font and Size to suit the rest of the invoice. Click OK.
5. If necessary, expand the size of the text field so that all the text fits in. (Change the size of a field by resting your mouse on the bottom right corner of the field and dragging this corner outwards.)
6. Click Save Form As and enter ‘Invoice’ as the form Description. Then click OK to return to the Print Invoices window.