Embed Size (px)
Citation preview
1HOW I GOT THE SHOT
an educational guide by:
2HOW I GOT THE SHOT
© 2016 Tether ToolsNo part of this publication may be reproduced, stored in a retrieval system or transmitted in any form or by any means, electronic, mechanical, photocopying, recording, scanning or otherwise, without the prior written consent of Tether Tools. The logos of the companies described are the trademarks of their respective owners. No endorsement is implied.Tether Tools. makes no representations or warranties with respect to the accuracy or completeness of the contents of this work and specifically disclaim all warranties, including without lim-itation warranties of fitness for a particular purpose. The advice and strategies contained herein may not be suitable for every situation.
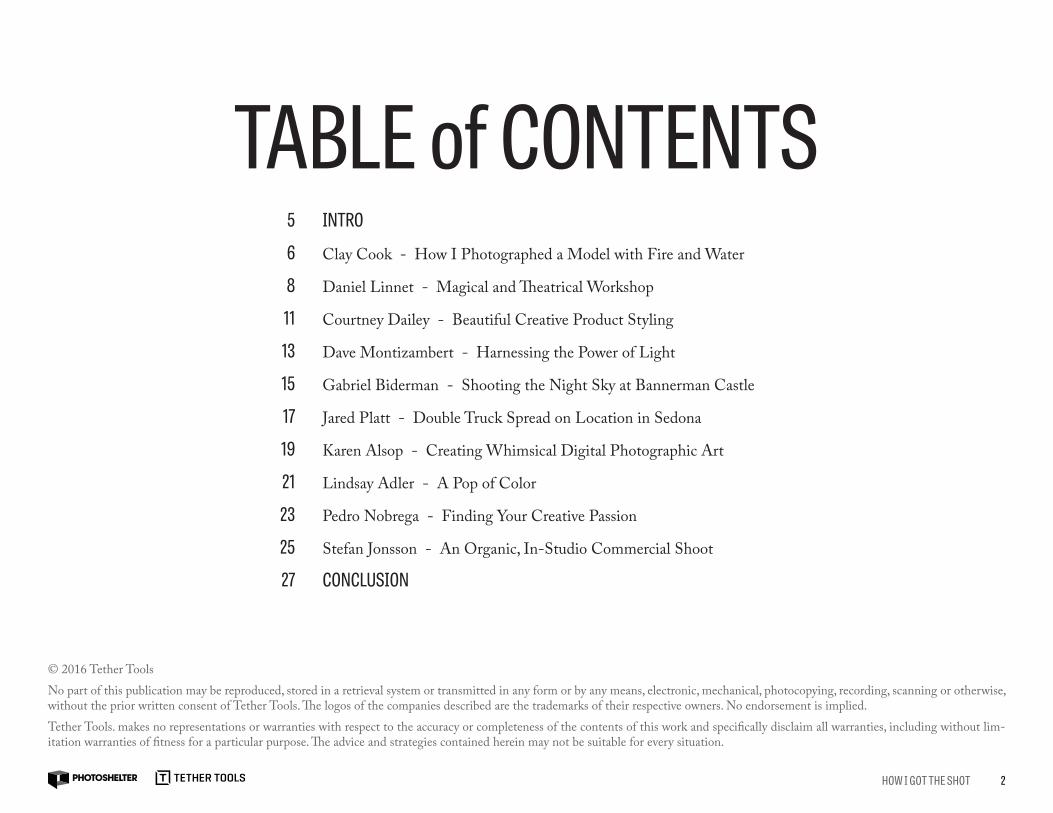
TABLE of CONTENTSINTRO
Clay Cook - How I Photographed a Model with Fire and Water
Daniel Linnet - Magical and Theatrical Workshop
Courtney Dailey - Beautiful Creative Product Styling
Dave Montizambert - Harnessing the Power of Light
Gabriel Biderman - Shooting the Night Sky at Bannerman Castle
Jared Platt - Double Truck Spread on Location in Sedona
Karen Alsop - Creating Whimsical Digital Photographic Art
Lindsay Adler - A Pop of Color
Pedro Nobrega - Finding Your Creative Passion
Stefan Jonsson - An Organic, In-Studio Commercial Shoot
CONCLUSION
5
6
8
11
13
15
17
19
21
23
25
27
3HOW I GOT THE SHOT
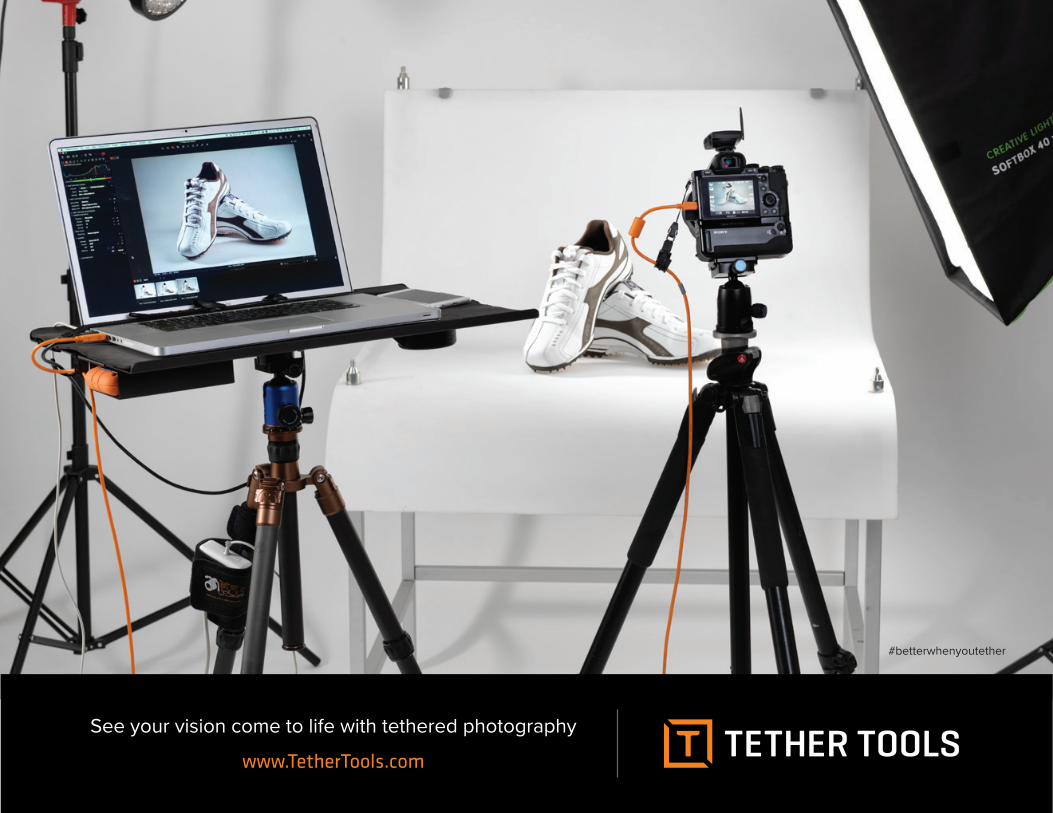
#betterwhenyoutether
See your vision come to life with tethered photography
www.TetherTools.com
4HOW I GOT THE SHOT1TIPS TO GETTING A PHOTO REP 1THE PHOTOGRAPHER’S GUIDE TO TWITTER
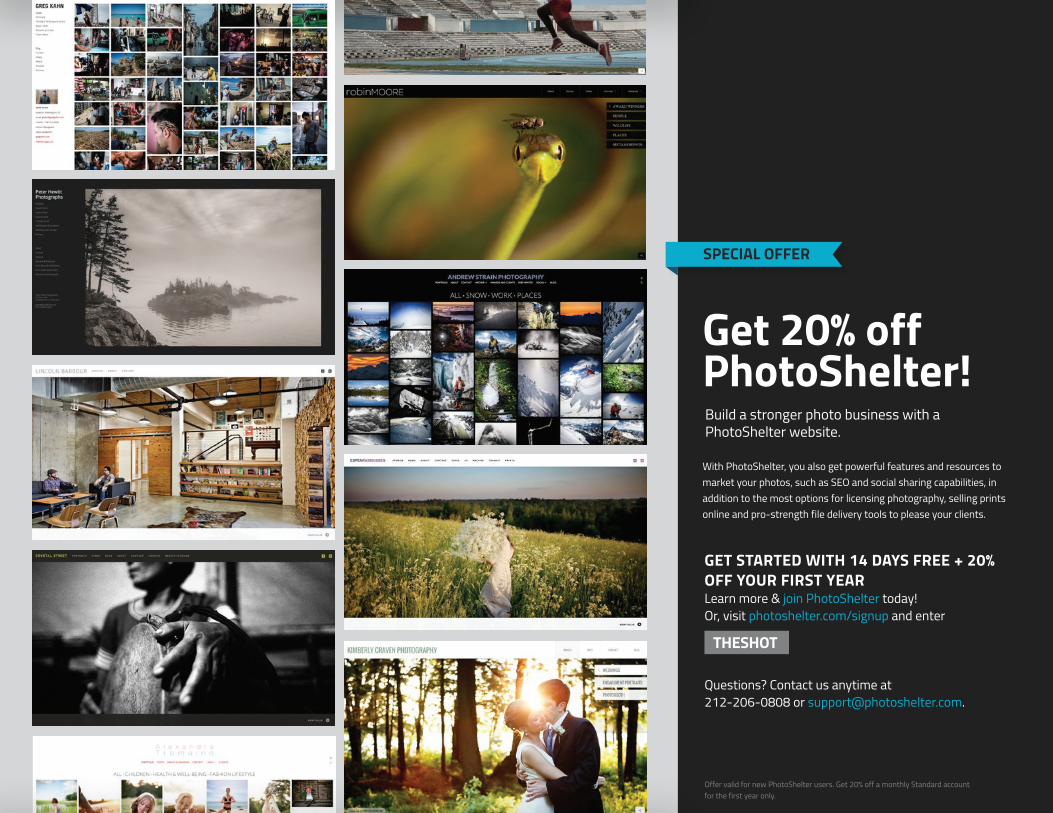
Get 20% off PhotoShelter!Build a stronger photo business with a PhotoShelter website.
With PhotoShelter, you also get powerful features and resources to market your photos, such as SEO and social sharing capabilities, in addition to the most options for licensing photography, selling prints online and pro-strength file delivery tools to please your clients.
GET STARTED WITH 14 DAYS FREE + 20% OFF YOUR FIRST YEARLearn more & join PhotoShelter today!Or, visit photoshelter.com/signup and enter
Questions? Contact us anytime at 212-206-0808 or [email protected].
Offer valid for new PhotoShelter users. Get 20% off a monthly Standard account for the first year only.
THESHOT
SPECIAL OFFER
5HOW I GOT THE SHOT
Tether Tools and PhotoShelter are proud to present this How I Got the Shot Educational Series
which showcases ten incredibly talented professional photographers whose work widely varies and
includes fashion, commercial, time-lapse, product, portrait, fine art and conceptual photography.
Each educational article features a different image, behind-the-scenes video, as well as a detailed
breakdown of how the shot was made. We’re proud to share this How I Got the Shot Educational
Series with you and thank these ten photographers for pulling back the curtain on their latest shoot.
INTRO
6HOW I GOT THE SHOT
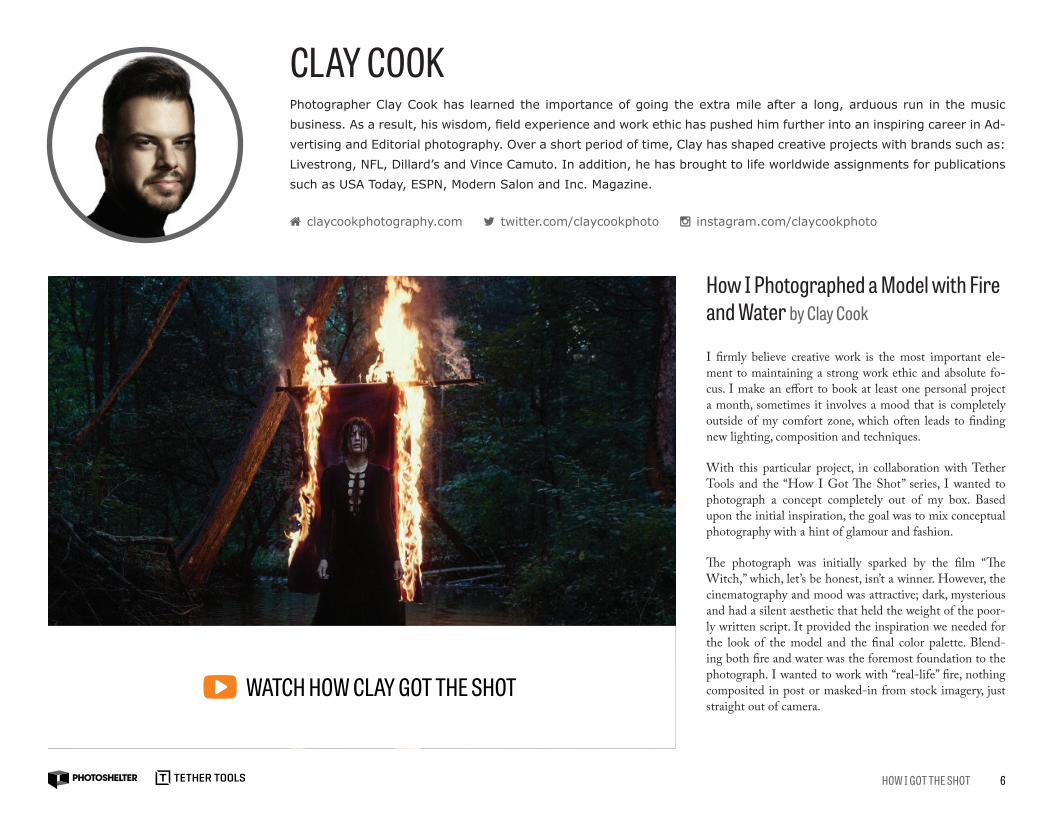
How I Photographed a Model with Fire and Water by Clay Cook
I firmly believe creative work is the most important ele-ment to maintaining a strong work ethic and absolute fo-cus. I make an effort to book at least one personal project a month, sometimes it involves a mood that is completely outside of my comfort zone, which often leads to finding new lighting, composition and techniques.
With this particular project, in collaboration with Tether Tools and the “How I Got The Shot” series, I wanted to photograph a concept completely out of my box. Based upon the initial inspiration, the goal was to mix conceptual photography with a hint of glamour and fashion.
The photograph was initially sparked by the film “The Witch,” which, let’s be honest, isn’t a winner. However, the cinematography and mood was attractive; dark, mysterious and had a silent aesthetic that held the weight of the poor-ly written script. It provided the inspiration we needed for the look of the model and the final color palette. Blend-ing both fire and water was the foremost foundation to the photograph. I wanted to work with “real-life” fire, nothing composited in post or masked-in from stock imagery, just straight out of camera.
CLAY COOKPhotographer Clay Cook has learned the importance of going the extra mile after a long, arduous run in the music
business. As a result, his wisdom, field experience and work ethic has pushed him further into an inspiring career in Ad-
vertising and Editorial photography. Over a short period of time, Clay has shaped creative projects with brands such as:
Livestrong, NFL, Dillard’s and Vince Camuto. In addition, he has brought to life worldwide assignments for publications
such as USA Today, ESPN, Modern Salon and Inc. Magazine.
WATCH HOW CLAY GOT THE SHOT
claycookphotography.com twitter.com/claycookphoto instagram.com/claycookphoto
7HOW I GOT THE SHOT
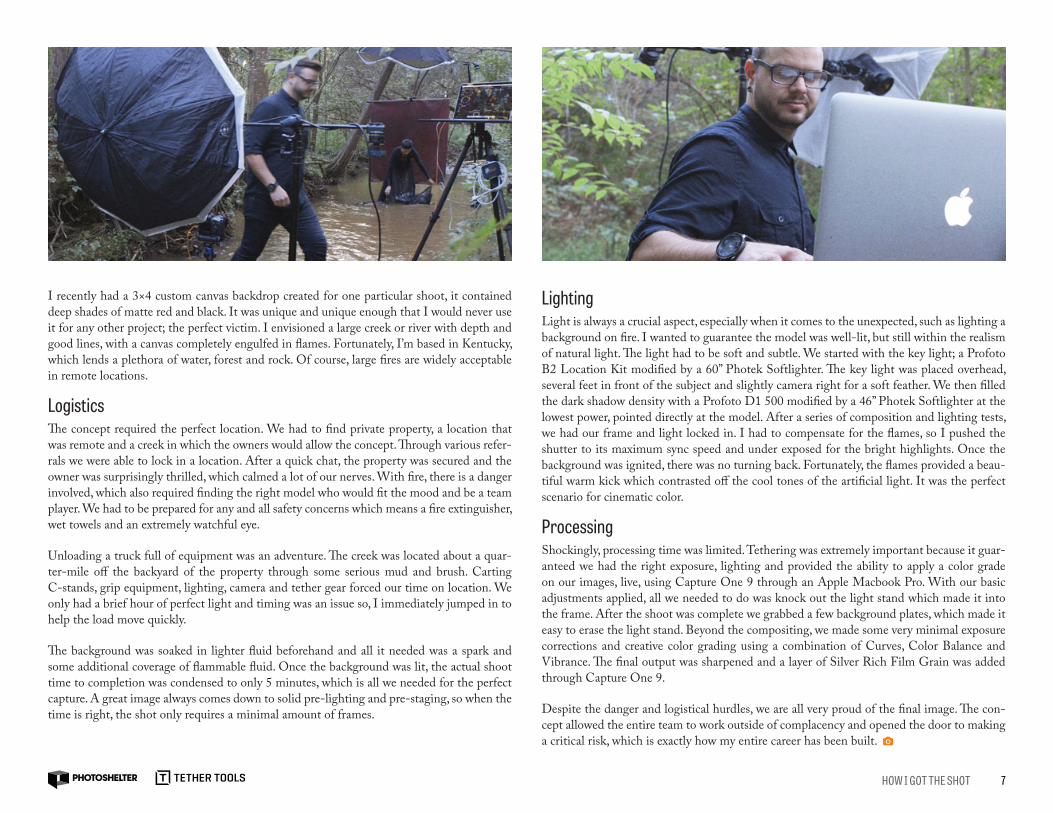
I recently had a 3×4 custom canvas backdrop created for one particular shoot, it contained deep shades of matte red and black. It was unique and unique enough that I would never use it for any other project; the perfect victim. I envisioned a large creek or river with depth and good lines, with a canvas completely engulfed in flames. Fortunately, I’m based in Kentucky, which lends a plethora of water, forest and rock. Of course, large fires are widely acceptable in remote locations.
LogisticsThe concept required the perfect location. We had to find private property, a location that was remote and a creek in which the owners would allow the concept. Through various refer-rals we were able to lock in a location. After a quick chat, the property was secured and the owner was surprisingly thrilled, which calmed a lot of our nerves. With fire, there is a danger involved, which also required finding the right model who would fit the mood and be a team player. We had to be prepared for any and all safety concerns which means a fire extinguisher, wet towels and an extremely watchful eye.
Unloading a truck full of equipment was an adventure. The creek was located about a quar-ter-mile off the backyard of the property through some serious mud and brush. Carting C-stands, grip equipment, lighting, camera and tether gear forced our time on location. We only had a brief hour of perfect light and timing was an issue so, I immediately jumped in to help the load move quickly.
The background was soaked in lighter fluid beforehand and all it needed was a spark and some additional coverage of flammable fluid. Once the background was lit, the actual shoot time to completion was condensed to only 5 minutes, which is all we needed for the perfect capture. A great image always comes down to solid pre-lighting and pre-staging, so when the time is right, the shot only requires a minimal amount of frames.
LightingLight is always a crucial aspect, especially when it comes to the unexpected, such as lighting a background on fire. I wanted to guarantee the model was well-lit, but still within the realism of natural light. The light had to be soft and subtle. We started with the key light; a Profoto B2 Location Kit modified by a 60” Photek Softlighter. The key light was placed overhead, several feet in front of the subject and slightly camera right for a soft feather. We then filled the dark shadow density with a Profoto D1 500 modified by a 46” Photek Softlighter at the lowest power, pointed directly at the model. After a series of composition and lighting tests, we had our frame and light locked in. I had to compensate for the flames, so I pushed the shutter to its maximum sync speed and under exposed for the bright highlights. Once the background was ignited, there was no turning back. Fortunately, the flames provided a beau-tiful warm kick which contrasted off the cool tones of the artificial light. It was the perfect scenario for cinematic color.
ProcessingShockingly, processing time was limited. Tethering was extremely important because it guar-anteed we had the right exposure, lighting and provided the ability to apply a color grade on our images, live, using Capture One 9 through an Apple Macbook Pro. With our basic adjustments applied, all we needed to do was knock out the light stand which made it into the frame. After the shoot was complete we grabbed a few background plates, which made it easy to erase the light stand. Beyond the compositing, we made some very minimal exposure corrections and creative color grading using a combination of Curves, Color Balance and Vibrance. The final output was sharpened and a layer of Silver Rich Film Grain was added through Capture One 9.
Despite the danger and logistical hurdles, we are all very proud of the final image. The con-cept allowed the entire team to work outside of complacency and opened the door to making a critical risk, which is exactly how my entire career has been built.
8HOW I GOT THE SHOT
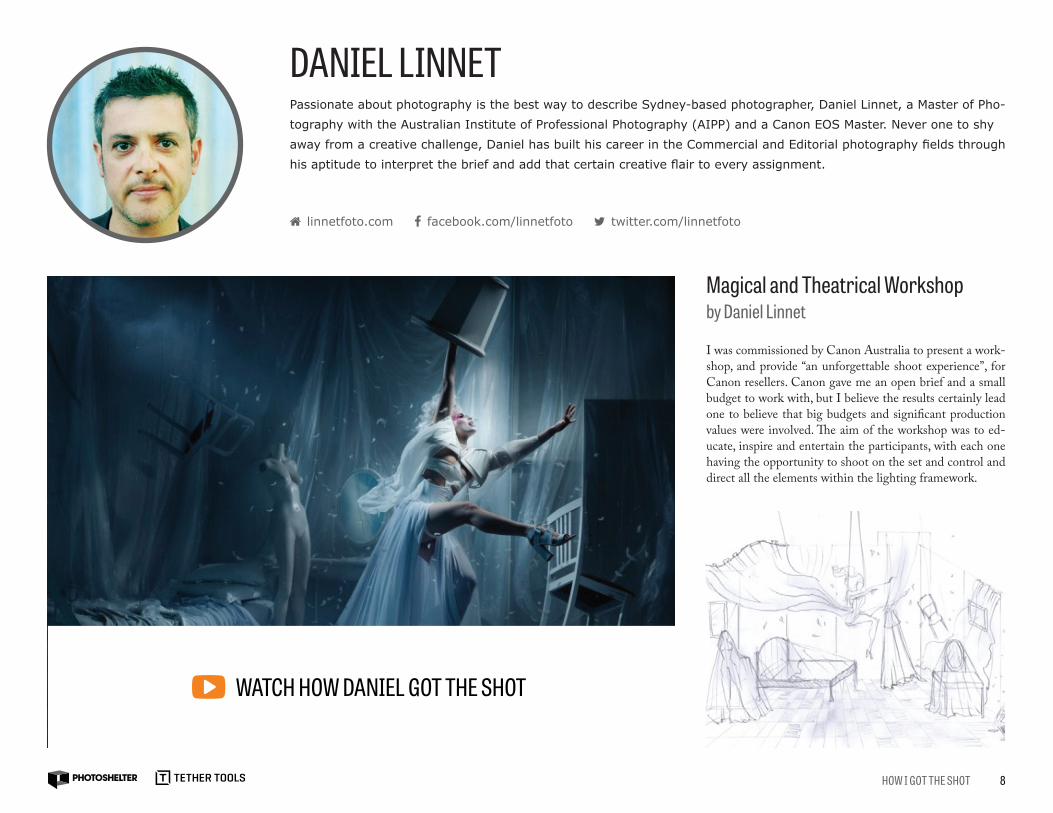
Magical and Theatrical Workshop by Daniel Linnet
I was commissioned by Canon Australia to present a work-shop, and provide “an unforgettable shoot experience”, for Canon resellers. Canon gave me an open brief and a small budget to work with, but I believe the results certainly lead one to believe that big budgets and significant production values were involved. The aim of the workshop was to ed-ucate, inspire and entertain the participants, with each one having the opportunity to shoot on the set and control and direct all the elements within the lighting framework.
WATCH HOW DANIEL GOT THE SHOT
DANIEL LINNETPassionate about photography is the best way to describe Sydney-based photographer, Daniel Linnet, a Master of Pho-
tography with the Australian Institute of Professional Photography (AIPP) and a Canon EOS Master. Never one to shy
away from a creative challenge, Daniel has built his career in the Commercial and Editorial photography fields through
his aptitude to interpret the brief and add that certain creative flair to every assignment.
linnetfoto.com facebook.com/linnetfoto twitter.com/linnetfoto
9HOW I GOT THE SHOT
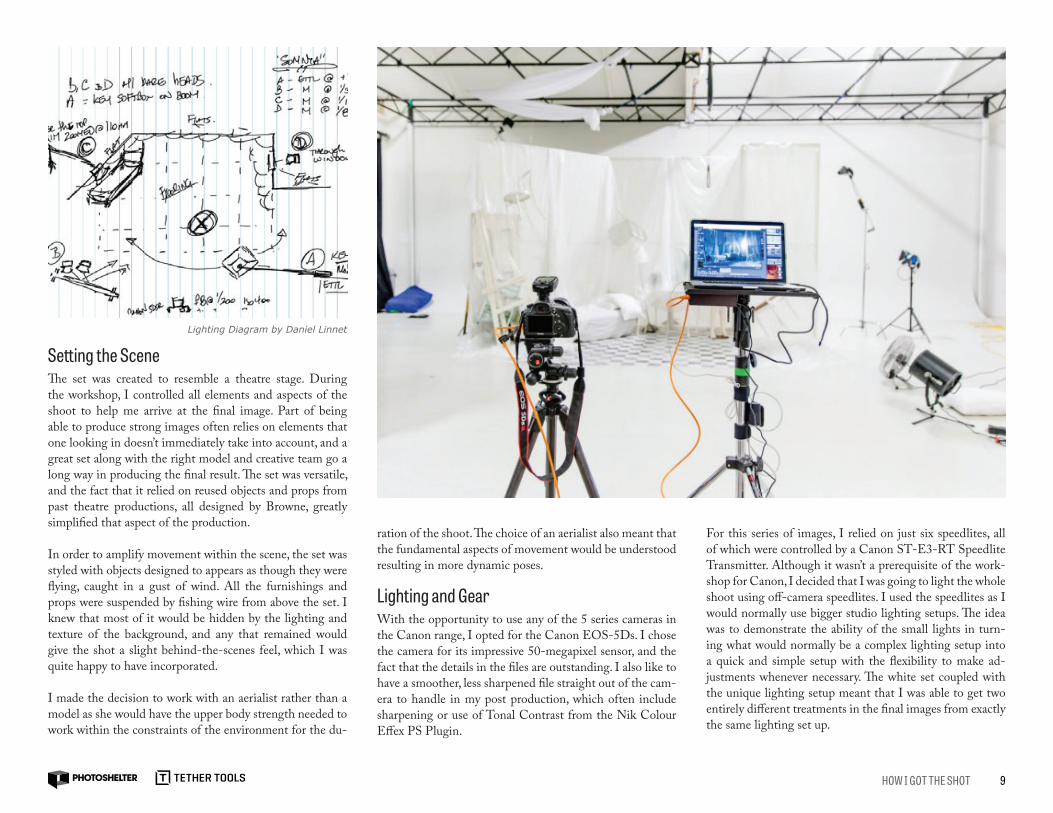
Setting the SceneThe set was created to resemble a theatre stage. During the workshop, I controlled all elements and aspects of the shoot to help me arrive at the final image. Part of being able to produce strong images often relies on elements that one looking in doesn’t immediately take into account, and a great set along with the right model and creative team go a long way in producing the final result. The set was versatile, and the fact that it relied on reused objects and props from past theatre productions, all designed by Browne, greatly simplified that aspect of the production.
In order to amplify movement within the scene, the set was styled with objects designed to appears as though they were flying, caught in a gust of wind. All the furnishings and props were suspended by fishing wire from above the set. I knew that most of it would be hidden by the lighting and texture of the background, and any that remained would give the shot a slight behind-the-scenes feel, which I was quite happy to have incorporated.
I made the decision to work with an aerialist rather than a model as she would have the upper body strength needed to work within the constraints of the environment for the du-
ration of the shoot. The choice of an aerialist also meant that the fundamental aspects of movement would be understood resulting in more dynamic poses.
Lighting and GearWith the opportunity to use any of the 5 series cameras in the Canon range, I opted for the Canon EOS-5Ds. I chose the camera for its impressive 50-megapixel sensor, and the fact that the details in the files are outstanding. I also like to have a smoother, less sharpened file straight out of the cam-era to handle in my post production, which often include sharpening or use of Tonal Contrast from the Nik Colour Effex PS Plugin.
For this series of images, I relied on just six speedlites, all of which were controlled by a Canon ST-E3-RT Speedlite Transmitter. Although it wasn’t a prerequisite of the work-shop for Canon, I decided that I was going to light the whole shoot using off-camera speedlites. I used the speedlites as I would normally use bigger studio lighting setups. The idea was to demonstrate the ability of the small lights in turn-ing what would normally be a complex lighting setup into a quick and simple setup with the flexibility to make ad-justments whenever necessary. The white set coupled with the unique lighting setup meant that I was able to get two entirely different treatments in the final images from exactly the same lighting set up.
Lighting Diagram by Daniel Linnet
10HOW I GOT THE SHOT
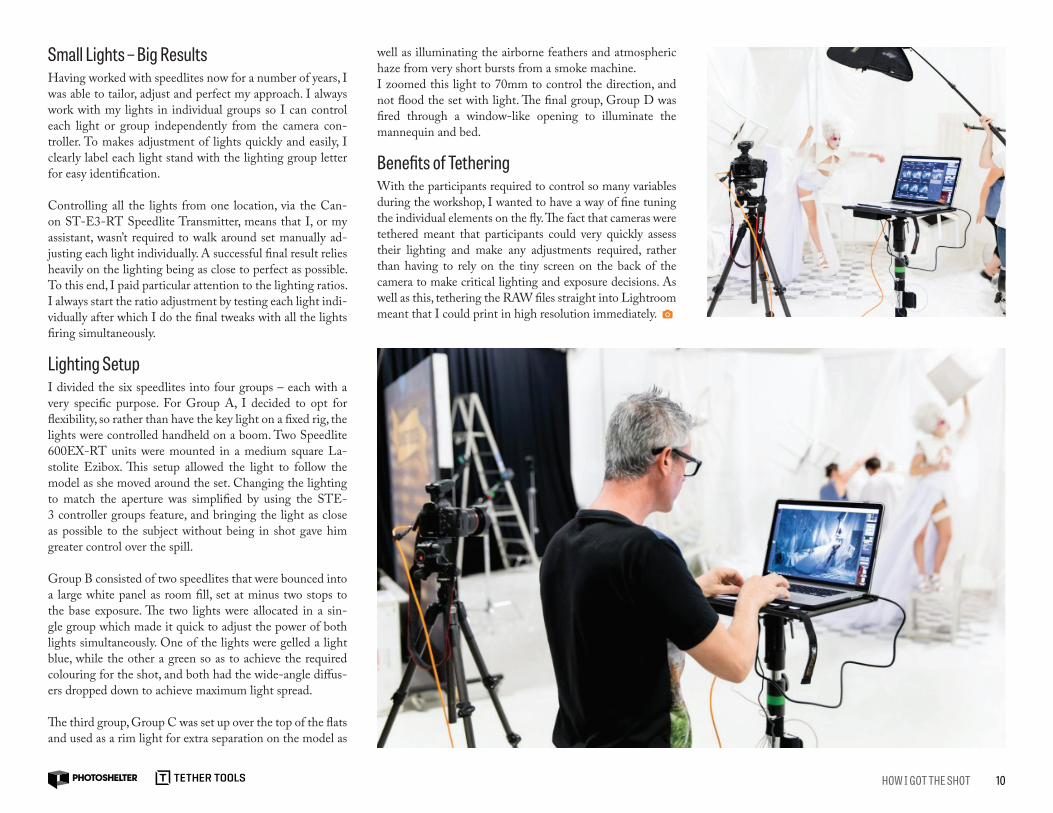
Small Lights – Big ResultsHaving worked with speedlites now for a number of years, I was able to tailor, adjust and perfect my approach. I always work with my lights in individual groups so I can control each light or group independently from the camera con-troller. To makes adjustment of lights quickly and easily, I clearly label each light stand with the lighting group letter for easy identification.
Controlling all the lights from one location, via the Can-on ST-E3-RT Speedlite Transmitter, means that I, or my assistant, wasn’t required to walk around set manually ad-justing each light individually. A successful final result relies heavily on the lighting being as close to perfect as possible. To this end, I paid particular attention to the lighting ratios. I always start the ratio adjustment by testing each light indi-vidually after which I do the final tweaks with all the lights firing simultaneously.
Lighting SetupI divided the six speedlites into four groups – each with a very specific purpose. For Group A, I decided to opt for flexibility, so rather than have the key light on a fixed rig, the lights were controlled handheld on a boom. Two Speedlite 600EX-RT units were mounted in a medium square La-stolite Ezibox. This setup allowed the light to follow the model as she moved around the set. Changing the lighting to match the aperture was simplified by using the STE-3 controller groups feature, and bringing the light as close as possible to the subject without being in shot gave him greater control over the spill.
Group B consisted of two speedlites that were bounced into a large white panel as room fill, set at minus two stops to the base exposure. The two lights were allocated in a sin-gle group which made it quick to adjust the power of both lights simultaneously. One of the lights were gelled a light blue, while the other a green so as to achieve the required colouring for the shot, and both had the wide-angle diffus-ers dropped down to achieve maximum light spread.
The third group, Group C was set up over the top of the flats and used as a rim light for extra separation on the model as
well as illuminating the airborne feathers and atmospheric haze from very short bursts from a smoke machine. I zoomed this light to 70mm to control the direction, and not flood the set with light. The final group, Group D was fired through a window-like opening to illuminate the mannequin and bed.
Benefits of TetheringWith the participants required to control so many variables during the workshop, I wanted to have a way of fine tuning the individual elements on the fly. The fact that cameras were tethered meant that participants could very quickly assess their lighting and make any adjustments required, rather than having to rely on the tiny screen on the back of the camera to make critical lighting and exposure decisions. As well as this, tethering the RAW files straight into Lightroom meant that I could print in high resolution immediately.
11HOW I GOT THE SHOT
WATCH HOW COURTNEY GOT THE SHOT
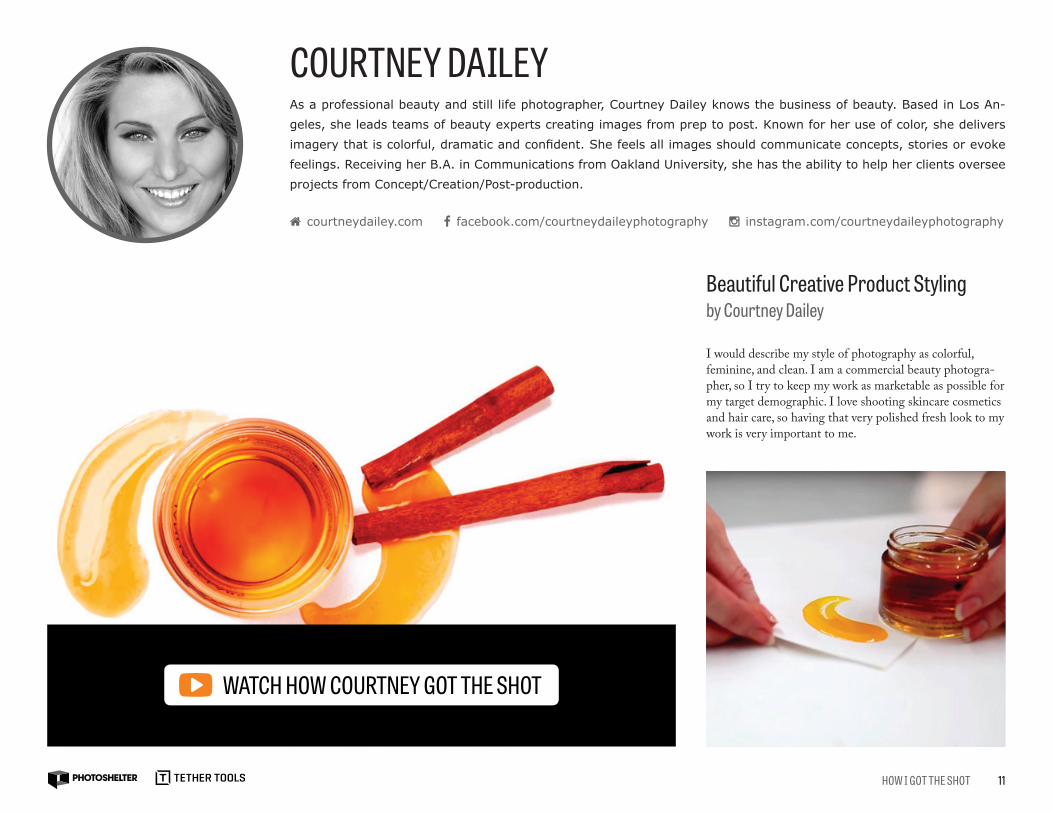
Beautiful Creative Product Styling by Courtney Dailey
I would describe my style of photography as colorful, feminine, and clean. I am a commercial beauty photogra-pher, so I try to keep my work as marketable as possible for my target demographic. I love shooting skincare cosmetics and hair care, so having that very polished fresh look to my work is very important to me.
COURTNEY DAILEYAs a professional beauty and still life photographer, Courtney Dailey knows the business of beauty. Based in Los An-
geles, she leads teams of beauty experts creating images from prep to post. Known for her use of color, she delivers
imagery that is colorful, dramatic and confident. She feels all images should communicate concepts, stories or evoke
feelings. Receiving her B.A. in Communications from Oakland University, she has the ability to help her clients oversee
projects from Concept/Creation/Post-production.
courtneydailey.com facebook.com/courtneydaileyphotography instagram.com/courtneydaileyphotography
12HOW I GOT THE SHOT
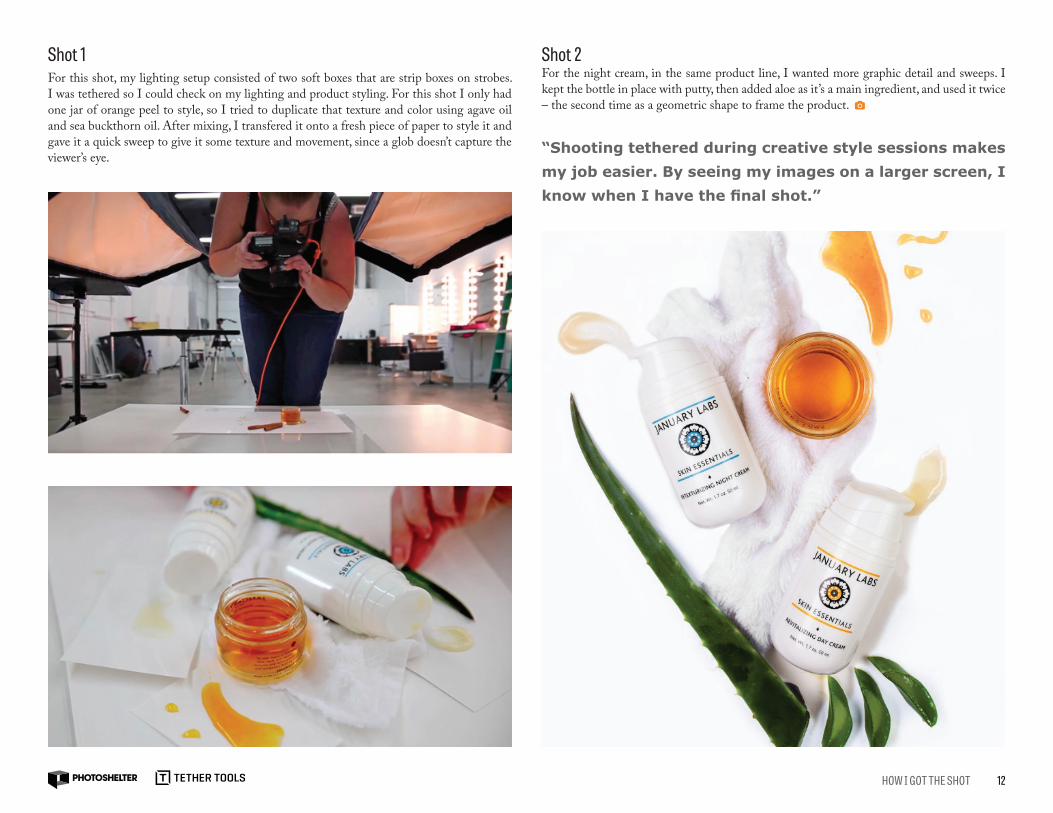
Shot 1For this shot, my lighting setup consisted of two soft boxes that are strip boxes on strobes. I was tethered so I could check on my lighting and product styling. For this shot I only had one jar of orange peel to style, so I tried to duplicate that texture and color using agave oil and sea buckthorn oil. After mixing, I transfered it onto a fresh piece of paper to style it and gave it a quick sweep to give it some texture and movement, since a glob doesn’t capture the viewer’s eye.
Shot 2For the night cream, in the same product line, I wanted more graphic detail and sweeps. I kept the bottle in place with putty, then added aloe as it’s a main ingredient, and used it twice – the second time as a geometric shape to frame the product.
“Shooting tethered during creative style sessions makes my job easier. By seeing my images on a larger screen, I know when I have the final shot.”
13HOW I GOT THE SHOT
Harnessing the Power of Light by Dave Montizambert
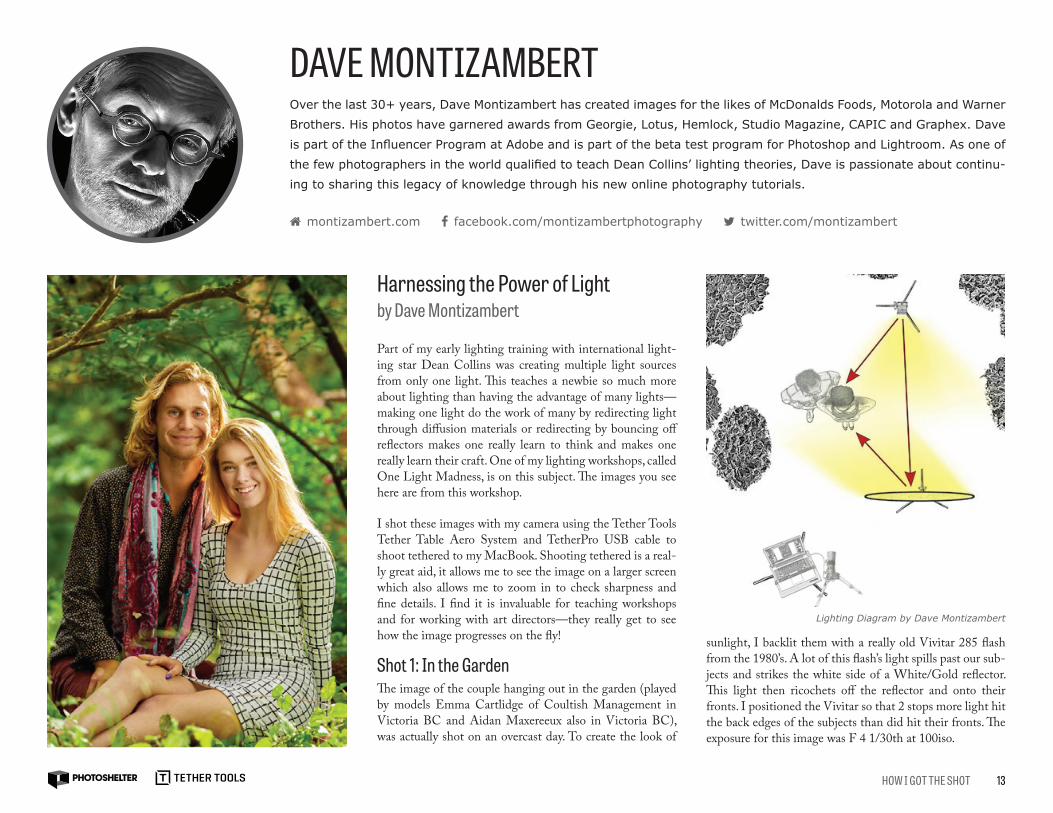
Part of my early lighting training with international light-ing star Dean Collins was creating multiple light sources from only one light. This teaches a newbie so much more about lighting than having the advantage of many lights—making one light do the work of many by redirecting light through diffusion materials or redirecting by bouncing off reflectors makes one really learn to think and makes one really learn their craft. One of my lighting workshops, called One Light Madness, is on this subject. The images you see here are from this workshop.
I shot these images with my camera using the Tether Tools Tether Table Aero System and TetherPro USB cable to shoot tethered to my MacBook. Shooting tethered is a real-ly great aid, it allows me to see the image on a larger screen which also allows me to zoom in to check sharpness and fine details. I find it is invaluable for teaching workshops and for working with art directors—they really get to see how the image progresses on the fly!
Shot 1: In the GardenThe image of the couple hanging out in the garden (played by models Emma Cartlidge of Coultish Management in Victoria BC and Aidan Maxereeux also in Victoria BC), was actually shot on an overcast day. To create the look of
sunlight, I backlit them with a really old Vivitar 285 flash from the 1980’s. A lot of this flash’s light spills past our sub-jects and strikes the white side of a White/Gold reflector. This light then ricochets off the reflector and onto their fronts. I positioned the Vivitar so that 2 stops more light hit the back edges of the subjects than did hit their fronts. The exposure for this image was F 4 1/30th at 100iso.
DAVE MONTIZAMBERTOver the last 30+ years, Dave Montizambert has created images for the likes of McDonalds Foods, Motorola and Warner
Brothers. His photos have garnered awards from Georgie, Lotus, Hemlock, Studio Magazine, CAPIC and Graphex. Dave
is part of the Influencer Program at Adobe and is part of the beta test program for Photoshop and Lightroom. As one of
the few photographers in the world qualified to teach Dean Collins’ lighting theories, Dave is passionate about continu-
ing to sharing this legacy of knowledge through his new online photography tutorials.
montizambert.com facebook.com/montizambertphotography twitter.com/montizambert
Lighting Diagram by Dave Montizambert

14HOW I GOT THE SHOT
Shot 2: Emma on WhiteThe image of Emma standing against a pure white back-ground was also a one light setup. Emma stood in front of a white seamless backdrop (a light coloured wall would work the same). A Lightrein studio strobe was positioned so that it lights both Emma and the background at the same time. The trick here is to overexpose the background to pure white while keeping the subject correctly exposed. To do this you actually have to darken the subject by adding some diffusion material between the subject and the strobe, then compen-sate for the underexposed subject by turning the power of the strobe up (or you could re-adjust the camera exposure).
I read change in light with my Sekonic incident flash meter so that I would know exactly how much to adjust by. I used a Chimera 4×8 foot panel frame with a white diffusion ma-terial stretched over it making sure to place it so that it only affects the light hitting Emma and not the background. This panel alters the light hitting Emma making her about 2 stops darker and since the panel creates a much larger source of illumination, creates a much softer quality of light on Emma than would the unfettered direct light from the Lightrein strobe. The exposure was F 8 1/120th at 100iso. Lighting Diagram by Dave Montizambert
15HOW I GOT THE SHOT
WATCH HOW GABRIEL GOT THE SHOT
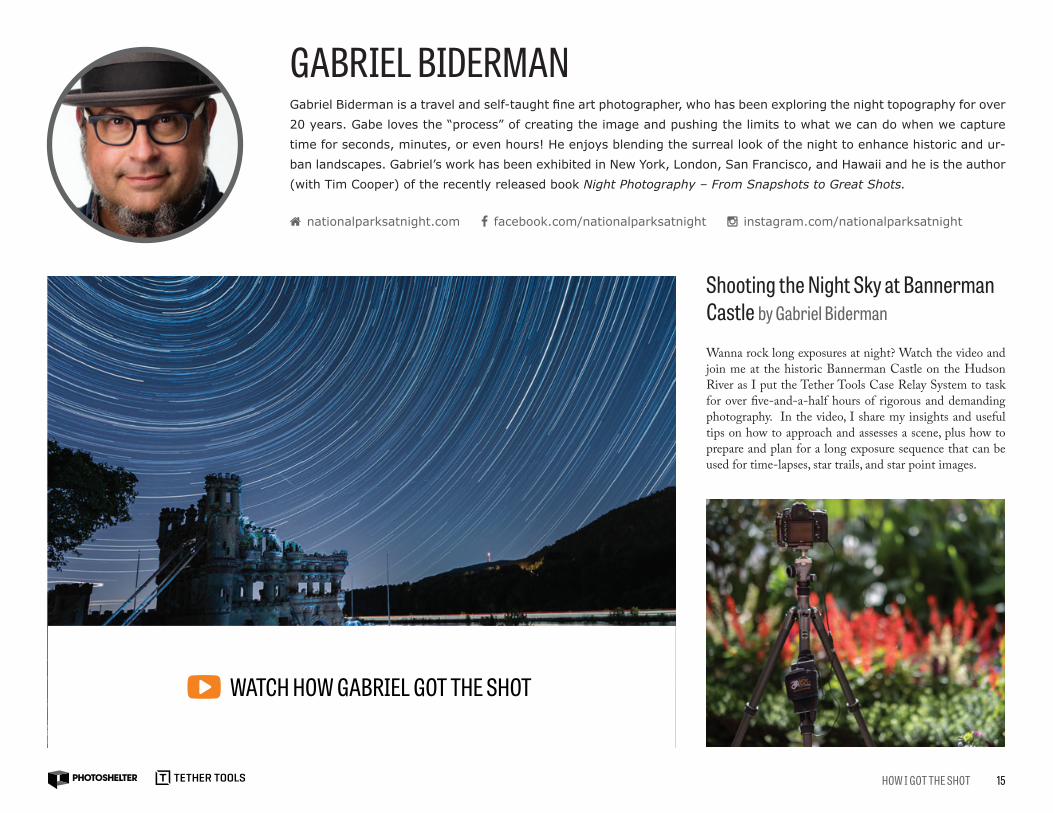
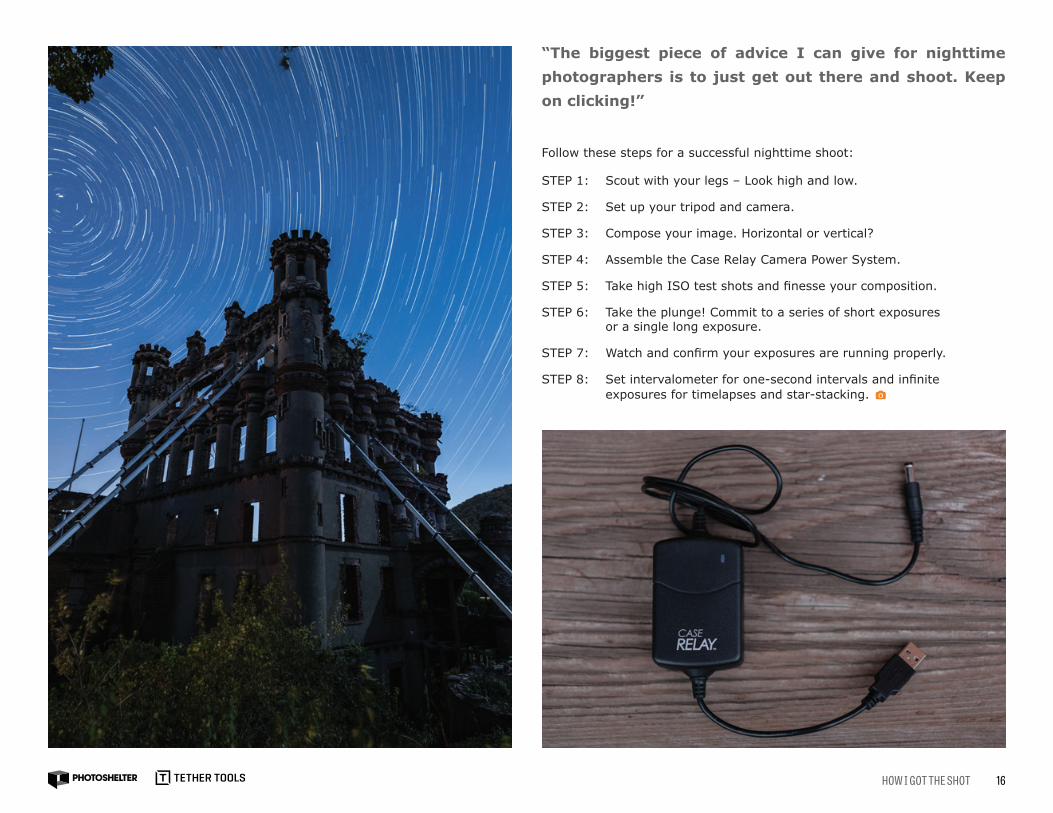
Shooting the Night Sky at Bannerman Castle by Gabriel Biderman
Wanna rock long exposures at night? Watch the video and join me at the historic Bannerman Castle on the Hudson River as I put the Tether Tools Case Relay System to task for over five-and-a-half hours of rigorous and demanding photography. In the video, I share my insights and useful tips on how to approach and assesses a scene, plus how to prepare and plan for a long exposure sequence that can be used for time-lapses, star trails, and star point images.
GABRIEL BIDERMANGabriel Biderman is a travel and self-taught fine art photographer, who has been exploring the night topography for over
20 years. Gabe loves the “process” of creating the image and pushing the limits to what we can do when we capture
time for seconds, minutes, or even hours! He enjoys blending the surreal look of the night to enhance historic and ur-
ban landscapes. Gabriel’s work has been exhibited in New York, London, San Francisco, and Hawaii and he is the author
(with Tim Cooper) of the recently released book Night Photography – From Snapshots to Great Shots.
nationalparksatnight.com facebook.com/nationalparksatnight instagram.com/nationalparksatnight
16HOW I GOT THE SHOT
Follow these steps for a successful nighttime shoot:
STEP 1: Scout with your legs – Look high and low.
STEP 2: Set up your tripod and camera.
STEP 3: Compose your image. Horizontal or vertical?
STEP 4: Assemble the Case Relay Camera Power System.
STEP 5: Take high ISO test shots and finesse your composition.
STEP 6: Take the plunge! Commit to a series of short exposures or a single long exposure.
STEP 7: Watch and confirm your exposures are running properly.
STEP 8: Set intervalometer for one-second intervals and infinite exposures for timelapses and star-stacking.
“The biggest piece of advice I can give for nighttime photographers is to just get out there and shoot. Keep on clicking!”
17HOW I GOT THE SHOT
WATCH HOW JARED GOT THE SHOT
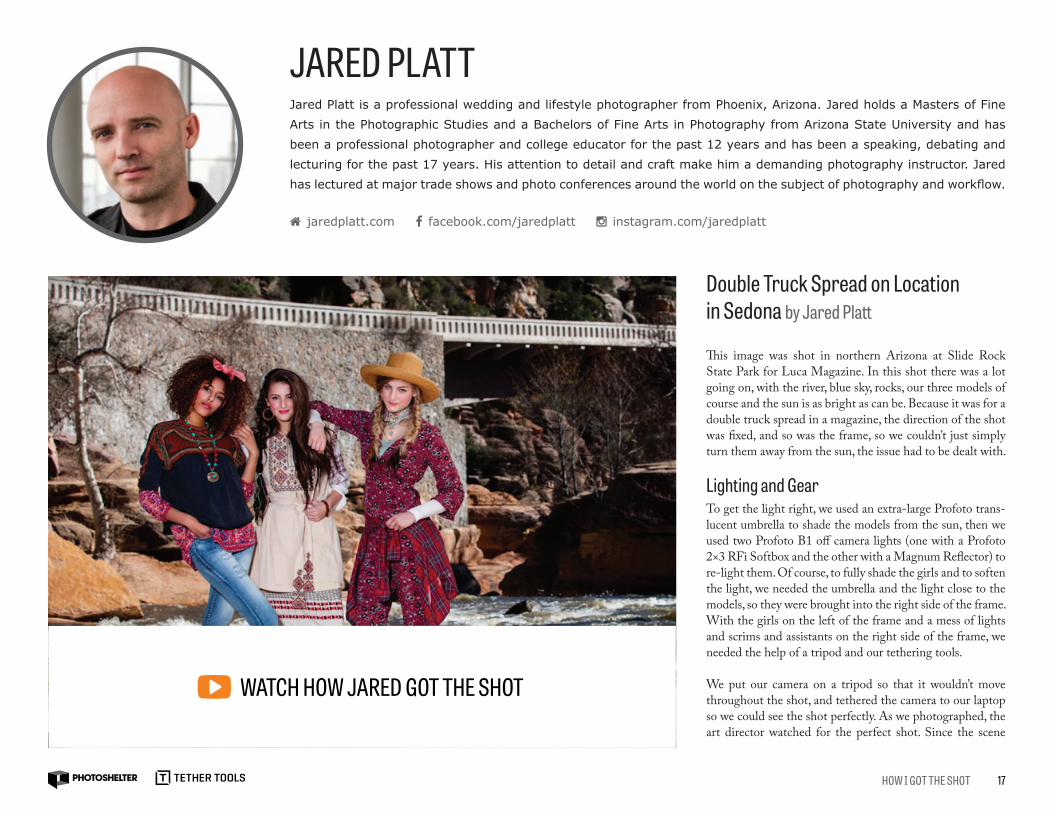
Double Truck Spread on Location in Sedona by Jared Platt
This image was shot in northern Arizona at Slide Rock State Park for Luca Magazine. In this shot there was a lot going on, with the river, blue sky, rocks, our three models of course and the sun is as bright as can be. Because it was for a double truck spread in a magazine, the direction of the shot was fixed, and so was the frame, so we couldn’t just simply turn them away from the sun, the issue had to be dealt with. Lighting and GearTo get the light right, we used an extra-large Profoto trans-lucent umbrella to shade the models from the sun, then we used two Profoto B1 off camera lights (one with a Profoto 2×3 RFi Softbox and the other with a Magnum Reflector) to re-light them. Of course, to fully shade the girls and to soften the light, we needed the umbrella and the light close to the models, so they were brought into the right side of the frame. With the girls on the left of the frame and a mess of lights and scrims and assistants on the right side of the frame, we needed the help of a tripod and our tethering tools. We put our camera on a tripod so that it wouldn’t move throughout the shot, and tethered the camera to our laptop so we could see the shot perfectly. As we photographed, the art director watched for the perfect shot. Since the scene
JARED PLATTJared Platt is a professional wedding and lifestyle photographer from Phoenix, Arizona. Jared holds a Masters of Fine
Arts in the Photographic Studies and a Bachelors of Fine Arts in Photography from Arizona State University and has
been a professional photographer and college educator for the past 12 years and has been a speaking, debating and
lecturing for the past 17 years. His attention to detail and craft make him a demanding photography instructor. Jared
has lectured at major trade shows and photo conferences around the world on the subject of photography and workflow.
jaredplatt.com facebook.com/jaredplatt instagram.com/jaredplatt

18HOW I GOT THE SHOT
and the crop were not changing, she could focus completely on the models poses, hair and clothing. Once we had an approved shot, the model’s left the frame and the assistants pulled the lights and we quickly took the final shot, which was a background with no changes to the framing, the focus, or the exposure. A quick confirmation between the AD’s pick and the background was made by toggling back and forth between the two shots to confirm we had the right match. Then we called it a wrap for the shot. TetheringBy tethering this shot, we were able to get an instant approval from the client, and be ab-solutely certain that our composite was going to work before we moved onto another shot. For a shot like this, I’ll use a tripod so that I can pull my equipment in and get much more power out of my lights. First, I’ll take a shot and check the computer screen with the client to ensure we got it right. Next, I’ll move out the lights, take one more shot, and I know they’ll match because we’re lined up and the tripod hasn’t moved. I shot the image using a Canon 5Ds R, which was tethered to my Apple laptop using a Teth-erPro USB cable and TetherBoost to maintain a stable, reliable connection. Our ThinkTank Sun Screen was shielding the laptop on a Tether Table Aero so we could clearly see the screen in bright conditions.
“By tethering this shot, we were able to get an instant approval from the client, and be absolutely certain that our composite was going to work before we moved onto another shot.”
19HOW I GOT THE SHOT
WATCH HOW KAREN GOT THE SHOT
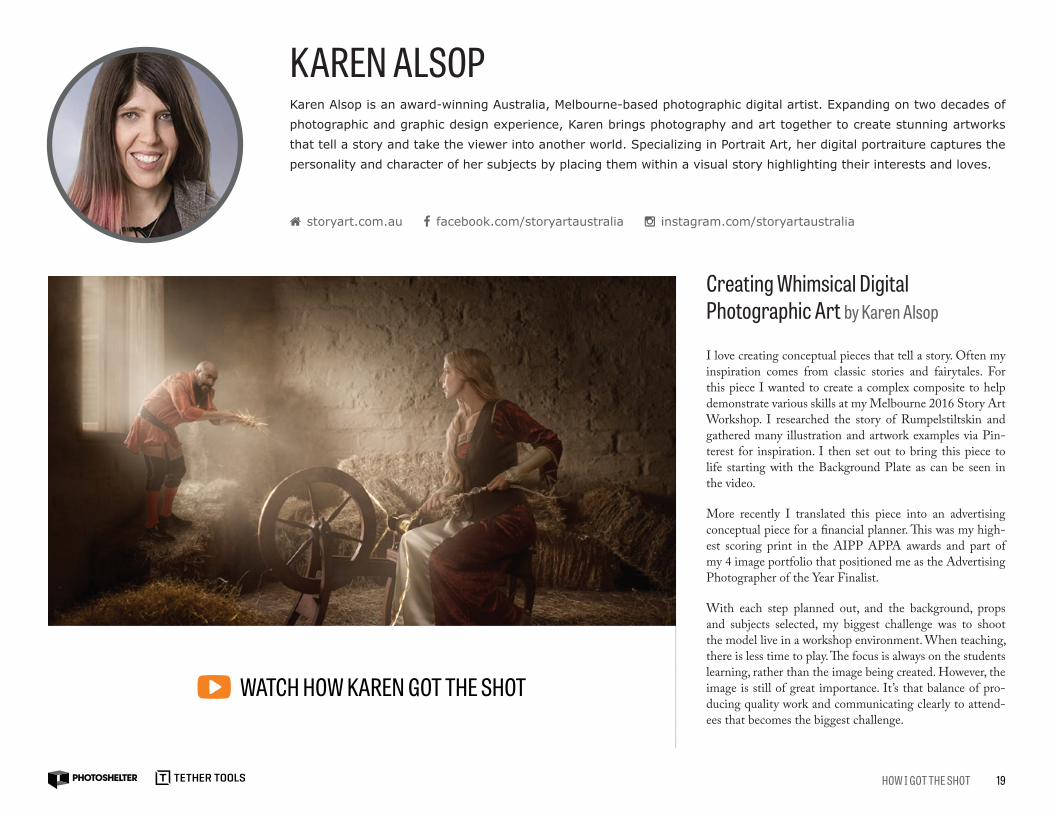
Creating Whimsical Digital Photographic Art by Karen Alsop
I love creating conceptual pieces that tell a story. Often my inspiration comes from classic stories and fairytales. For this piece I wanted to create a complex composite to help demonstrate various skills at my Melbourne 2016 Story Art Workshop. I researched the story of Rumpelstiltskin and gathered many illustration and artwork examples via Pin-terest for inspiration. I then set out to bring this piece to life starting with the Background Plate as can be seen in the video.
More recently I translated this piece into an advertising conceptual piece for a financial planner. This was my high-est scoring print in the AIPP APPA awards and part of my 4 image portfolio that positioned me as the Advertising Photographer of the Year Finalist.
With each step planned out, and the background, props and subjects selected, my biggest challenge was to shoot the model live in a workshop environment. When teaching, there is less time to play. The focus is always on the students learning, rather than the image being created. However, the image is still of great importance. It’s that balance of pro-ducing quality work and communicating clearly to attend-ees that becomes the biggest challenge.
KAREN ALSOPKaren Alsop is an award-winning Australia, Melbourne-based photographic digital artist. Expanding on two decades of
photographic and graphic design experience, Karen brings photography and art together to create stunning artworks
that tell a story and take the viewer into another world. Specializing in Portrait Art, her digital portraiture captures the
personality and character of her subjects by placing them within a visual story highlighting their interests and loves.
storyart.com.au facebook.com/storyartaustralia instagram.com/storyartaustralia
20HOW I GOT THE SHOT
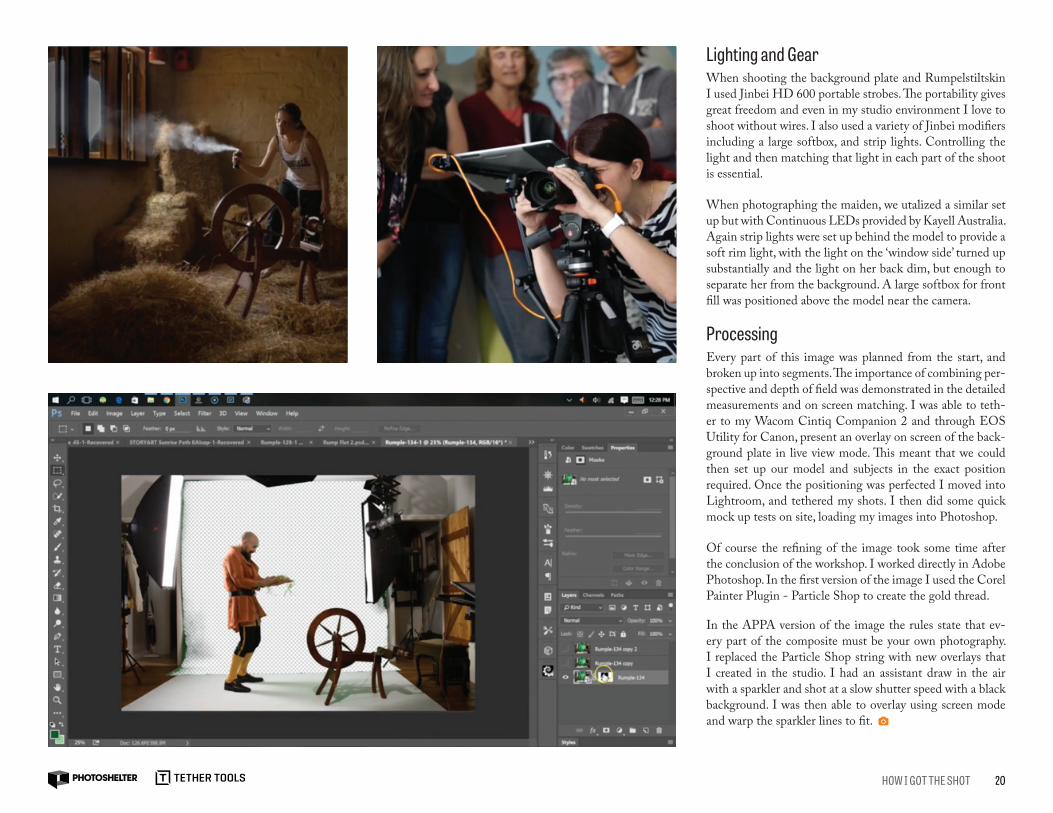
Lighting and GearWhen shooting the background plate and Rumpelstiltskin I used Jinbei HD 600 portable strobes. The portability gives great freedom and even in my studio environment I love to shoot without wires. I also used a variety of Jinbei modifiers including a large softbox, and strip lights. Controlling the light and then matching that light in each part of the shoot is essential.
When photographing the maiden, we utalized a similar set up but with Continuous LEDs provided by Kayell Australia. Again strip lights were set up behind the model to provide a soft rim light, with the light on the ‘window side’ turned up substantially and the light on her back dim, but enough to separate her from the background. A large softbox for front fill was positioned above the model near the camera. Processing Every part of this image was planned from the start, and broken up into segments. The importance of combining per-spective and depth of field was demonstrated in the detailed measurements and on screen matching. I was able to teth-er to my Wacom Cintiq Companion 2 and through EOS Utility for Canon, present an overlay on screen of the back-ground plate in live view mode. This meant that we could then set up our model and subjects in the exact position required. Once the positioning was perfected I moved into Lightroom, and tethered my shots. I then did some quick mock up tests on site, loading my images into Photoshop.
Of course the refining of the image took some time after the conclusion of the workshop. I worked directly in Adobe Photoshop. In the first version of the image I used the Corel Painter Plugin - Particle Shop to create the gold thread.
In the APPA version of the image the rules state that ev-ery part of the composite must be your own photography. I replaced the Particle Shop string with new overlays that I created in the studio. I had an assistant draw in the air with a sparkler and shot at a slow shutter speed with a black background. I was then able to overlay using screen mode and warp the sparkler lines to fit.
21HOW I GOT THE SHOT
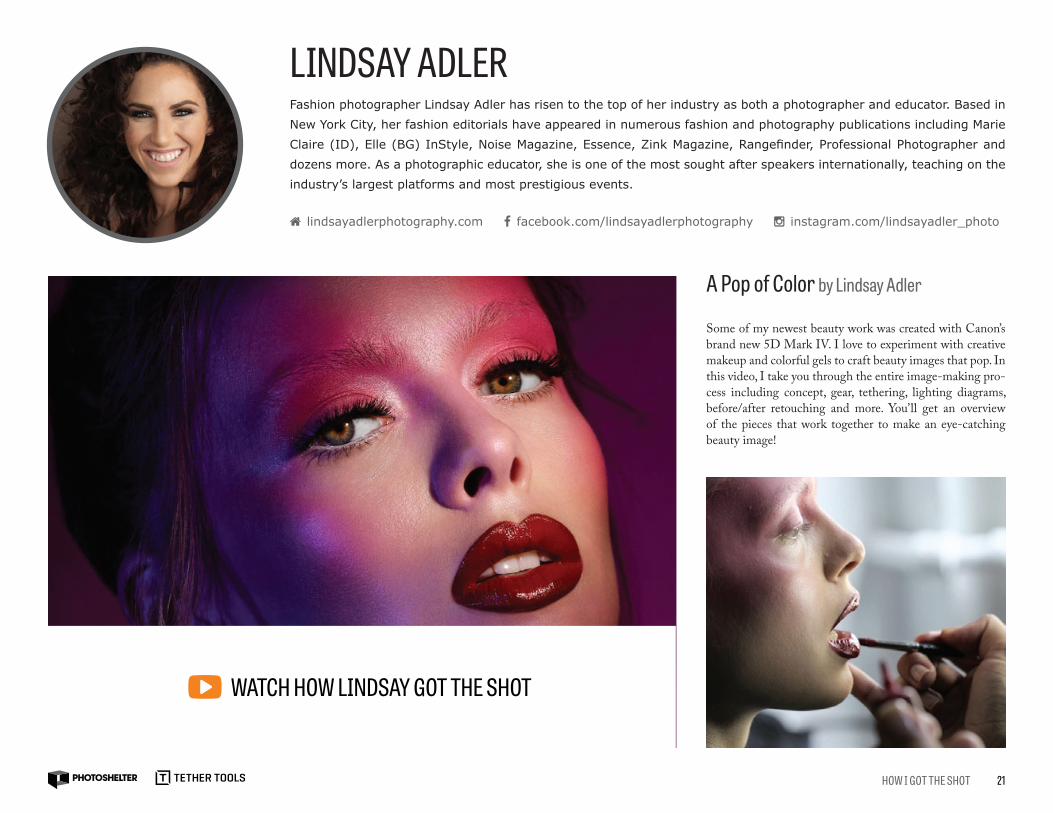
A Pop of Color by Lindsay Adler
Some of my newest beauty work was created with Canon’s brand new 5D Mark IV. I love to experiment with creative makeup and colorful gels to craft beauty images that pop. In this video, I take you through the entire image-making pro-cess including concept, gear, tethering, lighting diagrams, before/after retouching and more. You’ll get an overview of the pieces that work together to make an eye-catching beauty image!
WATCH HOW LINDSAY GOT THE SHOT
LINDSAY ADLERFashion photographer Lindsay Adler has risen to the top of her industry as both a photographer and educator. Based in
New York City, her fashion editorials have appeared in numerous fashion and photography publications including Marie
Claire (ID), Elle (BG) InStyle, Noise Magazine, Essence, Zink Magazine, Rangefinder, Professional Photographer and
dozens more. As a photographic educator, she is one of the most sought after speakers internationally, teaching on the
industry’s largest platforms and most prestigious events.
lindsayadlerphotography.com facebook.com/lindsayadlerphotography instagram.com/lindsayadler_photo
22HOW I GOT THE SHOT
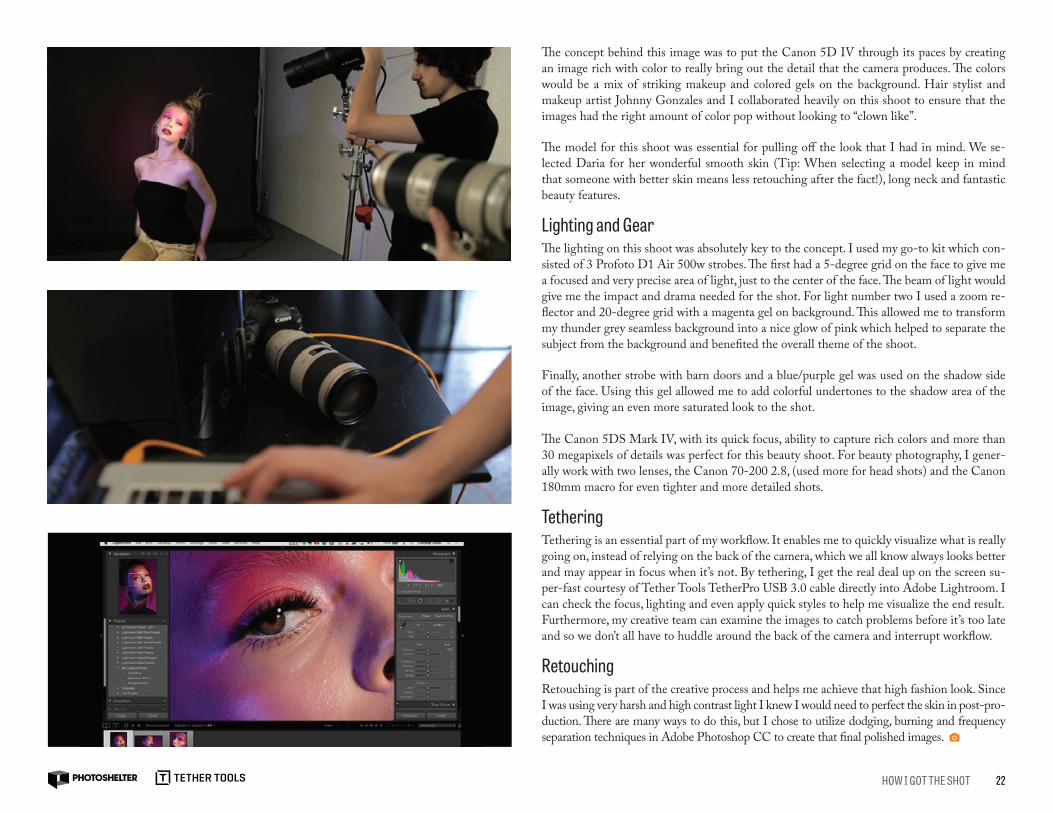
The concept behind this image was to put the Canon 5D IV through its paces by creating an image rich with color to really bring out the detail that the camera produces. The colors would be a mix of striking makeup and colored gels on the background. Hair stylist and makeup artist Johnny Gonzales and I collaborated heavily on this shoot to ensure that the images had the right amount of color pop without looking to “clown like”.
The model for this shoot was essential for pulling off the look that I had in mind. We se-lected Daria for her wonderful smooth skin (Tip: When selecting a model keep in mind that someone with better skin means less retouching after the fact!), long neck and fantastic beauty features.
Lighting and GearThe lighting on this shoot was absolutely key to the concept. I used my go-to kit which con-sisted of 3 Profoto D1 Air 500w strobes. The first had a 5-degree grid on the face to give me a focused and very precise area of light, just to the center of the face. The beam of light would give me the impact and drama needed for the shot. For light number two I used a zoom re-flector and 20-degree grid with a magenta gel on background. This allowed me to transform my thunder grey seamless background into a nice glow of pink which helped to separate the subject from the background and benefited the overall theme of the shoot.
Finally, another strobe with barn doors and a blue/purple gel was used on the shadow side of the face. Using this gel allowed me to add colorful undertones to the shadow area of the image, giving an even more saturated look to the shot.
The Canon 5DS Mark IV, with its quick focus, ability to capture rich colors and more than 30 megapixels of details was perfect for this beauty shoot. For beauty photography, I gener-ally work with two lenses, the Canon 70-200 2.8, (used more for head shots) and the Canon 180mm macro for even tighter and more detailed shots.
TetheringTethering is an essential part of my workflow. It enables me to quickly visualize what is really going on, instead of relying on the back of the camera, which we all know always looks better and may appear in focus when it’s not. By tethering, I get the real deal up on the screen su-per-fast courtesy of Tether Tools TetherPro USB 3.0 cable directly into Adobe Lightroom. I can check the focus, lighting and even apply quick styles to help me visualize the end result.Furthermore, my creative team can examine the images to catch problems before it’s too late and so we don’t all have to huddle around the back of the camera and interrupt workflow.
RetouchingRetouching is part of the creative process and helps me achieve that high fashion look. Since I was using very harsh and high contrast light I knew I would need to perfect the skin in post-pro-duction. There are many ways to do this, but I chose to utilize dodging, burning and frequency separation techniques in Adobe Photoshop CC to create that final polished images.
23HOW I GOT THE SHOT
WATCH HOW PEDRO GOT THE SHOT
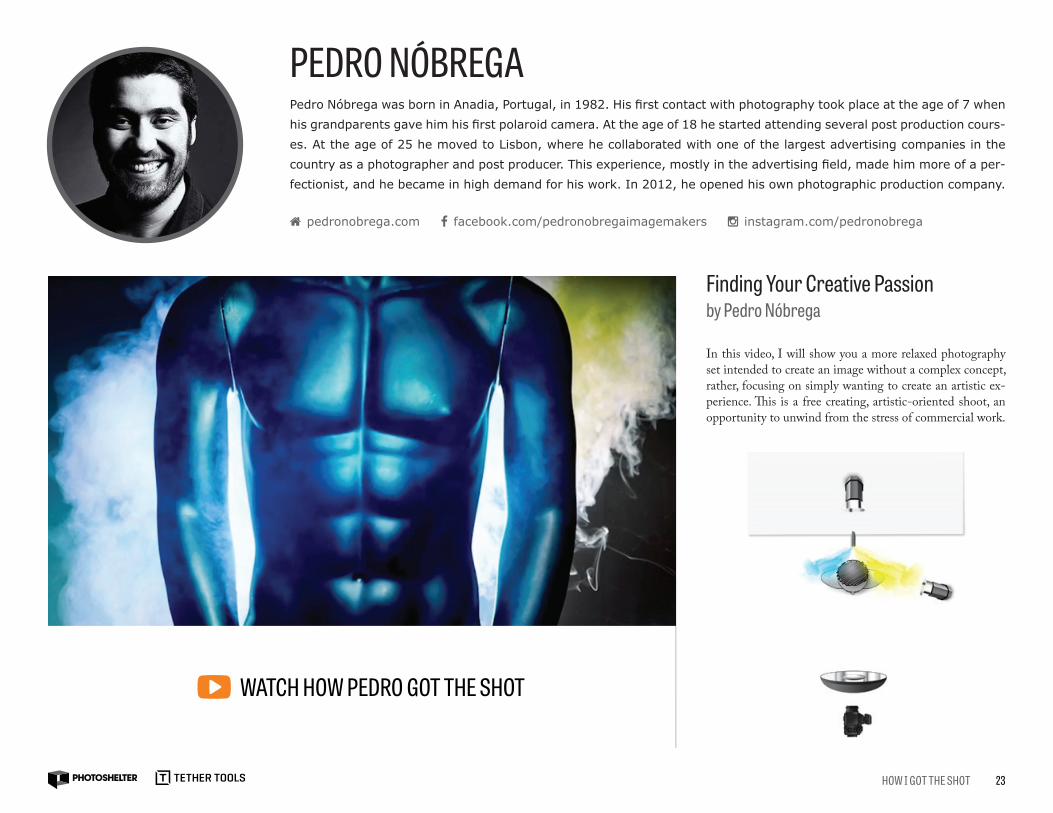
Finding Your Creative Passion by Pedro Nóbrega
In this video, I will show you a more relaxed photography set intended to create an image without a complex concept, rather, focusing on simply wanting to create an artistic ex-perience. This is a free creating, artistic-oriented shoot, an opportunity to unwind from the stress of commercial work.
PEDRO NÓBREGAPedro Nóbrega was born in Anadia, Portugal, in 1982. His first contact with photography took place at the age of 7 when
his grandparents gave him his first polaroid camera. At the age of 18 he started attending several post production cours-
es. At the age of 25 he moved to Lisbon, where he collaborated with one of the largest advertising companies in the
country as a photographer and post producer. This experience, mostly in the advertising field, made him more of a per-
fectionist, and he became in high demand for his work. In 2012, he opened his own photographic production company.
pedronobrega.com facebook.com/pedronobregaimagemakers instagram.com/pedronobrega
24HOW I GOT THE SHOT
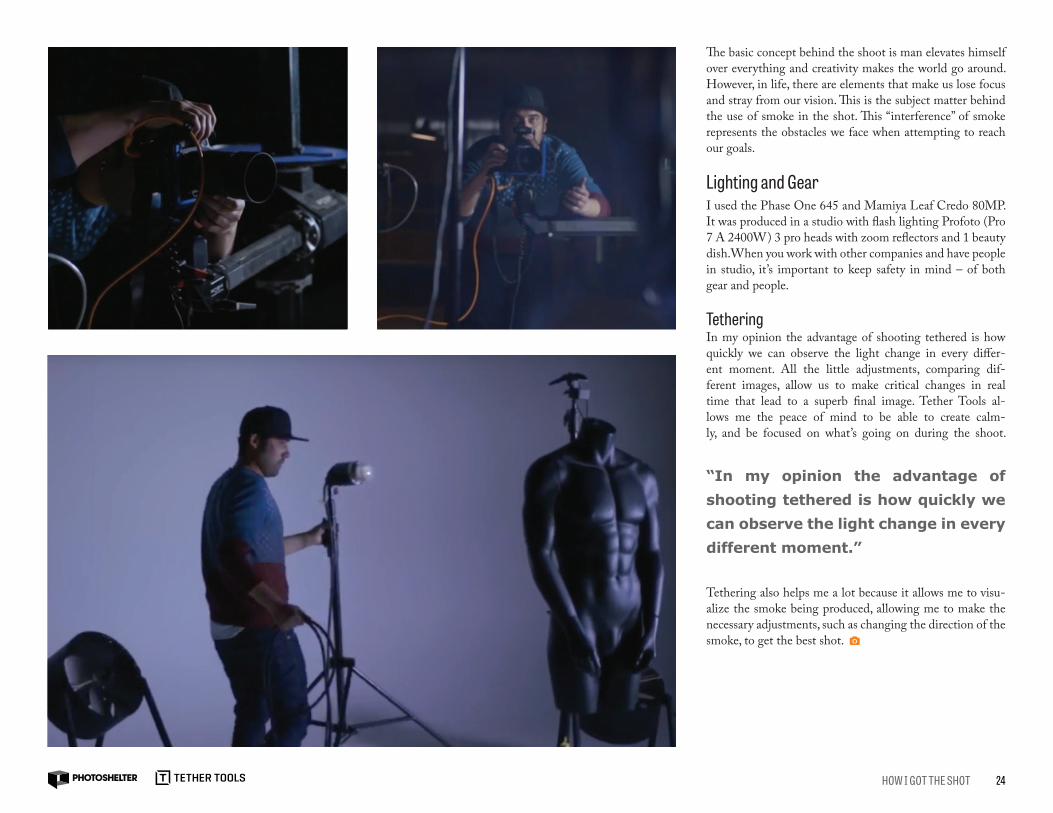
The basic concept behind the shoot is man elevates himself over everything and creativity makes the world go around. However, in life, there are elements that make us lose focus and stray from our vision. This is the subject matter behind the use of smoke in the shot. This “interference” of smoke represents the obstacles we face when attempting to reach our goals.
Lighting and GearI used the Phase One 645 and Mamiya Leaf Credo 80MP. It was produced in a studio with flash lighting Profoto (Pro 7 A 2400W) 3 pro heads with zoom reflectors and 1 beauty dish.When you work with other companies and have people in studio, it’s important to keep safety in mind – of both gear and people.
TetheringIn my opinion the advantage of shooting tethered is how quickly we can observe the light change in every differ-ent moment. All the little adjustments, comparing dif-ferent images, allow us to make critical changes in real time that lead to a superb final image. Tether Tools al-lows me the peace of mind to be able to create calm-ly, and be focused on what’s going on during the shoot.
Tethering also helps me a lot because it allows me to visu-alize the smoke being produced, allowing me to make the necessary adjustments, such as changing the direction of the smoke, to get the best shot.
“In my opinion the advantage of shooting tethered is how quickly we can observe the light change in every different moment.”
25HOW I GOT THE SHOT
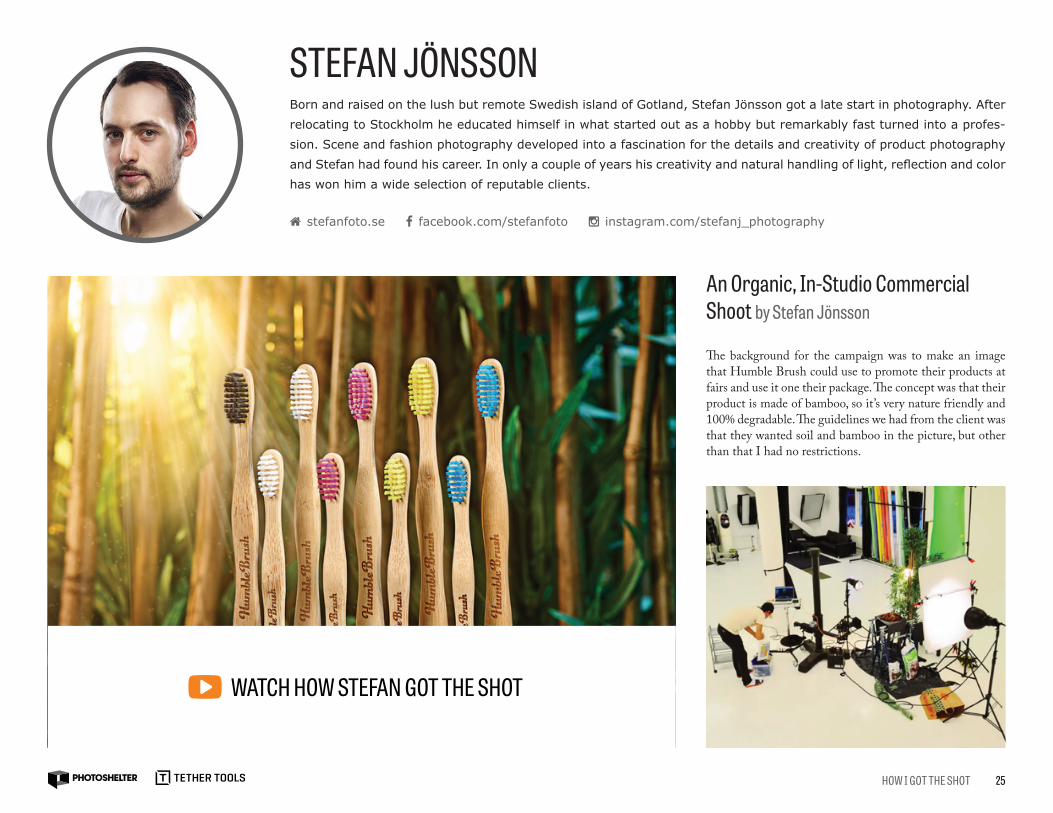
An Organic, In-Studio Commercial Shoot by Stefan Jönsson
The background for the campaign was to make an image that Humble Brush could use to promote their products at fairs and use it one their package. The concept was that their product is made of bamboo, so it’s very nature friendly and 100% degradable. The guidelines we had from the client was that they wanted soil and bamboo in the picture, but other than that I had no restrictions.
WATCH HOW STEFAN GOT THE SHOT
STEFAN JÖNSSONBorn and raised on the lush but remote Swedish island of Gotland, Stefan Jönsson got a late start in photography. After
relocating to Stockholm he educated himself in what started out as a hobby but remarkably fast turned into a profes-
sion. Scene and fashion photography developed into a fascination for the details and creativity of product photography
and Stefan had found his career. In only a couple of years his creativity and natural handling of light, reflection and color
has won him a wide selection of reputable clients.
stefanfoto.se facebook.com/stefanfoto instagram.com/stefanj_photography
26HOW I GOT THE SHOT
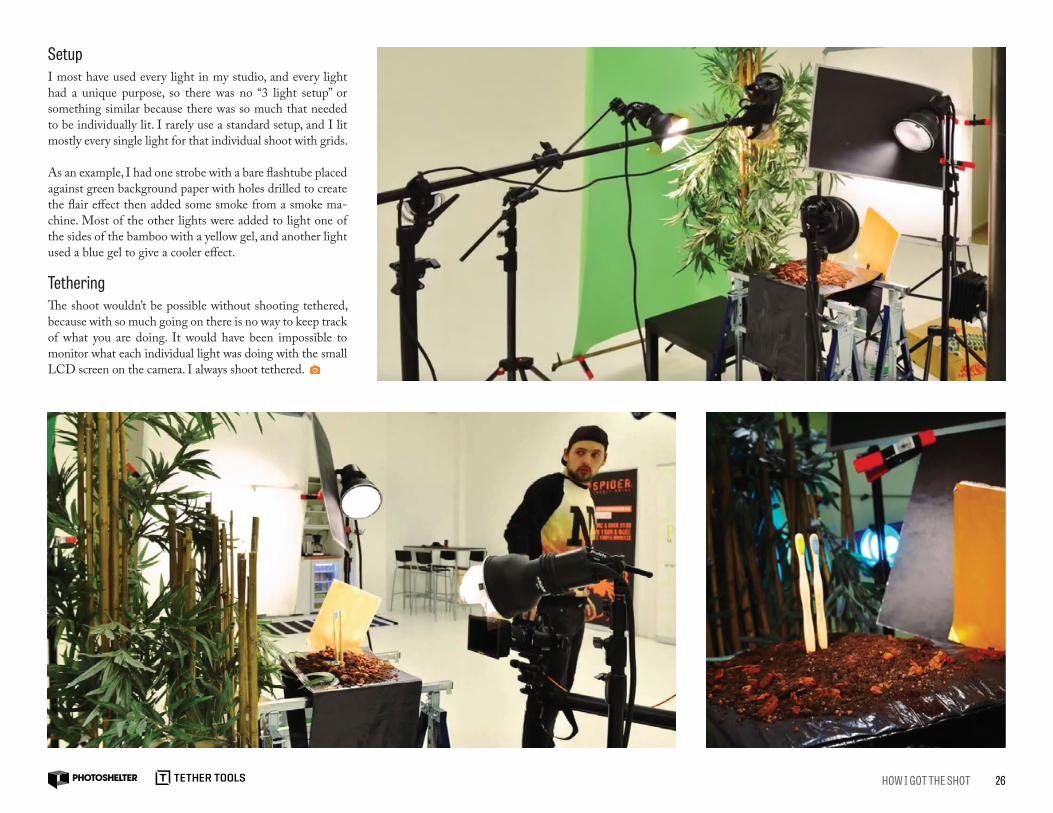
SetupI most have used every light in my studio, and every light had a unique purpose, so there was no “3 light setup” or something similar because there was so much that needed to be individually lit. I rarely use a standard setup, and I lit mostly every single light for that individual shoot with grids.
As an example, I had one strobe with a bare flashtube placed against green background paper with holes drilled to create the flair effect then added some smoke from a smoke ma-chine. Most of the other lights were added to light one of the sides of the bamboo with a yellow gel, and another light used a blue gel to give a cooler effect.
TetheringThe shoot wouldn’t be possible without shooting tethered, because with so much going on there is no way to keep track of what you are doing. It would have been impossible to monitor what each individual light was doing with the small LCD screen on the camera. I always shoot tethered.
27HOW I GOT THE SHOT
After reading this How I Got the Shot Educational Series, you may find that there is no one formula
to ‘getting the shot’ – and that’s okay. As a photographer, and as an artist, you know that some-
times you need to break the mold, that there’s no such things as rules; merely suggestions.
Above all else, we hope that you’re able to take something from this How I Got the Shot Educa-
tional Series, be it a tip or technique, that will help you become a more well-rounded photographer.
Now that you’ve got some inspiration, it’s time to get to work!
CONCLUSION


![Tether anthony[1]](https://img.pdfslide.us/doc/110x75/557c7d36d8b42a494c8b5161/tether-anthony1.jpg)