Embed Size (px)
Citation preview
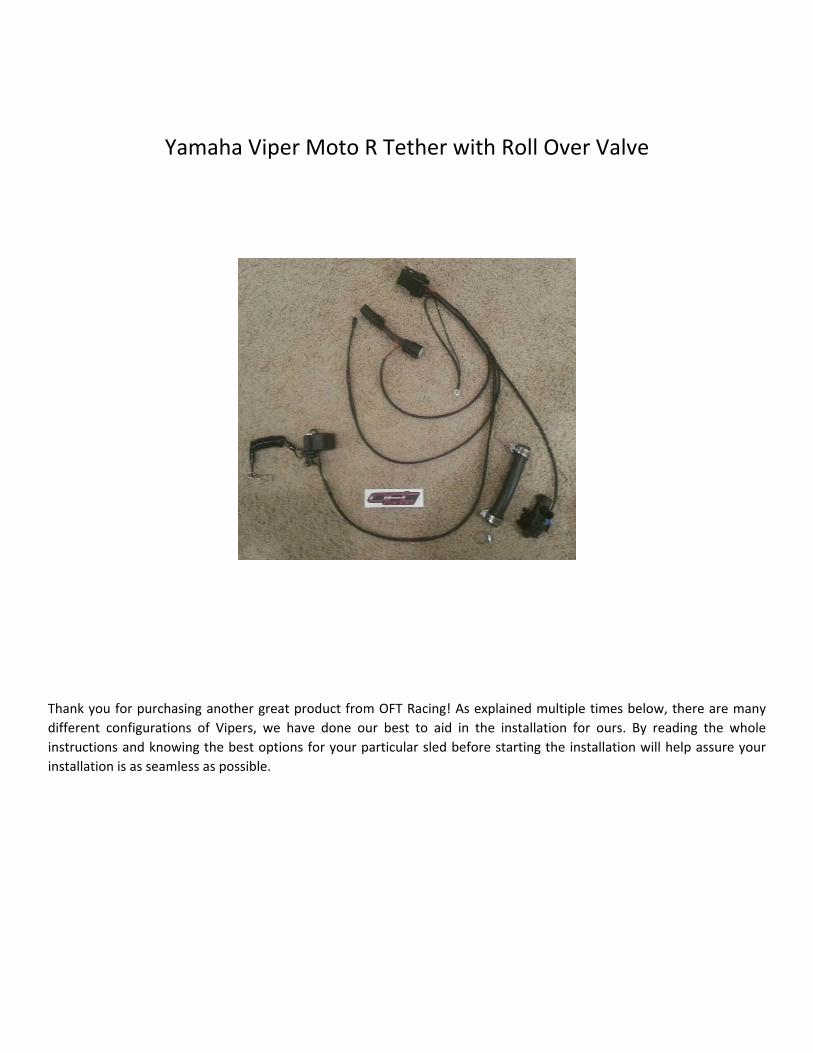
Yamaha Viper Moto R Tether with Roll Over Valve
Thank you for purchasing another great product from OFT Racing! As explained multiple times below, there are many
different configurations of Vipers, we have done our best to aid in the installation for ours. By reading the whole
instructions and knowing the best options for your particular sled before starting the installation will help assure your
installation is as seamless as possible.
Installation Instructions:
1. Remove hood, side panels and tank cover. (Note: depending on
installation you may not need to remove the tank cover)
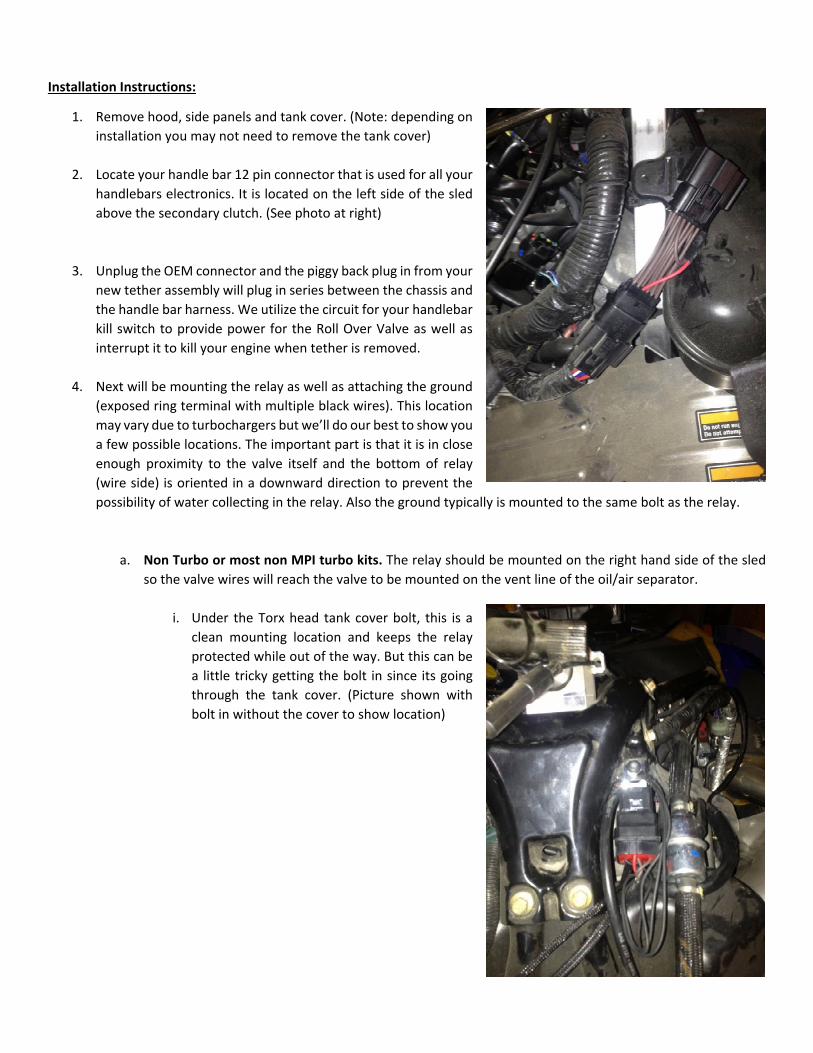
2. Locate your handle bar 12 pin connector that is used for all your
handlebars electronics. It is located on the left side of the sled
above the secondary clutch. (See photo at right)
3. Unplug the OEM connector and the piggy back plug in from your
new tether assembly will plug in series between the chassis and
the handle bar harness. We utilize the circuit for your handlebar
kill switch to provide power for the Roll Over Valve as well as
interrupt it to kill your engine when tether is removed.
4. Next will be mounting the relay as well as attaching the ground
(exposed ring terminal with multiple black wires). This location
may vary due to turbochargers but we’ll do our best to show you
a few possible locations. The important part is that it is in close
enough proximity to the valve itself and the bottom of relay
(wire side) is oriented in a downward direction to prevent the
possibility of water collecting in the relay. Also the ground typically is mounted to the same bolt as the relay.
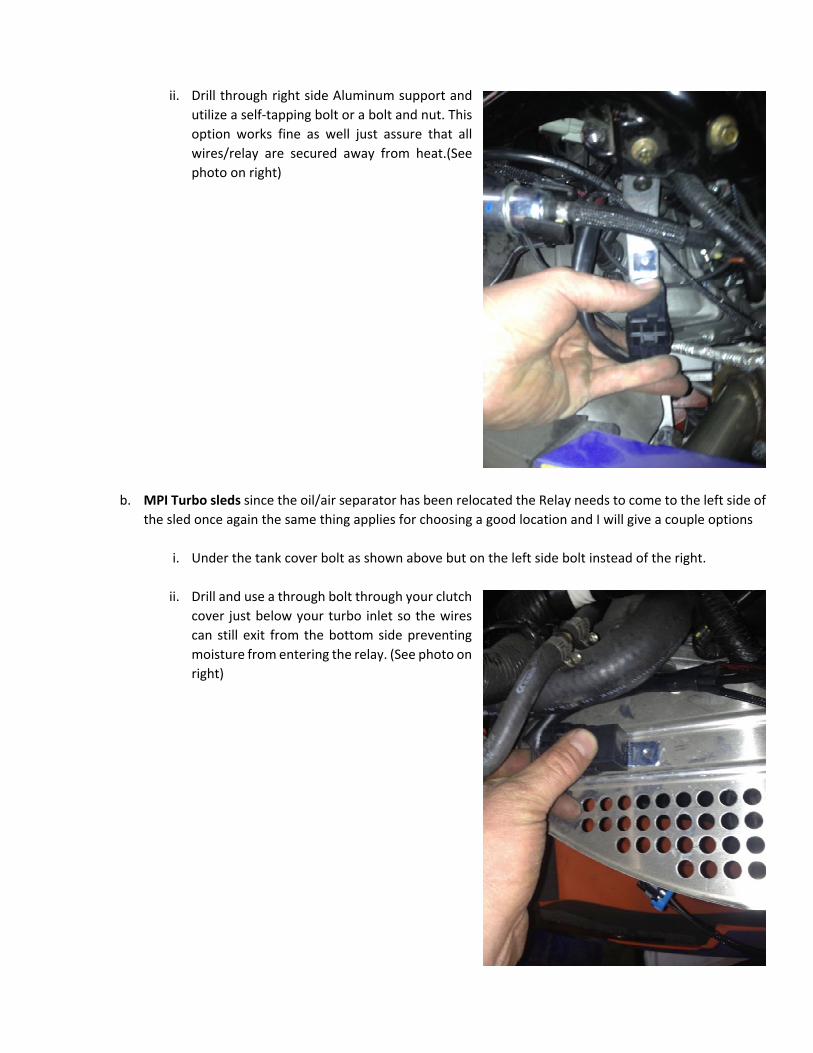
a. Non Turbo or most non MPI turbo kits. The relay should be mounted on the right hand side of the sled
so the valve wires will reach the valve to be mounted on the vent line of the oil/air separator.
i. Under the Torx head tank cover bolt, this is a
clean mounting location and keeps the relay
protected while out of the way. But this can be
a little tricky getting the bolt in since its going
through the tank cover. (Picture shown with
bolt in without the cover to show location)
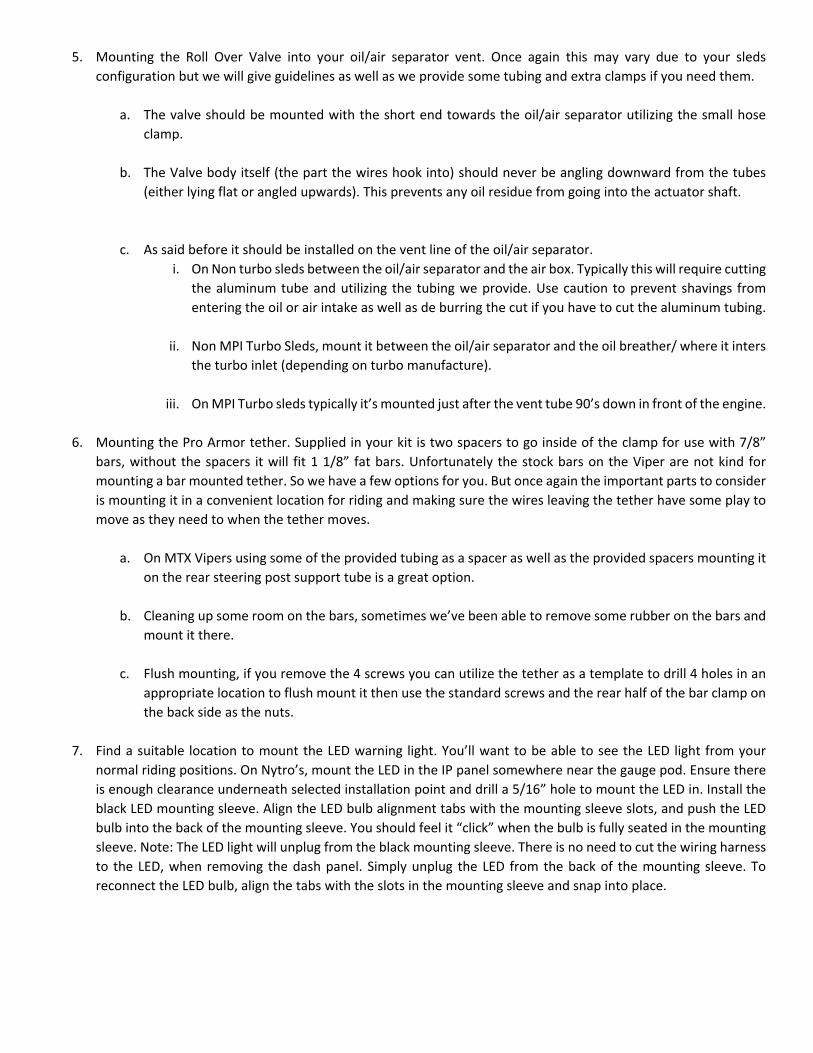
ii. Drill through right side Aluminum support and
utilize a self‐tapping bolt or a bolt and nut. This
option works fine as well just assure that all
wires/relay are secured away from heat.(See
photo on right)
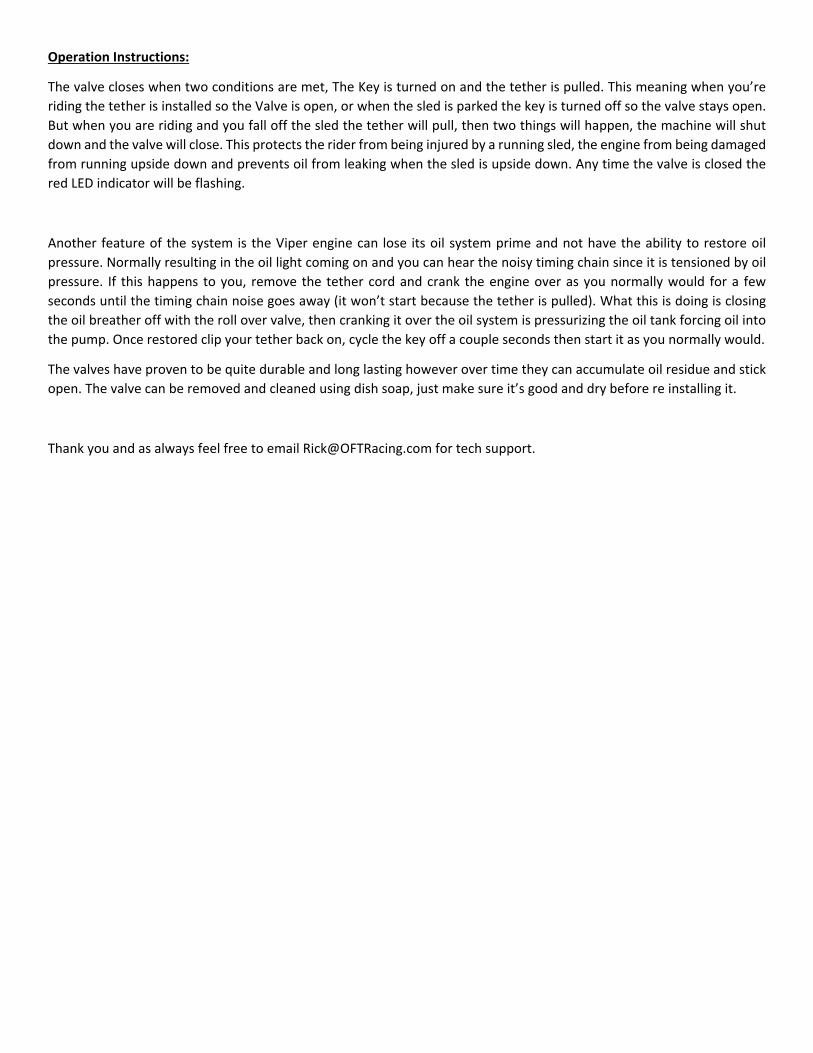
b. MPI Turbo sleds since the oil/air separator has been relocated the Relay needs to come to the left side of
the sled once again the same thing applies for choosing a good location and I will give a couple options
i. Under the tank cover bolt as shown above but on the left side bolt instead of the right.
ii. Drill and use a through bolt through your clutch
cover just below your turbo inlet so the wires
can still exit from the bottom side preventing
moisture from entering the relay. (See photo on
right)
5. Mounting the Roll Over Valve into your oil/air separator vent. Once again this may vary due to your sleds
configuration but we will give guidelines as well as we provide some tubing and extra clamps if you need them.
a. The valve should be mounted with the short end towards the oil/air separator utilizing the small hose
clamp.
b. The Valve body itself (the part the wires hook into) should never be angling downward from the tubes
(either lying flat or angled upwards). This prevents any oil residue from going into the actuator shaft.
c. As said before it should be installed on the vent line of the oil/air separator.
i. On Non turbo sleds between the oil/air separator and the air box. Typically this will require cutting
the aluminum tube and utilizing the tubing we provide. Use caution to prevent shavings from
entering the oil or air intake as well as de burring the cut if you have to cut the aluminum tubing.
ii. Non MPI Turbo Sleds, mount it between the oil/air separator and the oil breather/ where it inters
the turbo inlet (depending on turbo manufacture).
iii. On MPI Turbo sleds typically it’s mounted just after the vent tube 90’s down in front of the engine.
6. Mounting the Pro Armor tether. Supplied in your kit is two spacers to go inside of the clamp for use with 7/8”
bars, without the spacers it will fit 1 1/8” fat bars. Unfortunately the stock bars on the Viper are not kind for
mounting a bar mounted tether. So we have a few options for you. But once again the important parts to consider
is mounting it in a convenient location for riding and making sure the wires leaving the tether have some play to
move as they need to when the tether moves.
a. On MTX Vipers using some of the provided tubing as a spacer as well as the provided spacers mounting it
on the rear steering post support tube is a great option.
b. Cleaning up some room on the bars, sometimes we’ve been able to remove some rubber on the bars and
mount it there.
c. Flush mounting, if you remove the 4 screws you can utilize the tether as a template to drill 4 holes in an
appropriate location to flush mount it then use the standard screws and the rear half of the bar clamp on
the back side as the nuts.
7. Find a suitable location to mount the LED warning light. You’ll want to be able to see the LED light from your
normal riding positions. On Nytro’s, mount the LED in the IP panel somewhere near the gauge pod. Ensure there
is enough clearance underneath selected installation point and drill a 5/16” hole to mount the LED in. Install the
black LED mounting sleeve. Align the LED bulb alignment tabs with the mounting sleeve slots, and push the LED
bulb into the back of the mounting sleeve. You should feel it “click” when the bulb is fully seated in the mounting
sleeve. Note: The LED light will unplug from the black mounting sleeve. There is no need to cut the wiring harness
to the LED, when removing the dash panel. Simply unplug the LED from the back of the mounting sleeve. To
reconnect the LED bulb, align the tabs with the slots in the mounting sleeve and snap into place.
Operation Instructions:
The valve closes when two conditions are met, The Key is turned on and the tether is pulled. This meaning when you’re
riding the tether is installed so the Valve is open, or when the sled is parked the key is turned off so the valve stays open.
But when you are riding and you fall off the sled the tether will pull, then two things will happen, the machine will shut
down and the valve will close. This protects the rider from being injured by a running sled, the engine from being damaged
from running upside down and prevents oil from leaking when the sled is upside down. Any time the valve is closed the
red LED indicator will be flashing.
Another feature of the system is the Viper engine can lose its oil system prime and not have the ability to restore oil
pressure. Normally resulting in the oil light coming on and you can hear the noisy timing chain since it is tensioned by oil
pressure. If this happens to you, remove the tether cord and crank the engine over as you normally would for a few
seconds until the timing chain noise goes away (it won’t start because the tether is pulled). What this is doing is closing
the oil breather off with the roll over valve, then cranking it over the oil system is pressurizing the oil tank forcing oil into
the pump. Once restored clip your tether back on, cycle the key off a couple seconds then start it as you normally would.
The valves have proven to be quite durable and long lasting however over time they can accumulate oil residue and stick
open. The valve can be removed and cleaned using dish soap, just make sure it’s good and dry before re installing it.
Thank you and as always feel free to email [email protected] for tech support.


![Tether anthony[1]](https://img.pdfslide.us/doc/110x75/557c7d36d8b42a494c8b5161/tether-anthony1.jpg)