Embed Size (px)
DESCRIPTION
couse resources
Citation preview
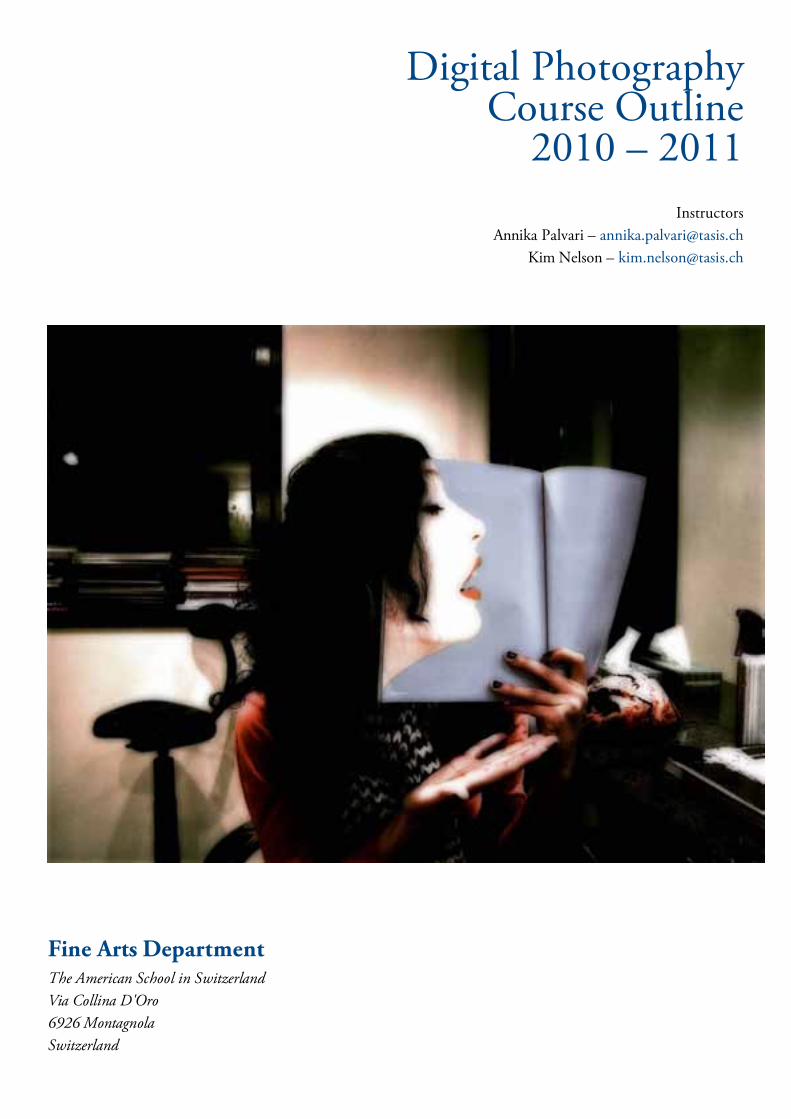
Digital Photography Course Outline
2010 – 2011
Instructors Annika Palvari – [email protected]
Kim Nelson – [email protected]
Fine Arts Department The American School in Switzerland Via Collina D'Oro 6926 Montagnola Switzerland
1. General Description Digital Photography provides the students with the necessary skills and techniques to successfully navigate digital capture and production. Both beginning and advanced classes are taught. Time is spent reviewing how to operate digital cameras, scanners, and printers. There will also be an introduction to the photography studio and directions on the school’s professional lighting equipment. Beginning and advanced techniques in camera operation and alternative printing procedures are also explored. Discussions about the differences between traditional film photography and digital will take place, the history of. Time will also be spent examining the history of photography. The image manipulation program, Adobe Photoshop CS 3, is used for all digital classes, and a significant amount of time is spent learning how to enhance photographs. Students also spend time discussing the ethics involved with digital photography as it relates to journalism, advertising, and publications. This course is excellent for preparing for the IB Visual Arts/IB Photography. It is recommended to complete at least one semester, better one year of Digital Photography beforehand.
2. General Course Format Digital photography is offered as a full credit course each semester. As students’ schedules allow, placement in classes is dependent on skill level. Classes meet four times a week with 3-4 hours of work required outside of class. Time in class is divided between independent work on photographs, in-class tutorials, printing, and classroom discussions. Most shooting of photographs happens outside of the regularly scheduled class period.
3. Course Goals Upon completion of basic digital photography the student will:
• Identify the basic components of a digital camera and be able to explain each function • Apply knowledge of basic camera operation and be able to correctly expose and focus a photograph • Demonstrate an understanding of aperture settings to achieve both shallow and maximum depth of field • Demonstrate an understanding of shutter speed settings to create images that show blurred & stopped
motion • Identify and use basic compositional elements when creating successful photographs • Demonstrate basic understanding of Adobe Photoshop and be able to successfully crop, adjust, and
print photographs. Upon completion of advanced digital photography the student will:
• Demonstrate competency in basic digital photography goals • Demonstrate an understanding of studio lighting and the operation of lighting equipment • Apply knowledge of color management to achieve consistent color with their photographs • Demonstrate advanced understanding of Adobe Photoshop and be able to successfully use adjustment
layers, layer masks, black and white conversion, and other creative techniques. • Identify and discuss the development of digital photography and its impact on today’s world • Understand the basic history of photography
4. Course Objectives In addition, the following list of objectives is intended to reinforce the course goals:
• Without notes or other materials, identify the basic parts of the camera • Given specific shooting assignments, demonstrate a working knowledge of basic exposure • Given specific shooting assignments, demonstrate a working knowledge of focus and depth of field and
shutter speed • Given specific shooting assignments, apply compositional techniques in shooting photographs. • Evaluate and critique photographs on their technical and creative merits. • List the basic file formats and color modes that their camera captures • Demonstrate and choose correct resolution settings while shooting. • Identify and explain histograms and evaluate exposure based on the histogram. • Demonstrate how to locate and select images from their hard drive, the server, or computer using Adobe
Bridge • Demonstrate the following Adobe Photoshop skills:
- Use of the crop tool - Execute simple repair and touchup with healing brush and patch tools - Use of layers and curves to make all adjustments on photographs - Execute appropriate amount of sharpening of photograph
5. Prerequisites Digital photography is open to all students in grades 9 - 13. Advanced classes require prior consent of the instructor. This probably means a previous course in Digital Photography, but the instructor will make the final decision on an individual basis. It is possible to take digital photography for only one semester or many. As much as possible the classes are grouped according to experience. Many 9th and 10th grade students may take photography for one or many semesters, and then may decide to start IB photography in the 11th grade.
6. Methods of Instruction The very first semester of Digital Photography tends to have more group discussions, lectures, and in-class tutorials. As skill and knowledge are acquired, more and more of the work in class becomes individualized with assignments and work adapted to the interests of the students. Advanced classes become even more individualized with extended project work. There are certain times in the advanced classes when student become more teacher led when the history of photography is being discussed. The internet is also used in class with students to look at different photographer’s galleries, seeking answers to creative problems, and researching for information on the development of photography, new techniques, and current trends. This tends to be guided Internet time.
7. Texts, Periodicals, Reference, and Written Support Materials Textbooks used for the course include: Understanding Digital Photography, by Bryan Peterson (beginning and advanced students) Art and Fear, by David Bayles and Ted Orland (advanced students)
Periodicals available: Lenswork (Photo lab only) American Photo (Library) DVDs available: War Photographer - James Nachtway American Photography The Impassioned Eye - Henri Cartier Bresson The Manufactured Landscape The Wooden Camera Shooting the Past National Geographic - The Photographers National Geographic - Adventure Photography An American Legend - Ansel Adams The Photography of Shelby Adams Total Training DVD set - CS2 (Please note the photography department has a variety of older VHS tapes, but are currently shifting everything, which is useful and current to DVD.) Support ing Writ t en Material s: The photo lab has a fairly extensive library of over 200 books. These resources are available to students at any time. However, all books are to be used only in the Photo Lab. Books can be signed out only by the instructor. The school’s main library has a smaller, yet useful collection of monographs and general photography history books.
8. Equipment and Technology Computer and electronic equipment: 8 Apple iMac G5s 8 – 10 card readers 2 Epson 3200 flatbed scanners 1 Nikon 5000 film scanner 3 Epson 2400 printers 1 Epson 2100 printer 1 color printer 1 Wacom drawing tablet with extra 2 extra drawing pens 1 Casio projector 1 DVD player Software used: Adobe CS 3 programs (InDesign, Photoshop, Illustrator, and Acrobat Professional) Ninja Noise (noise reduction software) Final Cut Pro Microsoft Office for Apple iPhoto and Mac applications are used on occasion
Color management software and hardware: Gretag Macbeth - Eye one match software and monitor calibration device Spyder Print FIX pro – Datacolor 1005 spectrocolorimeter and software Other equipment includes: Fully appointed studio with power, strobes, soft box, umbrellas, reflectors 1 Flashmate Sekonic flash meter 8 enlargers (darkroom) and 8 electronic timers (Gralab) 1 print dryer (Many) 35mm SLR film cameras 1 EOS 20D Canon Digital SLR 1 Sony video camera
9. Material Fees There is a 150 CHF (per semester) fee charged to students. This fee covers paper and ink. Students purchase all paper for use in the class from the instructor, and the charge for the paper is deducted from the materials fee. If a student does not use the entire fee, their student account is credited and if they need to purchase additional paper their account is charged. For any special framing or presentation, students are responsible for these charges.
10. Assessment
Advanced Digital Photography Class participation & preparedness will constitute approximately 5% of one’s semester grade. Quizzes and practical exams will comprise another 10%. Misc. shooting assignments, worksheets, and in class work will constitute 5%. Final digital portfolio/digital projects will count for 80% of one’s semester grade. A number of projects will also be given to the students to complete (i.e., calendar, advertisement photographs, self portraits, etc.). A final grouping of images will constitute a final portfolio to be graded. More specific criteria will be given in class. Effort Grades: For all Digital Photography classes, the evaluation process will include verbal critiques, self-evaluation, assessments of creative problem solving ability and a demonstrated willingness to explore and expand skills and awareness in photography. In addition to a letter grade, TASIS gives an “effort grade”. Effort grades are being on time to class, respectful in class, and sincerely engaged in the class activities and work. Here is a breakdown of the effort marks” 5 - “Lives in the Photo Lab”. A student whose work (quantity and quality) is above and beyond 4 - Works very hard and shows exceptional passion towards photography 3 - Does what is asked, but does not work beyond the minimum requirements

2 - Work is not handed in consistently, struggles to come to class and not engaged 1 - No obvious sign of effort or interest in the class For a more detailed breakdown, please refer to the Grading Rubric.
11. Summary: Basic Course Expectations Please be on time and ready to work at the start of the class time. Attendance and attentiveness during class will play a part in the semester grade. Certain days will be spent downloading and shooting, and each student's camera must be ready to go. When a camera is lost, it is the students’ responsibility to find means for photographing. During class time they can use the studio camera, but it will not be lent out. Students will not be excused from completing assignments in case of equipment failure. Most of each student's “post-shooting” work will be done on Photo Lab computers or in the darkroom. Students may work on their own computers if they have their own version of Photoshop installed. Required field trios to museums and exhibitions will take place. All school computer use policies are in effect. Photoshop is a powerful tool, and using this or any other program/piece of equipment in an inappropriate manner will result in a disciplinary action and being asked to drop the course. Darkroom chemicals and equipment must be used in a safe and healthy manner. The photo studio is also to be used for appropriate assignments. Shooting of nude, racist or violent photography is not allowed at TASIS – although there may be such photographs in exhibitions and book where it is discussed. Each student's work will be shown at the January Photography show and again during the Spring Arts Festival. Students may have additional opportunities to show their work, for example in DeNobili gallery or various administrative offices.
Adv. Digital Photography 2010-2011 Outline and Assessment
Ms. Nelson - office [email protected]
Overview: Digital Photography provides the students with the necessary digital photography skills and techniques to successfully navigate digital capture and production. Time will be spent learning how to operate digital cameras, scanners, and printers. Depending on the skill level of the stu-dents, time will be spent either learning about or reviewing basic photography skills early in the term. Discussions about the differences between traditional film photography and digital will also take place. Time will also be spent examining the history of photography. The image manip-ulation program, Adobe Photoshop CS3, will be used to work with all the students’ photographs. Students will also have the opportunity to discuss the ethics involved with digital photography as it relates to journalism, advertising, and publications.
Course Requirements: At least one term of digital photography taken at TASIS or another school is encouraged. Students must provide their own digital camera. There is a charge/term to cover ink, paper, and display supplies.
Class attendance and participation: Please be on time and ready to work at the start of class-time. Attendance and attentiveness during class will play a part in the semester grade. Certain days will be spent downloading and/or shooting, and each student’s camera must be ready to go. Tardies will be recorded and multiple tardies may result in reduction of one’s grade.
Grading: • Class participation & preparedness will constitute approximately 5% of one’s semester grade. (For example, the reality of our classroom is that we use computers. If I have to repeatedly ask you to not be on facebook, YouTube, or other sites not related to class..this will reflect in your semester grade.)• Quizzes and practical exams will comprise another 10%. Early on in the term, quizzes and practical exams using the computer will be given to make sure students are understanding the technical aspects of the class.• Misc. reading assignments, worksheets, and in class work will constitute 5%.(For example, if I ask you to write a paragraph response to a reading or complete a worksheet, it is expected that you complete this work on time and the best you can.)• Photographs taken for the term will count for 80% of one’s semester grade. Throughout the term the opportunity to print will be provided for the students. A number of projects may be given to the students to complete (ie, calendar, advertisement photographs, self portraits, academic travel photos, etc.). A final portfolio of images will count heavily towards your final semester grade. More specific criteria will be given in class.
It is important to note that 80% of the grade for this class involves having to shoot, work on, and print photographs. Everyone must have images to work with, and this mean you need to be shooting many many photographs!
Advanced Digital Photography 2010 - 2011
Week 1: Introduction to courseShooting assignment - There will be a first week shooting assignmentOrientation to Adobe CS5 - yes, a new photoshop versionWorkflow and review of “how to work an image”
Topics to discuss/explore/learn
The following list includes many ideas and possible assignments. Once we have the computers/darkroom all up and functioning, your input will be important as I establish the semester’s “timeline.” Not included in the list below is our continuing exploration of Photoshop.
Photography and science (micro and macro) - We now have one Canon macro lens to be used during class.
Bookmaking - We will explore the world of self publishing. The companies providing POD (Publish on Demand) have improved their software, covers, quality a great deal. It would be fun to create your own book to collect the images from this class. For seniors, it also might be a wonderful addition to your college portfolios.
Exploring resources on the internet - Occasionally, we will take time to explore and find tutorials on the internet, interesting articles, portfolios to share and report in class about. The internet has ama
Camera-less photos - An interesting adventure...more later.
High Dynamic Range photography - Review for some of you, new for others....
Night photography - We will watch the weather and see if we can spend a classtime or two capturing star trails, night scenes, and maybe even lightening (safely)!
Discussion of ethics and photojournalism - Ah...the use of photoshop. When to alter a photo and when to not retouch at all......how much retouching is too much. There are many controversial and interesting questions that digital photography has brought out in advertising and journalism. We will explore and dis-cuss!
Digital Asset Management - Keeping track and sorting your images. This is a very important topic, and even though it might not be the most interesting topic, it is essential as you accumulate hundreds of im-ages.
Aperture control - Review of depth of field, use of the new lensbaby, and becoming more comfortable with manual controls.
Shutter speed control - Exploring movement, use of long shutter speeds, 1st/2nd shutter curtain synchro-nisation and the use of flash with motion, long exposures, etc.
Elements of design - What makes a strong photo? Why do some photos just work, and others seem to fall flat? Learning to see....better.
Abstract photography - It doesn’t always have to be literal. We will take a look at some of the photogra-phers who have made a name for themselves by photographing rust spots, ripples, patterns, etc.

Once you start looking, you will find photographs everywhere.Everyday items and situations will present themselves faster than you can take a picture. You will find there is never a shortage of material and deciding what to take and soon you will have a variety of unique and original digital photographs.
Photographers and artists have an obsessiveness with the light. Monet is a good example. His famous haystack paintings are a perfect example. He watched the light, and it is one of the most important factors when shooting photographs. Once you take note of it, the light changes al-most as you watch and it is easy to understand why artists are “all about the light.”
One of the best learning experiences is to miss out on the best shot because you thought you’d get it on the way home or some other time to find it has changed gone, or the lighting had completely changed. Simple tips to try before you start to take a photograph1. Spend some time looking around you. Look up, look down, look
around, notice things...everything.2. Walk around some distance away and then walk back before you take a shot3. Look to see if there is a better shot from another angle4. Take time to notice things that you would not have seen had you just started shooting straight away5. Get into the mood of your chosen place first and become aware of your surroundings6. Take a second look at things you wouldn’t normally give a second glance7. Experiment with where the light falls and really look to see which angle makes a better shot8. Move in and take close up - closely cropped usually works, moving further away usually will not
Ideas!Rust is amazing to shoot and has a wide range of colors and shades with such diversity. (Anderson!)
Mould, and slime are also good starting points. Assuming you have macro on your camera, go out and see what you can rustle up , you will be amazed how fantastic your photos can look with close up pix of some of these.
Cobwebs can look ethereal or surreal stretched across some iron or old de-cayed wood.
Kitchen utensils make excellent shots and some close ups can make some very different abstract photos - personally I am kind of into sinks!
Food items like eggs, strawberries and veggies can take the most amazing shots and something as simple as a cabbage has the most exciting form and texture and make interesting posters and prints.
The challenge ......make everyday objects made extraordinary
The Photographer’s Guide to Depth of Field
Photograph by Nicolas Raymond
A Light Stalking Guide
The Photographer’s Guide to Depth of Field: A Light Stalking Guide – www.lightstalking.com 1
”
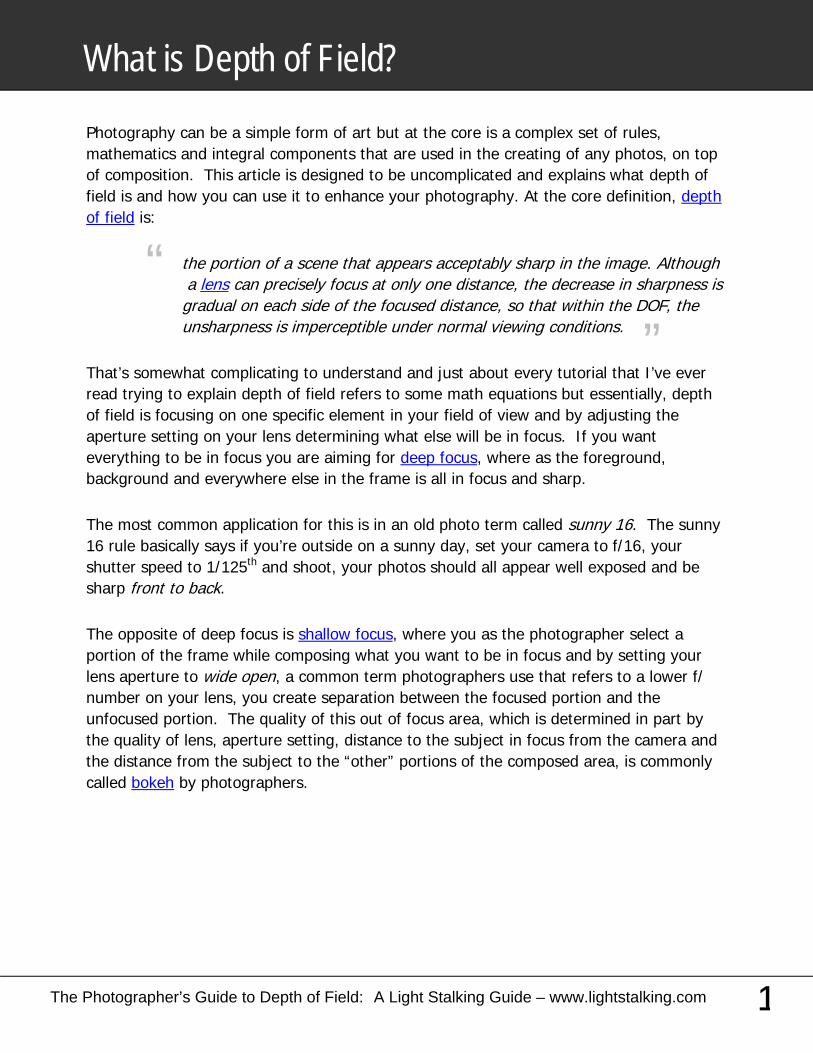
Photography can be a simple form of art but at the core is a complex set of rules, mathematics and integral components that are used in the creating of any photos, on top of composition. This article is designed to be uncomplicated and explains what depth of field is and how you can use it to enhance your photography. At the core definition, depth of field is:
the portion of a scene that appears acceptably sharp in the image. Although a lens can precisely focus at only one distance, the decrease in sharpness isgradual on each side of the focused distance, so that within the DOF, theunsharpness is imperceptible under normal viewing conditions.
That’s somewhat complicating to understand and just about every tutorial that I’ve ever read trying to explain depth of field refers to some math equations but essentially, depth of field is focusing on one specific element in your field of view and by adjusting the aperture setting on your lens determining what else will be in focus. If you want everything to be in focus you are aiming for deep focus, where as the foreground, background and everywhere else in the frame is all in focus and sharp.
The most common application for this is in an old photo term called sunny 16. The sunny 16 rule basically says if you’re outside on a sunny day, set your camera to f/16, your shutter speed to 1/125th and shoot, your photos should all appear well exposed and be sharp front to back.
The opposite of deep focus is shallow focus, where you as the photographer select a portion of the frame while composing what you want to be in focus and by setting your lens aperture to wide open, a common term photographers use that refers to a lower f/ number on your lens, you create separation between the focused portion and the unfocused portion. The quality of this out of focus area, which is determined in part by the quality of lens, aperture setting, distance to the subject in focus from the camera andthe distance from the subject to the “other” portions of the composed area, is commonly called bokeh by photographers.
What is Depth of Field?
“
The Photographer’s Guide to Depth of Field: A Light Stalking Guide – www.lightstalking.com 2
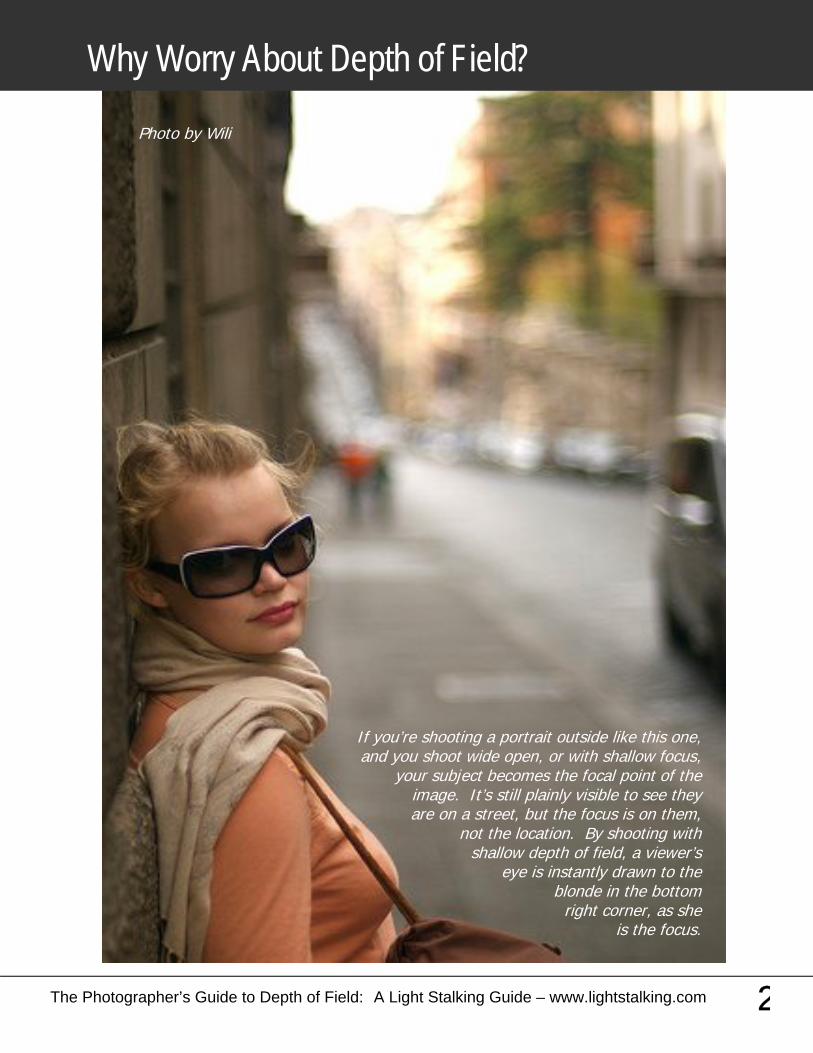
Why Worry About Depth of Field?
Photo by Wili
If you’re shooting a portrait outside like this one, and you shoot wide open, or with shallow focus,
your subject becomes the focal point of the image. It’s still plainly visible to see theyare on a street, but the focus is on them,
not the location. By shooting withshallow depth of field, a viewer’s
eye is instantly drawn to theblonde in the bottom right corner, as she
is the focus.
Why Worry About Depth of Field?
The Photographer’s Guide to Depth of Field: A Light Stalking Guide – www.lightstalking.com 3
So why is it important to know about depth of field and how do you go about implementing it into your photography? Shallow depth of field lets you draw the viewer’s eye into specific parts of the image, creating a visible distance between subject and the rest of the otherwise flat, two-dimensional photograph. On the other side, using a large focus point will ensure that things like sunsets or group shots of people are sharp from corner to corner in your image. Implementing these two basic techniques of depth of field allows you to choose how the viewer of your photograph perceives everything and allows you to be creative with what is and isn’t in focus.
Both the earlier linked wiki article and this one by Bernie feature the actual math calculations and illustrations that explain in great detail how depth of field is calculated, what the potential bokeh will look like and how to calculate things like the circle of confusion. This table and explanation is extremely helpful, but it’s also very confusing in itself. They do illustrate what’s actually happening, but more importantly, I can help share with you what they are actually talking about and why you may want to use them. For me, once I grasped how and why to use depth of field I stopped taking snapshots and started to create photographs.
Why Worry About Depth of Field?
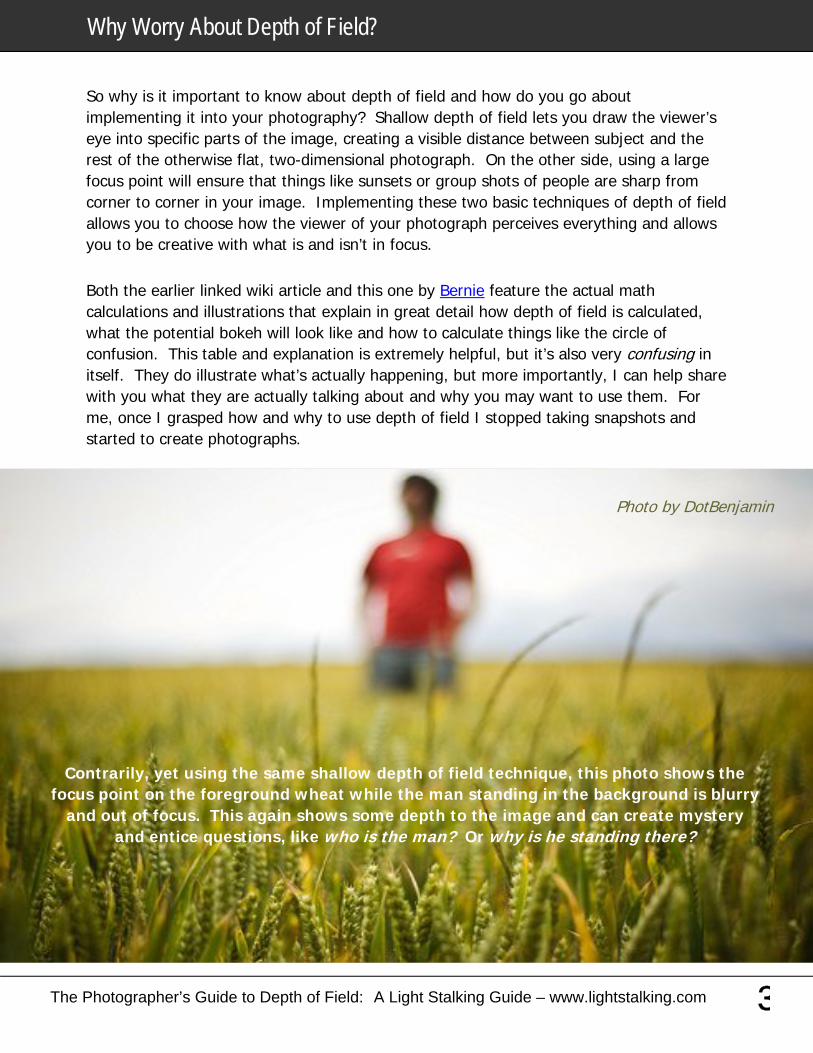
Contrarily, yet using the same shallow depth of field technique, this photo shows the focus point on the foreground wheat while the man standing in the background is blurry
and out of focus. This again shows some depth to the image and can create mysteryand entice questions, like who is the man? Or why is he standing there?
Photo by DotBenjamin
The Photographer’s Guide to Depth of Field: A Light Stalking Guide – www.lightstalking.com 4
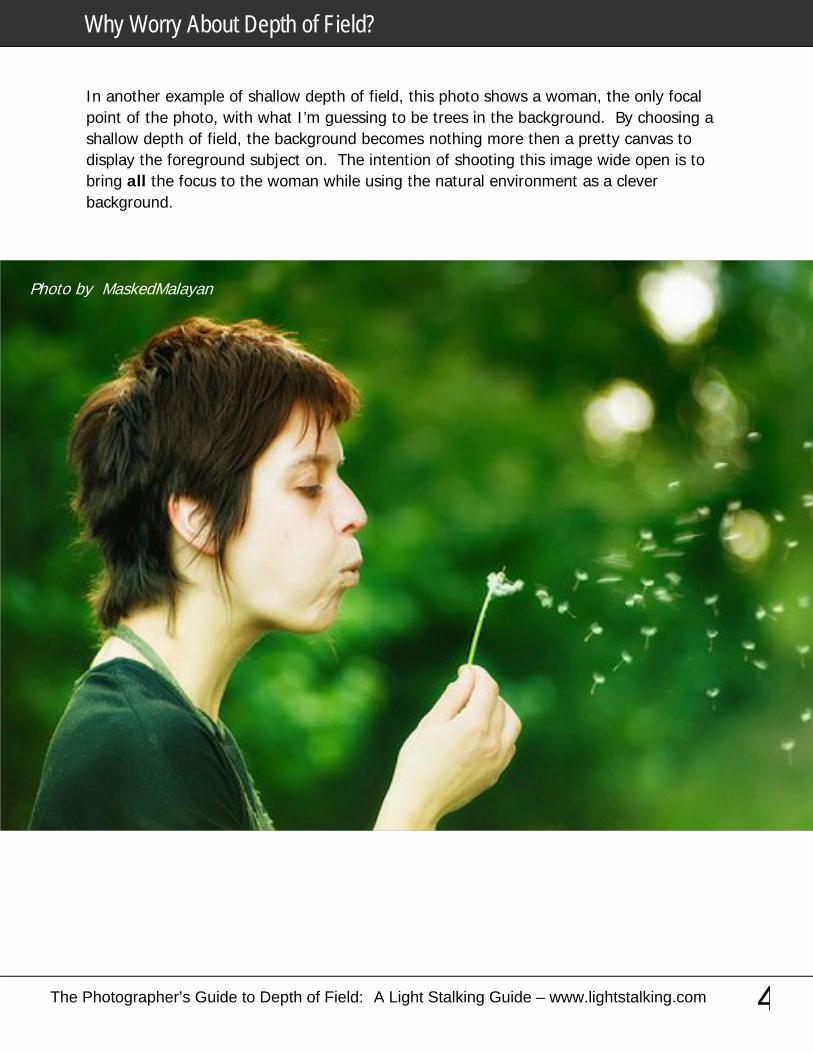
In another example of shallow depth of field, this photo shows a woman, the only focal point of the photo, with what I’m guessing to be trees in the background. By choosing a shallow depth of field, the background becomes nothing more then a pretty canvas to display the foreground subject on. The intention of shooting this image wide open is to bring all the focus to the woman while using the natural environment as a clever background.
Why Worry About Depth of Field?
Photo by MaskedMalayan
The Photographer’s Guide to Depth of Field: A Light Stalking Guide – www.lightstalking.com 5
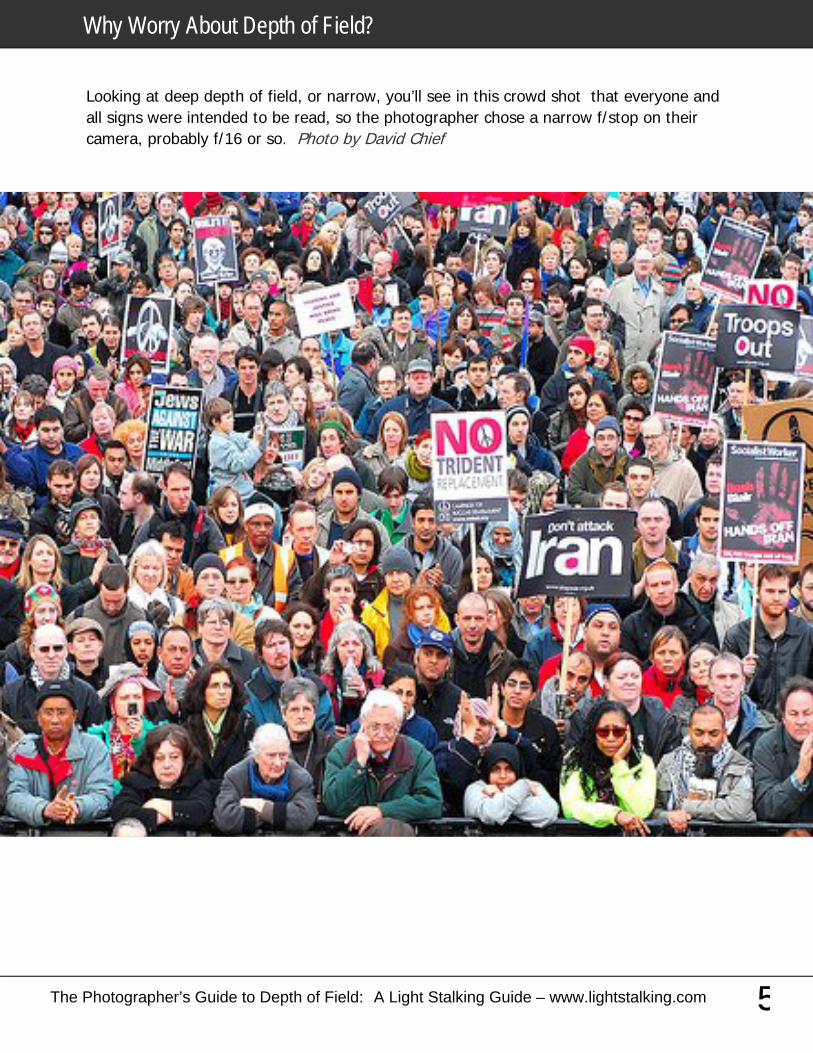
Looking at deep depth of field, or narrow, you’ll see in this crowd shot that everyone and all signs were intended to be read, so the photographer chose a narrow f/stop on their camera, probably f/16 or so. Photo by David Chief
Why Worry About Depth of Field?

The Photographer’s Guide to Depth of Field: A Light Stalking Guide – www.lightstalking.com 6
In this stunning waterfall photo the entire scene is sharp and in focus. Utilizing shallow depth of field would not have made sense because no one part of the image is more important then the other. While another technique is used here – for long exposures– the depth of field concept is still the same.
Why Worry About Depth of Field?
Photo by Tropical Living
The Photographer’s Guide to Depth of Field: A Light Stalking Guide – www.lightstalking.com 7
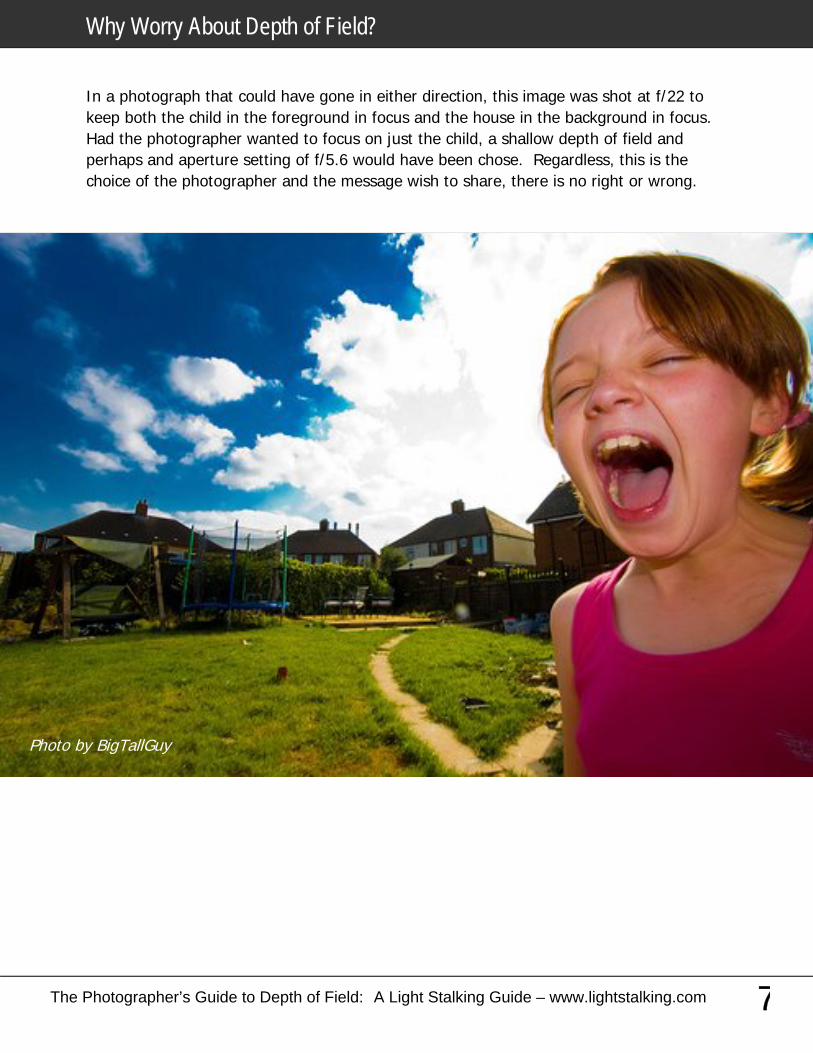
In a photograph that could have gone in either direction, this image was shot at f/22 to keep both the child in the foreground in focus and the house in the background in focus.Had the photographer wanted to focus on just the child, a shallow depth of field and perhaps and aperture setting of f/5.6 would have been chose. Regardless, this is the choice of the photographer and the message wish to share, there is no right or wrong.
Why Worry About Depth of Field?
Photo by BigTallGuy
The Photographer’s Guide to Depth of Field: A Light Stalking Guide – www.lightstalking.com 8
With some basic understanding of what depth of field is and some basic examples, implementation is the next step. In order to shoot photographs with a narrow depth of field a few factors come into play.
Focal length of your lens
Maximum aperture (lowest f/stop)
Focal distance for your subject (if you’re not using a prime lens)
Distance between your in-focus subject and the out of focus section
Digital sensor size
Film size (for film shooters, 35mm, 120, 4x5, etc.)
All of these factors will essentially determine what you can and can’t do in regards to bokeh or overall sharpness of the image from corner to corner.
So how can you apply these techniques? For the maximum depth of field when your goal is shallow depth of field you want the longest and fastest lens (lowest f/stop) and your subject to be as close to the lens as possible while the background is as far away as possible. This is why macro photographs of bugs look so amazing, but also what separates a portrait photograph from a snapshot.
Needless to say, you can’t achieve a shallow depth of field by having someone lean up against a wall. This is also why portraits and fashion photography are generally shot on lenses in the 70-200 range and why the Nikon 85mm f/1.4 and Canon 85mm f/1.2 are among the most popular lenses in these niches. This is not to say you need to spend nearly $2,000 on a lens to get great depth of field, just know that you will get better results with better gear.
For deep depth of field, nearly any lens will work since the goal is everything in focus, however again, build quality and overall glass quality will help define a better, sharper image. It’s also worth noting that most lenses have a sweet spot to them, that is to say, the larger the f/stop does not always equal a better, sharper photo from corner to corner.Most lenses are their sharpest one or two stops from the highest f/stop, however most lenses are their sharpest between f/16 and f/22.
How to Apply Good DOF Principles to Your Photos
The Photographer’s Guide to Depth of Field: A Light Stalking Guide – www.lightstalking.com 9
With a little understanding, how can you best apply this technique? Simple. Regardless of which end of the depth of field spectrum you want to achieve the application is the same.Set your camera to aperture priority mode. In this mode you choose what aperture to shoot and the camera, through the internal light meter, will select the best shutter speed for you. It’s not always full proof and sometimes you may need to use the EV compensation to over or under expose slightly, but more than nine out of ten times this will give you great results. Why not shoot in full manual mode? Because it might not always make the most sense, based on your particular shooting conditions.
When I shoot candid children photography of them outside playing at a park or in a field, they often run and play in both the sun and under the shade of trees. I’m more focused on running around to keep up with them and working on my composition, I don’t want to focus on looking at what settings my camera is on. I set it into aperture priority mode and wide open (lower f/stop number) and never have to worry about exposure because the camera is doing it for me.
Likewise, when I’m taking group shots of friends or family or doing scenics or landscape photography, I’ll set my camera again to aperture priority but at f/16 to ensure everything is nice and sharp and in focus.
Why don’t I use the built in Portrait mode for my camera? Well to be honest, it sucks.Camera manufactures add these presets in an attempt to make shooting easier, but the reality is, some basic photography knowledge and knowing what you want the end result to be means you never need to rely on them, ever. Portrait mode in cameras is essentially setup for a wide depth of field (lower f/stop), that’s it, no other magic! Why let the camera choose how much or how little shallow depth of field appears in your photos?
What About Camera Presets?
The Photographer’s Guide to Depth of Field: A Light Stalking Guide – www.lightstalking.com 10
Depth of Field in Post-Production
I always suggest that you do as much in camera as possible because the end result is that much better, but what if you can’t get the desired shallow depth of field in camera or you simply forgot or are editing older photos? Some advanced techniques in Photoshop, which require selectively blurring the background can bring you, close but they do require a lot of time and a steady hand to achieve. Editing photos this way isn’t something you’d want to do to a lot of images, it’s tedious work, but possible.Another option would be to use a specific plug-in, like the Bokeh plug-in from Alien Skin.This Photoshop plug-in filter emulates the effects from more than a dozen popular lenses renowned for their bokeh and gives you full control after the fact. I’ve used this filter and really adore it, but again, it does take some time to use and can easily be abused to the point of photos looking fake.
Mastering and utilizing depth of field is both a basic and complex photography technique that is applicable to nearly every type and niche of photography. It will allow you to disregard those unflattering presets on your camera in favor of more control, ultimately ending in better photographs, not just snapshots. Get out there and play around with depth of field and see how amazing your photography can become!
What About Camera Presets?
Digital Photography September 13 - 17, 2010 (Week Two)
Overview of week:Monday: Hand in the questionaire about yourselves, and also the notes on the Basic Workflow.
Remember you to have read this, and then give me terms/ideas/techniques you are not quite sure
about. This will help me plan what happens in the next week or so.
Handout paper and reveiw/learn how the printers work.
Assignment: Read the handout about making ordinary objects extraordinary. Also read the
article on Composition located in the Resources section on Veracross for this class.
Weekly Shooting Assignment: Shoot a photograph of a common everyday object and try to cre-
ate an image which causes people to pause, smile, and wonder! One print due on Friday. A4
Tuesday: Photoshop work day. Review (or learn) the basic steps in workflow. Items to discuss
will depend on your workflow questions and concerns
Assignment: Shoot your everyday object.
Wednesday: In class time to work on images. Depending on where the questions are with the
Short Quiz - Aperture/Depth of Field
Assignment: Establish five goals for the term. Write them down for class on Friday.
Mrs. Nelsonx5178
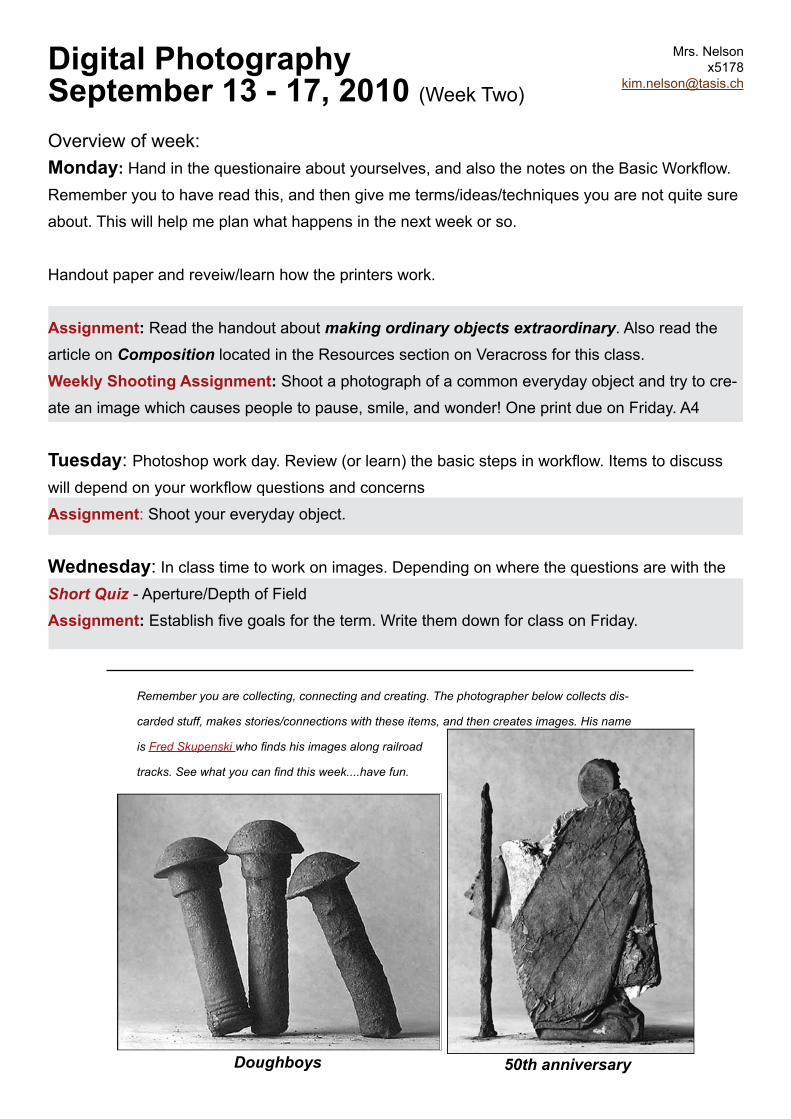
Doughboys 50th anniversary
Remember you are collecting, connecting and creating. The photographer below collects dis-
carded stuff, makes stories/connections with these items, and then creates images. His name
is Fred Skupenski who finds his images along railroad
tracks. See what you can find this week....have fun.
Digital Photography September 21 - 25, 2009 (Week Three)
Overview of week:Monday: Print your “simple to extraordinary” print. A4. (Hand in your goals for the term.)
Tuesday: Discuss the Shooting assignment for the week. Curves exploration! (video and tutorial)
Wednesday: Have your subject chosen. Tell me!:) Plan on choosing something you could shoot
easily. Do not pick Zoos or Sunsets, for example, since you won’t be at a zoo or maybe see a lot of
sunsets this week. It can be an object like trees, a building (the library), a color, spend time choos-
ing your subject.
Take a look at the link below about covering subjects with a wide shot, one medium and one tight.
CNN BootcampNational Geographic Photo Galleries
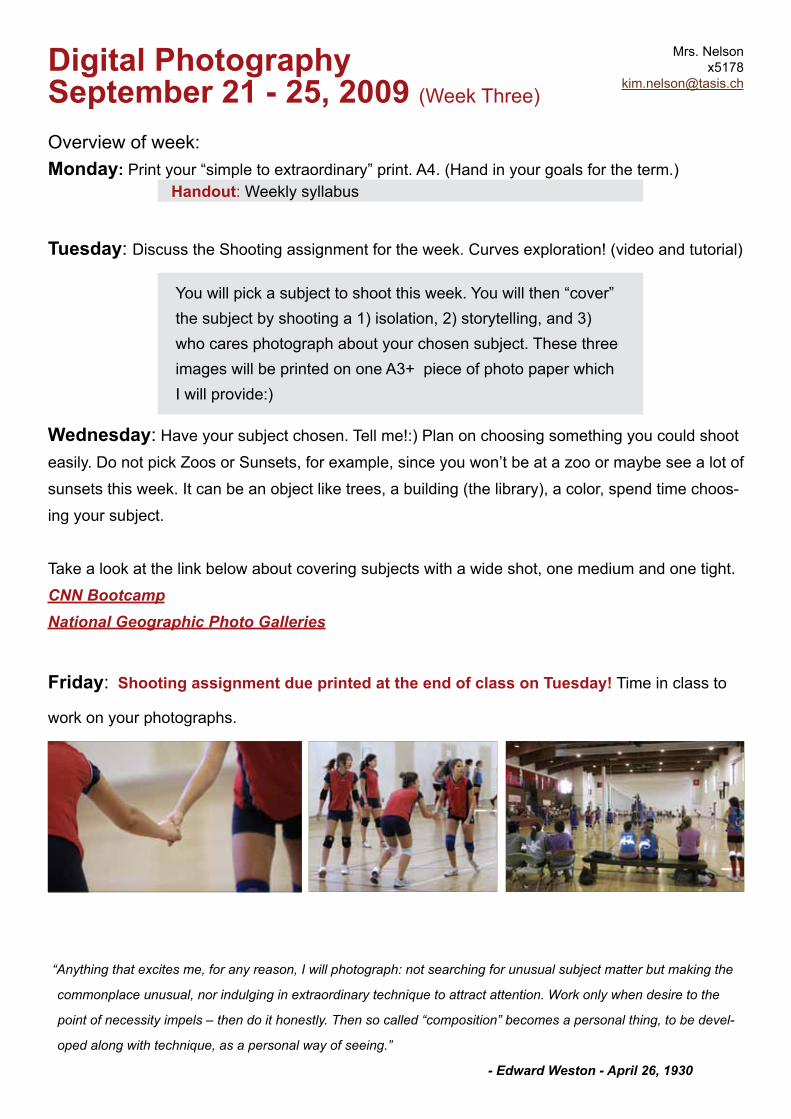
Friday: Shooting assignment due printed at the end of class on Tuesday! Time in class to
work on your photographs.
Mrs. Nelsonx5178
Handout: Weekly syllabus
“Anything that excites me, for any reason, I will photograph: not searching for unusual subject matter but making the
commonplace unusual, nor indulging in extraordinary technique to attract attention. Work only when desire to the
point of necessity impels – then do it honestly. Then so called “composition” becomes a personal thing, to be devel-
oped along with technique, as a personal way of seeing.”
- Edward Weston - April 26, 1930
You will pick a subject to shoot this week. You will then “cover” the subject by shooting a 1) isolation, 2) storytelling, and 3) who cares photograph about your chosen subject. These three images will be printed on one A3+ piece of photo paper which I will provide:)
Overview of week: No shooting assignment.Tuesday: Everyone should get caught up with their isolation/storytelling/who cares print during class.
Wednesday: I sense that everyone wants to shoot photos and work on photos. Discuss photog-
raphers and inspiration in class. A looking/talking day and catch-up.....
For the next three - four weeks we will work on shooting images to be used in a personal project.
Everyone will be expected to have a “subject or theme”, and 4-5 prints will be expected by the end
of the project (October 20th). We will try to set up some of these in a Family Weekend display.
This project will have one other component. You need to produce one of the following: (Please
note with which ever of the items below you choose....additional instructions will be given.)
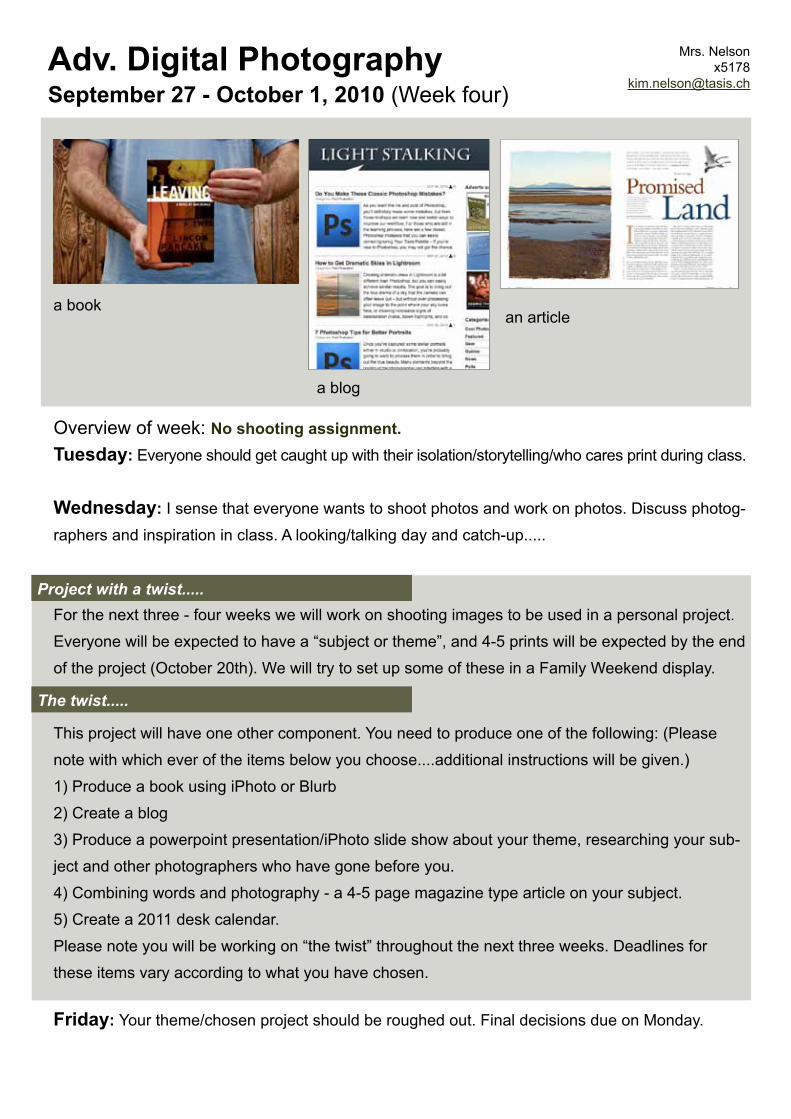
1) Produce a book using iPhoto or Blurb
2) Create a blog
3) Produce a powerpoint presentation/iPhoto slide show about your theme, researching your sub-
ject and other photographers who have gone before you.
4) Combining words and photography - a 4-5 page magazine type article on your subject.
5) Create a 2011 desk calendar.
Please note you will be working on “the twist” throughout the next three weeks. Deadlines for
these items vary according to what you have chosen.
Mrs. Nelsonx5178
[email protected]. Digital Photography September 27 - October 1, 2010 (Week four)
Project with a twist.....
The twist.....
Friday: Your theme/chosen project should be roughed out. Final decisions due on Monday.
a blog
a bookan article
Overview of week: Monday: Everyone should have their subject chosen, additional project chosen. Sign-up for week-
end photo lab duty. Announce extra help hours by Ms. Palvarri and me. Finish movie.
Tuesday: Depending on the choices for the projects - I will provide additional sites/ideas/tutorials
where you can learn InDesign, books sites, whatever you have chosen. Work in class.
Wednesday: Work in Class on project. Shoot photos, research...increase your inputs!!
Friday: Work in Class. Remember that there is plenty
for you to learn, many photos for you to shoot, etc. Your
grade in this class is also affected by your work ethic
and to some extent how well you manage time. I will
touch base personally with each of you for 5-8 minutes
to find out how your project is developing.
It’s the way to educate your eyes.
Stare. Pry, listen eavesdrop.
Die knowing something.
You are not here long.
- Walker Evans, Photographer
Mrs. Nelsonx5178
[email protected]. Digital Photography October 4 - October 8, 2010 (Week five)
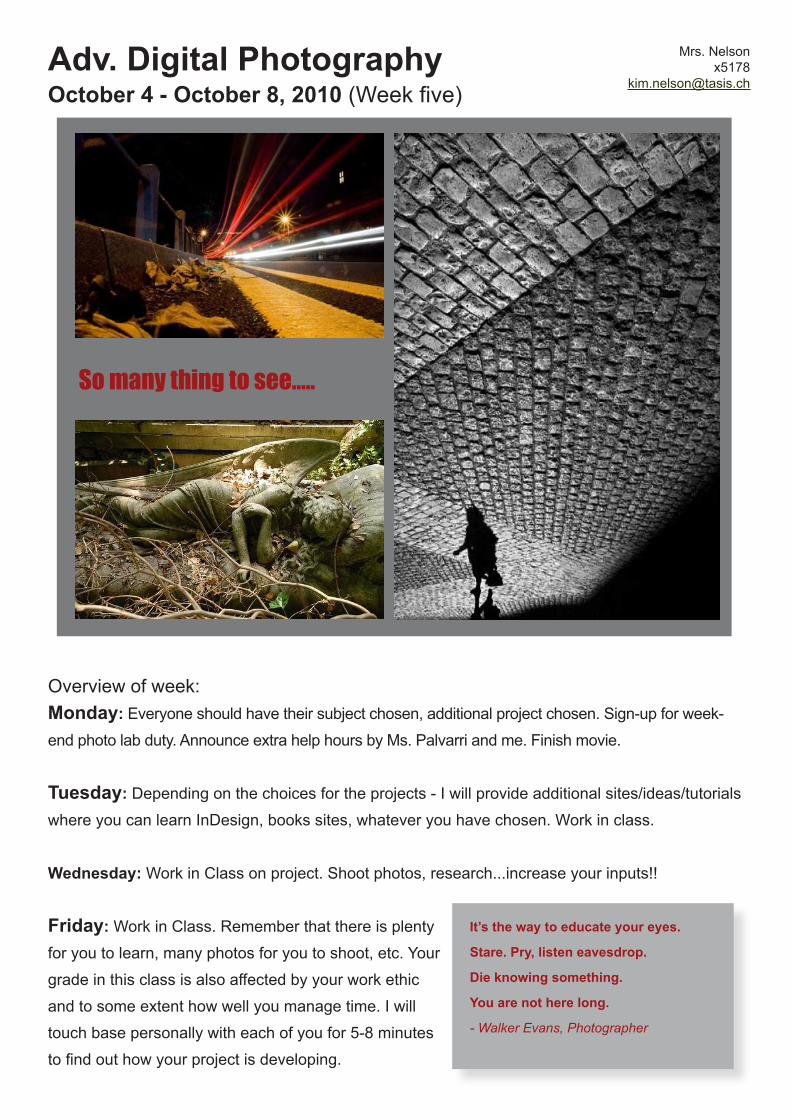
So many thing to see.....
Listed below are the requirements for the “twists” to your assignment for the next few weeks. You will need to be proactive and maybe even sketch out a timeline of how you will get everything done on time. Of course, I will guide and help as much as I can:) If you come up with bigger and better ideas to try with one of the five projects below, please talk to me and I will consider what you have come up with. (For example, if you want to produce a podcast for #3 instead of a power-point....great!)
1) Create a book with iPhoto or BlurbI would ask you to pick one of these formats (look at both and read reviews about both) to make your book. You will need to have more photos than your initial 4-5 prints you will hand in to me. This means shooting lots of images! However, I would not ask you to complete your book by the deadline, but this could be an ongoing project all year. Requirements:• Notes about at least three different book making companies (POD - Print on Demand) books.• Choose one and have your cover, title page, and at least 10 pages of your book begun.• Present your book, research to the class.
2) Create a blogThere are many blogging platforms and styles out there. Decide early to do this option and begin to research what platform you will try out.Requirements:• Research your options for blogging. Take notes, and compare at least two different blogging
platforms.• Choose a blogging platform and begin your own photoblog. It might not necessarily always
have photographs from your chosen subject, but you will need to post at least five different days before the assignment is due.
• Write a short one page report on what exactly is a blog, photoblog, how are they used, why make one, etc. You will explain to the rest of the class your findings.
3) Produce a powerpoint/iPhoto slide show about your themeThere is a lot of flexibility if you choose this option. It would really work with almost any subject. If your subject is more technique heavy (motion/night) where you need to sharpen technical skilss, your presentation would have slides teaching others how you accomplished your work. It alsomot be simply portraits, and your presentation would include examples of famous photographers past and present who work with portraits.
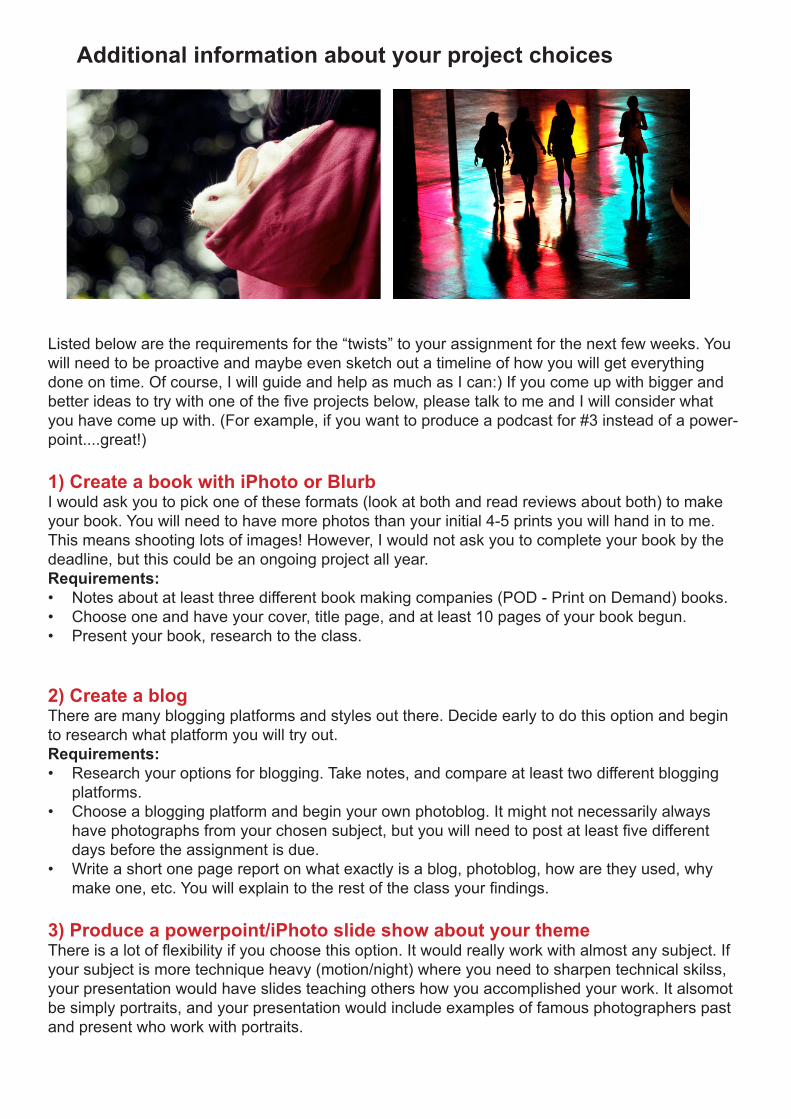
Additional information about your project choices

Requirements:• Research your subject and prepare at least 12 slides showing your work, explanations of your
technique and/or history of your subject as it relates to photography.• Prepare you presentation using Powerpoint, iPhoto, or iMovie • Present your completed powerpoint to the class.
4) Combining words and photographyYou would need to have a subject where you will also combine writing. Poetry, prose, explanation of technique...all are a possibilities. Requirements:• Research magazine design layout and find examples of design you like. Screen capture these
layouts and use them as inspiration when making your article. (in other words save these the layouts you like and place in a folder.
• Take time to learn the basics of InDesign. (placing text, photos, resizing, and exporting)• Create your article and export the article as a pdf. • Present to the class what you learned about design and also InDesign.
5) Create a 2011 Desk CalendarNo real explanation....create a calendar!Requirements:• You will need a cover/back cover and 12 images for your calendar• Learn the basics of InDesign in order to create your calendar template and importing your pho-
tographs into your calendar• Finish and present your calendar to the class. • Write a half page essay on your biggest struggles in making this calendar! There will be a cou-
ple!! :)