Embed Size (px)
Citation preview
Cisco ASA S
C H A P T E R 2
acl-netmask-convert through application-access hide-details Commands2-1eries Command Reference, A through H Commands

Chapter
acl-netmask-convertTo specify how the ASA treats netmasks received in a downloadable ACL from a RADIUS server that is accessed by using the aaa-server host command, use the acl-netmask-convert command in aaa-server host configuration mode. To remove the specified behavior for the ASA, use the no form of this command.
acl-netmask-convert {auto-detect | standard | wildcard}
no acl-netmask-convert
Syntax Description
Defaults By default, no conversion from wildcard netmask expressions is performed.
Command Modes The following table shows the modes in which you can enter the command:
Command History
Usage Guidelines Use the acl-netmask-convert command with the wildcard or auto-detect keywords when a RADIUS server provides downloadable ACLs that contain netmasks in wildcard format. The ASA expects downloadable ACLs to contain standard netmask expressions whereas Cisco VPN 3000 series concentrators expect downloadable ACLs to contain wildcard netmask expressions, which are the reverse of a standard netmas expression. A wildcard mask has ones in bit positions to ignore, zeros in bit positions to match.The acl-netmask-convert command helps minimize the effects of these differences upon how you configure downloadable ACLs on your RADIUS servers.
auto-detect Specifies that the ASA should attempt to determine the type of netmask expression used. If the ASA detects a wildcard netmask expression, it converts it to a standard netmask expression. See “Usage Guidelines” for more information about this keyword.
standard Specifies that the ASA assumes downloadable ACLs received from the RADIUS server contain only standard netmask expressions. No translation from wildcard netmask expressions is performed.
wildcard Specifies that the ASA assumes downloadable ACLs received from the RADIUS server contain only wildcard netmask expressions and converts them all to standard netmask expressions when the ACLs are downloaded.
Command Mode
Firewall Mode Security Context
Routed Transparent Single
Multiple
Context System
Aaa-server-host configuration • Yes • Yes • Yes • Yes —
Release Modification
7.0(4) This command was added.
2-2Cisco ASA Series Command Reference, A through H Commands
Chapter
The auto-detect keyword is helpful when you are uncertain how the RADIUS server is configured; however, wildcard netmask expressions with “holes” in them cannot be unambiguously detected and converted. For example, the wildcard netmask 0.0.255.0 permits anything in the third octet and can be used validly on Cisco VPN 3000 series concentrators, but the ASA may not detect this expression as a wildcard netmask.
Examples The following example configures a RADIUS AAA server named “srvgrp1” on host “192.168.3.4”, enables conversion of downloadable ACL netmasks, sets a timeout of 9 seconds, sets a retry-interval of 7 seconds, and configures authentication port 1650:
ciscoasa(config)# aaa-server svrgrp1 protocol radiusciscoasa(config-aaa-server-group)# aaa-server svrgrp1 host 192.168.3.4ciscoasa(config-aaa-server-host)# acl-netmask-convert wildcardciscoasa(config-aaa-server-host)# timeout 9ciscoasa(config-aaa-server-host)# retry-interval 7ciscoasa(config-aaa-server-host)# authentication-port 1650ciscoasa(config-aaa-server-host)# exitciscoasa(config)#
Related Commands Command Description
aaa authentication Enables or disables LOCAL, TACACS+, or RADIUS user authentication, on a server designated by the aaa-server command, or ASDM user authentication.
aaa-server host Enters aaa-server host configuration mode, so you can configure AAA server parameters that are host-specific.
clear configure aaa-server
Removes all AAA command statements from the configuration.
show running-config aaa-server
Displays AAA server statistics for all AAA servers, for a particular server group, for a particular server within a particular group, or for a particular protocol.
2-3Cisco ASA Series Command Reference, A through H Commands
Chapter
actionTo either apply access policies to a session or terminate the session, use the action command in dynamic-access-policy-record configuration mode. To reset the session to apply an access policy to a session, use the no form of the command.
action {continue | terminate}
no action {continue | terminate}
Syntax Description
Defaults The default value is continue.
Command Modes The following table shows the modes in which you can enter the command:
Command History
Usage Guidelines Use the continue keyword to apply the access policies to the session in all of the selected DAP records. Use the terminate keyword to terminate the connection in any of the selected DAP records.
Examples The following example shows how to terminate a session for the DAP policy Finance:
ciscoasa (config)# config-dynamic-access-policy-record Financeciscoasa(config-dynamic-access-policy-record)# action terminateciscoasa(config-dynamic-access-policy-record)#
Related Commands
continue Applies the access policies to the session.
terminate Terminates the connection.
Command Mode
Firewall Mode Security Context
Routed Transparent Single
Multiple
Context System
Dynamic-access-policy-record configuration
• Yes • Yes • Yes — —
Release Modification
8.0(2) This command was added.
Command Description
dynamic-access-policy-record Creates a DAP record.
show running-config dynamic-access-policy-record
Displays the running configuration for all DAP records, or for the named DAP record.
2-4Cisco ASA Series Command Reference, A through H Commands
Chapter
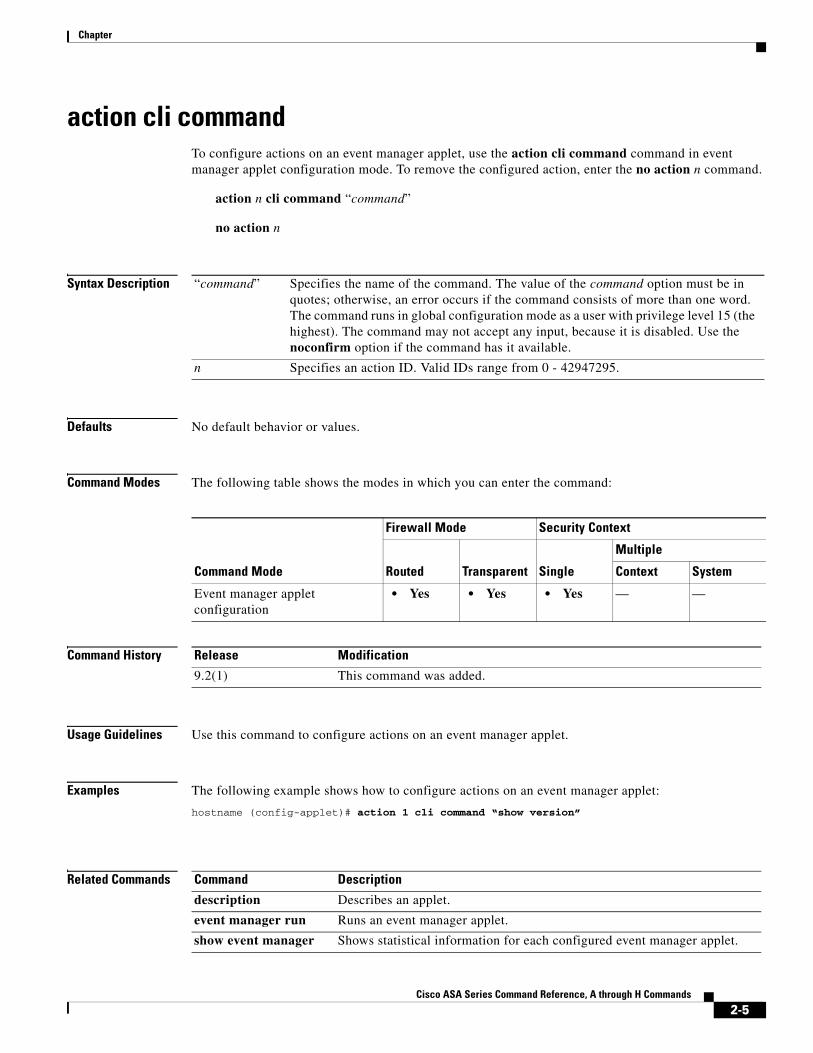
action cli commandTo configure actions on an event manager applet, use the action cli command command in event manager applet configuration mode. To remove the configured action, enter the no action n command.
action n cli command “command”
no action n
Syntax Description
Defaults No default behavior or values.
Command Modes The following table shows the modes in which you can enter the command:
Command History
Usage Guidelines Use this command to configure actions on an event manager applet.
Examples The following example shows how to configure actions on an event manager applet:
hostname (config-applet)# action 1 cli command “show version”
Related Commands
“command” Specifies the name of the command. The value of the command option must be in quotes; otherwise, an error occurs if the command consists of more than one word. The command runs in global configuration mode as a user with privilege level 15 (the highest). The command may not accept any input, because it is disabled. Use the noconfirm option if the command has it available.
n Specifies an action ID. Valid IDs range from 0 - 42947295.
Command Mode
Firewall Mode Security Context
Routed Transparent Single
Multiple
Context System
Event manager applet configuration
• Yes • Yes • Yes — —
Release Modification
9.2(1) This command was added.
Command Description
description Describes an applet.
event manager run Runs an event manager applet.
show event manager Shows statistical information for each configured event manager applet.
2-5Cisco ASA Series Command Reference, A through H Commands

Chapter
debug event manager Manages debugging traces for the event manager.
Command Description
2-6Cisco ASA Series Command Reference, A through H Commands
Chapter
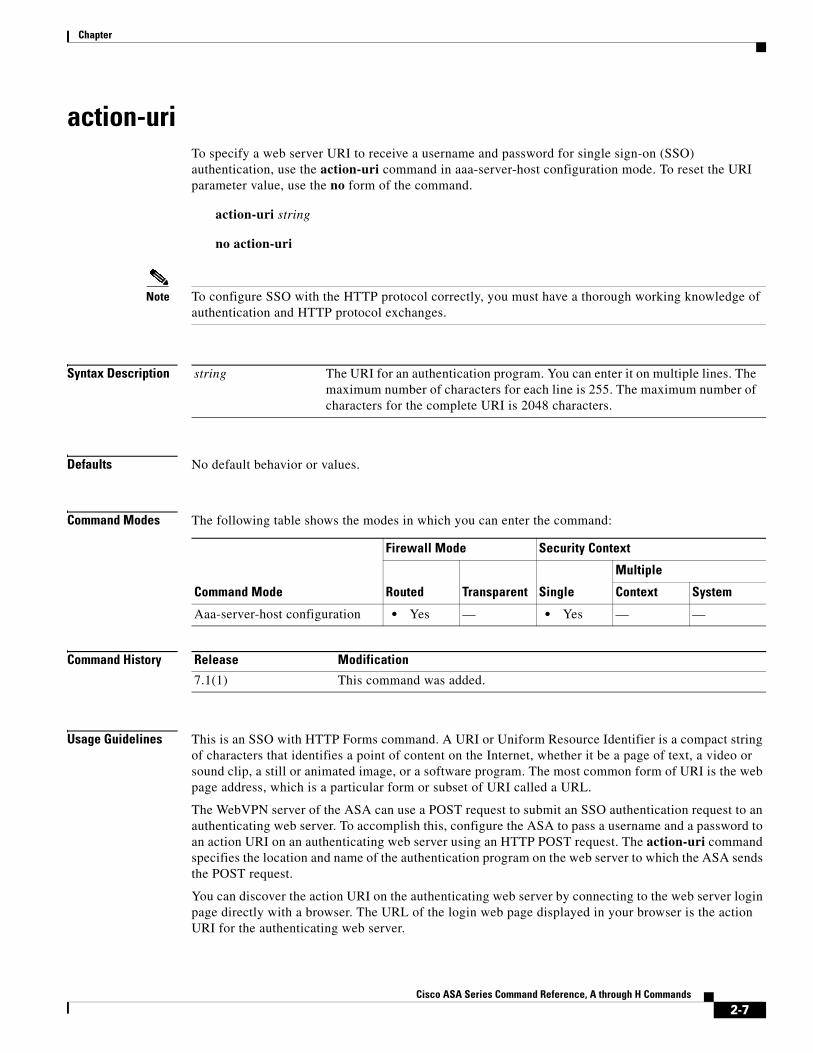
action-uriTo specify a web server URI to receive a username and password for single sign-on (SSO) authentication, use the action-uri command in aaa-server-host configuration mode. To reset the URI parameter value, use the no form of the command.
action-uri string
no action-uri
Note To configure SSO with the HTTP protocol correctly, you must have a thorough working knowledge of authentication and HTTP protocol exchanges.
Syntax Description
Defaults No default behavior or values.
Command Modes The following table shows the modes in which you can enter the command:
Command History
Usage Guidelines This is an SSO with HTTP Forms command. A URI or Uniform Resource Identifier is a compact string of characters that identifies a point of content on the Internet, whether it be a page of text, a video or sound clip, a still or animated image, or a software program. The most common form of URI is the web page address, which is a particular form or subset of URI called a URL.
The WebVPN server of the ASA can use a POST request to submit an SSO authentication request to an authenticating web server. To accomplish this, configure the ASA to pass a username and a password to an action URI on an authenticating web server using an HTTP POST request. The action-uri command specifies the location and name of the authentication program on the web server to which the ASA sends the POST request.
You can discover the action URI on the authenticating web server by connecting to the web server login page directly with a browser. The URL of the login web page displayed in your browser is the action URI for the authenticating web server.
string The URI for an authentication program. You can enter it on multiple lines. The maximum number of characters for each line is 255. The maximum number of characters for the complete URI is 2048 characters.
Command Mode
Firewall Mode Security Context
Routed Transparent Single
Multiple
Context System
Aaa-server-host configuration • Yes — • Yes — —
Release Modification
7.1(1) This command was added.
2-7Cisco ASA Series Command Reference, A through H Commands
Chapter
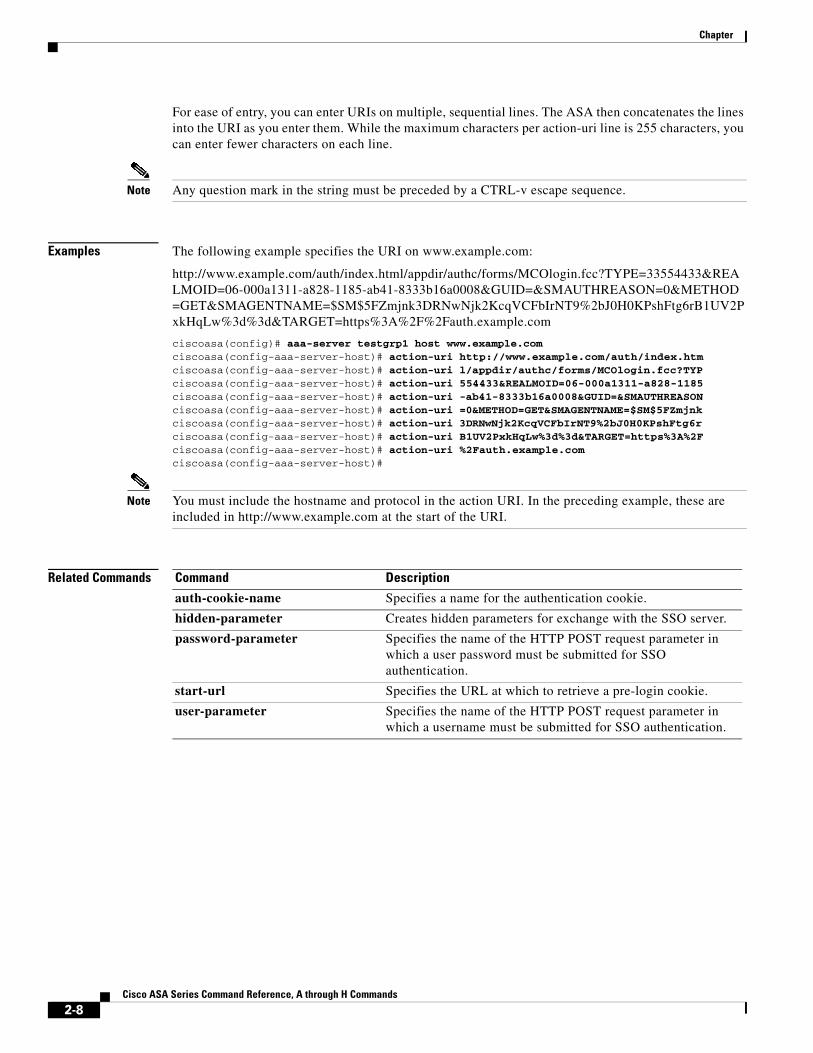
For ease of entry, you can enter URIs on multiple, sequential lines. The ASA then concatenates the lines into the URI as you enter them. While the maximum characters per action-uri line is 255 characters, you can enter fewer characters on each line.
Note Any question mark in the string must be preceded by a CTRL-v escape sequence.
Examples The following example specifies the URI on www.example.com:
http://www.example.com/auth/index.html/appdir/authc/forms/MCOlogin.fcc?TYPE=33554433&REALMOID=06-000a1311-a828-1185-ab41-8333b16a0008&GUID=&SMAUTHREASON=0&METHOD=GET&SMAGENTNAME=$SM$5FZmjnk3DRNwNjk2KcqVCFbIrNT9%2bJ0H0KPshFtg6rB1UV2PxkHqLw%3d%3d&TARGET=https%3A%2F%2Fauth.example.com
ciscoasa(config)# aaa-server testgrp1 host www.example.comciscoasa(config-aaa-server-host)# action-uri http://www.example.com/auth/index.htmciscoasa(config-aaa-server-host)# action-uri l/appdir/authc/forms/MCOlogin.fcc?TYPciscoasa(config-aaa-server-host)# action-uri 554433&REALMOID=06-000a1311-a828-1185ciscoasa(config-aaa-server-host)# action-uri -ab41-8333b16a0008&GUID=&SMAUTHREASONciscoasa(config-aaa-server-host)# action-uri =0&METHOD=GET&SMAGENTNAME=$SM$5FZmjnkciscoasa(config-aaa-server-host)# action-uri 3DRNwNjk2KcqVCFbIrNT9%2bJ0H0KPshFtg6rciscoasa(config-aaa-server-host)# action-uri B1UV2PxkHqLw%3d%3d&TARGET=https%3A%2Fciscoasa(config-aaa-server-host)# action-uri %2Fauth.example.comciscoasa(config-aaa-server-host)#
Note You must include the hostname and protocol in the action URI. In the preceding example, these are included in http://www.example.com at the start of the URI.
Related Commands Command Description
auth-cookie-name Specifies a name for the authentication cookie.
hidden-parameter Creates hidden parameters for exchange with the SSO server.
password-parameter Specifies the name of the HTTP POST request parameter in which a user password must be submitted for SSO authentication.
start-url Specifies the URL at which to retrieve a pre-login cookie.
user-parameter Specifies the name of the HTTP POST request parameter in which a username must be submitted for SSO authentication.
2-8Cisco ASA Series Command Reference, A through H Commands
Chapter
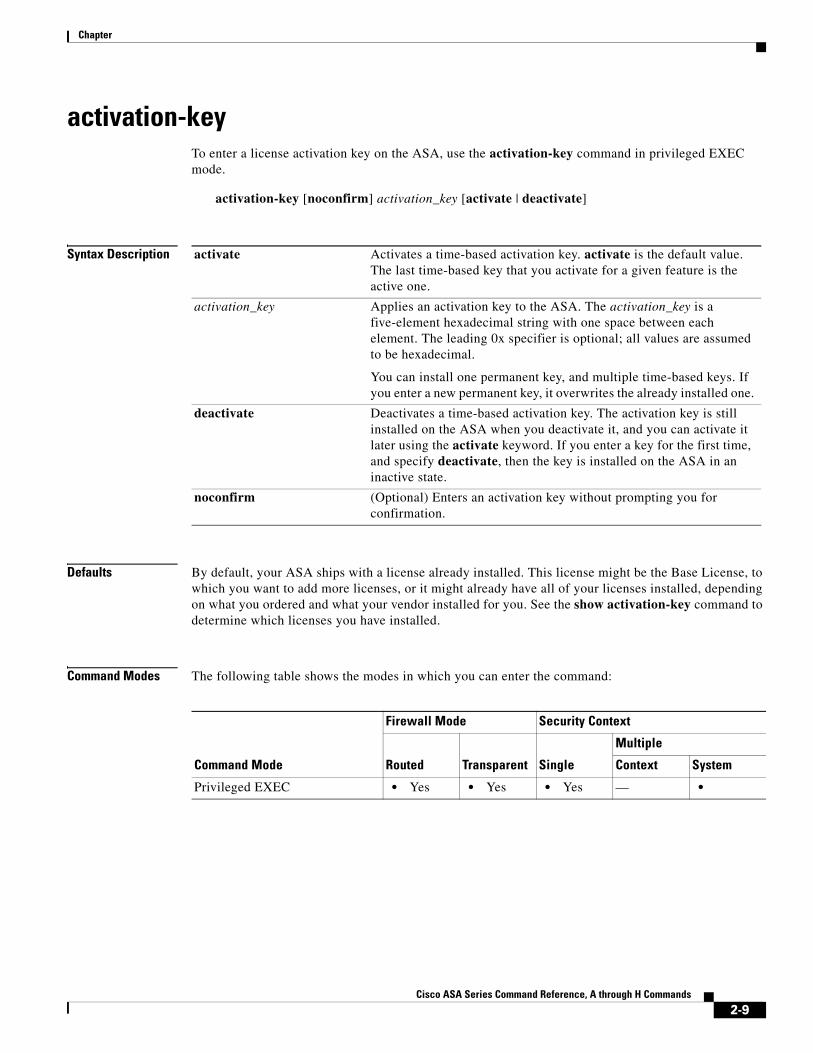
activation-keyTo enter a license activation key on the ASA, use the activation-key command in privileged EXEC mode.
activation-key [noconfirm] activation_key [activate | deactivate]
Syntax Description
Defaults By default, your ASA ships with a license already installed. This license might be the Base License, to which you want to add more licenses, or it might already have all of your licenses installed, depending on what you ordered and what your vendor installed for you. See the show activation-key command to determine which licenses you have installed.
Command Modes The following table shows the modes in which you can enter the command:
activate Activates a time-based activation key. activate is the default value. The last time-based key that you activate for a given feature is the active one.
activation_key Applies an activation key to the ASA. The activation_key is a five-element hexadecimal string with one space between each element. The leading 0x specifier is optional; all values are assumed to be hexadecimal.
You can install one permanent key, and multiple time-based keys. If you enter a new permanent key, it overwrites the already installed one.
deactivate Deactivates a time-based activation key. The activation key is still installed on the ASA when you deactivate it, and you can activate it later using the activate keyword. If you enter a key for the first time, and specify deactivate, then the key is installed on the ASA in an inactive state.
noconfirm (Optional) Enters an activation key without prompting you for confirmation.
Command Mode
Firewall Mode Security Context
Routed Transparent Single
Multiple
Context System
Privileged EXEC • Yes • Yes • Yes — •
2-9Cisco ASA Series Command Reference, A through H Commands
Chapter
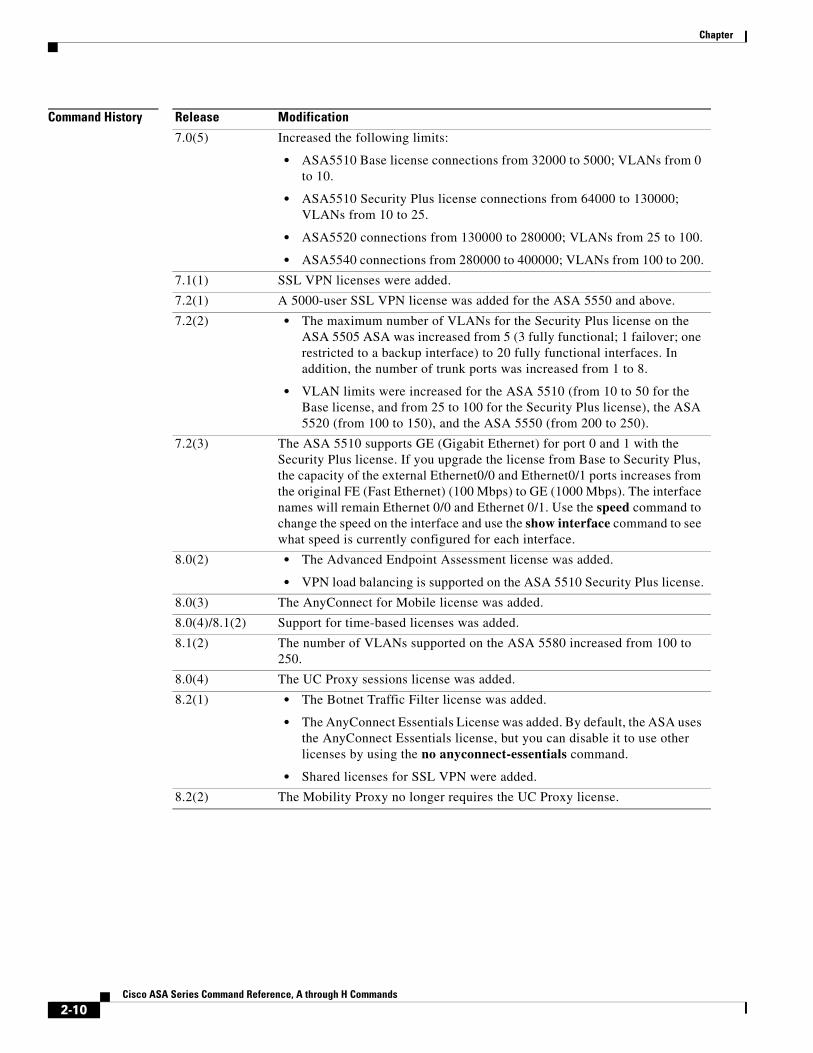
Command History Release Modification
7.0(5) Increased the following limits:
• ASA5510 Base license connections from 32000 to 5000; VLANs from 0 to 10.
• ASA5510 Security Plus license connections from 64000 to 130000; VLANs from 10 to 25.
• ASA5520 connections from 130000 to 280000; VLANs from 25 to 100.
• ASA5540 connections from 280000 to 400000; VLANs from 100 to 200.
7.1(1) SSL VPN licenses were added.
7.2(1) A 5000-user SSL VPN license was added for the ASA 5550 and above.
7.2(2) • The maximum number of VLANs for the Security Plus license on the ASA 5505 ASA was increased from 5 (3 fully functional; 1 failover; one restricted to a backup interface) to 20 fully functional interfaces. In addition, the number of trunk ports was increased from 1 to 8.
• VLAN limits were increased for the ASA 5510 (from 10 to 50 for the Base license, and from 25 to 100 for the Security Plus license), the ASA 5520 (from 100 to 150), and the ASA 5550 (from 200 to 250).
7.2(3) The ASA 5510 supports GE (Gigabit Ethernet) for port 0 and 1 with the Security Plus license. If you upgrade the license from Base to Security Plus, the capacity of the external Ethernet0/0 and Ethernet0/1 ports increases from the original FE (Fast Ethernet) (100 Mbps) to GE (1000 Mbps). The interface names will remain Ethernet 0/0 and Ethernet 0/1. Use the speed command to change the speed on the interface and use the show interface command to see what speed is currently configured for each interface.
8.0(2) • The Advanced Endpoint Assessment license was added.
• VPN load balancing is supported on the ASA 5510 Security Plus license.
8.0(3) The AnyConnect for Mobile license was added.
8.0(4)/8.1(2) Support for time-based licenses was added.
8.1(2) The number of VLANs supported on the ASA 5580 increased from 100 to 250.
8.0(4) The UC Proxy sessions license was added.
8.2(1) • The Botnet Traffic Filter license was added.
• The AnyConnect Essentials License was added. By default, the ASA uses the AnyConnect Essentials license, but you can disable it to use other licenses by using the no anyconnect-essentials command.
• Shared licenses for SSL VPN were added.
8.2(2) The Mobility Proxy no longer requires the UC Proxy license.
2-10Cisco ASA Series Command Reference, A through H Commands
Chapter
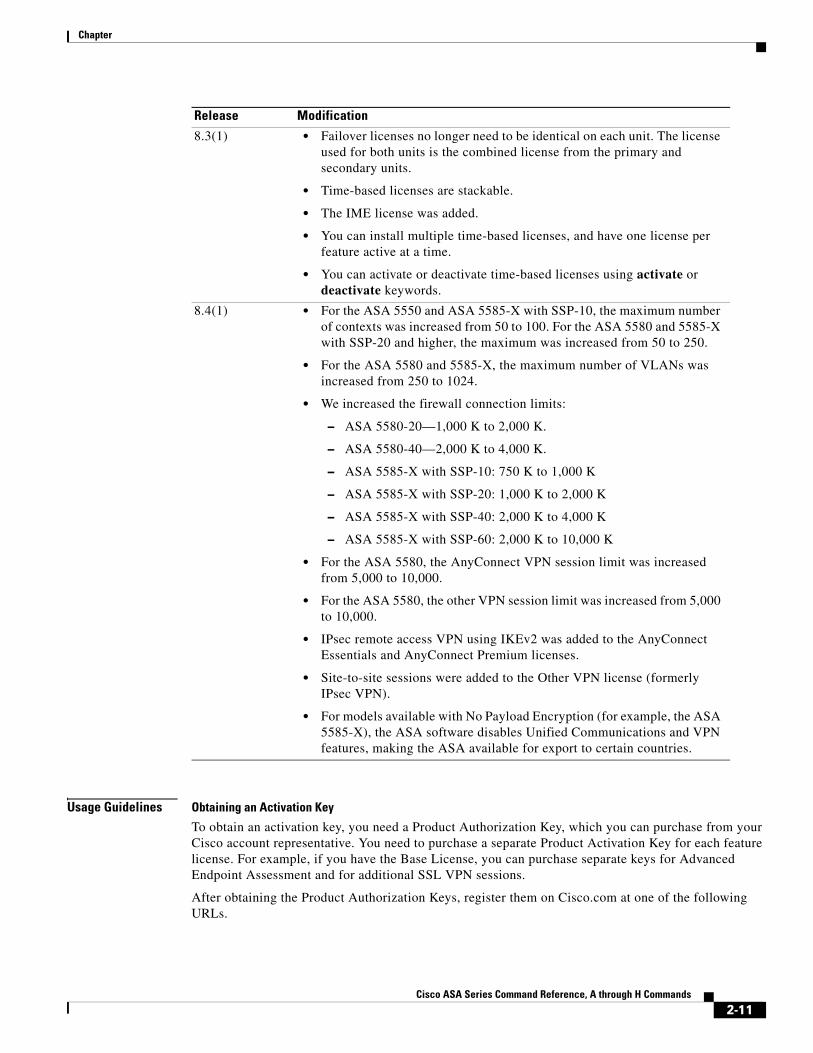
Usage Guidelines Obtaining an Activation Key
To obtain an activation key, you need a Product Authorization Key, which you can purchase from your Cisco account representative. You need to purchase a separate Product Activation Key for each feature license. For example, if you have the Base License, you can purchase separate keys for Advanced Endpoint Assessment and for additional SSL VPN sessions.
After obtaining the Product Authorization Keys, register them on Cisco.com at one of the following URLs.
8.3(1) • Failover licenses no longer need to be identical on each unit. The license used for both units is the combined license from the primary and secondary units.
• Time-based licenses are stackable.
• The IME license was added.
• You can install multiple time-based licenses, and have one license per feature active at a time.
• You can activate or deactivate time-based licenses using activate or deactivate keywords.
8.4(1) • For the ASA 5550 and ASA 5585-X with SSP-10, the maximum number of contexts was increased from 50 to 100. For the ASA 5580 and 5585-X with SSP-20 and higher, the maximum was increased from 50 to 250.
• For the ASA 5580 and 5585-X, the maximum number of VLANs was increased from 250 to 1024.
• We increased the firewall connection limits:
– ASA 5580-20—1,000 K to 2,000 K.
– ASA 5580-40—2,000 K to 4,000 K.
– ASA 5585-X with SSP-10: 750 K to 1,000 K
– ASA 5585-X with SSP-20: 1,000 K to 2,000 K
– ASA 5585-X with SSP-40: 2,000 K to 4,000 K
– ASA 5585-X with SSP-60: 2,000 K to 10,000 K
• For the ASA 5580, the AnyConnect VPN session limit was increased from 5,000 to 10,000.
• For the ASA 5580, the other VPN session limit was increased from 5,000 to 10,000.
• IPsec remote access VPN using IKEv2 was added to the AnyConnect Essentials and AnyConnect Premium licenses.
• Site-to-site sessions were added to the Other VPN license (formerly IPsec VPN).
• For models available with No Payload Encryption (for example, the ASA 5585-X), the ASA software disables Unified Communications and VPN features, making the ASA available for export to certain countries.
Release Modification
2-11Cisco ASA Series Command Reference, A through H Commands
Chapter
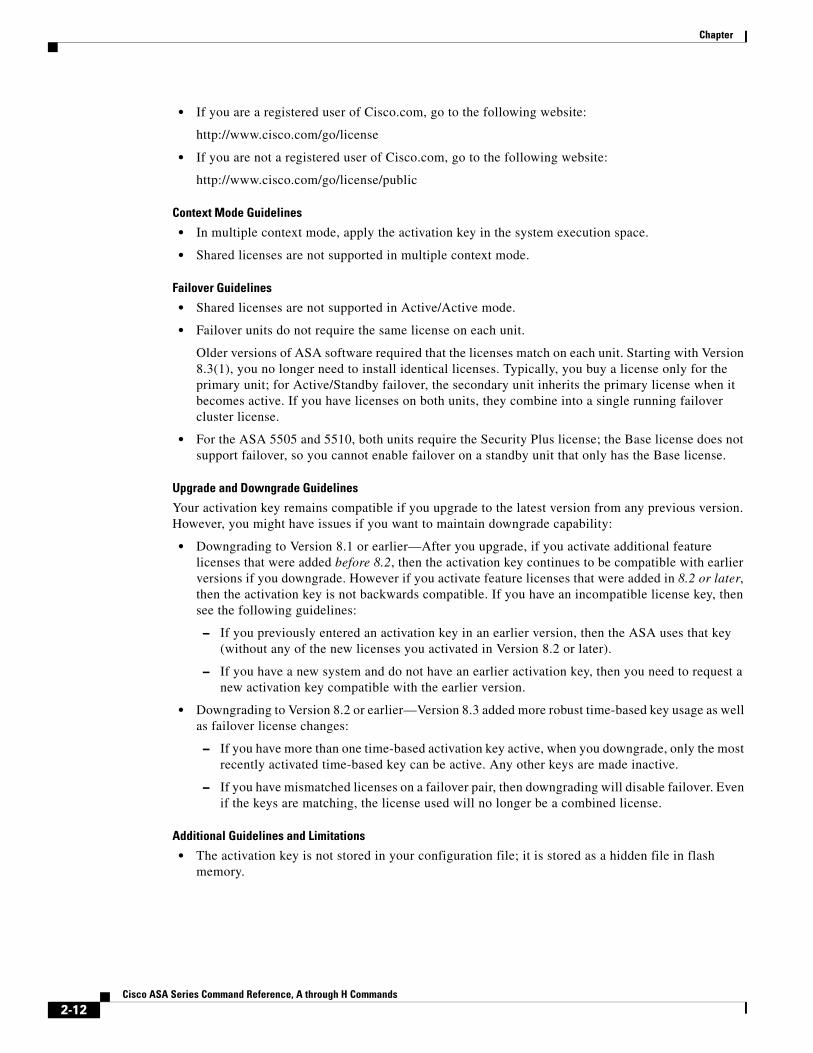
• If you are a registered user of Cisco.com, go to the following website:
http://www.cisco.com/go/license
• If you are not a registered user of Cisco.com, go to the following website:
http://www.cisco.com/go/license/public
Context Mode Guidelines
• In multiple context mode, apply the activation key in the system execution space.
• Shared licenses are not supported in multiple context mode.
Failover Guidelines
• Shared licenses are not supported in Active/Active mode.
• Failover units do not require the same license on each unit.
Older versions of ASA software required that the licenses match on each unit. Starting with Version 8.3(1), you no longer need to install identical licenses. Typically, you buy a license only for the primary unit; for Active/Standby failover, the secondary unit inherits the primary license when it becomes active. If you have licenses on both units, they combine into a single running failover cluster license.
• For the ASA 5505 and 5510, both units require the Security Plus license; the Base license does not support failover, so you cannot enable failover on a standby unit that only has the Base license.
Upgrade and Downgrade Guidelines
Your activation key remains compatible if you upgrade to the latest version from any previous version. However, you might have issues if you want to maintain downgrade capability:
• Downgrading to Version 8.1 or earlier—After you upgrade, if you activate additional feature licenses that were added before 8.2, then the activation key continues to be compatible with earlier versions if you downgrade. However if you activate feature licenses that were added in 8.2 or later, then the activation key is not backwards compatible. If you have an incompatible license key, then see the following guidelines:
– If you previously entered an activation key in an earlier version, then the ASA uses that key (without any of the new licenses you activated in Version 8.2 or later).
– If you have a new system and do not have an earlier activation key, then you need to request a new activation key compatible with the earlier version.
• Downgrading to Version 8.2 or earlier—Version 8.3 added more robust time-based key usage as well as failover license changes:
– If you have more than one time-based activation key active, when you downgrade, only the most recently activated time-based key can be active. Any other keys are made inactive.
– If you have mismatched licenses on a failover pair, then downgrading will disable failover. Even if the keys are matching, the license used will no longer be a combined license.
Additional Guidelines and Limitations
• The activation key is not stored in your configuration file; it is stored as a hidden file in flash memory.
2-12Cisco ASA Series Command Reference, A through H Commands
Chapter
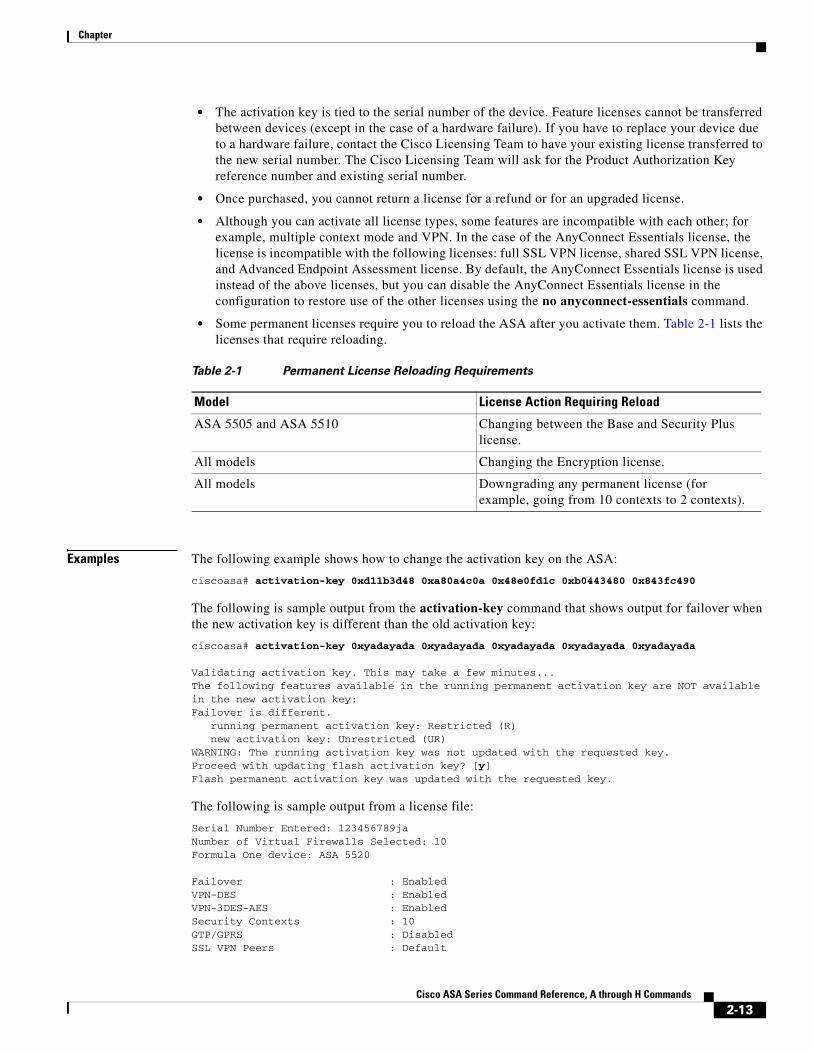
• The activation key is tied to the serial number of the device. Feature licenses cannot be transferred between devices (except in the case of a hardware failure). If you have to replace your device due to a hardware failure, contact the Cisco Licensing Team to have your existing license transferred to the new serial number. The Cisco Licensing Team will ask for the Product Authorization Key reference number and existing serial number.
• Once purchased, you cannot return a license for a refund or for an upgraded license.
• Although you can activate all license types, some features are incompatible with each other; for example, multiple context mode and VPN. In the case of the AnyConnect Essentials license, the license is incompatible with the following licenses: full SSL VPN license, shared SSL VPN license, and Advanced Endpoint Assessment license. By default, the AnyConnect Essentials license is used instead of the above licenses, but you can disable the AnyConnect Essentials license in the configuration to restore use of the other licenses using the no anyconnect-essentials command.
• Some permanent licenses require you to reload the ASA after you activate them. Table 2-1 lists the licenses that require reloading.
Examples The following example shows how to change the activation key on the ASA:
ciscoasa# activation-key 0xd11b3d48 0xa80a4c0a 0x48e0fd1c 0xb0443480 0x843fc490
The following is sample output from the activation-key command that shows output for failover when the new activation key is different than the old activation key:
ciscoasa# activation-key 0xyadayada 0xyadayada 0xyadayada 0xyadayada 0xyadayada
Validating activation key. This may take a few minutes...The following features available in the running permanent activation key are NOT available in the new activation key:Failover is different. running permanent activation key: Restricted (R) new activation key: Unrestricted (UR)WARNING: The running activation key was not updated with the requested key.Proceed with updating flash activation key? [y]Flash permanent activation key was updated with the requested key.
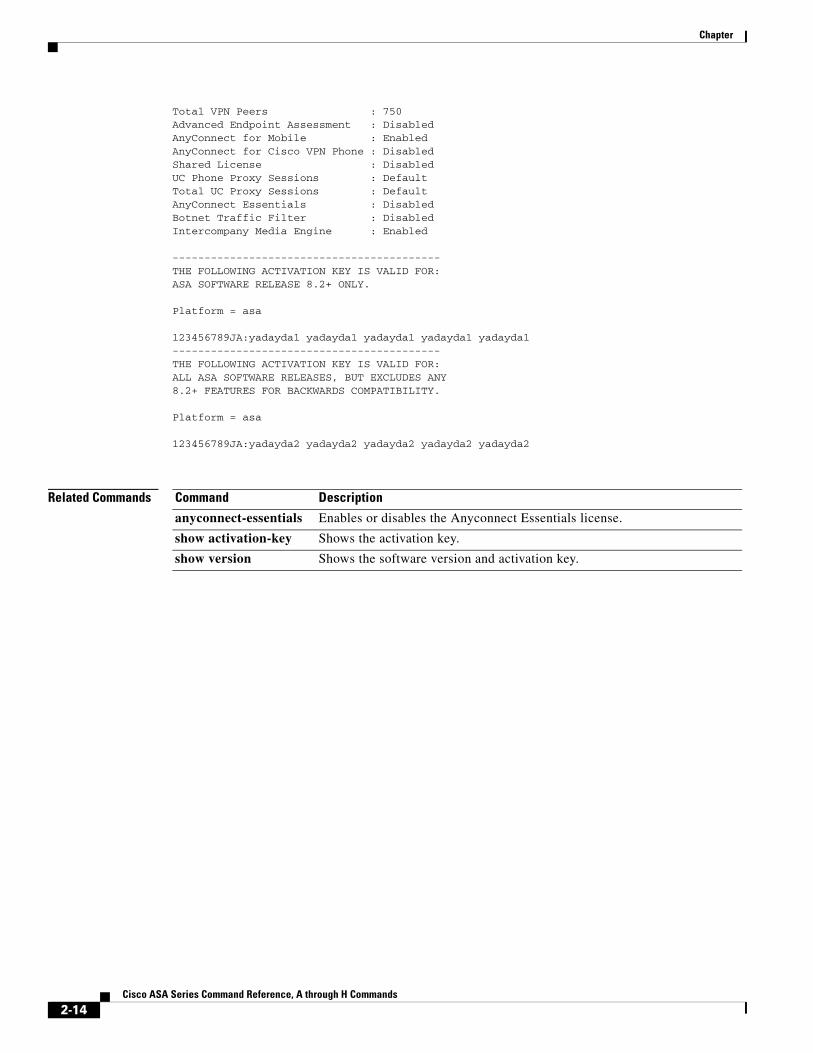
The following is sample output from a license file:
Serial Number Entered: 123456789ja Number of Virtual Firewalls Selected: 10 Formula One device: ASA 5520
Failover : Enabled VPN-DES : Enabled VPN-3DES-AES : Enabled Security Contexts : 10 GTP/GPRS : Disabled SSL VPN Peers : Default
Table 2-1 Permanent License Reloading Requirements
Model License Action Requiring Reload
ASA 5505 and ASA 5510 Changing between the Base and Security Plus license.
All models Changing the Encryption license.
All models Downgrading any permanent license (for example, going from 10 contexts to 2 contexts).
2-13Cisco ASA Series Command Reference, A through H Commands
Chapter
Total VPN Peers : 750 Advanced Endpoint Assessment : Disabled AnyConnect for Mobile : Enabled AnyConnect for Cisco VPN Phone : Disabled Shared License : Disabled UC Phone Proxy Sessions : Default Total UC Proxy Sessions : Default AnyConnect Essentials : Disabled Botnet Traffic Filter : Disabled Intercompany Media Engine : Enabled
------------------------------------------THE FOLLOWING ACTIVATION KEY IS VALID FOR:ASA SOFTWARE RELEASE 8.2+ ONLY.
Platform = asa
123456789JA:yadayda1 yadayda1 yadayda1 yadayda1 yadayda1 ------------------------------------------THE FOLLOWING ACTIVATION KEY IS VALID FOR:ALL ASA SOFTWARE RELEASES, BUT EXCLUDES ANY8.2+ FEATURES FOR BACKWARDS COMPATIBILITY.
Platform = asa
123456789JA:yadayda2 yadayda2 yadayda2 yadayda2 yadayda2
Related Commands Command Description
anyconnect-essentials Enables or disables the Anyconnect Essentials license.
show activation-key Shows the activation key.
show version Shows the software version and activation key.
2-14Cisco ASA Series Command Reference, A through H Commands
Chapter
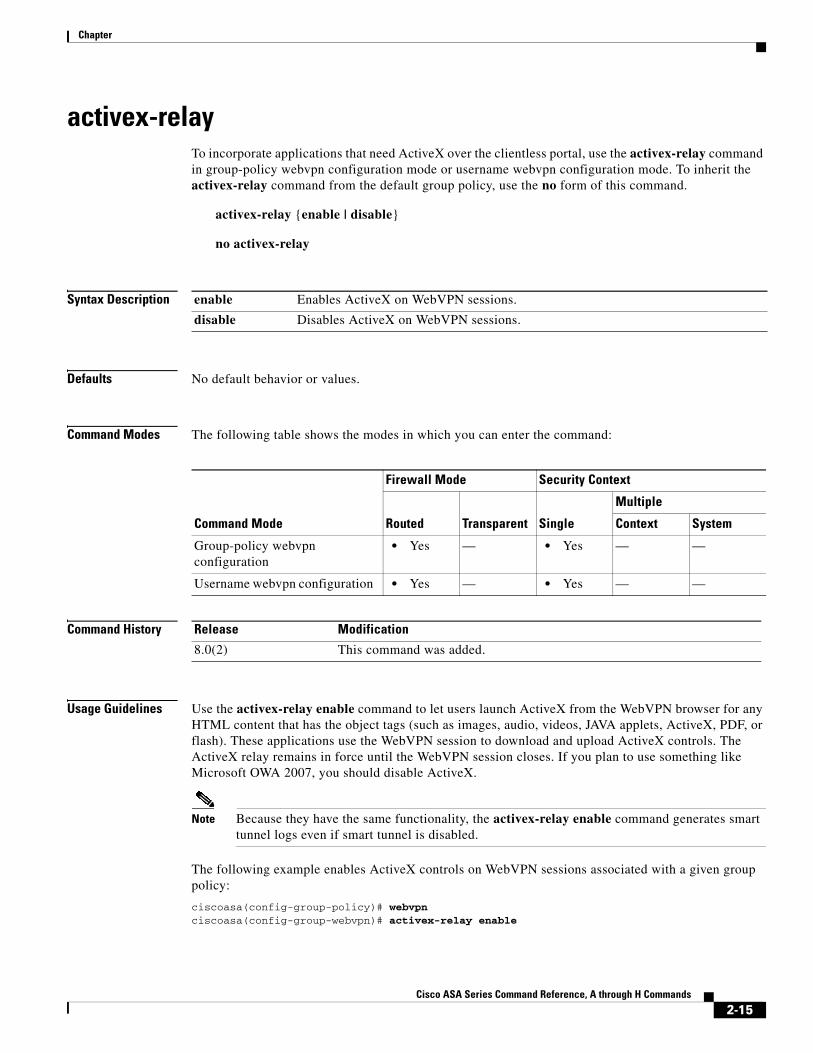
activex-relayTo incorporate applications that need ActiveX over the clientless portal, use the activex-relay command in group-policy webvpn configuration mode or username webvpn configuration mode. To inherit the activex-relay command from the default group policy, use the no form of this command.
activex-relay {enable | disable}
no activex-relay
Syntax Description
Defaults No default behavior or values.
Command Modes The following table shows the modes in which you can enter the command:
Command History
Usage Guidelines Use the activex-relay enable command to let users launch ActiveX from the WebVPN browser for any HTML content that has the object tags (such as images, audio, videos, JAVA applets, ActiveX, PDF, or flash). These applications use the WebVPN session to download and upload ActiveX controls. The ActiveX relay remains in force until the WebVPN session closes. If you plan to use something like Microsoft OWA 2007, you should disable ActiveX.
Note Because they have the same functionality, the activex-relay enable command generates smart tunnel logs even if smart tunnel is disabled.
The following example enables ActiveX controls on WebVPN sessions associated with a given group policy:
ciscoasa(config-group-policy)# webvpnciscoasa(config-group-webvpn)# activex-relay enable
enable Enables ActiveX on WebVPN sessions.
disable Disables ActiveX on WebVPN sessions.
Command Mode
Firewall Mode Security Context
Routed Transparent Single
Multiple
Context System
Group-policy webvpn configuration
• Yes — • Yes — —
Username webvpn configuration • Yes — • Yes — —
Release Modification
8.0(2) This command was added.
2-15Cisco ASA Series Command Reference, A through H Commands
Chapter
The following example disables ActiveX controls on WebVPN sessions associated with a given username:
ciscoasa(config-username-policy)# webvpnciscoasa(config-username-webvpn)# activex-relay disable
2-16Cisco ASA Series Command Reference, A through H Commands
Chapter
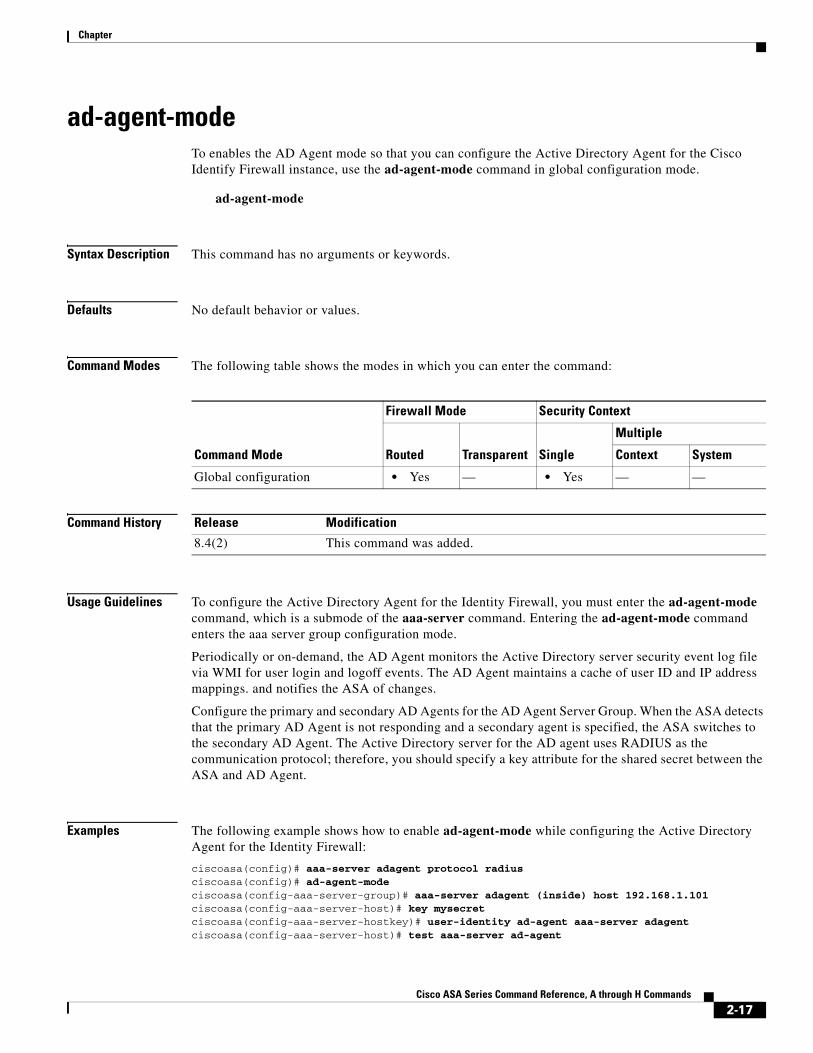
ad-agent-modeTo enables the AD Agent mode so that you can configure the Active Directory Agent for the Cisco Identify Firewall instance, use the ad-agent-mode command in global configuration mode.
ad-agent-mode
Syntax Description This command has no arguments or keywords.
Defaults No default behavior or values.
Command Modes The following table shows the modes in which you can enter the command:
Command History
Usage Guidelines To configure the Active Directory Agent for the Identity Firewall, you must enter the ad-agent-mode command, which is a submode of the aaa-server command. Entering the ad-agent-mode command enters the aaa server group configuration mode.
Periodically or on-demand, the AD Agent monitors the Active Directory server security event log file via WMI for user login and logoff events. The AD Agent maintains a cache of user ID and IP address mappings. and notifies the ASA of changes.
Configure the primary and secondary AD Agents for the AD Agent Server Group. When the ASA detects that the primary AD Agent is not responding and a secondary agent is specified, the ASA switches to the secondary AD Agent. The Active Directory server for the AD agent uses RADIUS as the communication protocol; therefore, you should specify a key attribute for the shared secret between the ASA and AD Agent.
Examples The following example shows how to enable ad-agent-mode while configuring the Active Directory Agent for the Identity Firewall:
ciscoasa(config)# aaa-server adagent protocol radiusciscoasa(config)# ad-agent-modeciscoasa(config-aaa-server-group)# aaa-server adagent (inside) host 192.168.1.101ciscoasa(config-aaa-server-host)# key mysecretciscoasa(config-aaa-server-hostkey)# user-identity ad-agent aaa-server adagentciscoasa(config-aaa-server-host)# test aaa-server ad-agent
Command Mode
Firewall Mode Security Context
Routed Transparent Single
Multiple
Context System
Global configuration • Yes — • Yes — —
Release Modification
8.4(2) This command was added.
2-17Cisco ASA Series Command Reference, A through H Commands
Chapter
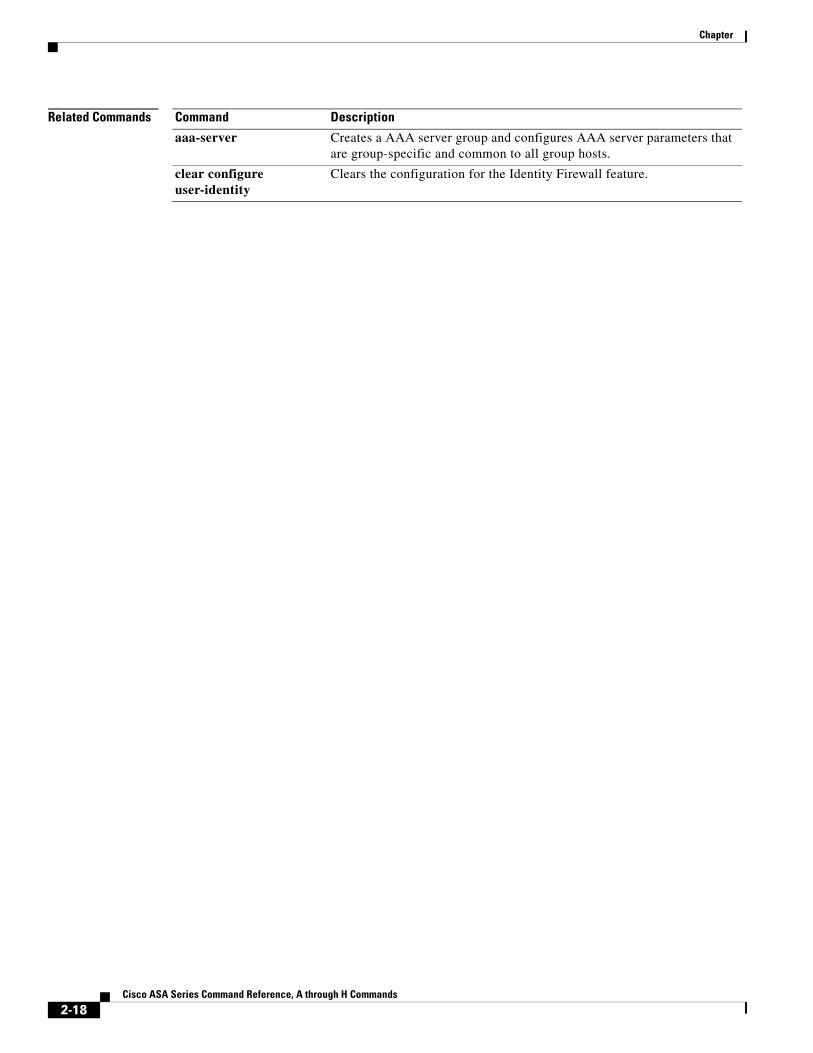
Related Commands Command Description
aaa-server Creates a AAA server group and configures AAA server parameters that are group-specific and common to all group hosts.
clear configure user-identity
Clears the configuration for the Identity Firewall feature.
2-18Cisco ASA Series Command Reference, A through H Commands
Chapter
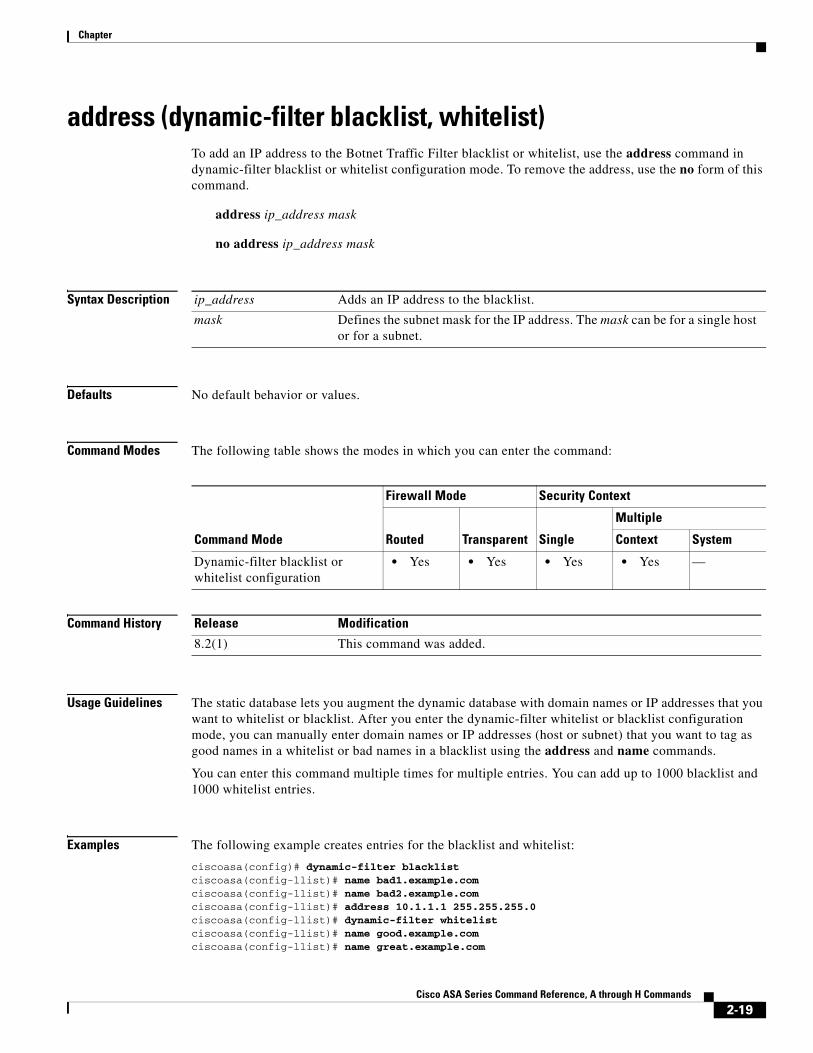
address (dynamic-filter blacklist, whitelist)To add an IP address to the Botnet Traffic Filter blacklist or whitelist, use the address command in dynamic-filter blacklist or whitelist configuration mode. To remove the address, use the no form of this command.
address ip_address mask
no address ip_address mask
Syntax Description
Defaults No default behavior or values.
Command Modes The following table shows the modes in which you can enter the command:
Command History
Usage Guidelines The static database lets you augment the dynamic database with domain names or IP addresses that you want to whitelist or blacklist. After you enter the dynamic-filter whitelist or blacklist configuration mode, you can manually enter domain names or IP addresses (host or subnet) that you want to tag as good names in a whitelist or bad names in a blacklist using the address and name commands.
You can enter this command multiple times for multiple entries. You can add up to 1000 blacklist and 1000 whitelist entries.
Examples The following example creates entries for the blacklist and whitelist:
ciscoasa(config)# dynamic-filter blacklistciscoasa(config-llist)# name bad1.example.comciscoasa(config-llist)# name bad2.example.comciscoasa(config-llist)# address 10.1.1.1 255.255.255.0ciscoasa(config-llist)# dynamic-filter whitelistciscoasa(config-llist)# name good.example.comciscoasa(config-llist)# name great.example.com
ip_address Adds an IP address to the blacklist.
mask Defines the subnet mask for the IP address. The mask can be for a single host or for a subnet.
Command Mode
Firewall Mode Security Context
Routed Transparent Single
Multiple
Context System
Dynamic-filter blacklist or whitelist configuration
• Yes • Yes • Yes • Yes —
Release Modification
8.2(1) This command was added.
2-19Cisco ASA Series Command Reference, A through H Commands
Chapter
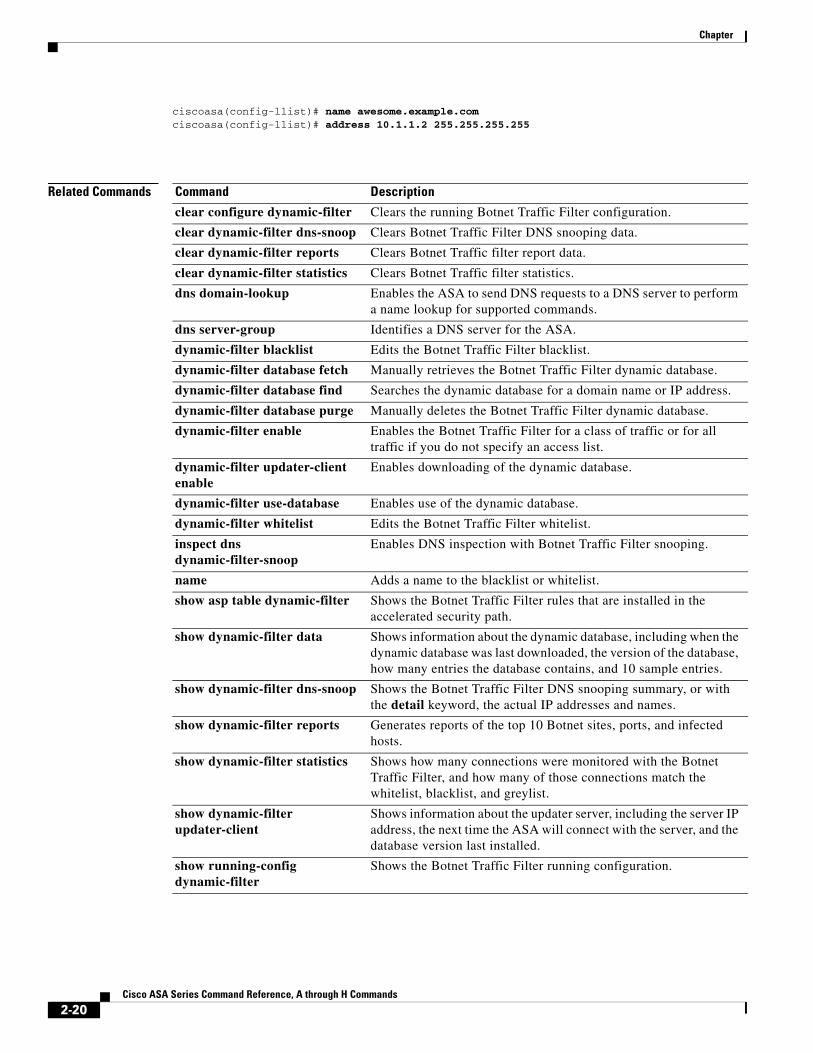
ciscoasa(config-llist)# name awesome.example.comciscoasa(config-llist)# address 10.1.1.2 255.255.255.255
Related Commands Command Description
clear configure dynamic-filter Clears the running Botnet Traffic Filter configuration.
clear dynamic-filter dns-snoop Clears Botnet Traffic Filter DNS snooping data.
clear dynamic-filter reports Clears Botnet Traffic filter report data.
clear dynamic-filter statistics Clears Botnet Traffic filter statistics.
dns domain-lookup Enables the ASA to send DNS requests to a DNS server to perform a name lookup for supported commands.
dns server-group Identifies a DNS server for the ASA.
dynamic-filter blacklist Edits the Botnet Traffic Filter blacklist.
dynamic-filter database fetch Manually retrieves the Botnet Traffic Filter dynamic database.
dynamic-filter database find Searches the dynamic database for a domain name or IP address.
dynamic-filter database purge Manually deletes the Botnet Traffic Filter dynamic database.
dynamic-filter enable Enables the Botnet Traffic Filter for a class of traffic or for all traffic if you do not specify an access list.
dynamic-filter updater-client enable
Enables downloading of the dynamic database.
dynamic-filter use-database Enables use of the dynamic database.
dynamic-filter whitelist Edits the Botnet Traffic Filter whitelist.
inspect dns dynamic-filter-snoop
Enables DNS inspection with Botnet Traffic Filter snooping.
name Adds a name to the blacklist or whitelist.
show asp table dynamic-filter Shows the Botnet Traffic Filter rules that are installed in the accelerated security path.
show dynamic-filter data Shows information about the dynamic database, including when the dynamic database was last downloaded, the version of the database, how many entries the database contains, and 10 sample entries.
show dynamic-filter dns-snoop Shows the Botnet Traffic Filter DNS snooping summary, or with the detail keyword, the actual IP addresses and names.
show dynamic-filter reports Generates reports of the top 10 Botnet sites, ports, and infected hosts.
show dynamic-filter statistics Shows how many connections were monitored with the Botnet Traffic Filter, and how many of those connections match the whitelist, blacklist, and greylist.
show dynamic-filter updater-client
Shows information about the updater server, including the server IP address, the next time the ASA will connect with the server, and the database version last installed.
show running-config dynamic-filter
Shows the Botnet Traffic Filter running configuration.
2-20Cisco ASA Series Command Reference, A through H Commands

Chapter
address (media-termination) (Deprecated)To specify the address for a media termination instance to use for media connections to the Phone Proxy feature, use the address command in the media-termination configuration mode. To remove the address from the media termination configuration, use the no form of this command.
address ip_address [interface intf_name]
no address ip_address [interface intf_name]
Syntax Description
Defaults No default behavior or values.
Command Modes The following table shows the modes in which you can enter the command:
Command History
Usage Guidelines The ASA must have IP addresses for media termination that meet the following criteria:
• For the media termination instance, you can configure a global media-termination address for all interfaces or configure a media-termination address for different interfaces. However, you cannot use a global media-termination address and media-termination addresses configured for each interface at the same time.
• If you configure a media termination address for multiple interfaces, you must configure an address on each interface that the ASA uses when communicating with IP phones.
• The IP addresses are publicly routable addresses that are unused IP addresses within the address range on that interface.
interface intf_name Specifies the name of the interface for which the media termination address is used. Only one media-termination address can be configured per interface.
ip_address Specifies the IP address to use for the media termination instance.
Command Mode
Firewall Mode Security Context
Routed Transparent Single
Multiple
Context System
Media-termination configuration • Yes — • Yes — —
Release Modification
8.2(1) This command was added.
9.4(1) This command was deprecated along with all phone-proxy and uc-ime commands.
2-21Cisco ASA Series Command Reference, A through H Commands
Chapter
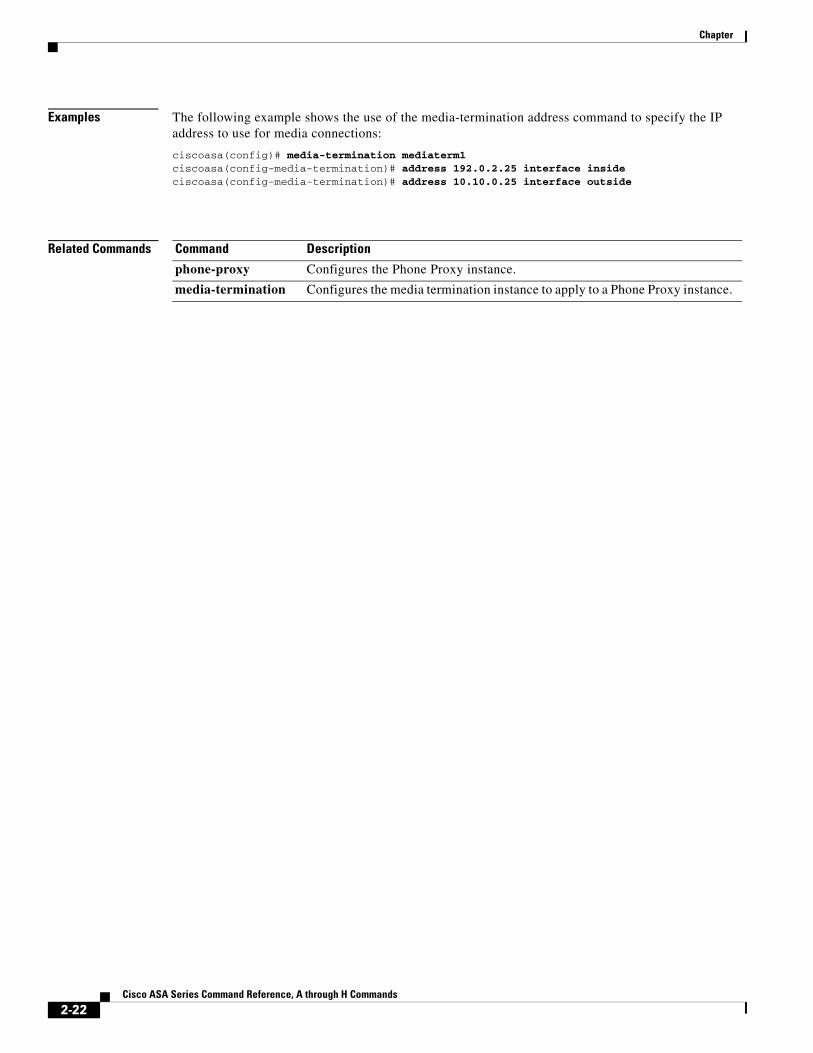
Examples The following example shows the use of the media-termination address command to specify the IP address to use for media connections:
ciscoasa(config)# media-termination mediaterm1ciscoasa(config-media-termination)# address 192.0.2.25 interface insideciscoasa(config-media-termination)# address 10.10.0.25 interface outside
Related Commands Command Description
phone-proxy Configures the Phone Proxy instance.
media-termination Configures the media termination instance to apply to a Phone Proxy instance.
2-22Cisco ASA Series Command Reference, A through H Commands
Chapter
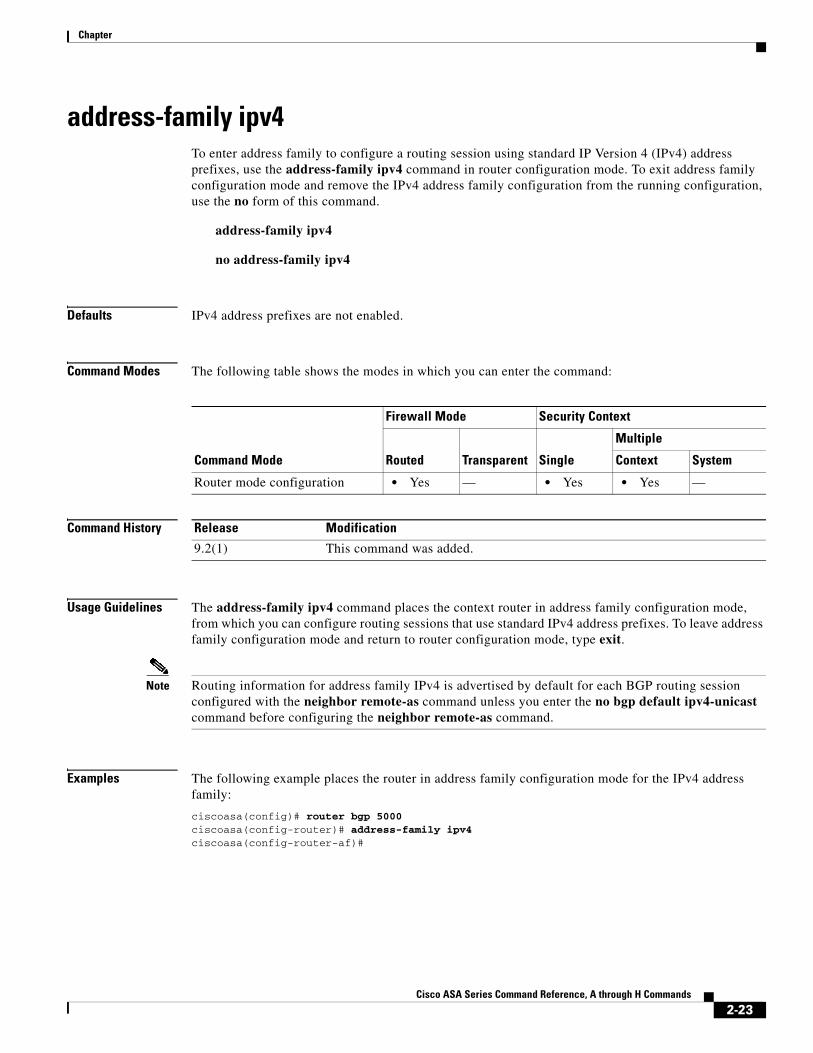
address-family ipv4To enter address family to configure a routing session using standard IP Version 4 (IPv4) address prefixes, use the address-family ipv4 command in router configuration mode. To exit address family configuration mode and remove the IPv4 address family configuration from the running configuration, use the no form of this command.
address-family ipv4
no address-family ipv4
Defaults IPv4 address prefixes are not enabled.
Command Modes The following table shows the modes in which you can enter the command:
Command History
Usage Guidelines The address-family ipv4 command places the context router in address family configuration mode, from which you can configure routing sessions that use standard IPv4 address prefixes. To leave address family configuration mode and return to router configuration mode, type exit.
Note Routing information for address family IPv4 is advertised by default for each BGP routing session configured with the neighbor remote-as command unless you enter the no bgp default ipv4-unicast command before configuring the neighbor remote-as command.
Examples The following example places the router in address family configuration mode for the IPv4 address family:
ciscoasa(config)# router bgp 5000ciscoasa(config-router)# address-family ipv4ciscoasa(config-router-af)#
Command Mode
Firewall Mode Security Context
Routed Transparent Single
Multiple
Context System
Router mode configuration • Yes — • Yes • Yes —
Release Modification
9.2(1) This command was added.
2-23Cisco ASA Series Command Reference, A through H Commands
Chapter
Related Commands Command Description
bgp default ipv4-unicast Sets the IP version 4 (IPv4) unicast address family as default for BGP peering session.
neighbor remote-as Adds an entry to the BGP or multiprotocol BGP neighbor table.
2-24Cisco ASA Series Command Reference, A through H Commands
Chapter
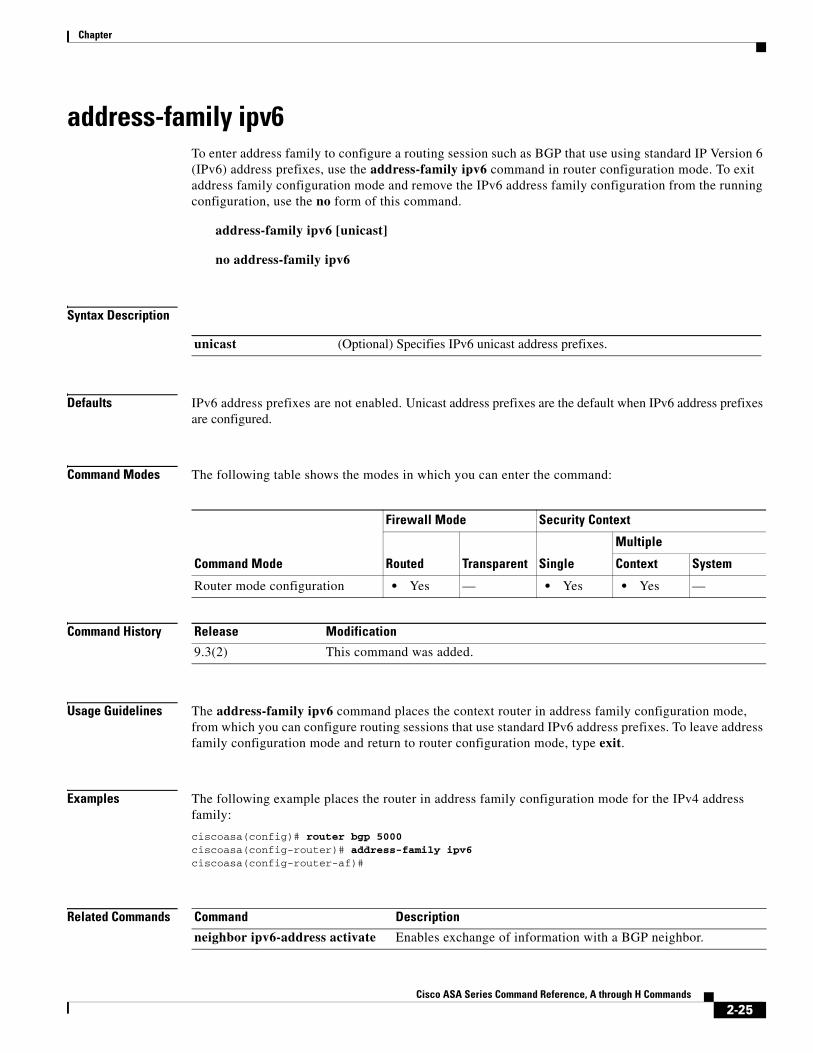
address-family ipv6To enter address family to configure a routing session such as BGP that use using standard IP Version 6 (IPv6) address prefixes, use the address-family ipv6 command in router configuration mode. To exit address family configuration mode and remove the IPv6 address family configuration from the running configuration, use the no form of this command.
address-family ipv6 [unicast]
no address-family ipv6
Syntax Description
Defaults IPv6 address prefixes are not enabled. Unicast address prefixes are the default when IPv6 address prefixes are configured.
Command Modes The following table shows the modes in which you can enter the command:
Command History
Usage Guidelines The address-family ipv6 command places the context router in address family configuration mode, from which you can configure routing sessions that use standard IPv6 address prefixes. To leave address family configuration mode and return to router configuration mode, type exit.
Examples The following example places the router in address family configuration mode for the IPv4 address family:
ciscoasa(config)# router bgp 5000ciscoasa(config-router)# address-family ipv6ciscoasa(config-router-af)#
Related Commands
unicast (Optional) Specifies IPv6 unicast address prefixes.
Command Mode
Firewall Mode Security Context
Routed Transparent Single
Multiple
Context System
Router mode configuration • Yes — • Yes • Yes —
Release Modification
9.3(2) This command was added.
Command Description
neighbor ipv6-address activate Enables exchange of information with a BGP neighbor.
2-25Cisco ASA Series Command Reference, A through H Commands
Chapter
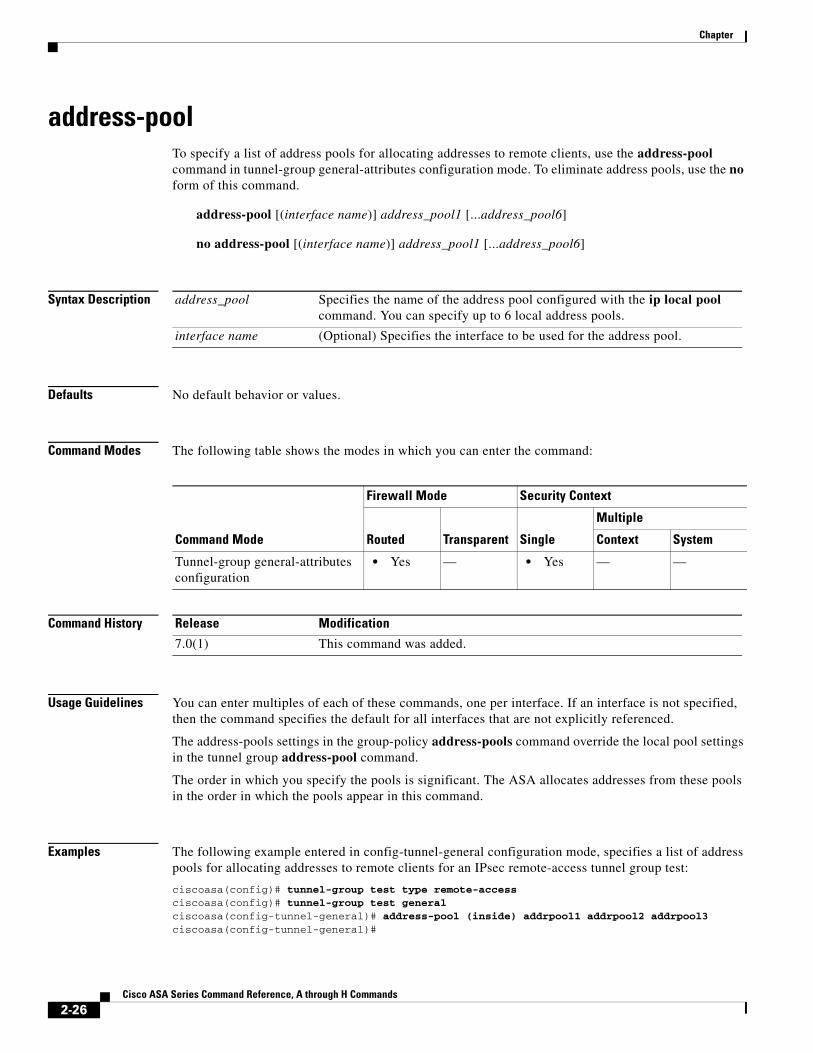
address-poolTo specify a list of address pools for allocating addresses to remote clients, use the address-pool command in tunnel-group general-attributes configuration mode. To eliminate address pools, use the no form of this command.
address-pool [(interface name)] address_pool1 [...address_pool6]
no address-pool [(interface name)] address_pool1 [...address_pool6]
Syntax Description
Defaults No default behavior or values.
Command Modes The following table shows the modes in which you can enter the command:
Command History
Usage Guidelines You can enter multiples of each of these commands, one per interface. If an interface is not specified, then the command specifies the default for all interfaces that are not explicitly referenced.
The address-pools settings in the group-policy address-pools command override the local pool settings in the tunnel group address-pool command.
The order in which you specify the pools is significant. The ASA allocates addresses from these pools in the order in which the pools appear in this command.
Examples The following example entered in config-tunnel-general configuration mode, specifies a list of address pools for allocating addresses to remote clients for an IPsec remote-access tunnel group test:
ciscoasa(config)# tunnel-group test type remote-accessciscoasa(config)# tunnel-group test generalciscoasa(config-tunnel-general)# address-pool (inside) addrpool1 addrpool2 addrpool3ciscoasa(config-tunnel-general)#
address_pool Specifies the name of the address pool configured with the ip local pool command. You can specify up to 6 local address pools.
interface name (Optional) Specifies the interface to be used for the address pool.
Command Mode
Firewall Mode Security Context
Routed Transparent Single
Multiple
Context System
Tunnel-group general-attributes configuration
• Yes — • Yes — —
Release Modification
7.0(1) This command was added.
2-26Cisco ASA Series Command Reference, A through H Commands
Chapter
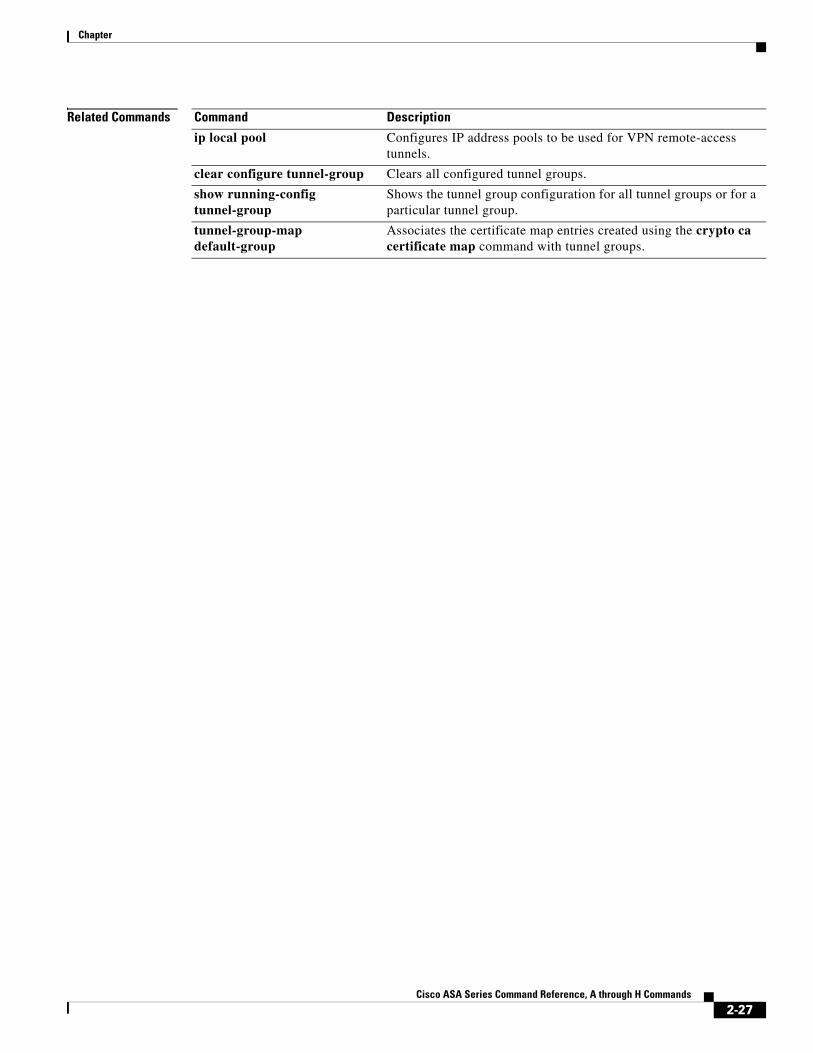
Related Commands Command Description
ip local pool Configures IP address pools to be used for VPN remote-access tunnels.
clear configure tunnel-group Clears all configured tunnel groups.
show running-config tunnel-group
Shows the tunnel group configuration for all tunnel groups or for a particular tunnel group.
tunnel-group-map default-group
Associates the certificate map entries created using the crypto ca certificate map command with tunnel groups.
2-27Cisco ASA Series Command Reference, A through H Commands
Chapter
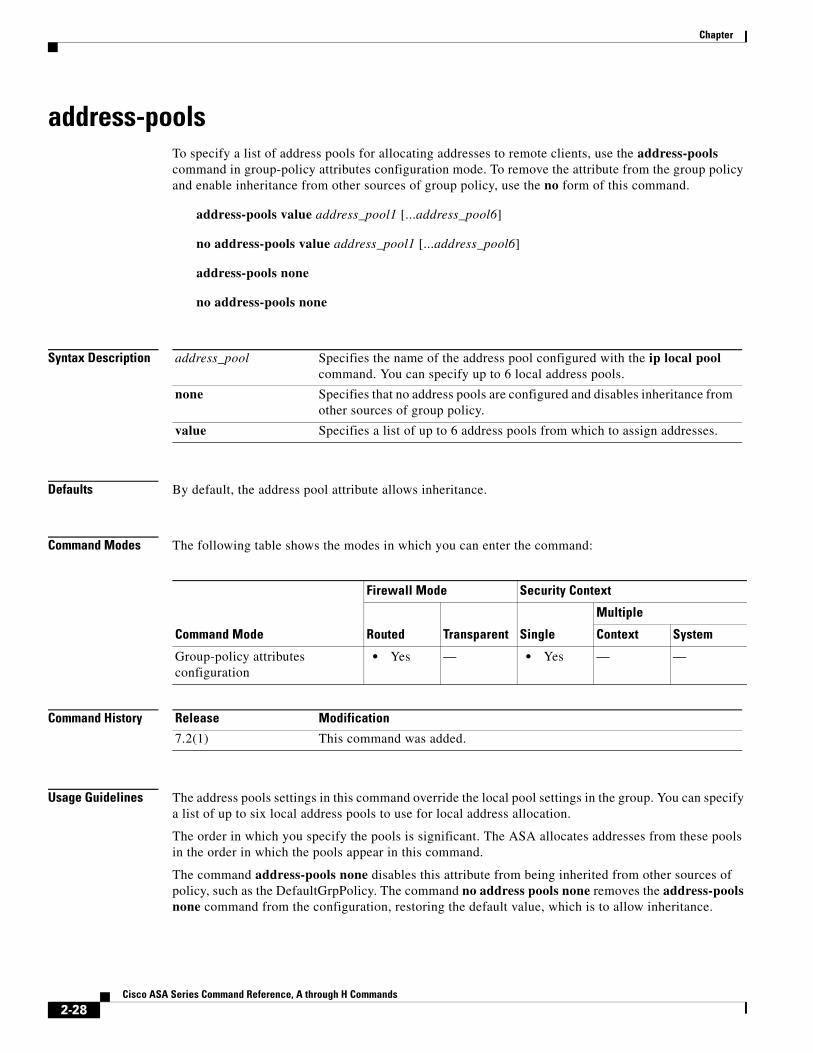
address-poolsTo specify a list of address pools for allocating addresses to remote clients, use the address-pools command in group-policy attributes configuration mode. To remove the attribute from the group policy and enable inheritance from other sources of group policy, use the no form of this command.
address-pools value address_pool1 [...address_pool6]
no address-pools value address_pool1 [...address_pool6]
address-pools none
no address-pools none
Syntax Description
Defaults By default, the address pool attribute allows inheritance.
Command Modes The following table shows the modes in which you can enter the command:
Command History
Usage Guidelines The address pools settings in this command override the local pool settings in the group. You can specify a list of up to six local address pools to use for local address allocation.
The order in which you specify the pools is significant. The ASA allocates addresses from these pools in the order in which the pools appear in this command.
The command address-pools none disables this attribute from being inherited from other sources of policy, such as the DefaultGrpPolicy. The command no address pools none removes the address-pools none command from the configuration, restoring the default value, which is to allow inheritance.
address_pool Specifies the name of the address pool configured with the ip local pool command. You can specify up to 6 local address pools.
none Specifies that no address pools are configured and disables inheritance from other sources of group policy.
value Specifies a list of up to 6 address pools from which to assign addresses.
Command Mode
Firewall Mode Security Context
Routed Transparent Single
Multiple
Context System
Group-policy attributes configuration
• Yes — • Yes — —
Release Modification
7.2(1) This command was added.
2-28Cisco ASA Series Command Reference, A through H Commands
Chapter
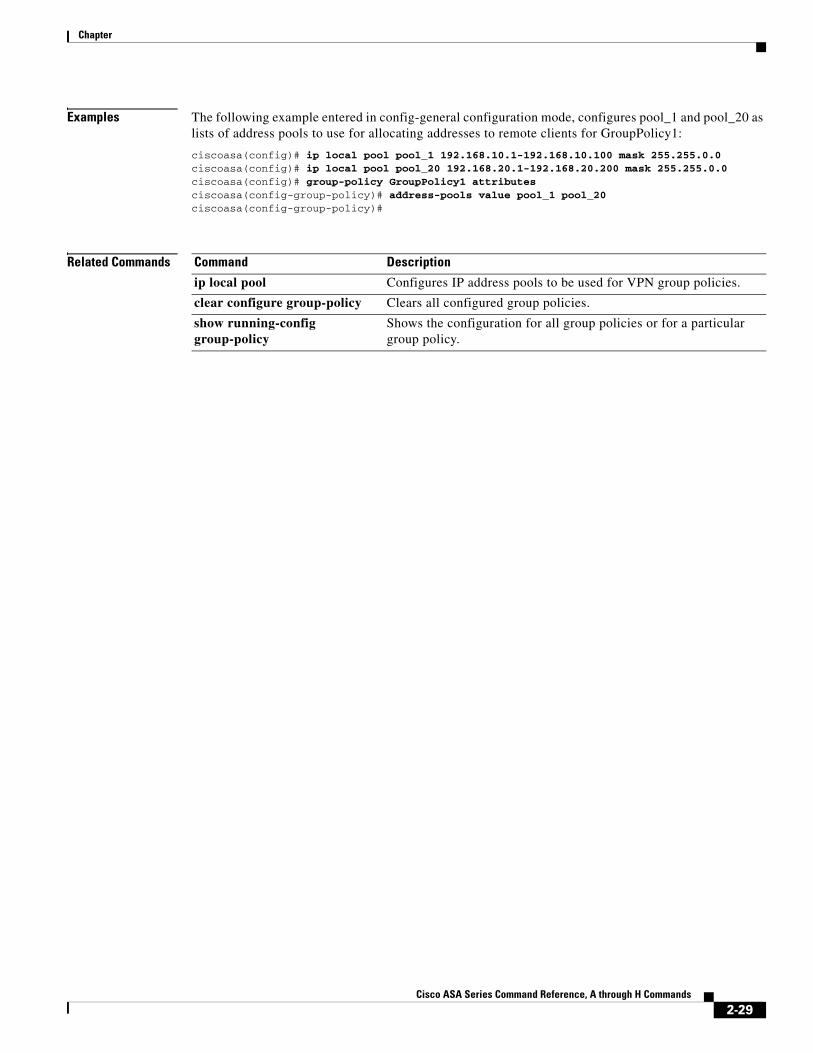
Examples The following example entered in config-general configuration mode, configures pool_1 and pool_20 as lists of address pools to use for allocating addresses to remote clients for GroupPolicy1:
ciscoasa(config)# ip local pool pool_1 192.168.10.1-192.168.10.100 mask 255.255.0.0ciscoasa(config)# ip local pool pool_20 192.168.20.1-192.168.20.200 mask 255.255.0.0ciscoasa(config)# group-policy GroupPolicy1 attributesciscoasa(config-group-policy)# address-pools value pool_1 pool_20ciscoasa(config-group-policy)#
Related Commands Command Description
ip local pool Configures IP address pools to be used for VPN group policies.
clear configure group-policy Clears all configured group policies.
show running-config group-policy
Shows the configuration for all group policies or for a particular group policy.
2-29Cisco ASA Series Command Reference, A through H Commands
Chapter
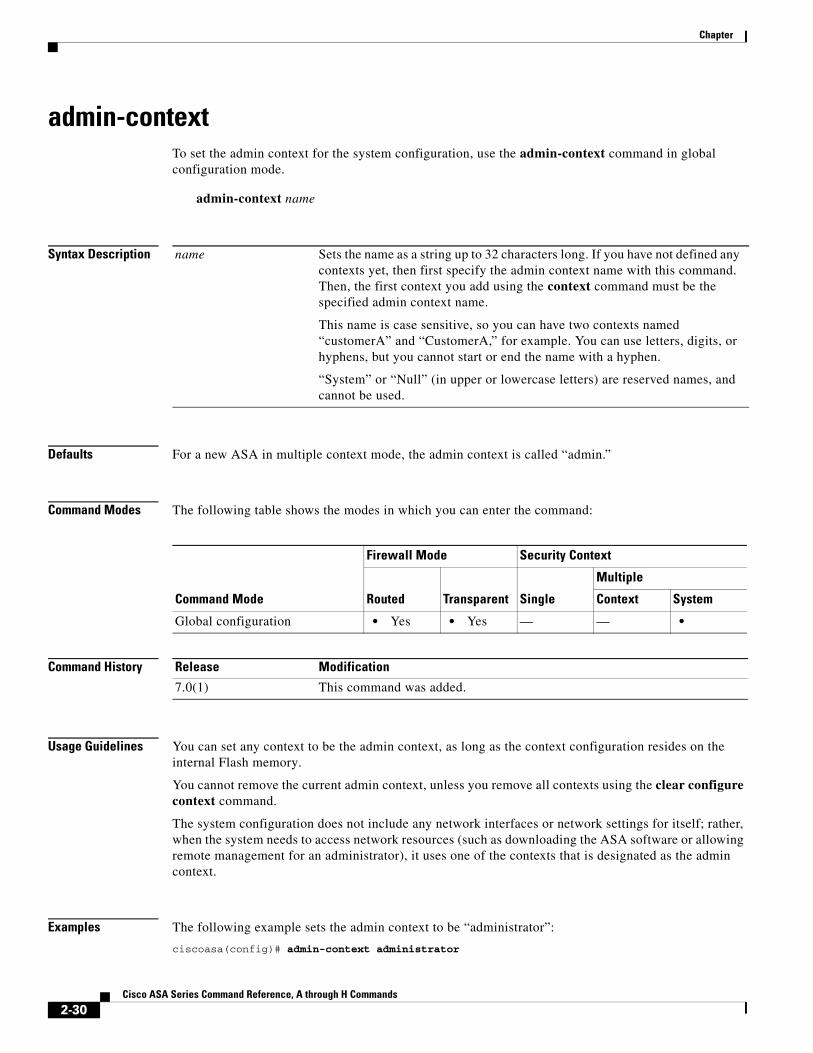
admin-contextTo set the admin context for the system configuration, use the admin-context command in global configuration mode.
admin-context name
Syntax Description
Defaults For a new ASA in multiple context mode, the admin context is called “admin.”
Command Modes The following table shows the modes in which you can enter the command:
Command History
Usage Guidelines You can set any context to be the admin context, as long as the context configuration resides on the internal Flash memory.
You cannot remove the current admin context, unless you remove all contexts using the clear configure context command.
The system configuration does not include any network interfaces or network settings for itself; rather, when the system needs to access network resources (such as downloading the ASA software or allowing remote management for an administrator), it uses one of the contexts that is designated as the admin context.
Examples The following example sets the admin context to be “administrator”:
ciscoasa(config)# admin-context administrator
name Sets the name as a string up to 32 characters long. If you have not defined any contexts yet, then first specify the admin context name with this command. Then, the first context you add using the context command must be the specified admin context name.
This name is case sensitive, so you can have two contexts named “customerA” and “CustomerA,” for example. You can use letters, digits, or hyphens, but you cannot start or end the name with a hyphen.
“System” or “Null” (in upper or lowercase letters) are reserved names, and cannot be used.
Command Mode
Firewall Mode Security Context
Routed Transparent Single
Multiple
Context System
Global configuration • Yes • Yes — — •
Release Modification
7.0(1) This command was added.
2-30Cisco ASA Series Command Reference, A through H Commands
Chapter
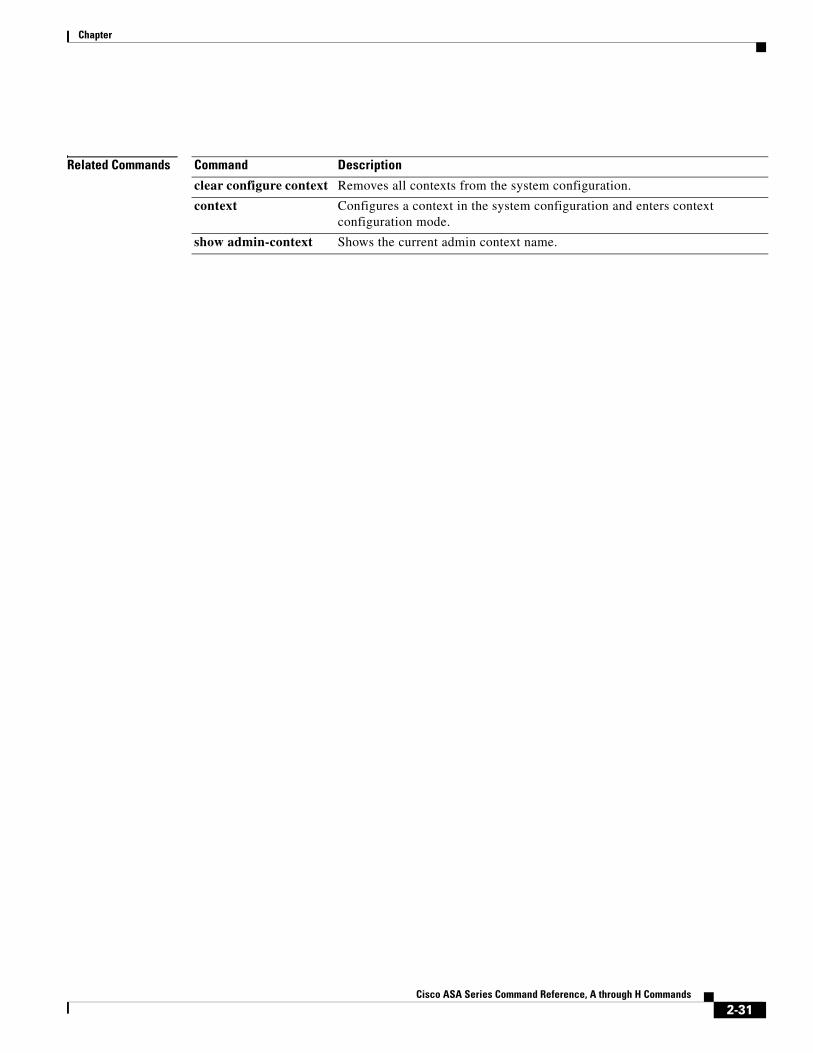
Related Commands Command Description
clear configure context Removes all contexts from the system configuration.
context Configures a context in the system configuration and enters context configuration mode.
show admin-context Shows the current admin context name.
2-31Cisco ASA Series Command Reference, A through H Commands
Chapter
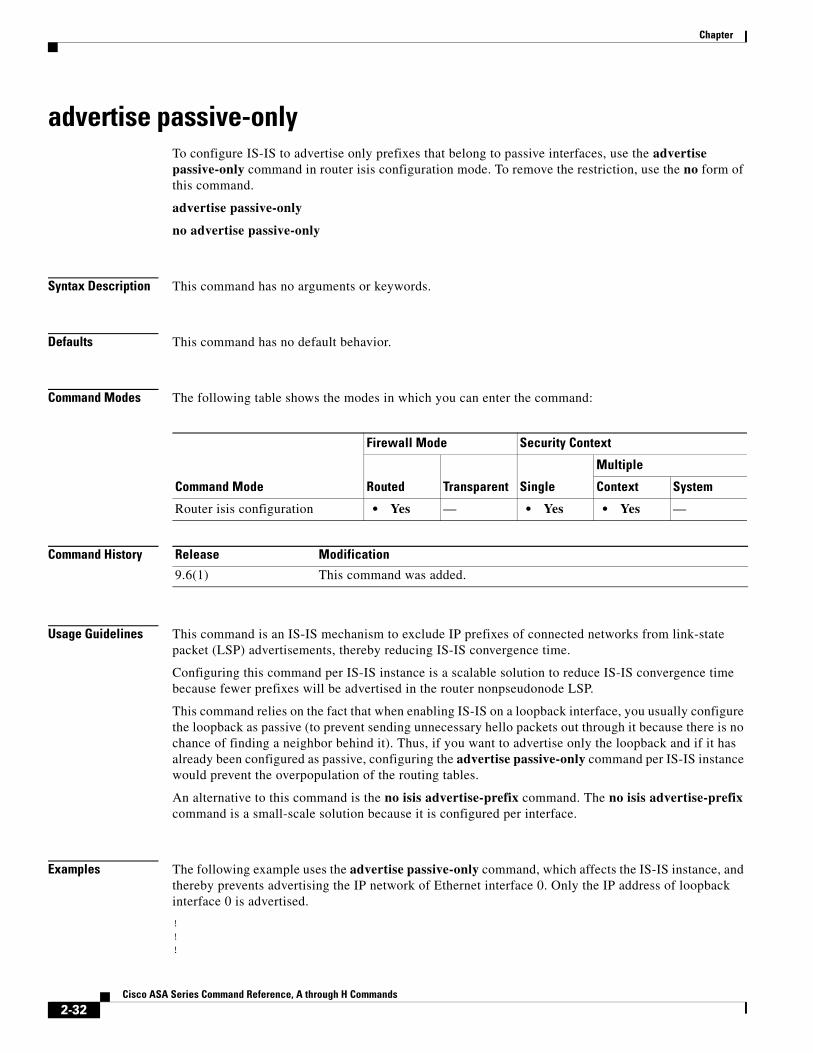
advertise passive-onlyTo configure IS-IS to advertise only prefixes that belong to passive interfaces, use the advertise passive-only command in router isis configuration mode. To remove the restriction, use the no form of this command.
advertise passive-only
no advertise passive-only
Syntax Description This command has no arguments or keywords.
Defaults This command has no default behavior.
Command Modes The following table shows the modes in which you can enter the command:
Command History
Usage Guidelines This command is an IS-IS mechanism to exclude IP prefixes of connected networks from link-state packet (LSP) advertisements, thereby reducing IS-IS convergence time.
Configuring this command per IS-IS instance is a scalable solution to reduce IS-IS convergence time because fewer prefixes will be advertised in the router nonpseudonode LSP.
This command relies on the fact that when enabling IS-IS on a loopback interface, you usually configure the loopback as passive (to prevent sending unnecessary hello packets out through it because there is no chance of finding a neighbor behind it). Thus, if you want to advertise only the loopback and if it has already been configured as passive, configuring the advertise passive-only command per IS-IS instance would prevent the overpopulation of the routing tables.
An alternative to this command is the no isis advertise-prefix command. The no isis advertise-prefix command is a small-scale solution because it is configured per interface.
Examples The following example uses the advertise passive-only command, which affects the IS-IS instance, and thereby prevents advertising the IP network of Ethernet interface 0. Only the IP address of loopback interface 0 is advertised.
!!!
Command Mode
Firewall Mode Security Context
Routed Transparent Single
Multiple
Context System
Router isis configuration • Yes — • Yes • Yes —
Release Modification
9.6(1) This command was added.
2-32Cisco ASA Series Command Reference, A through H Commands
Chapter
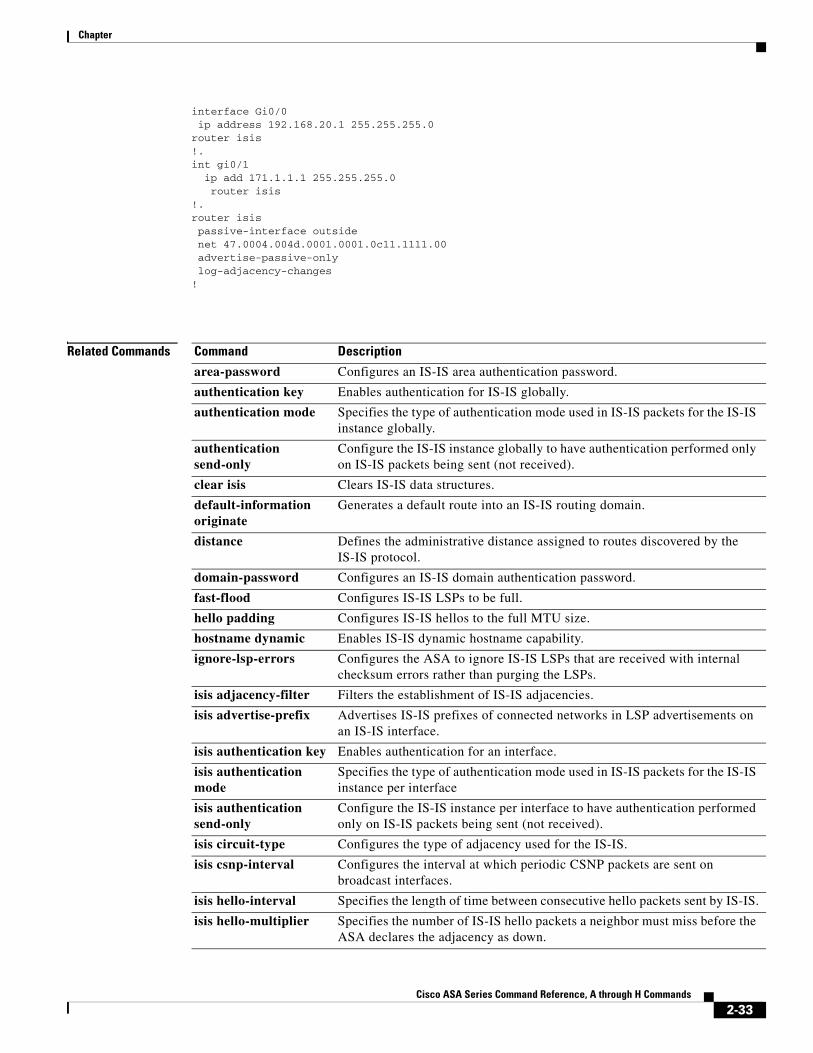
interface Gi0/0 ip address 192.168.20.1 255.255.255.0router isis !.int gi0/1 ip add 171.1.1.1 255.255.255.0 router isis!.router isis passive-interface outside net 47.0004.004d.0001.0001.0c11.1111.00 advertise-passive-only log-adjacency-changes!
Related Commands Command Description
area-password Configures an IS-IS area authentication password.
authentication key Enables authentication for IS-IS globally.
authentication mode Specifies the type of authentication mode used in IS-IS packets for the IS-IS instance globally.
authentication send-only
Configure the IS-IS instance globally to have authentication performed only on IS-IS packets being sent (not received).
clear isis Clears IS-IS data structures.
default-information originate
Generates a default route into an IS-IS routing domain.
distance Defines the administrative distance assigned to routes discovered by the IS-IS protocol.
domain-password Configures an IS-IS domain authentication password.
fast-flood Configures IS-IS LSPs to be full.
hello padding Configures IS-IS hellos to the full MTU size.
hostname dynamic Enables IS-IS dynamic hostname capability.
ignore-lsp-errors Configures the ASA to ignore IS-IS LSPs that are received with internal checksum errors rather than purging the LSPs.
isis adjacency-filter Filters the establishment of IS-IS adjacencies.
isis advertise-prefix Advertises IS-IS prefixes of connected networks in LSP advertisements on an IS-IS interface.
isis authentication key Enables authentication for an interface.
isis authentication mode
Specifies the type of authentication mode used in IS-IS packets for the IS-IS instance per interface
isis authentication send-only
Configure the IS-IS instance per interface to have authentication performed only on IS-IS packets being sent (not received).
isis circuit-type Configures the type of adjacency used for the IS-IS.
isis csnp-interval Configures the interval at which periodic CSNP packets are sent on broadcast interfaces.
isis hello-interval Specifies the length of time between consecutive hello packets sent by IS-IS.
isis hello-multiplier Specifies the number of IS-IS hello packets a neighbor must miss before the ASA declares the adjacency as down.
2-33Cisco ASA Series Command Reference, A through H Commands
Chapter
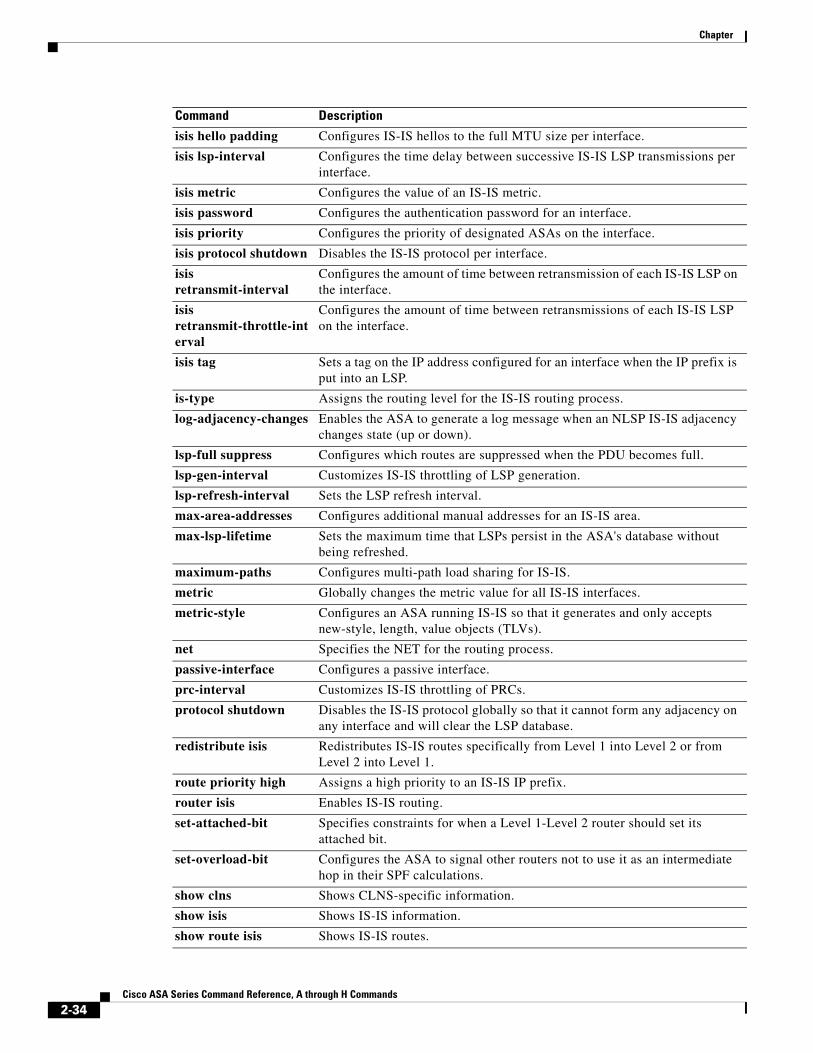
isis hello padding Configures IS-IS hellos to the full MTU size per interface.
isis lsp-interval Configures the time delay between successive IS-IS LSP transmissions per interface.
isis metric Configures the value of an IS-IS metric.
isis password Configures the authentication password for an interface.
isis priority Configures the priority of designated ASAs on the interface.
isis protocol shutdown Disables the IS-IS protocol per interface.
isis retransmit-interval
Configures the amount of time between retransmission of each IS-IS LSP on the interface.
isis retransmit-throttle-interval
Configures the amount of time between retransmissions of each IS-IS LSP on the interface.
isis tag Sets a tag on the IP address configured for an interface when the IP prefix is put into an LSP.
is-type Assigns the routing level for the IS-IS routing process.
log-adjacency-changes Enables the ASA to generate a log message when an NLSP IS-IS adjacency changes state (up or down).
lsp-full suppress Configures which routes are suppressed when the PDU becomes full.
lsp-gen-interval Customizes IS-IS throttling of LSP generation.
lsp-refresh-interval Sets the LSP refresh interval.
max-area-addresses Configures additional manual addresses for an IS-IS area.
max-lsp-lifetime Sets the maximum time that LSPs persist in the ASA's database without being refreshed.
maximum-paths Configures multi-path load sharing for IS-IS.
metric Globally changes the metric value for all IS-IS interfaces.
metric-style Configures an ASA running IS-IS so that it generates and only accepts new-style, length, value objects (TLVs).
net Specifies the NET for the routing process.
passive-interface Configures a passive interface.
prc-interval Customizes IS-IS throttling of PRCs.
protocol shutdown Disables the IS-IS protocol globally so that it cannot form any adjacency on any interface and will clear the LSP database.
redistribute isis Redistributes IS-IS routes specifically from Level 1 into Level 2 or from Level 2 into Level 1.
route priority high Assigns a high priority to an IS-IS IP prefix.
router isis Enables IS-IS routing.
set-attached-bit Specifies constraints for when a Level 1-Level 2 router should set its attached bit.
set-overload-bit Configures the ASA to signal other routers not to use it as an intermediate hop in their SPF calculations.
show clns Shows CLNS-specific information.
show isis Shows IS-IS information.
show route isis Shows IS-IS routes.
Command Description
2-34Cisco ASA Series Command Reference, A through H Commands
Chapter
spf-interval Customizes IS-IS throttling of SPF calculations.
summary-address Creates aggregate addresses for IS-IS.
Command Description
2-35Cisco ASA Series Command Reference, A through H Commands
Chapter
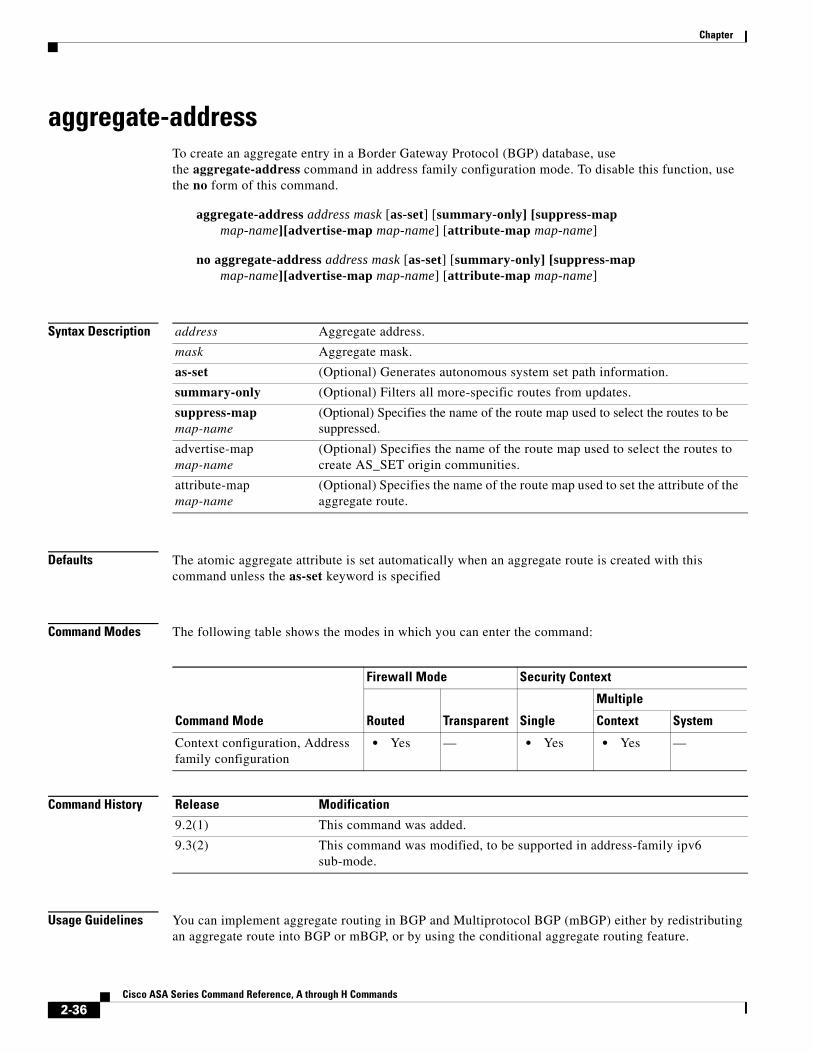
aggregate-addressTo create an aggregate entry in a Border Gateway Protocol (BGP) database, use the aggregate-address command in address family configuration mode. To disable this function, use the no form of this command.
aggregate-address address mask [as-set] [summary-only] [suppress-map map-name][advertise-map map-name] [attribute-map map-name]
no aggregate-address address mask [as-set] [summary-only] [suppress-map map-name][advertise-map map-name] [attribute-map map-name]
Syntax Description
Defaults The atomic aggregate attribute is set automatically when an aggregate route is created with this command unless the as-set keyword is specified
Command Modes The following table shows the modes in which you can enter the command:
Command History
Usage Guidelines You can implement aggregate routing in BGP and Multiprotocol BGP (mBGP) either by redistributing an aggregate route into BGP or mBGP, or by using the conditional aggregate routing feature.
address Aggregate address.
mask Aggregate mask.
as-set (Optional) Generates autonomous system set path information.
summary-only (Optional) Filters all more-specific routes from updates.
suppress-map map-name
(Optional) Specifies the name of the route map used to select the routes to be suppressed.
advertise-map map-name
(Optional) Specifies the name of the route map used to select the routes to create AS_SET origin communities.
attribute-map map-name
(Optional) Specifies the name of the route map used to set the attribute of the aggregate route.
Command Mode
Firewall Mode Security Context
Routed Transparent Single
Multiple
Context System
Context configuration, Address family configuration
• Yes — • Yes • Yes —
Release Modification
9.2(1) This command was added.
9.3(2) This command was modified, to be supported in address-family ipv6 sub-mode.
2-36Cisco ASA Series Command Reference, A through H Commands

Chapter
Using the aggregate-address command with no keywords will create an aggregate entry in the BGP or mBGP routing table if any more-specific BGP or mBGP routes are available that fall within the specified range. (A longer prefix that matches the aggregate must exist in the Routing Information Base (RIB).) The aggregate route will be advertised as coming from your autonomous system and will have the atomic aggregate attribute set to show that information might be missing. (By default, the atomic aggregate attribute is set unless you specify the as-set keyword.)
Using the as-set keyword creates an aggregate entry using the same rules that the command follows without this keyword, but the path advertised for this route will be an AS_SET consisting of all elements contained in all paths that are being summarized. Do not use this form of the aggregate-address command when aggregating many paths, because this route must be continually withdrawn and updated as autonomous system path reach ability information for the summarized routes changes.
Using the summary-only keyword not only creates the aggregate route (for example, 192.*.*.*) but also suppresses advertisements of more-specific routes to all neighbors. If you want to suppress only advertisements to certain neighbors, you may use the neighbor distribute-list command, with caution. If a more-specific route leaks out, all BGP or mBGP routers will prefer that route over the less-specific aggregate you are generating (using longest-match routing).
Using the suppress-map keyword creates the aggregate route but suppresses advertisement of specified routes. You can use the match clauses of route maps to selectively suppress some more-specific routes of the aggregate and leave others unsuppressed. IP access lists and autonomous system path access lists match clauses are supported.
Using the advertise-map keyword selects specific routes that will be used to build different components of the aggregate route, such as AS_SET or community. This form of the aggregate-address command is useful when the components of an aggregate are in separate autonomous systems and you want to create an aggregate with AS_SET, and advertise it back to some of the same autonomous systems. You must remember to omit the specific autonomous system numbers from the AS_SET to prevent the aggregate from being dropped by the BGP loop detection mechanism at the receiving router. IP access lists and autonomous system path access lists match clauses are supported.
Using the attribute-map keyword allows attributes of the aggregate route to be changed. This form of the aggregate-address command is useful when one of the routes forming the AS_SET is configured with an attribute such as the community no-export attribute, which would prevent the aggregate route from being exported. An attribute map route map can be created to change the aggregate attributes.
Examples The following example creates an aggregate route and suppresses advertisements of more specific routes to all neighbors.
ciscoasa(config)# router bgp 5000ciscoasa(config-router)# address-family ipv4ciscoasa(config-router)# aggregate-address 10.0.0.0 255.0.0.0 summary-only
Related Commands Command Description
address-family ipv4 Enters the address family configuration mode to configure a routing session using standard IP Version 4.
2-37Cisco ASA Series Command Reference, A through H Commands

Chapter
alarm contact descriptionTo enter a description for the alarm inputs in the ISA 3000, use the alarm contact description command in global configuration mode. To set the default description to the corresponding contact number, use the no form of this command.
alarm contact {1 | 2} description string
no alarm contact {1 | 2} description
Syntax Description
Command Default No default behavior or values.
Command Modes The following table shows the modes in which you can enter the command:
Command History
Examples The following example specifies the description for the alarm contact 1:
ciscoasa(config)# alarm contact 1 description Door Open
Related Commands
1 | 2 Specifies the alarm contact for which the description is configured. Enter 1 or 2.
string Specifies the description. This may be up to 80 alphanumeric characters long, and will be included in syslog messages.
Command Mode
Firewall Mode Security Context
Routed Transparent Single
Multiple
Context System
Global configuration • Yes • Yes • Yes — —
Release Modification
9.7(1) We introduced this command.
Command Description
alarm contact severity Specifies the severity of an alarm which will in turn affect the LED state in the ISA 3000.
alarm contact trigger Specifies a trigger for one or all alarm inputs.
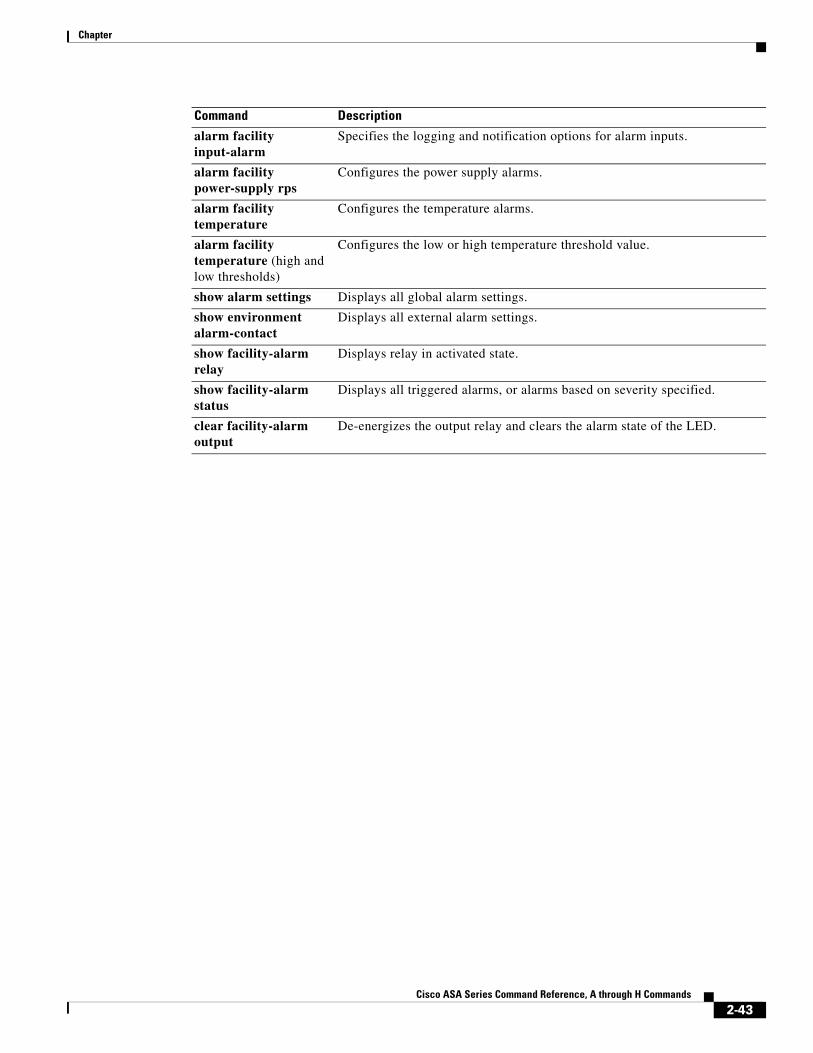
alarm facility input-alarm Specifies the logging and notification options for alarm inputs.
alarm facility power-supply rps Configures the power supply alarms.
alarm facility temperature Configures the temperature alarms.
2-38Cisco ASA Series Command Reference, A through H Commands

Chapter
alarm facility temperature (high and low thresholds)
Configures the low or high temperature threshold value.
show alarm settings Displays all global alarm settings.
show environment alarm-contact Displays all external alarm settings.
show facility-alarm relay Displays relay in activated state.
show facility-alarm status Displays all triggered alarms, or alarms based on severity specified.
clear facility-alarm output De-energizes the output relay and clears the alarm state of the LED.
Command Description
2-39Cisco ASA Series Command Reference, A through H Commands
Chapter
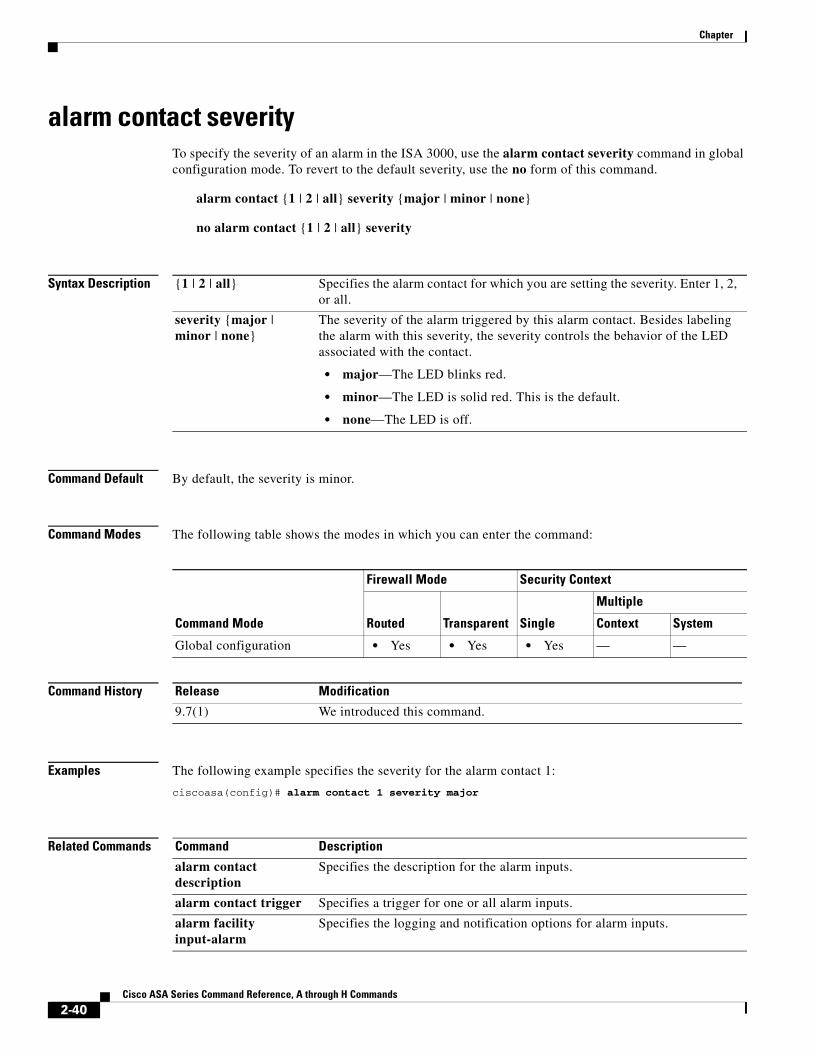
alarm contact severityTo specify the severity of an alarm in the ISA 3000, use the alarm contact severity command in global configuration mode. To revert to the default severity, use the no form of this command.
alarm contact {1 | 2 | all} severity {major | minor | none}
no alarm contact {1 | 2 | all} severity
Syntax Description
Command Default By default, the severity is minor.
Command Modes The following table shows the modes in which you can enter the command:
Command History
Examples The following example specifies the severity for the alarm contact 1:
ciscoasa(config)# alarm contact 1 severity major
Related Commands
{1 | 2 | all} Specifies the alarm contact for which you are setting the severity. Enter 1, 2, or all.
severity {major | minor | none}
The severity of the alarm triggered by this alarm contact. Besides labeling the alarm with this severity, the severity controls the behavior of the LED associated with the contact.
• major—The LED blinks red.
• minor—The LED is solid red. This is the default.
• none—The LED is off.
Command Mode
Firewall Mode Security Context
Routed Transparent Single
Multiple
Context System
Global configuration • Yes • Yes • Yes — —
Release Modification
9.7(1) We introduced this command.
Command Description
alarm contact description
Specifies the description for the alarm inputs.
alarm contact trigger Specifies a trigger for one or all alarm inputs.
alarm facility input-alarm
Specifies the logging and notification options for alarm inputs.
2-40Cisco ASA Series Command Reference, A through H Commands

Chapter
alarm facility power-supply rps
Configures the power supply alarms.
alarm facility temperature
Configures the temperature alarms.
alarm facility temperature (high and low thresholds)
Configures the low or high temperature threshold value.
show alarm settings Displays all global alarm settings.
show environment alarm-contact
Displays all external alarm settings.
show facility-alarm relay
Displays relay in activated state.
show facility-alarm status
Displays all triggered alarms, or alarms based on severity specified.
clear facility-alarm output
De-energizes the output relay and clears the alarm state of the LED.
Command Description
2-41Cisco ASA Series Command Reference, A through H Commands
Chapter
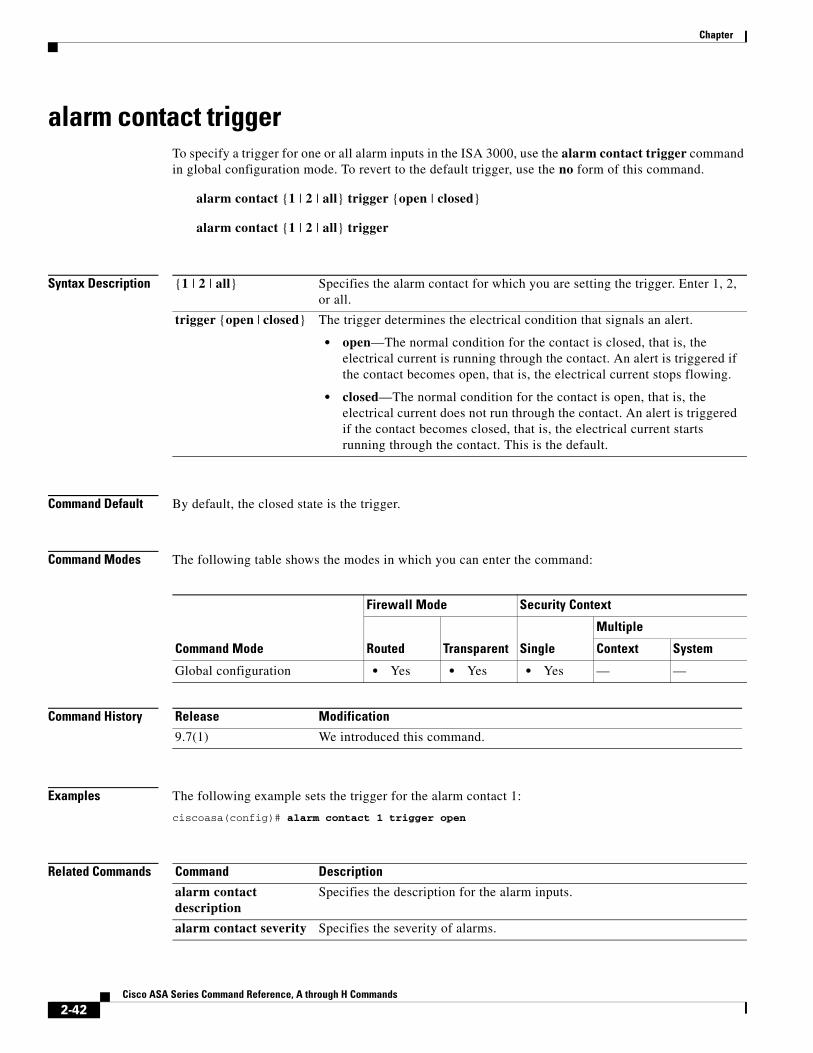
alarm contact triggerTo specify a trigger for one or all alarm inputs in the ISA 3000, use the alarm contact trigger command in global configuration mode. To revert to the default trigger, use the no form of this command.
alarm contact {1 | 2 | all} trigger {open | closed}
alarm contact {1 | 2 | all} trigger
Syntax Description
Command Default By default, the closed state is the trigger.
Command Modes The following table shows the modes in which you can enter the command:
Command History
Examples The following example sets the trigger for the alarm contact 1:
ciscoasa(config)# alarm contact 1 trigger open
Related Commands
{1 | 2 | all} Specifies the alarm contact for which you are setting the trigger. Enter 1, 2, or all.
trigger {open | closed} The trigger determines the electrical condition that signals an alert.
• open—The normal condition for the contact is closed, that is, the electrical current is running through the contact. An alert is triggered if the contact becomes open, that is, the electrical current stops flowing.
• closed—The normal condition for the contact is open, that is, the electrical current does not run through the contact. An alert is triggered if the contact becomes closed, that is, the electrical current starts running through the contact. This is the default.
Command Mode
Firewall Mode Security Context
Routed Transparent Single
Multiple
Context System
Global configuration • Yes • Yes • Yes — —
Release Modification
9.7(1) We introduced this command.
Command Description
alarm contact description
Specifies the description for the alarm inputs.
alarm contact severity Specifies the severity of alarms.
2-42Cisco ASA Series Command Reference, A through H Commands
Chapter
alarm facility input-alarm
Specifies the logging and notification options for alarm inputs.
alarm facility power-supply rps
Configures the power supply alarms.
alarm facility temperature
Configures the temperature alarms.
alarm facility temperature (high and low thresholds)
Configures the low or high temperature threshold value.
show alarm settings Displays all global alarm settings.
show environment alarm-contact
Displays all external alarm settings.
show facility-alarm relay
Displays relay in activated state.
show facility-alarm status
Displays all triggered alarms, or alarms based on severity specified.
clear facility-alarm output
De-energizes the output relay and clears the alarm state of the LED.
Command Description
2-43Cisco ASA Series Command Reference, A through H Commands
Chapter
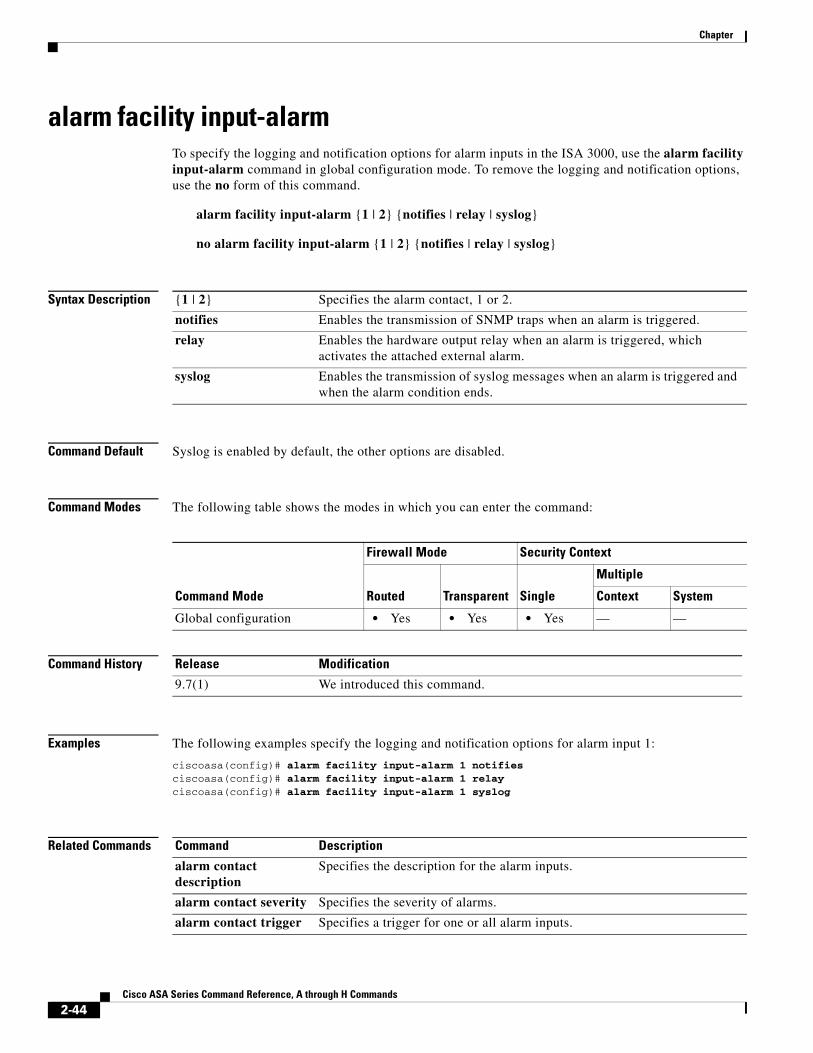
alarm facility input-alarmTo specify the logging and notification options for alarm inputs in the ISA 3000, use the alarm facility input-alarm command in global configuration mode. To remove the logging and notification options, use the no form of this command.
alarm facility input-alarm {1 | 2} {notifies | relay | syslog}
no alarm facility input-alarm {1 | 2} {notifies | relay | syslog}
Syntax Description
Command Default Syslog is enabled by default, the other options are disabled.
Command Modes The following table shows the modes in which you can enter the command:
Command History
Examples The following examples specify the logging and notification options for alarm input 1:
ciscoasa(config)# alarm facility input-alarm 1 notifies ciscoasa(config)# alarm facility input-alarm 1 relay ciscoasa(config)# alarm facility input-alarm 1 syslog
Related Commands
{1 | 2} Specifies the alarm contact, 1 or 2.
notifies Enables the transmission of SNMP traps when an alarm is triggered.
relay Enables the hardware output relay when an alarm is triggered, which activates the attached external alarm.
syslog Enables the transmission of syslog messages when an alarm is triggered and when the alarm condition ends.
Command Mode
Firewall Mode Security Context
Routed Transparent Single
Multiple
Context System
Global configuration • Yes • Yes • Yes — —
Release Modification
9.7(1) We introduced this command.
Command Description
alarm contact description
Specifies the description for the alarm inputs.
alarm contact severity Specifies the severity of alarms.
alarm contact trigger Specifies a trigger for one or all alarm inputs.
2-44Cisco ASA Series Command Reference, A through H Commands
Chapter
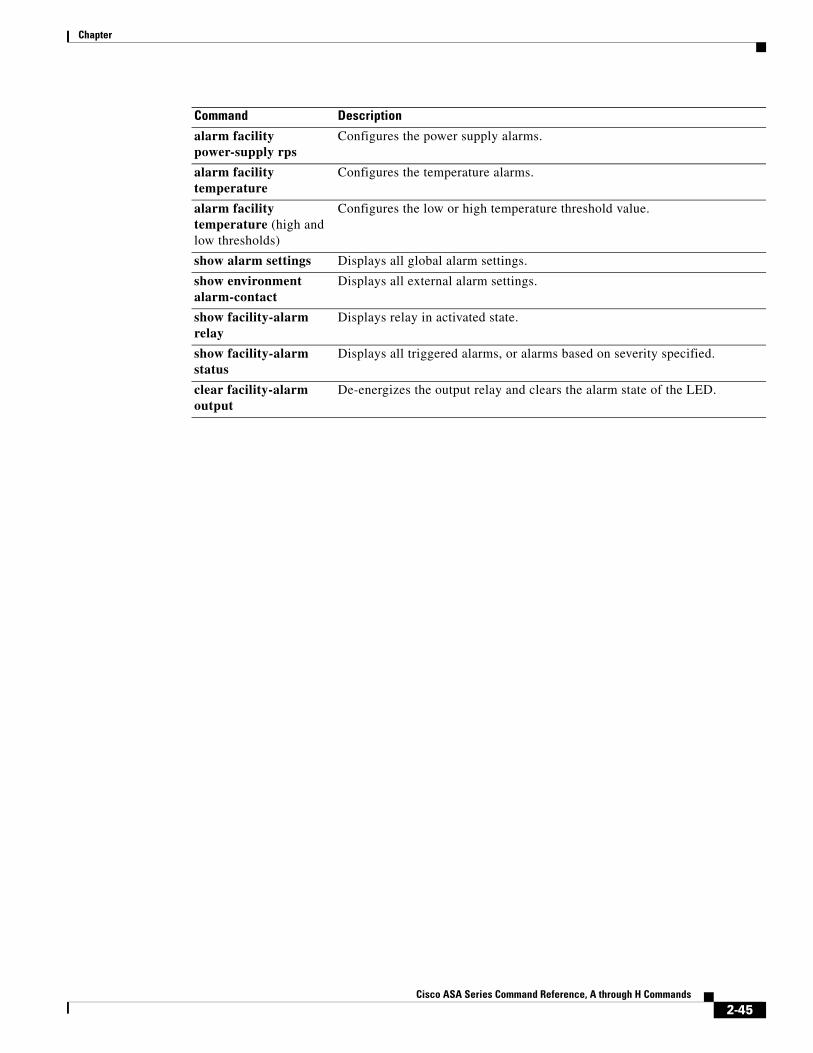
alarm facility power-supply rps
Configures the power supply alarms.
alarm facility temperature
Configures the temperature alarms.
alarm facility temperature (high and low thresholds)
Configures the low or high temperature threshold value.
show alarm settings Displays all global alarm settings.
show environment alarm-contact
Displays all external alarm settings.
show facility-alarm relay
Displays relay in activated state.
show facility-alarm status
Displays all triggered alarms, or alarms based on severity specified.
clear facility-alarm output
De-energizes the output relay and clears the alarm state of the LED.
Command Description
2-45Cisco ASA Series Command Reference, A through H Commands
Chapter
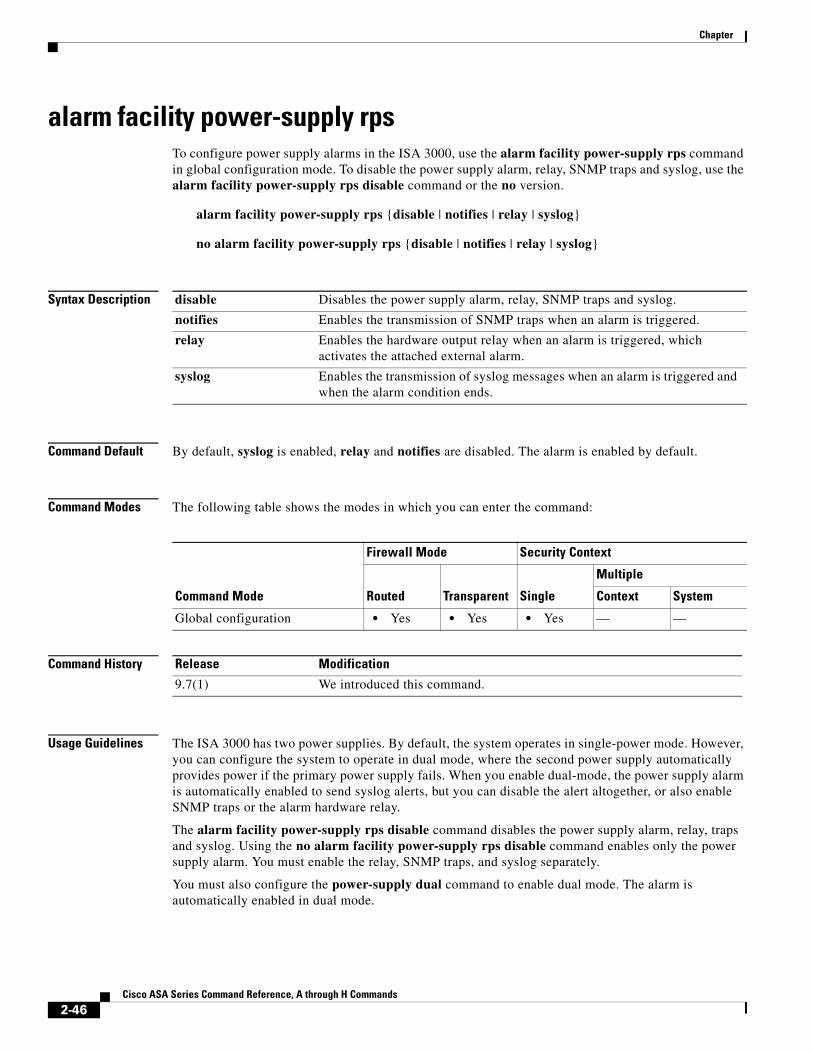
alarm facility power-supply rpsTo configure power supply alarms in the ISA 3000, use the alarm facility power-supply rps command in global configuration mode. To disable the power supply alarm, relay, SNMP traps and syslog, use the alarm facility power-supply rps disable command or the no version.
alarm facility power-supply rps {disable | notifies | relay | syslog}
no alarm facility power-supply rps {disable | notifies | relay | syslog}
Syntax Description
Command Default By default, syslog is enabled, relay and notifies are disabled. The alarm is enabled by default.
Command Modes The following table shows the modes in which you can enter the command:
Command History
Usage Guidelines The ISA 3000 has two power supplies. By default, the system operates in single-power mode. However, you can configure the system to operate in dual mode, where the second power supply automatically provides power if the primary power supply fails. When you enable dual-mode, the power supply alarm is automatically enabled to send syslog alerts, but you can disable the alert altogether, or also enable SNMP traps or the alarm hardware relay.
The alarm facility power-supply rps disable command disables the power supply alarm, relay, traps and syslog. Using the no alarm facility power-supply rps disable command enables only the power supply alarm. You must enable the relay, SNMP traps, and syslog separately.
You must also configure the power-supply dual command to enable dual mode. The alarm is automatically enabled in dual mode.
disable Disables the power supply alarm, relay, SNMP traps and syslog.
notifies Enables the transmission of SNMP traps when an alarm is triggered.
relay Enables the hardware output relay when an alarm is triggered, which activates the attached external alarm.
syslog Enables the transmission of syslog messages when an alarm is triggered and when the alarm condition ends.
Command Mode
Firewall Mode Security Context
Routed Transparent Single
Multiple
Context System
Global configuration • Yes • Yes • Yes — —
Release Modification
9.7(1) We introduced this command.
2-46Cisco ASA Series Command Reference, A through H Commands
Chapter
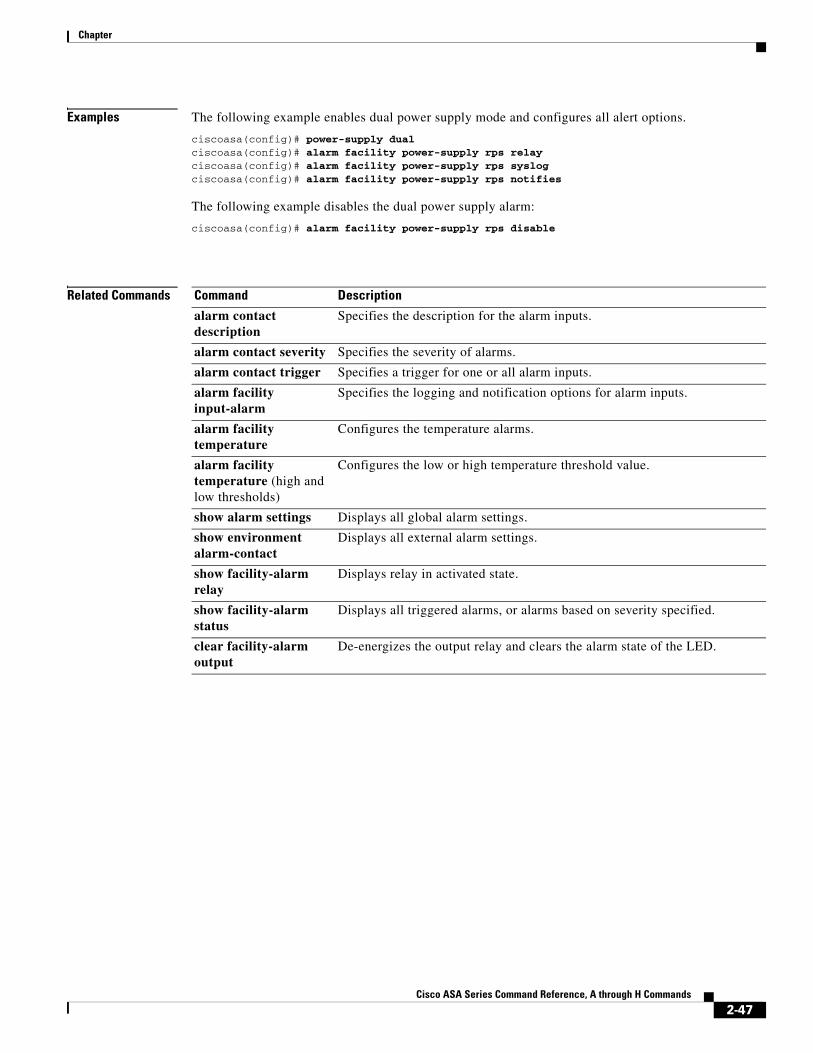
Examples The following example enables dual power supply mode and configures all alert options.
ciscoasa(config)# power-supply dual ciscoasa(config)# alarm facility power-supply rps relay ciscoasa(config)# alarm facility power-supply rps syslog ciscoasa(config)# alarm facility power-supply rps notifies
The following example disables the dual power supply alarm:
ciscoasa(config)# alarm facility power-supply rps disable
Related Commands Command Description
alarm contact description
Specifies the description for the alarm inputs.
alarm contact severity Specifies the severity of alarms.
alarm contact trigger Specifies a trigger for one or all alarm inputs.
alarm facility input-alarm
Specifies the logging and notification options for alarm inputs.
alarm facility temperature
Configures the temperature alarms.
alarm facility temperature (high and low thresholds)
Configures the low or high temperature threshold value.
show alarm settings Displays all global alarm settings.
show environment alarm-contact
Displays all external alarm settings.
show facility-alarm relay
Displays relay in activated state.
show facility-alarm status
Displays all triggered alarms, or alarms based on severity specified.
clear facility-alarm output
De-energizes the output relay and clears the alarm state of the LED.
2-47Cisco ASA Series Command Reference, A through H Commands
Chapter
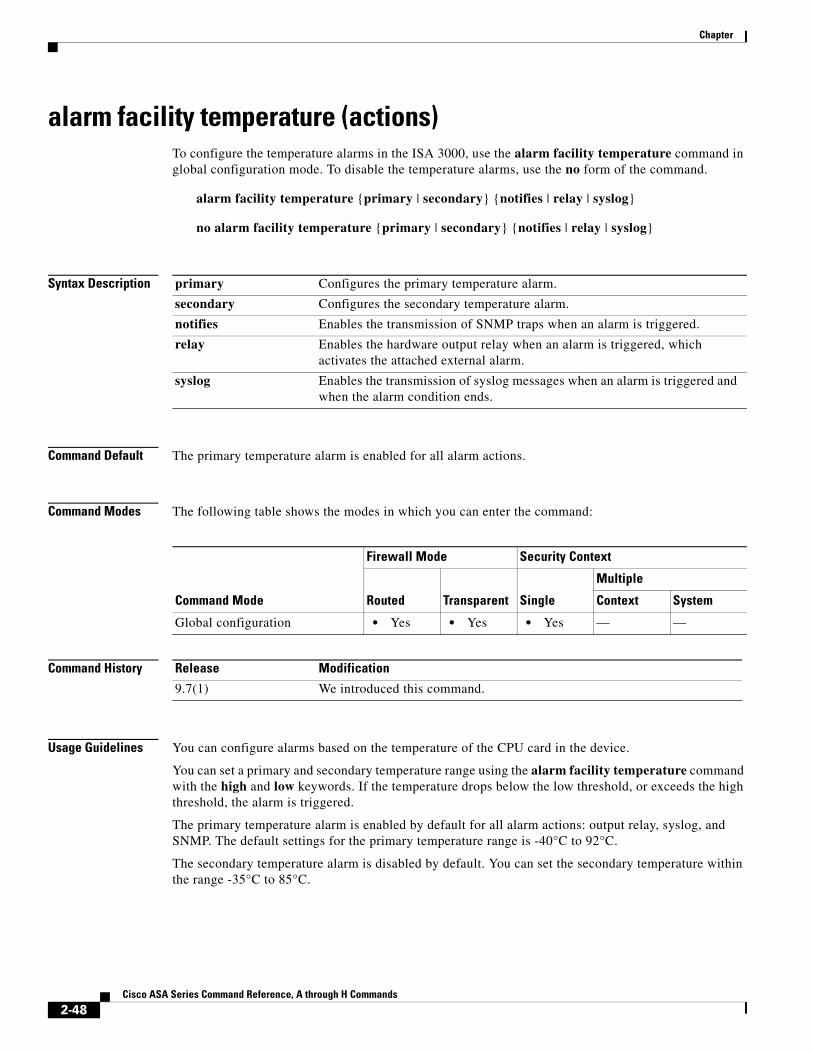
alarm facility temperature (actions) To configure the temperature alarms in the ISA 3000, use the alarm facility temperature command in global configuration mode. To disable the temperature alarms, use the no form of the command.
alarm facility temperature {primary | secondary} {notifies | relay | syslog}
no alarm facility temperature {primary | secondary} {notifies | relay | syslog}
Syntax Description
Command Default The primary temperature alarm is enabled for all alarm actions.
Command Modes The following table shows the modes in which you can enter the command:
Command History
Usage Guidelines You can configure alarms based on the temperature of the CPU card in the device.
You can set a primary and secondary temperature range using the alarm facility temperature command with the high and low keywords. If the temperature drops below the low threshold, or exceeds the high threshold, the alarm is triggered.
The primary temperature alarm is enabled by default for all alarm actions: output relay, syslog, and SNMP. The default settings for the primary temperature range is -40°C to 92°C.
The secondary temperature alarm is disabled by default. You can set the secondary temperature within the range -35°C to 85°C.
primary Configures the primary temperature alarm.
secondary Configures the secondary temperature alarm.
notifies Enables the transmission of SNMP traps when an alarm is triggered.
relay Enables the hardware output relay when an alarm is triggered, which activates the attached external alarm.
syslog Enables the transmission of syslog messages when an alarm is triggered and when the alarm condition ends.
Command Mode
Firewall Mode Security Context
Routed Transparent Single
Multiple
Context System
Global configuration • Yes • Yes • Yes — —
Release Modification
9.7(1) We introduced this command.
2-48Cisco ASA Series Command Reference, A through H Commands
Chapter
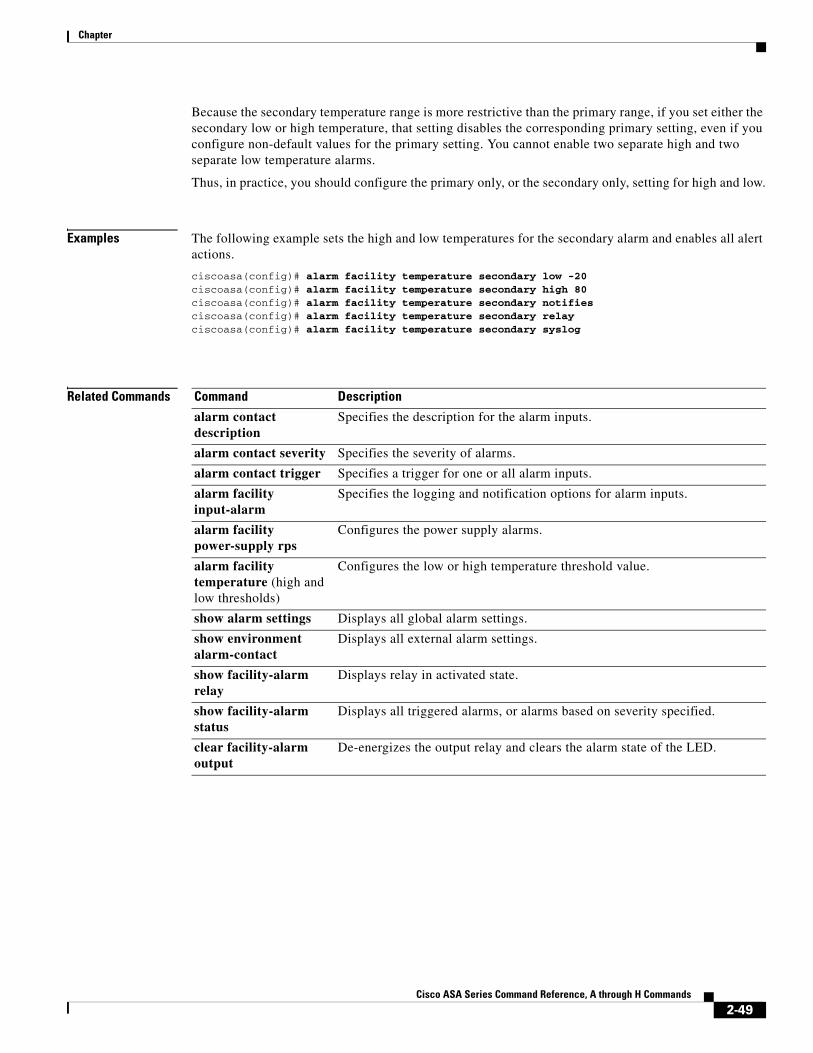
Because the secondary temperature range is more restrictive than the primary range, if you set either the secondary low or high temperature, that setting disables the corresponding primary setting, even if you configure non-default values for the primary setting. You cannot enable two separate high and two separate low temperature alarms.
Thus, in practice, you should configure the primary only, or the secondary only, setting for high and low.
Examples The following example sets the high and low temperatures for the secondary alarm and enables all alert actions.
ciscoasa(config)# alarm facility temperature secondary low -20 ciscoasa(config)# alarm facility temperature secondary high 80 ciscoasa(config)# alarm facility temperature secondary notifies ciscoasa(config)# alarm facility temperature secondary relay ciscoasa(config)# alarm facility temperature secondary syslog
Related Commands Command Description
alarm contact description
Specifies the description for the alarm inputs.
alarm contact severity Specifies the severity of alarms.
alarm contact trigger Specifies a trigger for one or all alarm inputs.
alarm facility input-alarm
Specifies the logging and notification options for alarm inputs.
alarm facility power-supply rps
Configures the power supply alarms.
alarm facility temperature (high and low thresholds)
Configures the low or high temperature threshold value.
show alarm settings Displays all global alarm settings.
show environment alarm-contact
Displays all external alarm settings.
show facility-alarm relay
Displays relay in activated state.
show facility-alarm status
Displays all triggered alarms, or alarms based on severity specified.
clear facility-alarm output
De-energizes the output relay and clears the alarm state of the LED.
2-49Cisco ASA Series Command Reference, A through H Commands
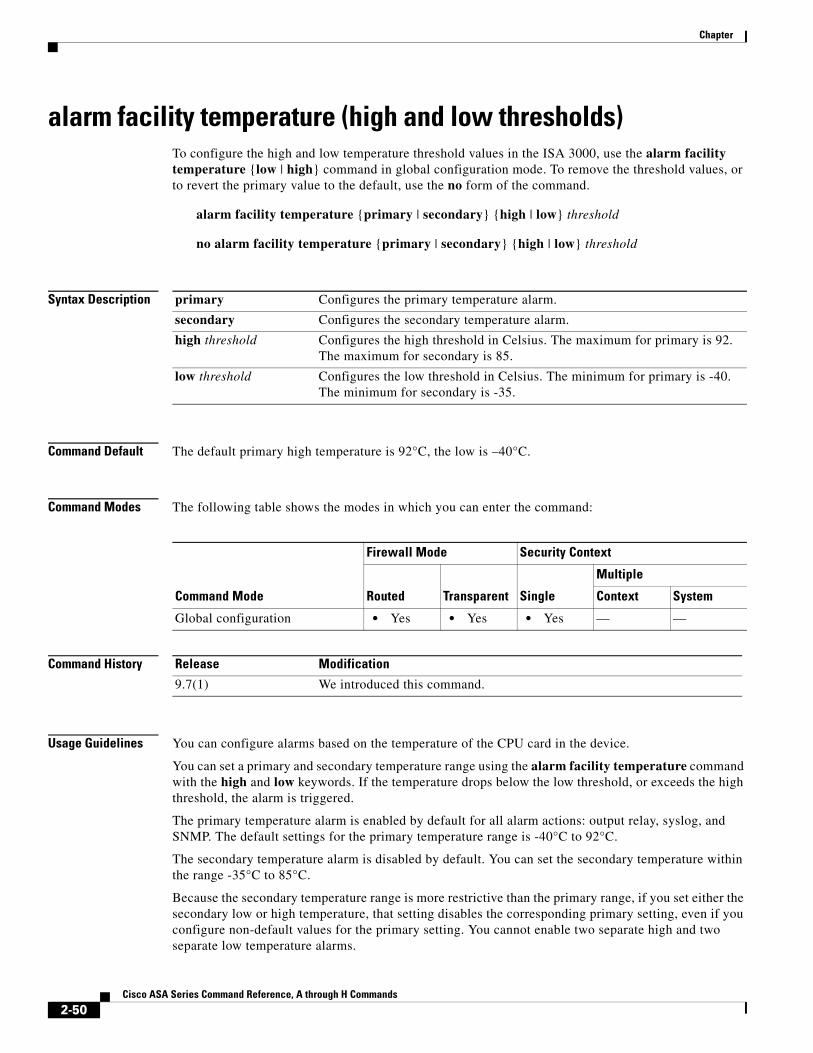
Chapter
alarm facility temperature (high and low thresholds)To configure the high and low temperature threshold values in the ISA 3000, use the alarm facility temperature {low | high} command in global configuration mode. To remove the threshold values, or to revert the primary value to the default, use the no form of the command.
alarm facility temperature {primary | secondary} {high | low} threshold
no alarm facility temperature {primary | secondary} {high | low} threshold
Syntax Description
Command Default The default primary high temperature is 92°C, the low is –40°C.
Command Modes The following table shows the modes in which you can enter the command:
Command History
Usage Guidelines You can configure alarms based on the temperature of the CPU card in the device.
You can set a primary and secondary temperature range using the alarm facility temperature command with the high and low keywords. If the temperature drops below the low threshold, or exceeds the high threshold, the alarm is triggered.
The primary temperature alarm is enabled by default for all alarm actions: output relay, syslog, and SNMP. The default settings for the primary temperature range is -40°C to 92°C.
The secondary temperature alarm is disabled by default. You can set the secondary temperature within the range -35°C to 85°C.
Because the secondary temperature range is more restrictive than the primary range, if you set either the secondary low or high temperature, that setting disables the corresponding primary setting, even if you configure non-default values for the primary setting. You cannot enable two separate high and two separate low temperature alarms.
primary Configures the primary temperature alarm.
secondary Configures the secondary temperature alarm.
high threshold Configures the high threshold in Celsius. The maximum for primary is 92. The maximum for secondary is 85.
low threshold Configures the low threshold in Celsius. The minimum for primary is -40. The minimum for secondary is -35.
Command Mode
Firewall Mode Security Context
Routed Transparent Single
Multiple
Context System
Global configuration • Yes • Yes • Yes — —
Release Modification
9.7(1) We introduced this command.
2-50Cisco ASA Series Command Reference, A through H Commands
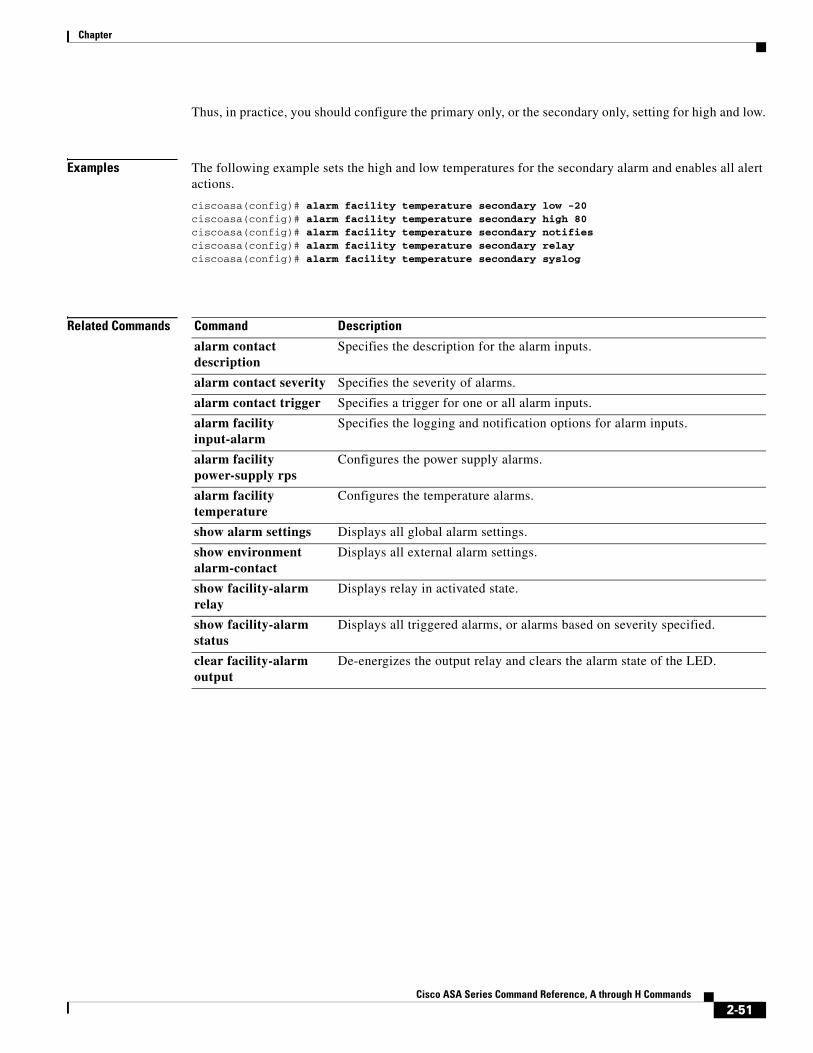
Chapter
Thus, in practice, you should configure the primary only, or the secondary only, setting for high and low.
Examples The following example sets the high and low temperatures for the secondary alarm and enables all alert actions.
ciscoasa(config)# alarm facility temperature secondary low -20 ciscoasa(config)# alarm facility temperature secondary high 80 ciscoasa(config)# alarm facility temperature secondary notifies ciscoasa(config)# alarm facility temperature secondary relay ciscoasa(config)# alarm facility temperature secondary syslog
Related Commands Command Description
alarm contact description
Specifies the description for the alarm inputs.
alarm contact severity Specifies the severity of alarms.
alarm contact trigger Specifies a trigger for one or all alarm inputs.
alarm facility input-alarm
Specifies the logging and notification options for alarm inputs.
alarm facility power-supply rps
Configures the power supply alarms.
alarm facility temperature
Configures the temperature alarms.
show alarm settings Displays all global alarm settings.
show environment alarm-contact
Displays all external alarm settings.
show facility-alarm relay
Displays relay in activated state.
show facility-alarm status
Displays all triggered alarms, or alarms based on severity specified.
clear facility-alarm output
De-energizes the output relay and clears the alarm state of the LED.
2-51Cisco ASA Series Command Reference, A through H Commands
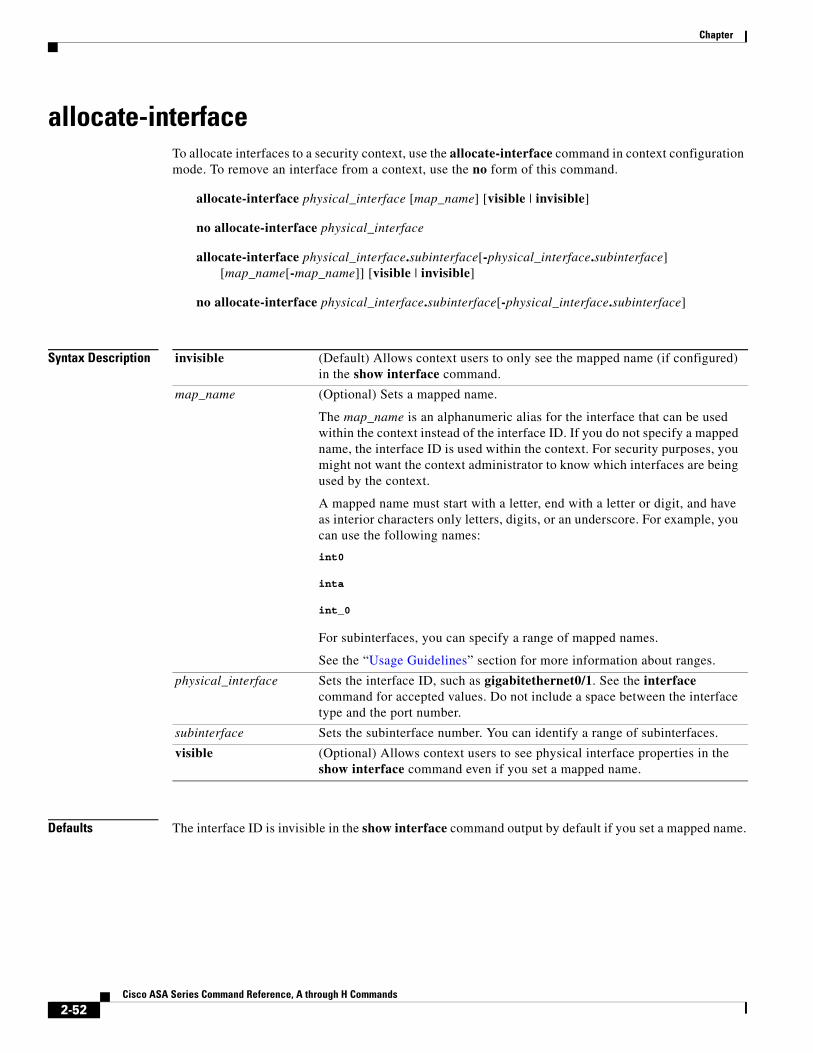
Chapter
allocate-interfaceTo allocate interfaces to a security context, use the allocate-interface command in context configuration mode. To remove an interface from a context, use the no form of this command.
allocate-interface physical_interface [map_name] [visible | invisible]
no allocate-interface physical_interface
allocate-interface physical_interface.subinterface[-physical_interface.subinterface] [map_name[-map_name]] [visible | invisible]
no allocate-interface physical_interface.subinterface[-physical_interface.subinterface]
Syntax Description
Defaults The interface ID is invisible in the show interface command output by default if you set a mapped name.
invisible (Default) Allows context users to only see the mapped name (if configured) in the show interface command.
map_name (Optional) Sets a mapped name.
The map_name is an alphanumeric alias for the interface that can be used within the context instead of the interface ID. If you do not specify a mapped name, the interface ID is used within the context. For security purposes, you might not want the context administrator to know which interfaces are being used by the context.
A mapped name must start with a letter, end with a letter or digit, and have as interior characters only letters, digits, or an underscore. For example, you can use the following names:
int0
inta
int_0
For subinterfaces, you can specify a range of mapped names.
See the “Usage Guidelines” section for more information about ranges.
physical_interface Sets the interface ID, such as gigabitethernet0/1. See the interface command for accepted values. Do not include a space between the interface type and the port number.
subinterface Sets the subinterface number. You can identify a range of subinterfaces.
visible (Optional) Allows context users to see physical interface properties in the show interface command even if you set a mapped name.
2-52Cisco ASA Series Command Reference, A through H Commands
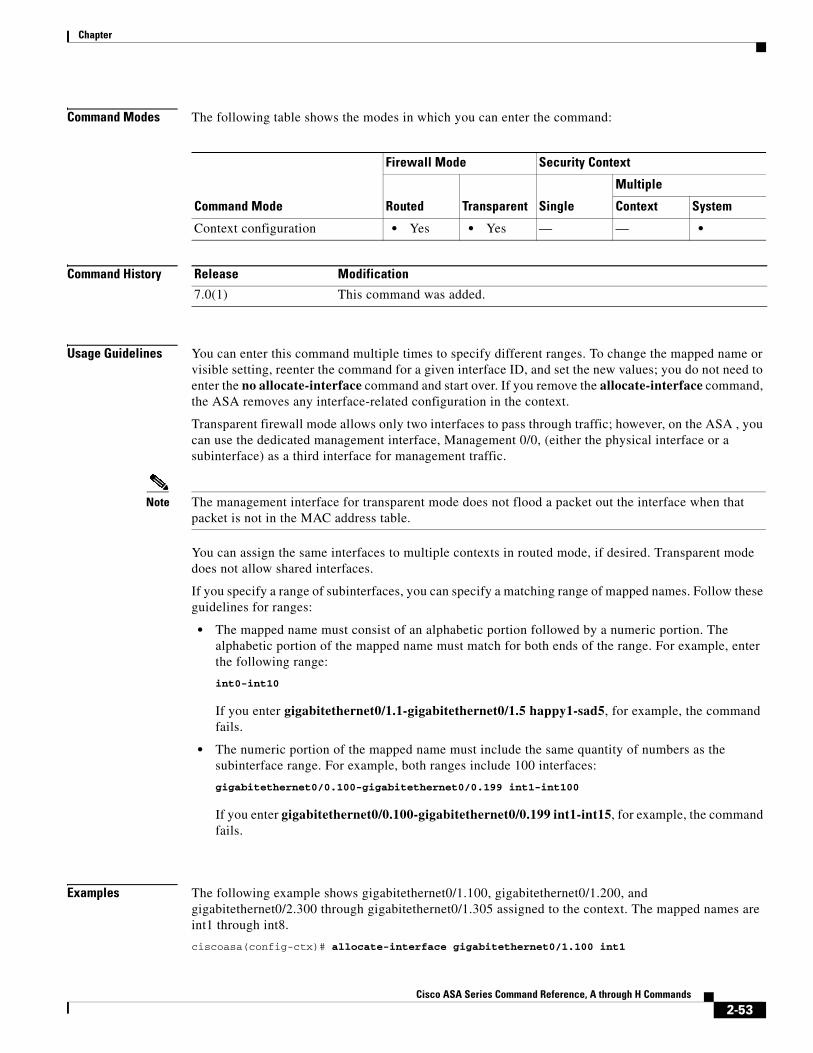
Chapter
Command Modes The following table shows the modes in which you can enter the command:
Command History
Usage Guidelines You can enter this command multiple times to specify different ranges. To change the mapped name or visible setting, reenter the command for a given interface ID, and set the new values; you do not need to enter the no allocate-interface command and start over. If you remove the allocate-interface command, the ASA removes any interface-related configuration in the context.
Transparent firewall mode allows only two interfaces to pass through traffic; however, on the ASA , you can use the dedicated management interface, Management 0/0, (either the physical interface or a subinterface) as a third interface for management traffic.
Note The management interface for transparent mode does not flood a packet out the interface when that packet is not in the MAC address table.
You can assign the same interfaces to multiple contexts in routed mode, if desired. Transparent mode does not allow shared interfaces.
If you specify a range of subinterfaces, you can specify a matching range of mapped names. Follow these guidelines for ranges:
• The mapped name must consist of an alphabetic portion followed by a numeric portion. The alphabetic portion of the mapped name must match for both ends of the range. For example, enter the following range:
int0-int10
If you enter gigabitethernet0/1.1-gigabitethernet0/1.5 happy1-sad5, for example, the command fails.
• The numeric portion of the mapped name must include the same quantity of numbers as the subinterface range. For example, both ranges include 100 interfaces:
gigabitethernet0/0.100-gigabitethernet0/0.199 int1-int100
If you enter gigabitethernet0/0.100-gigabitethernet0/0.199 int1-int15, for example, the command fails.
Examples The following example shows gigabitethernet0/1.100, gigabitethernet0/1.200, and gigabitethernet0/2.300 through gigabitethernet0/1.305 assigned to the context. The mapped names are int1 through int8.
ciscoasa(config-ctx)# allocate-interface gigabitethernet0/1.100 int1
Command Mode
Firewall Mode Security Context
Routed Transparent Single
Multiple
Context System
Context configuration • Yes • Yes — — •
Release Modification
7.0(1) This command was added.
2-53Cisco ASA Series Command Reference, A through H Commands
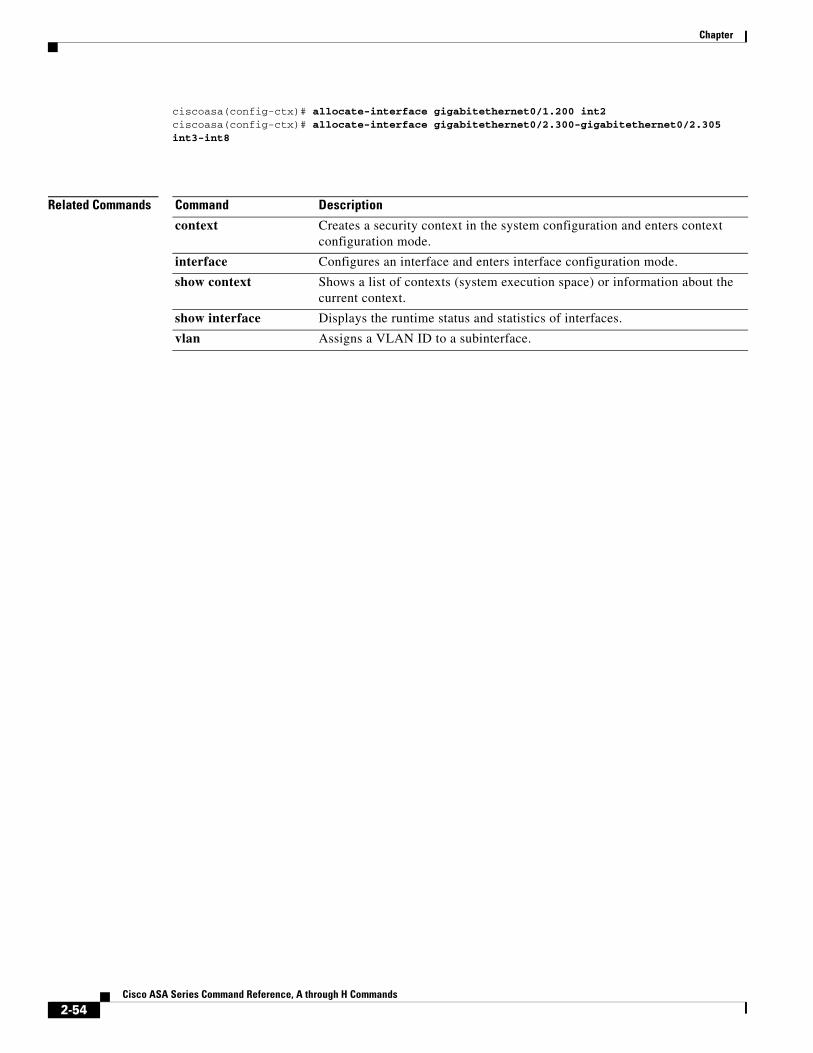
Chapter
ciscoasa(config-ctx)# allocate-interface gigabitethernet0/1.200 int2ciscoasa(config-ctx)# allocate-interface gigabitethernet0/2.300-gigabitethernet0/2.305 int3-int8
Related Commands Command Description
context Creates a security context in the system configuration and enters context configuration mode.
interface Configures an interface and enters interface configuration mode.
show context Shows a list of contexts (system execution space) or information about the current context.
show interface Displays the runtime status and statistics of interfaces.
vlan Assigns a VLAN ID to a subinterface.
2-54Cisco ASA Series Command Reference, A through H Commands
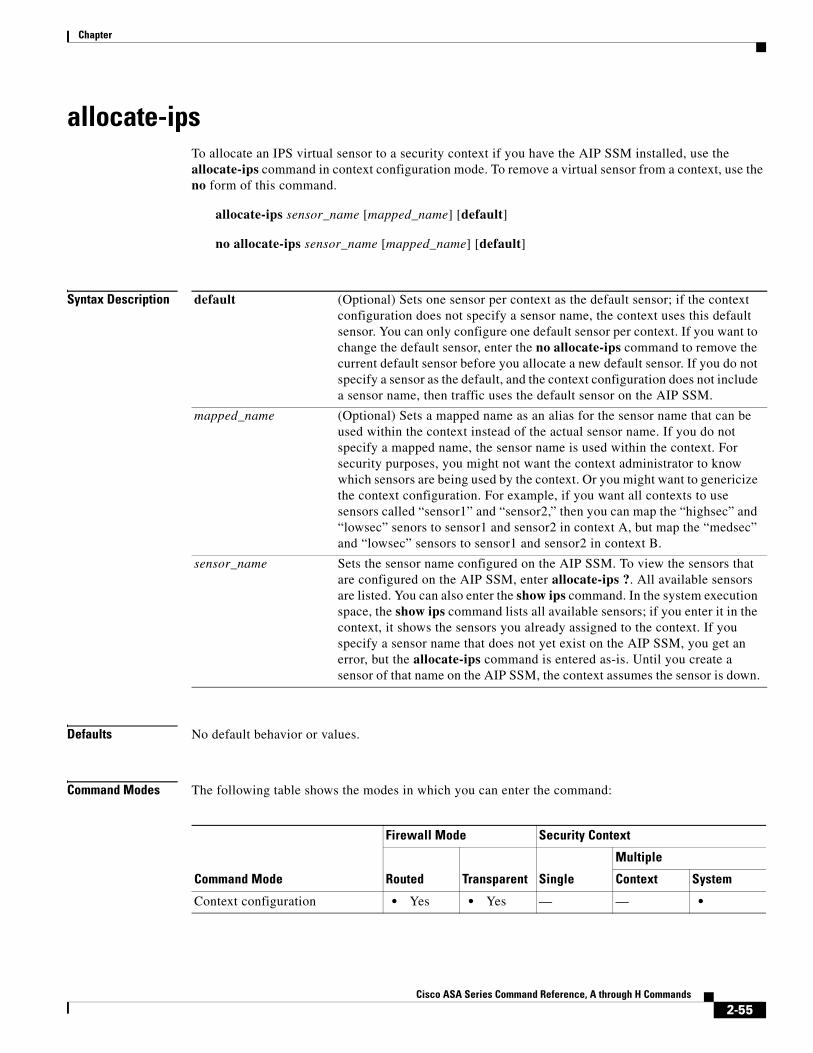
Chapter
allocate-ipsTo allocate an IPS virtual sensor to a security context if you have the AIP SSM installed, use the allocate-ips command in context configuration mode. To remove a virtual sensor from a context, use the no form of this command.
allocate-ips sensor_name [mapped_name] [default]
no allocate-ips sensor_name [mapped_name] [default]
Syntax Description
Defaults No default behavior or values.
Command Modes The following table shows the modes in which you can enter the command:
default (Optional) Sets one sensor per context as the default sensor; if the context configuration does not specify a sensor name, the context uses this default sensor. You can only configure one default sensor per context. If you want to change the default sensor, enter the no allocate-ips command to remove the current default sensor before you allocate a new default sensor. If you do not specify a sensor as the default, and the context configuration does not include a sensor name, then traffic uses the default sensor on the AIP SSM.
mapped_name (Optional) Sets a mapped name as an alias for the sensor name that can be used within the context instead of the actual sensor name. If you do not specify a mapped name, the sensor name is used within the context. For security purposes, you might not want the context administrator to know which sensors are being used by the context. Or you might want to genericize the context configuration. For example, if you want all contexts to use sensors called “sensor1” and “sensor2,” then you can map the “highsec” and “lowsec” senors to sensor1 and sensor2 in context A, but map the “medsec” and “lowsec” sensors to sensor1 and sensor2 in context B.
sensor_name Sets the sensor name configured on the AIP SSM. To view the sensors that are configured on the AIP SSM, enter allocate-ips ?. All available sensors are listed. You can also enter the show ips command. In the system execution space, the show ips command lists all available sensors; if you enter it in the context, it shows the sensors you already assigned to the context. If you specify a sensor name that does not yet exist on the AIP SSM, you get an error, but the allocate-ips command is entered as-is. Until you create a sensor of that name on the AIP SSM, the context assumes the sensor is down.
Command Mode
Firewall Mode Security Context
Routed Transparent Single
Multiple
Context System
Context configuration • Yes • Yes — — •
2-55Cisco ASA Series Command Reference, A through H Commands
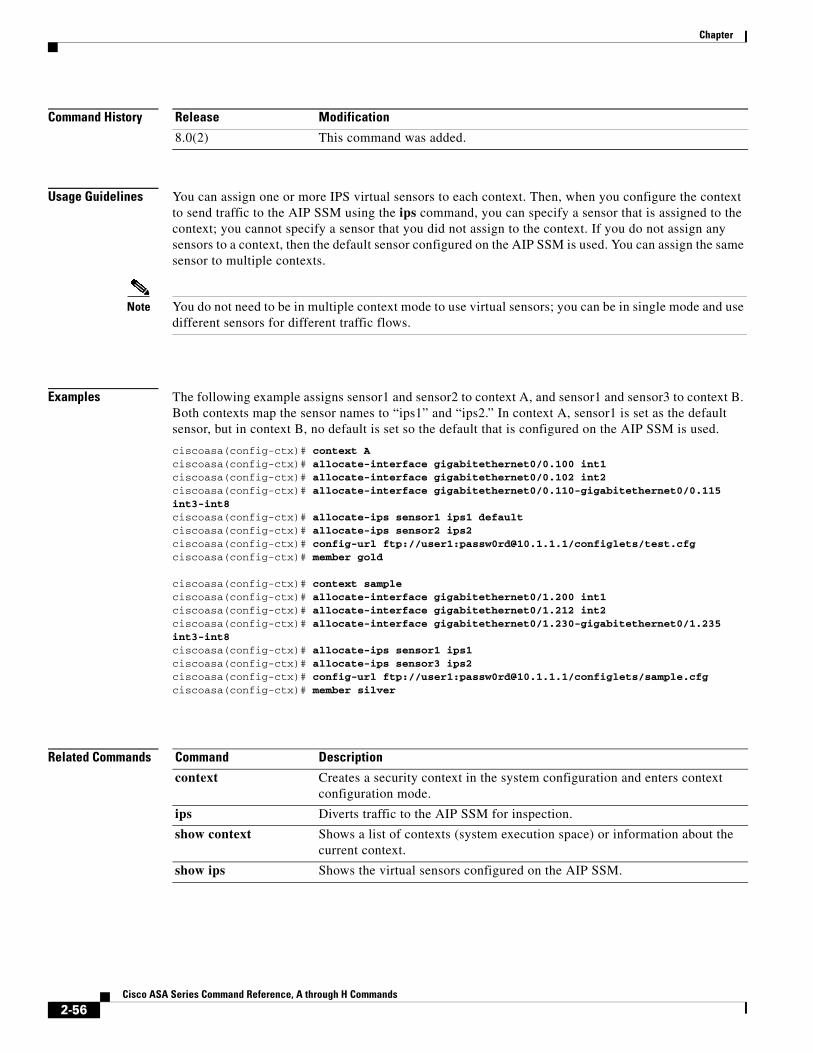
Chapter
Command History
Usage Guidelines You can assign one or more IPS virtual sensors to each context. Then, when you configure the context to send traffic to the AIP SSM using the ips command, you can specify a sensor that is assigned to the context; you cannot specify a sensor that you did not assign to the context. If you do not assign any sensors to a context, then the default sensor configured on the AIP SSM is used. You can assign the same sensor to multiple contexts.
Note You do not need to be in multiple context mode to use virtual sensors; you can be in single mode and use different sensors for different traffic flows.
Examples The following example assigns sensor1 and sensor2 to context A, and sensor1 and sensor3 to context B. Both contexts map the sensor names to “ips1” and “ips2.” In context A, sensor1 is set as the default sensor, but in context B, no default is set so the default that is configured on the AIP SSM is used.
ciscoasa(config-ctx)# context Aciscoasa(config-ctx)# allocate-interface gigabitethernet0/0.100 int1ciscoasa(config-ctx)# allocate-interface gigabitethernet0/0.102 int2ciscoasa(config-ctx)# allocate-interface gigabitethernet0/0.110-gigabitethernet0/0.115 int3-int8ciscoasa(config-ctx)# allocate-ips sensor1 ips1 defaultciscoasa(config-ctx)# allocate-ips sensor2 ips2ciscoasa(config-ctx)# config-url ftp://user1:[email protected]/configlets/test.cfgciscoasa(config-ctx)# member gold
ciscoasa(config-ctx)# context sampleciscoasa(config-ctx)# allocate-interface gigabitethernet0/1.200 int1ciscoasa(config-ctx)# allocate-interface gigabitethernet0/1.212 int2ciscoasa(config-ctx)# allocate-interface gigabitethernet0/1.230-gigabitethernet0/1.235 int3-int8ciscoasa(config-ctx)# allocate-ips sensor1 ips1ciscoasa(config-ctx)# allocate-ips sensor3 ips2ciscoasa(config-ctx)# config-url ftp://user1:[email protected]/configlets/sample.cfgciscoasa(config-ctx)# member silver
Related Commands
Release Modification
8.0(2) This command was added.
Command Description
context Creates a security context in the system configuration and enters context configuration mode.
ips Diverts traffic to the AIP SSM for inspection.
show context Shows a list of contexts (system execution space) or information about the current context.
show ips Shows the virtual sensors configured on the AIP SSM.
2-56Cisco ASA Series Command Reference, A through H Commands
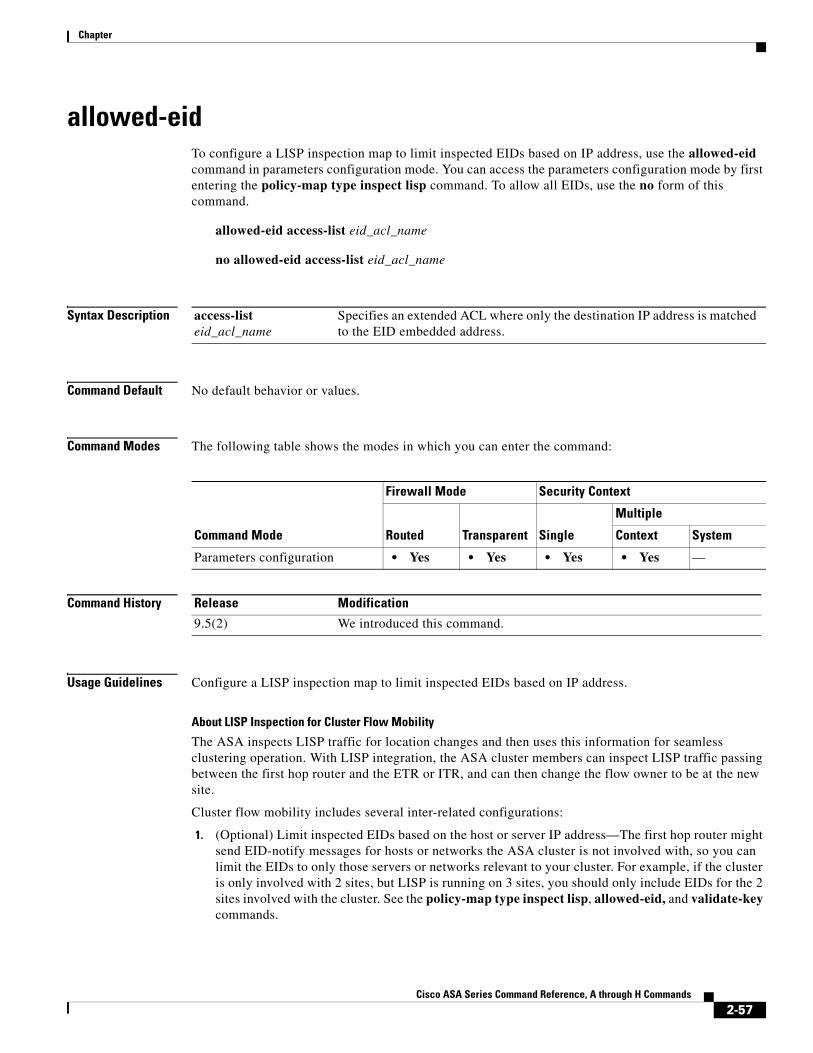
Chapter
allowed-eidTo configure a LISP inspection map to limit inspected EIDs based on IP address, use the allowed-eid command in parameters configuration mode. You can access the parameters configuration mode by first entering the policy-map type inspect lisp command. To allow all EIDs, use the no form of this command.
allowed-eid access-list eid_acl_name
no allowed-eid access-list eid_acl_name
Syntax Description
Command Default No default behavior or values.
Command Modes The following table shows the modes in which you can enter the command:
Command History
Usage Guidelines Configure a LISP inspection map to limit inspected EIDs based on IP address.
About LISP Inspection for Cluster Flow Mobility
The ASA inspects LISP traffic for location changes and then uses this information for seamless clustering operation. With LISP integration, the ASA cluster members can inspect LISP traffic passing between the first hop router and the ETR or ITR, and can then change the flow owner to be at the new site.
Cluster flow mobility includes several inter-related configurations:
1. (Optional) Limit inspected EIDs based on the host or server IP address—The first hop router might send EID-notify messages for hosts or networks the ASA cluster is not involved with, so you can limit the EIDs to only those servers or networks relevant to your cluster. For example, if the cluster is only involved with 2 sites, but LISP is running on 3 sites, you should only include EIDs for the 2 sites involved with the cluster. See the policy-map type inspect lisp, allowed-eid, and validate-key commands.
access-list eid_acl_name
Specifies an extended ACL where only the destination IP address is matched to the EID embedded address.
Command Mode
Firewall Mode Security Context
Routed Transparent Single
Multiple
Context System
Parameters configuration • Yes • Yes • Yes • Yes —
Release Modification
9.5(2) We introduced this command.
2-57Cisco ASA Series Command Reference, A through H Commands
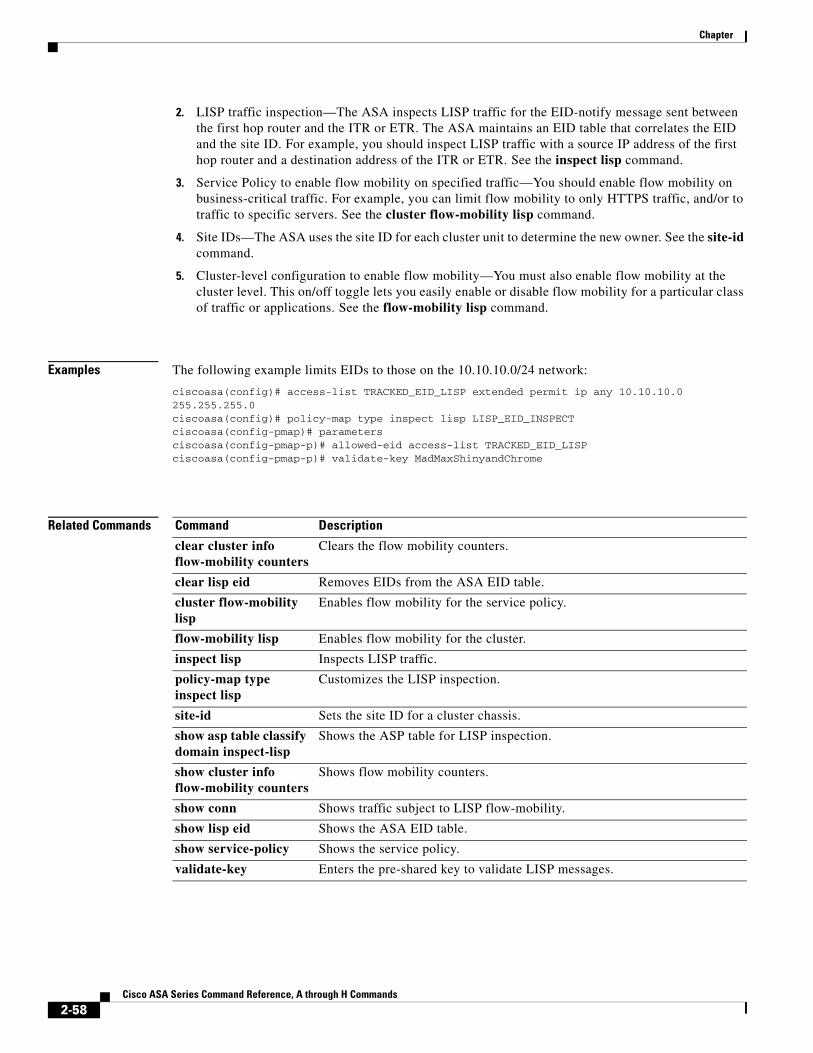
Chapter
2. LISP traffic inspection—The ASA inspects LISP traffic for the EID-notify message sent between the first hop router and the ITR or ETR. The ASA maintains an EID table that correlates the EID and the site ID. For example, you should inspect LISP traffic with a source IP address of the first hop router and a destination address of the ITR or ETR. See the inspect lisp command.
3. Service Policy to enable flow mobility on specified traffic—You should enable flow mobility on business-critical traffic. For example, you can limit flow mobility to only HTTPS traffic, and/or to traffic to specific servers. See the cluster flow-mobility lisp command.
4. Site IDs—The ASA uses the site ID for each cluster unit to determine the new owner. See the site-id command.
5. Cluster-level configuration to enable flow mobility—You must also enable flow mobility at the cluster level. This on/off toggle lets you easily enable or disable flow mobility for a particular class of traffic or applications. See the flow-mobility lisp command.
Examples The following example limits EIDs to those on the 10.10.10.0/24 network:
ciscoasa(config)# access-list TRACKED_EID_LISP extended permit ip any 10.10.10.0 255.255.255.0ciscoasa(config)# policy-map type inspect lisp LISP_EID_INSPECTciscoasa(config-pmap)# parameters ciscoasa(config-pmap-p)# allowed-eid access-list TRACKED_EID_LISPciscoasa(config-pmap-p)# validate-key MadMaxShinyandChrome
Related Commands Command Description
clear cluster info flow-mobility counters
Clears the flow mobility counters.
clear lisp eid Removes EIDs from the ASA EID table.
cluster flow-mobility lisp
Enables flow mobility for the service policy.
flow-mobility lisp Enables flow mobility for the cluster.
inspect lisp Inspects LISP traffic.
policy-map type inspect lisp
Customizes the LISP inspection.
site-id Sets the site ID for a cluster chassis.
show asp table classify domain inspect-lisp
Shows the ASP table for LISP inspection.
show cluster info flow-mobility counters
Shows flow mobility counters.
show conn Shows traffic subject to LISP flow-mobility.
show lisp eid Shows the ASA EID table.
show service-policy Shows the service policy.
validate-key Enters the pre-shared key to validate LISP messages.
2-58Cisco ASA Series Command Reference, A through H Commands

Chapter
allow-ssc-mgmtTo set an interface on the ASA 5505 to be the SSC management interface, use the allow-ssc-mgmt command in interface configuration mode. To unassign an interface, use the no form of this command.
allow-ssc-mgmt
no allow-ssc-mgmt
Syntax Description This command has no arguments or keywords.
Command Default This command is enabled in the factory default configuration for VLAN 1.
Command Modes The following table shows the modes in which you can enter the command:
Command History
Usage Guidelines An SSC does not have any external interfaces. You can configure a VLAN as a management VLAN to allow access to an internal management IP address over the backplane. By default, VLAN 1 is enabled for the SSC management address. You can only assign one VLAN as the SSC management VLAN.
Do not configure NAT for the management address if you intend to access it using ASDM. For initial setup with ASDM, you need to access the real address. After initial setup (where you set the password in the SSC), you can configure NAT and supply ASDM with the translated address when you want to access the SSC.
Examples The following example disables management access on VLAN 1, and enables it for VLAN 2:
ciscoasa(config)# interface vlan 1ciscoasa(config-if)# no allow-ssc-mgmtciscoasa(config-if)# interface vlan 2ciscoasa(config-if)# allow-ssc-mgmt
Related Commands
Command Mode
Firewall Mode Security Context
Routed Transparent Single
Multiple
Context System
Interface configuration • Yes • Yes • Yes — —
Release Modification
8.2(1) This command was added.
Command Description
interface Configures an interface.
2-59Cisco ASA Series Command Reference, A through H Commands
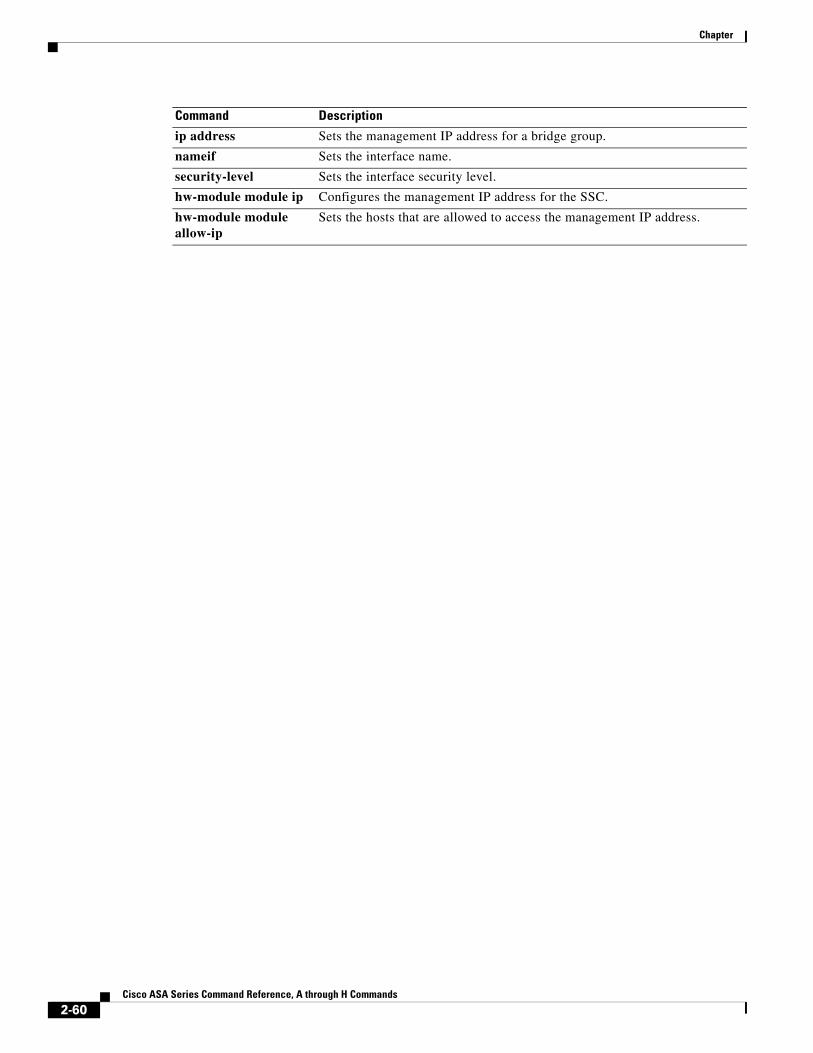
Chapter
ip address Sets the management IP address for a bridge group.
nameif Sets the interface name.
security-level Sets the interface security level.
hw-module module ip Configures the management IP address for the SSC.
hw-module module allow-ip
Sets the hosts that are allowed to access the management IP address.
Command Description
2-60Cisco ASA Series Command Reference, A through H Commands
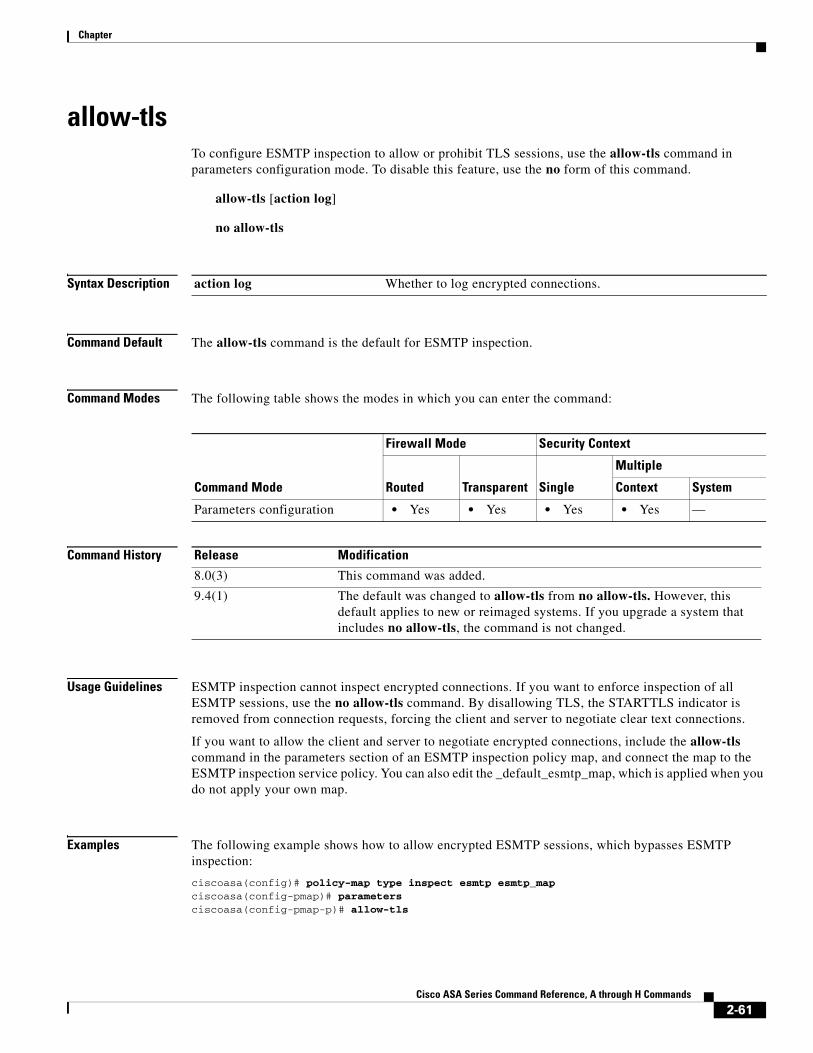
Chapter
allow-tlsTo configure ESMTP inspection to allow or prohibit TLS sessions, use the allow-tls command in parameters configuration mode. To disable this feature, use the no form of this command.
allow-tls [action log]
no allow-tls
Syntax Description
Command Default The allow-tls command is the default for ESMTP inspection.
Command Modes The following table shows the modes in which you can enter the command:
Command History
Usage Guidelines ESMTP inspection cannot inspect encrypted connections. If you want to enforce inspection of all ESMTP sessions, use the no allow-tls command. By disallowing TLS, the STARTTLS indicator is removed from connection requests, forcing the client and server to negotiate clear text connections.
If you want to allow the client and server to negotiate encrypted connections, include the allow-tls command in the parameters section of an ESMTP inspection policy map, and connect the map to the ESMTP inspection service policy. You can also edit the _default_esmtp_map, which is applied when you do not apply your own map.
Examples The following example shows how to allow encrypted ESMTP sessions, which bypasses ESMTP inspection:
ciscoasa(config)# policy-map type inspect esmtp esmtp_map ciscoasa(config-pmap)# parameters ciscoasa(config-pmap-p)# allow-tls
action log Whether to log encrypted connections.
Command Mode
Firewall Mode Security Context
Routed Transparent Single
Multiple
Context System
Parameters configuration • Yes • Yes • Yes • Yes —
Release Modification
8.0(3) This command was added.
9.4(1) The default was changed to allow-tls from no allow-tls. However, this default applies to new or reimaged systems. If you upgrade a system that includes no allow-tls, the command is not changed.
2-61Cisco ASA Series Command Reference, A through H Commands
Chapter
Related Commands Command Description
policy-map type inspect esmtp
Configures an ESMTP policy map for inspection.
2-62Cisco ASA Series Command Reference, A through H Commands
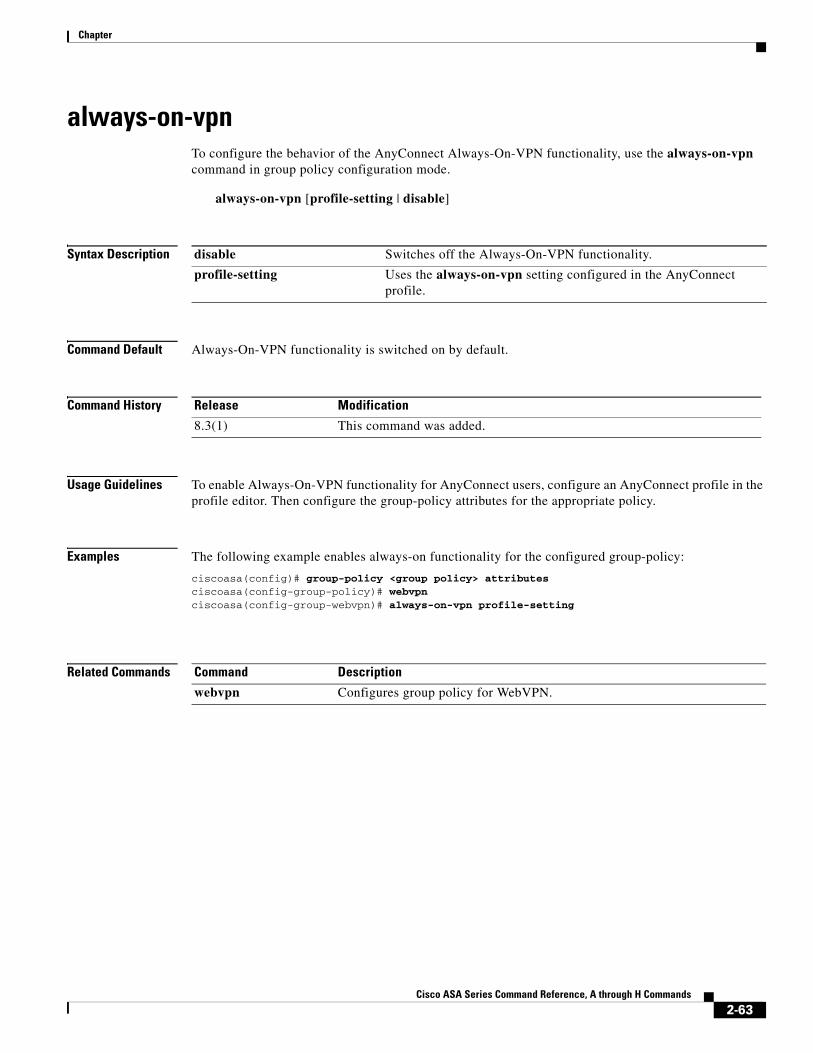
Chapter
always-on-vpnTo configure the behavior of the AnyConnect Always-On-VPN functionality, use the always-on-vpn command in group policy configuration mode.
always-on-vpn [profile-setting | disable]
Syntax Description
Command Default Always-On-VPN functionality is switched on by default.
Command History
Usage Guidelines To enable Always-On-VPN functionality for AnyConnect users, configure an AnyConnect profile in the profile editor. Then configure the group-policy attributes for the appropriate policy.
Examples The following example enables always-on functionality for the configured group-policy:
ciscoasa(config)# group-policy <group policy> attributesciscoasa(config-group-policy)# webvpnciscoasa(config-group-webvpn)# always-on-vpn profile-setting
Related Commands
disable Switches off the Always-On-VPN functionality.
profile-setting Uses the always-on-vpn setting configured in the AnyConnect profile.
Release Modification
8.3(1) This command was added.
Command Description
webvpn Configures group policy for WebVPN.
2-63Cisco ASA Series Command Reference, A through H Commands
Chapter
anyconnect askTo enable the ASA to prompt remote SSL VPN client users to download the client, use the anyconnect ask command in group policy webvpn or username webvpn configuration modes. To remove the command from the configuration, use the no form of the command.
anyconnect ask {none | enable [default {webvpn | anyconnect} timeout value]}
no anyconnect ask none [default {webvpn | anyconnect}]
Syntax Description
Defaults The default for this command is anyconnect ask none default webvpn. The ASA immediately displays the portal page for clientless connections.
Command Modes The following table shows the modes in which you can enter the command:
Command History
Usage Guidelines Figure 2-1 shows the prompt displayed to remote users when either the default anyconnect timeout value command or default webvpn timeout value command is configured:
default anyconnect timeout value
Prompts the remote user to download the client or goes to the portal page for clientless connections, and waits the duration of value before taking the default action—downloading the client.
default webvpn timeout value Prompts the remote user to download the client or goes to the portal page for clientless connections, and waits the duration of value before taking the default action—displaying the WebVPN portal page.
enable Prompts the remote user to download the client or goes to the portal page for clientless connections and waits indefinitely for user response.
none Immediately performs the default action.
Command Mode
Firewall Mode Security Context
Routed Transparent Single
Multiple
Context System
Group policy webvpn configuration • Yes — • Yes — —
Username webvpn configuration • Yes — • Yes — —
Release Modification
8.0(2) This command was added.
8.4(1) The anyconnect ask command replaced the svc ask command.
2-64Cisco ASA Series Command Reference, A through H Commands
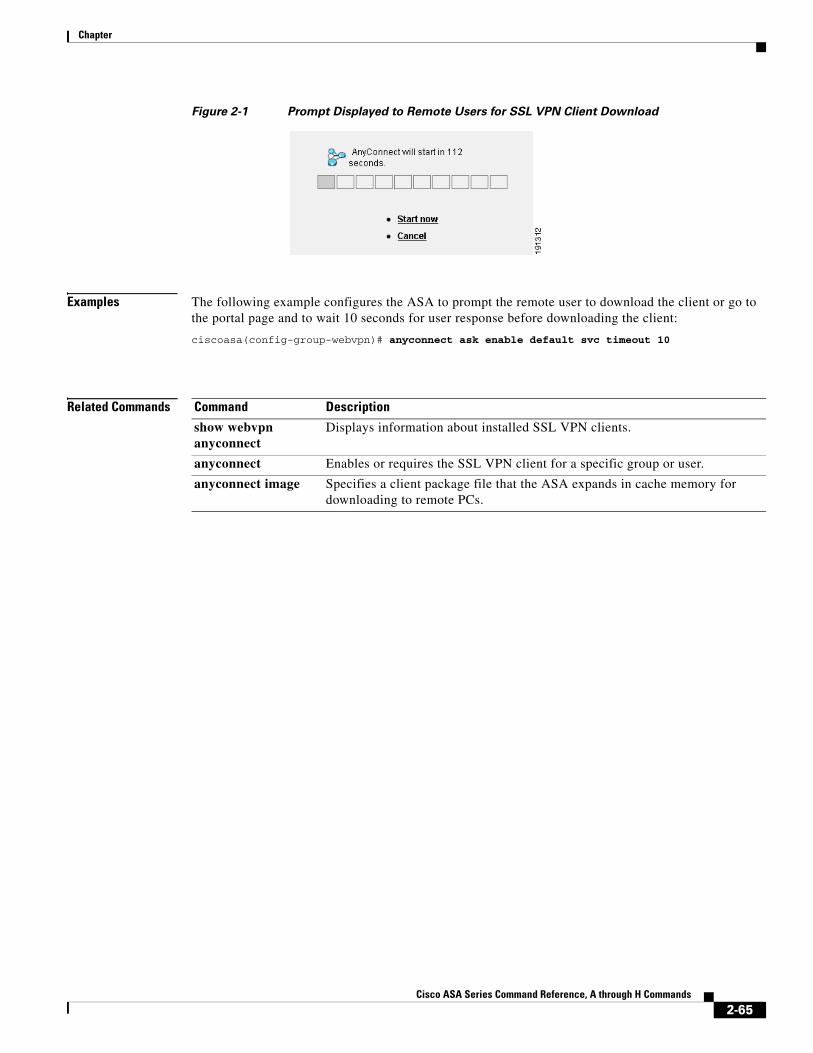
Chapter
Figure 2-1 Prompt Displayed to Remote Users for SSL VPN Client Download
Examples The following example configures the ASA to prompt the remote user to download the client or go to the portal page and to wait 10 seconds for user response before downloading the client:
ciscoasa(config-group-webvpn)# anyconnect ask enable default svc timeout 10
Related Commands Command Description
show webvpn anyconnect
Displays information about installed SSL VPN clients.
anyconnect Enables or requires the SSL VPN client for a specific group or user.
anyconnect image Specifies a client package file that the ASA expands in cache memory for downloading to remote PCs.
2-65Cisco ASA Series Command Reference, A through H Commands
Chapter
anyconnect-custom (Version 9.0 through 9.2) To set or update the value of a custom attribute, use the anyconnect-custom command in anyconnect-custom-attr configuration mode. To remove the value of a custom attribute, use the no form of this command.
anyconnect-custom attr-name value attr-value
anyconnect-custom attr-name none
no anyconnect-custom attr-name
Syntax Description
Command Modes The following table shows the modes in which you can enter the command:
Command History
Usage Guidelines This command sets the value of a custom attribute in a group policy. The AnyConnect Administrator’s Guide lists which values are valid for the custom attributes that apply to that release. Custom attributes are created with the anyconnect-custom-attr command.
Multiple instances of this command are supported to build a multiline value for an attribute. All data associated with a given attribute name is delivered to the client in the order that it is entered in the CLI. Individual lines of a multiline value can not be removed.
The no form of this command does not allow the value or none keywords.
If the data associated with an attribute name is entered in multiple CLI lines, it will be sent to the endpoint as a single concatenated string delimited by the newline character (\n).
Examples The following example configures a custom attribute for an AnyConnect Deferred Update:
ciscoasa(config-group-policy)# anyconnect-custom DeferredUpdateAllowed true
attr-name The name of the attribute in the current group policy, as defined by the anyconnnect-custom-attr command.
none Immediately performs the default action.
value attr-value A string containing the attribute value. The value is associated with the attribute name and passed to the client during connection setup. The maximum length is 450 characters.
Command Mode
Firewall Mode Security Context
Routed Transparent Single
Multiple
Context System
anyconnect-custom-attr configuration • Yes — • Yes — —
Release Modification
9.0(1) This command was added.
2-66Cisco ASA Series Command Reference, A through H Commands
Chapter
Related Commands Command Description
show run webvpn Displays configuration information about WebVPN, including anyconnect commands.
show run group-policy
Displays configuration information about current group policies.
anyconnect-custom-attr
Creates custom attributes.
2-67Cisco ASA Series Command Reference, A through H Commands
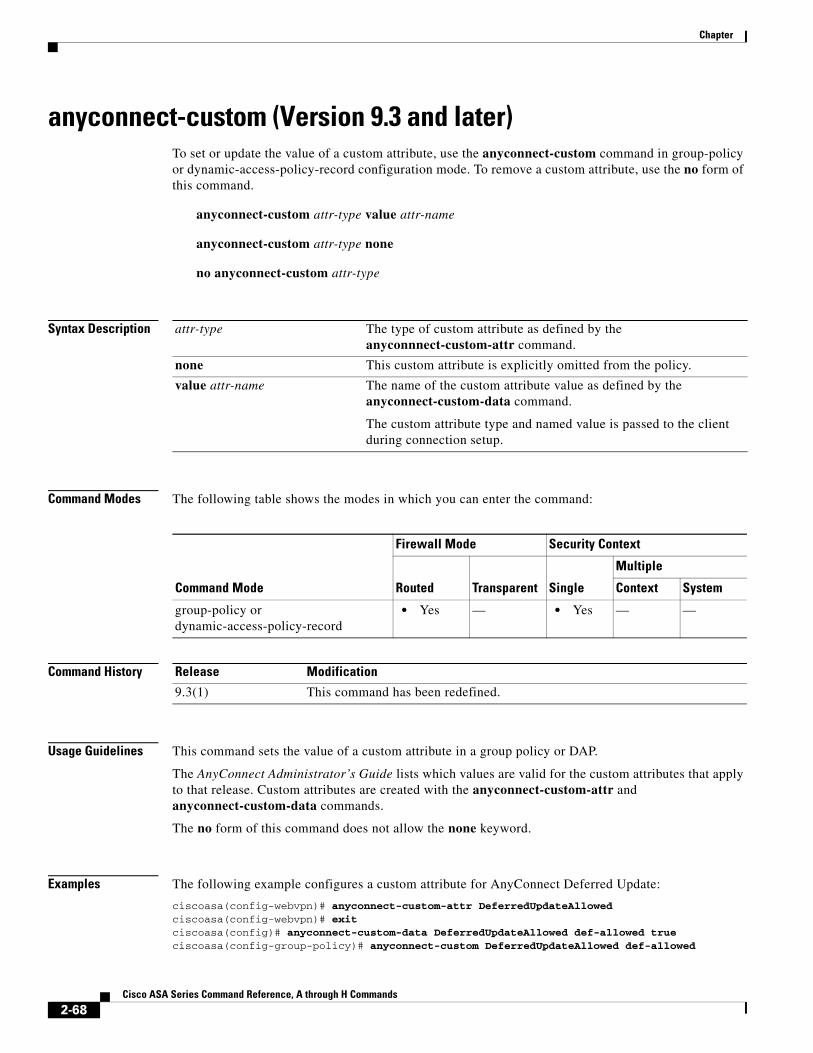
Chapter
anyconnect-custom (Version 9.3 and later)To set or update the value of a custom attribute, use the anyconnect-custom command in group-policy or dynamic-access-policy-record configuration mode. To remove a custom attribute, use the no form of this command.
anyconnect-custom attr-type value attr-name
anyconnect-custom attr-type none
no anyconnect-custom attr-type
Syntax Description
Command Modes The following table shows the modes in which you can enter the command:
Command History
Usage Guidelines This command sets the value of a custom attribute in a group policy or DAP.
The AnyConnect Administrator’s Guide lists which values are valid for the custom attributes that apply to that release. Custom attributes are created with the anyconnect-custom-attr and anyconnect-custom-data commands.
The no form of this command does not allow the none keyword.
Examples The following example configures a custom attribute for AnyConnect Deferred Update:
ciscoasa(config-webvpn)# anyconnect-custom-attr DeferredUpdateAllowedciscoasa(config-webvpn)# exitciscoasa(config)# anyconnect-custom-data DeferredUpdateAllowed def-allowed trueciscoasa(config-group-policy)# anyconnect-custom DeferredUpdateAllowed def-allowed
attr-type The type of custom attribute as defined by the anyconnnect-custom-attr command.
none This custom attribute is explicitly omitted from the policy.
value attr-name The name of the custom attribute value as defined by the anyconnect-custom-data command.
The custom attribute type and named value is passed to the client during connection setup.
Command Mode
Firewall Mode Security Context
Routed Transparent Single
Multiple
Context System
group-policy or dynamic-access-policy-record
• Yes — • Yes — —
Release Modification
9.3(1) This command has been redefined.
2-68Cisco ASA Series Command Reference, A through H Commands
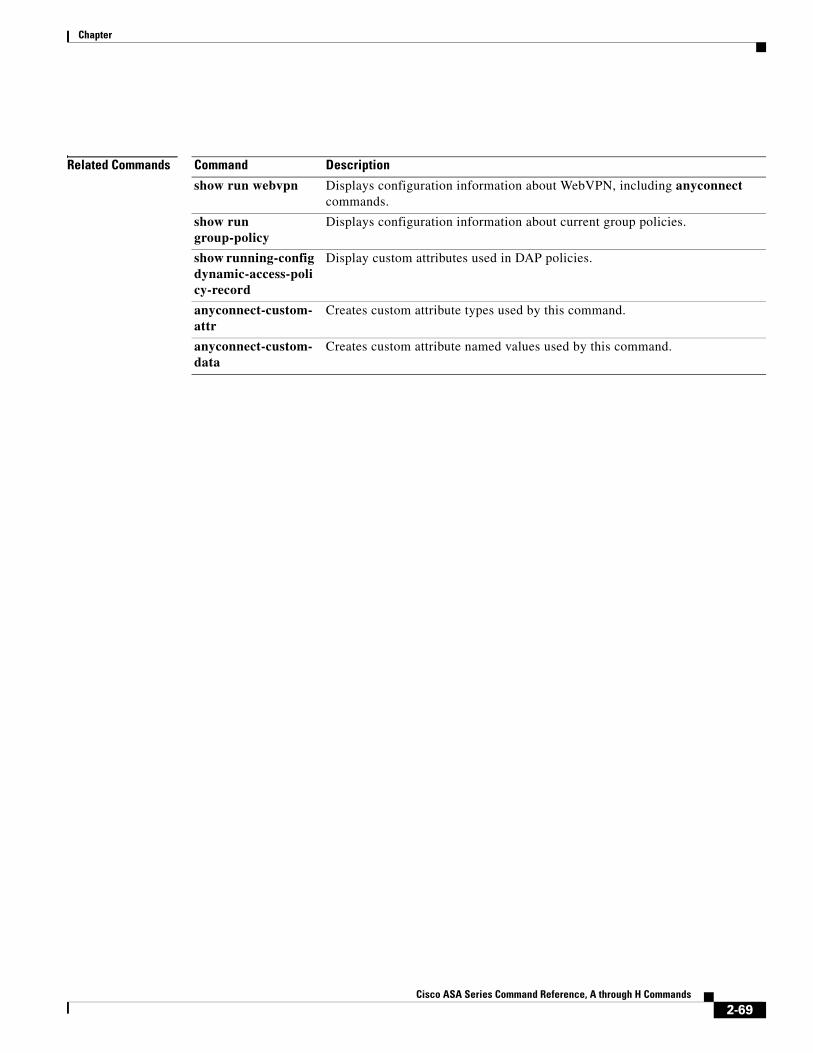
Chapter
Related Commands Command Description
show run webvpn Displays configuration information about WebVPN, including anyconnect commands.
show run group-policy
Displays configuration information about current group policies.
show running-config dynamic-access-policy-record
Display custom attributes used in DAP policies.
anyconnect-custom-attr
Creates custom attribute types used by this command.
anyconnect-custom-data
Creates custom attribute named values used by this command.
2-69Cisco ASA Series Command Reference, A through H Commands
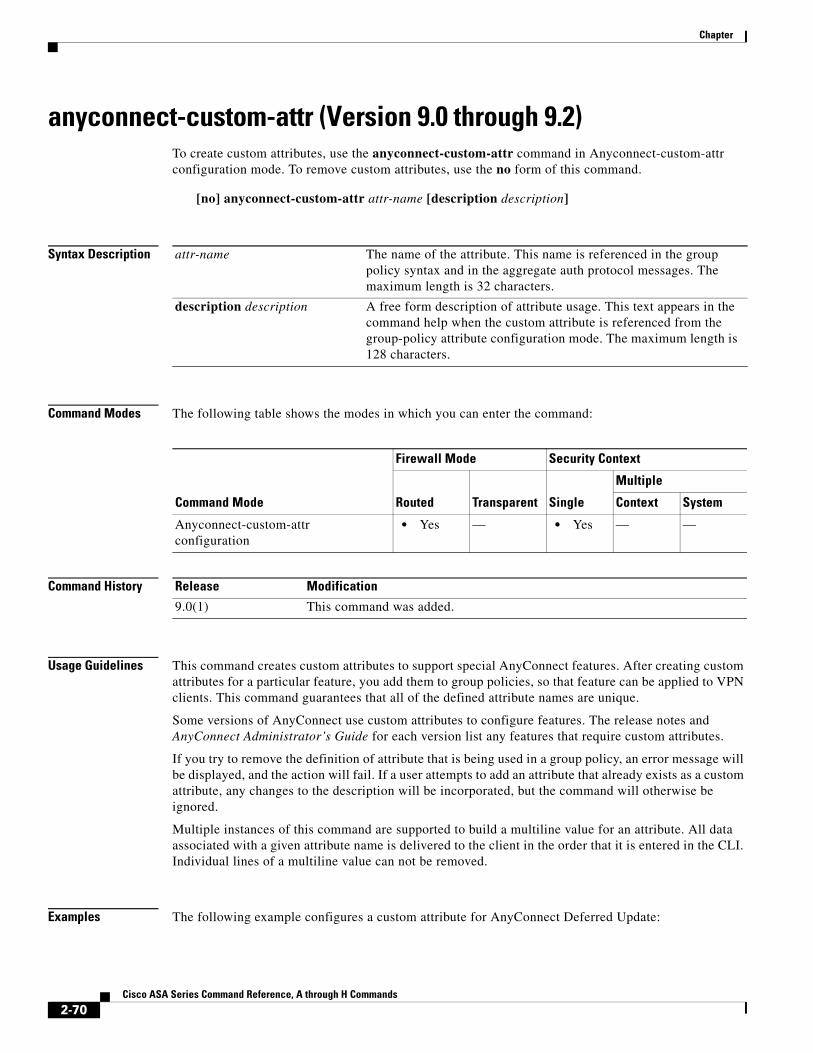
Chapter
anyconnect-custom-attr (Version 9.0 through 9.2) To create custom attributes, use the anyconnect-custom-attr command in Anyconnect-custom-attr configuration mode. To remove custom attributes, use the no form of this command.
[no] anyconnect-custom-attr attr-name [description description]
Syntax Description
Command Modes The following table shows the modes in which you can enter the command:
Command History
Usage Guidelines This command creates custom attributes to support special AnyConnect features. After creating custom attributes for a particular feature, you add them to group policies, so that feature can be applied to VPN clients. This command guarantees that all of the defined attribute names are unique.
Some versions of AnyConnect use custom attributes to configure features. The release notes and AnyConnect Administrator’s Guide for each version list any features that require custom attributes.
If you try to remove the definition of attribute that is being used in a group policy, an error message will be displayed, and the action will fail. If a user attempts to add an attribute that already exists as a custom attribute, any changes to the description will be incorporated, but the command will otherwise be ignored.
Multiple instances of this command are supported to build a multiline value for an attribute. All data associated with a given attribute name is delivered to the client in the order that it is entered in the CLI. Individual lines of a multiline value can not be removed.
Examples The following example configures a custom attribute for AnyConnect Deferred Update:
attr-name The name of the attribute. This name is referenced in the group policy syntax and in the aggregate auth protocol messages. The maximum length is 32 characters.
description description A free form description of attribute usage. This text appears in the command help when the custom attribute is referenced from the group-policy attribute configuration mode. The maximum length is 128 characters.
Command Mode
Firewall Mode Security Context
Routed Transparent Single
Multiple
Context System
Anyconnect-custom-attr configuration
• Yes — • Yes — —
Release Modification
9.0(1) This command was added.
2-70Cisco ASA Series Command Reference, A through H Commands
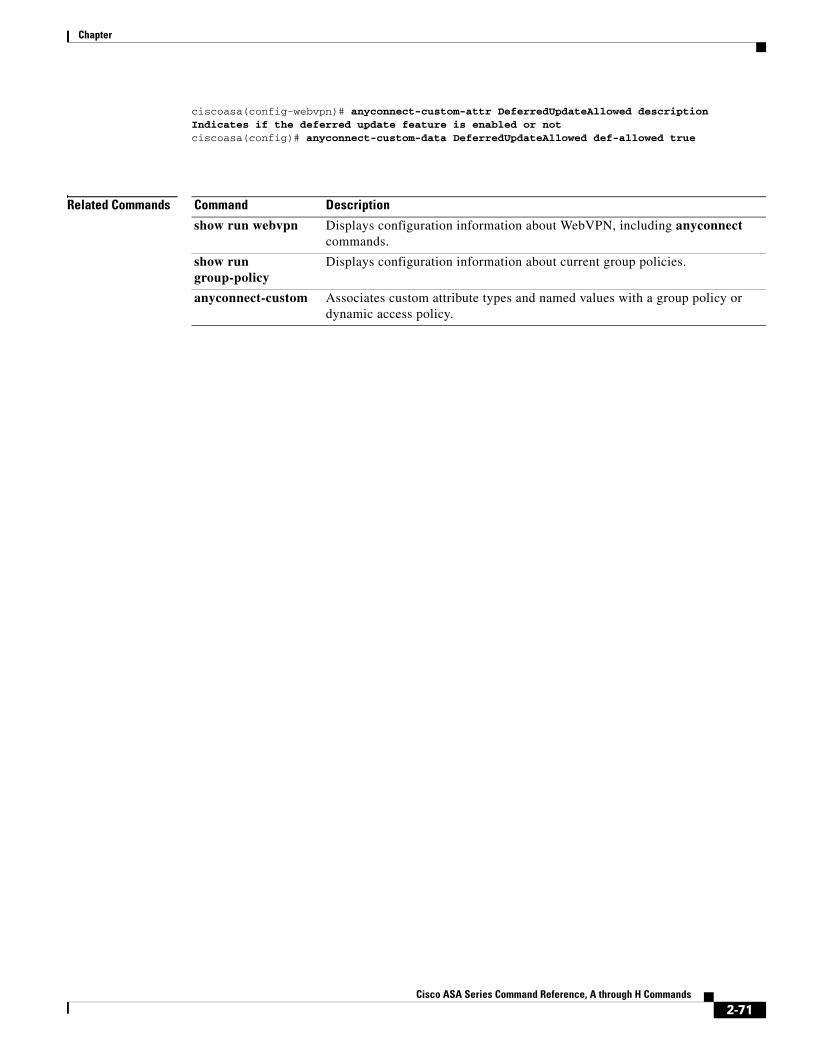
Chapter
ciscoasa(config-webvpn)# anyconnect-custom-attr DeferredUpdateAllowed description Indicates if the deferred update feature is enabled or notciscoasa(config)# anyconnect-custom-data DeferredUpdateAllowed def-allowed true
Related Commands Command Description
show run webvpn Displays configuration information about WebVPN, including anyconnect commands.
show run group-policy
Displays configuration information about current group policies.
anyconnect-custom Associates custom attribute types and named values with a group policy or dynamic access policy.
2-71Cisco ASA Series Command Reference, A through H Commands
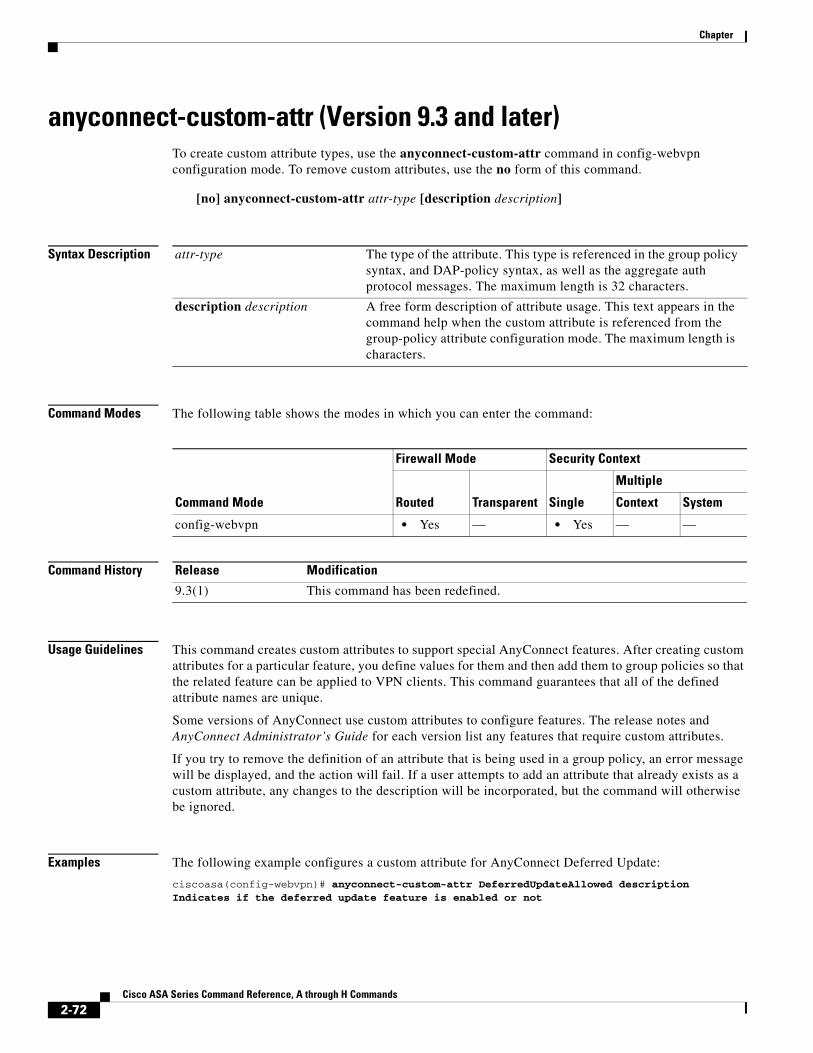
Chapter
anyconnect-custom-attr (Version 9.3 and later)To create custom attribute types, use the anyconnect-custom-attr command in config-webvpn configuration mode. To remove custom attributes, use the no form of this command.
[no] anyconnect-custom-attr attr-type [description description]
Syntax Description
Command Modes The following table shows the modes in which you can enter the command:
Command History
Usage Guidelines This command creates custom attributes to support special AnyConnect features. After creating custom attributes for a particular feature, you define values for them and then add them to group policies so that the related feature can be applied to VPN clients. This command guarantees that all of the defined attribute names are unique.
Some versions of AnyConnect use custom attributes to configure features. The release notes and AnyConnect Administrator’s Guide for each version list any features that require custom attributes.
If you try to remove the definition of an attribute that is being used in a group policy, an error message will be displayed, and the action will fail. If a user attempts to add an attribute that already exists as a custom attribute, any changes to the description will be incorporated, but the command will otherwise be ignored.
Examples The following example configures a custom attribute for AnyConnect Deferred Update:
ciscoasa(config-webvpn)# anyconnect-custom-attr DeferredUpdateAllowed description Indicates if the deferred update feature is enabled or not
attr-type The type of the attribute. This type is referenced in the group policy syntax, and DAP-policy syntax, as well as the aggregate auth protocol messages. The maximum length is 32 characters.
description description A free form description of attribute usage. This text appears in the command help when the custom attribute is referenced from the group-policy attribute configuration mode. The maximum length is characters.
Command Mode
Firewall Mode Security Context
Routed Transparent Single
Multiple
Context System
config-webvpn • Yes — • Yes — —
Release Modification
9.3(1) This command has been redefined.
2-72Cisco ASA Series Command Reference, A through H Commands
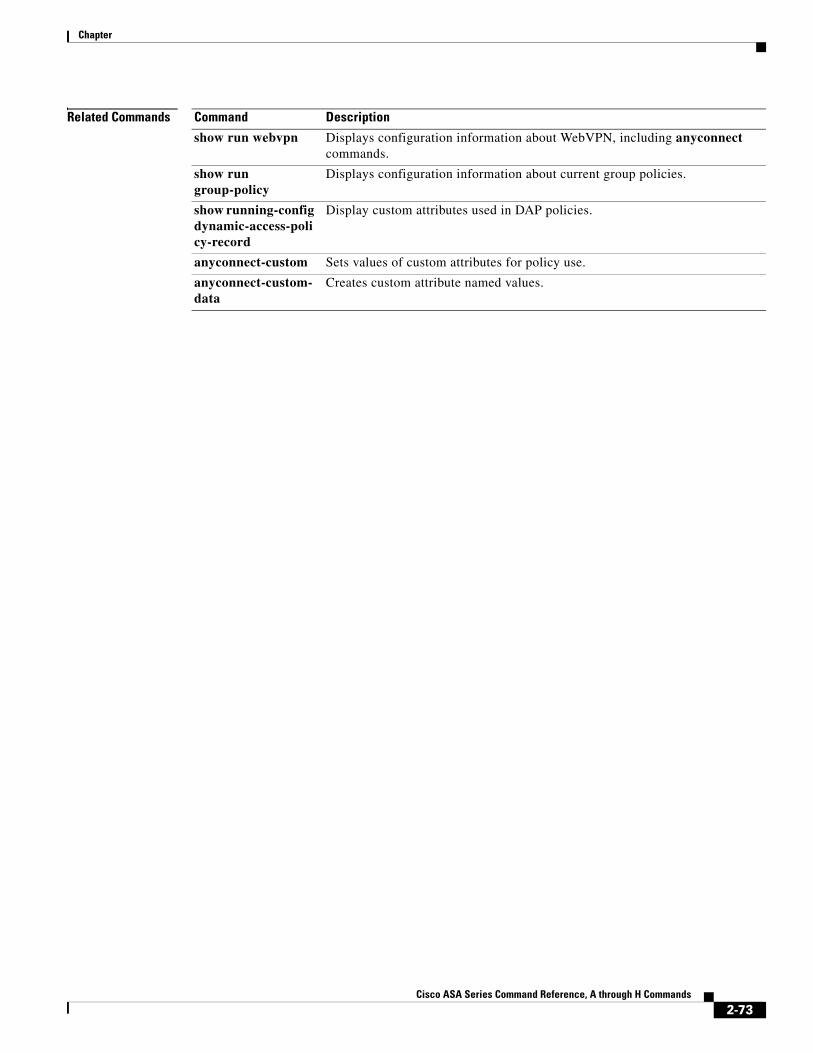
Chapter
Related Commands Command Description
show run webvpn Displays configuration information about WebVPN, including anyconnect commands.
show run group-policy
Displays configuration information about current group policies.
show running-config dynamic-access-policy-record
Display custom attributes used in DAP policies.
anyconnect-custom Sets values of custom attributes for policy use.
anyconnect-custom-data
Creates custom attribute named values.
2-73Cisco ASA Series Command Reference, A through H Commands
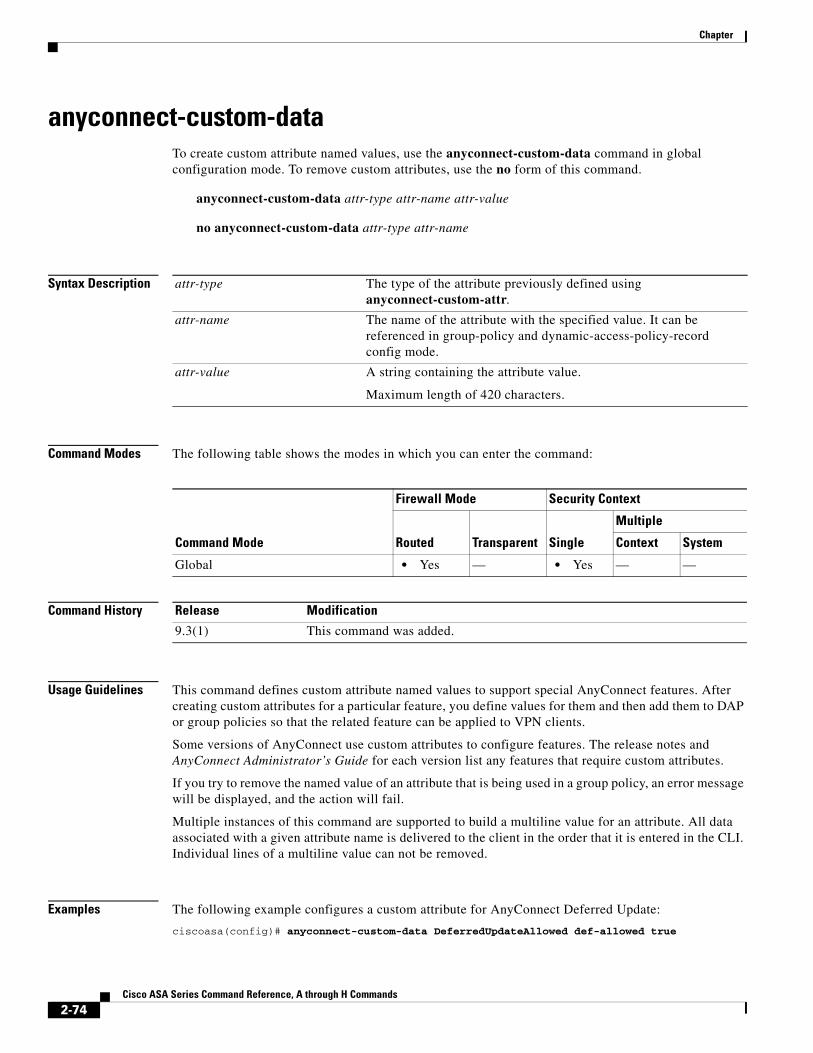
Chapter
anyconnect-custom-dataTo create custom attribute named values, use the anyconnect-custom-data command in global configuration mode. To remove custom attributes, use the no form of this command.
anyconnect-custom-data attr-type attr-name attr-value
no anyconnect-custom-data attr-type attr-name
Syntax Description
Command Modes The following table shows the modes in which you can enter the command:
Command History
Usage Guidelines This command defines custom attribute named values to support special AnyConnect features. After creating custom attributes for a particular feature, you define values for them and then add them to DAP or group policies so that the related feature can be applied to VPN clients.
Some versions of AnyConnect use custom attributes to configure features. The release notes and AnyConnect Administrator’s Guide for each version list any features that require custom attributes.
If you try to remove the named value of an attribute that is being used in a group policy, an error message will be displayed, and the action will fail.
Multiple instances of this command are supported to build a multiline value for an attribute. All data associated with a given attribute name is delivered to the client in the order that it is entered in the CLI. Individual lines of a multiline value can not be removed.
Examples The following example configures a custom attribute for AnyConnect Deferred Update:
ciscoasa(config)# anyconnect-custom-data DeferredUpdateAllowed def-allowed true
attr-type The type of the attribute previously defined using anyconnect-custom-attr.
attr-name The name of the attribute with the specified value. It can be referenced in group-policy and dynamic-access-policy-record config mode.
attr-value A string containing the attribute value.
Maximum length of 420 characters.
Command Mode
Firewall Mode Security Context
Routed Transparent Single
Multiple
Context System
Global • Yes — • Yes — —
Release Modification
9.3(1) This command was added.
2-74Cisco ASA Series Command Reference, A through H Commands
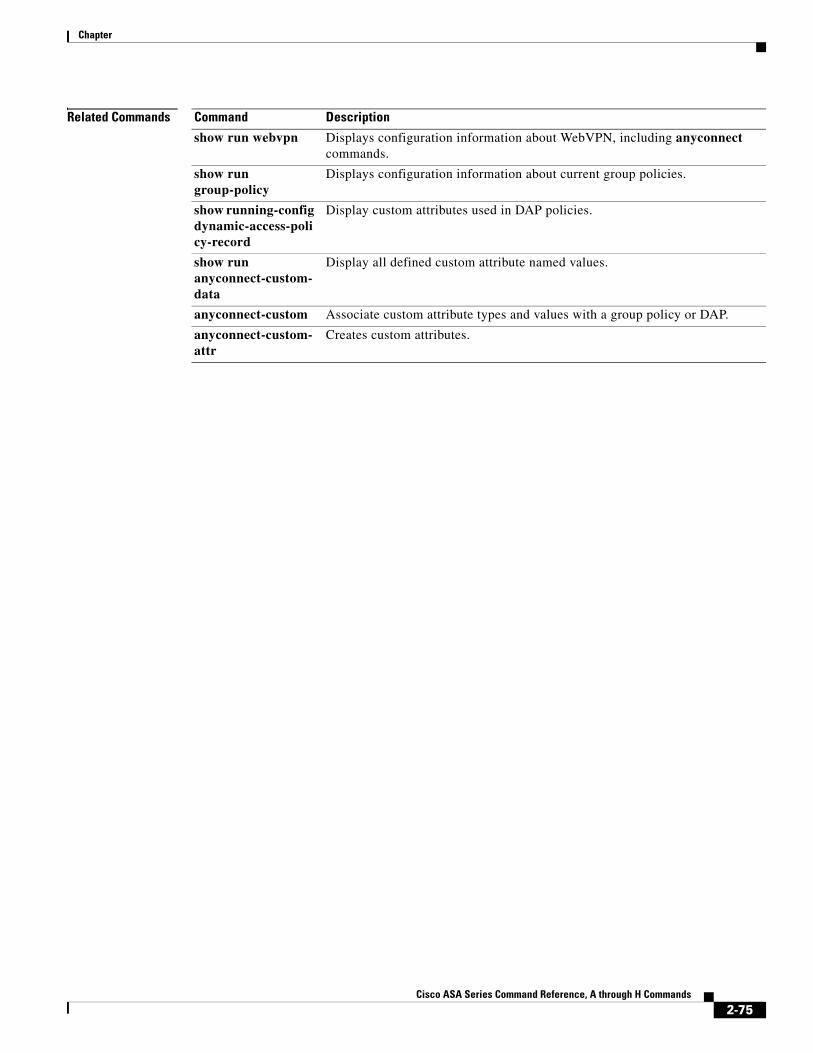
Chapter
Related Commands Command Description
show run webvpn Displays configuration information about WebVPN, including anyconnect commands.
show run group-policy
Displays configuration information about current group policies.
show running-config dynamic-access-policy-record
Display custom attributes used in DAP policies.
show run anyconnect-custom-data
Display all defined custom attribute named values.
anyconnect-custom Associate custom attribute types and values with a group policy or DAP.
anyconnect-custom-attr
Creates custom attributes.
2-75Cisco ASA Series Command Reference, A through H Commands

Chapter
anyconnect df-bit-ignoreTo ignore the DF bit in packets that need fragmentation, use the anyconnect-df-bit-ignore command in group policy webvpn configuration mode. To acknowledge the DF bits that need fragmentation, use the no form of the command.
anyconnect df-bit-ignore {enable | none}
no anyconnect df-bit-ignore {enable | none}
Syntax Description
Defaults By default, this option is not enabled.
Command Modes The following table shows the modes in which you can enter the command:
Command History
Examples vmb-5520(config-group-webvpn)# anyconnect routing-filtering-ignore ?
config-group-webvpn mode commands/options: enable Enable Routing/Filtering for AnyConnect Client none Disable Routing/Filtering for AnyConnect Client
enable Enables DF-bit ignore for AnyConnect client.
none Disables DF-bit for AnyConnect client.
Command Mode
Firewall Mode Security Context
Routed Transparent Single
Multiple
Context System
Group policy webvpn configuration • Yes — • Yes — —
Release Modification
8.2(2) The svc df-bit-ignore command was added.
8.4(3) The anyconnect df-bit-ignore command replaced the svc df-bit-ignore command.
2-76Cisco ASA Series Command Reference, A through H Commands
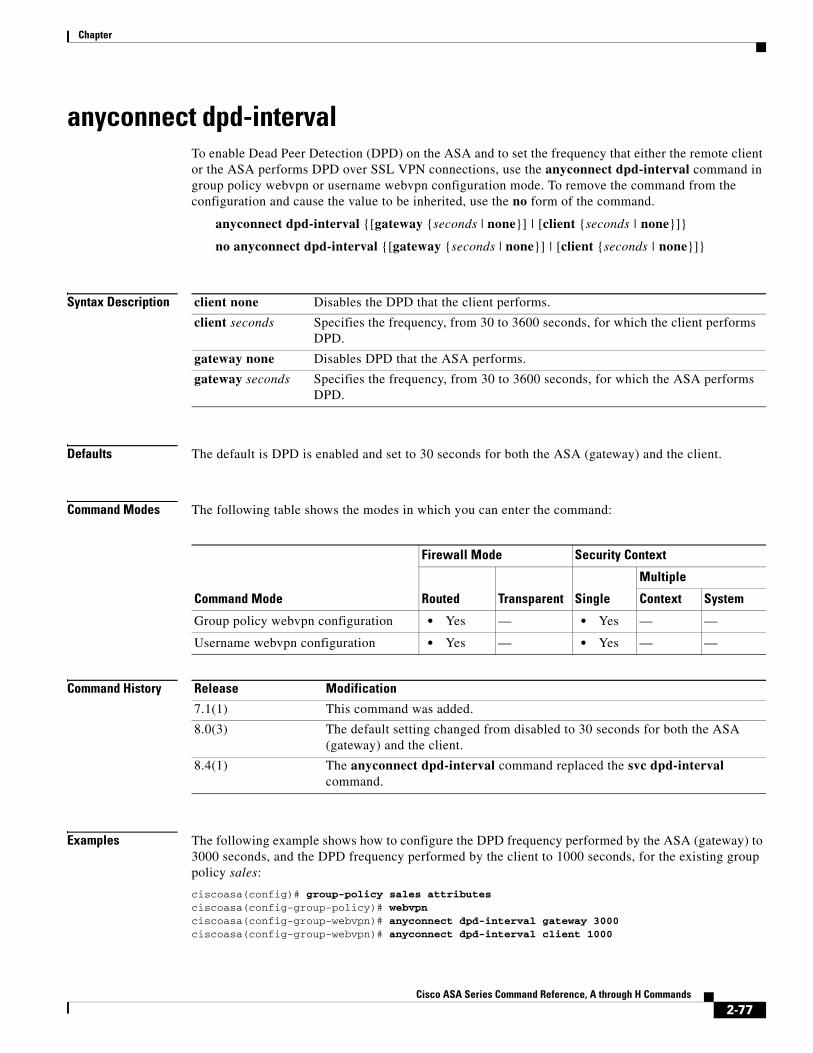
Chapter
anyconnect dpd-intervalTo enable Dead Peer Detection (DPD) on the ASA and to set the frequency that either the remote client or the ASA performs DPD over SSL VPN connections, use the anyconnect dpd-interval command in group policy webvpn or username webvpn configuration mode. To remove the command from the configuration and cause the value to be inherited, use the no form of the command.
anyconnect dpd-interval {[gateway {seconds | none}] | [client {seconds | none}]}
no anyconnect dpd-interval {[gateway {seconds | none}] | [client {seconds | none}]}
Syntax Description
Defaults The default is DPD is enabled and set to 30 seconds for both the ASA (gateway) and the client.
Command Modes The following table shows the modes in which you can enter the command:
Command History
Examples The following example shows how to configure the DPD frequency performed by the ASA (gateway) to 3000 seconds, and the DPD frequency performed by the client to 1000 seconds, for the existing group policy sales:
ciscoasa(config)# group-policy sales attributesciscoasa(config-group-policy)# webvpnciscoasa(config-group-webvpn)# anyconnect dpd-interval gateway 3000ciscoasa(config-group-webvpn)# anyconnect dpd-interval client 1000
client none Disables the DPD that the client performs.
client seconds Specifies the frequency, from 30 to 3600 seconds, for which the client performs DPD.
gateway none Disables DPD that the ASA performs.
gateway seconds Specifies the frequency, from 30 to 3600 seconds, for which the ASA performs DPD.
Command Mode
Firewall Mode Security Context
Routed Transparent Single
Multiple
Context System
Group policy webvpn configuration • Yes — • Yes — —
Username webvpn configuration • Yes — • Yes — —
Release Modification
7.1(1) This command was added.
8.0(3) The default setting changed from disabled to 30 seconds for both the ASA (gateway) and the client.
8.4(1) The anyconnect dpd-interval command replaced the svc dpd-interval command.
2-77Cisco ASA Series Command Reference, A through H Commands
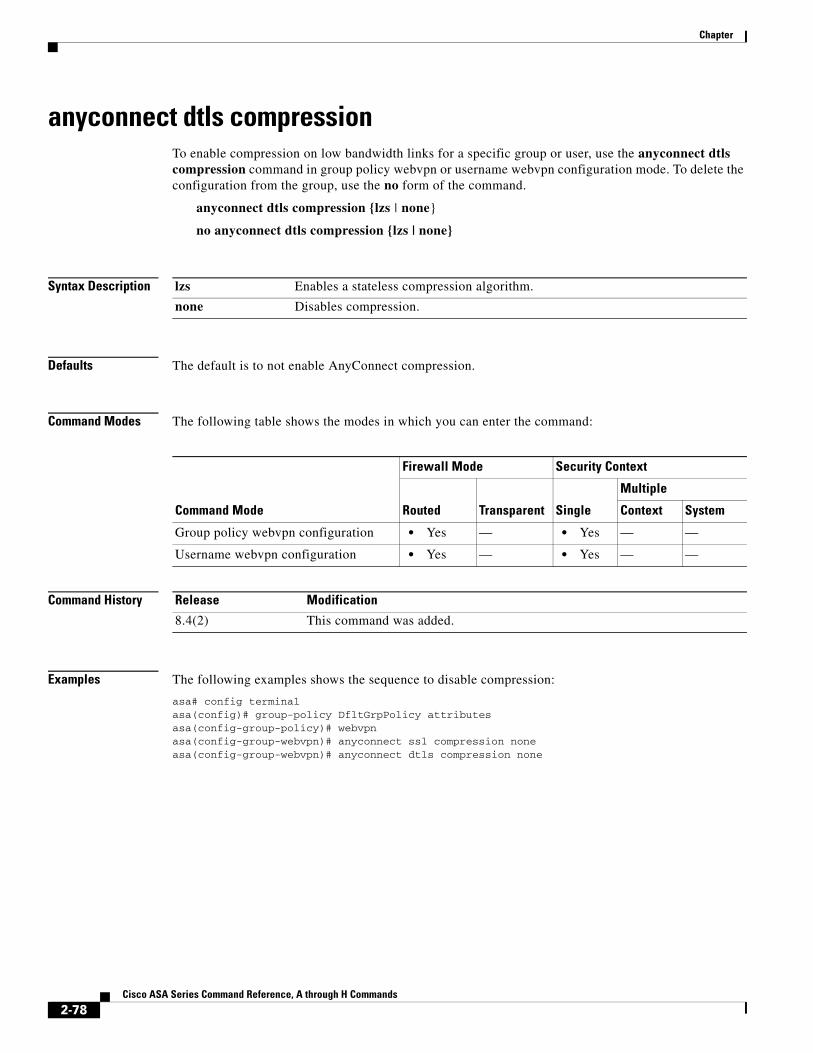
Chapter
anyconnect dtls compressionTo enable compression on low bandwidth links for a specific group or user, use the anyconnect dtls compression command in group policy webvpn or username webvpn configuration mode. To delete the configuration from the group, use the no form of the command.
anyconnect dtls compression {lzs | none}
no anyconnect dtls compression {lzs | none}
Syntax Description
Defaults The default is to not enable AnyConnect compression.
Command Modes The following table shows the modes in which you can enter the command:
Command History
Examples The following examples shows the sequence to disable compression:
asa# config terminalasa(config)# group-policy DfltGrpPolicy attributesasa(config-group-policy)# webvpnasa(config-group-webvpn)# anyconnect ssl compression noneasa(config-group-webvpn)# anyconnect dtls compression none
lzs Enables a stateless compression algorithm.
none Disables compression.
Command Mode
Firewall Mode Security Context
Routed Transparent Single
Multiple
Context System
Group policy webvpn configuration • Yes — • Yes — —
Username webvpn configuration • Yes — • Yes — —
Release Modification
8.4(2) This command was added.
2-78Cisco ASA Series Command Reference, A through H Commands
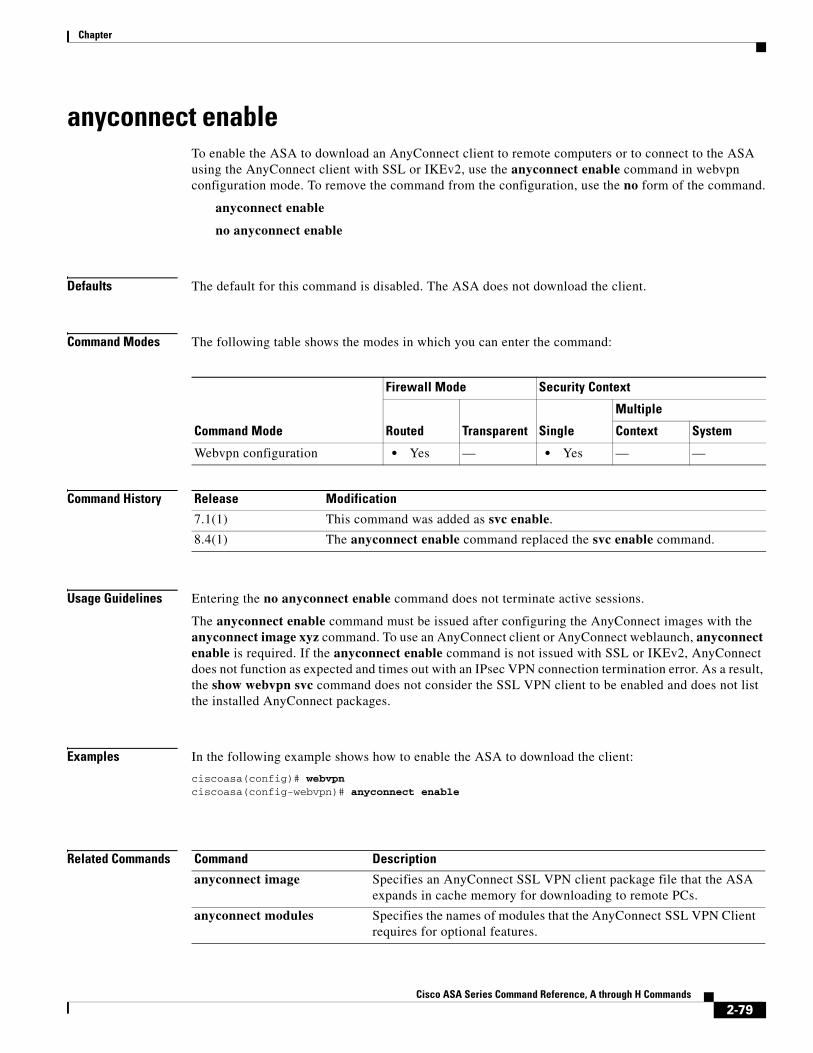
Chapter
anyconnect enableTo enable the ASA to download an AnyConnect client to remote computers or to connect to the ASA using the AnyConnect client with SSL or IKEv2, use the anyconnect enable command in webvpn configuration mode. To remove the command from the configuration, use the no form of the command.
anyconnect enable
no anyconnect enable
Defaults The default for this command is disabled. The ASA does not download the client.
Command Modes The following table shows the modes in which you can enter the command:
Command History
Usage Guidelines Entering the no anyconnect enable command does not terminate active sessions.
The anyconnect enable command must be issued after configuring the AnyConnect images with the anyconnect image xyz command. To use an AnyConnect client or AnyConnect weblaunch, anyconnect enable is required. If the anyconnect enable command is not issued with SSL or IKEv2, AnyConnect does not function as expected and times out with an IPsec VPN connection termination error. As a result, the show webvpn svc command does not consider the SSL VPN client to be enabled and does not list the installed AnyConnect packages.
Examples In the following example shows how to enable the ASA to download the client:
ciscoasa(config)# webvpnciscoasa(config-webvpn)# anyconnect enable
Related Commands
Command Mode
Firewall Mode Security Context
Routed Transparent Single
Multiple
Context System
Webvpn configuration • Yes — • Yes — —
Release Modification
7.1(1) This command was added as svc enable.
8.4(1) The anyconnect enable command replaced the svc enable command.
Command Description
anyconnect image Specifies an AnyConnect SSL VPN client package file that the ASA expands in cache memory for downloading to remote PCs.
anyconnect modules Specifies the names of modules that the AnyConnect SSL VPN Client requires for optional features.
2-79Cisco ASA Series Command Reference, A through H Commands
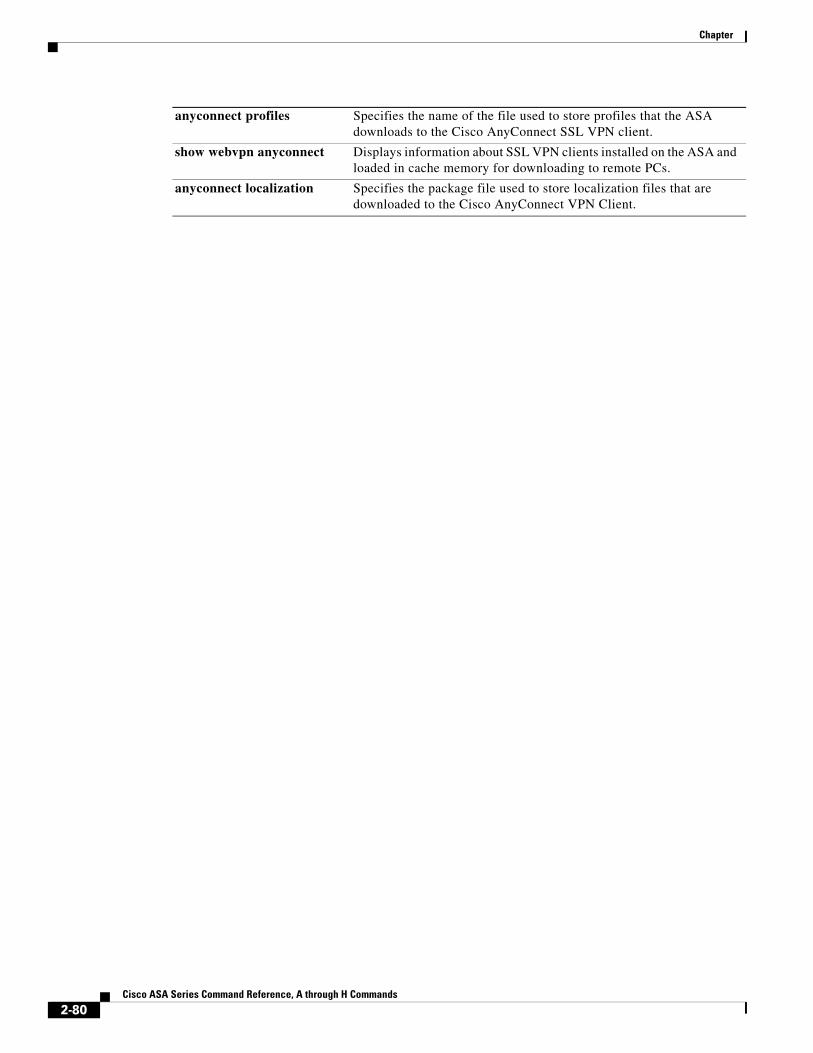
Chapter
anyconnect profiles Specifies the name of the file used to store profiles that the ASA downloads to the Cisco AnyConnect SSL VPN client.
show webvpn anyconnect Displays information about SSL VPN clients installed on the ASA and loaded in cache memory for downloading to remote PCs.
anyconnect localization Specifies the package file used to store localization files that are downloaded to the Cisco AnyConnect VPN Client.
2-80Cisco ASA Series Command Reference, A through H Commands
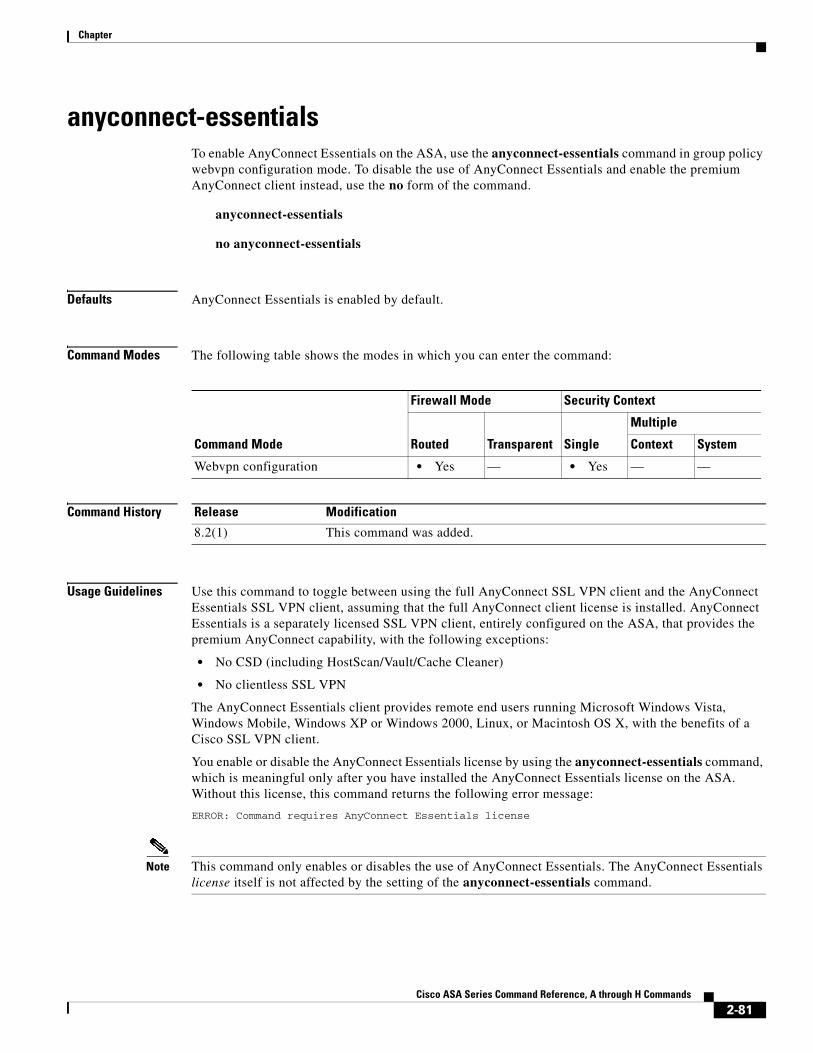
Chapter
anyconnect-essentialsTo enable AnyConnect Essentials on the ASA, use the anyconnect-essentials command in group policy webvpn configuration mode. To disable the use of AnyConnect Essentials and enable the premium AnyConnect client instead, use the no form of the command.
anyconnect-essentials
no anyconnect-essentials
Defaults AnyConnect Essentials is enabled by default.
Command Modes The following table shows the modes in which you can enter the command:
Command History
Usage Guidelines Use this command to toggle between using the full AnyConnect SSL VPN client and the AnyConnect Essentials SSL VPN client, assuming that the full AnyConnect client license is installed. AnyConnect Essentials is a separately licensed SSL VPN client, entirely configured on the ASA, that provides the premium AnyConnect capability, with the following exceptions:
• No CSD (including HostScan/Vault/Cache Cleaner)
• No clientless SSL VPN
The AnyConnect Essentials client provides remote end users running Microsoft Windows Vista, Windows Mobile, Windows XP or Windows 2000, Linux, or Macintosh OS X, with the benefits of a Cisco SSL VPN client.
You enable or disable the AnyConnect Essentials license by using the anyconnect-essentials command, which is meaningful only after you have installed the AnyConnect Essentials license on the ASA. Without this license, this command returns the following error message:
ERROR: Command requires AnyConnect Essentials license
Note This command only enables or disables the use of AnyConnect Essentials. The AnyConnect Essentials license itself is not affected by the setting of the anyconnect-essentials command.
Command Mode
Firewall Mode Security Context
Routed Transparent Single
Multiple
Context System
Webvpn configuration • Yes — • Yes — —
Release Modification
8.2(1) This command was added.
2-81Cisco ASA Series Command Reference, A through H Commands
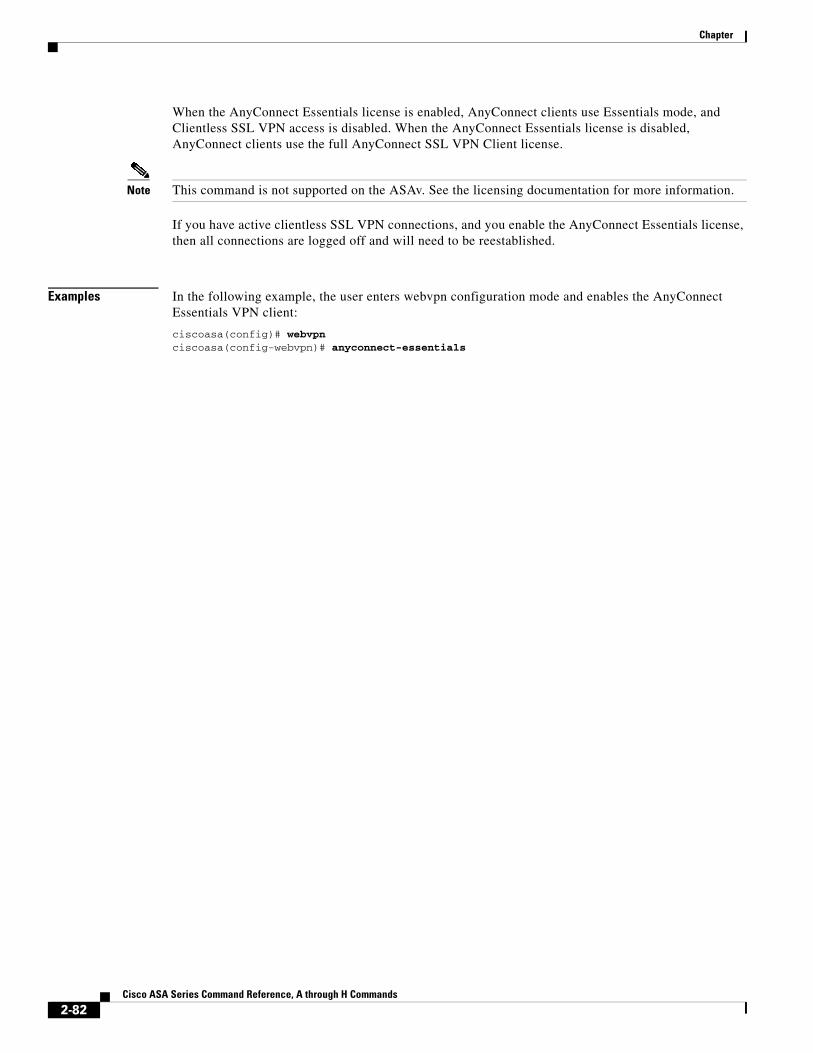
Chapter
When the AnyConnect Essentials license is enabled, AnyConnect clients use Essentials mode, and Clientless SSL VPN access is disabled. When the AnyConnect Essentials license is disabled, AnyConnect clients use the full AnyConnect SSL VPN Client license.
Note This command is not supported on the ASAv. See the licensing documentation for more information.
If you have active clientless SSL VPN connections, and you enable the AnyConnect Essentials license, then all connections are logged off and will need to be reestablished.
Examples In the following example, the user enters webvpn configuration mode and enables the AnyConnect Essentials VPN client:
ciscoasa(config)# webvpnciscoasa(config-webvpn)# anyconnect-essentials
2-82Cisco ASA Series Command Reference, A through H Commands
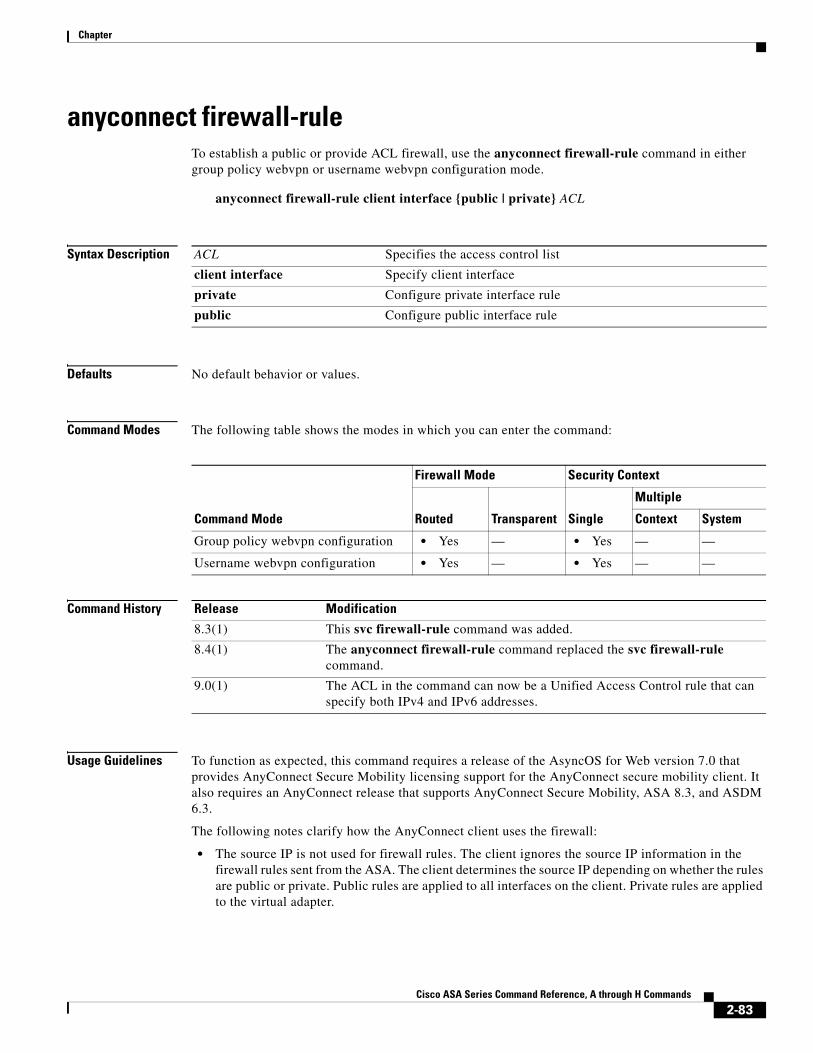
Chapter
anyconnect firewall-ruleTo establish a public or provide ACL firewall, use the anyconnect firewall-rule command in either group policy webvpn or username webvpn configuration mode.
anyconnect firewall-rule client interface {public | private} ACL
Syntax Description
Defaults No default behavior or values.
Command Modes The following table shows the modes in which you can enter the command:
Command History
Usage Guidelines To function as expected, this command requires a release of the AsyncOS for Web version 7.0 that provides AnyConnect Secure Mobility licensing support for the AnyConnect secure mobility client. It also requires an AnyConnect release that supports AnyConnect Secure Mobility, ASA 8.3, and ASDM 6.3.
The following notes clarify how the AnyConnect client uses the firewall:
• The source IP is not used for firewall rules. The client ignores the source IP information in the firewall rules sent from the ASA. The client determines the source IP depending on whether the rules are public or private. Public rules are applied to all interfaces on the client. Private rules are applied to the virtual adapter.
ACL Specifies the access control list
client interface Specify client interface
private Configure private interface rule
public Configure public interface rule
Command Mode
Firewall Mode Security Context
Routed Transparent Single
Multiple
Context System
Group policy webvpn configuration • Yes — • Yes — —
Username webvpn configuration • Yes — • Yes — —
Release Modification
8.3(1) This svc firewall-rule command was added.
8.4(1) The anyconnect firewall-rule command replaced the svc firewall-rule command.
9.0(1) The ACL in the command can now be a Unified Access Control rule that can specify both IPv4 and IPv6 addresses.
2-83Cisco ASA Series Command Reference, A through H Commands
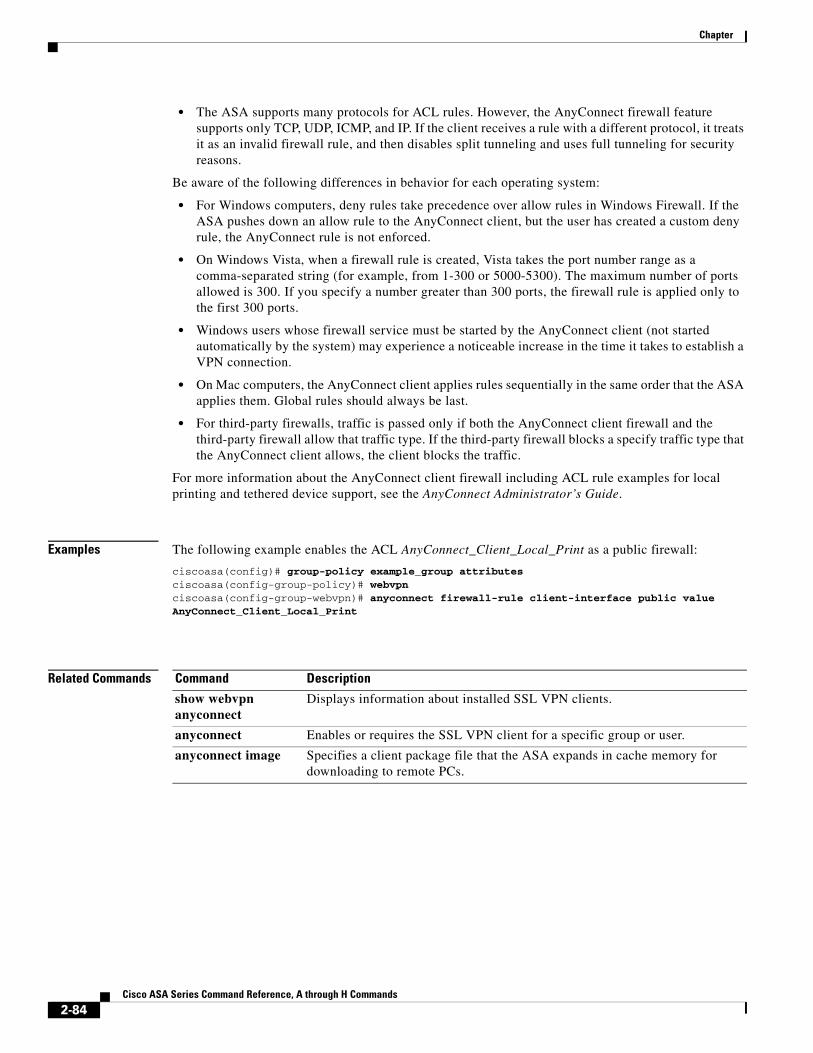
Chapter
• The ASA supports many protocols for ACL rules. However, the AnyConnect firewall feature supports only TCP, UDP, ICMP, and IP. If the client receives a rule with a different protocol, it treats it as an invalid firewall rule, and then disables split tunneling and uses full tunneling for security reasons.
Be aware of the following differences in behavior for each operating system:
• For Windows computers, deny rules take precedence over allow rules in Windows Firewall. If the ASA pushes down an allow rule to the AnyConnect client, but the user has created a custom deny rule, the AnyConnect rule is not enforced.
• On Windows Vista, when a firewall rule is created, Vista takes the port number range as a comma-separated string (for example, from 1-300 or 5000-5300). The maximum number of ports allowed is 300. If you specify a number greater than 300 ports, the firewall rule is applied only to the first 300 ports.
• Windows users whose firewall service must be started by the AnyConnect client (not started automatically by the system) may experience a noticeable increase in the time it takes to establish a VPN connection.
• On Mac computers, the AnyConnect client applies rules sequentially in the same order that the ASA applies them. Global rules should always be last.
• For third-party firewalls, traffic is passed only if both the AnyConnect client firewall and the third-party firewall allow that traffic type. If the third-party firewall blocks a specify traffic type that the AnyConnect client allows, the client blocks the traffic.
For more information about the AnyConnect client firewall including ACL rule examples for local printing and tethered device support, see the AnyConnect Administrator’s Guide.
Examples The following example enables the ACL AnyConnect_Client_Local_Print as a public firewall:
ciscoasa(config)# group-policy example_group attributesciscoasa(config-group-policy)# webvpnciscoasa(config-group-webvpn)# anyconnect firewall-rule client-interface public value AnyConnect_Client_Local_Print
Related Commands Command Description
show webvpn anyconnect
Displays information about installed SSL VPN clients.
anyconnect Enables or requires the SSL VPN client for a specific group or user.
anyconnect image Specifies a client package file that the ASA expands in cache memory for downloading to remote PCs.
2-84Cisco ASA Series Command Reference, A through H Commands
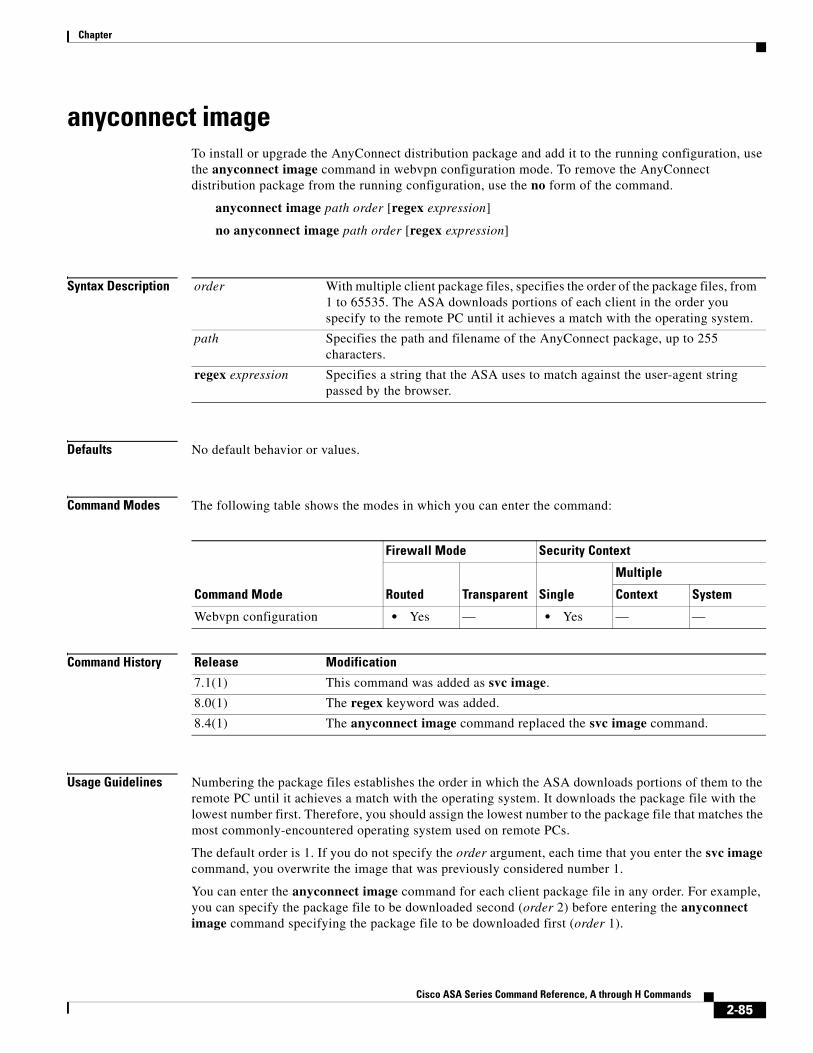
Chapter
anyconnect imageTo install or upgrade the AnyConnect distribution package and add it to the running configuration, use the anyconnect image command in webvpn configuration mode. To remove the AnyConnect distribution package from the running configuration, use the no form of the command.
anyconnect image path order [regex expression]
no anyconnect image path order [regex expression]
Syntax Description
Defaults No default behavior or values.
Command Modes The following table shows the modes in which you can enter the command:
Command History
Usage Guidelines Numbering the package files establishes the order in which the ASA downloads portions of them to the remote PC until it achieves a match with the operating system. It downloads the package file with the lowest number first. Therefore, you should assign the lowest number to the package file that matches the most commonly-encountered operating system used on remote PCs.
The default order is 1. If you do not specify the order argument, each time that you enter the svc image command, you overwrite the image that was previously considered number 1.
You can enter the anyconnect image command for each client package file in any order. For example, you can specify the package file to be downloaded second (order 2) before entering the anyconnect image command specifying the package file to be downloaded first (order 1).
order With multiple client package files, specifies the order of the package files, from 1 to 65535. The ASA downloads portions of each client in the order you specify to the remote PC until it achieves a match with the operating system.
path Specifies the path and filename of the AnyConnect package, up to 255 characters.
regex expression Specifies a string that the ASA uses to match against the user-agent string passed by the browser.
Command Mode
Firewall Mode Security Context
Routed Transparent Single
Multiple
Context System
Webvpn configuration • Yes — • Yes — —
Release Modification
7.1(1) This command was added as svc image.
8.0(1) The regex keyword was added.
8.4(1) The anyconnect image command replaced the svc image command.
2-85Cisco ASA Series Command Reference, A through H Commands
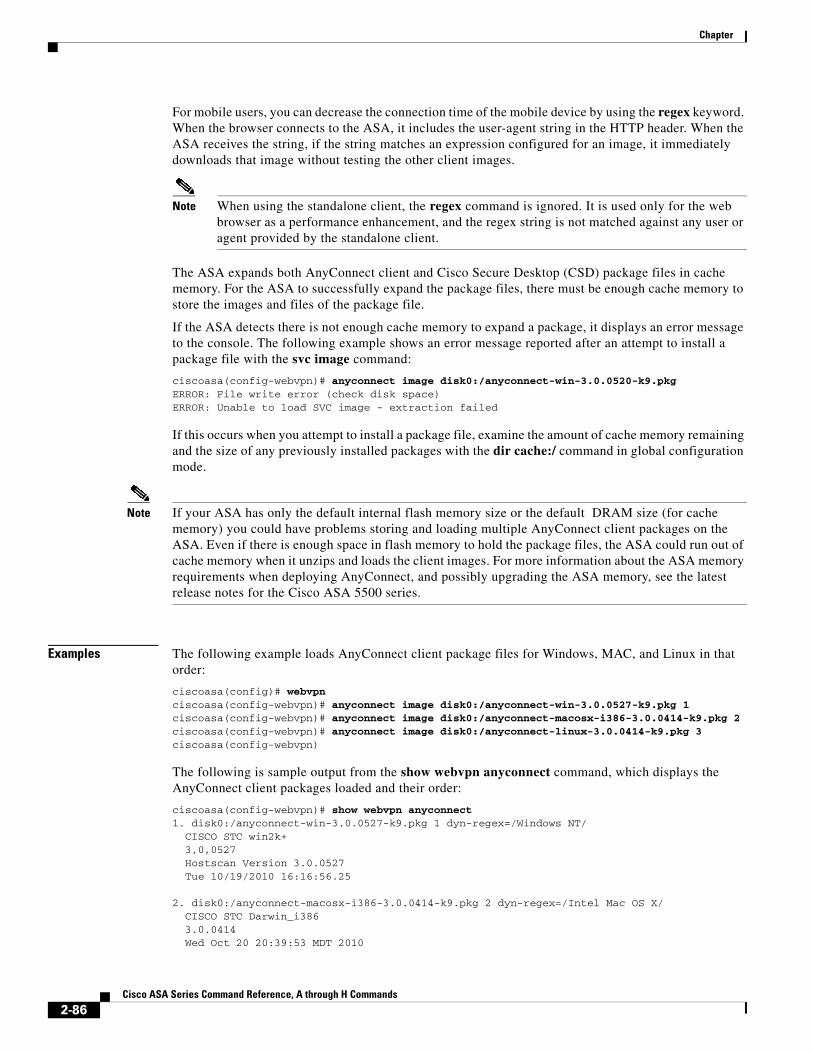
Chapter
For mobile users, you can decrease the connection time of the mobile device by using the regex keyword. When the browser connects to the ASA, it includes the user-agent string in the HTTP header. When the ASA receives the string, if the string matches an expression configured for an image, it immediately downloads that image without testing the other client images.
Note When using the standalone client, the regex command is ignored. It is used only for the web browser as a performance enhancement, and the regex string is not matched against any user or agent provided by the standalone client.
The ASA expands both AnyConnect client and Cisco Secure Desktop (CSD) package files in cache memory. For the ASA to successfully expand the package files, there must be enough cache memory to store the images and files of the package file.
If the ASA detects there is not enough cache memory to expand a package, it displays an error message to the console. The following example shows an error message reported after an attempt to install a package file with the svc image command:
ciscoasa(config-webvpn)# anyconnect image disk0:/anyconnect-win-3.0.0520-k9.pkgERROR: File write error (check disk space)ERROR: Unable to load SVC image - extraction failed
If this occurs when you attempt to install a package file, examine the amount of cache memory remaining and the size of any previously installed packages with the dir cache:/ command in global configuration mode.
Note If your ASA has only the default internal flash memory size or the default DRAM size (for cache memory) you could have problems storing and loading multiple AnyConnect client packages on the ASA. Even if there is enough space in flash memory to hold the package files, the ASA could run out of cache memory when it unzips and loads the client images. For more information about the ASA memory requirements when deploying AnyConnect, and possibly upgrading the ASA memory, see the latest release notes for the Cisco ASA 5500 series.
Examples The following example loads AnyConnect client package files for Windows, MAC, and Linux in that order:
ciscoasa(config)# webvpnciscoasa(config-webvpn)# anyconnect image disk0:/anyconnect-win-3.0.0527-k9.pkg 1ciscoasa(config-webvpn)# anyconnect image disk0:/anyconnect-macosx-i386-3.0.0414-k9.pkg 2ciscoasa(config-webvpn)# anyconnect image disk0:/anyconnect-linux-3.0.0414-k9.pkg 3ciscoasa(config-webvpn)
The following is sample output from the show webvpn anyconnect command, which displays the AnyConnect client packages loaded and their order:
ciscoasa(config-webvpn)# show webvpn anyconnect1. disk0:/anyconnect-win-3.0.0527-k9.pkg 1 dyn-regex=/Windows NT/ CISCO STC win2k+ 3,0,0527 Hostscan Version 3.0.0527 Tue 10/19/2010 16:16:56.25
2. disk0:/anyconnect-macosx-i386-3.0.0414-k9.pkg 2 dyn-regex=/Intel Mac OS X/ CISCO STC Darwin_i386 3.0.0414 Wed Oct 20 20:39:53 MDT 2010
2-86Cisco ASA Series Command Reference, A through H Commands
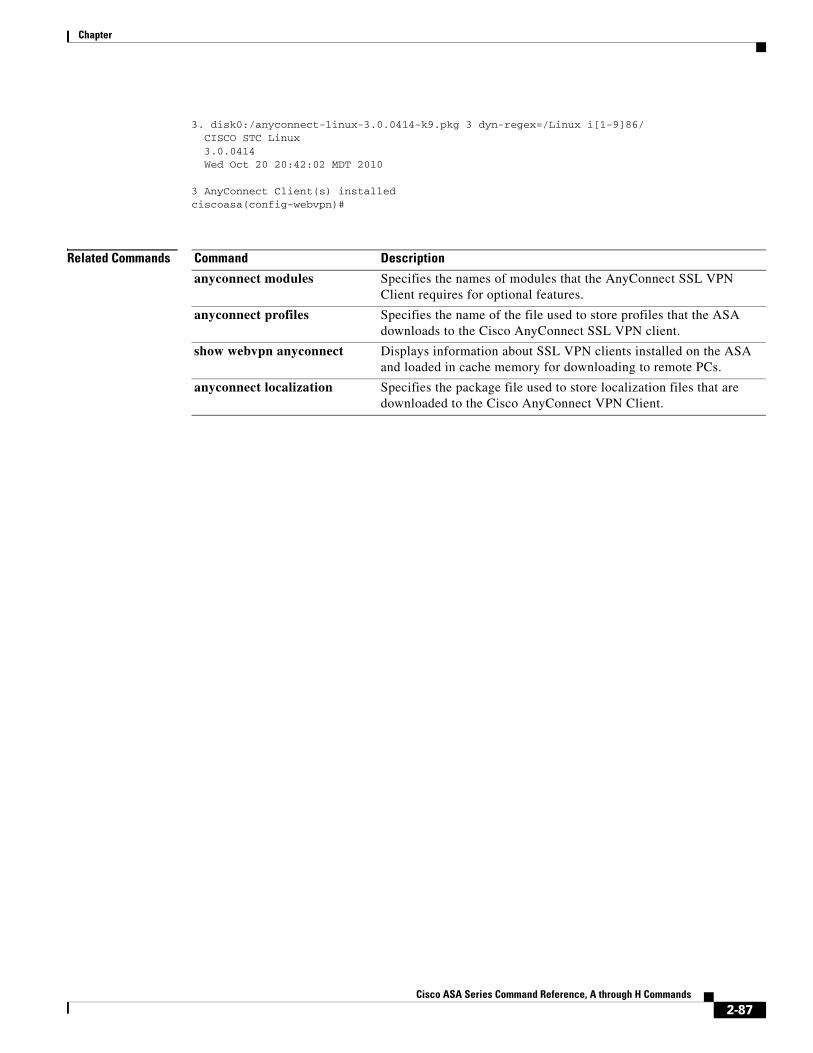
Chapter
3. disk0:/anyconnect-linux-3.0.0414-k9.pkg 3 dyn-regex=/Linux i[1-9]86/ CISCO STC Linux 3.0.0414 Wed Oct 20 20:42:02 MDT 2010
3 AnyConnect Client(s) installedciscoasa(config-webvpn)#
Related Commands Command Description
anyconnect modules Specifies the names of modules that the AnyConnect SSL VPN Client requires for optional features.
anyconnect profiles Specifies the name of the file used to store profiles that the ASA downloads to the Cisco AnyConnect SSL VPN client.
show webvpn anyconnect Displays information about SSL VPN clients installed on the ASA and loaded in cache memory for downloading to remote PCs.
anyconnect localization Specifies the package file used to store localization files that are downloaded to the Cisco AnyConnect VPN Client.
2-87Cisco ASA Series Command Reference, A through H Commands
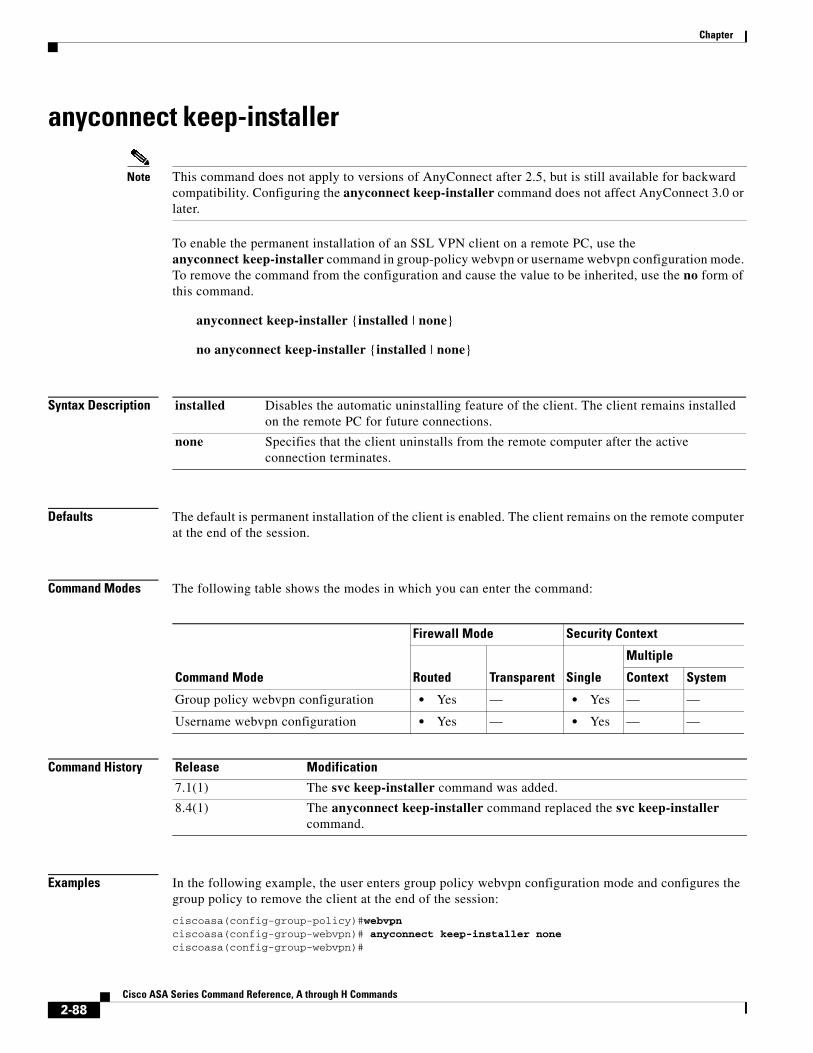
Chapter
anyconnect keep-installer
Note This command does not apply to versions of AnyConnect after 2.5, but is still available for backward compatibility. Configuring the anyconnect keep-installer command does not affect AnyConnect 3.0 or later.
To enable the permanent installation of an SSL VPN client on a remote PC, use the anyconnect keep-installer command in group-policy webvpn or username webvpn configuration mode. To remove the command from the configuration and cause the value to be inherited, use the no form of this command.
anyconnect keep-installer {installed | none}
no anyconnect keep-installer {installed | none}
Syntax Description
Defaults The default is permanent installation of the client is enabled. The client remains on the remote computer at the end of the session.
Command Modes The following table shows the modes in which you can enter the command:
Command History
Examples In the following example, the user enters group policy webvpn configuration mode and configures the group policy to remove the client at the end of the session:
ciscoasa(config-group-policy)#webvpnciscoasa(config-group-webvpn)# anyconnect keep-installer noneciscoasa(config-group-webvpn)#
installed Disables the automatic uninstalling feature of the client. The client remains installed on the remote PC for future connections.
none Specifies that the client uninstalls from the remote computer after the active connection terminates.
Command Mode
Firewall Mode Security Context
Routed Transparent Single
Multiple
Context System
Group policy webvpn configuration • Yes — • Yes — —
Username webvpn configuration • Yes — • Yes — —
Release Modification
7.1(1) The svc keep-installer command was added.
8.4(1) The anyconnect keep-installer command replaced the svc keep-installer command.
2-88Cisco ASA Series Command Reference, A through H Commands
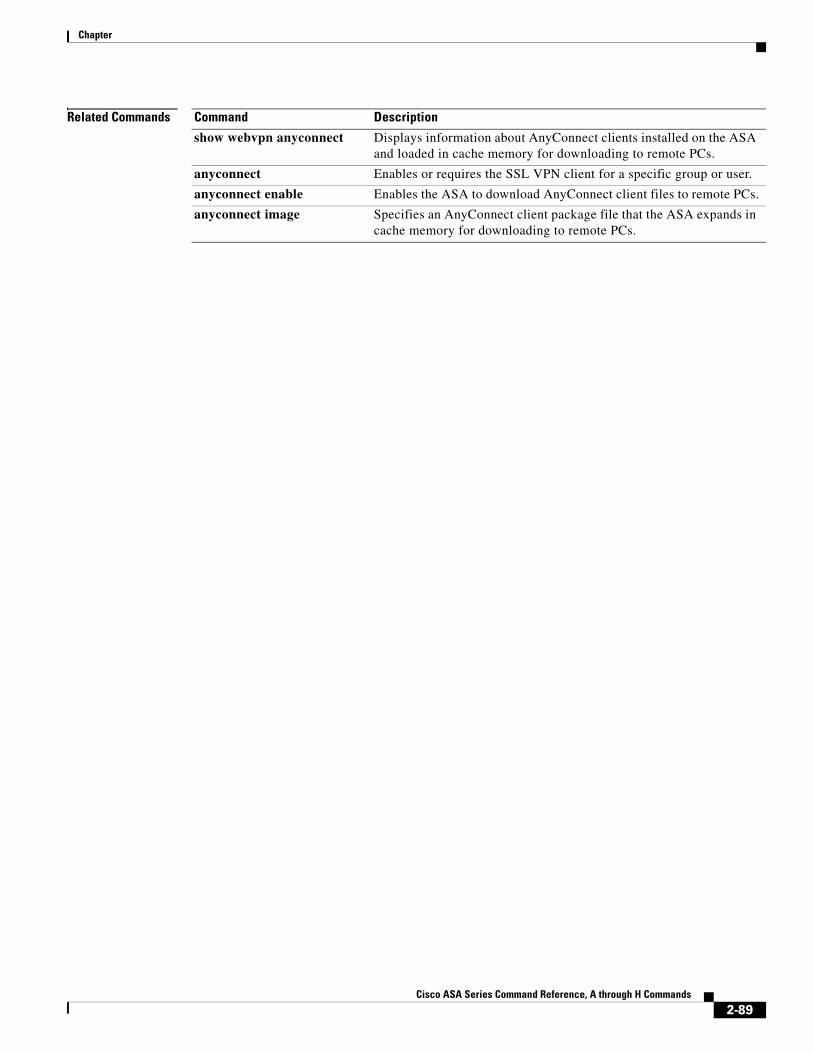
Chapter
Related Commands Command Description
show webvpn anyconnect Displays information about AnyConnect clients installed on the ASA and loaded in cache memory for downloading to remote PCs.
anyconnect Enables or requires the SSL VPN client for a specific group or user.
anyconnect enable Enables the ASA to download AnyConnect client files to remote PCs.
anyconnect image Specifies an AnyConnect client package file that the ASA expands in cache memory for downloading to remote PCs.
2-89Cisco ASA Series Command Reference, A through H Commands
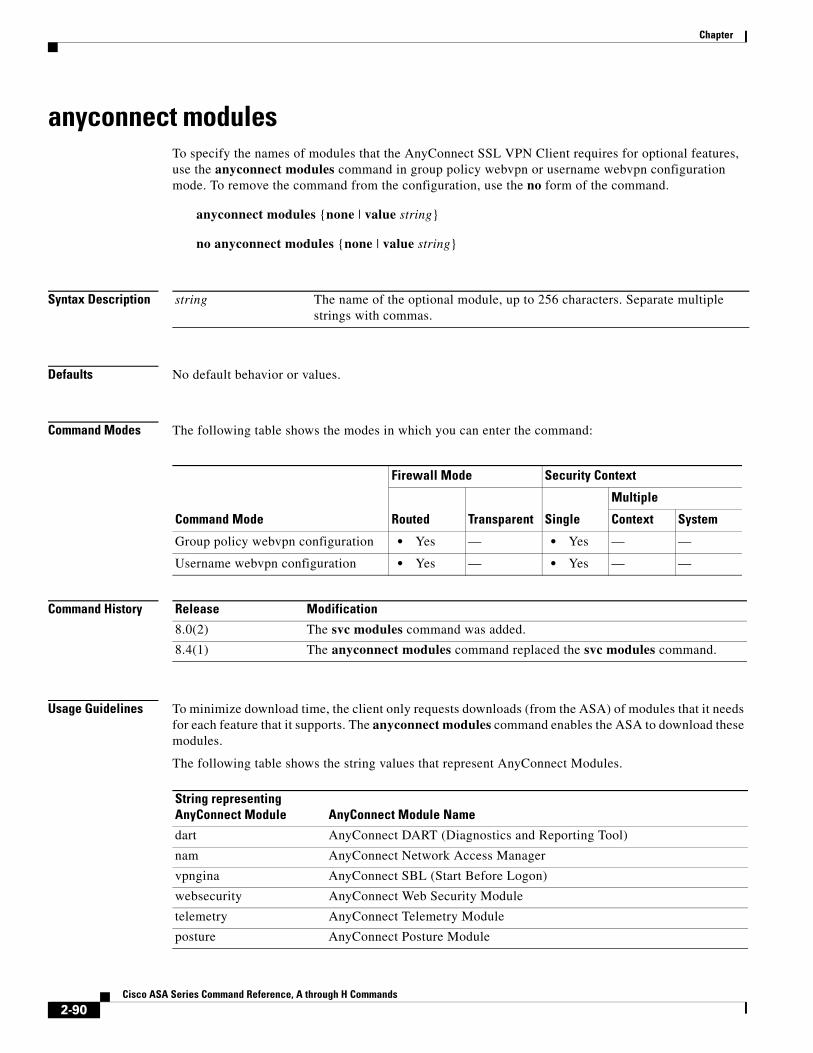
Chapter
anyconnect modulesTo specify the names of modules that the AnyConnect SSL VPN Client requires for optional features, use the anyconnect modules command in group policy webvpn or username webvpn configuration mode. To remove the command from the configuration, use the no form of the command.
anyconnect modules {none | value string}
no anyconnect modules {none | value string}
Syntax Description
Defaults No default behavior or values.
Command Modes The following table shows the modes in which you can enter the command:
Command History
Usage Guidelines To minimize download time, the client only requests downloads (from the ASA) of modules that it needs for each feature that it supports. The anyconnect modules command enables the ASA to download these modules.
The following table shows the string values that represent AnyConnect Modules.
string The name of the optional module, up to 256 characters. Separate multiple strings with commas.
Command Mode
Firewall Mode Security Context
Routed Transparent Single
Multiple
Context System
Group policy webvpn configuration • Yes — • Yes — —
Username webvpn configuration • Yes — • Yes — —
Release Modification
8.0(2) The svc modules command was added.
8.4(1) The anyconnect modules command replaced the svc modules command.
String representing AnyConnect Module AnyConnect Module Name
dart AnyConnect DART (Diagnostics and Reporting Tool)
nam AnyConnect Network Access Manager
vpngina AnyConnect SBL (Start Before Logon)
websecurity AnyConnect Web Security Module
telemetry AnyConnect Telemetry Module
posture AnyConnect Posture Module
2-90Cisco ASA Series Command Reference, A through H Commands
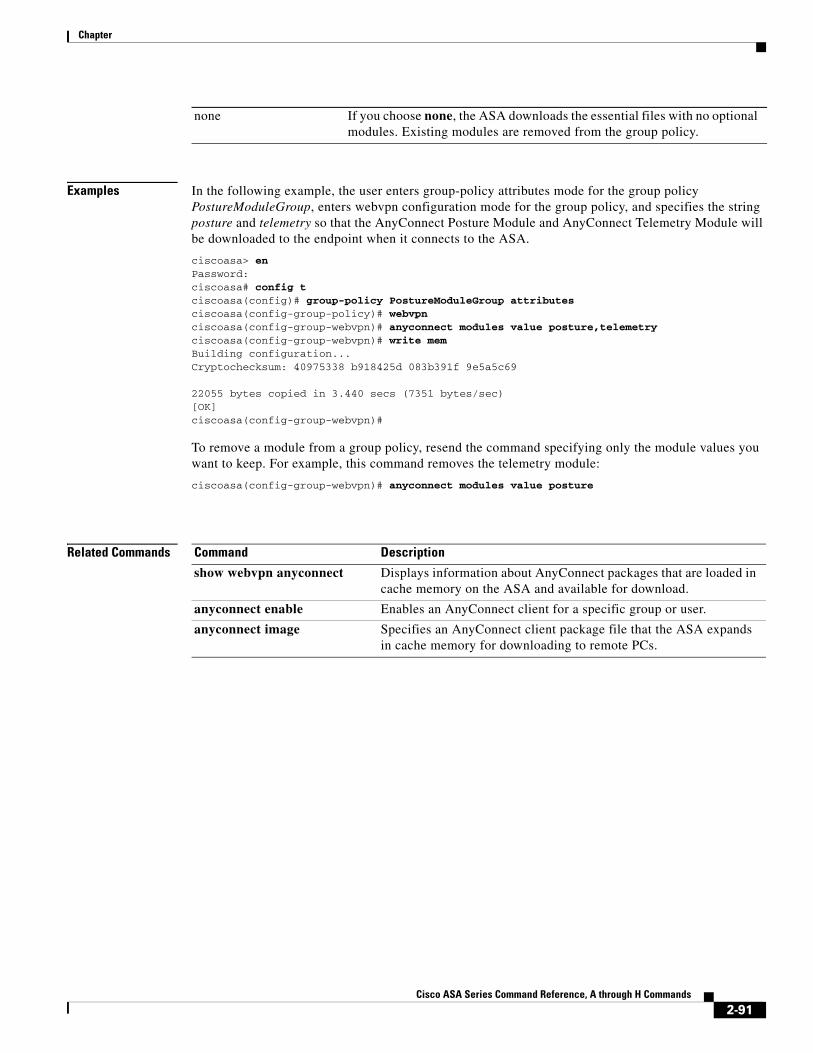
Chapter
Examples In the following example, the user enters group-policy attributes mode for the group policy PostureModuleGroup, enters webvpn configuration mode for the group policy, and specifies the string posture and telemetry so that the AnyConnect Posture Module and AnyConnect Telemetry Module will be downloaded to the endpoint when it connects to the ASA.
ciscoasa> en Password: ciscoasa# config tciscoasa(config)# group-policy PostureModuleGroup attributes ciscoasa(config-group-policy)# webvpnciscoasa(config-group-webvpn)# anyconnect modules value posture,telemetry ciscoasa(config-group-webvpn)# write mem Building configuration...Cryptochecksum: 40975338 b918425d 083b391f 9e5a5c69
22055 bytes copied in 3.440 secs (7351 bytes/sec)[OK]ciscoasa(config-group-webvpn)#
To remove a module from a group policy, resend the command specifying only the module values you want to keep. For example, this command removes the telemetry module:
ciscoasa(config-group-webvpn)# anyconnect modules value posture
Related Commands
none If you choose none, the ASA downloads the essential files with no optional modules. Existing modules are removed from the group policy.
Command Description
show webvpn anyconnect Displays information about AnyConnect packages that are loaded in cache memory on the ASA and available for download.
anyconnect enable Enables an AnyConnect client for a specific group or user.
anyconnect image Specifies an AnyConnect client package file that the ASA expands in cache memory for downloading to remote PCs.
2-91Cisco ASA Series Command Reference, A through H Commands
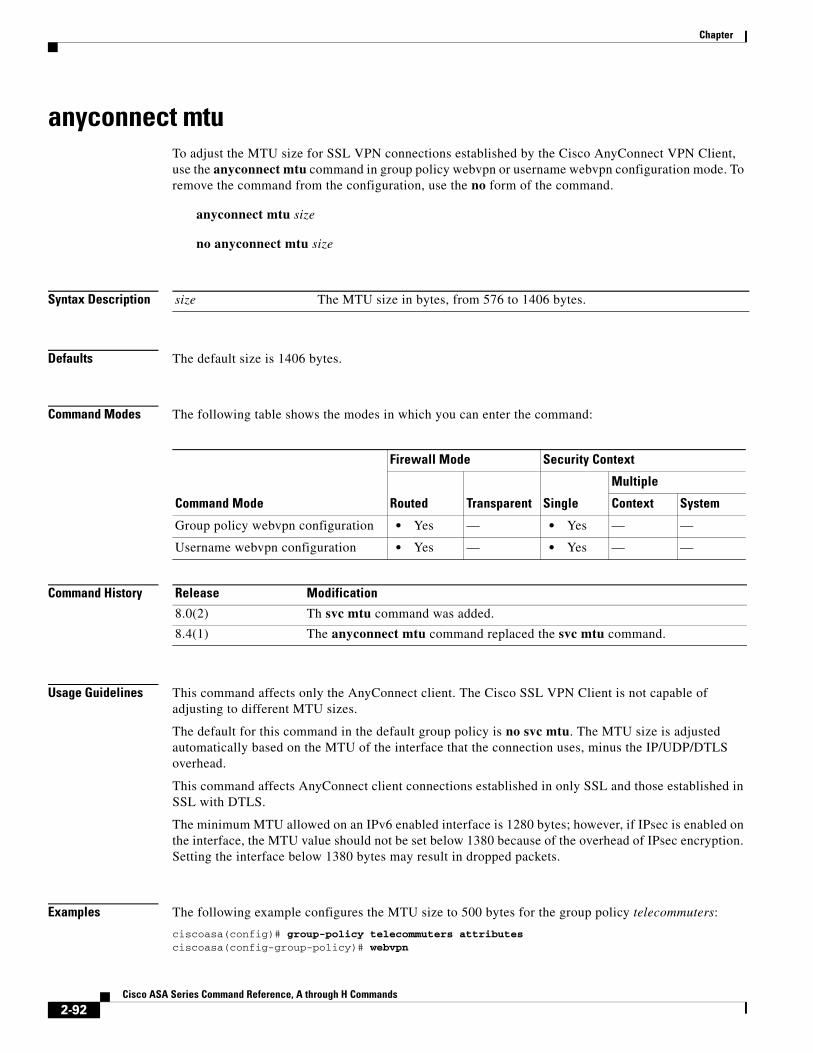
Chapter
anyconnect mtuTo adjust the MTU size for SSL VPN connections established by the Cisco AnyConnect VPN Client, use the anyconnect mtu command in group policy webvpn or username webvpn configuration mode. To remove the command from the configuration, use the no form of the command.
anyconnect mtu size
no anyconnect mtu size
Syntax Description
Defaults The default size is 1406 bytes.
Command Modes The following table shows the modes in which you can enter the command:
Command History
Usage Guidelines This command affects only the AnyConnect client. The Cisco SSL VPN Client is not capable of adjusting to different MTU sizes.
The default for this command in the default group policy is no svc mtu. The MTU size is adjusted automatically based on the MTU of the interface that the connection uses, minus the IP/UDP/DTLS overhead.
This command affects AnyConnect client connections established in only SSL and those established in SSL with DTLS.
The minimum MTU allowed on an IPv6 enabled interface is 1280 bytes; however, if IPsec is enabled on the interface, the MTU value should not be set below 1380 because of the overhead of IPsec encryption. Setting the interface below 1380 bytes may result in dropped packets.
Examples The following example configures the MTU size to 500 bytes for the group policy telecommuters:
ciscoasa(config)# group-policy telecommuters attributesciscoasa(config-group-policy)# webvpn
size The MTU size in bytes, from 576 to 1406 bytes.
Command Mode
Firewall Mode Security Context
Routed Transparent Single
Multiple
Context System
Group policy webvpn configuration • Yes — • Yes — —
Username webvpn configuration • Yes — • Yes — —
Release Modification
8.0(2) Th svc mtu command was added.
8.4(1) The anyconnect mtu command replaced the svc mtu command.
2-92Cisco ASA Series Command Reference, A through H Commands
Chapter
ciscoasa(config-group-webvpn)# anyconnect mtu 500
Related Commands Command Description
anyconnect keep-installer
Disables the automatic uninstalling feature of the client. After the initial download, the client remains on the remote PC after the connection terminates.
anyconnect ssl dtls Enables DTLS for CVCs establishing SSL VPN connections.
show run webvpn Displays configuration information about WebVPN, including anyconnect commands.
2-93Cisco ASA Series Command Reference, A through H Commands
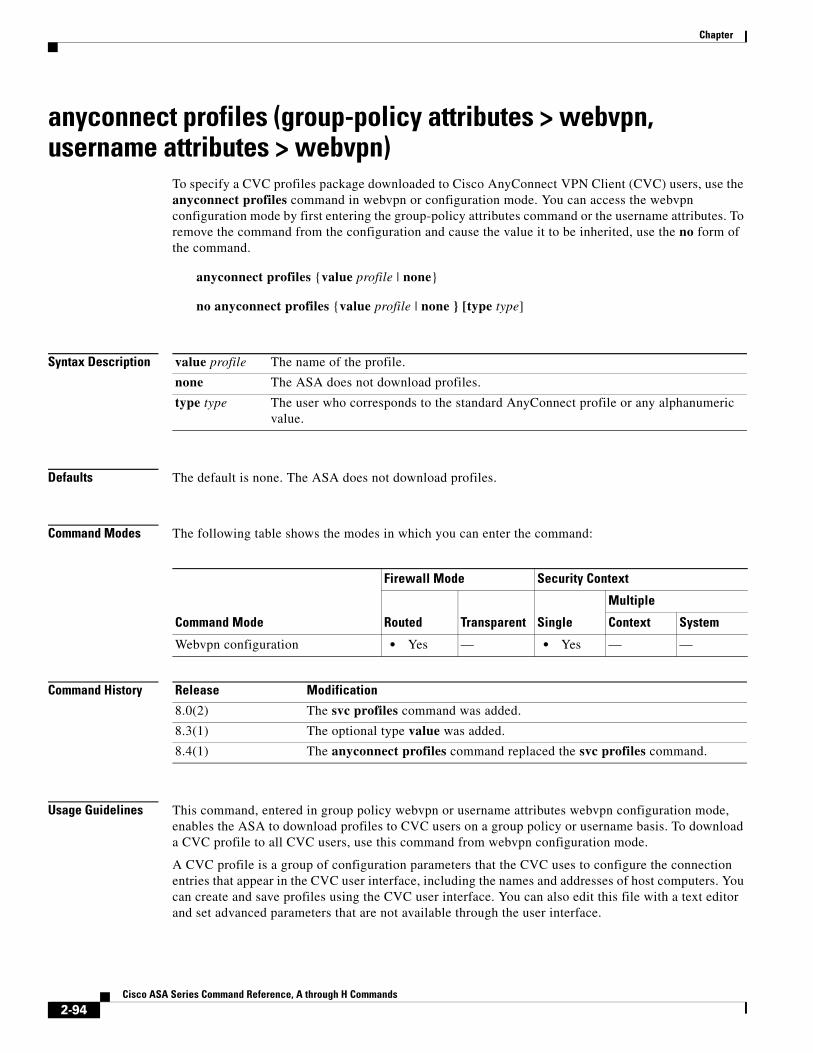
Chapter
anyconnect profiles (group-policy attributes > webvpn, username attributes > webvpn)
To specify a CVC profiles package downloaded to Cisco AnyConnect VPN Client (CVC) users, use the anyconnect profiles command in webvpn or configuration mode. You can access the webvpn configuration mode by first entering the group-policy attributes command or the username attributes. To remove the command from the configuration and cause the value it to be inherited, use the no form of the command.
anyconnect profiles {value profile | none}
no anyconnect profiles {value profile | none } [type type]
Syntax Description
Defaults The default is none. The ASA does not download profiles.
Command Modes The following table shows the modes in which you can enter the command:
Command History
Usage Guidelines This command, entered in group policy webvpn or username attributes webvpn configuration mode, enables the ASA to download profiles to CVC users on a group policy or username basis. To download a CVC profile to all CVC users, use this command from webvpn configuration mode.
A CVC profile is a group of configuration parameters that the CVC uses to configure the connection entries that appear in the CVC user interface, including the names and addresses of host computers. You can create and save profiles using the CVC user interface. You can also edit this file with a text editor and set advanced parameters that are not available through the user interface.
value profile The name of the profile.
none The ASA does not download profiles.
type type The user who corresponds to the standard AnyConnect profile or any alphanumeric value.
Command Mode
Firewall Mode Security Context
Routed Transparent Single
Multiple
Context System
Webvpn configuration • Yes — • Yes — —
Release Modification
8.0(2) The svc profiles command was added.
8.3(1) The optional type value was added.
8.4(1) The anyconnect profiles command replaced the svc profiles command.
2-94Cisco ASA Series Command Reference, A through H Commands
Chapter
The CVC installation contains one profile template (cvcprofile.xml) that you can edit and use as a basis for creating other profile files. For more information about editing CVC profiles, see the Cisco AnyConnect VPN Client Administrator Guide.
Examples In the following example, the user enters the anyconnect profiles value command, which displays the available profiles:
ciscoasa(config-group-webvpn)# anyconnect profiles value ?
config-group-webvpn mode commands/options:Available configured profile packages: engineering sales
Then the user configures the group policy to use the CVC profile sales:
ciscoasa(config-group-webvpn)# anyconnect profiles sales
Related Commands Command Description
show webvpn anyconnect Displays information about installed AnyConnect clients.
anyconnect Enables or requires an SSL VPN client for a specific group or user.
anyconnect image Specifies an AnyConnect client package file that the ASA expands in cache memory for downloading to remote PCs.
2-95Cisco ASA Series Command Reference, A through H Commands
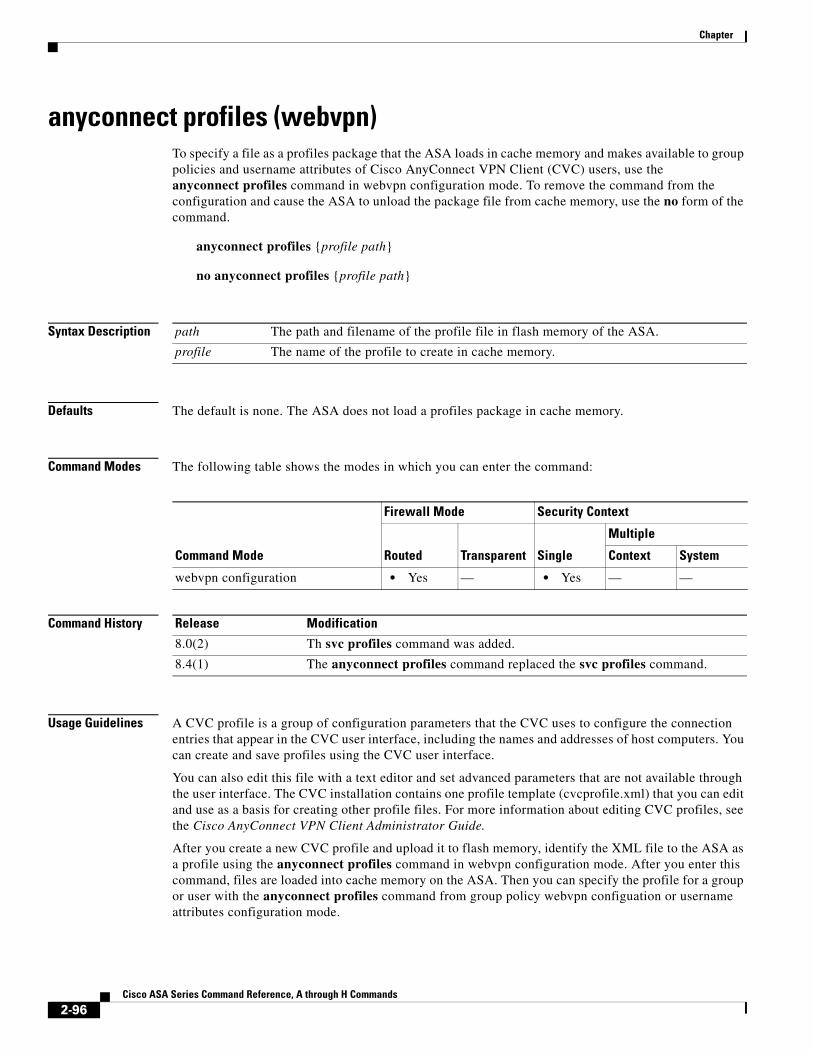
Chapter
anyconnect profiles (webvpn)To specify a file as a profiles package that the ASA loads in cache memory and makes available to group policies and username attributes of Cisco AnyConnect VPN Client (CVC) users, use the anyconnect profiles command in webvpn configuration mode. To remove the command from the configuration and cause the ASA to unload the package file from cache memory, use the no form of the command.
anyconnect profiles {profile path}
no anyconnect profiles {profile path}
Syntax Description
Defaults The default is none. The ASA does not load a profiles package in cache memory.
Command Modes The following table shows the modes in which you can enter the command:
Command History
Usage Guidelines A CVC profile is a group of configuration parameters that the CVC uses to configure the connection entries that appear in the CVC user interface, including the names and addresses of host computers. You can create and save profiles using the CVC user interface.
You can also edit this file with a text editor and set advanced parameters that are not available through the user interface. The CVC installation contains one profile template (cvcprofile.xml) that you can edit and use as a basis for creating other profile files. For more information about editing CVC profiles, see the Cisco AnyConnect VPN Client Administrator Guide.
After you create a new CVC profile and upload it to flash memory, identify the XML file to the ASA as a profile using the anyconnect profiles command in webvpn configuration mode. After you enter this command, files are loaded into cache memory on the ASA. Then you can specify the profile for a group or user with the anyconnect profiles command from group policy webvpn configuation or username attributes configuration mode.
path The path and filename of the profile file in flash memory of the ASA.
profile The name of the profile to create in cache memory.
Command Mode
Firewall Mode Security Context
Routed Transparent Single
Multiple
Context System
webvpn configuration • Yes — • Yes — —
Release Modification
8.0(2) Th svc profiles command was added.
8.4(1) The anyconnect profiles command replaced the svc profiles command.
2-96Cisco ASA Series Command Reference, A through H Commands

Chapter
Examples In the following example, the user previously created two new profile files (sales_hosts.xml and engineering_hosts.xml) from the cvcprofile.xml file provided in the CVC installation and uploaded them to flash memory on the ASA.
Then the user identifies these files to the ASA as CVC profiles, specifying the names sales and engineering:
ciscoasa(config-webvpn)# anyconnect profiles sales disk0:sales_hosts.xmlciscoasa(config-webvpn)# anyconnect profiles engineering disk0:engineering_hosts.xml
Entering the dir cache:stc/profiles command shows the profiles that have been loaded into cache memory:
ciscoasa(config-webvpn)# dir cache:stc/profiles
Directory of cache:stc/profiles/
0 ---- 774 11:54:41 Nov 22 2006 engineering.pkg0 ---- 774 11:54:29 Nov 22 2006 sales.pkg
2428928 bytes total (18219008 bytes free)ciscoasa(config-webvpn)#
These profiles are available to the svc profiles command in group policy webvpn configuration or username attributes configurate modes:
ciscoasa(config)# group-policy sales attributesciscoasa(config-group-policy)# webvpnciscoasa(config-group-webvpn)# anyconnect profiles value ?
config-group-webvpn mode commands/options:Available configured profile packages: engineering sales
Related Commands Command Description
show webvpn anyconnect Displays information about installed AnyConnect clients.
anyconnect Enables or requires the SSL VPN client for a specific group or user.
anyconnect image Specifies an AnyConnect package file that the ASA expands in cache memory for downloading to remote PCs.
2-97Cisco ASA Series Command Reference, A through H Commands
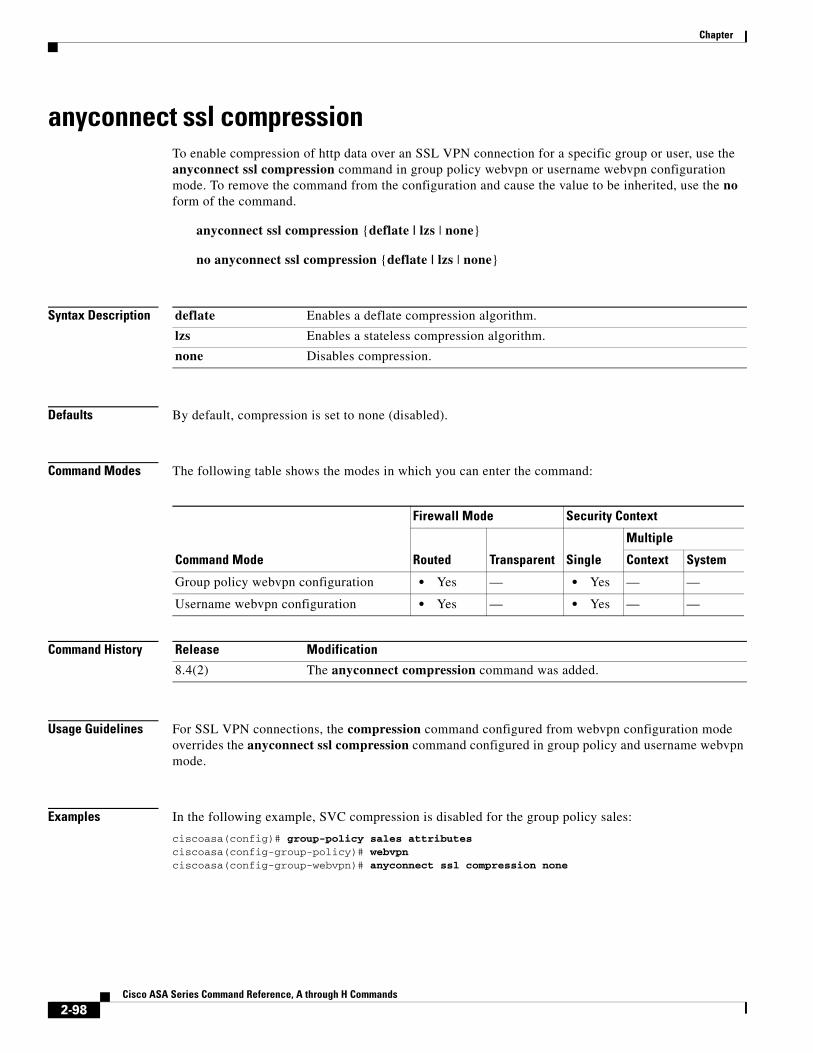
Chapter
anyconnect ssl compressionTo enable compression of http data over an SSL VPN connection for a specific group or user, use the anyconnect ssl compression command in group policy webvpn or username webvpn configuration mode. To remove the command from the configuration and cause the value to be inherited, use the no form of the command.
anyconnect ssl compression {deflate | lzs | none}
no anyconnect ssl compression {deflate | lzs | none}
Syntax Description
Defaults By default, compression is set to none (disabled).
Command Modes The following table shows the modes in which you can enter the command:
Command History
Usage Guidelines For SSL VPN connections, the compression command configured from webvpn configuration mode overrides the anyconnect ssl compression command configured in group policy and username webvpn mode.
Examples In the following example, SVC compression is disabled for the group policy sales:
ciscoasa(config)# group-policy sales attributesciscoasa(config-group-policy)# webvpnciscoasa(config-group-webvpn)# anyconnect ssl compression none
deflate Enables a deflate compression algorithm.
lzs Enables a stateless compression algorithm.
none Disables compression.
Command Mode
Firewall Mode Security Context
Routed Transparent Single
Multiple
Context System
Group policy webvpn configuration • Yes — • Yes — —
Username webvpn configuration • Yes — • Yes — —
Release Modification
8.4(2) The anyconnect compression command was added.
2-98Cisco ASA Series Command Reference, A through H Commands
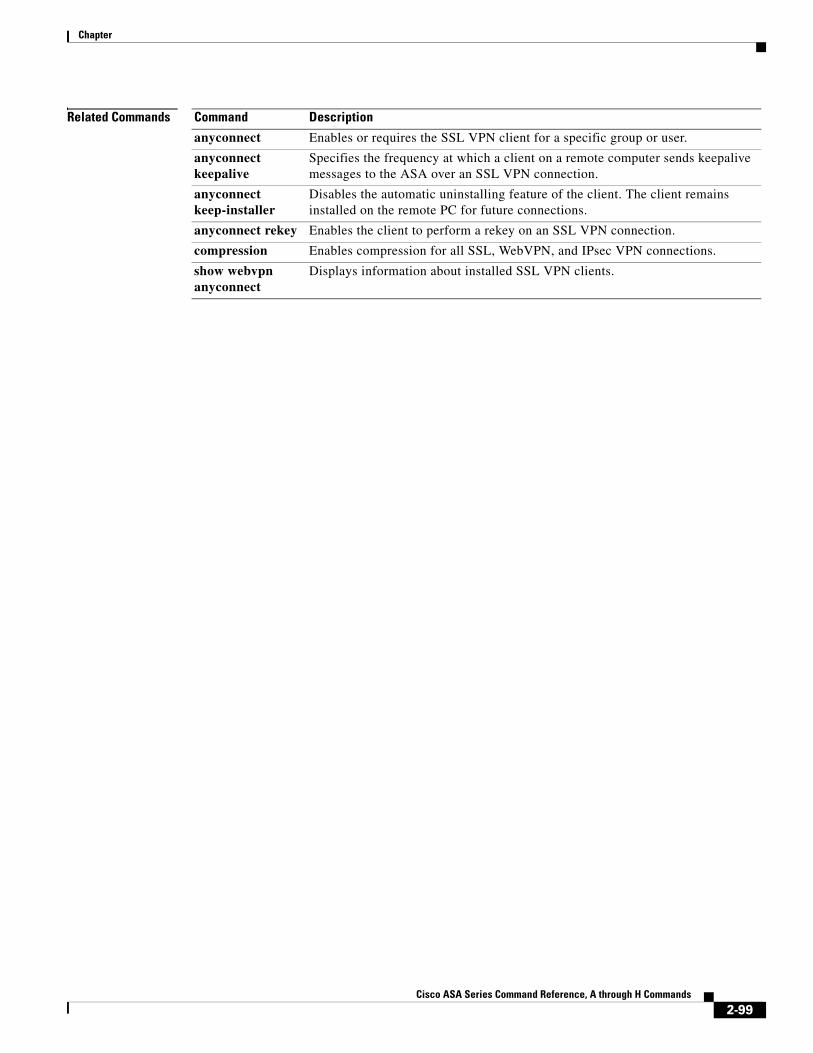
Chapter
Related Commands Command Description
anyconnect Enables or requires the SSL VPN client for a specific group or user.
anyconnect keepalive
Specifies the frequency at which a client on a remote computer sends keepalive messages to the ASA over an SSL VPN connection.
anyconnect keep-installer
Disables the automatic uninstalling feature of the client. The client remains installed on the remote PC for future connections.
anyconnect rekey Enables the client to perform a rekey on an SSL VPN connection.
compression Enables compression for all SSL, WebVPN, and IPsec VPN connections.
show webvpn anyconnect
Displays information about installed SSL VPN clients.
2-99Cisco ASA Series Command Reference, A through H Commands
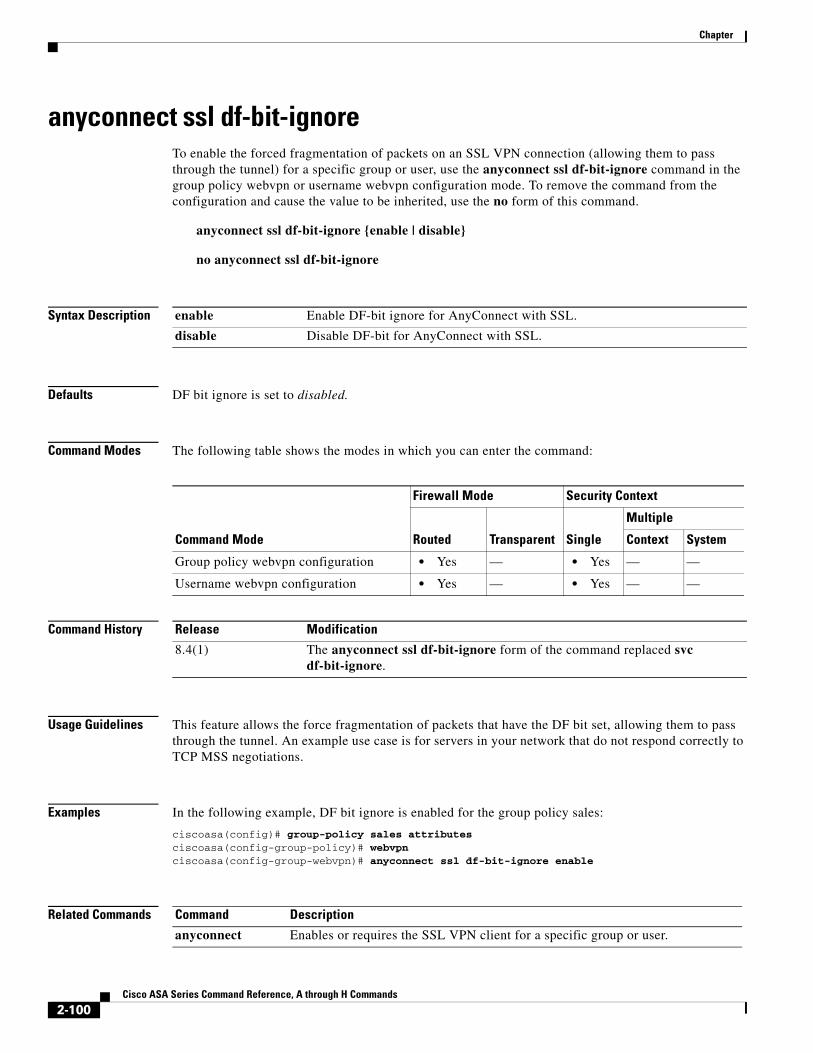
Chapter
anyconnect ssl df-bit-ignoreTo enable the forced fragmentation of packets on an SSL VPN connection (allowing them to pass through the tunnel) for a specific group or user, use the anyconnect ssl df-bit-ignore command in the group policy webvpn or username webvpn configuration mode. To remove the command from the configuration and cause the value to be inherited, use the no form of this command.
anyconnect ssl df-bit-ignore {enable | disable}
no anyconnect ssl df-bit-ignore
Syntax Description
Defaults DF bit ignore is set to disabled.
Command Modes The following table shows the modes in which you can enter the command:
Command History
Usage Guidelines This feature allows the force fragmentation of packets that have the DF bit set, allowing them to pass through the tunnel. An example use case is for servers in your network that do not respond correctly to TCP MSS negotiations.
Examples In the following example, DF bit ignore is enabled for the group policy sales:
ciscoasa(config)# group-policy sales attributesciscoasa(config-group-policy)# webvpnciscoasa(config-group-webvpn)# anyconnect ssl df-bit-ignore enable
Related Commands
enable Enable DF-bit ignore for AnyConnect with SSL.
disable Disable DF-bit for AnyConnect with SSL.
Command Mode
Firewall Mode Security Context
Routed Transparent Single
Multiple
Context System
Group policy webvpn configuration • Yes — • Yes — —
Username webvpn configuration • Yes — • Yes — —
Release Modification
8.4(1) The anyconnect ssl df-bit-ignore form of the command replaced svc df-bit-ignore.
Command Description
anyconnect Enables or requires the SSL VPN client for a specific group or user.
2-100Cisco ASA Series Command Reference, A through H Commands
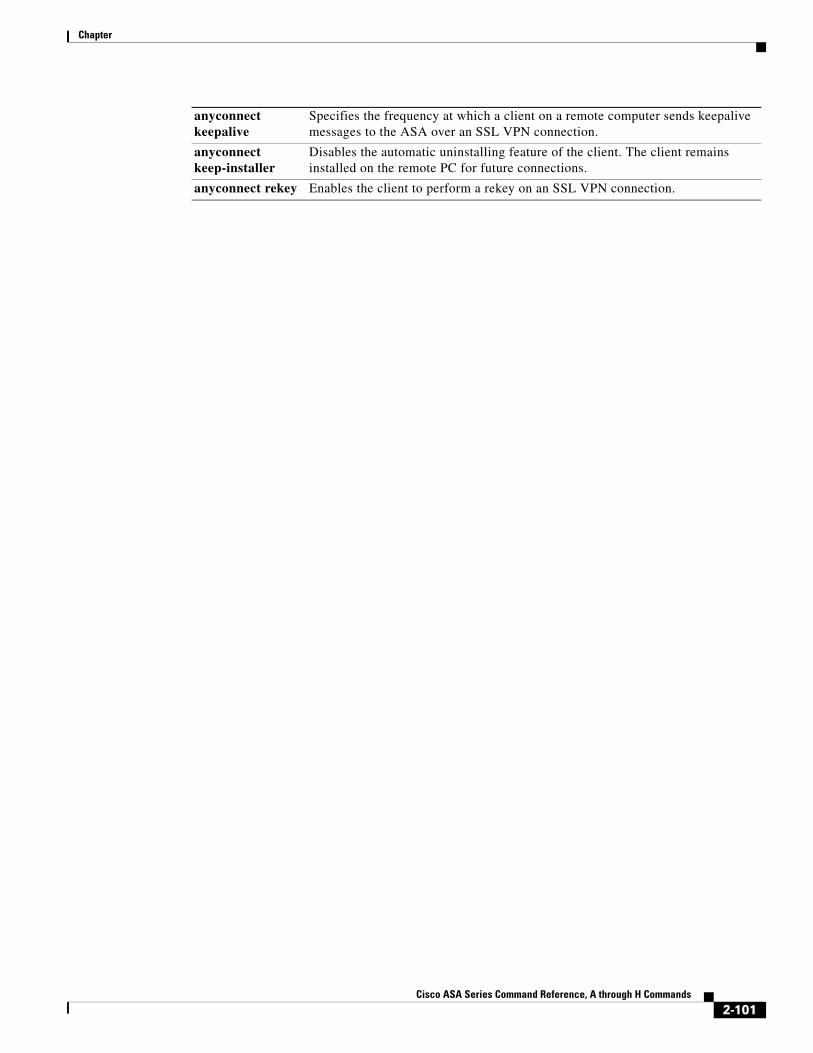
Chapter
anyconnect keepalive
Specifies the frequency at which a client on a remote computer sends keepalive messages to the ASA over an SSL VPN connection.
anyconnect keep-installer
Disables the automatic uninstalling feature of the client. The client remains installed on the remote PC for future connections.
anyconnect rekey Enables the client to perform a rekey on an SSL VPN connection.
2-101Cisco ASA Series Command Reference, A through H Commands
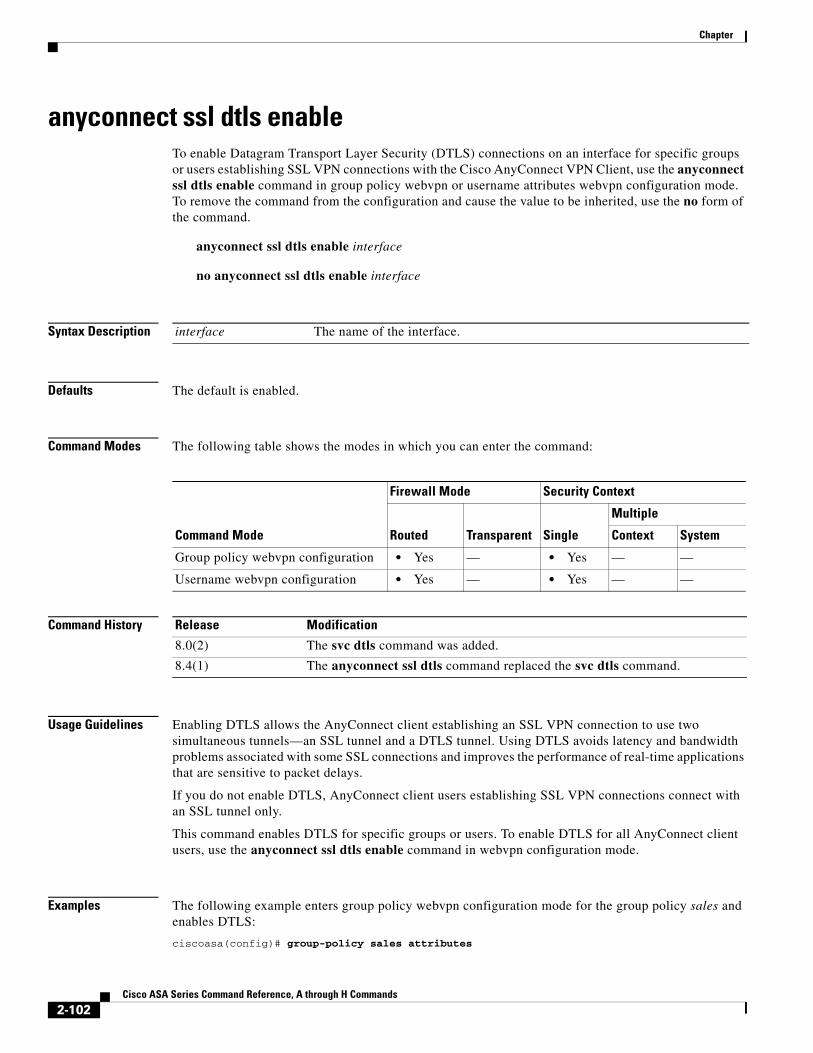
Chapter
anyconnect ssl dtls enableTo enable Datagram Transport Layer Security (DTLS) connections on an interface for specific groups or users establishing SSL VPN connections with the Cisco AnyConnect VPN Client, use the anyconnect ssl dtls enable command in group policy webvpn or username attributes webvpn configuration mode. To remove the command from the configuration and cause the value to be inherited, use the no form of the command.
anyconnect ssl dtls enable interface
no anyconnect ssl dtls enable interface
Syntax Description
Defaults The default is enabled.
Command Modes The following table shows the modes in which you can enter the command:
Command History
Usage Guidelines Enabling DTLS allows the AnyConnect client establishing an SSL VPN connection to use two simultaneous tunnels—an SSL tunnel and a DTLS tunnel. Using DTLS avoids latency and bandwidth problems associated with some SSL connections and improves the performance of real-time applications that are sensitive to packet delays.
If you do not enable DTLS, AnyConnect client users establishing SSL VPN connections connect with an SSL tunnel only.
This command enables DTLS for specific groups or users. To enable DTLS for all AnyConnect client users, use the anyconnect ssl dtls enable command in webvpn configuration mode.
Examples The following example enters group policy webvpn configuration mode for the group policy sales and enables DTLS:
ciscoasa(config)# group-policy sales attributes
interface The name of the interface.
Command Mode
Firewall Mode Security Context
Routed Transparent Single
Multiple
Context System
Group policy webvpn configuration • Yes — • Yes — —
Username webvpn configuration • Yes — • Yes — —
Release Modification
8.0(2) The svc dtls command was added.
8.4(1) The anyconnect ssl dtls command replaced the svc dtls command.
2-102Cisco ASA Series Command Reference, A through H Commands
Chapter
ciscoasa(config-group-policy)# webvpnciscoasa(config-group-webvpn)# anyconnect ssl dtls enable
Related Commands Command Description
dtls port Specifies a UDP port for DTLS.
anyconnect dtls Enables DTLS for groups or users establishing SSL VPN connections.
vpn-tunnel-protocol Specifies VPN protocols that the ASA allows for remote access, including SSL.
2-103Cisco ASA Series Command Reference, A through H Commands
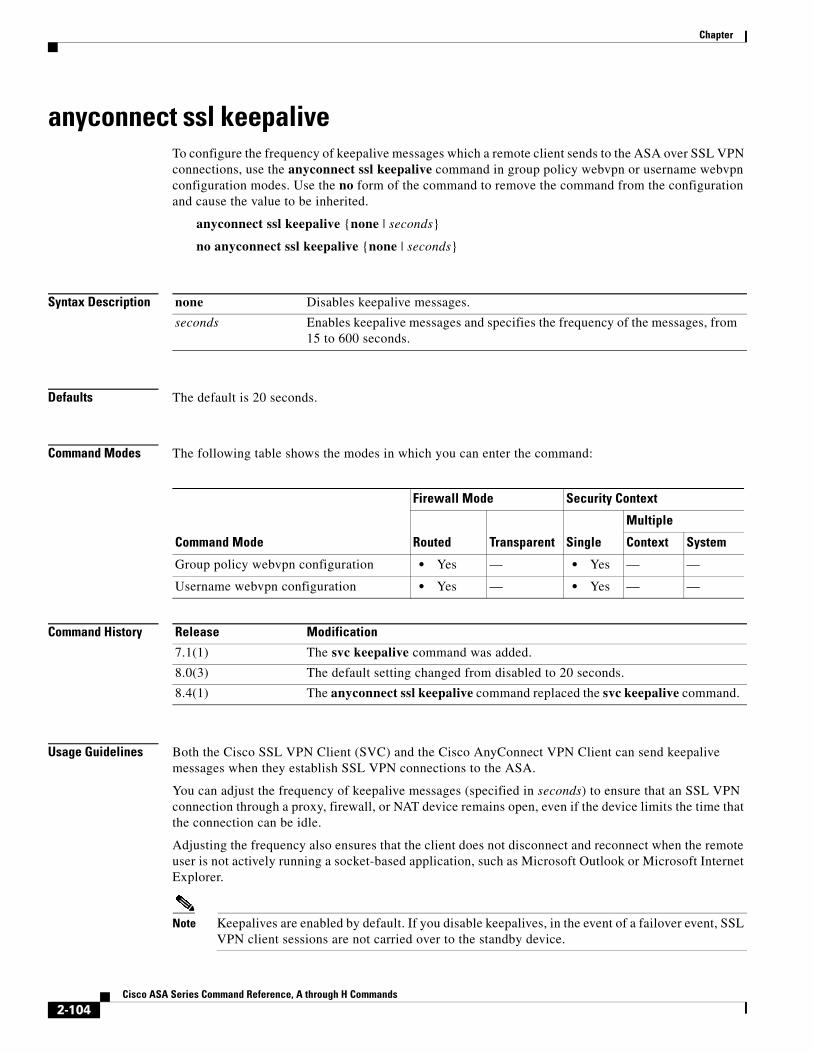
Chapter
anyconnect ssl keepaliveTo configure the frequency of keepalive messages which a remote client sends to the ASA over SSL VPN connections, use the anyconnect ssl keepalive command in group policy webvpn or username webvpn configuration modes. Use the no form of the command to remove the command from the configuration and cause the value to be inherited.
anyconnect ssl keepalive {none | seconds}
no anyconnect ssl keepalive {none | seconds}
Syntax Description
Defaults The default is 20 seconds.
Command Modes The following table shows the modes in which you can enter the command:
Command History
Usage Guidelines Both the Cisco SSL VPN Client (SVC) and the Cisco AnyConnect VPN Client can send keepalive messages when they establish SSL VPN connections to the ASA.
You can adjust the frequency of keepalive messages (specified in seconds) to ensure that an SSL VPN connection through a proxy, firewall, or NAT device remains open, even if the device limits the time that the connection can be idle.
Adjusting the frequency also ensures that the client does not disconnect and reconnect when the remote user is not actively running a socket-based application, such as Microsoft Outlook or Microsoft Internet Explorer.
Note Keepalives are enabled by default. If you disable keepalives, in the event of a failover event, SSL VPN client sessions are not carried over to the standby device.
none Disables keepalive messages.
seconds Enables keepalive messages and specifies the frequency of the messages, from 15 to 600 seconds.
Command Mode
Firewall Mode Security Context
Routed Transparent Single
Multiple
Context System
Group policy webvpn configuration • Yes — • Yes — —
Username webvpn configuration • Yes — • Yes — —
Release Modification
7.1(1) The svc keepalive command was added.
8.0(3) The default setting changed from disabled to 20 seconds.
8.4(1) The anyconnect ssl keepalive command replaced the svc keepalive command.
2-104Cisco ASA Series Command Reference, A through H Commands
Chapter
Examples In the following example, the user configures the ASA to enable the client to send keepalive messages, with a frequency of 300 seconds (5 minutes), for the existing group policy named sales:
ciscoasa(config)# group-policy sales attributesciscoasa(config-group-policy)# webvpnciscoasa(config-group-webvpn)# anyconnect ssl keepalive 300
Related Commands Command Description
anyconnect Enables or requires an SSL VPN client for a specific group or user.
anyconnect dpd-interval
Enables Dead Peer Detection (DPD) on the ASA, and sets the frequency in which either the client or the ASA performs DPD.
anyconnect keep-installer
Disables the automatic uninstalling feature of the client. The client remains installed on the remote PC for future connections.
anyconnect ssl rekey
Enables the client to perform a rekey on a session.
2-105Cisco ASA Series Command Reference, A through H Commands
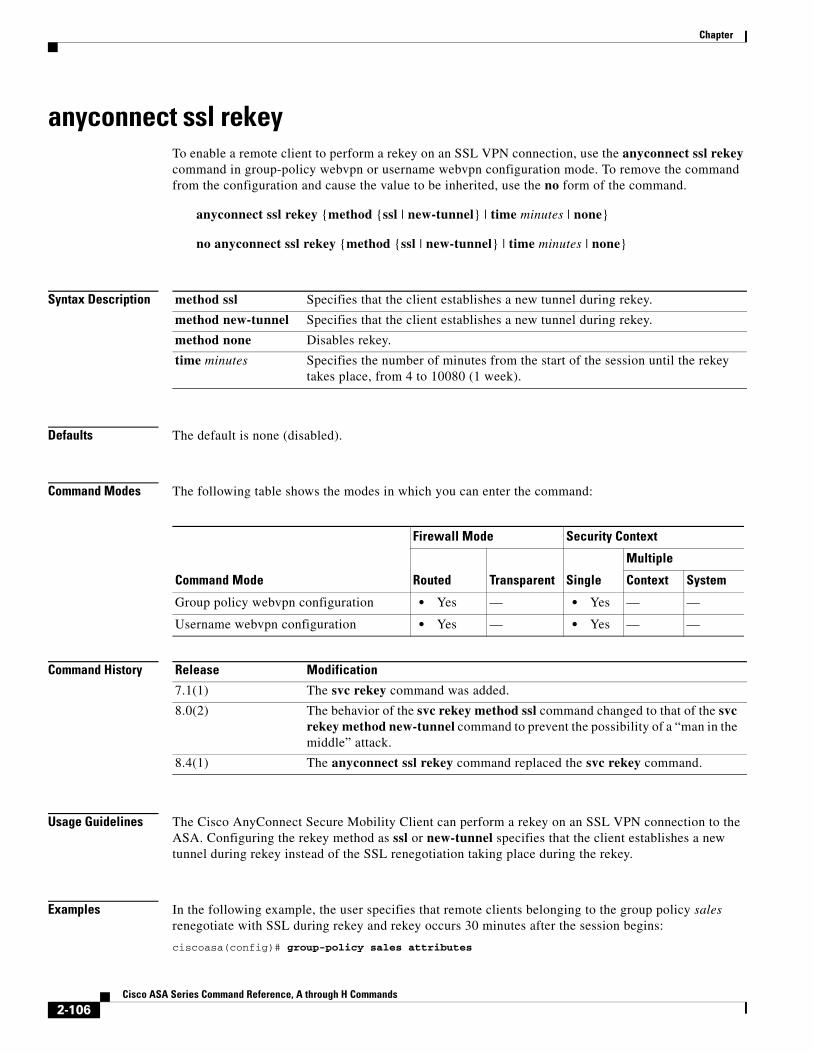
Chapter
anyconnect ssl rekeyTo enable a remote client to perform a rekey on an SSL VPN connection, use the anyconnect ssl rekey command in group-policy webvpn or username webvpn configuration mode. To remove the command from the configuration and cause the value to be inherited, use the no form of the command.
anyconnect ssl rekey {method {ssl | new-tunnel} | time minutes | none}
no anyconnect ssl rekey {method {ssl | new-tunnel} | time minutes | none}
Syntax Description
Defaults The default is none (disabled).
Command Modes The following table shows the modes in which you can enter the command:
Command History
Usage Guidelines The Cisco AnyConnect Secure Mobility Client can perform a rekey on an SSL VPN connection to the ASA. Configuring the rekey method as ssl or new-tunnel specifies that the client establishes a new tunnel during rekey instead of the SSL renegotiation taking place during the rekey.
Examples In the following example, the user specifies that remote clients belonging to the group policy sales renegotiate with SSL during rekey and rekey occurs 30 minutes after the session begins:
ciscoasa(config)# group-policy sales attributes
method ssl Specifies that the client establishes a new tunnel during rekey.
method new-tunnel Specifies that the client establishes a new tunnel during rekey.
method none Disables rekey.
time minutes Specifies the number of minutes from the start of the session until the rekey takes place, from 4 to 10080 (1 week).
Command Mode
Firewall Mode Security Context
Routed Transparent Single
Multiple
Context System
Group policy webvpn configuration • Yes — • Yes — —
Username webvpn configuration • Yes — • Yes — —
Release Modification
7.1(1) The svc rekey command was added.
8.0(2) The behavior of the svc rekey method ssl command changed to that of the svc rekey method new-tunnel command to prevent the possibility of a “man in the middle” attack.
8.4(1) The anyconnect ssl rekey command replaced the svc rekey command.
2-106Cisco ASA Series Command Reference, A through H Commands
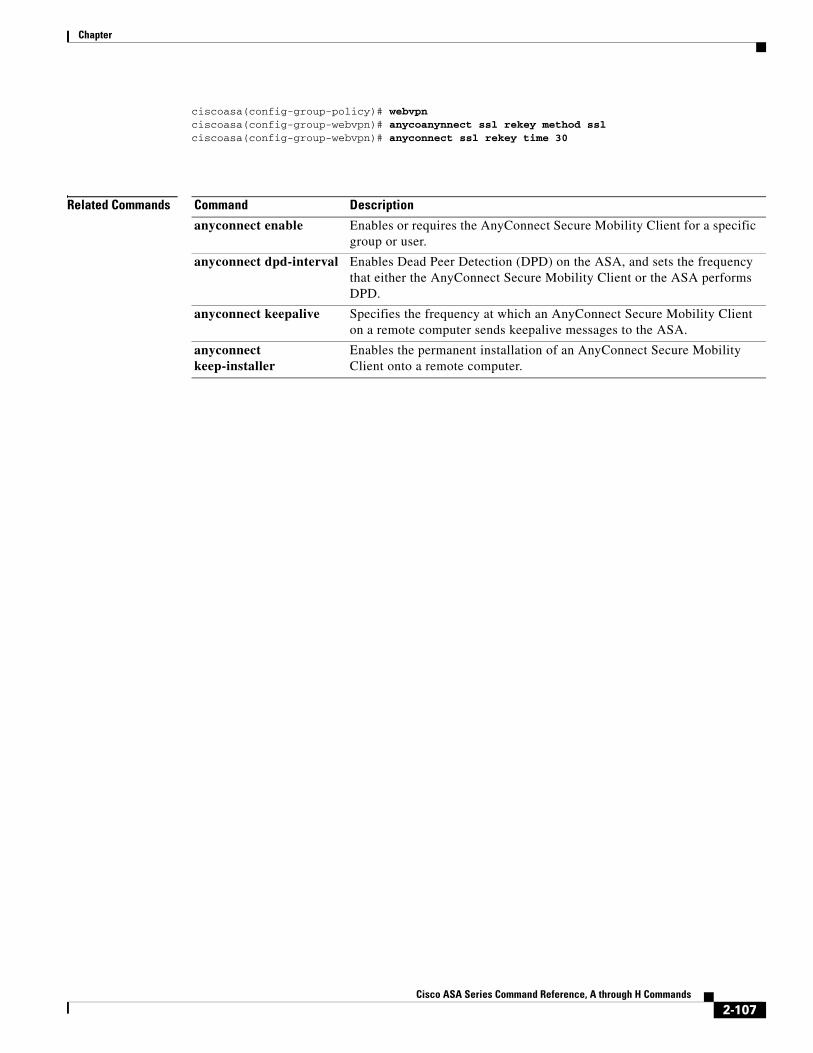
Chapter
ciscoasa(config-group-policy)# webvpnciscoasa(config-group-webvpn)# anycoanynnect ssl rekey method sslciscoasa(config-group-webvpn)# anyconnect ssl rekey time 30
Related Commands Command Description
anyconnect enable Enables or requires the AnyConnect Secure Mobility Client for a specific group or user.
anyconnect dpd-interval Enables Dead Peer Detection (DPD) on the ASA, and sets the frequency that either the AnyConnect Secure Mobility Client or the ASA performs DPD.
anyconnect keepalive Specifies the frequency at which an AnyConnect Secure Mobility Client on a remote computer sends keepalive messages to the ASA.
anyconnect keep-installer
Enables the permanent installation of an AnyConnect Secure Mobility Client onto a remote computer.
2-107Cisco ASA Series Command Reference, A through H Commands
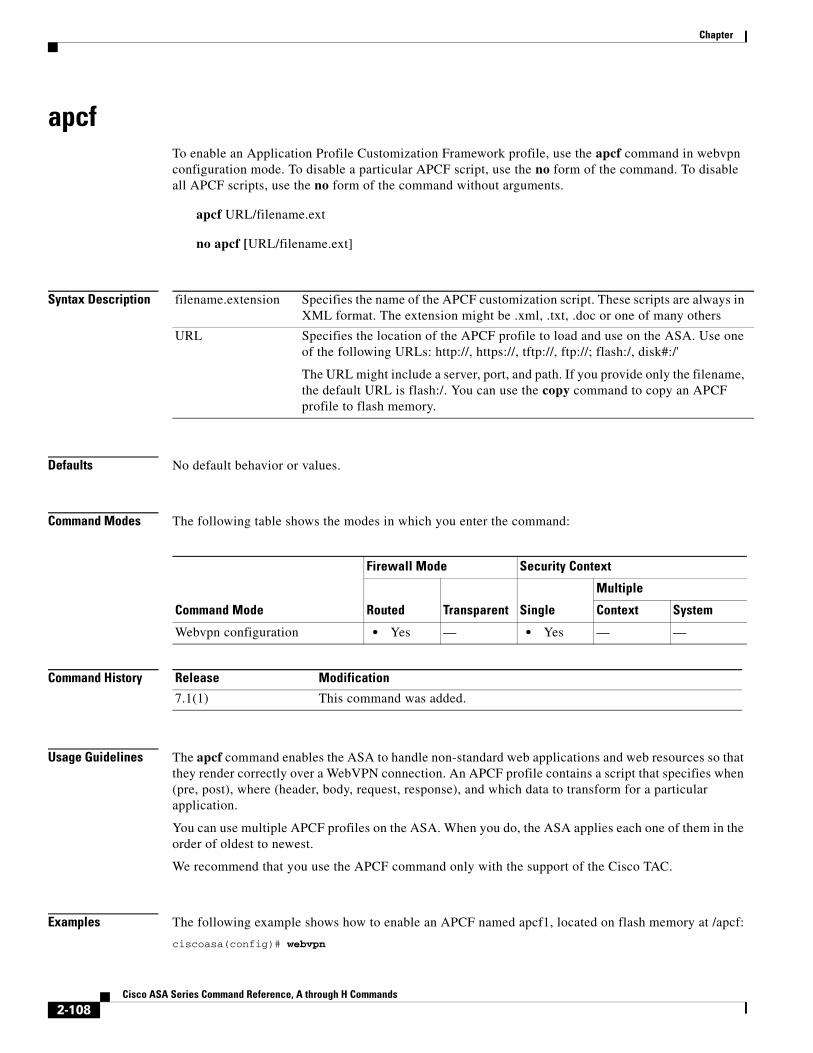
Chapter
apcfTo enable an Application Profile Customization Framework profile, use the apcf command in webvpn configuration mode. To disable a particular APCF script, use the no form of the command. To disable all APCF scripts, use the no form of the command without arguments.
apcf URL/filename.ext
no apcf [URL/filename.ext]
Syntax Description
Defaults No default behavior or values.
Command Modes The following table shows the modes in which you enter the command:
Command History
Usage Guidelines The apcf command enables the ASA to handle non-standard web applications and web resources so that they render correctly over a WebVPN connection. An APCF profile contains a script that specifies when (pre, post), where (header, body, request, response), and which data to transform for a particular application.
You can use multiple APCF profiles on the ASA. When you do, the ASA applies each one of them in the order of oldest to newest.
We recommend that you use the APCF command only with the support of the Cisco TAC.
Examples The following example shows how to enable an APCF named apcf1, located on flash memory at /apcf:
ciscoasa(config)# webvpn
filename.extension Specifies the name of the APCF customization script. These scripts are always in XML format. The extension might be .xml, .txt, .doc or one of many others
URL Specifies the location of the APCF profile to load and use on the ASA. Use one of the following URLs: http://, https://, tftp://, ftp://; flash:/, disk#:/'
The URL might include a server, port, and path. If you provide only the filename, the default URL is flash:/. You can use the copy command to copy an APCF profile to flash memory.
Command Mode
Firewall Mode Security Context
Routed Transparent Single
Multiple
Context System
Webvpn configuration • Yes — • Yes — —
Release Modification
7.1(1) This command was added.
2-108Cisco ASA Series Command Reference, A through H Commands

Chapter
ciscoasa(config-webvpn)# apcf flash:/apcf/apcf1.xmlciscoasa(config-webvpn)#
This example shows how to enable an APCF named apcf2.xml, located on an HTTPS server called myserver, port 1440 with the path /apcf:
ciscoasa(config)# webvpnciscoasa(config-webvpn)# apcf https://myserver:1440/apcf/apcf2.xmlciscoasa(config-webvpn)#
Related Commands Command Description
proxy-bypass Configures minimal content rewriting for a particular application.
rewrite Determines whether traffic travels through the ASA.
show running config webvpn apcf Displays the APCF configuration.
2-109Cisco ASA Series Command Reference, A through H Commands
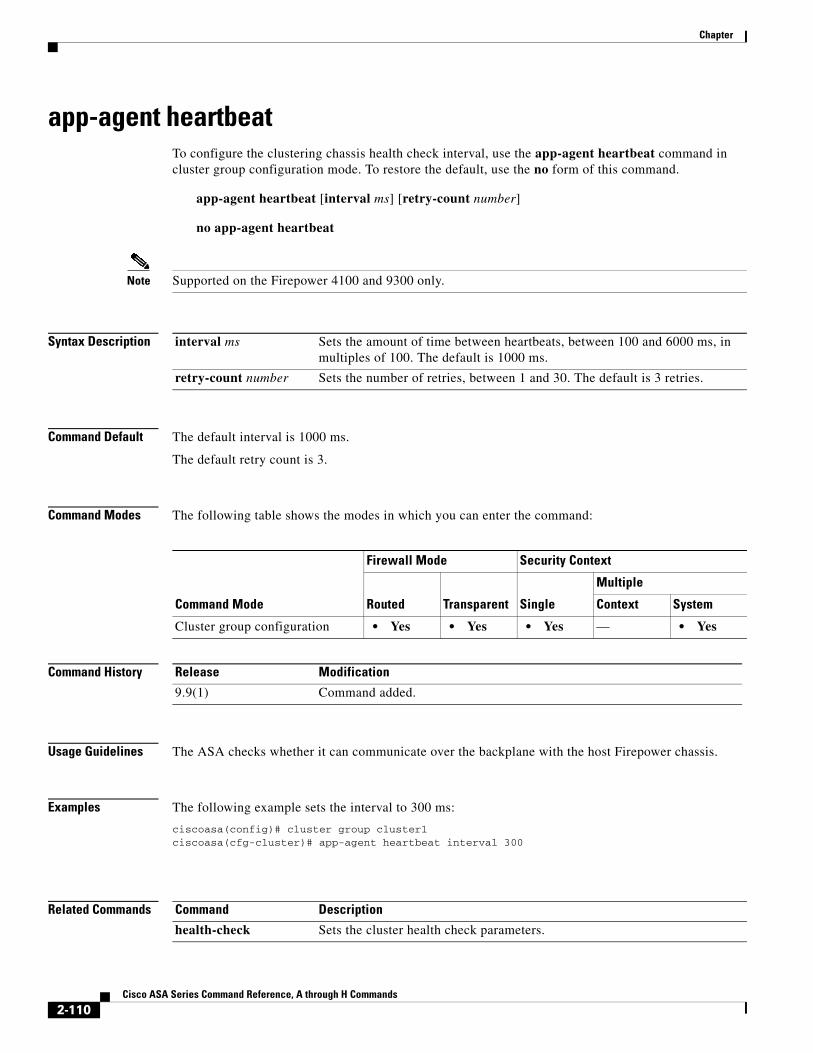
Chapter
app-agent heartbeatTo configure the clustering chassis health check interval, use the app-agent heartbeat command in cluster group configuration mode. To restore the default, use the no form of this command.
app-agent heartbeat [interval ms] [retry-count number]
no app-agent heartbeat
Note Supported on the Firepower 4100 and 9300 only.
Syntax Description
Command Default The default interval is 1000 ms.
The default retry count is 3.
Command Modes The following table shows the modes in which you can enter the command:
Command History
Usage Guidelines The ASA checks whether it can communicate over the backplane with the host Firepower chassis.
Examples The following example sets the interval to 300 ms:
ciscoasa(config)# cluster group cluster1ciscoasa(cfg-cluster)# app-agent heartbeat interval 300
Related Commands
interval ms Sets the amount of time between heartbeats, between 100 and 6000 ms, in multiples of 100. The default is 1000 ms.
retry-count number Sets the number of retries, between 1 and 30. The default is 3 retries.
Command Mode
Firewall Mode Security Context
Routed Transparent Single
Multiple
Context System
Cluster group configuration • Yes • Yes • Yes — • Yes
Release Modification
9.9(1) Command added.
Command Description
health-check Sets the cluster health check parameters.
2-110Cisco ASA Series Command Reference, A through H Commands

Chapter
appl-aclTo identify a previously configured webtype ACL to apply to a session, use the appl-acl command in dap webvpn configuration mode. To remove the attribute from the configuration, use the no form of the command. To remove all web-type ACLs, use the no form of the command without arguments.
appl-acl [identifier]
no appl-acl [identifier]
Syntax Description
Defaults No default value or behaviors.
Command Modes The following table shows the modes in which you can enter the command:
Command History
Usage Guidelines To configure webtype ACLs, use the access-list webtype command in global configuration mode.
Use the appl-acl command multiple times to apply more than one webtype ACL to the DAP policy.
Examples The following example shows how to apply the previously configured webtype ACL called newacl to the dynamic access policy:
ciscoasa (config)# config-dynamic-access-policy-record Financeciscoasa(config-dynamic-access-policy-record)# webvpnciscoasa(config-dynamic-access-policy-record)# appl-acl newacl
Related Commands
identifier The name of the previously configured webtype ACL. The maximum length is 240 characters.
Command Mode
Firewall Mode Security Context
Routed Transparent Single
Multiple
Context System
Dap webvpn configuration • Yes • Yes • Yes — —
Release Modification
8.0(2) This command was added.
Command Description
dynamic-access-policy-record Creates a DAP record.
access-list_webtype Creates a web-type ACL.
2-111Cisco ASA Series Command Reference, A through H Commands
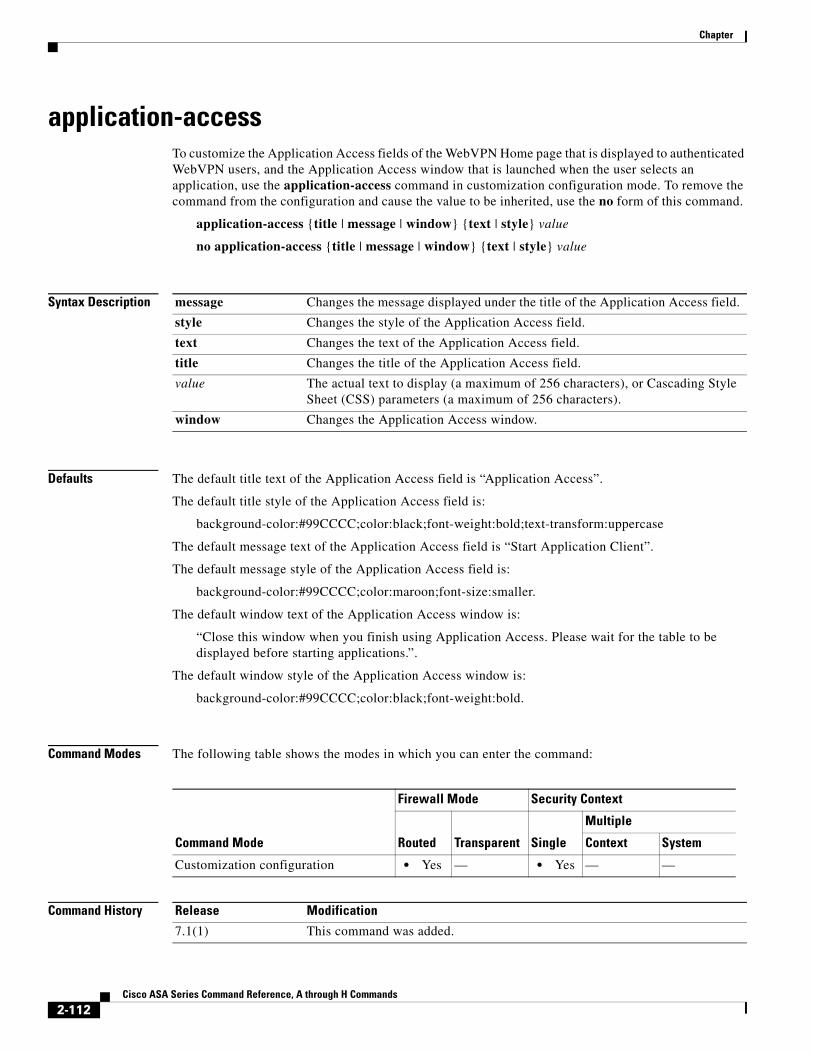
Chapter
application-accessTo customize the Application Access fields of the WebVPN Home page that is displayed to authenticated WebVPN users, and the Application Access window that is launched when the user selects an application, use the application-access command in customization configuration mode. To remove the command from the configuration and cause the value to be inherited, use the no form of this command.
application-access {title | message | window} {text | style} value
no application-access {title | message | window} {text | style} value
Syntax Description
Defaults The default title text of the Application Access field is “Application Access”.
The default title style of the Application Access field is:
background-color:#99CCCC;color:black;font-weight:bold;text-transform:uppercase
The default message text of the Application Access field is “Start Application Client”.
The default message style of the Application Access field is:
background-color:#99CCCC;color:maroon;font-size:smaller.
The default window text of the Application Access window is:
“Close this window when you finish using Application Access. Please wait for the table to be displayed before starting applications.”.
The default window style of the Application Access window is:
background-color:#99CCCC;color:black;font-weight:bold.
Command Modes The following table shows the modes in which you can enter the command:
Command History
message Changes the message displayed under the title of the Application Access field.
style Changes the style of the Application Access field.
text Changes the text of the Application Access field.
title Changes the title of the Application Access field.
value The actual text to display (a maximum of 256 characters), or Cascading Style Sheet (CSS) parameters (a maximum of 256 characters).
window Changes the Application Access window.
Command Mode
Firewall Mode Security Context
Routed Transparent Single
Multiple
Context System
Customization configuration • Yes — • Yes — —
Release Modification
7.1(1) This command was added.
2-112Cisco ASA Series Command Reference, A through H Commands
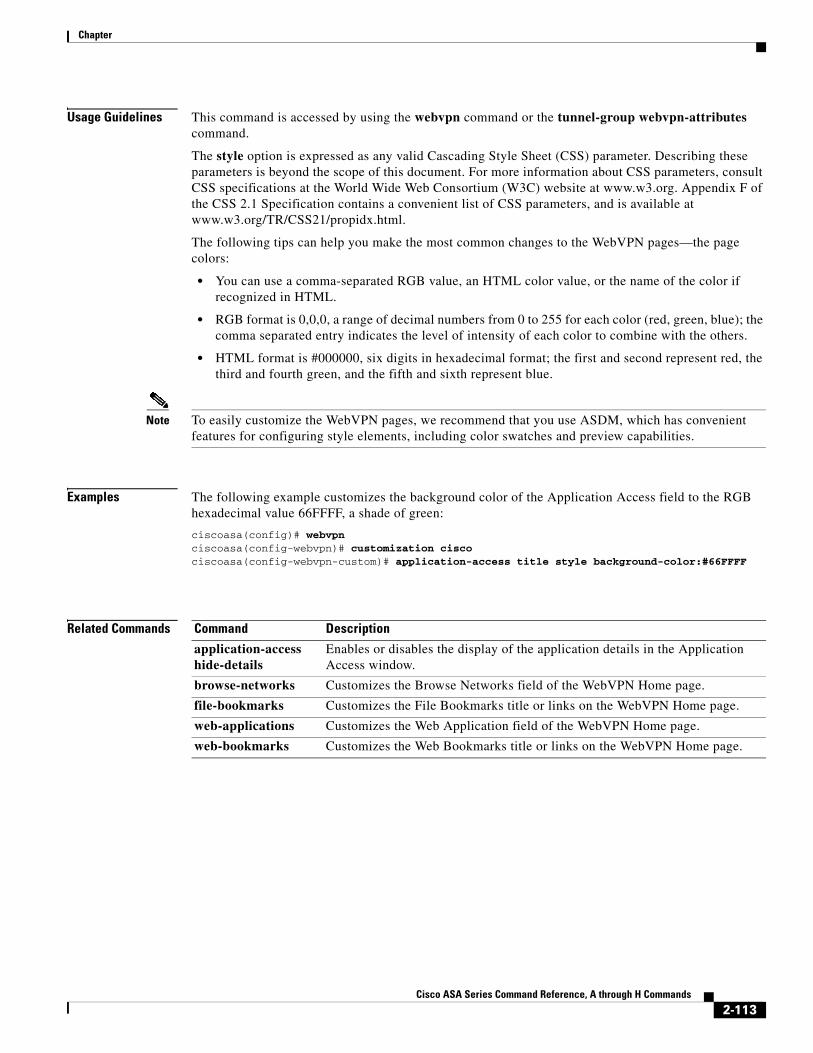
Chapter
Usage Guidelines This command is accessed by using the webvpn command or the tunnel-group webvpn-attributes command.
The style option is expressed as any valid Cascading Style Sheet (CSS) parameter. Describing these parameters is beyond the scope of this document. For more information about CSS parameters, consult CSS specifications at the World Wide Web Consortium (W3C) website at www.w3.org. Appendix F of the CSS 2.1 Specification contains a convenient list of CSS parameters, and is available at www.w3.org/TR/CSS21/propidx.html.
The following tips can help you make the most common changes to the WebVPN pages—the page colors:
• You can use a comma-separated RGB value, an HTML color value, or the name of the color if recognized in HTML.
• RGB format is 0,0,0, a range of decimal numbers from 0 to 255 for each color (red, green, blue); the comma separated entry indicates the level of intensity of each color to combine with the others.
• HTML format is #000000, six digits in hexadecimal format; the first and second represent red, the third and fourth green, and the fifth and sixth represent blue.
Note To easily customize the WebVPN pages, we recommend that you use ASDM, which has convenient features for configuring style elements, including color swatches and preview capabilities.
Examples The following example customizes the background color of the Application Access field to the RGB hexadecimal value 66FFFF, a shade of green:
ciscoasa(config)# webvpnciscoasa(config-webvpn)# customization ciscociscoasa(config-webvpn-custom)# application-access title style background-color:#66FFFF
Related Commands Command Description
application-access hide-details
Enables or disables the display of the application details in the Application Access window.
browse-networks Customizes the Browse Networks field of the WebVPN Home page.
file-bookmarks Customizes the File Bookmarks title or links on the WebVPN Home page.
web-applications Customizes the Web Application field of the WebVPN Home page.
web-bookmarks Customizes the Web Bookmarks title or links on the WebVPN Home page.
2-113Cisco ASA Series Command Reference, A through H Commands
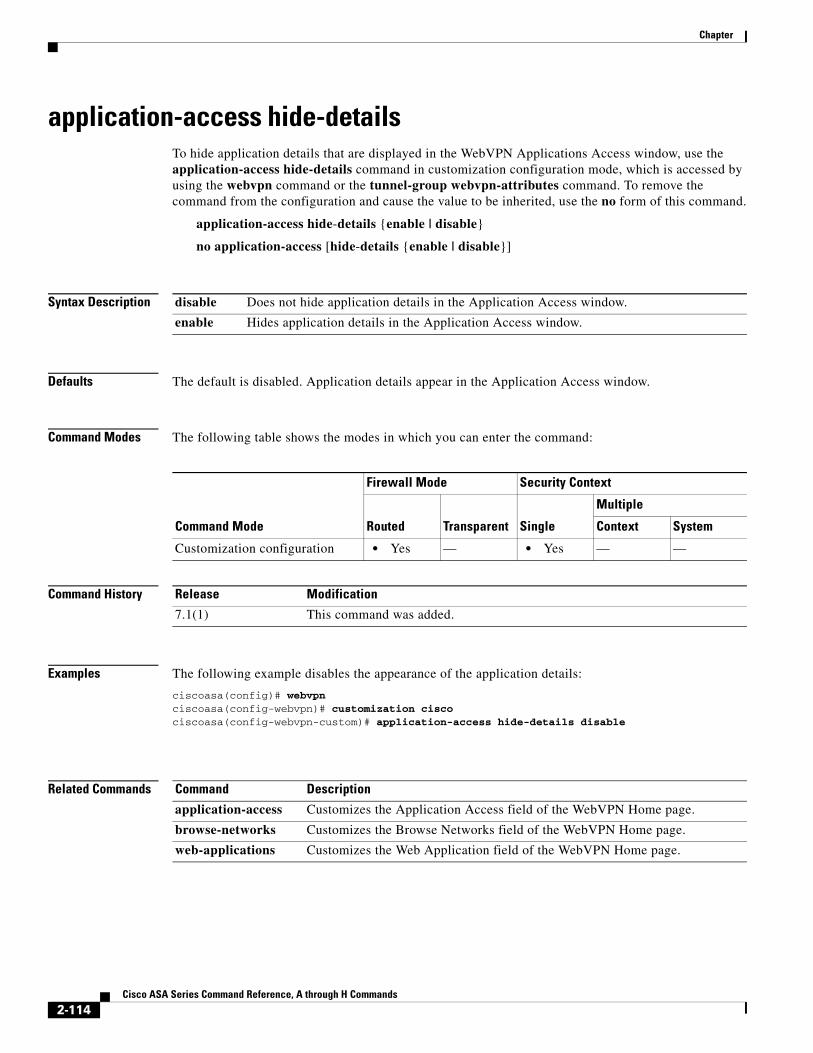
Chapter
application-access hide-detailsTo hide application details that are displayed in the WebVPN Applications Access window, use the application-access hide-details command in customization configuration mode, which is accessed by using the webvpn command or the tunnel-group webvpn-attributes command. To remove the command from the configuration and cause the value to be inherited, use the no form of this command.
application-access hide-details {enable | disable}
no application-access [hide-details {enable | disable}]
Syntax Description
Defaults The default is disabled. Application details appear in the Application Access window.
Command Modes The following table shows the modes in which you can enter the command:
Command History
Examples The following example disables the appearance of the application details:
ciscoasa(config)# webvpnciscoasa(config-webvpn)# customization ciscociscoasa(config-webvpn-custom)# application-access hide-details disable
Related Commands
disable Does not hide application details in the Application Access window.
enable Hides application details in the Application Access window.
Command Mode
Firewall Mode Security Context
Routed Transparent Single
Multiple
Context System
Customization configuration • Yes — • Yes — —
Release Modification
7.1(1) This command was added.
Command Description
application-access Customizes the Application Access field of the WebVPN Home page.
browse-networks Customizes the Browse Networks field of the WebVPN Home page.
web-applications Customizes the Web Application field of the WebVPN Home page.
2-114Cisco ASA Series Command Reference, A through H Commands