Embed Size (px)
Citation preview
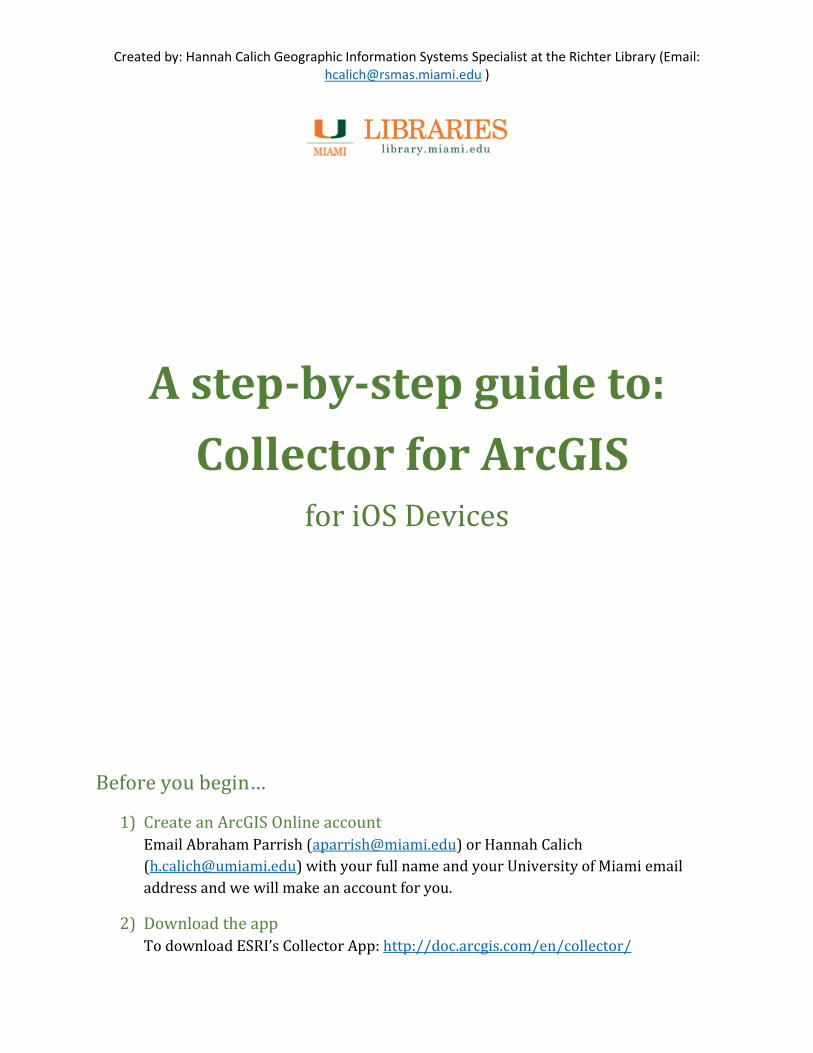
Created by: Hannah Calich Geographic Information Systems Specialist at the Richter Library (Email: [email protected] )
A step-by-step guide to:
Collector for ArcGIS for iOS Devices
Before you begin…
1) Create an ArcGIS Online account
Email Abraham Parrish ([email protected]) or Hannah Calich
([email protected]) with your full name and your University of Miami email
address and we will make an account for you.
2) Download the app
To download ESRI’s Collector App: http://doc.arcgis.com/en/collector/
2
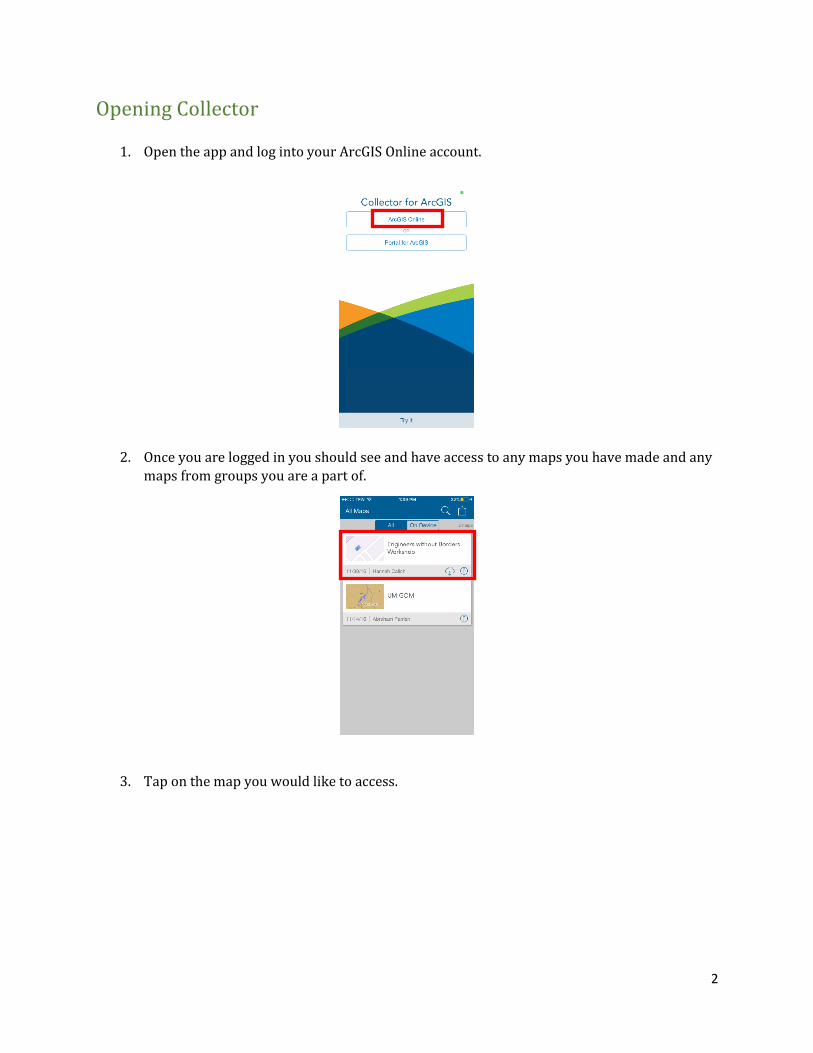
Opening Collector
1. Open the app and log into your ArcGIS Online account.
2. Once you are logged in you should see and have access to any maps you have made and any
maps from groups you are a part of.
3. Tap on the map you would like to access.
3
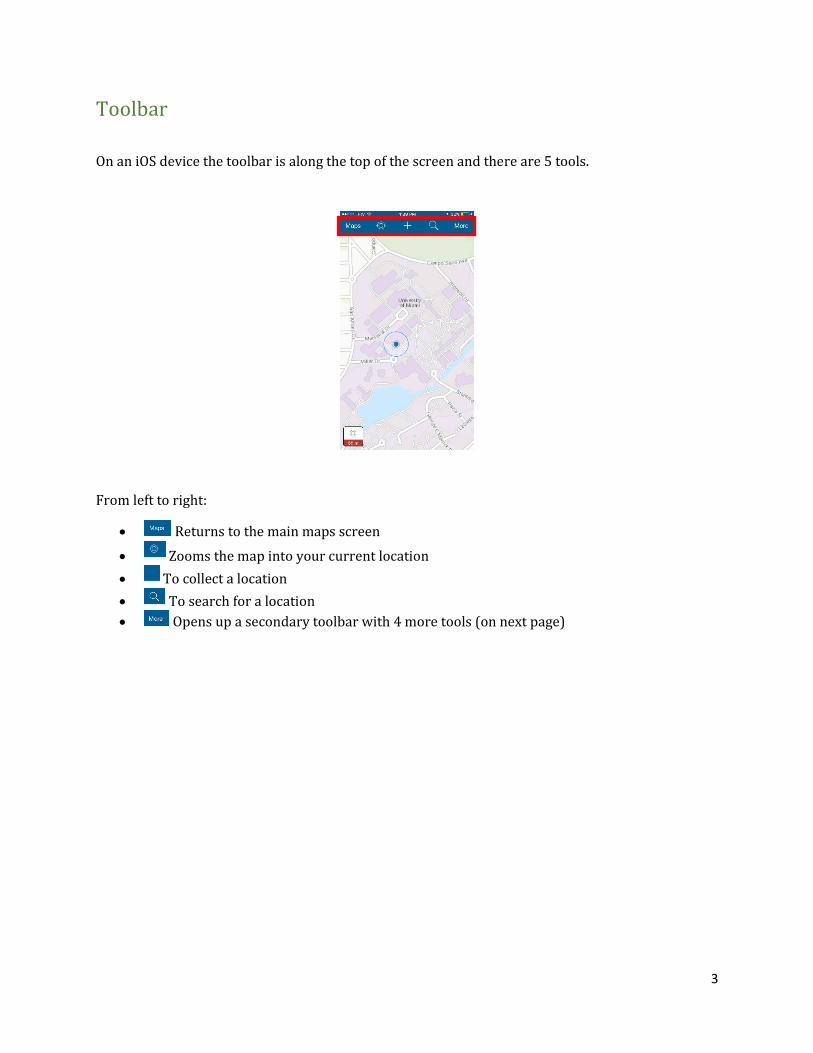
Toolbar
On an iOS device the toolbar is along the top of the screen and there are 5 tools.
From left to right:
Returns to the main maps screen
Zooms the map into your current location
To collect a location
To search for a location
Opens up a secondary toolbar with 4 more tools (on next page)
4
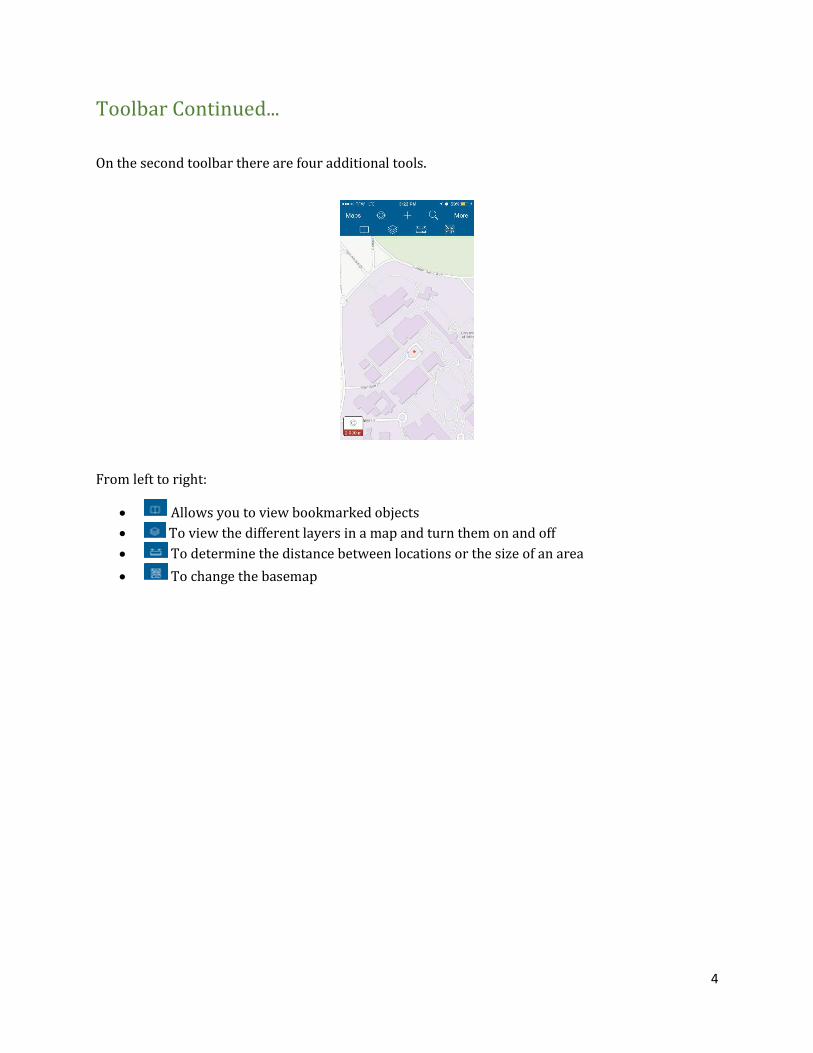
Toolbar Continued...
On the second toolbar there are four additional tools.
From left to right:
Allows you to view bookmarked objects
To view the different layers in a map and turn them on and off
To determine the distance between locations or the size of an area
To change the basemap
5
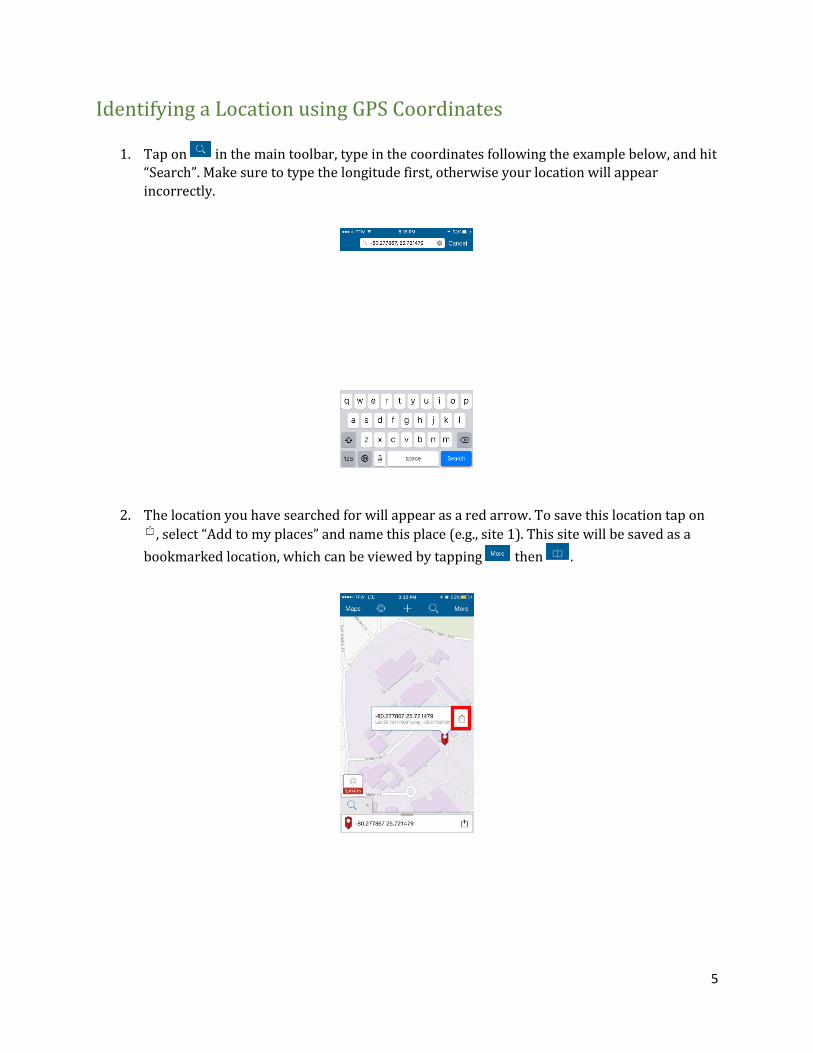
Identifying a Location using GPS Coordinates
1. Tap on in the main toolbar, type in the coordinates following the example below, and hit
“Search”. Make sure to type the longitude first, otherwise your location will appear
incorrectly.
2. The location you have searched for will appear as a red arrow. To save this location tap on
, select “Add to my places” and name this place (e.g., site 1). This site will be saved as a
bookmarked location, which can be viewed by tapping then .

6
Using the Measure Tool
Using ESRI’s Collector app you can either measure the distance of a line, or the area of a
polygon. Tap then to begin measuring.
Measuring a straight line:
1. To measure a straight line, make sure the straight line icon is selected ( ).
2. Tap on a starting point, then another location, and a line with automatically draw. You can
add as many vertices as you would like to your line and the total distance will continue to
update (at the bottom of the screen).
3. To determine the distance from your current location to another location, press then tap
on the location you want to measure to.
Measuring an area:
1. To measure an area, make sure the area icon is selected ( ).
2. Tap on a starting point, then another location, and a polygon with automatically start to
draw. You can add as many vertices as you’d like to your polygon. The total area will
automatically update along the bottom of the screen.
3. To incorporate you current location into the polygon, press then tap on the map to add
other vertices to your polygon.
Tips on using the measure tool:
The units of your line can be changed by tapping the blue bar along the bottom of the screen
To undo your last step, press .
To delete the entire line/area press .
Press “Done” when you are finished measuring to return to the current map.
Measuring a straight line Measuring an area
7
Collecting Features
Collector for ArcGIS allows users to collect point, line, or polygon features. Each feature type can
store geographic data as well as attribute data (if applicable).
To record a feature press to collect a new feature, then tap on the layer you want to add to.
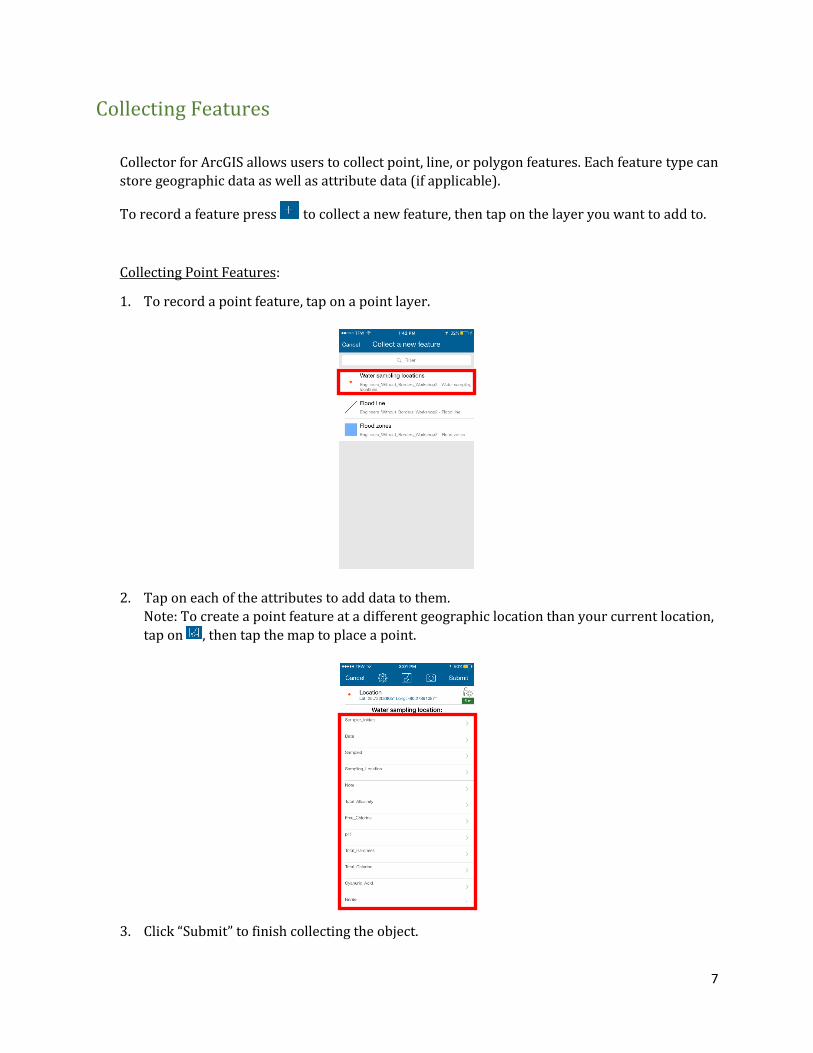
Collecting Point Features:
1. To record a point feature, tap on a point layer.
2. Tap on each of the attributes to add data to them.
Note: To create a point feature at a different geographic location than your current location,
tap on , then tap the map to place a point.
3. Click “Submit” to finish collecting the object.
8
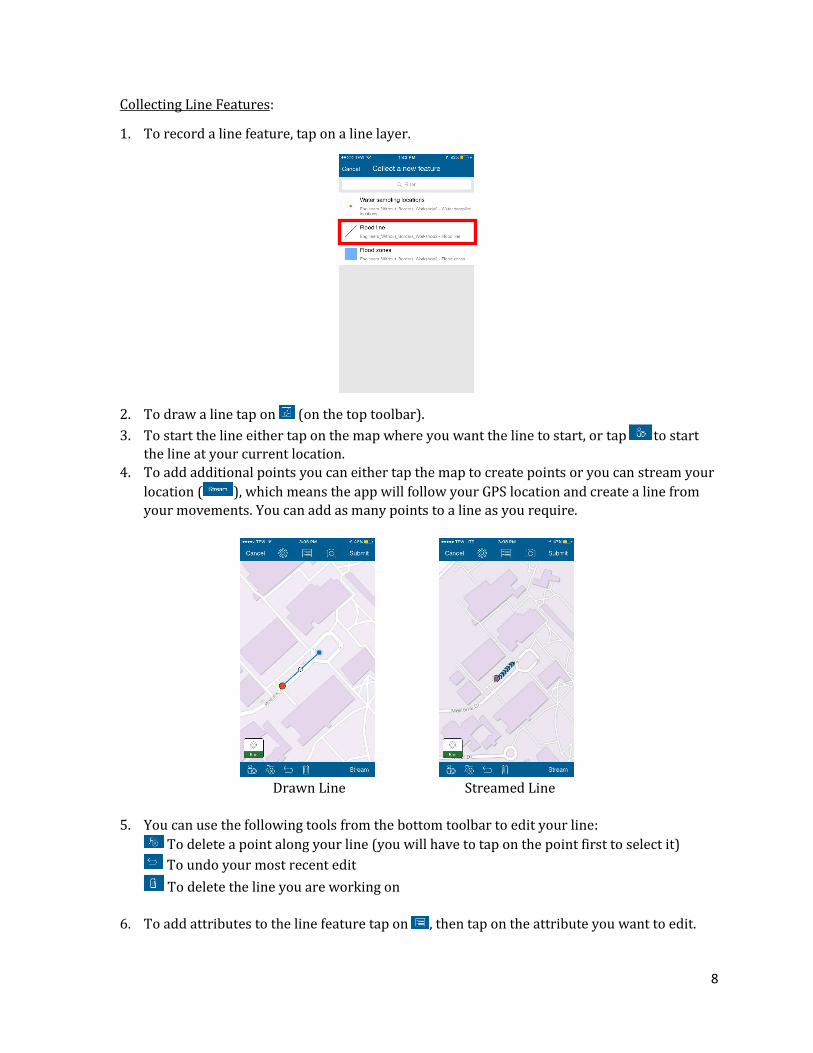
Collecting Line Features:
1. To record a line feature, tap on a line layer.
2. To draw a line tap on (on the top toolbar).
3. To start the line either tap on the map where you want the line to start, or tap to start the line at your current location.
4. To add additional points you can either tap the map to create points or you can stream your
location ( ), which means the app will follow your GPS location and create a line from
your movements. You can add as many points to a line as you require.
Drawn Line Streamed Line
5. You can use the following tools from the bottom toolbar to edit your line:
To delete a point along your line (you will have to tap on the point first to select it)
To undo your most recent edit
To delete the line you are working on
6. To add attributes to the line feature tap on , then tap on the attribute you want to edit.
9
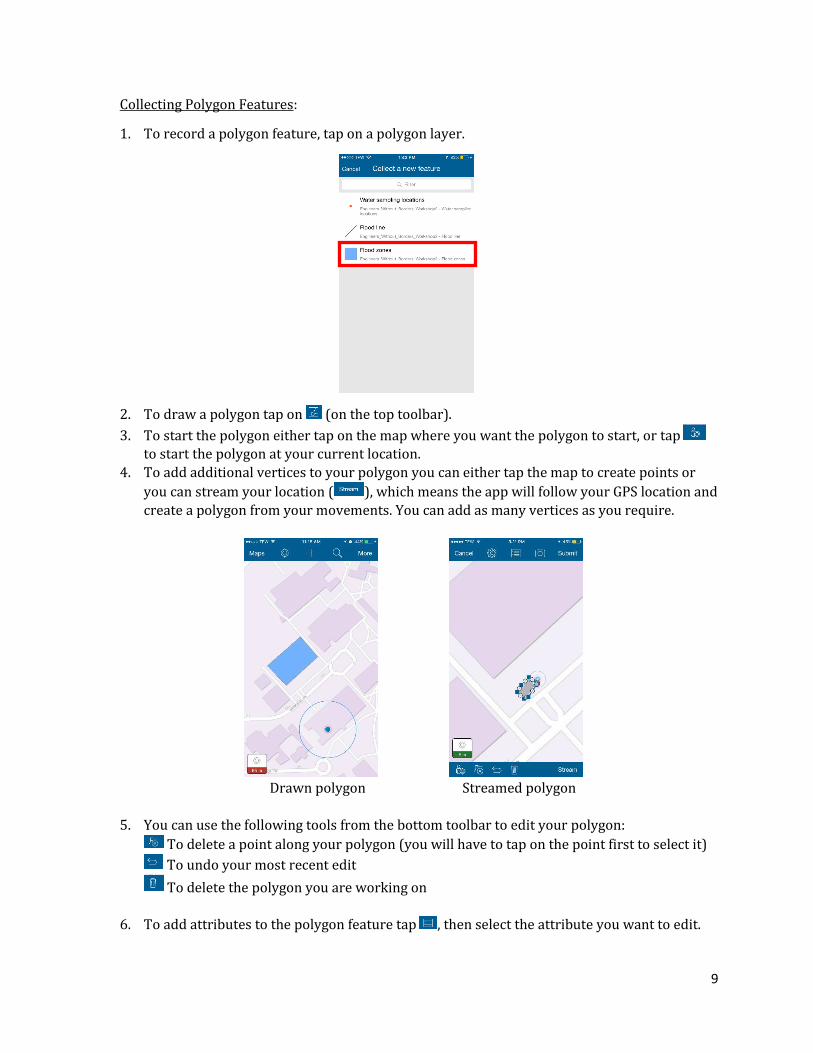
Collecting Polygon Features:
1. To record a polygon feature, tap on a polygon layer.
2. To draw a polygon tap on (on the top toolbar).
3. To start the polygon either tap on the map where you want the polygon to start, or tap to start the polygon at your current location.
4. To add additional vertices to your polygon you can either tap the map to create points or
you can stream your location ( ), which means the app will follow your GPS location and
create a polygon from your movements. You can add as many vertices as you require.
Drawn polygon Streamed polygon
5. You can use the following tools from the bottom toolbar to edit your polygon:
To delete a point along your polygon (you will have to tap on the point first to select it)
To undo your most recent edit
To delete the polygon you are working on
6. To add attributes to the polygon feature tap , then select the attribute you want to edit.

10
Adding a Photograph to a Feature:
1. Tap , then “add”, and take a photo of the object with your smartphone.
2. Press “Done” when you are finished taking the photo to return to the collection screen.
11
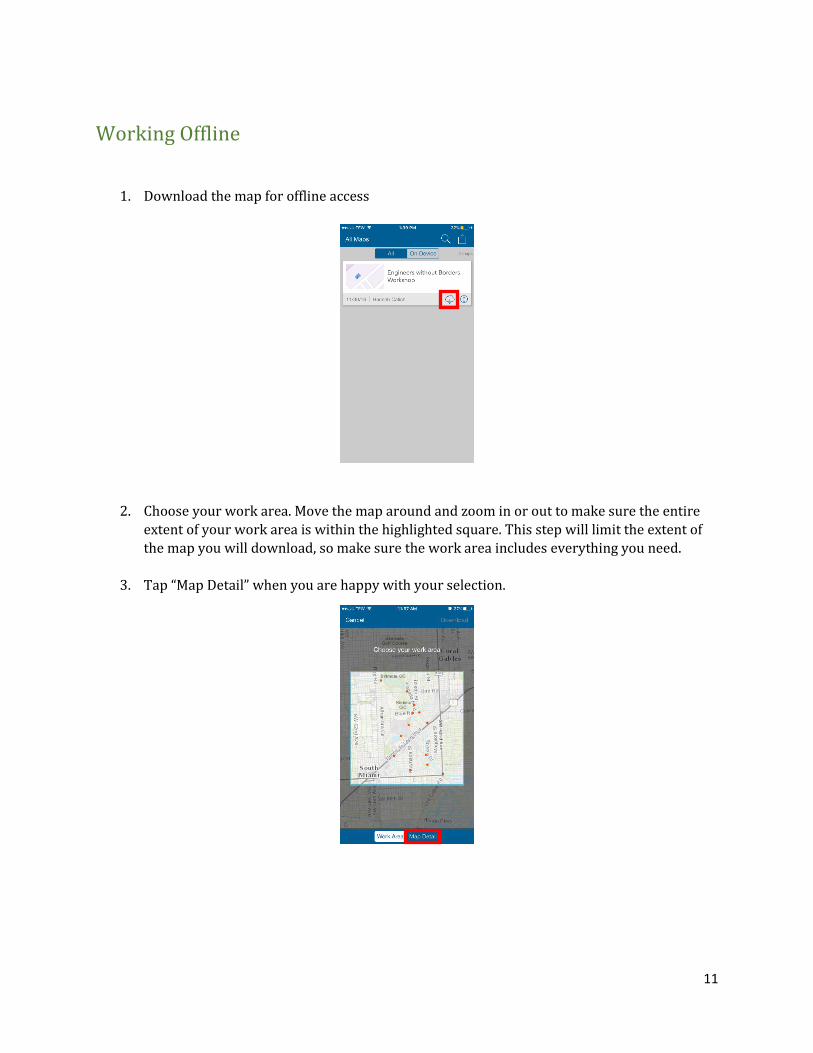
Working Offline
1. Download the map for offline access
2. Choose your work area. Move the map around and zoom in or out to make sure the entire
extent of your work area is within the highlighted square. This step will limit the extent of
the map you will download, so make sure the work area includes everything you need.
3. Tap “Map Detail” when you are happy with your selection.
12
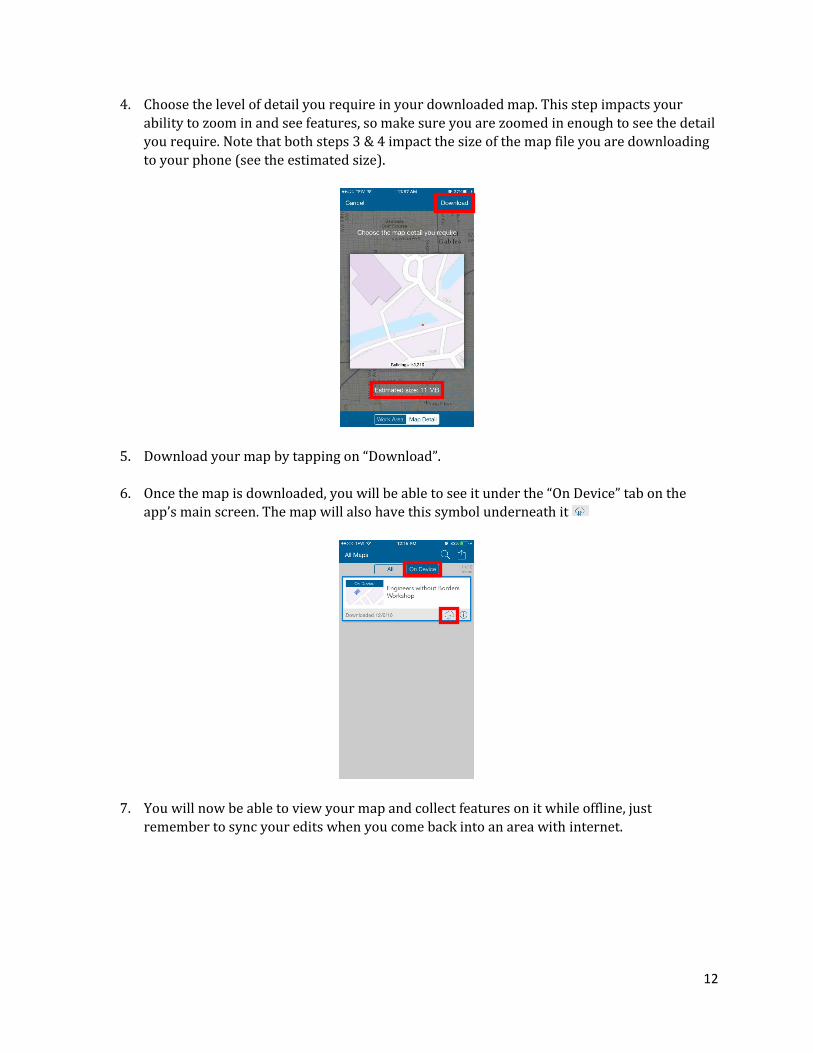
4. Choose the level of detail you require in your downloaded map. This step impacts your
ability to zoom in and see features, so make sure you are zoomed in enough to see the detail
you require. Note that both steps 3 & 4 impact the size of the map file you are downloading
to your phone (see the estimated size).
5. Download your map by tapping on “Download”.
6. Once the map is downloaded, you will be able to see it under the “On Device” tab on the
app’s main screen. The map will also have this symbol underneath it
7. You will now be able to view your map and collect features on it while offline, just
remember to sync your edits when you come back into an area with internet.
13
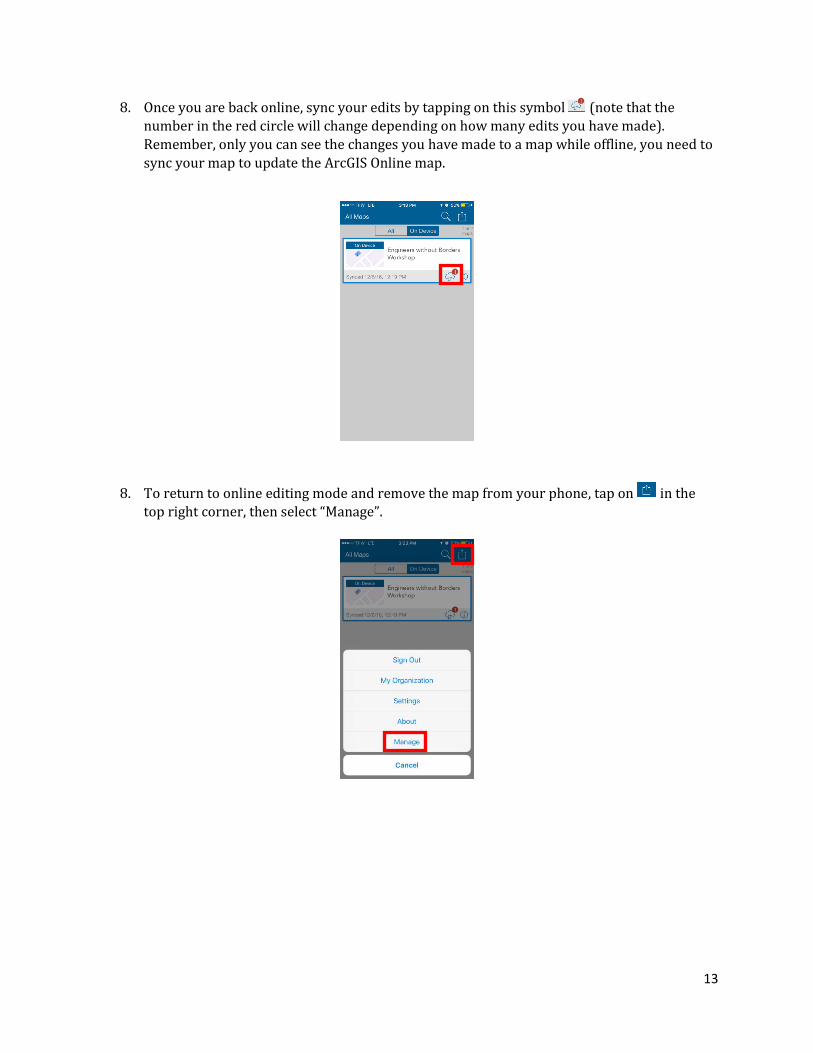
8. Once you are back online, sync your edits by tapping on this symbol (note that the
number in the red circle will change depending on how many edits you have made).
Remember, only you can see the changes you have made to a map while offline, you need to
sync your map to update the ArcGIS Online map.
8. To return to online editing mode and remove the map from your phone, tap on in the top right corner, then select “Manage”.
14
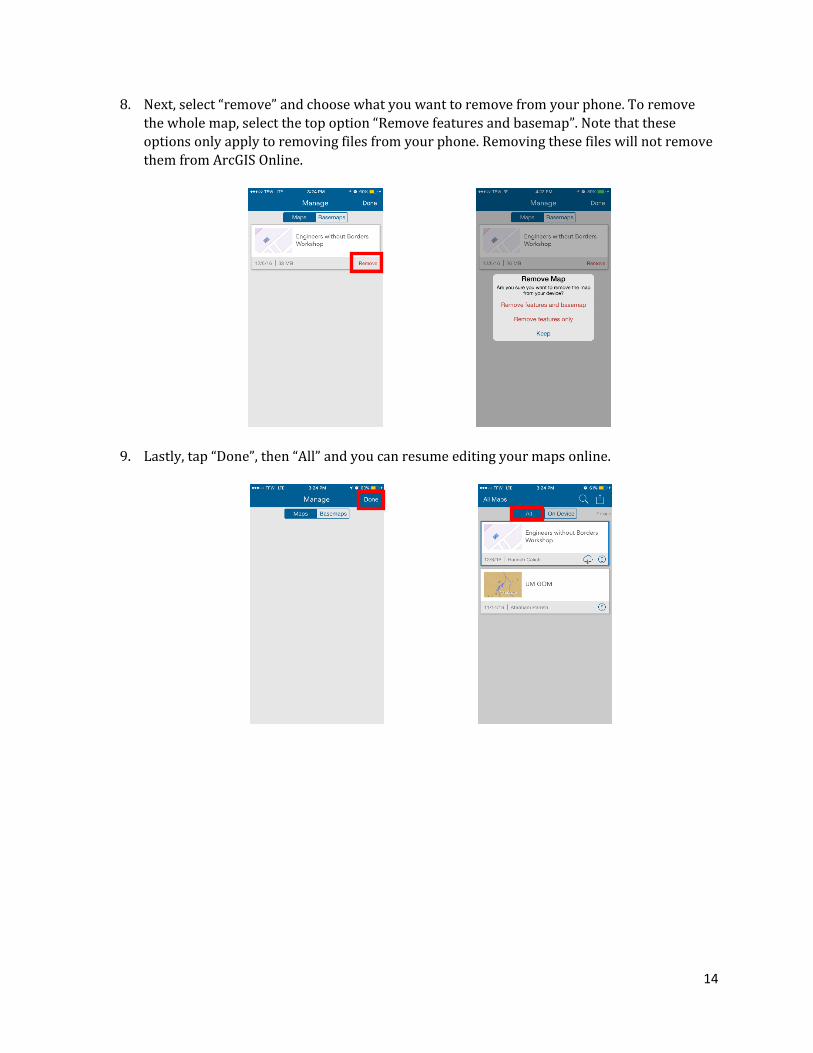
8. Next, select “remove” and choose what you want to remove from your phone. To remove
the whole map, select the top option “Remove features and basemap”. Note that these
options only apply to removing files from your phone. Removing these files will not remove
them from ArcGIS Online.
9. Lastly, tap “Done”, then “All” and you can resume editing your maps online.