Embed Size (px)
Citation preview
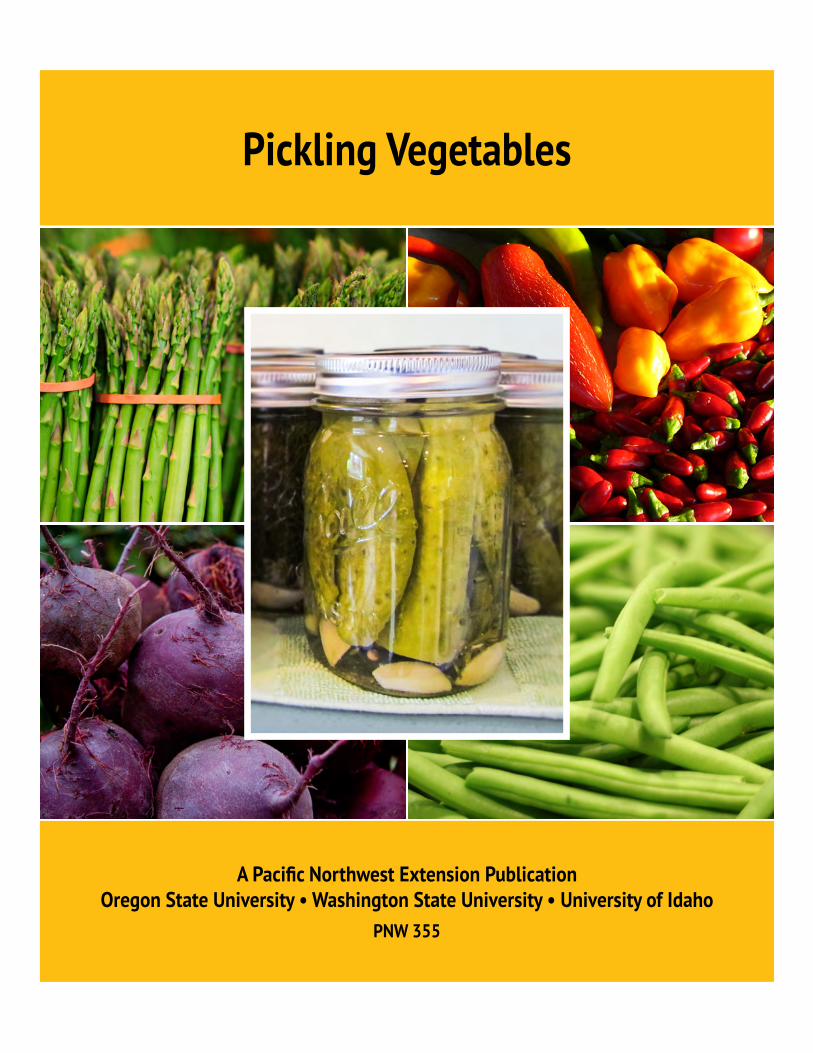
Pickling Vegetables
A Pacific Northwest Extension PublicationOregon State University • Washington State University • University of Idaho
PNW 355
2 Pickling Vegetables
Contents Pickling Vegetables . . . . . . . . . . . . . . . . . . . . . 2Preservation by Pickling . . . . . . . . . . . . . . . . . 2Equipment for Fermenting . . . . . . . . . . . . . . . 3Other Equipment . . . . . . . . . . . . . . . . . . . . . . . 3Ingredients . . . . . . . . . . . . . . . . . . . . . . . . . . . . 4Packing the Jars . . . . . . . . . . . . . . . . . . . . . . . . 6Processing . . . . . . . . . . . . . . . . . . . . . . . . . . . . . 6Storing . . . . . . . . . . . . . . . . . . . . . . . . . . . . . . . . 8Recipes . . . . . . . . . . . . . . . . . . . . . . . . . . . . . . . 9
Dill Pickles . . . . . . . . . . . . . . . . . . . . . . . . . . 10 Sauerkraut . . . . . . . . . . . . . . . . . . . . . . . . . . 10
Quick Kosher Dills . . . . . . . . . . . . . . . . . . . 11Quick Sweet Pickles . . . . . . . . . . . . . . . . . . 12Bread-and-Butter Pickles . . . . . . . . . . . . . 13 Sweet Gherkin Pickles . . . . . . . . . . . . . . . . 13 Pickled Asparagus . . . . . . . . . . . . . . . . . . . . 14 Pickled Dilled Beans . . . . . . . . . . . . . . . . . 14 Pickled Three-Bean Salad . . . . . . . . . . . . . 15Pickled Beets . . . . . . . . . . . . . . . . . . . . . . . . 15 Pickled Hot Peppers . . . . . . . . . . . . . . . . . . 16 Marinated Whole Mushrooms . . . . . . . . . 16Sweet Pickle Relish . . . . . . . . . . . . . . . . . . 17 Dill Pickle Relish (Hot Dog Relish) . . . . . . 17Summer Squash Relish . . . . . . . . . . . . . . . 17Reduced-Sodium Sliced Sweet Pickles . . 18No-Sugar-Added Sweet Cucumber Slices 18
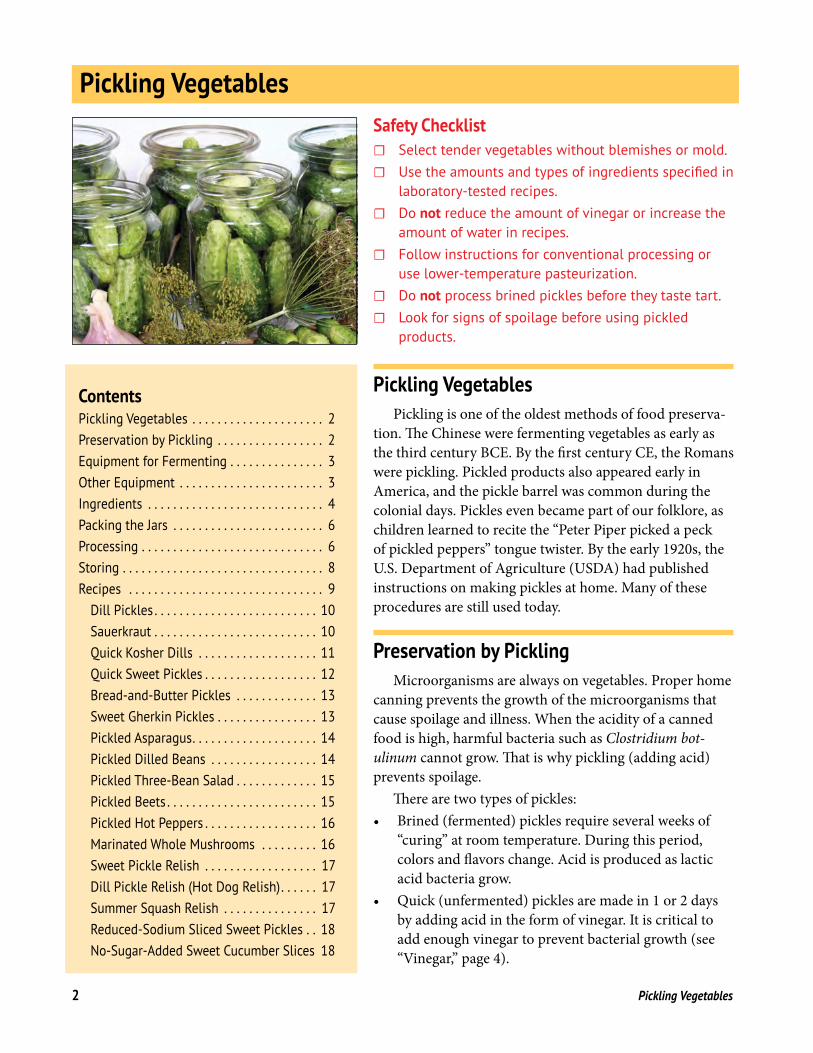
Pickling Vegetables Safety Checklist
☐ Select tender vegetables without blemishes or mold . ☐ Use the amounts and types of ingredients specified in
laboratory-tested recipes . ☐ Do not reduce the amount of vinegar or increase the
amount of water in recipes . ☐ Follow instructions for conventional processing or
use lower-temperature pasteurization . ☐ Do not process brined pickles before they taste tart . ☐ Look for signs of spoilage before using pickled
products .
Pickling VegetablesPickling is one of the oldest methods of food preserva-
tion. The Chinese were fermenting vegetables as early as the third century BCE. By the first century CE, the Romans were pickling. Pickled products also appeared early in America, and the pickle barrel was common during the colonial days. Pickles even became part of our folklore, as children learned to recite the “Peter Piper picked a peck of pickled peppers” tongue twister. By the early 1920s, the U.S. Department of Agriculture (USDA) had published instructions on making pickles at home. Many of these procedures are still used today.
Preservation by Pickling Microorganisms are always on vegetables. Proper home
canning prevents the growth of the microorganisms that cause spoilage and illness. When the acidity of a canned food is high, harmful bacteria such as Clostridium bot-ulinum cannot grow. That is why pickling (adding acid) prevents spoilage.
There are two types of pickles: • Brined (fermented) pickles require several weeks of
“curing” at room temperature. During this period,colors and flavors change. Acid is produced as lacticacid bacteria grow.
• Quick (unfermented) pickles are made in 1 or 2 daysby adding acid in the form of vinegar. It is critical toadd enough vinegar to prevent bacterial growth (see“Vinegar,” page 4).
Pickling Vegetables 3
Equipment for Fermenting
Crock A 1-gallon container is needed for each 5 pounds of fresh vegeta-
bles. Therefore, a 5-gallon stoneware crock is an ideal size for ferment-ing about 25 pounds of fresh cabbage or cucumbers. Select a crock that is made for food use. Food-grade plastic and glass containers are excellent substitutes. Sauerkraut may be fermented in quart or half- gallon jars.
Caution: It is not safe to use garbage cans or other containers that are not made to come into contact with food for humans .
Weight A weight keeps fermenting food under the brine. When using a
crock, select a dinner plate or glass pie plate that is slightly smaller than the container opening. Weigh it down with 2 or 3 quart jars that are filled with water and have closed lids.
You also can use a large, food-grade plastic bag (either heavyweight or double-bagged) as a weight. Fill the bag with brine (1½ Tablespoons salt per 1 quart water) and close it. Place the bag in the fermentation container to cover and hold down the fermenting food. Using brine prevents dilution in case the bag leaks.
Cabbage and cucumbers must be kept 1 to 2 inches under the brine while fermenting. After weighing down, cover the container opening with a clean, heavy bath towel to prevent contamination from insects and molds during fermentation.
Other Equipment
Utensils Do not use zinc, copper, brass, galvanized metal, or iron utensils.
These metals may react with acid or salt and affect the quality (color changes) and safety of pickles.
Jars Processing times are based on standard-sized, Mason-type jars
designed for home canning use. Inspect jars for cracks and chips, and discard damaged ones.
Lids Two-piece, metal canning lids and screw bands are recommended.
Follow the manufacturer’s instructions for preparing the lids. To prevent sealing failures, do not reuse lids. Wash the screw bands and discard any with dents or rust.
Phot
o: Je
anne
Bra
ndt,
© O
rego
n St
ate
Univ
ersi
ty
4 Pickling Vegetables
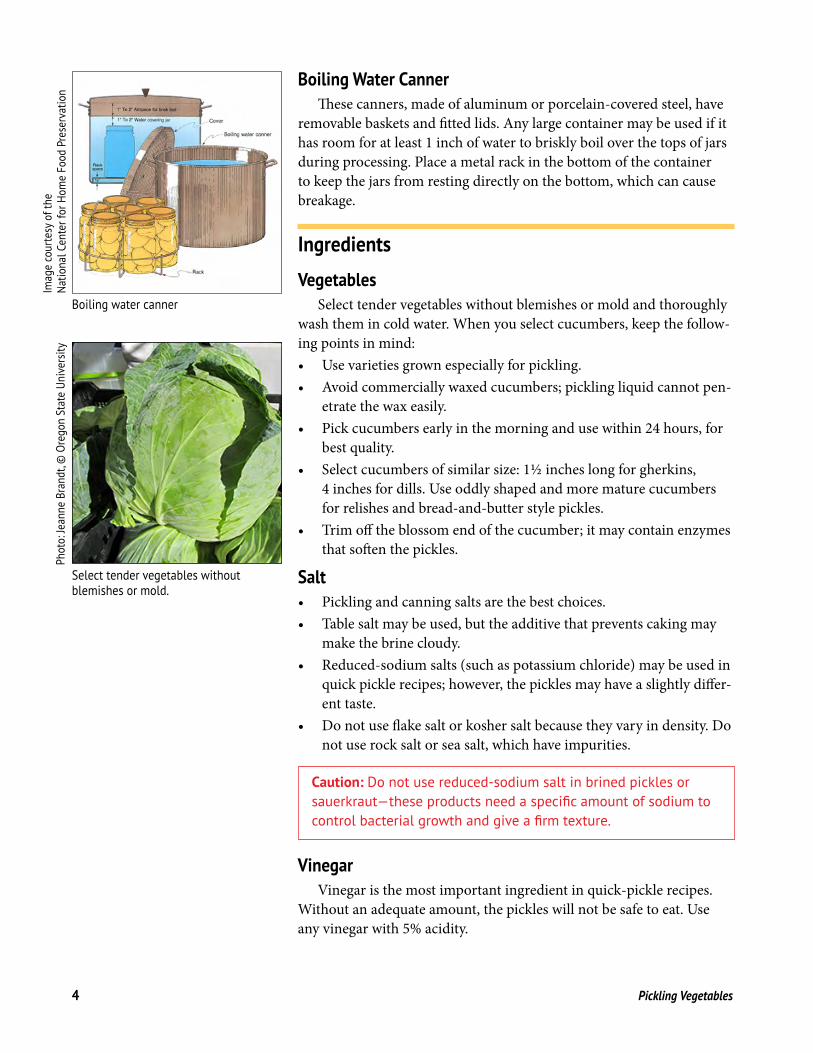
Boiling Water Canner These canners, made of aluminum or porcelain-covered steel, have
removable baskets and fitted lids. Any large container may be used if it has room for at least 1 inch of water to briskly boil over the tops of jars during processing. Place a metal rack in the bottom of the container to keep the jars from resting directly on the bottom, which can cause breakage.
Ingredients
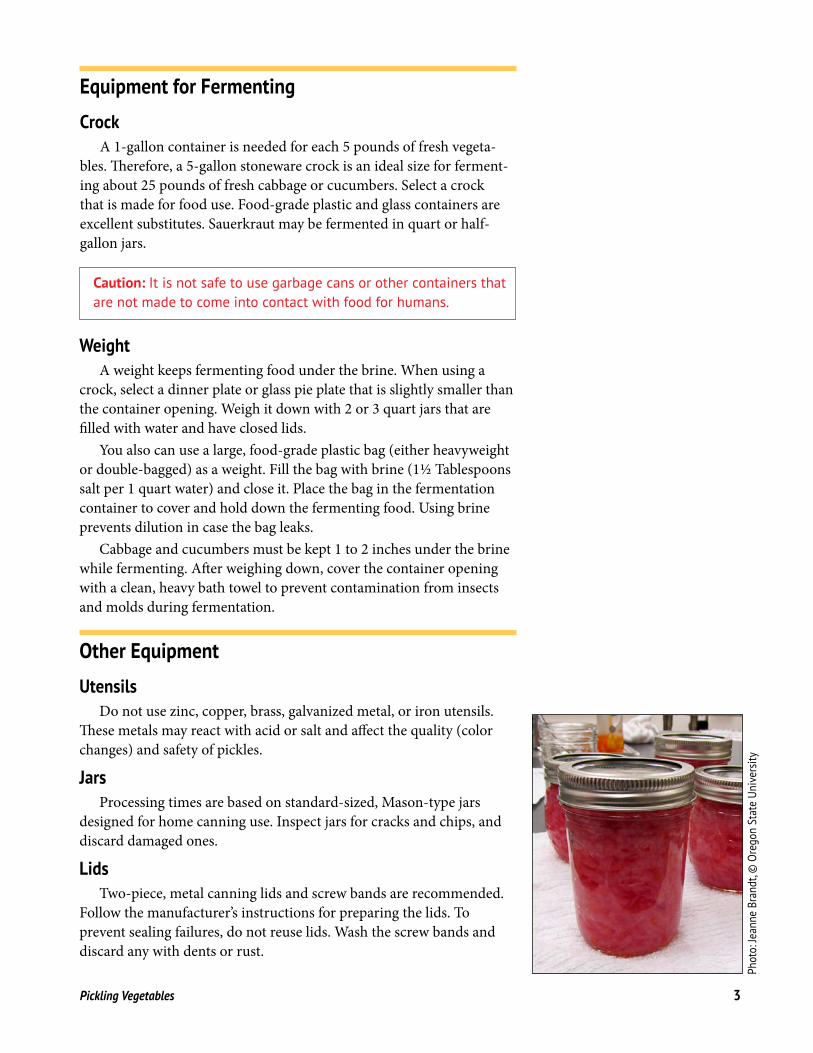
Vegetables Select tender vegetables without blemishes or mold and thoroughly
wash them in cold water. When you select cucumbers, keep the follow-ing points in mind: • Use varieties grown especially for pickling.• Avoid commercially waxed cucumbers; pickling liquid cannot pen-
etrate the wax easily.• Pick cucumbers early in the morning and use within 24 hours, for
best quality.• Select cucumbers of similar size: 1½ inches long for gherkins,
4 inches for dills. Use oddly shaped and more mature cucumbersfor relishes and bread-and-butter style pickles.
• Trim off the blossom end of the cucumber; it may contain enzymesthat soften the pickles.
Salt • Pickling and canning salts are the best choices.• Table salt may be used, but the additive that prevents caking may
make the brine cloudy.• Reduced-sodium salts (such as potassium chloride) may be used in
quick pickle recipes; however, the pickles may have a slightly differ-ent taste.
• Do not use flake salt or kosher salt because they vary in density. Donot use rock salt or sea salt, which have impurities.
Boiling water canner
Imag
e co
urte
sy o
f the
Na
tiona
l Cen
ter f
or H
ome
Food
Pre
serv
atio
n
Caution: Do not use reduced-sodium salt in brined pickles or sauerkraut—these products need a specific amount of sodium to control bacterial growth and give a firm texture.
Vinegar Vinegar is the most important ingredient in quick-pickle recipes.
Without an adequate amount, the pickles will not be safe to eat. Use any vinegar with 5% acidity.
Select tender vegetables without blemishes or mold .
Phot
o: Je
anne
Bra
ndt,
© O
rego
n St
ate
Univ
ersi
ty
Pickling Vegetables 5
Caution: Do not reduce the amount of vinegar or increase the amount of water in a recipe . For a less sour taste, add a small amount of sugar .
• White distilled vinegar has a pungent taste. Use it when picklinglight-color foods such as cauliflower and onions.
• Cider vinegar has a milder flavor. It will make a darker brine.
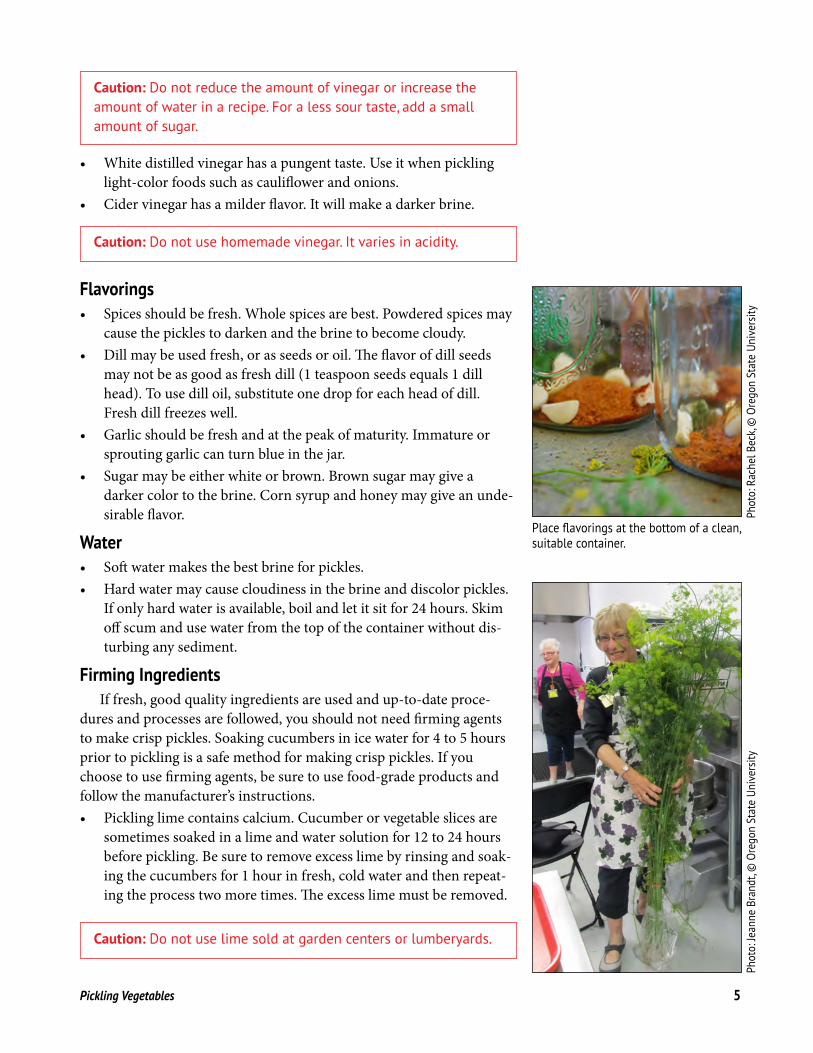
Flavorings • Spices should be fresh. Whole spices are best. Powdered spices may
cause the pickles to darken and the brine to become cloudy.• Dill may be used fresh, or as seeds or oil. The flavor of dill seeds
may not be as good as fresh dill (1 teaspoon seeds equals 1 dillhead). To use dill oil, substitute one drop for each head of dill.Fresh dill freezes well.
• Garlic should be fresh and at the peak of maturity. Immature orsprouting garlic can turn blue in the jar.
• Sugar may be either white or brown. Brown sugar may give adarker color to the brine. Corn syrup and honey may give an unde-sirable flavor.
Water • Soft water makes the best brine for pickles.• Hard water may cause cloudiness in the brine and discolor pickles.
If only hard water is available, boil and let it sit for 24 hours. Skimoff scum and use water from the top of the container without dis-turbing any sediment.
Firming Ingredients If fresh, good quality ingredients are used and up-to-date proce-
dures and processes are followed, you should not need firming agents to make crisp pickles. Soaking cucumbers in ice water for 4 to 5 hours prior to pickling is a safe method for making crisp pickles. If you choose to use firming agents, be sure to use food-grade products and follow the manufacturer’s instructions. • Pickling lime contains calcium. Cucumber or vegetable slices are
sometimes soaked in a lime and water solution for 12 to 24 hoursbefore pickling. Be sure to remove excess lime by rinsing and soak-ing the cucumbers for 1 hour in fresh, cold water and then repeat-ing the process two more times. The excess lime must be removed.
Caution: Do not use homemade vinegar . It varies in acidity .
Phot
o: R
ache
l Bec
k, ©
Ore
gon
Stat
e Un
iver
sity
Phot
o: Je
anne
Bra
ndt,
© O
rego
n St
ate
Univ
ersi
ty
Place flavorings at the bottom of a clean, suitable container .
Caution: Do not use lime sold at garden centers or lumberyards .
6 Pickling Vegetables
• Calcium chloride for pickling is often sold where you buy canningsupplies. It is usually added directly to the jars of pickles. Follow theinstructions on the package for use.
• Alum may also be used to firm fermented cucumbers. However, itis not necessary and is not included in this publication. Alum doesnot improve the firmness of quick pickles.
Packing the Jars 1. Wash the jars in hot, soapy water and rinse well. Keep them hot
until ready for use by placing them in the canner filled with hotwater or in a hot dishwasher. Jars that will be filled with food andprocessed for less than 10 minutes should be sterilized by boilingthem for 10 minutes. Follow manufacturer’s directions for prepar-ing lids.
2. Prepare ingredients.3. Follow instructions for packing hot (vegetables preheated in brine)
or raw ingredients into hot jars.4. Pack food and liquid to within ½ inch from the top of the jar,
unless otherwise specified. If the jars are too full, some contentscould siphon out of the jar during heat processing, stick to the rim,and prevent sealing. All air may not be exhausted during process-ing if the space between the packed food and liquid and the top ofthe jar (headspace) is too large.
5. Run a plastic spatula around the inside of the jar to remove air bub-bles. Adjust headspace, if needed.
6. Wipe jar rims and threads with a clean, damp cloth to remove anybits of food that might prevent a seal.
7. Adjust lids and screw bands.
Processing Pickles are processed to stop fermentation and the growth of bacte-
ria that cause spoilage. Use either conventional boiling water canner processing or low-
er-temperature pasteurization, if a firmer result is desired and the recipe allows for this method.
Phot
o: R
ache
l Bec
k, ©
Ore
gon
Stat
e Un
iver
sity
Caution: It is extremely important to wait until fermented pickles taste tart before processing .
Conventional, Boiling Water Canner Processing 1. Arrange the filled jars on the rack of a canner filled halfway with
very hot water (140°F for raw-packed foods, 180°F for hot-packedfoods). Add more very hot water, if needed, to bring the water level
Pickling Vegetables 7
up to 1 to 2 inches above jar tops. Place a tight-fitting cover on the canner.
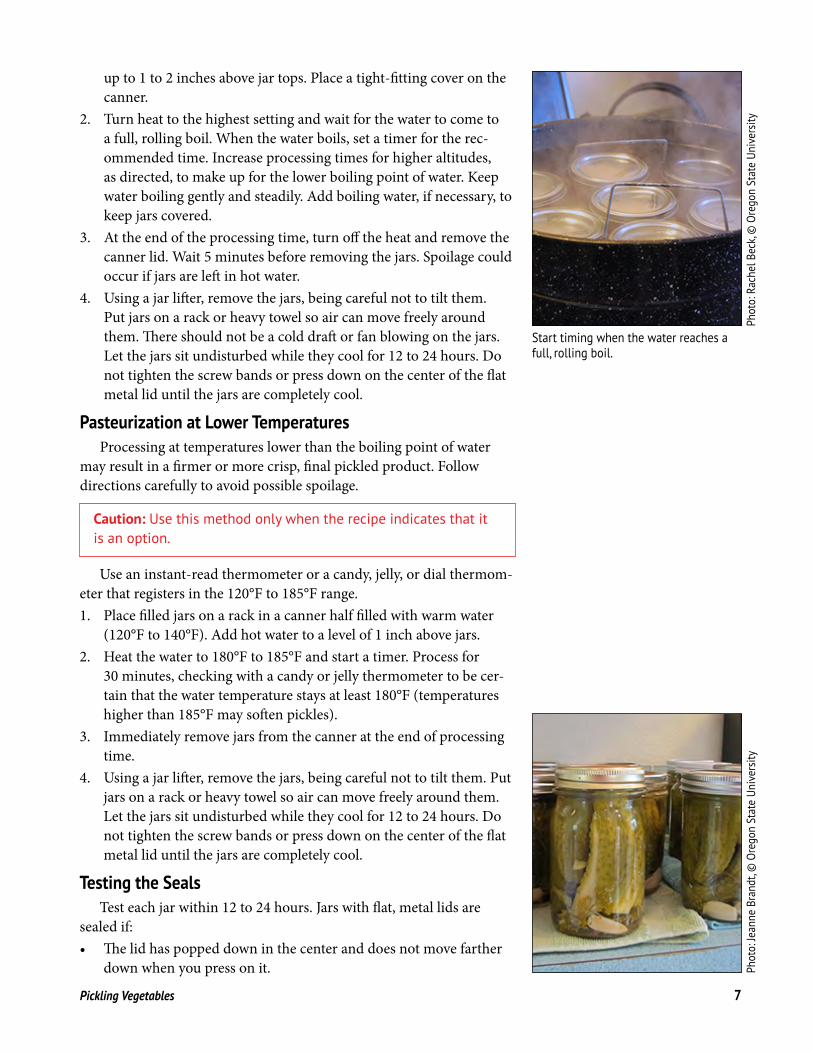
2. Turn heat to the highest setting and wait for the water to come to a full, rolling boil. When the water boils, set a timer for the rec-ommended time. Increase processing times for higher altitudes, as directed, to make up for the lower boiling point of water. Keep water boiling gently and steadily. Add boiling water, if necessary, to keep jars covered.
3. At the end of the processing time, turn off the heat and remove the canner lid. Wait 5 minutes before removing the jars. Spoilage could occur if jars are left in hot water.
4. Using a jar lifter, remove the jars, being careful not to tilt them. Put jars on a rack or heavy towel so air can move freely around them. There should not be a cold draft or fan blowing on the jars. Let the jars sit undisturbed while they cool for 12 to 24 hours. Do not tighten the screw bands or press down on the center of the flat metal lid until the jars are completely cool.
Pasteurization at Lower Temperatures Processing at temperatures lower than the boiling point of water
may result in a firmer or more crisp, final pickled product. Follow directions carefully to avoid possible spoilage.
Phot
o: R
ache
l Bec
k, ©
Ore
gon
Stat
e Un
iver
sity
Start timing when the water reaches a full, rolling boil .
Caution: Use this method only when the recipe indicates that it is an option .
Use an instant-read thermometer or a candy, jelly, or dial thermom-eter that registers in the 120°F to 185°F range. 1. Place filled jars on a rack in a canner half filled with warm water
(120°F to 140°F). Add hot water to a level of 1 inch above jars. 2. Heat the water to 180°F to 185°F and start a timer. Process for
30 minutes, checking with a candy or jelly thermometer to be cer-tain that the water temperature stays at least 180°F (temperatures higher than 185°F may soften pickles).
3. Immediately remove jars from the canner at the end of processing time.
4. Using a jar lifter, remove the jars, being careful not to tilt them. Put jars on a rack or heavy towel so air can move freely around them. Let the jars sit undisturbed while they cool for 12 to 24 hours. Do not tighten the screw bands or press down on the center of the flat metal lid until the jars are completely cool.
Testing the Seals Test each jar within 12 to 24 hours. Jars with flat, metal lids are
sealed if: • The lid has popped down in the center and does not move farther
down when you press on it. Phot
o: Je
anne
Bra
ndt,
© O
rego
n St
ate
Univ
ersi
ty
8 Pickling Vegetables
• The center of the lid gives a clear, ringing sound when you tap it with a spoon. Note: This is not as reliable as the first method.
Jars that have not sealed can be either refrigerated or reprocessed. To reprocess, start by removing the lid. Check and clean the sealing surface (the rim) of the jar. The brine in the jar must be reheated to boiling before reprocessing. Use a new lid and process again for the full time. The quality of the pickled food will not be as good after reprocessing.
Caution: If jars unseal during storage, do not consume .
Storing Remove screw bands for storage so that the liquid under them will
not cause rusting. Wipe the jars and label them with the date, contents, and processing
information. Store jars in a cool, dark, and dry place. After processing and cooling, store jars of pickles 4 to 5 weeks to
develop ideal flavor. Use within 1 year for best eating quality and nutritive value.
Exposure to heat, freezing, or light decreases the quality and shelf life of canned food.
Using PicklesAs you select each jar for use, examine it for signs of spoilage. Check
the lid for tightness and vacuum seal. With the jar at eye level, examine for streaks of dried food on the outside of the jar. Inside of the jar, look for cloudy canning liquid, rising air bubbles, or any unnatural color. While opening the jar, watch for spurting liquid or cotton-like mold growth on food surfaces or the underside of the lid. Smell for unnatural or off odors.
Caution: Never taste food from a jar with an unsealed lid or food that shows signs of spoilage .
Carefully discard any jar of spoiled food to prevent possible illness to you, your family, or your pets. Any pickles not prepared according to these or other laboratory-tested recipes should be treated as having botulism and handled in one of two ways: • If the suspect jars are still sealed, write on the jar
Danger: Poison. Do Not Eat.
Place the jars in a heavyweight garbage bag. Close and place the bag in a regular trash container or dispose of in a nearby landfill.
Phot
o: Je
anne
Bra
ndt,
© O
rego
n St
ate
Univ
ersi
ty
Pickling Vegetables 9
• If the suspect jars are unsealed, open, or leaking, they should be detoxified before disposal (see below).
Detoxification ProcessWear rubber or heavy plastic gloves when handling suspect foods
and cleaning up. Remove the jar lids and carefully place the suspect jars on their sides (along with the lids) in a stockpot, pan, or boiling water canner (8-quart volume or larger). Carefully add water to the pot until the level is 1 inch above the jars. Put a lid on the pot and heat the water to boiling. Boil for 30 minutes to detoxify the food. Cool and discard the food and lids. Wash jars and pot.
Spray or wet contaminated surfaces (such as counters and cutting boards) with a room-temperature household chlorine bleach solution (1 part unscented 5% to 6% sodium hypochlorite bleach to 5 parts clean water) and let stand for 30 minutes. Wipe up treated spills with paper towels and put them in a plastic bag before discarding in the trash. Rinse surfaces. Soak metal utensils in a mild chlorine solution (1 teaspoon bleach to 1 quart room-temperature water) for 30 minutes. Rinse. Wash your gloved hands well.
RecipesMost of the recipes in this publication for brined and quick pickles
are from the USDA’s Complete Guide to Home Canning. For additional laboratory-tested recipes, contact your local Extension office. If you want to use pickle recipes from other sources, see the suggestions below to ensure your recipes are safe.
Phot
o: Je
anne
Bra
ndt,
© O
rego
n St
ate
Univ
ersi
ty
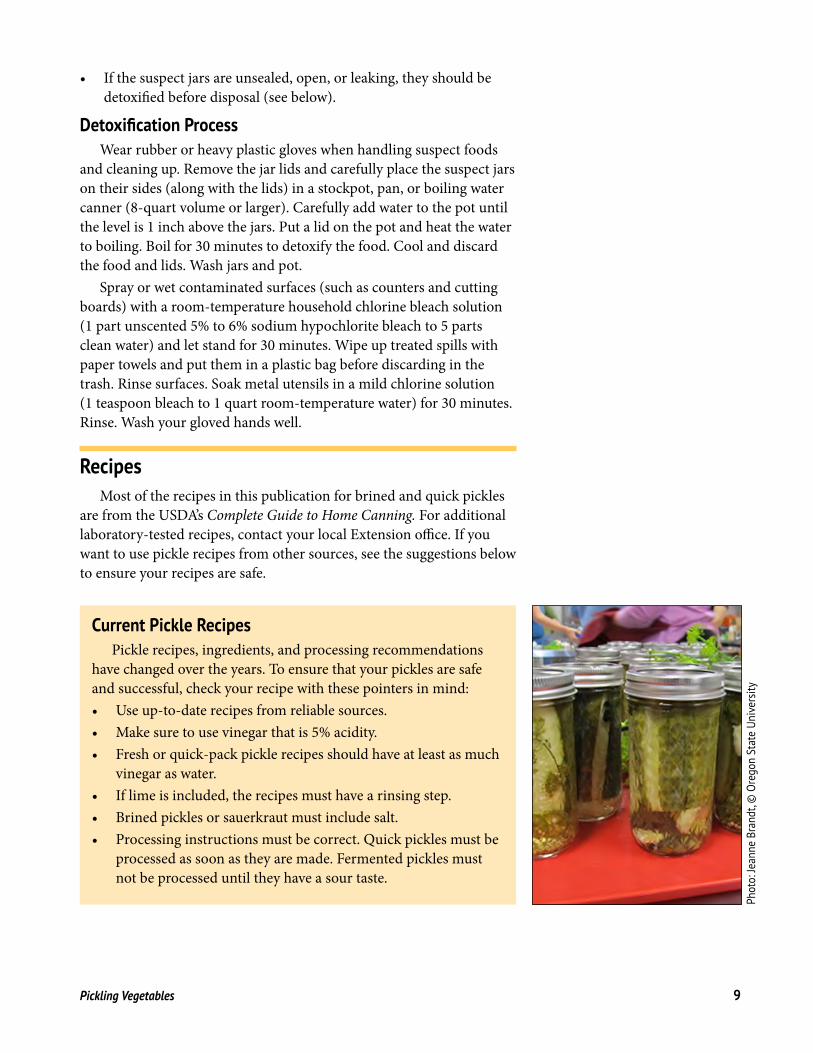
Current Pickle RecipesPickle recipes, ingredients, and processing recommendations
have changed over the years. To ensure that your pickles are safe and successful, check your recipe with these pointers in mind:• Use up-to-date recipes from reliable sources.• Make sure to use vinegar that is 5% acidity.• Fresh or quick-pack pickle recipes should have at least as much
vinegar as water.• If lime is included, the recipes must have a rinsing step.• Brined pickles or sauerkraut must include salt.• Processing instructions must be correct. Quick pickles must be
processed as soon as they are made. Fermented pickles must not be processed until they have a sour taste.
10 Pickling Vegetables
Brined (Fermented) Foods
Dill PicklesIngredients
4 pounds pickling cucumbers (4-inch) 2 Tablespoons dill seed, or 4 to 5 heads fresh or dry
dill weed 8 cups water ¼ cup vinegar (5% acidity) ½ cup salt 2 cloves garlic (optional) 2 dried red peppers (optional) 2 teaspoons whole mixed pickling spices (optional)
Procedure Wash cucumbers. Cut 1�16 inch off blossom end
but leave ¼ inch of stem at the other end. Place half of the dill and half of the other flavorings on the bottom of a clean, suitable container (see page 3). Add cucumbers, remaining dill, and desired spices. Dissolve salt in vinegar and water, and pour over cucumbers. Add suitable weight and cover.
Store for about 3 to 4 weeks in a location where temperature is 70°F to 75°F. Temperatures of 55°F to 65°F are acceptable, but the fermentation will take 5 to 6 weeks. Pickles will become too soft if tem-peratures are above 80°F during fermentation.
Check the container several times a week and promptly remove surface scum or mold.
Caution: If the pickles become soft or slimy, or if they develop a disagreeable odor, discard them .
Fully fermented pickles may be stored in the original container for 4 to 6 months, provided you refrigerate them and remove surface scum and molds regularly.
Canning is a better way to store fully fermented pickles. To can them, pour the brine into a pan, heat slowly to a boil, and simmer 5 minutes. Filter brine through paper coffee filters to reduce cloudiness, if desired. Fill hot pint or quart jars with pickles and hot brine, leaving ½-inch headspace. Remove air bubbles and adjust headspace, if needed. Wipe rims
and adjust lids. Process as follows or use the lower-temperature pasteurization treatment described on page 7.
Hot Pack Processing Times for Dill Pickles
Jar size At an altitude of0– 1,000 ft
1,001– 6,000 ft
above 6,001 ft
Pint 10 min. 15 min. 20 min.
Quart 15 min. 20 min. 25 min.
SauerkrautIngredients
Use the following quantities for each gallon of your container’s capacity.
5 pounds cabbage3 Tablespoons canning or pickling salt
Quality For the best sauerkraut, use firm heads of fresh
cabbage. Start sauerkraut within 24 to 48 hours after harvest.
Yield About 4 to 6 pints or 2 to 3 quarts
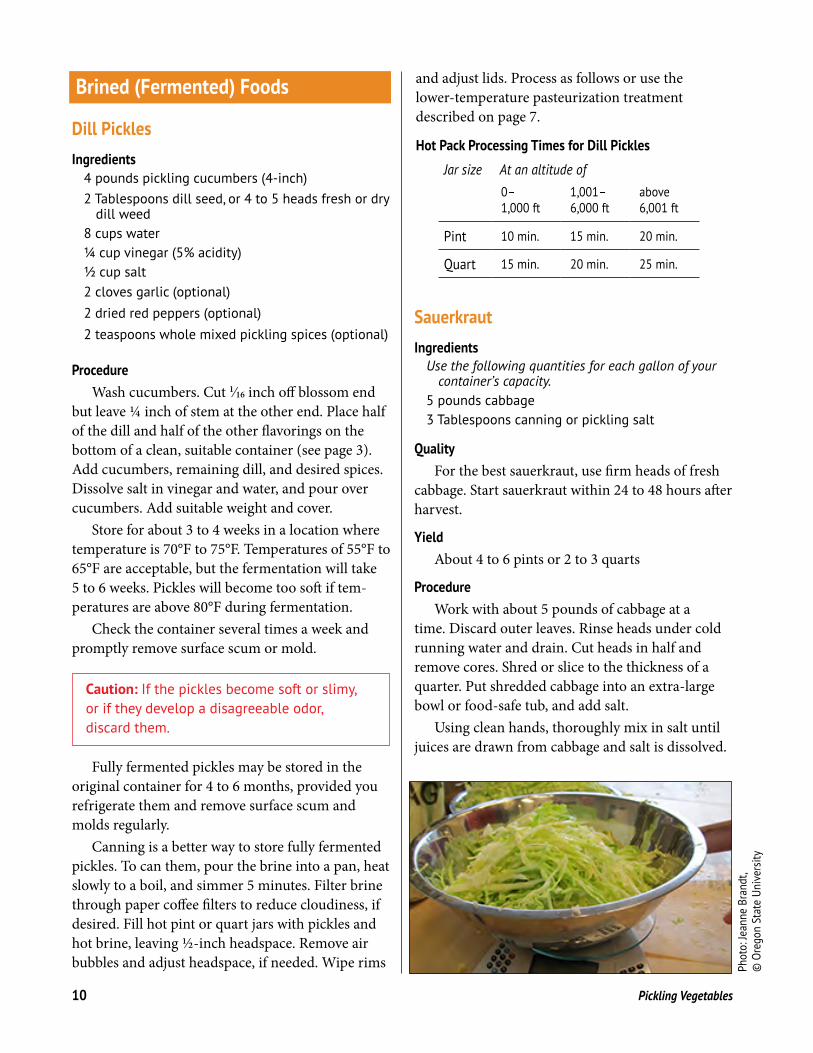
Procedure Work with about 5 pounds of cabbage at a
time. Discard outer leaves. Rinse heads under cold running water and drain. Cut heads in half and remove cores. Shred or slice to the thickness of a quarter. Put shredded cabbage into an extra-large bowl or food-safe tub, and add salt.
Using clean hands, thoroughly mix in salt until juices are drawn from cabbage and salt is dissolved.
Phot
o: Je
anne
Bra
ndt,
© O
rego
n St
ate
Univ
ersi
ty
Pickling Vegetables 11
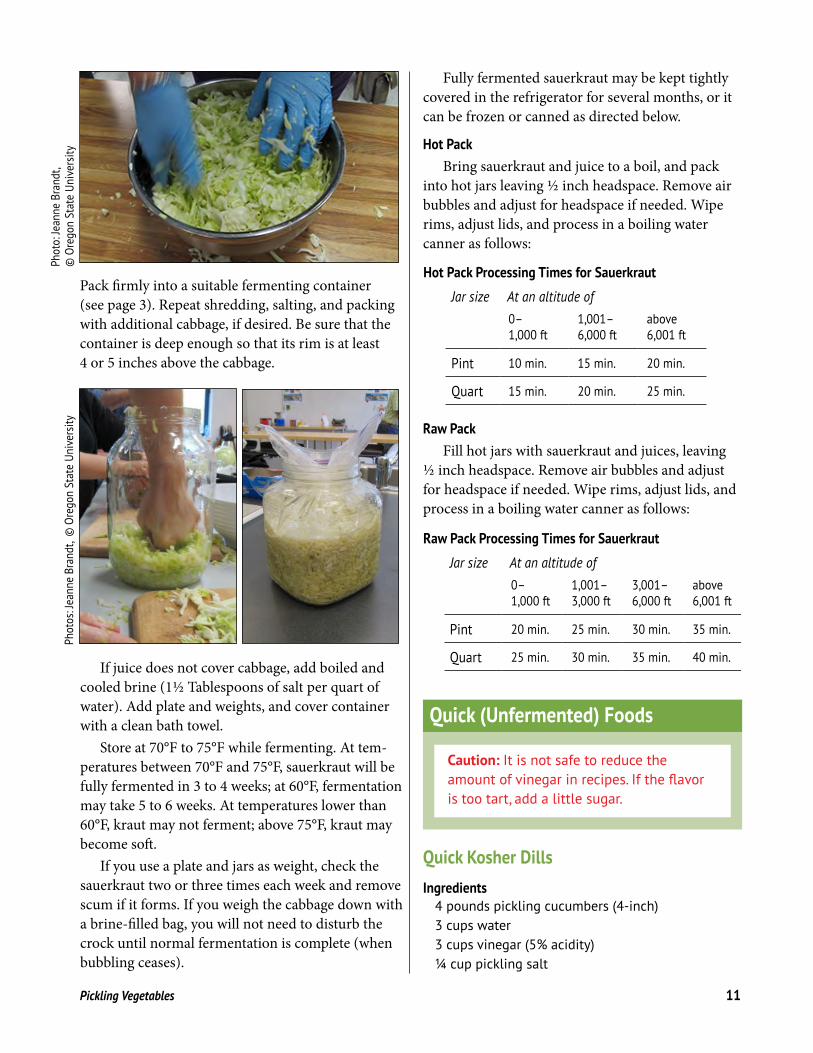
Pack firmly into a suitable fermenting container (see page 3). Repeat shredding, salting, and packing with additional cabbage, if desired. Be sure that the container is deep enough so that its rim is at least 4 or 5 inches above the cabbage.
If juice does not cover cabbage, add boiled and cooled brine (1½ Tablespoons of salt per quart of water). Add plate and weights, and cover container with a clean bath towel.
Store at 70°F to 75°F while fermenting. At tem-peratures between 70°F and 75°F, sauerkraut will be fully fermented in 3 to 4 weeks; at 60°F, fermentation may take 5 to 6 weeks. At temperatures lower than 60°F, kraut may not ferment; above 75°F, kraut may become soft.
If you use a plate and jars as weight, check the sauerkraut two or three times each week and remove scum if it forms. If you weigh the cabbage down with a brine-filled bag, you will not need to disturb the crock until normal fermentation is complete (when bubbling ceases).
Fully fermented sauerkraut may be kept tightly covered in the refrigerator for several months, or it can be frozen or canned as directed below.
Hot Pack Bring sauerkraut and juice to a boil, and pack
into hot jars leaving ½ inch headspace. Remove air bubbles and adjust for headspace if needed. Wipe rims, adjust lids, and process in a boiling water canner as follows:
Hot Pack Processing Times for Sauerkraut
Jar size At an altitude of0– 1,000 ft
1,001– 6,000 ft
above 6,001 ft
Pint 10 min. 15 min. 20 min.
Quart 15 min. 20 min. 25 min.
Raw Pack Fill hot jars with sauerkraut and juices, leaving
½ inch headspace. Remove air bubbles and adjust for headspace if needed. Wipe rims, adjust lids, and process in a boiling water canner as follows:
Raw Pack Processing Times for Sauerkraut
Jar size At an altitude of0– 1,000 ft
1,001– 3,000 ft
3,001– 6,000 ft
above 6,001 ft
Pint 20 min. 25 min. 30 min. 35 min.
Quart 25 min. 30 min. 35 min. 40 min.
Quick (Unfermented) Foods
Caution: It is not safe to reduce the amount of vinegar in recipes. If the flavor is too tart, add a little sugar .
Quick Kosher DillsIngredients
4 pounds pickling cucumbers (4-inch) 3 cups water 3 cups vinegar (5% acidity)¼ cup pickling salt
Phot
o: Je
anne
Bra
ndt,
© O
rego
n St
ate
Univ
ersi
tyPh
otos
: Jea
nne
Bran
dt, ©
Ore
gon
Stat
e Un
iver
sity
12 Pickling Vegetables
14 garlic cloves, split 14 heads fresh dill 28 peppercorns 2 teaspoons hot red pepper flakes (optional)
Yield6 to 7 pints or 3 to 4 quarts
Procedure Wash cucumbers. Cut 1�16 inch off blossom end
but leave ¼ inch of stem on the other end. Cut in half lengthwise. Heat salt, vinegar, and water to boiling. Pack cucumbers into hot pint or quart jars, adding 4 garlic halves, 2 heads dill, and 4 pepper-corns per jar. Add ¼ teaspoon hot red pepper flakes per pint, if desired.
Pour hot vinegar solution over cucumbers leaving ½ inch headspace. Remove air bubbles and adjust headspace, if needed. Wipe rims and process as follows or use the lower-temperature pasteuriza-tion treatment described on page 7.
Raw Pack Processing Times for Quick Kosher Dills
Jar size At an altitude of0– 1,000 ft
1,001– 6,000 ft
above 6,001 ft
Pint 10 min. 15 min. 20 min.
Quart 15 min. 20 min. 25 min.
Quick Sweet PicklesIngredients
8 pounds pickling cucumbers (3- to 4-inch)1∕³ cup canning or pickling saltIce 4½ cups sugar3½ cups vinegar (5% acidity) 2 teaspoons celery seed1 Tablespoon whole allspice2 Tablespoons mustard seed
Yield About 7 to 9 pints or 3 to 4 quarts
Procedure Wash cucumbers. Cut 1�16 inch off blossom end
but leave ¼ inch of stem at other end. Slice or cut in
strips, if desired. Place in bowl and sprinkle with ⅓ cup salt. Cover with 2 inches of crushed or cubed ice. Refrigerate 3 to 4 hours, adding more ice as needed. Drain well. Combine sugar, vinegar, celery seed, allspice, and mustard seed in 6-quart kettle. Heat to boiling.
Hot Pack Add cucumbers to vinegar solution and heat
slowly until it returns to a boil. Stir occasionally to make sure mixture heats evenly. Fill hot pint or quart jars, leaving ½ inch headspace. Remove air bubbles and adjust headspace, if needed. Adjust lids and process in a boiling water canner as follows:
Hot Pack Processing Times for Quick Sweet Pickles
Jar size At an altitude of0– 1,000 ft
1,001– 6,000 ft
above 6,001 ft
Pint 5 min. 10 min. 15 min.
Quart 5 min. 10 min. 15 min.
Raw Pack Fill hot pint or quart jars with cucumbers and
add hot pickling syrup, leaving ½ inch headspace. Remove air bubbles and adjust headspace, if needed. Wipe rims and adjust lids. Process as follows or use the lower-temperature pasteurization treatment described on page 7.
Raw Pack Processing Times for Quick Sweet Pickles
Jar size At an altitude of0– 1,000 ft
1,001– 6,000 ft
above 6,001 ft
Pint 10 min. 15 min. 20 min.
Quart 15 min. 20 min. 25 min.
Variation: Onions Add 2 slices of raw onion to each jar before fill-
ing with cucumbers.
Storage After processing and cooling, store jars 4 to
5 weeks to develop ideal flavor.
Pickling Vegetables 13
Variation: Firmer Pickles Wash cucumbers. Cut 1�16 inch off blossom end
but leave ¼ inch of stem attached. Slice or cut in strips. Mix 1 cup pickling lime and ½ cup salt to 1 gallon water in a 2- to 3-gallon crock or enamelware container.
Caution: Avoid inhaling lime dust while mixing the lime-and-water solution .
Soak cucumber slices or strips in lime water solution for 12 to 24 hours, stirring occasionally. Remove from lime solution, rinse, and resoak for 1 hour in fresh, cold water. Repeat the rinsing and resoaking two more times in fresh water. Handle carefully—slices or strips will be brittle. Drain well. Follow hot or raw pack instructions after draining.
Bread-and-Butter PicklesIngredients
6 pounds pickling cucumbers (4- to 5-inch) 8 cups thinly sliced onions (about 3 pounds) ½ cup canning or pickling salt Ice 4 cups vinegar (5% acidity) 4½ cups sugar 2 Tablespoons mustard seed 1½ Tablespoons celery seed 1 Tablespoon ground turmeric
Yield About 8 pints or 4 quarts
Procedure Wash cucumbers. Cut 1�16 inch off blossom end
and discard. Cut into 3�16-inch slices. Combine cucumbers and onions in a large bowl. Add salt. Cover with 2 inches crushed or cubed ice. Refrigerate 3 to 4 hours, adding more ice as needed. Drain. Combine remaining ingredients in a large pot. Boil 10 minutes. Add cucumbers and onions to the vinegar solution and slowly reheat to boiling. Fill hot pint or quart jars with slices and cook-ing syrup, leaving ½ inch headspace. Remove air bubbles and adjust headspace, if needed. Adjust lids and process in a boiling water canner as follows or
use the lower-temperature pasteurization treatment described on page 7.
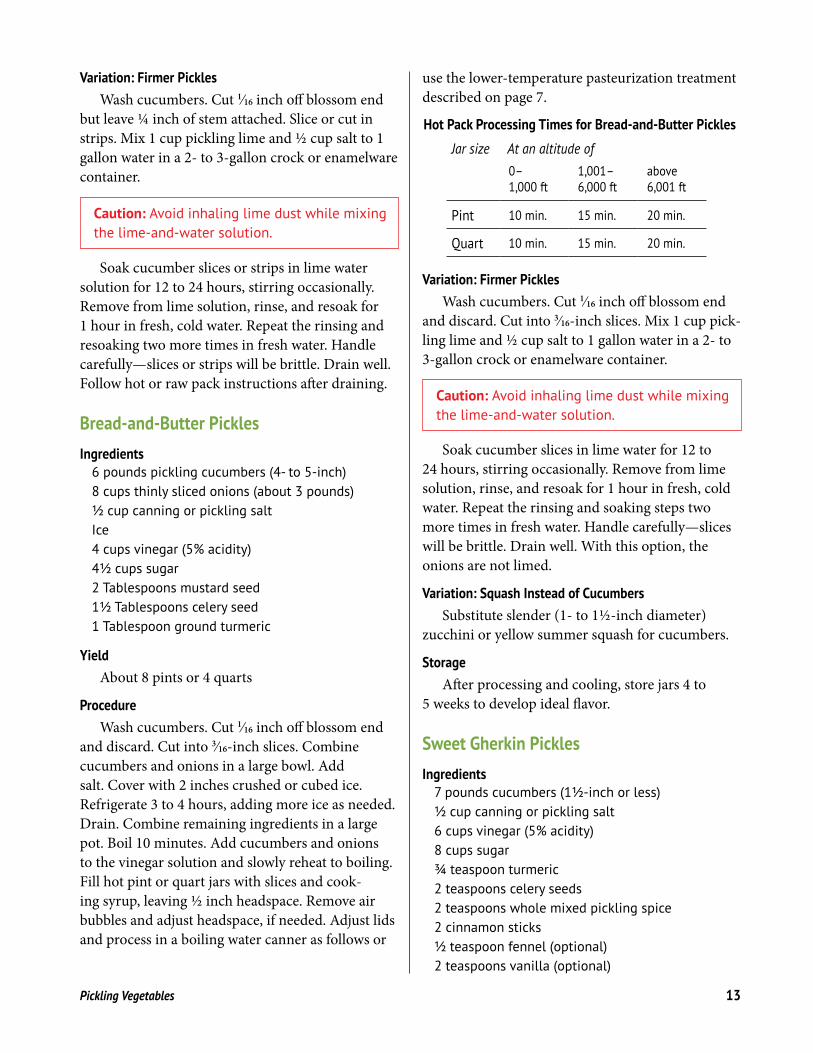
Hot Pack Processing Times for Bread-and-Butter Pickles
Jar size At an altitude of0– 1,000 ft
1,001– 6,000 ft
above 6,001 ft
Pint 10 min. 15 min. 20 min.
Quart 10 min. 15 min. 20 min.
Variation: Firmer Pickles Wash cucumbers. Cut 1�16 inch off blossom end
and discard. Cut into 3�16-inch slices. Mix 1 cup pick-ling lime and ½ cup salt to 1 gallon water in a 2- to 3-gallon crock or enamelware container.
Caution: Avoid inhaling lime dust while mixing the lime-and-water solution .
Soak cucumber slices in lime water for 12 to 24 hours, stirring occasionally. Remove from lime solution, rinse, and resoak for 1 hour in fresh, cold water. Repeat the rinsing and soaking steps two more times in fresh water. Handle carefully—slices will be brittle. Drain well. With this option, the onions are not limed.
Variation: Squash Instead of Cucumbers Substitute slender (1- to 1½-inch diameter)
zucchini or yellow summer squash for cucumbers.
Storage After processing and cooling, store jars 4 to
5 weeks to develop ideal flavor.
Sweet Gherkin Pickles Ingredients
7 pounds cucumbers (1½-inch or less) ½ cup canning or pickling salt 6 cups vinegar (5% acidity) 8 cups sugar ¾ teaspoon turmeric 2 teaspoons celery seeds 2 teaspoons whole mixed pickling spice 2 cinnamon sticks ½ teaspoon fennel (optional) 2 teaspoons vanilla (optional)
14 Pickling Vegetables
Yield 6 to 7 pints
Procedure Wash cucumbers. Cut 1�16 inch off blossom end
and discard but leave ¼ inch of stem attached. Place cucumbers in large container and cover with boiling water. Six to 8 hours later, drain and cover with 6 quarts of fresh boiling water containing ¼ cup salt. Repeat on the second day.
On the third day, drain and prick cucumbers with a table fork. Combine and bring to boil 3 cups vinegar, 3 cups sugar, and spices. Pour over cucum-bers. Six to 8 hours later, drain and save pickling syrup. Add another 2 cups each of sugar and vinegar to the syrup and reheat to boiling. Pour over pickles.
On the fourth day, drain and save syrup. Add another 2 cups sugar and 1 cup vinegar. Heat syrup to boiling and pour over pickles. Let sit 6 to 8 hours and then drain, saving the pickling syrup. Add 1 cup sugar and 2 teaspoons vanilla, and heat to boiling. Fill hot, sterilized pint jars with pickles and cover with hot syrup, leaving ½ inch headspace. Remove air bubbles and adjust headspace, if needed. Wipe rims, adjust lids, and process in a boiling water canner as follows or use the lower-temperature pas-teurization treatment described on page 7.
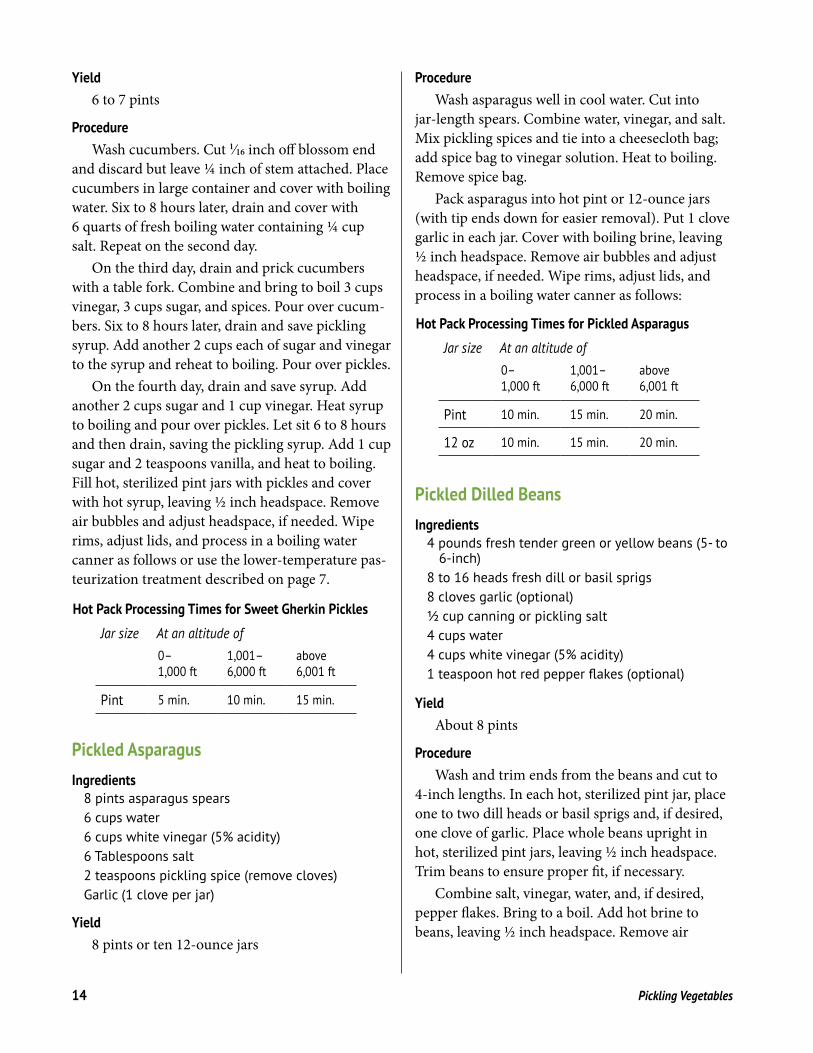
Hot Pack Processing Times for Sweet Gherkin Pickles
Jar size At an altitude of0– 1,000 ft
1,001– 6,000 ft
above 6,001 ft
Pint 5 min. 10 min. 15 min.
Pickled Asparagus Ingredients
8 pints asparagus spears 6 cups water 6 cups white vinegar (5% acidity) 6 Tablespoons salt 2 teaspoons pickling spice (remove cloves) Garlic (1 clove per jar)
Yield 8 pints or ten 12-ounce jars
Procedure Wash asparagus well in cool water. Cut into
jar-length spears. Combine water, vinegar, and salt. Mix pickling spices and tie into a cheesecloth bag; add spice bag to vinegar solution. Heat to boiling. Remove spice bag.
Pack asparagus into hot pint or 12-ounce jars (with tip ends down for easier removal). Put 1 clove garlic in each jar. Cover with boiling brine, leaving ½ inch headspace. Remove air bubbles and adjust headspace, if needed. Wipe rims, adjust lids, and process in a boiling water canner as follows:
Hot Pack Processing Times for Pickled Asparagus
Jar size At an altitude of0– 1,000 ft
1,001– 6,000 ft
above 6,001 ft
Pint 10 min. 15 min. 20 min.
12 oz 10 min. 15 min. 20 min.
Pickled Dilled Beans Ingredients
4 pounds fresh tender green or yellow beans (5- to 6-inch)
8 to 16 heads fresh dill or basil sprigs 8 cloves garlic (optional) ½ cup canning or pickling salt 4 cups water 4 cups white vinegar (5% acidity) 1 teaspoon hot red pepper flakes (optional)
Yield About 8 pints
Procedure Wash and trim ends from the beans and cut to
4-inch lengths. In each hot, sterilized pint jar, place one to two dill heads or basil sprigs and, if desired, one clove of garlic. Place whole beans upright in hot, sterilized pint jars, leaving ½ inch headspace. Trim beans to ensure proper fit, if necessary.
Combine salt, vinegar, water, and, if desired, pepper flakes. Bring to a boil. Add hot brine to beans, leaving ½ inch headspace. Remove air
Pickling Vegetables 15
bubbles and adjust headspace, if needed. Adjust lids and process in a boiling water canner as follows:
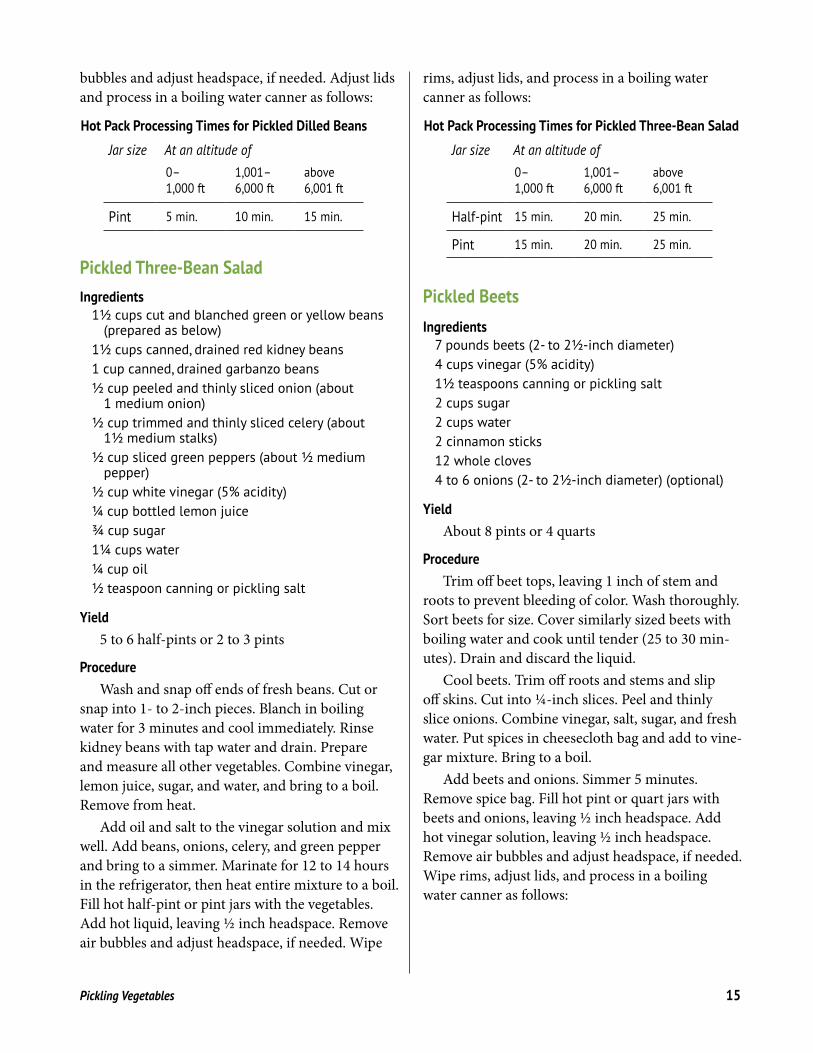
Hot Pack Processing Times for Pickled Dilled Beans
Jar size At an altitude of0– 1,000 ft
1,001– 6,000 ft
above 6,001 ft
Pint 5 min. 10 min. 15 min.
Pickled Three-Bean Salad Ingredients
1½ cups cut and blanched green or yellow beans (prepared as below)
1½ cups canned, drained red kidney beans 1 cup canned, drained garbanzo beans ½ cup peeled and thinly sliced onion (about
1 medium onion) ½ cup trimmed and thinly sliced celery (about
1½ medium stalks) ½ cup sliced green peppers (about ½ medium
pepper) ½ cup white vinegar (5% acidity)¼ cup bottled lemon juice ¾ cup sugar 1¼ cups water ¼ cup oil ½ teaspoon canning or pickling salt
Yield 5 to 6 half-pints or 2 to 3 pints
Procedure Wash and snap off ends of fresh beans. Cut or
snap into 1- to 2-inch pieces. Blanch in boiling water for 3 minutes and cool immediately. Rinse kidney beans with tap water and drain. Prepare and measure all other vegetables. Combine vinegar, lemon juice, sugar, and water, and bring to a boil. Remove from heat.
Add oil and salt to the vinegar solution and mix well. Add beans, onions, celery, and green pepper and bring to a simmer. Marinate for 12 to 14 hours in the refrigerator, then heat entire mixture to a boil. Fill hot half-pint or pint jars with the vegetables. Add hot liquid, leaving ½ inch headspace. Remove air bubbles and adjust headspace, if needed. Wipe
rims, adjust lids, and process in a boiling water canner as follows:
Hot Pack Processing Times for Pickled Three-Bean Salad
Jar size At an altitude of0– 1,000 ft
1,001– 6,000 ft
above 6,001 ft
Half-pint 15 min. 20 min. 25 min.
Pint 15 min. 20 min. 25 min.
Pickled Beets Ingredients
7 pounds beets (2- to 2½-inch diameter) 4 cups vinegar (5% acidity) 1½ teaspoons canning or pickling salt2 cups sugar2 cups water2 cinnamon sticks12 whole cloves4 to 6 onions (2- to 2½-inch diameter) (optional)
Yield About 8 pints or 4 quarts
Procedure Trim off beet tops, leaving 1 inch of stem and
roots to prevent bleeding of color. Wash thoroughly. Sort beets for size. Cover similarly sized beets with boiling water and cook until tender (25 to 30 min-utes). Drain and discard the liquid.
Cool beets. Trim off roots and stems and slip off skins. Cut into ¼-inch slices. Peel and thinly slice onions. Combine vinegar, salt, sugar, and fresh water. Put spices in cheesecloth bag and add to vine-gar mixture. Bring to a boil.
Add beets and onions. Simmer 5 minutes. Remove spice bag. Fill hot pint or quart jars with beets and onions, leaving ½ inch headspace. Add hot vinegar solution, leaving ½ inch headspace. Remove air bubbles and adjust headspace, if needed. Wipe rims, adjust lids, and process in a boiling water canner as follows:
16 Pickling Vegetables
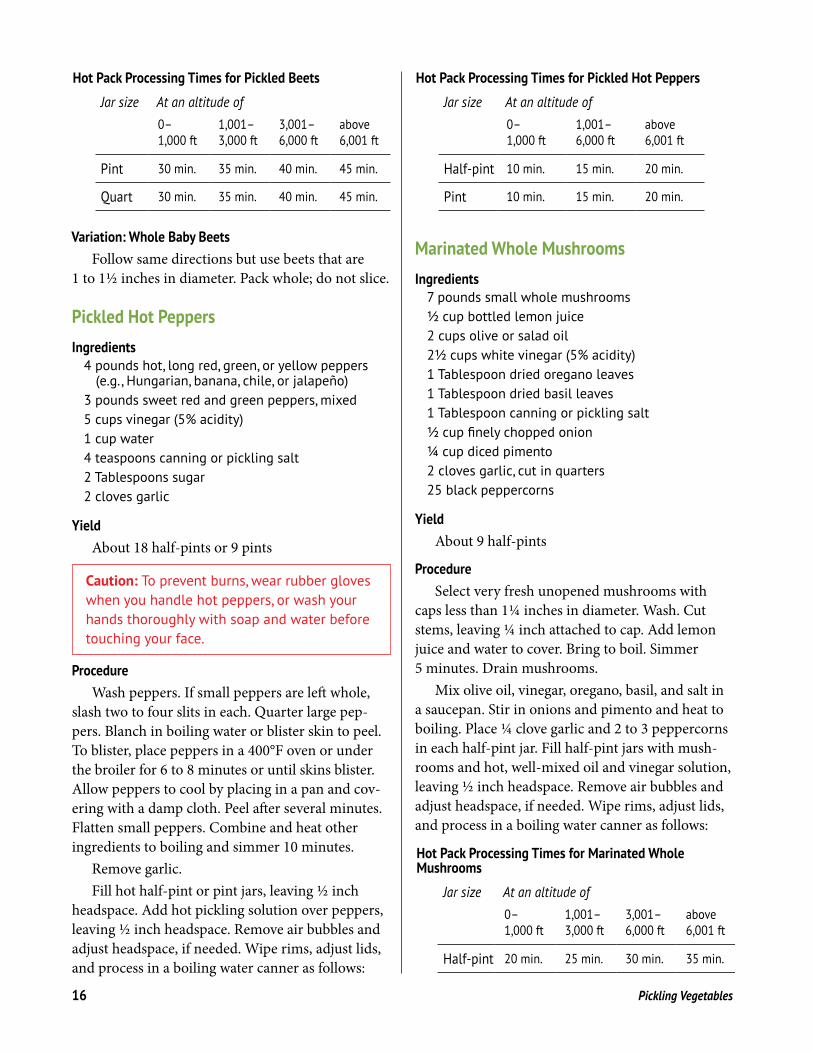
Hot Pack Processing Times for Pickled Beets
Jar size At an altitude of0– 1,000 ft
1,001– 3,000 ft
3,001– 6,000 ft
above 6,001 ft
Pint 30 min. 35 min. 40 min. 45 min.
Quart 30 min. 35 min. 40 min. 45 min.
Variation: Whole Baby Beets Follow same directions but use beets that are
1 to 1½ inches in diameter. Pack whole; do not slice.
Pickled Hot Peppers Ingredients
4 pounds hot, long red, green, or yellow peppers (e .g ., Hungarian, banana, chile, or jalapeño)
3 pounds sweet red and green peppers, mixed 5 cups vinegar (5% acidity) 1 cup water 4 teaspoons canning or pickling salt 2 Tablespoons sugar 2 cloves garlic
Yield About 18 half-pints or 9 pints
Caution: To prevent burns, wear rubber gloves when you handle hot peppers, or wash your hands thoroughly with soap and water before touching your face .
Procedure Wash peppers. If small peppers are left whole,
slash two to four slits in each. Quarter large pep-pers. Blanch in boiling water or blister skin to peel. To blister, place peppers in a 400°F oven or under the broiler for 6 to 8 minutes or until skins blister. Allow peppers to cool by placing in a pan and cov-ering with a damp cloth. Peel after several minutes. Flatten small peppers. Combine and heat other ingredients to boiling and simmer 10 minutes.
Remove garlic.Fill hot half-pint or pint jars, leaving ½ inch
headspace. Add hot pickling solution over peppers, leaving ½ inch headspace. Remove air bubbles and adjust headspace, if needed. Wipe rims, adjust lids, and process in a boiling water canner as follows:
Hot Pack Processing Times for Pickled Hot Peppers
Jar size At an altitude of0– 1,000 ft
1,001– 6,000 ft
above 6,001 ft
Half-pint 10 min. 15 min. 20 min.
Pint 10 min. 15 min. 20 min.
Marinated Whole Mushrooms Ingredients
7 pounds small whole mushrooms ½ cup bottled lemon juice 2 cups olive or salad oil 2½ cups white vinegar (5% acidity) 1 Tablespoon dried oregano leaves 1 Tablespoon dried basil leaves 1 Tablespoon canning or pickling salt½ cup finely chopped onion ¼ cup diced pimento 2 cloves garlic, cut in quarters 25 black peppercorns
Yield About 9 half-pints
Procedure Select very fresh unopened mushrooms with
caps less than 1¼ inches in diameter. Wash. Cut stems, leaving ¼ inch attached to cap. Add lemon juice and water to cover. Bring to boil. Simmer 5 minutes. Drain mushrooms.
Mix olive oil, vinegar, oregano, basil, and salt in a saucepan. Stir in onions and pimento and heat to boiling. Place ¼ clove garlic and 2 to 3 peppercorns in each half-pint jar. Fill half-pint jars with mush-rooms and hot, well-mixed oil and vinegar solution, leaving ½ inch headspace. Remove air bubbles and adjust headspace, if needed. Wipe rims, adjust lids, and process in a boiling water canner as follows:
Hot Pack Processing Times for Marinated Whole Mushrooms
Jar size At an altitude of0– 1,000 ft
1,001– 3,000 ft
3,001– 6,000 ft
above 6,001 ft
Half-pint 20 min. 25 min. 30 min. 35 min.
Pickling Vegetables 17
Sweet Pickle Relish Ingredients
12 cups chopped cucumbers 3 cups chopped sweet green peppers3 cups chopped red peppers1 cup chopped onions ¾ cup canning or pickling salt 5 cups crushed ice 8 cups water 2 cups sugar 4 teaspoons mustard seed4 teaspoons turmeric4 teaspoons whole allspice4 teaspoons whole cloves6 cups white vinegar (5% acidity)
YieldAbout 18 half-pints or 9 pints
Procedure Add cucumbers, peppers, onions, salt, and ice
to water and let stand 4 hours. Drain and re-cover vegetables with fresh ice water for another hour. Drain again.
Combine spices in a cheesecloth bag. Add spice bag to sugar and vinegar. Heat to boiling and pour mixture over vegetables. Cover and refrigerate 24 hours.
Heat mixture to boiling and fill hot half-pint or pint jars, leaving ½ inch headspace. Remove air bubbles and adjust headspace, if needed. Wipe rims, adjust lids, and process in a boiling water canner as follows:
Hot Pack Processing Times for Sweet Pickle Relish
Jar size At an altitude of0– 1,000 ft
1,001– 6,000 ft
above 6,001 ft
Half-pint 10 min. 15 min. 20 min.
Pint 10 min. 15 min. 20 min.
Dill Pickle Relish (Hot Dog Relish) Ingredients
14 cups chopped pickling cucumbers (about 5 pounds whole pickling cucumbers)
2 cups chopped red bell pepper5½ cups cider vinegar (5% acidity)3 teaspoons dill seed6 cloves garlic, minced5 Tablespoons pickling or canning salt
YieldAbout 7 pints or 14 half-pints
ProcedureWash cucumbers and peppers well. After wash-
ing the cucumbers, slice a thin piece from both the stem and blossom ends, and discard. Cut into 1-inch pieces and chop in a food processor (using about 3 to 4 short pulses on “chop”) to yield ¼-inch or smaller pieces. Measure 14 cups of the chopped cucumber.
After washing the peppers, remove the stem, seeds, and white membranes. Cut into 1-inch pieces or slices and then chop in a food processor (using about 3 to 4 pulses on “chop”) to yield about ¼-inch or slightly smaller pieces. Measure 2 cups of the chopped pepper. Combine chopped cucumbers and bell peppers, and set aside.
In a large stockpot, stir together the cider vine-gar, dill seed, minced garlic, and pickling salt, until the salt dissolves. Add the chopped vegetables and bring to a boil. Reduce heat and simmer 10 minutes.
Fill hot pint jars with hot relish, leaving ½-inch headspace. Remove air bubbles and adjust head-space, if needed. Make sure liquid covers the top of the food pieces. Wipe rims, adjust lids, and process in a boiling water canner as follows:
Hot Pack Processing Times for Dill Pickle Relish
Jar size At an altitude of0– 1,000 ft
1,001– 6,000 ft
above 6,001 ft
Pint 15 min. 20 min. 25 min.
Developed at The University of Georgia, Athens, for the National Center for Home Food Preservation .
Summer Squash RelishIngredients
4 pounds fresh, firm yellow and/or zucchini summer squash (as purchased)
18 Pickling Vegetables
½ cup diced sweet onion 2 cups cider vinegar (5%)2¼ cups white sugar2 teaspoons celery seed2 teaspoons turmeric4 teaspoons mustard seed
Yield About 5 pint jars or 10 half-pints
ProcedureRinse squash well, remove blossom and stem
ends, and shred in a food processor. Peel onions, remove stem and root ends. Dice or shred in a food processor.
Combine vinegar, sugar and spices and bring to a boil. Carefully add squash and onions. Return combined ingredients to a boil; boil gently for 5 minutes, stirring often.
Pack hot vegetables with liquid into hot jars, leaving ½-inch headspace. Remove air bubbles and adjust headspace if needed. Make sure liquid covers the top of the food pieces. Wipe rims, adjust lids, and process in a boiling water as follows:
Hot Pack Processing Times for Summer Squash Relish
Jar size At an altitude of0– 1,000 ft
1,001– 6,000 ft
above 6,001 ft
Half-pint 15 min. 20 min. 25 min.
Pint 15 min. 20 min. 25 min.
Recipe may use all yellow squash, all zucchini squash, or a combination of both. Celery salt may be used in place of celery seed as taste preference.
Developed at The University of Georgia, Athens for the National Center for Home Food Preservation .
Note
Pickles for Special Diets
Reduced-Sodium Sliced Sweet Pickles Ingredients
4 pounds pickling cucumbers (3- to 4-inch)
Canning syrup 1²∕³ cups distilled white vinegar (5% acidity)3 cups sugar 1 Tablespoon whole allspice 2¼ teaspoons celery seed
Brining solution 1 quart distilled white vinegar (5% acidity) 1 Tablespoon canning or pickling salt 1 Tablespoon mustard seed ½ cup sugar
Yield 4 to 5 pints
Procedure Wash cucumbers and cut 1�16 inch off blossom
end and discard. Cut cucumbers into ¼-inch slices. Combine all ingredients for canning syrup in a saucepan and bring to boiling. Keep syrup hot until used.
In a large kettle, mix the ingredients for the brining solution. Add the cut cucumbers; cover and simmer until the cucumbers change color from bright to dull green (5 to 7 minutes). Drain the cucumber slices. Fill hot pint jars with cucumber slices, and cover with hot canning syrup, leaving ½ inch headspace. Remove air bubbles and adjust headspace, if needed. Wipe rims, adjust lids, and process in a boiling water canner as follows:
Hot Pack Processing Times for Reduced-Sodium Sliced Sweet Pickles
Jar size At an altitude of0– 1,000 ft
1,001– 6,000 ft
above 6,001 ft
Pint 10 min. 15 min. 20 min.
No-Sugar-Added Sweet Cucumber SlicesIngredients
3½ pounds of pickling cucumbersBoiling water to cover sliced cucumbers4 cups cider vinegar (5% acidity)3 cups Splenda 1 Tablespoon canning salt1 cup water
Pickling Vegetables 19
1 Tablespoon mustard seed1 Tablespoon whole allspice1 Tablespoon celery seed4 one-inch cinnamon sticks
YieldAbout 4 or 5 pint jars
ProcedureWash cucumbers. Slice 1�16 inch off the blos-
som and stem ends and discard. Slice cucumbers into ¼-inch thick slices. Pour boiling water over the cucumber slices and let stand 5 to 10 minutes. Drain off the hot water and pour cold water over the cucumbers. Let cold water run continuously over the cucumber slices or change water frequently, until cucumbers are cooled. Drain slices well.
Mix vinegar, 1 cup water, Splenda, and all spices in a large stockpot. Bring to a boil. Carefully add drained cucumber slices to the boiling liquid. Return to a boil.
Place one cinnamon stick in each jar, if desired. With a slotted spoon, fill hot pickle slices into hot pint jars, leaving ½ inch headspace. Cover with boil-ing hot pickling syrup, leaving ½ inch headspace. Remove air bubbles and adjust headspace, if needed. Wipe rims, adjust lids, and process in a boiling water canner as follows:
Hot Pack Processing Times for No-Sugar-Added Cucumber Slices
Jar size At an altitude of0– 1,000 ft
1,001– 6,000 ft
above 6,001 ft
Pint 10 min. 15 min. 20 min.
Phot
o: Je
anne
Bra
ndt,
© O
rego
n St
ate
Univ
ersi
ty
Developed at The University of Georgia, Athens, for the National Center for Home Food Preservation .

20 Pickling Vegetables
How to order this publication To purchase copies of this publication, please contact an office or visit a website below.
Oregon State University phone: 1-800-561-6719 http://extension.oregonstate.edu/catalog/
University of Idaho phone: 208-885-7982 http://www.cals.uidaho.edu/edComm/catalog.asp
Washington State Universityphone: 1-800-723-1763 http://pubs.wsu.edu/
Cover photos (clockwise from top left): Asparagus: photo by Sharon & Nikki McCutcheon, CC BY 2.0; Peppers: photo by John Winkelman, CC BY 2.0; Green beans: photo by Mohammed Mahdi, CC BY 2.0; Beets: photo by Tim Sackton, CC BY-SA 2.0; Pickles (center): photo by Jeanne Brandt, © Oregon State University.
Trade-name products and services are mentioned as illustrations only. This does not mean that the Oregon State University Extension Service either endorses these products and services or intends to discriminate against products and services not mentioned .
Revised by Jeanne Brandt, Extension family and community health educator and professor, Washington County; original publication by Carolyn A. Raab, former Extension food and nutrition specialist, professor, and registered dietitian; both of Oregon State University. Information in this publication, which is based on U.S. Department of Agriculture recommendations, was reviewed by Extension specialists in food and nutrition at Washington State University, and the University of Idaho . © 2015 Oregon State UniversityPublished and distributed in furtherance of the Acts of Congress of May 8 and June 30, 1914, by the Oregon State University Extension Service, Washington State University Extension, University of Idaho Extension, and the U.S. Department of Agriculture cooperating. The three participating Extension services offer educational programs, activities, and materials without discrimination based on age, color, disability, familial or parental status, gender identity or expression, genetic information, marital status, national origin, political beliefs, race, religion, reprisal, sex, sexual orientation, veteran’s status, or because all or a part of an individual’s income is derived from any public assistance program. The Oregon State University Extension Service, Washington State University Extension, and University of Idaho Extension are an AA/EOE/Veterans/Disabled.Revised June 2007 . Revised August 2015 .