Embed Size (px)
Citation preview

Make It Happen ! A Manual for Creating
Leadership Training Events
See materials from these exciting events:
Contra Dance Calling: Beyond the Basics A one-day workshop for 25 intermediate callers
held in Amherst, Massachusetts
Contra Dance Callers and Musicians: Making Connections A “house workshop” for 10 callers and musicians held in Belfast, Maine
West Coast Leadership Conference A conference for 77 callers, musicians and
organizers held on in Portland, Oregon
CDSS Leadership Funds are available to support events that train callers, musicians, singers
and/or organizers. To apply for this assistance, see guidelines
and application. www.cdss.org
PREFACE – Introduction and Table of Contents
DESIGN PHASE – Envisioning Your Event
STEP-BY-STEP TIME LINE – Vision Becomes Reality!
Photos:CDSS
Photo: Bennett ;Konesni;with permisison
Photo: Rob Hoffman;with permssion

Make It Happen! A Manual for Creating Leadership Training Events
PREFACE – Introduction
Do you… know of callers, musicians or organizers in your music and dance community who would
like to hone their skills? know other aspects of the music and dance activities in your area that could be improved? hear about nearby communities that have to “import” talent for their regular dances? wish you could bring resources to your area that would address any of these topics?
If your answer is YES to any of these questions, then this Make It Happen! manual is designed especially for YOU
(and your co-planners). This material is intended to be a template to guide you through the planning process. We invite you to make it your own and adapt it to suit your needs. It is in PDF format so that it can be printed out for easy reference. If you’d like to receive an editable version (in Word format), please contact Linda Henry at [email protected] or 413-268-7426, ext. 105. If you reprint any portion of this manual, please include this credit: © 2007 Country Dance and Song Society www.cdss.org. These documents are a work in progress. We welcome your input as we improve them over time. If you have suggestions about how any aspect could be more complete and/or user-friendly, please send them to Linda at the email address above. We very much appreciate the thoughtful feedback we’ve already received from Lisa Greenleaf, David Millstone, Carol Ormand, Lisa Sieverts, Bob Snope and Jane Srivastava. We hope this manual will inspire you to create an event that will carry the quality of music and dancing in your community to a new level. Away we go! Linda Henry, Author and Editor CDSS Outreach Manager Brad Foster CDSS Executive and Artistic Director

Make It Happen! A Manual for Creating Leadership Training Events
PREFACE – Table of Contents
Page PREFACE: Introduction 1 Index 2 DESIGN PHASE – Envisioning Your Event 4 STEP-BY-STEP TIME LINE – Vision Becomes Reality!
1. It’s All in the Timing 7 2. Gathering Support – It Takes a Village 10 3. Putting the BIG Pieces in Place 11 4. Spreading the Word 15 5. Registration – It’s Really Happening! 17
6. Shaping the Program 19 7. Final Details – The Countdown 23 8. At the Event – Things to Remember 26 9. After the Event – Follow-Up for the Future 29
APPENDICES – Sample Events Contra Dance Calling: Beyond the Basics – A one-day workshop for 25 intermediate callers held on June 24, 2006 in Amherst, Massachusetts
• CDSS News article describing the event • Flyer • Sample budget • Registration materials:
o Description of event o Registration information o Registration form o Scholarship information and application form
• Schedule • CDSS News article describing feedback process used at workshop • Evaluation form
Contra Dance Callers and Musicians: Making Connections – A “house workshop” for 10 callers and musicians held on November 3-4, 2006 in Belfast Maine
• CDSS News article describing the event • Flyer • Schedule

Make It Happen! Table of Contents continued West Coast Leadership Conference – A conference for 77 callers, musicians and organizers held on September 15-17, 2006 in Portland, Oregon
• CDSS News article describing the event • Flyer • Registration form • Schedule • List of conference topics • Financial report • Final report and lessons learned
This manual was originally released on January 28, 2008.
This is revision: 1.0

Make It Happen! A Manual for Creating Leadership Training Events
DESIGN PHASE – Envisioning Your Event Here is some grist for the mill to help you begin to picture a workshop in your area. Print this out and fill in your preliminary ideas. Depending on the needs of your community/region, who would you design this event for?
• callers
• musicians
• singers
• organizers
What outcomes would you like to see from this event? For example, callers improving certain skills, musicians and callers working together more easily, organizers feeling part of a network, etc.
• for each participant • for your community/region
• for you/the staff What skills/topics need to be addressed? Who could teach these skills and/or address these topics?
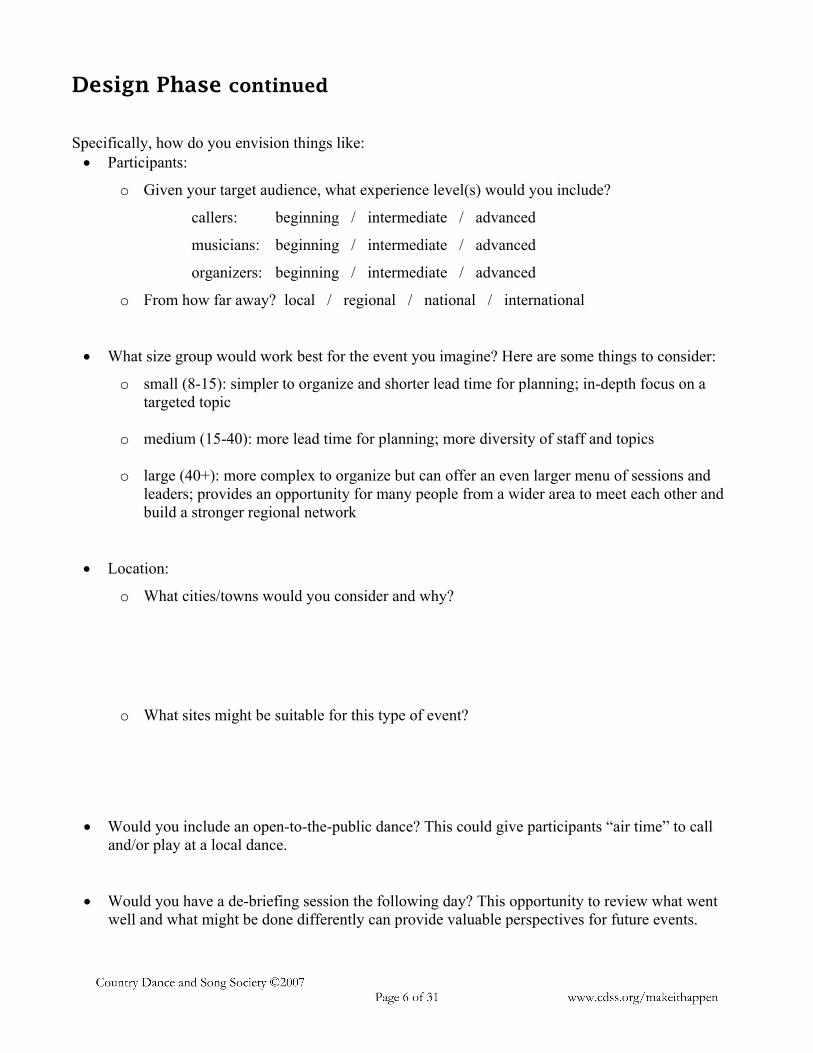
Design Phase continued Specifically, how do you envision things like:
• Participants:
o Given your target audience, what experience level(s) would you include?
callers: beginning / intermediate / advanced
musicians: beginning / intermediate / advanced
organizers: beginning / intermediate / advanced
o From how far away? local / regional / national / international
• What size group would work best for the event you imagine? Here are some things to consider:
o small (8-15): simpler to organize and shorter lead time for planning; in-depth focus on a targeted topic
o medium (15-40): more lead time for planning; more diversity of staff and topics
o large (40+): more complex to organize but can offer an even larger menu of sessions and
leaders; provides an opportunity for many people from a wider area to meet each other and build a stronger regional network
• Location:
o What cities/towns would you consider and why?
o What sites might be suitable for this type of event?
• Would you include an open-to-the-public dance? This could give participants “air time” to call and/or play at a local dance.
• Would you have a de-briefing session the following day? This opportunity to review what went
well and what might be done differently can provide valuable perspectives for future events.
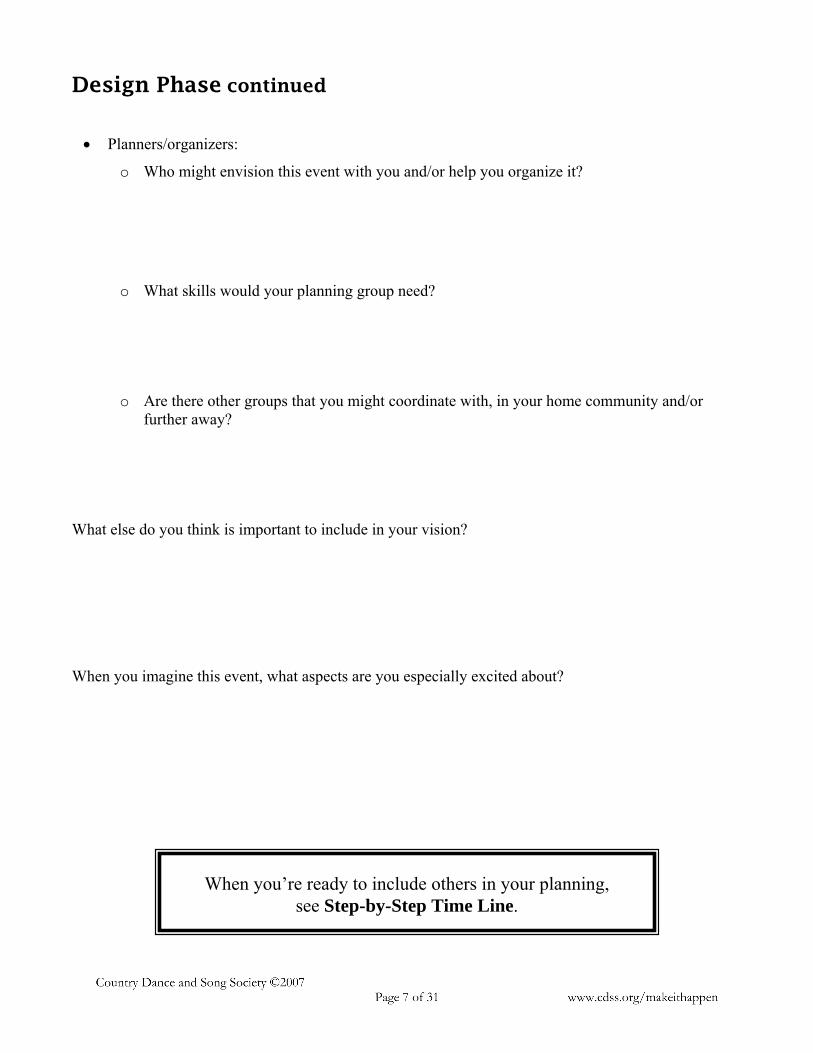
Design Phase continued
• Planners/organizers:
o Who might envision this event with you and/or help you organize it?
o What skills would your planning group need?
o Are there other groups that you might coordinate with, in your home community and/or further away?
What else do you think is important to include in your vision? When you imagine this event, what aspects are you especially excited about?
When you’re ready to include others in your planning,
see Step-by-Step Time Line.

Make It Happen! A Manual for Creating Leadership Training Events
STEP-BY-STEP TIME LINE – Vision Becomes Reality! As you launch your event, bear in mind that CDSS can provide assistance in a number of ways: logistical advice, publicity, financial support, etc. For more information, feel free to contact Linda Henry at [email protected] or 413-268-7426, ext. 105. To apply for a grant from CDSS Leadership Funds, refer to the guidelines and application. Step 1: It’s All in the Timing
After you’ve answered the questions in the Design Phase, begin to hone in on a date for your event. Here are some things to consider:
What time(s) of year would work best for YOU?
What time(s) of year would work for your target audience?
Do you know of any potentially conflicting events that happen in your area at this time of year?
What about religious holidays? School vacations?
Taking these things into account, choose an approximate TARGET date (month and year) and fill it in here:
To estimate time frames for your entire planning process, refer to the charts on the next page…

Step 1 continued
Here are actual time frames that were used for planning a one-day workshop for 25 people (see Contra Dance Calling). These are only suggestions about when most of the work was being done for each Step. 2005 2006 Planning Steps May June July Aug Sept Oct Nov Dec Jan Feb Mar Apr May June 1. It’s All in
the Timing X
2. Gathering Support
X X
3. Putting the BIG Pieces in Place
X X X
4. Spreading the Word
X X X
5. Registration X X X X X X 6. Shaping the
Program X X X
7. Final Details X X 8. At the Event X Use the following chart to estimate your own time frames. Start by setting up the chart: put an X in the lower right corner. At the top of that column, write your TARGET date from the previous page. Work backwards in time, filling in preceding months at the top of each column. Target month/year here↓ Planning Steps 1. It’s All in
the Timing
2. Gathering Support
3. Putting the BIG Pieces in Place
4. Spreading the Word
5. Registration 6. Shaping the
Program
7. Final Details 8. At the Event Now refer to the considerations on the next page and fill in your chart with estimated months for each Planning Step.

Step 1 continued Take another look at the suggested time frames in the first chart. If the event you envision is longer than one day and/or larger or smaller than 25 participants, adjust your estimated time frames accordingly. Our best advice is to allow plenty of time! As a general guideline, allow at least six months to plan a one-day event for a small group (8-15). Larger or longer events might need two years or more. Bear in mind that some well-known callers and musicians are often booked one to two years in advance these days. Estimate how long you’ll need for Step 7 and put an X in the column(s) of the corresponding month(s). Again working backwards in time, estimate how many months you’ll need for each Step, putting an X in other columns as you go. When you’ve filled in Xs for each Step, take a look at Step 2 (Gathering Support). Near the top there’s a space to fill in a date to begin this Step. Using the information you’ve written in your chart, fill in an approximate starting date for Step 2. You will find spaces to fill in your estimated dates at the beginning of each Step. Now that you have a general sense of when to start your planning, it’s time to round up other people to help make it happen!

Step 2: Gathering Support – It Takes a Village! Begin on this date: Here’s another piece of important advice: Involve MANY people in the process of planning and running your event! This Step will help you start doing just that. Dates Who Tasks Done
Using your thoughts from the Design Phase, write a summary to describe the event you’d like to create, including who, what, when, how, why, etc.
Create a planning group.
• Make a list of the people (from near and far) you’d like to help you plan this event, depending on what skills/support you need.
• Contact these people. Using your written summary as a reference, describe the event you’re envisioning. Ask if they would like to join you in creating this event. Let them know about ways they might help based on their interests and expertise.
• Once you know who is “on board,” find a time for your first planning meeting (in person or by teleconference).
• Before your first meeting, send them a preliminary agenda (see below).
First planning meeting – suggested agenda questions: • What outcomes would you like to see from this event? • What are some general skills/topics that would be useful to address?
• What is the target audience? How experienced will the participants be in these skills?
• What staff would you like to hire to address these skills/topics at that experience level?
• How many participants would be ideal? (minimum/maximum)
• Will the target date you’ve chosen work for everyone in the planning group? How long would you like the event to be to allow time for teaching/learning the skills you have in mind?
• Do you want to include a gathering the evening before, an open-to-the-public dance, a debriefing session with participants the next day?
• What are some of the key roles in the planning process, e.g. treasurer, publicity coordinator, registrar, food coordinator, etc.?
• Are there other people you know who might be interested in helping out with any of these roles?
Choose a time to meet again soon about the BIG Pieces awaiting!

Step 3: Putting the BIG Pieces in Place Begin on this date: The purpose and scope of the event will have an effect on which of the key aspects in the planning process need to be addressed first. Here’s some advice to help you and the planning group clarify these: PURPOSE: Re-visit the summary you wrote at the beginning of Step 2 and revise it with
your co-planners as needed. Having a clear statement about why you are creating this event and what outcomes you hope for can aid collective decision-making and be a helpful reference throughout the planning process. If you’d like to write a mission statement, see general suggestions and samples available on the Internet.
SCOPE: Re-visit the preliminary information you gathered about size in the Design Phase
and Step 2. The following guidelines will help you assess how big and how long the event will need to be in order to best serve its purpose.
If you’ve decided the event will be relatively small, you may already have a sense of how long it will be and how many staff members will be needed to cover the topics you have in mind. For a longer/larger event, you’ll need more information in order to decide how big a site is needed, how many staff to hire, etc. If possible, consult with potential staff members for their perspectives and preferences about the following questions.
• What total number of participants would be ideal? • What maximum number of people in each session would be preferable? • How many sessions will need to happen simultaneously during each time period in order to
accommodate everyone? (Divide the total number of participants by the maximum number per session.) This will dictate how many rooms will be needed for concurrent sessions.
Now get a sense of how many days will be needed to cover the sessions you have in mind: • How long will each session be? • Depending on their length, how many time periods will fit into each part of the day, i.e. two in the
morning(s)? two in the afternoon(s)? any in the evening(s)? Calculate a total number of sessions that will fit into one day. (See Step 6 for a sample grid.)
• What general topics will be addressed? (Step 6 also goes into detail about choosing specific topics.) • Approximately how many sessions will be needed to cover each of these topics? • Calculate a total number of sessions. Compare this with the total number of sessions that will fit into
one day. Will it be possible to cover the topics you have in mind within one day’s time? If not, continue estimating how much more time will be needed to cover all topics.
With a clear sense of purpose and scope, it’s time to proceed with other important aspects…

Step 3 continued Here is a summary of the key pieces to address at this point. With the planning group, decide who will be involved with and responsible for each one.
Who Overview of the BIG Pieces
• Choose a name for this event • Hire staff • Choose date(s) • Find a site • Make arrangements for food
Roles to designate: • Treasurer (needs to start by drafting a budget) • Publicity Coordinator • Registrar • CDSS Liaison (see note below)
The scope of the event will impact which pieces need to be addressed first. For smaller events, you may want to choose staff first, then find a date that works for everybody, then locate a site. For larger/longer events, you may want to choose a site first, then date(s) and staff. Details about each of these key aspects are outlined on the following pages.
NOTE: Other CDSS groups in your region may have helpful input about: • what skills or topics would be pertinent for their local callers, musicians,
and/or organizers (depending on the target audience) • what callers and/or musicians they would request/recommend • dates of potentially conflicting events in their area • suitable resources in their area, i.e. sites, caterers, etc.
They might also publicize your event in their newsletters, at their events, etc. If you’d like to contact this wider community, CDSS can provide an email list. Your CDSS Liaison can contact Linda Henry at [email protected] for details about this and other logistical support.

Dates Who Tasks (Step 3, page 3) – Details about each BIG Piece Done
Choose a NAME for the event based on the purpose and target audience.
Designate a Treasurer to draft a preliminary BUDGET. See sample.
• Estimate costs: staff salaries (and travel?) based on the total number of staff, site rental (to accommodate the ideal size of this event), food, sound equipment and operator, scholarships, publicity, etc. Calculate your total expenses to estimate the total income needed to break even. (You can replace these estimates with actual figures as they become available.)
• Determine the registration fee: Estimate your desired number of participants. Divide your total estimated income by this number. Will this be an appropriate registration fee? Compare this to charges for similar events. Consult with a few members of your target audience to see if this amount is a reasonable fee for the program you are offering. NOTE: If you’re receiving a CDSS grant, consider offering a CDSS member discount.
• If you need to lower the fee but the income from registration fees is not enough to cover your expenses, consider other sources of income you might pursue. Determine if you want to ask for donations (from participants, local groups, etc.) and/or for assistance from CDSS Leadership Funds. Refer to guidelines and application.
• Discuss scholarships. Estimate how many you will offer depending on possible work exchange jobs and how many the budget will support.
Hire all STAFF:
• Brainstorm what staff you’d like to hire to cover the general topics you’ve identified. List possible staff in order of preference.
• Brainstorm which musicians you think would provide suitable music for the sessions you have in mind. List in order of preference.
• Will you need a sound system? If so, brainstorm a list of who might operate it. Decide if this will be a paid or scholarship position.
• Contact prospective staff to determine dates they’re available (within your time frame) and remuneration. (Adjust budget amounts as needed.) Also discuss possible workshop topics (to include in preliminary publicity).
• When all staff members have been confirmed, send staff contracts.
Finalize DATE(S) that work for you, your planning group, your target audience and the availability of your staff:
• Avoid dates of any pre-existing events. (See above for information on contacting groups in your target area.)
• If you want to have a de-briefing session the following day, be sure to include this in the dates you choose.

Dates Who Tasks (Step 3, page 4) – Details about each BIG Piece Done
Find a SITE:
• Make a list of considerations about location: ease of transportation (public or private) to and from site, availability of food nearby if necessary, proximity of lodging, etc.
• Based on the participants and types of concurrent activities, make a list of considerations: kitchen facilities, chairs, tables, piano(s), number of rooms needed for workshop sessions (with sound privacy) and dances (with suitable flooring), parking, handicap accessibility, etc.
• Research any potential sites. When you find one that meets the needs of this event, reserve it for the dates you’ve chosen and pay the deposit. Find out if the site’s insurance policy covers this type of event. (CDSS offers some basic liability insurance, which may or may not be suitable for your event.) Add the cost of the site (and insurance) to your budget.
• If a keyboard/piano will be needed at the site and/or evening dance, be sure there is one that’s in good condition and in tune. If keyboard and/or sound equipment need to be rented, add this to your budget.
If you’re having a DANCE in a separate place: • Decide who to invite (see Step 6) and what type of facility you’ll need. • Research likely sites; locate and reserve a space that meets your needs. • Add the rental cost to your budget.
If you’re having a de-briefing session the following day, find a suitable setting, perhaps a local home nearby. If not, reserve a space that meets your needs and add the rental cost to your budget.
Make arrangements for FOOD:
• Decide what will be needed and who will provide it. Having plenty of good food available throughout an event adds to the enjoyment!
• To what extent will special food preferences be accommodated, e.g. vegetarian, vegan, etc.?
• If food will be provided by participants, decide what will be purchased and estimate the cost. Will any food be catered? If so, research options, ask for estimates and line up a caterer.
• Add the total estimated cost of food to your budget.
Treasurer finalize BUDGET based on costs for staff, site, food, etc.
Designate a PUBLICITY Coordinator to follow through with Step 4. If you plan to have a website for your event, decide who will set this up.
Designate a REGISTRAR to process registrations. S/he will have his/her name and contact information on all publicity. See Step 5 and estimate a DATE by which the Registrar will be ready to receive applications.

Step 4: Spreading the Word Begin on this date: As soon as the BIG pieces from Step 3 are in place, it’s time to send a preliminary announce-ment to let people know about this event. Here is a summary for the Publicity Coordinator outlining how to proceed:
Finalize all key information (see below)
Send out a “Save This Date” announcement with this basic information
Prepare a final flyer with further details
Prepare all registration materials (see Step 5)
THEN send out the final flyer NOTE: Some people may want to register as soon as they see it. So WAIT to send out the final flyer until the Registrar is ready to begin processing registrations.
Begin by confirming and filling in the following:
• Name of Event:
• Date(s):
• Location:
• Staff:
• Cost:
• Date to begin accepting registrations:
• Registrar:
• Contact information (including website if available):
As soon as all of the above is definite, refer to the next page.

ep 4 continued
Prepare “Save This Date” announcement: Dates Who Tasks Done
• Include all basic information from the previous page. Remember, the purpose is simply to announce the event. Make it clear that registrations will begin after a certain date.
• Brainstorm ways to distribute this announcement: personal invitations, other websites, local papers, email lists, newsletters, etc. Generate a list of interested people who might help spread the word. (See Step 3 for acquiring an email list of CDSS groups in your area.)
• Make a hard copy “Save This Date” publicity to distribute at dances, send by mail, etc.
• Post this preliminary information on your website if you have one. • Distribute the “Save This Date” announcement far and wide!
• Send information to CDSS ([email protected]) for inclusion in the Upcoming Events section in the CDSS News and website. NOTE: Information must be submitted by the 15th of January, March, May, July, September and November for newsletter issues that are sent six weeks after these deadlines.
Then prepare final flyer: • Decide who will design and produce the final flyer. Sample.
• In addition to the key information in the box above, consider adding: o Photos of staff and/or brief bios. Ask staff members to forward information for this event. Use bios from their website if available. o A short list of possible topics (see Step 2). These will pique the interest of potential participants. o If any organization is funding your event, be sure to include wording to acknowledge this. Some organizations also require the inclusion of their logo.
Prepare to send final flyer to everyone who got the “Save This Date” announcement.
Remember to distribute the final flyer AFTER you’ve completed Step 5.

Step 5: Registration – It’s Really Happening! Begin on this date:
As you prepare materials for the registration process, refer to samples from the sample events listed in the table of contents. You will find one or more examples of the following:
Description of event Registration information Registration form Scholarship information and application form
Here are things to consider and decide:
Dates Who Tasks Done
Finalize who will be responsible for which tasks: preparing registration materials, handling finances, processing registrations, etc.
Do you want to include a longer list of possible session topics on the registration form and ask applicants to indicate their preferences? (This can be useful information for your planning! See Step 6.) Gather topic ideas from co-planners and staff. (See options on registration form.)
How will payments be handled? Will a deposit be required? If so, for what amount? When will the deposit and full payment be due? Who will make deposits/write checks? What checking account will be used?
How will people access registration materials? On your website? Will you offer online registration? If so, is the registrar comfortable with processing this information?
Will you be concerned with gender balance? If so, how will you proceed?
Will you have a cut-off date for registrations? Will you have a maximum number of participants? What will happen if the event is over-subscribed? Will you have a lottery? Or have a first-come, first-serve policy? Will you have a minimum number? What if that number isn’t reached?
Who will handle scholarships? This should include calculating how many are available (based on the budget), generating a list of work exchange jobs, writing up scholarship descriptions, posting this on your website, etc.
Make decisions about lodging. Will you ask local people to offer housing? If so, who will coordinate this? OR Will you simply provide information about local hotels, B&Bs, etc.? If so, who will compile this information? Will it be posted on the website?
About travel: Who will write up directions, compile airport information, etc.? Will this be posted on the website? Will you coordinate rides and/or airport pickups?
When all information is ready, NOW it’s time to distribute the final flyer.
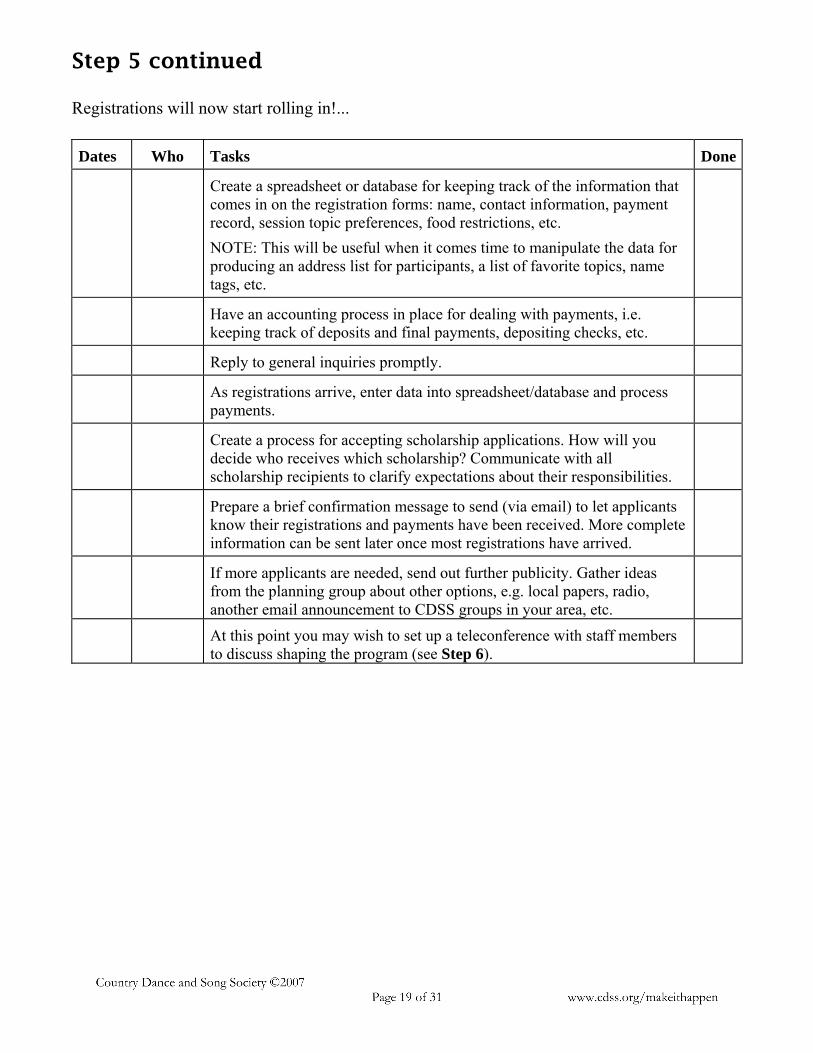
Step 5 continued Registrations will now start rolling in!... Dates Who Tasks Done
Create a spreadsheet or database for keeping track of the information that comes in on the registration forms: name, contact information, payment record, session topic preferences, food restrictions, etc. NOTE: This will be useful when it comes time to manipulate the data for producing an address list for participants, a list of favorite topics, name tags, etc.
Have an accounting process in place for dealing with payments, i.e. keeping track of deposits and final payments, depositing checks, etc.
Reply to general inquiries promptly.
As registrations arrive, enter data into spreadsheet/database and process payments.
Create a process for accepting scholarship applications. How will you decide who receives which scholarship? Communicate with all scholarship recipients to clarify expectations about their responsibilities.
Prepare a brief confirmation message to send (via email) to let applicants know their registrations and payments have been received. More complete information can be sent later once most registrations have arrived.
If more applicants are needed, send out further publicity. Gather ideas from the planning group about other options, e.g. local papers, radio, another email announcement to CDSS groups in your area, etc.
At this point you may wish to set up a teleconference with staff members to discuss shaping the program (see Step 6).

Step 6: Shaping the Program Begin on this date: Now it’s time to clarify the content. See links for schedules from smaller and larger events. Meet with your planning group to gather their thoughts about the following:
Dates Who Tasks Done
Start by deciding which topics are most pertinent:
• What do the applicants think? If you’ve given them the option of requesting topics on the application form, compile this data in the spreadsheet to see which ones are most popular.
• What does your planning group think? Show them the compiled data from the applicants. Are there any other topics that would be important to address, based on the needs of the community?
• What does your staff think? (See below.)
• Do you want to include time for practicing calling and/or offering feedback? See article for a useful tool that was incorporated in the Contra Dance Calling workshop.
Decide how many topics will fit into the schedule based on the number of staff and the length of the event (see Step 3).
As you finalize topics that will be addressed at the event, fill them in here:
NOTE: Don’t worry about actual titles for the sessions at this. •
•
•
•
•
•
•
•

Step 6 continued Here are other things to consider in shaping the content of each day:
Think about how to get the day(s) off to a great start. Estimate how much time will be needed for:
• arrivals, checking in at the registration table, settling in, socializing, etc. (Will you serve any morning snacks and/or beverages?)
• brief orientation for introducing the event, announcements, etc. (Will you include an ice breaker activity?)
Will you have time for a breather during any part(s) of the day? Option: a mid-afternoon tea time can provide an opportunity for schmoozing, networking, etc.
Think about how and where to bring the group together at the end of the day(s). Estimate how much time will be needed for: • final announcements • closing activity (perhaps a dance? a song?)
• written evaluations (Will you pass out forms and give people time to fill them out before they leave?)
What meal times would work depending on other parts of the day(s)?
If you’re having a dance associated with this event:
• What will the purpose of this dance be? If the workshop participants will be calling/playing, what setting will provide an encouraging atmosphere?
• Will the dance be open to the public? If so, will it be attached to an established dance in the area? If so, the staff will need to know more about your particular dance community (see next page).
• Will the dance be open to a more specialized audience? If so, this can address specific needs, e.g. calling for mixed age groups, experienced dancers, etc.
If you’re having a post-event de-briefing session, see the end of Step 8.

Step 6 continued Now contact staff members (via email or teleconference) to discuss the following:
Dates Who Tasks Done
• Make sure they have a clear understanding of the purpose of this event. (See beginning of Step 3.) This will help them choose and prepare sessions to support your goals.
• Give them the list of chosen topics. Can they think of anything else that would be important to include?
• Let them know if you want to allow time for giving/receiving feedback in any sessions. (See article for possible process.)
• Ask who would like to cover which topics.
• Ask them to be thinking about specific titles for the sessions they will each be leading. Give them a deadline for providing this information. A month or so before the event will give you time to include titles in the event schedule.
• Give them the estimated information from the beginning of Step 3 about maximum number of participants per session, length of time for each session, etc. Do they want to adjust these numbers?
• Ask for other input about scheduling: o If sessions will be happening simultaneously, which topics would
would work well in the same time period to offer variety? o Should certain sessions happen during any particular time of day?
For example, right after lunch can be a drowsy time. What topics would keep the participants engaged?
• Do they have preferences about what type of room they need for each session? For example, a suitable floor and more space if there will be dancing, less space if there will only be discussion.
• If an evening dance will be associated with this event, help the staff plan a program to fit the community’s needs by educating them about the dancers. Let them know things like:
o how many people are likely to attend o what proportion will be newcomers o if there will be a session for beginners o how welcoming the community is

Step 6 continued Taking into account the considerations above, create a schedule for each day of the event. Here is a general framework to help you put together a first draft. Fill in each segment of the event as it comes into focus:
Times Staff Member(s) Room(s)*
Check In Orientation Morning Sessions: Break? Lunch Afternoon Sessions: Break? Closing Evening Activity
What about a debriefing session the next day?
* Names of rooms can be filled in after your site visit (see Step 7).
Want to run a CDSS consignment at your event? Give your participants a chance to build their skills with help from the many books and CDs available through the CDSS store. You can sell these materials, earn a commission AND help support CDSS. If your planning group is interested, decide who will oversee the CDSS consignment. This person should contact the Sales Department at least 2 months before your target date. See www.cds.org/sales/consignments.html for details.
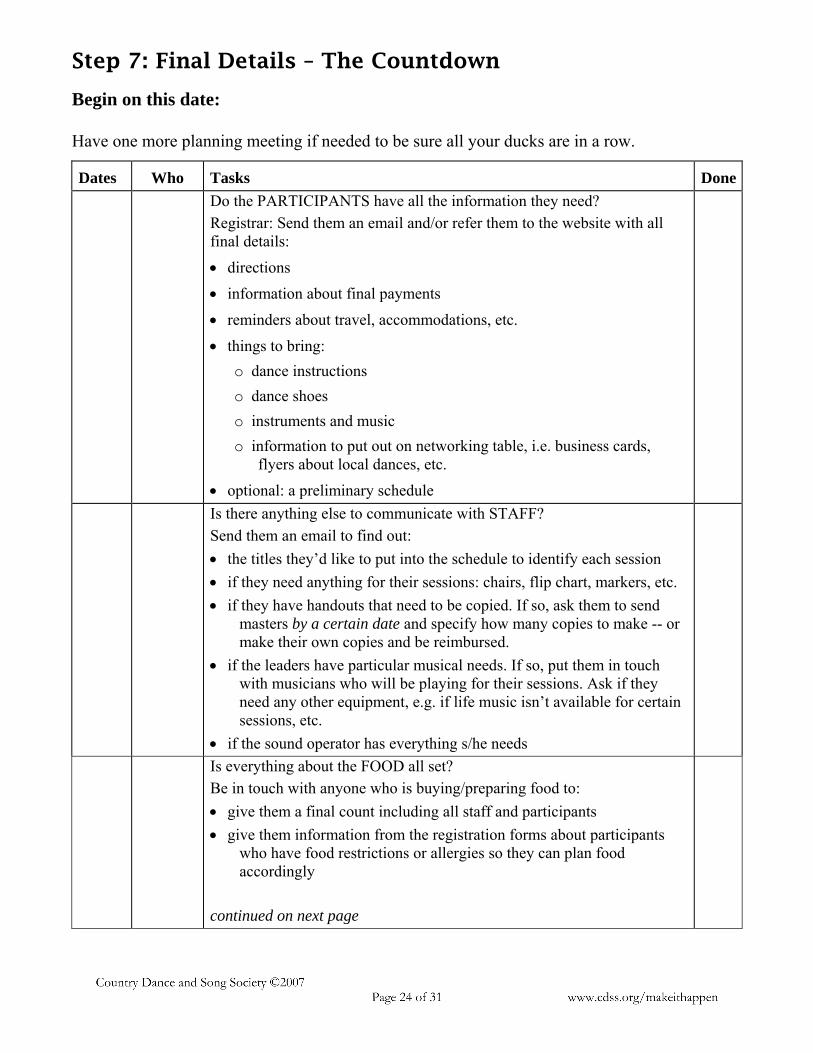
Step 7: Final Details – The Countdown Begin on this date: Have one more planning meeting if needed to be sure all your ducks are in a row.
Dates Who Tasks Done
Do the PARTICIPANTS have all the information they need? Registrar: Send them an email and/or refer them to the website with all final details: • directions • information about final payments • reminders about travel, accommodations, etc. • things to bring:
o dance instructions o dance shoes o instruments and music o information to put out on networking table, i.e. business cards,
flyers about local dances, etc. • optional: a preliminary schedule
Is there anything else to communicate with STAFF? Send them an email to find out: • the titles they’d like to put into the schedule to identify each session • if they need anything for their sessions: chairs, flip chart, markers, etc. • if they have handouts that need to be copied. If so, ask them to send
masters by a certain date and specify how many copies to make -- or make their own copies and be reimbursed.
• if the leaders have particular musical needs. If so, put them in touch with musicians who will be playing for their sessions. Ask if they need any other equipment, e.g. if life music isn’t available for certain sessions, etc.
• if the sound operator has everything s/he needs
Is everything about the FOOD all set? Be in touch with anyone who is buying/preparing food to: • give them a final count including all staff and participants • give them information from the registration forms about participants
who have food restrictions or allergies so they can plan food accordingly
continued on next page

Dates Who Tasks (Step 7, page 2) FOOD arrangements, cont. Done
• if any food will be catered, find out the amount for the final bill and when payment is required. Make arrangements to have this check available whenever it is needed.
• if others are buying food, make sure they’re keeping track of any expenses that need to be reimbursed. Remind them to save receipts for your records.
• ask food preparers if they have questions about kitchen facilities (see the following information about a site visit)
Are there things to finalize in relation to the SITE? Make sure the rent has been paid. Arrange to visit the facility. Ask your planning group if anyone would like to go with you, e.g. whoever will be helping to set up, working in the kitchen, etc. If not, ask if they have any site-related questions and bring these with you. Here’s a list of things to request: • key(s) to any doors that will be locked • a tour of the building to learn where to locate: o light switches o thermostats (learn how to adjust the temperatures) o rest rooms o piano(s) (are they in tune?) o first aid materials (or will you need to bring?) and defibrillator o phones (In case there’s an emergency and you need to call 911, it’s
better to call from a phone in the building, because the address is automatically forwarded to 911.)
o storage area for tables and chairs o different spaces for sessions (Make notes about names for any of
these rooms. If not, come up with your own – these will be needed to insert into the schedule.)
o dining area(s) and kitchen (Learn how to operate coffee makers, dish washer, etc. Ask where to find dishes, silverware, trash cans, etc. plus other questions from the food preparers.)
Give yourself time to visualize where things will be: o opening and closing activities o each session o meals, tables for serving beverages and food o chairs and tables (Decide where they will be needed, how many, how
far they need to be moved, etc.) o registration table and networking table for flyers, business cards, etc. o coats, personal items o CDSS consignment (if your event is running one)

Dates Who Tasks (Step 7, page 3) Done
Do SCHOLARSHIP RECIPIENTS have all the information they need? Send emails to convey any pertinent information about their jobs based on your recent site visit. If anyone’s job involves coming early or staying late, give specific times to be available.
Read Step 8 thoroughly and be sure all bases are covered and tasks are delegated. Buy/gather all supplies listed. Designate people to be greeters.
Make arrangements to have staff paychecks ready.
If local housing is offered, make sure hosts have any information they need about whoever will be staying with them.
Find a volunteer to take photos and/or videos at the event.
Make a list of announcements. Designate who will make them and when.
If there will be a DANCE, confirm who will: • put the program together • coordinate the callers, musicians, sound operator • be the emcee • do publicity: make a flyer, send emails, information to newspapers, etc. • bring snacks, etc.
If having a debriefing session the next day, delegate tasks in Step 8.
Prepare all materials to distribute at the event. • schedules (Sample). Also make several enlarged copies – enough to
post in any room in the building where sessions will be held. • list of all participants, including addresses and emails • handouts for any sessions (if staff members are providing any) • evaluation forms
• restaurant suggestions and directions (if participants will be on their own for any meals). This type of information may be available from your local Chamber of Commerce.
• additional directions, e.g. if the evening dance and/or debriefing session the following day will be held in other locations)
Make enough copies for all participants and staff.
Make signs, e.g. bathrooms this way, coats here, networking table, etc.
If the event is receiving a grant from CDSS Leadership Funds, Linda Henry will be in touch about sending a box of promotional materials to make available at the workshop.
Contact [email protected] with any questions about the CDSS consignment.

Step 8: At the Event – Things to Remember Target date (See Step 1):
Who THINGS TO BRING
• this list (Remember, it’s only intended to be a guide, so edit it to suit your needs!) • a cell phone or two and any phone numbers you may need (church contact, etc.) • key(s) to any doors that might be locked
• for registration table: name tags, schedules (plus enlarged copies), address lists, session hand-outs, evaluation forms, directions (to restaurants, dance, debriefing session)
• office supplies: name tags, pens, markers, paper, scissors, tape, push pins, etc. • kitchen supplies: disposable plates, cups, utensils? markers for cups? napkins, garbage
bags, coffee filters, etc. • all foods and beverages including water jugs and cups • written instructions as needed for scholarship jobs, kitchen use, etc. • first aid supplies • sound system • keyboard • paychecks for all hired staff • CDSS consignment and/or promotional material (if event has received a CDSS grant) • cash box and seed money (if needed for consignment sales, etc.)
AT THE EVENT – SET UP
• unlock any doors that will be used during the event • adjust thermostat and turn on lights as needed • start the coffee maker! • meet with scholarship recipients/volunteers who are helping out • check in with staff members, give them handouts for their sessions, etc. • set up registration table and display materials mentioned above • post an enlarged schedule in any room where sessions will be held • put up signs indicating bathrooms this way, areas for coats, personal items, etc. • set up a “networking” table for dance flyers, business cards, etc. • set up CDSS consignment and promotional materials if available • set up chairs and tables in whatever rooms they’ll be needed • set up sound system(s) wherever needed continued on next page

Who AT THE EVENT – SET UP cont. (Step 8, page 2)
• organize food and beverages in kitchen so they are ready for all meals, snacks, etc. • set out snacks to be served as people arrive if applicable • check in with the photographer about whatever you want to be documented
(set ground rules about use of flash to avoid interruption of workshop sessions) • orient scholarship recipients who are helping out during the event (see below)
DURING THE EVENT
Make sure the following areas are running smoothly and on time: • greeters checking people in at the registration table • chairs and tables set up for sessions and meals • sound system(s) operating • announcements • meals:
o preparation o serving o cleanup
• CDSS consignment materials
Acknowledge any organization that has subsidized this event. If your event received a grant from CDSS. Let participants know about the promotional materials that are available and mention the CDSS consignment if there is one.
During the final announcements, ask workshop attendees to help with clean up. This will help them feel even more part of the event.
AFTER THE EVENT – CLEAN UP
• give paychecks to all hired staff members • orient volunteers/scholarship recipients who are helping out about all jobs that
need to be done
• pack up any leftovers from registration table, “networking” table, CDSS consignment, etc.
• take down all sound system equipment • put away chairs, tables, etc. • clean kitchen, pack up food • clean floors as needed
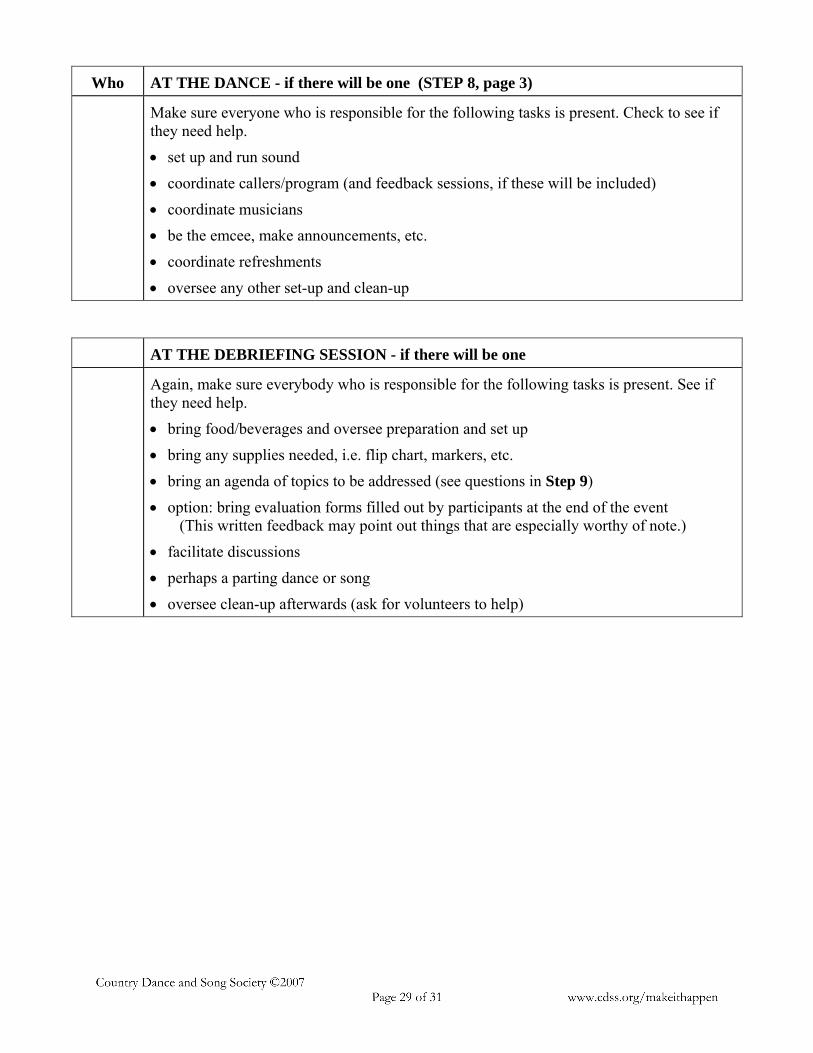
Who AT THE DANCE - if there will be one (STEP 8, page 3)
Make sure everyone who is responsible for the following tasks is present. Check to see if they need help. • set up and run sound • coordinate callers/program (and feedback sessions, if these will be included) • coordinate musicians • be the emcee, make announcements, etc. • coordinate refreshments • oversee any other set-up and clean-up
AT THE DEBRIEFING SESSION - if there will be one
Again, make sure everybody who is responsible for the following tasks is present. See if they need help. • bring food/beverages and oversee preparation and set up • bring any supplies needed, i.e. flip chart, markers, etc. • bring an agenda of topics to be addressed (see questions in Step 9) • option: bring evaluation forms filled out by participants at the end of the event
(This written feedback may point out things that are especially worthy of note.) • facilitate discussions • perhaps a parting dance or song • oversee clean-up afterwards (ask for volunteers to help)

Step 9: After the Event – Follow-Up for the Future Aim to complete by this date: Hopefully at this point you will be basking in the glow of a job well done! Please give yourself time to acknowledge and enjoy this feeling of accomplishment. While these memories are fresh, carve out some time to “tuck in” this event on your own and/or with your planning group. Here are some questions to help you glean information that could come in handy for future workshops. Making notes about these topics is important, both to complete the event in your own mind and to guide others who are involved in similar efforts. Remember to include any feedback the participants provided on their evaluation forms.
WHAT WENT WELL?
About the PROGRAM…
sessions:
schedule:
evening dance:
About the SITE…
location:
spaces for session:
meals:
What were the ROUGH SPOTS in any of these areas?
Step 9 continued
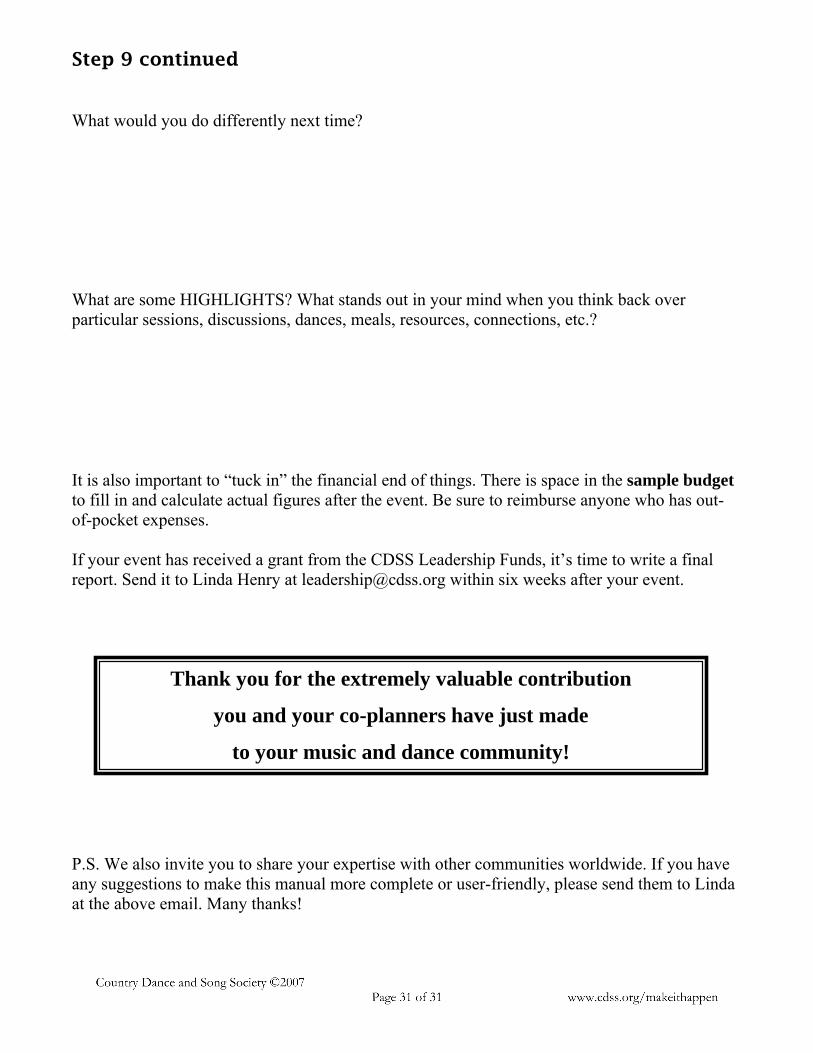
What would you do differently next time?
What are some HIGHLIGHTS? What stands out in your mind when you think back over particular sessions, discussions, dances, meals, resources, connections, etc.? It is also important to “tuck in” the financial end of things. There is space in the sample budget to fill in and calculate actual figures after the event. Be sure to reimburse anyone who has out-of-pocket expenses. If your event has received a grant from the CDSS Leadership Funds, it’s time to write a final report. Send it to Linda Henry at [email protected] within six weeks after your event.
Thank you for the extremely valuable contribution
you and your co-planners have just made
to your music and dance community!
P.S. We also invite you to share your expertise with other communities worldwide. If you have any suggestions to make this manual more complete or user-friendly, please send them to Linda at the above email. Many thanks!