Embed Size (px)
Citation preview
1
Tools & GluesWhen it comes to building a resin model, a selection of tools will be required. When buying tools, it is often a good idea to buy the best quality tool that you can afford – they should last a lot longer, saving you money in the long run as they will need to be replaced less often. A range of tools are available from Games Workshop as part of the Citadel range.
Tools
ClippersClippers are useful for removing pieces of resin that are too large to safely remove with a knife, and for snipping both resin and plastic components off their sprues.
Modelling Knife A good quality modelling knife is very important – it will be necessary for cleaning up castings prior to assembly and is a very useful tool for removing mould lines and shims (see the Preparation section of this guide).
Model Filler and Model PuttyThese can be used to fill in any small air bubbles or gaps between components.
Sanding Pads, Sandpaper and FilesSandpaper or sanding pads are useful for sanding larger areas and smoothing trimmed or sawn areas after larger gates or vents have been removed. For smaller areas, a file set is also useful. Sanding resin can produce a very fine dust, so wearing a dust mask is advised.
Variable Speed Rotary Tool A rotary tool can be used any time you need to sand, file or cut something, and will greatly increase the speed of these tasks. It is, however, a tool for the experienced modeller and should be used with care – using eye protection and a dusk mask are advised.
Saw The most useful type of saw when modelling will be a piercing saw or a razor saw. A piercing saw gives very fine cuts, but the blades are quite fragile. A razor saw is more substantial, but won’t give as fine a cut. Sawing resin can produce a very fine dust, so wearing a dust mask is advised.
TweezersVery useful for adding small and fine detail parts or for adding parts in hard to reach places.
Pin Vice and Drill BitsPin vices can be used to drill out gun barrels as well as for drilling a hole to pin parts together using metal rods for greater strength.
Glues
SuperglueEven though resin is a type of plastic, glues used for plastic kits are not effective at sticking resin pieces together, a good superglue is required instead.
Epoxy GlueFor larger and heavier parts, a two-part epoxy can be used to provide a very strong bond. As epoxy can take a long time to dry, you can put some superglue on part of the area to hold it in place whilst the epoxy is drying. Superglue AcceleratorThis can be applied to get superglue to set almost instantly. Always read the instructions before applying it to your models as care must be taken when using it. It is often best to add accelerator to one surface and the glue to the other.
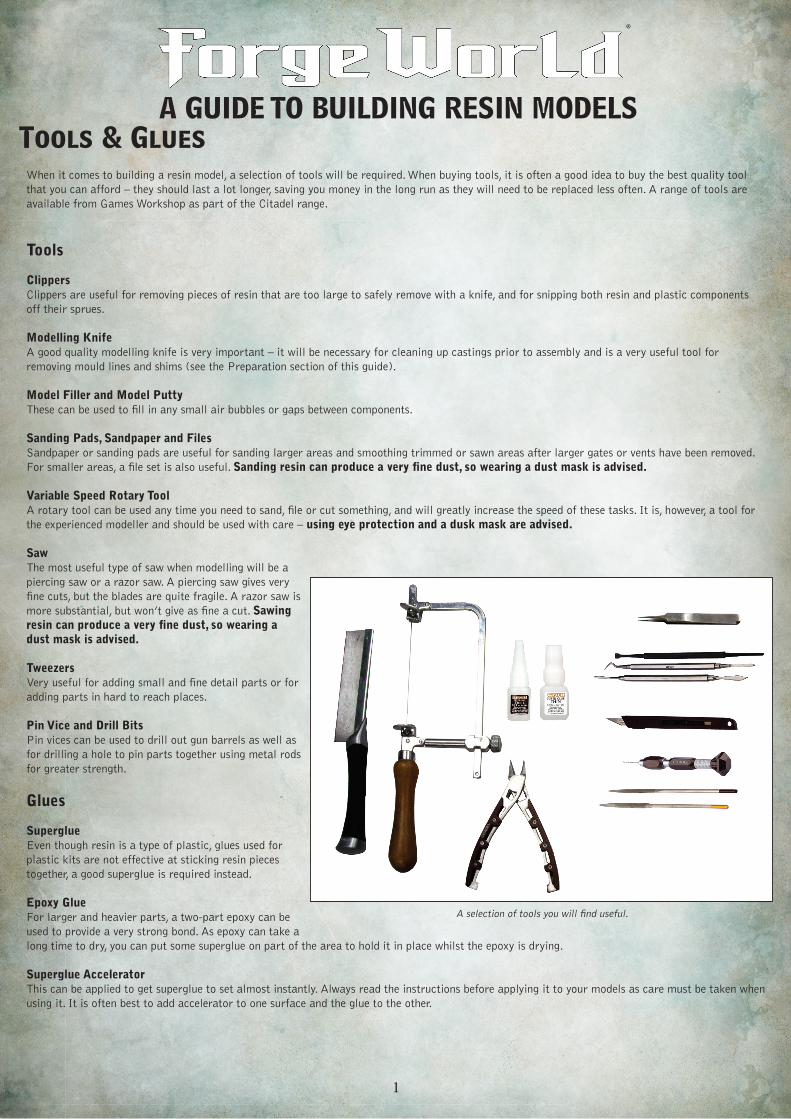
A selection of tools you will find useful.
A GUIDE TO BUILDING RESIN MODELS
®

2
Preparation1. Checking and CleaningThe first thing to do is to check the components for any missing or miscast parts, should you find a problem then get in touch with the Forge World Customer Service team.
Next, clean each part in warm water with a good degreasing agent, such as dish washing liquid, and an old toothbrush. This is to remove any excess mould release agent which may still be on the surface of the parts. Any mould release agent left on the model may prevent the primer adhering to the model. It may be required to leave the parts to soak for a while before scubbing if they feel very greasy.
2. Casting GatesThese appear where the resin has been poured into the mould. They are easily removed by using a pair of clippers to trim them off. You can then use a modelling knife, sanding pad or model file to clean off any excess. For gates too large for the clippers, a razor saw or piercing saw is ideal.
3. Mould LinesResin components are produced from silicone moulds that usually have a split line. Consequently, there will often be a slight line on the model that shows where the mould joins together. These are usually very fine, but nevertheless they will need removing so that they don’t show up after painting. Mould lines can be removed with a modelling knife or file by carefully scraping or filing away the line.
A smooth surface can then be restored with some fine sandpaper. This shouldn’t take too long and makes a big difference to the finished model.
4. ShimsShims are used to allow resin to flow through a mould without completely filling a gap that is part of a model. They are common in areas such as canopy frames or between loose cabling. To remove the shim, simply run the blade of a modelling knife around the edge of the shim and then press it out. Any excess shim left over can also be scraped away with the knife or filed down.
5. Warped Parts and RepositioningThis sometimes happens to thinner parts where they have bent or twisted slightly, often due to the heat from the reaction of the resin curing. This can be easily fixed by carefully applying heat either by immersing the piece into hot water or by applying heat via a hot air gun or hair dryer. Often the piece will reform to its original shape by itself. If not, gently twist the piece back into position. The amount of heat that needs to be applied is often determined by the thickness of the parts, with thicker parts needing to be heated for a longer time.
This technique can also be used to bend certain parts into shapes and positions to pose models, such as the mechadendrites of Mechanicum models or the Kytan’s pturges.
DO NOT USE A NAKED FLAME TO HEAT THE RESIN!
Clippers being used to remove the casting gates.
This component has a mould line and some excess resin resulting from the casting gate removal process.
Shims are easily removed by cutting their edges with a modelling knife.
By carefully heating the detail on this component, it can be reposed and will set in its new position as it cools.
3
Priming and PaintingCitadel Chaos Black or Corax White sprays are great primers for resin models. After the primer has dried, check that it has covered and adhered to the model. If the primer has peeled away from some areas then contact the Forge World Customer Service Team for advice on how to resolve this. Once primed, it’s then simply a case of choosing your colour schemes from Citadel’s huge range of paints and painting your model.
When painting larger models, you might find an airbrush an invaluble aid for obtaining a smooth coverage, particularly on large flat surfaces. Forge World sells a variety of airbrush paints which are specially formulated acrylic paints designed to give great results with an airbrush, whilst retaining the perfect consistency for applying with a paint brush. A range of Forge World Weathering Powders are available to help give an aged weather-beaten look to your models. We also produce a range of Model Masterclass books that demonstrate some great techniques for detailing and painting your models.
AssemblyOnce the components have been washed and all excess resin has been removed, the model is ready for assembly. If the model has any interior detail or parts that may be difficult to access when fully assembled, it may be best to paint them at an appropriate point during the assembly.
Before gluing the components together, it is a good idea to dry fit them. This allows you to check if there are any potential problems such as uneven joins or gaps. If there is an uneven join, just quickly take a file or fine sandpaper to it before gluing. If there is a gap, this will need filling with modelling putty. Glue the components together so they are straight but don’t worry if it leaves a gap. Once the glue has set, use a small amount of modelling putty or model filler to fill in the gap. Sculpting tools can be very useful for helping to apply and smooth the putty into the gap. Once the putty has set, it can be sanded flat to create a smooth surface that matches the components on either side.
Modelling putty has been applied to the gap on this model and sculpting tools have been used to smooth it into place.
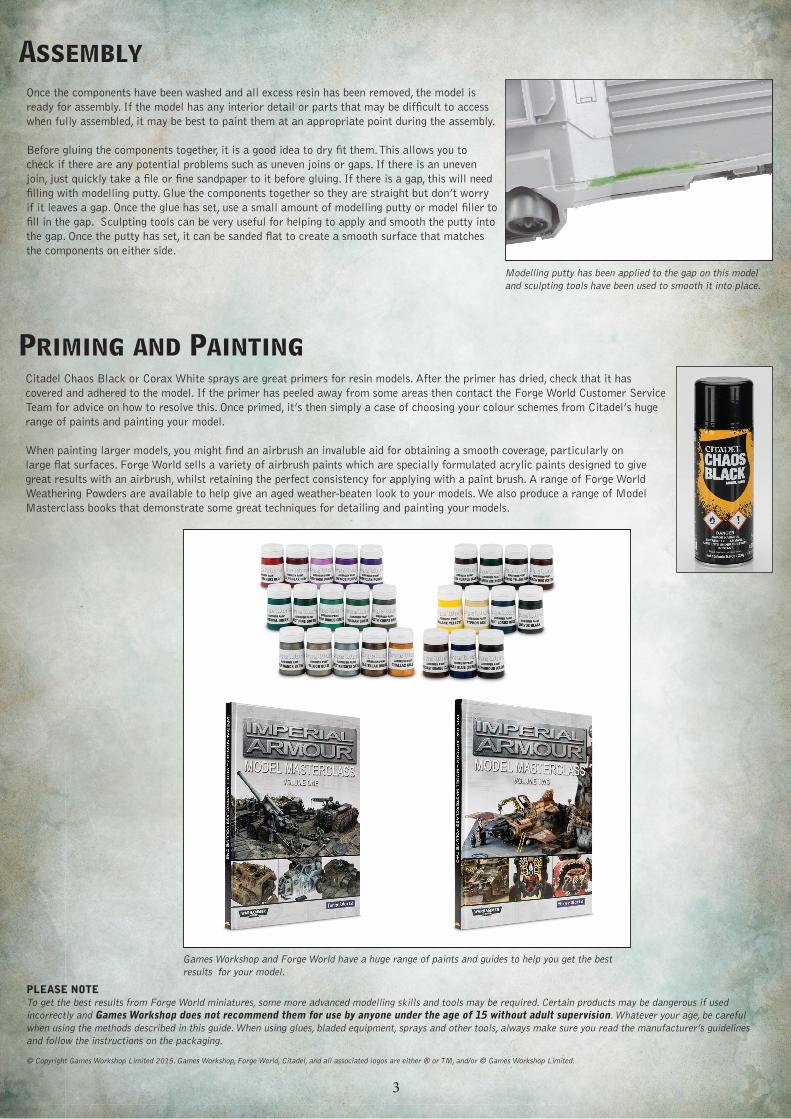
Games Workshop and Forge World have a huge range of paints and guides to help you get the best results for your model.
PLEASE NOTE To get the best results from Forge World miniatures, some more advanced modelling skills and tools may be required. Certain products may be dangerous if used incorrectly and Games Workshop does not recommend them for use by anyone under the age of 15 without adult supervision. Whatever your age, be careful when using the methods described in this guide. When using glues, bladed equipment, sprays and other tools, always make sure you read the manufacturer’s guidelines and follow the instructions on the packaging.
© Copyright Games Workshop Limited 2015. Games Workshop, Forge World, Citadel, and all associated logos are either ® or TM, and/or © Games Workshop Limited.