Embed Size (px)
Citation preview
Version: 7 March 2011 92
8. FIELD DATA QUALITY ASSURANCE/QUALITY CONTROL (QAQC I) Desert tortoise monitoring QA/QC is accomplished in three phases, of which the field data collection teams are responsible for the first phase, or QA/QC I. The goal of QA/QC I is to provide the most accurate, valid, and complete data to USFWS. Each and every crew member is responsible for QA/QC I. As a field monitor you are responsible for double-checking your data at each entry as well as reviewing it at the end of each transect for completeness and correctness before submitting it. At this point your team’s QA/QC specialist receives your data and downloads it into a Collection database that contains all your fellow crew members’ data. To keep an unaltered copy of this Collection database, it is imported into the Contractor database before edits are identified and made. The QA/QC specialist uses all tools (provided scripts and visual inspection) to search the data for inconsistencies and then corrects them. In the process of correcting the original field data, your QA/QC specialist may only need to review your paper data sheets. In other cases, the specialist will need your assistance in correcting errors in your data. The outline below details the individual objectives and standards each data collection team must meet. Field technicians and QA/QC specialists need to work together to meet the goal of these objectives: to deliver correct and complete data to benefit recovery of the desert tortoise. Objective 1: Limit and correct data entry errors Each field technician will 1) understand data required under every data field; 2) enter paper and electronic data in parallel; 3) use these data forms in tandem to check for completion and correctness at data entry, at transect completion, and when reviewing data from other teams. Objective 2: Initiate QAQC I by the QA/QC specialist Each QA/QC specialist will implement a system of procedures for handling data between completion of data proofing by field technicians and through delivery to QA/QC II. Objective 3: Execute QA/QC scripts Each QA/QC specialist will be trained to 1) import field data, 2) understand conceptually how the scripts work, 3) understand how each QAQC check is executed, and 4) understand how and where errors are logged. Objective 4: Identify errors that are not addressed by QA/QC scripts QA/QC specialists will be trained to 1) systematically work with each data table to visually identify errors. Objective 5: Correct errors before data delivery Each QA/QC specialist will be trained to 1) identify error records, 2) add error records for errors not identified by QA/QC scripts, 3) identify if error is correctable by contacting crew member or using paper data sheets, 4) correct errors, and 5) update the error table fields (old_value, new_value, resolution, resolver and the error_status field to explain action taken. Objective 6: Database back up and delivery Each QA/QC specialist will be trained to 1) back up database to external device daily, and 2) send the database to appropriate personnel by uploading to FTP sites.
93
Objective 7: Juno annual preparation and recovery from system failure Each QA/QC specialist will be trained to recover Juno units in case of total system failure. This includes, 1) performing hard reset, 2) restoring Juno with project firmware, 3) setting date and time, 4) changing Juno's name, 5) loading field data collection forms, and 6) testing the Juno setup. Metrics: Each QA/QC specialist will be tested on their understanding of basic QA/QC process operation and ability to restore a faulty Juno. They will be given several Juno units to download data from, they will run QA/QC scripts, correct identified errors, identify additional data errors and correct them. They will backup the database and send it to appropriate personnel. In addition, they will be required to restore a faulty Juno. They will be re-trained if they are not proficient with the QA/QC process and restoring Juno. Continued delivery of poor quality data will prevent participation in the monitoring project.
94
Objective 1: Limit and Correct Data Entry Errors
1. Crews proof their Juno and paper data sheets for missing entries every day. In so doing they should find and complete any blank data fields assuming an answer can be found on the paper data sheet. If they cannot complete a blank data field it should be reported to the QA/QC specialist when data from their Juno is downloaded.
2. Crews compare their Juno and paper data sheets for discrepancies. If possible, discrepancies between the two should be resolved immediately. Any discrepancies that you are unable to resolve should be reported to your QA/QC specialist when data are transferred. These errors should be recorded in the discrepancy spread sheet so they do not continue to cause the QA/QC specialists to expend further effort.
3. Crews will be apprised of identified issues so they can correct the way they enter data for future deliveries. All resolvable, correctable, or fixable (synonyms used for emphasis!) data entry issues should be resolved before submitting the data to MDEP (performs the next, independent level of QA/QC). With each passing day issues such as these become more and more difficult to fix.
Note that following proofing by individual crews, the combined data from all crews in a field group are scrutinized carefully by QA/QC I and by the U.S. Fish and Wildlife Service each week. Each issue that is discovered in the process and has not been explained in comment fields or through conversation with the QA/QC specialist will usually result in reconsultation between the specialist and the crew.
Crews should have face to face conversations with the QA/QC specialist when one of these subsequent checks identifies a recurring issue with their team’s data. In addition, crews are responsible for ensuring they have discussed each weekly assessment provided by the U.S. Fish and Wildlife Service to the crew leaders. These assessments report on issues that are priorities for all field crews.
95
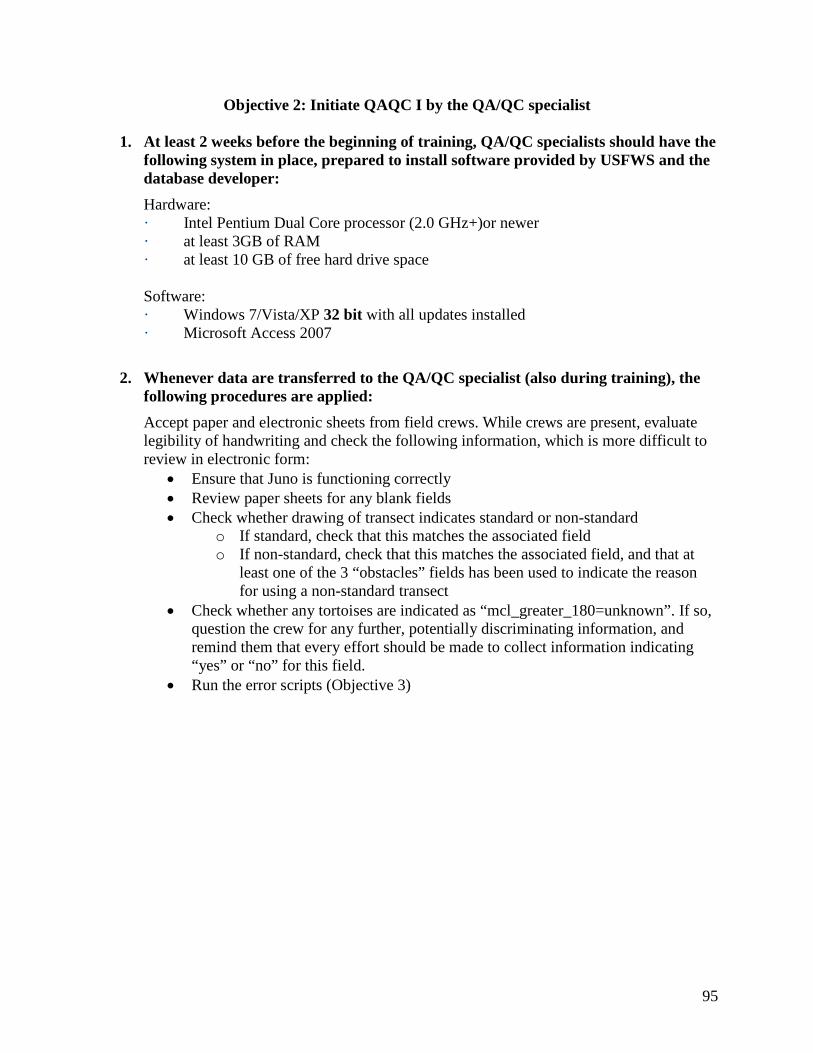
Objective 2: Initiate QAQC I by the QA/QC specialist
1. At least 2 weeks before the beginning of training, QA/QC specialists should have the following system in place, prepared to install software provided by USFWS and the database developer: Hardware: · Intel Pentium Dual Core processor (2.0 GHz+)or newer · at least 3GB of RAM · at least 10 GB of free hard drive space Software: · Windows 7/Vista/XP 32 bit with all updates installed · Microsoft Access 2007
2. Whenever data are transferred to the QA/QC specialist (also during training), the
following procedures are applied: Accept paper and electronic sheets from field crews. While crews are present, evaluate legibility of handwriting and check the following information, which is more difficult to review in electronic form:
• Ensure that Juno is functioning correctly • Review paper sheets for any blank fields • Check whether drawing of transect indicates standard or non-standard
o If standard, check that this matches the associated field o If non-standard, check that this matches the associated field, and that at
least one of the 3 “obstacles” fields has been used to indicate the reason for using a non-standard transect
• Check whether any tortoises are indicated as “mcl_greater_180=unknown”. If so, question the crew for any further, potentially discriminating information, and remind them that every effort should be made to collect information indicating “yes” or “no” for this field.
• Run the error scripts (Objective 3)
96
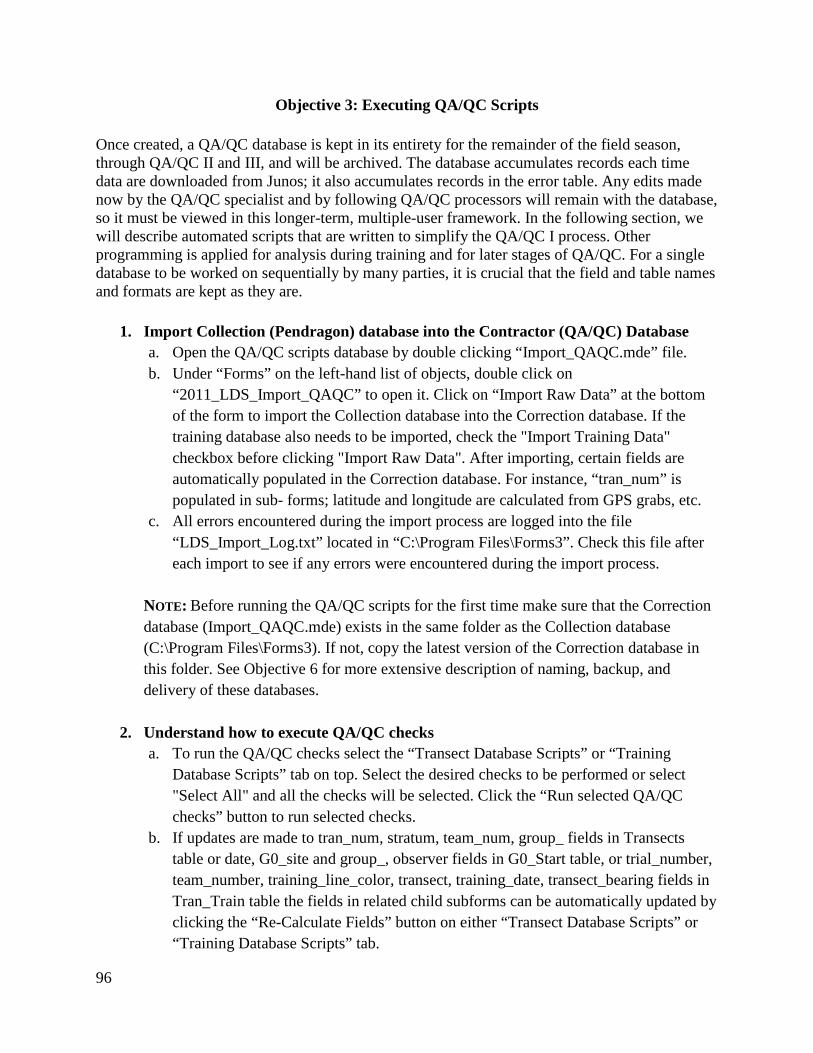
Objective 3: Executing QA/QC Scripts
Once created, a QA/QC database is kept in its entirety for the remainder of the field season, through QA/QC II and III, and will be archived. The database accumulates records each time data are downloaded from Junos; it also accumulates records in the error table. Any edits made now by the QA/QC specialist and by following QA/QC processors will remain with the database, so it must be viewed in this longer-term, multiple-user framework. In the following section, we will describe automated scripts that are written to simplify the QA/QC I process. Other programming is applied for analysis during training and for later stages of QA/QC. For a single database to be worked on sequentially by many parties, it is crucial that the field and table names and formats are kept as they are.
1. Import Collection (Pendragon) database into the Contractor (QA/QC) Database a. Open the QA/QC scripts database by double clicking “Import_QAQC.mde” file. b. Under “Forms” on the left-hand list of objects, double click on
“2011_LDS_Import_QAQC” to open it. Click on “Import Raw Data” at the bottom of the form to import the Collection database into the Correction database. If the training database also needs to be imported, check the "Import Training Data" checkbox before clicking "Import Raw Data". After importing, certain fields are automatically populated in the Correction database. For instance, “tran_num” is populated in sub- forms; latitude and longitude are calculated from GPS grabs, etc.
c. All errors encountered during the import process are logged into the file “LDS_Import_Log.txt” located in “C:\Program Files\Forms3”. Check this file after each import to see if any errors were encountered during the import process.
NOTE: Before running the QA/QC scripts for the first time make sure that the Correction database (Import_QAQC.mde) exists in the same folder as the Collection database (C:\Program Files\Forms3). If not, copy the latest version of the Correction database in this folder. See Objective 6 for more extensive description of naming, backup, and delivery of these databases.
2. Understand how to execute QA/QC checks a. To run the QA/QC checks select the “Transect Database Scripts” or “Training
Database Scripts” tab on top. Select the desired checks to be performed or select "Select All" and all the checks will be selected. Click the “Run selected QA/QC checks” button to run selected checks.
b. If updates are made to tran_num, stratum, team_num, group_ fields in Transects table or date, G0_site and group_, observer fields in G0_Start table, or trial_number, team_number, training_line_color, transect, training_date, transect_bearing fields in Tran_Train table the fields in related child subforms can be automatically updated by clicking the “Re-Calculate Fields” button on either “Transect Database Scripts” or “Training Database Scripts” tab.

97
3. Understand Each QA/QC Check
a.
Database relationship checks
• Missing waypoints Tables included in check:
• For non-interrupted transects, this check will identify transects with missing waypoints 0, 1, 99 and 100.
Waypoints
• For interrupted transects, this check will identify main transect (xxx) with missing 0 and 1 waypoint and the last part (xxx.x) for missing waypoints 99 and 100.
Error description: missing waypoint xxx.
Error description: missing waypoint xxx.
• Orphan records Tables included in check:
• Checks for orphan records created when a parent record is deleted without first deleting the related child records.
Waypoints, OppCarcObs, OppLiveObs, TranCarcObs, TranLiveObs, g0_Obs, g0_OppLiveObs
Error description: missing parent record.
•
Duplicate record checks
• Duplicate transects Tables included in check:• Checks for duplicate transect numbers in transect table.
Transects
Error description: duplicate tran_num.
• Duplicate waypoints Tables included in check:• checks for duplicate waypoints in the same transect.
Waypoints
Error description: duplicate waypoint.
• • Lead and Follow
Multi-field attribute condition checks
Tables included in check: Transects
98
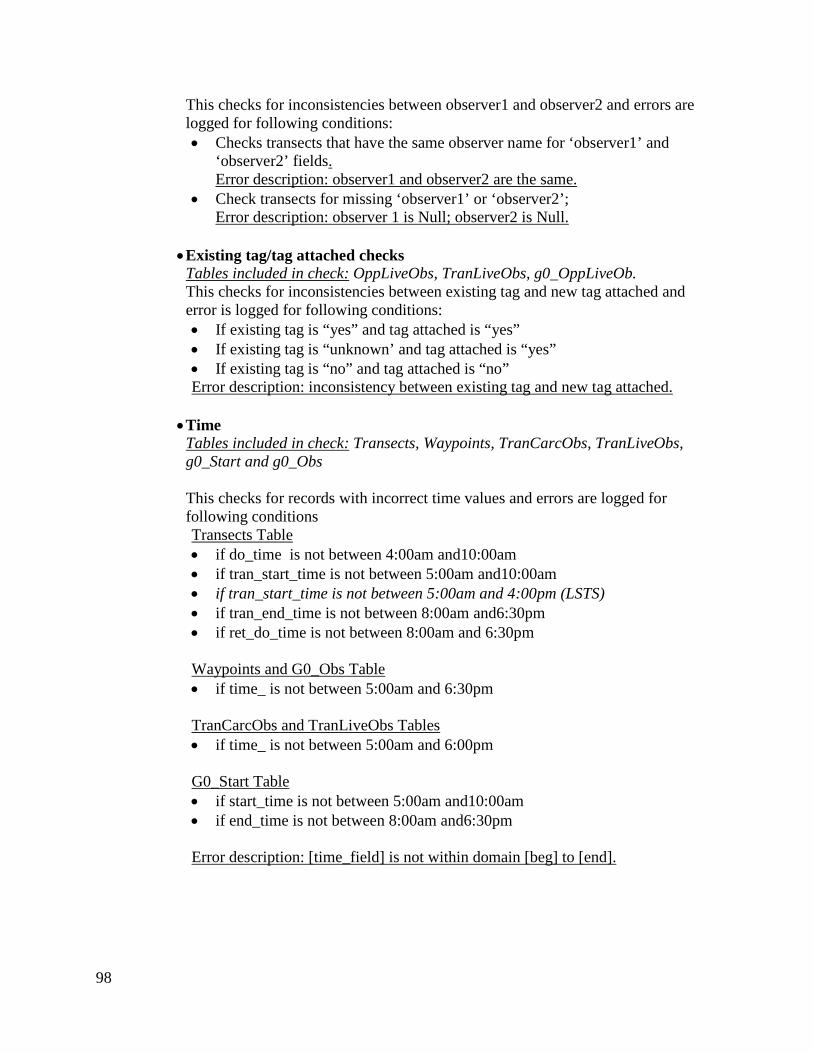
This checks for inconsistencies between observer1 and observer2 and errors are logged for following conditions: • Checks transects that have the same observer name for ‘observer1’ and
‘observer2’ fields
• Check transects for missing ‘observer1’ or ‘observer2’;
. Error description: observer1 and observer2 are the same.
Error description: observer 1 is Null; observer2 is Null.
• Existing tag/tag attached checks Tables included in check:This checks for inconsistencies between existing tag and new tag attached and error is logged for following conditions:
OppLiveObs, TranLiveObs, g0_OppLiveOb.
• If existing tag is “yes” and tag attached is “yes” • If existing tag is “unknown’ and tag attached is “yes” • If existing tag is “no” and tag attached is “no”
Error description: inconsistency between existing tag and new tag attached.
• Time Tables included in check:
Transects, Waypoints, TranCarcObs, TranLiveObs, g0_Start and g0_Obs
This checks for records with incorrect time values and errors are logged for following conditions
• if do_time is not between 4:00am and10:00am Transects Table
• if tran_start_time is not between 5:00am and10:00am • if tran_start_time is not between 5:00am and 4:00pm (LSTS) • if tran_end_time is not between 8:00am and6:30pm • if ret_do_time is not between 8:00am and 6:30pm
• if time_ is not between 5:00am and 6:30pm Waypoints and G0_Obs Table
• if time_ is not between 5:00am and 6:00pm TranCarcObs and TranLiveObs Tables
• if start_time is not between 5:00am and10:00am G0_Start Table
• if end_time is not between 8:00am and6:30pm
Error description: [time_field] is not within domain [beg] to [end].
99
• Date Tables included in check:
• Checks for incorrect date values. An error is logged if the date is not withing 3/1/2011 and 6/2/2011
Transects, Waypoints, TranCarcObs, TranLiveObs, g0_Start and g0_Obs
Error description: [date_field] is not within domain [beg] to [end].
• MCL Tables included in check:
OppCarcObs, OppLiveObs, TranCarcObs, TranLiveObs, g0_OppLiveObs
This checks for inconsistencies between mcl, mcl_greater_180, carc_condition and temperature. An error is logged for the following conditions • Checks for mcl_mm greater than 180, but mcl_greater_180 not "yes" OR if
mcl_mm less than 180, but mcl_greater_180 not "no" OR if mcl_mm greater than 0, but mcl_greater_180 is "unknown"
• Checks for mcl_mm equal to 0 if temperature is less than 36°C. Error description: inconsistency between mcl_mm and mcl_greater_180.
• Checks for carc_condition intact, but mcl_mm is Null (-99). OR if carc_condition disarticulated, but mcl_mm is not Null (-99).
Error description: Mcl_mm is 0.
• Checks for tortoise location is not burrow and temperature is less than 36°C but mcl_mm is null.
Error description: inconsistency between carc_condition and mcl_mm.
Error description: inconsistency between tort_location, and mcl_mm.
• Temperature Tables included in check:• Checks for inconsistency between temp_greater_35C and actual temperature
temp_C fields
OppLiveObs, TranLiveObs
Error Description: inconsistency between temp_C and temp_greater_35C
• Visibility Tables included in check:• Checks for inconsistency between visibility and behavior . If visibility is “no”
then behavior must be “unknown”.
g0_Obs
Error description: Inconsistency between visibility and behavior.
• Burned Tables included in check:• Checks if burned field is null for sites CS and HW and if it is not null for other
sites.
g0_Obs
Error description: site is CS or HW, but burned is null; site is not CS or HW, but burned is not null.
100
d. Spatial condition checks
• UTM_zone
Tables included in check:
• Checks for missing or incorrect UTM zone. An error is logged if strata other than “BD” and “GB” have zone 12.
Waypoints, OppCarcObs, OppLiveObs, TranCarcObs, TranLiveObs, g0_Obs, g0_OppLiveObs.
Error description: gps_zone or manual_zone are 12, but stratum is not BD or GB; missing gps zone or manual zone.
• Easting and northing Tables included in check:• Checks for easting or northing coordinates that fall outside of the 3km
buffered monitoring stratum. Coordinates for this check are in the Stratum_Info table of the database and should match coordinates in this plan.
Waypoints, TranCarcObs, TranLiveObs.
Error description: easting or northing are not within stratum boundary.
• Missing location data Tables included in check:• Checks records for missing automatic and manual gps coordinates
Waypoints, TranCarcObs, TranLiveObs, g0_Obs.
Error description: missing gps or manual easting or northing
e. Training Database Checks
i. Training transects Tables included in check:• Checks for duplicate transects for the same team on the same day with the
same trial_number and same line color.
Train_Tran.
Error description: duplicate training transect
.
ii. Tortoise ID Tables included in check:• Checks for duplicate tortoise_id in same day, same team, same line_color.
Train_Obs.
Error description: contains duplicate tortoise_id, trial_number, team_number, and training_line_color values
iii. Observer name and position Tables included in check:• Checks for observer_name and observer_position not matching lead and
follow fields in the Train_Tran table.
Train_Tran, Train_Obs.
Error description: observer_name and observer_position do not match lead or follow in Train_Tran table
.
101
iv. Transect segment number Tables included in check:• Checks for transect_seg_num not matching calculated value from
transect_bearing and start_post.
Train_Obs.
Error description: transect_seg_num does not match transect bearing and start post.
v. Time Tables included in check:• Checks for training_start_time not before training_end_time.
Train_Tran, Train_Obs.
• Checks for observation_time not between training_start_time and training_end_time.
Error description: training_start_time is after training_end_time
Error description: observation_time is not between training_start_time and training_end_time
vi. Radial Distance Tables included in check:• Checks for radial_dist with more than one decimal place.
Train_Obs.
Error description: radial_distance_m has more than one decimal place
vii. Bearing Tables included in check:• Checks for local_bearing not within 40 degrees of tran_bearing.
Train_Obs.
Error description: local_bearing is not within 40 degrees of tran_bearing
viii. Perpendicular distance Tables included in check:• Checks for perp_distance_m greater than radial_distance_m.
Train_Obs.
• Checks for perp_distance_m greater than 25 m. Error description: perp_dist_m is greater than radial_distance_m.
Error description: perp_distance_m is greater than 25 m.
4. Understand How and Where Errors are Logged
After executing the QA/QC checks all errors encountered are logged into the Error tables. For subsequent QA/QC checks, all uncorrected errors will be logged again into the Errors table unless the error status field is marked as “exception allowed” for errors that cannot be resolved. All errors from Transect database tables (Transects, Waypoints, OppLiveObs, OppCarcObs, TranLiveObs and TranCarcObs) are logged into "Errors_Transects" table, all errors from G0 database tables (G0_start, G0_Obs and G0_OppLiveObs) are logged into "Errors_G0" table and all errors from Training database tables (Tran_Train and Tran_Obs) are logged into "Errors_Training" table.
102
Objective 4: Identify errors not addressed by QA/QC scripts The following lists describe checks for common errors that may not be identified by the automated checks, or that may have appeared in the process of making corrections for the automated checks. The lists are not exhaustive, but illustrate ways to methodically examine data tables for missing or inconsistent values. When an error or inconsistency is found, it should be manually entered into the Violations table being sure to correctly identify the record by its TableName and TableRecord_ID fields. Many of the non-automated checks are purposefully redundant of the automated checks to provide a last review of the data and to catch errors or inconsistencies that might have been introduced earlier in the QA/QC I process. Such redundant checks are shown in italic below. Note that for the Training database, in addition to correcting errors, the specialists should also generate a Train_Teams table and populate it with team numbers and names for each trial. Because teams may be reconstituted for each Trial, new records identifying teams should be created for each trial.
Checks common to all tables • Check that timestamps are valid by sorting them in ascending and descending
order. The TimeStamp fields are never edited, but descriptions of the cause for invalid times should be provided in the Violations table and the violation status should be ‘exception allowed’. Until the status is changed to ‘exception allowed’, automated scripts will identify these errors each week.
• Check numeric fields for errors (e.g. decimals after numbers, zero preceding number). Sort by field. These errors can occur where the field type is text, such as tortoise ID numbers (transects and G0), and Easting/Northing fields.
• View unique entries in each text or categorical field looking for typos or values that are not consistent, such as observer names with typos, entries with extra punctuation, values that are abbreviations, etc. Unique entries for continuous numeric data such as radial distance, easting, northing, mass, etc. do not need to be viewed.
Train_Tran Table
• Sort by total_time, look for unusually high or low numbers • Sort by team_number, look for unusually high or low numbers • Sort start_post descending, look for letters higher than “L” • Sort transect_seg_num descending, look for numbers higher than “8” • Sort training_date ascending and descending, look for dates outside of training
sessions • View unique values for lead and follow, look for misspellings of observer names • sort end_post descending, look for letters higher than “L”
103
Train_Obs Table • View unique values for observer_name, look for misspellings of observer names • Sort tortoise_id in descending order, look for ID#s larger than the known highest
ID#(288) Train_Teams Table
• Write a query based on Train_Tran to create a single record of Observer1 and Observer2 for each team
• Populate the Train_Teams table Transects table
• Check if do_time, tran_start_time, tran_end_time and ret_do_time are null (1:00AM). Sort by time.
• Check if tran_standard field is null. Sort by field. • Check for the accuracy of tran_standard field. Visual check of transect waypoints
converted to lines in GIS software. Display by tran_standard. Only typical square 12km transects should be tran_standard = Y.
• Make sure observer names are spelled consistently. View unique values for Observer1 and Observer2 fields.
• Check for invalid entries in the date field. Sort dates ascending then descending. •
• Compare date and time fields with PDA date/time stamp. Do not edit the TimeStamp fields, but if necessary, corrections can be made to the individual date and time fields.
Check do_time, tran_start_time, tran_end_time and ret_do_time for accuracy. For example, do_time should be earlier than tran_start_time, etc.
Waypoints Table
• Lead or Follow fields should be null only for waypoints 0, 99 and 100. • Check for waypoint numbers that are missing or invalid (skipped, duplicate, or
with decimal places).
OppCarcObs Table • Check for the accuracy of detection numbers. Sort by transect number, then
detection number. • mcl_mm should be null for disarticulated carcass and mcl_mm should be > 0 for
intact carcass.
OppLiveObs Table
104
• Check for the accuracy of detection numbers. Sort by transect number, then detection number.
• If tortoise location is burrow, burrow_visibility and tortoise_in_burrow_visibility should not be null. For other locations the tortoise_visibility field should not be null.
• The mcl_mm and mass fields should be null if the temperature is greater than 35°C.
• If new tag attached is “Yes” then new tag number should not be null and if existing tag is yes then existing tag number should not be null.
• Sort ascending and descending on both mcl_mm and mass and look for unrealistic discrepancies.
• Check for New tag number format. “FWxxxx” is correct. “FW-xxxx” is not.
TranCarcObs Table • Check for the accuracy of detection numbers. Sort by transect number, then
detection number. • Look for radial distances with more than one decimal place. Radial distance should
only be recorded to one decimal place. • If the carcass condition is Disarticulated then mcl_mm should be null. • If the carcass condition is Intact then mcl_mm should not be null. • If existing tag is “Yes” then existing tag number should not be null.
TranLiveObs Table
• Check for the accuracy of detection numbers. Sort by transect number, then detection number.
• Look for radial distances with more than one decimal place. Radial distance should only be recorded to one decimal place.
• If tortoise location is burrow, burrow_visibility and tortoise_in_burrow_visibility should not be null. For other locations the tortoise_visibility field should not be null.
• The mcl_mm and mass fields should be null if the temperature is greater than 95°F.
• If the tortoise is in the “Open” and temperature is less than 36°C then the mcl_mm and mass should not be null.
• Check if the existing tag is “No” and new tag attached is “No”. • Sort ascending and descending on both mcl_mm and mass and look for unrealistic
discrepancies. • Check for New tag number format. Should be “FWxxxx”. Should not be “FW-
xxxx”.
G0_Start Table • Check for start_time or end_time null values (1:00AM). Sort ascending and
descending.
105
G0_OppLiveObs Table • Check for the accuracy of detection numbers. Sort by transect number, then
detection number. • If the tortoise location is burrow, check if the burrow_visibility and
tortoise_in_burrow_visibility should not be null. For other locations the tortoise_visibility field is not null.
• The mcl_mm and mass fields should be null if the temperature is greater than 35°C.
• If new tag attached is “Yes” then new tag number should not be null and if existing tag is “Yes” then existing tag number should not be null.
G0_Obs Table • The burned field should be null for all sites except CS or HW. • If the tortoise is not visible the behavior can only be unknown. • If the tortoise is in open then behavior should not be unknown. • If the tortoise location is burrow, check if the burrow_visibility and
tortoise_in_burrow_visibility should not be null. For other locations the tortoise_visibility field should not be null.
The U.S. Fish and Wildlife Service will perform a weekly assessment of each vendor’s populated, corrected Contractor database. This is a non-automated review of the data and is intended to provide timely feedback in order to reduce errors in future weeks of data collection. Because vendors submit appended contractor databases each week, there is also opportunity to remedy errors identified by U.S. Fish and Wildlife Service in the weekly assessment. The weekly assessment will focus on identification of non-script errors and inconsistencies (see above). It will also summarize start-, end-, and total time on transect, as well as changes in the shape of the detection curve over the field season.
106
Objective 5: Correcting Errors before Data Delivery
1. Identify Error Records After the QA/QC checks are run, all the errors encountered are logged into either Errors_Transects, Errors_G0 or Errors_Training tables in Correction database. Following are the fields and their description that are found in error tables. All the error tables have the fields in "Common fields for all error tables" and have specific fields (d1,d1, etc) depending on the error table. Fields (a)-(g) that includes (d1,d2, etc) are automatically populated by the scripts and the fields (g)-(j) are manually entered by QA/QC specialist after correcting error.
Common fields for all error tables a. ID – auto-number used to identify record b. date – the date when the QA/QC scripts were run c. table_name – table name of the error record. d. fields specific to error table. e. prime_key – primary key of the table with error record f. error_desc – short description on type of error found g. old_value – old incorrect value of the field h. new_value – null, new correct value entered by QA/QC specialist i. resolution – null, resolution steps taken by QA/QC specialist to resolve the error j. resolver – null, name of agency correcting the errors k. error_status – null, status of error after correction
Specific fields in Transects Error table
d1. tran_date – date when the transect was walked d2. tran_num – transect number for error record d3. stratum – stratum for the error record d4. team_num – team number for the error record d5. wp_obs_num – waypoint number or observation number depending on error table
Specific fields in G0 Error Table
d1. G0_date – date when the G0 observation was recorded d2. stratum– stratum for the error record, null if not applicable d3. group_ – group for the error record, null if not applicable d4. tort_obs_num - tortoise ID or observation number depending on error table
Specific fields in Training Error table
d1. traning_date – date when the training record was collected d2. trial_num – trail number for error record d3. team_num – team number for the error record d4. training_line_color– training line color for the error record, null if not applicable d5. transect - transect number for the error record. d6. tran_seg_num - transect segment number for the error record
107
The error records can be identified using the information in table_name, prime_key, tran_num, stratum team_num, wp_obs_num and tran_date fields in the Errors table. Some of the fields might not be available and will be either null (text field) or -99(numeric field) or 1:00AM (time fields).
2. Add error records for errors not identified by QA/QC scripts
For errors that were identified during systematic visual inspection of tables, the error records will not be created automatically in the Errors table. In such cases a manual error record will need to be created. The QAQC specialist will have to populate fields (b)-(k) as above for each record that is manually created. Care should be taken to enter the information accurately as these fields are critical for identifying the correct record.
3. Decide whether Error is correctable
After identifying the error record, a decision must be made whether the error can be corrected or not. To determine if the error can be corrected, review the paper datasheets or contact crew members, if necessary. The two sets of data, paper and electronic, are used to verify and correct one another. During each step of QA/QC, the electronic data are systematically reviewed (often using automated procedures). If a discrepancy is found in the electronic form, and a different entry is available on the paper form the paper data take precedence. If an error is suspected on the paper data sheet, the crew recording the data should be questioned and any other evidence considered to determine whether an error was committed on the paper data sheet. If a discrepancy between the paper and electronic data forms cannot be corroborated one way or the other, the paper data sheet stands as the definitive data entry.
4. Correct Errors in the QA/QC Database If the error can be corrected, the error record identified should be corrected in the corresponding table in the QA/QC database.
5. Update the error table resolution fields and the record’s error_status field to explain action taken After the error has been fixed or determined that it cannot be fixed, the old_value, new_value, resolution, resolver and status fields in the appropriate Errors table (there are Training, Transects, andr G0 Error tables) must be manually filled in for the error record. The “resolution” column should clearly mention steps taken to correct the error or should explain why the error could not be corrected. The “old_value” columns, if automatically populated, should contain the original incorrect value of the field and “new_value” column should contain the correct value replaced. For example if the time field is corrected, the resolution should be “changed time to match the datasheet” and the “old_value” field should contain 6:00PM and “new_value” should contain 6:00AM. The resolver column should contain the name of the person/agency correcting the error. The error_status column should contain “resolved” if the error was corrected or “exception allowed” if the error cannot be corrected. Marking the status to “exception allowed” will skip the error (and not log it again in error tables) in subsequent QA/QC checks. Any changes to data records should be represented by error records with an error_status value of “resolved”. If you changed any part of a record, the associated error record should not be marked as “exception allowed”. If you need to make a correction to a record for which there is no error record, then you must manually add the
108
error record and use the resolution field to describe the correction, as described above. If you have thoroughly reviewed the database records and paper datasheets, as well as consulted the field monitors, and a correction is still not possible, you should mark the record as “exception allowed” and use the resolution field to explain why the exception is being allowed.
An exception may be allowed because a correction could not be made (i.e. the paper datasheet matched the electronic data or the field monitors could not explain the discrepancy) or because the record did not represent an error (i.e. the perpendicular distance really was greater than 25m, the tortoise retreated into a burrow, the tortoise was too small to tag). It is especially important to describe why error records are being left as exceptions. For example, if an mcl_mm field is blank, it matches the paper datasheet, and could not be resolved by consulting with the field monitors, the resolution field should be “mcl_mm not measured, matched datasheet, team could not explain”. Another example might be that one of the RDA units failed and the data had to be entered into the electronic units later in the day. When this happens, there will be error records generated because the TimeStamp when the data was entered will not match the times entered from the paper datasheets. In these cases, the error records should be marked as “exception allowed” and the resolution field should note the device failure such as “RDA failed, data was entered manually later in the day”. If a crew forgets their RDA and only records the data on the paper datasheets while walking the transect, these errors would also be marked as “exception allowed” but the resolution would be “team forgot RDA, data was entered manually later in the day”. All records marked as “exception allowed” should have an explanation in the resolution field. Ideally, the associated records in the database table (Transects, Waypoints, etc) would also have an explanation in the comments field.
6. Update the paper data sheets to reflect changes to match electronic database If an error on the paper data sheet is corroborated, the QA/QC person identifying and determining the data error draws a single line through the erroneous data on the paper sheet, neatly prints in ink the correct data above the erroneous data, then initials and dates the correct data entry. This data correction is then input into the errors table of the digital database in order to maintain a record of the correction.
After the paper sheet has been scanned, it should no longer be edited by hand. Instead, all further corrections will be made electronically as Adobe “sticky notes.” These notes are anchored to the point where they are inserted, and automatically indicate the date and identify the commenter. The commenter documents necessary edits by writing, "Change field "zzzzz" from xxxx to yyyy" If multiple related changes need to be made, a general explanation is provided first: "Crew confirmed verbally that the tortoise was in a pallet, not a burrow. Change "tortoise_location" field from pallet to burrow. Change field "burrow_visibility" from high to null. Change field "tortoise_in_burrow_visibility" from high to null." Rather than replace the original scanned file after edits are made, the edited version should be renamed to add the initials of the reviewer (see “Deliver Paper Datasheets,” below).
109
Objective 6: Database Backup and Delivery As described under Objective 3, a QAQC database is maintained with all records intact through all stages of QA/QC. For this project, there are two QAQC databases. After all training is completed, QA/QC I is finalized on that database and it is delivered. A new collection database is started for the field season only. Both the training and field season databases have the same forms, so there is no difference in the Juno version of the database. There is also no difference in the QAQC version of the database, but a new one is created from the master database. As noted, the Correction Database appends only new records each time the Collection Database is imported. The steps below ensure that 1) each iteration of the Collection and Correction databases are saved in a separate location from the active versions, 2) all saved databases are identified by the last date of information they contain (associated Collection and Correction databases will have the same date information), 3) the current Collection database to be uploaded always has the same name for recognition by the scripts in the Correction database. The remaining steps are also associated back-up, standardization so anyone will know what is in a given file, and delivery to all of the next people in the data chain. The following steps describe the process of finalizing each updated version of a database after the data have been downloaded from Junos and have gone through QA/QC procedures. After these steps, you are ready to repeat the process again with new data! 1. Backup Collection (Pendragon) database
The collection database should be backed up daily on external storage device after any new data has been downloaded from Junos. The collection database file “FORMS32K.MDB” is located in the “C:\Program Files\Forms3” folder on the machine used for syncing Juno’s. To back up the database, copy this file (“FORMS32K.MDB”) onto the external storage device and then rename the file on the external storage device to “FORMS32K_ContractorName_MMDDYY.MDB”. Create a zip file from this renamed MDB file, store it in the same location renaming it to “FORMS32K_ContractorName_MMDDYY.zip”. The date should correspond to the last instance of collected data. For instance, if the data were ready to upload on 8 April 2010 and represent data collected through the day before, the file name would include “040710”. Do not rename the source file found in “C:\Program Files\Forms3”.
2. Backup QA/QC Database The QA/QC database should be backed up after each QA/QC session. A QA/QC session consists of importing new data from the Collection database, running QA/QC checks and then correcting all the errors found in the Errors table. If all corrections have not been completed on the scheduled delivery date, the backup and delivery procedures should nonetheless be completed. The contractor database file “Import_QAQC.mde” is located in the “C:\Program Files\Forms3” folder on the machine used for hot-syncing Juno’s. To back up the database, copy this file (“Import_QAQC.mde”) onto the external storage device and then rename the file on the external storage device to “Import_QAQC_ContractorName_MMDDYY.MDE”.
110
Create a zip file from this renamed MDE file, store it in the same location and rename it to “Import_QAQC_ContractorName_MMDDYY.zip”. The date used for naming should match the date of the corresponding Collection database file. Do not rename the source file found in “C:\Program Files\Forms3”.
3. Deliver Collection and QA/QC Databases
The databases on the external storage device (“Forms32K_ContractorName_MMDDYY.zip” and “Import_QAQC_ContractorName_MMDDYY.zip” should be uploaded to the Weekly_Data folder in the _GBI10 or _IWS10 folder on the MDEP FTP site. After the databases have been uploaded, send an email to appropriate personnel about data delivery. At a minimum, notice should be sent to Linda Allison and Doug Zeliff. The following is sufficient notice:
“FORMS32K_CONTRACTORNAME_MMDDYY.zip and Import_QAQC_CONTRACTORNAME_MMDDYY.zip have been uploaded to the MDEP FTP site in this directory.
_CONTRACTORNAME11/weekly data”
4. Backup and deliver the Transect GIS Data and Tracking Access Database The intended Transect GIS data and Transect Tracking Access Database should also be backed up and uploaded to the MDEP FTP site on at least a weekly basis. To back up the intended Transect GIS data, copy the “PlannedTransects_11_GDB.mdb” file to a back up location and then rename it to “PlannedTransects_11_GDB_SurveyOrganization_MMDDYY.mdb”. To back up the Transect Tracking Access Database, copy the “TransectTracking_11_SurveyOrganization.mdb” file to a back up location and then rename it to “TransectTracking_11_SurveyOrganization_MMDDYY.mdb”. The dates used for the naming should match the date of the corresponding “FORMS….mde” file. Both back up version should be uploaded to the MDEP FTP site along with the Collection and Correction databases.
USFWS has provided each group with details on accessing and uploading data to the FTP site.
5. Deliver Paper Datasheets
Each week, QA/QC specialists send scanned versions of that week’s paper datasheets to MDEP. The DPI Rate should be 300 or higher with the setting of halftone black and white to pick up lightly hand written images. Copies of these scanned versions are kept by the QA/QC specialist to add necessary annotations if further data errors and inconsistencies are addressed. The original datasheets themselves should be sent to MDEP when the QA/QC database for the associated transects is uploaded to the ftp site. Transect datasheets: Staple all associated transect sheets (Waypoints, LiveObs, CarcObs, etc) together, Sort by Strata and then in ascending Transect # sequence
111
G0 datasheets: Staple all associated G0 sheets together, Sort by Strata and then in ascending date sequence Training datasheets: Staple all associated Training sheets together, Sort by contactor(GBI, IWS, Kiva), Sort in ascending date sequence, sort in Team # sequence Final data delivery should include any scanned data sheets that were annotated after the original version was uploaded to the ftp site. These edited files should have the reviewer’s initials affixed at the end of the file name that was otherwise built using the conventions below (e.g. 168_GB_2009_mb.pdf, where “mb” are the initials of the person(s) who added digital annotations). Digital scanned datasheet filenames and folder organization should follow the guidelines below. Note that naming conventions are very important. If the QA/QC I specialist uploads a revised/annotated scanned sheet, it should replace the earlier version, but this will only happen if the names are identical.
Training Data: Training scanned datasheets should be organized into the following folders: ‘TrainingLines_datasheets’, ‘PracticeTransects_datasheets’, and ‘PracticeG0_datasheets’.
TrainingLines_datasheets: This folder should contain scanned datasheet PDF files for the practice training lines. All sheets associated with a single transect for a team in a specific trial should be grouped into one PDF file. Filenames should be composed of the Team number, Trial number, and Transect (examples: Team21_Trial1_Green7.pdf, Team6_Trial2_Orange3.pdf). PracticeTransects_datasheets: This folder should contain scanned datasheet PDF files for the practice transects at the Large Scale Translocation Site (LSTS). All sheets associated with a single practice transect for a team should be grouped into one PDF file. Filenames should be composed of the Transect number, Stratum (LSTS), and Year (examples: 10_LSTS_2009.pdf, 14.1_LSTS_2009.pdf). PracticeG0_datasheets: This folder should contain scanned datasheet PDF files for the practice G0 iterations. All sheets associated with a single iteration for an observer on a day should be grouped into one PDF file (both the G0 observations sheet and the OppLiveObs sheet should be grouped into a single file). Filenames should be composed of the G0_site and the Date of the iteration. If more than one observer performed iterations on the same day, one of the files should be suffixed with ‘_A’ and the other with ‘_B’. (examples: PM_040208_A.pdf, PM_040208_B.pdf, PM_040308.pdf).
Transect Data: Transect scanned datasheets should be organized into a folder named “Transects_datasheets”. This folder should contain subfolders for each stratum abbreviation. Each subfolder should contain scanned datasheet PDF files for the transects walked in that stratum. All sheets associated with a single transect for a team should be grouped into one PDF file. Filenames should be composed of the Transect number, Stratum, and Year (examples for the ‘AG’ subfolder: 119_AG_2009.pdf, 122_AG_2009.pdf; examples for the ‘GB’ subfolder: 168_GB_2009.pdf, 239_GB_2009.pdf).
112
G0 Data: G0 scanned datasheets should be organized into a folder named “G0_datasheets”. This folder should contain subfolders for each G0 site abbreviation. Each subfolder should contain scanned datasheet PDF files for the G0 iterations in that G0 site. All sheets associated with a single G0 iteration for an observer should be grouped into one PDF file. Filenames should be composed of the G0 site and the Date of the iteration. If more than one observer performed iterations on the same day in the same G0 site, each file should be suffixed with ‘_ObserverInitials’. (examples for the ‘CK’ subfolder: CK_040208_ks.pdf, CK_040208_pa.pdf, CK_040308.pdf; examples for the PM subfolder: PM_040508_ky.pdf, PM_040508_dk.pdf, PM_040608.pdf).
113
Objective 7: JUNO Preparation and Recovery from System Failure The recovery procedure should only be performed by QA/QC personnel if soft reset as well as hard reset with system restore does not work. This method clears all the data from the Juno and PC and then does a fresh install of all software. Approximately 5 days before training begins. QA/QC personnel are responsible for checking and conditioning Junos, then configuring Junos with the season’s software and forms and linking each Juno to its associated laptop. Conditioning procedures include replacing the screen covers, replacing and attaching styluses as needed, recharging the Junos, and identifying any units from the outset that do not hold charge well or have faulty accessories, such as charging cables. The latter procedures (preparing Junos with the season’s software and forms) mirror those that can be used later to restore the Juno from system failure. Both procedures involve interaction between the Juno and PC so that software on both can remove or distribute files (forms) that we use for monitoring work. “Sync” operations, used frequently below, refer to this interaction between the two devices and their shared software.
For setting up new Juno please follow the procedure outlined in the "Recovery from System Failure" section on next page.
Updating the Collection database on Juno
The following procedure should be used to replace the old working version of Pendragon database on the Juno with a new updated Pendragon database version.
1. Material to have at-hand • Have ready the Juno, and USB data cable • Your machine should be loaded with Windows Mobile and Pendragon 5.1 software.
2. Erase all existing versions of Pendragon forms from your Juno • Remove the current user from the Default Group list for the Pendragon database. • Sync the Juno to remove all current forms from the Forms 5.1 on Juno • Verify that there are no old forms left on Juno. Open Forms 5.1 on Juno and click on
“Pendragon forms” on the top left of the screen. From the menu, select "Delete Form Designs". It the list is not empty select each form and click "Delete" until the list is empty.
3. Install the newest version of the Pendragon forms. • On your PC, copy the new database into the c:\Program Files\Forms3 folder. Rename
any existing copies with an appropriate trailer, then rename the new version to FORMS32K.mdb.
• In Pendragon, open the database and add the user under “Users” and “Groups” (default group).
• Sync the Juno and you should have all the forms from the new database.
114
Recovery from System Failure
This following procedure will delete all the data on the Juno
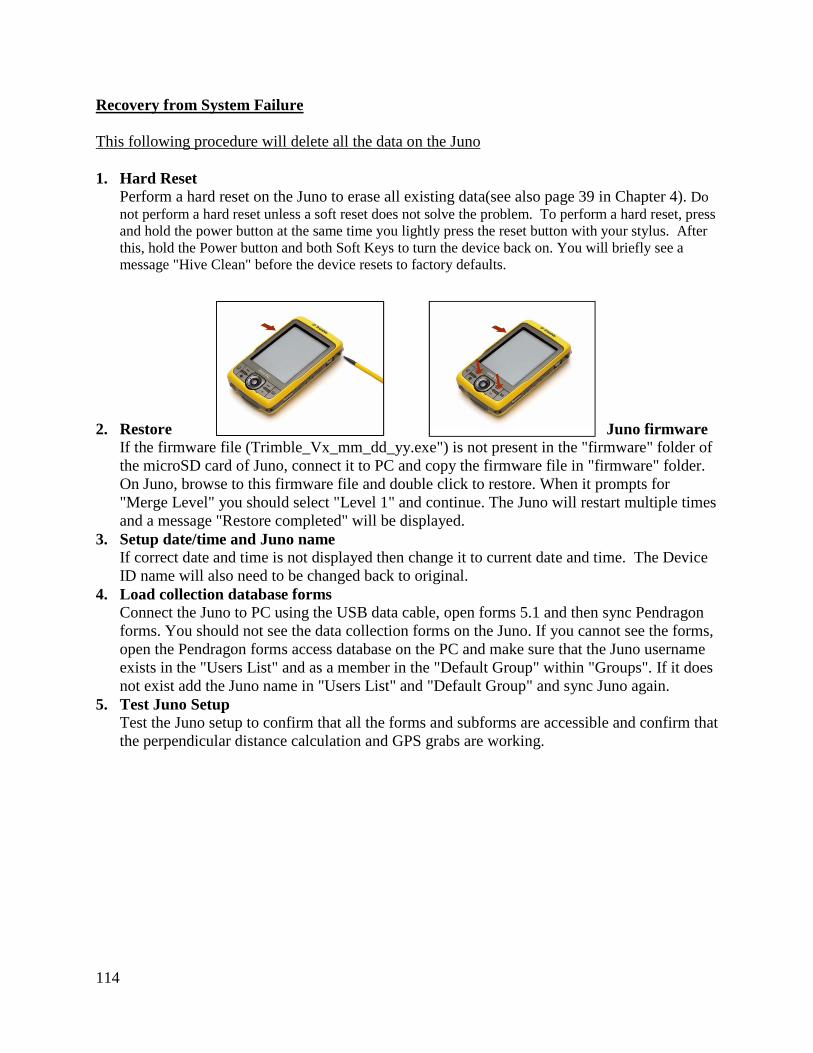
1. Hard Reset Perform a hard reset on the Juno to erase all existing data(see also page 39 in Chapter 4). Do not perform a hard reset unless a soft reset does not solve the problem. To perform a hard reset, press and hold the power button at the same time you lightly press the reset button with your stylus. After this, hold the Power button and both Soft Keys to turn the device back on. You will briefly see a message "Hive Clean" before the device resets to factory defaults.
2. Restore Juno firmware If the firmware file (Trimble_Vx_mm_dd_yy.exe") is not present in the "firmware" folder of the microSD card of Juno, connect it to PC and copy the firmware file in "firmware" folder. On Juno, browse to this firmware file and double click to restore. When it prompts for "Merge Level" you should select "Level 1" and continue. The Juno will restart multiple times and a message "Restore completed" will be displayed.
3. Setup date/time and Juno name If correct date and time is not displayed then change it to current date and time. The Device ID name will also need to be changed back to original.
4. Load collection database forms Connect the Juno to PC using the USB data cable, open forms 5.1 and then sync Pendragon forms. You should not see the data collection forms on the Juno. If you cannot see the forms, open the Pendragon forms access database on the PC and make sure that the Juno username exists in the "Users List" and as a member in the "Default Group" within "Groups". If it does not exist add the Juno name in "Users List" and "Default Group" and sync Juno again.
5. Test Juno Setup Test the Juno setup to confirm that all the forms and subforms are accessible and confirm that the perpendicular distance calculation and GPS grabs are working.