Embed Size (px)
Citation preview

Illustration: Chris Glowacki
For many woodwork-ers, the router gets the hands-down vote as the
most capable and convenient portable power tool in the shop. Whether handheld or mounted in a table, it excels at tasks ranging from profil-ing edges and cutting joints to pattern-routing and cre-ating decorative inlays. The tool’s design and engineer-ing are just as impressive as its multifaceted usefulness. Considering all the tricks this workhorse can perform, it’s not surprising that it requires regular care and occasional first aid.
I’ll first touch on preven-tive maintenance and then run through six potential problem areas to help you diagnose router ills and per-form the necessary cures. Use the illustration on this page to locate the key problem areas on your router. To assist with the inspection and repairs, I’ve prepared a router “first aid kit” consisting of the items listed in the sidebar on the next page. Finally, should the repair be too major, I’ll steer you to the nearest tool service center for professional help.
Power cord with strain-relief boot
Fan on motor shaft
Locking knob for edge guide rod
Commutator
Depth stop rod
Turret
Plunge tubes with internal springs
Screws for securing sub-base
Base
Brushes with holders and electrical pigtail
Collet nut
Speed control adjustment
Start/stop switch
Shaft bearings
Plastic motor end cap
Sub-base
Maintenance and cures for an ailing toolBy Bill Sands
6 Tips for ROUTERRESUSCITATION
April/May 2020 | woodcraftmagazine.com 45
As part of your router’s health care program, preventive maintenance can help ward off problems due to normal wear and tear. Surprisingly, fine dust and debris are your router’s worst enemies. They can lead to switch failure, accelerated brush wear, and overheating. It’s a good practice to regularly blow out accumulated debris
with low-pressure air. (High-pressure air from a compressor can force dirt into previously uncontaminated parts.) A quick visual inspection before each use will help you identify developing problems.
When a router ailment causes poor performance or no performance at all, it’s time to reach for the first aid kit. Always unplug your router before making any repair.
Preventive maintenance1
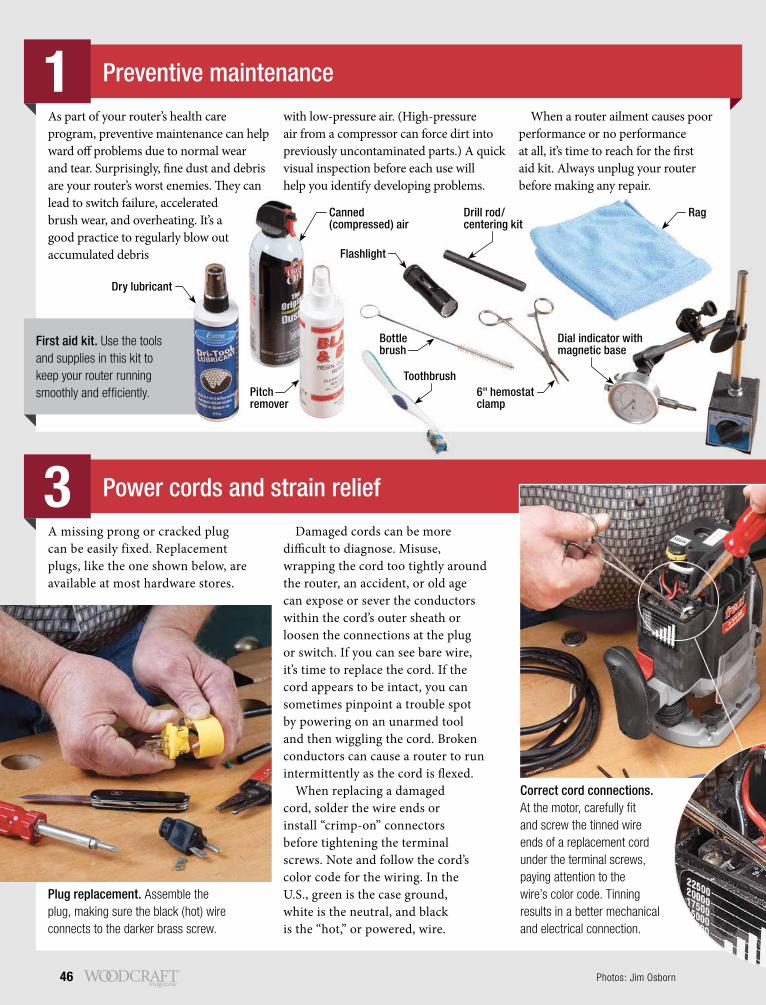
Power cords and strain relief3A missing prong or cracked plug can be easily fixed. Replacement plugs, like the one shown below, are available at most hardware stores.
Plug replacement. Assemble the plug, making sure the black (hot) wire connects to the darker brass screw.
First aid kit. Use the tools and supplies in this kit to keep your router running smoothly and efficiently.
Dry lubricant
Canned (compressed) air
Rag
Flashlight
Drill rod/centering kit
Dial indicator with magnetic base
Bottle brush
Toothbrush6" hemostatclamp
Pitchremover
Photos: Jim Osborn
Correct cord connections. At the motor, carefully fit and screw the tinned wire ends of a replacement cord under the terminal screws, paying attention to the wire’s color code. Tinning results in a better mechanical and electrical connection.
Damaged cords can be more difficult to diagnose. Misuse, wrapping the cord too tightly around the router, an accident, or old age can expose or sever the conductors within the cord’s outer sheath or loosen the connections at the plug or switch. If you can see bare wire, it’s time to replace the cord. If the cord appears to be intact, you can sometimes pinpoint a trouble spot by powering on an unarmed tool and then wiggling the cord. Broken conductors can cause a router to run intermittently as the cord is flexed.
When replacing a damaged cord, solder the wire ends or install “crimp-on” connectors before tightening the terminal screws. Note and follow the cord’s color code for the wiring. In the U.S., green is the case ground, white is the neutral, and black is the “hot,” or powered, wire.
46

Power cords and strain relief
A power switch or speed control that has been compromised by accumulated dust and dirt may cause a router to run intermittently or not at all. Closely examine these parts and their cord connections and try cleaning them with low-pressure air. Then test the tool. If the problem persists, you can order a new switch or speed control and replace the parts as shown. Alternatively, you can ship your router to a service center for diagnosis and/or possible part replacement and repair.
Switches and electronic controls2
Switching out a switch. To install a new switch, orient it properly and reattach the wires in their original configuration.
Brushes4Manufacturers recommend checking brushes every 50 to 100 hours of running time. This isn’t easy to track, so make a point of checking brushes once a year or before starting a major job. Brushes typically need replacing when worn to one-fourth of their original length. If your brushes don’t have a wear line, consult the manual or check with a service center for minimum length specifications. Signs of impending brush death include increased noise levels and excessive sparking. Ignoring the problem for too long risks damage to the commutator’s soft copper surface.
On some routers, the two brushes sit under threaded plugs in the motor end cap. On others, the cap itself must be removed to expose the brush holders. With the brushes exposed, disconnect the brush’s electrical connection and carefully reposition the end of the spring that presses the brush to the commutator.
After removing the brush, blow away any carbon dust on the commutator, and then inspect it with a strong light. A healthy commutator should reveal a clean copper surface. If it appears burned or excessively worn, get a repair estimate from your service center.
Fit a new brush in each holder, and reconnect the pigtails. Make sure the brushes contact the commutator and move freely in their holder. Reassemble the parts and test the router.
Brush replacement. Always replace brushes in pairs. A hemostat clamp works great for maneuvering brushes, springs, and connecting wires.
Quick TipWhen disassembling a tool for repair work, take photos of the wiring, hardware, and part arrangements for reference during reassembly.
Quick TipIf brushes removed for inspection don’t need replacement, be sure to reinsert them in their original orientation.
Worn
Fresh
April/May 2020 | woodcraftmagazine.com 47
Routers employ a variety of locks and stops to position and guide the cutter. These function best when they are clean, lubricated, and properly adjusted.
On fixed-base routers, a locking mechanism secures the motor in the base while allowing depth-of-cut adjustment. Whatever the particular
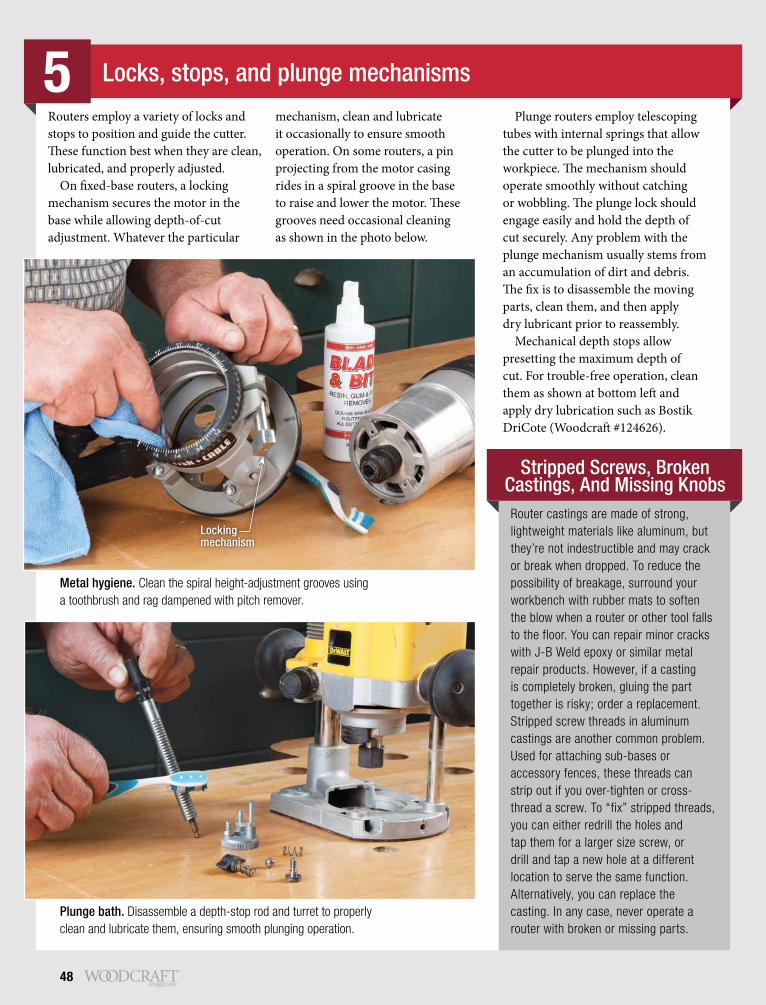
mechanism, clean and lubricate it occasionally to ensure smooth operation. On some routers, a pin projecting from the motor casing rides in a spiral groove in the base to raise and lower the motor. These grooves need occasional cleaning as shown in the photo below.
Plunge routers employ telescoping tubes with internal springs that allow the cutter to be plunged into the workpiece. The mechanism should operate smoothly without catching or wobbling. The plunge lock should engage easily and hold the depth of cut securely. Any problem with the plunge mechanism usually stems from an accumulation of dirt and debris. The fix is to disassemble the moving parts, clean them, and then apply dry lubricant prior to reassembly.
Mechanical depth stops allow presetting the maximum depth of cut. For trouble-free operation, clean them as shown at bottom left and apply dry lubrication such as Bostik DriCote (Woodcraft #124626).
Locks, stops, and plunge mechanisms
Metal hygiene. Clean the spiral height-adjustment grooves using a toothbrush and rag dampened with pitch remover.
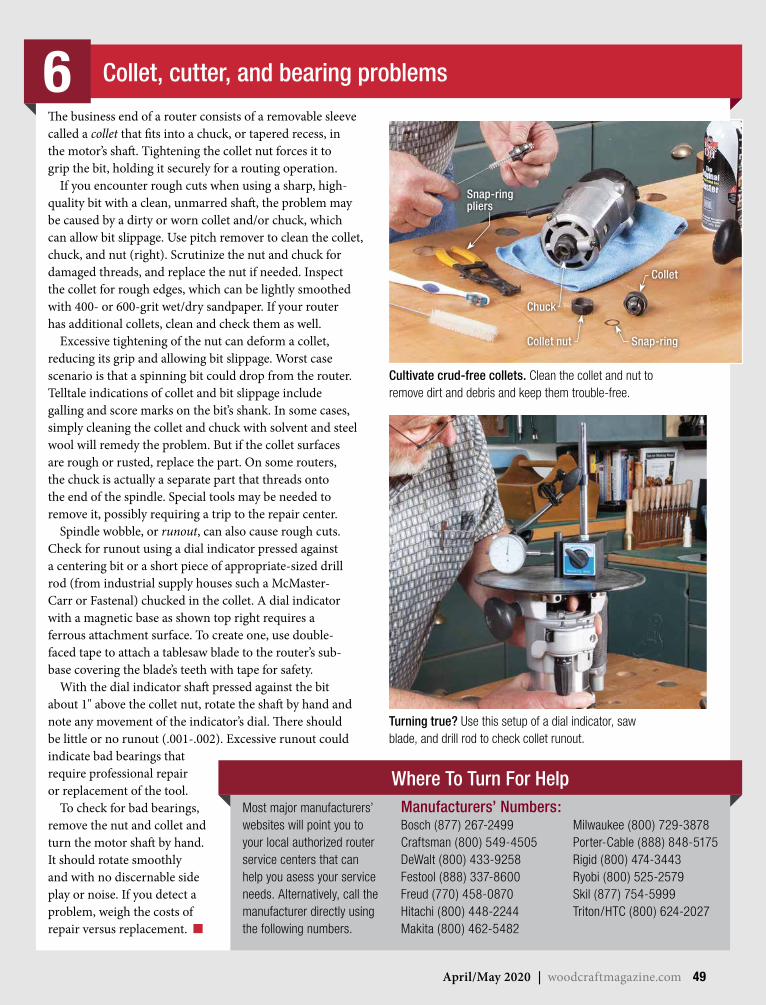
Plunge bath. Disassemble a depth-stop rod and turret to properly clean and lubricate them, ensuring smooth plunging operation.
5
Router castings are made of strong, lightweight materials like aluminum, but they’re not indestructible and may crack or break when dropped. To reduce the possibility of breakage, surround your workbench with rubber mats to soften the blow when a router or other tool falls to the floor. You can repair minor cracks with J-B Weld epoxy or similar metal repair products. However, if a casting is completely broken, gluing the part together is risky; order a replacement.Stripped screw threads in aluminum castings are another common problem. Used for attaching sub-bases or accessory fences, these threads can strip out if you over-tighten or cross-thread a screw. To “fix” stripped threads, you can either redrill the holes and tap them for a larger size screw, or drill and tap a new hole at a different location to serve the same function. Alternatively, you can replace the casting. In any case, never operate a router with broken or missing parts.
Stripped Screws, Broken Castings, And Missing Knobs
Lockingmechanism
48
Turning true? Use this setup of a dial indicator, saw blade, and drill rod to check collet runout.
Cultivate crud-free collets. Clean the collet and nut to remove dirt and debris and keep them trouble-free.
Most major manufacturers’ websites will point you to your local authorized router service centers that can help you asess your service needs. Alternatively, call the manufacturer directly using the following numbers.
Where To Turn For HelpManufacturers’ Numbers:Bosch (877) 267-2499Craftsman (800) 549-4505DeWalt (800) 433-9258Festool (888) 337-8600Freud (770) 458-0870Hitachi (800) 448-2244Makita (800) 462-5482
Milwaukee (800) 729-3878Porter-Cable (888) 848-5175Rigid (800) 474-3443Ryobi (800) 525-2579Skil (877) 754-5999Triton/HTC (800) 624-2027
The business end of a router consists of a removable sleeve called a collet that fits into a chuck, or tapered recess, in the motor’s shaft. Tightening the collet nut forces it to grip the bit, holding it securely for a routing operation.
If you encounter rough cuts when using a sharp, high-quality bit with a clean, unmarred shaft, the problem may be caused by a dirty or worn collet and/or chuck, which can allow bit slippage. Use pitch remover to clean the collet, chuck, and nut (right). Scrutinize the nut and chuck for damaged threads, and replace the nut if needed. Inspect the collet for rough edges, which can be lightly smoothed with 400- or 600-grit wet/dry sandpaper. If your router has additional collets, clean and check them as well.
Excessive tightening of the nut can deform a collet, reducing its grip and allowing bit slippage. Worst case scenario is that a spinning bit could drop from the router. Telltale indications of collet and bit slippage include galling and score marks on the bit’s shank. In some cases, simply cleaning the collet and chuck with solvent and steel wool will remedy the problem. But if the collet surfaces are rough or rusted, replace the part. On some routers, the chuck is actually a separate part that threads onto the end of the spindle. Special tools may be needed to remove it, possibly requiring a trip to the repair center.
Spindle wobble, or runout, can also cause rough cuts. Check for runout using a dial indicator pressed against a centering bit or a short piece of appropriate-sized drill rod (from industrial supply houses such a McMaster-Carr or Fastenal) chucked in the collet. A dial indicator with a magnetic base as shown top right requires a ferrous attachment surface. To create one, use double-faced tape to attach a tablesaw blade to the router’s sub-base covering the blade’s teeth with tape for safety.
With the dial indicator shaft pressed against the bit about 1" above the collet nut, rotate the shaft by hand and note any movement of the indicator’s dial. There should be little or no runout (.001-.002). Excessive runout could indicate bad bearings that require professional repair or replacement of the tool.
To check for bad bearings, remove the nut and collet and turn the motor shaft by hand. It should rotate smoothly and with no discernable side play or noise. If you detect a problem, weigh the costs of repair versus replacement. n
Collet, cutter, and bearing problems6
Snap-ringpliers
Snap-ring
Collet
Chuck
Collet nut
April/May 2020 | woodcraftmagazine.com 49

SUBSCRIBE!
go to woodcraftmagazine.comand click SUBSCRIBE
Complete the form below and mail in an envelope addressed to:
-or-
WOODCRAFT MAGAZINEPO BOX 7020
PARKERSBURG WV 26102-9916
2 YEARS for $29.99!
Outside of the U.S and Canada add $30 for postage. Foreign orders must be prepaid. Payment in U.S. Funds only.
By providing my e-mail address, I am indicating I’d like to receive information about my subscription and other offers from Woodcraft Magazine via e-mail.
□ Payment Enclosed □ Bill Me
Name
Address
City
State Zip
Country
Send in now to get
2 Years for $29.99!Projects, Techniques and Products
Dovetail a case Divide a cabinet into compartments
Create a cornice
4 more projects Famous furniture
And learn how to…
Plus…
Best-everLUMBER RACK
DECORATIVE FINISHES Done Right
Build Betterwith a CUT LIST
SPICE BOXBuild this classic
or go to woodcraftmagazine.com and click SUBSCRIBE