Embed Size (px)
Citation preview
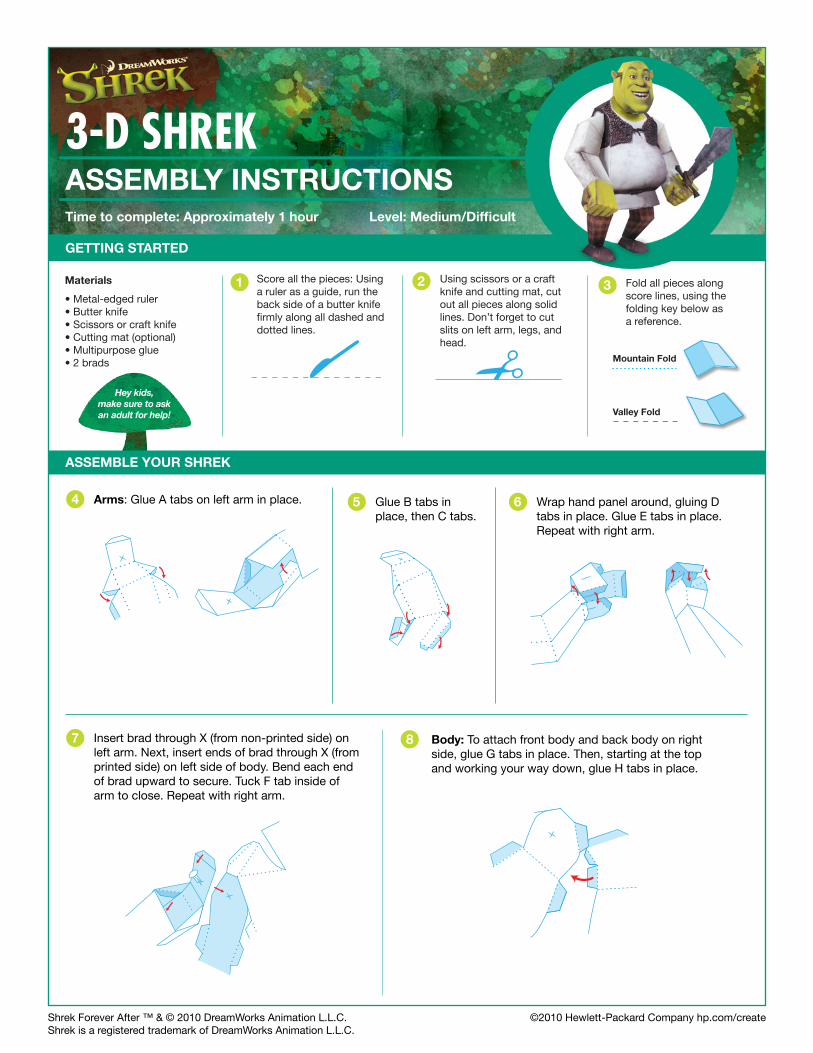
GETTING STARTED
Arms: Glue A tabs on left arm in place.
Body: To attach front body and back body on right side, glue G tabs in place. Then, starting at the top and working your way down, glue H tabs in place.
Insert brad through X (from non-printed side) on left arm. Next, insert ends of brad through X (from printed side) on left side of body. Bend each end of brad upward to secure. Tuck F tab inside of arm to close. Repeat with right arm.
Glue B tabs in place, then C tabs.
Wrap hand panel around, gluing D tabs in place. Glue E tabs in place. Repeat with right arm.
Time to complete: Approximately 1 hour
ASSEMBLY INSTRUCTIONSLevel: Medium/Difficult
4
87
5 6
1
3-D shrek
Shrek Forever After ™ & © 2010 DreamWorks Animation L.L.C.Shrek is a registered trademark of DreamWorks Animation L.L.C.
©2010 Hewlett-Packard Company hp.com/create
Materials
• Metal-edged ruler • Butter knife • Scissors or craft knife • Cutting mat (optional) • Multipurpose glue • 2 brads
3 Fold all pieces along score lines, using the folding key below as a reference.
Mountain Fold
Valley Fold
1 Score all the pieces: Using a ruler as a guide, run the back side of a butter knife firmly along all dashed and dotted lines.
2 Using scissors or a craft knife and cutting mat, cut out all pieces along solid lines. Don’t forget to cut slits on left arm, legs, and head.
Hey kids, make sure to ask an adult for help!
ASSEMBLE YOUR ShREk
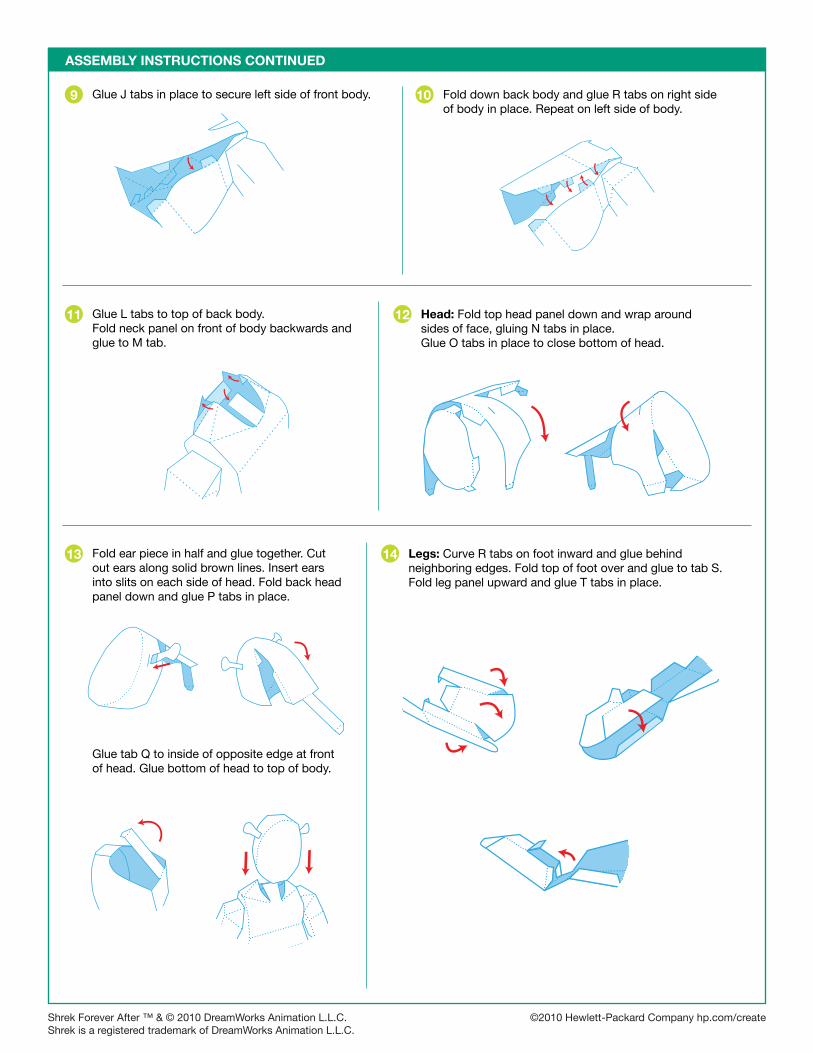
ASSEMBLY INSTRUCTIONS CONTINUED
Fold down back body and glue R tabs on right side of body in place. Repeat on left side of body.
9
11 12
13 14
12
10
Shrek Forever After ™ & © 2010 DreamWorks Animation L.L.C.Shrek is a registered trademark of DreamWorks Animation L.L.C.
©2010 Hewlett-Packard Company hp.com/create
Glue J tabs in place to secure left side of front body.
Glue L tabs to top of back body. Fold neck panel on front of body backwards and glue to M tab.
Fold ear piece in half and glue together. Cut out ears along solid brown lines. Insert ears into slits on each side of head. Fold back head panel down and glue P tabs in place.
Glue tab Q to inside of opposite edge at front of head. Glue bottom of head to top of body.
Legs: Curve R tabs on foot inward and glue behind neighboring edges. Fold top of foot over and glue to tab S.Fold leg panel upward and glue T tabs in place.
head: Fold top head panel down and wrap around sides of face, gluing N tabs in place. Glue O tabs in place to close bottom of head.
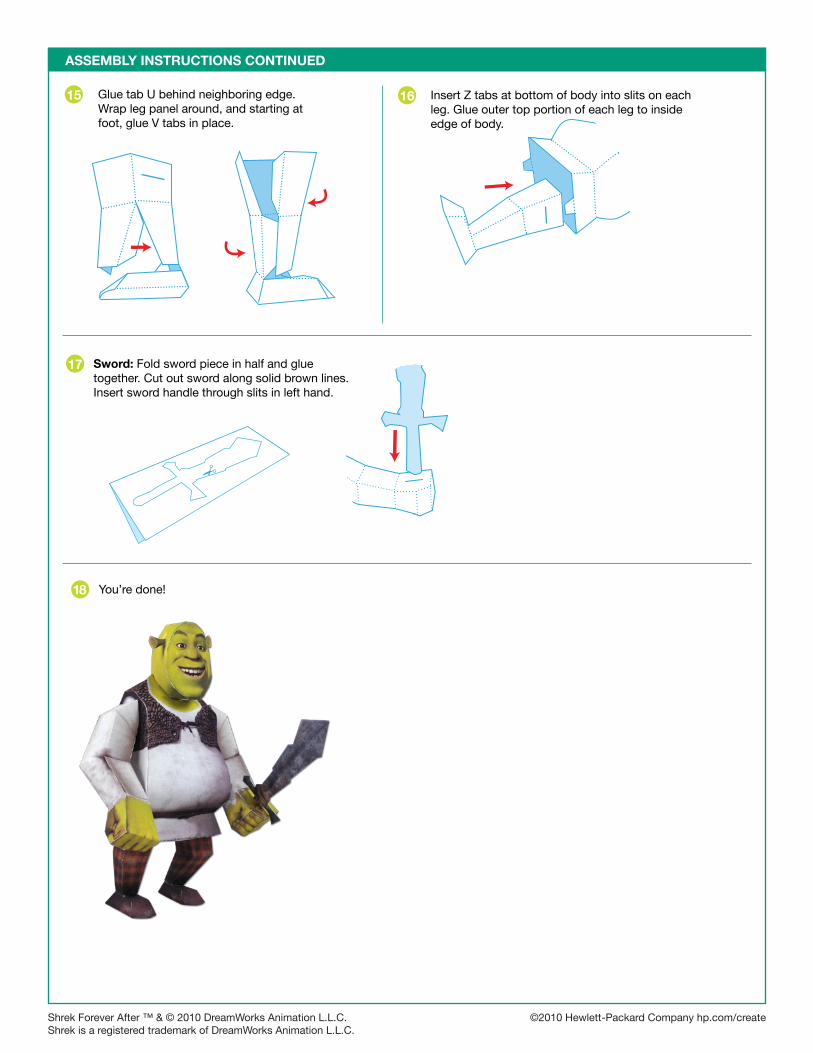
ASSEMBLY INSTRUCTIONS CONTINUED
15 16
17
Shrek Forever After ™ & © 2010 DreamWorks Animation L.L.C.Shrek is a registered trademark of DreamWorks Animation L.L.C.
©2010 Hewlett-Packard Company hp.com/create
Glue tab U behind neighboring edge. Wrap leg panel around, and starting at foot, glue V tabs in place.
Insert Z tabs at bottom of body into slits on each leg. Glue outer top portion of each leg to inside edge of body.
Sword: Fold sword piece in half and glue together. Cut out sword along solid brown lines. Insert sword handle through slits in left hand.
You’re done!18

RIGHT ARM
HEAD
EARS
SHREK FOREVER AFTER: 3-D SHREK
Shrek Forever After ™ & © 2010 DreamWorks Animation L.L.C.Shrek is a registered trademark of DreamWorks Animation L.L.C. ©2010 Hewlett-Packard Company hp.com/create
A
A
F
A
B
B
C
C
D
D
DD
Q
P
P
N
O
O
N
N
NN
N
P
P
E
E
E

LEFT ARM
SWORD
SHREK FOREVER AFTER: 3-D SHREK
Shrek Forever After ™ & © 2010 DreamWorks Animation L.L.C.Shrek is a registered trademark of DreamWorks Animation L.L.C. ©2010 Hewlett-Packard Company hp.com/create
A
A
F
A
B
B
C
C
D
D
D
E
E
E
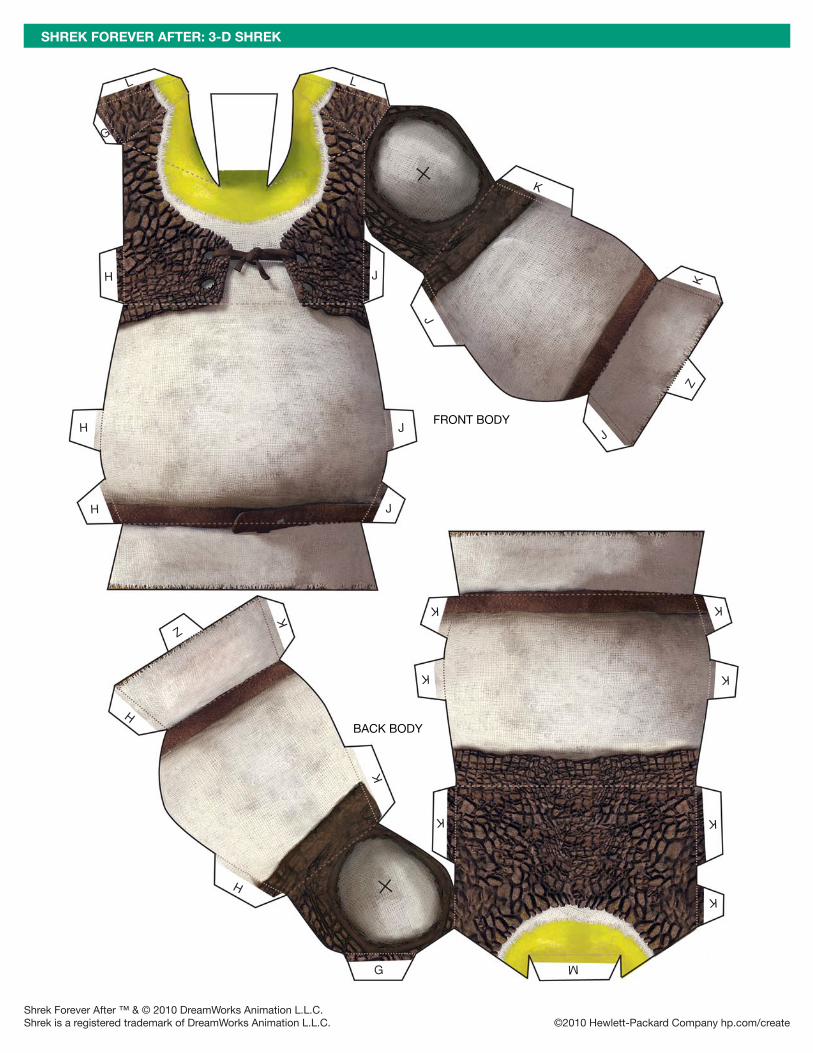
FRONT BODY
BACK BODY
SHREK FOREVER AFTER: 3-D SHREK
Shrek Forever After ™ & © 2010 DreamWorks Animation L.L.C.Shrek is a registered trademark of DreamWorks Animation L.L.C. ©2010 Hewlett-Packard Company hp.com/create
L L
G
H
H
H J
J
J
J
J
K
K
K
KK
K
K
K
K K
K
M
G
H
H
Z
Z
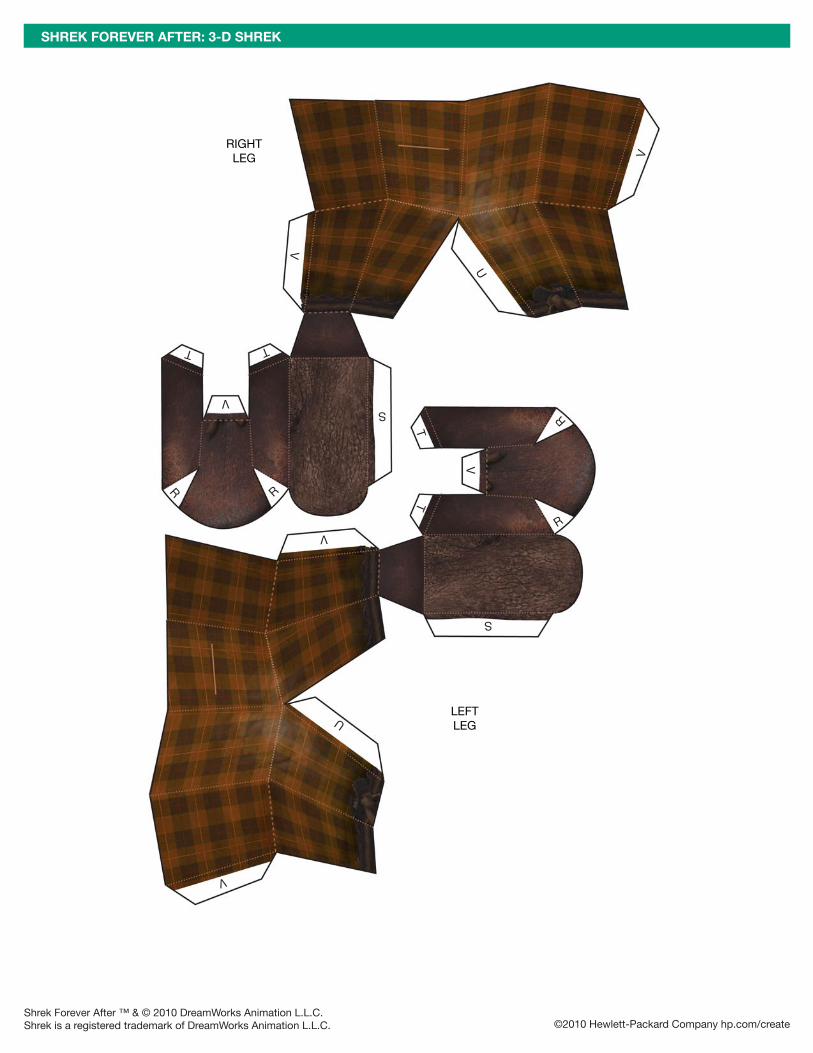
RIGHT LEG
LEFTLEG
SHREK FOREVER AFTER: 3-D SHREK
Shrek Forever After ™ & © 2010 DreamWorks Animation L.L.C.Shrek is a registered trademark of DreamWorks Animation L.L.C. ©2010 Hewlett-Packard Company hp.com/create
V
V
V
V
V
V
UU
S
S
R
R
TT
TT
R
R