Embed Size (px)
Citation preview
13-inch White MacBook Care and HandlingTake good care of your computer and it will take care of you.

Contents
Page 3 Getting to Know Your MacBook
The Startup Process Ports on Your MacBook Other Hardware Features
Page 6 Adjusting Your Display and Cleaning the Screen
Adjusting Your MacBook DisplayCleaning the MacBook Screen
Page 7 Using Your Optical Drive
Inserting a CD or DVDEjecting a Disc
Page 8 Putting Your MacBook to Sleep or Shutting It Down
Putting Your MacBook to Sleep Putting Your Display to Sleep Shutting Down Your Computer
Page 10 Powering Your MacBook
Using the MagSafe Power AdapterUsing Your Battery
Page 14 Solving Simple Problems
When an Application Doesn’t RespondWhen Your Computer Doesn’t RespondGetting Answers from Mac Help
Page 15 Caring for Your MacBook
Moving Your MacBook Using and Taking Care of Your MacBookCleaning Your MacBook Using CablesPreventing Theft and Breakage
213-inch White MacBook
Care and Handling

Getting to Know Your MacBook
The Startup ProcessYour MacBook is designed so that you can start using it right away. To open your MacBook, locate the magnetic latch in the middle of the front side and gently lift up the display.
Adjust the screen to the best viewing angle, but be careful not to open it beyond the designed stopping point.
Now, press the power ( ) button located in the upper-‐right corner of the keyboard.
You’ll hear a tone, which indicates the computer is starting up. It may take as long as a minute before you see the next screen, so be patient. If the computer is already on when you press the power button, it will wake from sleep mode in a few seconds without the tone. You’ll see a succession of screens as your computer starts up.
Ports on Your MacBookThe left side of your MacBook contains all the ports you’ll need to connect peripherals like digital cameras, camcorders, printers, video projectors, science probes, an iPod, and so on. The following sections describe each port (from left to right).
MagSafe power port
To power your MacBook and charge the battery, plug your power adapter into a power outlet, then attach the MagSafe connector to this port. As the connector gets close to the port, you’ll feel a magnetic pull drawing it in. This connector will safely release in the event of someone tripping on the power cord.
Gigabit Ethernet port
The Gigabit Ethernet port connects your MacBook to a wired network. For example, at home you can use the Gigabit Ethernet port to connect to a small network or a cable or DSL modem. Because your computer has an AirPort wireless networking card,1 you might not use the Gigabit Ethernet port if a wireless network is set up at the school.
313-inch White MacBook
Care and Handling
Opening latch
Power button
USB 2.0 ports Gigabit Ethernet Audio in/out
Mini DisplayPortMagSafe power port Kensington cable lock slot

413-inch White MacBook
Care and Handling
Mini DisplayPort
The Mini DisplayPort allows you to connect an external display or projector to your MacBook using an adapter (sold separately). You can use the external display as your main workspace or to extend your desktop, or you can work in mirrored mode with a projector so you can view exactly what your audience sees.
By default, your MacBook starts up in extended desktop mode. To toggle between extended desktop and video mirroring when using an external display, press the Command ( and F1 keys.
Mini DisplayPort to DVI Adapter lets you connect an advanced digital monitor that includes a DVI connector.
Mini DisplayPort to VGA Adapter connects your MacBook to a standard analog monitor, projector, or LCD display that uses a VGA connector or cable.
Mini DisplayPort to Dual-‐Link DVI Adapter lets you connect your MacBook to a 30-‐inch display that includes a DVI connector, such as the 30-‐inch Apple Cinema HD Display.
USB 2.0 ports
The two USB 2.0 ports allow you to connect many types of external devices including
your desktop before they can be safely disconnected.
in the Dock. The Trash icon becomes the Eject ( ) icon and the device is unmounted from your desktop when you release the trackpad.
Audio in/out port
The audio port allows you to connect external speakers, headphones (including iPhone and iPod earphones), or digital audio equipment. To use a line-‐level microphone or analog audio equipment, specify audio line-‐in functionality using the Sound pane of System Preferences. The audio port does not provide power to a connected device, so you must use self-‐powered devices. Note: If you’re running Windows on your MacBook, the port supports only audio output.
Kensington cable lock slot
The last port on the MacBook is the security slot. To protect your MacBook, you can purchase a security cable lock that can secure your computer to a desk or table.
Mini DisplayPort to VGA Adapter
Mini DisplayPort to Dual-‐Link DVI Adapter
Mini DisplayPort to DVI Adapter

513-inch White MacBook
Care and Handling
Other Hardware FeaturesiSight camera
The MacBook has a built-‐in iSight camera at the top of the display bezel. It’s perfect for video conferencing with others using the included iChat AV application, or for making a movie or capturing a photo for a class project. The camera indicator light turns green
Sudden Motion Sensor technology
Your MacBook is equipped with Sudden Motion Sensor technology, which helps protect the hard disk from damage if the computer is dropped or shaken. Sudden Motion Sensor
Occasionally, unusually strong vibrations can activate the Sudden Motion Sensor technology when your MacBook is writing or reading data intensively (such as playing or recording video or audio). If you notice dropped video frames, freeze frames, or sound elements, make sure that your MacBook is in a stable environment without vibration or abrupt movement.
Important: You should avoid moving your MacBook while the hard disk is spinning to prevent potential damage and data loss.
Multi-Touch trackpad
Use the trackpad to move the pointer and to perform a variety of Multi-‐Touch gestures. Unlike typical trackpads, the entire MacBook trackpad is a button, and you can click anywhere on the trackpad. To enable Multi-‐Touch gestures, view instructional videos of
Preferences, then click Trackpad.
To select an item on the MacBook screen, position the pointer on the item’s icon and press down anywhere on the trackpad. To open an item, double-‐click the item’s icon by pressing down on the trackpad twice.
you rapidly page through documents, move to the previous or next photo, and more.
the desktop or display all open windows.
Secondary clicking, or right-‐clicking, lets you access shortcut menu commands. To
You can also plug a USB mouse into either of the USB ports or use a Bluetooth wireless
Preferences pane.
Tips for using the trackpad
For best results with the trackpad:
or condensation, gently wipe it with a clean cloth.

613-inch White MacBook
Care and Handling
Adjusting Your MacBook DisplayYour computer display is adjustable for optimal viewing. Adjust the angle of the display
display if you meet resistance. The display is designed to open up to 135 degrees from the closed position.
Use the brightness controls at the top of your keyboard (F1, F2) to increase or decrease the brightness of the screen.
Cleaning the MacBook Screen
dampen a clean cloth with water and wipe the screen. Don’t spray liquid directly on the screen.
Remember to protect your screen from damage. Don’t poke it with a sharp object like a pen, and make sure pencils or other items are not on your keyboard before closing
carrying case or stack items on top of it. Excessive pressure can damage your screen.
Adjusting Your Display and Cleaning the Screen

713-inch White MacBook
Care and Handling
Optical drive
The optical drive is located on the right side of the computer. It is a slot-‐loading drive mechanism and has no tray to eject. You can play multimedia on CDs and music from audio CDs; play DVD movies; and write (“burn”) music, documents, and other digital
on writable DVD discs (DVD±R DL/DVD±RW).
Important: Because the drive is slot loading, you should insert only round 120mm (4.7-‐inch) discs. The drive doesn’t work with irregularly shaped discs, which could damage the drive if inserted.
Inserting a CD or DVDTo use a CD or DVD:
1. With the computer turned on, gently insert the disc (with the label facing up) into the drive slot until you feel the drive catch the disc and pull it in the rest of the way. You might need to insert the disc nearly all the way before the drive takes it.
2. The disc is ready to use when its icon appears on the desktop.
Ejecting a DiscTo eject a disc, do one of the following:
) icon.
) key on the keyboard until the disc ejects.
Allow the disc to fully eject before removing or reinserting it. If you can’t eject the disc, quit any applications that might be using the disc and try again. If that doesn’t work, restart the computer while holding down the trackpad.
Using Your Optical Drive
813-inch White MacBook
Care and Handling
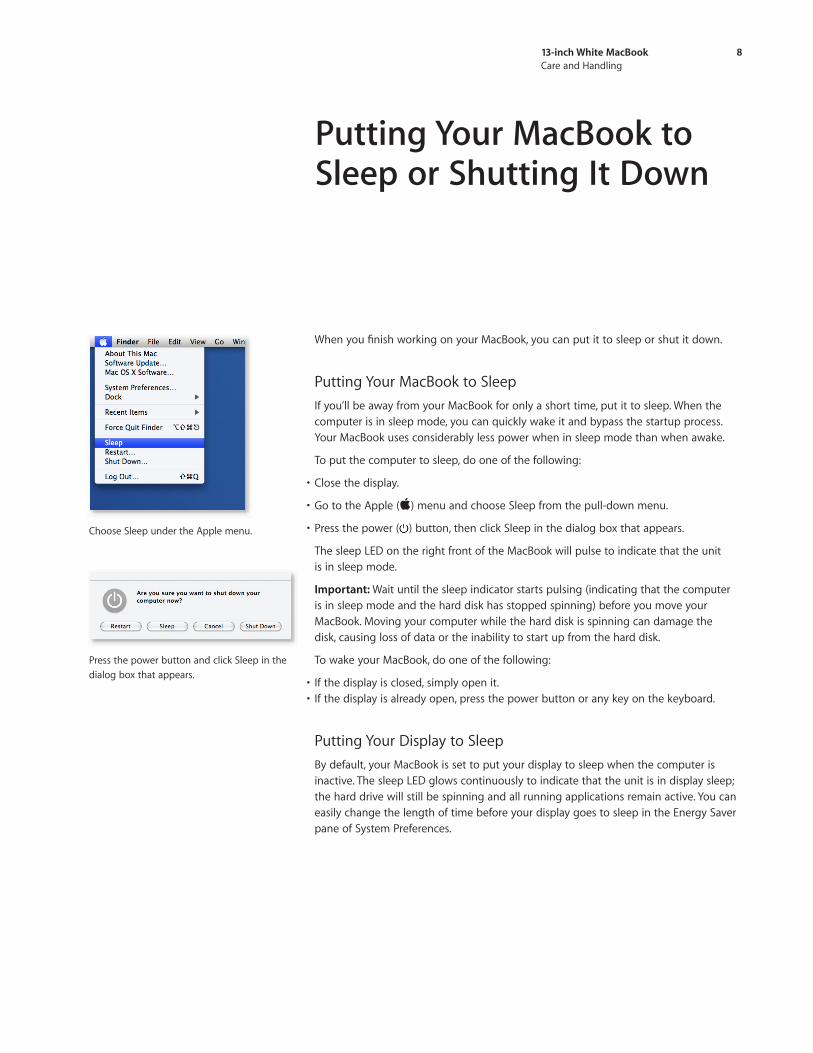
Putting Your MacBook to SleepIf you’ll be away from your MacBook for only a short time, put it to sleep. When the computer is in sleep mode, you can quickly wake it and bypass the startup process. Your MacBook uses considerably less power when in sleep mode than when awake.
To put the computer to sleep, do one of the following:
) button, then click Sleep in the dialog box that appears.
The sleep LED on the right front of the MacBook will pulse to indicate that the unit is in sleep mode.
Important: Wait until the sleep indicator starts pulsing (indicating that the computer is in sleep mode and the hard disk has stopped spinning) before you move your MacBook. Moving your computer while the hard disk is spinning can damage the disk, causing loss of data or the inability to start up from the hard disk.
To wake your MacBook, do one of the following:
Putting Your Display to SleepBy default, your MacBook is set to put your display to sleep when the computer is inactive. The sleep LED glows continuously to indicate that the unit is in display sleep; the hard drive will still be spinning and all running applications remain active. You can easily change the length of time before your display goes to sleep in the Energy Saver pane of System Preferences.
Putting Your MacBook to Sleep or Shutting It Down
Choose Sleep under the Apple menu.
Press the power button and click Sleep in the dialog box that appears.
913-inch White MacBook
Care and Handling
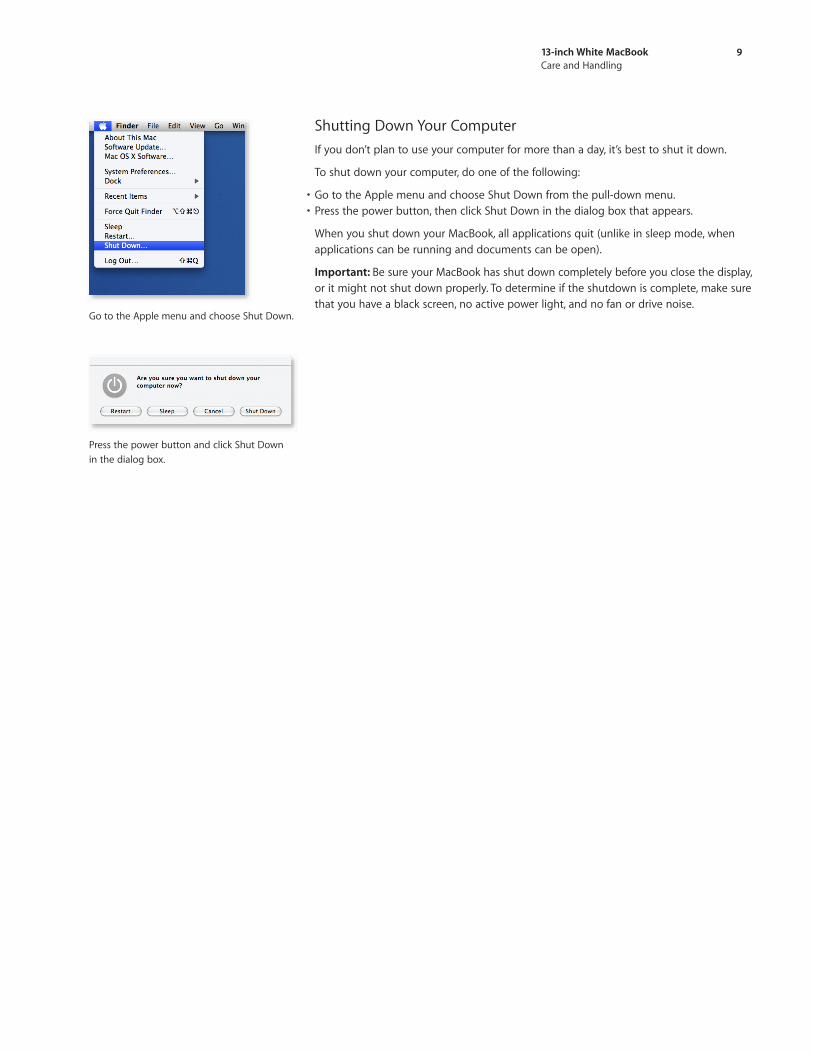
Shutting Down Your ComputerIf you don’t plan to use your computer for more than a day, it’s best to shut it down.
To shut down your computer, do one of the following:
When you shut down your MacBook, all applications quit (unlike in sleep mode, when applications can be running and documents can be open).
Important: Be sure your MacBook has shut down completely before you close the display, or it might not shut down properly. To determine if the shutdown is complete, make sure that you have a black screen, no active power light, and no fan or drive noise.
Go to the Apple menu and choose Shut Down.
Press the power button and click Shut Down in the dialog box.

1013-inch White MacBook
Care and Handling
MagSafe connector
MagSafe Power Adapter
Powering Your MacBook
Using the MagSafe Power AdapterYour MacBook comes with a MagSafe Power Adapter that connects magnetically to the charging port. The MagSafe power port gives you a trip-‐proof connection to safeguard your system and valuable data.
Warning: The MacBook power adapter port contains a magnet that can erase data on a credit card, iPod, or other device. To preserve your data, keep these and other magnetic media away from the MagSafe power port.
charging port is located on the left side of the computer, the port closest to the back. When the power adapter is securely connected, an LED light glows on the MagSafe connector. An amber light indicates the battery is charging; green indicates the battery is fully charged.
It takes up to 4 hours to fully charge the battery for your MacBook. When the power
If you don’t see a light glowing on the MagSafe connector, make sure it is seated properly and the adapter is plugged in. If the light still isn’t glowing, unplug the adapter from the AC outlet for 60 seconds, then try it again. If the adapter works after this 60-‐second “rest,” you might have a line noise issue with your power source that is causing the overvoltage
The MagSafe Power Adapter may become very warm during normal use. Always put the
location. If you are using your MagSafe adapter in a poorly ventilated area or if it is
from heating up. Unplug it; once the adapter cools down, it should function normally.
Using Your BatteryWhen the power adapter isn’t connected, your computer draws power from its battery. The length of time that your MacBook can run on the battery depends on the applica-‐tions you use and the external devices connected.
You can determine the amount of battery charge remaining by viewing the battery status icon in the menu bar on the MacBook desktop. If your battery charge runs low while you’re working, attach the power adapter and let the battery recharge.

1113-inch White MacBook
Care and Handling
Battery life
A fully charged battery can provide up to 7 hours of use,2 depending on application usage, network activity, and other system settings. When the computer is on, you can monitor the battery-‐charge level using the battery status icon in the menu bar.
If the battery status icon in the Finder menu bar is set to show the percentage of charge, the battery sometimes won’t show a full 100 percent charge when the power adapter is
the charge capacity is between 93 and 100 percent. If you notice that your battery doesn’t charge up to 100 percent, use your computer on battery power until the charge drops below 93 percent. Plug in your power adapter to charge the battery to 100 percent.
Note: Do not remove the battery from your MacBook. The battery should be replaced only by an Apple Authorized Service Provider or an Apple Retail Store.
Depletion
A properly maintained Apple computer battery is designed to retain up to 80 percent of its original capacity for as many as 1,000 full charge and discharge cycles. Typically you accumulate these full cycles across many partial discharge cycles, but the end result is that the length of time the battery can hold a charge is reduced. Battery depletion over time and with usage is normal and isn’t considered a defect. You may choose to replace
Beginning with Mac OS X v10.6, the Battery menu provides information about the condition of the battery, as well the amount of time remaining on the current charge, the active power source, and details on charge status. You may see one of the following messages:
Important: If the battery is fully drained when you plug in the computer’s power cord and start up the computer, you may see an “X” over the battery status icon in the menu bar and the “No Battery Available” message. If so, allow up to 5 minutes for the battery to come out of its low-‐power mode and begin accepting a charge again. If the issue persists, consult your Apple support person for assistance.
Standard maintenance
For proper maintenance of a lithium-‐based battery, it’s important that the electrons get to move occasionally. Therefore, Apple doesn’t recommend leaving your MacBook plugged in all the time. The ideal setup would be to run your computer with the battery at school, then plug in the battery at home to recharge. This keeps the battery
Battery replacement
The battery in your MacBook can be replaced only by an Apple Authorized Service Provider or an Apple Retail Store.
Tips for battery conservation
The amount of work time your battery can provide before you need to recharge depends on the applications and peripheral devices you’re currently using, and the steps you take to conserve power while you work. For optimal conservation of battery power, do the following:
printers and digital cameras, can draw power from your battery even when you’re not using them.

1213-inch White MacBook
Care and Handling
status icons in the menu bar. If these icons don’t appear in the menu bar, you can turn them on in the Network and Bluetooth panes of System Preferences.)
keyboard when your MacBook is being run on battery power.
Preferences, select the checkbox labeled “Put the hard disk(s) to sleep when possible.”
Energy Saver pane of System Preferences.
Storing your MacBook
If you won’t be using your computer for more than three months, keep it in a cool location (ideally, 71° F or 22° C) and discharge the battery to approximately 50 percent. To maintain the capacity of the battery, recharge the battery to 50 percent every six months or so.
Adapter care
Proper usage and maintenance of the MagSafe power adapter can increase the life of the adapter.
While the MagSafe power adapter is designed to travel with your MacBook, damage to the adapter can be prevented by following certain guidelines. Excessive bending of the cord, especially near the adapter brick or the MagSafe connector itself, may weaken the
instead of angles.
In addition, avoid improper wrapping of the cord on the adapter’s “wings” or excessive strain where it connects to the adapter brick. Wrap the cable loosely to avoid creating undue stress or harsh angles with the adapter.
Battery troubleshooting 101 (intended for technical personnel)
If your MacBook operates normally when plugged into AC power (wall outlet), but doesn’t operate using a battery, follow the steps below to verify whether the issue is with the battery or another component of the computer.
1. Ensure that the battery is fully charged by using the proper power adapter for your computer. The connector on the power adapter will glow amber if the battery is accepting a charge. It may take up to 5 minutes for a fully drained battery to begin charging. If the power connector isn’t glowing, there may be an issue with the power adapter or outlet.
2. Reset the System Management Controller (see the next section).

1313-inch White MacBook
Care and Handling
Resetting the System Management Controller (intended for technical personnel)
The System Management Controller (SMC) is an integrated circuit (computer chip) located on the logic board of the computer. As the name implies, it is responsible for power management of the computer. It controls backlighting, hard disk spin down, sleep and wake, some charging aspects, trackpad control, and some input/output as it relates to the computer sleeping.
Over time, the settings in the System Management Controller may become unusable, which can result in operational anomalies with the computer. Examples include not turning on, not waking from sleep, not charging the battery, or not recognizing the power adapter.
Resetting the SMC isn’t intended for resolution of a stall or situation in which the computer is unresponsive. An SMC reset should not be necessary except as a last resort, in cases where a hardware issue with the power management system is suspected. The process resets the hardware power management functions.
For most situations, restarting your computer will solve the problem. If the computer has stopped responding, try the following steps, one at a time. Run a test after each step to see if it has worked; if so, you needn’t go on to any of the others. You should reset the SMC only if you’ve tried all three of these options and the computer still isn’t working.
1. Force quit by pressing Command ( -‐Option-‐Escape.
2. Restart by pressing Command-‐Control-‐Power ( ).
3. Force shut down (press the power button for 10 seconds).
Perform an SMC reset on the computer only if none of the above steps resolves the situation. For MacBook computers, you can reset the SMC by doing the following:
2. Connect the power adapter to a working power source.
3. On the built-‐in keyboard, press (left) Shift-‐Control-‐Option along with the power button once. Note: You must use the keys on the left side of the built-‐in keyboard.
4. Wait 5 seconds and press the power button to start the computer.

1413-inch White MacBook
Care and Handling
Solving Simple Problems
When an Application Doesn’t RespondOnce in a while, an application you’re using might freeze. You can quit a frozen application without restarting your computer, which may allow you to save your work in other open applications.
To force an application to quit:
( selected.
When Your Computer Doesn’t RespondIf your computer doesn’t respond and you want to restart it, press Command-‐Control, and the power button ( ) at the same time (this is known as a “soft reset”). The computer should restart automatically. If that doesn’t work, hold down the power button for 10 seconds (this is known as a “hard reset”). You’ll then have to release the power button
will be lost if you restart your computer with either a soft reset or a hard reset. That’s
Getting Answers from Mac HelpMuch more information about using your MacBook is available in Mac Help on your computer. To access Mac Help:
1. Click the Finder icon in the Dock (the bar of icons along the edge of the screen).
2. Click Help in the menu bar.
3. Type a question in the search box or select Mac Help to open the Mac Help application.
Note that while using most applications on your MacBook, you can access Help in the top menu bar of the application.
1513-inch White MacBook
Care and Handling
Caring for Your MacBookA guide for students
The MacBook is well built and a great tool for learning, but it is a computer and, like any piece of electronic equipment, it needs to be treated with care. You can do several things to make sure that your MacBook is trouble-‐free and lasts a long time.
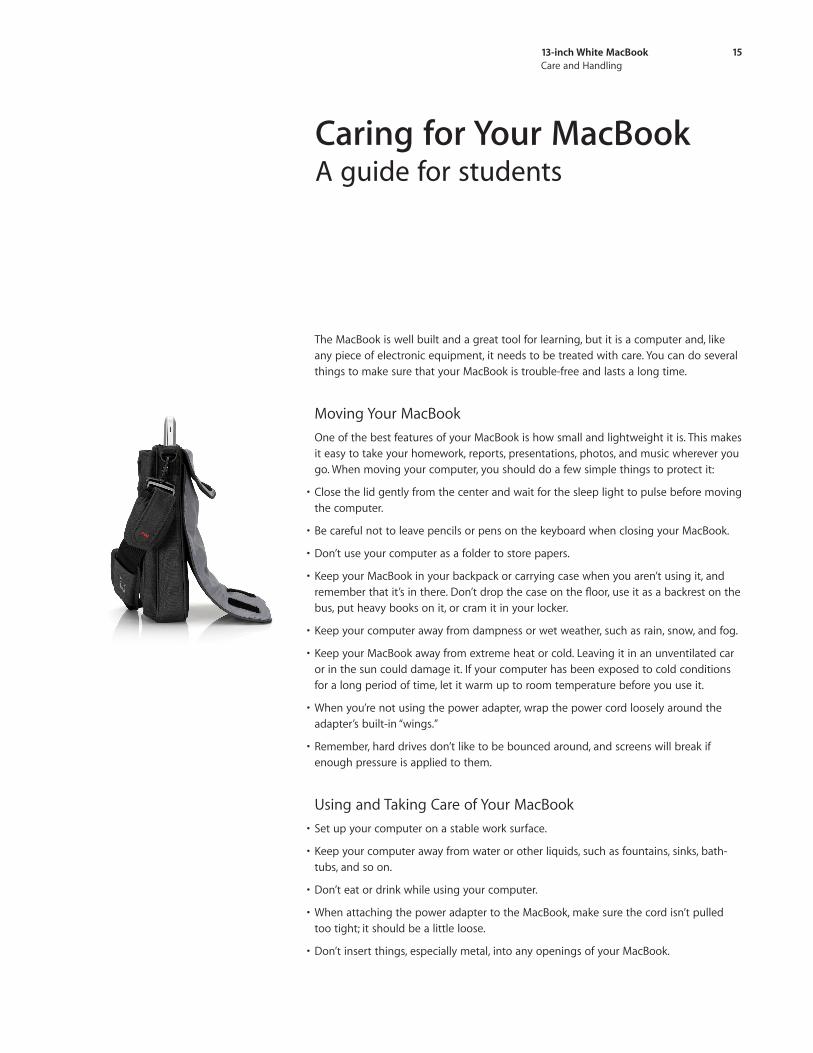
Moving Your MacBookOne of the best features of your MacBook is how small and lightweight it is. This makes it easy to take your homework, reports, presentations, photos, and music wherever you go. When moving your computer, you should do a few simple things to protect it:
the computer.
bus, put heavy books on it, or cram it in your locker.
or in the sun could damage it. If your computer has been exposed to cold conditions for a long period of time, let it warm up to room temperature before you use it.
adapter’s built-‐in “wings.”
enough pressure is applied to them.
Using and Taking Care of Your MacBook
-‐tubs, and so on.
too tight; it should be a little loose.

1613-inch White MacBook
Care and Handling
take it to the beach.
on the keys if your computer doesn’t respond right away.
charged for the next day.
Cleaning Your MacBookFollow these rules when cleaning your computer:
1. Shut down your MacBook, then unplug the power adapter and any external devices.
2. Use a damp, soft, lint-‐free cloth to clean the computer’s exterior. Avoid getting moisture in any openings. Don’t spray liquid directly on the computer or use aerosol sprays,
3. The bottom case of the MacBook (13-‐inch, Late 2009) uses a soft nonslip material. Use
to use isopropyl alcohol 70% or iKlear on the bottom case. Remove any surface dirt gently with your bare hand before proceeding with a cleaner and cloth. After cleaning,
To clean the MacBook screen, do the following:
1. Shut down your MacBook and unplug the power adapter.
2. Dampen a clean, soft, lint-‐free cloth with water and gently wipe the screen. Never sprayliquid directly on the screen; it may drip inside the display and cause damage.
Using Cables
they are connecting to. When disconnecting, grab the plug, not the cord, and pull it straight out. To disconnect the power adapter from your MacBook, grab the MagSafe connector and tilt it up, down, or to one side.
the connector then reattaching it. A battery that is completely run down may take up to 5 minutes to begin charging. If the battery still doesn’t work, contact your teacher or computer support person at your school.

1713-inch White MacBook
Care and Handling
1AirPort Extreme Wi-‐Fi wireless networking; 802.11a/b/g compatible. Wireless Internet access requires a base station or other wireless access point and Internet access; fees may apply. 2Testing conducted by Apple in January 2009 using preproduction
more information. The wireless productivity test measures battery life by wirelessly browsing various websites and editing text in a word processing document with display brightness set to 50 percent. 3The AppleCare Protection Plan must be purchased within the computer’s one-‐year warranty term. For further details, please review terms and conditions.
© 2010 Apple Inc. All rights reserved. Apple, the Apple logo, AirPort, AirPort Extreme, FireWire, iChat, iPod, iSight, Mac, MacBook, and MagSafe are trademarks of Apple Inc., registered in the U.S. and other countries. Finder is a trademark of Apple Inc. AppleCare is a service mark of Apple Inc. Intel and Intel Core are trademarks of Intel Corp. in the U.S. and other countries. Other product and company names mentioned herein may be trademarks of their respective companies. February 2010 L407057B
Preventing Theft and BreakageTake proper care to make sure your computer doesn’t get broken or stolen. Your school has rules to ensure proper use and care of computers. Be sure to familiarize yourself with these rules.
The Apple limited warranty or AppleCare Protection Plan3 provides coverage for defects in materials and workmanship. However, damage resulting from any external cause, such as an accidental drop or spill, isn’t covered by Apple. Refer to your school’s