Embed Size (px)
Citation preview

1
Computerized Word Processing Computerized Word Processing and Office Suitesand Office Suites
AssAsstt. Prof. Emin Korkut. Prof. Emin Korkut
2
StarOffice 5 for Linux
WHAT IS STAR OFFICE?
StarOffice is a complete office suite, a collection of office tools for Linux. It was developed by Star Division, a German company.
•Star Office is distributed for free for personal use.
•It seems like Star Office is serious competition to Microsoft Office, and Corel WordPerfect Suite which currently dominate the office suite applications market.
•It offers similar functionality to Microsoft Office and is able to read and write the file formats of MS office tools, including the most important ones: the word processor and spreadsheet.

3
* StarOffice is cross-platform, it runs natively on the Solaris, Microsoft Windows 95/98/\-NT, OS/2, and Linux operating systems. It is designed as an integrated desktop rather than as individual applications that work together.
* StarOffice is a desktop.
* StarOffice contains internet applications.
* StarOffice is a file manager.
* StarOffice is an HTML editor.
* StarOffice is an image editor.
* StarOffice is a word processor. Star Writer, the word processor of StarOffice.

4
* StarOffice is a spreadsheet. Using Star Calc, the spreadsheet of StarOffice, you can easily create tables, make calculations, draw graphics and make analysis of the statistics.
* StarOffice is a database.
* StarOffice is a presentation and graphics program.
* StarOffice is a math editor. StarMath, the math editor of StarOffice can write equations and work on them.
* StarOffice is 100% compatible with other office applications. You can save the documents you prepared with StarOffice in any format and open the documents you prepared with other applications in StarOffice.
5
You can download StarOffice from the web site of SUN,
www. stardivision. com for free.

6
OVERVIEW OF STAROFFICE \& STARDESKTOP:
StarOffice consists of many components such as
•the desktop
•Bars
•Spreadsheet
•Presentation
•document programs.
When you open Staroffice, you come across the contents of the main work area which is actually your desktop. At the top, there are the menu bar and the function bar and at the bottom, the task bar.

7
StarDesktop cannot be closed like ordinary document windows and is always visible in the work area if you have no other files or windows open. With the context menu of your desktop icon, you can choose either the Windows desktop or the StarOffice desktop.

8
THE SCREEN ELEMENTS:
The Title Bar:
In the title bar, you can see the name of the StarOffice application and the title of the actual document. If the document does not have a title, you see the name of the file.
The Menu Bar:
On the top of the StarOffice window, there is the menu bar. By pointing to a menu with the mouse and pressing the left mouse button, the menu opens and you can select an item from the submenu by clicking it.
The Edit menu includes functions necessary for editing a document (Copy and Paste, Cut, Undo, and so on). The View menu contains functions with which you can control your view of a document and other on-screen elements.

9
The Function Bar:
Below the menu bar, there is the Function bar. This bar contains icons for some important commands and functions that you can activate in StarOffice.
At the left of the function bar, the URL field indicates the location of the active document. It is possible to select or enter other URL (Uniform Resource Locator) addresses in order to open a document either in your file system or in the Internet.
Other toolbars include the object bar, main toolbar and the option bar. These bars are assigned to certain document types you edit in StarOffice.

10
The Desktop:
After starting StarOffice, the first thing to be seen is the StarDesktop. On the desktop, documents, folders, mails, etc. are displayed in separate windows. However, if no document is open, the background of the desktop is displayed.
When a document is opened, the content of the document or folder appears in the desktop. The desktop may be partially or completely hidden from view in this case, though it is always active in the background. If a newsgroup or an e-mail account is opened, the message is displayed in separate frames containing the relevant information but the desktop is always on the background. In order to switch back to the desktop view, one needs to click the Desktop icon on the task bar.

11
The Explorer:
In the Explorer, you can manage and organize all the elements in StarOffice. You can open the Explorer with the Explorer icon in the function bar. If it is open but hidden, you should click the Show icon at the left border of your desktop.
The Beamer:
The Beamer's function is to show the contents of a selected Explorer entry; whereby folders and directories are not displayed in the Beamer.
The contents of the Beamer depends on the entry selected in the Explorer. You will have different contents in the Beamer if you select a database, a Gallery theme or a folder.

12
The Task Bar:
StarOffice has a task bar which displays all active tasks as icons. Click any icon in order to view and edit the active task. From left to right the Start and Desktop icons followed by all StarOffice tasks and any other system tasks. On the right in the task bar a task tray where the e-mail indicator and the time of day are shown.
The area between the Desktop and Start button in the Task Bar represents the Quickstart Bar. It can be used to quickly start an application, or open a document or folder. The Start icon opens a menu where you can choose from the various StarOffice document types.

13
WORKING WITH STARWRITER
Entering a text:
Enter some text. Line breaks are controlled automatically with your software, so you do not need to manually do so. Press the Enter key only where you want to begin a new paragraph.
You can also format headings, highlight words, and make other typographical changes after you have finished writing the main bulk of your text.
Also the automatic word completion can help you when entering text: If you enter the same word (longer than 5 characters), StarWriter will suggest after typing the first three characters the familiar word. Press the Enter key to accept the suggestion if correct. If more than one word begins with the same three characters, you can enter the key combination (Ctrl)(Tab) to search from the beginning of the list, and (Shift)(Ctrl)(Tab) to search from the end of the list of familiar words.

14
Inserting Text:
To insert new characters into an already existing text, simply place the cursor at the position where the change should be made and enter the correction.
If the text is not meant to be shifted but instead overwritten by a new text, then the text document should be in the Overwrite mode instead of in the default Insert mode. You can switch between these modes by pressing the (Ins) key. The selected mode will be indicated in the status bar with "INSERT' or "OVER". You can also toggle this function by clicking the field in the status bar.
Correcting Typing Errors:

15
Saving Your Text:
Printing Documents:

16
Printing Several Pages to a Sheet:
With StarOffice it is easy to print several pages of a text document on one single sheet of paper:
Switch in the Page view to (File - Page View). In the Object bar, you can choose to display either two or four pages, or you can click on the Scale icon and define the amount of pages to be shown by setting the number of rows and columns. With a long click on the icon, you will open a grid formed submenu. Here you can determine by dragging with your mouse cursor, how many columns and rows ("Pages") can be viewed and printed.
Creating Text With or Without Styles:A text without any special formatting can have a monotonous appearance. To outline text, to highlight individual words, quotations, or references, or to separate certain parts of the text, you can apply various types of formatting.

17
Hard or Soft Formatting:
StarOffice offers a choice between hard or soft formatting for applying text attributes such as bold or italics, and defining the font, type, and font size.
•A hard format is obtained by applying an attribute directly to a portion of text. For example, you can apply bold formatting directly to a selected text by clicking the Bold icon in the Text object bar.
•Soft formatting applies a style to the text. The style is a named set of defaults for formatting text.
Using Styles in StarOffice:
The styles for characters, paragraphs, frames, numbering and pages (or cells in spreadsheets) are always saved with the document. When the document is opened again, the styles still apply to all formatted objects.

18
The Styles in the Stylist:
Open the Stylist with the command in the Format menu or by pressing (F11). You can also click on the icon in the Function bar.
At the top left of the Stylist, the five icons enable you to switch the display between paragraph, text, frame, page and numbering styles. The available styles are listed in the main area of the Stylist. However, only the styles in the category selected in the list box at the bottom of the Stylist are displayed.
19
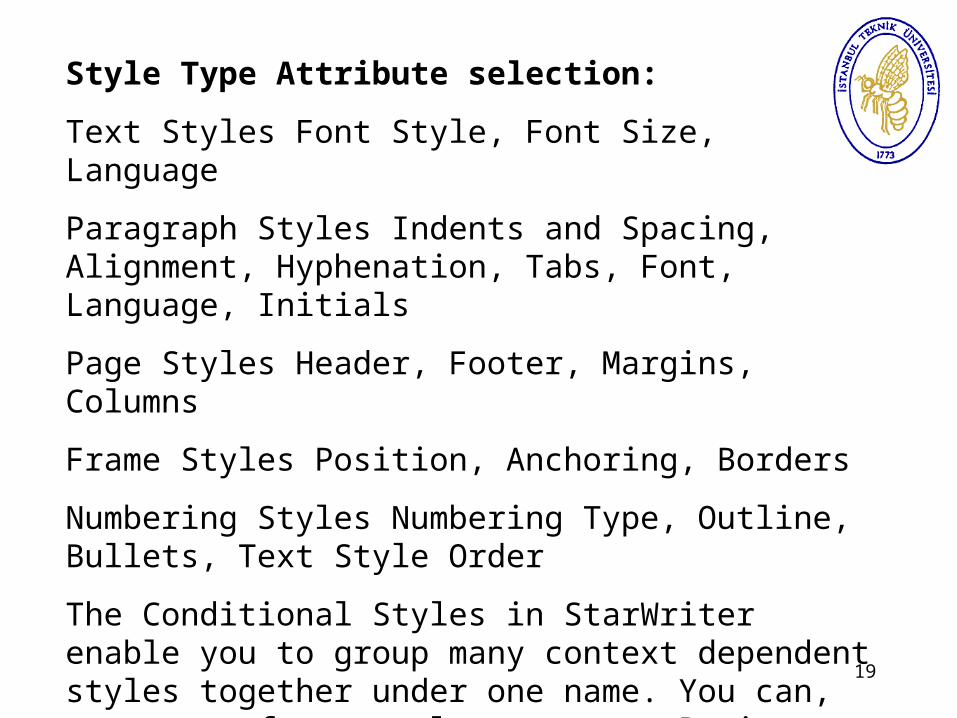
Style Type Attribute selection:
Text Styles Font Style, Font Size, Language
Paragraph Styles Indents and Spacing, Alignment, Hyphenation, Tabs, Font, Language, Initials
Page Styles Header, Footer, Margins, Columns
Frame Styles Position, Anchoring, Borders
Numbering Styles Numbering Type, Outline, Bullets, Text Style Order
The Conditional Styles in StarWriter enable you to group many context dependent styles together under one name. You can, for example, create a Business Letter" template, that contains hierarchic derived styles for titles, bulleting, tables, etc.

20
Numbering Style:
With the corresponding icons in the object bar, you are able to assign bulleting and numbering to your text document.
How to Create a Document Template:
To apply the newly defined paragraph or text styles in other documents, create a document template. When you create a document template from an existing document, it contains all styles of the current document. If you wish, you can delete all text from the current document, leaving only the styles. Activate the menu command FileDocument Template. . . on. In the dialog Document Template, select the section where you would like to save your template. In the text field New Document enter the name for your template and click OK. Later, you can open a dialog with File - New - From Template. . . and select a template to be used in creating a document.

21
Formatting Multiple Paragraphs:
In this example, you have applied the same "Head 1" paragraph style to multiple paragraphs.
The Standard Template:
When you open a new document, it is based on the predefined standard formatting. The default fonts can be modified under Tools - Options - Text Document. . . - Standard Fonts. If you realize that you keep modifying the formats in your document to adjust again the page layout, then you should create a new standard template:

22
How to Create a Custom Document Template on the Desktop:
Write the document that you want to use as a template for later documents. Apply the desired formatting and modify the character and paragraph styles as necessary. Insert graphics and fields to automatically update the date in your document. You can use text, spreadsheet, presentation or drawing documents as templates.
Assign a name to the document and save it anywhere on your hard disk. Switch to the Desktop by clicking the Desktop button in the task bar. On the Desktop now create a new link which refers to the saved document. Click New - Link. . . in the context menu to open the Properties of Link dialog. Enter a name for the link, for example New Letter.

23
Switch to the Bookmark tab. Click the File. . . button and select the desired file from the file selection dialog. Finally, be sure to select the Open as Template check box. Click OK. In the Desktop, open the context menu and select the Update command to refresh the Desktop display. The new link (e. g. New Letter) to the file will then appear. You can now double-click the template on the desktop whenever you want to write a new letter. The new letter contains all the objects, styles and formats you defined in the original. The new letter is "Untitled," so when you save it you will automatically be asked to assign a name and specify the location where you want to store the document. The template will not be overwritten and can be used as often as you like.

24
Page Style: Summary
Navigator
In addition to the Stylist, which helps you format the document, the Navigator is another essential tool in StarOffice. The Navigator enables you to move exactly to a desired position in your document. Additionally, the Navigator provides useful information about the contents of the entire document at a glance. The Navigator offers you complete lists of all graphics and tables in your document.

25
Jumping to a Specific Page
One of the features of the Navigator is that it enables you to quickly jump to specific pages in long documents. If the Navigator is not yet open, just double-click on the display of the current page number in the status bar to open it.
Moving among Objects in Text
Clicking on the Navigation button at the top of the Navigator opens a list box where you can choose the type of object. If you select "Picture" in the list box and click the Previous or Next buttons, the cursor jumps to the next or previous graphic in your document. This also works for tables, frames, sections and notes. You can select further objects in your documents within the main area of the Navigator.

26
Moving Between Reminders
In the Navigator, you can also set temporary reminders that stay in effect until you close the document. This method makes it easy to move between particular locations in the document. Position the cursor at the position in the text where you want to set a reminder. Click the icon Set Reminder in the Navigator. The reminder will not be visible in the document. If you want to jump to a reminder, open the Navigation bar by clicking the respective icon at the top left of the Navigator, and select the entry "Reminder". You can now move through the reminders by clicking the Previous and Next icons.

27
Spellcheck Function
Auto Spellcheck
The automatic spellcheck can be switched on or off with the Auto Spellcheck icon in the Main toolbar. As you enter text, words not in the dictionary will be underlined in red. StarOffice comes with a dictionary called "Standard. dic," but you can also create your own dictionary or adapt and supplement the standard dictionary according to your own needs.
Multilingual text check
StarWriter can spellcheck for various languages (with Thesaurus and hyphenation). In StarOffice's setup program, you can determine with the manual installation and later on with the "Change Installation" function which choice of available languages you want to install.

28
Search and Replace
With the Search function in StarOffice, you can search for variations of key words.
Searching for a Word in Text
Searching Only for Whole Words
Match Case
29
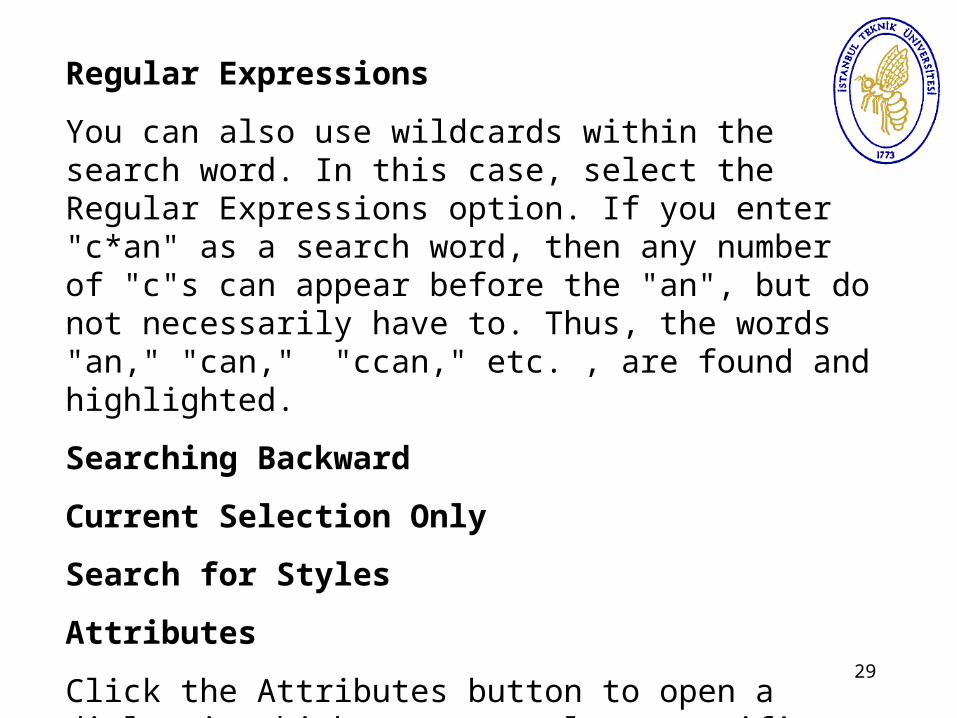
Regular Expressions
You can also use wildcards within the search word. In this case, select the Regular Expressions option. If you enter "c*an" as a search word, then any number of "c"s can appear before the "an", but do not necessarily have to. Thus, the words "an," "can," "ccan," etc. , are found and highlighted.
Searching Backward
Current Selection Only
Search for Styles
Attributes
Click the Attributes button to open a dialog in which you can select specific text attributes to search for within a document. StarOffice will then find all attributes that differ from the format of the current paragraph style.
30
Using Automatic Functions
Using AutoCorrect and AutoFormat
StarOffice can format your documents as you type or whenever you specifically choose to do so. Once you have become familiar with using AutoFormat during input, you can draft your documents more quickly and effectively.
31
Creating a Letter Template with the AutoPilot
For a complete list of predefined and custom templates, select the menu command File - New - From Template. . . or (Ctrl)(N). Start the AutoPilot with the File - AutoPilot - Letter menu command. In this short introduction, simply accept all AutoPilot defaults, and then print the result. You could click on the Create button right away, but to familiarize yourself with these procedures you should click Next on each dialog page, so that you have seen every page at least once. Browse successively through the AutoPilot pages for creating a letter template.
Customized Document Templates

32
Drawing Frames and Lines, Slanting Letters
Accentuate Text
Use the "normal" Formatting (e. g. with the icons in the text object bar). You can use some of the following possibilities:
Create the text in bold or in another font, change the text colour and background, centre the text. To optically accentuate a paragraph, select in the context menu the Outline tab. Here you can choose an outline frame for your paragraph, which can include a shadow if you wish. Enter in the Indents and Spacing tab the same value for the right and left indents, so that the framed text will appear centred.
How to Insert a Text Frame

33
Draw Objects as Frames
How to Draw Lines in Text

34
Some Snapshots from StarWriter Sessions

35
36
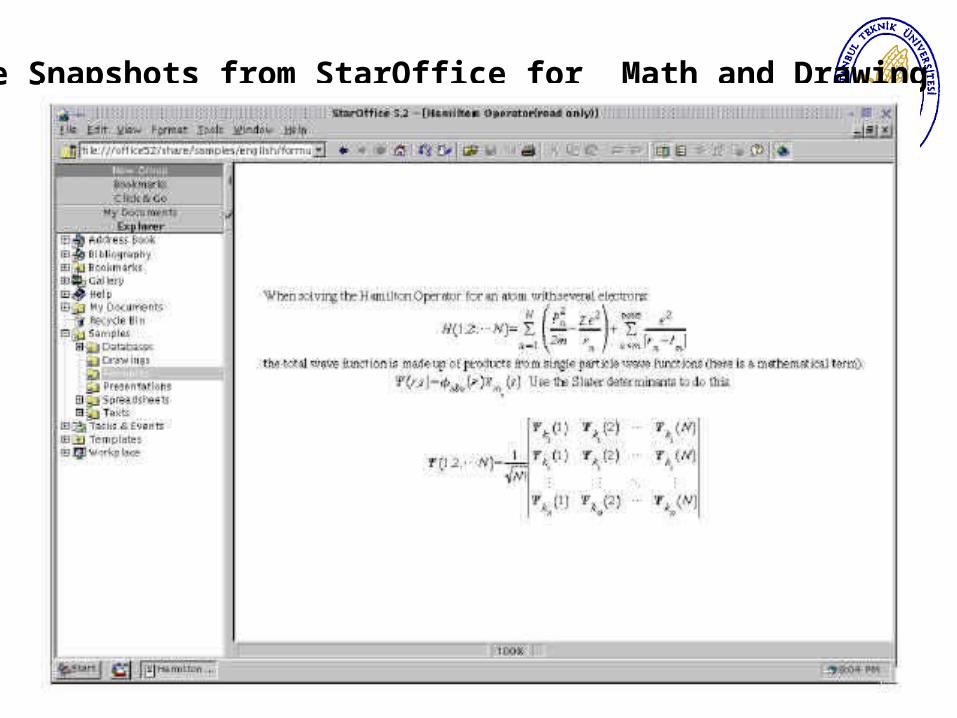
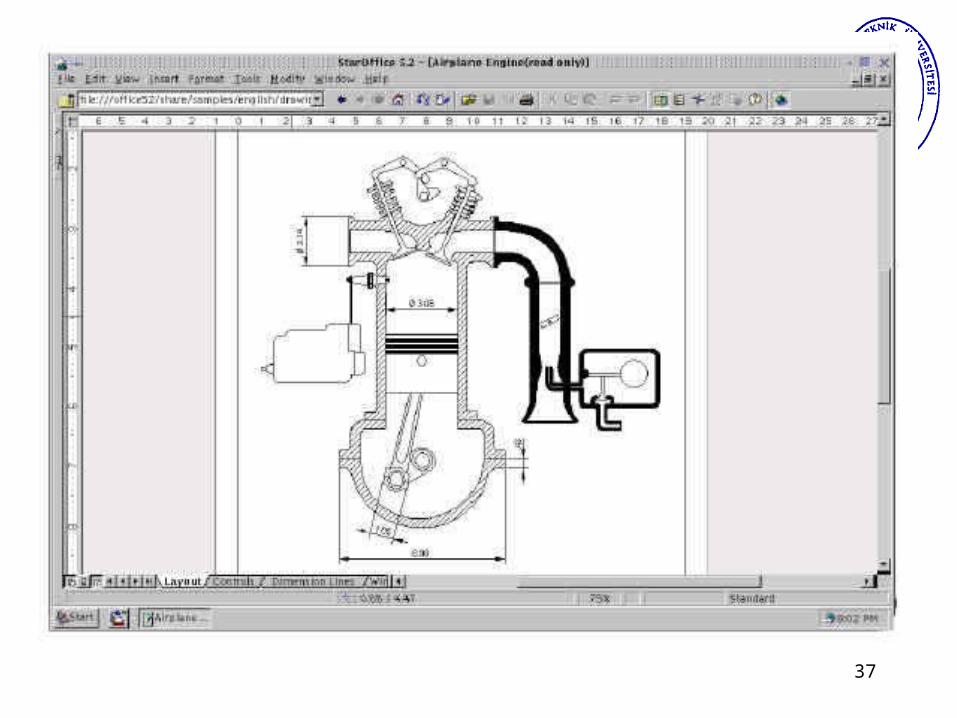
Some Snapshots from StarOffice for Math and Drawing
37

38
WORKING WITH PRESENTATIONS
Creating Presentations With StarImpress
* Choose New from the file menu, and then choose Presentation from the New submenu.
* Double-click the new Presentation icon on the Desktop.
* Choose Presentation from the Start menu.
Slides and Pages
StarImpress is like a combination of Power Point and CorelDraw. StarImpress can create multiple-slide presentations with transitions, embedded links,and slide templates.

39
Using a Slide Layout
1. Choose new from the file menu.
2. Choose from template. . . from the new submenu.
3. Scroll down the categories list until you find Presentation Layouts. Click on it to see a list of layouts in the right side of the dialog box.
4. Decide on the layout that you want to use and double click on it in new dialog box.
5. Select a slide layout for your first slide from the dialog box that appears. When you choose OK, the first slide in a new presentation appears.
40
Creating Individual Slides
Adding a Layout to a Slide
Inserting a New Slide

41
Entering Text on a Slide
Adjusting Paragraphs
Saving Your Presentation
42
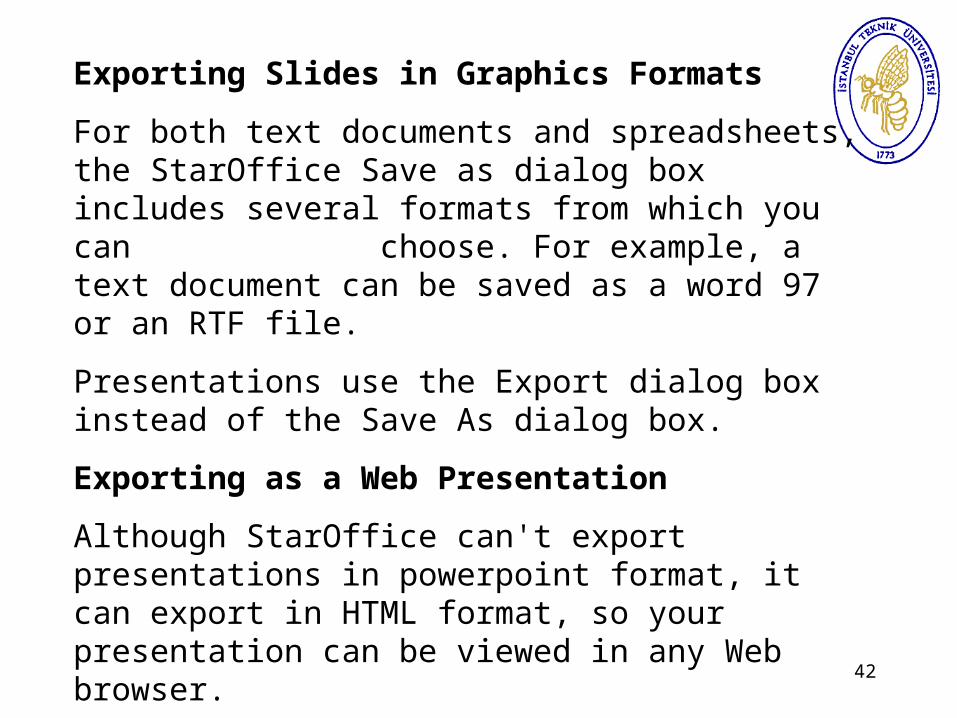
Exporting Slides in Graphics Formats
For both text documents and spreadsheets, the StarOffice Save as dialog box includes several formats from which you can choose. For example, a text document can be saved as a word 97 or an RTF file.
Presentations use the Export dialog box instead of the Save As dialog box.
Exporting as a Web Presentation
Although StarOffice can't export presentations in powerpoint format, it can export in HTML format, so your presentation can be viewed in any Web browser.

43
Adding Graphics and Charts to Your Presentation
Graphics are an important part of any slide presentation. With only bulleted lists ,any presentation rapidly becomes a chore for both presenter and audience. With colourful graphics that illustrate your points, however, everything, becomes more interesting.
Importing and Editing Graphic Files
1. Move to the slide on which you want to insert a graphic.
2. Set the viewing mode to Drawing (from the master view submenu under the view menu)
3. Select Picture under the Insert Menu, and then choose from the file on the picture submenu. The Insert Picture dialog box appears.

44
Editing an Imported Graphic File
For most bitmapped graphics that you import into a StarImpress presentation, you can use the image editor to edit the imported graphic directly. To use the image editor, right click on a selected graphic and choose Image from the pop--up menu. Choose edit from the image menu that appears.
Adding Actions to Graphics
1. Import a graphic into your slide.
2. Select the imported graphic by clicking on it.
3. Choose interaction from the presentation menu.
4. Click on the drop down box and select an action to associate with clicking on this graphic.

45
Drawing Your Own Graphics
StarOffice drawing tools enable you to do this. The basic drawing tools are always visible on the main tool bar on the left of the screen as you edit slides in Drawing mode. The drawing tools shown on the main tool bar are vector-based drawing tools, like those used in StarDraw. Bitmap (raster) drawing tools are available by choosing Picture from the Insert menu, and then selecting from image editor.
Adding Lines and Rectangles
46
Using Charts from Spreadsheets
Importing a Chart
The easiest way to import a chart from a spread sheet is to use the standart copy and paste functions. Follow these steps:
1. Go to the spreadsheet that contains a chart that you want to use in your presentation.
2. Click on the chart to select it.
3. Choose copy from the edit menu.
4. Switch the presentation you are working on by selecting it from the window menu.
5. Move to the slide on which you want to chart inserted.
6. Choose paste from the edit menu.
47
Inserting a Spreadsheet
If the chart isn't enough , you can add a mini-spreadsheet to a slide in your presentation. To insert a spread sheet into your slide, choose spreadsheet from the Insert menu while viewing a slide in Drawing mode. A miniature spreadsheet appears in the slide, ready to have numbers entered.
Formatting and Giving Your Presentation
Arranging Your Slides
StarImpress provides several master views that make it easy to see all your slides, and to rearrange or sort them as needed.

48
Choosing a Master View
When you start a new presentation, StarImpress displays in Drawing View. This view shows a single slide that fills the working area. All the drawing tools are available, and all the graphics, text, and other components of a slide are displayed as they will appear during a slide show. The advantage to the drawing view is that what you see onscreen is how to actual slide will look.
Moving Between Slides
1. The easiest way to move to the next slide is to press Page Down. Pressing Page up moves you to the previous slide.
2. At the bottom of the viewing area, StarOffice displays a tab for each slide, as well as navigation arrows.
49
Rearranging Slides Using the Slide Order
With the slide sort view, you can work with all the slides at once, seeing how they relate to each other in the presentation.
Moving Slides
Copying and Pasting Slides
1. Click on the slide that you want to copy to select it.
2. Press CTRL+C to copy the selected slide.
3. Press CTRL+V to paste the selected slide.
Deleting Slides

50
Defining Transitions Between Slides
Transitions are the visual movement from one slide to the next in your presentation. The transitions between slides can add or take away from the effect that you are trying to create. To begin choosing slide transitions, choose Slide Transition from the presentation menu. The slide transition window appears. Use the window select slide transitions, apply them to slides, and preview the results.
SpellChecking Your Presentation
Adding Speaker Notes
To add notes to a slide, you must be in the notes view of your slides. Choose Master view from the View menu, and then notes from the Master view submenu.
51
Setting Presentation and Slide Show Options
Setting Presentation Options
You can open the Presentations Options dialog box by selecting presentations on the Options submenu under the tools menu. This dialog box includes settings for what is displayed and how graphic snap and grids function, and for various layout and measurement options.
* Picture placeholders:
* Object outlines:
* Text placeholders:
* Line contours:
52
Setting the Slide Show Options
The options that apply to running a slide show are not part of the Presentation options dialog box. Instead, you can find them by selecting presentation settings from the Presentation menu. Here we will explain three of them.
* Range
* Repeat continuously
* Change slides manually

53
Setting the Slide Show Options
* Choose the slide show icon on the right edge of the StarOffice window.
* Select Slide Show from the presentation menu.
* Press CTRL+F2, after a few seconds the first slide appears full-screen.
Preparing Hardcopy Slides
Setting the Page Size

54
Some Snapshots from StarOffice for Presentation

55

56
Microsoft Word
Word is a computerized word processing utility which is based on WYSIWYG (What You See Is What You Get) philosophy. It is quite capable of doing a lot of important things like using different fonts in size and shape for the document preparation in a easy--to--get approach. It has a lot of tools to be provided for various user demands. Generally, the term Word recalls the Microsoft Word which is a part of Microsoft Office Suite. However there are many other word processors which may not have the term Word in their names but they have almost all features of Microsoft Word. Amongst these we can mention about the word processor of StarOffice we mentioned at the beginning of this document and the word processor of KOffice, and Abiword which is developed mostly for Linux.

57

58
By default, Word documents are maintained in a file format which is specified by the suffix {\tt . doc} in the name. However it can handle the documents by reading from or saving into the other file formats like text files {\tt . txt} or rich text format files {\tt . rtf}. Since 1997 Word is able to manipulate the HTML files.

59
The word window contains 9 main menus which are given below:
File:
Edit:
View:
Insert:
Format:
Tools:
Table:
Window:
Help: