Embed Size (px)
Citation preview
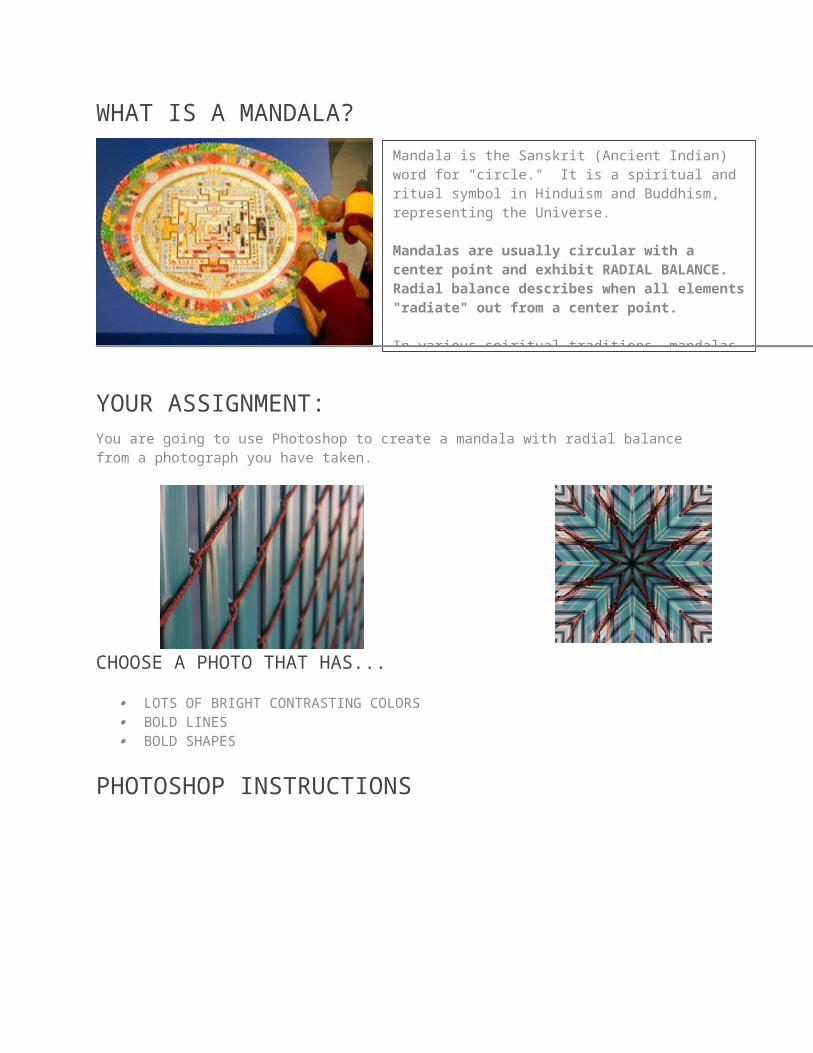
WHAT IS A MANDALA?
YOUR ASSIGNMENT:You are going to use Photoshop to create a mandala with radial balance from a photograph you have taken.
CHOOSE A PHOTO THAT HAS...
LOTS OF BRIGHT CONTRASTING COLORS BOLD LINES BOLD SHAPES
PHOTOSHOP INSTRUCTIONS
Mandala is the Sanskrit (Ancient Indian) word for "circle." It is a spiritual and ritual symbol in Hinduism and Buddhism, representing the Universe.
Mandalas are usually circular with a center point and exhibit RADIAL BALANCE. Radial balance describes when all elements "radiate" out from a center point.
In various spiritual traditions, mandalas may be employed as a spiritual teaching tool, for establishing a sacred space, and as an aid to meditation and trance induction.
File > Open Choose File, OK
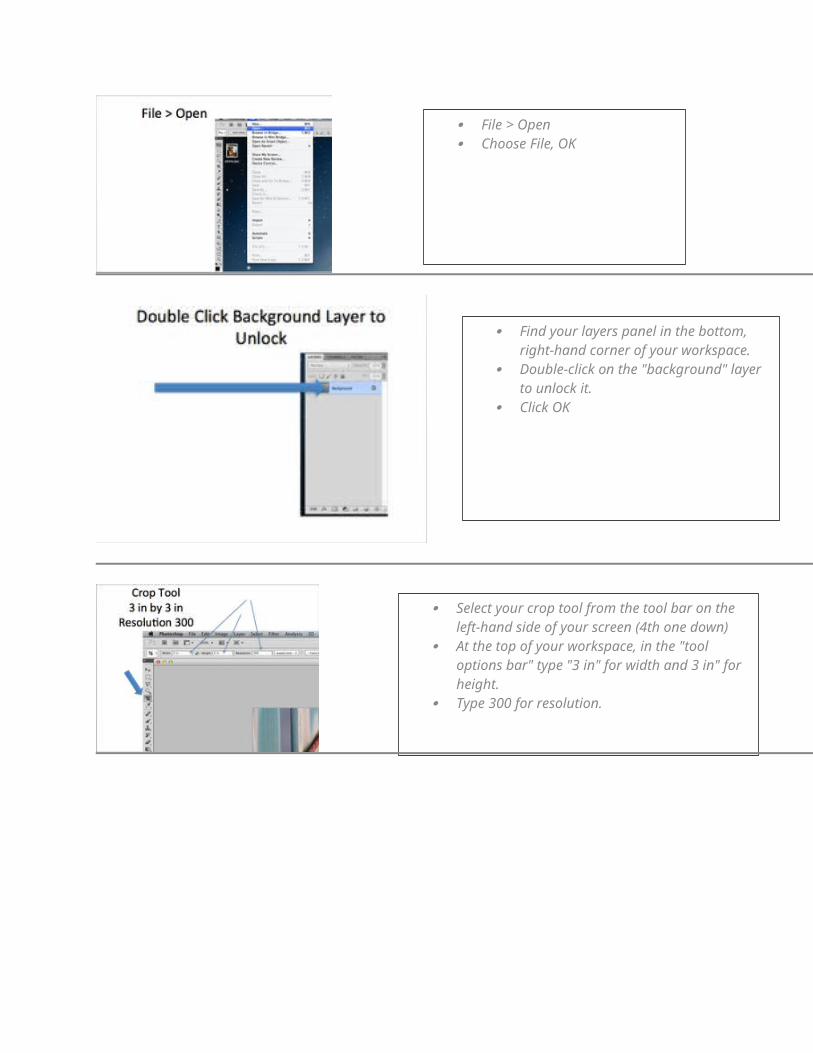
Find your layers panel in the bottom, right-hand corner of your workspace.
Double-click on the "background" layer to unlock it.
Click OK
Select your crop tool from the tool bar on the left-hand side of your screen (4th one down)
At the top of your workspace, in the "tool options bar" type "3 in" for width and 3 in" for height.
Type 300 for resolution.
Outline the portion of your photograph you would like to focus on.
Click the check mark (commit button) to save your selection.
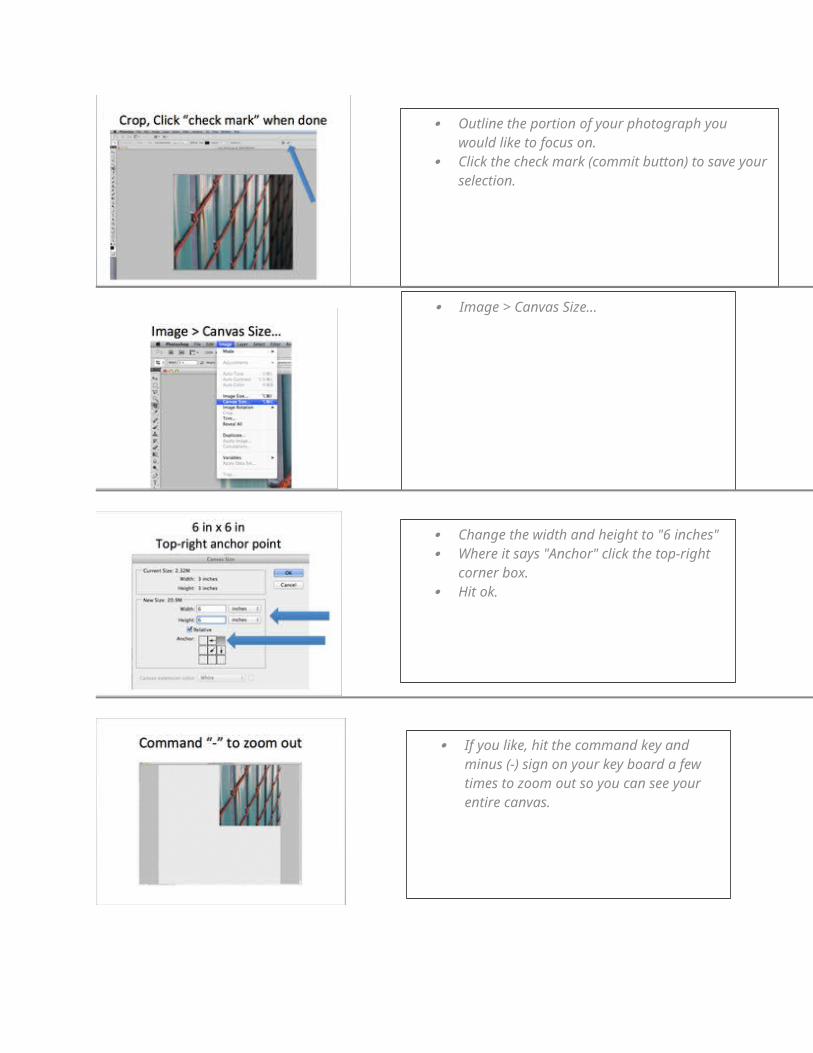
Image > Canvas Size...
Change the width and height to "6 inches" Where it says "Anchor" click the top-right
corner box. Hit ok.
If you like, hit the command key and minus (-) sign on your key board a few times to zoom out so you can see your entire canvas.
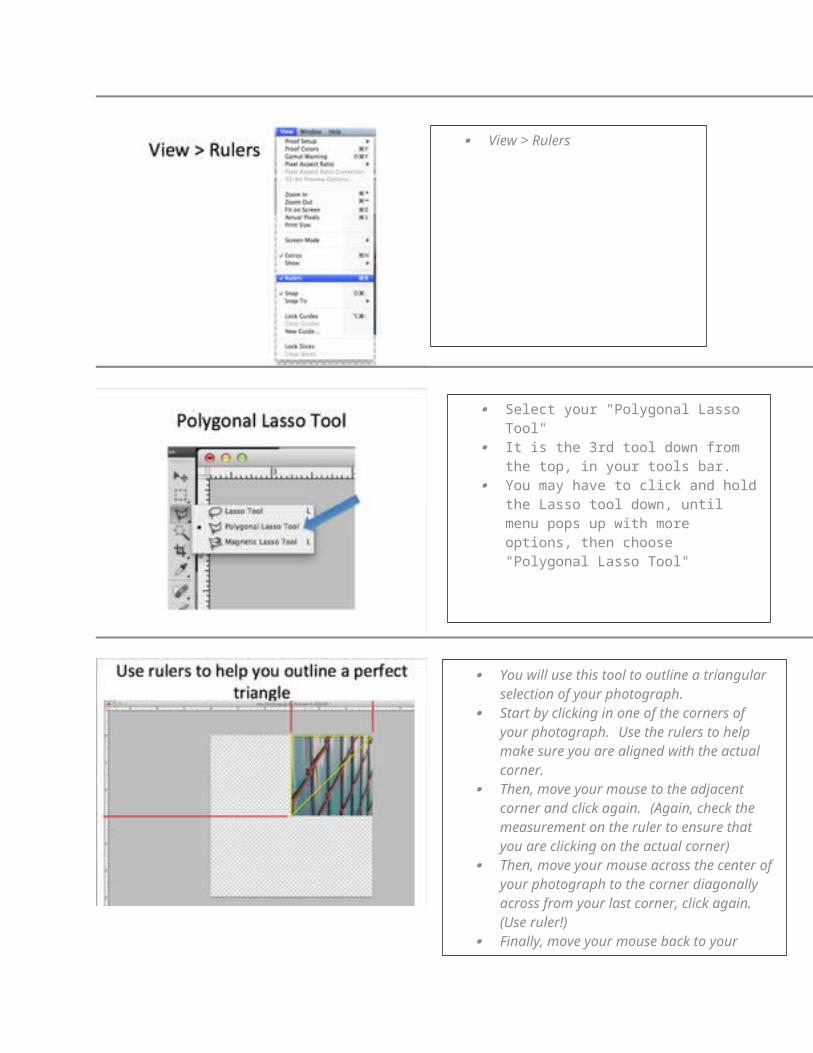
View > Rulers
Select your "Polygonal Lasso Tool" It is the 3rd tool down from the top, in
your tools bar. You may have to click and hold the
Lasso tool down, until menu pops up with more options, then choose "Polygonal Lasso Tool"
You will use this tool to outline a triangular selection of your photograph.
Start by clicking in one of the corners of your photograph. Use the rulers to help make sure you are aligned with the actual corner.
Then, move your mouse to the adjacent corner and click again. (Again, check the measurement on the ruler to ensure that you are clicking on the actual corner)
Then, move your mouse across the center of your photograph to the corner diagonally across from your last corner, click again. (Use ruler!)
Finally, move your mouse back to your original corner and click where you started.
If you messed up, hit Command D to deselect your selection and start over.
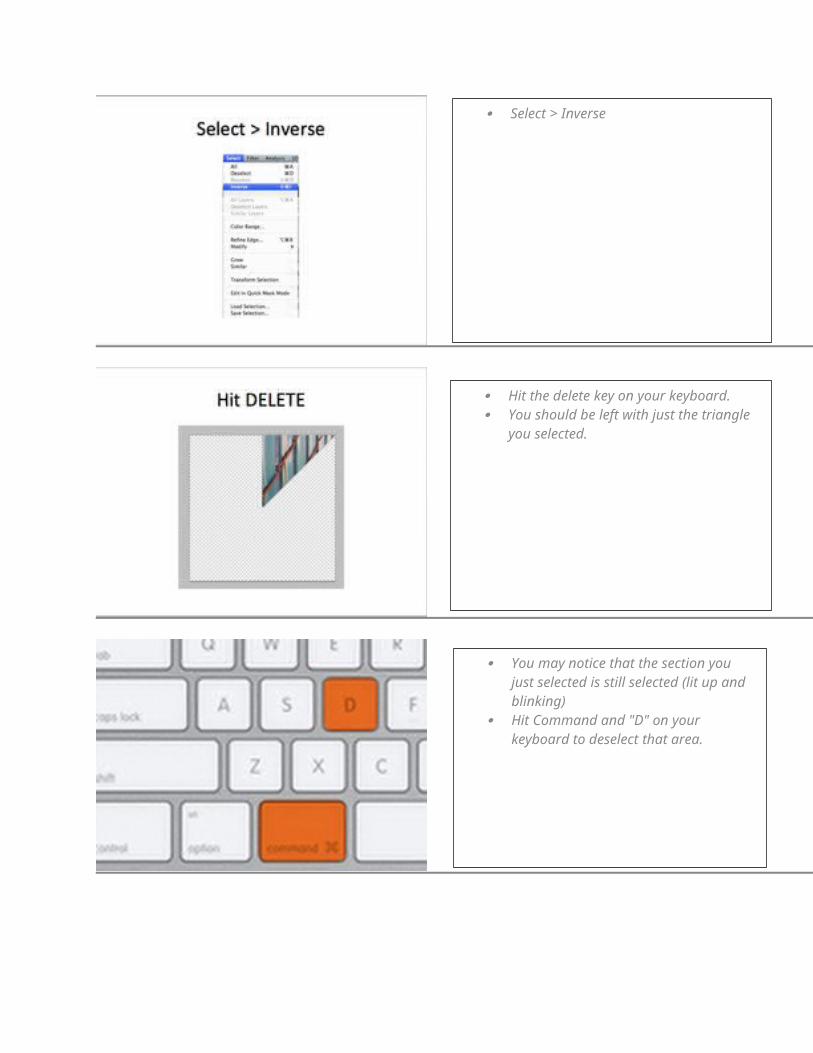
Select > Inverse
Hit the delete key on your keyboard. You should be left with just the triangle
you selected.
You may notice that the section you just selected is still selected (lit up and blinking)
Hit Command and "D" on your keyboard to deselect that area.

Hit Command J on your keyboard to duplicate your layer.
Edit > Transform > Flip Horizontal
Select your move tool. It is the first one at the top of your tools bar.
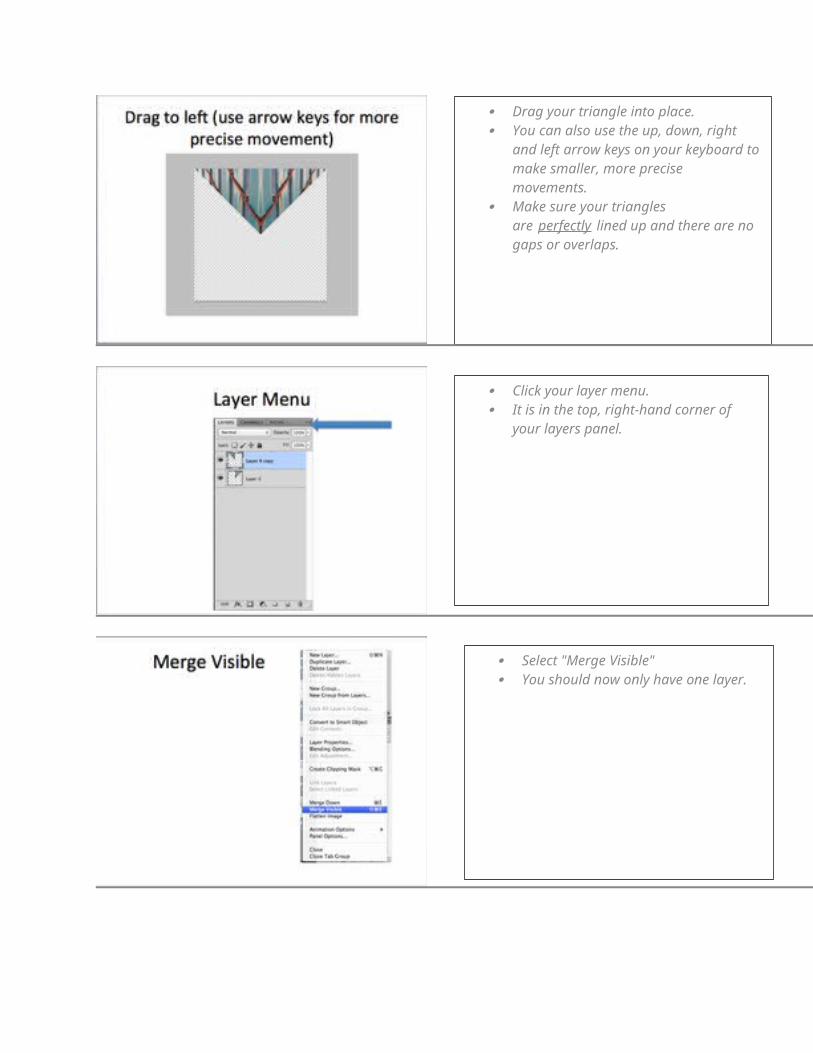
Drag your triangle into place. You can also use the up, down, right
and left arrow keys on your keyboard to make smaller, more precise movements.
Make sure your triangles are perfectly lined up and there are no gaps or overlaps.
Click your layer menu. It is in the top, right-hand corner of your
layers panel.
Select "Merge Visible" You should now only have one layer.
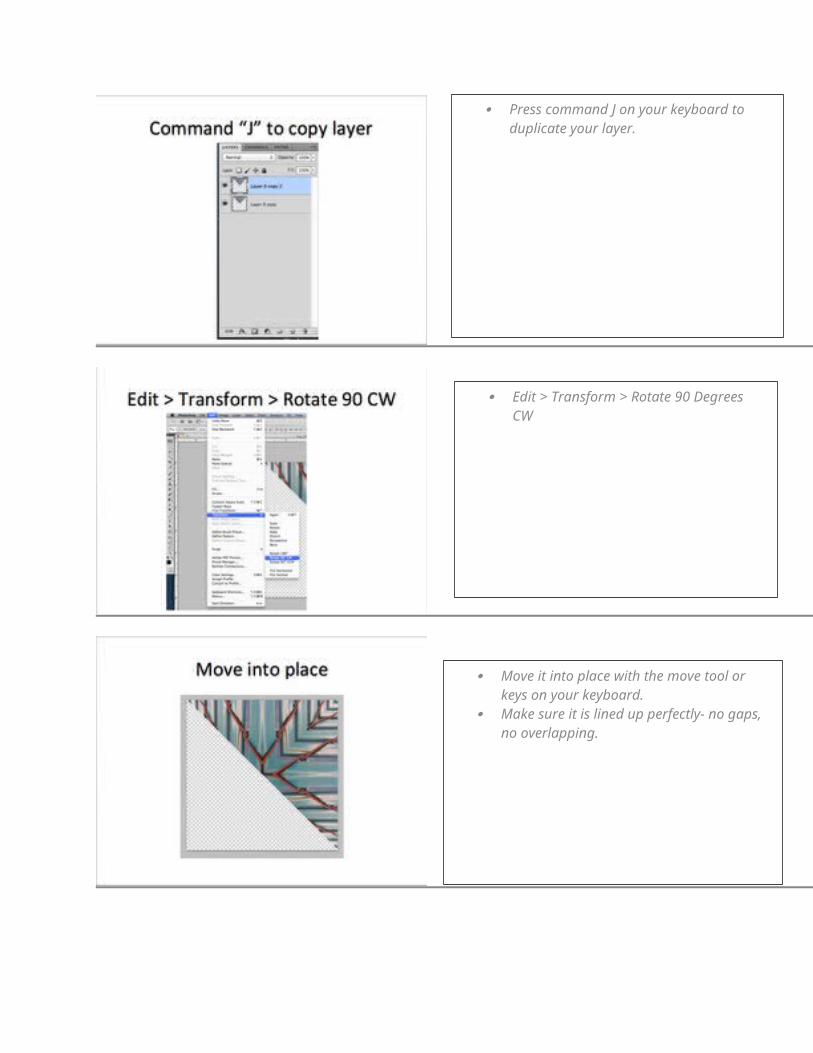
Press command J on your keyboard to duplicate your layer.
Edit > Transform > Rotate 90 Degrees CW
Move it into place with the move tool or keys on your keyboard.
Make sure it is lined up perfectly- no gaps, no overlapping.

Go to your layer menu again. Choose "Merge Visible" again.
Hit "command J" on your keyboard to duplicate your layer.
Edit > Transform > Rotate 180 Degrees
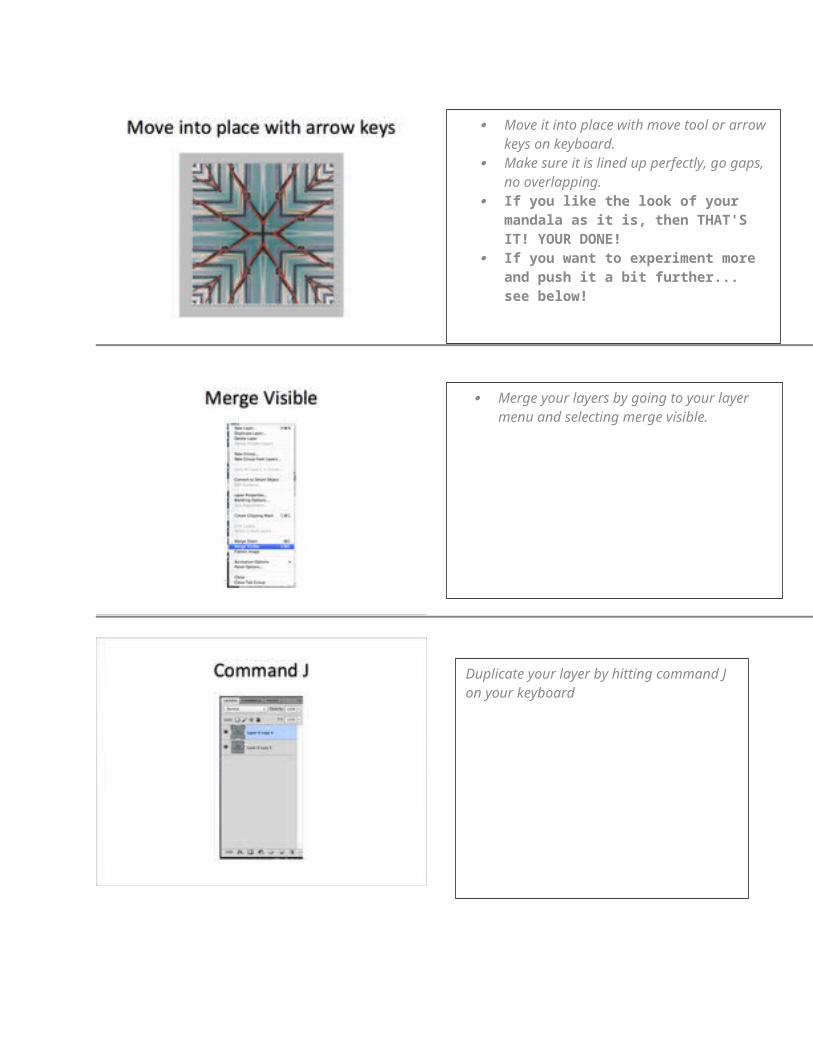
Move it into place with move tool or arrow keys on keyboard.
Make sure it is lined up perfectly, go gaps, no overlapping.
If you like the look of your mandala as it is, then THAT'S IT! YOUR DONE!
If you want to experiment more and push it a bit further... see below!
Merge your layers by going to your layer menu and selecting merge visible.
Duplicate your layer by hitting command J on your keyboard
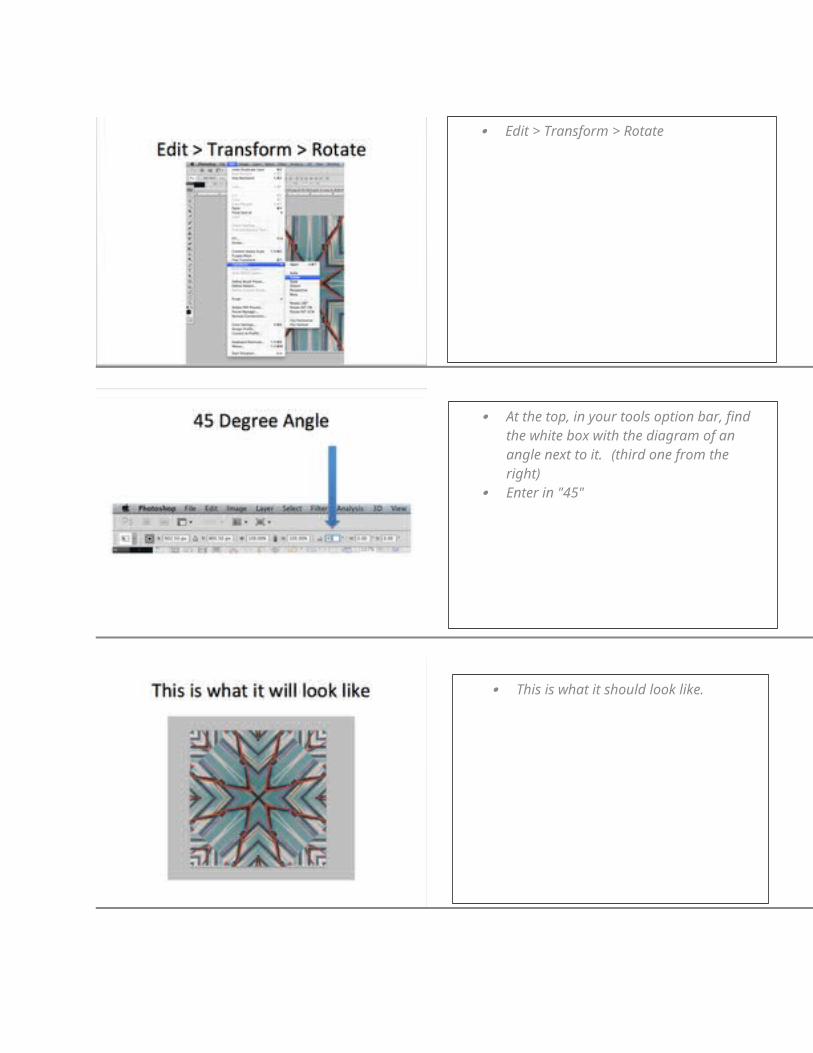
Edit > Transform > Rotate
At the top, in your tools option bar, find the white box with the diagram of an angle next to it. (third one from the right)
Enter in "45"
This is what it should look like.

Now find your "Layer Blending Modes" at the top, left-hand corner of your layers panel.
Look through the different blending modes and select one that you like, its up to you!
If you have funky edges (white and gray checkers showing), crop it off so that its nice and even!
Choose your crop tool CHANGE THE HEIGHT AND
WIDTH TO SAY 6 IN Click on your image and drag out
your crop box, cropping out the uneven edges.
Commit to save (click check mark button at top)
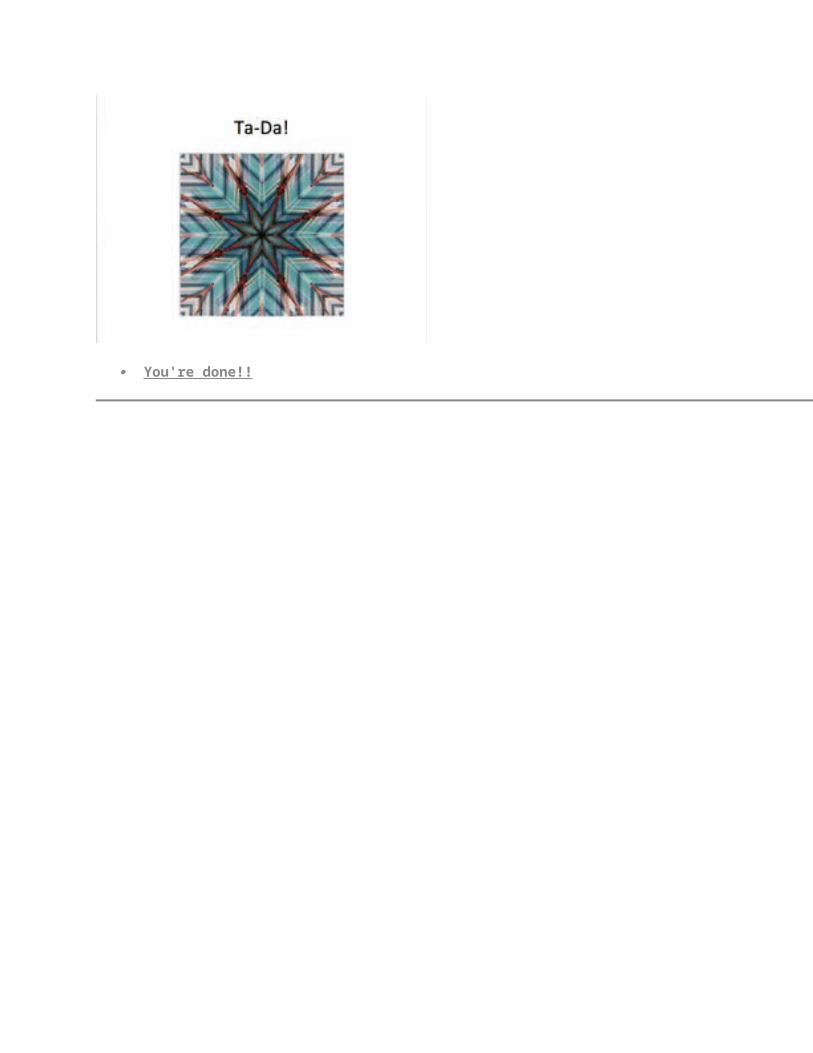
You're done!!


![Rebranding Sanskrit An occidental perspective Sanskrit [Compatibility Mode].pdf‐Rebranding Sanskrit and promoting its literatureRebranding Sanskrit and promoting its literature 2](https://img.pdfslide.us/doc/110x75/5e6dbf5916f1b9735b64f6ac/rebranding-sanskrit-an-occidental-sanskrit-compatibility-modepdf-arebranding.jpg)