Embed Size (px)
Citation preview
A Recipe for CI usingOpenStack Private Cloud Part II: The 7-Step Recipe
Bich Le & Madhura Maskasky
Agenda• The product being integrated and tested • CI Architecture • Flow • Exploiting OpenStack features
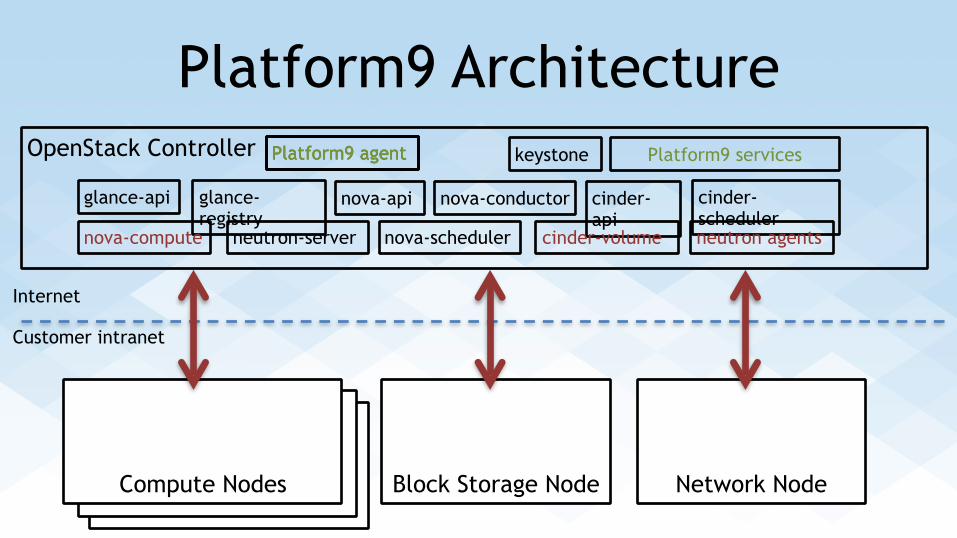
OpenStack Controller
Platform9 Architecture
nova-scheduler
nova-api nova-conductor cinder-api
cinder-scheduler
glance-registry
glance-api
neutron-server
Compute Nodes
Platform9 agent
Block Storage Node
Platform9 agent
Network Node
Platform9 agent
Internet
Customer intranet
nova-compute cinder-volume neutron agents
Platform9 serviceskeystone
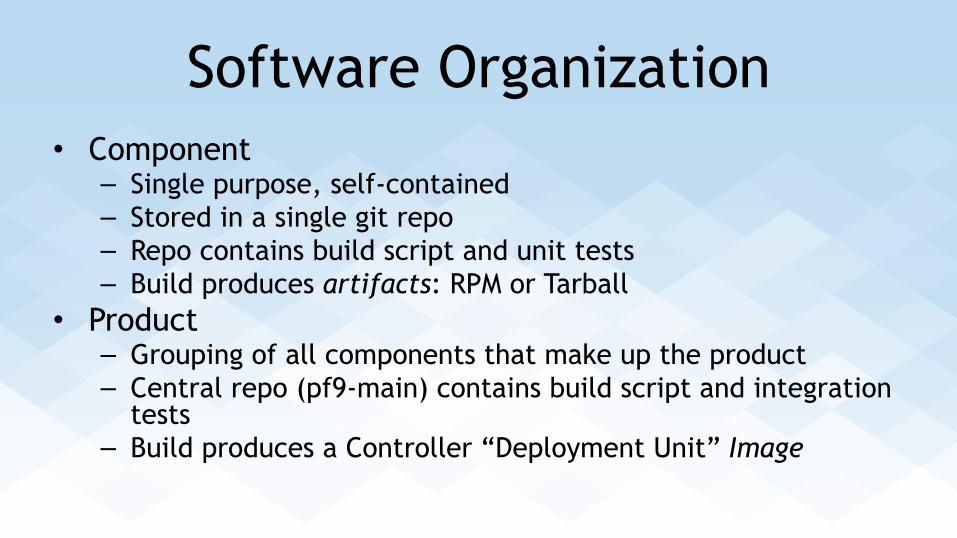
Software Organization• Component
– Single purpose, self-contained – Stored in a single git repo – Repo contains build script and unit tests – Build produces artifacts: RPM or Tarball
• Product – Grouping of all components that make up the product – Central repo (pf9-main) contains build script and integration
tests – Build produces a Controller “Deployment Unit” Image
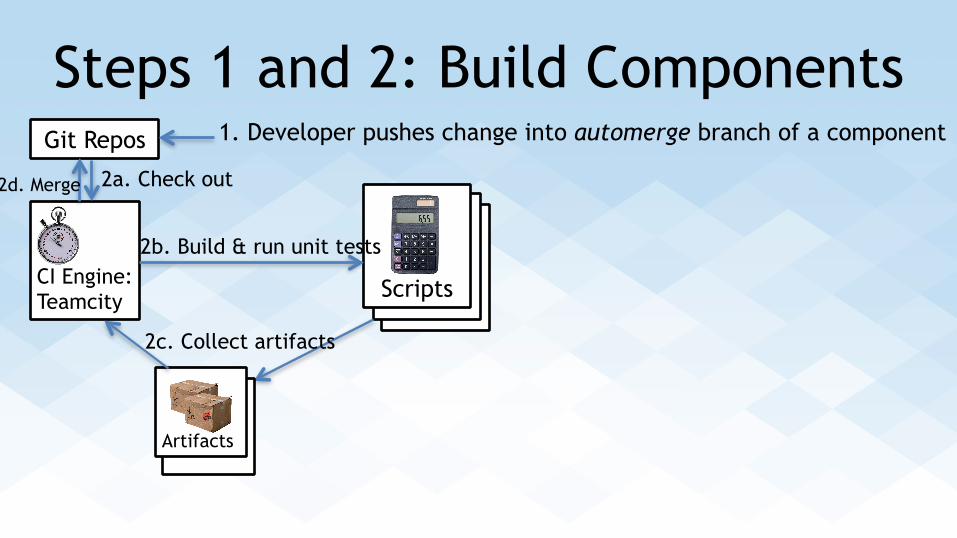
Steps 1 and 2: Build Components
CI Engine: Teamcity
Git Repos
2a. Check out
Scripts
2b. Build & run unit tests
Artifacts
2c. Collect artifacts
2d. Merge
1. Developer pushes change into automerge branch of a component
Flow summary for components1. Developer pushes change to “automerge”
branch of a component’s git repo 2. Teamcity detects change, checks out code,
builds , runs unit tests. If unit tests pass, archive artifacts, mark build as successful, and merge changes to master branch
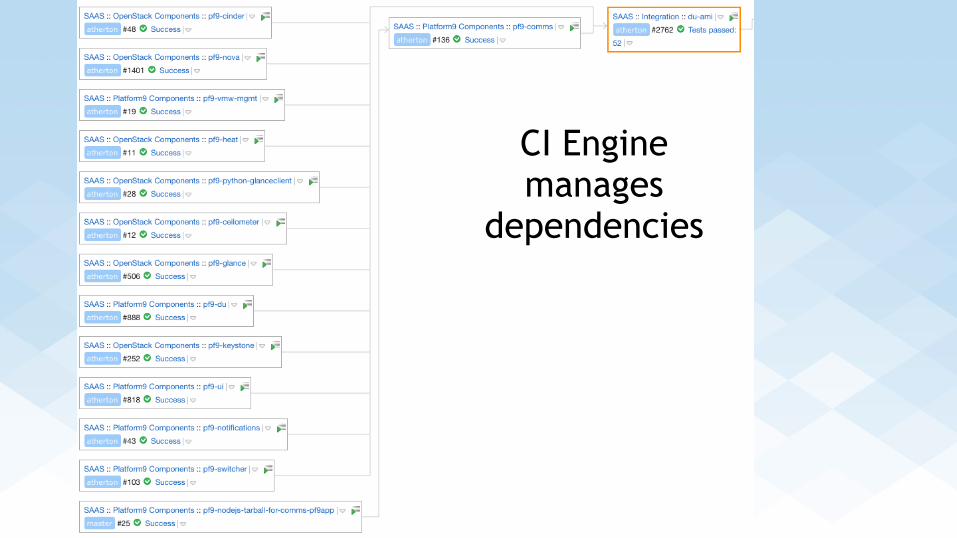
CI Engine manages
dependencies
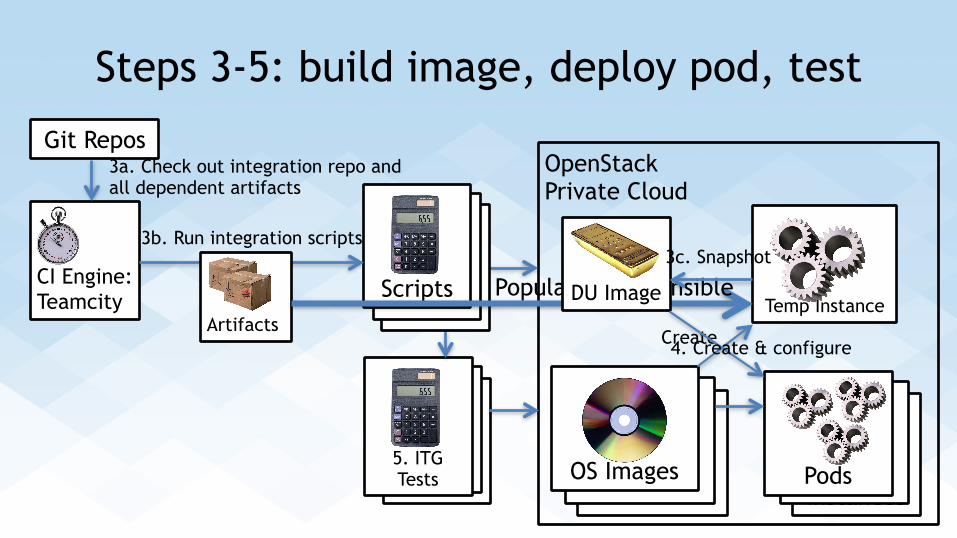
Steps 3-5: build image, deploy pod, test
CI Engine: Teamcity
Git ReposOpenStack Private Cloud
OS Images5. ITG Tests
3a. Check out integration repo andall dependent artifacts
ScriptsArtifacts
3b. Run integration scripts
Temp Instance
Create
Populate using AnsibleDU Image
3c. Snapshot
Instances Pods
4. Create & configure
OpenStack Controller
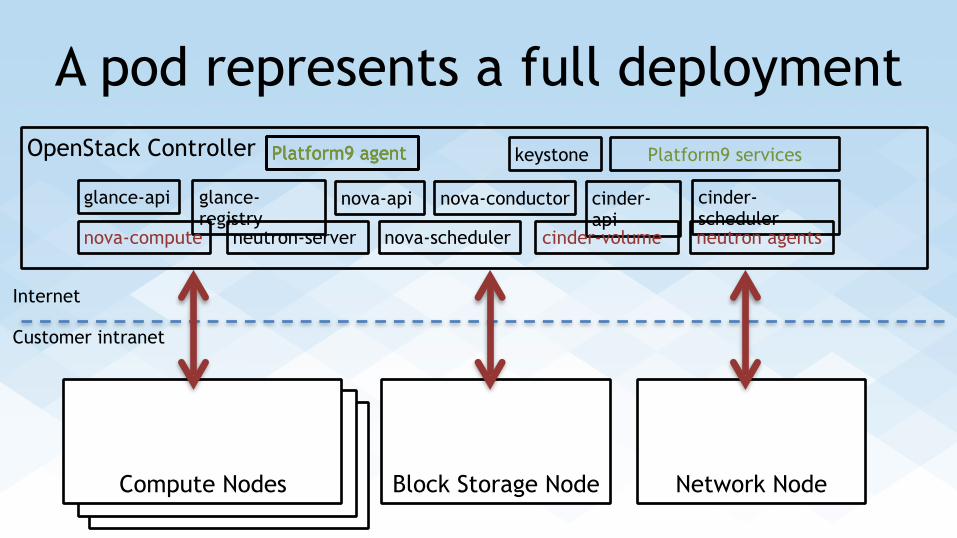
A pod represents a full deployment
nova-scheduler
nova-api nova-conductor cinder-api
cinder-scheduler
glance-registry
glance-api
neutron-server
Compute Nodes
Platform9 agent
Block Storage Node
Platform9 agent
Network Node
Platform9 agent
Internet
Customer intranet
nova-compute cinder-volume neutron agents
Platform9 serviceskeystone

Integration tests• Exercise end user product features, for e.g: – Upload images to cloud – Spawn instances – Connect instances over virtual network
• Automation – REST APIs for interacting with the cloud controller – Fabric for running ssh commands inside instances
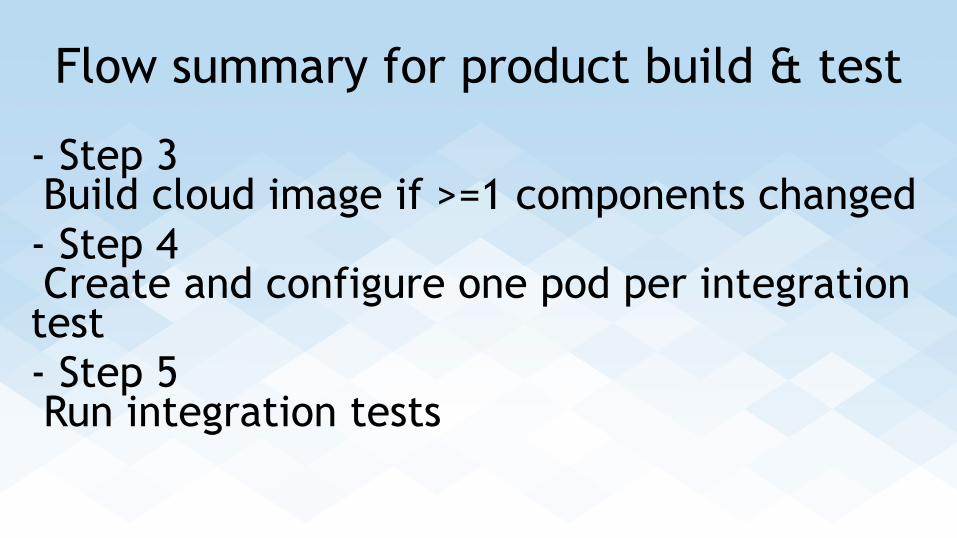
Flow summary for product build & test
- Step 3 Build cloud image if >=1 components changed - Step 4 Create and configure one pod per integration test - Step 5 Run integration tests
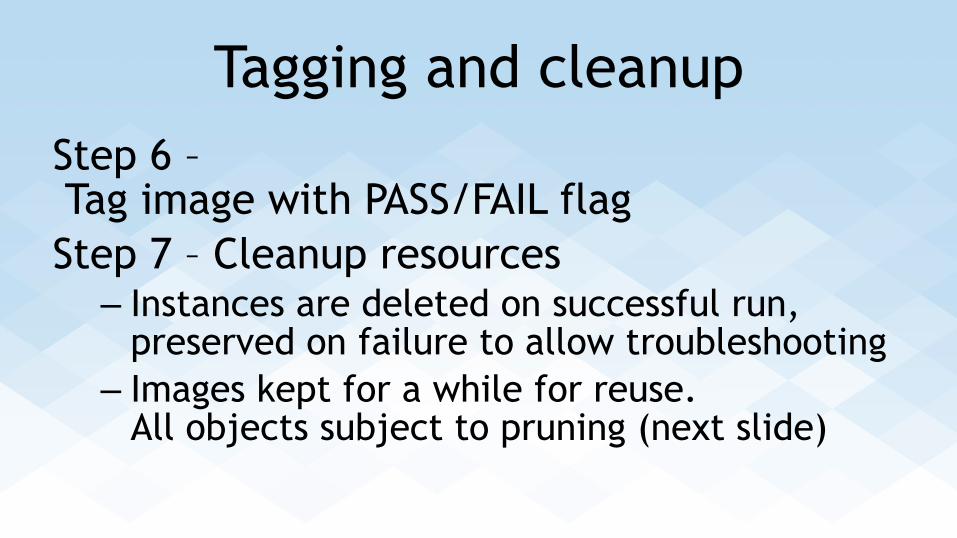
Tagging and cleanupStep 6 – Tag image with PASS/FAIL flag Step 7 – Cleanup resources – Instances are deleted on successful run,
preserved on failure to allow troubleshooting – Images kept for a while for reuse.
All objects subject to pruning (next slide)
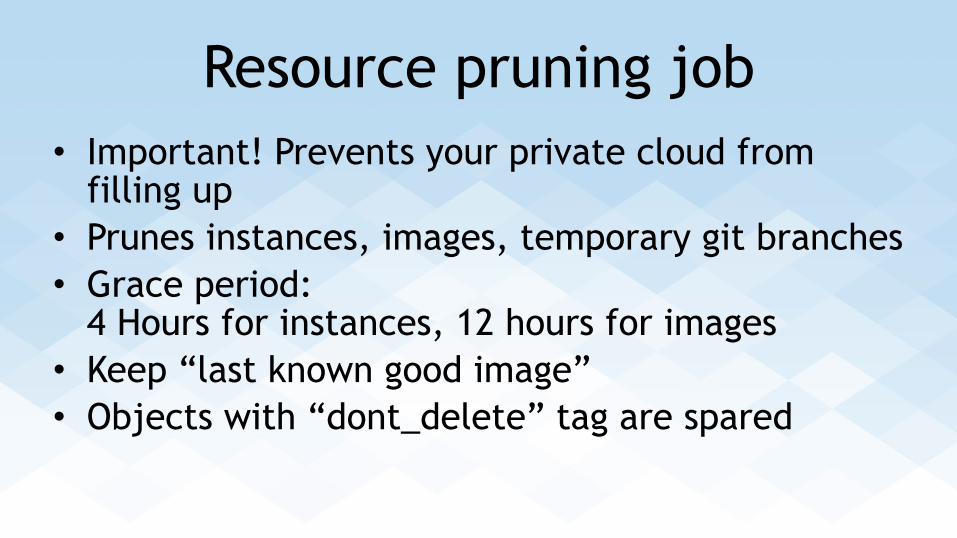
Resource pruning job• Important! Prevents your private cloud from
filling up • Prunes instances, images, temporary git branches • Grace period:
4 Hours for instances, 12 hours for images • Keep “last known good image” • Objects with “dont_delete” tag are spared
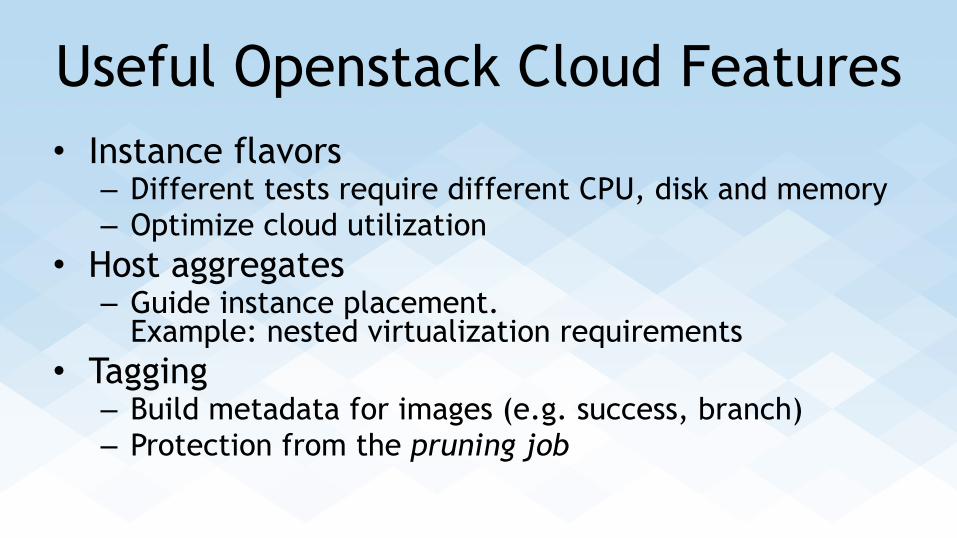
Useful Openstack Cloud Features• Instance flavors
– Different tests require different CPU, disk and memory – Optimize cloud utilization
• Host aggregates – Guide instance placement.
Example: nested virtualization requirements • Tagging
– Build metadata for images (e.g. success, branch) – Protection from the pruning job
Thanks!Questions?
Backup Slides
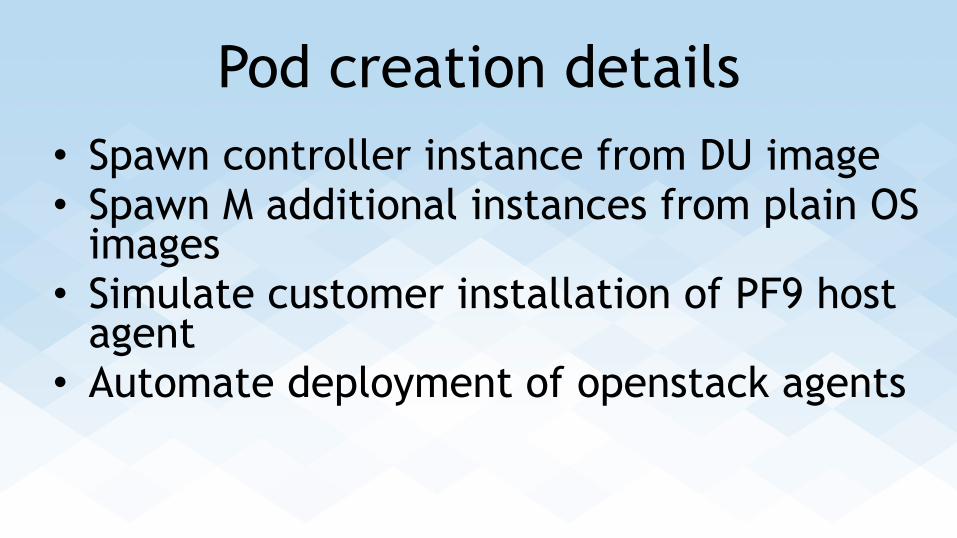
Pod creation details• Spawn controller instance from DU image • Spawn M additional instances from plain OS
images • Simulate customer installation of PF9 host
agent • Automate deployment of openstack agents