Embed Size (px)
Citation preview

IBM Watson Virtual Agent – Node.js
Cognitive Solutions Application Development
Paul Godby IBM CSP & ISV Ecosystems Duration: 45 minutes Updated: February 28, 2017
Page 2 of 19
IBM Watson Virtual Agent is a set of preconfigured cognitive components based on the IBM Watson Conversation service. By configuring the virtual agent with your company's information, you can quickly implement an automated chat bot that enables your customers to achieve their goals.
Watson Virtual Agent provides the following components:
A tool to configure how you want the bot to respond to various types of requests. A set of intents representing actions a customer might request (such as "Pay my bill" or "Tell
me your business hours"). A natural-language model trained to identify intents based on customer input. A conversation dialog flow that can handle some complex intents by prompting for additional
information, generate replies, and trigger events to be handled by your application. If the predefined dialog does not satisfy your needs, you can implement your own custom dialog using the Watson Conversation service tools.
A chat widget you can embed in your web page A SDK you can use to develop a custom chat widget. A set of APIs you can use to integrate your application with the virtual agent.
Benefits of using the IBM Watson Virtual Agent include:
Reduce support cost: minimize your dependency on higher cost channels by letting Watson handle customer interactions.
Improve customer satisfaction: Personalize your customer interactions and help them take the action they need – instantly.
Resolve customer concerns: Increase First Contact Resolution by solving the most common customer issues on the first touch.
Learn how to provision a Watson Virtual Agent trial instance
Learn how to explore the configuration and analytics interfaces
Learn how to modify the predefined intents used by the trial
Learn how to embed the chat widget into an external application
Before you start the exercises in this guide, you will need to complete the following prerequisite tasks:
Guide – Getting Started with the IBM Watson Node.js SDK
Overview
Objectives
Prerequisites
Page 3 of 19
Watson Virtual Agent is a new way to provide automated services to your customers. It offers a
cognitive, conversational self-service experience that can provide answers and take action. Watson
Virtual Agent is a software-as-a-service (SaaS) application and includes a free 30-day trial.
1. In a web browser, navigate to the following URL:
http://ibm.biz/watsonvirtualagent
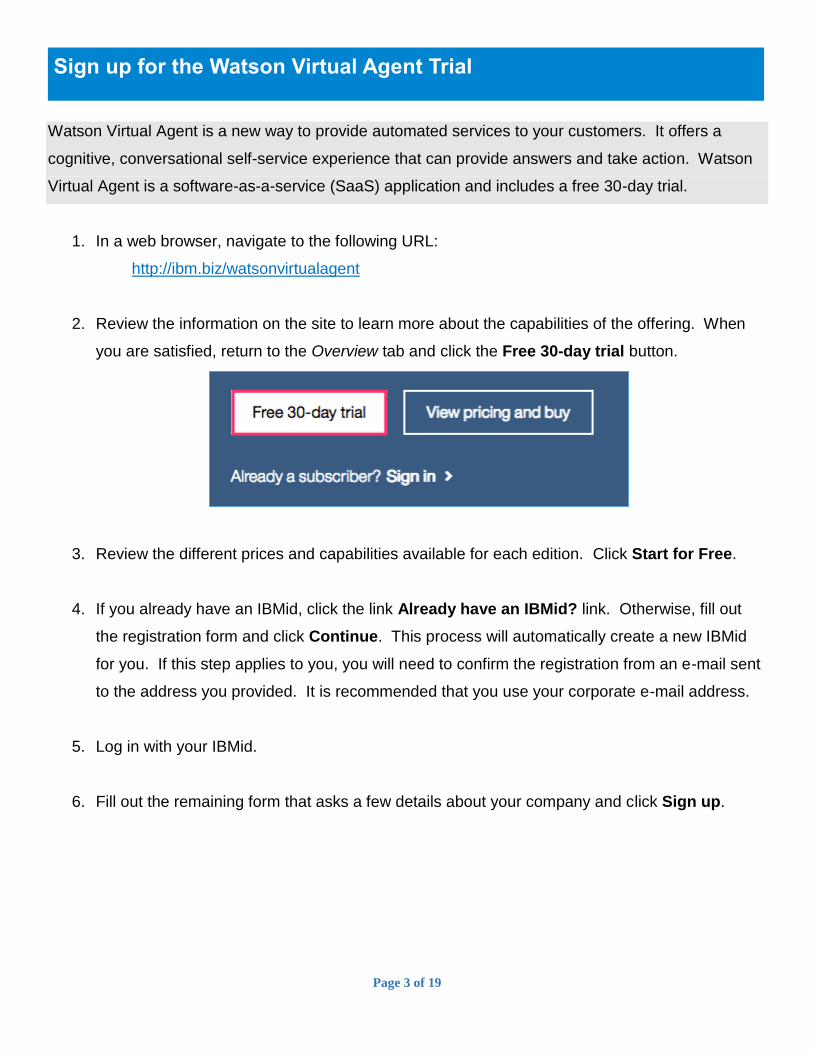
2. Review the information on the site to learn more about the capabilities of the offering. When
you are satisfied, return to the Overview tab and click the Free 30-day trial button.
3. Review the different prices and capabilities available for each edition. Click Start for Free.
4. If you already have an IBMid, click the link Already have an IBMid? link. Otherwise, fill out
the registration form and click Continue. This process will automatically create a new IBMid
for you. If this step applies to you, you will need to confirm the registration from an e-mail sent
to the address you provided. It is recommended that you use your corporate e-mail address.
5. Log in with your IBMid.
6. Fill out the remaining form that asks a few details about your company and click Sign up.
Sign up for the Watson Virtual Agent Trial

Page 4 of 19
7. Wait for the trial instance to be provisioned. Once this operation completes, a new Watson
Virtual Agent Trial tile will appear on your product dashboard!
8. Congratulations! Your 30-day trial is now ready to use!
An intent is the goal or purpose of a user’s input, such as a query for information or a request to
perform an action. To configure the bot, you must decide which customer intents you want your
virtual agent to handle, and how to respond to each intent.
(Note: Any change you make to the trial instance will persist between sessions! So, if you are using the trial to perform client demos, you will need to manually reset (or back off) the changes you made before your next demo. You’ve been warned!)
9. Click the Launch button on the Watson Virtual Agent Trial tile. This will open a new browser
tab and launch the Home page for the Virtual Agent trial.
10. Review the simple steps for getting started.
Explore the Watson Virtual Agent trial intents
Page 5 of 19
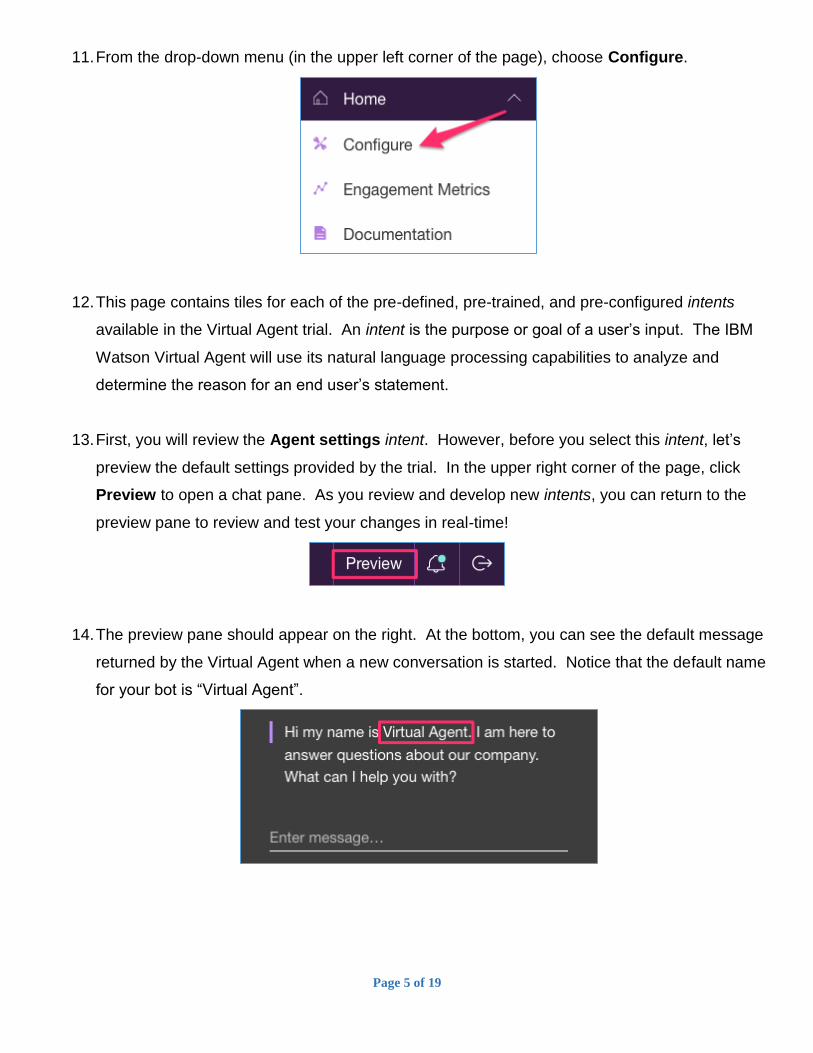
11. From the drop-down menu (in the upper left corner of the page), choose Configure.
12. This page contains tiles for each of the pre-defined, pre-trained, and pre-configured intents
available in the Virtual Agent trial. An intent is the purpose or goal of a user’s input. The IBM
Watson Virtual Agent will use its natural language processing capabilities to analyze and
determine the reason for an end user’s statement.
13. First, you will review the Agent settings intent. However, before you select this intent, let’s
preview the default settings provided by the trial. In the upper right corner of the page, click
Preview to open a chat pane. As you review and develop new intents, you can return to the
preview pane to review and test your changes in real-time!
14. The preview pane should appear on the right. At the bottom, you can see the default message
returned by the Virtual Agent when a new conversation is started. Notice that the default name
for your bot is “Virtual Agent”.
Page 6 of 19
15. Let’s change this! Click Preview again to close the chat pane. On the left, click the Agent
settings tile. As you can see from the description, this intent will provide the agent name and
greeting used to address your end users at the beginning of the conversation.
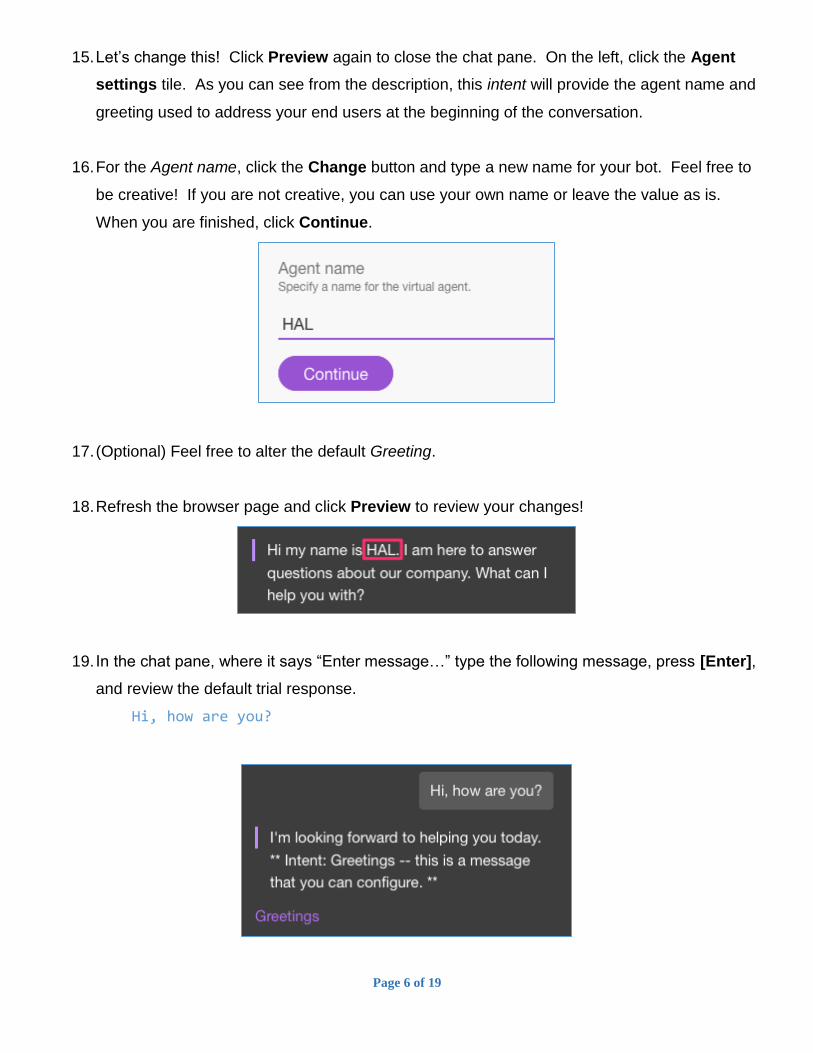
16. For the Agent name, click the Change button and type a new name for your bot. Feel free to
be creative! If you are not creative, you can use your own name or leave the value as is.
When you are finished, click Continue.
17. (Optional) Feel free to alter the default Greeting.
18. Refresh the browser page and click Preview to review your changes!
19. In the chat pane, where it says “Enter message…” type the following message, press [Enter],
and review the default trial response.
Hi, how are you?
Page 7 of 19
20. As you can see, this pre-defined intent provided by the trial returns a rather generic response
and a disclaimer that this is a message you can configure. It also provides information about
the associated intent that was used to identify the appropriate response. Click Greetings to
be taken to this intent.
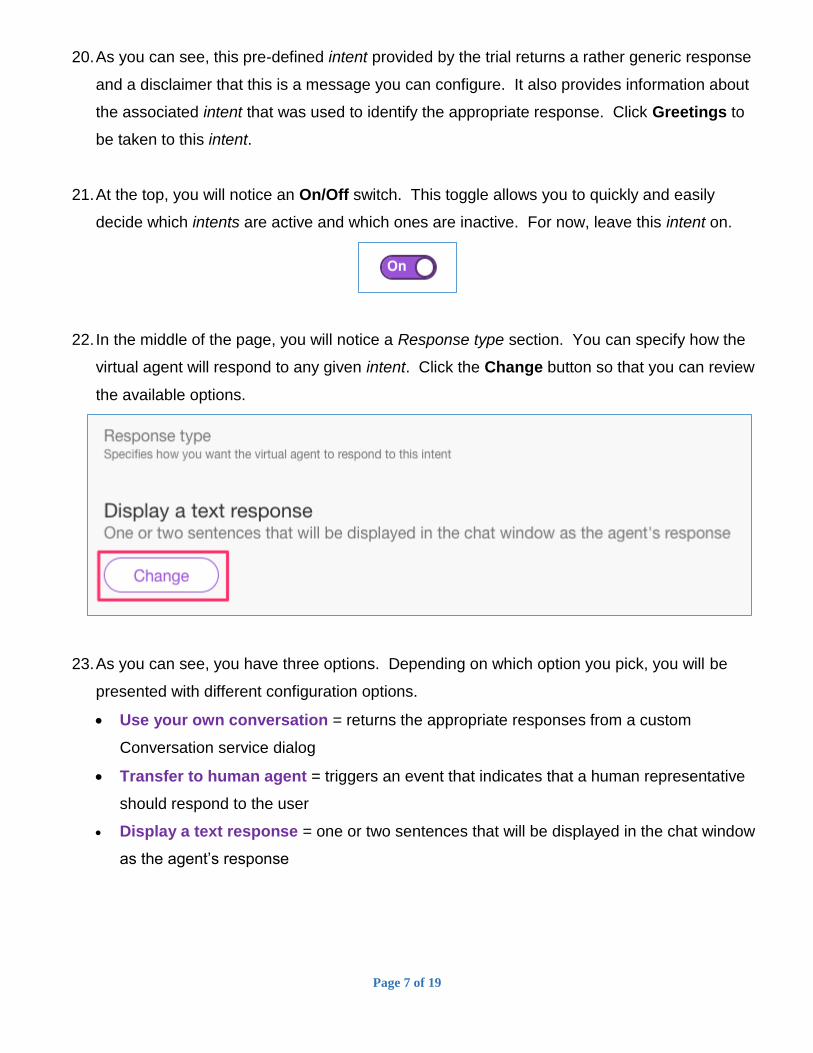
21. At the top, you will notice an On/Off switch. This toggle allows you to quickly and easily
decide which intents are active and which ones are inactive. For now, leave this intent on.
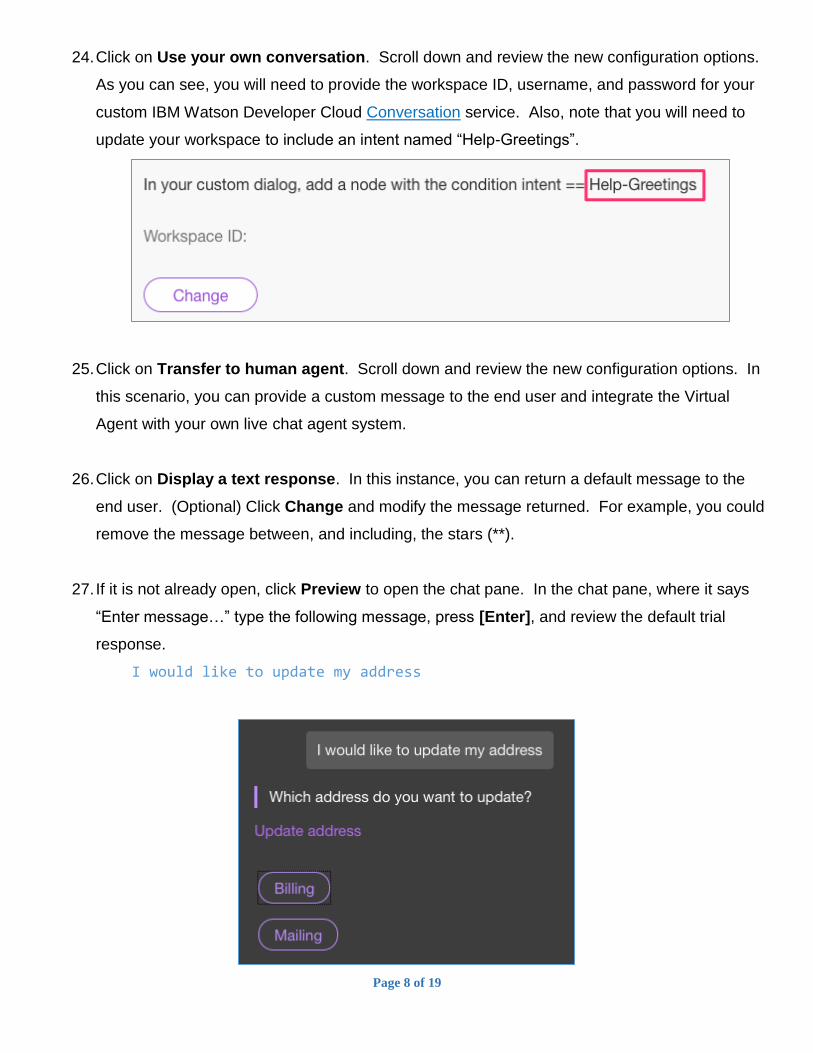
22. In the middle of the page, you will notice a Response type section. You can specify how the
virtual agent will respond to any given intent. Click the Change button so that you can review
the available options.
23. As you can see, you have three options. Depending on which option you pick, you will be
presented with different configuration options.
Use your own conversation = returns the appropriate responses from a custom
Conversation service dialog
Transfer to human agent = triggers an event that indicates that a human representative
should respond to the user
Display a text response = one or two sentences that will be displayed in the chat window
as the agent’s response
Page 8 of 19
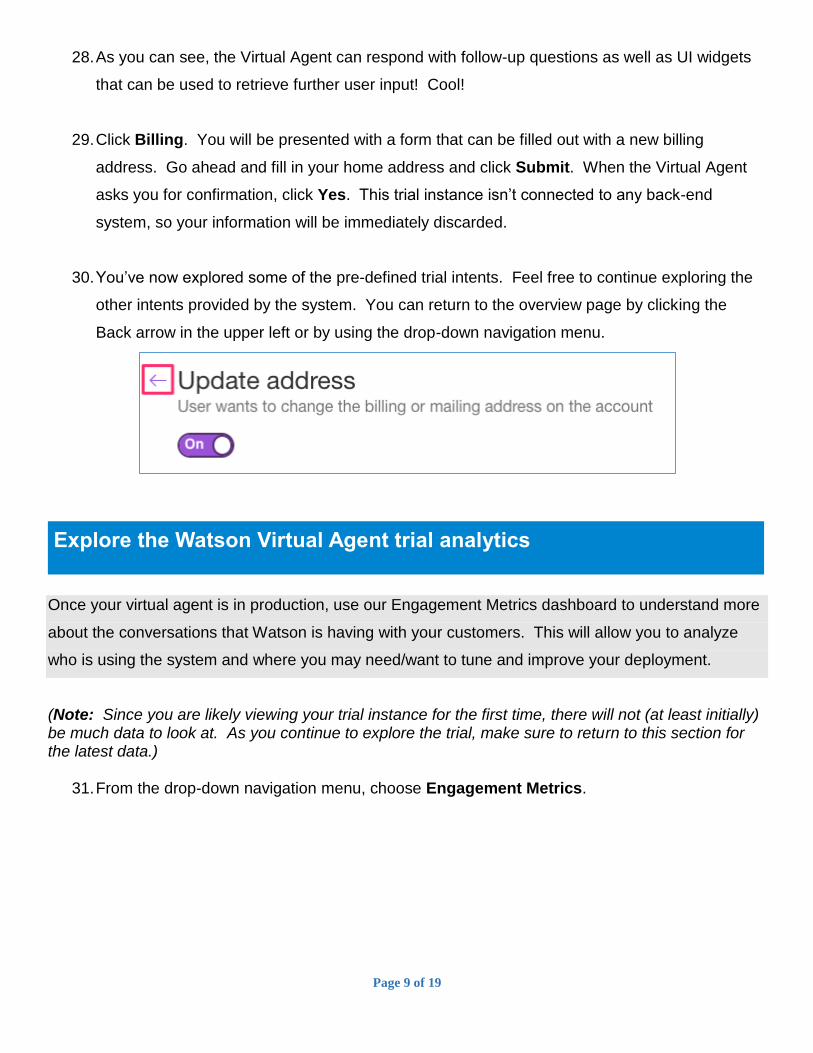
24. Click on Use your own conversation. Scroll down and review the new configuration options.
As you can see, you will need to provide the workspace ID, username, and password for your
custom IBM Watson Developer Cloud Conversation service. Also, note that you will need to
update your workspace to include an intent named “Help-Greetings”.
25. Click on Transfer to human agent. Scroll down and review the new configuration options. In
this scenario, you can provide a custom message to the end user and integrate the Virtual
Agent with your own live chat agent system.
26. Click on Display a text response. In this instance, you can return a default message to the
end user. (Optional) Click Change and modify the message returned. For example, you could
remove the message between, and including, the stars (**).
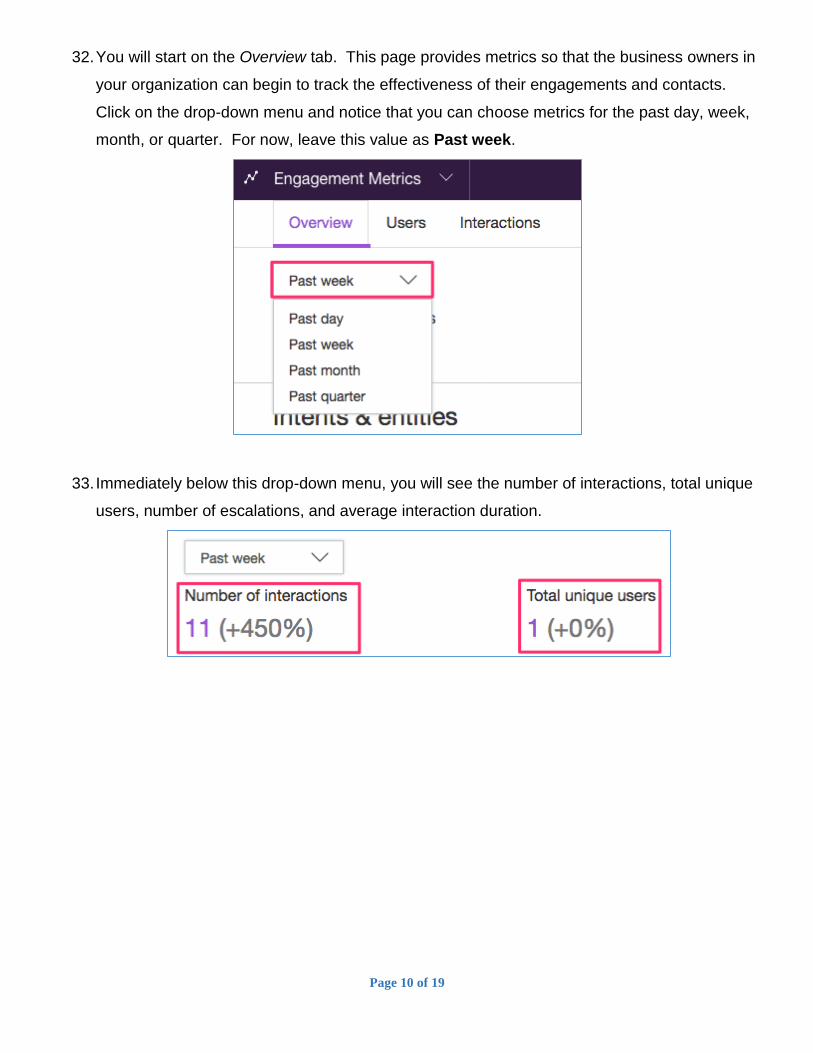
27. If it is not already open, click Preview to open the chat pane. In the chat pane, where it says
“Enter message…” type the following message, press [Enter], and review the default trial
response.
I would like to update my address
Page 9 of 19
28. As you can see, the Virtual Agent can respond with follow-up questions as well as UI widgets
that can be used to retrieve further user input! Cool!
29. Click Billing. You will be presented with a form that can be filled out with a new billing
address. Go ahead and fill in your home address and click Submit. When the Virtual Agent
asks you for confirmation, click Yes. This trial instance isn’t connected to any back-end
system, so your information will be immediately discarded.
30. You’ve now explored some of the pre-defined trial intents. Feel free to continue exploring the
other intents provided by the system. You can return to the overview page by clicking the
Back arrow in the upper left or by using the drop-down navigation menu.
Once your virtual agent is in production, use our Engagement Metrics dashboard to understand more
about the conversations that Watson is having with your customers. This will allow you to analyze
who is using the system and where you may need/want to tune and improve your deployment.
(Note: Since you are likely viewing your trial instance for the first time, there will not (at least initially) be much data to look at. As you continue to explore the trial, make sure to return to this section for the latest data.)
31. From the drop-down navigation menu, choose Engagement Metrics.
Explore the Watson Virtual Agent trial analytics
Page 10 of 19
32. You will start on the Overview tab. This page provides metrics so that the business owners in
your organization can begin to track the effectiveness of their engagements and contacts.
Click on the drop-down menu and notice that you can choose metrics for the past day, week,
month, or quarter. For now, leave this value as Past week.
33. Immediately below this drop-down menu, you will see the number of interactions, total unique
users, number of escalations, and average interaction duration.

Page 11 of 19
34. Moving down, you will find the Intents & entities section. In this section, you will find a
breakdown of which intents and entities are being used in interactions. This will help you
determine what your end users are asking about the most and to ensure adequate resources
are being devoted to those areas that need it the most.
35. Moving down, you will find the Topics section. This chart provides the percentage of all
interactions that contain words and phrases frequently used with your virtual agent.
36. Moving down, review the Interactions and Escalations sections for more metrics.
37. Scroll back up to the top and choose the Users tab.
Page 12 of 19
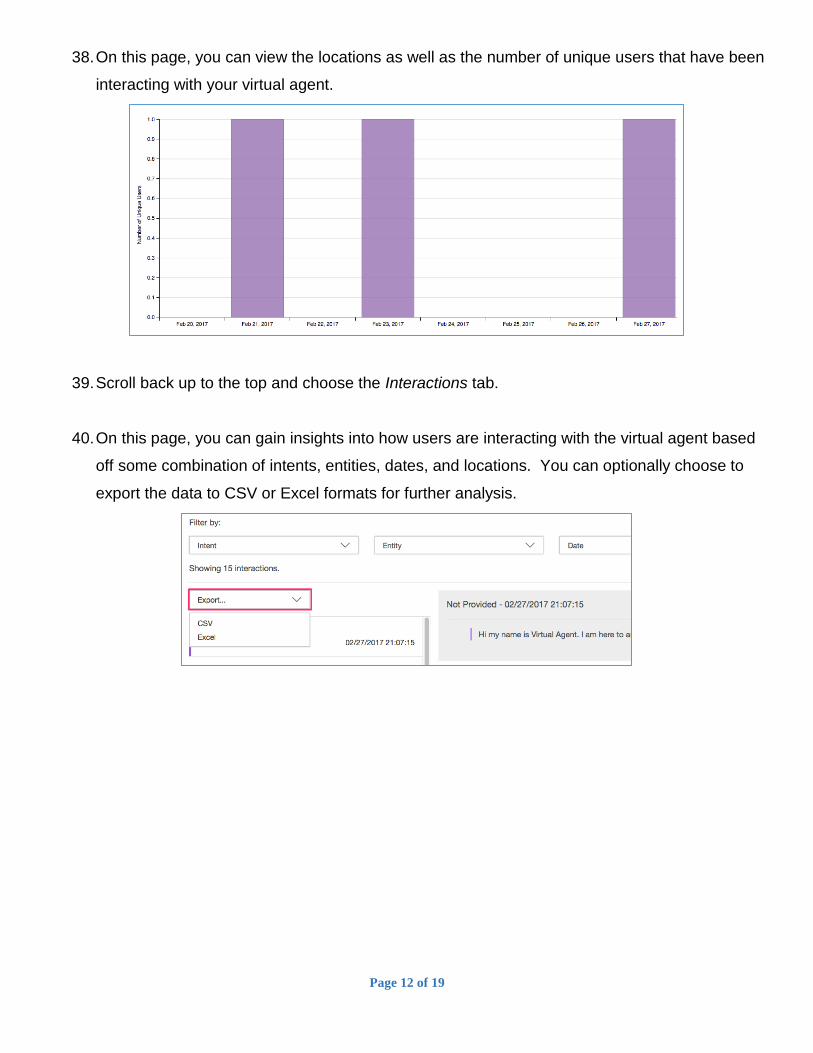
38. On this page, you can view the locations as well as the number of unique users that have been
interacting with your virtual agent.
39. Scroll back up to the top and choose the Interactions tab.
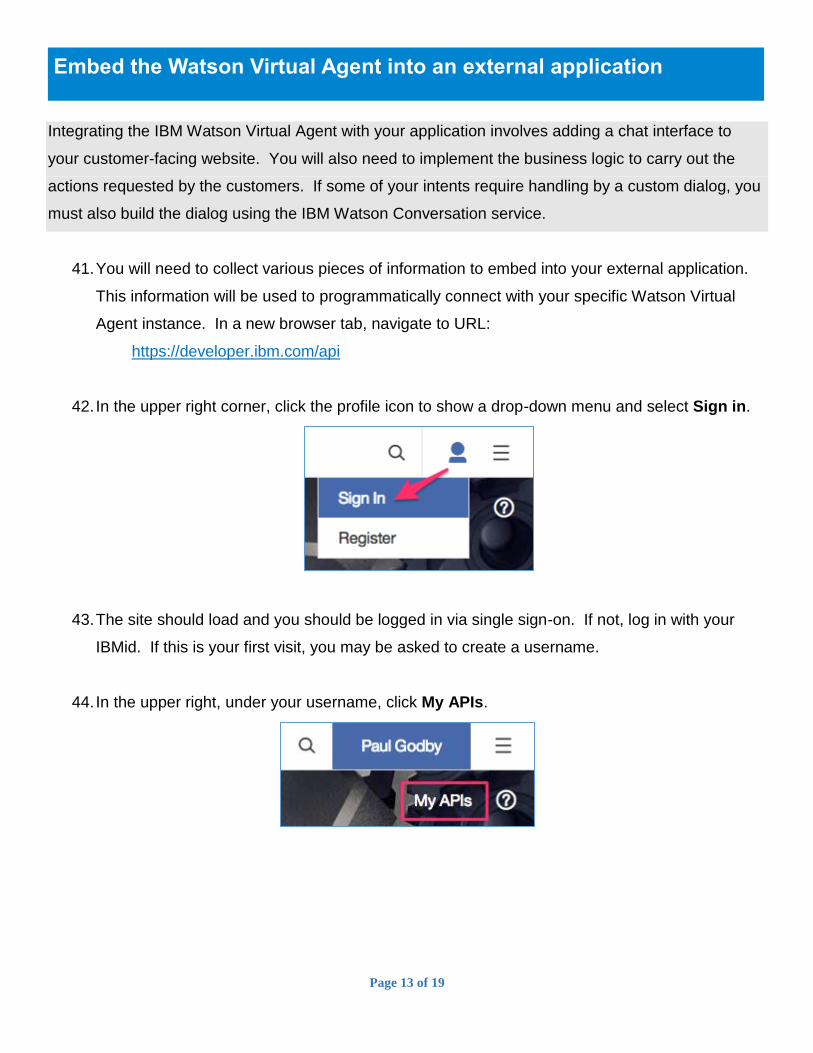
40. On this page, you can gain insights into how users are interacting with the virtual agent based
off some combination of intents, entities, dates, and locations. You can optionally choose to
export the data to CSV or Excel formats for further analysis.
Page 13 of 19
Integrating the IBM Watson Virtual Agent with your application involves adding a chat interface to
your customer-facing website. You will also need to implement the business logic to carry out the
actions requested by the customers. If some of your intents require handling by a custom dialog, you
must also build the dialog using the IBM Watson Conversation service.
41. You will need to collect various pieces of information to embed into your external application.
This information will be used to programmatically connect with your specific Watson Virtual
Agent instance. In a new browser tab, navigate to URL:
https://developer.ibm.com/api
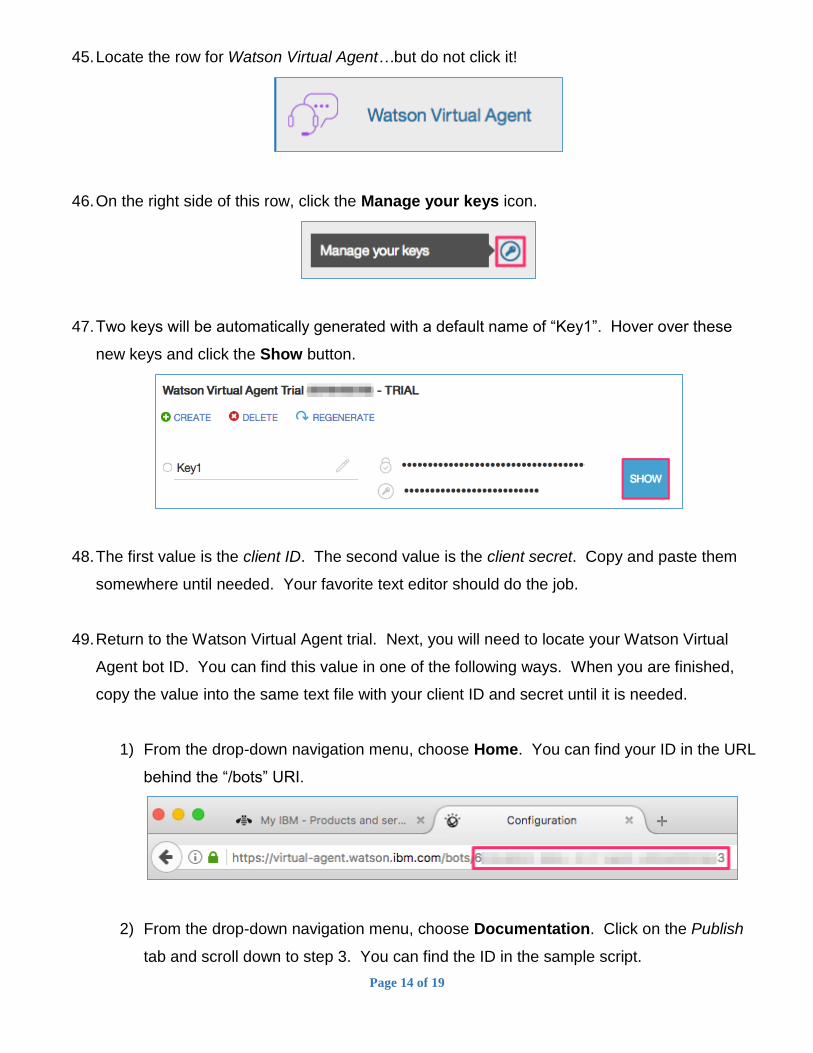
42. In the upper right corner, click the profile icon to show a drop-down menu and select Sign in.
43. The site should load and you should be logged in via single sign-on. If not, log in with your
IBMid. If this is your first visit, you may be asked to create a username.
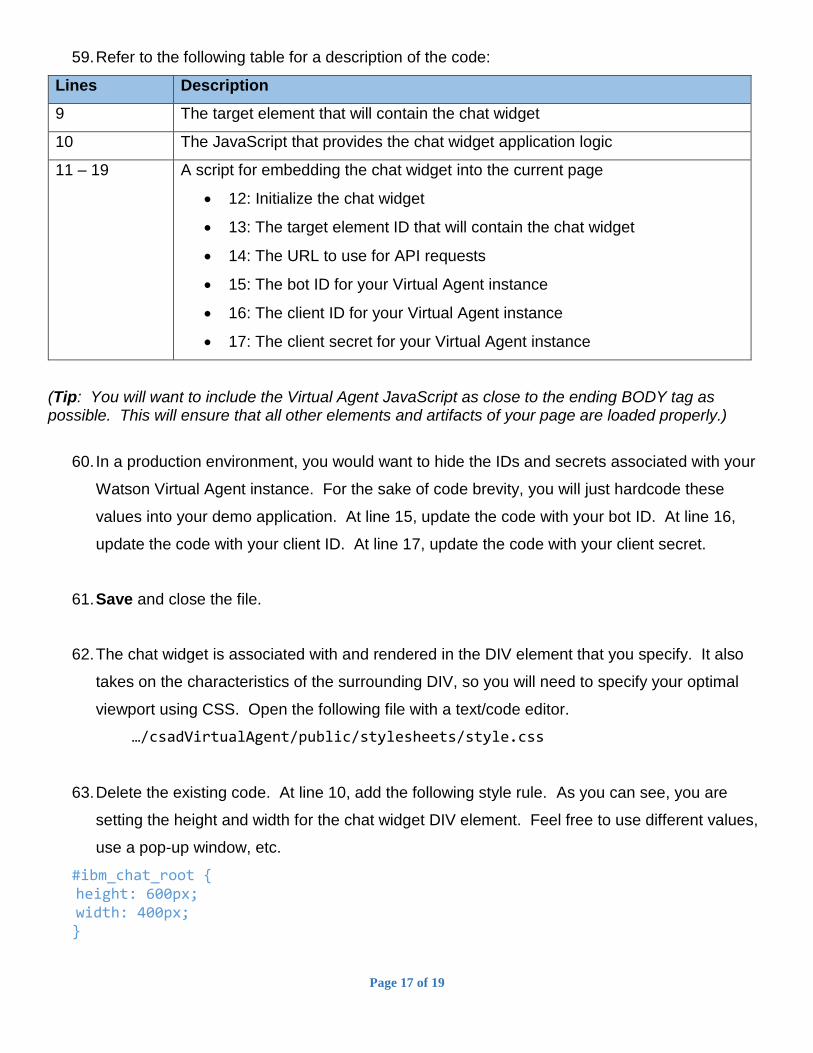
44. In the upper right, under your username, click My APIs.
Embed the Watson Virtual Agent into an external application
Page 14 of 19
45. Locate the row for Watson Virtual Agent…but do not click it!
46. On the right side of this row, click the Manage your keys icon.
47. Two keys will be automatically generated with a default name of “Key1”. Hover over these
new keys and click the Show button.
48. The first value is the client ID. The second value is the client secret. Copy and paste them
somewhere until needed. Your favorite text editor should do the job.
49. Return to the Watson Virtual Agent trial. Next, you will need to locate your Watson Virtual
Agent bot ID. You can find this value in one of the following ways. When you are finished,
copy the value into the same text file with your client ID and secret until it is needed.
1) From the drop-down navigation menu, choose Home. You can find your ID in the URL
behind the “/bots” URI.
2) From the drop-down navigation menu, choose Documentation. Click on the Publish
tab and scroll down to step 3. You can find the ID in the sample script.

Page 15 of 19
50. Now that you have the client ID, client secret, and bot ID, you are ready to embed the Watson
Virtual Agent into an external application. If you are up for it, proceed to the next section!
Node.js is an open-source, cross-platform runtime environment for developing server-side web
applications using JavaScript. Node.js has an event-driven architecture capable of asynchronous I/O
utilizing callbacks.
Express is a minimal and flexible Node.js web application framework that provides a robust set of
features to develop web and mobile applications. It’s ability to facilitate rapid development of Node
based web applications makes it the de facto framework for Node.js.
51. In a terminal/command window, issue a change directory command to navigate to a top-level
directory that will contain your Node.js projects. Subsequent commands will generate a folder
for each individual Node.js project in this top-level directory.
52. Express supports a variety of view template engines. By default, Express applications will use
the Jade template engine. This engine was developed by the author of Express but it
abstracts away the HTML that most front-end developers are used to. In this demo
application, you will use the EJS view engine since it’s syntax more closely resembles
standard HTML code.
53. Enter the following commands to generate a new Express application that uses the EJS
template engine (as noted by the -e flag).
express -e csadVirtualAgent
cd ./csadVirtualAgent
54. Test the application on your local workstation with the following command(s). The install
command will install all required dependencies for the application.
npm install
npm start
Create a Node Express application

Page 16 of 19
55. You should see some output indicating the application is running. In a web browser, navigate
to the following URL. You should see the skeleton of your new Express application running
locally on your machine.
http://localhost:3000/
56. In subsequent steps, you will be asked to read or create text files using the text editor of your
choice. However, please note that code instructions will be given using line numbers. The
author of this guide suggests using Sublime or the Eclipse IDE (or similar tools).
In this section, you will create a basic demo user interface to embed your cognitive chat widget.
57. Open the following file with a text/code editor.
…/csadVirtualAgent/views/index.ejs
58. Delete the existing code. At line 1, add the following HTML code.
<!DOCTYPE html> <html> <head> <title>IBM Watson Virtual Agent</title> <link rel='stylesheet' href='/stylesheets/style.css' /> </head> <body> <p/><div><b>IBM Watson Virtual Agent</b></div> <p/><div id="ibm_chat_root"></div> <script src='https://unpkg.com/@watson-virtual-agent/[email protected]/dist/chat.min.js'></script> <script> IBMChat.init({ el: 'ibm_chat_root', baseURL: 'https://api.ibm.com/virtualagent/run/api/v1', botID: '', XIBMClientID: '', XIBMClientSecret: '' }); </script> </body> </html>
Create a demo user interface for the application
Page 17 of 19
59. Refer to the following table for a description of the code:
Lines Description
9 The target element that will contain the chat widget
10 The JavaScript that provides the chat widget application logic
11 – 19 A script for embedding the chat widget into the current page
12: Initialize the chat widget
13: The target element ID that will contain the chat widget
14: The URL to use for API requests
15: The bot ID for your Virtual Agent instance
16: The client ID for your Virtual Agent instance
17: The client secret for your Virtual Agent instance
(Tip: You will want to include the Virtual Agent JavaScript as close to the ending BODY tag as possible. This will ensure that all other elements and artifacts of your page are loaded properly.)
60. In a production environment, you would want to hide the IDs and secrets associated with your
Watson Virtual Agent instance. For the sake of code brevity, you will just hardcode these
values into your demo application. At line 15, update the code with your bot ID. At line 16,
update the code with your client ID. At line 17, update the code with your client secret.
61. Save and close the file.
62. The chat widget is associated with and rendered in the DIV element that you specify. It also
takes on the characteristics of the surrounding DIV, so you will need to specify your optimal
viewport using CSS. Open the following file with a text/code editor.
…/csadVirtualAgent/public/stylesheets/style.css
63. Delete the existing code. At line 10, add the following style rule. As you can see, you are
setting the height and width for the chat widget DIV element. Feel free to use different values,
use a pop-up window, etc.
#ibm_chat_root { height: 600px; width: 400px; }
Page 18 of 19
64. Save and close the file.
Your demo application showcasing IBM Watson cognitive services is now ready! Take a deep breath
and cross your fingers because it’s time to test the application.
65. Since you have only altered client-side HTML/CSS files, there is no need to restart the server.
However, if the server is not currently running, you will need to return to the terminal/command
window and start it using the following command(s).
npm start
66. Return to the web browser and refresh the page to pick up the HTML/CSS changes. You
should be viewing the following URL:
http://localhost:3000/
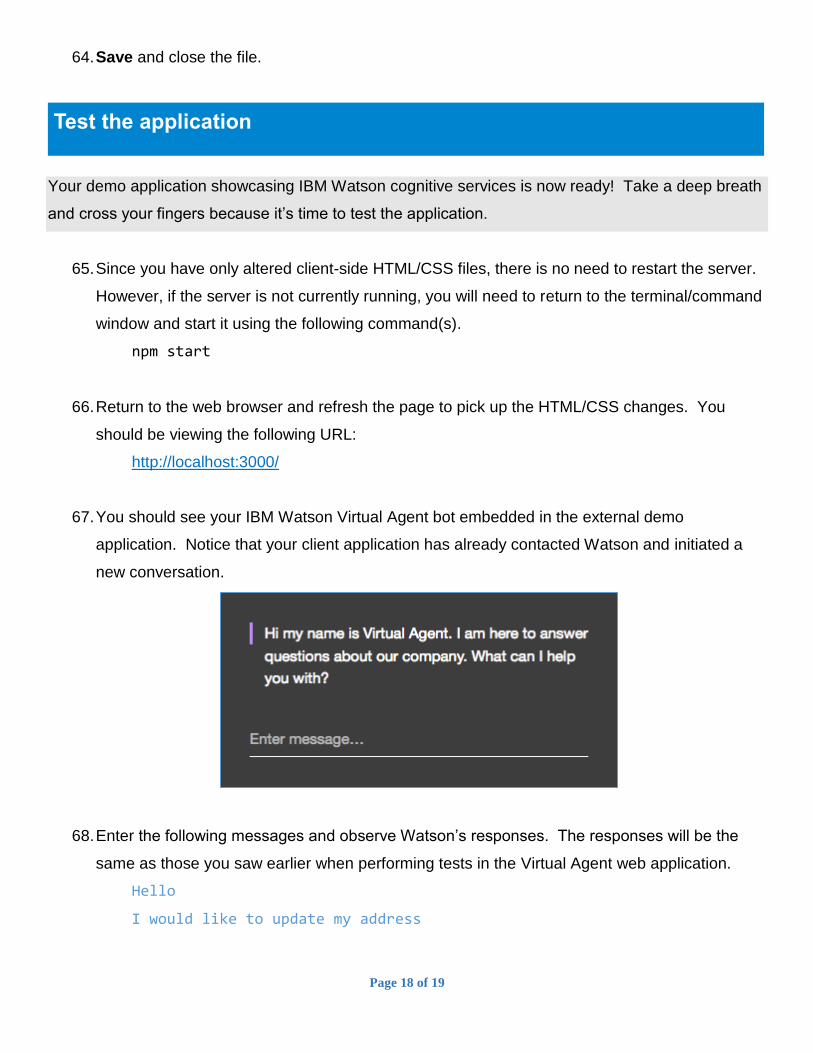
67. You should see your IBM Watson Virtual Agent bot embedded in the external demo
application. Notice that your client application has already contacted Watson and initiated a
new conversation.
68. Enter the following messages and observe Watson’s responses. The responses will be the
same as those you saw earlier when performing tests in the Virtual Agent web application.
Hello
I would like to update my address
Test the application
Page 19 of 19
69. Feel free to experiment with other phrases and intents from the Virtual Agent trial.
In this demo exercise, you have been working locally and running your Node.js server on your own
workstation. You can very easily push your application to the IBM Bluemix environment and make it
publicly accessible to customers, partners, friends, and/or family!
70. Instructions for this section can be found in the following prerequisite guide:
Getting Started with the IBM Watson Node.js SDK
71. When you are asked for the application’s host name, use the following value, but make sure to
substitute your initials for “xyz”.
host: csadVirtualAgent-xyz
(Optional) Deploy the application to IBM Bluemix