Embed Size (px)
Citation preview

Installation Instructions For Our Faux Stone Panels
Transform Your Home…….
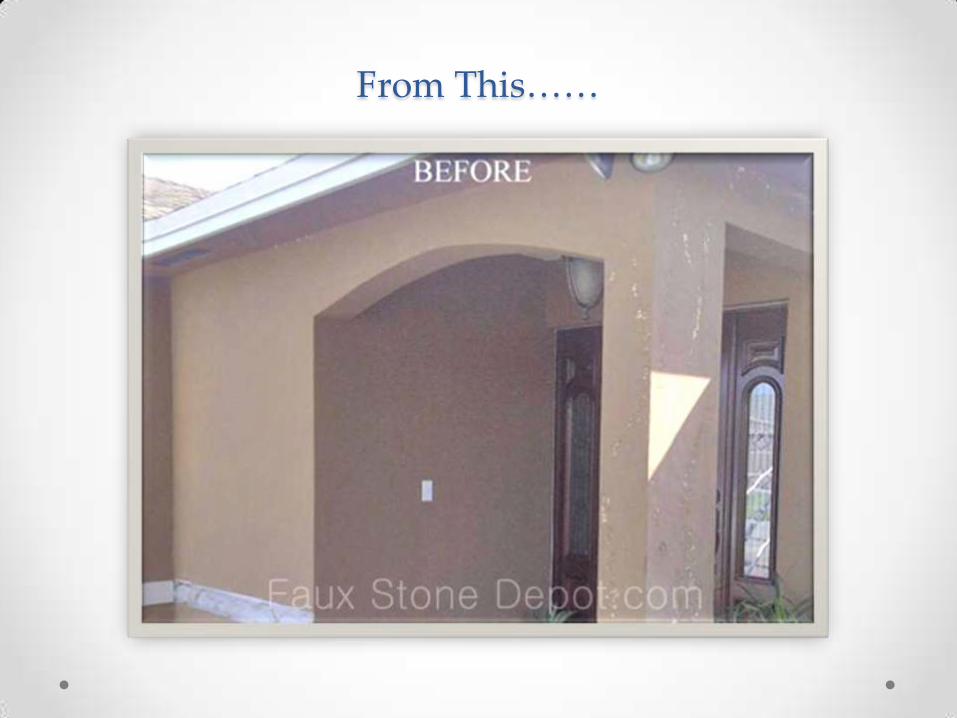
From This……
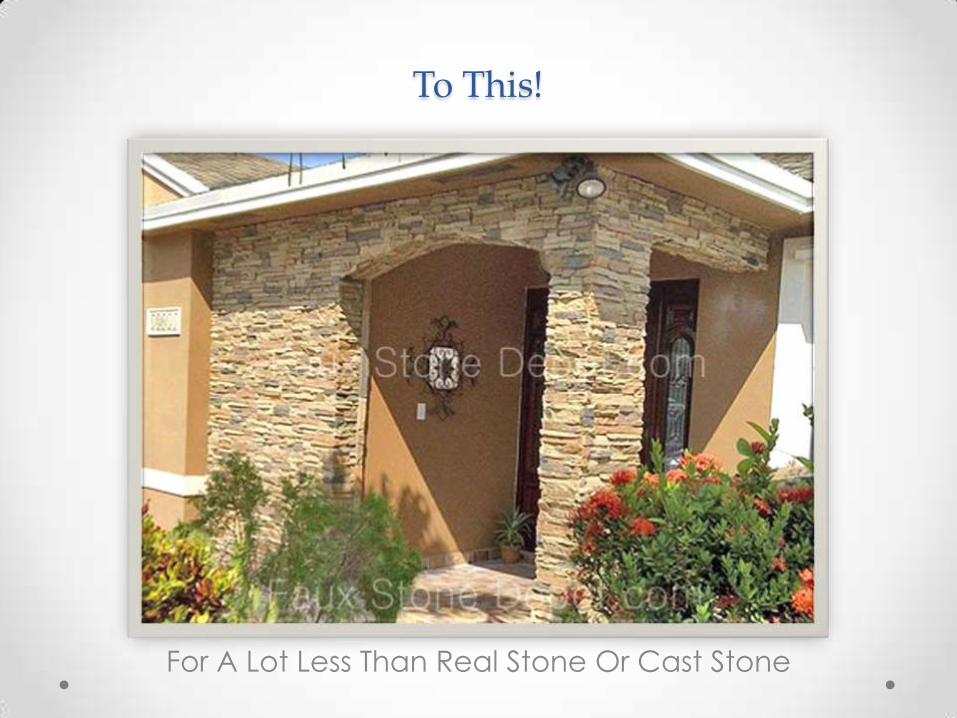
To This!
For A Lot Less Than Real Stone Or Cast Stone

No Need To Become Or Hire A Mason
Basic Carpenter Tools Are Enough!
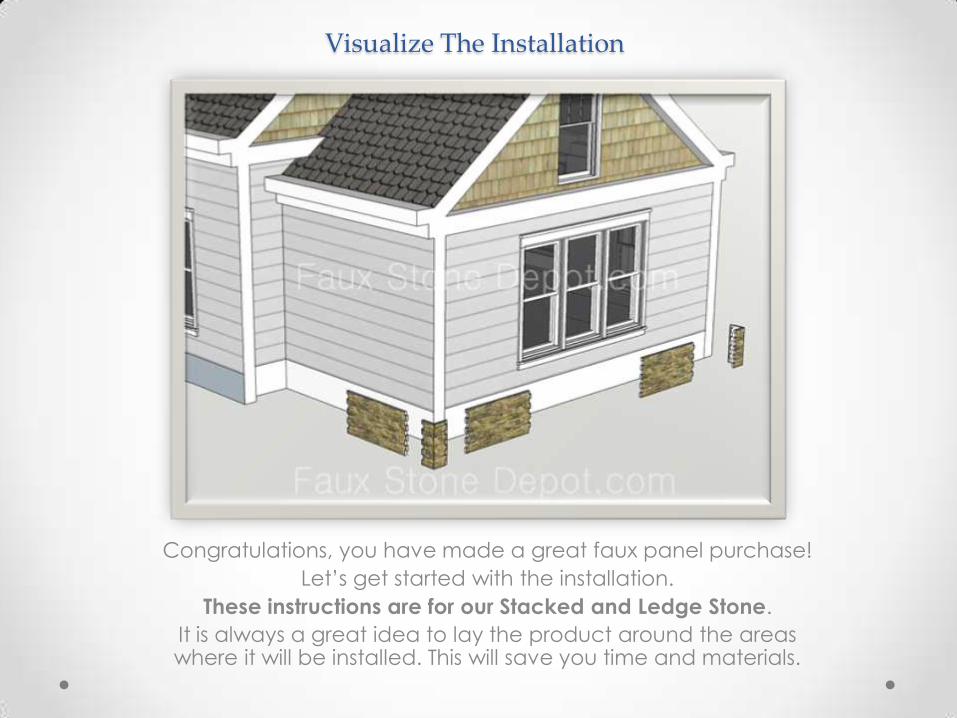
Visualize The Installation
Congratulations, you have made a great faux panel purchase!
Let’s get started with the installation.
These instructions are for our Stacked and Ledge Stone.
It is always a great idea to lay the product around the areas where it will be installed. This will save you time and materials.
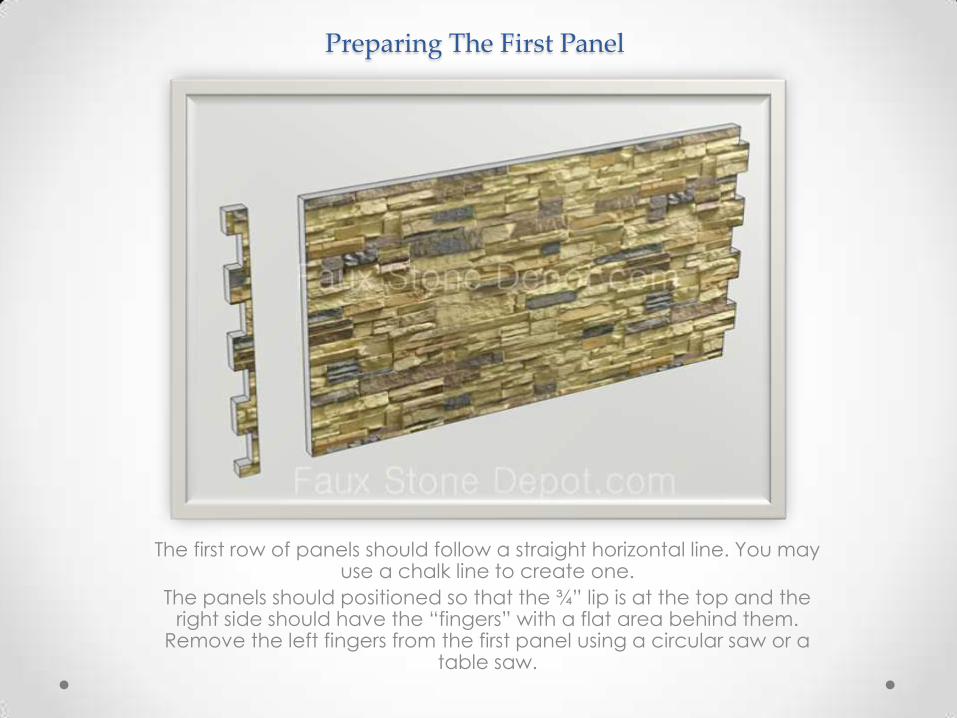
Preparing The First Panel
The first row of panels should follow a straight horizontal line. You may use a chalk line to create one.
The panels should positioned so that the ¾” lip is at the top and the right side should have the “fingers” with a flat area behind them.
Remove the left fingers from the first panel using a circular saw or a table saw.
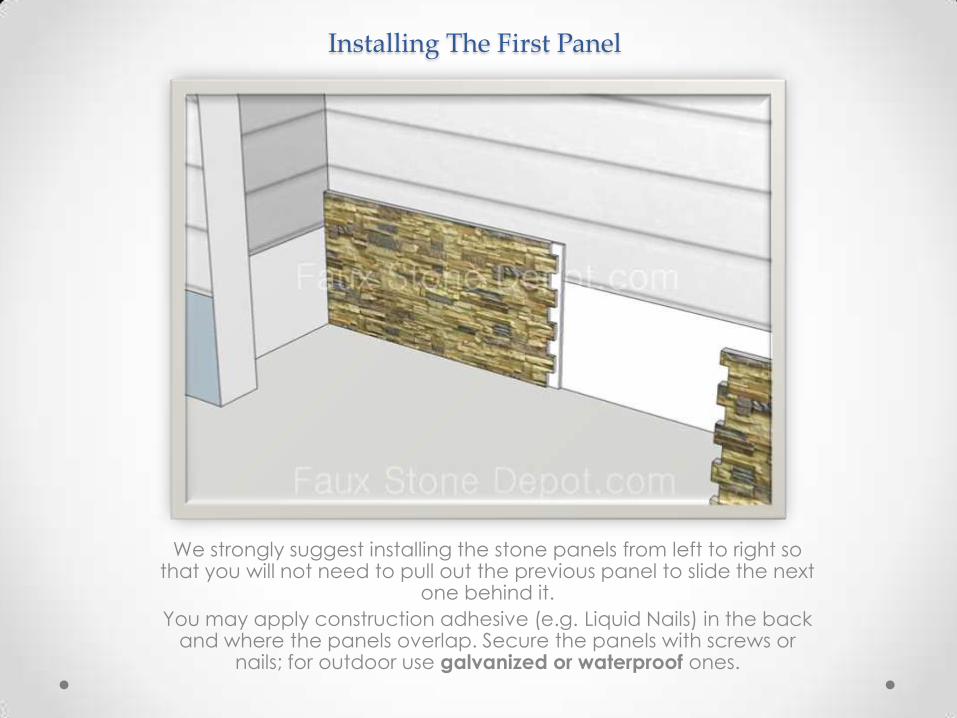
Installing The First Panel
We strongly suggest installing the stone panels from left to right so that you will not need to pull out the previous panel to slide the next
one behind it.
You may apply construction adhesive (e.g. Liquid Nails) in the back and where the panels overlap. Secure the panels with screws or
nails; for outdoor use galvanized or waterproof ones.
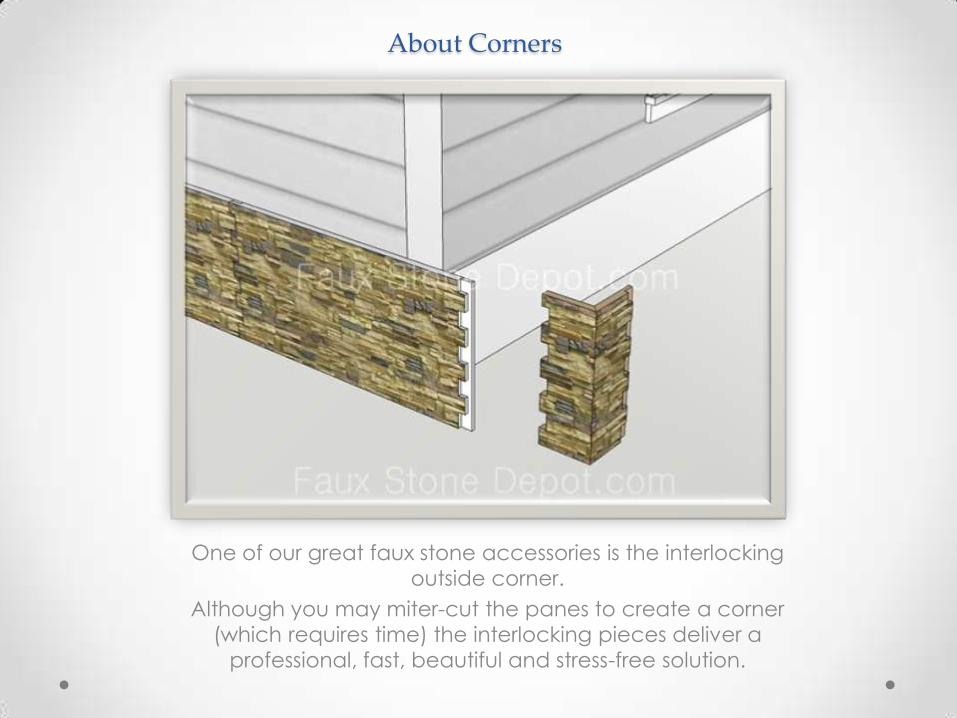
About Corners
One of our great faux stone accessories is the interlocking
outside corner.
Although you may miter-cut the panes to create a corner
(which requires time) the interlocking pieces deliver a
professional, fast, beautiful and stress-free solution.

About Corners
Our interlocking corners are meant to interlock on both sides of the panels but in some case, as the one above, one side of the panel may need to be modified to match the fingers of the corner. This is
still better than miter-cutting a panel.
Begin by cutting one side of the panel flush with the corner of the wall. Lay this panel on the wall without fastening it.
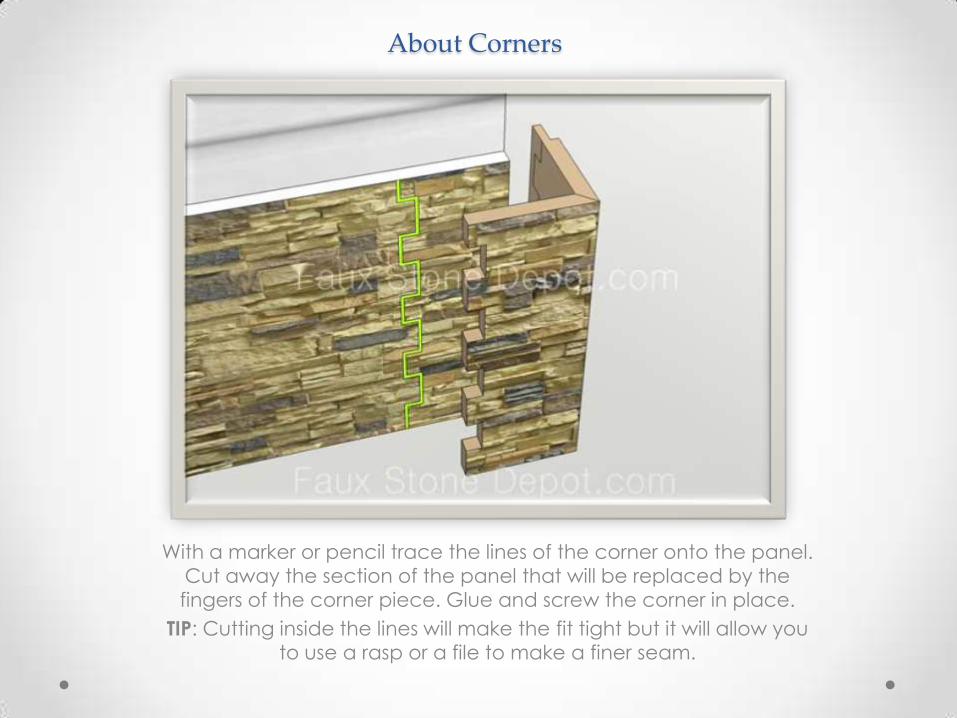
About Corners
With a marker or pencil trace the lines of the corner onto the panel.
Cut away the section of the panel that will be replaced by the
fingers of the corner piece. Glue and screw the corner in place.
TIP: Cutting inside the lines will make the fit tight but it will allow you
to use a rasp or a file to make a finer seam.
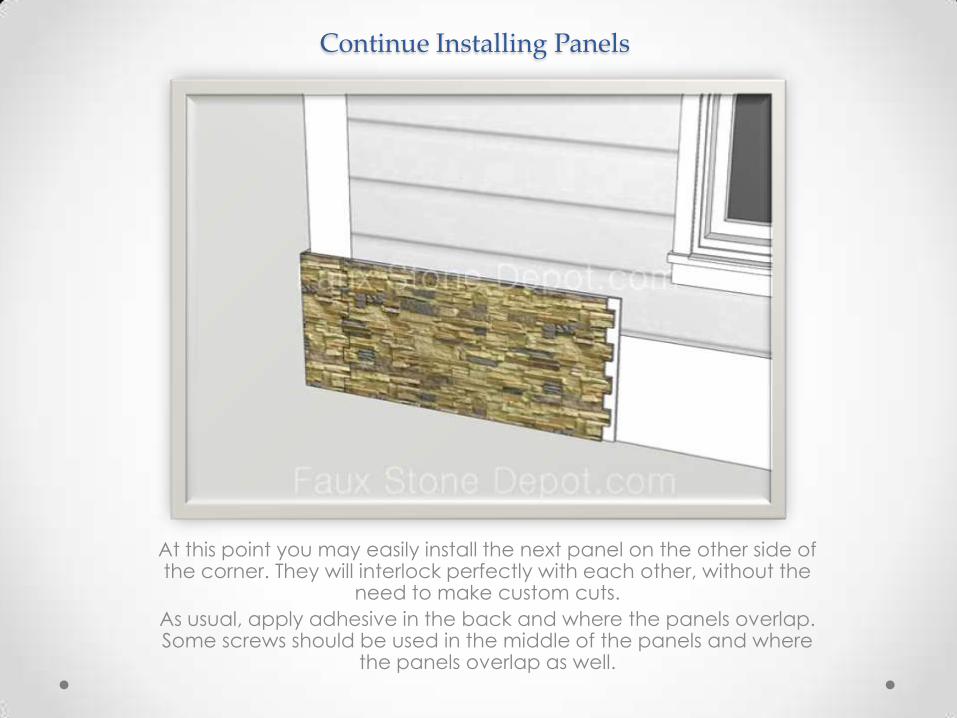
Continue Installing Panels
At this point you may easily install the next panel on the other side of the corner. They will interlock perfectly with each other, without the
need to make custom cuts.
As usual, apply adhesive in the back and where the panels overlap. Some screws should be used in the middle of the panels and where
the panels overlap as well.
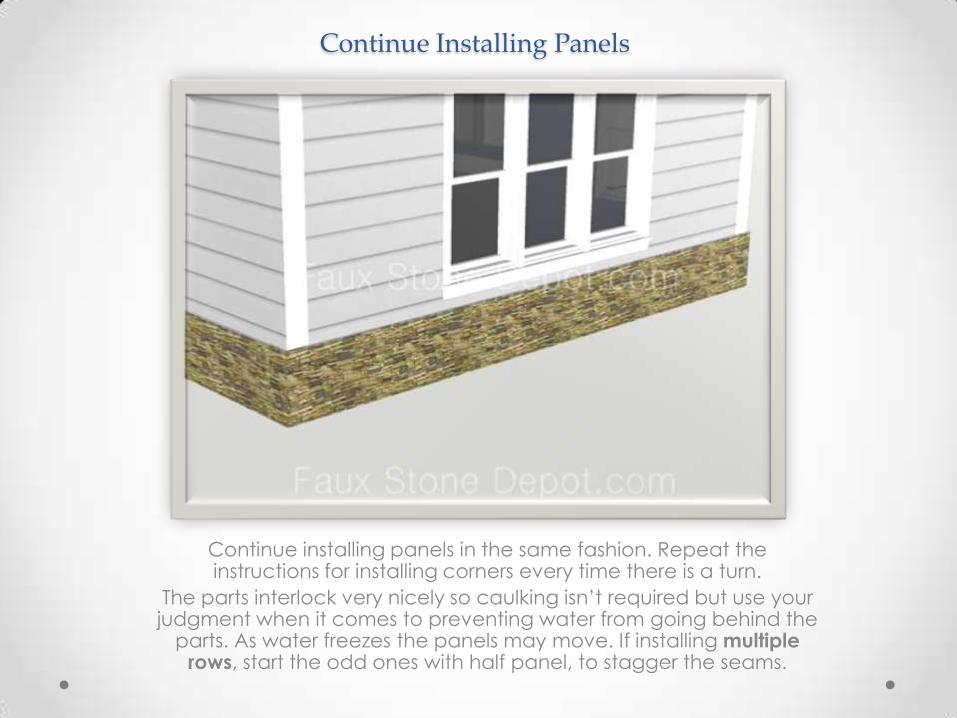
Continue Installing Panels
Continue installing panels in the same fashion. Repeat the instructions for installing corners every time there is a turn.
The parts interlock very nicely so caulking isn’t required but use your judgment when it comes to preventing water from going behind the
parts. As water freezes the panels may move. If installing multiple rows, start the odd ones with half panel, to stagger the seams.
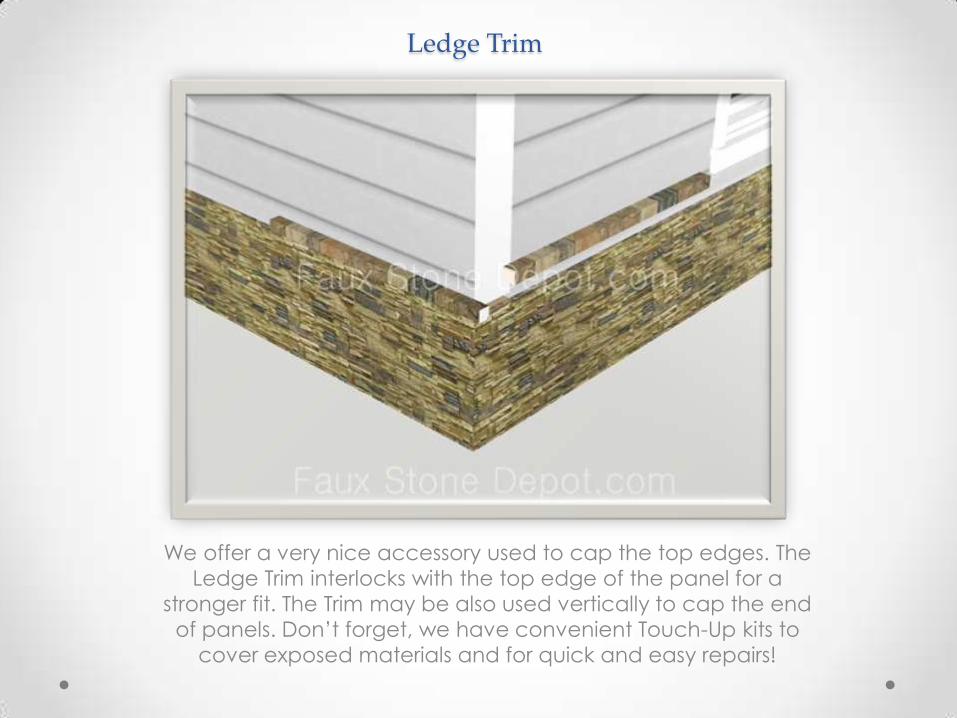
Ledge Trim
We offer a very nice accessory used to cap the top edges. The
Ledge Trim interlocks with the top edge of the panel for a
stronger fit. The Trim may be also used vertically to cap the end
of panels. Don’t forget, we have convenient Touch-Up kits to
cover exposed materials and for quick and easy repairs!
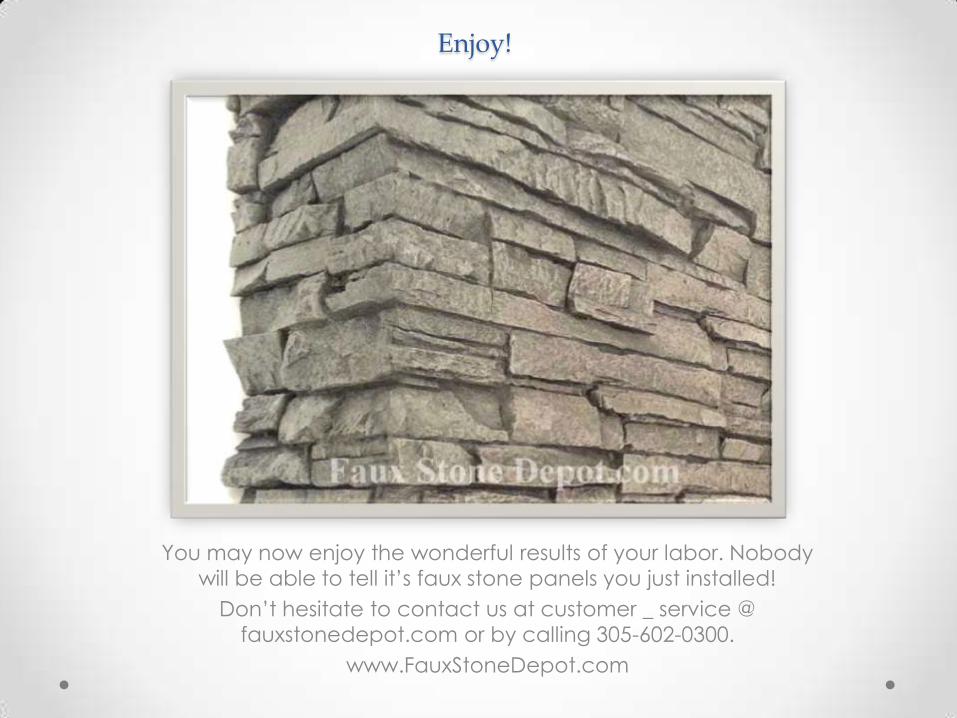
Enjoy!
You may now enjoy the wonderful results of your labor. Nobody
will be able to tell it’s faux stone panels you just installed!
Don’t hesitate to contact us at customer _ service @
fauxstonedepot.com or by calling 305-602-0300.
www.FauxStoneDepot.com