Embed Size (px)
Citation preview
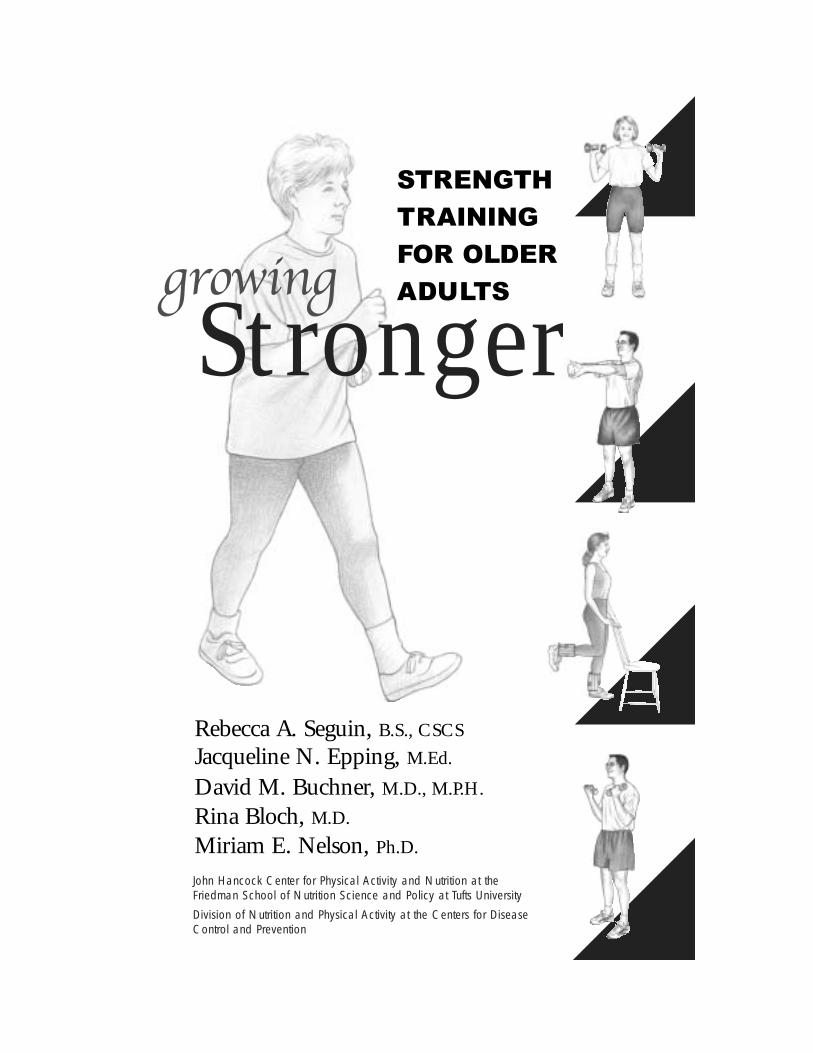
Rebecca A. Seguin, B.S., CSCS
Jacqueline N. Epping, M.Ed.
David M. Buchner, M.D., M.P.H.
Rina Bloch, M.D.
Miriam E. Nelson, Ph.D.
Strongergrowing
John Hancock Center for Physical Activity and Nutrition at theFriedman School of Nutrition Science and Policy at Tufts University
Division of Nutrition and Physical Activity at the Centers for DiseaseControl and Prevention
STRENGTH
TRAINING
FOR OLDER
ADULTS
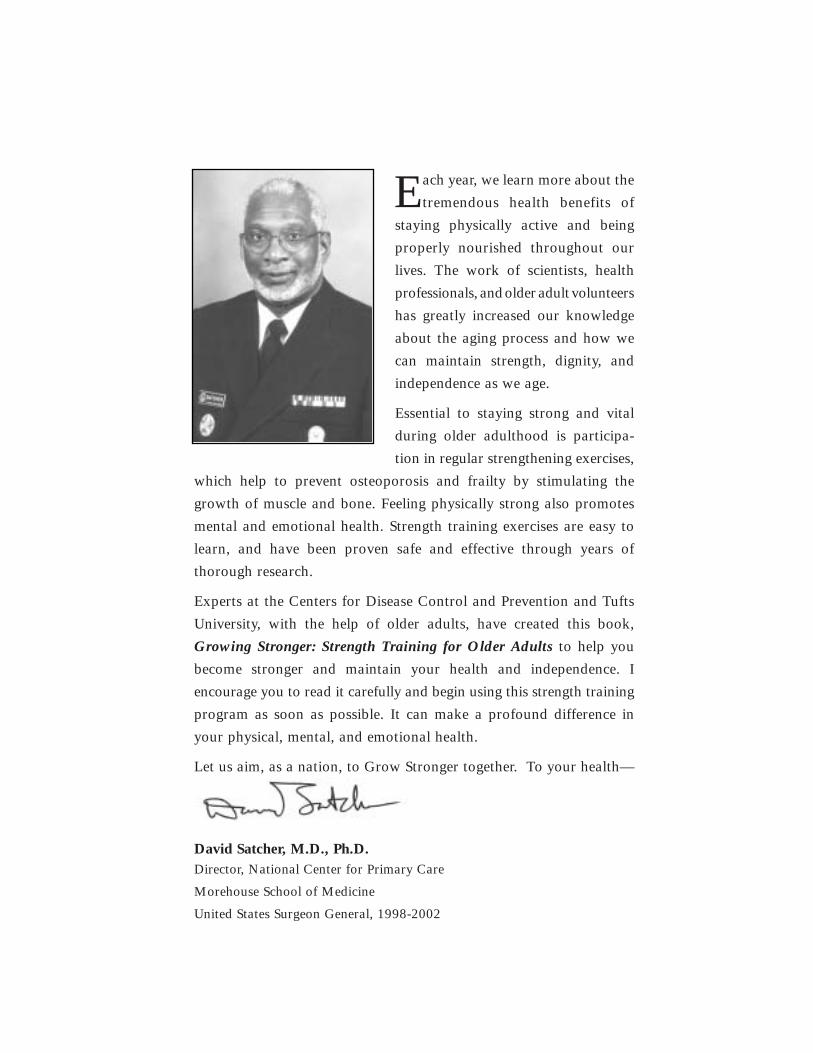
Each year, we learn more about the
tremendous health benefits of
staying physically active and being
properly nourished throughout our
lives. The work of scientists, health
professionals, andolderadultvolunteers
has greatly increased our knowledge
about the aging process and how we
can maintain strength, dignity, and
independence as we age.
Essential to staying strong and vital
during older adulthood is participa-
tion in regular strengthening exercises,
which help to prevent osteoporosis and frailty by stimulating the
growth of muscle and bone. Feeling physically strong also promotes
mental and emotional health. Strength training exercises are easy to
learn, and have been proven safe and effective through years of
thorough research.
Experts at the Centers for Disease Control and Prevention and Tufts
University, with the help of older adults, have created this book,
Growing Stronger: Strength Training for Older Adults to help you
become stronger and maintain your health and independence. I
encourage you to read it carefully and begin using this strength training
program as soon as possible. It can make a profound difference in
your physical, mental, and emotional health.
Let us aim, as a nation, to Grow Stronger together. To your health—
David Satcher, M.D., Ph.D.Director, National Center for Primary Care
Morehouse School of Medicine
United States Surgeon General, 1998-2002
U.S. DEPARTMENT OF HEALTH AND HUMAN SERVICES
Centers for Disease Control and Prevention
Rebecca A. Seguin, B.S., CSCS 1
Jacqueline N. Epping, M.Ed.2
David Buchner, M.D., M.P.H.2
Rina Bloch, M.D.1
Miriam E. Nelson, Ph.D.1
From the John Hancock Center for PhysicalActivity and Nutrition at the Friedman School ofNutrition Science and Policy at Tufts University,Boston, Massachusetts.
From the Division of Nutrition and PhysicalActivity at the Centers for Disease Control andPrevention, Atlanta, Georgia.
Strongergrowing
STRENGTH
TRAINING
FOR OLDER
ADULTS
1
2
Illustrations by Wendy Wray/Morgan Gaynin Inc., NYC.
The PAR-Q test on pages 14 and 15 reprinted fromthe 1994 revised version of the Physical Activity ReadinessQuestionnaire (PAR-Q and YOU). The PAR-Q and YOU is acopyrighted, pre-exercise screen owned by the CanadianSociety for Exercise Physiology.
This material is based upon work supported by theU.S. Department of Agriculture under agreement number58-1950-9-001 and the Association of Teachers of PreventiveMedicine/Centers for Disease Control and Prevention/Agency forToxic Substances and Disease Registry cooperative agreementnumber TS 359-15/16. Any opinions, findings, conclusion, orrecommendations expressed in this publication are those ofthe author(s) and do not necessarily reflect the views of theseorganizations.
This book was produced for free distribution by anymeans, electronic or mechanical, including photocopying,recording, or by any information storage and retrieval sys-tem, without requiring permission. However, please creditthe authors and Tufts University and do not change any ofthe content.
Copyright © 2002 by Tufts University.
Printed in the United States of America.
Contents
ACKNOWLEDGMENTS i
PREFACE An Exercise Program for You iii
CHAPTER 1 The Power of Strength Training 1
CHAPTER 2 Making Change 4
CHAPTER 3 Getting Motivated 7
CHAPTER 4 Starting Your Journey: 6 Simple Steps 13
CHAPTER 5 Getting Stronger: A 3-Part Program 32
CHAPTER 6 The Courage to Progress 70
CHAPTER 7 Staying on Track: Your 12-Week Workbook 74
APPENDIX Resources for Staying Strong 103
GLOSSARY 107
INDEX 109
An Important Caution
The Growing Stronger exercise program is based on
extensive scientific research. The book contains detailed
instructions and safety cautions, and you are urged to
read them carefully. If you are under a physician’s care
for a medical condition, discuss this program with him
or her before you start. Remember that regular medical
checkups are essential for your health and well-being.
While this book can serve as your guide to growing
stronger and becoming more physically active, it cannot
replace the advice of a health care professional who
knows you personally.
This book would not have been possible without the time
and assistance of our Peer Advisory Board members, Sister
Mary Patrice, Al, Dorothy, and Helen. These individuals
unselfishly donated their time; some provided their expertise
and others shared their experiences of living with arthritis as
well as starting—and continuing—a strength training
program. Several of the Peer Advisory Board members were
volunteers in our research center for arthritis studies, which
are the foundation for the Growing Stronger program. We
are so grateful for their help with this project.
Before completing this book, we worked with another
set of volunteers whose insight was invaluable to the success
of this book. These individuals had no previous experience
with strength training, and they volunteered to try the
Growing Stronger program on their own and provide feed-
back on numerous aspects of the book and exercises. We
wish to extend our sincere gratitude to these volunteers and
to the countless others like them who have made enormous
Acknowledgments
Growing Stronger: Strength Training for Older Adults
contributions to keep scientific research moving forward and
without whom our work would not be possible.
Several of our colleagues at Tufts and elsewhere con-
tributed to the success of this project. Many thanks to Drs.
Irwin Rosenberg, Ronenn Roubenoff, Kristin Baker, and Bess
Marcus for their encouragement as well as their personal
contribution to the body of research that helped form the
basis for the Growing Stronger program. Jennifer Layne,
M.S., CSCS, donated her time to review the exercise program.
Her expertise and experience was invaluable. Finally, to all of
the members of the Nutrition, Exercise Physiology and
Sarcopenia Laboratory as well as our other colleagues at
Tufts University and the Centers for Disease Control and
Prevention, we are grateful for your feedback about this
book and for your continued support.
We had the benefit of collaborating with several tal-
ented individuals for different aspects of this book. We wish
to acknowledge Jennifer Ackerman for her editorial genius
and thoughtful contribution to reshaping certain sections of
the book. Thank you to Wendy Wray for the wonderful illus-
trations and to Ilana Rosenberg for her creative energy and
diligent work on the design of this book.
ii
An Exercise Program for You
preface
In choosing to read this book, you have taken the first step
on a journey toward greater strength and vitality. Growing
Stronger was written for you—the older adult who wants to
grow stronger, healthier, more active, and more independent.
You may be inactive or only mildly active at the moment.
You may know that regular exercise is important for your
health and well-being and want to get started on a program
of physical activity. But you may feel that you don’t have the
necessary information. Perhaps you are concerned that
because of your age or health problems physical activity may
not be safe for you. Or perhaps you have had trouble finding
or staying with a suitable program.
This book gives you a safe, simple, and highly effective
exercise program based on the principles of strength training.
Studies at laboratories around the world have shown that
strength training benefits women and men of all ages and all
levels of fitness. According to Physical Activity and Health:
A Report of the Surgeon General (1996), experts agree that
aerobic activities should be supplemented with strength-
iii
developing exercises at least twice per week.
These activities will help you:
build strength
maintain bone density
improve balance, coordination, and mobility
reduce your risk of falling
maintain independence in performing activities
of daily life.
Strength training requires little time and minimal
equipment. And it’s safe, even for people with health prob-
lems. The strength training “prescription” featured here—
the motivational tips, safety precautions, and specific
exercises—was developed at the Nutrition, Exercise
Physiology and Sarcopenia Laboratory at Tufts University.
Whatever your age, medical condition, or current level of
activity, you are likely a perfect candidate for this gentle but
powerful program.
This book gives you all the tools you need to succeed
in this exciting program. It introduces you to the many
advantages of strength training—boosts in strength, energy,
and vitality and the role it plays in helping to prevent and
An Exercise Program for Youiv
An Exercise Program for You v
treat such chronic diseases as arthritis and osteoporosis. It
helps you decide whether these exercises are safe for you or
whether you need to consult with your doctor first. It offers
a program tailored to your needs, with step-by-step instruc-
tions on getting started, staying on track, and growing
stronger and healthier as you age. At the end of the book is
a 12-week workbook in which you can record and gauge
your progress and celebrate your success.
The goal of this program is to help you make strength
training a lifelong habit. By doing so, you will be on your
way to a strong, independent, and vibrant life!
For many older adults, growing older seems to involve an
inevitable loss of strength, energy, and vigor. But it need not
be so. The frailty and decreased energy we associate with
aging, such as difficulty walking for distances, climbing
stairs, or carrying groceries, are largely due to muscle loss.
This muscle loss results mainly from inactivity. The old say-
ing is true when it comes to muscle: “Use it or lose it.”
One of the best ways to keep muscles healthy and
strong is through exercises called strength training—some-
times known as weight lifting or resistance training. Studies
at Tufts University have shown that strength training is one
of the best ways to fight the weakness and frailty that can
come with age. Done regularly, strength training builds bone
and muscle and helps to preserve strength, independence,
and energy. These exercises are safe and effective for women
and men of all ages, including those who are not in perfect
health. In fact, people with health concerns—such as
arthritis or heart disease—often benefit the most from an
1 The Power of Strength Training
chapter
exercise program that includes lifting weights a few times
each week.
Strength training can also reduce the signs and
symptoms of many diseases and chronic conditions in the
following ways:
Arthritis—Reduces pain and stiffness, and increases
strength and flexibility.
Diabetes—Improves glycemic control.
Osteoporosis—Builds bone density and reduces risk
for falls.
Heart disease—Reduces cardiovascular risk by
improving lipid profile and overall fitness.
Obesity—Increases metabolism, which helps burn more
calories and helps with long-term weight control.
Back pain—Strengthens back and abdominal muscles
to reduce stress on the spine.
Strength training, when done with regular aerobic
exercise, can also have a major effect on a person’s mental
and emotional health. Studies have shown that people who
exercise regularly sleep better; they sleep more deeply and
longer and awaken less often. Strength training exercises can
The Power of Strength Training2
The Power of Strength Training 3
also reduce depression and boost self-confidence and self-
esteem, and improve your sense of well-being.
The exercises that make up the Growing Stronger
strength training program have been widely tested on healthy
individuals and people with chronic but stable medical
concerns. No matter how old you are, you do not have to get
weaker with age. Strength training can help you stay vital,
strong, and independent throughout your life. Start the
Growing Stronger program and make it a regular part of
your life so you can begin enjoying the many physical and
emotional benefits of strength training today.
Introducing any major change into our daily lives can
be very challenging. Starting an exercise program is like
setting off on a journey; it requires a step-by-step approach.
When making any major lifestyle changes, most people
go through 5 stages, as defined by the transtheoretical
model: pre-contemplation, contemplation, preparation,
action, and maintenance.
CONTEMPLATION—GETTING MOTIVATED
By reading this book, you have already moved beyond pre-
contemplation, which is the stage in which you’re not yet
thinking about strength training. In contemplation, you are
intrigued by what you have heard about strength training.
Reading about the health benefits of these exercises or hear-
ing about them from a friend or doctor has stimulated your
interest in starting the program yourself. At this stage, you
work on getting motivated, thinking about your goals, and
asking yourself what you want to get out of the program.
This is also the time to address possible obstacles and find
ways to overcome them.
2Making Change
chapter
PREPARATION—STARTING YOUR JOURNEY
You are ready to take action once you have thought about
your motivations and goals for strength training. At this
stage, you take steps to prepare for a new exercise program.
You set aside the physical space needed to do the exercises
and buy any equipment you may need. You look at your
schedule to see where strength training might fit in and set
specific exercise days and times.
ACTION—ADOPTING THE PROGRAM
At this exciting stage, you are learning the exercises and
doing them 2 or 3 times per week. You are beginning to see
the results of your work. You notice physical changes and
find that your clothes fit a little better and that you feel
stronger, more energetic, and happier. Technically, the action
stage continues as long as you are engaged in the program.
But after about 6 months of doing the exercises, you will have
moved to the maintenance stage.
MAINTENANCE—STAYING ON TRACK
This is the stage when strength training becomes a way of
life. When you reach this point, there’s a good chance that
you find it hard to imagine not doing your exercises. You
find them empowering and enjoyable and want to continue
them because they make you feel stronger and more upbeat,
Making Change 5
independent, and vital. You may find that you’re taking up
activities you had stopped doing years ago—gardening, golf-
ing, dancing, or canoeing. As you progress, you may also
add new strengthening exercises to your routine and new
activities to your life.
Here’s a timetable for moving through the first three
stages of change:
Days 1—5: Read this book and set goals
(contemplation)
Days 6—10: Buy equipment and set an exercise
schedule (preparation)
Days 11—12: Start the program (action)
For some people, one stage flows easily and naturally
into the next in a short period of time with few major
problems. But many of us get hung up at one stage or another.
Keep in mind that it often takes several tries to change one’s
daily routine. Stay with it—you’ll find that the effort pays off
in ways you never imagined!
Making Change6
If you want to make a positive, lasting change in your life, it
helps to spend some time thinking about what motivates
you. What are your reasons for wanting to strength train?
What are your personal goals? What obstacles might stop
you and how might you overcome them? It’s also a good idea
to visualize your success and consider how you might
celebrate your achievements.
SETTING GOALS
Thirty years ago, a British doctor put together a list of the
reasons why people choose to exercise. Look at the reasons
listed below and see which of them match your motivations:
Pleasure. People often enjoy strength-training exercises; they
find them easier than aerobic workouts and love the results.
Health and fitness benefits. Strength training can increase
muscle mass and bone density. It makes you feel strong and
energized, relieves stress and depression, and gives you a
better night’s sleep. It can also help prevent the onset of
certain chronic diseases or ease their symptoms.
3Getting Motivated
chapter
Improvements in appearance. Lifting weights firms the body,
trims fat, and can boost metabolism by as much as 15
percent, which helps control your weight.
Social opportunities. Exercising with friends or family gives
you a chance to visit and chat while you work out.
Thrills. People who start strength training later in life often
find that they are willing and able to try new, exciting
activities, such as parasailing, windsurfing, or kayaking.
Chapter 4, “Starting Your Journey,” includes work-
sheets on setting your own short-term and long-term goals.
These worksheets will help you personalize the benefits of
the program.
ELIMINATING OBSTACLES
While thinking about your motivations, you will want to
consider possible obstacles and plan ways to overcome them.
The most common barriers seem to be:
Time. For many of us, being too busy is the big obstacle.
How can we find a few times each week to exercise? You
might consider combining strength training with another
activity or with a social visit. Try scheduling your sessions
during a lunch-hour break or during a favorite television
Getting Motivated 8
program. Instead of going out to lunch, lift weights with a
good friend or family member. The half hour or so that you
spend watching the evening news is a perfect time to sneak in
a whole workout.
Fatigue. It’s a proven fact that strength training gives you
more energy; it also makes other daily activities easier.
Age or fitness. If you think you’re too old or out of shape to
lift weights, rest assured. People have successfully started
strength training in their 70s, 80s, and even 90s, and you can
too! The same goes for people who are not active. You will
need to start slowly and follow basic safety rules. But there
is no such thing as being too old or out of shape to benefit
from this program.
Health concerns. If you have a health problem, you should
talk to your doctor before you start any exercise program.
But chances are that your condition will not stop you from
strength training. In fact, you may be among those who gain
the most from this form of exercise.
Getting Motivated 9
VISUALIZING SUCCESS
The ticket to success is believing in yourself and your ability
to overcome barriers and reach your goals. Visualization, a
process of “training” the mind, is one of the best ways to
build self-confidence. It involves imagining that you are
accomplishing desired changes or goals and successfully
completing each step in a given activity. As a result, you can
create, modify, or strengthen brain pathways that prepare
your muscles for the activity. Visualization is useful in many
areas of life, from avoiding stress to performing well during
competition. You may find it a powerful tool as you begin
this program.
First, it’s a good idea to define your personal goals so
you can apply them during the visualization process. For
instance, if you hope to start walking the golf course again or
spend longer hours gardening, you might establish these as
your specific goals. The technique is simple, but you will
need to practice to make it work well for you. It does not
require equipment and does not cost money, but it does take
time and focus.
CELEBRATE YOUR ACHIEVEMENTS
Making any major lifestyle change can be challenging.
Celebrating your success is a great way to motivate yourself
Getting Motivated 10
Getting Motivated 11
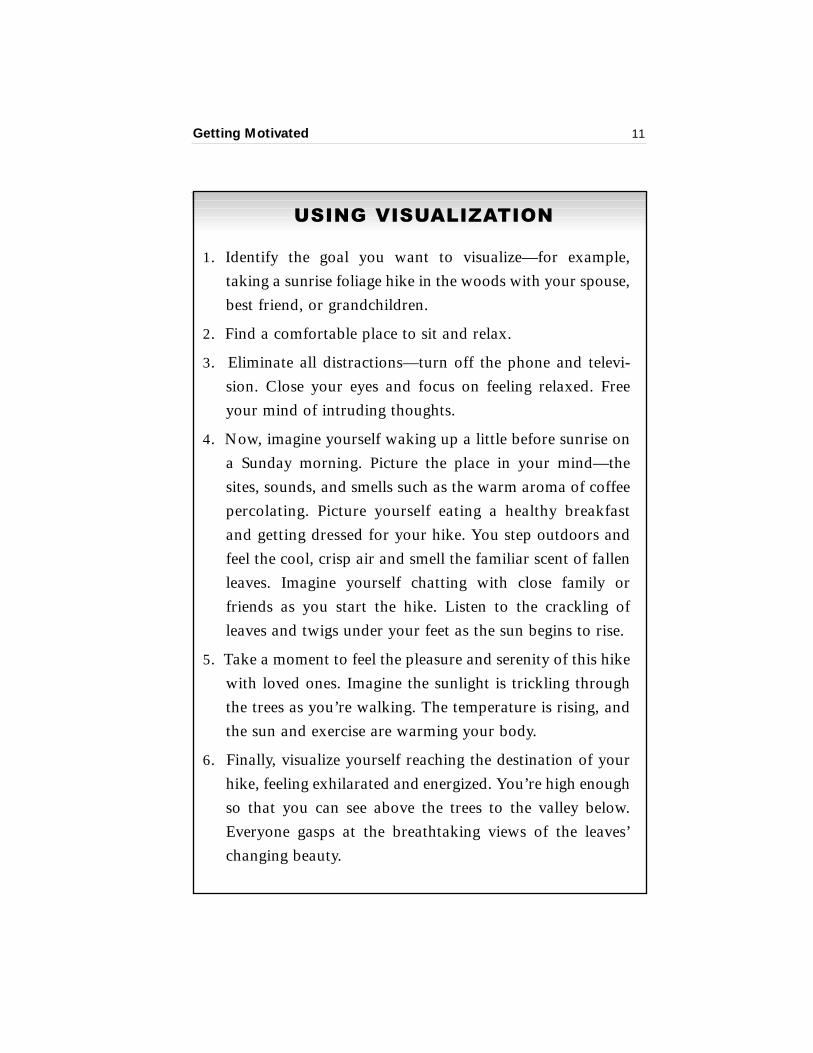
USING VISUALIZATION
1. Identify the goal you want to visualize—for example,
taking a sunrise foliage hike in the woods with your spouse,
best friend, or grandchildren.
2. Find a comfortable place to sit and relax.
3. Eliminate all distractions—turn off the phone and televi-
sion. Close your eyes and focus on feeling relaxed. Free
your mind of intruding thoughts.
4. Now, imagine yourself waking up a little before sunrise on
a Sunday morning. Picture the place in your mind—the
sites, sounds, and smells such as the warm aroma of coffee
percolating. Picture yourself eating a healthy breakfast
and getting dressed for your hike. You step outdoors and
feel the cool, crisp air and smell the familiar scent of fallen
leaves. Imagine yourself chatting with close family or
friends as you start the hike. Listen to the crackling of
leaves and twigs under your feet as the sun begins to rise.
5. Take a moment to feel the pleasure and serenity of this hike
with loved ones. Imagine the sunlight is trickling through
the trees as you’re walking. The temperature is rising, and
the sun and exercise are warming your body.
6. Finally, visualize yourself reaching the destination of your
hike, feeling exhilarated and energized. You’re high enough
so that you can see above the trees to the valley below.
Everyone gasps at the breathtaking views of the leaves’
changing beauty.
to keep with the program. This may be as important as
setting goals and visualizing success. Make sure that you
reward yourself well when you accomplish one of your
short-term or long-term goals!
Getting Motivated 12
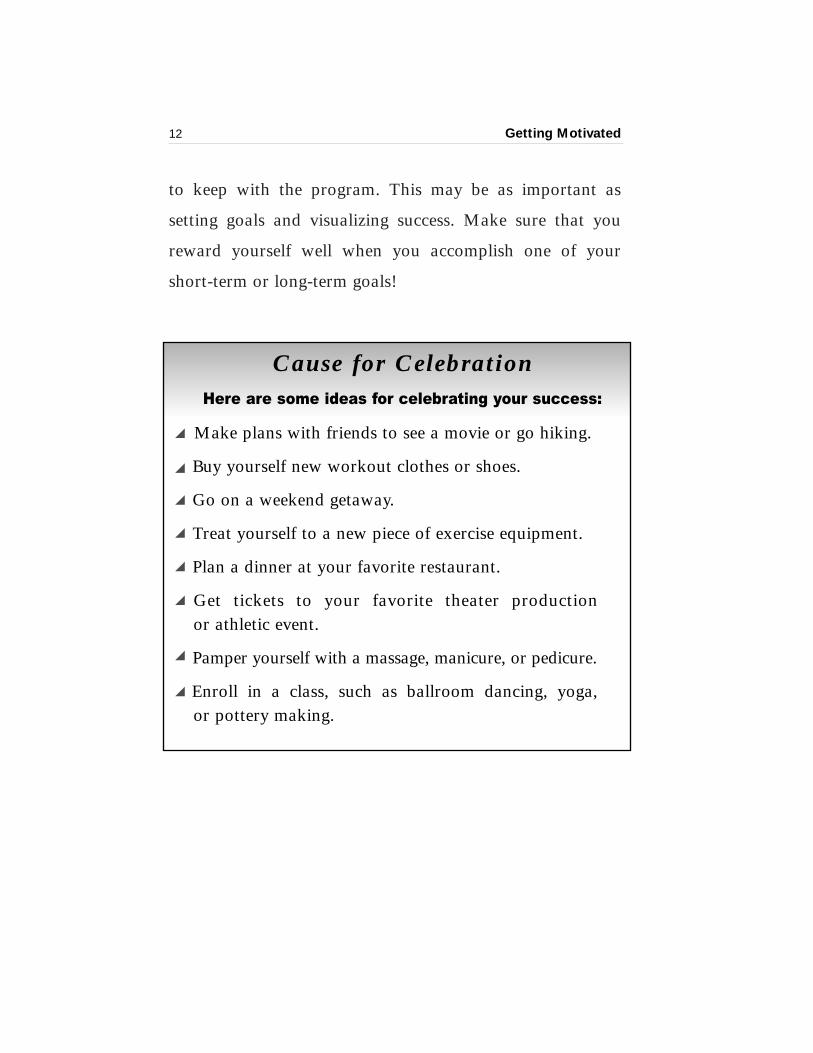
Cause for CelebrationHere are some ideas for celebrating your success:
Make plans with friends to see a movie or go hiking.
Buy yourself new workout clothes or shoes.
Go on a weekend getaway.
Treat yourself to a new piece of exercise equipment.
Plan a dinner at your favorite restaurant.
Get tickets to your favorite theater production or athletic event.
Pamper yourself with a massage, manicure, or pedicure.
Enroll in a class, such as ballroom dancing, yoga, or pottery making.
Now that you have thought about your own motivations for
strength training, you are ready to prepare for the program.
Follow these simple steps:
STEP 1: DETERMINE IF STRENGTH TRAINING IS SAFE FOR YOU
It’s important to talk to your doctor before beginning any
exercise program if you have health concerns. Chronic health
conditions should not stop you from strength training. It’s
likely that you will still be able to take part in this program
if you have arthritis, osteoporosis, diabetes, congestive heart
failure, or have recently suffered a heart attack.
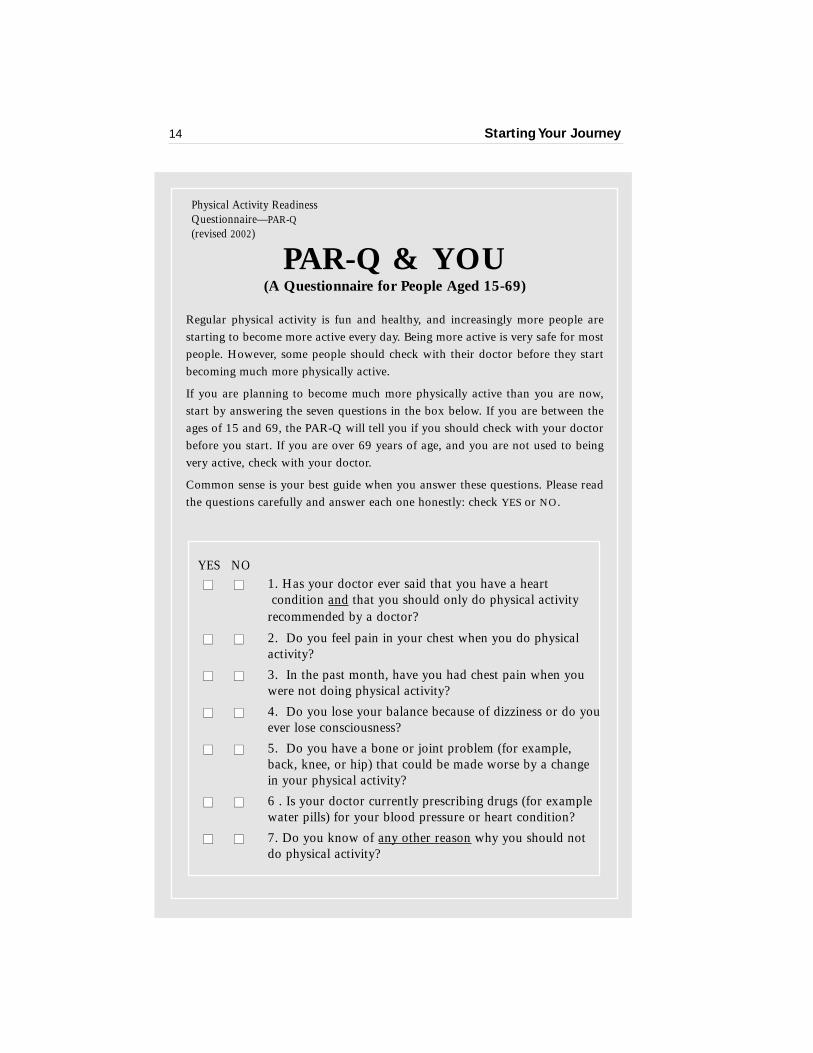
First it’s important to find out whether or not you
need to speak with your doctor before you can safely start
the program. The Physical Activity Readiness Questionnaire
—known as the PAR-Q—is on the next two pages. These
questions will help you get started.
4 Starting Your Journey:6 Simple Steps
chapter
Starting Your Journey14
PAR-Q & YOU(A Questionnaire for People Aged 15-69)
Regular physical activity is fun and healthy, and increasingly more people arestarting to become more active every day. Being more active is very safe for mostpeople. However, some people should check with their doctor before they startbecoming much more physically active.
If you are planning to become much more physically active than you are now,start by answering the seven questions in the box below. If you are between theages of 15 and 69, the PAR-Q will tell you if you should check with your doctorbefore you start. If you are over 69 years of age, and you are not used to beingvery active, check with your doctor.
Common sense is your best guide when you answer these questions. Please readthe questions carefully and answer each one honestly: check YES or NO.
Physical Activity ReadinessQuestionnaire—PAR-Q(revised 2002)
YES NO�� �� 1. Has your doctor ever said that you have a heart
condition and that you should only do physical activityrecommended by a doctor?
�� �� 2. Do you feel pain in your chest when you do physical activity?
�� �� 3. In the past month, have you had chest pain when youwere not doing physical activity?
�� �� 4. Do you lose your balance because of dizziness or do youever lose consciousness?
�� �� 5. Do you have a bone or joint problem (for example,back, knee, or hip) that could be made worse by a changein your physical activity?
�� �� 6 . Is your doctor currently prescribing drugs (for examplewater pills) for your blood pressure or heart condition?
�� �� 7. Do you know of any other reason why you should notdo physical activity?
15 Starting Your Journey
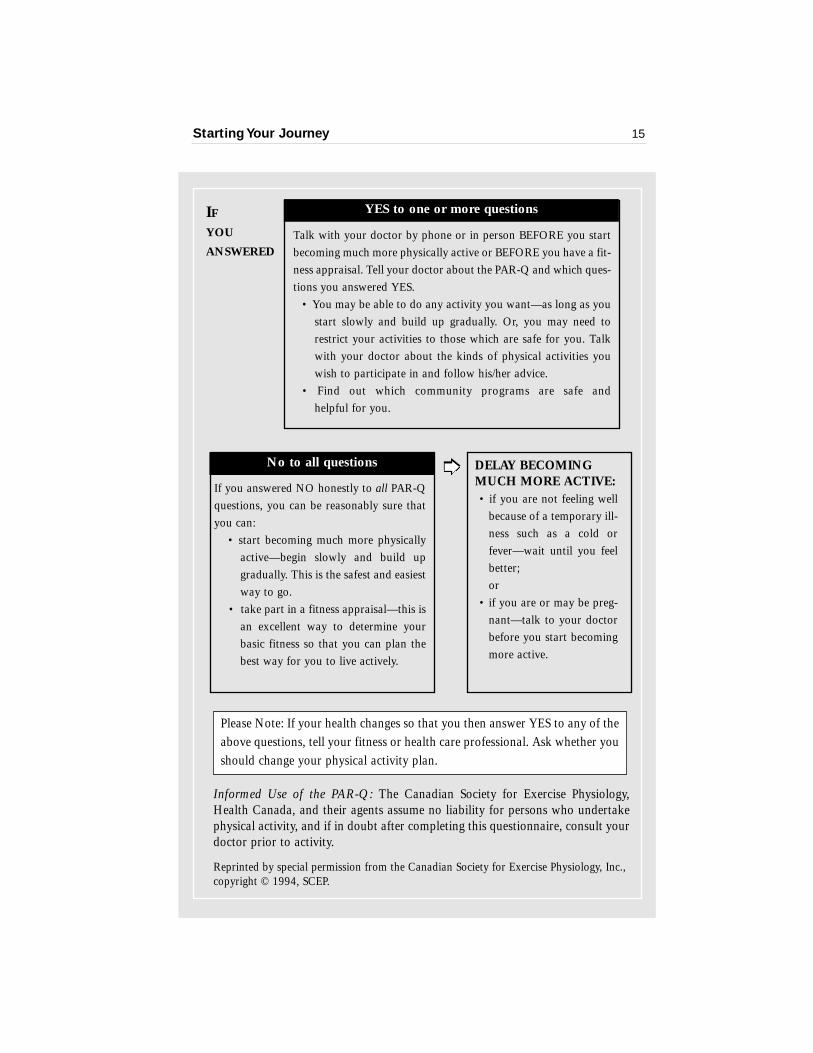
Please Note: If your health changes so that you then answer YES to any of theabove questions, tell your fitness or health care professional. Ask whether youshould change your physical activity plan.
Informed Use of the PAR-Q: The Canadian Society for Exercise Physiology,Health Canada, and their agents assume no liability for persons who undertakephysical activity, and if in doubt after completing this questionnaire, consult yourdoctor prior to activity.
Reprinted by special permission from the Canadian Society for Exercise Physiology, Inc.,copyright © 1994, SCEP.
IF
YOU
ANSWEREDTalk with your doctor by phone or in person BEFORE you startbecoming much more physically active or BEFORE you have a fit-ness appraisal. Tell your doctor about the PAR-Q and which ques-tions you answered YES.
• You may be able to do any activity you want—as long as youstart slowly and build up gradually. Or, you may need torestrict your activities to those which are safe for you. Talkwith your doctor about the kinds of physical activities youwish to participate in and follow his/her advice.
• Find out which community programs are safe and helpful for you.
YES to one or more questions
If you answered NO honestly to all PAR-Qquestions, you can be reasonably sure thatyou can:
• start becoming much more physicallyactive—begin slowly and build upgradually. This is the safest and easiestway to go.
• take part in a fitness appraisal—this isan excellent way to determine yourbasic fitness so that you can plan thebest way for you to live actively.
No to all questions DELAY BECOMINGMUCH MORE ACTIVE:• if you are not feeling well
because of a temporary ill-ness such as a cold orfever—wait until you feelbetter; or
• if you are or may be preg-nant—talk to your doctorbefore you start becomingmore active.

16 Starting Your Journey
You should get approval from your doctor if you
answered “yes” to one or more questions on the PAR-Q or
if you are over the age of 69. Answering “yes” or being older
than 69 simply means that you should discuss the program
with your doctor before getting started. You can get started
right away if you honestly answered “no” to all of the ques-
tions and are between the ages of 15—69.
IF YOU HAVE ONE OR MORE CHRONIC DISEASES,
KEEP THESE THINGS IN MIND
Speak with your doctor before starting any new exer-
cise program—you may need a physical examination.
Stay in touch with your doctor about your exercise
program and your health.
Never exercise if you have a health condition that is
unstable or serious, you have new symptoms, or your
doctor recommends against it.
17 Starting Your Journey
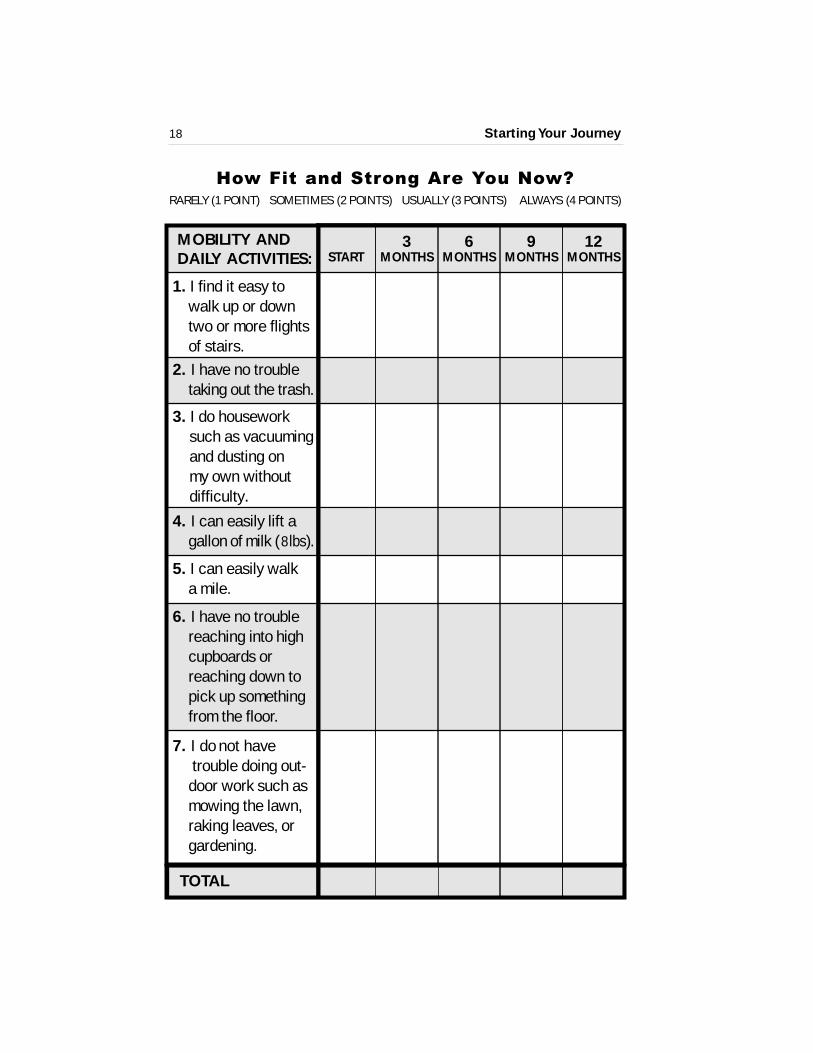
STEP 2: FIND OUT HOW FIT AND STRONG YOU ARE NOW?
Before you start this program, answer the questions on the
next two pages in the worksheet How Fit and Strong Are
You Now? Try returning to them again after you have been
strength training for 3, 6, and 12 months. This will help you
see how useful the program has been to you.
Record your score for each question in the “start”
column and then add all of the scores together. Answer the
questions again at the 3-, 6-, and 12-month marks. Add up
each score and compare it with previous scores. An increase
of even a point or two from the last test is a great improve-
ment. Remember, your score may stay the same or even
decrease if you have not stayed on the program for any
reason—say, illness or injury. Don’t be discouraged—just try
to get back on track.
3MONTHSSTART
6MONTHS
9MONTHS
How Fit and Strong Are You Now?RARELY (1 POINT) SOMETIMES (2 POINTS) USUALLY (3 POINTS) ALWAYS (4 POINTS)
TOTAL
12MONTHS
18 Starting Your Journey
MOBILITY ANDDAILY ACTIVITIES:
1. I find it easy towalk up or downtwo or more flightsof stairs.
2. I have no troubletaking out the trash.
3. I do houseworksuch as vacuumingand dusting on my own without difficulty.
4. I can easily lift agallon of milk ( 8 lbs).
5. I can easily walk a mile.
6. I have no troublereaching into highcupboards orreaching down topick up somethingfrom the floor.
7. I do not havetrouble doing out-
door work such asmowing the lawn,raking leaves, orgardening.
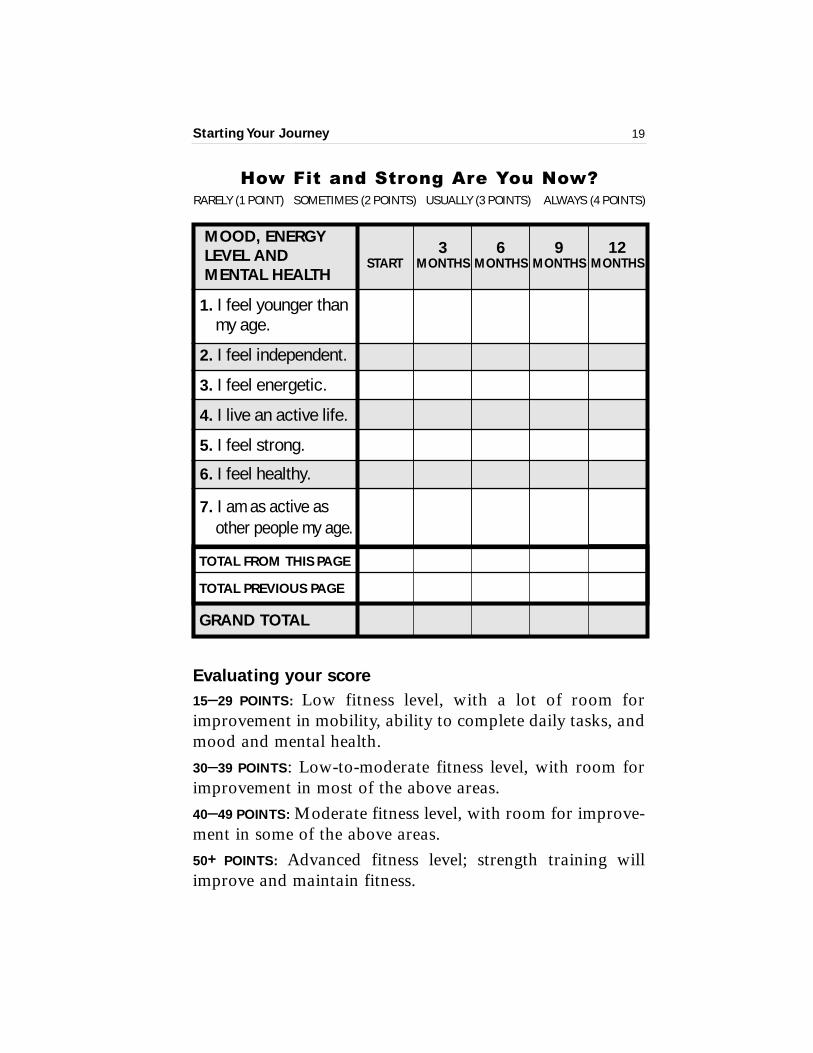
TOTAL FROM THIS PAGE
TOTAL PREVIOUS PAGE
GRAND TOTAL
Starting Your Journey 19
Evaluating your score
15—29 POINTS: Low fitness level, with a lot of room forimprovement in mobility, ability to complete daily tasks, andmood and mental health.
30—39 POINTS: Low-to-moderate fitness level, with room forimprovement in most of the above areas.
40—49 POINTS: Moderate fitness level, with room for improve-ment in some of the above areas.
50+ POINTS: Advanced fitness level; strength training willimprove and maintain fitness.
START6
MONTHS
How Fit and Strong Are You Now?RARELY (1 POINT) SOMETIMES (2 POINTS) USUALLY (3 POINTS) ALWAYS (4 POINTS)
9MONTHS
12MONTHS
MOOD, ENERGYLEVEL ANDMENTAL HEALTH
1. I feel younger thanmy age.
2. I feel independent.
3. I feel energetic.
4. I live an active life.
5. I feel strong.
6. I feel healthy.
7. I am as active asother people my age.
3MONTHS
STEP 3: DEFINE YOUR GOALS
When taking on any challenge, it’s a good idea to define your
goals. You should identify what you want to accomplish and
how you will carry out your plan. This is important when
making positive change and will help you succeed.
Before starting this program, set short-term and long-
term goals. These goals should be S-M-A-R-T :
S — SPECIFIC
M — MEASURABLE
A — ATTAINABLE
R — RELEVANT
T — TIME-BASED
For instance:
A SPECIFIC short-term goal may be to start strength
training; the long-term goal may be easing the symp-
toms of arthritis, improving balance, or controlling
your weight.
This goal is easily MEASURABLE: Have you or have you
not begun the program?
Indeed, this is an ATTAINABLE goal, as long as your
doctor approves.
And this goal is certainly RELEVANT to living a long,
healthy life.
Your goal should be TIME-BASED: you should read this
Starting Your Journey20
book within 5 days; buy the equipment you need and
set your exercise schedule within the next 5 days. Start
the program within the next 2 to 3 days.
The goals and timeframe are entirely up to you. You
may want to focus your long-term goals on improving a
specific health condition, such as reducing pain from arthritis,
controlling diabetes, increasing bone density to help combat
osteoporosis, or increasing muscle mass to help with balance
or weight control. Or your goal may be to bowl or play tennis,
or perhaps, to do all of your own chores, such as cleaning
windows or vacuuming. Your success depends on setting
goals that are truly important to you—and possessing a
strong desire to achieve them.
Starting Your Journey 21
Starting Your Journey
GOAL-SETTING WORKSHEET #1:IDENTIFYING YOUR SHORT-TERM GOALS
Identify at least two or three of your own short-term goals. If
you have more goals, write them down now. Remember that
each goal should be S-M-A-R-T— Specific, Measurable,
Attainable, Relevant, and Time-based. Setting these short-term
goals will help motivate you to make the program a regular
part of your life.
MY SHORT-TERM GOALS
Examples:
I will talk to my doctor about starting this program.
I will buy the equipment I need and get ready to exercise
within 2 weeks.
I will look at my calendar and schedule 2 or 3
45-minute blocks of time for exercise each week.
I will invite my spouse/friend/family member to join me
in these exercises.
22
Starting Your Journey
S M A R T23
MY PERSONAL SHORT-TERM GOALS:
1.
2.
3.
4.
5.

GOAL-SETTING WORKSHEET #2:IDENTIFYING YOUR LONG-TERM GOALS
Identify at least two or three long-term goals. If you have
more goals, write them down now. Are there activities that
you want to do more easily over the long term? Are there
things that you haven’t done in some time that you want to
try again? Listing these goals will help you stay with the
program, see your progress, and enjoy your success. (Don’t
forget to use the S-M-A-R-T technique.)
MY LONG-TERM GOALS
Examples:
I will do each exercise 2 or 3 times each week. Within
3 months, I will do each exercise with 5-lb weights.
After 12 weeks of the program, I will take the stairs
instead of the elevator.
I will be able to walk to the store or office.
I will do my own vacuuming.
I will play golf.
I will reduce some of the pain and stiffness from arthritis.
Starting Your Journey24
Starting Your Journey
MY PERSONAL LONG-TERM GOALS:
1.
2.
3.
4.
5.
25
S M A R T
STEP 4: GET EQUIPMENT
Strength training requires little special equipment, but there
are a few basic necessities:
A sturdy chair and exercise space
Find a strong, stable chair that does not rock or sway when
you sit in it or move when you stand up from it. When you
sit in the chair, your knees should be at a 90-degree angle and
your feet should be flat on the ground. If the chair is too high,
find one with shorter legs; if it’s too low, try putting a pillow
or a folded blanket on the seat to give you a slight boost.
For your exercise space, choose an open area, prefer-
ably carpeted, with at least enough space for your chair and
ample room to walk around it. Carpeting will stop the chair
from sliding. On bare floor, put your chair against the wall.
If want to exercise to music or while watching television,
plan your space accordingly.
Good shoes
Good shoes are essential for any exercise. For strength train-
ing, try athletic shoes with good support, such as walking,
running, or cross-training sneakers. The sole should be rubber,
but not too thick, because fat soles may cause you to trip. If
you don’t already have the right shoes, you can find them at
sporting goods, discount, and department stores.
Starting Your Journey26
Comfortable clothing
Wear loose, cool clothing that breathes well during exercise
—for example, a cotton T-shirt and cotton shorts or pants.
If you want to buy new workout clothes, look for materials
that absorb moisture and that you feel comfortable in.
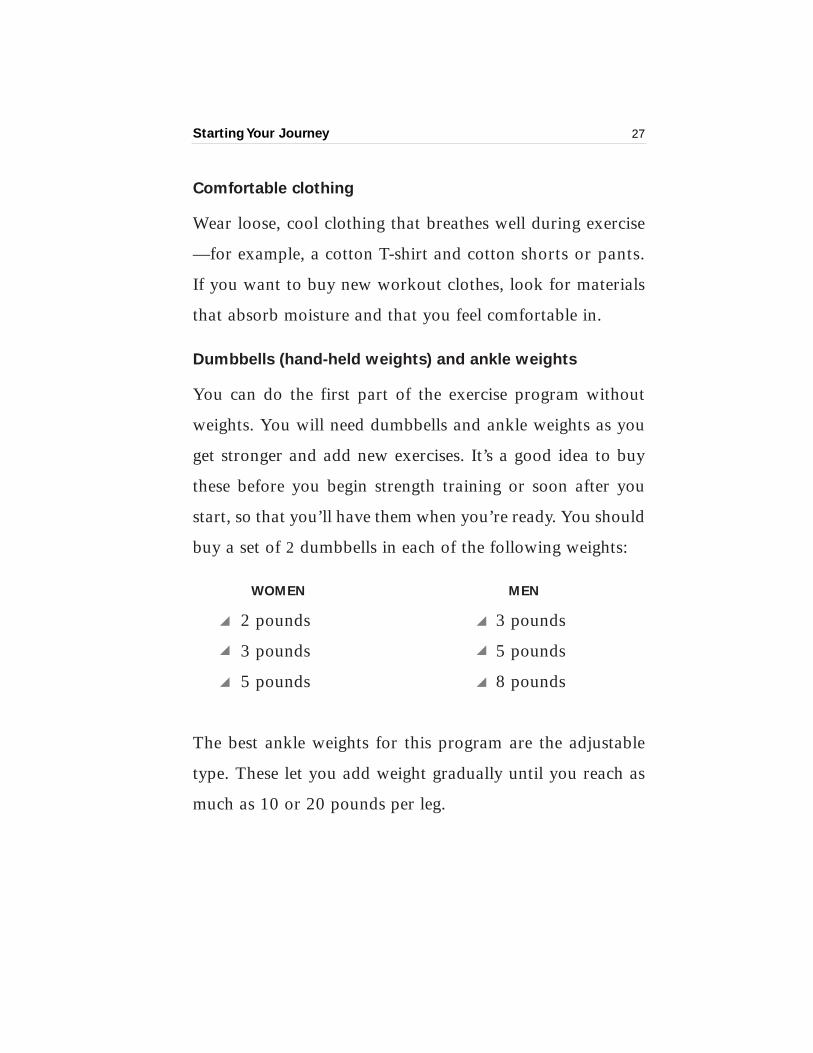
Dumbbells (hand-held weights) and ankle weights
You can do the first part of the exercise program without
weights. You will need dumbbells and ankle weights as you
get stronger and add new exercises. It’s a good idea to buy
these before you begin strength training or soon after you
start, so that you’ll have them when you’re ready. You should
buy a set of 2 dumbbells in each of the following weights:
WOMEN MEN
2 pounds 3 pounds
3 pounds 5 pounds
5 pounds 8 pounds
The best ankle weights for this program are the adjustable
type. These let you add weight gradually until you reach as
much as 10 or 20 pounds per leg.
Starting Your Journey 27
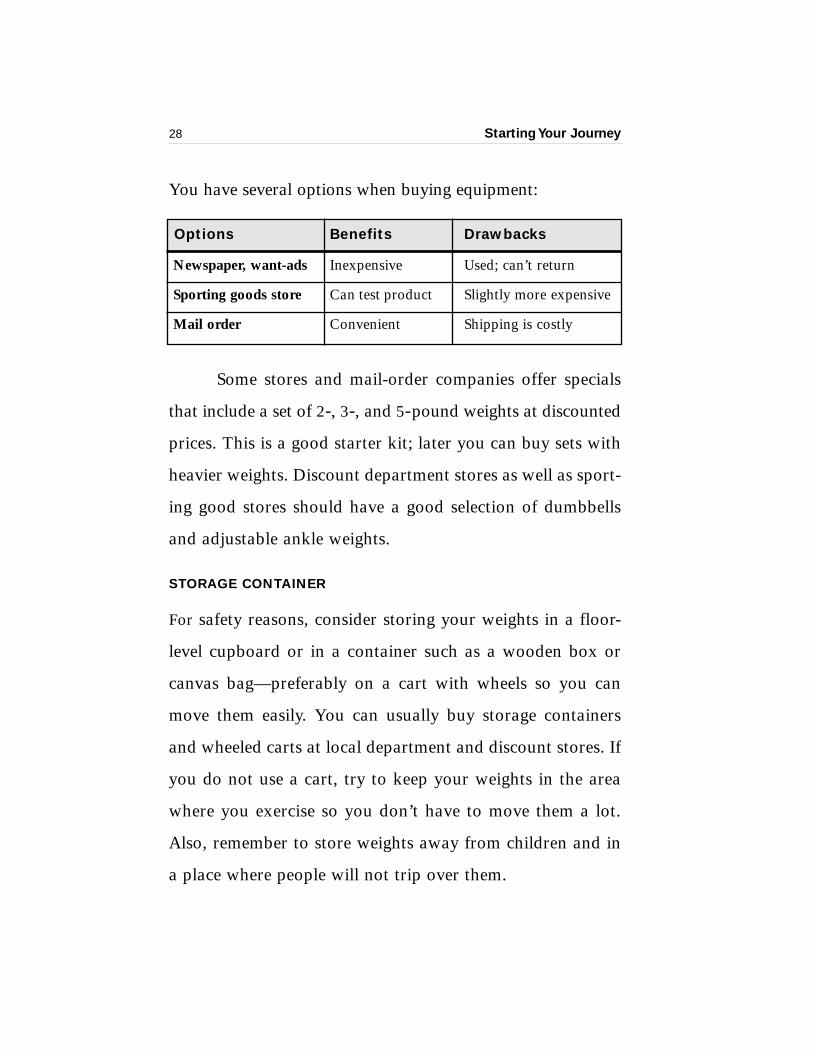
You have several options when buying equipment:
Options Benefits Drawbacks
Newspaper, want-ads Inexpensive Used; can’t return
Sporting goods store Can test product Slightly more expensive
Mail order Convenient Shipping is costly
Some stores and mail-order companies offer specials
that include a set of 2-, 3-, and 5-pound weights at discounted
prices. This is a good starter kit; later you can buy sets with
heavier weights. Discount department stores as well as sport-
ing good stores should have a good selection of dumbbells
and adjustable ankle weights.
STORAGE CONTAINER
For safety reasons, consider storing your weights in a floor-
level cupboard or in a container such as a wooden box or
canvas bag—preferably on a cart with wheels so you can
move them easily. You can usually buy storage containers
and wheeled carts at local department and discount stores. If
you do not use a cart, try to keep your weights in the area
where you exercise so you don’t have to move them a lot.
Also, remember to store weights away from children and in
a place where people will not trip over them.
Starting Your Journey28
STEP 5: SCHEDULE YOUR EXERCISE
Look at your schedule to see where strength training may
best fit in—perhaps on weekday mornings before work or
during your favorite evening TV show. There are no rules
about the best time to exercise. But keep in mind that you
should exercise on three non-consecutive days of the week
(say, Monday, Wednesday, and Friday; or Tuesday, Thursday,
Saturday). This gives your muscles a proper rest. You can
also try doing lower body exercises one day and then upper
body exercises the next. This way, you will avoid overwork-
ing the same muscle groups.
Put your scheduled strength-training appointments on
your calendar and keep them faithfully, just as you would a
doctor’s appointment. You might also try to find an exercise
partner who can join you for your scheduled sessions.
Exercising with a friend will help you adhere to your routine
and keep you motivated.
Starting Your Journey 29
Here are some tips on scheduling exercise:
Consider what days best suit your schedule, given
your other commitments.
Pick a time of day when you most enjoy exercising.
Some people like to exercise first thing in the morning;
others are more motivated in the evening or afternoon.
Write your first exercise appointments on your calendar.
After your first 2 or 3 sessions, decide whether your
selected days and times work well for you. If they
don’t, look at your schedule again and try to find
better times.
STEP 6: EXERCISE SAFE AND SMART
At times, you will not feel like exercising. This is true for
everyone. If you’re just feeling a little tired or low on energy,
go ahead and try to exercise. The workout will likely
boost your energy level and your mood. However, if you’re
not feeling well—if you think you might be getting sick,
coming down with a cold or the flu; or if you have any kind
of pain or swelling—take a break from exercising and, if
necessary, contact your doctor. Your health and safety are the
top priorities.
Starting Your Journey30
REFRAIN FROM EXERCISING OR CHECK
WITH YOUR DOCTOR FIRST IF YOU HAVE:
A cold, flu, or infection accompanied by fever.
Significantly more fatigue than usual.
A swollen or painful muscle or joint.
Any new or undiagnosed symptom.
Chest pain or irregular, rapid, or fluttery heartbeat.
Shortness of breath.
A hernia with symptoms.
Been advised by your doctor not to exert yourself for
a given period of time due to illness, surgery, etc.
Listen to your body. You will know when you’re well
enough to handle a workout and when you need to take
a day off or see your doctor, as you get used to your
exercise program.
The reasons listed below are good cause to take a day
off from strength training. Be cautious—if you’re not sure
whether you’re well enough to exercise, take a break and see
how you feel the next day.
Starting Your Journey 31
5 Getting Stronger:A 3-Part Program
chapter
The strength-training program outlined in this book has
three phases:
Part I strengthens your body slowly and gently,
using only your own body weight
Part II introduces dumbbells and ankle weights
to increase strength
Part III adds variety with new ways to boost
your strength even more.
The exercises in this program were devised in a
research laboratory at Tufts University. The exercises are safe
and effective. They are designed to strengthen all of the
major muscle groups in the upper body (shoulders, upper
arms, back, chest, and abdomen) and in the lower body
(hips, thighs, knees, lower legs, and ankles). They also target
muscles affected by osteoarthritis, particularly in the
shoulders, hands, hips, and knees.
The exercises involve lifting a heavy load—either your
own body weight or a dumbbell or ankle weight—by raising
the weight (to a count of two to four) and then lowering it
Getting Stronger
(to a count of four) in a smooth, fluid motion. The full
motion is then repeated 10 times to make a full “set,” or
group of repetitions.
Here’s a timetable for going through the three parts of
the program:
Part I: Weeks 1 — 2
Part II: Weeks 3 — 6
Part III: Weeks 7 +
Once you have done the exercises in Part I two or
three times a week for at least two weeks, you can safely
move on to Part II. Do the exercises in Part II two or three
times a week for four weeks before you move on to the
exercises described in Part III.
Chapter 7 includes a 12-week workbook. Start
keeping a record in this workbook when you begin strength
training. It will help you monitor your progress and stay on
track with the program. Research studies show that record-
keeping helps people stay with strength training over the
long term.
Make sure that you are doing each exercise safely and
properly with the full range of motion. Also, make sure that
you stretch after each workout and breathe regularly through-
out the exercises—don’t hold your breath!
33

Getting Stronger34
W A R M - U P
PART I: 4 EXERCISES FOR GETTING STARTED
This first part of your exercise program starts you on your
journey to greater strength, balance, and coordination. This
part is gentle and requires no special equipment so it can
serve as an anchor program. You only need a chair and a
wall. It’s helpful (but not necessary) to have a mirror so you
can check your form during the exercises.
Later, once you have moved to Part II or III, if you’re not
feeling well or if you’re away from home, you can do these
exercises to keep up with your program.
Remember to breatheregularly throughouteach exercise. This willhelp keep blood andoxygen flowing to yourworking muscles.
Exercise Tip
Getting Stronger
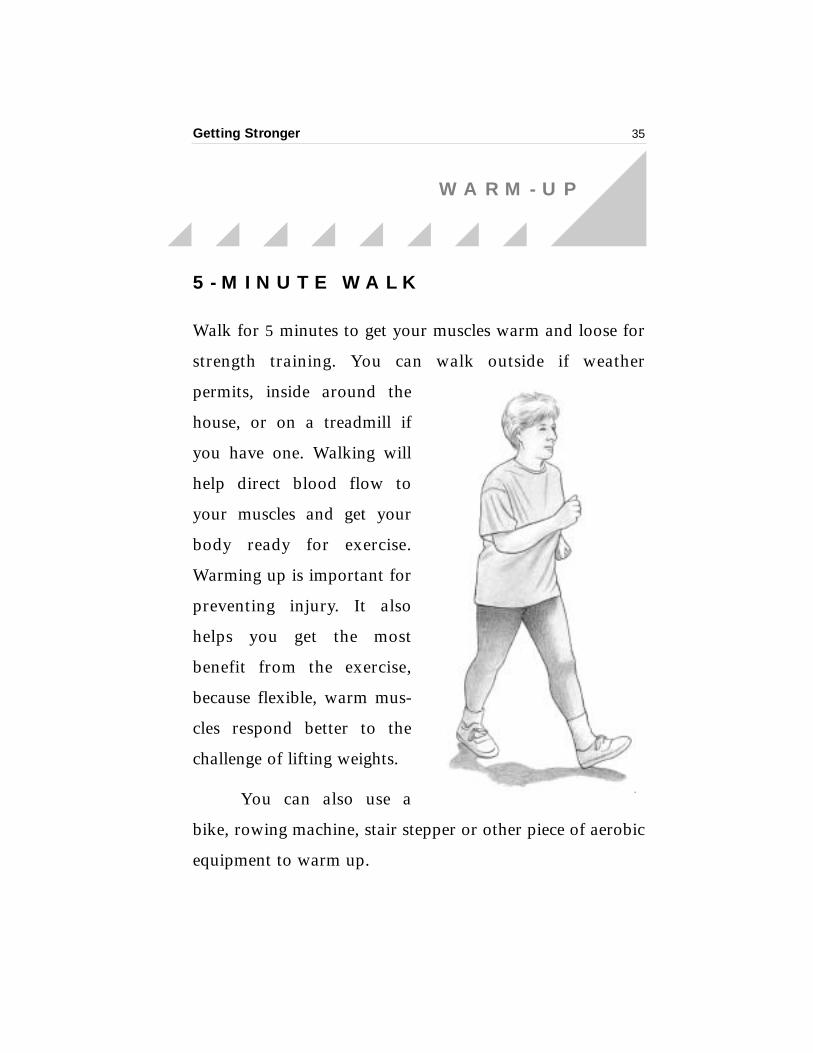
5 - M I N U T E W A L K
Walk for 5 minutes to get your muscles warm and loose for
strength training. You can walk outside if weather
permits, inside around the
house, or on a treadmill if
you have one. Walking will
help direct blood flow to
your muscles and get your
body ready for exercise.
Warming up is important for
preventing injury. It also
helps you get the most
benefit from the exercise,
because flexible, warm mus-
cles respond better to the
challenge of lifting weights.
You can also use a
bike, rowing machine, stair stepper or other piece of aerobic
equipment to warm up.
35
W A R M - U P
Getting Stronger36
E X E R C I S E 1
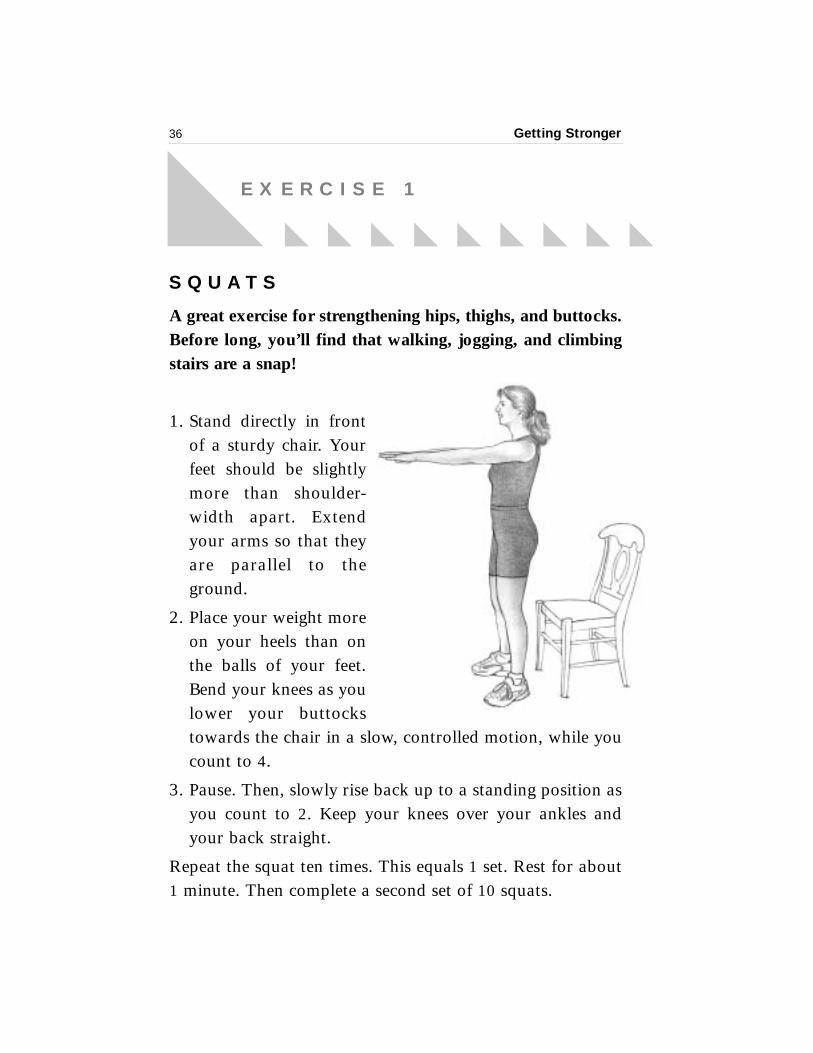
S Q U AT S
A great exercise for strengthening hips, thighs, and buttocks.Before long, you’ll find that walking, jogging, and climbingstairs are a snap!
1. Stand directly in frontof a sturdy chair. Yourfeet should be slightlymore than shoulder-width apart. Extendyour arms so that theyare parallel to theground.
2. Place your weight moreon your heels than onthe balls of your feet.Bend your knees as youlower your buttockstowards the chair in a slow, controlled motion, while youcount to 4.
3. Pause. Then, slowly rise back up to a standing position asyou count to 2. Keep your knees over your ankles andyour back straight.
Repeat the squat ten times. This equals 1 set. Rest for about1 minute. Then complete a second set of 10 squats.
Getting Stronger 37
E X E R C I S E 1
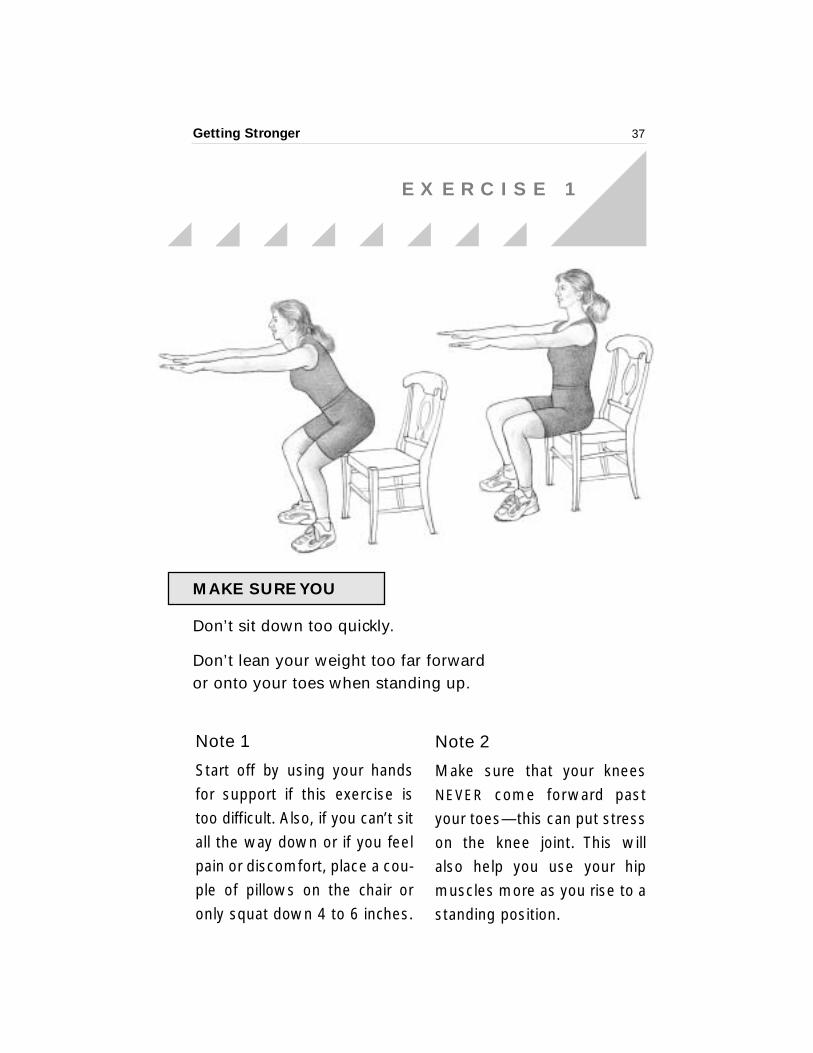
MAKE SURE YOU
Don’t sit down too quickly.
Don’t lean your weight too far forward or onto your toes when standing up.
Note 1
Start off by using your handsfor support if this exercise istoo difficult. Also, if you can’t sitall the way down or if you feelpain or discomfort, place a cou-ple of pillows on the chair oronly squat down 4 to 6 inches.
Note 2
Make sure that your kneesNEVER come forward pastyour toes—this can put stresson the knee joint. This willalso help you use your hipmuscles more as you rise to astanding position.
E X E R C I S E 2
Getting Stronger38
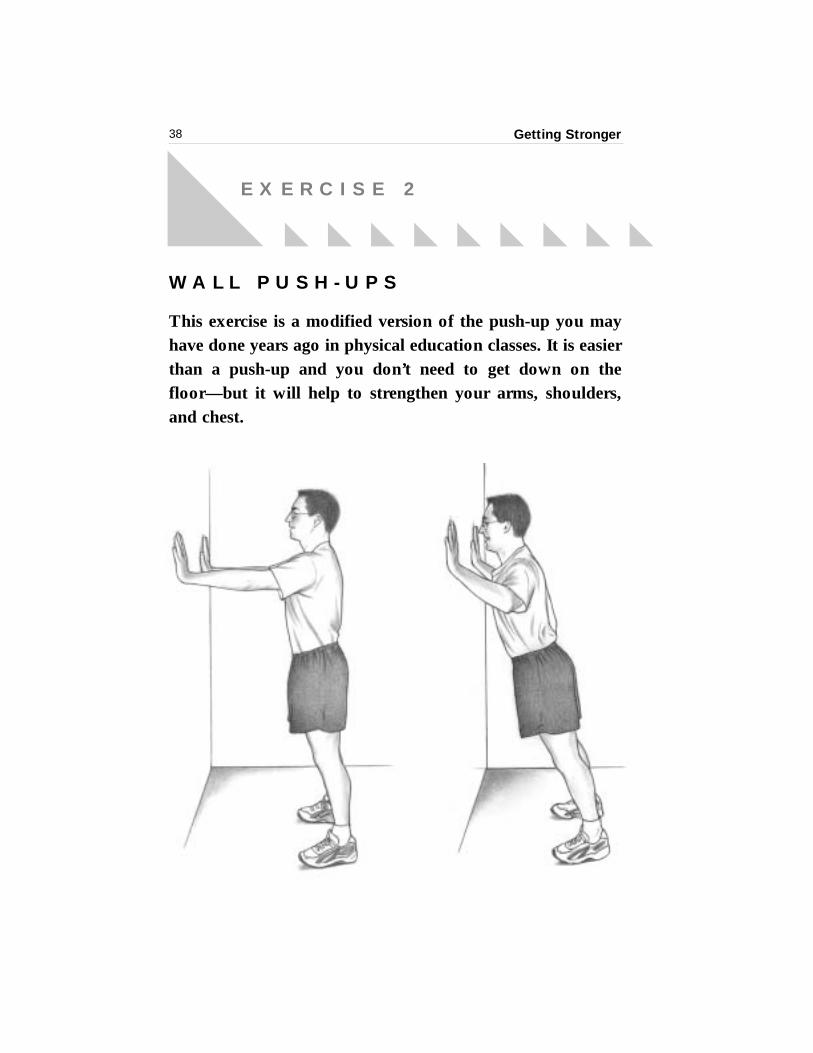
W A L L P U S H - U P S
This exercise is a modified version of the push-up you mayhave done years ago in physical education classes. It is easierthan a push-up and you don’t need to get down on thefloor—but it will help to strengthen your arms, shoulders,and chest.
E X E R C I S E 2
Getting Stronger 39
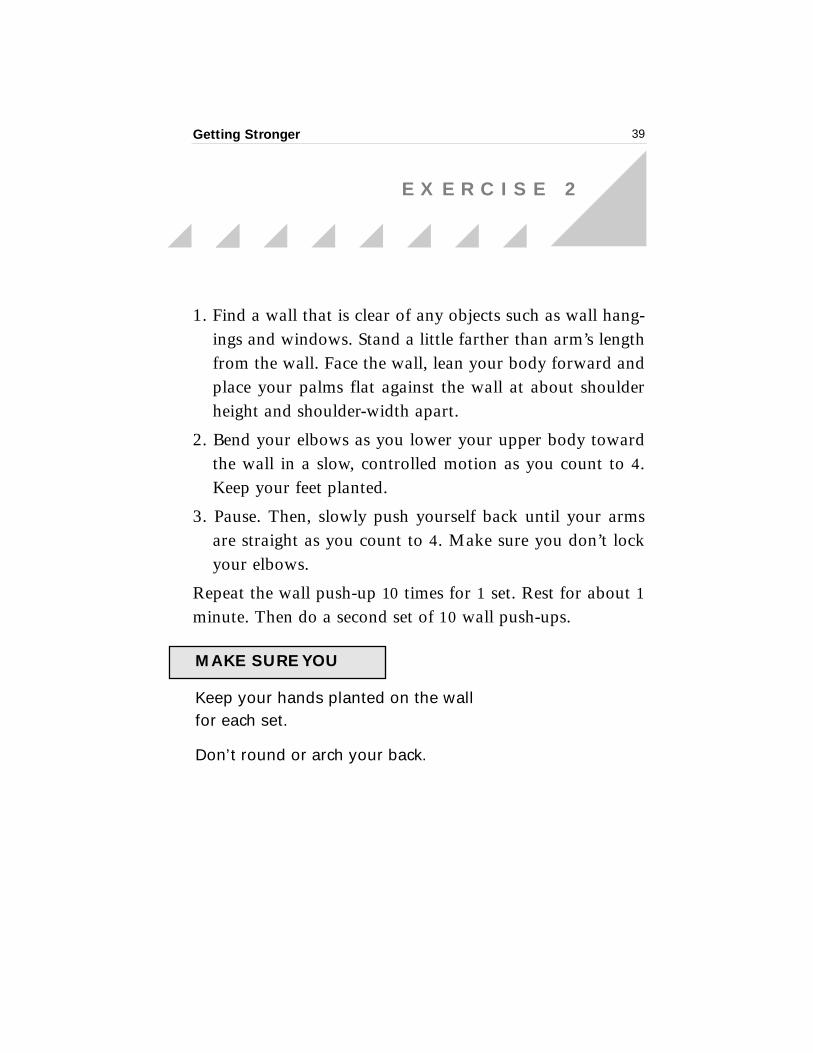
MAKE SURE YOU
Keep your hands planted on the wallfor each set.
Don’t round or arch your back.
1. Find a wall that is clear of any objects such as wall hang-ings and windows. Stand a little farther than arm’s lengthfrom the wall. Face the wall, lean your body forward andplace your palms flat against the wall at about shoulderheight and shoulder-width apart.
2. Bend your elbows as you lower your upper body towardthe wall in a slow, controlled motion as you count to 4.Keep your feet planted.
3. Pause. Then, slowly push yourself back until your armsare straight as you count to 4. Make sure you don’t lockyour elbows.
Repeat the wall push-up 10 times for 1 set. Rest for about 1minute. Then do a second set of 10 wall push-ups.
If a walk in the park no longer seems easy or enjoyable, thetoe stand exercise is for you! It will help make that stroll inthe park fun and relaxing by strengthening your calves andankles and restoring stability and balance.
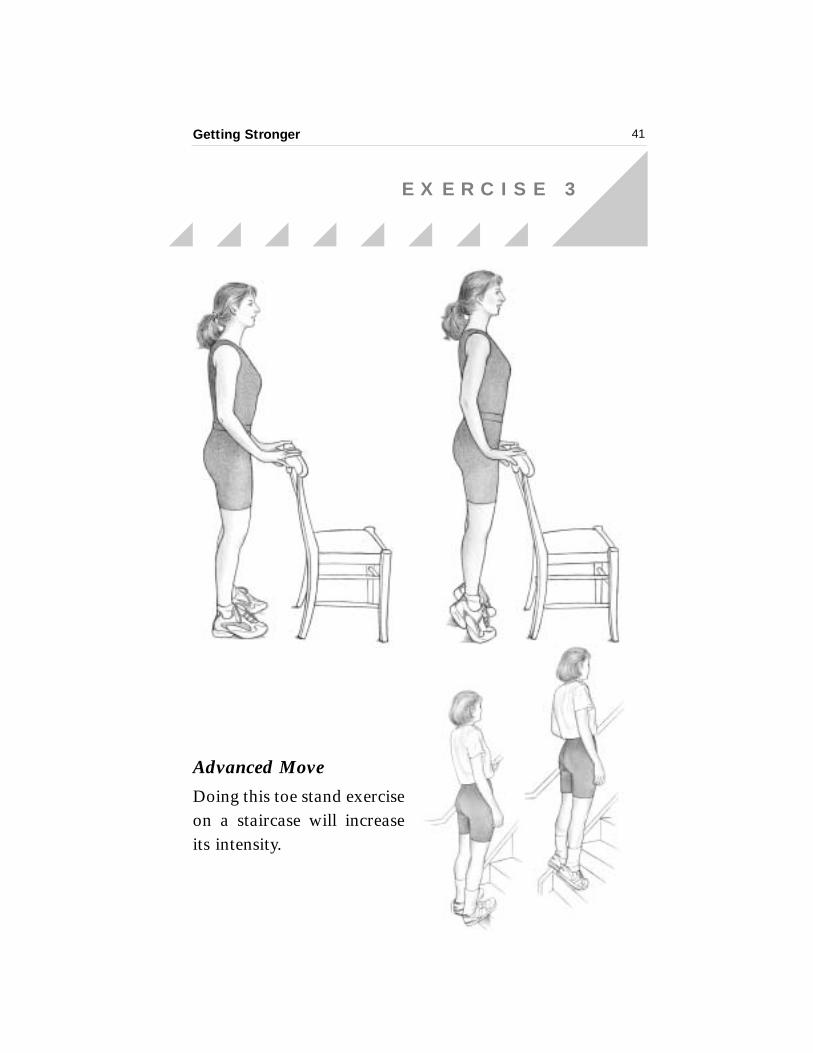
1. Stand with your feet shoulder-width apart near a counter orsturdy chair. Use the chair or counter for balance.
2. Slowly push up as far as you can onto the balls of your feetas you count to 4. Hold this position for 2 to 4 seconds.
3. Then, slowly lower your heels back to the floor as youcount to 4.
Repeat 10 toe stands for 1 set. Rest for about 1 minute. Thencomplete a second set of 10 toe stands.
Getting Stronger
MAKE SURE YOU
Don’t lean on the counter or chair—use it forbalance only.
Breathe regularly throughout the exercise.
40
E X E R C I S E 3
T O E S TA N D S
Getting Stronger 41
E X E R C I S E 3
Advanced Move
Doing this toe stand exerciseon a staircase will increaseits intensity.
In this exercise, you’ll let your fingers, hands, and arms dothe walking. This will help strengthen your upper body andyour grip. It will also increase the flexibility of your arms,back, and shoulders.
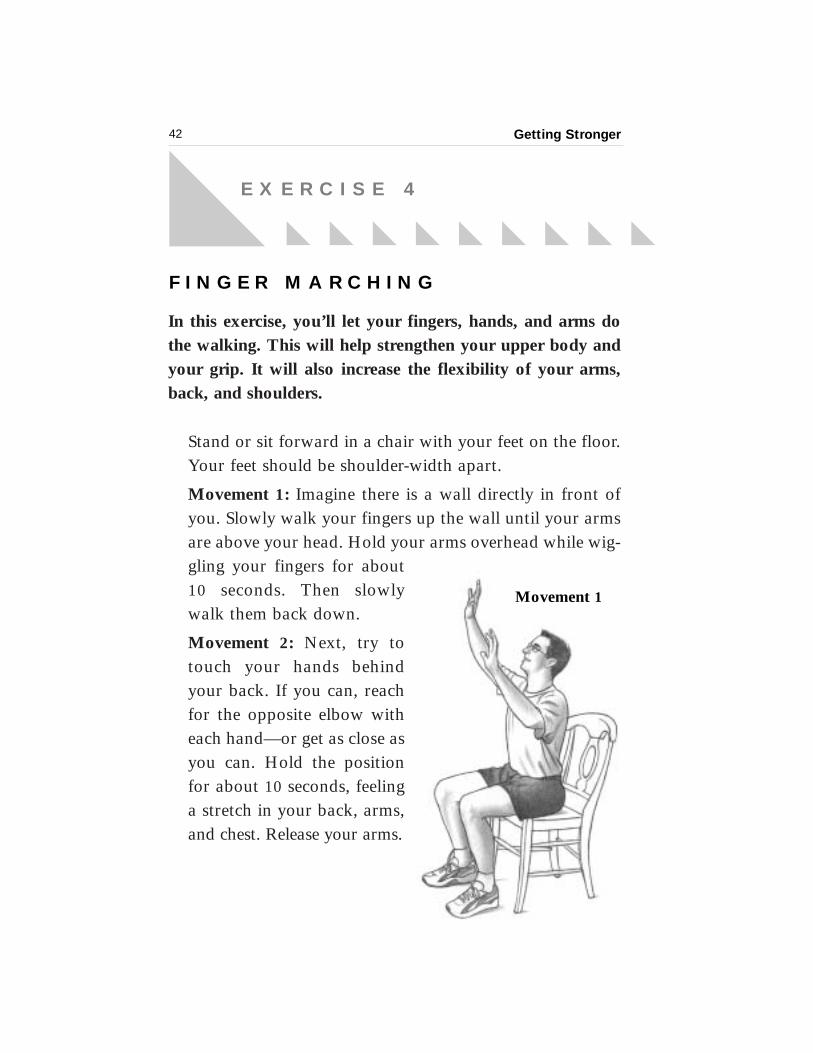
Stand or sit forward in a chair with your feet on the floor.Your feet should be shoulder-width apart.
Movement 1: Imagine there is a wall directly in front ofyou. Slowly walk your fingers up the wall until your armsare above your head. Hold your arms overhead while wig-gling your fingers for about10 seconds. Then slowlywalk them back down.
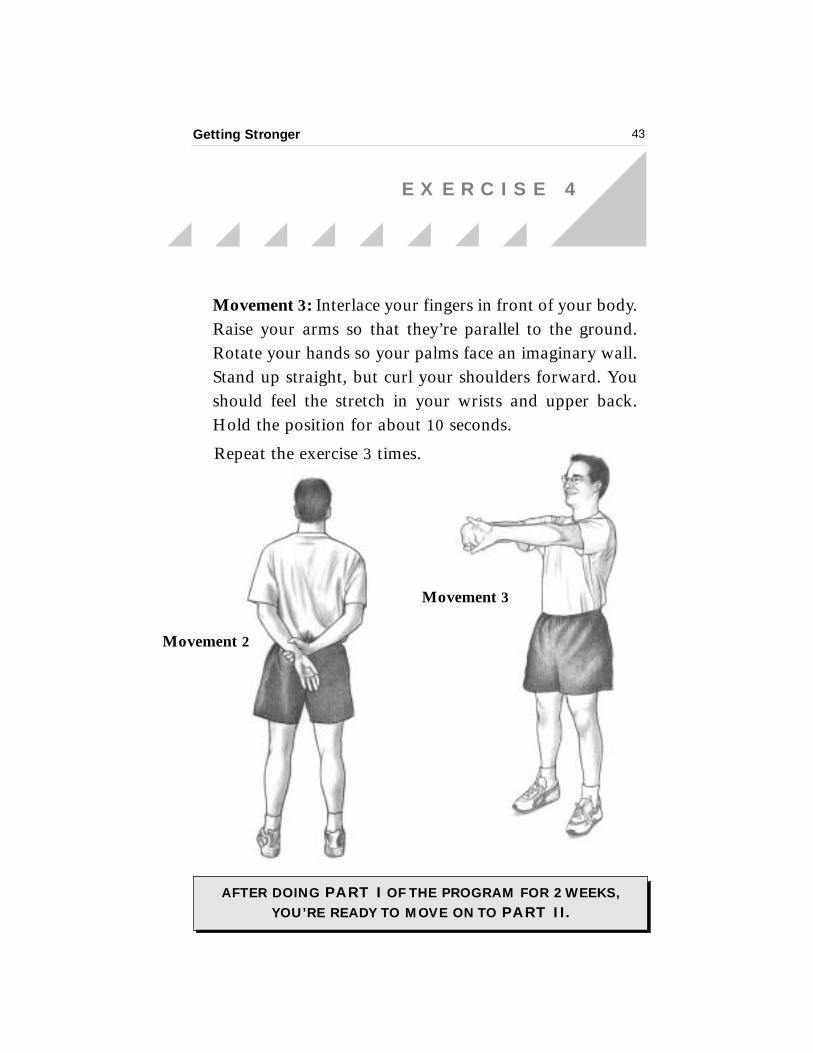
Movement 2: Next, try totouch your hands behindyour back. If you can, reachfor the opposite elbow witheach hand—or get as close asyou can. Hold the positionfor about 10 seconds, feelinga stretch in your back, arms,and chest. Release your arms.
Getting Stronger
E X E R C I S E 4
42
F I N G E R M A R C H I N G
Movement 1
Getting Stronger
E X E R C I S E 4
43
Movement 3: Interlace your fingers in front of your body.Raise your arms so that they’re parallel to the ground.Rotate your hands so your palms face an imaginary wall.Stand up straight, but curl your shoulders forward. Youshould feel the stretch in your wrists and upper back.Hold the position for about 10 seconds.
Repeat the exercise 3 times.
AFTER DOING PART I OF THE PROGRAM FOR 2 WEEKS,
YOU’RE READY TO MOVE ON TO PART II.
Movement 2
Movement 3
Getting Stronger44
GAINING GRIP STRENGTH
If you have arthritis, you may have trouble picking up thingswith your hands or keeping a grip on them. Some of the exer-cises in the next section of this book will help strengthenyour hand muscles. If you’re concerned about grip strength,you may also want to add a grip exercise to increase strengthand decrease stiffness in your hands. The exercise is simple; itcan be done easily while reading or watching TV, and mostpeople already have the equipment at home.
Equipment: Racquetball, tennis ball, or “stress” ball.
Time: Less than 5 minutes.
Exercise: Grasp a ball in one hand while sitting orstanding. Slowly squeeze it as hard asyou can and hold the squeeze for 3 to 5seconds. Slowly release the squeeze.Take a short rest, then repeat the exer-cise 10 times. Switch hands, and do 2
sets of 10 squeezes with the other hand.
Frequency: You may do this exercise every day orevery other day, depending on how yourhands feel. If they feel stiff or painful,you may want to skip a day.
Getting Stronger
PART II:STEPPING UP YOUR STRENGTH
This part of the program is more challenging because it adds
weights to the exercises. When you start this part, approach
the exercises enthusiastically but with care. It’s important to
exercise at the proper intensity, with the correct amount of
weight for your current level of strength. You are working at
the right intensity (or difficulty) if you can complete 10 rep-
etitions of a given exercise—and no more. Whatever your
current level of strength, it is best to start this part using 2-
to 3-pound weights for both dumbbells and ankle weights.
This will reduce your risk of injury.
45
Don’t perform the exercises quickly. They should be done in a slow, controlled motion.
Exercise Tip
Does a gallon of milk feel a lot heavier than it used to? Aftera few weeks of doing the biceps curl, lifting that eight-poundjug will be a cinch!
1. Stand or sit in a chair with a dumbbell in each hand. Yourfeet should be shoulder-width apart with your arms atyour sides and your palms facing your thighs.
2. Rotate your forearms and slowly lift the weights as youcount to 2. Your palms should be facing in towards yourshoulders. Keep your upper arms and elbows close to your
Getting Stronger46
E X E R C I S E 5
B I C E P S C U R L
PART II:STEPPING UP YOUR STRENGTH CONTINUED
Reassess the intensity of the exercises after completing one
week (or 3 sessions) of each set of exercises. Start using
heavier weights if any exercise seems easy with the weights
you are using and you can complete more than 10 repetitions
in proper form.
After a few weeks of these exercises, you’ll find it
easier to lift and carry heavy items, complete household
chores, and walk distances without discomfort.
Getting Stronger
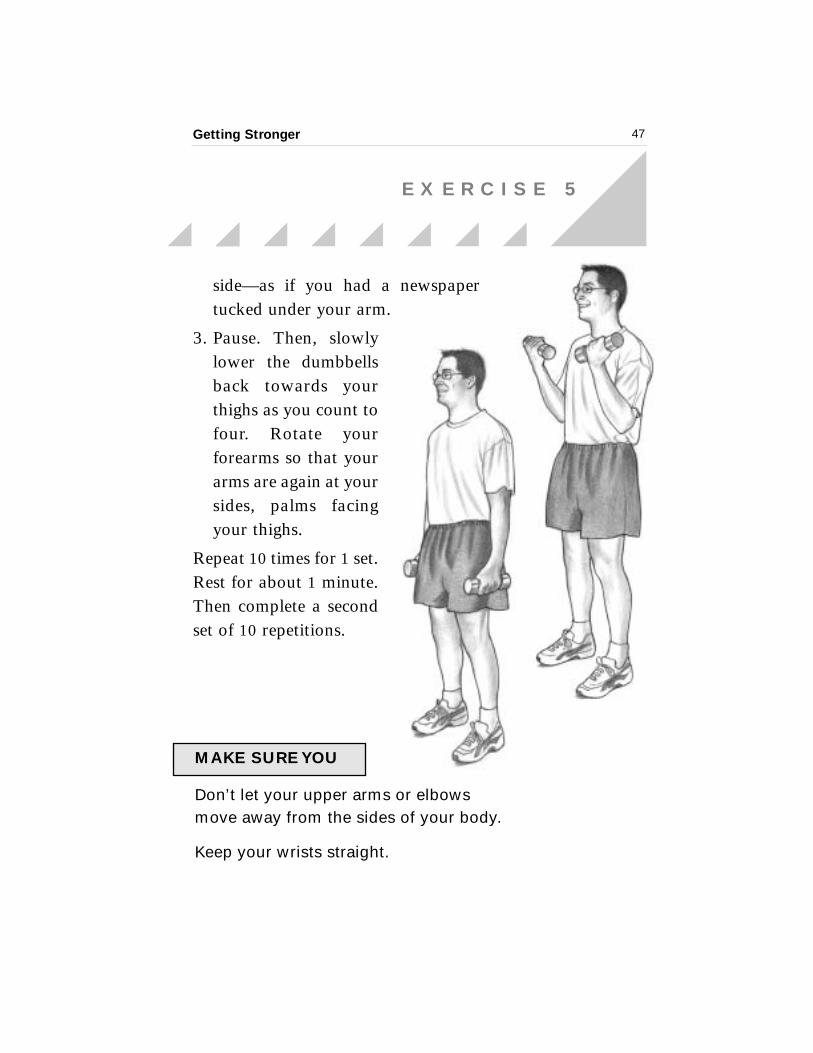
side—as if you had a newspapertucked under your arm.
3. Pause. Then, slowlylower the dumbbellsback towards yourthighs as you count tofour. Rotate yourforearms so that yourarms are again at yoursides, palms facingyour thighs.
Repeat 10 times for 1 set.Rest for about 1 minute.Then complete a secondset of 10 repetitions.
47
E X E R C I S E 5
MAKE SURE YOU
Don’t let your upper arms or elbowsmove away from the sides of your body.
Keep your wrists straight.
Getting Stronger48
E X E R C I S E 6
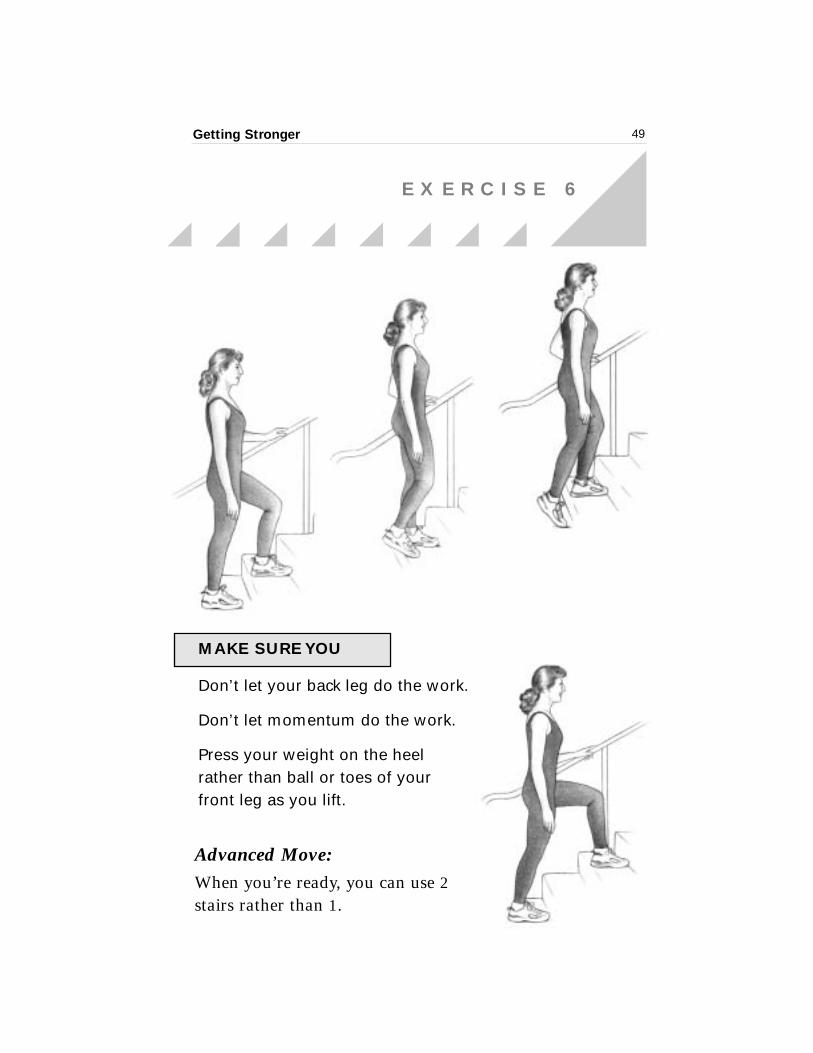
S T E P - U P S
This is a great strengthening exercise that requires only a setof stairs. But don’t let its simplicity fool you. Step-ups willimprove your balance and build strength in your legs, hips,and buttocks.
1. Stand next to a handrail at the bottom of a staircase. Withyour feet flat and toes facing forward, put your entire leftfoot on the first step.
2. Hold the handrail for balance. As you count to 2, placeyour weight on your left leg and straighten it as you slowly lift your right leg until it reaches the first step. Make sure that your left knee stays straight and does notmove forward past your ankle as you’re lifting yourselfup. Let your right foot tap the first step near your left foot.
3. Pause. Then, use your left leg to support your weight andslowly lower your right foot back to the floor as you countto 4.
Repeat 10 times with the left leg and 10 times with the rightleg for 1 set. Rest for about 1 minute. Then do a second setof 10 repetitions with each leg.
Getting Stronger 49
E X E R C I S E 6
MAKE SURE YOU
Don’t let your back leg do the work.
Don’t let momentum do the work.
Press your weight on the heelrather than ball or toes of yourfront leg as you lift.
Advanced Move:When you’re ready, you can use 2stairs rather than 1.

O V E R H E A D P R E S S
Getting Stronger50
E X E R C I S E 7
This useful exercise targets several muscles in the arms,upper back, and shoulders. It can also help firm the back ofyour upper arms and make reaching for objects in high cupboards easier.
Getting Stronger 51
E X E R C I S E 7
MAKE SURE YOU
Keep your wrists straight.
Relax your neck and shoulders.
Don’t lock your elbows; keep a slight bend inyour arms.
Don’t let the dumbbells move too far in front ofyour body or behind it.
Breathe regularly throughout the exercise.
1. Stand or sit in a chair with feet shoulder-width apart. Pickup a dumbbell in each hand. Raise your hands with yourpalms and forearms facing forward, until the dumbbellsare level with your shoulders and parallel to the floor.
2. Slowly push the dumbbells up over your head until yourarms are fully extended as you count to 2. Make sure youdon’t lock your elbows.
3. Pause. Then, slowly lower the dumbbells back to shoulderlevel as you count to 4, bringing your elbows down closeto your sides.
Repeat 10 times for 1 set. Rest for about 1 minute. Thencomplete a second set of 10 repetitions.

Getting Stronger52
E X E R C I S E 8
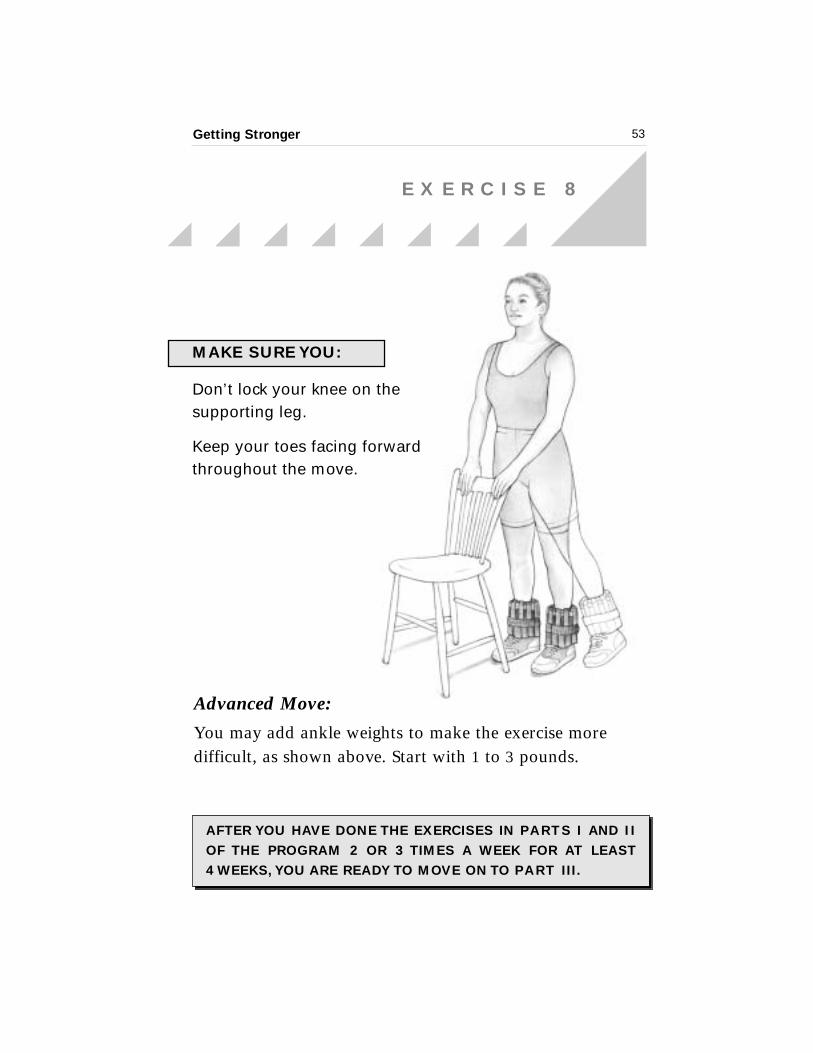
S I D E H I P R A I S E
The side hip raise targets the muscles in your hips, thighs,and buttocks. This exercise firms and shapes your lowerbody, and strengthens your hipbones, which are more vulnerable to fracture as you age.
1. Stand behind a sturdy chair, with feet slightly apart andtoes facing forward. Keep your legs straight, but do notlock your knees.
2. Slowly lift your left leg out to the side as you count to 2.Keep your leg straight—but again, do not lock your knee.
3. Pause. Then, slowly lower your left foot back to theground as you count to 4.
Repeat 10 times with the left leg and 10 times with the rightleg for 1 set. Rest for about 1 minute. Then do a second setof 10 repetitions with each leg.
Note
Only a small amount of movement out to theside is necessary. It is very important to do thisexercise in a slow, controlled motion.
Getting Stronger 53
E X E R C I S E 8
MAKE SURE YOU:
Don’t lock your knee on thesupporting leg.
Keep your toes facing forwardthroughout the move.
AFTER YOU HAVE DONE THE EXERCISES IN PARTS I AND IIOF THE PROGRAM 2 OR 3 TIMES A WEEK FOR AT LEAST
4 WEEKS, YOU ARE READY TO MOVE ON TO PART III.
Advanced Move:
You may add ankle weights to make the exercise moredifficult, as shown above. Start with 1 to 3 pounds.
PART III: COMPLEMENTING YOUR PROGRAM
The next exercises add variety to your routine and give you
new ways to increase your strength. Exercises 9 and 10 target
the muscles of the upper leg and require ankle weights. These
exercises should be done together. Exercises 11 and 12
strengthen the abdomen and the back and should also be
done together. As with all strength-training exercises,
remember to breathe throughout each exercise. When you
start to use ankle weights, use 1 to 3 pounds and increase the
weight as you get stronger over time.
Getting Stronger54
E X E R C I S E 9
Never wear ankleweights or hold dumb-bells while walking ordoing other aerobicexercises such as bikingor jogging.
Exercise Tip

Getting Stronger 55
E X E R C I S E 9
MAKE SURE YOU
Keep your ankle flexedthroughout the move.
This exercise strengthens weak knees and reduces the symptoms of arthritis of the knee by targeting the muscles ofthe front of the thigh.
1. Put your ankle weights on snugly. Sit all the way back in a sturdy chair so that your feet barely touch the ground. If your chair is too low, add a rolled-up towel under your knees.
2. Point your toes forward. Flex your left foot and slowly liftyour left leg as you count to two. Extend your leg untilyour knee is straight.
3. Pause. Then, slowly lower your foot back to the ground as you count to 4.
K N E E E X T E N S I O N
Repeat 10 times with the left leg and 10 timeswith the right leg for 1 set. Rest for 1 to 2 minutes. Then do a second set of 10
repetitions with each leg.

Getting Stronger56
E X E R C I S E 1 0
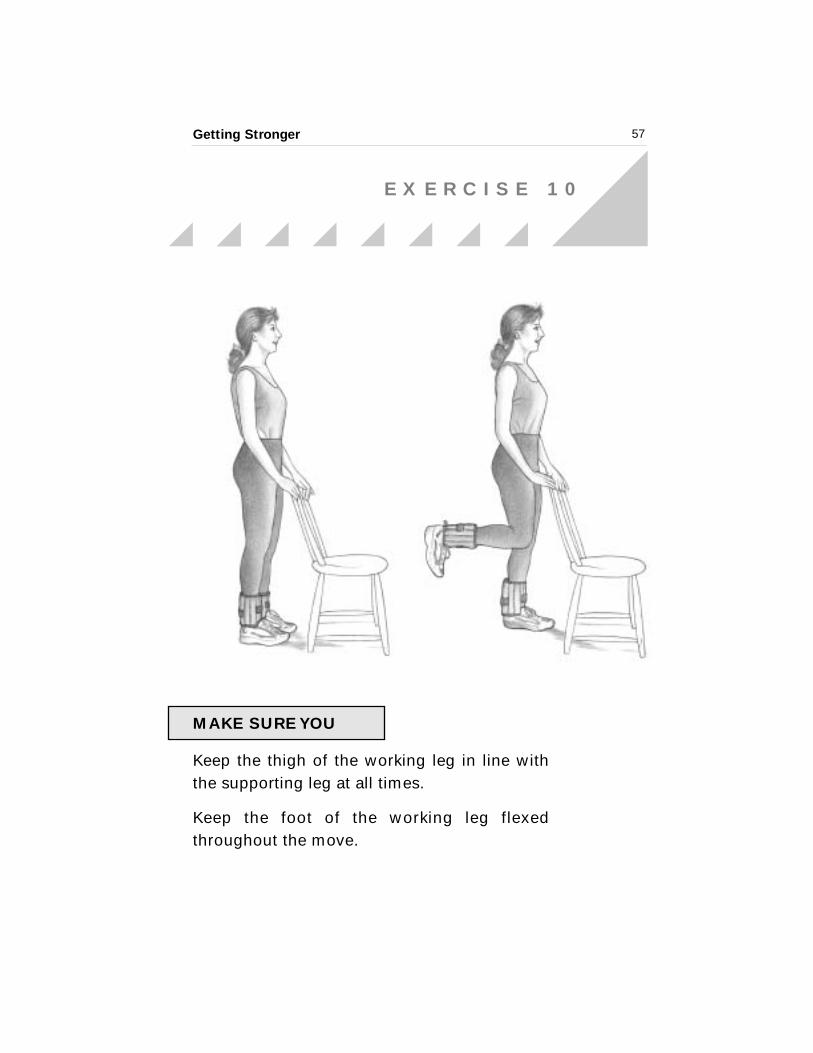
K N E E C U R L
This is an excellent exercise for strengthening the muscles of the back of the upper leg, known as the hamstrings.Walking and climbing are easier when you do both the knee extensions and knee curl.
1. Keep your ankle weights on and stand behind a sturdychair. Your feet should be a little less than shoulder-widthapart and face forward.
2. Keep your foot flexed and slowly bend your right leg andbring your heel up toward your buttocks as you count to 2.
3. Pause. Then, slowly lower your foot back to the ground asyou count to 4.
Repeat 10 times with your right leg and 10 times with yourleft leg for one set. Rest for 1 to 2 minutes. Then do a secondset of 10 repetitions with each leg.
Getting Stronger 57
E X E R C I S E 1 0
MAKE SURE YOU
Keep the thigh of the working leg in line withthe supporting leg at all times.
Keep the foot of the working leg flexedthroughout the move.
Getting Stronger58
E X E R C I S E 1 1
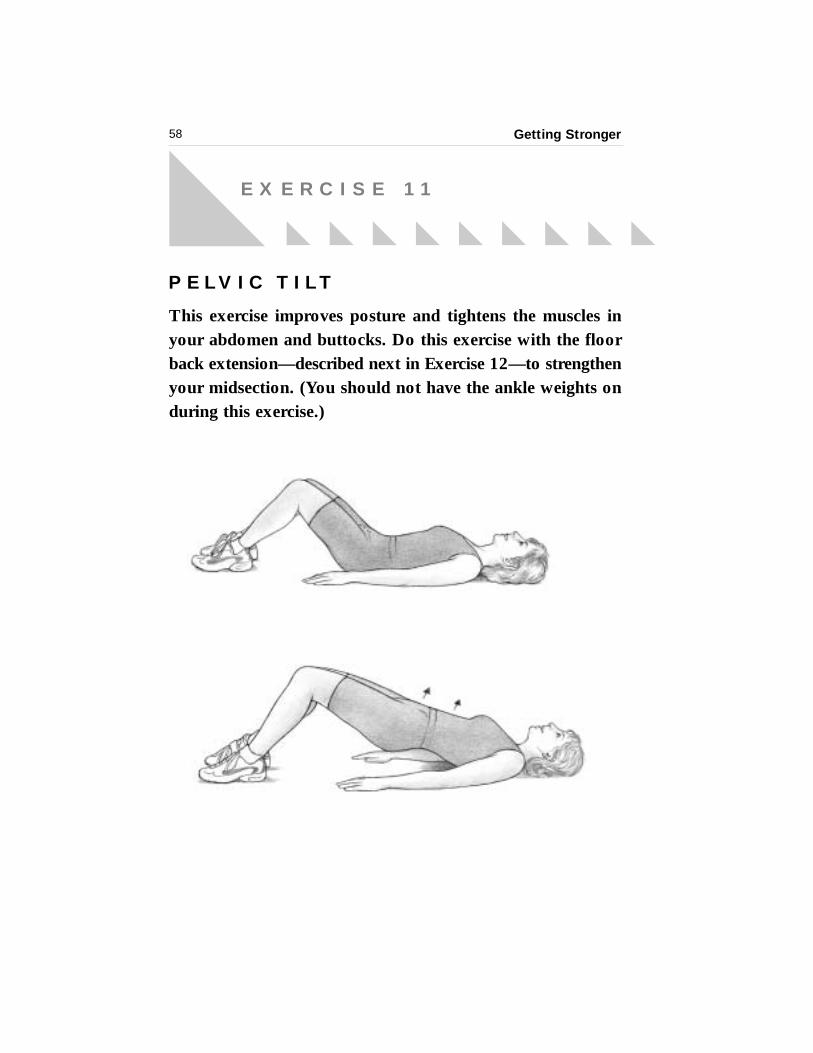
P E LV I C T I LT
This exercise improves posture and tightens the muscles inyour abdomen and buttocks. Do this exercise with the floorback extension—described next in Exercise 12—to strengthenyour midsection. (You should not have the ankle weights onduring this exercise.)
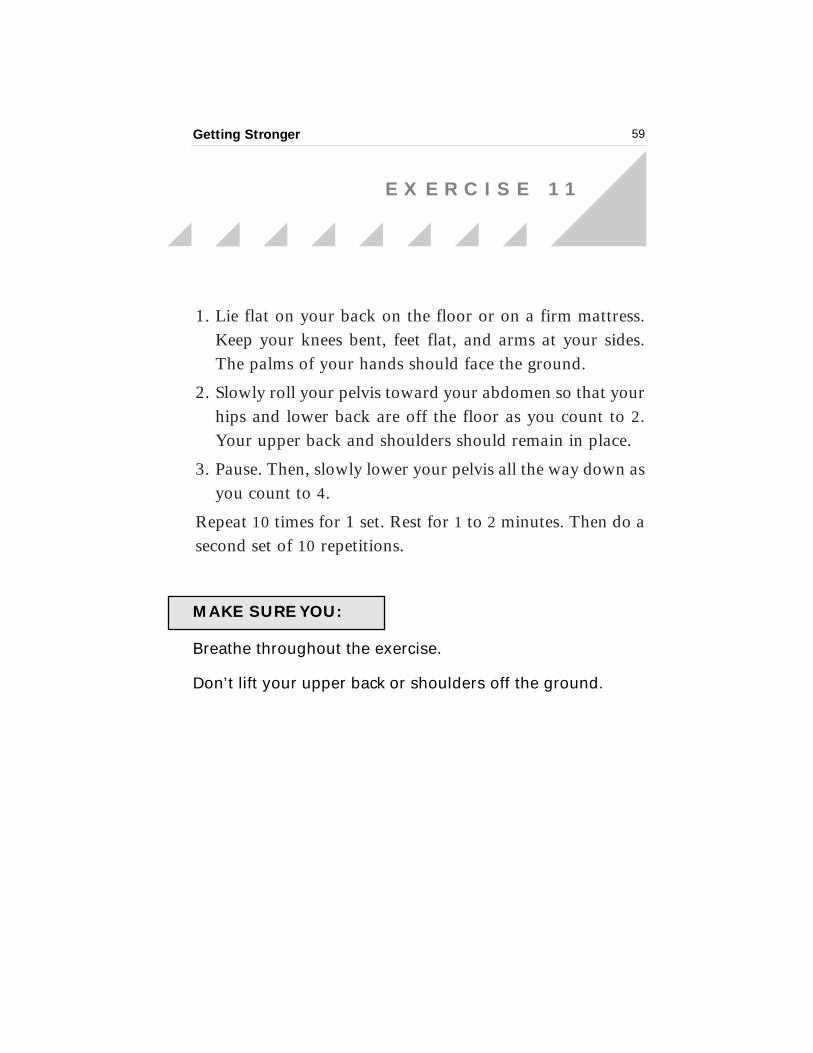
1. Lie flat on your back on the floor or on a firm mattress.Keep your knees bent, feet flat, and arms at your sides.The palms of your hands should face the ground.
2. Slowly roll your pelvis toward your abdomen so that yourhips and lower back are off the floor as you count to 2.Your upper back and shoulders should remain in place.
3. Pause. Then, slowly lower your pelvis all the way down asyou count to 4.
Repeat 10 times for 1 set. Rest for 1 to 2 minutes. Then do asecond set of 10 repetitions.
Getting Stronger
E X E R C I S E 1 1
59
MAKE SURE YOU:
Breathe throughout the exercise.
Don’t lift your upper back or shoulders off the ground.
Getting Stronger60
E X E R C I S E 1 2
F L O O R B A C K E X T E N S I O N
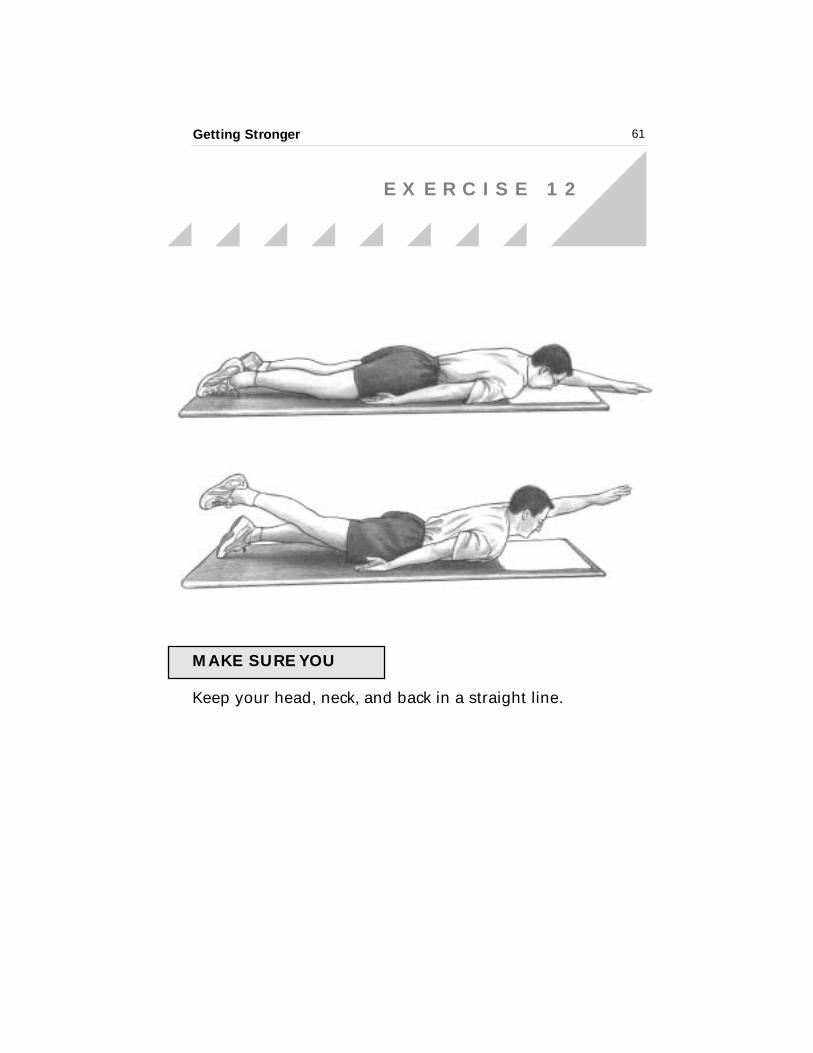
You may suffer from lower back pain because your backmuscles are weak. The floor back extension, done with thepelvic tilt, will strengthen these muscles and ease back pain.
1. Lie on the floor face-down. Extend your left arm straightoverhead so that it aligns with your body. Keep the otherarm at your side.
2. Slowly lift your left arm and right leg off the ground as youcount to 2. Keep your arm and leg at the same level.
3. Pause. Then slowly lower your arm and leg back to theground as you count to 4.
Repeat 10 times for 1 set, and then switch to the right armand the left leg for another 10 repetitions. Rest for 1 to 2minutes. Then, do a second set of 10 repetitions.
Getting Stronger
E X E R C I S E 1 2
61
MAKE SURE YOU
Keep your head, neck, and back in a straight line.
Getting Stronger
COOL-DOWN:STRETCHING FOR FLEXIBILITY AND RELAXATION
Cooling down right after completing your workout is just as
important as warming up before starting to exercise.
Stretching is an excellent way to cool down, improve flexi-
bility, and avoid injuries. It will also relieve tension and help
you relax. In fact, it’s a good idea to stretch and breathe
deeply whenever you feel tense or need to relax—it will benefit
your body and mind.
Do the following stretches after each strength-training
workout, along with any others you already know.
62
C O O L - D O W N
Remember to hold thestretch for at least 20 to30 seconds each time.
Exercise Tip
Getting Stronger
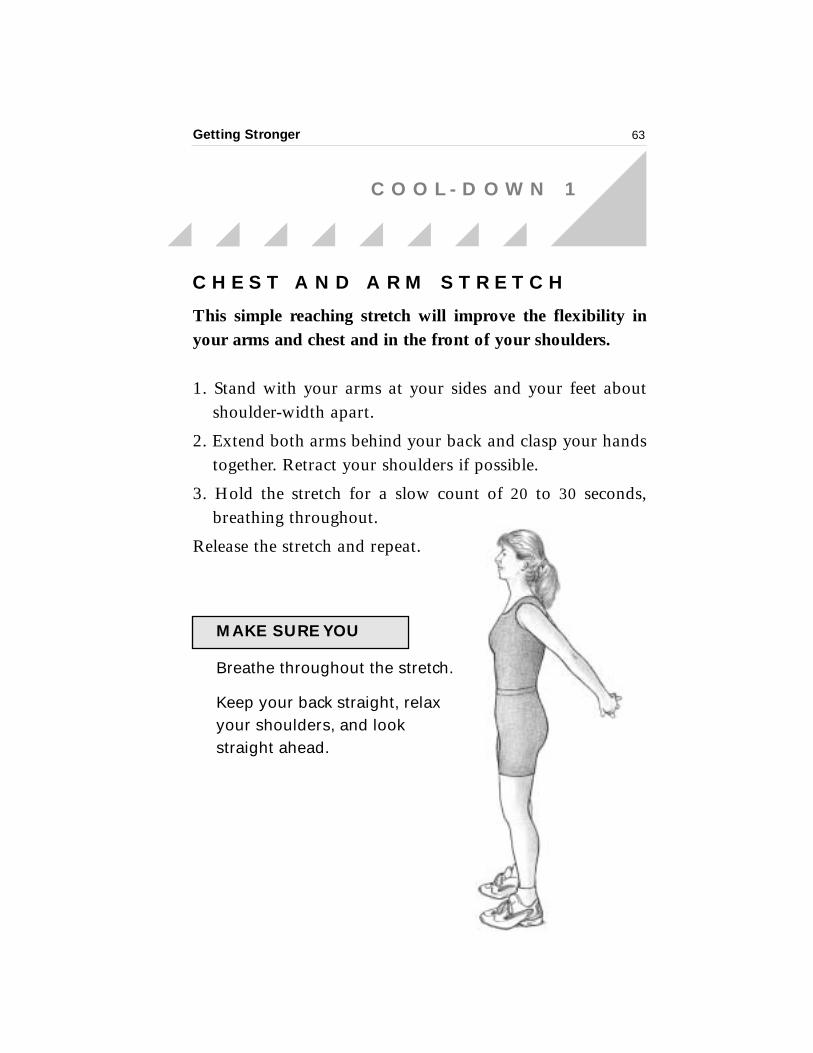
This simple reaching stretch will improve the flexibility inyour arms and chest and in the front of your shoulders.
1. Stand with your arms at your sides and your feet aboutshoulder-width apart.
2. Extend both arms behind your back and clasp your handstogether. Retract your shoulders if possible.
3. Hold the stretch for a slow count of 20 to 30 seconds,breathing throughout.
Release the stretch and repeat.
63
C O O L - D O W N 1
C H E S T A N D A R M S T R E T C H
MAKE SURE YOU
Breathe throughout the stretch.
Keep your back straight, relaxyour shoulders, and lookstraight ahead.
Getting Stronger
Note
If this stretch is too easy and you’re not feeling a comfort-able pull in the back of your legs, try bending your elbowsmore. Try going as far as to rest your forearms and elbowson the seat of the chair. Just make sure you are bending atthe hips and keeping your back straight.
64
C O O L - D O W N 2
H A M S T R I N G / C A L F S T R E T C H
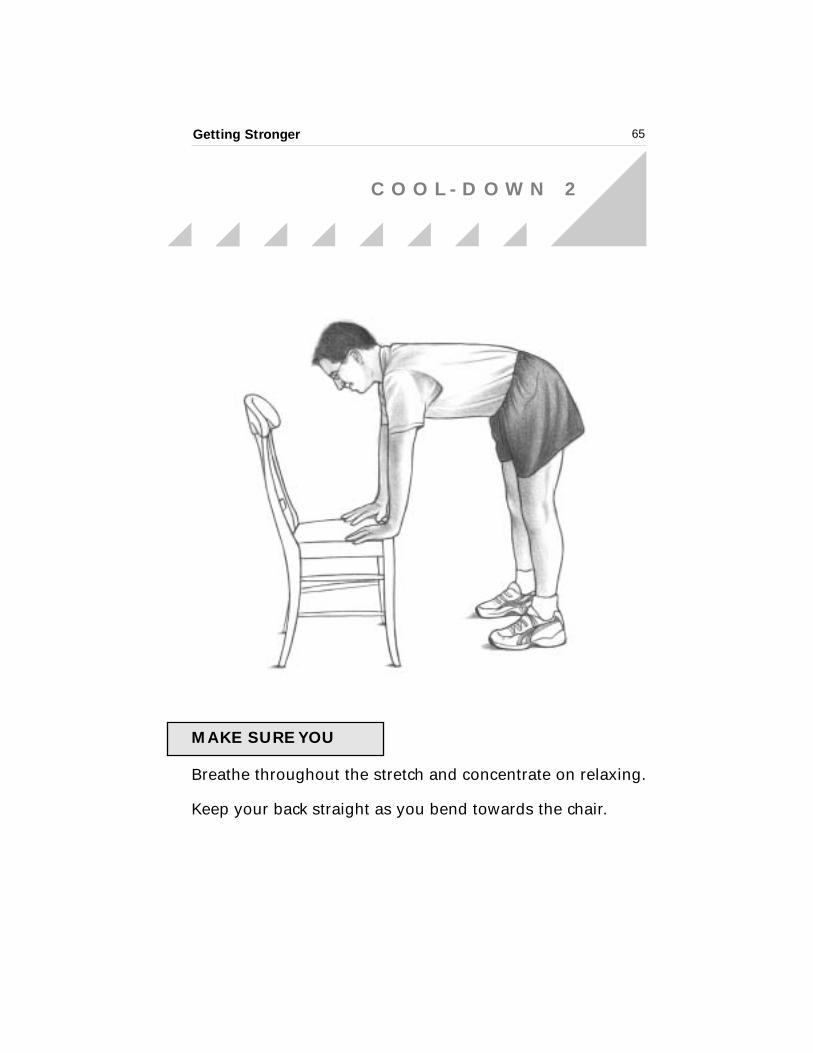
If touching your toes with straight legs seems too difficult,you’re not alone. Many people have tight muscles in the backof the leg. This stretch will give these muscles more flexibilityand make it easier for you to bend and reach.
1. Stand facing a sturdy chair.
2. Slowly bend forward at the hip, keeping your legs straightwithout locking your knees. Rest your hands on the seatof the chair with your elbows slightly bent, feeling astretch in the back of your upper and lower leg. Keep yourback flat.
3. Hold the stretch for a slow count of 20 to 30 seconds,breathing throughout.
Release the stretch and repeat.
Getting Stronger 65
C O O L - D O W N 2
MAKE SURE YOU
Breathe throughout the stretch and concentrate on relaxing.
Keep your back straight as you bend towards the chair.
Getting Stronger66
C O O L - D O W N 3
Q U A D R I C E P S S T R E T C H
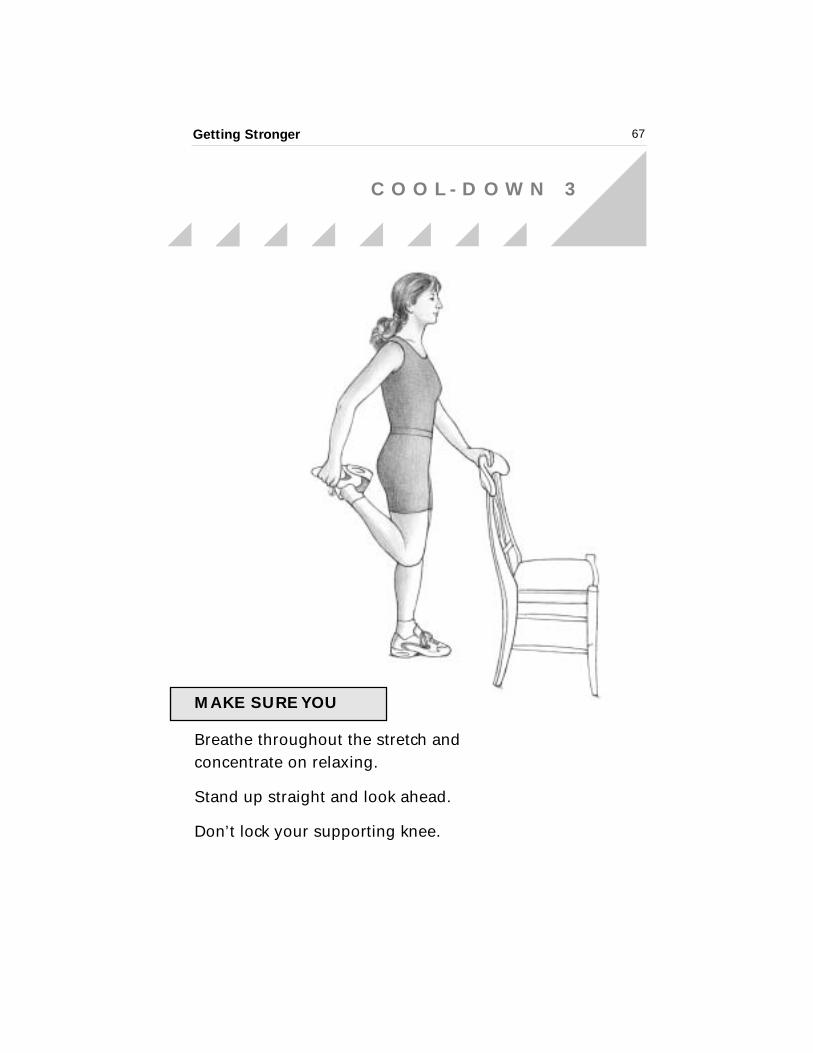
This excellent stretch should be a regular part of your cool-down. Strength-training exercises such as squats, step-ups,and knee extensions focus on strengthening the quadricepsmuscles. This stretch will help these muscles relax and makethem more flexible.
1. Stand next to a counter or sturdy chair with your feetabout shoulder-width apart and your knees straight—butnot locked.
2. Hold a chair or counter for balance with your left hand.Bend your right leg back and grab your right foot or anklein your right hand until your thigh is perpendicular to theground. Make sure you stand up straight—don’t lean forward. (If you can’t grab your ankle in your hand, justkeep your leg as close to perpendicular as possible andhold the bend.) You should feel a stretch in the front ofyour thigh.
3. Hold the stretch for a slow count of 20 to 30 seconds,breathing throughout.
Release your right ankle and repeat the stretch with the other leg.
Getting Stronger 67
C O O L - D O W N 3
MAKE SURE YOU
Breathe throughout the stretch andconcentrate on relaxing.
Stand up straight and look ahead.
Don’t lock your supporting knee.
C O O L - D O W N 4
Getting Stronger68
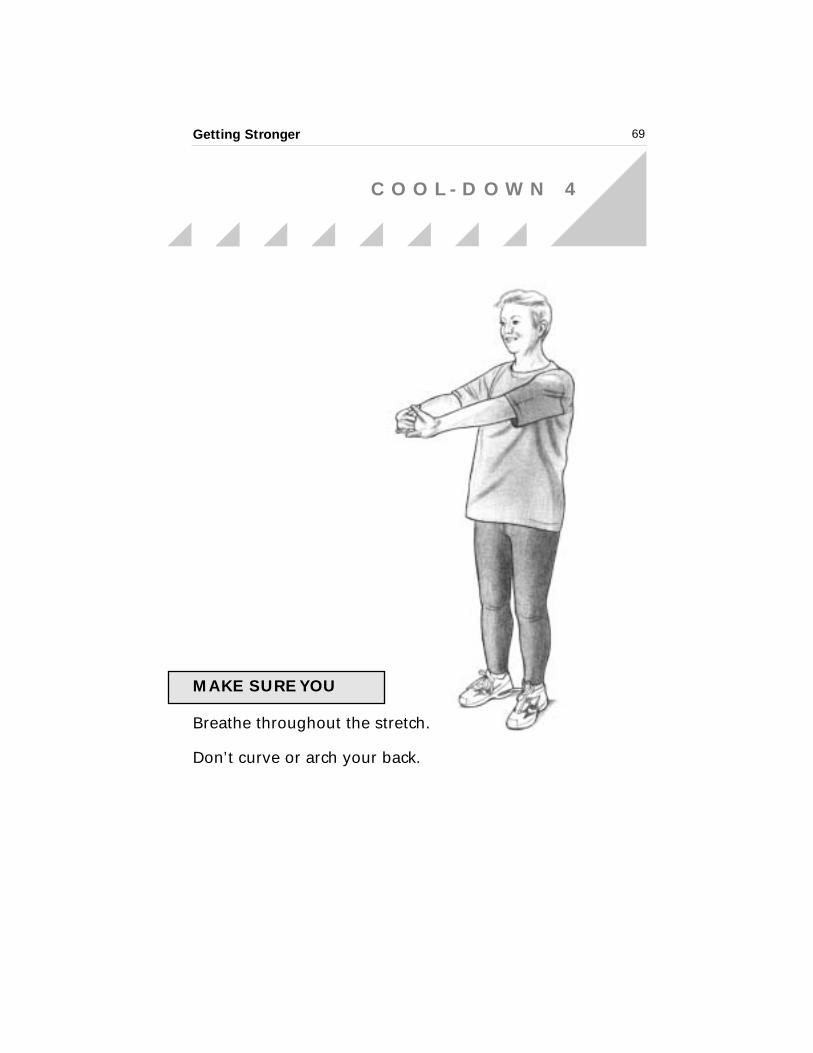
N E C K , U P P E R B A C K , A N D S H O U L D E R S T R E T C H
This easy stretch targets another group of muscles that areeasily tensed and stressed—the neck, back, and shoulders.Stretch after strength training and during any activity thatmakes you feel stiff, such as sitting at a desk. You’ll find itwill give you energy.
1. Stand (or sit) with your feet shoulder-width apart, yourknees straight but not locked, and your hands clasped infront of you. Rotate your hands so that your palms facethe ground. Then raise your arms to about chest height.
2. Press your palms away from your body and feel a stretchin your neck, upper back, and along your shoulders.
3. Hold the stretch for a slow count of 20 to 30 seconds, breathing throughout.
Release the stretch and repeat.
Getting Stronger 69
C O O L - D O W N 4
MAKE SURE YOU
Breathe throughout the stretch.
Don’t curve or arch your back.
6 The Courage to Progress
chapter
Once you can do the exercises in Part III of the program, you
will likely have gained a lot of muscle mass and strength and
improved your balance, coordination, and flexibility.
Congratulations. It’s a great achievement to start and continue
a strength-training program. It’s important to progress if you
want to experience the many benefits of strength training.
This means always advancing the intensity of your workout
by using heavier weights. As a result, your muscles will grow
and stay strong. You will also feel more independent and
will be more able to live well into old age without
the fear of falling. It will also give you a great sense of pride
and accomplishment.
HOW TO PROGRESS
After about the first week of strength training, you should
start doing each exercise with weights that you can lift at
least 10 times with only moderate difficulty. The weight you
are using may be too heavy if you can’t do a given exercise 8
times in a row. You may need to scale back.
You should rethink whether the weights you are using
are heavy enough after 2 weeks of strength training.
You may start doing the overhead press with
2-pound dumbbells, for example. By the end of the second
week, you may be able to easily lift the 2-pound dumbbell
more than 12 times. Make sure you are doing all the
movements in the exercise and that your body is positioned
properly (known as good form). You should now try to use
3-pound dumbbells and see how the exercise feels.
WHEN TO PROGRESS—AND WHEN NOT TO
It may be time to add heavier weights to your workout if
you are in good health, are exercising regularly, and a given
exercise feels too easy. An exercise should be considered
too easy if you can do it more than 10 or 12 times with the
weights you have currently been using. Do not progress
if you have been sick, are injured, or your muscles feel
very sore.
The Courage to Progress 71
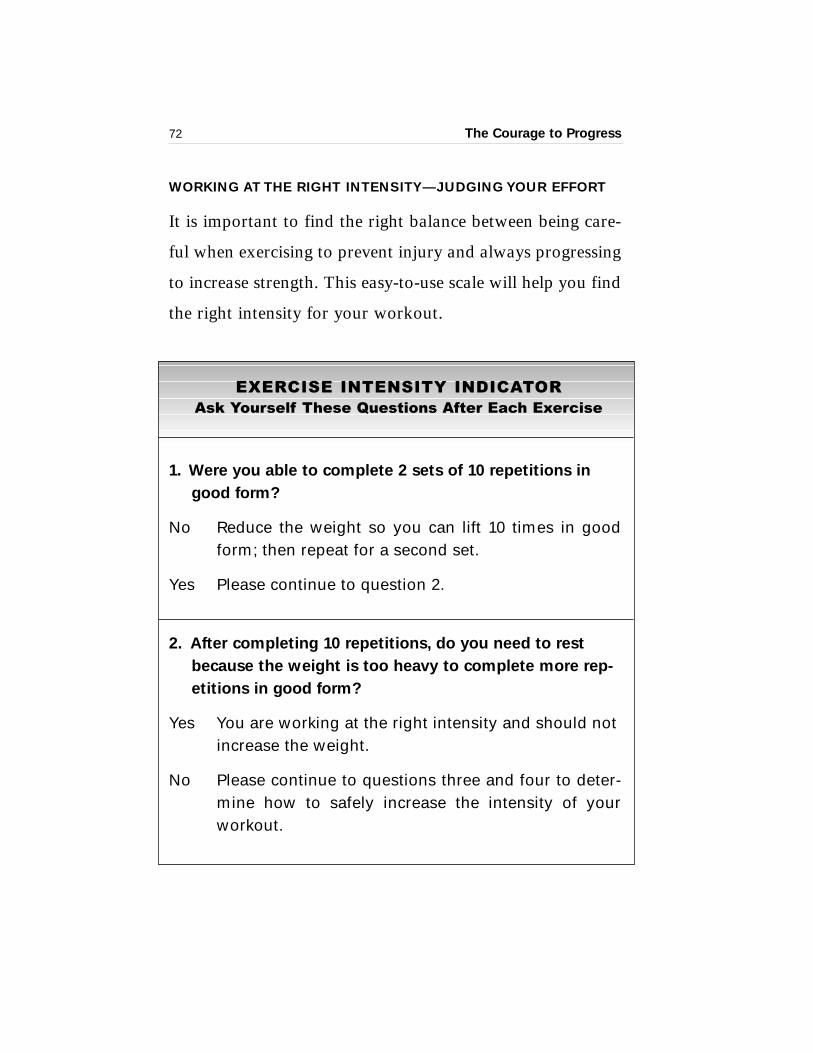
WORKING AT THE RIGHT INTENSITY—JUDGING YOUR EFFORT
It is important to find the right balance between being care-
ful when exercising to prevent injury and always progressing
to increase strength. This easy-to-use scale will help you find
the right intensity for your workout.
The Courage to Progress72
EXERCISE INTENSITY INDICATORAsk Yourself These Questions After Each Exercise
1. Were you able to complete 2 sets of 10 repetitions in
good form?
No Reduce the weight so you can lift 10 times in goodform; then repeat for a second set.
Yes Please continue to question 2.
2. After completing 10 repetitions, do you need to rest
because the weight is too heavy to complete more rep-
etitions in good form?
Yes You are working at the right intensity and should notincrease the weight.
No Please continue to questions three and four to deter-mine how to safely increase the intensity of yourworkout.
The Courage to Progress
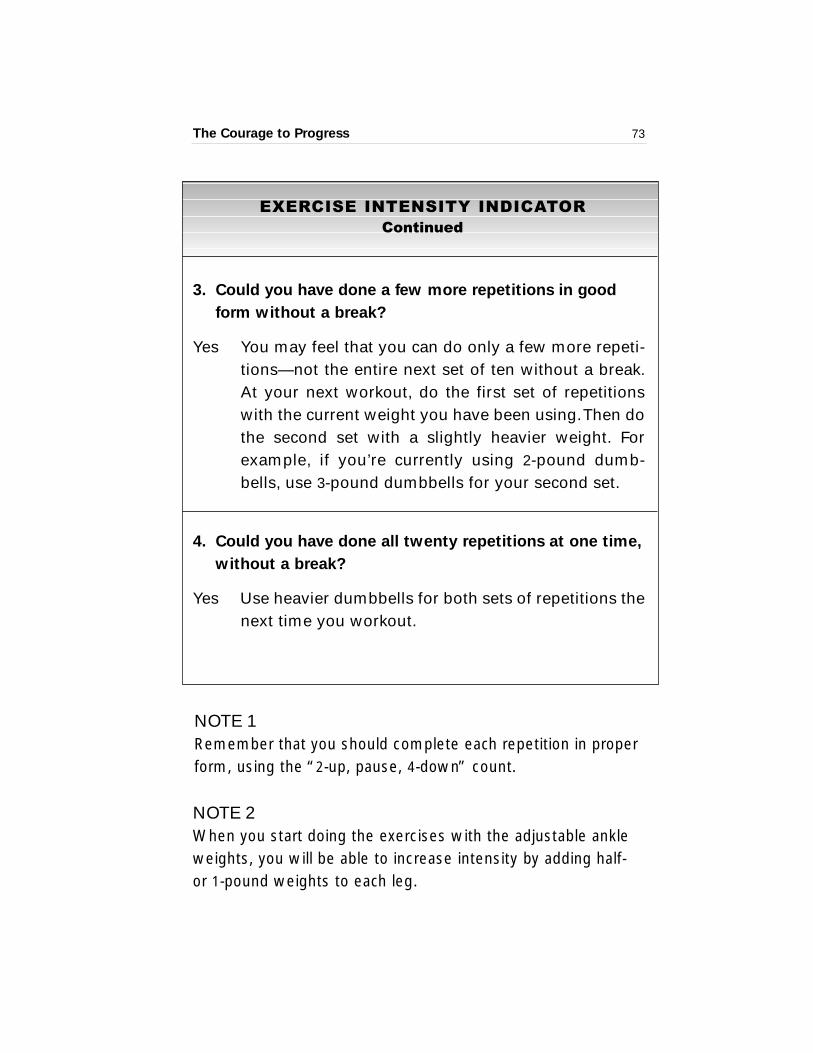
NOTE 2When you start doing the exercises with the adjustable ankleweights, you will be able to increase intensity by adding half-or 1-pound weights to each leg.
73
EXERCISE INTENSITY INDICATORContinued
3. Could you have done a few more repetitions in good
form without a break?
Yes You may feel that you can do only a few more repeti-tions—not the entire next set of ten without a break.At your next workout, do the first set of repetitionswith the current weight you have been using. Then dothe second set with a slightly heavier weight. Forexample, if you’re currently using 2-pound dumb-bells, use 3-pound dumbbells for your second set.
4. Could you have done all twenty repetitions at one time,
without a break?
Yes Use heavier dumbbells for both sets of repetitions thenext time you workout.
NOTE 1Remember that you should complete each repetition in properform, using the “2-up, pause, 4-down” count.
7 Staying on Track:A 12-Week Workbook
chapter
It’s important to stick to your strength-training program as
much as you can. You may find that you make a few false
starts before you succeed at making this program a regular
part of your life. There may be times when interruptions such
as vacation, illness, family, or work demands prevent you
from doing your exercises for a week or 2—or even longer.
Try not to feel guilty or disappointed in yourself. Just restart
your routine as quickly as you can. You may not be able to
pick up exactly where you left off—you may need to decrease
your weights a bit. But stay with it, and you will regain
lost ground.
If you have trouble getting back into the swing of
things, start back into the program slowly. Remember why
you picked up this book in the first place and why you chose
your goals. It may help to reassess your goals and make new
ones because your motivations may change as time passes.
Most important, remember how your past successes made
you feel: healthy, strong, independent, and empowered!
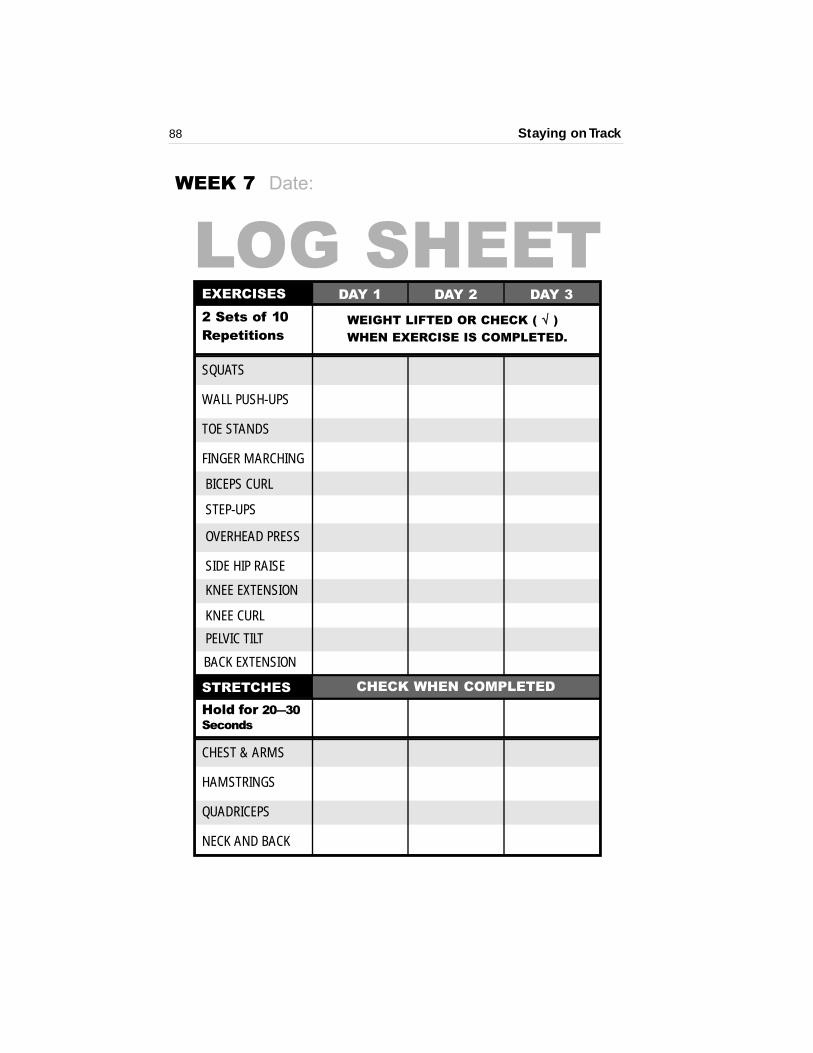
You’ll find a workbook on the following pages with a
12-week supply of easy-to-use exercise log sheets. Each log
sheet has a motivational or instructional tip. At the end of
the 12-week supply, you will find a blank log sheet for
photocopying so you can keep track of your progress. These
log sheets will help you accurately monitor your progress in
strength training. Keeping a record in this workbook is an
important part of the program and will help you succeed.
Staying on Track 75

LOG SHEET
Staying on Track76
WEEK 1 Date:
DAY 3 DAY 1 DAY 2
WEIGHT LIFTED OR CHECK ( √√ )
WHEN EXERCISE IS COMPLETED.
CHECK WHEN COMPLETED
EXERCISES
2 Sets of 10Repetitions
SQUATS
WALL PUSH-UPS
TOE STANDS
FINGER MARCHING
STRETCHES
Hold for 20—30Seconds
CHEST & ARMS
HAMSTRINGS
QUADRICEPS
NECK AND BACK
Staying on Track 77
WEEK 1
Count out loud during the exercisesto make sure you keep the proper pace.
Personal Notes
R E C O R D A N Y A D D I T I O N A L A C T I V I T I E S / E X E R C I S E S H E R E
DESCRIPTION
1 hour, felt energized
ACTIVITY
Hiking
Staying on Track78
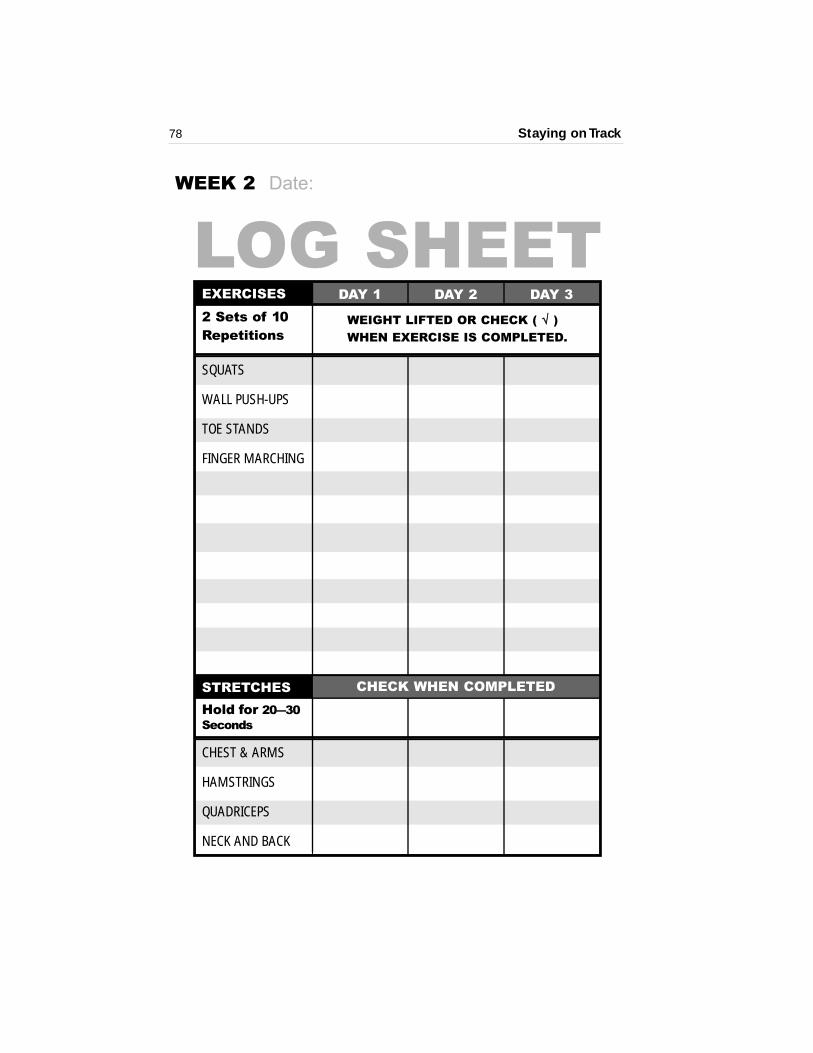
WEEK 2 Date:
LOG SHEETDAY 3 DAY 1 DAY 2
WEIGHT LIFTED OR CHECK ( √√ )
WHEN EXERCISE IS COMPLETED.
CHECK WHEN COMPLETED
EXERCISES
2 Sets of 10Repetitions
SQUATS
WALL PUSH-UPS
TOE STANDS
FINGER MARCHING
STRETCHES
Hold for 20—30Seconds
CHEST & ARMS
HAMSTRINGS
QUADRICEPS
NECK AND BACK
Staying on Track 79
WEEK 2
Strength training 2 or 3 times a week will help prevent arthritis and/or ease its symptoms.
Personal Notes
R E C O R D A N Y A D D I T I O N A L A C T I V I T I E S / E X E R C I S E S H E R E
DESCRIPTIONACTIVITY
Staying on Track80
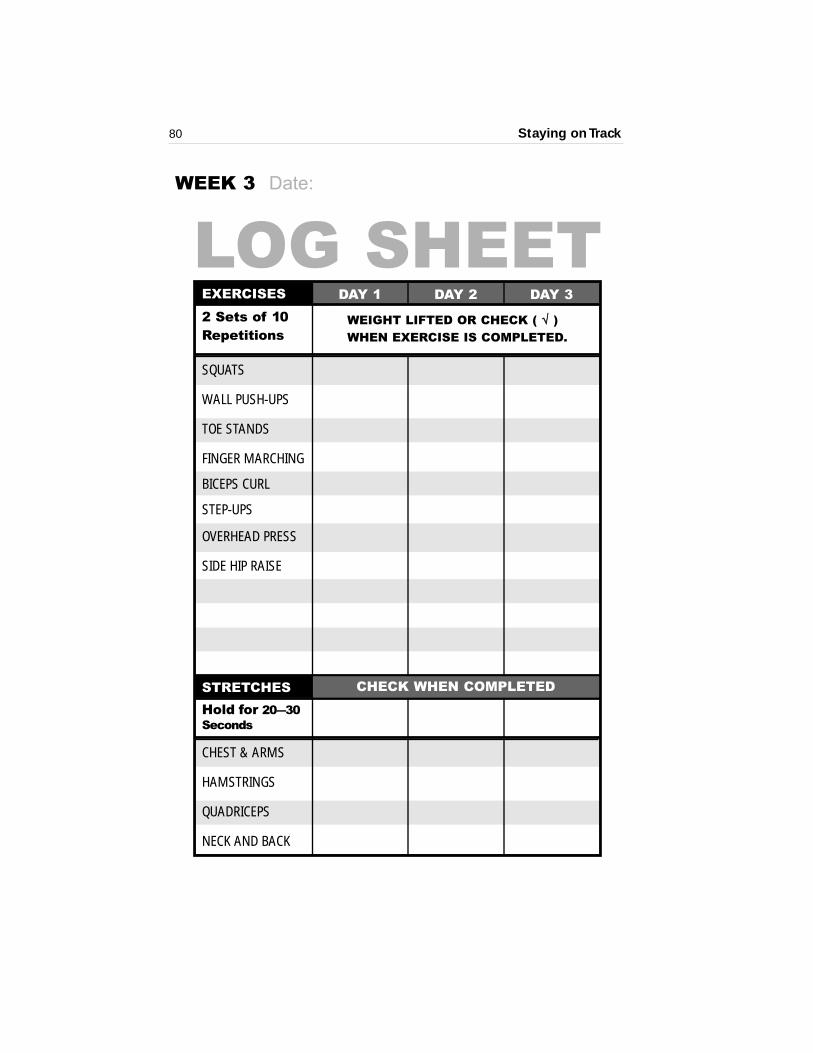
WEEK 3 Date:
LOG SHEETDAY 3 DAY 1 DAY 2
WEIGHT LIFTED OR CHECK ( √√ )
WHEN EXERCISE IS COMPLETED.
CHECK WHEN COMPLETED
EXERCISES
2 Sets of 10Repetitions
SQUATS
WALL PUSH-UPS
TOE STANDS
FINGER MARCHING
BICEPS CURL
STEP-UPS
OVERHEAD PRESS
SIDE HIP RAISE
STRETCHES
Hold for 20—30Seconds
CHEST & ARMS
HAMSTRINGS
QUADRICEPS
NECK AND BACK

Staying on Track 81
WEEK 3
Breathe throughout each exercise.
Personal Notes
R E C O R D A N Y A D D I T I O N A L A C T I V I T I E S / E X E R C I S E S H E R E
DESCRIPTIONACTIVITY

DAY 3 DAY 1 DAY 2
WEIGHT LIFTED OR CHECK ( √√ )
WHEN EXERCISE IS COMPLETED.
CHECK WHEN COMPLETED
Staying on Track82
WEEK 4 Date:
LOG SHEETEXERCISES
2 Sets of 10Repetitions
SQUATS
WALL PUSH-UPS
TOE STANDS
FINGER MARCHING
BICEPS CURL
STEP-UPS
OVERHEAD PRESS
SIDE HIP RAISE
STRETCHES
Hold for 20—30Seconds
CHEST & ARMS
HAMSTRINGS
QUADRICEPS
NECK AND BACK

Staying on Track 83
WEEK 4
Strength training will make you feel energized!
Personal Notes
R E C O R D A N Y A D D I T I O N A L A C T I V I T I E S / E X E R C I S E S H E R E
DESCRIPTION ACTIVITY

Staying on Track84
WEEK 5 Date:
LOG SHEETDAY 3 DAY 1 DAY 2
WEIGHT LIFTED OR CHECK ( √√ )
WHEN EXERCISE IS COMPLETED.
CHECK WHEN COMPLETED
EXERCISES
2 Sets of 10Repetitions
SQUATS
WALL PUSH-UPS
TOE STANDS
FINGER MARCHING
BICEPS CURL
STEP-UPS
OVERHEAD PRESS
HIP ABDUCTION
STRETCHES
Hold for 20—30Seconds
CHEST & ARMS
HAMSTRINGS
QUADRICEPS
NECK AND BACK

Staying on Track 85
WEEK 5
Look in a mirror to make sure that your form matches what is shown in the picture.
Personal Notes
R E C O R D A N Y A D D I T I O N A L A C T I V I T I E S / E X E R C I S E S H E R E
DESCRIPTION ACTIVITY

Staying on Track86
WEEK 6 Date:
LOG SHEETDAY 3 DAY 1 DAY 2
WEIGHT LIFTED OR CHECK ( √√ )
WHEN EXERCISE IS COMPLETED.
CHECK WHEN COMPLETED
EXERCISES
2 Sets of 10Repetitions
SQUATS
WALL PUSH-UPS
TOE STANDS
FINGER MARCHING
BICEPS CURL
STEP-UPS
OVERHEAD PRESS
SIDE HIP RAISE
STRETCHES
Hold for 20—30Seconds
CHEST & ARMS
HAMSTRINGS
QUADRICEPS
NECK AND BACK
Staying on Track 87
WEEK 6
When you can do more than 10 repetitions in good form,increase the weight you are lifting.
Personal Notes
R E C O R D A N Y A D D I T I O N A L A C T I V I T I E S / E X E R C I S E S H E R E
DESCRIPTIONACTIVITY
Staying on Track88
WEEK 7 Date:
LOG SHEETDAY 3 DAY 1 DAY 2
WEIGHT LIFTED OR CHECK ( √√ )
WHEN EXERCISE IS COMPLETED.
CHECK WHEN COMPLETED
EXERCISES
2 Sets of 10Repetitions
SQUATS
WALL PUSH-UPS
TOE STANDS
FINGER MARCHING
BICEPS CURL
STEP-UPS
OVERHEAD PRESS
SIDE HIP RAISE
KNEE EXTENSION
KNEE CURL
PELVIC TILT
STRETCHES
Hold for 20—30Seconds
CHEST & ARMS
HAMSTRINGS
QUADRICEPS
NECK AND BACK
BACK EXTENSION
Staying on Track 89
WEEK 7
Strength training will help you buildand maintain strong bones.
Personal Notes
R E C O R D A N Y A D D I T I O N A L A C T I V I T I E S / E X E R C I S E S H E R E
DESCRIPTIONACTIVITY

Staying on Track90
WEEK 8 Date:
LOG SHEETDAY 3 DAY 1 DAY 2
WEIGHT LIFTED OR CHECK ( √√ )
WHEN EXERCISE IS COMPLETED.
CHECK WHEN COMPLETED
BACK EXTENSION
EXERCISES
2 Sets of 10Repetitions
SQUATS
WALL PUSH-UPS
TOE STANDS
FINGER MARCHING
BICEPS CURL
STEP-UPS
OVERHEAD PRESS
SIDE HIP RAISE
KNEE EXTENSION
KNEE CURL
PELVIC TILT
STRETCHES
Hold for 20—30Seconds
CHEST & ARMS
HAMSTRINGS
QUADRICEPS
NECK AND BACK
Staying on Track 91
WEEK 8
Strength training will help you sleep better.
Personal Notes
R E C O R D A N Y A D D I T I O N A L A C T I V I T I E S / E X E R C I S E S H E R E
DESCRIPTIONACTIVITY

Staying on Track92
WEEK 9 Date:
LOG SHEETDAY 3 DAY 1 DAY 2
WEIGHT LIFTED OR CHECK ( √√ )
WHEN EXERCISE IS COMPLETED.
CHECK WHEN COMPLETED
EXERCISES
2 Sets of 10Repetitions
SQUATS
WALL PUSH-UPS
TOE STANDS
FINGER MARCHING
BICEPS CURL
STEP-UPS
OVERHEAD PRESS
SIDE HIP RAISE
KNEE EXTENSION
KNEE CURL
PELVIC TILT
STRETCHES
Hold for 20—30Seconds
CHEST & ARMS
HAMSTRINGS
QUADRICEPS
NECK AND BACK
BACK EXTENSION
Staying on Track 93
WEEK 9
During squats and step-ups, make sure that your kneesdon’t move forward past your toes.
Personal Notes
R E C O R D A N Y A D D I T I O N A L A C T I V I T I E S / E X E R C I S E S H E R E
DESCRIPTIONACTIVITY

Staying on Track94
WEEK 10 Date:
LOG SHEETDAY 3 DAY 1 DAY 2
WEIGHT LIFTED OR CHECK ( √√ )
WHEN EXERCISE IS COMPLETED.
CHECK WHEN COMPLETED
EXERCISES
2 Sets of 10Repetitions
SQUATS
WALL PUSH-UPS
TOE STANDS
FINGER MARCHING
BICEPS CURL
STEP-UPS
OVERHEAD PRESS
SIDE HIP RAISE
KNEE EXTENSION
KNEE CURL
PELVIC TILT
STRETCHES
Hold for 20—30Seconds
CHEST & ARMS
HAMSTRINGS
QUADRICEPS
NECK AND BACK
BACK EXTENSION

Staying on Track 95
WEEK 10
Strength training will make aerobic exercise such asswimming, biking, and walking easier.
Personal Notes
R E C O R D A N Y A D D I T I O N A L A C T I V I T I E S / E X E R C I S E S H E R E
DESCRIPTIONACTIVITY

Staying on Track96
WEEK 11 Date:
LOG SHEETDAY 3 DAY 1 DAY 2
WEIGHT LIFTED OR CHECK ( √√ )
WHEN EXERCISE IS COMPLETED.
CHECK WHEN COMPLETED
EXERCISES
2 Sets of 10Repetitions
SQUATS
WALL PUSH-UPS
TOE STANDS
FINGER MARCHING
BICEPS CURL
STEP-UPS
OVERHEAD PRESS
SIDE HIP RAISE
KNEE EXTENSION
KNEE CURL
PELVIC TILT
STRETCHES
Hold for 20—30Seconds
CHEST & ARMS
HAMSTRINGS
QUADRICEPS
NECK AND BACK
BACK EXTENSION
Staying on Track 97
WEEK 11
During the biceps curl and overhead press, be sure to keep your wrists straight.
Personal Notes
R E C O R D A N Y A D D I T I O N A L A C T I V I T I E S / E X E R C I S E S H E R E
DESCRIPTIONACTIVITY
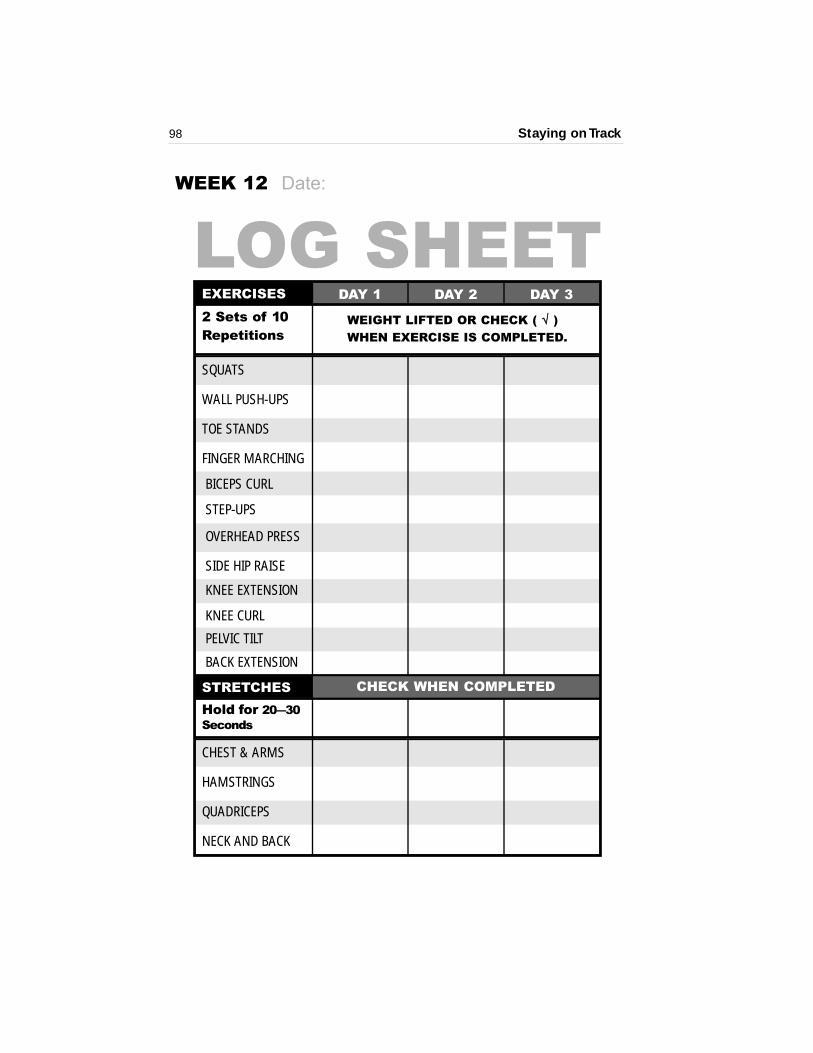
Staying on Track98
WEEK 12 Date:
LOG SHEETDAY 3 DAY 1 DAY 2
WEIGHT LIFTED OR CHECK ( √√ )
WHEN EXERCISE IS COMPLETED.
CHECK WHEN COMPLETED
EXERCISES
2 Sets of 10Repetitions
SQUATS
WALL PUSH-UPS
TOE STANDS
FINGER MARCHING
BICEPS CURL
STEP-UPS
OVERHEAD PRESS
SIDE HIP RAISE
KNEE EXTENSION
KNEE CURL
PELVIC TILT
STRETCHES
Hold for 20—30Seconds
CHEST & ARMS
HAMSTRINGS
QUADRICEPS
NECK AND BACK
BACK EXTENSION
Staying on Track 99
WEEK 12
Strength training will help you maintain your independence.
Personal Notes
R E C O R D A N Y A D D I T I O N A L A C T I V I T I E S / E X E R C I S E S H E R E
DESCRIPTIONACTIVITY
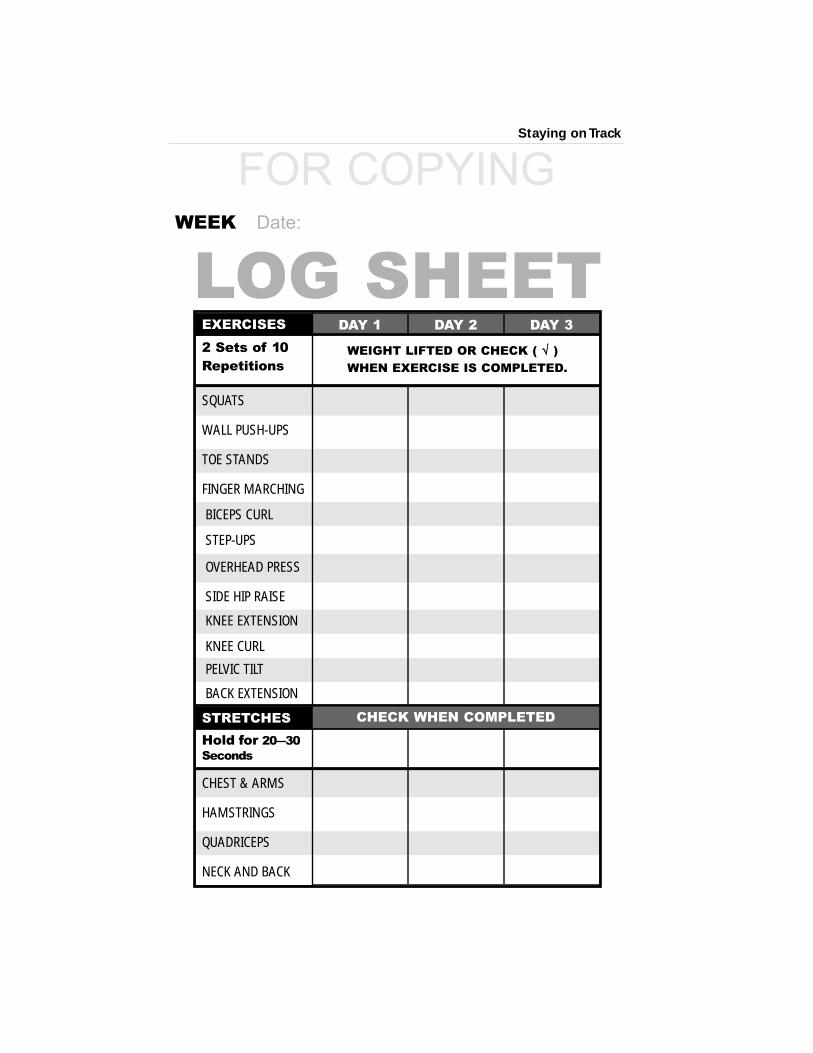
Staying on Track
WEEK Date:
FOR COPYING
LOG SHEETEXERCISES
2 Sets of 10Repetitions
SQUATS
WALL PUSH-UPS
TOE STANDS
FINGER MARCHING
BICEPS CURL
STEP-UPS
OVERHEAD PRESS
SIDE HIP RAISE
KNEE EXTENSION
KNEE CURL
PELVIC TILT
STRETCHES
Hold for 20—30Seconds
CHEST & ARMS
HAMSTRINGS
QUADRICEPS
NECK AND BACK
DAY 3 DAY 1 DAY 2
WEIGHT LIFTED OR CHECK ( √√ )
WHEN EXERCISE IS COMPLETED.
CHECK WHEN COMPLETED
BACK EXTENSION
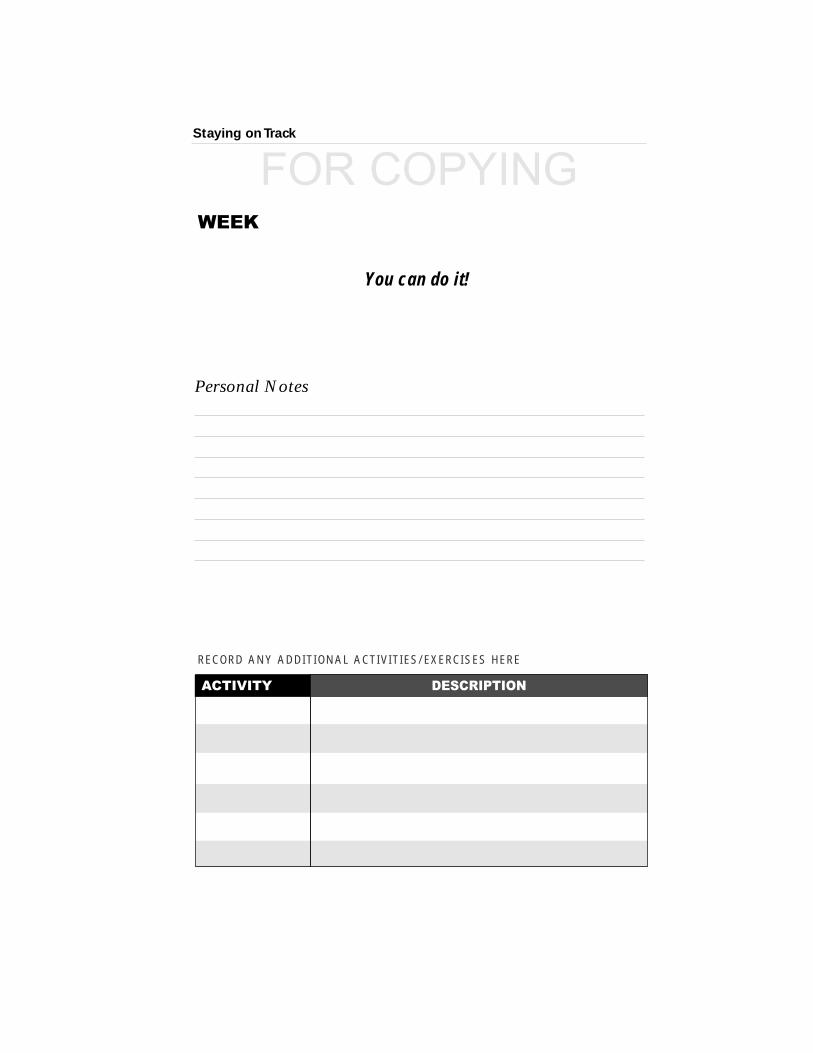
FOR COPYINGStaying on Track
WEEK
You can do it!
Personal Notes
R E C O R D A N Y A D D I T I O N A L A C T I V I T I E S / E X E R C I S E S H E R E
DESCRIPTIONACTIVITY
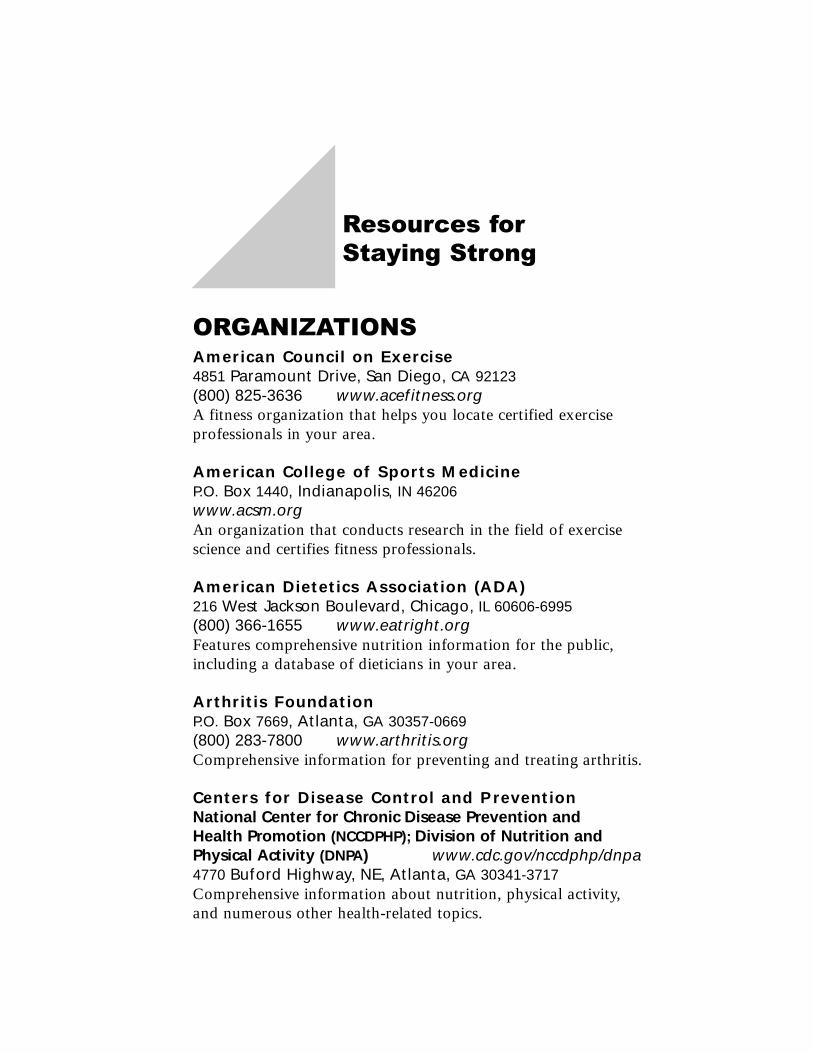
Resources forStaying Strong
ORGANIZATIONSAmerican Council on Exercise4851 Paramount Drive, San Diego, CA 92123(800) 825-3636 www.acefitness.orgA fitness organization that helps you locate certified exercise professionals in your area.
American College of Sports MedicineP.O. Box 1440, Indianapolis, IN 46206www.acsm.orgAn organization that conducts research in the field of exercisescience and certifies fitness professionals.
American Dietetics Association (ADA)216 West Jackson Boulevard, Chicago, IL 60606-6995(800) 366-1655 www.eatright.orgFeatures comprehensive nutrition information for the public,including a database of dieticians in your area.
Arthritis FoundationP.O. Box 7669, Atlanta, GA 30357-0669(800) 283-7800 www.arthritis.orgComprehensive information for preventing and treating arthritis.
Centers for Disease Control and PreventionNational Center for Chronic Disease Prevention and Health Promotion (NCCDPHP); Division of Nutrition andPhysical Activity (DNPA) www.cdc.gov/nccdphp/dnpa4770 Buford Highway, NE, Atlanta, GA 30341-3717Comprehensive information about nutrition, physical activity,and numerous other health-related topics.
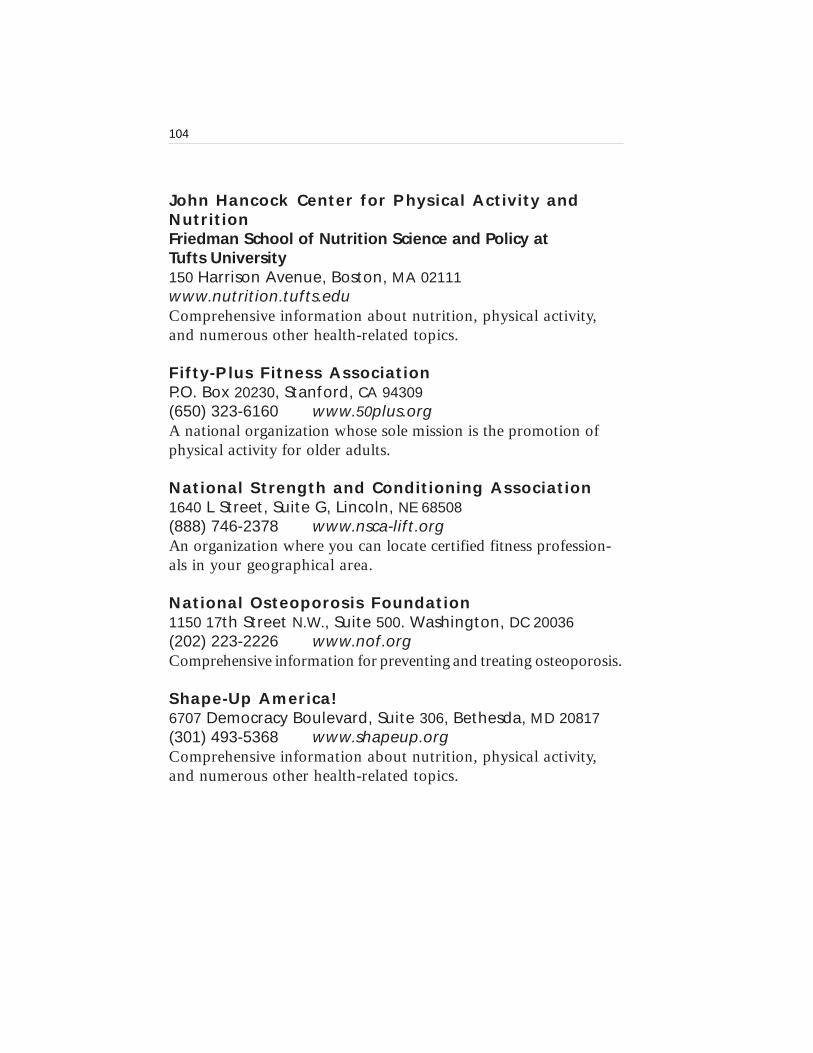
John Hancock Center for Physical Activity andNutrition Friedman School of Nutrition Science and Policy at Tufts University150 Harrison Avenue, Boston, MA 02111www.nutrition.tufts.eduComprehensive information about nutrition, physical activity,and numerous other health-related topics.
Fifty-Plus Fitness AssociationP.O. Box 20230, Stanford, CA 94309(650) 323-6160 www.50plus.orgA national organization whose sole mission is the promotion ofphysical activity for older adults.
National Strength and Conditioning Association1640 L Street, Suite G, Lincoln, NE 68508(888) 746-2378 www.nsca-lift.orgAn organization where you can locate certified fitness profession-als in your geographical area.
National Osteoporosis Foundation1150 17th Street N.W., Suite 500. Washington, DC 20036(202) 223-2226 www.nof.orgComprehensive information for preventing and treating osteoporosis.
Shape-Up America! 6707 Democracy Boulevard, Suite 306, Bethesda, MD 20817(301) 493-5368 www.shapeup.orgComprehensive information about nutrition, physical activity,and numerous other health-related topics.
104
105
BOOKS
Strong Women and Men Beat Arthritis, Miriam Nelson,Kristin Baker, Ronenn Roubenoff, and Lawrence Lindner(Putnam, 2002).
Exercise: A Guide from the National Institute onAging, Public Information Office. National Institutes ofHealth. Publication No. NIH 99-4258, June 2001.
Strong Women, Strong Bones, Miriam Nelson and SarahWernick (Putnam, 2000).
Strength Training Past 50, by Wayne Wescott, ThomasBaechler, and Mark Williams (Human Kinetics, 1997).
The Wellness Guide to Lifelong Fitness, by Timothy P.White, and the editors of the University of California atBerkeley Wellness Letter (Rebus, 1993).
Biomarkers: The 10 Determinants of Aging You CanControl, by William Evans, Irwin Rosenberg, and JaquelineThompson (Simon & Schuster, 1991).
EQUIPMENT CHECKLIST
BASIC:
- Sturdy chair
- Exercise space
- Rubber sole shoes
- Loose, comfortable clothing
- Dumbbells (hand-held weights)
- Adjustable ankle weights
- Stairs or raised platform
- Storage container
OPTIONAL:
- Rolling storage cart
- Mirror
- Heavier sets of dumbbells
106
Glossary
AEROBIC EXERCISE is physical activity that elevates the
heart rate and breathing rate, thereby stimulating the
cardiovascular system.
ARTHRITIS is the inflammation of a joint.
OSTEOARTHRITIS is the most common type of arthritis
and is characterized by a degenerative process with
inflammation around the joint.
RHEUMATOID ARTHRITIS is the most common type of
inflammatory arthritis and usually affects many joints,
including the hands and feet.
COOL-DOWN is the process of reducing the intensity of
exercise at the end of a workout to help the body return
to resting levels.
DURATION is the amount of time you spend doing a given
exercise, whether it is aerobic exercise or strength training.
FREQUENCY defines how often you do the exercise; for
example: three times each week.
INFLAMMATION is defined as pain, swelling, and redness
caused by immune cells in response to injury or auto-
immune disease.
107
INTENSITY (in the case of strength training) refers to the
amount of weight you are lifting and indicates how
difficult the exercise is for you to complete. Increasing
your intensity (the weight you are lifting) is the key to
progression and your success with a strength-training
program.
OSTEOPOROSIS is a dangerous thinning of the bones that
can increase a person’s risk of fracture with minimal or
little trauma.
REPETITION or “rep” refers to doing an exercise once through
the complete range of motion. For instance, 1 push-up
or 1 sit-up is a repetition.
SET is a group of repetitions completed consecutively.
Typically, there are 8 to 12 repetitions in a set. There
should always be a 1- to 2-minute rest between sets.
Usually 1 to 3 sets are performed for a particular exercise.
STRENGTH TRAINING is an activity in which the muscle is
working against a force such as a dumbbell, an ankle
weight, or gravity. The intensity should be enough to
increase muscular strength over time.
WARM-UP is the process of slowly increasing activity level
and intensity prior to a workout to prepare the body
for exercise.
Growing Stronger108
Index
Action: 5
Active: 2, 14, 15, 19, 74
Activity: iii, iv, 1, 9, 10, 13,
14—15, 68
Ankle weights: 27—28
Arthritis: i, iv, 1, 2, 13, 20, 21,
24, 44, 55
Balance: 34
Cardiovascular (aerobic)
exercise: iii, 2, 54, 95, 107
Congestive heart failure (CHF): 11
Contemplation: 4
Diabetes: 2
Dumbbells: 27
Duration: 105
Equipment: 26—29
Exercises
Biceps curl: 46—47
Finger marching: 42—43
Floor back extension: 60—61
Knee curl: 56—57
Knee extension: 54—55
Overhead press: 50—51
Pelvic tilt: 58—59
Exercises cont.
Side Hip Raise: 52—53
Squat: 36
Step-up: 48—49
Toe stand: 40—41
Wall push-up: 38—39
Warm-up: 34—35
Frailty: 1
Goal setting: 7, 20—25
Heart Disease: 2
Imagery: 10—11
Inactive: 9
Inactivity: 1
Intensity: 45, 46, 70, 71,
72-73, 107—108
Log: 74—99
Maintenance: 5
Motivation: 7—12
Obesity: 2—3
Osteoporosis: 2
PAR-Q: 13—16
Pre-contemplation: 4
Preparation: 5
Progression: 70—73
Growing Stronger110
Repetition (rep): 33, 45, 46,
71, 72—73, 87, 108
Safety: 13—16, 30—31
Schedule: 29—30
Set: 33, 46, 72—73, 108
SMART: 20—25
Stages of change: 4—6
Strength: 1, 6, 17, 45—46, 54
Strength training: iii, iv, 1—5
7—9, 13, 19, 26, 27, 32,
70—72, 79, 83, 89, 95,
99, 104—105, 108
Stretches
Chest & Arm: 63
Hamstring: 64—65
Quadriceps: 66—67
Upper Back, Neck, &
Shoulder: 68—69
Visualization: 10—11
Weight control (metabolism):
2—3, 8
About the Authors
REBECCA A. SEGUIN, B.S., CSCS
Rebecca Seguin is Project Manager for the John Hancock Centerfor Physical Activity and Nutrition (CPAN) at the Gerald J. andDorothy R. Friedman School of Nutrition Science and Policy atTufts University in Boston. She received her bachelor’s degree inClinical Exercise Physiology from Boston University. She hasexperience developing exercise programs for older adults and reg-ularly writes exercise and nutrition articles for professional andlay press publications. She is certified by the National Strengthand Conditioning Association (NSCA) as a Strength andConditioning Specialist (CSCS).
JACQUELINE N. EPPING, M.ED.
Jacqueline Epping is a Public Health Educator in the PhysicalActivity and Health Branch, Division of Nutrition and PhysicalActivity, National Center for Chronic Disease Prevention andHealth Promotion, U. S. Centers for Disease Control andPrevention. Ms. Epping has developed, implemented, and evalu-ated curricula and instructional materials for a number of studiesto promote physical activity. She currently provides technicalassistance to several national projects promoting physical activityin older adults.
DAVID M. BUCHNER, M.D., M.P.H.
David Buchner is Chief of the Physical Activity and HealthBranch, Division of Nutrition and Physical Activity, NationalCenter for Chronic Disease Prevention and Health Promotion, U. S. Centers for Disease Control and Prevention. With a special-ty in geriatric medicine, Dr. Buchner has published extensively inthe areas of physical activity in older adults and the role of phys-ical activity in preventing fall injuries. He is the designer of thenational award winning “Lifetime Fitness” exercise program,which has been disseminated in multiple centers throughout thestate of Washington.
RINA BLOCH, M.D.
Rina Bloch is an Assistant Professor in the Department ofPhysical Medicine and Rehabilitation at Tufts University Schoolof Medicine in Boston. She is an attending physician at Tufts-NewEngland Medical Center.
MIRIAM E. NELSON, PH.D.
Miriam Nelson is Director of the John Hancock Center forPhysical Activity and Nutrition (CPAN) at the Gerald J. andDorothy R. Friedman School of Nutrition Science and Policy atTufts University in Boston. She has been principal investigator onnumerous studies of exercise and nutrition for older adults. Dr.Nelson is author of the internationally best selling Strong Womenbook series.
Growing Stronger112
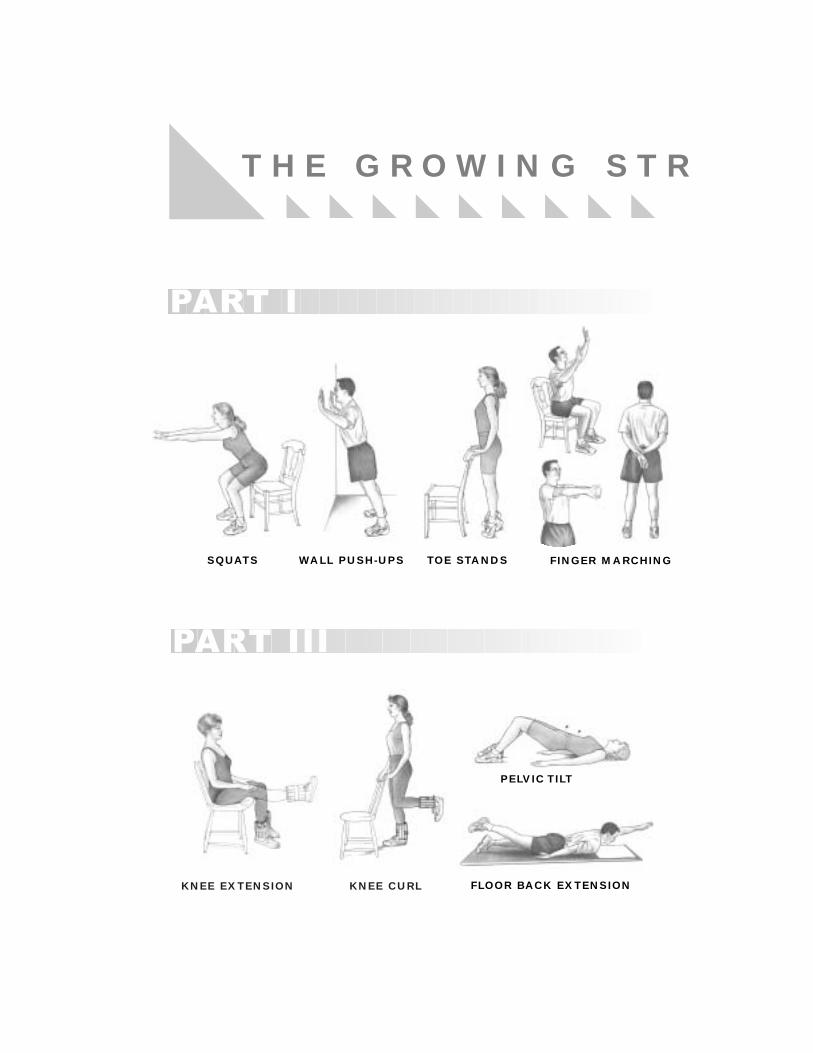
KNEE EXTENSION KNEE CURL
PELVIC TILT
FLOOR BACK EXTENSION
PART III
T H E G R O W I N G S T R
PART I
FINGER MARCHINGWALL PUSH-UPSSQUATS TOE STANDS

BICEPS CURL STEP UPS OVERHEAD PRESS SIDE HIP RAISE
PART II
O N G E R P R O G R A M
S T R E T C H E SCOOL-DOWN
CHEST & ARM HAMSTRING/CALF QUADRICEPS NECK & BACK
All of the exercises that comprise the Growing
Stronger program are featured on the following pages.
You can do the program by using the illustrations on
these pages once you are familiar with the exercises
and their accompanying instructions.
TO USE THE INTERACTIVE GROWING STRONGER PROGRAM
PLEASE GO TO: www.nutrition.tufts.edu/growingstronger

TO LEARN MORE ABOUT THE GERALD J. AND DOROTHY R. FRIEDMANSCHOOL OF NUTRITION SCIENCE AND POLICY AT TUFTS UNIVERSITY PLEASEWRITE TO:
Office of DevelopmentGerald J. & Dorothy R. Friedman School of Nutrition Science and PolicyTufts University. 136 Harrison Avenue. Boston, MA 02111
OR VISIT THE SCHOOL’S WEBSITE AT:www.nutrition.tufts.edu
TO USE THE INTERACTIVE GROWING STRONGER PROGRAM PLEASE GO TO:
www.nutrition.tufts.edu/growingstronger/
TO RECEIVE MORE INFORMATION FROM THE CENTERS FOR DISEASE CONTROL
AND PREVENTION PLEASE GO TO:
www.cdc.gov/nccdphp/dnpa/physical/
The Gerald J. and Dorothy R. Friedman School of NutritionScience and Policy at Tufts University was established in 1981and is the first and only independent school of nutrition inNorth America. The school’s mission is to conduct research,educational, and community-service programs to improve thenutritional health and well-being of populations throughoutthe world. The John Hancock Center for Physical Activityand Nutrition is one of eight centers within the school. Thegoal of the Center is to develop and promote scientifically -based exercise and nutrition programs to the public at large.
U.S. DEPARTMENT OF HEALTH AND HUMAN SERVICES
Centers for Disease Control and Prevention