Embed Size (px)
Citation preview

The making of our film posterSpoken for

Stage 1
First of all we opened the image that we wanted as our background, in this case, being a landscape photo and then cropped it to the size which we wanted.
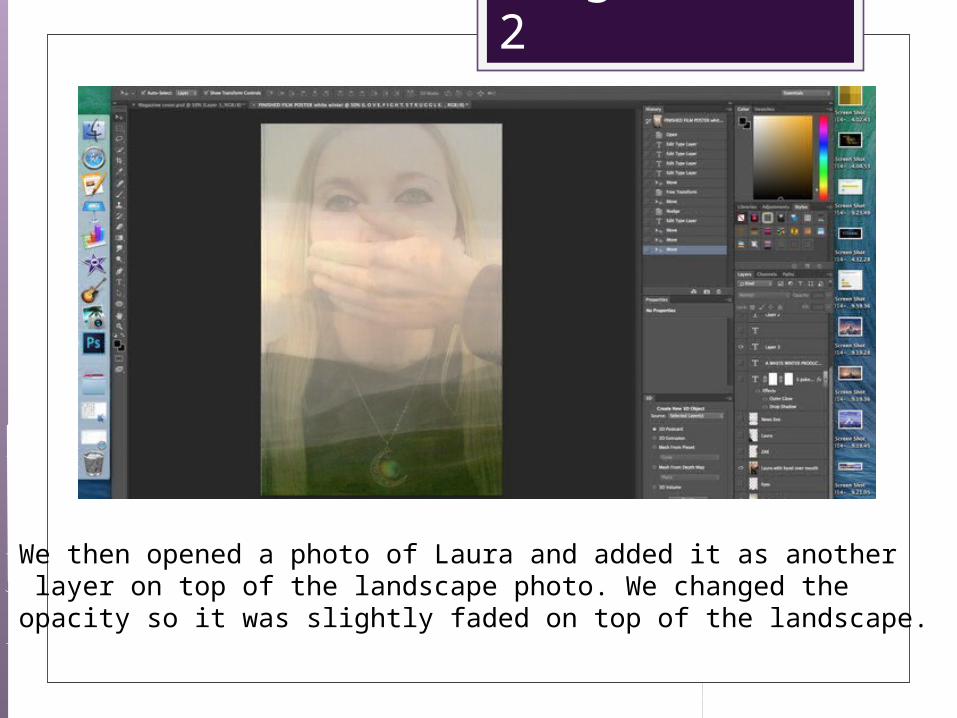
Stage 2
We then opened a photo of Laura and added it as another layer on top of the landscape photo. We changed theopacity so it was slightly faded on top of the landscape.

Stage 3
Once we had completed that, we instead a photo of Laura facing the side and used the quick selection tool to crop Laura from the background and put her into the position atwhich we thought would be suitable leaving us with enough room for other pictures etc. to be inserted.
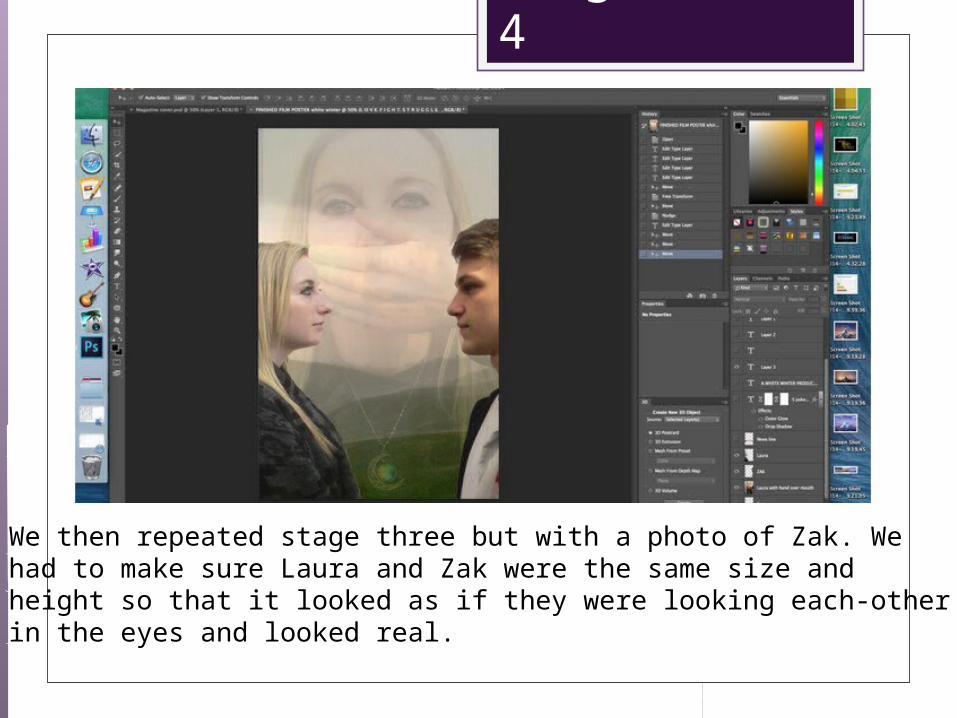
Stage 4
We then repeated stage three but with a photo of Zak. We had to make sure Laura and Zak were the same size and height so that it looked as if they were looking each-other in the eyes and looked real.
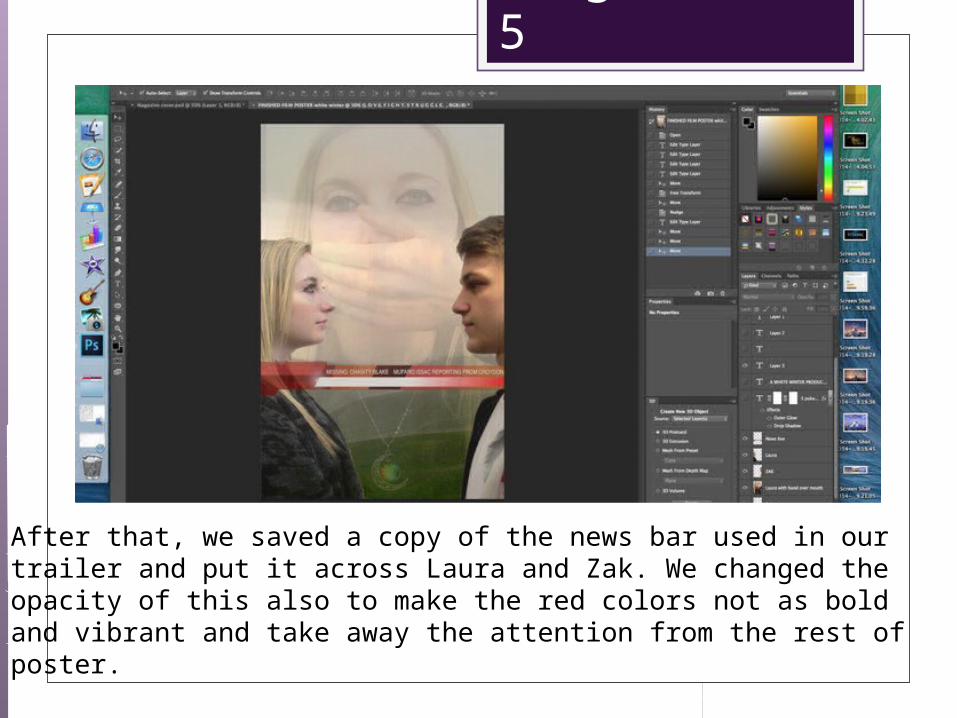
Stage 5
After that, we saved a copy of the news bar used in ourtrailer and put it across Laura and Zak. We changed the opacity of this also to make the red colors not as bold and vibrant and take away the attention from the rest of poster.

Stage 6
We then used the text tool and typed out the title of ourfilm-’Spoken For’ and chose a font which best suited our film poster. We were originally going to go for a plainbold font, however after going through all fonts we decided to go for this one. We added effects to the title like adding noise, outer glow and opacity.

Stage 7
After adding the title, we added 3 words underneath resembling words of the film. After looking at differentfilm posters, we were inspired to add words on our film poster to make it more dramatic.

Stage 8
Then we typed in our poster credits, including director, editor, producer etc. as well as the release date and a social media hash-tag. We used the same font as stage 7 to do so.

Stage 9
After, we added the actors names at the top of the film Poster as does many other film posters.

Stage 9
We then added the age rating of the film which is a 15. We got the image from Google added it as a layer just like the rest of the photos on our poster.

Stage 10
The last step was to add our production logo onto our film poster and eventually we had finished!