Embed Size (px)
Citation preview
Question 6: Technology - What have you learnt about
technologies from the process of constructing this product?
20/02/15
20/02/15
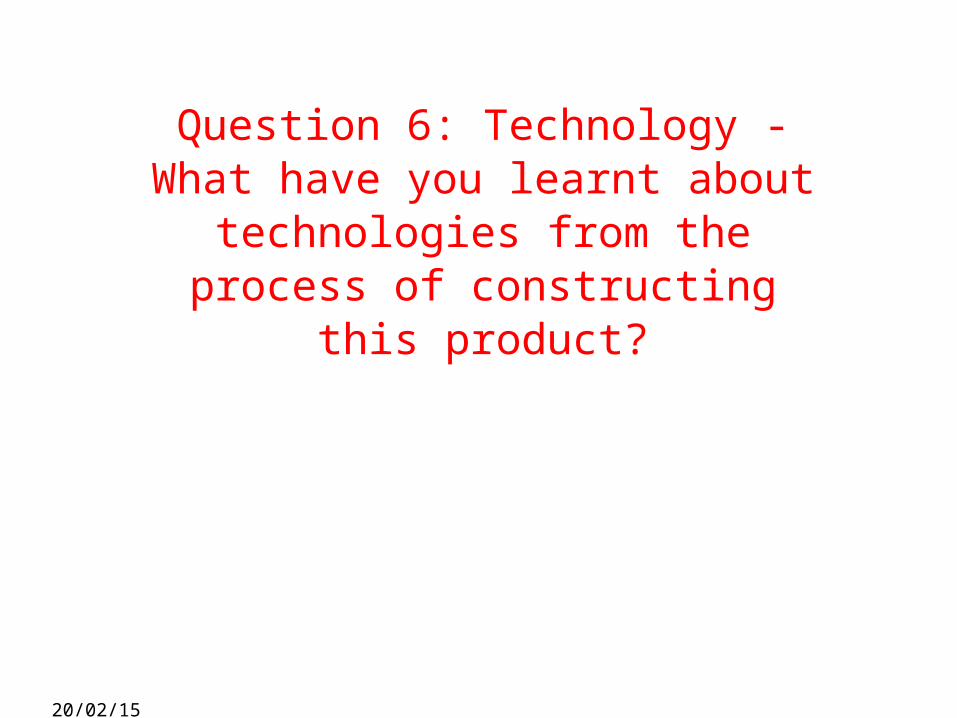
Hardware:
the machines, wiring, and other physical components of a computer or other electronic system
20/02/15
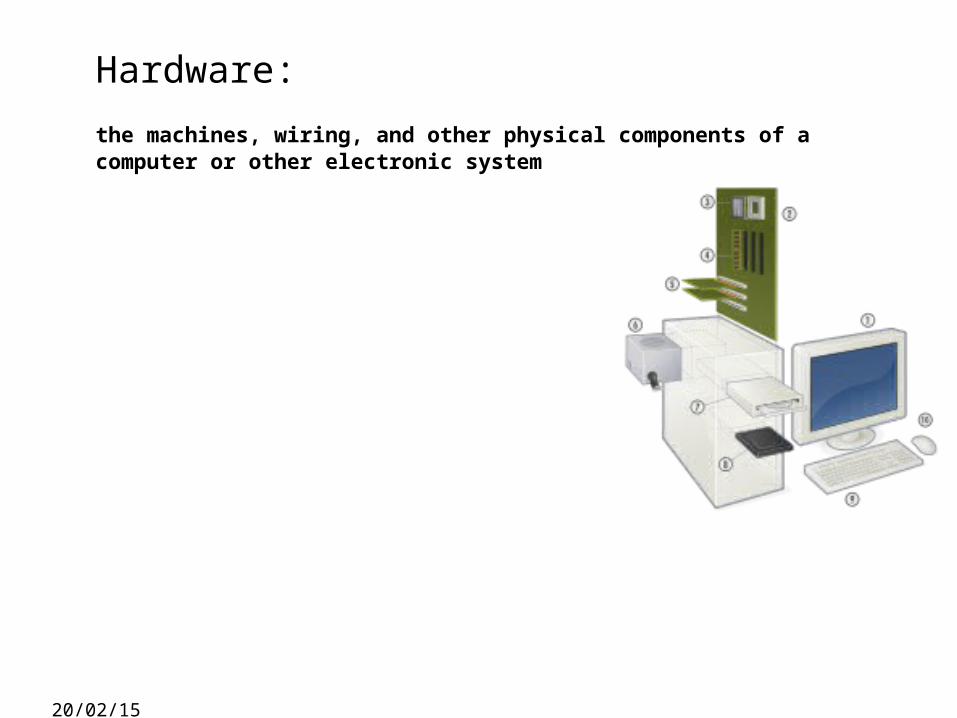
Apple mac
• The Apple Mac version that I completed my magazine on was called ‘Mac OS X: Version 10.5.8’.
• It has 3 main components: the screen, the keyboard and the mouse.
• Not only did I have to learn how to operate new software such as ‘Adobe Photoshop’ but the Macs themselves were also a new challenge.
• As someone who is used to ‘Windows’ operated systems such as ‘Dell’, I had to get used to a new interface and controls, such as clicking on the mouse + selecting CTRL on the keyboard at the same time in order to right-click, as opposed to their being a LEFT and RIGHT button on the mouse.
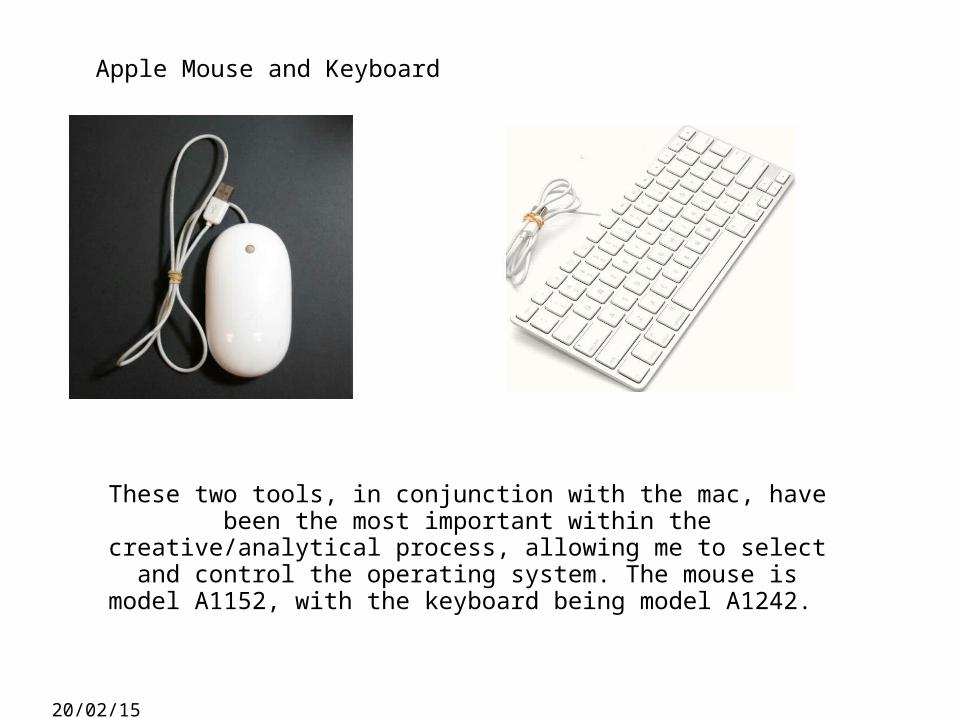
Apple Mouse and Keyboard
20/02/15
These two tools, in conjunction with the mac, have been the most important within the creative/analytical process, allowing me to select and control the operating system. The mouse is model A1152, with
the keyboard being model A1242.
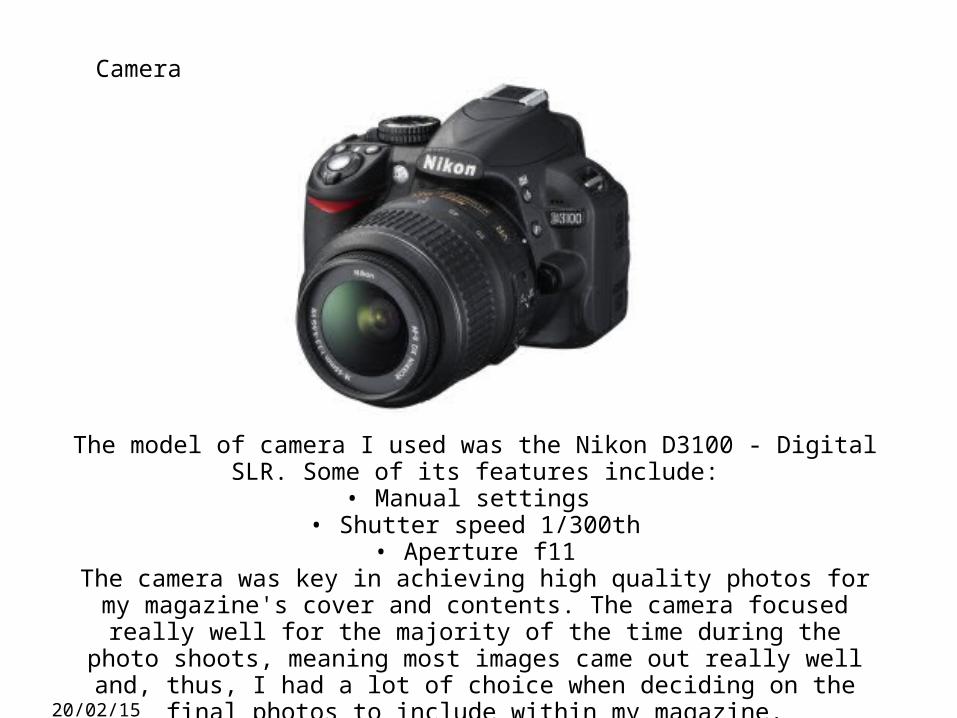
Camera
20/02/15
The model of camera I used was the Nikon D3100 - Digital SLR. Some of its features include:
• Manual settings • Shutter speed 1/300th
• Aperture f11The camera was key in achieving high quality photos for my magazine's
cover and contents. The camera focused really well for the majority of the time during the photo shoots, meaning most images came out really well
and, thus, I had a lot of choice when deciding on the final photos to include within my magazine.
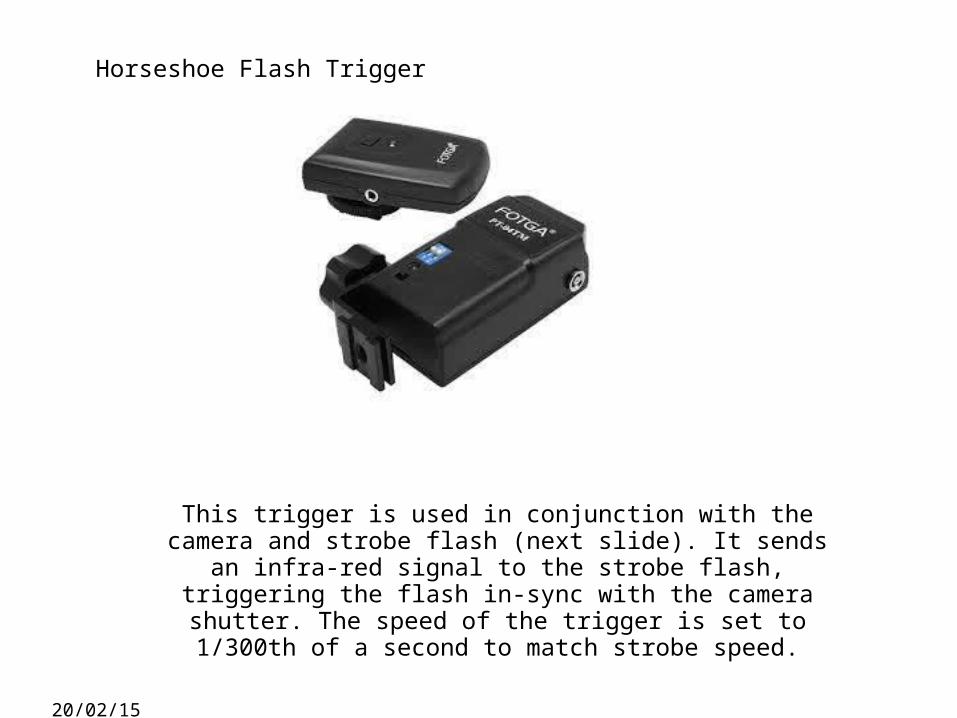
Horseshoe Flash Trigger
20/02/15
This trigger is used in conjunction with the camera and strobe flash (next slide). It sends an infra-red signal to the strobe flash, triggering the flash in-sync with the camera shutter. The speed of the trigger is set to 1/300th of a second to match strobe speed.
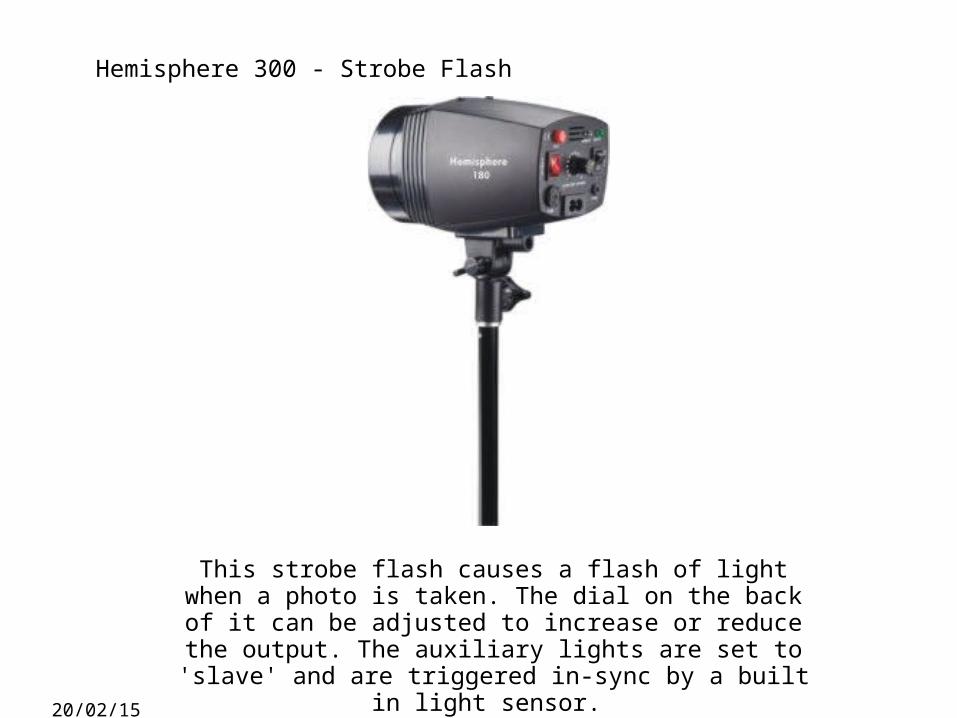
Hemisphere 300 - Strobe Flash
20/02/15
This strobe flash causes a flash of light when a photo is taken. The dial on the back of it can be adjusted to increase
or reduce the output. The auxiliary lights are set to 'slave' and are triggered in-sync by a built in light sensor.
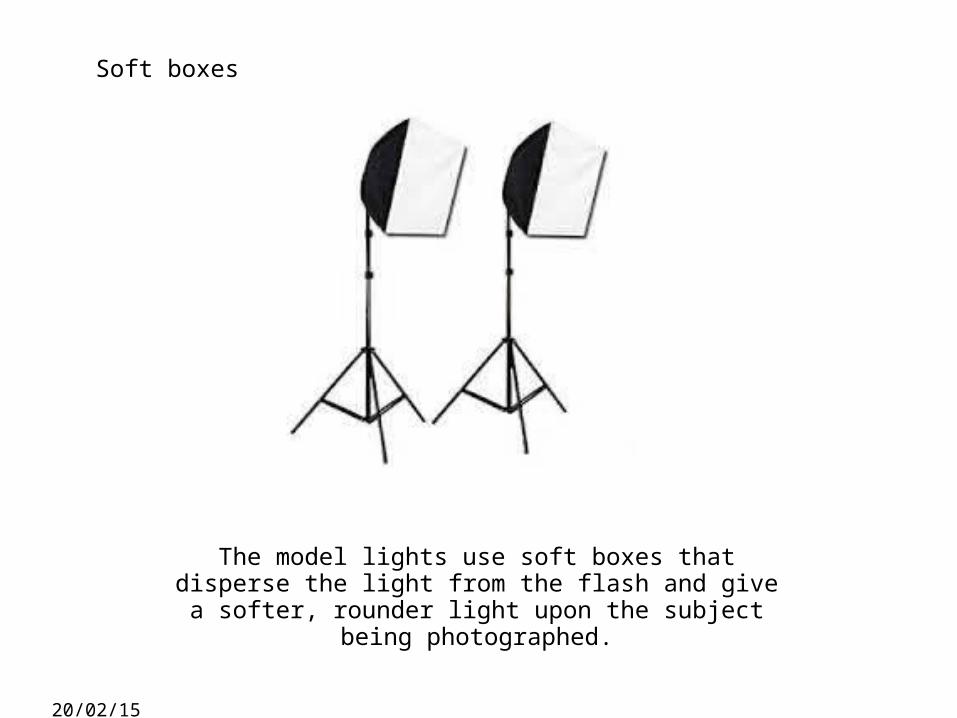
Soft boxes
20/02/15
The model lights use soft boxes that disperse the light from the flash and give a softer, rounder light upon the
subject being photographed.
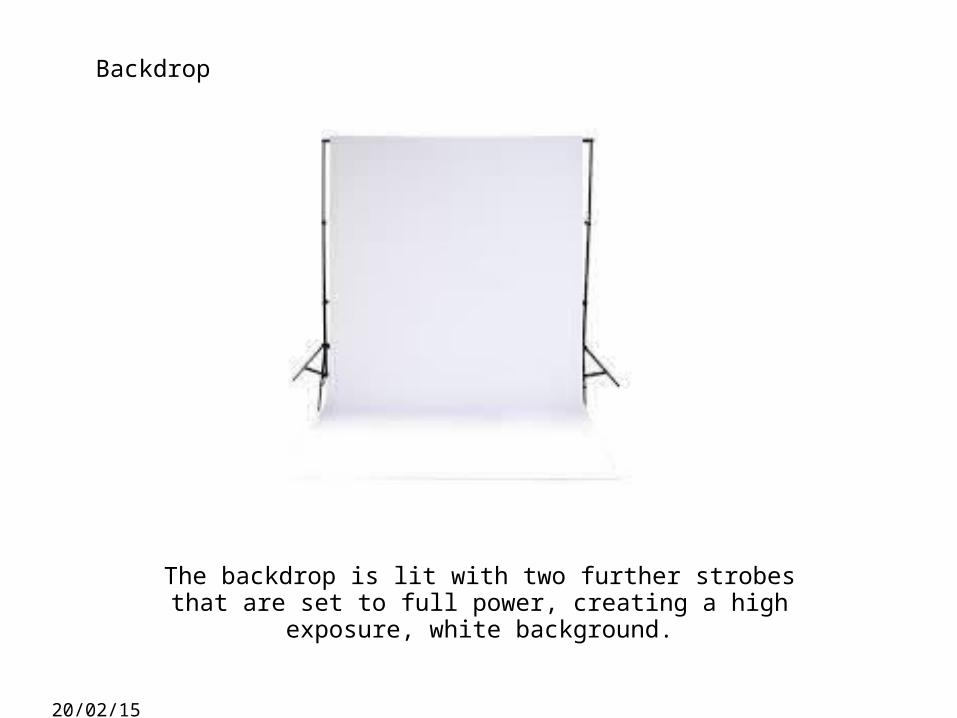
Backdrop
20/02/15
The backdrop is lit with two further strobes that are set to full power, creating a high exposure, white background.
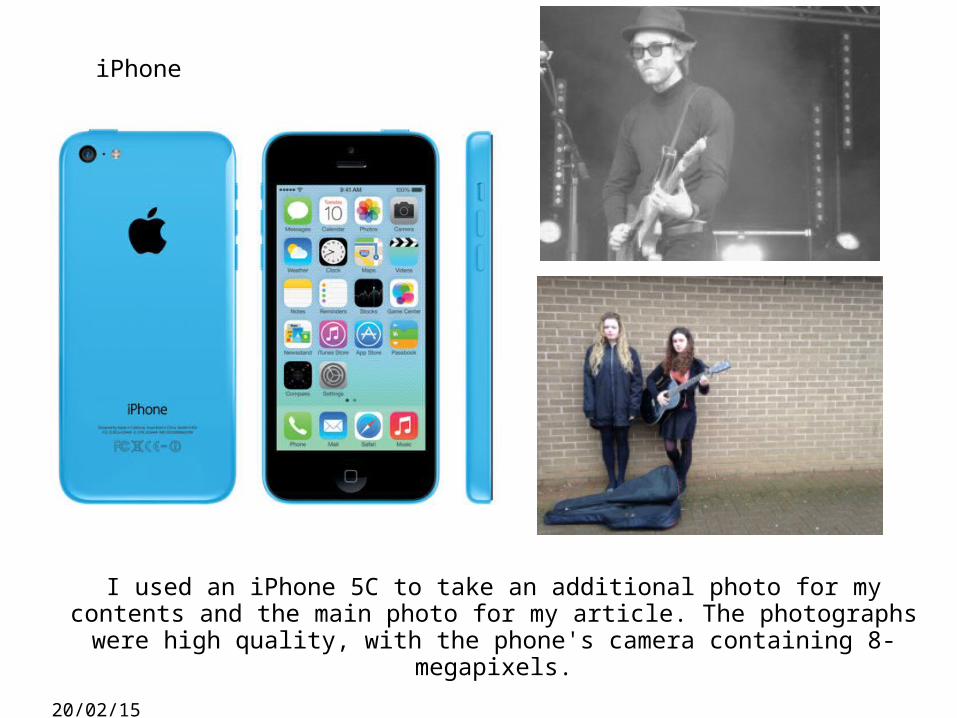
iPhone
20/02/15
I used an iPhone 5C to take an additional photo for my contents and the main photo for my article. The photographs were high quality, with the phone's camera
containing 8-megapixels.
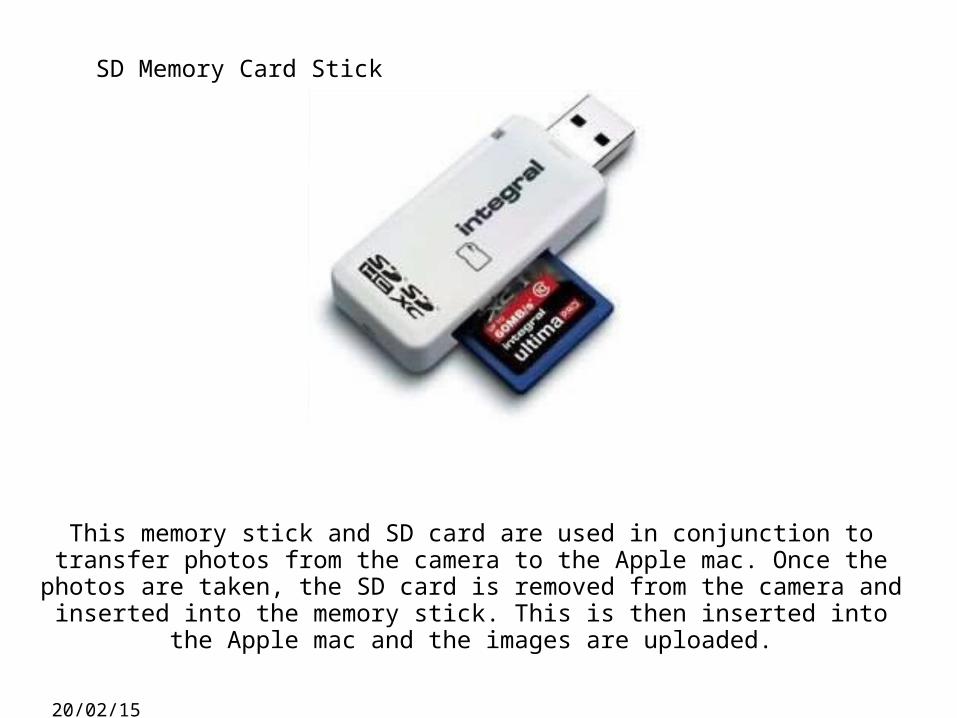
SD Memory Card Stick
20/02/15
This memory stick and SD card are used in conjunction to transfer photos from the camera to the Apple mac. Once the photos are taken, the SD card is removed from the camera and inserted into the memory stick. This is then inserted into the Apple
mac and the images are uploaded.
20/02/15
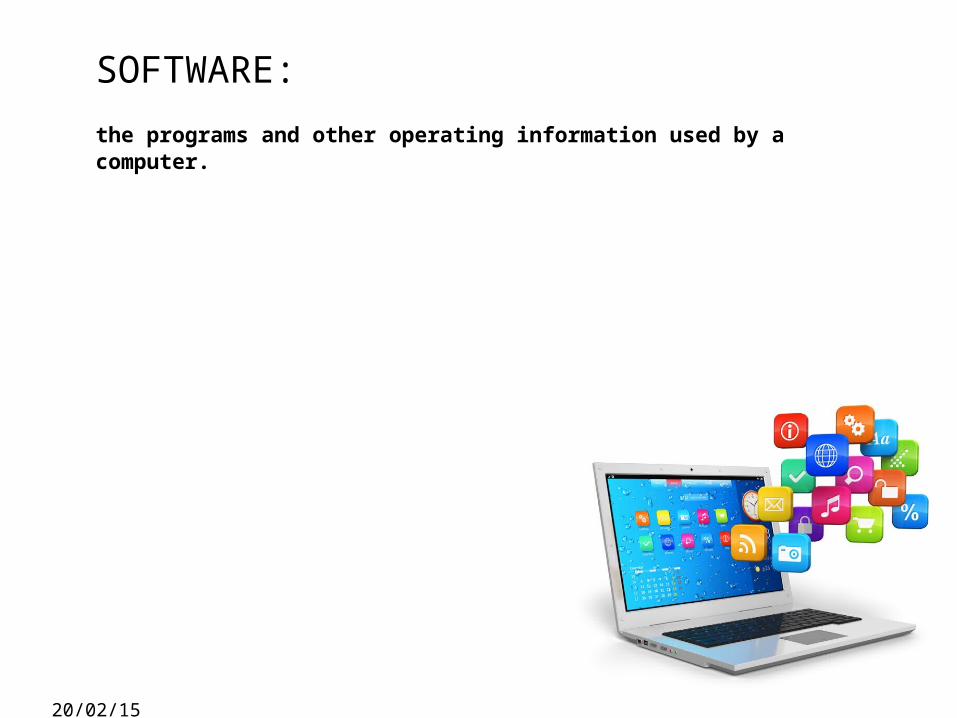
SOFTWARE:
the programs and other operating information used by a computer.
20/02/15
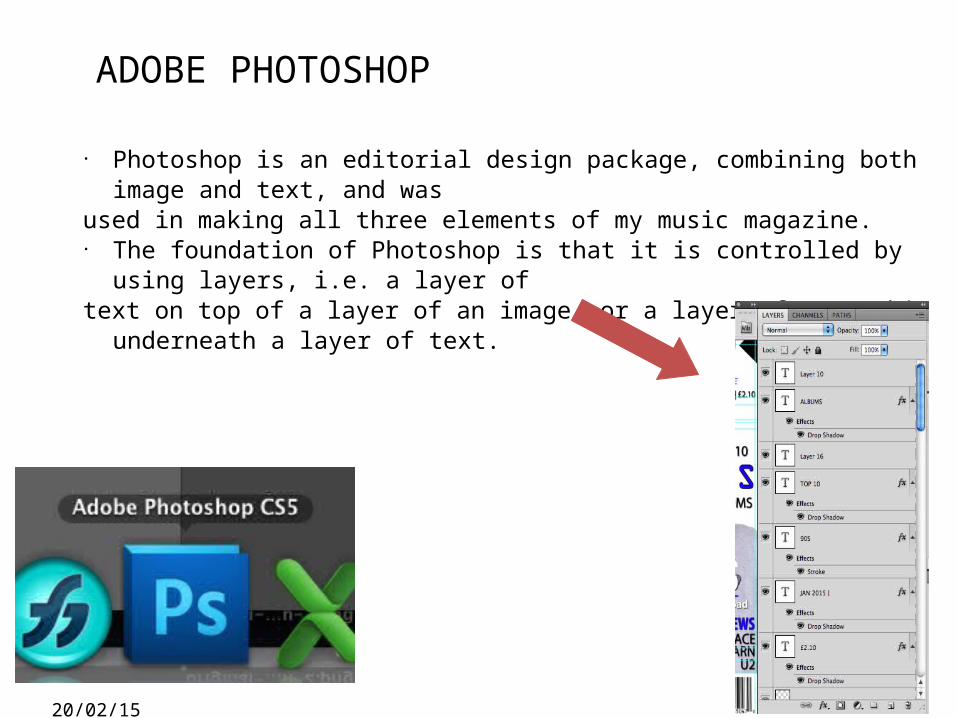
ADOBE PHOTOSHOP
• Photoshop is an editorial design package, combining both image and text, and was
used in making all three elements of my music magazine.• The foundation of Photoshop is that it is controlled by using layers,
i.e. a layer oftext on top of a layer of an image, or a layer of a graphic underneath a
layer of text.
20/02/15
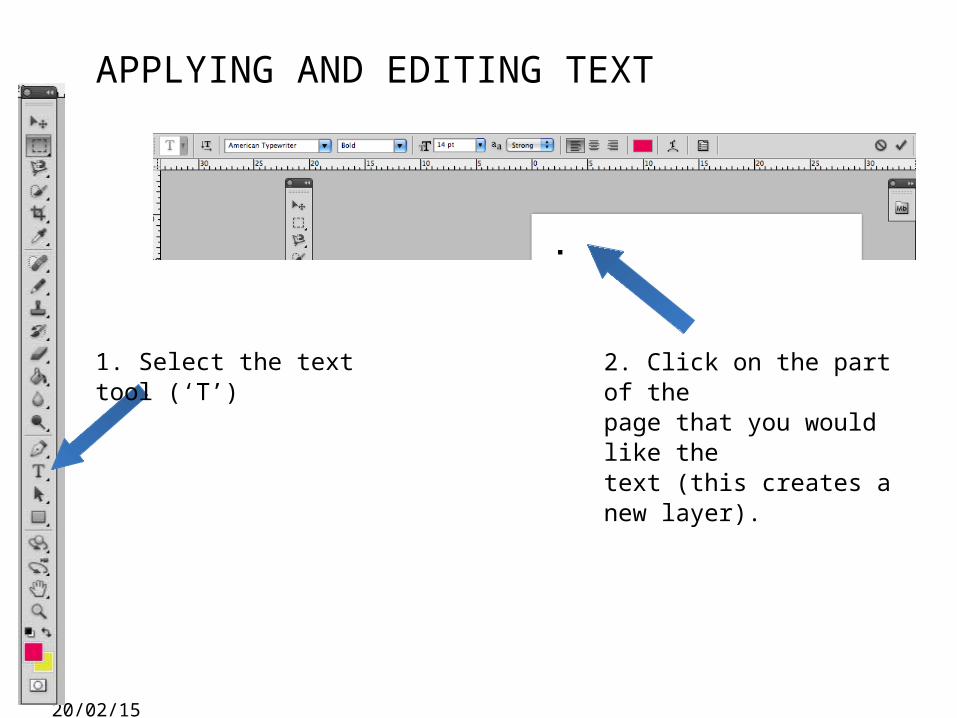
APPLYING AND EDITING TEXT
1. Select the text tool (‘T’)
2. Click on the part of thepage that you would like the text (this creates a new layer).
20/02/15
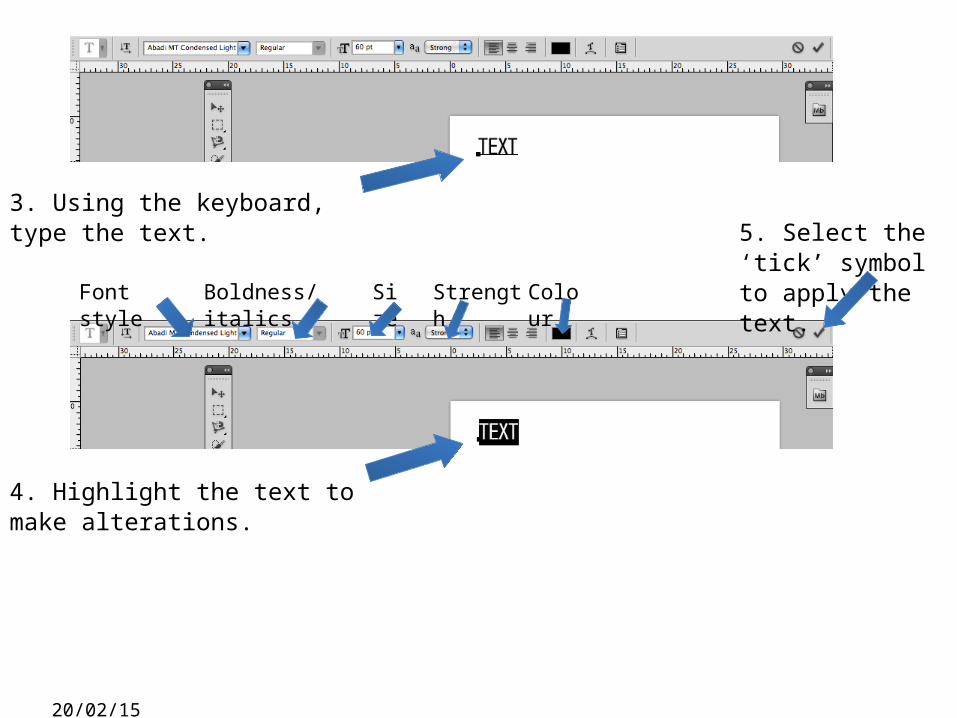
3. Using the keyboard, type the text.
4. Highlight the text to make alterations.
Font style
Boldness/italics
Size
Strength
Colour
5. Select the ‘tick’ symbol to apply the text.
20/02/15
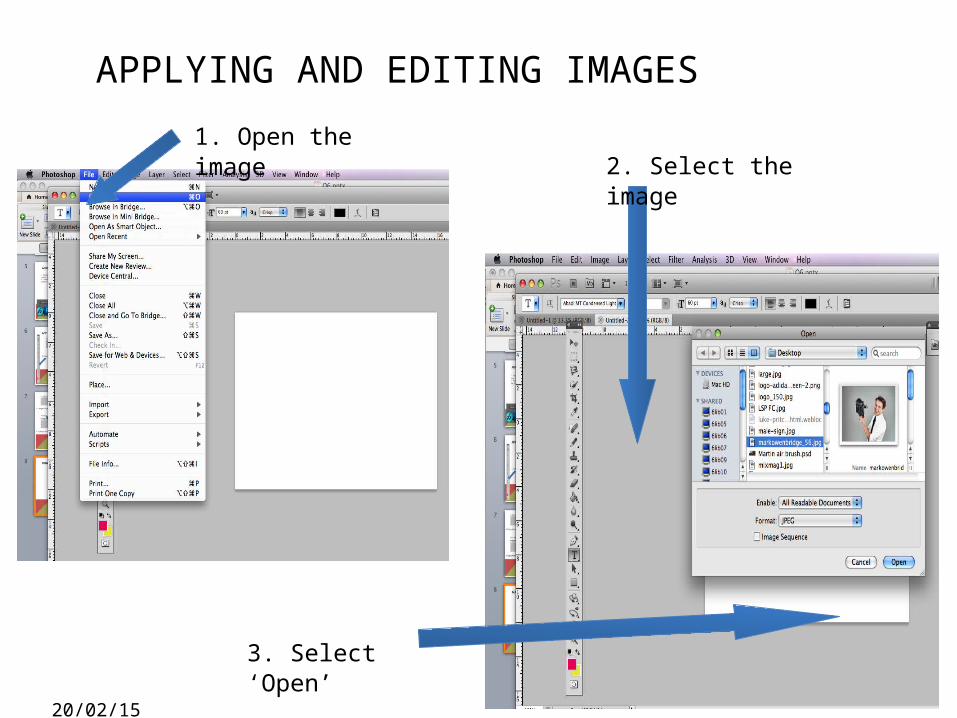
APPLYING AND EDITING IMAGES
1. Open the image 2. Select the
image
3. Select ‘Open’
20/02/15
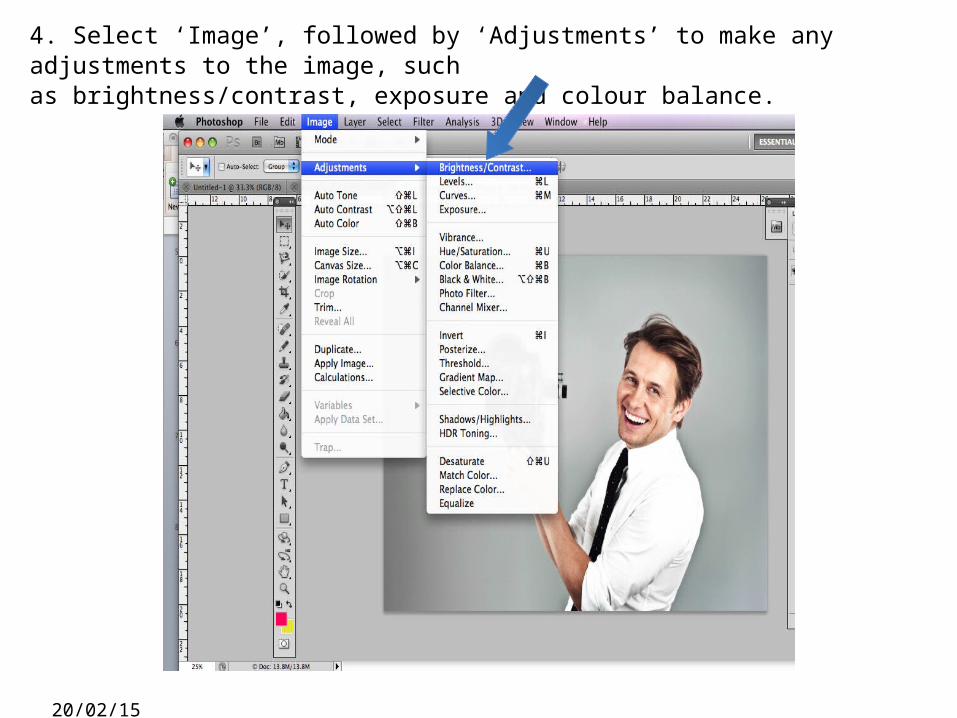
4. Select ‘Image’, followed by ‘Adjustments’ to make any adjustments to the image, suchas brightness/contrast, exposure and colour balance.
20/02/15
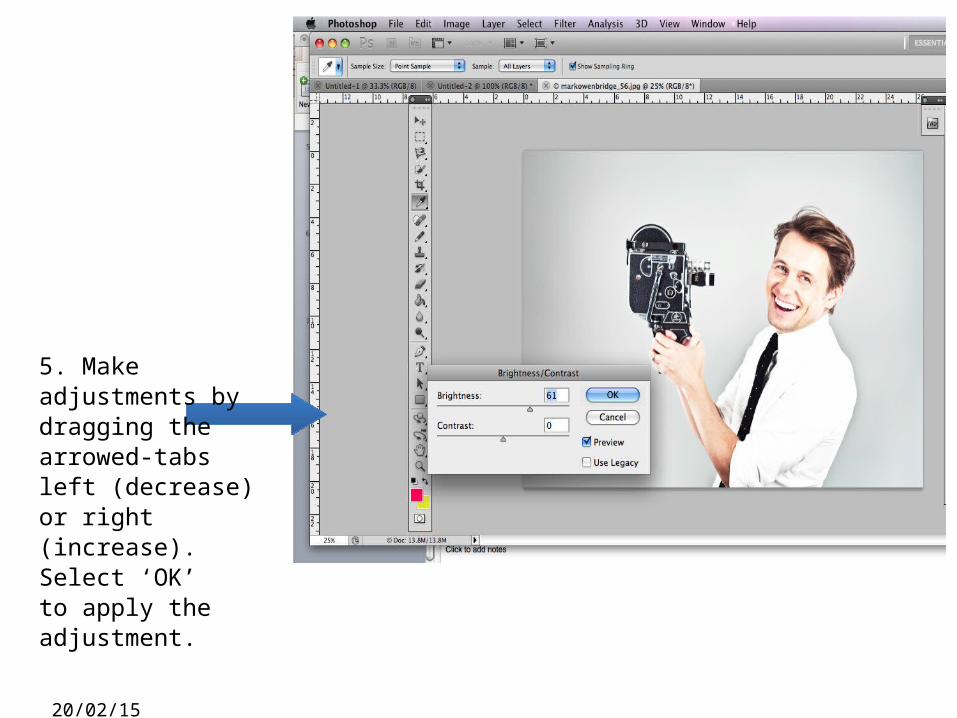
5. Make adjustments bydragging the arrowed-tabsleft (decrease) or right (increase). Select ‘OK’to apply the adjustment.
20/02/15
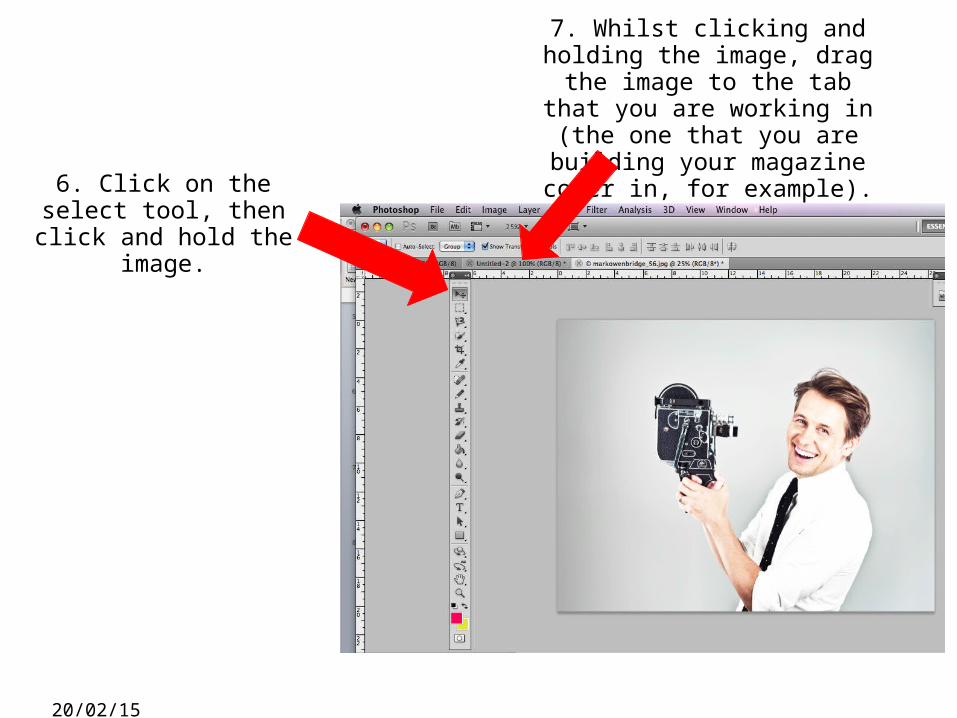
6. Click on the select tool, then click and hold the
image.
7. Whilst clicking and holding the image, drag the image to
the tab that you are working in (the one that you are building your magazine cover in, for
example).
20/02/15
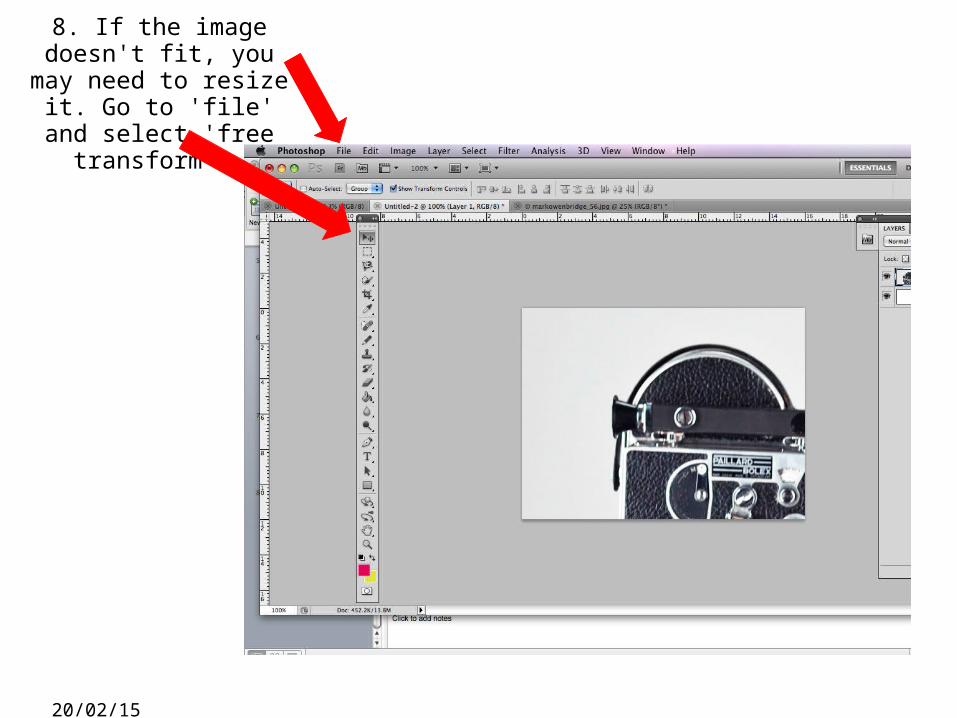
8. If the image doesn't fit, you may need to resize it. Go to 'file' and select
'free transform'.
20/02/15
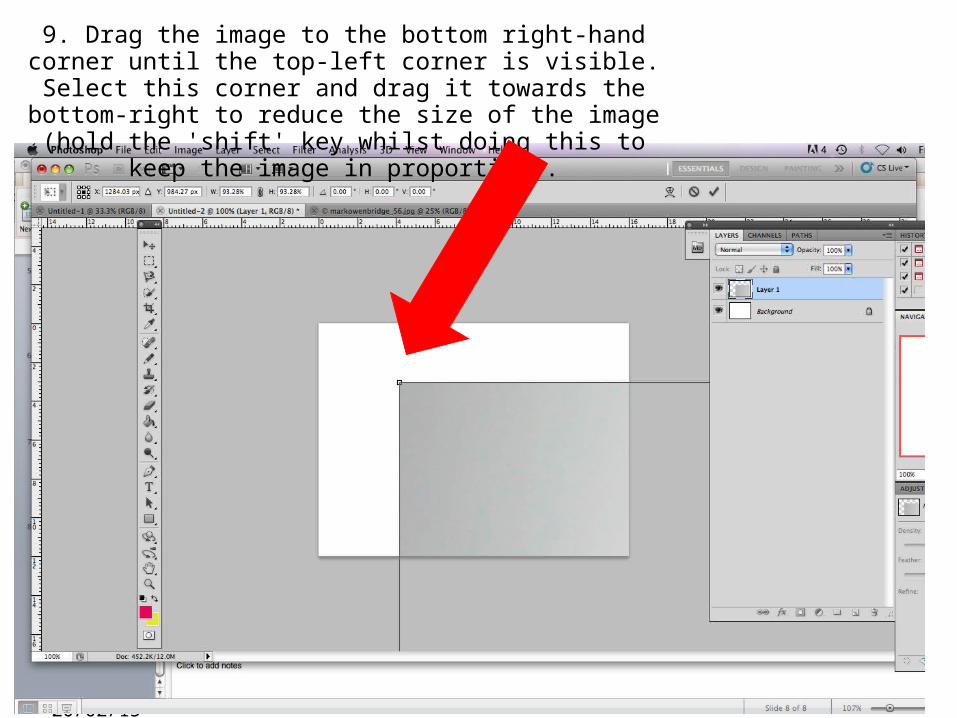
9. Drag the image to the bottom right-hand corner until the top-left corner is visible. Select this corner and drag it towards
the bottom-right to reduce the size of the image (hold the 'shift' key whilst doing this to keep the image in proportion).
20/02/15
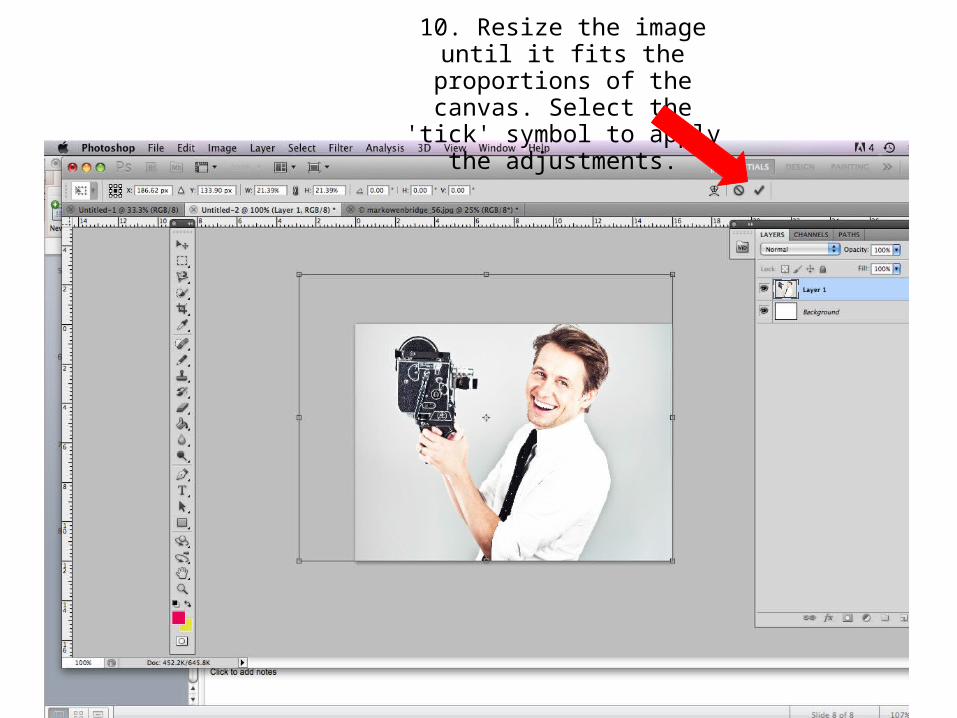
10. Resize the image until it fits the proportions of the canvas.
Select the 'tick' symbol to apply the adjustments.
INDESIGN
20/02/15
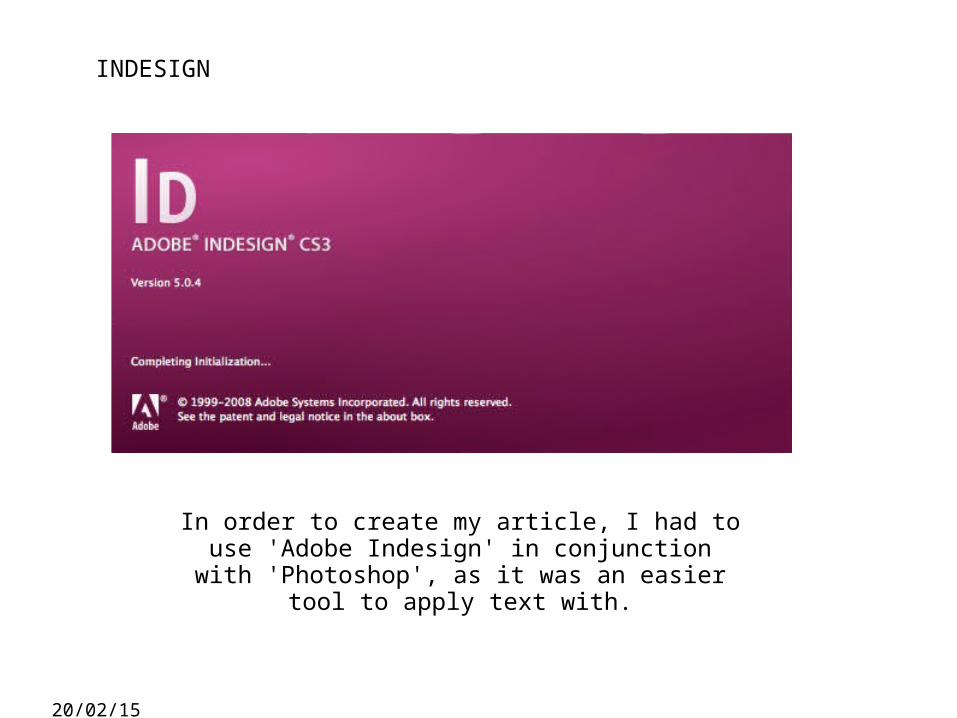
In order to create my article, I had to use 'Adobe Indesign' in conjunction with 'Photoshop', as it was
an easier tool to apply text with.
20/02/15
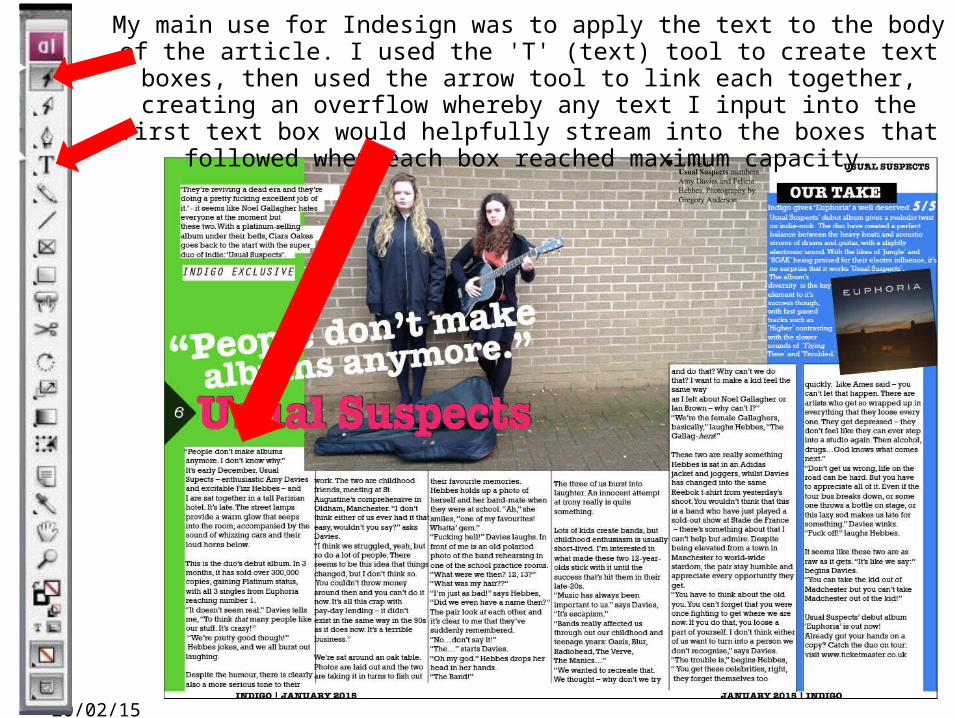
My main use for Indesign was to apply the text to the body of the article. I used the 'T' (text) tool to create text boxes, then used the arrow tool to link each together, creating an overflow whereby any text I input into the first text box would helpfully stream into the boxes that followed when each box reached
maximum capacity.
20/02/15
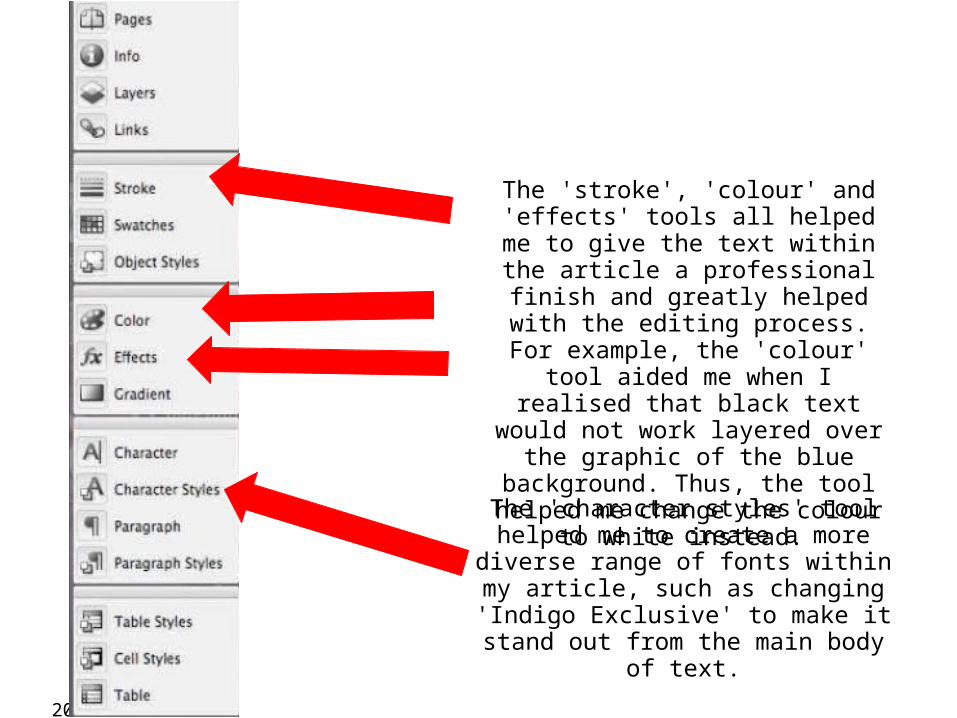
The 'stroke', 'colour' and 'effects' tools all helped me to give the text within the article a professional finish and
greatly helped with the editing process. For example, the 'colour' tool
aided me when I realised that black text would not work layered over the
graphic of the blue background. Thus, the tool helped me change the colour
to white instead.
The 'character styles' tool helped me to create a more diverse range of fonts within my article, such as changing
'Indigo Exclusive' to make it stand out from the main body of text.
WordPress
20/02/15
The WordPress website has allowed me to create an online blog to record the creative and analytical process
of creating a music magazine.
20/02/15
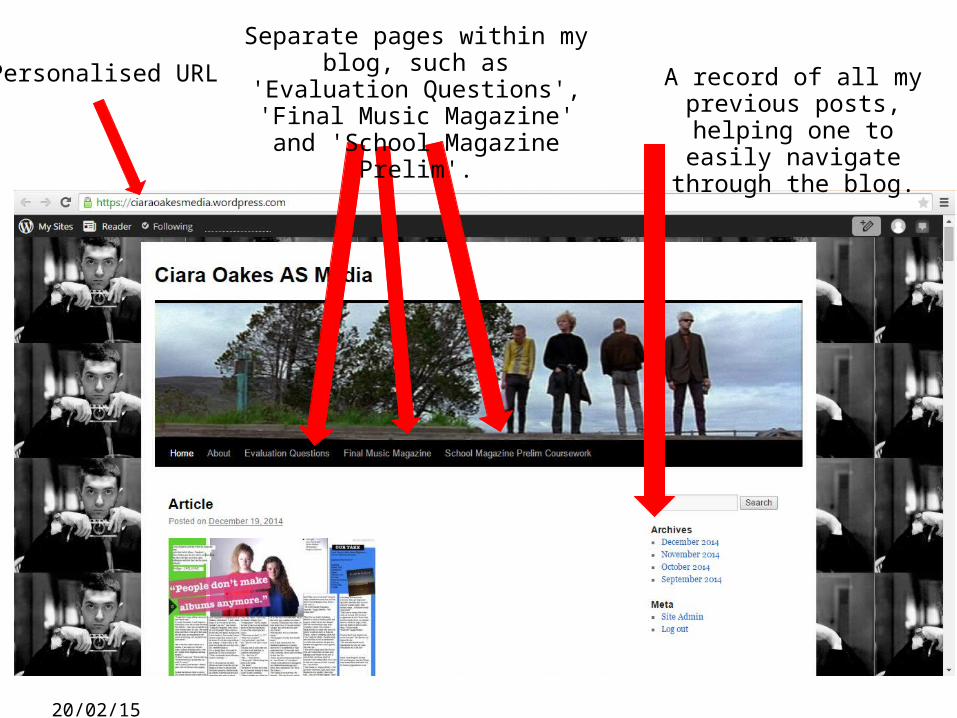
Personalised URL A record of all my previous posts, helping one to easily navigate
through the blog.
Separate pages within my blog, such as 'Evaluation Questions',
'Final Music Magazine' and 'School Magazine Prelim'.
Powerpoint
20/02/15
Microsoft Powerpoint has allowed me to vary the creative tools that I have used to present my evaluation of my coursework, as well as
homeworks also. It is a very visual tool, allowing the use of images and graphics (such as arrows) to clearly present one's ideas.
SlideShare
20/02/15
SlideShare is an online storage facility that has allowed me to embded powerpoints into my Wordpress blog. It defeats some of the issues with Wordpress, in that it
does not allow direct upload of powerpoints to blogs, thus, it is a very helpful tool.
Word
20/02/15
Microsoft Word was the tool I used to write and plan my article before finally applying it to the body of my article within 'Indesign'. It was much easier to write
the article and then copy + paste the text to 'Indesign', as opposed to directly writing it within the programme, as Word is a simple and easy-to-use programme that is specifically designed for typing text, whilst 'Indesign' has its focus on other,
more visual aspects, thus, directly typing text can sometimes be difficult.
YouTube
20/02/15
I used YouTube to embded links from music videos of the indie-rock genre into my blog. This helped create a more visual aspect to my blog, presenting a
clear theme and style of my magazine.