Embed Size (px)
Citation preview
Another eBookWholesaler Publication
Perfume, Soap and Candle Making
The Beginner’s Guide
By Irene Palmer
Proudly brought to you by
WOW Enterprises Inc.
Recommended Resources
• Web Site Hosting Service
• Internet Marketing
• Affiliate Program
“Perfume, Soap and Candle Making” by Irene Palmer Page 2 of 118
Please Read This First
Terms of Use This Electronic book is Copyright © 2007 John Williams. All rights
reserved. No part of this book may be reproduced, stored in a
retrieval system, or transmitted by any means, electronic,
mechanical, photocopying, recording, or otherwise, without written
permission from the copyright holder(s).
You must not distribute any part of this ebook in any way at all.
Members of eBookwholesaler are the sole distributors and must
abide by all the terms at
http://www.ebookwholesaler.net/terms.php
Disclaimer The advice contained in this material might not be suitable for
everyone. The author obtained the information from sources
believed to be reliable and from his own personal experience, but he
neither implies nor intends any guarantee of accuracy.
These crafts involve ingredients and processes which require careful
observance of all appropriate safety measures at all times by
everyone involved. You must accept full responsibility for your
actions and assumptions.
The author, publisher and distributors never give legal, accounting,
medical or any other type of professional advice. The reader must
always seek those services from competent professionals that can
review their own particular circumstances.
The author, publisher and distributors particularly disclaim any
liability, loss, or risk taken by individuals who directly or indirectly
Copyright © 2007 ~ All Rights Reserved Worldwide
“Perfume, Soap and Candle Making” by Irene Palmer Page 3 of 118
act on the information contained herein. All readers must accept full
responsibility for their use of this material.
All pictures used in this book are for illustrative purposes only. The
pictures must not be used for any other purpose.
Some images in this book are © 2008 Jupiterimages Corporation.
The people in the pictures are not connected with the book, author
or publisher and no link or endorsement between any of them and
the topic or content is implied, nor should any be assumed.
Copyright © 2007 ~ All Rights Reserved Worldwide

“Perfume, Soap and Candle Making” by Irene Palmer Page 4 of 118
Table of Contents
Please Read This First ........................................................................ 2
Terms of Use........................................................................................................ 2 Disclaimer............................................................................................................. 2
Table of Contents ................................................................................ 4
About the Author............................................................................... 10
1. Perfume Making - An Overview.................................................... 11
2. The History of Perfume ................................................................. 14
3. What is Needed to Make Homemade Perfumes?........................ 16
4. Making Your Own Perfume - The First Steps.............................. 19
The Things that You Need .................................................................................... 19 Steps for Making your Perfume ........................................................................... 20
5. The Materials Needed and Where to Get Them .......................... 21
6. Unit Conversions - Measuring and Mixing .................................. 23
Measuring Of Ingredients ..................................................................................... 23 Mixing Of Ingredients............................................................................................ 24
7. Bottling and Labeling.................................................................... 25
8. Choosing a Formulation ............................................................... 27
Formulation Techniques for Perfume Making.................................................... 28
9. Aromas ........................................................................................... 29
Sources of Aromas................................................................................................ 29
10. Solvent and Fixative.................................................................... 31
Solvent.................................................................................................................... 31 Fixative ................................................................................................................... 31
Copyright © 2007 ~ All Rights Reserved Worldwide
“Perfume, Soap and Candle Making” by Irene Palmer Page 5 of 118
11. Creating Aromatherapy Perfumes at Home .............................. 32
Procedure for Making Aromatherapy Perfumes ................................................ 33 Different Aromatherapy Recipes ......................................................................... 33
1. Calming Aromatherapy Perfume ................................................................. 33 2. Energizing Aromatherapy Perfume ............................................................. 34 3. Tranquilizing Aromatherapy Perfume ......................................................... 34 4. Relaxing Aromatherapy Perfumes............................................................... 34 5. Blended Aromatherapy Perfume ................................................................. 35
12. Simple Recipes to Make Perfume at Home ............................... 37
Basic Perfume Recipe........................................................................................... 37 Steps................................................................................................................... 37
Perfume using Essential Oils............................................................................... 38 Ingredients Necessary ...................................................................................... 38 Steps................................................................................................................... 38
Perfume using essential oils, water, and alcohol .............................................. 38 Ingredients Necessary ...................................................................................... 38 Use Different Ingredients for Different Results.............................................. 39
Part-II: Soap Making .............................................................................................. 41
14. Soap Making – An Introduction.................................................. 41
The Cold Process Soap Making....................................................................... 41 Melt and Pour Soap Making.............................................................................. 41 Rebatch Soap Making Method ......................................................................... 42
Essential Precautions when Making Soap ...................................... 43
15. How is Soap Made?..................................................................... 45
16. Methods of Making Soap ............................................................ 47
Soap Making Methods........................................................................................... 47 Hot Process: ...................................................................................................... 48 Melt and Pour..................................................................................................... 48 Rebatching ......................................................................................................... 48
Copyright © 2007 ~ All Rights Reserved Worldwide
“Perfume, Soap and Candle Making” by Irene Palmer Page 6 of 118
17. Getting Started - Making Soap from Scratch ............................ 50
18. Ingredients Needed to Make Soap ............................................. 52
Other Requirements for Your Soap Making.................................................... 53
19. Tools and Equipment to Make Cold Process Soap .................. 54
20. Soap Making Safety Procedures................................................ 56
21. Soap Making Oils and Their Properties..................................... 58
Sweet Almond Oil .................................................................................................. 58 Aloe Vera Gel and Liquid ...................................................................................... 58 Apricot Kernel Oil .................................................................................................. 58 Avocado Oil............................................................................................................ 58 Beeswax ................................................................................................................. 58 Calendula Oil.......................................................................................................... 58 Canola Oil ............................................................................................................... 59 Castor Oil................................................................................................................ 59 Cocoa Butter .......................................................................................................... 59 Coconut Oil ............................................................................................................ 59 Cottonseed Oil ....................................................................................................... 59 Emu Oil ................................................................................................................... 59 Evening Primrose Oil ............................................................................................ 59 Grapeseed Oil ........................................................................................................ 60 Hazelnut Oil ............................................................................................................ 60 Hempseed Oil......................................................................................................... 60 Honey...................................................................................................................... 60 Jojoba ..................................................................................................................... 60 Kukui Nut Oil .......................................................................................................... 60 Lard ......................................................................................................................... 60 Macadamia Oil ....................................................................................................... 61 Mango Butter ......................................................................................................... 61 Monoi Oil ................................................................................................................ 61 Neem Oil ................................................................................................................. 61 Olive Oil .................................................................................................................. 61
Copyright © 2007 ~ All Rights Reserved Worldwide

“Perfume, Soap and Candle Making” by Irene Palmer Page 7 of 118
Palm Oil/ Vegetable Tallow................................................................................... 61 Palm Kernel Oil ...................................................................................................... 61 Peanut Oil ............................................................................................................... 62 Safflower Oil........................................................................................................... 62 Sesame Seed Oil.................................................................................................... 62 Shea Butter............................................................................................................. 62 Sunflower Oil ......................................................................................................... 62 Vegetable Shortening............................................................................................ 62 Soybean Oil ............................................................................................................ 63 Wheat Germ Oil...................................................................................................... 63
22. Using Natural Colorants in Soap Making .................................. 64
Three Tests for Natural Colorants ....................................................................... 64 The Lye Test....................................................................................................... 64 The Oil Test ........................................................................................................ 64 The Soap Batch Test ......................................................................................... 64
23. Rebatching Soap - The Hand Rebatch Method......................... 66
24. Step-by-Step Instructions - Cold Process Soap Making.......... 68
25. Make a Lye-Water Solution for Your Cold Process Soap ........ 71
26. Step-by-Step Instructions - Melt and Pour Soap Making ......... 72
Equipment and Materials Necessary................................................................... 72 Procedure............................................................................................................... 72
27. Making Liquid Soap..................................................................... 75
Ingredients and Equipment for Making Liquid Soap ......................................... 75 Basic tools for mixing lye and similar procedures ........................................ 75
Procedure............................................................................................................... 75
28. Finding or Making Soap Making Molds ..................................... 78
Design and Make Your own Soap Molds ............................................................ 78
29. Lavender-Mint Layered Soap Recipe......................................... 80
Copyright © 2007 ~ All Rights Reserved Worldwide
“Perfume, Soap and Candle Making” by Irene Palmer Page 8 of 118
Ingredients ............................................................................................................. 80 Procedure............................................................................................................... 80
30. Troubleshooting Your Soap Making Problems......................... 82
Common Problems in Soap Making .................................................................... 82 1. Curdling of soap mixture while stirring ...................................................... 82 2. Grainy Mixture ............................................................................................... 82 3. Tracing of soap does not occur or is very slow......................................... 82 4. Mixture settles very quickly in pan.............................................................. 82 5. Oil layer appears on the top when soap cools in the mold....................... 83 6. Soft and spongy Soap................................................................................... 83
31. Candle Making Basics................................................................. 84
Types of Candles................................................................................................... 84 Get Started Making Candles................................................................................. 85
32. Tools and Materials to Begin Candle Making............................ 87
Essential Equipment ............................................................................................. 87
33. Candle Additives and How They Make Your Wax Work........... 89
34. Wax Melting Instructions ............................................................ 91
Safety Precautions ................................................................................................ 91
35. Candle Making Mold Techniques............................................... 93
Aluminum Molds.................................................................................................... 93 Wicking the Candle with a Pillar Pin or Rubber Plug .................................... 93
Polycarbonate Molds ............................................................................................ 94
36. Making Pillar Candles ................................................................. 95
A Simple Votive Candle. ....................................................................................... 95
37. Making a Simple Pillar Candle.................................................... 98
38. Making Container-Based Candles............................................ 102
Equipment and ingredients ................................................................................ 102
Copyright © 2007 ~ All Rights Reserved Worldwide
“Perfume, Soap and Candle Making” by Irene Palmer Page 9 of 118
Clean-up Tips....................................................................................................... 103
39. Make a Halloween Appliqué Candle......................................... 105
Materials Required .............................................................................................. 105 Procedure............................................................................................................. 105
40. Candle Making Safety Tips ....................................................... 108
Candle Making Safety Tips................................................................................. 108
Supplies and Classes...................................................................... 111
U.S.A. and Canada........................................................................................... 112 UK and Europe: ............................................................................................... 115 Australia ........................................................................................................... 116
Author’s Afterword.......................................................................... 117
Copyright © 2007 ~ All Rights Reserved Worldwide
“Perfume, Soap and Candle Making” by Irene Palmer Page 10 of 118
About the Author
Irene Palmer has learned many crafts and enjoys sharing the items
she produces with her friends and, especially, members of her large
family.
She also is happy to help other people to improve their craft skills.
Many of her friends kept asking her to write down the steps for the
various craft projects that she helped them with.
After a couple of years, she decided to tidy up her files and use
them to fill another of her life-long ambitions – to write a book!
Irene hopes that her experience and the information that she has
previously only shared with the people around her will now help
spread the skills and joy of crafting wider.
Copyright © 2007 ~ All Rights Reserved Worldwide
“Perfume, Soap and Candle Making” by Irene Palmer Page 11 of 118
Part-I: Perfume Making
1. Perfume Making - An Overview
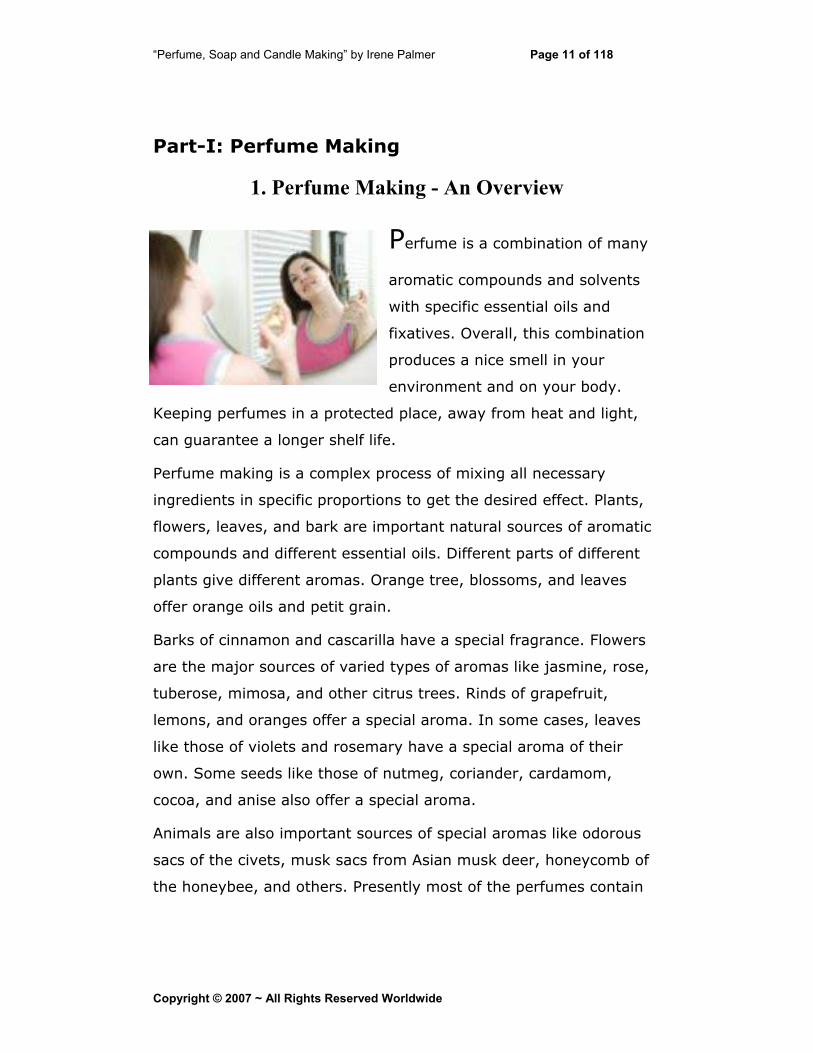
Perfume is a combination of many
aromatic compounds and solvents
with specific essential oils and
fixatives. Overall, this combination
produces a nice smell in your
environment and on your body.
Keeping perfumes in a protected place, away from heat and light,
can guarantee a longer shelf life.
Perfume making is a complex process of mixing all necessary
ingredients in specific proportions to get the desired effect. Plants,
flowers, leaves, and bark are important natural sources of aromatic
compounds and different essential oils. Different parts of different
plants give different aromas. Orange tree, blossoms, and leaves
offer orange oils and petit grain.
Barks of cinnamon and cascarilla have a special fragrance. Flowers
are the major sources of varied types of aromas like jasmine, rose,
tuberose, mimosa, and other citrus trees. Rinds of grapefruit,
lemons, and oranges offer a special aroma. In some cases, leaves
like those of violets and rosemary have a special aroma of their
own. Some seeds like those of nutmeg, coriander, cardamom,
cocoa, and anise also offer a special aroma.
Animals are also important sources of special aromas like odorous
sacs of the civets, musk sacs from Asian musk deer, honeycomb of
the honeybee, and others. Presently most of the perfumes contain
Copyright © 2007 ~ All Rights Reserved Worldwide

“Perfume, Soap and Candle Making” by Irene Palmer Page 12 of 118
synthetic aromatic compounds like those from petroleum distillates,
coal tar, organic feedstock, or pine resins. Synthetic compounds are
beneficial and prove to be good alternate sources for compounds
that are difficult to obtain from natural sources.
Perfume making is a long process. Before starting, you should
acquire all odorants through proper techniques. You may have to
use strong solvents or heat to get these odorants. Sometimes, such
processes could change the odor or lessen aroma extensively. Some
of these techniques include supercritical fluid extraction, solvent
extraction, dry or steam distillation, ethanol extraction, or
effleurage, which involves absorption of aromatic compounds into
wax.
Purity of essential oils or fragrant extracts depends on specific
techniques used to obtain such extracts. Soaking some specific
compounds in ethanol can help extract pure fragrance without any
process of dissolving. Concretes like thick oily liquids and waxy
solids can help in extraction of hydrophobic compounds. Expression
oils are available from distillation and expression processes.
Tinctures are thin fluids. You can produce fragrant materials by
soaking raw materials directly in ethanol.
A perfumer is an expert in the making or composing of perfumes.
Rather, a perfumer has a keen sense and knowledge of smell,
fragrance, and other aesthetics. This person has intensive training
in various abstract concepts and moods of perfume making. He can
distinguish between different scents and smells. He therefore,
designs and produces perfumes according to client specifications.
Clients could be huge perfume companies, fashion houses, and
others.
Copyright © 2007 ~ All Rights Reserved Worldwide
“Perfume, Soap and Candle Making” by Irene Palmer Page 13 of 118
The perfumer blends perfumes according to desired fragrance and
concentration. In some cases, clients require perfumes to arouse
specific feelings. So, the perfumer uses different combinations of
aromatic compounds with essential oils to deliver the desired
fragrance of perfume. This process could take many months and
sometimes even years to deliver the perfect desired fragrance.
Sometimes clients use these fragrances to add to shampoos,
detergents, and others.
There is no single and perfect technique for perfume making. It all
depends on your choice of fragrance and other specifications like if
it should be a lingering fragrance or a short and sweet smell alone.
Careful organization of all different processes is essential to arrive at
the correct and suitable scent. The process starts with apt
organization of different ingredients like primary scents, modifiers,
blenders, and fixatives.
Different primary scents can constitute a single fragrance. Blending
of fragrance oils with water and ethyl alcohol requires their proper
storage and filtration within a specified minimum period. Some
perfumers and companies use available fragrance bases to blend
with essential oils and deliver new concepts or new scents. This
process offers extensive variation and experimentation with
different essences and fragrances.
Use of perfumes could raise some health issues like allergies, skin
irritations, serious ailments, and physiological changes. FDA
regulations only govern the ingredients in use in making perfumes.
There is no FDA regulation for the perfume industry. Further, many
companies do not list ingredients in use to preserve their trade
secrets.
Copyright © 2007 ~ All Rights Reserved Worldwide
“Perfume, Soap and Candle Making” by Irene Palmer Page 14 of 118
2. The History of Perfume
The word perfume owes its meaning to Latin word ‘per fumum’.
This means through smoke. The art of making perfumes had its
origin in ancient Mesopotamia and Egypt. Tapputi is the world’s first
recorded chemist and perfume maker from Mesopotamia. Later,
perfumes spread to Rome and Arabian countries. Most of the
perfumes from these places were based on incense.
Egyptians used perfumes in religious rituals like cleansing
ceremonies. Perfumed oils had many medicinal properties and were
in use in balms and ointments. Slowly, Egyptian women started
using perfumed creams and oils as toiletries. This also led to the
spread of perfumes to other countries like Greece, Arabian
countries, and Rome. However, with the fall of the Roman Empire,
perfumes started losing their importance in this part of the world.
However, Islamic countries kept their traditions alive and developed
their perfume making.
From the twelfth century onwards, perfumes started regaining their
importance across different pockets of the world. France was the
foremost in use and development of perfumes. The court of Louis
XV was popular as ‘the perfumed court’ due to application of
perfumes to furniture, clothing, and everything else.
Eau de Cologne was an invention of the eighteenth century. It
offered a refreshing blend of various scents like neroli, rosemary,
bergamot, and lemon. Liquid perfumes now became popular and
were available in glass bottles. Perfumes underwent major changes
in the nineteenth century. This was due to improved perfume
Copyright © 2007 ~ All Rights Reserved Worldwide
“Perfume, Soap and Candle Making” by Irene Palmer Page 15 of 118
making techniques, use of different chemicals, and changes in
tastes of perfume users.
Grasse in Provence was then the largest production center of
perfumes. Slowly, Paris became the commercial center for
production of perfumes. This also led to development of different
perfume houses across Europe. William Sparks Thomson set up The
Crown Perfumery in 1872 with a collection of floral fragrances.
Leather fragrances became popular in the 1930s. Noteworthy
perfumers include Jacques Fath, Christian Dior, Pierre Balmain, Jean
Patou, and Nina Ricci. Presently, there are more than 30,000
designer perfumes in the market catering to all ranges of cost and
luxury in addition to their fragrance.
Copyright © 2007 ~ All Rights Reserved Worldwide
“Perfume, Soap and Candle Making” by Irene Palmer Page 16 of 118
3. What is Needed to Make Homemade Perfumes?
Perfumes are a perennial favorite and many people love to wear a
perfume. It makes you smell nice and the scent lingers for a long
time. Perfumes are an ideal combination of fragrant oils, fixatives,
aroma blends, and solvents.
The main composition of perfume consists of base perfume oils,
which could be animal or synthetic. Mixing of solvents helps dilute
their concentration and make it easy to use and apply. Undiluted
and pure form of base oils cause allergies and skin damage.
You can make perfumes at home. Your choice of perfumes decides
the ingredients you need to make perfumes at home. Some of them
are strong and last long while some have a soft smell and do not
linger long.
There are three main categories of ingredients necessary for making
perfumes.
They are:
Pure grain oil •
•
•
Essential oils, available from different plant and animal
sources, form the essence of your perfume, and
Water
Essential oils as in use in making perfumes belong to three different
categories. You normally mix equal quantities of each of these oils
in your perfume.
These categories include:
Copyright © 2007 ~ All Rights Reserved Worldwide
“Perfume, Soap and Candle Making” by Irene Palmer Page 17 of 118
•
•
•
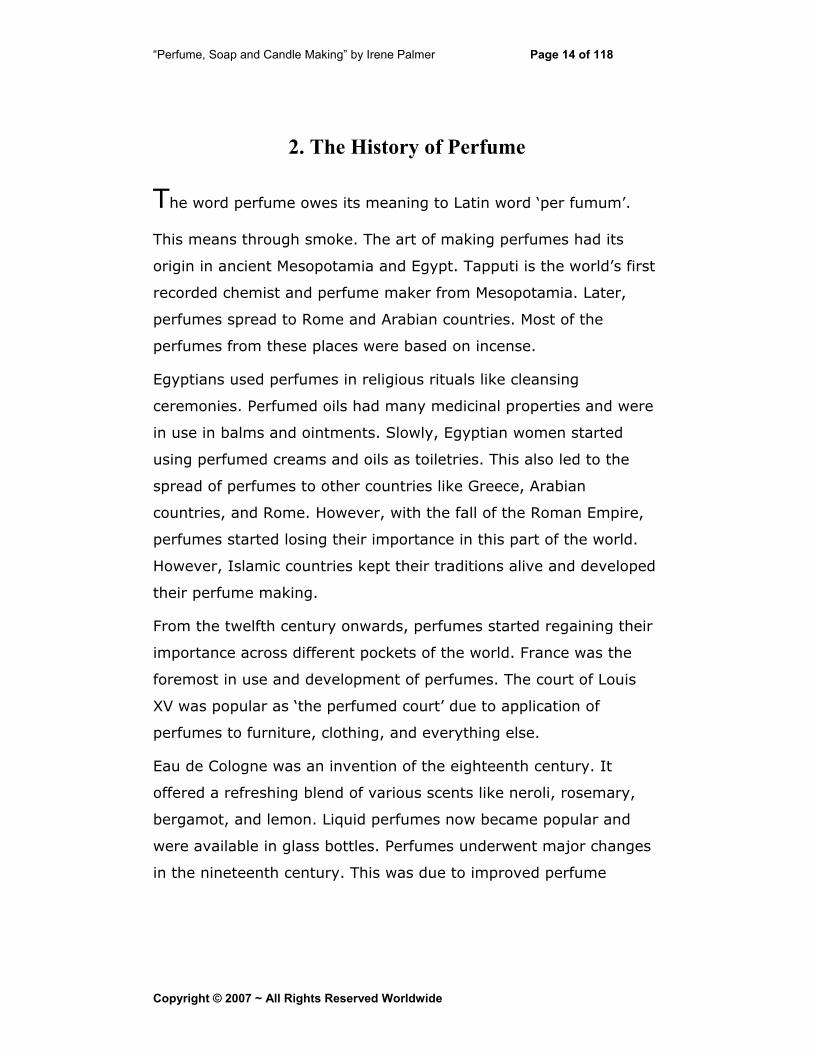
Base oil or Base
notes: These oils have
the strongest scent
among different oils in
use in your perfume.
Hence, their scent
lingers longest. Popular base notes include Vanilla,
Sandalwood, Cinnamon, Lichens, Mosses, and Ferns.
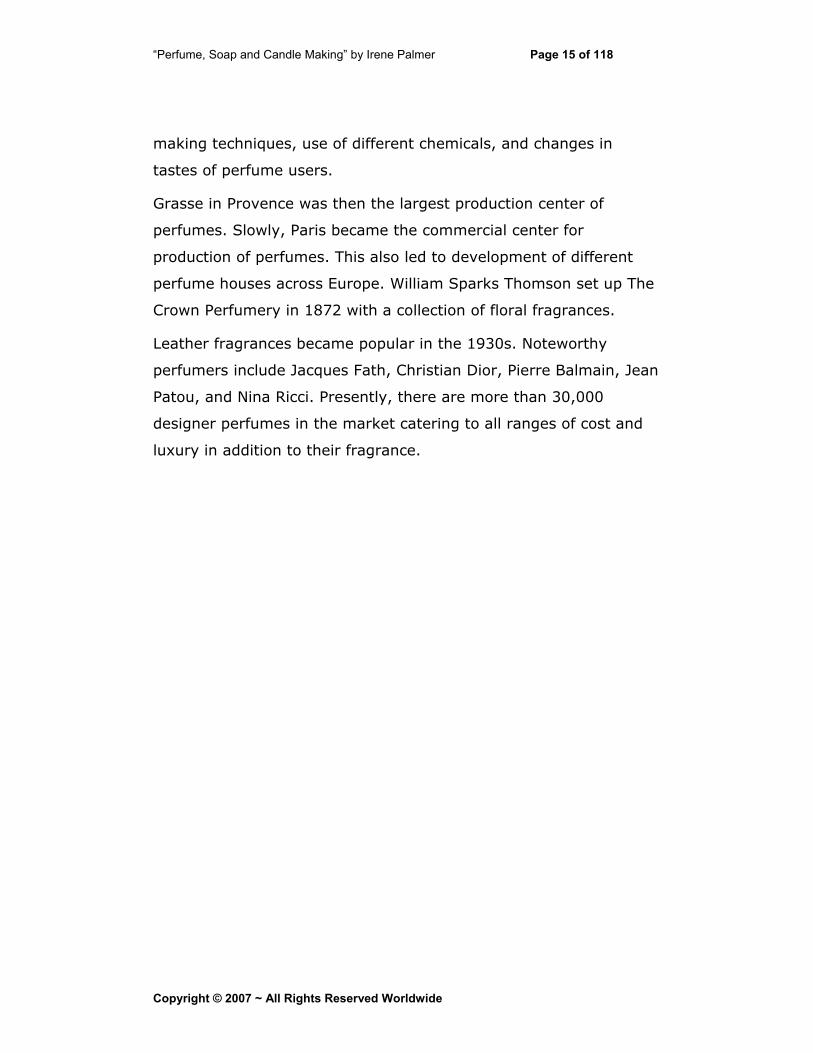
Middle oil or Middle notes: These
oils have a mild scent and influence
the overall product after mixing of
all oils in the perfume. Popular
middle notes include Geranium,
Lemongrass, Ylang-Ylang, and
Neroli.
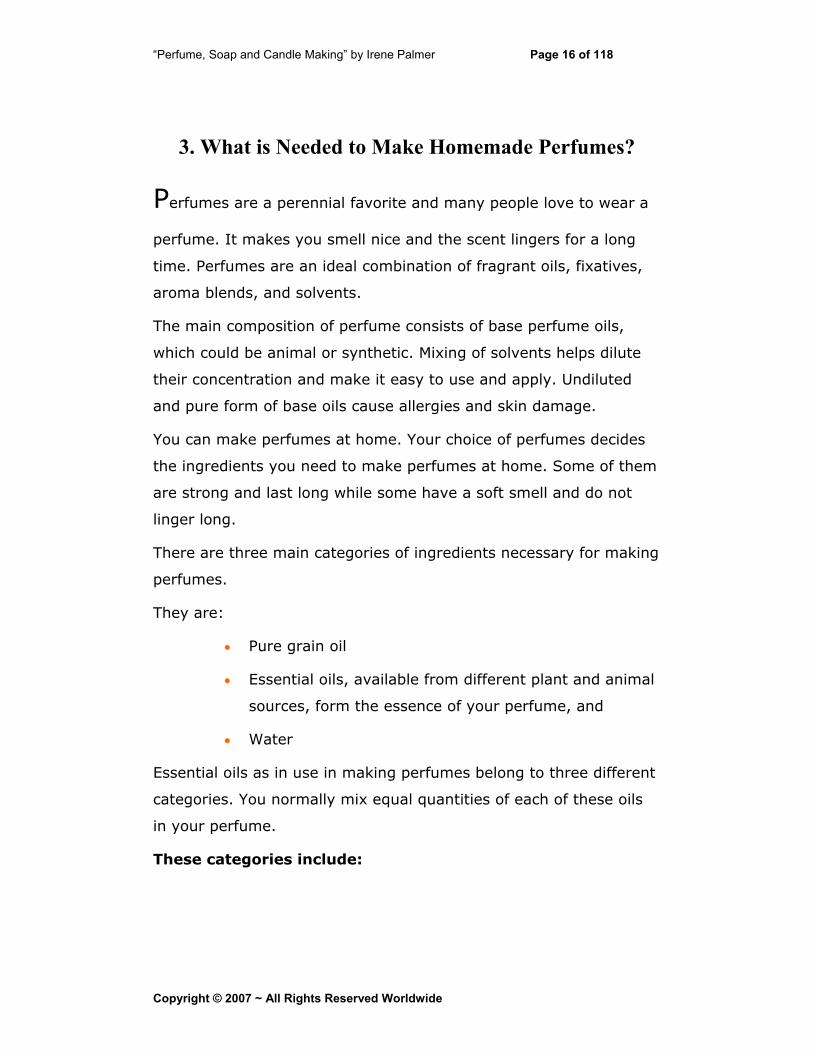
Top oil or Top notes: You add
these oils to your perfume mixture
after adding middle notes. These
oils help all oils to form a new
scent and add essence to your
perfume. Top notes include Rose,
Orchid, Bergamot, Lemon,
Lavender, and Lime.
Perfumes require proper storage as otherwise they deteriorate fast
and lose their smell. After making your perfumes, put them into
tightly sealed containers and store in a fridge with temperatures
between three and seven degrees Celsius. Perfumes should be kept
away from light and heat sources, oxygen, and other organic
compounds.
Copyright © 2007 ~ All Rights Reserved Worldwide

“Perfume, Soap and Candle Making” by Irene Palmer Page 18 of 118
Copyright © 2007 ~ All Rights Reserved Worldwide
“Perfume, Soap and Candle Making” by Irene Palmer Page 19 of 118
4. Making Your Own Perfume - The First Steps
You can make your own perfume at home. Perfume making is not a
huge task; it only involves collecting essential ingredients, mixing
them appropriately, and later bottling them perfectly to preserve
the scent.
Perfume making involves mixing of three main constituents. These
are essential oils, water, and pure grain alcohol, although not
necessarily in that order. Normally, you mix all ingredients in equal
quantities. Yet, you can try different recipes to make a different
combination and develop a new perfume and a different scent.
Essential oils could be plant or animal extracts like lavender oil,
bergamot oil.
The Internet is one source for your ingredients. But, there are
advantages to using local suppliers, even if the prices are slightly
higher. They know local crafts-people so they can put you in touch
with those who share your interest. They also are more ready to
help you with answers to questions and you can usually get smaller
quantities of many of the less used supplies.
The Things that You Need •
•
•
•
•
•
Lavender essential oil
Bergamot essential oil
Ethyl alcohol
Distilled water
Bottles
Large Bowl
Copyright © 2007 ~ All Rights Reserved Worldwide
“Perfume, Soap and Candle Making” by Irene Palmer Page 20 of 118
•
•
•
•
•
•
•
•
Measuring Spoons
Steps for Making your Perfume Mix in two cups of distilled water, four tablespoons of
ethyl alcohol, ten drops of bergamot essential oil and
ten drops of lavender essential oil into the bowl.
Mix them well and allow them to stay overnight or for
twelve hours in the bowl. The bowl should be away
from heat, sunlight, and preferably in a cool, dark
place.
Transfer contents into a dark colored bottle and close
lid tightly.
Allow it to settle for 24 to 48 hours.
Choose a suitable name for your perfume and design a
label.
You can then use your perfume.
Take care that while preparing and pouring perfume
into glass containers that you are in a sterile
environment.
Base notes form the core of your perfume. These smells last the
longest and are therefore mixed in the first. Middle notes consist of
geranium, lemongrass, neroli, and ylang-ylang.
Mix these oils after base oils.
This scent stays longer, although not as much as base oils. Top
notes are added last, as their scent lasts the least time.
Copyright © 2007 ~ All Rights Reserved Worldwide
“Perfume, Soap and Candle Making” by Irene Palmer Page 21 of 118
5. The Materials Needed and Where to Get Them
If you intend making perfumes at home, you should choose a
specific perfume formula. Which formula depends on the type of
perfume you want to make and use.
Every perfume has its own set of necessary essential oils and
fragrance oils. Choose oils of good quality to ensure your perfume is
of high quality. It will be on your skin or those of some of your close
friends and family.
Essential and fragrance oils determine the scent, character, mood,
and quality of your perfume. However, essential oils are costlier
than fragrance oils. Hence, in the initial days, it is best to make
perfumes with fragrance oils alone. You can start using essential oils
in your perfume making after you become an expert perfume-
maker.
You should use correct combinations of fragrance and essential oils
in your perfume. Otherwise, it could cause serious health problems.
Therefore, use glass measuring devices so that you can see the
exact amount of oils you use perfectly.
Alcohol is the main solvent in use while making perfumes. It helps
reduce the strength of all oils used in perfume making. You also
require specific fixatives. These lower evaporation rates of fragrance
and essential oils in your perfume and makes fragrance stay longer.
You may be lucky enough to live where you can purchase all
necessary supplies for your perfume at a local store or one in the
nearest city. They may charge more than Internet-based suppliers
but you can probably order only the amount you need and get it
immediately.
Copyright © 2007 ~ All Rights Reserved Worldwide
“Perfume, Soap and Candle Making” by Irene Palmer Page 22 of 118
The Internet offers you further choices for placing online orders and
purchase essential perfume kits, possibly at lower cost.
I’ve put a Chapter covering suppliers for Candle making, Soap
Making and Perfumery supplies at the end of the book.
Many of the suppliers offer products for more than one category, so
I’ve put colored letters beside each entry.
Copyright © 2007 ~ All Rights Reserved Worldwide
“Perfume, Soap and Candle Making” by Irene Palmer Page 23 of 118
6. Unit Conversions - Measuring and Mixing
Perfume making involves mixing of oils, solvent, and fixatives in
correct quantities to get the desired fragrance.
Before starting with perfume making, you should have all
ingredients and their measuring devices ready.
Use glass measuring devices. Transparent glasses can help you
measure correct levels of ingredients. Use a graduated beaker of
500ml, a burette of 50ml, and small syringes of 2ml for making
perfumes at home.
Funnels should have long and narrow necks as perfume bottles have
narrow openings. These funnels are good for easier filling of bottles.
Clean all glassware thoroughly with a neutral soap to remove any
dirt or stains. Dry all items well before use.
You may use alcohol or vodka to clean all delicate glassware like
syringes and pipettes as these are delicate devices and require mild
cleansers.
Unclean glassware could change the fragrance of the scent where
soluble deposits are already present.
Measuring Of Ingredients Always follow the same directions and instructions while mixing oils
in burettes and beakers. When you pour a liquid into a cylindrical
container, the flat liquid surface (meniscus) curves across the
container.
Normally, you should fill the container until the straight part of the
liquid meniscus meets the upper part of the graduation and
Copyright © 2007 ~ All Rights Reserved Worldwide
“Perfume, Soap and Candle Making” by Irene Palmer Page 24 of 118
expresses the desired volume. Glass containers allow easy viewing
of flat and small curved surfaces of liquids.
Mixing Of Ingredients Mixing of ingredients in perfume making is possible in two ways.
You may choose to mix all essential oils and form a base. Store this
and add required proportions to fixatives and alcohol when
necessary.
Another way of mixing ingredients for perfume making is to add all
of them in a sequential manner. This is a simple process.
Start by first adding solvent to the beaker.
Proceed by adding all the other ingredients in the prescribed order.
Gently mix in all ingredients with a glass rod.
Alcohol helps with fast dissolving of the oils. This is a comparatively
fast process.
But, you should store your perfume in suitable tightly closed glass
containers immediately to prevent loss of fragrance.
Copyright © 2007 ~ All Rights Reserved Worldwide
“Perfume, Soap and Candle Making” by Irene Palmer Page 25 of 118
7. Bottling and Labeling
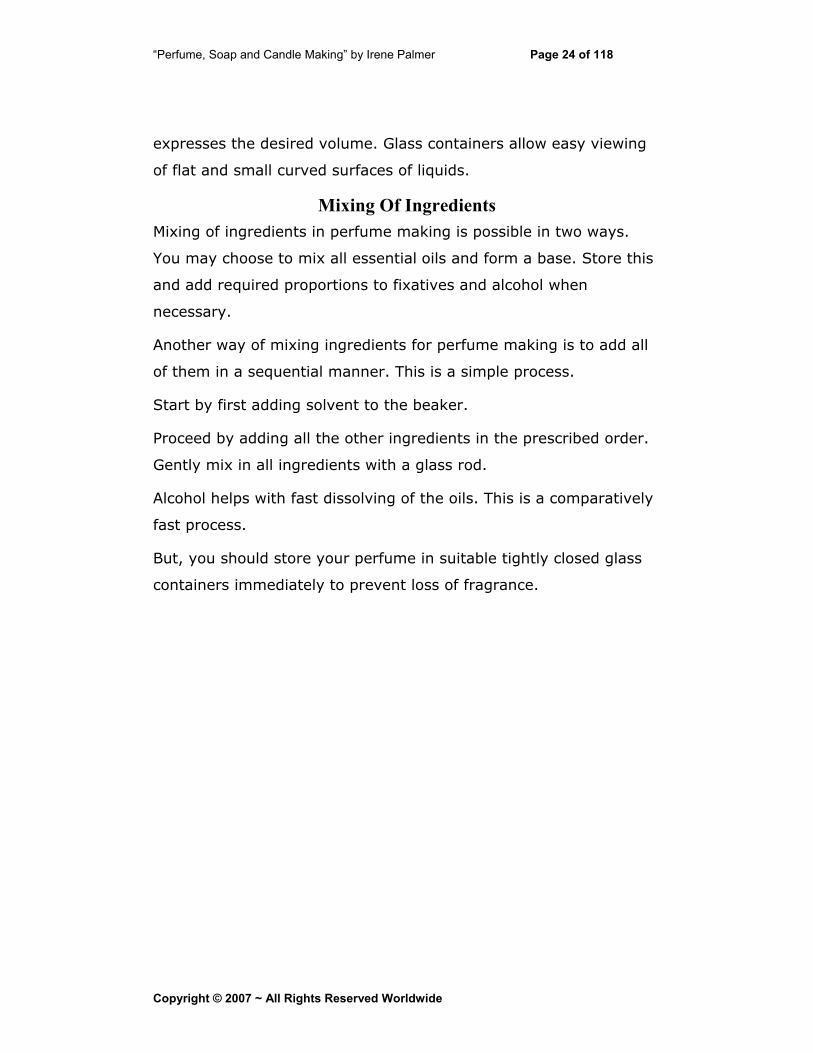
Bottling of perfumes is an important process of
perfume making. The correct choice of bottles helps to
avoid wastage and loss of fragrance. While choosing
bottles for your perfumes, avoid using open bottles or
those with roller caps. Instead try using bottles with
spray dispensers.
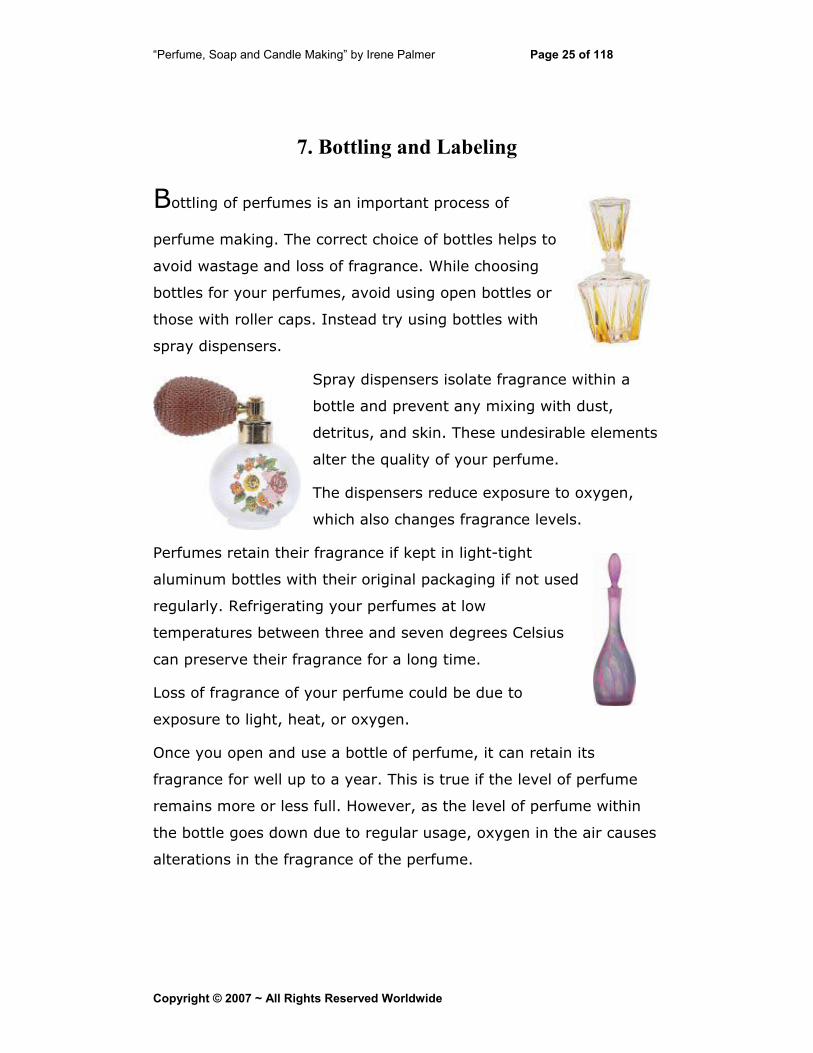
Spray dispensers isolate fragrance within a
bottle and prevent any mixing with dust,
detritus, and skin. These undesirable elements
alter the quality of your perfume.
The dispensers reduce exposure to oxygen,
which also changes fragrance levels.
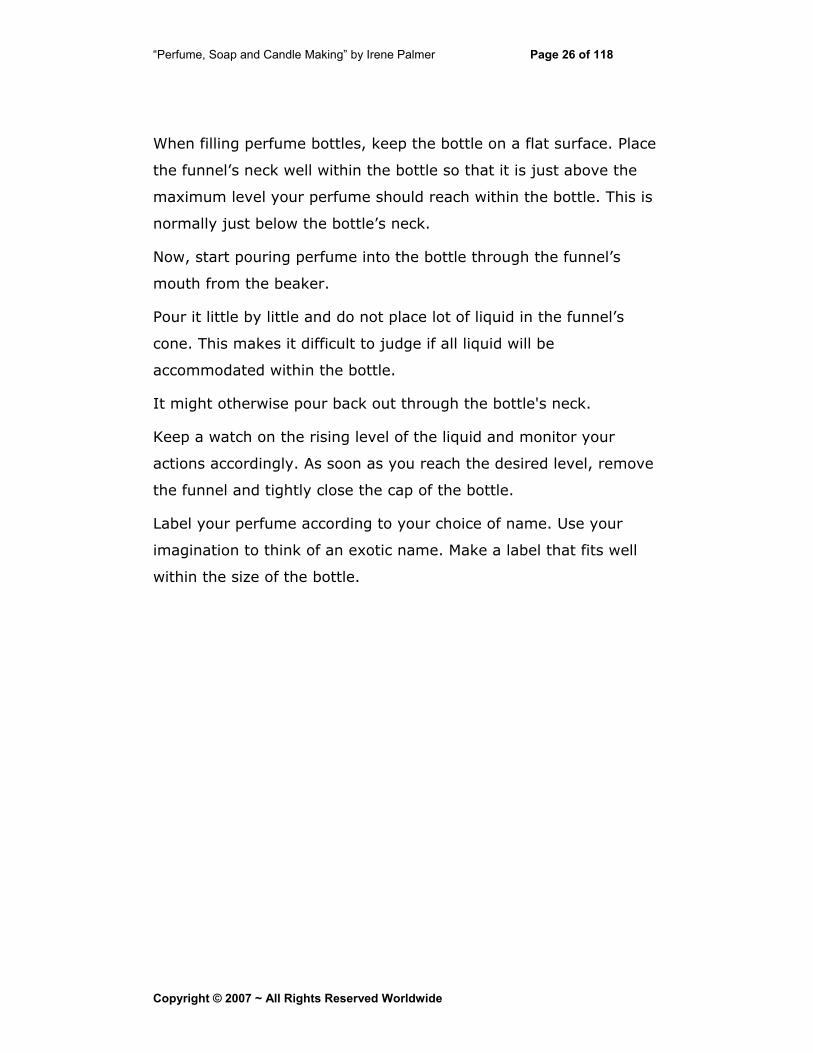
Perfumes retain their fragrance if kept in light-tight
aluminum bottles with their original packaging if not used
regularly. Refrigerating your perfumes at low
temperatures between three and seven degrees Celsius
can preserve their fragrance for a long time.
Loss of fragrance of your perfume could be due to
exposure to light, heat, or oxygen.
Once you open and use a bottle of perfume, it can retain its
fragrance for well up to a year. This is true if the level of perfume
remains more or less full. However, as the level of perfume within
the bottle goes down due to regular usage, oxygen in the air causes
alterations in the fragrance of the perfume.
Copyright © 2007 ~ All Rights Reserved Worldwide
“Perfume, Soap and Candle Making” by Irene Palmer Page 26 of 118
When filling perfume bottles, keep the bottle on a flat surface. Place
the funnel’s neck well within the bottle so that it is just above the
maximum level your perfume should reach within the bottle. This is
normally just below the bottle’s neck.
Now, start pouring perfume into the bottle through the funnel’s
mouth from the beaker.
Pour it little by little and do not place lot of liquid in the funnel’s
cone. This makes it difficult to judge if all liquid will be
accommodated within the bottle.
It might otherwise pour back out through the bottle's neck.
Keep a watch on the rising level of the liquid and monitor your
actions accordingly. As soon as you reach the desired level, remove
the funnel and tightly close the cap of the bottle.
Label your perfume according to your choice of name. Use your
imagination to think of an exotic name. Make a label that fits well
within the size of the bottle.
Copyright © 2007 ~ All Rights Reserved Worldwide
“Perfume, Soap and Candle Making” by Irene Palmer Page 27 of 118
8. Choosing a Formulation
The blend of different aromas available through use of diverse
essential oils constitute a perfume. You can follow specific
formulations of perfumes as available on the Internet. Or, you can
choose to make your own formulations.
Formulations require use of specific volumes and proportions of
ingredients. While making perfumes at home, it could pose a
problem. Kitchen balances are not so precise. Formulations of
perfumes requires the use of specific hardware. It is better not to
use plastic spoons and disposable glass jelly jars. These react with
solvents and essentials oils. Further, they may not offer precise
measurements.
Glass is the best for use in measuring and mixing ingredients for
making perfumes. Because it is transparent, it allows easy viewing
of all processes of perfume making. Glass burettes, beakers and
syringes offer precise measurements of volume.
Glass does not interact with any ingredients in the use of perfume
making.
It is easy to wash and clean glass of all stains. It can withstand high
temperatures and thermal shocks. It is still better to use graduated
glass.
Although such glass could prove costly, benefits accrued through
use of such glass in perfume making far outweighs the cost
incurred.
Copyright © 2007 ~ All Rights Reserved Worldwide
“Perfume, Soap and Candle Making” by Irene Palmer Page 28 of 118
Formulation Techniques for Perfume Making There is no specific formulation that proves to be the best in
perfume making. Although there are many ingredients that go into
making a bottle of perfume, you can group under four broad heads.
These include:
•
•
•
•
Primary scents: One or few main ingredients go into
making the foremost scent or fragrance of your
perfume. Choose a primary scent like a rose or mix a
few ingredients to create an abstract scent that does
not seem to be a natural scent. Cola flavorant is an
abstract scent while rose is a natural scent.
Modifiers: These ingredients help change the primary
scent to allow alternatives. Adding fruit esters to floral
scents can make the scent emanate as a fruity floral.
Citrus scents can make the effect similar to that of a
freshener.
Blenders: Blending ingredients like linalool and
hydroxycitronellal allow for easy mixing of all
ingredients and removing different bases or layers.
Fixatives: Resins, amber bases, and wood scents
support and fix the primary scent.
Copyright © 2007 ~ All Rights Reserved Worldwide
“Perfume, Soap and Candle Making” by Irene Palmer Page 29 of 118
9. Aromas
Aroma of a perfume is very important as it sets the tone and
personality of your perfume. Aroma is the effect of all ingredients
put together in making of a perfume. The choice of essential oils
assumes paramount importance in getting the desired aroma. There
are different methods of extraction of aromas from their sources like
ethanol extraction, solvent extraction, distillation, expression, and
effleurage.
Sources of Aromas Aroma sources could be plant or animal. Plants constitute the
largest source of fragrant compounds normally used in perfume
making. Every part of a plant like flowers, seeds, fruits, bark,
blossoms, twigs, leaves, roots, and resins have distinct flavors that
form diverse aromas. Flowers like jasmine, rose, tuberose, and
blossoms of citrus trees have a separate aroma. Leaves and twigs of
violets, lavender, sage, rosemary, patchouli, bring in a special
freshness.
Barks of cascarilla and cinnamon offer a separate fragrance. These
however require synthesis of other compounds before use in
perfumes. Fruits like strawberries and apples do not deliver the
same fragrance on extraction. You can use synthetic versions of
these fragrances in your perfume. Yet, juniper berry, vanilla, and
Litsea cubeba are exceptions and they offer original flavor. Rinds of
fruits like grapefruits, lemons, oranges, and limes have their own
special aroma.
Pine and fir resins are an important aroma source. Other resins
included in perfume making are copal and amber. Seeds like anise,
Copyright © 2007 ~ All Rights Reserved Worldwide

“Perfume, Soap and Candle Making” by Irene Palmer Page 30 of 118
coriander, nutmeg, cardamom, and mace deliver special aromas.
Wood oils offer base notes to a perfume. Popular woods include
rosewood, sandalwood, birch, juniper, cedar, and pine.
Animal sources of aromas include odorous sacs of the North
American beaver, odorous sacs of civets like the family of
mongoose, oxidized fatty compounds secreted and expelled by
Sperm Whale, honeycomb of honeybee, and musk sacs from the
Asian musk deer. Seaweed and oak moss are other sources of
aromas.
Synthetic sources of aromas include many odorants obtained from
petroleum distillates, coal-tar, pine resins, and cheap organic
feedstock. Synthetic sources are available through artificial creation
of naturally available fragrant compounds.
Copyright © 2007 ~ All Rights Reserved Worldwide
“Perfume, Soap and Candle Making” by Irene Palmer Page 31 of 118
10. Solvent and Fixative
Solvent Anhydrous pure Grain Ethanol is the most common solvent in use in
making perfumes. This solvent is a highly pure Ethyl Alcohol. It is
obtained from fermentation and distillation of cereal grains.
However, it is not easy to obtain such a pure form of alcohol.
Therefore, the best solvent for use in perfume making is good
quality distilled beverage obtained from grains. One such solvent is
vodka.
Fixative Fixatives are efficient in reducing the evaporation rate of oils used in
making your perfume. Absence of a good fixative is the main cause
for your perfume losing its scent over time.
Some essential and fragrance oils are extremely volatile. These
specifically require fixatives if you are using them to make
perfumes. Often in a perfume, 20% to 30% constitutes fragrance
and essential oils while the rest is alcohol and fixatives. Some
perfumes include water, which is a meager 0-5%.
Fixatives were traditionally obtained from natural sources like
animals and plants. However, presently, there are many synthetic
fixatives for use in perfume making. These include Phthalates and
Glycerin.
You should adopt certain precautions while using such fixatives.
Glycerin could cause skin allergies. Phthalates have carcinogenic
properties and could instigate allergic reactions. Since essential oils
do not have a very high evaporation rate at atmospheric pressure,
you can choose to make your perfumes without fixatives too.
Copyright © 2007 ~ All Rights Reserved Worldwide
“Perfume, Soap and Candle Making” by Irene Palmer Page 32 of 118
11. Creating Aromatherapy Perfumes at Home
Essential oils provide the main aroma in any perfume. Different
essential oils have varied properties like relaxing, calming, soothing,
and energizing effects. Some incite exotic feelings while some make
you feel extremely confident. Choose the type of aroma you would
prefer and make your extraordinary perfumes at home.
Creating aromatherapy perfumes at home is simple and interesting.
You need a proper base to start, which could be carrier oil or
alcohol. Some prefer a mixture of both. You could blend vodka,
odorless alcohol, and Jojoba oil. This oil has a lingering scent.
However, if you are a newbie to perfume making, you could
experiment with less costly carrier oils like apricot kernel oil or
almond oil.
Equipment Necessary for Making Aromatherapy Perfumes
•
•
•
•
•
•
•
Small funnels
Measuring spoons
Dropper
Small colored bottles
Ingredients Necessary for Making Aromatherapy Perfumes
Essential oils
Carrier oils
Alcohol or Vodka
You can use any essential oil according to your choice like jasmine,
cedarwood, grapefruit, clary sage, spearmint, bergamot, rose,
Copyright © 2007 ~ All Rights Reserved Worldwide
“Perfume, Soap and Candle Making” by Irene Palmer Page 33 of 118
patchouli, marjoram, chamomile, lavender, or mandarin. Carrier oils
could be almond, jojoba, or apricot kernel oil.
Procedure for Making Aromatherapy Perfumes Place the small funnel in a bottle and pour one teaspoon each of any
carrier oil and vodka. Next, add few drops of essential oils according
to your choice of recipe with the help of a dropper for accurate
measurements.
It is essential to close the lid of the bottle tightly and shake it after
adding each drop of essential oil.
Store the bottle in a cool and dark place. Every day, shake the
bottle at least three times.
Your aromatherapy perfume will be ready for use after completion
of the necessary period according to your choice of recipe.
Different Aromatherapy Recipes 1. Calming Aromatherapy Perfume a. 4 drops Jasmine
2 drops Lemon
1 drop Patchouli
b. 4 drops of Cedar wood
2 drops of Clary Sage
1 drop of Grapefruit
2 drops of Mandarin
c. 3 drops of lavender
Copyright © 2007 ~ All Rights Reserved Worldwide
“Perfume, Soap and Candle Making” by Irene Palmer Page 34 of 118
3 drops of Neroli
2 drops of Spearmint
2. Energizing Aromatherapy Perfume 2 drops of Grapefruit
2 drops of Patchouli
1 drop of Rose
3 drops of Vetivert
2 drops of Ylang-Ylang
3. Tranquilizing Aromatherapy Perfume
a. 4 drops of Cedarwood
2 drops of Clary Sage
1 drop of Grapefruit
2 drops of Mandarin
b. 2 drops of Bergamot
3 drops of Chamomile
2 drops of Marjoram
4 drops of Lavender
4. Relaxing Aromatherapy Perfumes a. 3 drops of Jasmine
3 drops of Neroli
4 drops of Orange
Copyright © 2007 ~ All Rights Reserved Worldwide

“Perfume, Soap and Candle Making” by Irene Palmer Page 35 of 118
b. 1 drop of Clary Sage
3 drops of Patchouli
2 drops of Rose
4 drops of Rosewood
5. Blended Aromatherapy Perfume 10 drops Frankincense essential oil
5 drops Black Pepper essential oil
4 drops Rose absolute or Rose Otto
1 drop Jasmine or grandiflorum absolute
5 drops Myrrh essential oil
10 drops Cedarwood
3 drops Rosewood essential oil
It can take from one to three months for your perfume to settle and
blend well. Shake the bottle daily. You can use any type of rose oil,
although be careful to check for alterations. Adding a drop of
Jasmine sambac absolute to grandiflorum can offer a different
aroma. You could use a drop of diluted cinnamon, clove, ginger, or
cumin in place of Black Pepper to get a different aroma. A drop of
Neroli absolute can be a substitute for Jasmine.
Increasing the given proportions could make your perfume very
concentrated. It could cause allergic skin reactions. If need be, pour
a little bit of your aromatherapy perfume into a bottle and mix it
with a blender. This will dilute contents and would have a lesser
Copyright © 2007 ~ All Rights Reserved Worldwide
“Perfume, Soap and Candle Making” by Irene Palmer Page 36 of 118
intensity. This idea works perfect for saving on the high costs of
essential oils like Rose and Jasmine absolutes.
If you prefer a higher incense aroma in your perfume, add a few
drops of Cedar Moss, Ambrette Seed, Tonka Bean, Copal, Jamarosa
Root, Gurjum, Guaiacwood, Benzoin resin, or Gum Arabic. These act
as fixatives and therefore offer a stronger perfume with a longer
lingering period. However, use them sparingly, as they have strong
effects.
Copyright © 2007 ~ All Rights Reserved Worldwide
“Perfume, Soap and Candle Making” by Irene Palmer Page 37 of 118
12. Simple Recipes to Make Perfume at Home
Perfume making is a simple process and you can make your own
perfumes at home easily. Although the basic recipe is the same, you
can experiment using different ingredients and thereby experience
different scents.
Basic Perfume Recipe This is the simplest of all perfume recipes. You only need two cups
of water and two cups of freshly chopped flower blossoms. You can
use any blossom of your choice like lilac, jasmine, rose, lavender,
honeysuckle, or orange.
Steps 1. Take a bowl and place cheesecloth on the bowl with the
edges of the cheesecloth hanging over the sides of the bowl.
Fill it with two cups of flower blossoms of your choice and
pour water over them, covering them completely.
2. Cover the bowl and allow it to stand overnight. The next day,
lift the edges of the cheesecloth gently and squeeze out all
the water into a small pot.
3. Allow water collected in this pot to simmer and reduce to just
one teaspoon.
4. Cool this solution and put it into a small bottle.
This homemade perfume can retain its scent for around a month.
Copyright © 2007 ~ All Rights Reserved Worldwide
“Perfume, Soap and Candle Making” by Irene Palmer Page 38 of 118
Perfume using Essential Oils Ingredients Necessary 4 drops of Sandalwood
4 drops of Musk
3 drops of Frankincense
2 teaspoons of Jojoba oil
Steps Pour all ingredients into a single bottle (preferably a dark-colored
bottle) and mix well by shaking vigorously.
Allow your perfume mixture to stand for a minimum of twelve
hours.
Your perfume is now ready to use. Always keep it in a cool and dry
place.
Perfume using essential oils, water, and alcohol Ingredients Necessary 2 cups distilled water
3 tablespoons of Vodka
5 drops of Lavender
10 drops of Chamomile
10 drops of Valerian
The steps for making this next perfume at home are the same as
that of the earlier one.
Copyright © 2007 ~ All Rights Reserved Worldwide
“Perfume, Soap and Candle Making” by Irene Palmer Page 39 of 118
Use Different Ingredients for Different Results Follow those same directions for making these perfumes.
The mix of ingredients is different in the following recipes, so you’ll
get a variety of perfumes from the same basic procedure.
Mixture I
2 cups distilled water
3 tablespoons vodka
5 drops sandalwood essential or fragrance oil
10 drops bergamot essential or fragrance oil
10 drops cassis essential or fragrance oil
Mixture II
• 2 cups distilled water
• 3 tablespoons vodka
• 5 drops everlasting essential or fragrance oil
• 10 drops peony essential or fragrance oil
• 10 drops sandalwood essential or fragrance oil
Another Mixture and Method.
3 drops passion flower essential or fragrance oil
2 drops ylang-ylang essential or fragrance oil
3 drops neroli essential or fragrance oil
300ml 70 percent alcohol or vodka
Steps
1. Pour alcohol into a dark bottle.
Copyright © 2007 ~ All Rights Reserved Worldwide
“Perfume, Soap and Candle Making” by Irene Palmer Page 40 of 118
2. Mix in all other ingredients.
3. Shake well.
4. Allow the mixture to settle for a week before using.
Copyright © 2007 ~ All Rights Reserved Worldwide
“Perfume, Soap and Candle Making” by Irene Palmer Page 41 of 118
Part-II: Soap Making
14. Soap Making – An Introduction
Soap making is an enjoyable interest and useful skill.
It is possible to make your own soap at home using simple
ingredients, tools, and equipment.
When you make your own soap, you know all the ingredients that
you put in and can add your own unique touches.
Soap making may involve the use of essential oils, colors, fragrance,
and other ingredients in appropriate proportions.
You can make soap by different processes:
Cold process, •
•
•
Melt and pour, and
the Rebatch method.
The Cold Process Soap Making Cold process soap-making involves the use of chemical lye which is
essential in this method of soap making.
But, excessive lye can make your soap harsh and requires care
wherever it is used. It could dry your skin. A very small amount of
lye in soap changes the pH balance of your soap.
Melt and Pour Soap Making The melt and pour soap-making process is very simple. You can
make soaps using this method by investing just a little time.
Soap made in this process is claimed to be very moisturizing and
even energizing.
This process involves use of a glycerin base.
Copyright © 2007 ~ All Rights Reserved Worldwide
“Perfume, Soap and Candle Making” by Irene Palmer Page 42 of 118
Rebatch Soap Making Method The Rebatch method involves the use of a pre-made base that you
purchase from a soap maker or a third-party supplier.
This soap making process does not take much time and involves
little labor. Soaps made with the rebatch method do not require any
curing time and can be used immediately.
Copyright © 2007 ~ All Rights Reserved Worldwide
“Perfume, Soap and Candle Making” by Irene Palmer Page 43 of 118
Essential Precautions when Making Soap
Irrespective of the method you use for soap making, it is essential
to adopt some simple safety measures.
Check all precautions required for using the different ingredients
and procedures for your soap making.
Some ingredients may not be suitable for use by some people. For
instance, I’ve seen recipes that involve ingredients such as valerian
and St John’s Wort. Pregnant women and maybe some other groups
may be seriously affected if they contact these ingredients which
many assume, because they are “natural” then they must be safe.
Always check with your doctor or pharmacist about any ingredients
that you don’t know are 100% safe.
Lye is an essential ingredient in soap making. But, it could prove
very dangerous if you are not cautious.
While making soap, always work in an open and well-ventilated
room. Keep windows open and use air purifiers and fans.
Have all your ingredients ready and arrange them systematically.
Use only equipment that is specified as being suitable for soap
making.
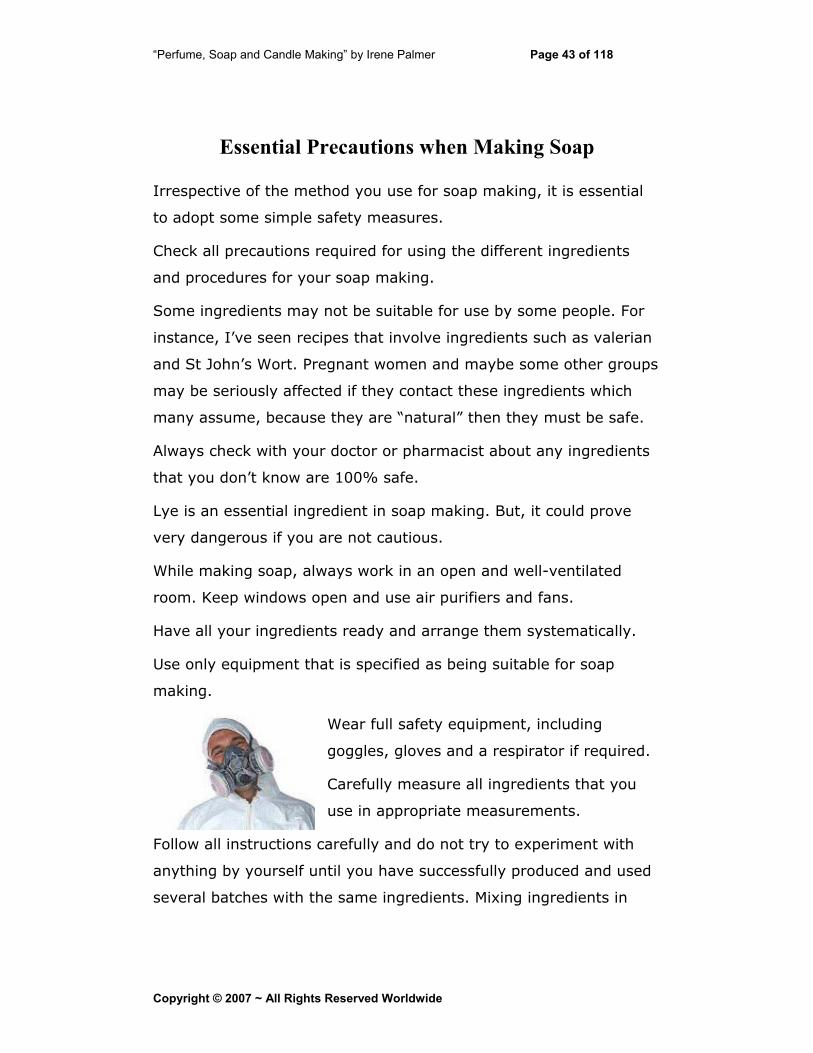
Wear full safety equipment, including
goggles, gloves and a respirator if required.
Carefully measure all ingredients that you
use in appropriate measurements.
Follow all instructions carefully and do not try to experiment with
anything by yourself until you have successfully produced and used
several batches with the same ingredients. Mixing ingredients in
Copyright © 2007 ~ All Rights Reserved Worldwide
“Perfume, Soap and Candle Making” by Irene Palmer Page 44 of 118
different proportions can significantly change the results you get for
good or for ill.
Keep all soap making ingredients, molds, and equipment out of the
reach of children and pets.
Observe all precautions so that you can enjoy your soap making and
especially using the unique soaps that you produce.
Copyright © 2007 ~ All Rights Reserved Worldwide
“Perfume, Soap and Candle Making” by Irene Palmer Page 45 of 118
15. How is Soap Made?
Soap making involves the mixing of lye and water with fats or oil.
Lye is a chemical; sodium hydroxide.
Fats and oils are acids and lye is a base.
When the acids and lye react, the lye converts the acids into a new
product, which is soap.
This entire reaction is called saponification.
The chemical reaction of lye and fats takes place in stages.
It starts with a thickening of the solution. This is called ‘trace’.
Once trace starts, you need to pour your soap solution into molds.
The chemical reaction of saponification continues to take place for
about the next three weeks in the molds.
The soap hardens within the molds and then it is probably ready for
use.
At home, you can make soap by using a cold process, melt and pour
process or the re-batched process.
The cold process does not mean there is no heat involved in soap
making by that method. The process involves many chemical
reactions that generate heat.
The melt and pour method is very easy and simple. You only need
to melt ready-made soap blocks and add necessary fragrance, color
and additives. Within hours, your soap sets and is ready for use.
The re-batched process only requires you to grate ready-made soap
and, then, allow it to melt in water.
Copyright © 2007 ~ All Rights Reserved Worldwide
“Perfume, Soap and Candle Making” by Irene Palmer Page 46 of 118
After that, you can add your own selection of additives and pour it
into molds to set.
You can use this soap immediately, as it does not require any curing
time.
Copyright © 2007 ~ All Rights Reserved Worldwide
“Perfume, Soap and Candle Making” by Irene Palmer Page 47 of 118
16. Methods of Making Soap
You can make soap at home by carefully mixing your ingredients in
appropriate measures with some chemicals and then allowing the
mixture to settle and harden in molds.
There are four methods of soap making.
1. Cold Process
2. Hot Process
3. Melt and Pour
4. Rebatching
Soap Making Methods Cold Process: This is the most common soap making process.
This process involves making soap from scratch without the use of
any pre-made soap.
You choose and gather all the necessary ingredients like lye,
vegetable oils, essential oils, and colorant.
Prepare the lye mixture by carefully adding lye to water. Heat will
be created, so be very cautious!
Allow it to cool substantially.
Heat your oil to around 100 degrees.
Then, add the lye mixture to your oils and blend the soap until it
thickens and starts forming your trace.
Next, add fragrance, additives and color.
Pour your soap into molds and allow it to harden and cure for
around three to four weeks.
Copyright © 2007 ~ All Rights Reserved Worldwide
“Perfume, Soap and Candle Making” by Irene Palmer Page 48 of 118
Hot Process: This is the oldest process of soap making.
Soap used to be boiled in vats on open fires. Now, you adapt this
process of cooking pre-made soaps to form new soaps.
When the trace starts to form, you use a double-boiler for extra
heat to hasten the saponification process.
This causes your soap to settle and harden faster.
Melt and Pour This process involves melting of uncolored and unscented pre-made
soap blocks.
After the soap blocks melt completely, you put in the additives,
fragrance and color that you have chosen.
After everything dissolves completely in the soap mixture, pour it
into your molds and allow the soap to settle.
Your soap might be as good as the pre-made soap you purchase.
This process does not involve use of lye mixture, so it is basically a
safer process.
It may also be easier and fairly inexpensive.
Rebatching This process involves grinding or grating of your ready-made soap
bars and then mixing them with milk, water, fragrance and any
other additives you desire.
Then, you change, or reblend, them into a new, unique soap that
you have created.
This process is also popularly called ‘hand-milling’.
Copyright © 2007 ~ All Rights Reserved Worldwide
“Perfume, Soap and Candle Making” by Irene Palmer Page 49 of 118
This process can be useful if you have soap leftovers and want to
make use of them.
Copyright © 2007 ~ All Rights Reserved Worldwide
“Perfume, Soap and Candle Making” by Irene Palmer Page 50 of 118
17. Getting Started - Making Soap from Scratch
Before starting to make soap, you need to prepare molds.
Some people use candy molds, capped PVC pipes or a greased pan
but molds that are specifically made for soap-preparation are better
and probably a much safer choice.
Grease them and place them on a flat surface.
Measure your lye and water separately and be sure of your
accuracy.
Dissolve the lye into the water in a heat-resistant glass container,
enamel coated steel container or a stainless steel container.
Do not use aluminum containers as this solution generates
extensive heat and aluminum would react under the high
temperatures.
Use a good lye-calculator to adjust the lye content in your soap.
This will ensure the presence of sufficient fat in your soap,
depending on your requirements.
Pour lye, a small amount at a time, into the water and stir gently to
dissolve it completely.
Cool it to around 110 degrees.
Measure all oils accurately, then melt and mix them.
Cool the oils to around 110 degrees. Otherwise, heat liquid oils to
110 degrees in a large pot.
Pour the lye solution slowly into your pot that contains your oils and
continue stirring gently and evenly.
Be careful to avoid any splashing or splattering of liquids.
Copyright © 2007 ~ All Rights Reserved Worldwide
“Perfume, Soap and Candle Making” by Irene Palmer Page 51 of 118
Keep stirring until the trace starts forming.
The solution will probably start forming trace within fifteen minutes
to three hours. That formation depends on the type of oils you use
in your soap.
Using coconut oil or palm oil can induce quicker formation of trace.
Add fragrances, additives and essential oils after your solution starts
to thicken.
Stir well to allow thorough mixing of all ingredients.
Pour this mixture slowly into prepared molds.
Cover each mold with a warm towel to prevent it from cooling too
fast. This also helps in the curing of your soap.
Allow the soap to harden within each mold for a day.
Then, pop it out and allow it to cure for three to four weeks.
You can use your homemade soap after four weeks.
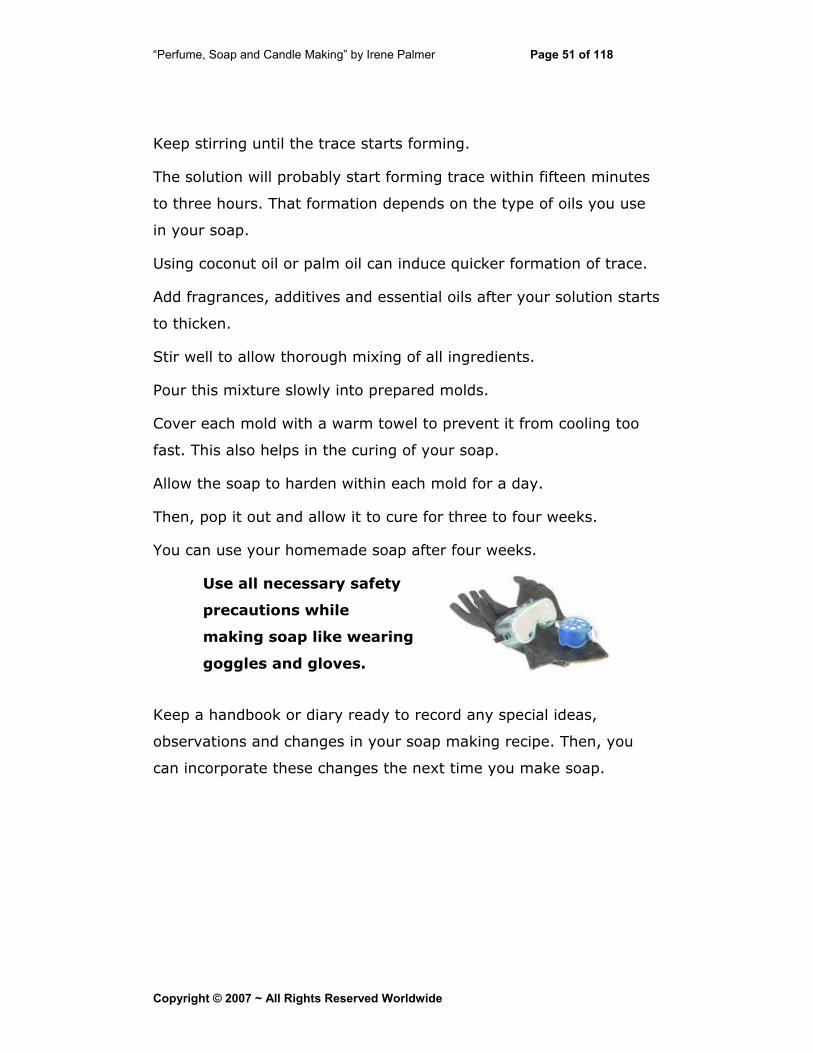
Use all necessary safety
precautions while
making soap like wearing
goggles and gloves.
Keep a handbook or diary ready to record any special ideas,
observations and changes in your soap making recipe. Then, you
can incorporate these changes the next time you make soap.
Copyright © 2007 ~ All Rights Reserved Worldwide
“Perfume, Soap and Candle Making” by Irene Palmer Page 52 of 118
18. Ingredients Needed to Make Soap
Ingredients necessary for making soap are readily available.
Common ingredients include:
Oils or fats: You can use natural oils or animal fats. Oils used in
soap making include canola oil, lard, corn oil, bacon grease, olive
oil, tallow, or vegetable shortening.
Sodium Hydroxide: This is lye. This chemical helps to convert oil
or fat into soap. You can purchase it at local stores, hardware shops
or some grocery stores.
Water: Use distilled or bottled water for making soap. Tap water in
many areas may contain minerals that can hamper the soap making
processes.
Essential Oils and Fragrances: Although these are not essential
ingredients for soap making, they can add exclusive scent or
fragrance to your soap.
Do not use any commercial scents or candle scent oils, as they
contain alcohol that could upset your soap making process.
You can purchase fragrances and essential oils at local health food
stores.
Soap Colorants: Purchase crayons from soap supply stores and
use them by melting and adding small amounts at the trace stage.
Additives: You can use different additives like herbs, spices and
even oatmeal. Adding them at the trace stages is best.
Copyright © 2007 ~ All Rights Reserved Worldwide

“Perfume, Soap and Candle Making” by Irene Palmer Page 53 of 118
Other Requirements for Your Soap Making A large stainless-steel mixing bowl
Old newspapers to cover your workspace
A digital scale to measure your ingredients
Protective equipments: gloves, safety goggles and possibly a
respirator
Electric fan(s)
Work aprons or coveralls
A heat-resistant container for mixing lye and water.
Copyright © 2007 ~ All Rights Reserved Worldwide

“Perfume, Soap and Candle Making” by Irene Palmer Page 54 of 118
19. Tools and Equipment to Make Cold Process Soap
Tools and equipment needed for making soap through the cold
process include:
• Safety goggles and rubber gloves
• An accurate scale to measure very small quantities (like one-
tenth of an ounce) of oils, fragrances, water, additives and
lye
• A stainless steel pot with a capacity of eight to twelve quarts
for melting oils and blending your soap mixture
• Heat-resistant stainless steel or plastic pitcher with lid that
can hold two to three quarts of lye mixture
• Long plastic or stainless-steel spoon for stirring lye solution
• Accurate thermometer for reading and monitoring the
temperatures of melted oils and lye solution
• Large pitchers, with a capacity of two to three quarts, for
measuring and holding liquid oils
• Stainless steel spoons to measure fragrances, additives,
colorants and essential oils
• Small spoons to mix oils and fragrances before adding to the
pot
• A stick blender for mixing oils and lye
• Soap mold(s) to pour soap mixture into
• Rubber spatulas to scrape out soap scraps from mold
• Dishcloths, paper towels and old newspapers to wipe spills
Copyright © 2007 ~ All Rights Reserved Worldwide
“Perfume, Soap and Candle Making” by Irene Palmer Page 55 of 118
• Beakers and measuring cups to hold fragrances and essential
oils before pouring into soap mixture
You can locate most of these items in your kitchen or you can
purchase them at local stores before starting your soap making.
Copyright © 2007 ~ All Rights Reserved Worldwide
“Perfume, Soap and Candle Making” by Irene Palmer Page 56 of 118
20. Soap Making Safety Procedures
Whether you are an experienced soap maker or a new hobbyist,
you should understand and observe all necessary soap making
safety procedures thoroughly.
Precautions include:
Wear safety goggles and rubber gloves before starting.
Organize your workplace and spread old newspapers on your
worktable.
Keep all necessary ingredients and equipment ready and organized
systematically.
Understand every part of the process of soap making thoroughly
and proceed systematically.
Do not try to jump over steps to complete your soap making faster.
Work in a relaxed manner. Rushing can cause spills and accidents.
Keep all family members informed of your soap making. Do not
allow any family members, children or pets to disturb you while you
are making soap.
Keep a bottle of vinegar ready. This can neutralize any lye spills.
Never leave melting oils or lye unattended on the stove.
Always add lye to water. Never add water to lye, as it could cause
extensive and violent reactions.
Keep lye in a safe place, locked away from the reach of children and
pets.
Copyright © 2007 ~ All Rights Reserved Worldwide

“Perfume, Soap and Candle Making” by Irene Palmer Page 57 of 118
Keep fresh water close by. If lye or raw soap accidentally gets in
your eyes, splash cool water continuously for around ten minutes
before rushing to a hospital or local doctor for emergency care.
If lye or raw soap spills accidentally on your skin, rinse with cool
water immediately and rush to hospital.
Copyright © 2007 ~ All Rights Reserved Worldwide

“Perfume, Soap and Candle Making” by Irene Palmer Page 58 of 118
21. Soap Making Oils and Their Properties
Sweet Almond Oil It is used for soaps that are claimed to condition your skin and
forms a stable lather.
Use: One ounce/pound at trace
Aloe Vera Gel and Liquid It is used in lotions and creams. It is claimed to help some effects of
some skin problems. Some people claim that we may use aloe vera
in soaps, cosmetic formulations and directly on the skin but you
should consult our doctor or pharmacist.
Apricot Kernel Oil It is used for ‘super-fatting’ and is claimed to be a good moisturizer.
Use: One or two ounces per pound of soap at the trace stage
Avocado Oil It is used for super fatting and is a good moisturizer. It contains
vitamin A, D, E that efficiently moisturizes.
Use: 30% as base oil.
Beeswax It makes for a harder bar of soap. It may be used for lotions,
creams, candle making, and lip balms.
Use: One ounce per pound of oils in the base oil to make soap hard.
Calendula Oil It is famous for its reputed therapeutic benefits. Some people claim
that it may help to alleviate some effects of various kinds of skin
damage.
Copyright © 2007 ~ All Rights Reserved Worldwide
“Perfume, Soap and Candle Making” by Irene Palmer Page 59 of 118
Use: Use one to two-thirds of a tablespoon per five pounds of super
fat soap at trace.
Canola Oil It is less saturated but a good moisturizer. You may substitute it for
expensive oils. If mixed with other oils, it may speed saponification.
Use: 50% as base oil
Castor Oil It makes good super fat. It is claimed to preserve the skin’s
moisture.
Use: 30% in the initial phase of soap making
Cocoa Butter It makes soap hard. When used as super-fatting in soap
preparation, it is claimed to preserve the skin’s moisture.
Use: 15% as base oil and about one ounce per pound at trace.
Coconut Oil It forms extra lather. It makes a hard bar-type soap.
Use: Do not use more than 20 to 30% as base oil
Cottonseed Oil It produces good lather and has emollient properties.
Use: Maximum of 25% as total base oils.
Emu Oil It is claimed to improve the condition of skin tissues.
Use: One ounce/pound at trace.
Evening Primrose Oil It is claimed to help the skin’s defence against inflammation and
infection, but is not advised for oily skins.
Copyright © 2007 ~ All Rights Reserved Worldwide
“Perfume, Soap and Candle Making” by Irene Palmer Page 60 of 118
Use: Two table spoons/pound of soap at trace.
Grapeseed Oil It is used as super fatting.
Use: One ounce/pound at trace
Hazelnut Oil It is claimed to add a moisturizing quality to the skin.
Use: 20% of total oils
Hempseed Oil It is less saturated and makes a silky soap bar.
Use: 20 to 30% as base or 5% at trace
Honey Honey is claimed to help retain skin moisture.
Use: 2 tablespoon/pound of oil
Jojoba Jojoba is claimed to help condition skin and to be excellent for
shampoo bars.
Kukui Nut Oil It is rich in linoleic acid and is claimed to help relieve the effects on
sunburned skin, psoriasis, acne and eczema.
Use: 2 tablespoon to 5 pounds of soap at trace.
Lard Lard comes from pig’s fat. It forms a white and lathery bar. If mixed
with palm or coconut oil, it could produce a firm soap that is claimed
to work well with cold water.
Use: Maximum 70% of the total oils.
Copyright © 2007 ~ All Rights Reserved Worldwide
“Perfume, Soap and Candle Making” by Irene Palmer Page 61 of 118
Macadamia Oil It has a long shelf life and forms a good addition to any soap. It acts
as an emollient skin protection agent.
Use: One ounce/pound at trace.
Mango Butter This is derived from mango. It is a yellowish odorless oil.
Use: 15% as base oil and as 5% super fatting at trace.
Monoi Oil It is derived from coconut oil. It makes luxury expensive soaps and
has moisturizing properties.
Use: 60% or more as base oil.
Neem Oil Neem bark is rich with neem oil. It is claimed to help with many skin
disorders and dandruff.
Use: 40% as base oil.
Olive Oil It forms an excellent base oil and is claimed to help reduce the loss
of skin moisture.
Use: 100% as base if you are making a mild soap.
Palm Oil/ Vegetable Tallow They make hard but mild soap bars and are a good substitute for
tallow. They can be used for luxurious soaps.
Use: 20 to 30% as base.
Palm Kernel Oil It makes a hard soap lather. It has some of the same qualities as
palm oil.
Copyright © 2007 ~ All Rights Reserved Worldwide
“Perfume, Soap and Candle Making” by Irene Palmer Page 62 of 118
Use: 20 to 30% as base oil.
Peanut Oil It lets soap continually form a lather.
Use: 20% as a base oil. Do not use more because it is unsaturated
and tends to spoil fairly quickly.
Safflower Oil It is unsaturated oil. It is rich in moisturizing qualities.
Use: 60% as a base oil.
Sesame Seed Oil It is claimed to be helpful for some people with eczema,
rheumatism, arthritis and psoriasis. It is a good super fatting oil and
makes soft soap bars.
Use: Add 10% to base oils.
Shea Butter It is an excellent super fatting agent. It forms a great soap that is
claimed to be helpful for nourishing the skin.
Use: 20% with the base oil, or add one to two third
tablespoons/pound of oil at trace as a super fatting agent.
Sunflower Oil It is an alternative to the more expensive olive oil. It is rich in
vitamin E.
Use: 20% as base oil.
Vegetable Shortening This produces a stable, mild lather. It is a good filler and makes a
white hard bar. Often mixed with other harder oils for good results.
Use: 50% as base of total oils.
Copyright © 2007 ~ All Rights Reserved Worldwide
“Perfume, Soap and Candle Making” by Irene Palmer Page 63 of 118
Soybean Oil Similar properties to vegetable shortening (above). It gives a stable,
mild lather. It is a good filler and makes a white hard bar. Better
results may be gained by mixing with other harder oils.
Use: 50% as base of total oils.
Wheat Germ Oil It is claimed to have antioxidant qualities and is rich in vitamin E.
Some claim it helps with cracked skin and to reduce stretch marks
and scarring but there are no medical support for these claims.
Use: One ounce/ pound at trace.
Copyright © 2007 ~ All Rights Reserved Worldwide
“Perfume, Soap and Candle Making” by Irene Palmer Page 64 of 118
22. Using Natural Colorants in Soap Making
Natural colorants have been used in soap making for a very long
time. Although natural colorants may not be very effervescent, they
may add an attractive tinge to your soap.
Natural colorants could be flower petals, leaves, fruits, fruit peel and
other plant products. You can locate these colorants in your kitchen
or get them at grocery stores and soap stores.
Before using natural colorants in soap making, you should carefully
test them and research for any possible negative outcomes.
Three Tests for Natural Colorants The Lye Test Dissolve a tablespoon of lye in half a cup of water and allow it to
cool substantially. Add just ¼ teaspoon of a specific colorant and
note the color change. Record all changes as they take place over
an hour, a day and longer.
The Oil Test This involves heating four ounces of colorless oil like coconut oil or
lard and adding a little colorant after the oil cools. Record color
changes as they occur.
The Soap Batch Test Different colorants produce different color effects and changes could
be different in lye and oil.
So, test your choice of color in a small batch of soap.
Some colors evolve better in lye while some work better in oil.
Some give a more vibrant shade if added at trace.
Copyright © 2007 ~ All Rights Reserved Worldwide
“Perfume, Soap and Candle Making” by Irene Palmer Page 65 of 118
Keep experimenting and recording your results so that you can add
the shades you want when you want a specific color in your soap.
Copyright © 2007 ~ All Rights Reserved Worldwide
“Perfume, Soap and Candle Making” by Irene Palmer Page 66 of 118
23. Rebatching Soap - The Hand Rebatch Method
Hand rebatching involves melting down soap scraps on an oven,
then adding fragrances and essential oils before pouring them into
molds to form new soaps.
Using fresh soap and low heat of an oven can deliver the best
results.
Slow and even heating of your oven ensures thorough mixing and
spreading of all soap ingredients.
Low heat prevents ‘burning’ of your soap.
Grate soap, or cut it into small pieces.
Put them into a glass pot, enamel coated pot or stainless steel
vessel.
Pour in a cup of milk for every pound of soap.
A half-cup of milk may be sufficient for olive oil and animal fat
based soap shavings.
If your soap is very fresh, use half of these measurements.
Cover the pot and allow your soap to soak in the milk-and-water for
around an hour.
Stir at intervals.
Heat your oven to just 170 degrees and place pot in the oven.
Allow it to heat for an hour, while stirring every quarter hour.
Once your soap has dissolved and the mixture is smooth, add
fragrances, essential oils, cocoa butter, herbs and oatmeal
according to your desire.
Copyright © 2007 ~ All Rights Reserved Worldwide
“Perfume, Soap and Candle Making” by Irene Palmer Page 67 of 118
Use a hand blender, or pour entire mixture into a kitchen blender,
and mix thoroughly.
After everything is thoroughly blended, pour your soap mixture into
your molds and allow it to set for few days.
After that, take your soap from the molds and allow it to age for a
week or two before use.
Copyright © 2007 ~ All Rights Reserved Worldwide
“Perfume, Soap and Candle Making” by Irene Palmer Page 68 of 118
24. Step-by-Step Instructions - Cold Process Soap
Making
Before you start to make cold process soap, assemble all the
necessary ingredients and equipment, then carefully arrange them
in your workspace.
Always wear your gloves and safety goggles.
Prepare lye solution and allow it to cool in a safe place.
Next, place your soap pot and glass pitcher separately on your scale
and zero out the weight of each.
Weigh all oils according to the required specifications. Use your
glass pitcher for liquid oils like castor, sunflower and canola. Use
your soap pot for the solid oils like palm, coconut and cocoa butter.
Place your soap pot with all the solid oils over a medium heat on
your stove.
Stir it gently until the oils melt.
Turn off the heat once it reaches 110 degrees. Keep stirring until all
solid oils melt thoroughly.
Next, add all liquid oils at room temperature to the melted oils. This
brings down the overall temperature to around one hundred
degrees. This is the correct temperature for adding lye-mixture.
Next, slowly and very carefully, add lye-mixture to your soap pot,
carefully stirring with a stick blender, like a spoon.
The oils will turn cloudy and you need to keep stirring constantly to
allow the oils to blend into the lye completely.
Copyright © 2007 ~ All Rights Reserved Worldwide
“Perfume, Soap and Candle Making” by Irene Palmer Page 69 of 118
Many chemical reactions start taking place as soon as your lye-
mixture and oils blend.
Keep all necessary additives, fragrances, and colors ready,
preferably near at hand. This helps you add things appropriately and
efficiently.
You can use the stick blender vigorously for three to five seconds
and then continue stirring.
Keep rotating both processes until your lye-mixture and the oils are
thoroughly blended. Once they are blended perfectly, you can reach
trace within minutes.
After complete blending, add the fragrance and essential oils slowly.
Do not use your stick blender to blend the mixture; instead, use it
like a spoon as you did before.
Next, add in any special moisturizing oils, flower petals or spices.
Stir them gently into your mixture with the help of your stick
blender.
The next step is to add colorant of your soap. If you want a single
unified color, add that color into the pot and stir vigorously.
However, if you want a swirl effect, pour out half to one cup of
mixture into a measuring cup. Add colorant into this cup. Hold this
cup at a height above the pot and pour it into your soap pot.
Use a rubber spatula to swirl in the color throughout the mixture
still in the pot. Do not swirl excessively as it will blend in color
thoroughly.
Pour raw soap into mold and allow it to spread evenly. If the top of
your soap is uneven, smooth it with a spatula.
Copyright © 2007 ~ All Rights Reserved Worldwide
“Perfume, Soap and Candle Making” by Irene Palmer Page 70 of 118
Tap your mold gently to remove any possible air bubbles. Put your
soap in a warm place. You might place a warm towel around each
mold, depending on the room temperature. This helps the
saponification reaction to keep going.
Keep wearing your gloves and safety goggles even while cleaning all
your utensils and soap pot, as there will be some soap leftover in
the pot.
It can cause caustic reactions, leading to burns and irritation.
After another twenty-four hours, slide out soap from each mold.
Slice it according to the specific size of the bars you want and set it
aside to cure.
Although all processes are complete, technically, your soap is safe
for use only after resting for four weeks. This is the curing period.
Copyright © 2007 ~ All Rights Reserved Worldwide
“Perfume, Soap and Candle Making” by Irene Palmer Page 71 of 118
25. Make a Lye-Water Solution for Your Cold Process
Soap
Lye solution is essential for your soap making process, but lye is a
dangerous, caustic chemical that could cause serious burns. You
should use all necessary precautions like wearing gloves and safety
goggles before starting to make your lye solution.
Place your pitcher on the scale and zero-out its weight. Weigh
distilled water according to your recipe.
Place a mason jar on the scale and zero-out the weight.
Gently shake out the necessary amount of lye from the container
and then immediately tightly close the lid of your lye container.
After weighing lye and water correctly, slowly and gently add lye to
the pitcher of water without splashing it around.
You should wear your goggles and gloves and try to keep yourself at
a distance.
You should always add lye to water and not water to lye. Adding
water to lye could cause volcanic reactions within the pitcher. This
can be dangerous.
Stir the lye and water mixture gently until all the lye dissolves
completely. This mixture could soon become very hot and emit
steam. It also makes boiling and bubbling sounds. Stir in the lye
completely and keep it in a safe place, away from the reach of
children and pets.
Also, do not keep any heat-sensitive things in the vicinity. Allow it to
cool to around 100 degrees.
Copyright © 2007 ~ All Rights Reserved Worldwide
“Perfume, Soap and Candle Making” by Irene Palmer Page 72 of 118
26. Step-by-Step Instructions - Melt and Pour Soap
Making
Equipment and Materials Necessary Melt and Pour Soap Base in a Pyrex container
Cutting Board
Scale
Measuring Spoons
Soap-Safe Dye, Red and Blue
Fragrance Oil
Large Knife
Rubber Spatulas
Cloths and Paper Towels
Rubbing Alcohol in Spray Bottle
Metal Whisks
Ramekin for Fragrance Oil
Soap Mold
Procedure Place a Pyrex container on your scale and zero-out its weight.
Cut your soap base into pieces which your mold can accommodate.
Use a clean knife, cutting board, and container to prevent any dirt
accumulation in your soap. Removing any such dirt accumulation
from your soap would be very difficult.
Cover the container and heat soap in microwave for a minute.
Covering prevents soap base from drying out while heating.
Copyright © 2007 ~ All Rights Reserved Worldwide
“Perfume, Soap and Candle Making” by Irene Palmer Page 73 of 118
Remove and stir the soap.
Repeat the heating process until soap melts completely.
Alternatively, you can melt soap in a double boiler. Be careful, as
melted soap can have a temperature of around 150 degrees.
Place a fragrance ramekin on the scale and zero-out its weight.
Measure essential fragrance for your soap. Normally, it should be
around a quarter ounce of fragrance per pound of soap. You can
choose to add more or less fragrance according to the amount of
scent you prefer in your soap.
After removing the melted soap from the heat, add fragrance to the
melted soap base by stirring it in gently.
Next, add soap-safe dyes or natural colorants.
Keep stirring melted soap to blend in fragrance and color
thoroughly. Do not stir very hard as this would form bubbles in your
soap.
Now, pour soap slowly into the mold. Do not splash soap around, as
it would cause more bubbles. If there are many bubbles, try
spraying the top of the bars with a little alcohol.
Place mold in a safe place and preferably keep it covered.
Your soap should become suitably hard within few hours. You can, if
need be, place your mold in the refrigerator (not in the freezer) ,
although the scent might affect food.
It can take an hour for your soap to cool and harden thoroughly,
even if you place it in the refrigerator.
Once soap hardens thoroughly, it will pop out easily from the mold.
Although most molds allow easy release of soaps, some molds could
Copyright © 2007 ~ All Rights Reserved Worldwide
“Perfume, Soap and Candle Making” by Irene Palmer Page 74 of 118
pose a little difficulty. You can try tapping the mold with a spoon or
with the palm of your hand.
If the mold is too sticky, try running hot water on the back of the
mold.
Trim off any imperfections in your soap with a knife or a small cloth.
Melt and pour soap does not require any curing time, as it is already
cured. Your soap is ready for use immediately.
Copyright © 2007 ~ All Rights Reserved Worldwide
“Perfume, Soap and Candle Making” by Irene Palmer Page 75 of 118
27. Making Liquid Soap
Making liquid soap is different and more complicated than the cold
soap making process.
The main difference is in the alkali used for saponification. You use
sodium hydroxide for bar soaps and potassium hydroxide for liquid
soaps. Another major difference is you apply heat while making
liquid soap instead of depending on heat generated through the
soap making process alone, as in cold soap making.
Ingredients and Equipment for Making Liquid Soap 7 oz. Coconut oil
16.5 oz. Sunflower oil
16.5 oz. Distilled water for Lye mixture
5.5 oz. Potassium Hydroxide (KOH)
40 oz. Distilled water to dilute soap paste
2 oz. of boric acid
3 oz. Fragrance or Essential oil
Soap dye or colorant
Thermometer, scale, measuring cups
Basic tools for mixing lye and similar procedures Large crock pot
Stick blender
Procedure Measure all oils and pour them into crock pot.
Set it at a 160 degree temperature.
Copyright © 2007 ~ All Rights Reserved Worldwide
“Perfume, Soap and Candle Making” by Irene Palmer Page 76 of 118
Prepare lye-water in the normal way.
After the lye-water is mixed and dissolved thoroughly, add it slowly
to the oils in the crock pot. Stir the lye and oils well.
Keep blending with stick blender.
It could take around thirty minutes for the trace to appear. Allow
trace to appear clearly, while stirring and blending the mixture.
After you locate a clear trace, take out the stick blender and close
the pot with the lid.
Allow paste to cook well.
After around fifteen to twenty minutes, stir mixture thoroughly and
then close the lid again.
Keep checking every twenty minutes. Allow paste to cook for around
three to four hours.
After about four hours, your soap mixture should become
sufficiently soft and translucent.
It is now necessary to check if the soap is sufficiently cooked.
Take two ounces of boiling water and add an ounce of your soap
paste mixture to it.
Stir it and allow mixture to dissolve.
If it dissolves thoroughly and appears lightly cloudy, it is fine.
If the dissolved mixture is very cloudy and milky, it is not
sufficiently cooked.
After testing the soap paste mixture, boil remaining 40 oz of
distilled water and add it to the paste.
Stir in well.
Copyright © 2007 ~ All Rights Reserved Worldwide
“Perfume, Soap and Candle Making” by Irene Palmer Page 77 of 118
Turn off the heat to the crock pot and close lid.
After an hour, stir soap mixture well again. Close lid and wait for a
few hours more or leave it overnight.
Add the fragrance to your soap now.
Again, turn on heat on crock pot to around 180 degrees.
Make a neutralizing solution by mixing 2 oz of boric acid in 8 oz of
boiling water.
Stir it well into soap mixture while it is very hot.
You could require 3/4 oz. of neutralizer for every pound of soap
paste.
Next, add the color.
Stir in well.
Allow your soap to cool sufficiently and pour into large bottles.
Copyright © 2007 ~ All Rights Reserved Worldwide
“Perfume, Soap and Candle Making” by Irene Palmer Page 78 of 118
28. Finding or Making Soap Making Molds
Anything that can hold water might be able to function as a soap
mold.
You can purchase purpose-made soap molds at soap supply
companies. There are numerous soap suppliers available offline and
online. You can contact any of them for your soap mold
requirements.
Alternatively, you can visit any hobby store and look for fancy molds
that can function as soap molds. You can use candy molds or candle
molds. These are available in different shapes, designs, and sizes.
Brownie pans prove excellent containers or molds for making
rectangular or square soaps.
Design and Make Your own Soap Molds Purchase short lengths of PVC pipes of 2” and 3” and caps for pipe
ends.
Cut pipe into two foot lengths and put a cap at the end of the pipe
after cleaning it.
Seal the cap to the pipe with clear tape so that no liquid can get
out.
Fill pipe with soap mixture.
Allow soap to harden.
Place pipe in freezer for an hour or two.
Remove from freezer and take off seal.
Place pipe under hot water tap for around thirty seconds.
Push soap gently out from the mold.
Copyright © 2007 ~ All Rights Reserved Worldwide

“Perfume, Soap and Candle Making” by Irene Palmer Page 79 of 118
Allow it to cool and harden for a day.
After that, cut off round pieces of soap.
Similarly, you can make your own soap molds from white or yellow
pine, or other scrap wood pieces.
Copyright © 2007 ~ All Rights Reserved Worldwide

“Perfume, Soap and Candle Making” by Irene Palmer Page 80 of 118
29. Lavender-Mint Layered Soap Recipe
Lavender-mint layered soap offers you two scents separately.
The soap making process is the same as cold process soap making.
You add lavender on one side and mint on the other to get both
scents in to your soap.
Use all precautions that are necessary for making the lye solution.
Wear safety goggles and gloves before starting with your soap
making.
Ingredients 30% Olive oil
30% Lard
25% Coconut oil
10% Sunflower oil
5% Castor oil
Lye and water as necessary
Lavender essential oil
Lavender buds
Manganese Violet Ultramarine
Ground Spearmint
Bergamot Mint essential oil
Chromium Green Oxide
Procedure Prepare lye solution and put it aside.
Copyright © 2007 ~ All Rights Reserved Worldwide
“Perfume, Soap and Candle Making” by Irene Palmer Page 81 of 118
Keep ready all necessary ingredients in two sets; one for each layer
of soap.
Make one batch with lavender essential oil, purple oxide and
lavender buds.
Make the other batch with mint, green oxide and ground spearmint.
You need lye water and oils to be at 100 degrees to start with your
mixing process.
Once the lye and oils mix in well, you need to pour out one half into
a large bowl or pitcher.
You can now add colorant, additives and essential oils that are in
the first batch.
Blend them well.
Slowly pour out this first blend into your soap mold.
Add the next lot of colors, additives, and essential oils in the second
batch to the other half mixture in the pot. Allow trace to appear and
then pour out this second layer on top of the first layer in the mold.
The pouring should be slow and not from a great height. Otherwise,
your mixture will swirl extensively and both colors will mix into one.
After pouring in your entire soap mixture, allow soap to settle well
within your mold.
Allow twenty-four hours for your soap to settle.
Then, you can remove your soap from mold, cut, and allow it to
cure for many weeks before you use it.
Copyright © 2007 ~ All Rights Reserved Worldwide
“Perfume, Soap and Candle Making” by Irene Palmer Page 82 of 118
30. Troubleshooting Your Soap Making Problems
Common Problems in Soap Making 1. Curdling of soap mixture while stirring Cause: This is due to either slow stirring or pouring oil and lye
mixture into your mixing bowl at very high temperatures.
Solution: Use a stick blender to make mixture smooth before
pouring into molds. Check for any irregularities in your soap bars
due to insufficient stirring. Discard soap bars with irregularities.
2. Grainy Mixture Cause: This is because lye solution or oils were either too hot or too
cold. Stirring was insufficient.
Solution: Use a stick blender to overcome such problems. Continue
stirring until trace appears, and then pour into molds.
3. Tracing of soap does not occur or is very slow Cause: Excess water, insufficient lye, wrong temperatures, too high
a percentage of unsaturated fats in base oils, or improper stirring
could be the cause for poor tracing of soap.
Solution: Check lye and water measurements thoroughly. Keep
stirring for around three hours at appropriate temperatures. You do
not have to stir continuously, but at intervals.
Stick blenders induce faster tracing. If your mixture does not
harden, even after all proper procedures, discard it.
4. Mixture settles very quickly in pan Cause: This occurs because the lye and/or water temperatures
were either too high or too low. Too high a percentage of saturated
fats could be another reason.
Copyright © 2007 ~ All Rights Reserved Worldwide
“Perfume, Soap and Candle Making” by Irene Palmer Page 83 of 118
Solution: Take less time when pouring your mixture into molds and
smoothing it with a spatula.
5. Oil layer appears on the top when soap cools in the mold Cause: This is because of insufficient lye or an excess of oils in your
soap recipe. Incorrect measurements can be the basic cause.
Solution: Stir and blend with the help of a stick blender. Pour soap
mixture into molds as soon as trace appears or even before that.
If soap does not lather well even after three to four weeks, discard
it, as it is probably too caustic and might harm your skin.
6. Soft and spongy Soap Cause: This occurs due to insufficient lye, excessive water or an
excess of unsaturated fats in your soap recipe.
Solution: Curing soap bars for few more weeks might make them
hard. If it remains soft still, discard soap.
Copyright © 2007 ~ All Rights Reserved Worldwide
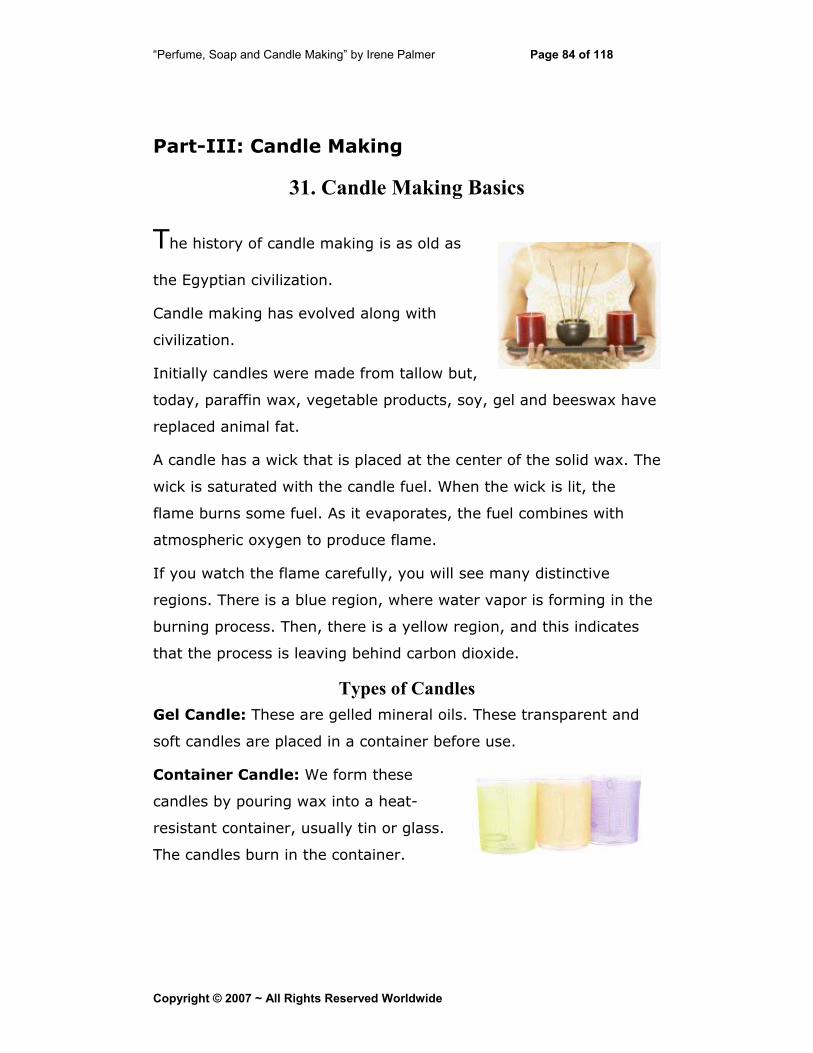
“Perfume, Soap and Candle Making” by Irene Palmer Page 84 of 118
Part-III: Candle Making
31. Candle Making Basics
The history of candle making is as old as
the Egyptian civilization.
Candle making has evolved along with
civilization.
Initially candles were made from tallow but,
today, paraffin wax, vegetable products, soy, gel and beeswax have
replaced animal fat.
A candle has a wick that is placed at the center of the solid wax. The
wick is saturated with the candle fuel. When the wick is lit, the
flame burns some fuel. As it evaporates, the fuel combines with
atmospheric oxygen to produce flame.
If you watch the flame carefully, you will see many distinctive
regions. There is a blue region, where water vapor is forming in the
burning process. Then, there is a yellow region, and this indicates
that the process is leaving behind carbon dioxide.
Types of Candles Gel Candle: These are gelled mineral oils. These transparent and
soft candles are placed in a container before use.
Container Candle: We form these
candles by pouring wax into a heat-
resistant container, usually tin or glass.
The candles burn in the container.
Copyright © 2007 ~ All Rights Reserved Worldwide
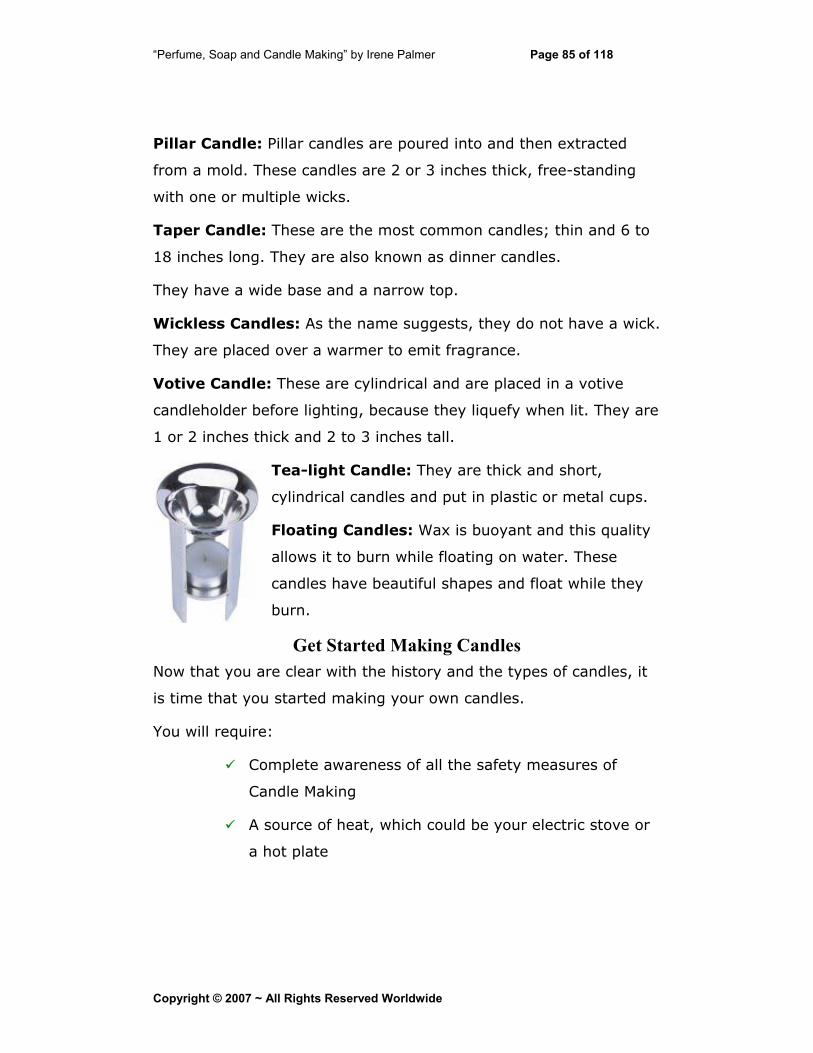
“Perfume, Soap and Candle Making” by Irene Palmer Page 85 of 118
Pillar Candle: Pillar candles are poured into and then extracted
from a mold. These candles are 2 or 3 inches thick, free-standing
with one or multiple wicks.
Taper Candle: These are the most common candles; thin and 6 to
18 inches long. They are also known as dinner candles.
They have a wide base and a narrow top.
Wickless Candles: As the name suggests, they do not have a wick.
They are placed over a warmer to emit fragrance.
Votive Candle: These are cylindrical and are placed in a votive
candleholder before lighting, because they liquefy when lit. They are
1 or 2 inches thick and 2 to 3 inches tall.
Tea-light Candle: They are thick and short,
cylindrical candles and put in plastic or metal cups.
Floating Candles: Wax is buoyant and this quality
allows it to burn while floating on water. These
candles have beautiful shapes and float while they
burn.
Get Started Making Candles Now that you are clear with the history and the types of candles, it
is time that you started making your own candles.
You will require:
Complete awareness of all the safety measures of
Candle Making
A source of heat, which could be your electric stove or
a hot plate
Copyright © 2007 ~ All Rights Reserved Worldwide
“Perfume, Soap and Candle Making” by Irene Palmer Page 86 of 118
A double-boiler. You may make one by placing a small
can (for melting the wax) within a low, wide bowl
which holds the boiling water.
Some wax
A suitable wick
A container or mold to pour the melted wax into
Color and fragrance (optional)
A match to light the candle so that you can see the
wonder you create
What is stopping you now? Let’s get started.
Copyright © 2007 ~ All Rights Reserved Worldwide
“Perfume, Soap and Candle Making” by Irene Palmer Page 87 of 118
32. Tools and Materials to Begin Candle Making
Essential Equipment Before you start with candle making, there are few basic things that
you need to gather.
These items are easily available locally or you can purchase them
from the Internet.
Melting System: Wax can be melted in various ways, but be
careful not to apply direct heat or microwave them.
If you are a beginner, it is advisable that you melt the wax on a
double boiler.
There are thermostatically controlled kitchen kettles, which can also
be used to melt the wax.
Thermometer: There is a special thermometer available that
measures the temperature of the melting wax. The scale of this
thermometer reads from 100 to 350 degrees Fahrenheit.
Scales: You may use a kitchen scale to measure the wax, provided
it is accurate enough.
Ladle: This is required to mix and while pouring the wax out of the
heated pot.
Measuring or Pouring Jug: If you pour the melted wax in a
measuring or pouring jug, it will be easier for you to accurately pour
them in to the molds.
Paraffin Wax: This is the most essential element for candle
making.
Wick: There are various types of wicks. The most common one is a
chemically treated braided cotton wick.
Copyright © 2007 ~ All Rights Reserved Worldwide
“Perfume, Soap and Candle Making” by Irene Palmer Page 88 of 118
Coloring or Dye: There are different types of colors or dyes used
for making candles.
They are:
Blocks: You need to shave a little amount into the wax for color.
Color Chips: They are used in a similar manner as the block.
Liquid Dyes: You use a dropper to add color.
Avoid wax crayons as they choke the wick.
The quantity of your dye decides the strength of the color.
Wax Additives: They help to create different effects to each
candle. Two of them are stearin and vybar. Stearin increases the
strength of the color and enhances burning whereas vybar provides
opacity and increases the burning rate.
Mold Seal: A mold seal is required for making a pillar candle. It
holds the wick and prevents spilling of the wax through the holes.
Candle Molds: Most candles require them for their shape. The
molds come in metal, rubber, plastic, glass and latex.
Heat Gun or Blowtorch: With their careful use, you can remove
any bubbles in a gel candle or make the candle look shiny.
Copyright © 2007 ~ All Rights Reserved Worldwide
“Perfume, Soap and Candle Making” by Irene Palmer Page 89 of 118
33. Candle Additives and How They Make Your Wax
Work
Various wax additives provide different effects to the candle. For
example, one can use these additives to derive effects such as
vibrant colors, a higher sheen, more durability and harden the wax.
These items cam provide your candle with these qualities.
Stearic Acid: These are also called stearine. They are mixed with
paraffin to strengthen the color and to help the candle to burn more
brightly. It hardens the waxes that have low melting points and it
lessens the melting point of high temperature waxes.
Vybar: They provide hardness to the wax, stabilize the scent and
reduce shrinkage. It provides opaqueness to the candle and helps it
to burn longer too.
There are two kinds of vybar; vybar 103 and vybar 260. However,
be careful not to exceed the recommended quantity as it binds the
fragrance.
Luster Crystals: They provide sheen, opaqueness and brightness
to the color of the candle. It also provides durability to the candle.
These luster crystals are fabricated wax polymer and especially
recommended for white candles.
Clear Crystals: They make the wax hard and give a transparent
look. Clear crystals have almost similar functions as the luster
crystals. They also provide the candle with a glowing effect.
Plastic Additives: They also add transparency to the candle and
harden the wax. They are also famous as “hurricane” candles.
However, you need to remember that plastic additives need a direct
Copyright © 2007 ~ All Rights Reserved Worldwide
“Perfume, Soap and Candle Making” by Irene Palmer Page 90 of 118
heating source, before you add them to the wax at the specified
temperature.
Microcrystalline Wax: This is mostly very helpful if you want to
make pillar or taper candles. They reduce mottling and harden the
wax. There are many types of microcrystalline wax. Their soft
nature is great for making hand-molded candles.
UV Inhibitors: It is mostly professional candle makers that use
these. UV Inhibitors help to reduce fading of color when the candle
is placed under strong artificial lighting or direct sunlight.
If you are using purple or red coloring, think seriously about using
UV inhibitors. These colors may fade very quickly when exposed to
light.
Parol Oil: Parol oil provides the candle with a mottled look.
Copyright © 2007 ~ All Rights Reserved Worldwide

“Perfume, Soap and Candle Making” by Irene Palmer Page 91 of 118
34. Wax Melting Instructions
Candle making is very simple, but there are many hazards
attached to it.
If you follow these few precautions carefully, your candle making art
could be as simple as it sounds.
Safety Precautions 1.
2.
3.
4.
5.
Keep your recently checked fire extinguisher within safe
reach. Learn how to operate it. Never use water to extinguish
a wax fire as this increases the flame.
Wax requires a long time to melt, but make sure that you do
not leave the wax unattended.
Get an appropriate thermometer to monitor the temperature
regularly. Do not let the temperature rise above 250 degree
Fahrenheit because the wax becomes flammable after that
point.
The required thermometer is a special type that has markings to
a higher number of degrees than clinical thermometers have. If
you do not have one, make sure it is the first item you purchase.
Always use a double boiler. A double boiler has a pot of
boiling water placed on the source of heat. Into this heating
water is placed a container that has wax in it. The wax melts
through the heat transmitted from the water. You possibly
could make your own double boiler at home from a large and
small vessel.
Using an electric heat source is advisable to reduce the
possibility of fire. If the wax combusts on reaching flash
Copyright © 2007 ~ All Rights Reserved Worldwide
“Perfume, Soap and Candle Making” by Irene Palmer Page 92 of 118
point, the chances of the vapors burning are lessened if you
use electric heat. When you use a gas stove, the vapor will
immediately ignite due to the gas fire.
Copyright © 2007 ~ All Rights Reserved Worldwide
“Perfume, Soap and Candle Making” by Irene Palmer Page 93 of 118
35. Candle Making Mold Techniques
There are various jars and containers that can be used for candle
molds in the market today, but here are few techniques that you
may try for making your candle.
Aluminum Molds Aluminum molds are durable, heat resistant and they produce a
smooth finish.
To get different effects you can try varying pour temperatures. In
case there is difficulty in de-molding, raise the pour temperature of
the wax.
Wicking the Candle with a Pillar Pin or Rubber Plug Pillar Pins have a flat, round metal base with a central hollow pillar.
The wax solution is poured around this so the candle has a central
tube that the wick can be inserted into after the candle has
solidified. They produce a professional finish but, because of their
higher cost, are mostly used by serious hobbyists and small
commercial producers.
A traditional and cheaper method of putting the wick into your
candle is to unroll a length of wick from the spool, and drop it
through the small hole at the bottom of the upturned mold. Then,
you use a small rubber plug to hold it in place in the wick hole.
Cut the wick off the spool and tie it around a “wick bar”. Then, rest
the wick bar on the mold until the wax has hardened.
If the wick is kept fairly taut, it will be straight down the center of
the candle after you’ve poured the wax around it and then let it
harden.
Copyright © 2007 ~ All Rights Reserved Worldwide
“Perfume, Soap and Candle Making” by Irene Palmer Page 94 of 118
If your mold is cold, the finish on the candle may be a little rough,
which is attractive to many people. You can get a smoother finish by
warming the mold before use.
Encourage an even coloring by keeping the mold level after pouring
the wax in to it.
But, some people carefully tip the mold while the wax is hardening
to introduce a striped effect. Use great care not to spill any warm
wax or do any other damage.
Some people use a piece of picture wire to make the hole through
the candle for the wick.
Polycarbonate Molds Use the correct wax for making candles in this mold. The incorrect
type of wax or wrong temperatures will make it difficult for you to
remove the candle from the mold or clean it before re-use.
If the wax is hotter than 200 degrees then do not pour it into the
mold because it will damage it.
If you want unique stripes on your candles, you can hold the
polycarbonate molds at various angles. Be very careful not to spill
any wax or cause any other problems through inattention.
Copyright © 2007 ~ All Rights Reserved Worldwide
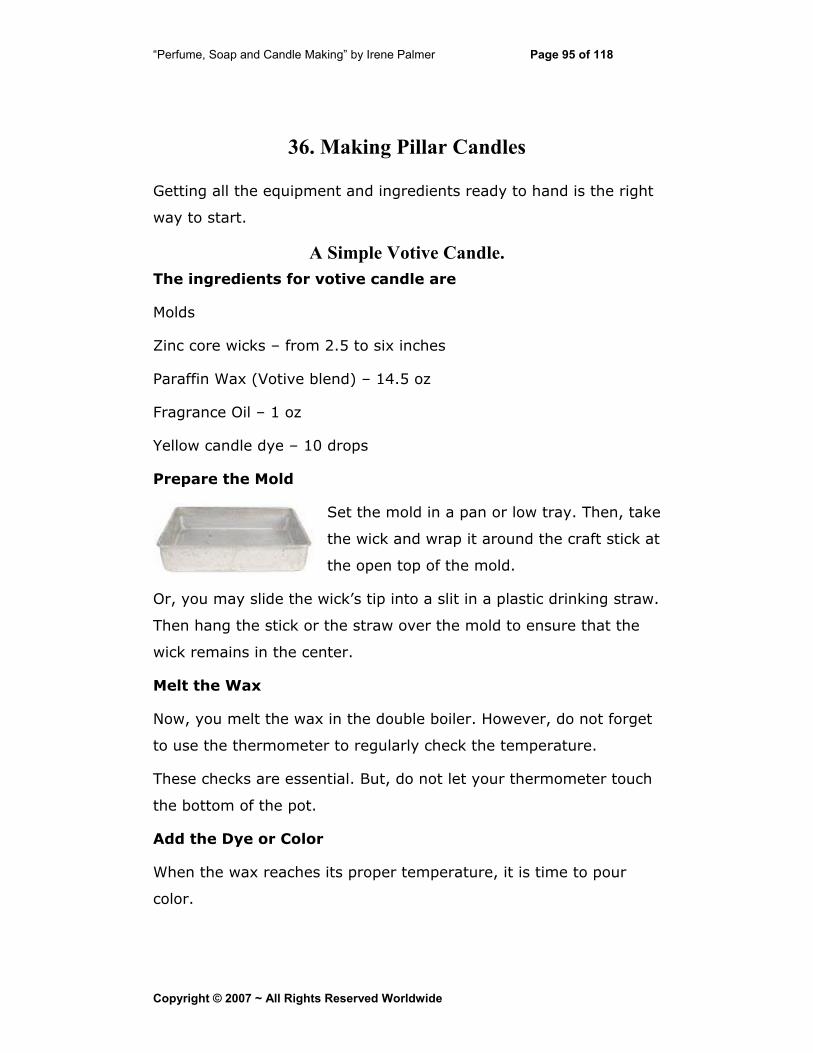
“Perfume, Soap and Candle Making” by Irene Palmer Page 95 of 118
36. Making Pillar Candles
Getting all the equipment and ingredients ready to hand is the right
way to start.
A Simple Votive Candle. The ingredients for votive candle are
Molds
Zinc core wicks – from 2.5 to six inches
Paraffin Wax (Votive blend) – 14.5 oz
Fragrance Oil – 1 oz
Yellow candle dye – 10 drops
Prepare the Mold
Set the mold in a pan or low tray. Then, t
the wick and wrap it around the craft stick a
the open top of the mold.
ake
t
Or, you may slide the wick’s tip into a slit in a plastic drinking straw.
Then hang the stick or the straw over the mold to ensure that the
wick remains in the center.
Melt the Wax
Now, you melt the wax in the double boiler. However, do not forget
to use the thermometer to regularly check the temperature.
These checks are essential. But, do not let your thermometer touch
the bottom of the pot.
Add the Dye or Color
When the wax reaches its proper temperature, it is time to pour
color.
Copyright © 2007 ~ All Rights Reserved Worldwide
“Perfume, Soap and Candle Making” by Irene Palmer Page 96 of 118
Remove the pot from the double boiler or turn the heat off when
you pour the color. Keep gently stirring the wax when you are
pouring the color.
Follow the manufacturer’s instructions for pouring the color.
Add the Fragrance
When you finish pouring the color, add the fragrance oil in to the
melted wax. Keep stirring this to prevent temporary solidification.
Pour the Candle
Now, apply appropriate heat for the pouring process. Carefully
follow the temperature recommended by the manufacturer of the
wax.
When the wax reaches the required temperature, remove it from
the heating source and gently pour into the molds (Be very careful
here). Do not pour wax to fill the mold right to the top. Leave a little
space for the cooling process.
Pierce the top to let Air Bubbles Escape
After a few minutes, when the wax starts to solidify, pierce the
candle skin to release all the air trapped inside the candle.
Remember to be careful. Do not push hard or the hot wax may
squirt at you.
Re-pour the candle
Most waxes shrink as they solidify. Therefore, just after you release
the air bubbles from the wax, gently pour in some more hot wax
over-the-top.
Now your votive candle is almost ready.
Copyright © 2007 ~ All Rights Reserved Worldwide
“Perfume, Soap and Candle Making” by Irene Palmer Page 97 of 118
Remove the Candle from the Mold
The candle will take 3 to 4 hours to cool. When it is cool, remove
the straw or plastic pipe. Trim the wick and wait at least 24 hours
before using it or giving it away.
Copyright © 2007 ~ All Rights Reserved Worldwide
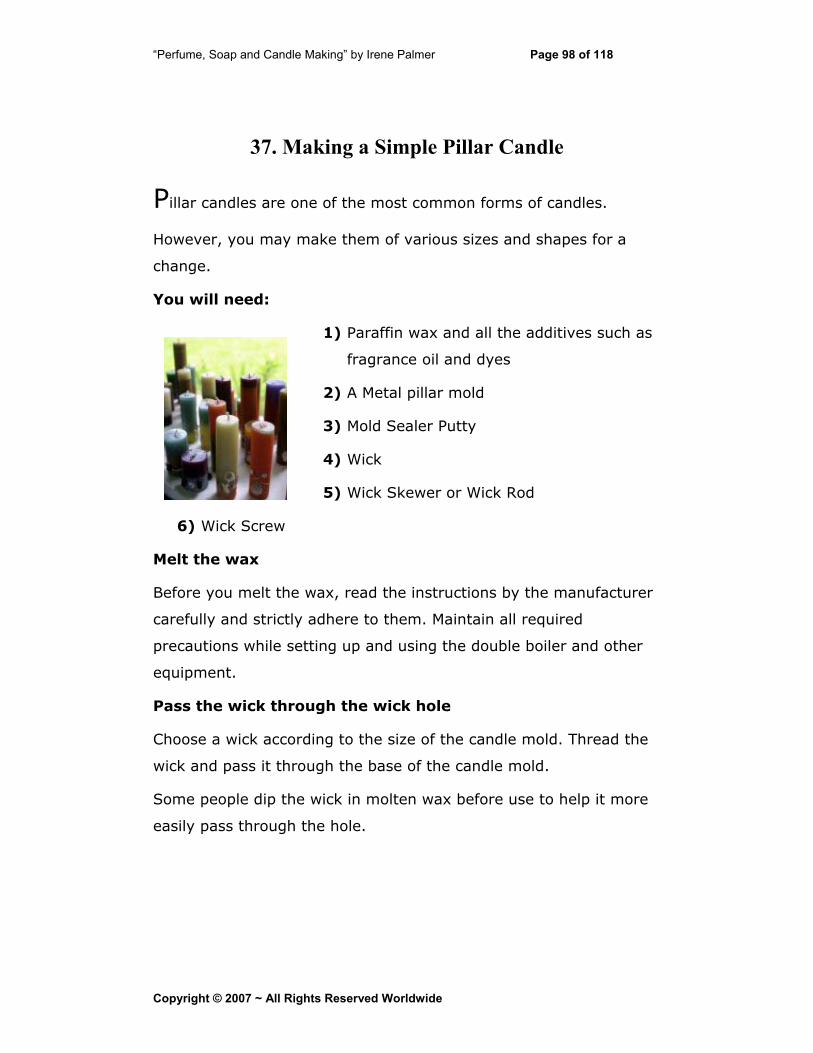
“Perfume, Soap and Candle Making” by Irene Palmer Page 98 of 118
37. Making a Simple Pillar Candle
Pillar candles are one of the most common forms of candles.
However, you may make them of various sizes and shapes for a
change.
You will need:
1) Paraffin wax and all the additives such as
fragrance oil and dyes
2) A Metal pillar mold
3) Mold Sealer Putty
4) Wick
5) Wick Skewer or Wick Rod
6) Wick Screw
Melt the wax
Before you melt the wax, read the instructions by the manufacturer
carefully and strictly adhere to them. Maintain all required
precautions while setting up and using the double boiler and other
equipment.
Pass the wick through the wick hole
Choose a wick according to the size of the candle mold. Thread the
wick and pass it through the base of the candle mold.
Some people dip the wick in molten wax before use to help it more
easily pass through the hole.
Copyright © 2007 ~ All Rights Reserved Worldwide
“Perfume, Soap and Candle Making” by Irene Palmer Page 99 of 118
Tie the Wick to the Wick-Rod
To keep the wick in the wick hole, tie the other end of the wick to
the wick rod.
Lock or tie the wick to the wick hole
Lock the wick in the small hole in the mold with a wick screw (or
you might use the rubber plug mentioned previously). Avoid over-
tightening to prevent damage. Locking helps the wick remain in
place and prevents the wick sliding which would make the candle
look a less professional product.
Seal the Wick Hole
Some crafters use a mold sealer to seal the hole. Sealing prevents
the leakage of melted wax.
Add the Color
When the wax reaches the required temperature, add color and
fragrance.
Pour the melted wax
Once they are thoroughly mixed, pour the wax into the mold.
Be careful while pouring and avoid haste.
Do not fill the wax to the brim. Leave some space on the top, so
that you can top up the wax when finishing the candle later.
Poke and Release air
After the wax is fairly cool, poke a few holes around the wick.
Poking the holes around the wick will help air escape from within the
candle. This reduces the forming of air cavities and candle
deformation.
Copyright © 2007 ~ All Rights Reserved Worldwide
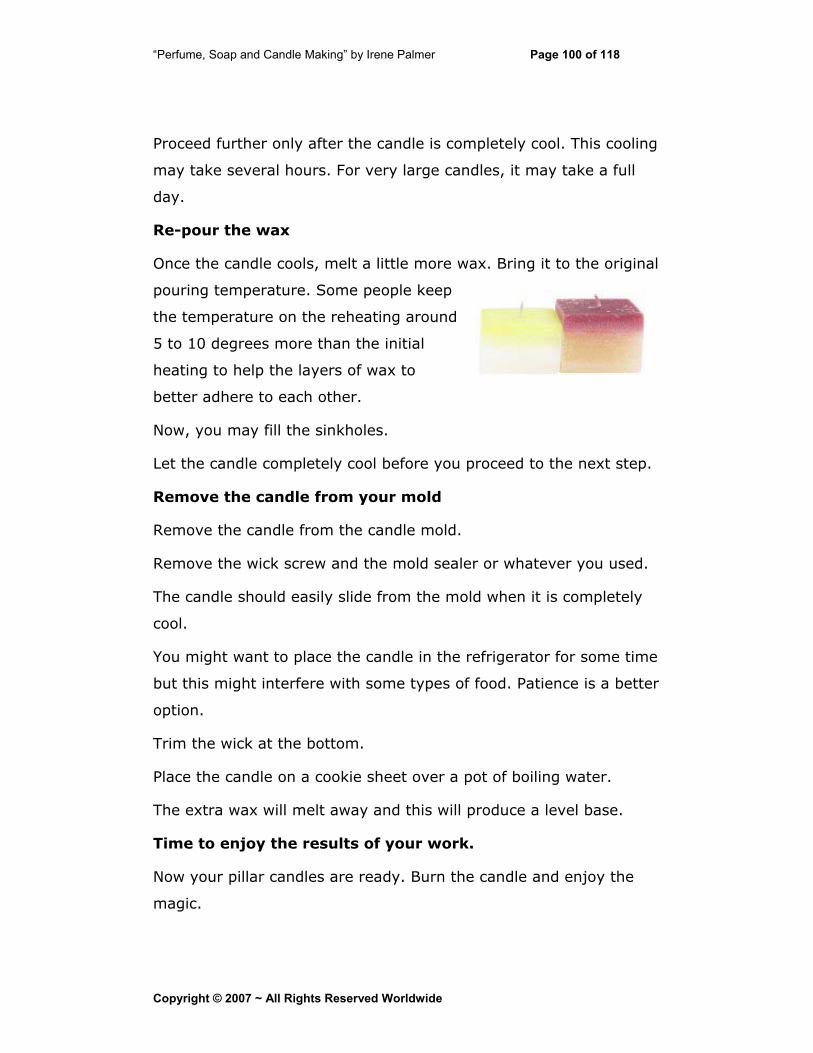
“Perfume, Soap and Candle Making” by Irene Palmer Page 100 of 118
Proceed further only after the candle is completely cool. This cooling
may take several hours. For very large candles, it may take a full
day.
Re-pour the wax
Once the candle cools, melt a little more wax. Bring it to the original
pouring temperature. Some people keep
the temperature on the reheating around
5 to 10 degrees more than the initial
heating to help the layers of wax to
better adhere to each other.
Now, you may fill the sinkholes.
Let the candle completely cool before you proceed to the next step.
Remove the candle from your mold
Remove the candle from the candle mold.
Remove the wick screw and the mold sealer or whatever you used.
The candle should easily slide from the mold when it is completely
cool.
You might want to place the candle in the refrigerator for some time
but this might interfere with some types of food. Patience is a better
option.
Trim the wick at the bottom.
Place the candle on a cookie sheet over a pot of boiling water.
The extra wax will melt away and this will produce a level base.
Time to enjoy the results of your work.
Now your pillar candles are ready. Burn the candle and enjoy the
magic.
Copyright © 2007 ~ All Rights Reserved Worldwide
“Perfume, Soap and Candle Making” by Irene Palmer Page 101 of 118
Copyright © 2007 ~ All Rights Reserved Worldwide
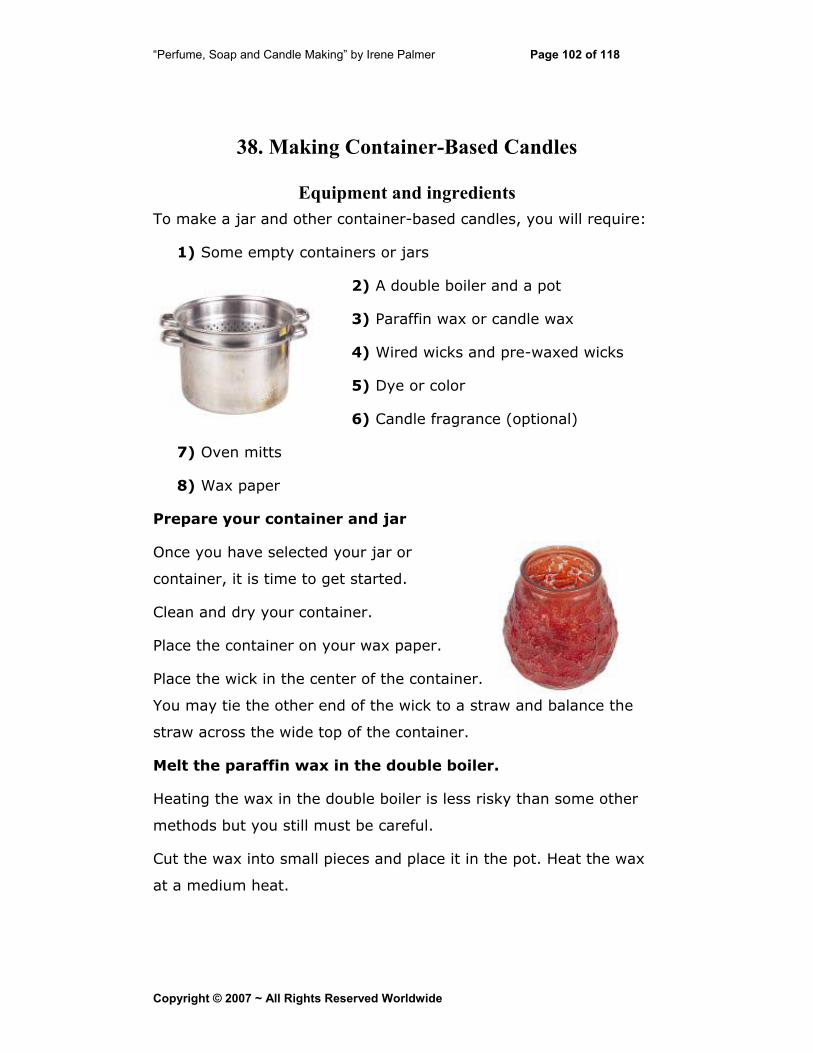
“Perfume, Soap and Candle Making” by Irene Palmer Page 102 of 118
38. Making Container-Based Candles
Equipment and ingredients To make a jar and other container-based candles, you will require:
1) Some empty containers or jars
2) A double boiler and a pot
3) Paraffin wax or candle wax
4) Wired wicks and pre-waxed wicks
5) Dye or color
6) Candle fragrance (optional)
7) Oven mitts
8) Wax paper
Prepare your container and jar
Once you have selected your jar or
container, it is time to get started.
Clean and dry your container.
Place the container on your wax paper.
Place the wick in the center of the container.
You may tie the other end of the wick to a straw and balance the
straw across the wide top of the container.
Melt the paraffin wax in the double boiler.
Heating the wax in the double boiler is less risky than some other
methods but you still must be careful.
Cut the wax into small pieces and place it in the pot. Heat the wax
at a medium heat.
Copyright © 2007 ~ All Rights Reserved Worldwide
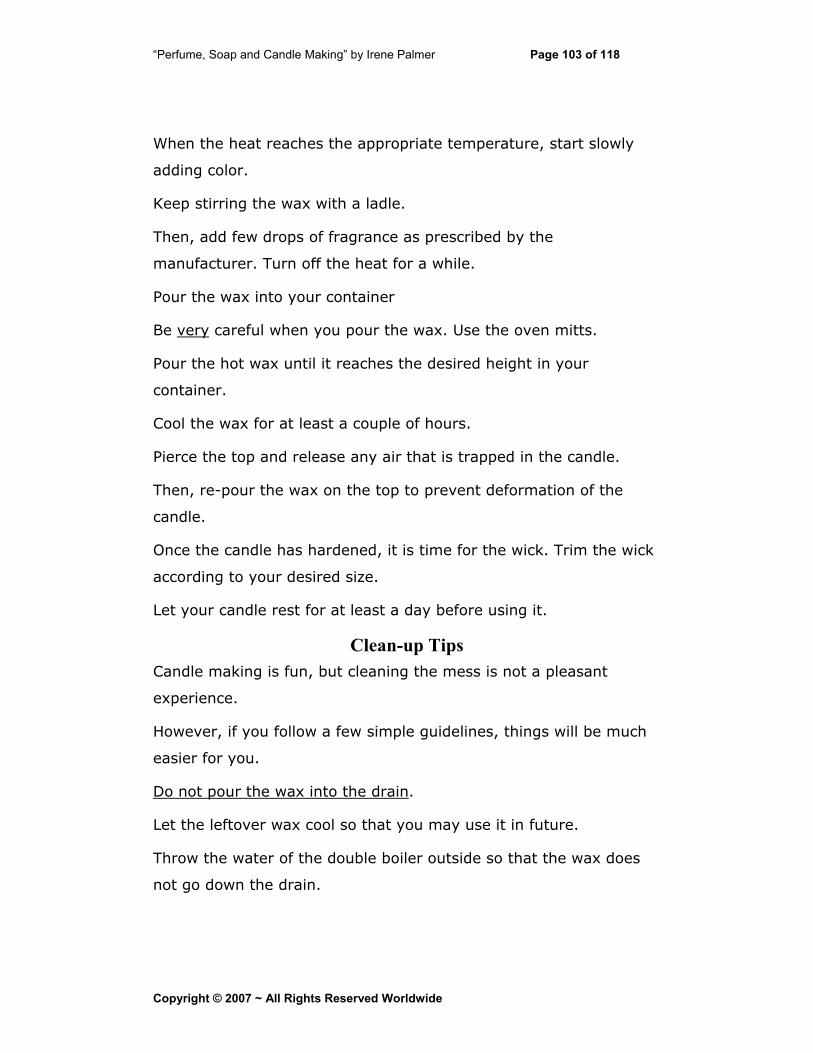
“Perfume, Soap and Candle Making” by Irene Palmer Page 103 of 118
When the heat reaches the appropriate temperature, start slowly
adding color.
Keep stirring the wax with a ladle.
Then, add few drops of fragrance as prescribed by the
manufacturer. Turn off the heat for a while.
Pour the wax into your container
Be very careful when you pour the wax. Use the oven mitts.
Pour the hot wax until it reaches the desired height in your
container.
Cool the wax for at least a couple of hours.
Pierce the top and release any air that is trapped in the candle.
Then, re-pour the wax on the top to prevent deformation of the
candle.
Once the candle has hardened, it is time for the wick. Trim the wick
according to your desired size.
Let your candle rest for at least a day before using it.
Clean-up Tips Candle making is fun, but cleaning the mess is not a pleasant
experience.
However, if you follow a few simple guidelines, things will be much
easier for you.
Do not pour the wax into the drain.
Let the leftover wax cool so that you may use it in future.
Throw the water of the double boiler outside so that the wax does
not go down the drain.
Copyright © 2007 ~ All Rights Reserved Worldwide
“Perfume, Soap and Candle Making” by Irene Palmer Page 104 of 118
Clean the wax from the heating source. Check with your local
authorities on the way they recommend that you dispose of the wax
and any other possible contaminants.
Be careful where you dispose of the wax drips and the cloths or
paper you use to clean them away. Leftover wax may ignite if it
reaches a high temperature.
Copyright © 2007 ~ All Rights Reserved Worldwide
“Perfume, Soap and Candle Making” by Irene Palmer Page 105 of 118
39. Make a Halloween Appliqué Candle
Materials Required 1) Pillar candle of 3” width and 6” height
2) Wax for making appliqués
3) Tacky wax to hold things together
4) Wide and shallow pan
5) Halloween cookie cutter shapes
Your other candle-making tools and equipment
Use all necessary precautions as required for candle making.
Procedure Heat wax and add your choice of colors.
Pour hot wax into the shallow pan to a depth of around ¼”.
Keep pan on flat so that the wax spreads evenly.
Allow the wax to cool a little but not completely. It should still be
soft enough to allow you to work with your cookie cutters and make
firm shapes.
Get ready with your cookie cutters and imagination.
Cut out shapes according to your needs and imagination.
You can make spooky or other designs.
Spooky variations might include:
a yellow eye for a black cat, •
•
•
a green stem for an orange pumpkin,
small cutouts for cat’s eyes, mouth, and nose,
Copyright © 2007 ~ All Rights Reserved Worldwide

“Perfume, Soap and Candle Making” by Irene Palmer Page 106 of 118
various other spooky forms like witches, goblins, and
stars.
•
Remove your cookie cutters
Give your creations sufficient time for the wax to harden properly.
After wax cools and hardens, you can pop out your shapes from the
pan. Use a spatula or a knife.
Heat the appliqué a little, so that it is easy to use and work with.
It just needs to be a little warm so that you can bend it.
Excessive warmth can melt it.
Gently press your appliqué around the pillar.
Be careful or you could crack your appliqué.
Use a little Tacky wax at the back of your appliqué and press it into
place on the candle.
Tacky wax is easy to work with, but you can also use melted wax.
Use firm pressure to fix your appliqué.
Take care to see there is no wax left behind. This could prove sticky
and you would find it difficult to remove it later without ruining the
surface of your pillar candle.
After a few hours rest for everything to dry, your candle will be
ready with its special Halloween shapes and effects.
Another
Fun design
for a
Halloween
candle
Copyright © 2007 ~ All Rights Reserved Worldwide
“Perfume, Soap and Candle Making” by Irene Palmer Page 107 of 118
Copyright © 2007 ~ All Rights Reserved Worldwide
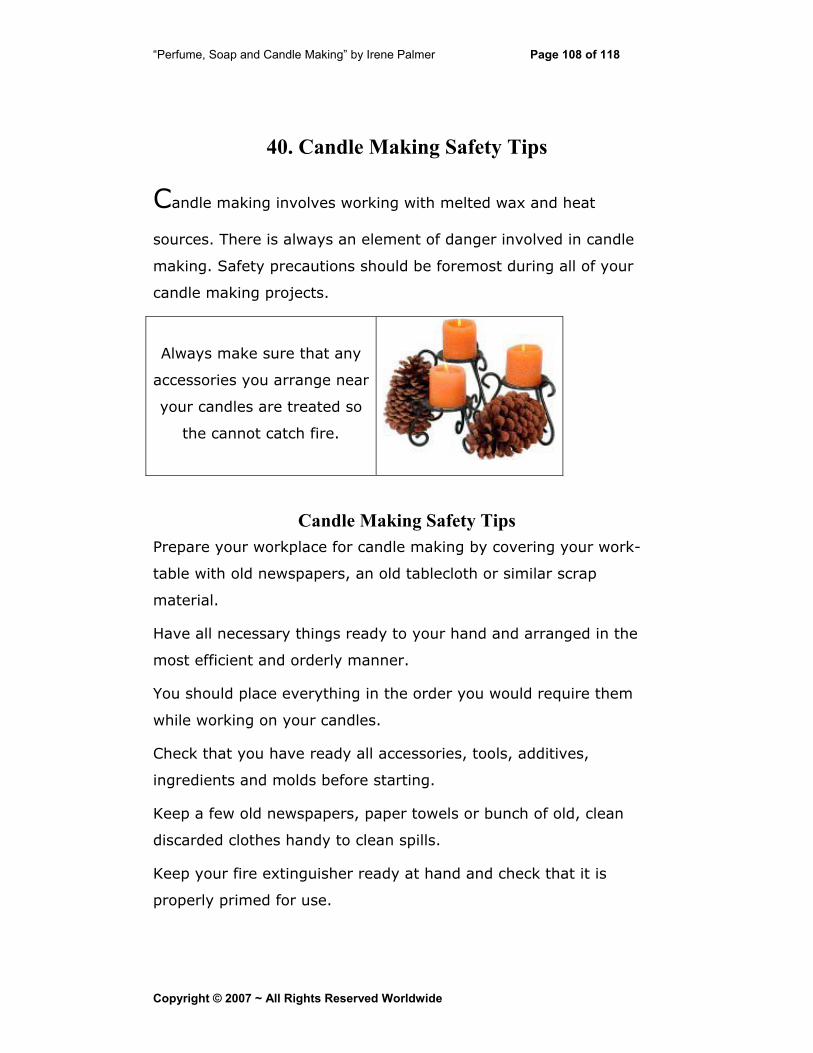
“Perfume, Soap and Candle Making” by Irene Palmer Page 108 of 118
40. Candle Making Safety Tips
Candle making involves working with melted wax and heat
sources. There is always an element of danger involved in candle
making. Safety precautions should be foremost during all of your
candle making projects.
Always make sure that any
accessories you arrange near
your candles are treated so
the cannot catch fire.
Candle Making Safety Tips Prepare your workplace for candle making by covering your work-
table with old newspapers, an old tablecloth or similar scrap
material.
Have all necessary things ready to your hand and arranged in the
most efficient and orderly manner.
You should place everything in the order you would require them
while working on your candles.
Check that you have ready all accessories, tools, additives,
ingredients and molds before starting.
Keep a few old newspapers, paper towels or bunch of old, clean
discarded clothes handy to clean spills.
Keep your fire extinguisher ready at hand and check that it is
properly primed for use.
Copyright © 2007 ~ All Rights Reserved Worldwide
“Perfume, Soap and Candle Making” by Irene Palmer Page 109 of 118
Your workplace should be secured from the attention and distraction
of inquisitive and intrusive pets.
Do not allow children anywhere in the vicinity of your candle making
room at any time.
Lock all your supplies and equipment away from them when you are
not actually using it.
Wax, when cold, could be a solid block. However, once you heat it,
it can cause irreparable and serious damage.
Always use a double boiler to heat wax. This is an essential
precaution.
Always work systematically and proceed carefully, one step at a
time, even if you are an expert and have been making candles for
ages.
Accidents can happen within a blink of your eye.
Newbies should be extremely careful and methodical. If you are
trying a new design or variation, proceed slowly. It could take more
time; but it will be much safer. Rushing or hurrying can cause
accidents.
Essential and fragrance oils can cause skin irritations and eat away
plastics and similar materials. Be careful while measuring fragrance
and essential oils.
Wash your hands immediately if even the smallest amount of oil
falls on your hand. Wipe off any drips as soon as they occur.
Be very careful about the temperature of melting wax. Do not allow
it to melt too much as it could turn into fumes and smoke.
Copyright © 2007 ~ All Rights Reserved Worldwide
“Perfume, Soap and Candle Making” by Irene Palmer Page 110 of 118
Never leave melting wax alone while you go to attend any other
work like answering phone in another room, searching for wicks in
another room or anything else.
If you have to leave your workplace while wax is melting, it is best
to turn off the burner and go.
You can return and turn on the burner when you are ready to
continue with your candle making.
Never empty the water from your double boiler into the drain. There
is sure to be some melted wax in it. This could clog your drain.
Allow any wax spills on hard surfaces like floors and countertops to
cool. Scrape them off later but make sure that no pets or children
come near them before they are cleaned away.
Copyright © 2007 ~ All Rights Reserved Worldwide
“Perfume, Soap and Candle Making” by Irene Palmer Page 111 of 118
Supplies and Classes
This brief Chapter shows details for some of the thousands of
suppliers you might use for your Candle making, Soap Making and
Perfumery supplies.
Many of these suppliers offer products for more than one category,
so I’ve put colored letters beside each entry;
[C] Candle supplies
[CL] Classes
[P] Perfume supplies
[S] Soap supplies
This list is just to help you get started.
The information was carefully compiled just before this book was
released but you should visit each site and contact the businesses
which you intend to purchase from yourself to ensure that you have
the most up-to-date information.
I have no relationship with the businesses listed except, perhaps, as
a retail customer, and no-one has received any inducement to have
any business listed here.
The presence of any business does not indicate a recommendation
for that listed business over any other, whether listed or not.
Neither the author, publisher or distributor can accept any
responsibility for the accuracy of this information.
Your use of this list is entirely your responsibility alone.
*** Always read the suppliers’ FAQ (Frequently Asked Questions)
and Terms of Trade before placing any order ***.
Copyright © 2007 ~ All Rights Reserved Worldwide
“Perfume, Soap and Candle Making” by Irene Palmer Page 112 of 118
U.S.A. and Canada ^^^^^^^^^^^^^^^^^^^^^^^^^^^^^^^^^^^^
[C] [S] Bramble Berry Soap Making Supplies
http://www.brambleberry.com/
Warehouse (Not open to walk-in customers):
2138 Humboldt St. Bellingham, WA.98225
Soapmaking products for everyone from the weekend hobbyist up to
high-volume professional soap makers
Some exclusive products. Newsletter. Gift Certificates
^^^^^^^^^^^^^^^^^^^^^^^^^^^^^^^^^^^^
[C] [CL] The Candlewic Company candle making supplies
http://www.candlewic.com/
3765 Old Easton Road, Doylestown, Pennsylvania 18902
Supplier of candle making and soap making supplies, started in
1972 as a project to help their local Scout troop. Was supplying
product World-wide in that first year!
No classes were scheduled when I checked the web site.
^^^^^^^^^^^^^^^^^^^^^^^^^^^^^^^^^^^^
[CL] [S] Cranberry Lane http://cranberrylane.stores.yahoo.net/
Soap Making Supplies and classes/
Warehouse/Office: #117 - 1611 Broadway St., Port Coquitlam, BC,
Canada V3C 2M7
Retail Store: #7 - 2755 Lougheed Hwy., Port Coquitlam, BC, Canada
V3B 5Y9
Supplies Canada and U.S.A.
Copyright © 2007 ~ All Rights Reserved Worldwide
“Perfume, Soap and Candle Making” by Irene Palmer Page 113 of 118
^^^^^^^^^^^^^^^^^^^^^^^^^^^^^^^^^^^^
[C] [CL] [S] One Stop Candle http://www.onestopcandle.com/
(formerly Candles & More)
Candle Making supplies and soap making supplies Large inventory.
Free project information online
Owned and operated by Bobby's Craft Boutique Inc., 120 Hillside
Avenue, Williston Park, New York 11596
Candle Making and candle Business classes
^^^^^^^^^^^^^^^^^^^^^^^^^^^^^^^^^^^^
[CL] [S] Otion http://www.otionsoap.com/ (Closely associated with
Bramble Berry Soap Making Supplies)
Shop:301 W. Holly, Bellingham, WA 98225 Tel: 360.676.1030
Environmentally active.
Lotions, soap, fragrance Oils, shampoos are also available from the
web site.
Offer soapmaking parties and soap making classes in Bellingham,
WA
^^^^^^^^^^^^^^^^^^^^^^^^^^^^^^^^^^^^
[C] [CL] [S] Pine Meadows http://www.pinemeadows.net/
Pine Meadows showroom 860 N. 1430 W. Orem, Utah. Regular
business hours are Monday - Thursday 8:30am - 4:30pm MST.
Retail soap making supplies and candle making supplies
Classes held regularly.
^^^^^^^^^^^^^^^^^^^^^^^^^^^^^^^^^^^^
Copyright © 2007 ~ All Rights Reserved Worldwide
“Perfume, Soap and Candle Making” by Irene Palmer Page 114 of 118
[S] Ponte Vedra Soap Shoppe, Inc., Ponte Vedra Beach, Florida
32082 http://www.pvsoap.com/
On-line sales and service ONLY.
USA and International sales. See their Terms and Conditions for
details BEFORE placing any orders.
^^^^^^^^^^^^^^^^^^^^^^^^^^^^^^^^^^^^
[CL] [S] Soap Crafters Company http://www.soapcrafters.com/
Mail and online only. Phone and email support
2944 S. West Temple, Salt Lake City, UT 84115 USA
Classes conducted in Salt Lake City, Utah.
^^^^^^^^^^^^^^^^^^^^^^^^^^^^^^^^^^^^
[S] Soap Goat Soap Shop http://www.thesoapgoat.com/
All Canadian orders shipped from Abbotsford Canada V2S 5W5.
All USA orders are shipped from Sumas Washington 98295
Accepts USA and Canada orders only.
Soap Making Supplies, Soap Molds, Goat Milk Soap, fragrance oils.
^^^^^^^^^^^^^^^^^^^^^^^^^^^^^^^^^^^^
[S] Suds N' Scents Inc. http://www.sudsandscents.com/
Abbotsford, B.C., Canada "high quality ingredients for soap making
and beautiful body care"
Closed until the end of January 2008. Check the site carefully after
then before contacting the company.
^^^^^^^^^^^^^^^^^^^^^^^^^^^^^^^^^^^^
[CL] [S] Summers Past Farms
http://www.summerspastfarms.com/
Copyright © 2007 ~ All Rights Reserved Worldwide
“Perfume, Soap and Candle Making” by Irene Palmer Page 115 of 118
15602 Olde Hwy 80, Flinn Springs, CA 92021
Herbal and other soap-making supplies. Soap-making and other
classes.
Closed on Monday and Tuesday
^^^^^^^^^^^^^^^^^^^^^^^^^^^^^^^^^^^^
[P] [S] Ye Olde Soap Shoppe http://www.soapmaking.com/
Soaps, Soap making supplies, Skin Care and cosmetic products
Sends all orders by UPS
Contact: 1400 N. Johnson Ave., Suite 103, El Cajon, CA 92020
Shop: 2497 San Diego Ave. in the Historic Old Town area of San
Diego California. Open 7 days a week 10:00am - 9:00pm
^^^^^^^^^^^^^^^^^^^^^^^^^^^^^^^^^^^^
UK and Europe: ^^^^^^^^^^^^^^^^^^^^^^^^^^^^^^^^^^^^
[CL] [S] Aromantic Ltd http://www.aromantic.co.uk/
17, Tytler Street, Forres, Moray IV36 1EL U.K.
Soap making supplies, consultancy and courses. Some courses held
at Fulham, London, UK and Forres, Scotland, UK
Kolbjørn Borseth, founder and owner
^^^^^^^^^^^^^^^^^^^^^^^^^^^^^^^^^^^^
[C] [S] Soap Basics http://www.soapbasics.co.uk/
Mail Order only:23 Southbrook Road, Melksham, Wiltshire SN12
8DS United Kingdom
Retail soap making supplies and candle making supplies for UK and
Europe.
Copyright © 2007 ~ All Rights Reserved Worldwide
“Perfume, Soap and Candle Making” by Irene Palmer Page 116 of 118
Minimum value for UK orders is £20 excluding postage and VAT
Minimum value for Europe orders is £50 excluding postage and VAT
^^^^^^^^^^^^^^^^^^^^^^^^^^^^^^^^^^^^
Australia ^^^^^^^^^^^^^^^^^^^^^^^^^^^^^^^^^^^^
[CL] [S] Aussie Soap Supplies
http://www.aussiesoapsupplies.com.au/
PO Box 165, PALMYRA Western Australia 6957
Small number of Cold Process Soapmaking Workshops - dates to be
published after February 2008
Retail and wholesale
^^^^^^^^^^^^^^^^^^^^^^^^^^^^^^^^^^^^
[C] [CL] [S] All Australian Candlemaking
http://www.candlemaking.com.au/
Mail: PO Box 113, Galston, NSW, Australia 2159
Supplies, kits etc
After seven years of workshops, new subjects are added. Held in
Arcadia, near Dural, in Sydney's rural north
^^^^^^^^^^^^^^^^^^^^^^^^^^^^^^^^^^^^
Copyright © 2007 ~ All Rights Reserved Worldwide
“Perfume, Soap and Candle Making” by Irene Palmer Page 117 of 118
Author’s Afterword
I hope that my little book will help you to get started on this
fantastic craft.
I have learned from other people, experienced and generous candle
crafts-people and the family members and friends that I’ve shown
early versions of this book. Their questions and suggestions have
been invaluable. It’s very easy to skip over small but important
steps when you’ve done something a hundred times!
Please respect the materials that you use so that your candle
making is safe, enjoyable and successful.
I can assure you that sharing your knowledge with a group of like-
minded people is the best way to speed up your learning of any new
activity. Check your local craft suppliers to find out if there are any
groups or courses for candle crafters that you could join.
Have Fun and Let Your Candles Light up Other People’s Lives.
Irene Palmer.
Copyright © 2007 ~ All Rights Reserved Worldwide
“Perfume, Soap and Candle Making” by Irene Palmer Page 118 of 118
Copyright © 2007 ~ All Rights Reserved Worldwide
Another eBookWholesaler Publication