Embed Size (px)
Citation preview


Microsoft®
PowerPoint 2010
• Many options on Picture Tools ribbon, including:
– Brightness and Contrast
– Sharpen and Soften
– Color Saturation and Tone
– Artistic Effects
– Picture Styles, Borders, and Effect
Modifying Pictures
2 © CCI Learning Solutions Inc.

Microsoft®
PowerPoint 2010 Picture Corrections
• Use when picture is not quite
perfect
• Sharpen blurry pictures or soften
for a more subdued effect
• Adjust brightness and contrast
for pictures that are too dark or
light
3 © CCI Learning Solutions Inc.
Microsoft®
PowerPoint 2010 Picture Color
• Make picture warmer or cooler
• apply a color effect
4 © CCI Learning Solutions Inc.
Microsoft®
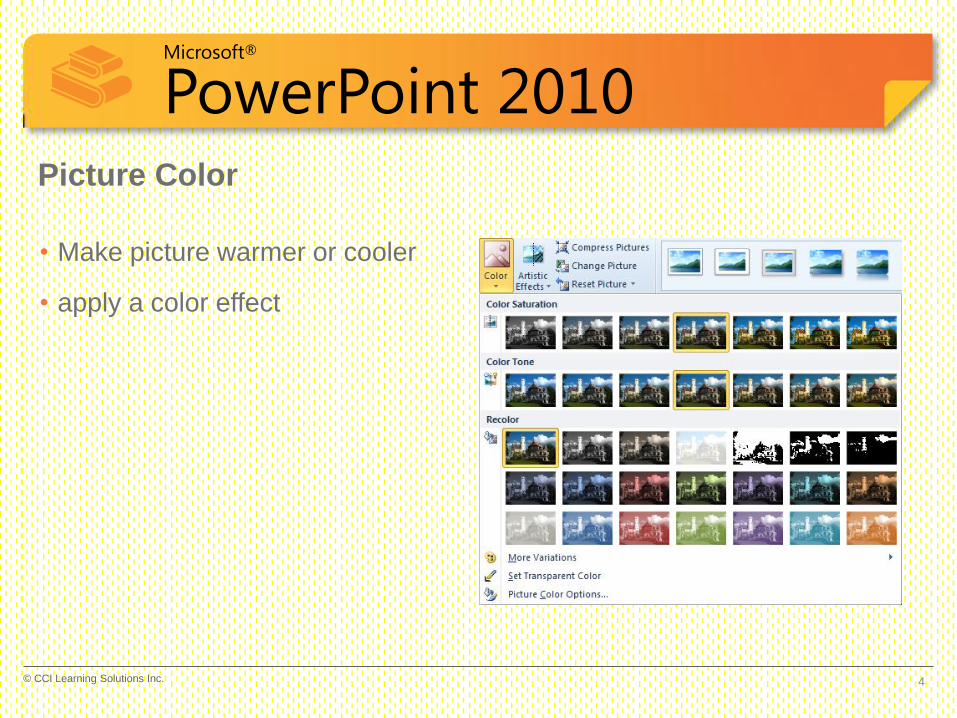
PowerPoint 2010 Artistic Effects
• Add visual interest with an
artistic effect
5 © CCI Learning Solutions Inc.

Microsoft®
PowerPoint 2010 Picture Styles and Borders
• Frames, borders and effects
enhance less interesting pictures
6 © CCI Learning Solutions Inc.

Microsoft®
PowerPoint 2010 Crop a Picture
• Remove unneeded content from
a picture to focus viewer on most
significant areas
7 © CCI Learning Solutions Inc.

Microsoft®
PowerPoint 2010
• Remove all formatting with Reset
Picture
• Keep formatting but change picture with
Change Picture
Reset or Change Picture
8 © CCI Learning Solutions Inc.

Microsoft®
PowerPoint 2010 Compressing Pictures
• Presentation can become a large file with many images
• Harder to email and copy
• Can compress images and remove cropped portions to reduce file size
• Optimize images for print, screen or email
• To compress pictures:
– click File, click Save As, and click Tools. Click Compress Pictures; or
– select a picture, then under Drawing Tools, on the Format tab, in the Adjust group, click Compress Pictures.
9 © CCI Learning Solutions Inc.
Microsoft®
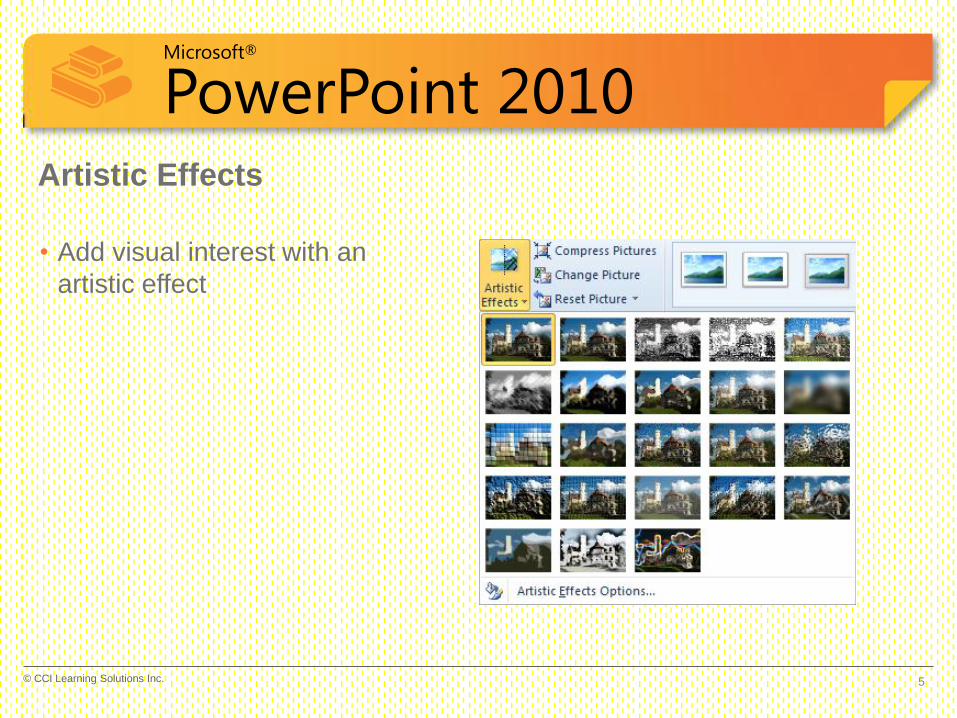
PowerPoint 2010 Inserting Clip Art
• Clip Organizer contains
– drawings,
– photographs,
– sounds,
– videos; and
– other media files.
• insert into a presentation to add impact and illustrate specific concepts.
• To insert Clip Art, on the Insert tab, in the Illustrations group, click Clip Art.
• Enter search criteria and click Go
• Limit results to specific types of clip art (e.g. just photographs)
• Click result to insert
10 © CCI Learning Solutions Inc.

Microsoft®
PowerPoint 2010 Inserting Shapes
• Use shapes to create a diagram or illustration that visually displays data, key points or graphically illustrates complicated ideas.
• To insert shapes, use one of the following methods:
– On the Home tab, in the Drawing group, click a
shape and drag the mouse cursor on the slide to form
the shape, or
– on the Insert tab, in the Illustrations group, click
Shapes, click a shape and drag the mouse cursor on
the slide to form the shape, or
– under Drawing Tools, on the Format tab, in the
Insert Shapes group, click a shape and drag the
mouse cursor on the slide to form the shape.
• Hold Shift or Ctrl to draw straight lines or symmetric shapes
• Add text to a shape by typing right after creating shape
New
11 © CCI Learning Solutions Inc.

Microsoft®
PowerPoint 2010 Selecting and Moving Shapes
• Click on shape to select, or use
Selection Pane
• Click and drag shape to reposition
on slide, or use arrow keys
12 © CCI Learning Solutions Inc.

Microsoft®
PowerPoint 2010 Formatting Illustrations and Shapes
• Apply a Quick Style; or
• add outline, fill or effect.
• Format text within shape
separately
13 © CCI Learning Solutions Inc.

Microsoft®
PowerPoint 2010 Using Gridlines and Guides
• Guides are nonprinting horizontal
and vertical lines you can use to
align objects on your slides.
• Gridlines are a set of intersecting
lines that you can display to
make it easier for you to align
shapes and other objects.
• On View tab, in Show group,
select Gridlines or Guides.
14 © CCI Learning Solutions Inc.
Microsoft®
PowerPoint 2010
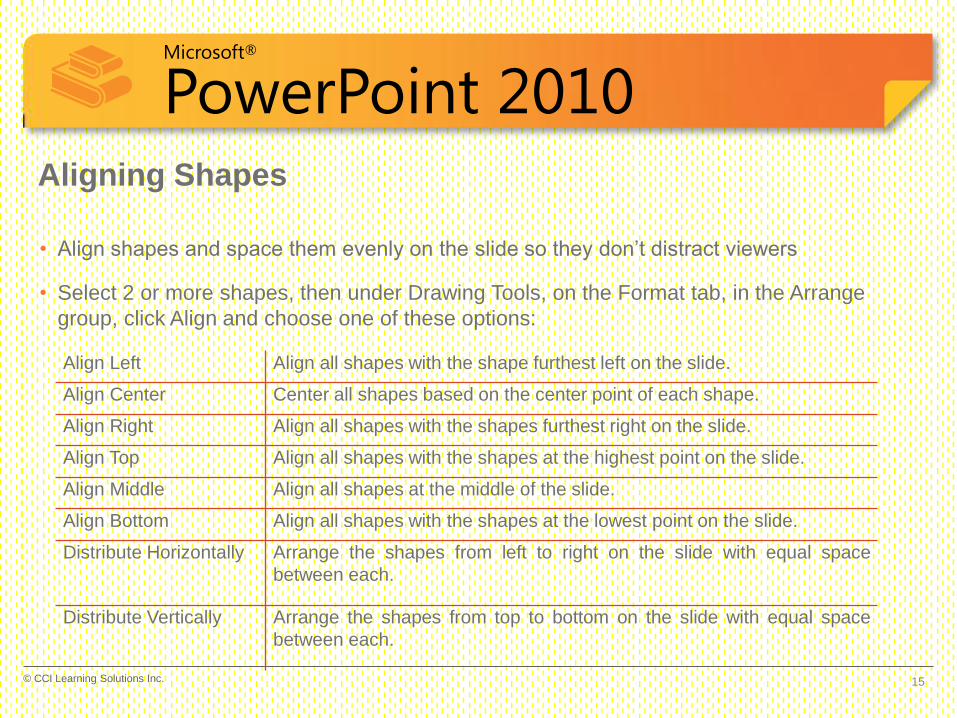
• Align shapes and space them evenly on the slide so they don’t distract viewers
• Select 2 or more shapes, then under Drawing Tools, on the Format tab, in the Arrange
group, click Align and choose one of these options:
Aligning Shapes
Align Left Align all shapes with the shape furthest left on the slide.
Align Center Center all shapes based on the center point of each shape.
Align Right Align all shapes with the shapes furthest right on the slide.
Align Top Align all shapes with the shapes at the highest point on the slide.
Align Middle Align all shapes at the middle of the slide.
Align Bottom Align all shapes with the shapes at the lowest point on the slide.
Distribute Horizontally Arrange the shapes from left to right on the slide with equal space
between each.
Distribute Vertically Arrange the shapes from top to bottom on the slide with equal space
between each.
15 © CCI Learning Solutions Inc.

Microsoft®
PowerPoint 2010 Sizing and Scaling Shapes
• resize shapes using handles (same as text boxes)
• Drag circular corner handles to retain proportions
or “aspect ratio”;
• Enter specific measurements under Drawing
Tools or Picture Tools, on the Format tab, in the
Size group.
• By default, shapes do not resize, nor text shrink in
size, as more text is added. Can change shape
options to change this.
• Can increase shape size by percentages
16 © CCI Learning Solutions Inc.
Microsoft®
PowerPoint 2010 Rotating Shapes
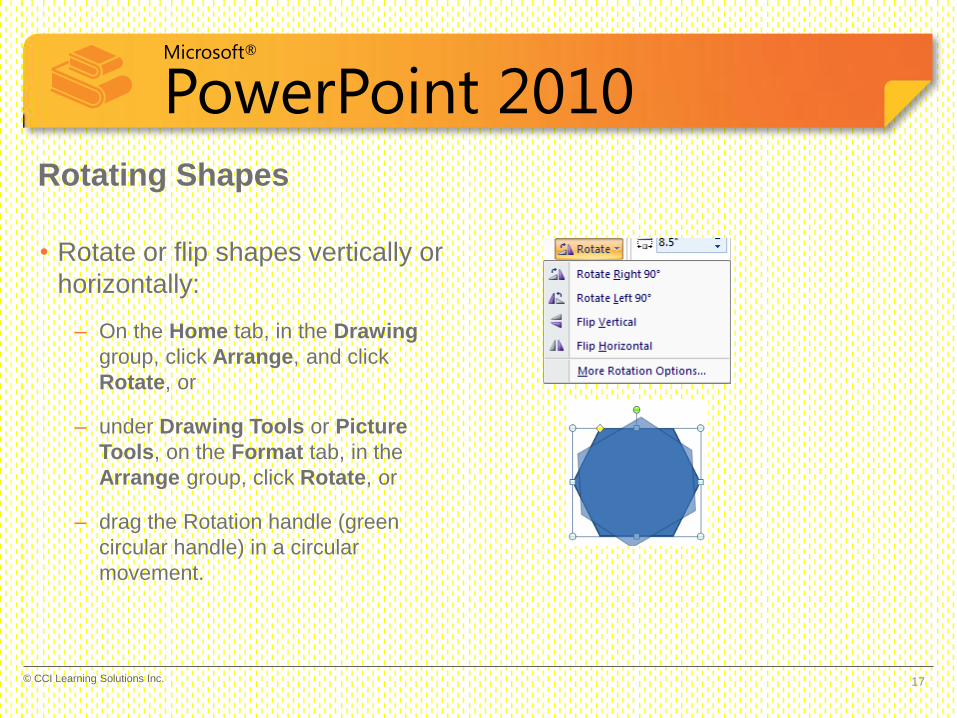
• Rotate or flip shapes vertically or
horizontally:
– On the Home tab, in the Drawing
group, click Arrange, and click
Rotate, or
– under Drawing Tools or Picture
Tools, on the Format tab, in the
Arrange group, click Rotate, or
– drag the Rotation handle (green
circular handle) in a circular
movement.
17 © CCI Learning Solutions Inc.

Microsoft®
PowerPoint 2010
• Shapes may overlap, but not in the right order
• Can change how shapes overlap, by moving them in this way:
Changing the Order of Content
Bring to the
Front Bring the shape to the front of all shapes.
Bring Forward Bring the shape from behind the shape directly in front of it.
Send to the
Back Send the shape to the back of all shapes.
Send
Backward Send the shape to behind the shape directly behind it.
18 © CCI Learning Solutions Inc.
Microsoft®
PowerPoint 2010
• Group shapes in a completed diagram to
– Prevent accidental moving of individual shapes
– More easily cut, copy, paste or move entire diagram within presentation
• Can temporarily ungroup to edit a shape, then regroup
• To group shapes, use one of the following methods:
– On the Home tab, in the Drawing group, click Arrange and click Group, or
– under Drawing Tools or Picture Tools, on the Format tab, in the Arrange group, click
Group, or
– right-click the shape and click Group.
Grouping and Ungrouping Content
19 © CCI Learning Solutions Inc.

Microsoft®
PowerPoint 2010 Working with SmartArt
• Challenging to create
professional or artistic
illustrations from individual
shapes
• Use SmartArt: pre-built
illustration templates
• Easy to add text and style
Shapes Pictures
ClipArt Illustrations
SmartArt
20 © CCI Learning Solutions Inc.

Microsoft®
PowerPoint 2010 Inserting SmartArt
• To add a SmartArt graphic to a
slide with a SmartArt graphic
placeholder, click Insert
SmartArt Graphic; or
• to add a SmartArt graphic to a
slide without a SmartArt graphic
placeholder, on the Insert tab, in
the Illustrations group, click
SmartArt.
• Select type of SmartArt shape
closest to content (can easily
change after entering text)
21 © CCI Learning Solutions Inc.
Microsoft®
PowerPoint 2010 Diagram Types
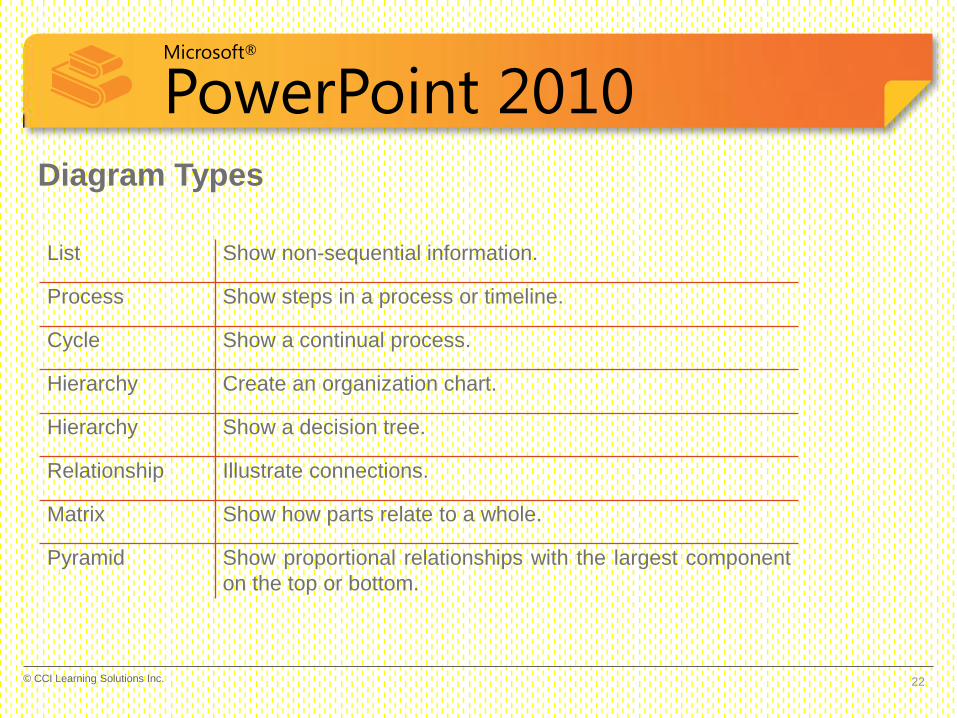
List Show non-sequential information.
Process Show steps in a process or timeline.
Cycle Show a continual process.
Hierarchy Create an organization chart.
Hierarchy Show a decision tree.
Relationship Illustrate connections.
Matrix Show how parts relate to a whole.
Pyramid Show proportional relationships with the largest component
on the top or bottom.
22 © CCI Learning Solutions Inc.

Microsoft®
PowerPoint 2010 Using the Text Pane
• Text pane is like a bulleted list:
associates text with a SmartArt
shape.
• Use and to move through
entries in pane
• Use Tab and Shift+Tab to
demote and promote entries
• Use Enter for more entries
23 © CCI Learning Solutions Inc.

Microsoft®
PowerPoint 2010
• Under SmartArt Tools, on the Design Tab, you can:
– Change Colors
– Select a SmartArt Style, including 3D effects
– Change the diagram type
– Reset the SmartArt graphic back to the original design
Using SmartArt Styles
24 © CCI Learning Solutions Inc.
Microsoft®
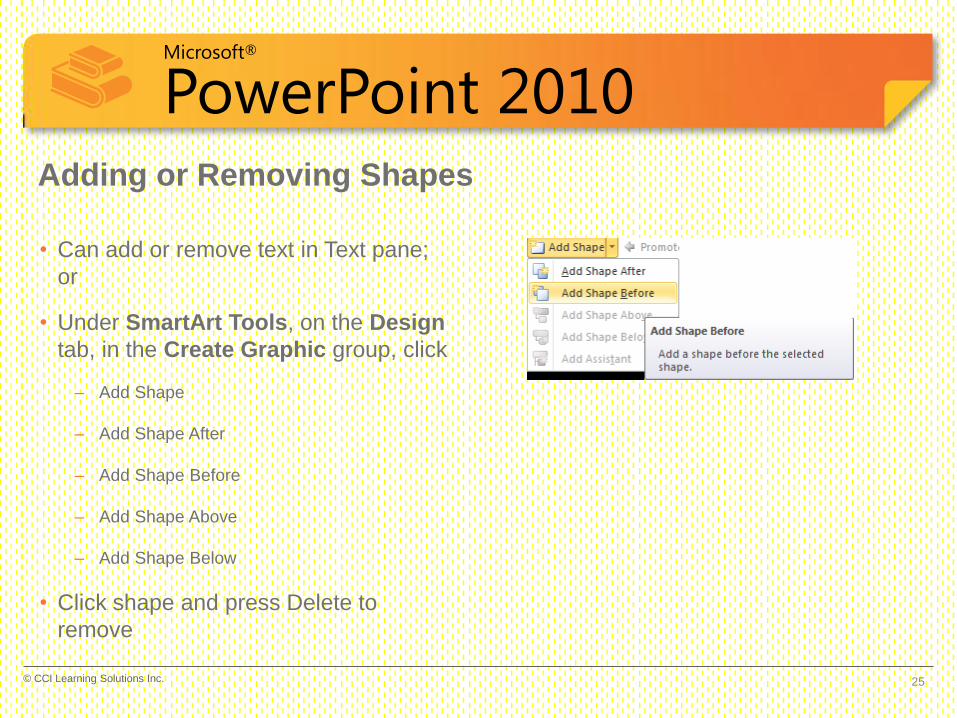
PowerPoint 2010 Adding or Removing Shapes
• Can add or remove text in Text pane;
or
• Under SmartArt Tools, on the Design
tab, in the Create Graphic group, click
– Add Shape
– Add Shape After
– Add Shape Before
– Add Shape Above
– Add Shape Below
• Click shape and press Delete to
remove
25 © CCI Learning Solutions Inc.
Microsoft®
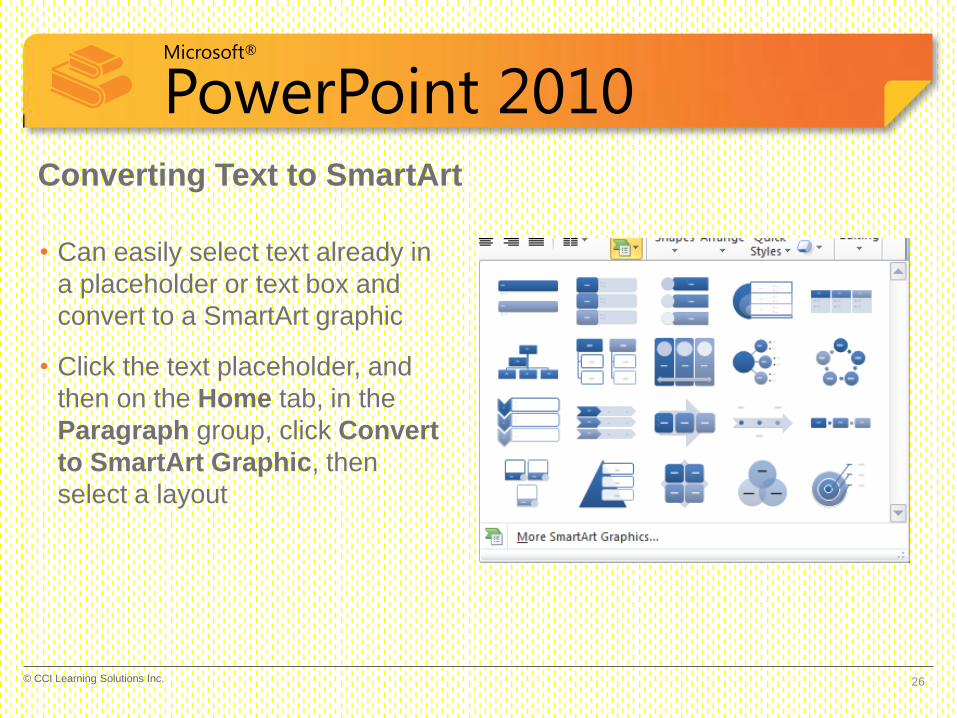
PowerPoint 2010 Converting Text to SmartArt
• Can easily select text already in
a placeholder or text box and
convert to a SmartArt graphic
• Click the text placeholder, and
then on the Home tab, in the
Paragraph group, click Convert
to SmartArt Graphic, then
select a layout
26 © CCI Learning Solutions Inc.

Microsoft®
PowerPoint 2010
• Converting SmartArt to shapes or text allows you to create a custom
design not available as a SmartArt, or simply remove the SmartArt
• Under SmartArt Tools, on the Design tab, click Convert, then Convert to
Text or Convert to Shapes.
• Can no longer be edited as SmartArt
Converting SmartArt to Text or Shapes
27 © CCI Learning Solutions Inc.
Microsoft®
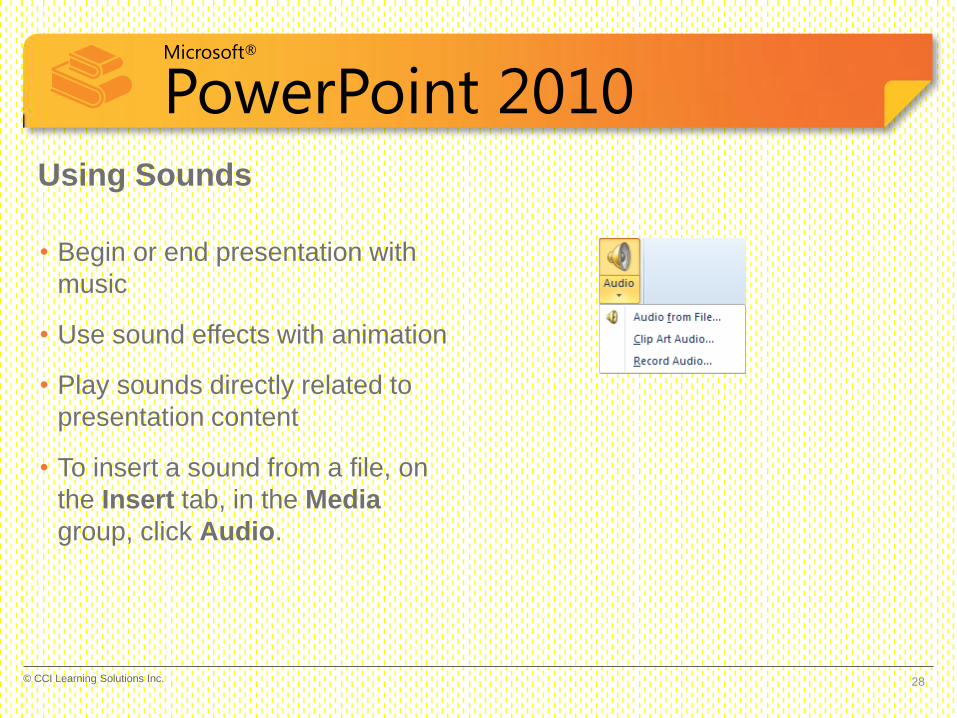
PowerPoint 2010 Using Sounds
• Begin or end presentation with
music
• Use sound effects with animation
• Play sounds directly related to
presentation content
• To insert a sound from a file, on
the Insert tab, in the Media
group, click Audio.
28 © CCI Learning Solutions Inc.

Microsoft®
PowerPoint 2010
• Under Audio Tools, on Playback tab, adjust sound options:
– Trim start and end of sound
– Fade sound in or out
– Raise or lower volume
– Loop until stopped
Using Sounds
29 © CCI Learning Solutions Inc.

Microsoft®
PowerPoint 2010 Using Movies
• Could use movies to:
– Play a speaker not in attendance
– Demonstrate products or deliver training
• Movies are desktop video files with formats
such as AVI or MPEG and file extensions
such as .avi, .mov, .mpg, and .mpeg
• To insert a movie from a file, on the Insert tab,
in the Media Clips group, click Video.
30 © CCI Learning Solutions Inc.

Microsoft®
PowerPoint 2010
• Under Video Tools, on Playback tab, adjust movie options:
– Trim start and end of movie
– Fade movie in or out
– Raise or lower volume
– Adjust start to play automatically
– Play full screen
– Loop until stopped
Using Movies
31 © CCI Learning Solutions Inc.

Microsoft®
PowerPoint 2010
• Under Video Tools, on Format tab, adjust movie border style or frame or
other visual effects (similar to effects on pictures and clip art)
Using Movies
32 © CCI Learning Solutions Inc.