Embed Size (px)
Citation preview

GroupA presentation
Introduction:We made a chair with LEGO
bricks.We introduce a process of our
group work.
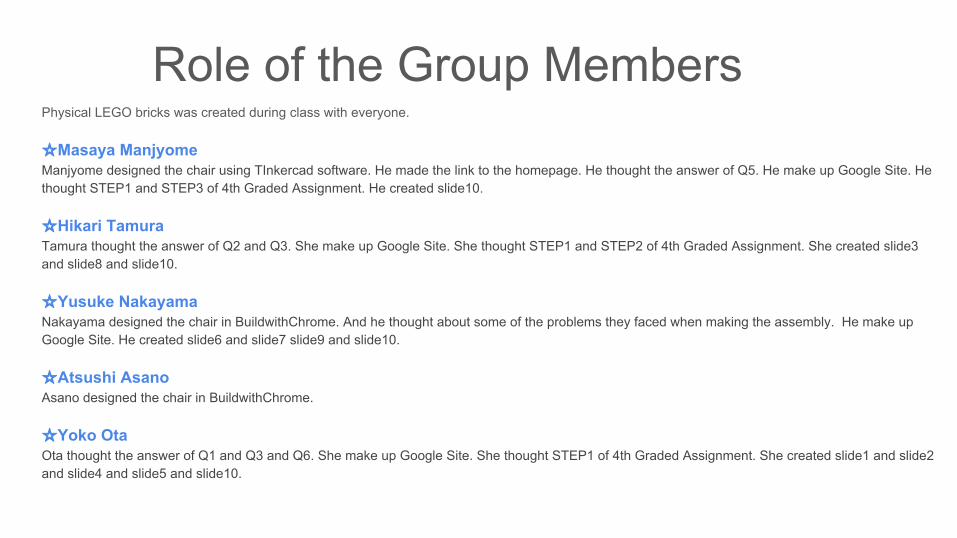
Role of the Group MembersPhysical LEGO bricks was created during class with everyone.
☆Masaya ManjyomeManjyome designed the chair using TInkercad software. He made the link to the homepage. He thought the answer of Q5. He make up Google Site. He thought STEP1 and STEP3 of 4th Graded Assignment. He created slide10.
☆Hikari TamuraTamura thought the answer of Q2 and Q3. She make up Google Site. She thought STEP1 and STEP2 of 4th Graded Assignment. She created slide3 and slide8 and slide10.
☆Yusuke NakayamaNakayama designed the chair in BuildwithChrome. And he thought about some of the problems they faced when making the assembly. He make up Google Site. He created slide6 and slide7 slide9 and slide10.
☆Atsushi AsanoAsano designed the chair in BuildwithChrome.
☆Yoko OtaOta thought the answer of Q1 and Q3 and Q6. She make up Google Site. She thought STEP1 of 4th Graded Assignment. She created slide1 and slide2 and slide4 and slide5 and slide10.
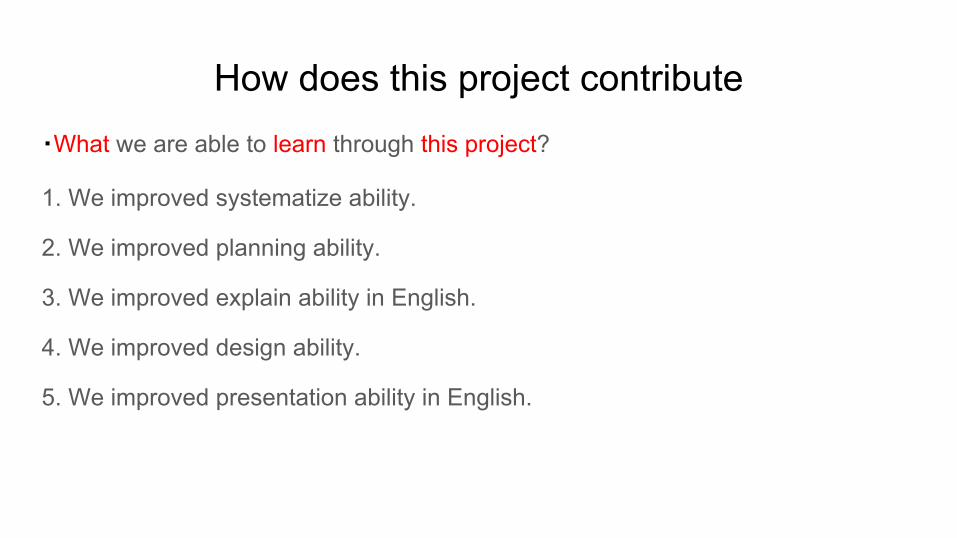
How does this project contribute・What we are able to learn through this project?
1. We improved systematize ability.
2. We improved planning ability.
3. We improved explain ability in English.
4. We improved design ability.
5. We improved presentation ability in English.
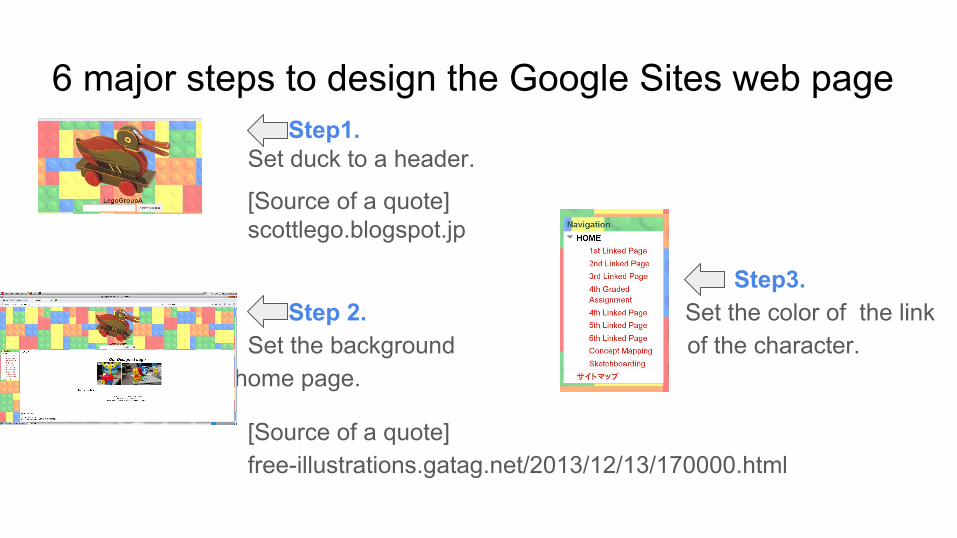
6 major steps to design the Google Sites web page Step1. Set duck to a header.
[Source of a quote] scottlego.blogspot.jp
Step3. Step 2. Set the color of the link Set the background of the character. of the home page.
[Source of a quote] free-illustrations.gatag.net/2013/12/13/170000.html
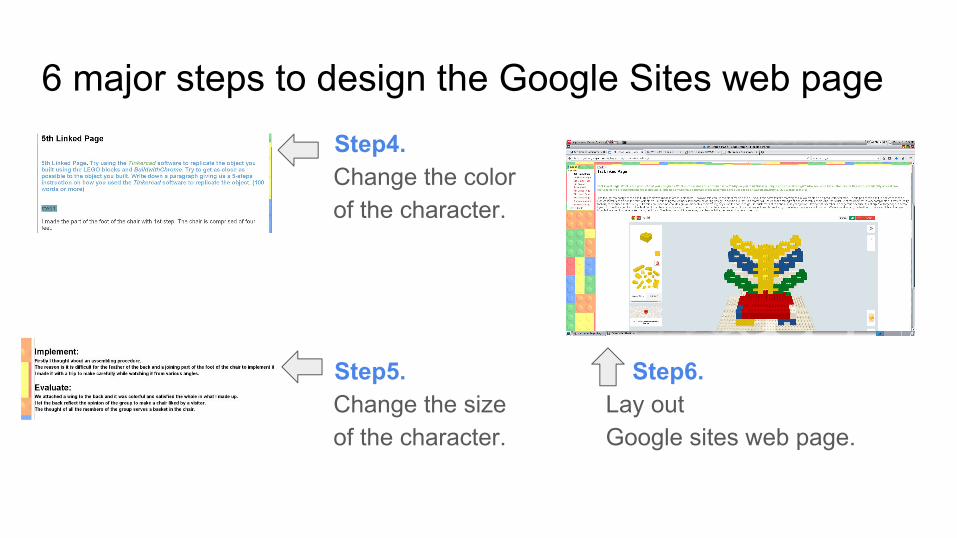
6 major steps to design the Google Sites web page Step4. Change the color of the character.
Step5. Step6. Change the size Lay out of the character. Google sites web page.
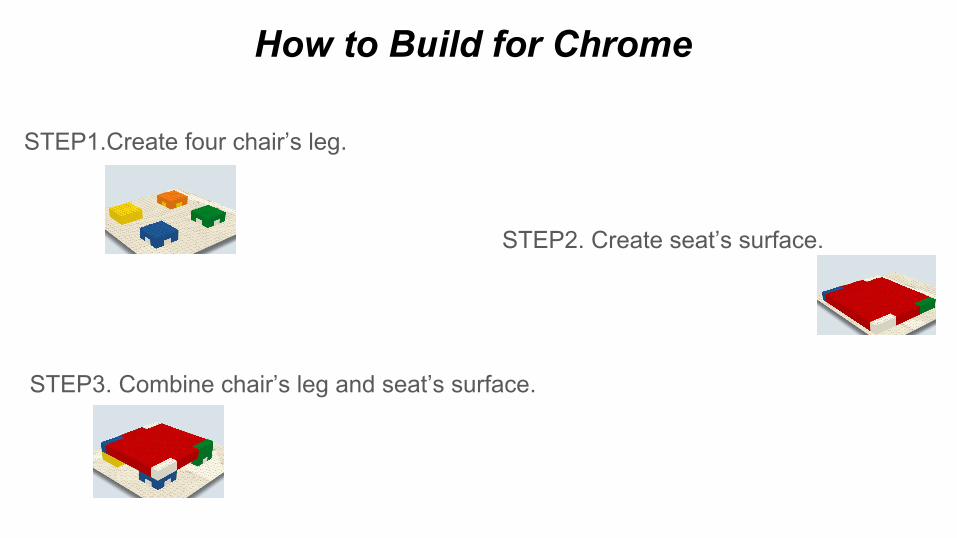
How to Build for Chrome
STEP3. Combine chair’s leg and seat’s surface.
STEP2. Create seat’s surface.
STEP1.Create four chair’s leg.
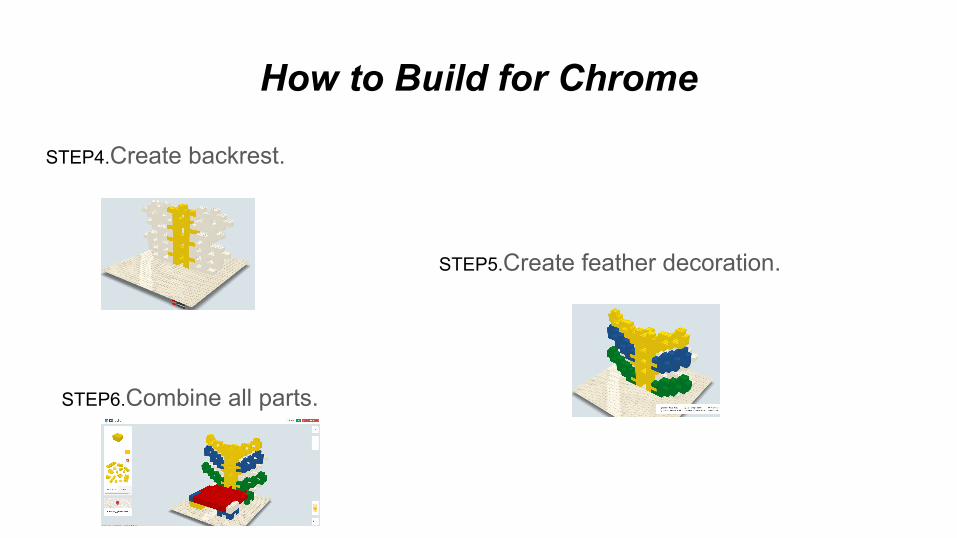
How to Build for Chrome
STEP5.Create feather decoration.
STEP4.Create backrest.
STEP6.Combine all parts.
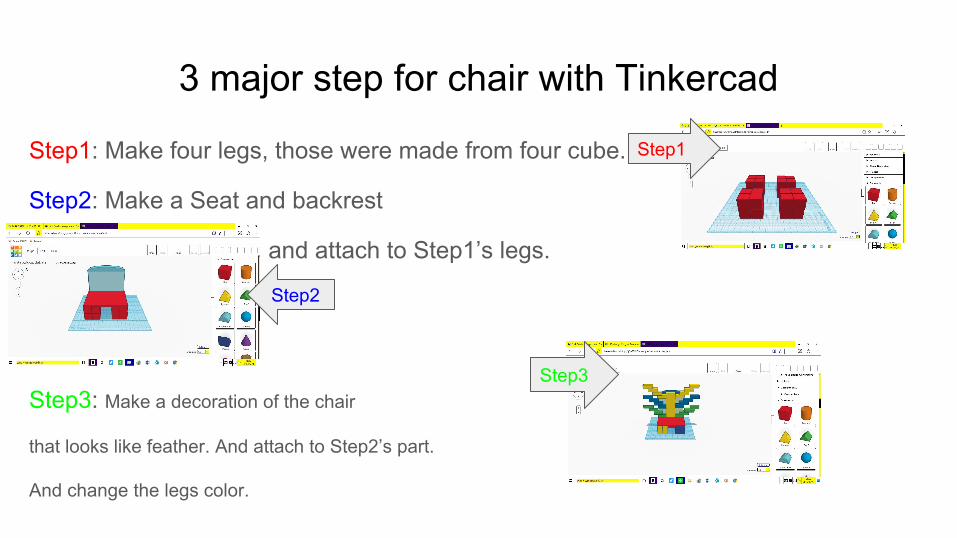
3 major step for chair with Tinkercad
Step1: Make four legs, those were made from four cube.
Step2: Make a Seat and backrest
and attach to Step1’s legs.
Step3: Make a decoration of the chair
that looks like feather. And attach to Step2’s part.
And change the legs color.
Step1
Step2
Step3
Our Product’s Unique Point1. The chair has overall colorful. Of course, we can use one color to align, but
we choose a lot of colors. 2. With feather. Usually, a chair don’t have feather. But we thought it is not fun
which the chair as it is.3. It has been built finely. We have insistence to implement decoration’s detail.
So the chair are one and only.4. It has four short leg. Ordinary chair will have long leg to extend your leg, but
the chair’s leg are very short.5. It has big backrest. Against short leg, the chair’s backrest was very large. So
the chair looks big and cool.
Some of mistake and what we are doing from next・We could not much speak in English while we are in English class. Next time→ We speak in English consciously at least while we are in English class.
・We could not handle all of the site very well.Next time→ We acquire that understanding by reading description.