Troubleshooting
This chapter provides procedures for troubleshooting the problems encountered during RMS Installation.
• Regeneration of Certificates, page 1
• Deployment Troubleshooting , page 7
Regeneration of CertificatesFollowing are the scenarios that requires regeneration of certificates:
• Certificate expiry (Certificate will have a validity of one year.)
• If importing certificates are not successful.
Follow the steps to regenerate self-signed certificates:
Certificate Regeneration for DPETo address the problems faced during the certificate generation process in Distributed Provisioning Engine(DPE), complete the following steps:
Step 1 Remove the root.ca.cer, server.ca.cer and client.ca.cer certificates that are installed in DPE.Enter:
ssh login to Serving_Node_1Change to root userNavigate to the conf foldercd /rms/app/CSCObac/dpe/conf/self_signedls -lrt
Output:
[root@rms-aio-serving self_signed]# ls -lrttotal 20-rw-r--r--. 1 bacservice bacservice 2239 Sep 23 11:08 dpe.keystore
RAN Management System Installation Guide, Release 4.1 May 25, 2015 HF 1
-rw-r--r--. 1 bacservice bacservice 1075 Sep 23 11:08 dpe.csr-rwxr-x---. 1 admin1 ciscorms 1742 Sep 23 11:51 server-ca.cer-rwxr-x---. 1 admin1 ciscorms 1182 Sep 23 11:51 root-ca.cer-rwxr-x---. 1 admin1 ciscorms 1626 Sep 23 11:51 client-ca.cer
Enter:
rm root-ca.cer
Output:
[root@blr-rms11-serving conf]# rm root-ca.cerrm: remove regular file `root-ca.cer'? Y
Enter:
rm server-ca.cer
Output:
[root@blr-rms11-serving conf]# rm server-ca.cerrm: remove regular file `server-ca.cer'? Y
Enter:
rm client-ca.cer
Output:
[root@blr-rms11-serving conf]# rm client-ca.cerrm: remove regular file `client-ca.cer'? Y
Enter:
ls –lrt
Output:
[root@rms-aio-serving self_signed]# ls -lrttotal 8-rw-r--r--. 1 bacservice bacservice 2239 Sep 23 11:08 dpe.keystore-rw-r--r--. 1 bacservice bacservice 1075 Sep 23 11:08 dpe.csr
Step 2 Take a backup of old DPE Keystore and CSR:Enter:
mv /rms/app/CSCObac/dpe/conf/self_signed/dpe.keystore/rms/app/CSCObac/dpe/conf/self_signed/dpe.keystore.bkup
Output:
System returns with command prompt
Enter:
mv /rms/app/CSCObac/dpe/conf/self_signed/dpe.csr/rms/app/CSCObac/dpe/conf/self_signed/dpe.csr.bkup
RAN Management System Installation Guide, Release 4.12 May 25, 2015 HF
TroubleshootingCertificate Regeneration for DPE
Output:
System returns with command prompt
Step 3 Remove the existing Server and Root ca from cacerts file:Enter:
/rms/app/CSCObac/jre/bin/keytool -delete -alias server-ca -keystore/rms/app/CSCObac/jre/lib/security/cacerts
The default password for the keystore is"changeit".
Note
Output:
Enter keystore password:
Enter:
/rms/app/CSCObac/jre/bin/keytool -delete -alias root-ca -keystore/rms/app/CSCObac/jre/lib/security/cacerts
The default password for the keystore is"changeit".
Note
Output:
Enter keystore password:
Step 4 Regenerate the keystore and CSR for DPE node. Ensure that CN field matches the FQDN or eth1 IP-Address of DPE).Enter:
/rms/app/CSCObac/jre/bin/keytool -keystore /rms/app/CSCObac/dpe/conf/self_signed/dpe.keystore -aliasdpe-key -genkey -keyalg RSA
The values must be as specified in OVA descriptorfile
Note
Output:
Enter keystore password:Re-enter new password:What is your first and last name?[Unknown]: 10.5.2.217What is the name of your organizational unit?[Unknown]: CISCOWhat is the name of your organization?[Unknown]: CISCOWhat is the name of your City or Locality?[Unknown]: BLRWhat is the name of your State or Province?[Unknown]: KAWhat is the two-letter country code for this unit?[Unknown]: INIs CN=10.5.2.217, OU=CISCO, O=CISCO, L=BLR, ST=KA, C=IN correct?[no]: yesEnter key password for <dpe-key>(RETURN if same as keystore password):Re-enter new password:
RAN Management System Installation Guide, Release 4.1 May 25, 2015 HF 3
TroubleshootingCertificate Regeneration for DPE

Enter:
/rms/app/CSCObac/jre/bin/keytool -keystore /rms/app/CSCObac/dpe/conf/ self_signed /dpe.keystore-alias dpe-key -certreq -file dpe.csr
Output:
Enter keystore password:
It is important to use the keytool utility provided by DPE instead of the default java keytool as per BACdocumentation.
Note
Step 5 Copy the regenerated keystore and CSR to the /rms/app/CSCObac/dpe/conf/ folder.Cp /rms/app/CSCObac/dpe/conf/self_signed/dpe.keystore /rms/app/CSCObac/dpe/conf/Cp /rms/app/CSCObac/dpe/conf/self_signed/dpe.csr /rms/app/CSCObac/dpe/conf/
Step 6 Set ownershipEnter:
chown bacservice:bacservice /rms/app/CSCObac/dpe/conf/dpe.keystore
Output:
System returns with command prompt
Enter:
chown bacservice:bacservice /rms/app/CSCObac/dpe/conf/dpe.csr
Output:
System returns with command prompt
Step 7 Get the CSR signed by the signing authority and get the signed certificates and CA certificates (client-ca.cer, root-ca.cer,and server-ca.cer).
Step 8 Reinstall the certificates. Follow the steps 4 and 5 in the “Installing RMS Certificates” section.Step 9 Reload the server process. Follow the step 7 in “Installing RMS Certificates" section.
Certificate Regeneration for Upload ServerFollowing are the Keystore regeneration steps to be performed manually if something goes wrong with thecertificate generation process in LUS:
Manually backup older keystores because the keystores are replaced whenever the script is executed.Note
Step 1 Open the generate_keystore.sh script from /opt/CSCOuls/bin/ directory as a 'root' user using the below command.
RAN Management System Installation Guide, Release 4.14 May 25, 2015 HF
TroubleshootingCertificate Regeneration for Upload Server

Example:vi /opt/CSCOuls/bin/generate_keystore.sh
Step 2 Edit the below lines as per OVA descriptor settings:
Cert_C="US"Cert_ST="NC"Cert_L="RTP"Cert_O="Cisco Systems, Inc."Cert_OU="SCTG"Upload_SB_Fqdn="rtpfga-ova-upload"Upload_Keystore_Password="Ch@ngeme1"Upload_Node_Eth1_Address="10.5.2.17"
Step 3 Run the script:Enter:
./generate_keystore.sh
Output:
[root@BLR17-Upload-41N bin]# ./generate_keystore.shcreate uls keystore, private key and certificate requestEnter keystore password: Re-enter new password: Enter key password for <uls-key>
(RETURN if same as keystore password): Re-enter new password: Enter destination keystorepassword: Re-enter new password: Enter source keystore password: Adding UBI CA certs to ulstruststoreEnter keystore password: Owner: O=Ubiquisys, CN=Co Int CAIssuer: O=Ubiquisys, CN=Co Root CASerial number: 40d8ada022c1f52dValid from: Fri Mar 22 16:42:03 IST 2013 until: Tue Mar 16 16:42:03 IST 2038Certificate fingerprints:
MD5: F0:F0:15:82:D3:22:A9:D7:4A:48:58:00:25:A9:E5:FCSHA1: 38:45:74:77:61:08:A9:78:53:22:C1:29:7F:B8:8C:35:52:6F:31:79SHA256:
DC:88:99:BE:A0:A3:BE:5F:49:11:DA:FB:85:83:05:CF:1E:A2:FA:E0:4F:4D:18:AF:0B:9B:23:3F:5F:D2:57:61Signature algorithm name: SHA256withRSAVersion: 3
Extensions:
#1: ObjectId: 2.5.29.35 Criticality=falseAuthorityKeyIdentifier [KeyIdentifier [0000: 4B 49 74 B3 E2 EF 41 BF KIt...A.]]
#2: ObjectId: 2.5.29.19 Criticality=falseBasicConstraints:[CA:truePathLen:0
]
#3: ObjectId: 2.5.29.15 Criticality=true
RAN Management System Installation Guide, Release 4.1 May 25, 2015 HF 5
TroubleshootingCertificate Regeneration for Upload Server
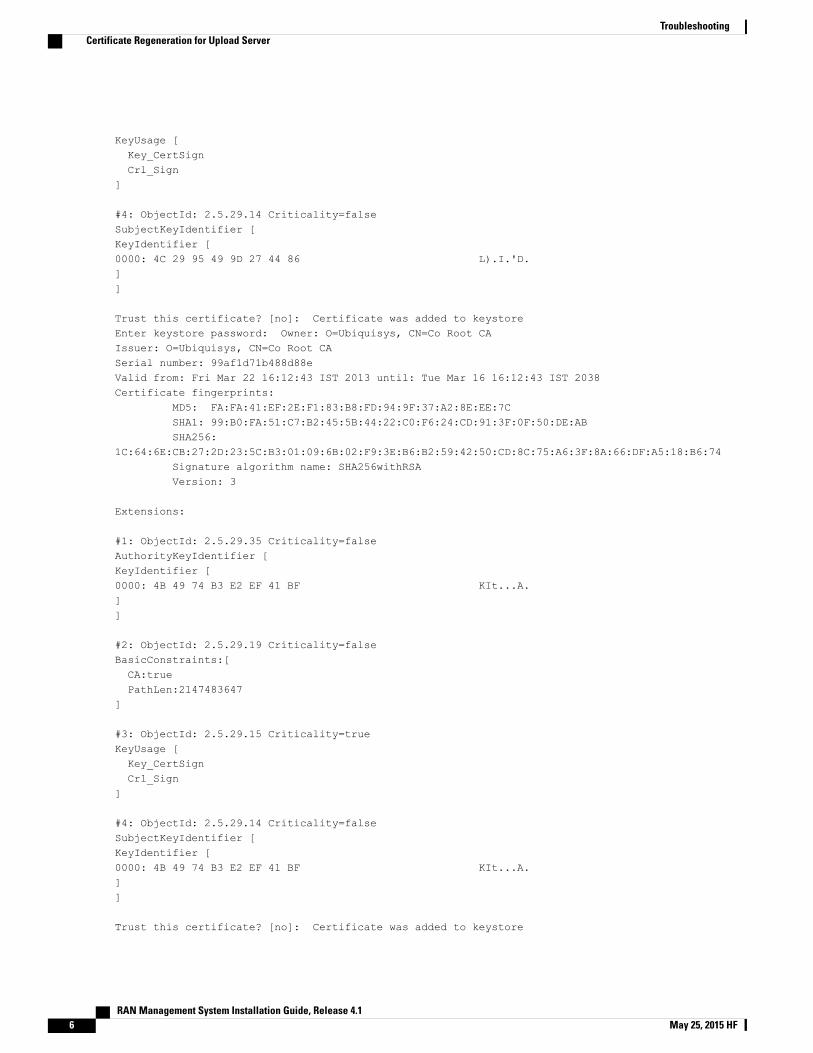
KeyUsage [Key_CertSignCrl_Sign
]
#4: ObjectId: 2.5.29.14 Criticality=falseSubjectKeyIdentifier [KeyIdentifier [0000: 4C 29 95 49 9D 27 44 86 L).I.'D.]]
Trust this certificate? [no]: Certificate was added to keystoreEnter keystore password: Owner: O=Ubiquisys, CN=Co Root CAIssuer: O=Ubiquisys, CN=Co Root CASerial number: 99af1d71b488d88eValid from: Fri Mar 22 16:12:43 IST 2013 until: Tue Mar 16 16:12:43 IST 2038Certificate fingerprints:
MD5: FA:FA:41:EF:2E:F1:83:B8:FD:94:9F:37:A2:8E:EE:7CSHA1: 99:B0:FA:51:C7:B2:45:5B:44:22:C0:F6:24:CD:91:3F:0F:50:DE:ABSHA256:
1C:64:6E:CB:27:2D:23:5C:B3:01:09:6B:02:F9:3E:B6:B2:59:42:50:CD:8C:75:A6:3F:8A:66:DF:A5:18:B6:74Signature algorithm name: SHA256withRSAVersion: 3
Extensions:
#1: ObjectId: 2.5.29.35 Criticality=falseAuthorityKeyIdentifier [KeyIdentifier [0000: 4B 49 74 B3 E2 EF 41 BF KIt...A.]]
#2: ObjectId: 2.5.29.19 Criticality=falseBasicConstraints:[CA:truePathLen:2147483647
]
#3: ObjectId: 2.5.29.15 Criticality=trueKeyUsage [Key_CertSignCrl_Sign
]
#4: ObjectId: 2.5.29.14 Criticality=falseSubjectKeyIdentifier [KeyIdentifier [0000: 4B 49 74 B3 E2 EF 41 BF KIt...A.]]
Trust this certificate? [no]: Certificate was added to keystore
RAN Management System Installation Guide, Release 4.16 May 25, 2015 HF
TroubleshootingCertificate Regeneration for Upload Server
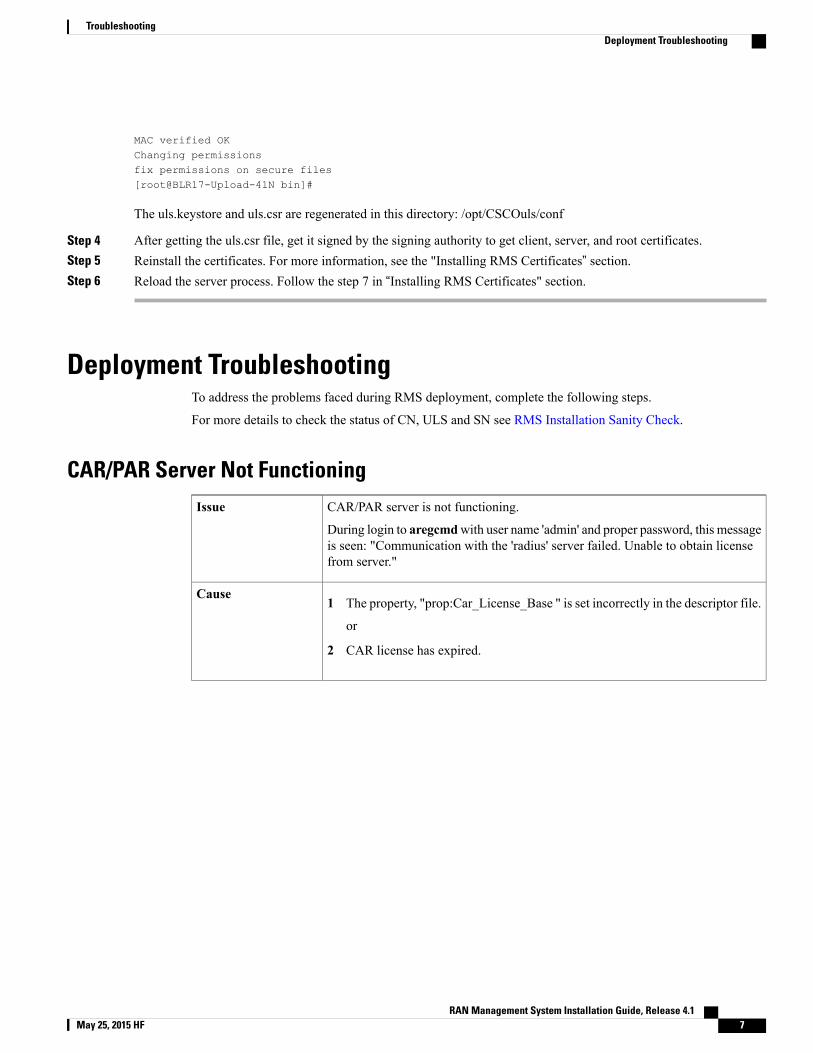
MAC verified OKChanging permissionsfix permissions on secure files[root@BLR17-Upload-41N bin]#
The uls.keystore and uls.csr are regenerated in this directory: /opt/CSCOuls/conf
Step 4 After getting the uls.csr file, get it signed by the signing authority to get client, server, and root certificates.Step 5 Reinstall the certificates. For more information, see the "Installing RMS Certificates” section.Step 6 Reload the server process. Follow the step 7 in “Installing RMS Certificates" section.
Deployment TroubleshootingTo address the problems faced during RMS deployment, complete the following steps.
For more details to check the status of CN, ULS and SN see RMS Installation Sanity Check.
CAR/PAR Server Not FunctioningCAR/PAR server is not functioning.
During login to aregcmdwith user name 'admin' and proper password, this messageis seen: "Communication with the 'radius' server failed. Unable to obtain licensefrom server."
Issue
1 The property, "prop:Car_License_Base " is set incorrectly in the descriptor file.
or
2 CAR license has expired.
Cause
RAN Management System Installation Guide, Release 4.1 May 25, 2015 HF 7
TroubleshootingDeployment Troubleshooting

1 Log in to Serving node as a root user.
2 Navigate to the /rms/app/CSCOar/license directory (cd/rms/app/CSCOar/license).
3 Edit CSCOar.lic file to vi CSCOar.lic. Either overwrite the new license in thefile or comment the existing one and add the fresh license in a new line:
Overwrite:[root@rms-aio-serving license]# vi CSCOar.licINCREMENT PAR-SIG-NG-TPS cisco 6.0 28-feb-2015 uncountedVENDOR_STRING=<count>1</count>HOSTID=ANYNOTICE="<LicFileID>20140818221132340</LicFileID><LicLineID>1</LicLineID><PAK></PAK>"SIGN=E42AA34ED7C4
Comment the existing license and add the fresh license in the new line:[root@rms-aio-serving license]# vi CSCOar.lic#INCREMENT PAR-SIG-NG-TPS cisco 6.0 06-sept-2014 uncountedVENDOR_STRING=<count>1</count> HOSTID=ANY NOTICE="<LicFileID>20140818221132340</LicFileID><LicLineID>1</LicLineID><PAK></PAK>"SIGN=E42AA34ED7C4
INCREMENT PAR-SIG-NG-TPS cisco 6.0 28-feb-2015 uncountedVENDOR_STRING=<count>1</count>HOSTID=ANY NOTICE="<LicFileID>20140818221132340</LicFileID><LicLineID>1</LicLineID> <PAK></PAK>" SIGN=E42AA34ED7C4
4 Navigate to the /home directory (cd /home) and repeat the previous step onthe CSCOar.lic file in this directory.
5 Go to the Serving node console and restart PAR server using the followingcommand:/etc/init.d/arserver stop/etc/init.d/arserver start
After restarting the PAR server, check the status using the following command:/rms/app/CSCOar/usrbin/arstatus
Output:Cisco Prime AR RADIUS server running (pid: 1668)Cisco Prime AR Server Agent running (pid: 1655)Cisco Prime AR MCD lock manager running (pid: 1659)Cisco Prime AR MCD server running (pid: 1666)Cisco Prime AR GUI running (pid: 1669)
Solution
Unable to Access BAC and DCC UINot able to access BAC UI and DCC UI due to expiry of certificates in browser.Issue
Certificate added to the browser just has three months validity.Cause
RAN Management System Installation Guide, Release 4.18 May 25, 2015 HF
TroubleshootingUnable to Access BAC and DCC UI

1 Delete the existing certificates from the browser.
Go to Tools > Options. In the Options dialog, click Advanced > Certificates> View Certificates.
2 Select RMS setup certificate and delete.3 Clear the browser history.4 Access DCC UI/BAC UI again. The message "This Connection is Untrusted"
appears. Click Add Exception and click Confirm Security Exception from AddSecurity Exception dialog.
Solution
DCC UI Shows Blank Page After LoginUnsupported plugins installed in the BrowserIssue
Unsupported plugins cause conflicts with the DCC UI OperationCause
1 Remove or uninstall all unsupported/incompatible third party plugins on thebrowser.
Or,2 Reinstall the Browser
Solution
DHCP Server Not FunctioningDHCP server is not functioning.
During login to nrcmd with user name 'cnradmin' and proper password, it showsgroups and roles as 'superuser'; but if any command related to DHCP is entered,the following message is displayed.
"You do not have permission to perform this action."
Issue
The property, "prop:Cnr_License_IPNode" is set incorrectly in the descriptor file.Cause
RAN Management System Installation Guide, Release 4.1 May 25, 2015 HF 9
TroubleshootingDCC UI Shows Blank Page After Login
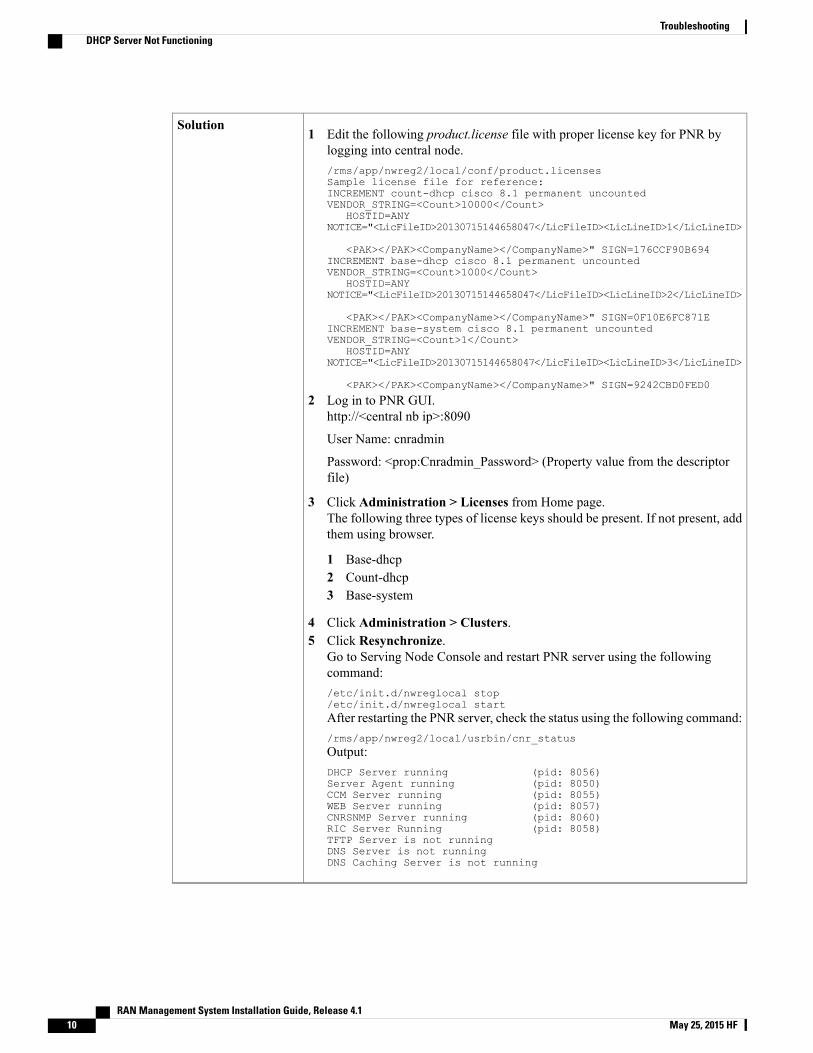
1 Edit the following product.license file with proper license key for PNR bylogging into central node./rms/app/nwreg2/local/conf/product.licensesSample license file for reference:INCREMENT count-dhcp cisco 8.1 permanent uncountedVENDOR_STRING=<Count>10000</Count>
HOSTID=ANYNOTICE="<LicFileID>20130715144658047</LicFileID><LicLineID>1</LicLineID>
<PAK></PAK><CompanyName></CompanyName>" SIGN=176CCF90B694INCREMENT base-dhcp cisco 8.1 permanent uncountedVENDOR_STRING=<Count>1000</Count>
HOSTID=ANYNOTICE="<LicFileID>20130715144658047</LicFileID><LicLineID>2</LicLineID>
<PAK></PAK><CompanyName></CompanyName>" SIGN=0F10E6FC871EINCREMENT base-system cisco 8.1 permanent uncountedVENDOR_STRING=<Count>1</Count>
HOSTID=ANYNOTICE="<LicFileID>20130715144658047</LicFileID><LicLineID>3</LicLineID>
<PAK></PAK><CompanyName></CompanyName>" SIGN=9242CBD0FED0
2 Log in to PNR GUI.http://<central nb ip>:8090
User Name: cnradmin
Password: <prop:Cnradmin_Password> (Property value from the descriptorfile)
3 Click Administration > Licenses from Home page.The following three types of license keys should be present. If not present, addthem using browser.
1 Base-dhcp2 Count-dhcp3 Base-system
4 Click Administration > Clusters.5 Click Resynchronize.
Go to Serving Node Console and restart PNR server using the followingcommand:/etc/init.d/nwreglocal stop/etc/init.d/nwreglocal startAfter restarting the PNR server, check the status using the following command:/rms/app/nwreg2/local/usrbin/cnr_statusOutput:DHCP Server running (pid: 8056)Server Agent running (pid: 8050)CCM Server running (pid: 8055)WEB Server running (pid: 8057)CNRSNMP Server running (pid: 8060)RIC Server Running (pid: 8058)TFTP Server is not runningDNS Server is not runningDNS Caching Server is not running
Solution
RAN Management System Installation Guide, Release 4.110 May 25, 2015 HF
TroubleshootingDHCP Server Not Functioning
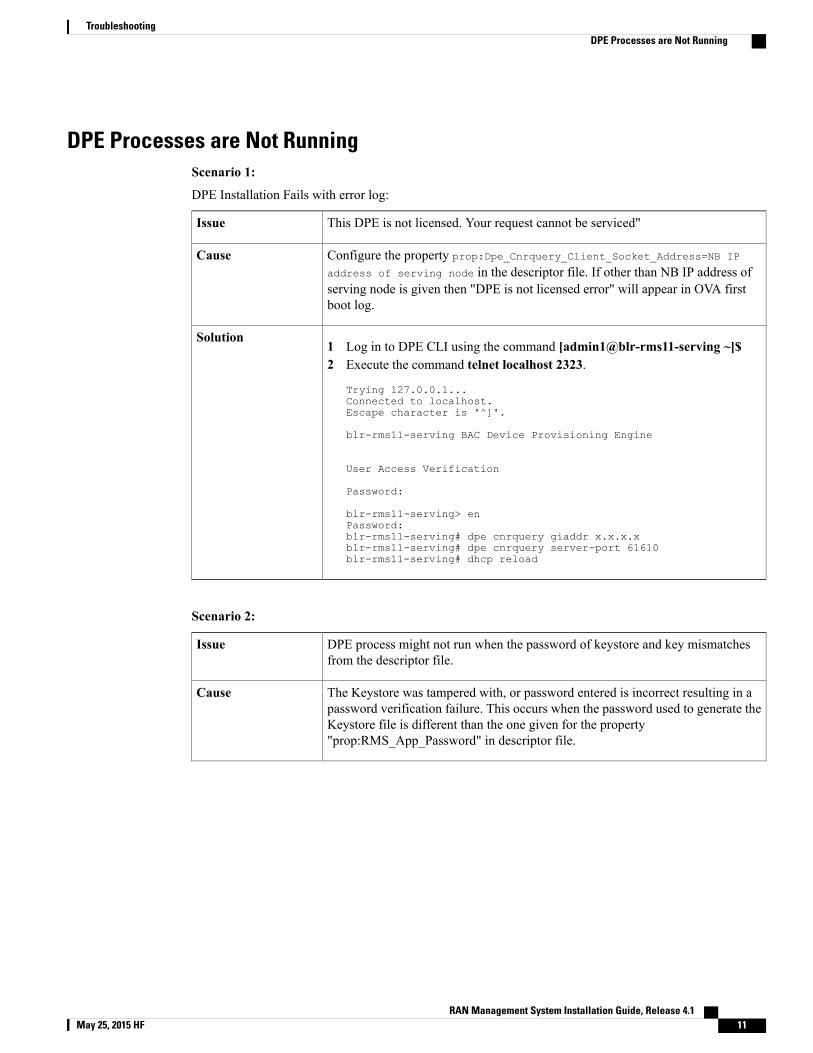
DPE Processes are Not RunningScenario 1:
DPE Installation Fails with error log:
This DPE is not licensed. Your request cannot be serviced"Issue
Configure the property prop:Dpe_Cnrquery_Client_Socket_Address=NB IP
address of serving node in the descriptor file. If other than NB IP address ofserving node is given then "DPE is not licensed error" will appear in OVA firstboot log.
Cause
1 Log in to DPE CLI using the command [admin1@blr-rms11-serving ~]$2 Execute the command telnet localhost 2323.
Trying 127.0.0.1...Connected to localhost.Escape character is '^]'.
blr-rms11-serving BAC Device Provisioning Engine
User Access Verification
Password:
blr-rms11-serving> enPassword:blr-rms11-serving# dpe cnrquery giaddr x.x.x.xblr-rms11-serving# dpe cnrquery server-port 61610blr-rms11-serving# dhcp reload
Solution
Scenario 2:
DPE process might not run when the password of keystore and key mismatchesfrom the descriptor file.
Issue
The Keystore was tampered with, or password entered is incorrect resulting in apassword verification failure. This occurs when the password used to generate theKeystore file is different than the one given for the property"prop:RMS_App_Password" in descriptor file.
Cause
RAN Management System Installation Guide, Release 4.1 May 25, 2015 HF 11
TroubleshootingDPE Processes are Not Running
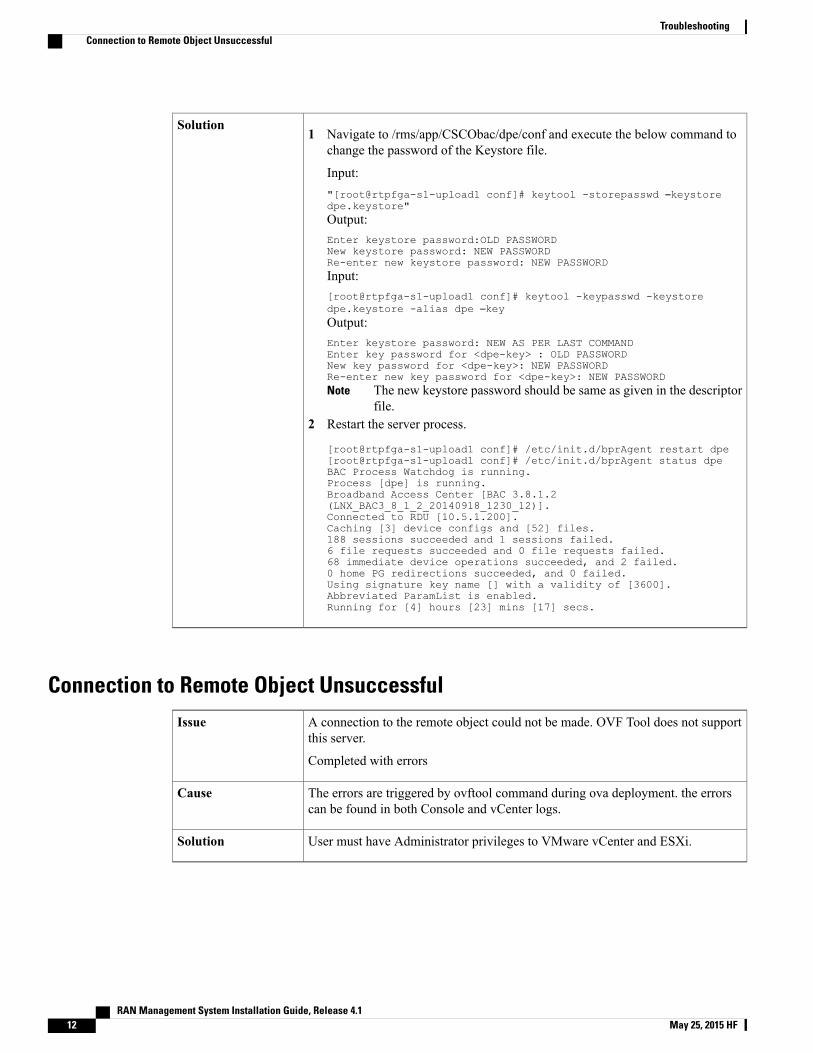
1 Navigate to /rms/app/CSCObac/dpe/conf and execute the below command tochange the password of the Keystore file.
Input:"[root@rtpfga-s1-upload1 conf]# keytool -storepasswd –keystoredpe.keystore"Output:Enter keystore password:OLD PASSWORDNew keystore password: NEW PASSWORDRe-enter new keystore password: NEW PASSWORDInput:[root@rtpfga-s1-upload1 conf]# keytool -keypasswd -keystoredpe.keystore -alias dpe –keyOutput:Enter keystore password: NEW AS PER LAST COMMANDEnter key password for <dpe-key> : OLD PASSWORDNew key password for <dpe-key>: NEW PASSWORDRe-enter new key password for <dpe-key>: NEW PASSWORD
The new keystore password should be same as given in the descriptorfile.
Note
2 Restart the server process.
[root@rtpfga-s1-upload1 conf]# /etc/init.d/bprAgent restart dpe[root@rtpfga-s1-upload1 conf]# /etc/init.d/bprAgent status dpeBAC Process Watchdog is running.Process [dpe] is running.Broadband Access Center [BAC 3.8.1.2(LNX_BAC3_8_1_2_20140918_1230_12)].Connected to RDU [10.5.1.200].Caching [3] device configs and [52] files.188 sessions succeeded and 1 sessions failed.6 file requests succeeded and 0 file requests failed.68 immediate device operations succeeded, and 2 failed.0 home PG redirections succeeded, and 0 failed.Using signature key name [] with a validity of [3600].Abbreviated ParamList is enabled.Running for [4] hours [23] mins [17] secs.
Solution
Connection to Remote Object UnsuccessfulA connection to the remote object could not be made. OVF Tool does not supportthis server.
Completed with errors
Issue
The errors are triggered by ovftool command during ova deployment. the errorscan be found in both Console and vCenter logs.
Cause
User must have Administrator privileges to VMware vCenter and ESXi.Solution
RAN Management System Installation Guide, Release 4.112 May 25, 2015 HF
TroubleshootingConnection to Remote Object Unsuccessful
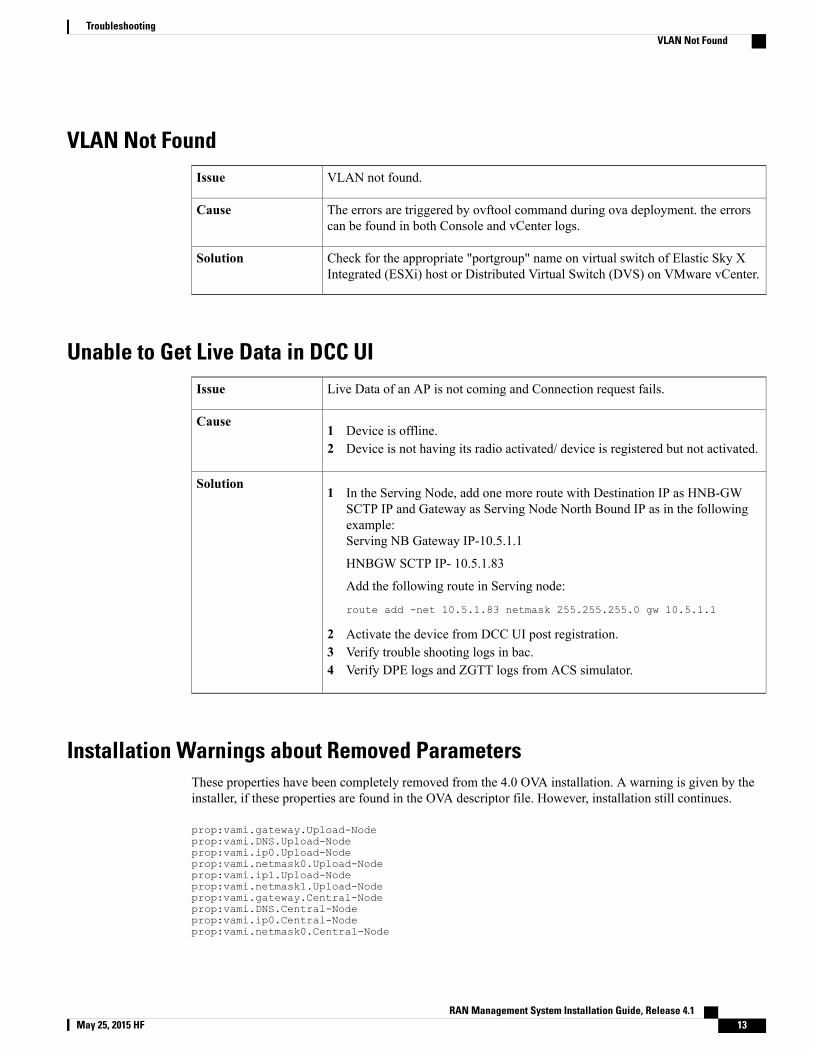
VLAN Not FoundVLAN not found.Issue
The errors are triggered by ovftool command during ova deployment. the errorscan be found in both Console and vCenter logs.
Cause
Check for the appropriate "portgroup" name on virtual switch of Elastic Sky XIntegrated (ESXi) host or Distributed Virtual Switch (DVS) on VMware vCenter.
Solution
Unable to Get Live Data in DCC UILive Data of an AP is not coming and Connection request fails.Issue
1 Device is offline.2 Device is not having its radio activated/ device is registered but not activated.
Cause
1 In the Serving Node, add one more route with Destination IP as HNB-GWSCTP IP and Gateway as Serving Node North Bound IP as in the followingexample:Serving NB Gateway IP-10.5.1.1
HNBGW SCTP IP- 10.5.1.83
Add the following route in Serving node:
route add -net 10.5.1.83 netmask 255.255.255.0 gw 10.5.1.1
2 Activate the device from DCC UI post registration.3 Verify trouble shooting logs in bac.4 Verify DPE logs and ZGTT logs from ACS simulator.
Solution
Installation Warnings about Removed ParametersThese properties have been completely removed from the 4.0 OVA installation. A warning is given by theinstaller, if these properties are found in the OVA descriptor file. However, installation still continues.
prop:vami.gateway.Upload-Nodeprop:vami.DNS.Upload-Nodeprop:vami.ip0.Upload-Nodeprop:vami.netmask0.Upload-Nodeprop:vami.ip1.Upload-Nodeprop:vami.netmask1.Upload-Nodeprop:vami.gateway.Central-Nodeprop:vami.DNS.Central-Nodeprop:vami.ip0.Central-Nodeprop:vami.netmask0.Central-Node
RAN Management System Installation Guide, Release 4.1 May 25, 2015 HF 13
TroubleshootingVLAN Not Found

prop:vami.ip1.Central-Nodeprop:vami.netmask1.Central-Nodeprop:vami.gateway.Serving-Nodeprop:vami.DNS.Serving-Nodeprop:vami.ip0.Serving-Nodeprop:vami.netmask0.Serving-Nodeprop:vami.ip1.Serving-Nodeprop:vami.netmask1.Serving-Nodeprop:Debug_Modeprop:Server_Crl_Urlsprop:Bacadmin_Passwordprop:Dccapp_Passwordprop:Opstools_Passwordprop:Dccadmin_Passwordprop:Postgresql_Passwordprop:Central_Keystore_Passwordprop:Upload_Stat_Passwordprop:Upload_Calldrop_Passwordprop:Upload_Demand_Passwordprop:Upload_Lostipsec_Passwordprop:Upload_Lostgwconnection_Passwordprop:Upload_Nwlscan_Passwordprop:Upload_Periodic_Passwordprop:Upload_Restart_Passwordprop:Upload_Crash_Passwordprop:Upload_Lowmem_Passwordprop:Upload_Unknown_Passwordprop:Serving_Keystore_Passwordprop:Cnradmin_Passwordprop:Caradmin_Passwordprop:Dpe_Cli_Passwordprop:Dpe_Enable_Passwordprop:Fc_Realmprop:Fc_Log_Periodic_Upload_Enableprop:Fc_Log_Periodic_Upload_Intervalprop:Fc_On_Nwl_Scan_Enableprop:Fc_On_Lost_Ipsec_Enableprop:Fc_On_Crash_Upload_Enableprop:Fc_On_Call_Drop_Enableprop:Fc_On_Lost_Gw_Connection_Enableprop:Upload_Keystore_Passwordprop:Dpe_Keystore_Passwordprop:Bac_Secretprop:Admin2_Usernameprop:Admin2_Passwordprop:Admin2_Firstnameprop:Admin2_Lastnameprop:Admin3_Usernameprop:Admin3_Passwordprop:Admin3_Firstnameprop:Admin3_Lastnameprop:Upgrade_Modeprop:Asr5k_Hnbgw_Address
Upload Server is Not UpThe upload server fails with java.lang.ExceptionInInitializerError in the following scenarios.
The errors can be seen in opt/CSCOuls/logs/uploadServer.console.log file.
Scenario 1:
RAN Management System Installation Guide, Release 4.114 May 25, 2015 HF
TroubleshootingUpload Server is Not Up

Upload Server failed with java.lang.ExceptionInInitializerErrorjava.lang.ExceptionInInitializerErrorat com.cisco.ca.rms.upload.server.UlsSouthBoundServer.getInstance
(UlsSouthBoundServer.java:58)at com.cisco.ca.rms.upload.server.UlsServer.<init>(UlsServer.java:123)at com.cisco.ca.rms.upload.server.UlsServer.<init>(UlsServer.java:25)at com.cisco.ca.rms.upload.server.UlsServer$SingleInstanceHolder.<clinit>
(UlsServer.java:70)at com.cisco.ca.rms.upload.server.UlsServer.getInstance(UlsServer.java:82)at com.cisco.ca.rms.upload.server.UlsServer.main(UlsServer.java:55)Caused by: org.jboss.netty.channel.ChannelException: Failed to bind to:/10.6.22.12:8080at org.jboss.netty.bootstrap.ServerBootstrap.bind(ServerBootstrap.java:298)at com.cisco.ca.rms.upload.server.UlsSouthBoundServer.<init>
(UlsSouthBoundServer.java:109)at com.cisco.ca.rms.upload.server.UlsSouthBoundServer.<init>
(UlsSouthBoundServer.java:22)atcom.cisco.ca.rms.upload.server.UlsSouthBoundServer$SingleInstanceHolder.<clinit>
(UlsSouthBoundServer.java:46)... 6 moreCaused by: java.net.BindException: Cannot assign requested addressat sun.nio.ch.Net.bind0(Native Method)at sun.nio.ch.Net.bind(Unknown Source)at sun.nio.ch.Net.bind(Unknown Source)at sun.nio.ch.ServerSocketChannelImpl.bind(Unknown Source)at sun.nio.ch.ServerSocketAdaptor.bind(Unknown Source)at org.jboss.netty.channel.socket.nio.NioServerSocketPipelineSink.bind
(NioServerSocketPipelineSink.java:140)atorg.jboss.netty.channel.socket.nio.NioServerSocketPipelineSink.handleServerSocket
(NioServerSocketPipelineSink.java:90)at org.jboss.netty.channel.socket.nio.NioServerSocketPipelineSink.eventSunk
(NioServerSocketPipelineSink.java:64)at org.jboss.netty.channel.Channels.bind(Channels.java:569)at org.jboss.netty.channel.AbstractChannel.bind(AbstractChannel.java:189)at org.jboss.netty.bootstrap.ServerBootstrap$Binder.channelOpen(
ServerBootstrap.java:343)at org.jboss.netty.channel.Channels.fireChannelOpen(Channels.java:170)at org.jboss.netty.channel.socket.nio.NioServerSocketChannel.<init>
(NioServerSocketChannel.java:80)at org.jboss.netty.channel.socket.nio.NioServerSocketChannelFactory.newChannel
(NioServerSocketChannelFactory.java:158)at org.jboss.netty.channel.socket.nio.NioServerSocketChannelFactory.newChannel
(NioServerSocketChannelFactory.java:86)at org.jboss.netty.bootstrap.ServerBootstrap.bind(ServerBootstrap.java:277)... 9 more
Issue
The server failed to bind to the IP /10.6.22.12:8080 because the requested address wasunavailable.
Cause
Navigate to /opt/CSCOuls/conf and modify the UploadServer.properties file with properSB and NB IP address.
Solution
Scenario 2:
RAN Management System Installation Guide, Release 4.1 May 25, 2015 HF 15
TroubleshootingUpload Server is Not Up

Upload Server failed with java.lang.ExceptionInInitializerErrorjava.lang.ExceptionInInitializerErrorat com.cisco.ca.rms.upload.server.security.UlsSbSslContextMgr.getInstance
(UlsSbSslContextMgr.java:65)at com.cisco.ca.rms.upload.server.UlsSouthBoundPipelineFactory.<init>
(UlsSouthBoundPipelineFactory.java:86)at com.cisco.ca.rms.upload.server.UlsSouthBoundServer.<init>
(UlsSouthBoundServer.java:102)at com.cisco.ca.rms.upload.server.UlsSouthBoundServer.<init>
(UlsSouthBoundServer.java:22)atcom.cisco.ca.rms.upload.server.UlsSouthBoundServer$SingleInstanceHolder.<clinit>
(UlsSouthBoundServer.java:46)at com.cisco.ca.rms.upload.server.UlsSouthBoundServer.getInstance
(UlsSouthBoundServer.java:58)at com.cisco.ca.rms.upload.server.UlsServer.<init>(UlsServer.java:123)at com.cisco.ca.rms.upload.server.UlsServer.<init>(UlsServer.java:25)at com.cisco.ca.rms.upload.server.UlsServer$SingleInstanceHolder.<clinit>
(UlsServer.java:70)at com.cisco.ca.rms.upload.server.UlsServer.getInstance(UlsServer.java:82)at com.cisco.ca.rms.upload.server.UlsServer.main(UlsServer.java:55)Caused by: java.lang.IllegalStateException: java.io.IOException:
Keystore was tampered with, or password was incorrectat com.cisco.ca.rms.commons.security.SslContextManager.<init>
(SslContextManager.java:79)at com.cisco.ca.rms.upload.server.security.UlsSbSslContextMgr.<init>
(UlsSbSslContextMgr.java:72)at com.cisco.ca.rms.upload.server.security.UlsSbSslContextMgr.<init>
(UlsSbSslContextMgr.java:28)atcom.cisco.ca.rms.upload.server.security.UlsSbSslContextMgr$SingleInstanceHolder.<clinit>
(UlsSbSslContextMgr.java:53)... 11 moreCaused by: java.io.IOException: Keystore was tampered with, or password wasincorrectat sun.security.provider.JavaKeyStore.engineLoad(Unknown Source)at sun.security.provider.JavaKeyStore$JKS.engineLoad(Unknown Source)at java.security.KeyStore.load(Unknown Source)at com.cisco.ca.rms.upload.server.security.UlsSbSslContextMgr.loadKeyManagers
(UlsSbSslContextMgr.java:91)atcom.cisco.ca.rms.commons.security.SslContextManager.<init>(SslContextManager.java:48)... 14 moreCaused by: java.security.UnrecoverableKeyException: Password verificationfailed... 19 more
Issue
The Keystore was tampered with, or password entered is incorrect resulting in a passwordverification failure.
This occurs when the password used to generate the Keystore file is different than the onegiven for the property “Upload_Keystore_Password” in descriptor file.
Cause
RAN Management System Installation Guide, Release 4.116 May 25, 2015 HF
TroubleshootingUpload Server is Not Up
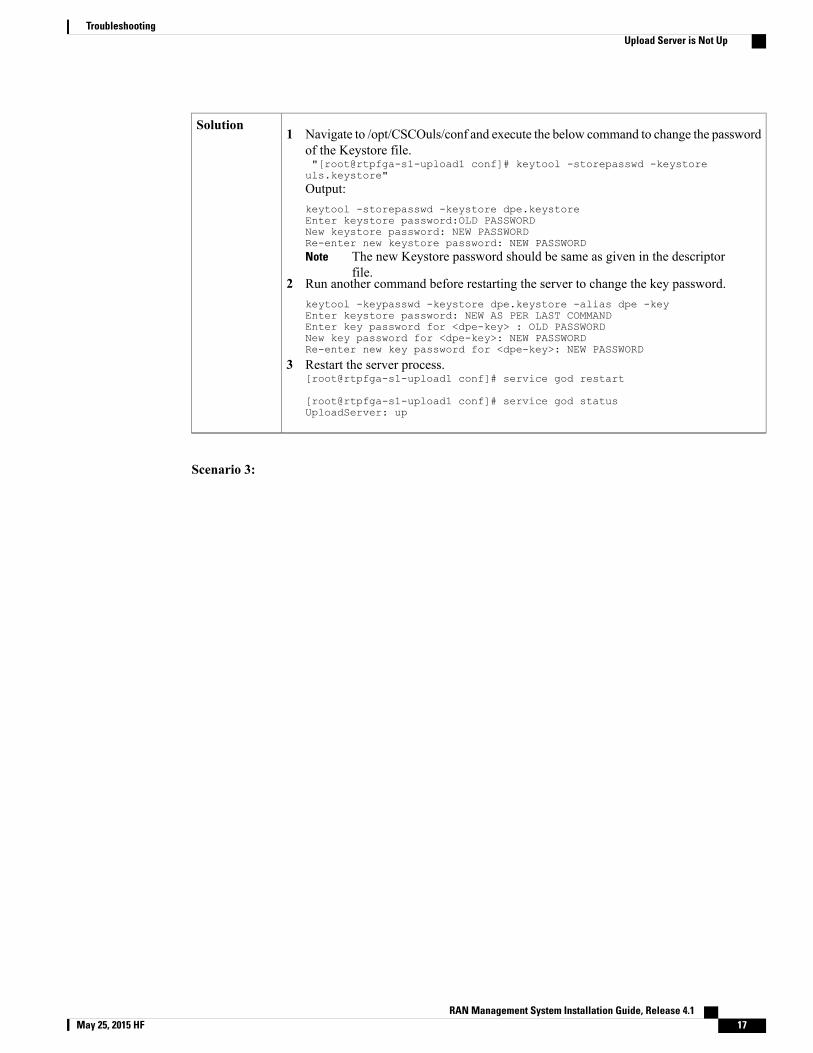
1 Navigate to /opt/CSCOuls/conf and execute the below command to change the passwordof the Keystore file."[root@rtpfga-s1-upload1 conf]# keytool -storepasswd -keystoreuls.keystore"Output:keytool -storepasswd -keystore dpe.keystoreEnter keystore password:OLD PASSWORDNew keystore password: NEW PASSWORDRe-enter new keystore password: NEW PASSWORD
The new Keystore password should be same as given in the descriptorfile.
Note
2 Run another command before restarting the server to change the key password.keytool -keypasswd -keystore dpe.keystore -alias dpe -keyEnter keystore password: NEW AS PER LAST COMMANDEnter key password for <dpe-key> : OLD PASSWORDNew key password for <dpe-key>: NEW PASSWORDRe-enter new key password for <dpe-key>: NEW PASSWORD
3 Restart the server process.[root@rtpfga-s1-upload1 conf]# service god restart
[root@rtpfga-s1-upload1 conf]# service god statusUploadServer: up
Solution
Scenario 3:
RAN Management System Installation Guide, Release 4.1 May 25, 2015 HF 17
TroubleshootingUpload Server is Not Up

Upload Server failed with java.lang.ExceptionInInitializerErrorjava.lang.ExceptionInInitializerErrorat com.cisco.ca.rms.dcc.lus.server.LusNorthBoundServer.getInstance
(LusNorthBoundServer.java:65)at com.cisco.ca.rms.dcc.lus.server.LusServer.<init>(LusServer.java:98)at com.cisco.ca.rms.dcc.lus.server.LusServer.<init>(LusServer.java:17)at com.cisco.ca.rms.dcc.lus.server.LusServer$SingleInstanceHolder.<clinit>
(LusServer.java:45)at com.cisco.ca.rms.dcc.lus.server.LusServer.getInstance(LusServer.java:57)at com.cisco.ca.rms.dcc.lus.server.LusServer.main(LusServer.java:30)Caused by: org.jboss.netty.channel.ChannelException: Failed to bind to:/0.0.0.0:8082at org.jboss.netty.bootstrap.ServerBootstrap.bind(ServerBootstrap.java:298)at com.cisco.ca.rms.dcc.lus.server.LusNorthBoundServer.<init>
(LusNorthBoundServer.java:120)at com.cisco.ca.rms.dcc.lus.server.LusNorthBoundServer.<init>
(LusNorthBoundServer.java:30)atcom.cisco.ca.rms.dcc.lus.server.LusNorthBoundServer$SingleInstanceHolder.<clinit>
(LusNorthBoundServer.java:53)... 6 moreCaused by: java.net.BindException: Address already in useat sun.nio.ch.Net.bind(Native Method)at sun.nio.ch.ServerSocketChannelImpl.bind(ServerSocketChannelImpl.java:137)at sun.nio.ch.ServerSocketAdaptor.bind(ServerSocketAdaptor.java:77)at org.jboss.netty.channel.socket.nio.NioServerSocketPipelineSink.bind
(NioServerSocketPipelineSink.java:140)atorg.jboss.netty.channel.socket.nio.NioServerSocketPipelineSink.handleServerSocket
(NioServerSocketPipelineSink.java:92)at org.jboss.netty.channel.socket.nio.NioServerSocketPipelineSink.eventSunk
(NioServerSocketPipelineSink.java:66)at org.jboss.netty.channel.Channels.bind(Channels.java:462)at org.jboss.netty.channel.AbstractChannel.bind(AbstractChannel.java:186)at org.jboss.netty.bootstrap.ServerBootstrap$Binder.channelOpen
(ServerBootstrap.java:343)at org.jboss.netty.channel.Channels.fireChannelOpen(Channels.java:170)at org.jboss.netty.channel.socket.nio.NioServerSocketChannel.<init>
(NioServerSocketChannel.java:77)at org.jboss.netty.channel.socket.nio.NioServerSocketChannelFactory.newChannel
(NioServerSocketChannelFactory.java:137)at org.jboss.netty.channel.socket.nio.NioServerSocketChannelFactory.newChannel
(NioServerSocketChannelFactory.java:85)at org.jboss.netty.bootstrap.ServerBootstrap.bind(ServerBootstrap.java:277)... 9 more
Issue
The server failed to bind to the IP /0.0.0.0:8082 because the requested address is alreadyin use.
Cause
Execute the command:netstat –anp |grep <port number>For example:[root@rtpfga-s1-upload1 conf]# netstat -anp |grep 8082tcp 0 0 10.6.23.16:8082 0.0.0.0:* LISTEN 26842/java
Kill the particular process.[root@rtpfga-s1-upload1 conf]# kill -9 26842Start the server.“[root@rtpfga-s1-upload1 conf]# service god start
[root@rtpfga-s1-upload1 conf]# service god statusUploadServer: up”
Solution
RAN Management System Installation Guide, Release 4.118 May 25, 2015 HF
TroubleshootingUpload Server is Not Up

OVA Installation failures
If the OVA installer displays an error on the installation Console.Issue
OVA Installation failuresCause
If there are any issues during OVA installation, the ova-first-boot.log should bereferred that is present in the Central node and Serving node. Validate the appropriateerrors in the boot log files.
Solution
Update failures in group type, Site - DCC UI throws an errorSITE Creation Fails While Importing All Mandatory and Optional Parameters.Issue
Invalid parameter value- FC-CSON-STATUS-HSCO-INNER with Optimised.Cause
For FC-CSON-STATUS-HSCO-INNER parameter, allowed value is Optimizednot Optimised. The spelling for Optimized should be corrected.
Solution
RAN Management System Installation Guide, Release 4.1 May 25, 2015 HF 19
TroubleshootingOVA Installation failures

RAN Management System Installation Guide, Release 4.120 May 25, 2015 HF
TroubleshootingUpdate failures in group type, Site - DCC UI throws an error
Recommended