Supplier Portal (External) JIRAUser Guide
July 2016
2 Honeywell Confidential
External JIRA Tool
• Allows users outside of Honeywell (i.e. suppliers and customers) to
interact with AeroJIRA projects
• Can be used by external users to search, create, and edit issues
pertaining to internal AeroJIRA projects
3 Honeywell Confidential
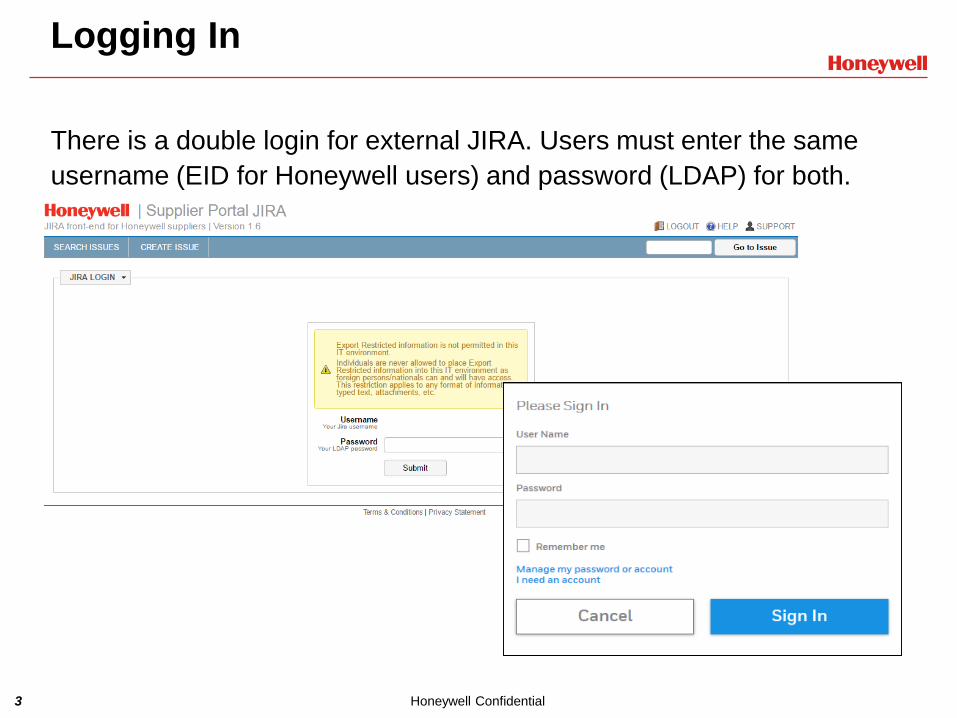
Logging In
There is a double login for external JIRA. Users must enter the same
username (EID for Honeywell users) and password (LDAP) for both.
4 Honeywell Confidential
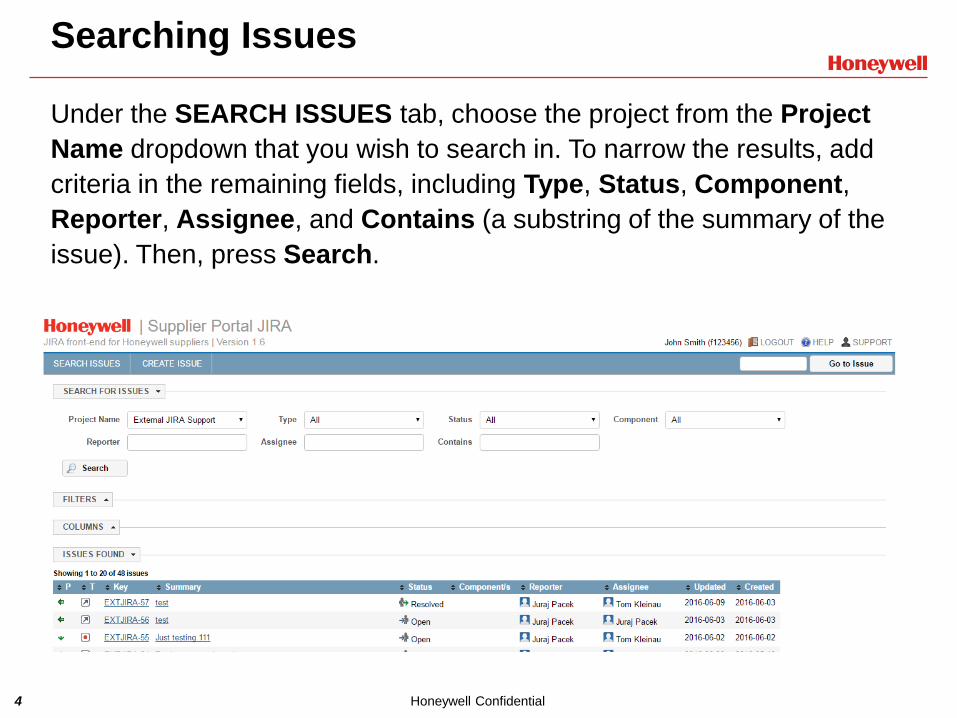
Searching Issues
Under the SEARCH ISSUES tab, choose the project from the Project
Name dropdown that you wish to search in. To narrow the results, add
criteria in the remaining fields, including Type, Status, Component,
Reporter, Assignee, and Contains (a substring of the summary of the
issue). Then, press Search.
5 Honeywell Confidential
Searching Issues cont.
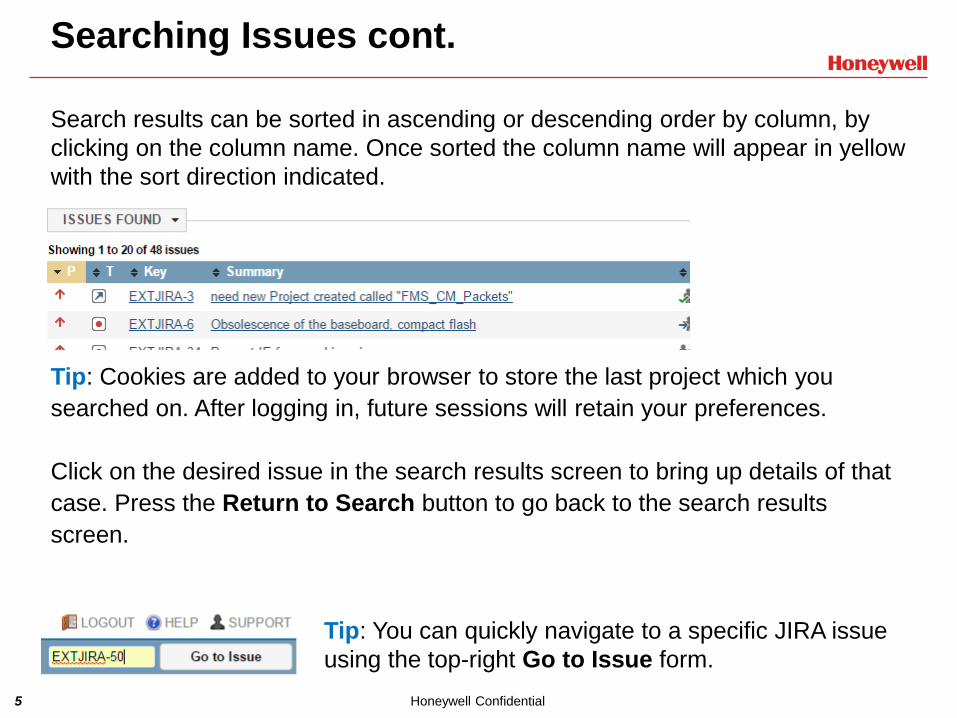
Tip: Cookies are added to your browser to store the last project which you
searched on. After logging in, future sessions will retain your preferences.
Click on the desired issue in the search results screen to bring up details of that
case. Press the Return to Search button to go back to the search results
screen.
Search results can be sorted in ascending or descending order by column, by
clicking on the column name. Once sorted the column name will appear in yellow
with the sort direction indicated.
Tip: You can quickly navigate to a specific JIRA issue
using the top-right Go to Issue form.
6 Honeywell Confidential
Searching Issues – Columns
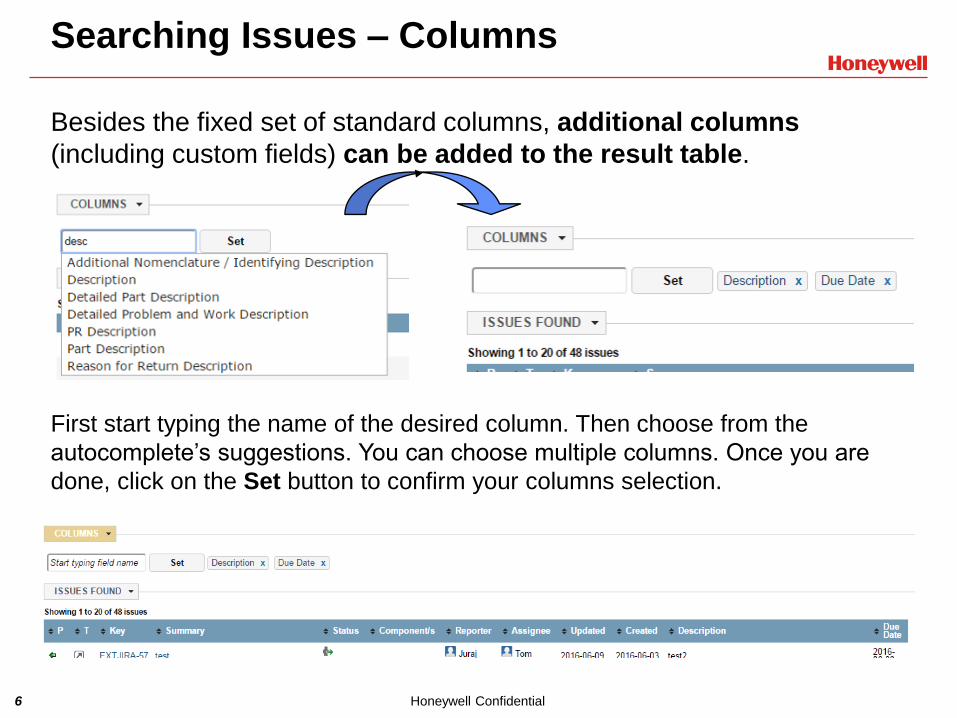
Besides the fixed set of standard columns, additional columns
(including custom fields) can be added to the result table.
First start typing the name of the desired column. Then choose from the
autocomplete’s suggestions. You can choose multiple columns. Once you are
done, click on the Set button to confirm your columns selection.
7 Honeywell Confidential
Searching Issues – Create Filter
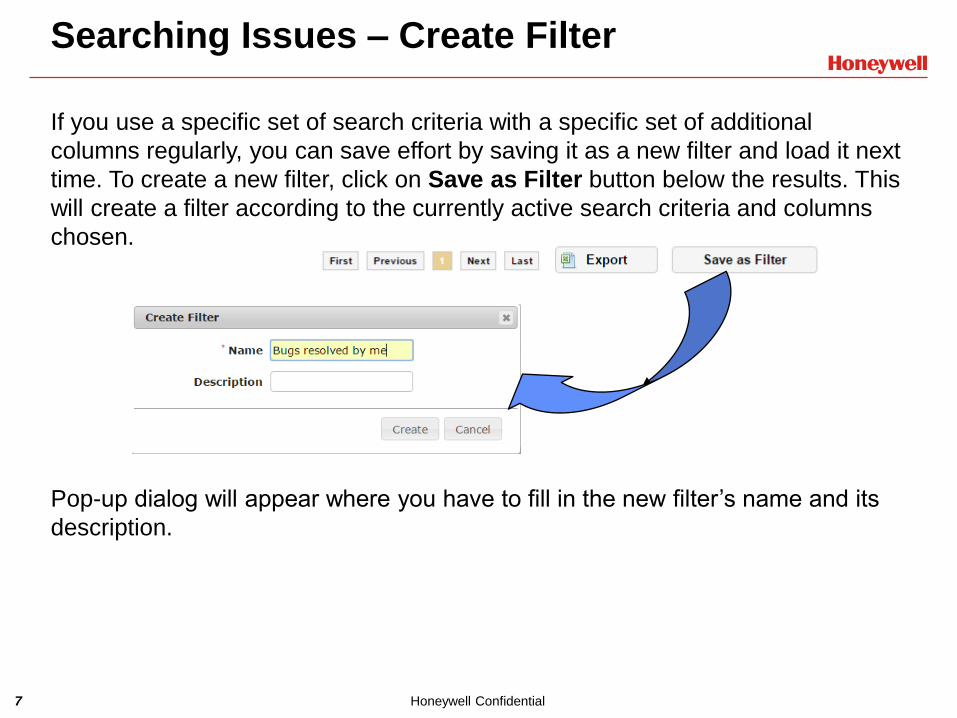
If you use a specific set of search criteria with a specific set of additional
columns regularly, you can save effort by saving it as a new filter and load it next
time. To create a new filter, click on Save as Filter button below the results. This
will create a filter according to the currently active search criteria and columns
chosen.
Pop-up dialog will appear where you have to fill in the new filter’s name and its
description.

8 Honeywell Confidential
Searching Issues – Create Filter cont.
After confirming the new filter name, you are redirected to the search page with
the filter activated. You can activate the filter at any time by unhiding Filters
section, choosing the filter you want and clicking on Load button. Similarly
you can delete a filter with Delete button.
Note: Supplier Portal JIRA has one limitation with regards to filters – you cannot
edit them yet. It also means you cannot change the order of the result table by
clicking on a column’s name or refining the search criteria (which are blank).
In order to get back from “filter” mode to “standard” search mode, define some
new search criteria and hit Search button or just click on SEARCH ISSUES
menu item.
9 Honeywell Confidential
Searching Issues – Export
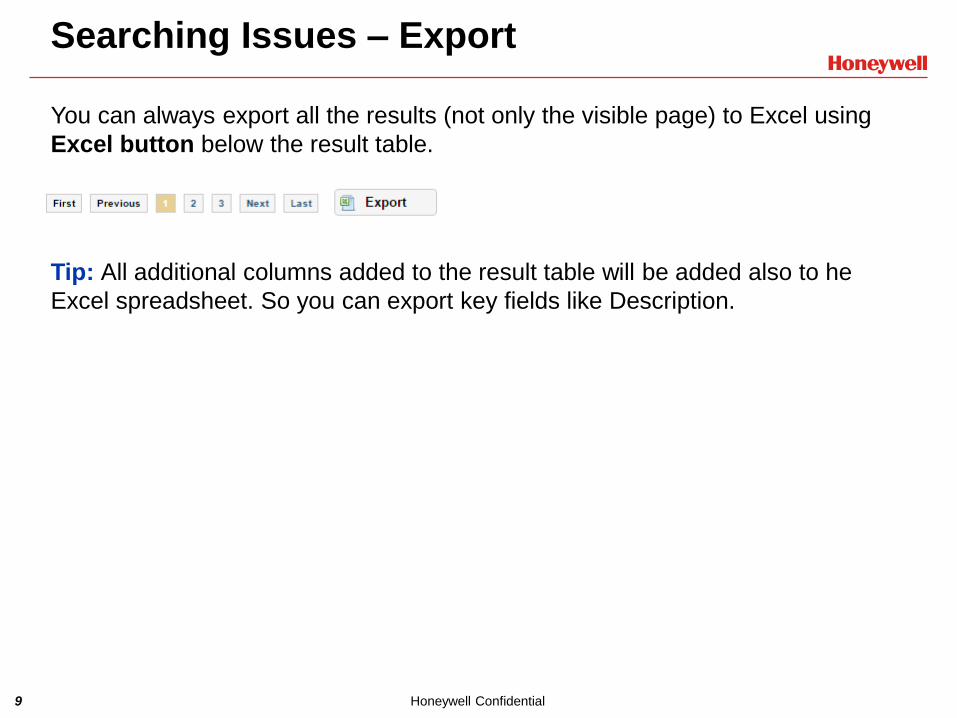
You can always export all the results (not only the visible page) to Excel using
Excel button below the result table.
Tip: All additional columns added to the result table will be added also to he
Excel spreadsheet. So you can export key fields like Description.
10 Honeywell Confidential
Creating Issues
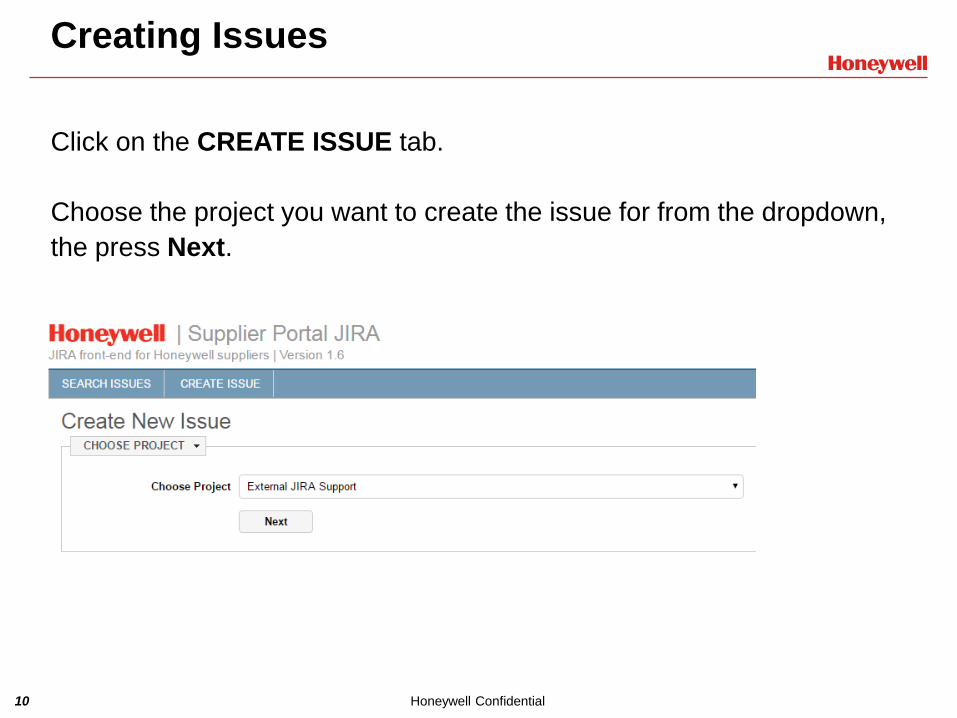
Click on the CREATE ISSUE tab.
Choose the project you want to create the issue for from the dropdown,
the press Next.
11 Honeywell Confidential
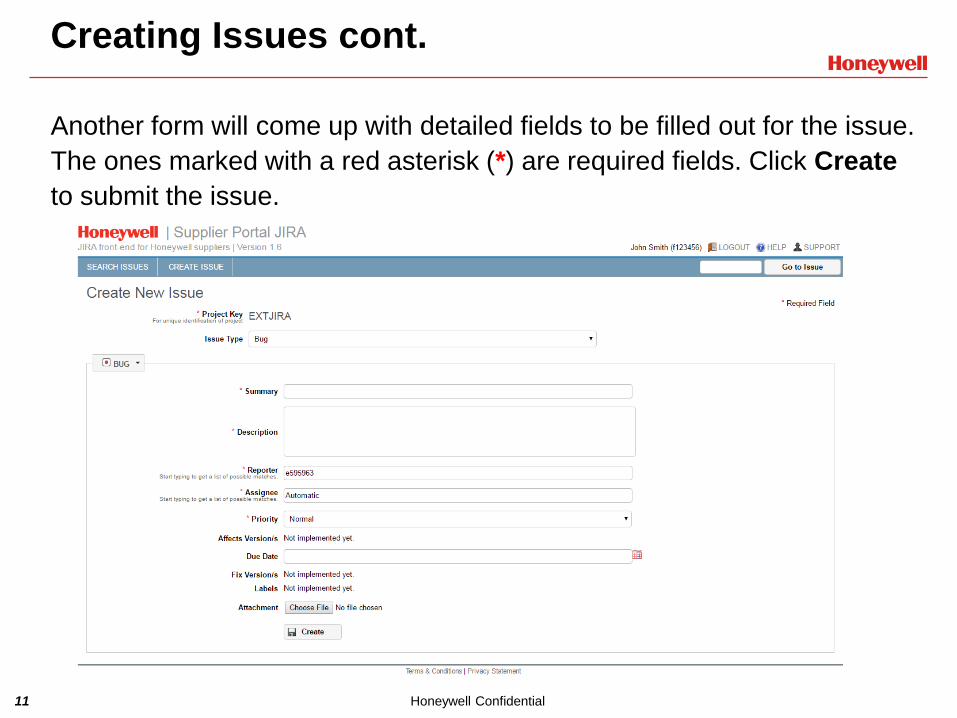
Creating Issues cont.
Another form will come up with detailed fields to be filled out for the issue.
The ones marked with a red asterisk (*) are required fields. Click Create
to submit the issue.
12 Honeywell Confidential
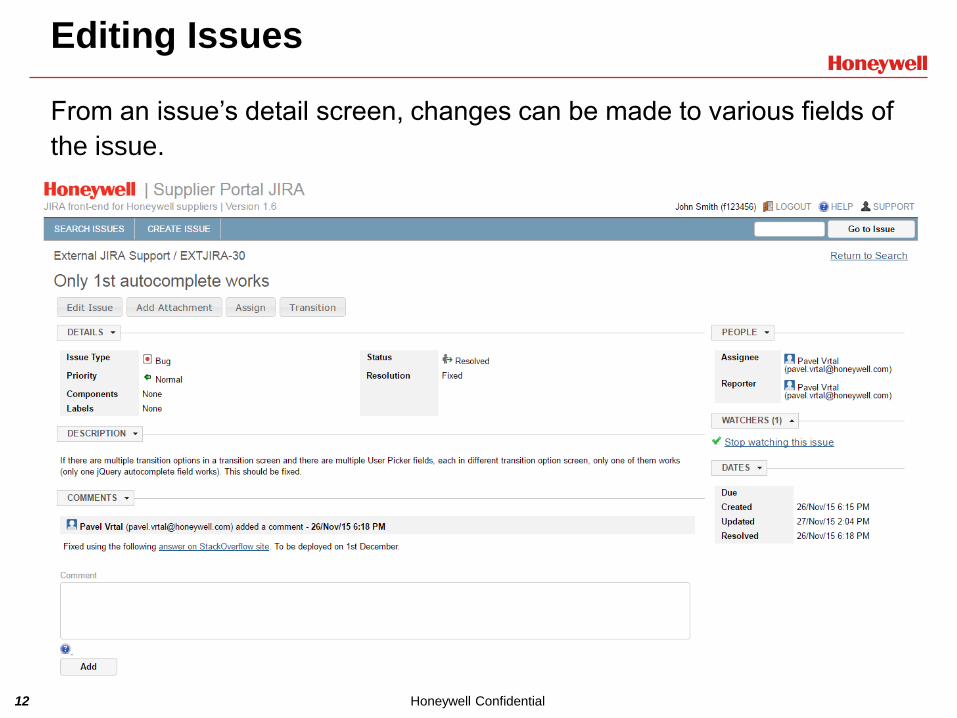
Editing Issues
From an issue’s detail screen, changes can be made to various fields of
the issue.
13 Honeywell Confidential
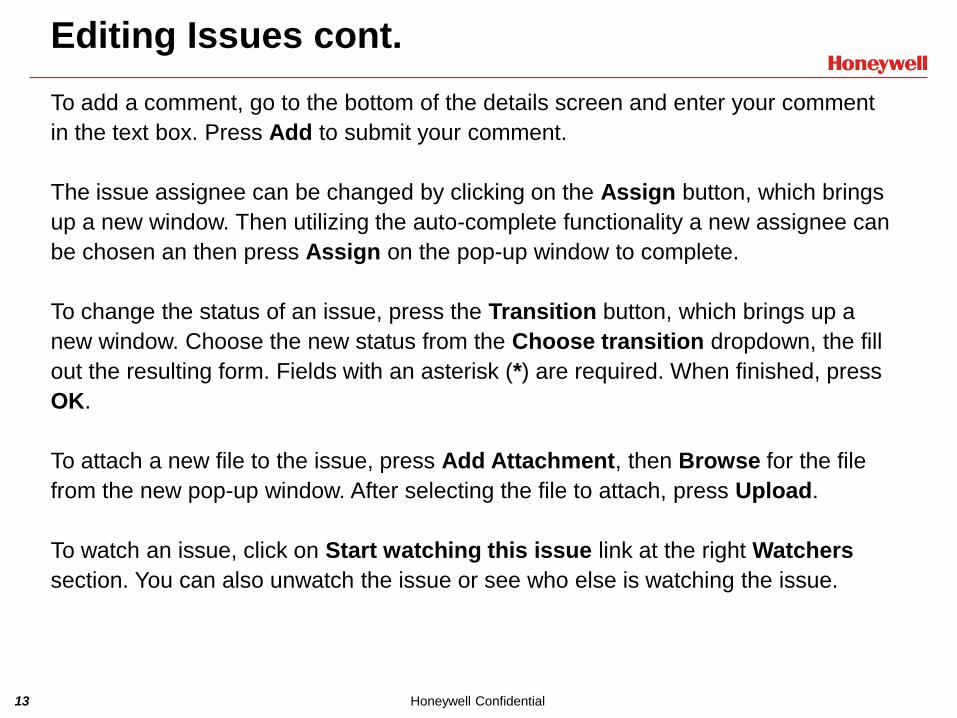
Editing Issues cont.
To add a comment, go to the bottom of the details screen and enter your comment
in the text box. Press Add to submit your comment.
The issue assignee can be changed by clicking on the Assign button, which brings
up a new window. Then utilizing the auto-complete functionality a new assignee can
be chosen an then press Assign on the pop-up window to complete.
To change the status of an issue, press the Transition button, which brings up a
new window. Choose the new status from the Choose transition dropdown, the fill
out the resulting form. Fields with an asterisk (*) are required. When finished, press
OK.
To attach a new file to the issue, press Add Attachment, then Browse for the file
from the new pop-up window. After selecting the file to attach, press Upload.
To watch an issue, click on Start watching this issue link at the right Watchers
section. You can also unwatch the issue or see who else is watching the issue.
14 Honeywell Confidential
External JIRA Contact Information
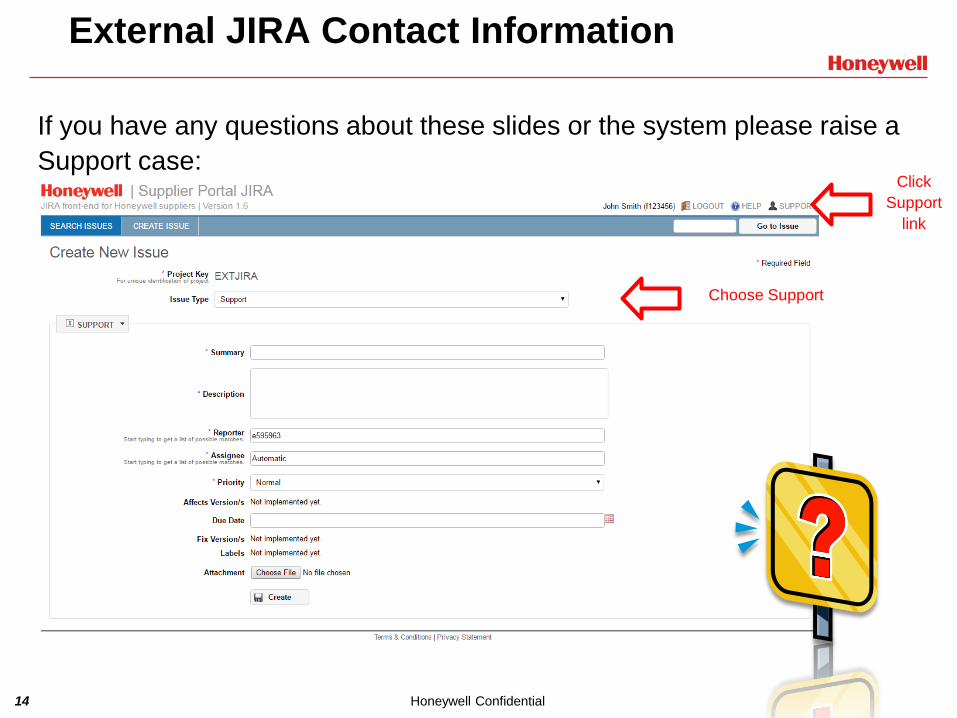
If you have any questions about these slides or the system please raise a
Support case:Click
Support
link
Choose Support
Recommended