BSBITU306 – Design and produce business documents
Learning guide V2.1 © AAMC Training Group 3
Section 1 Select and prepare resources
Business documents
A company uses documents to communicate, transact business and
analyse its productivity. Since documents provide proof of an
organisation’s dealings and may be referred to for years to come, it is
important that they be well written.
Business documents range from brief email messages to complex legal
agreements. Some documents are prepared by employees and business
owners, while others are drafted by professionals from outside of the
company, such as accountants and lawyers.
There are many different types of documents you might use in the
workplace to communicate ideas and events. Some typical examples are
described below:
Emails and memorandums
Co-workers typically use email to convey information to each other. Before
email became prevalent, memorandums were used for interoffice
messages. Memos are still used in situations where a message is meant to
accompany a specific file and in cases that require more privacy than an
email. Both a memo and an email identify the sender and recipient and
contain a subject line. The text is formatted in one or more paragraphs.
Letters
Business letters are used to communicate with individuals outside of the
office. Recipients may include customers, colleagues in other businesses,
service providers, professionals who advise the business, government
officials and job applicants.
A business letter is usually formatted in block style, in which all of the
elements of the letter, except the letterhead, are aligned with the left
margin. It can be emailed or delivered by mail.
If a letter is sent in the text of an email, the sender includes his name,
job title and contact information at the bottom of the email.
Reports
Business reports convey information in a format that is more formal and
usually longer than a letter. Reports cover a variety of topics, such as
safety compliance, sales figures, financial data, feasibility studies and
marketing plans. They may include statistics, charts, graphs, images, case
studies and survey results. Some reports are published for the benefit of
investors. If a report is periodic, such as a monthly sales report, a template
is used for convenience and to enable comparison with previous reports.

BSBITU306 – Design and produce business documents
4 © AAMC Training Group Learning guide V2.1
Transactional documents
A company uses documents to transact business with its clients. To save
time, these documents may be formatted as a form, such as an order
form, transmittal page, invoice or receipt.
The types of transactional documents used vary somewhat by the
nature of a business. An insurance agent, for example, generates
insurance applications and policies, while a lender uses loan applications
and mortgage documents. In some fields, businesses enter into
agreements and contracts with others; these documents might be
drafted by the company’s lawyer.
Financial documents
A business uses financial documents to stay within its budget, prepare
budget proposals and file tax returns. These documents include receipt
records, payroll reports, paid bills, bank statements, income statements,
balance sheets and tax reporting forms. These documents may be
prepared by the company’s accountant.
A business owner uses these documents to determine the financial
success of the company and to identify areas that are unproductive. A
department head might use financial documents to prepare a budget
proposal.
Technology
Technology has become part of our everyday lives. Businesses use different
kinds of technology every day and as such, we need to understand what
they are and how we can use them in creating documents.
Computer components
Any computer is made up of two major parts:
Hardware
Software
Hardware
When creating documents, you will be using several devices. The
physical equipment of the computer is known as hardware. Any item
you can actually touch is hardware.

BSBITU306 – Design and produce business documents
Learning guide V2.1 © AAMC Training Group 5
Input hardware
These come in many different shapes and sizes, and are tailored specifically
for particular systems. Below is a list of common input devices:
Keyboards
Touch screens
Pointing devices
Mouse
Touchpad/track pad
Joystick
Composite devices (capable of multiple abilities: movement, clicking,
etc.)
Game controllers
Light pen
Graphics tablet
Imaging input devices
Digital cameras
Webcam
Image scanner
Fingerprint scanner
Barcode reader
Audio input devices
Microphone
MIDI Keyboard
Drum machine
Processing hardware
Processing in a computer system is handled by the Central Processing
Unit (CPU).
The motherboard of a computer is essential to this process as it houses
the CPU, RAM and other integral components.
Random access memory (RAM) allows for the data being processed to
be stored temporarily.
Output hardware
Output devices are continuously changing as technology advances.
Various types of display outputs as well as printers and audio devices
continue to evolve daily. These devices are responsible for transmitting
data in to a form that we as humans are able to interpret: e.g. text,
images, and audio.
Monitors
Printers
Haptic sensors (for example, mobile device vibrations upon touch input)
Sound cards and speakers

BSBITU306 – Design and produce business documents
6 © AAMC Training Group Learning guide V2.1
Storage hardware
Often data that has been processed is stored for later processing or
reading. Many devices are capable of storing such information such as:
Hard disk drives (HDDs)
Solid-state drives (SSDs)
Optical drives (CDs / Blu-ray / DVD)
Flash storage devices (USB storage disks)
Network-attached storage devices (NAS)
Software
Software is a generic term for organised collections of computer data
and instructions, often broken into two major categories:
system software that provides the basic non-task-specific functions of
the computer
application software which is used by users to accomplish specific tasks.
System software
System software is responsible for controlling, integrating, and
managing the individual hardware components of a computer system so
that other software and the users of the system see it as a functional
unit without having to be concerned with the low-level details such as
transferring data from memory to disk, or rendering text onto a display.
Generally, system software consists of an operating system and some
fundamental utilities such as disk formatters, file managers, display
managers, text editors, user authentication (login) and management
tools, and networking and device control software.
Application software
Application software, on the other hand, is used to accomplish specific
tasks other than just running the computer system.
Application software may consist of:
a single program, such as: an image viewer;
a small collection of programs (often called a software package) that
work closely together to accomplish a task, such as a spreadsheet or
text processing system;
a larger collection (often called a software suite) of related but
independent programs and packages that have a common user interface
or shared data format, such as Microsoft Office, which consists of closely
integrated word processor, spreadsheet, database, etc.;
or a software system, such as a database management system, which is
a collection of fundamental programs that may provide some service to
a variety of other independent applications.

BSBITU306 – Design and produce business documents
Learning guide V2.1 © AAMC Training Group 7
Document production software
Word processing
Word processing software is used to manipulate a text document, such as
a resume or a report. You typically enter text by typing, and the software
provides tools for copying, deleting and various types of formatting.
Word processing includes a number of tools to format your pages. For
example, you can organise your text into columns, add page numbers,
insert illustrations, etc. However, word processing does not give you
complete control over the look and feel of your document. When design
becomes important, you may need to use desktop publishing software to
give you more control over the layout of your pages.
Word processing software typically also contains features to make it
easier for you to perform repetitive tasks. The letter is the same for all
customers except for the name and address at the top of the letter. A
mail merge function allows you to produce all the letters using one
template document and a table with customer names and addresses in
the database.
Word processors vary considerably, but all word processors support the
following basic features:
insert text: Allows you to insert text anywhere in the document.
delete text: Allows you to erase characters, words, lines, or pages as
easily as you can cross them out on paper.
cut and paste: Allows you to remove (cut) a section of text from one
place in a document and insert (paste) it somewhere else.
copy: Allows you to duplicate a section of text.
page size and margins: Allows you to define various page sizes and
margins, and the word processor will automatically readjust the text so
that it fits.
search and replace: Allows you to direct the word processor to search
for a particular word or phrase. You can also replace one group of
characters with another everywhere that the first group appears.
word wrap: Automatically moves to the next line when you have filled
one line with text, and it will readjust text if you change the margins.
print: Allows you to send a document to a printer to get hardcopy.
Examples of word processing software:
Microsoft Word
WordPerfect
Pages by Apple.
BSBITU306 – Design and produce business documents
8 © AAMC Training Group Learning guide V2.1
Spreadsheets
A spreadsheet is an interactive computer application for organisation,
analysis and storage of data in tabular form. Spreadsheets are developed
as computerised simulations of paper accounting worksheets. The
program operates on data entered in cells of a table. Each cell may
contain either numeric or text data, or the results of formulas that
automatically calculate and display a value based on the contents of other
cells. A spreadsheet may also refer to one such electronic document.
Spreadsheet users can adjust any stored value and observe the effects on
calculated values. This makes the spreadsheet useful for "what-if" analysis
since many cases can be rapidly investigated without manual recalculation.
Modern spreadsheet software can have multiple interacting sheets, and can
display data either as text and numerals, or in graphical form.
Besides performing basic arithmetic and mathematical functions, modern
spreadsheets provide built-in functions for common financial and
statistical operations. Such calculations as net present value or standard
deviation can be applied to tabular data with a pre-programmed function
in a formula. Spreadsheet programs also provide conditional expressions,
functions to convert between text and numbers, and functions that
operate on strings of text.
Examples of spreadsheet software:
Microsoft Office Excel
Google Sheets
Apple iWork Numbers
Desktop publishing software
Desktop publishing (abbreviated DTP) programs are used in creating
documents using page layout skills on a personal computer. Desktop
publishing software can generate layouts and produce typographic quality
text and images comparable to traditional typography and printing.
This technology allows individuals, businesses, and other organisations to
self-publish a wide range of printed matter. Desktop publishing is also the
main reference for digital typography. When used skilfully, desktop
publishing allows the user to produce a wide variety of materials, from
menus to magazines and books, without the expense of commercial printing.
Examples of DTP software:
Adobe InDesign
QuarkXPress
Microsoft Office Publisher
PagePlus

BSBITU306 – Design and produce business documents
Learning guide V2.1 © AAMC Training Group 9
Microsoft applications
Excel
Excel is a spreadsheet application for calculations, graphing tools, pivot
tables, etc.
PowerPoint
Big business design template for your client presentations or your first
home buyer seminar or SMSF seminar.

BSBITU306 – Design and produce business documents
10 © AAMC Training Group Learning guide V2.1
Word
Send a great business newsletter to your client database and referral
network.
Publisher
Create marketing materials and other documents.

BSBITU306 – Design and produce business documents
Learning guide V2.1 © AAMC Training Group 11
Section 2 Design document
Clarify format and style
Depending on the type of document you are producing, the way in which
it needs to be presented will vary. Your organisation may have
standardised procedures and set templates that it uses for specific
documentation.
For example, a company letter head may always be used for letters sent
out to clients, there may be a generic template for minutes of meetings,
and specific envelopes and labels may be used for certain mail merges.
Relevant personnel
It is important to familiarise yourself with all of these factors relating to
the production of the document before producing it. If you are unsure or
do not know, you need to seek clarification from the appropriate
member of staff.
Relevant personnel may include:
Fellow employee
Supervisor
Office manager
Administration department.
Organising information for creating documents
In your business, you will be constantly gathering data from many
different sources and you will need alternate programs so that you can
safely and securely contain that data. For your compliance, you will also
need to understand that this is very important that you keep this
information confidential as well as secure.
Now that you know more about the computers and applications used in
your workplace, you can start to use them. The first step will be to
gather the data you are going to use.
Before you begin to gather data to input into the computer, you will
need to be clear about the difference between data and information.
Data is a collection of facts, which can be added, subtracted, compared
or sorted. A fact can be almost anything; the number of items a
customer has ordered or even daily average temperatures etc.
Information may include data or the results of processed data. It also
includes text or words, graphics, video images and voice input.

BSBITU306 – Design and produce business documents
12 © AAMC Training Group Learning guide V2.1
Document design and layout
When a request/requirement arises to design/produce a document, ensure
all information is received (complete a brief) to include, timeframe
document is required within, the purpose of the document, the audience
and any technical requirements.
When designing, you should put yourself in the reader’s place. Try to think
through everything you do from the reader’s point of view. You cannot
force anyone to read anything, but you can make a document clear,
accessible, and adaptable, to help readers navigate their way around the
text for any purpose. There are certain principles of legibility and
perception which should be followed to help achieve this.
When developing a basic design for your documents you will need to
consider both their purpose and their function. What information is being
presented, how will the documents be used, will they be provided in printed
form or will they be accessed online?
NOTE: Your organisation may already have templates or a style guide in
place to be used in designing and producing business documents.
Templates and style guides are tools for ensuring that all documents or
pages have a standard layout, look and feel. These also ensure consistent
messaging and branding. These will be discussed further in detail in this
section.
Purpose of document
Workplace documents can have many different purposes. They might be
to inform work team members of a change in production, to reply to a
customer complaint, or to record decisions made at a meeting. Although
your purpose might be obvious to you, you must make sure that it is
equally obvious to your reader if you want your communication to be
effective.
By identifying your purpose, you can focus on what information you
need to include in your document. A document with a clear purpose has
all the information the reader needs without being long and rambling.
The purpose of your document will also affect the sort of style and
format you use. Your response to a customer complaint for example will
look and sound very different to safety instructions for OH & S. Some
documents such as memos and letters might even have specific
formatting ‘rules’ that make them easy to recognise and read.
When identifying your purpose, ask yourself the following questions:
What message do I want to put across to my reader?
What action do I want them to take in response?

BSBITU306 – Design and produce business documents
Learning guide V2.1 © AAMC Training Group 13
Purposes include to:
Inform – factual information that could include:
organisational newsletter
changes in organisational policy and procedure
information for clients
internal memos between departments
key performance indicators required for meetings and/or
presentations
agendas and briefing papers
press releases
Persuade – often sensational and exciting information that could
include:
advertising and promotional documents
testimonials
Instruct – direct and often formal instructions which could include:
minutes from meetings with action points
direct instructions to employees and/or management
final warning notices to clients with overdue payments
purchase order forms
Describe – a descriptive document that could include:
details of an accident or incident in the workplace
a witness statement.
Educate:
training documents
changes to legislation.
Who is your audience?
When planning your document you will also need to identify your
audience, that is, who is going to read the document?
Your audience may be as small as one or two people, or as large as a
whole department or workplace. It is important to think about who your
audience is so that your document can suit their needs.
When thinking about your audience you should ask yourself the
following questions:
What is the reading ability of the audience?
What does the audience need to know?
What would the audience already know about this subject?
How would you feel about this subject if you were the audience?

BSBITU306 – Design and produce business documents
14 © AAMC Training Group Learning guide V2.1
Visual style and features of document
What size and orientation will your document be—is a standard paper
size like A4 or A3 appropriate or will you need to set a custom size; does
your document layout require a portrait or landscape orientation?
Is colour an important feature of the document or is black on white a
better choice for printable documents?
Colour, if used, can be chosen to suit the subject of the document; to
add visual contrast, formality or informality; or to identify the structure
of your information or highlight key concepts and important points.
Will your document include any branding, labelling or copyright notices?
Will you need to break your document into sections—how do you retain
the feel that it is the same document?
Some basic principles of layout
Document layout, in its most basic sense, is the art of arranging 'blocks'
of content (text and images etc.) on a visual plane (the page/s). It
includes making judgements about balance, dominance, order, flow,
alignment and space. Well-designed documents can make content
easier to read and so enhance comprehension.
A common device used when designing a document is a layout grid—it is
used to divide the page up into regular column and row divisions, which
then act as guides for the arranging and alignment of objects.
Dominant elements can be used to help guide the reader/viewer,
highlighting key break points in the information and emphasising
important concepts and ideas.
Space is a handy tool in the layout arsenal—it can be used to open up
very text dense documents to improve readability, to help provide visual
balance on a page and to aid the flow of information.

BSBITU306 – Design and produce business documents
Learning guide V2.1 © AAMC Training Group 15
Style guides
A style guide (or manual of style) is a set of standards for the writing
and design of documents, either for general use or for a specific
publication, organisation, or field. A style guide can be used to create
templates.
Essentially, it’s a document that describes, defines and presents
examples of what your brand looks like in various visual media such as
print, Internet and broadcast. To be effective it must clearly define the
rules around your online presence in all channels such as websites,
landing pages, mobile sites, online ads, blogs, social media channels and
email communications (including email signatures!). Style guides ensure
brand consistency throughout any collateral you produce – no matter
who created it.
It is imperative not only that you create a brand style guide, but that
you keep it up-to-date and in the hands of everyone who touches your
brand. If your company is like most, your brand – meaning your logo,
tagline, graphics and text elements – is touched by many entities before
content is delivered to the public. These entities include distinct
departments within your company as well as one or more outside
resources managing various aspects of online content creation and
delivery. For example, a business may have one company updating
website content, a marketing company working on SEO and online ads,
and other companies working on social media and blog management.
To assure that your brand is handled consistently, each one of these
entities must adhere to the same set of guidelines when touching your
brand. Your brand style guide will accomplish this purpose. With a
common style guide to bind all who touch the inner sanctum of your
brand, your followers will experience a cohesive, unified marketing
message across all channels.
Logo size and placement
Define and give examples of your logo. Show how your logo should be
used in various formats including full colour, black and white,
transparent, or on different backgrounds. You should also provide logo
files for users in .png, .jpg and vector-based formats. If you have a
tagline, make sure there are rules around placement, font, colour and
size in relationship to the logo.
It’s also important to show how to not use the logo. Designers are
creative by nature, and it’s important to show them what they’re not
supposed to do alongside what they should.
That way if there’s any issue, you can refer them to the style guide and
show where it clearly states how the logo can and cannot look.

BSBITU306 – Design and produce business documents
16 © AAMC Training Group Learning guide V2.1
Below are samples from FourSquare’s Brand Book:
https://issuu.com/bondo/docs/foursquare

BSBITU306 – Design and produce business documents
Learning guide V2.1 © AAMC Training Group 17
Colour palette
Provide HEX and RBG colour values for each colour in your palette.
Include recommended colour combinations. Many brands have primary
and secondary colour palettes to define the main colours to be used and
accent colours.
Below is a sample from Google’s Visual Assets Guidelines:
https://www.behance.net/gallery/9028077/google-visual-assets-
guidelines-part-1

BSBITU306 – Design and produce business documents
18 © AAMC Training Group Learning guide V2.1
Typography
Define the font families, sizes, kerning, line spacing, colours for various
content types; header, sub-head, paragraph, cite, block quote, labels,
form headers or any other formatted text that will be used.
Below is a sample from Skype’s Brand Guidelines:
https://issuu.com/bondo/docs/skype_brand_book_-_look
Layout
Define where and how HTML and other elements are positioned on the
page and how they relate to each other. Define margins, padding,
gutters or grid patterns of the overall layout as well as any specific
elements if different. If necessary, provide examples of the layout to
show the differences in pages or layout templates, such as landing
pages, product pages and email communications.

BSBITU306 – Design and produce business documents
Learning guide V2.1 © AAMC Training Group 19
Graphics and icons
Define what type, sizes, file sizes, dimensions, and styles should be
used for graphics and icons on your site. Do you have specific icon sets
that need to be used? Show examples or have a library of graphics and
icons prepared for usage. Your graphic designer can customise or design
icons for you.
Below is a sample from Skype’s Brand Guidelines:
https://cdn.cms-twdigitalassets.com/content/dam/brand-twitter/asset-
download-zip-files/Twitter_Brand_Guidelines.pdf
Templates
A template is a sample document that has already some details in place;
those can be adapted (that is added/completed, removed or changed,
differently from a fill-in-the-blank approach as in a form).
For example, you might use template in Microsoft Word that is formatted
as a business letter. The template would likely have a space for your name
and address in the upper left corner, an area for the recipient's address a
little below that on the left site, an area for the message body below that,
and a spot for your signature at the bottom.
When you save a file created with a template, you are usually prompted to
save a copy of the file, so that you don't save over the template. Templates
can either come with a program or be created by the user.
As previously mentioned, the style guide sets the standards for writing and
designing documents, therefore if your organisation has a style guide, it
should be used in creating templates.

BSBITU306 – Design and produce business documents
20 © AAMC Training Group Learning guide V2.1
Setting up a template
Putting some thought into the set-up of your document template initially
will ensure that you create an effective and flexible starting point for
developing your documents. Start by building a framework for your
template, which can then be personalised to suit your particular needs.
Develop some draft designs / specifications
Write down your requirements/needs—what type of information do you
want to include in your document, how might you present this
information to maximise its readability/usability, will you use headers
and footers—then sketch some rough layout options. Think about layout
at the 'block' level; as a page design.
What features will be common to your finished documents? Include
them into your rough designs/specs.
Another approach is to begin with a pre-defined template and then
modify it to suit your particular needs.
Document level considerations
Set up the page size and the primary margins for your documents. Keep
in mind that you may need to account for such things as printing
limitations when establishing these settings.
If your document will be produced in booklet format you will need to set
appropriate internal margins.
Is a 'different first page' required, e.g. for a title page or to carry a
course banner in the heading?
If your document is to be laid out in columns, do they need to be pre-set?
Page level elements
The next step is to set up the page-level, or structural, elements—where
are the key text areas located, how many levels of heading do you need
to include, will you need to allocate space for tables and images?
You can add placeholder items into the document so that you can see
the template design at a glance.
The nonsense text 'Lorem Ipsum' is used by designers to mimic
paragraph text—it is good to use for these placeholders. You can find it
easily by doing a web search.
If you will use headers and footers in your documents, you can set
placeholders for these in your template.
Other items that may be part of your documents include corporate
'branding' elements and repeating elements like borders, rules and
backgrounds.
BSBITU306 – Design and produce business documents
Learning guide V2.1 © AAMC Training Group 21
Adding styles and page elements
Once your framework is in place you can then add some style to your
template by modifying the look and feel of the various elements. Keep in
mind that less is more—too much styling can make it difficult for the
reader/viewer to engage with your information effectively.
Creating and saving styles
Microsoft Word may have 'Keep track of formatting' turned on—turn this
off, particularly when developing templates. This will avoid you creating
a new style for every action you take on a piece of text.
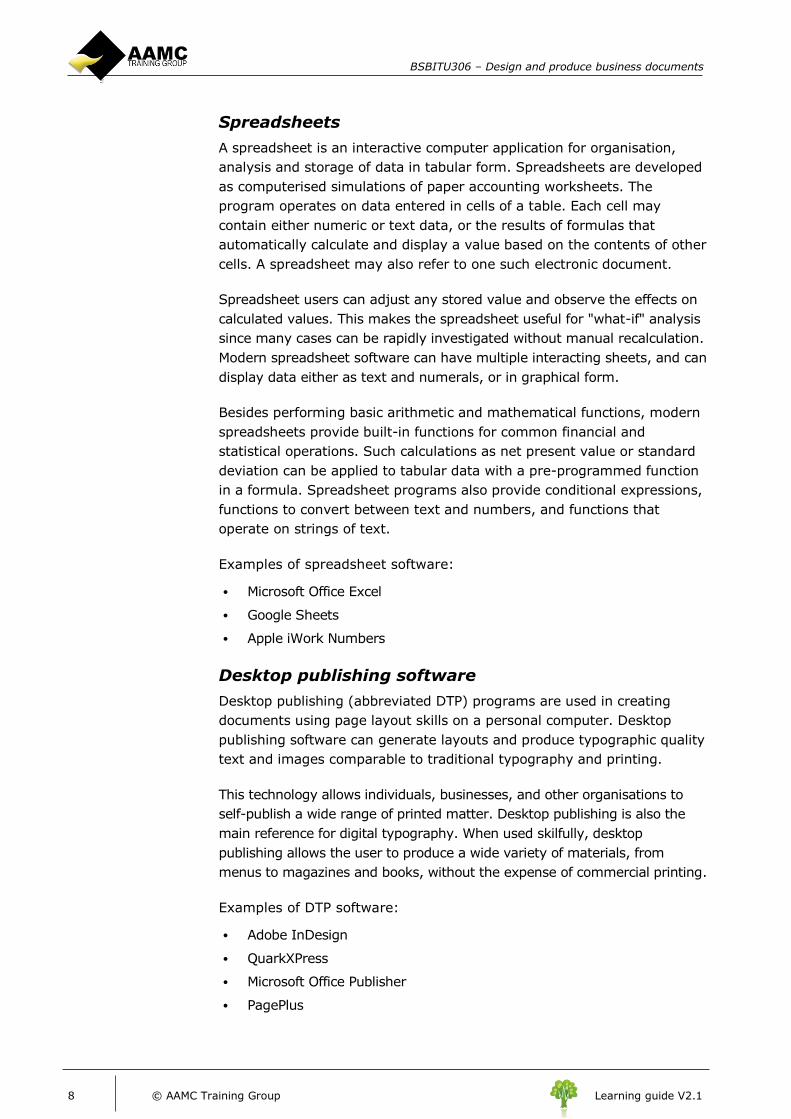
Build your styles on the structural elements you defined in your page-
level setup, then save them as your template specific styles, or base
them on the default Word styles—modify them and then save as new
styles to your own template.
Font choice, colour, and shading
The typeface/s you choose to use can have an impact on the readability
of your information—some studies suggest that serif fonts are easier to
read for printed documents, but sans serif fonts are a popular choice for
screen based documents. Decorative and specialised fonts should only
be used where appropriate. A good rule of thumb is to restrict yourself
to 2 or 3 fonts per document—you can then expand their range and add
variety by using bold, italics and changes in size.

BSBITU306 – Design and produce business documents
22 © AAMC Training Group Learning guide V2.1
Choose colours to suit the purpose of your document—you can use a
restricted palette of black and greys (especially suitable for printing to
standard laser printers and copiers); a contrast colour used with black
can be used to highlight key information and also be used to provide
visual interest for your reader/viewer.
Restricting yourself to using only a few colours in a document will help
you avoid potentially garish results. Different colours, or colour sets, can
also be used to identify different documents or groups of documents.
The overuse, or inappropriate use, of shading, 3D effects and coloured
or pictorial backgrounds can make the reader's job difficult—limit their
use to when they add value to your information. Recent versions of
Word allow the easy creation of 'smart art' objects—again, use wisely, if
the document is printed in black on white the contrast between colours
may not reproduce very well.
Font size, line length, leading
Leading is the space between the baseline of one line of type and the
baseline of the next line of type. It is usually expressed in points.
These three factors are interrelated. If you increase the font size, for
example, you might also have to increase the space between lines to
maintain legibility. The rules of thumb are these: space between letters
should be less than word space, and word space less than the space
between lines.
When using Desktop Publishing (DTP) software, in text designed for
continuous reading, lines should be between 50 and 70 characters in
length (including letters, numerals, spaces, and punctuation). If there
are fewer than that, there may be too many awkward line breaks; if
there are more, it can get difficult for the reader to find the beginning of
the next line.

BSBITU306 – Design and produce business documents
Learning guide V2.1 © AAMC Training Group 23
For the main text of a report, a type size of 10 or 11 point is a good
starting size. Try 12 or 13 point ‘leading’ (inter-line spacing) – but if your
lines are more than 70 characters long, more leading might be needed. If
you are using two columns, your type size can be smaller, to correspond to
the shorter line length. You can therefore reduce the leading.
Do not be tempted to use a very large type size for continuous text to
fill out long lines with the 50–70 characters – you don’t have to make
your lines fill the page width. Research shows that type sizes between 9
and 11 point are most comfortable for sustained reading. However,
don’t rely on these figures – different typefaces may vary in visible
appearing size at the same ‘point’ size.
You should make trials with samples of your text, tuning the type size,
line length, and leading so that the text is comfortable to read, in the
circumstances in which it is likely to be read.
Typefaces have different proportions; some may have large x-heights
and therefore relatively short ascenders, as in the above example, which
shows Times New Roman.
The nominal type size (‘point’ size) is therefore not always a reliable guide
to appearing size. The example above shows four typefaces at 10 point.
Text alignment and hyphenation
Justified text
Justified text has straight left-hand and right-hand edges. Because
readers may be familiar with seeing justified text in books (and
newspapers), the assumption is that this gives a formal appearance to
text. It does not improve legibility, however, and it is difficult to achieve a
satisfactory result: for justified text to look good, words at line endings
may have to be hyphenated and the spaces between words controlled.
If you accept the default ‘hyphenation and justification’ (h & j) settings in
many page make-up pro- grams, few or no hyphenation breaks are made,
and the system will often spread out the words on a line to fill a column, by
varying the width of word spaces and even by putting extra space between
letters, which ruins the evenness of the text. You should do some trials to
achieve good-looking text, allowing hyphenation, and controlling the
minimum and maximum word spaces. If possible, specify zero letter-
spacing. You should aim for an even appearance to each line of text.

BSBITU306 – Design and produce business documents
24 © AAMC Training Group Learning guide V2.1
Do not use justified setting for your letters, memos, and faxes.
Whatever the style of your letterhead, it is not worth making the text
justified, as the brevity of correspondence, often made up of short
paragraphs, does not sufficiently define a straight right-hand edge. More
importantly, some word-processing programs do not allow you to alter
the default settings for word spaces and hyphenation, which may result
in justified text with an uneven appearance.
Ranged left text
Ranged left (or ‘flush left’) text has a ragged right-hand edge. This is a
safer option than justified text and legibility is not impaired: it may even
be improved, since word spaces are kept constant. In page make-up
programs, if you have the hyphenation option switched off, very ragged
line endings may result, so you may want to accept some hyphenation.
Space between lines should appear greater than word space; this
preserves horizontal cohesion and assists the ‘flow’ of reading. In all DTP
programs, the default word space is usually large, but in page make-up
programs you can reduce the word space throughout. Word-processing
programs do not allow you to change these settings, so you may try to
compensate for this by increasing the leading: for 10 point type try 14,
15, and 16 point leading.

BSBITU306 – Design and produce business documents
Learning guide V2.1 © AAMC Training Group 25
Ranged right and centred text
Your DTP program also offers you these other choices for text
alignment. They are both fine for short items such as titles but they
make longer passages of text difficult to read. Ranged right is useful for
captions to tables or graphs, and for side-headings appearing in the left-
hand margin.
Formatting bullets, text boxes and tables
Additional formatting, to add visual interest and help aid readability, can
be achieved in your document by changing the type of bullets used,
modifying the indenting/overhang of text, and by adjusting the spacing
between items.
The modest use of text boxes and borders can be to great effect,
particularly to focus on key information or to set some information apart
from the main body of text. You can modify the internal margins and
offsets, borders, colours and backgrounds when formatting borders and
text boxes for inclusion in your template.
Table styles can be added to your template if needed—start with a basic
table and adjust the cell spacing, borders and shading as appropriate.
You can also start with a pre-defined Word style and modify it to suit.

BSBITU306 – Design and produce business documents
26 © AAMC Training Group Learning guide V2.1
Using headers and footers
Headers and footers can be very simple, repeating the same information on
each page or just adding a running page number, but they can also be
more complex, allowing for different header information in different
sections of your document and for changing page numbering sequences.
They can also be used to anchor static document elements.
First page, odd/even, page numbering
Use a page break to force a second page in your template, so you can
see the first and subsequent page headers/footers and be able to edit
them.
You can use tabs to control the positioning and alignment of
header/footer text and page numbering. If you are using odd and even
page headers/footers in your documents remember to mirror the
positioning of the text and page numbering.
You can introduce and control different headers and footers by using
section breaks within your document. When editing them, adding or
removing section breaks, watch out for the 'same as previous' trap.
Embedding elements in headers/footers
Headers/footers can also be used as a place to anchor static document
information, such as Faculty or School names or details, or common
repeating elements like page borders, rules, banners or logos.
By putting these elements in the header/footer you are then not able to
accidentally change or misalign them while working on the main body of
the document.

BSBITU306 – Design and produce business documents
Learning guide V2.1 © AAMC Training Group 27
Installing and using the template
Once you have your template in the shape you want it, you need to install it
on your computer so that you can easily access and use it when you need to.
Saving, installing and accessing the template
Once you have your template the way you want it, save it as .dotx (or
.dotm, if using interactive elements).
Save a copy to the 'Templates' folder (on your user profile) or in a
subfolder, if you have the appropriate permissions. Save a backup copy to
your computer hard drive.
To start using your template: Open Microsoft Word, select the Office
Button, then click on New, select 'My templates...', and then choose the
appropriate template from the list.
An easy to understand filename, or the inclusion of a 'preview' image when
saving the file, will make it easier to identify which template to choose.
Using the template
Import or paste the text into your new document and any related content
such as image files, charts and/or graphs. If you are having trouble with
formatting when loading the text, check the 'Pasting' options, under the
Advanced tab in Word Options.
Once the content is in your document you can then apply styles and format
elements as required.
Adjusting the document layout follows, refining the positioning of images
and other elements as appropriate and checking for any spacing and
indenting variations that are needed.
Lastly, review the section headings and page numbering and adjust them
as needed.
Updating the template
To include updates or modifications you can edit the original directly—use
right click/Open to open the template itself, rather than a copy.
You can also make style changes within a document based on the template
and then, when you save the changes, choose to have them updated in the
master template.
Alternatively, you can save changes within a document based on the
template and then overwrite the original template with this new version.

BSBITU306 – Design and produce business documents
28 © AAMC Training Group Learning guide V2.1
Templates and organisational standards
Correspondence to your customers or clients will influence their everyday
impression of your organisation. Desktop Publishing programs offer the
opportunity to make your letters and faxes appear typeset (not
typewritten) by the use of printers’ typefaces, you must make sure that
details of layout and text design are correspondingly professional. Even
internal memos are important in communicating information to your
colleagues clearly, so that business runs more smoothly.
As correspondence may be produced by many people within an
organisation, it is important that a standard style is set up, so that the
image of a coherent organisation is presented. You could set up a template
file for each kind of document you produce.
Factors that should remain constant are:
logo/s
information about your organisation
typeface
type size
leading
text area
colours
icons
With a template file, all employees can simply type in the new information
without worrying about the layout. This will benefit both you and your
readers: you save valuable time and your readers will be able to
concentrate on the content of your correspondence rather than being
diverted by unnecessary variety in its presentation.
BSBITU306 – Design and produce business documents
Learning guide V2.1 © AAMC Training Group 29
Microsoft Publisher basics
Publisher is excellent for documents with complex formatting and/or
multiple pages, such as newsletters, brochures, flyers, websites,
resumes, reports, and handouts. The Publisher window contains many
parts that work together to make creating a document easy.
NOTE: This section provides an overview on how a desktop publishing
software looks like. Your organisation may require you to use a different
program.
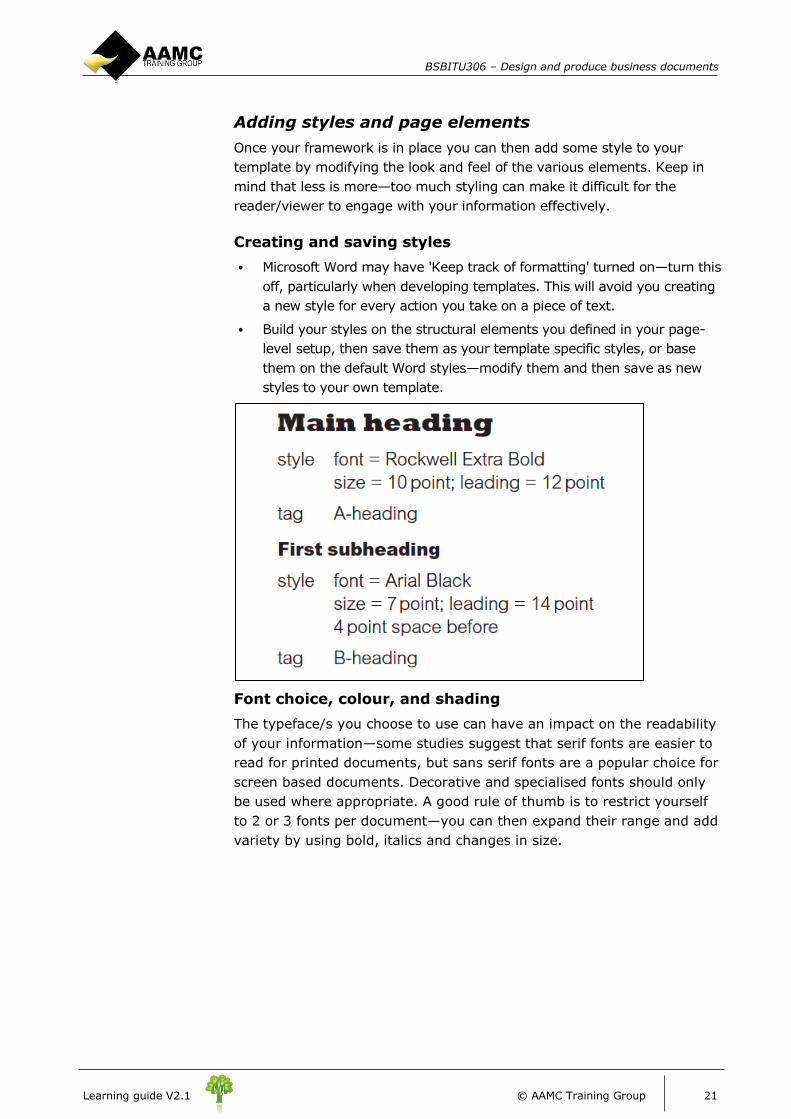
Creating files
All publications begin with a template, even if it’s a blank template. The
trick is to find a template that looks like the vision you have for your
final publication. Publisher comes with built-in templates.
Click File > New, and do one of the following:
Choose one of the Featured templates, and click Create.
To use one of the templates installed in Publisher, choose Built-in, scroll
to click the category you want, choose a template, and click Create.
To find a template on Office.com, use the Search for online templates
box to find what you need. Enter “newsletter,” for example, scroll to a
template you like, and click Create.

BSBITU306 – Design and produce business documents
30 © AAMC Training Group Learning guide V2.1
Save files
Save your publication the first time by following these steps.
1. Click File > Save As.
2. In Save As, choose where you want to save your publication.
OneDrive is a free Microsoft service that provides password-
protected online file storage.
Other Web Locations includes websites you’ve used recently, and
a Browse button to save your publication to any website you have
access to.
Computer includes any folder on your computer.
Add a Place lets you add an online location to save your
publication.
3. Enter the name for your publication, and click Save.
After you’ve saved your publication once, you can simply click File >
Save each time you want to save.
If you want to change the file name or location of your publication, click
File > Save As, and save the publication as if you were saving for the
first time.
Add pictures to your file
1. Click Home > Pictures.
2. Use the options in the Insert Pictures dialog box to find the picture
you want to use.
Add text to your file
Add text to your publication by inserting a text box first. Most templates
contain text boxes you can fill in, but you can also add your own text boxes.
First: Add a text box
1. Click Home > Draw Text Box, and drag the cross shaped cursor to
draw a box where you want text.

BSBITU306 – Design and produce business documents
Learning guide V2.1 © AAMC Training Group 31
2. Type text in the text box.
If the text you type is too long for the text box, you can make the text
box bigger, or link it to another text box.
Second: Link your text boxes
You can link text boxes so that text flows from one box to another.
1. When a text box has too much text, a little box with ellipses appears
in the lower right of the text box.
2. Create a new text box.
3. Click the overflow indicator and your cursor becomes a text box
linking pitcher, used to link text boxes.
4. Move to the new text box and click. The overflow text will show up in
the new text box.
Now as you add text, words flow from one text box to another. If you
run out of room in the second box you can link to another text box, and
the text will flow through all three boxes.

BSBITU306 – Design and produce business documents
32 © AAMC Training Group Learning guide V2.1
Save and reuse content in the Content Library
When you create branding for your business, you can store it and use it
again in subsequent publications. If you create logos, lists of services,
success stories, maps to a business location, testimonials, and pictures
that you plan to reuse in your future publications, add these items to the
Content Library.
Closing files and exiting Publisher
When you are done working with your document and would like to close
it, you have two options, depending on whether you want to continue
using Publisher. If you are finished using Publisher for now, be sure to
select the Exit command.
NOTE: If recent changes to the publication have not been saved, before
you can close the file or exit Publisher, a dialog box will ask if you want
to save changes to the document.
To close the saved publication and work on another publication:
From the File menu, select Close
In Publisher, open another publication or create a new publication
To close the saved publication and exit Publisher:
From the File menu, select Exit
If you have saved all recent changes to your document(s),
Publisher closes.
If you have not saved all recent changes to your document(s), a
dialog box appears asking if you want to save changes to the
document.
a. To save the publication, click YES
b. To close without saving, click NO

BSBITU306 – Design and produce business documents
Learning guide V2.1 © AAMC Training Group 33
Section 3 Produce document
Organisational requirements
Document layout and design may be governed by the following
factors:
Company logo
Company colour scheme
Observing copyright legislation
Document storage and filing
Style guide and/or templates.
Your organisation will have procedures in place that determine whether
templates are used, the quality of paper used to produce specific
documents, the size and colour of envelopes used for certain letters and
correspondence, and whether or not email signatures may be used on
certain documents, or whether hand signatures are essential.
These guidelines and procedures may cover things you had never
thought of before.
Timelines
Designated timelines
Whatever document you have been asked to produce you will have most
probably been given a submission or completion deadline.
Designated time lines may include:
organisational time line e.g. financial requirements
time line agreed with internal/external client
time line agreed with supervisor/person requiring spreadsheet
Designated time lines may be:
by month end
monthly
within agreed period
within organisational deadline
BSBITU306 – Design and produce business documents
34 © AAMC Training Group Learning guide V2.1
General administration timelines can be met if you observe common
sense principles:
1. Determine when the task must be accomplished by you.
2. This becomes your end point on the timeline.
3. Calculate how long you have from the current date until the deadline
arrives.
4. Write down specifically what needs to be done by the deadline.
For example, determine exactly the data input needs that are drawn
from a range of sources either within your organisation or from external
providers.
1. Divide the goal into smaller logical steps.
2. Think about what individual actions you need to take in order to get to
the end result you defined.
3. Estimate how much time each step will take to complete. Use prior
experience or your knowledge of the amount of work involved in
processing the data.
4. Add up your time estimates to determine if the total time needed fits
within the actual amount of time you have left or what has been
determined as organisational requirements for speed and accuracy.
5. If not, adjust the time lengths for each step as necessary to fit the
timeline.
6. Monitor your progress on each smaller step and toward the end goal at
regular intervals. Make any adjustments to the timeline as necessary if
you fall behind or get ahead of the estimated due dates.
How can you best manage your time?
Documents such as memos often need to be completed immediately,
while other documents such as reports and newsletter articles will have
deadlines that you have to meet.
To prepare for these deadlines it is a good idea to make a time line. Your
timeline should include time for planning, writing, drafting, proofreading
and of course your completion date. You will need to estimate how long it
will take to finish each of these stages, and how much time you actually
have to complete the document. Place your timeline in a place where you
can see it, so you can easily keep track of how you are going, for example
set a reminder in your MS Outlook calendar or iCal.
A production schedule should be worked backwards from the deadline for
delivery, taking into account the schedules of other people involved, such
as suppliers and printers. Make certain you allow for several stages of
proofing, and remember to keep frequent back-up copies of your work.
BSBITU306 – Design and produce business documents
Learning guide V2.1 © AAMC Training Group 35
Difficulties with using design applications
All applications with user documentation to enable the user to get as
much out of the product as they require. From basic functions used on a
daily basis to advanced presentation and formatting of documents, there
will be documentation explaining how to complete any action you need.
Manuals and user documentation
Tangible, hard copy user manuals are rapidly becoming a thing of the
past as the digital age is quickly taking over due to software being
replaced by updated versions seemingly no sooner than their
predecessors were launched, rendering the user guide almost obsolete.
It is also not as quick to find relevant information in a hard copy of a
manual as the human search engine does not work as fast as that of a
computer system. However, your organisation may still have a physical
copy of the user manual for the software with which you are working.
Online assistance
You will find endless technical support online that is just a click of a
mouse away. There are a plethora of websites that provide information
to answer every one of your questions however big or small.
Online help comes in many forms including:
User forums and blogs
Manufacturer forums
Frequently asked questions on manufacturer website
Live chat with employees of the manufacturer
Video tutorials
Manual downloads
How-to guides.
There is no harm in being stuck and encountering problems, but with so
much available information at your fingertips, there is no excuse for
staying stuck.
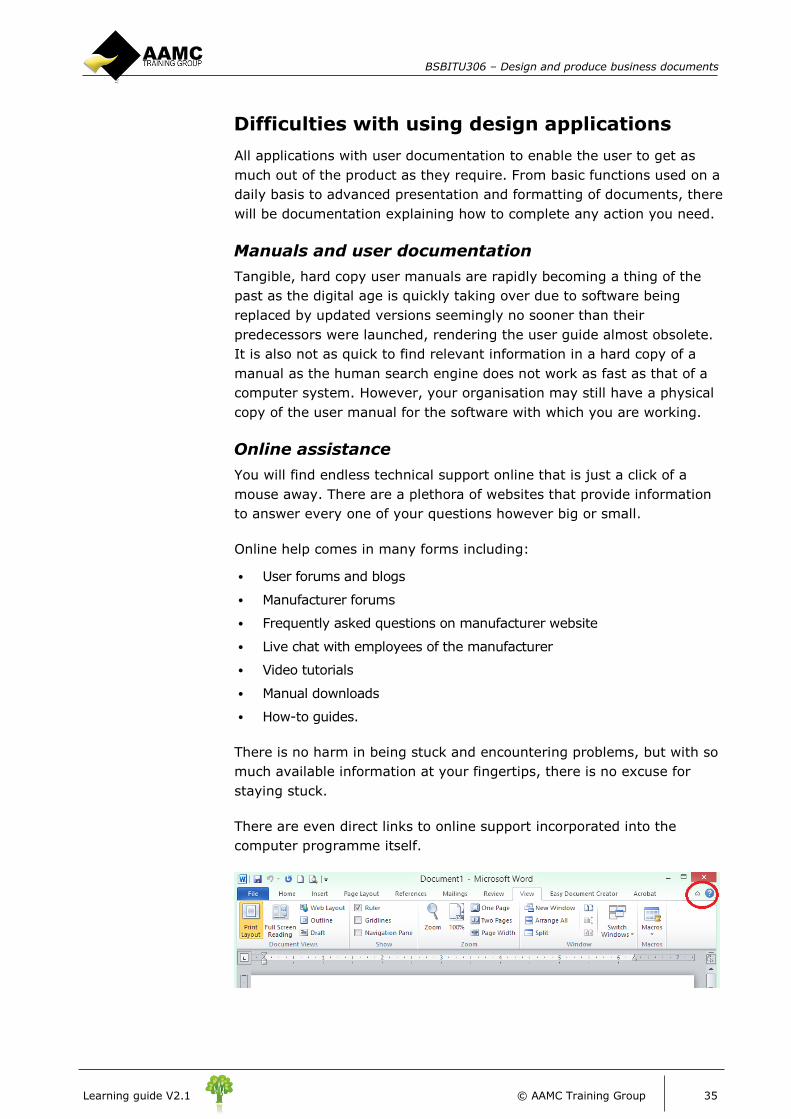
There are even direct links to online support incorporated into the
computer programme itself.

BSBITU306 – Design and produce business documents
36 © AAMC Training Group Learning guide V2.1

BSBITU306 – Design and produce business documents
Learning guide V2.1 © AAMC Training Group 37
Section 4 Finalise document
Now you have produced your document you need to put the finishing
touches to it. No first draft of a document is ever perfect regardless of
how precise you are with your work. When you think it is completed,
you need to check through it.
Checking a document may include:
Accuracy of information
Consistency of layout
Ensuring instructions with regard to content and format have been
followed
Grammar
Proofreading
Spelling, electronically and manually.
Once you have checked all of these aspects of your document you may
need to make adjustments. Adjusting anything within your document,
such as the consistency of usage of terms, paragraph formatting, line
spacing, addition or resizing of images, and corrections to spellings and
grammar, and layout may well have a knock on effect to the rest of the
document.
You may find that minor alterations change the layout elsewhere in the
document. It is therefore important after you have made all your
adjustments that you check it through again from start to finish to
ensure there are no errors.
Proofreading
You should check the text of your document as often as possible. If you
have been working on a text for some time, it is a good idea to have
someone else proofread it, as you can easily overlook errors in a text
you are accustomed to.
When you have finalised the page-layout of a report, print out the pages
and stick them together so that they resemble the finished document.
Proofreading and editing involves reading over your work, looking for
errors and areas for improvement. If possible, you should ask a second
person – perhaps a work friend, secretary, spouse or supervisor to
proofread your writing and suggest changes. A second pair of eyes will
often find problems that you have missed yourself.

BSBITU306 – Design and produce business documents
38 © AAMC Training Group Learning guide V2.1
The following tips can help you when you are doing your own editing:
If possible leave sometime between your last draft and proofreading –
sometimes you need a ‘fresh eye’ to pick up mistakes and
improvements
Read each sentence out loud to check that they are all complete –
ensure that your writing ‘flows’ and is easy to read
Put yourself in the shoes of your reader – is the message clear? Have
you avoided using clumsy and tactless language?
Remove all unnecessary words or phrases – check for jargon or
inappropriate technical language
Review all punctuation, capitals and spelling (use a dictionary or a spell
check if you are not sure)
Recheck numbers in addresses and dates to make sure they are correct.
The following list is to check style:
Is the text correct?
Is spelling, punctuation, and use of the style guide consistent?
Don’t forget to check headings, captions, footnotes, text in
illustrations, running heads, contents lists, and indexes, as well
as the main text.
Have the correct headings been given for the text? And the correct
running heads?
Do the headings in the text match the headings given in the
contents list?
And are the page numbers in the contents list correct?
Is the numbering system for parts, chapters, sections, and
subsections consistent?
Is the content of the illustrations correct?
Are they the right size, the right way around, has the correct part
of the illustration been used?
Do the illustrations match the captions?
Is the numbering of illustrations correct?
Are the cross-references within the text and between text and
illustrations correct?
Are the page numbers in the index correct?

BSBITU306 – Design and produce business documents
Learning guide V2.1 © AAMC Training Group 39
Naming and storing documents
Each organisation will have procedures and systems in place that
determine how and where documents are stored. Documents may be
stored as hard copies or digital files in specific filing systems; most
organisations will use a combination of both.
In large companies there may be a designated records co-ordinator in
each department, and a records retention schedule that lists all the
records held in each department, with a records manager who oversees
the entire information systems of the organisation.
Storage of documents may involve:
Storing files in designated locations
Storing data in the correct format
Password protection
Encryption
Security
Back-up schedules
Storing hard copies
File naming.
When storing documents you should consider the following points:
What is an appropriate file type?
Who has authorised access?
Appropriate filing location?
Where information is stored depends upon a number of things:
How often it is accessed
Who needs access to it
The security level with which it is classified
The physical form of the information
Who is responsible for managing it.
File names
File names are important for organising documents. Good file names
enable users to organise and locate the correct documents quickly and
easily.
File names should be identifiable in relation to the content:
‘September 2016 Update Newsletter’ as opposed to
‘New_Document’ or ‘September.’

BSBITU306 – Design and produce business documents
40 © AAMC Training Group Learning guide V2.1
Avoiding loss
There is nothing more frustrating than losing the important documents
that you've spent so much time creating. The only sure-fire way to
recover lost files is to restore them from a backup, and that is why it is
so important to have a system to prevent data loss.
1. Never store your documents on the same drive as your operating system
While most programs will save your files in the My Documents folder,
this is the worst place for them. Whether it is a virus or software failure,
majority of computer problems affect the operating system, most often
the only solution is to reformat the drive and reinstall the operating
system. In such an instance, everything on the drive will be lost.
Installing a second hard-drive in your computer can take care of this
problem. A second internal hard-drive will not be affected if the
operating system is corrupted, and it can even be installed in another
computer if you need to buy a new one; further, you'll be surprised at
how easy they are to set up.
Another excellent alternative is to buy an external hard-drive. An
external drive can be attached to any computer at any time simply by
plugging it into a USB or firewire port.
2. Back up your files regularly, no matter where they're stored
Create regular backups of your files, and let's face it, even your back up
is subject to failure: hard drives break, get corrupted, or erased.
Increase the odds of being able to retrieve a file by having a second or
multiple back-ups of it.
You can back work up to:
External hard drives
Data sticks
The Cloud
Email.
3. Beware of user error
We don't like to admit it, but we often engineer our own problems. Take
advantage of safeguards included in your application software, such as
versioning features and tracked changes. A common way users lose data
is when they're editing a document and accidentally delete portions --
after the document is saved, the portions that are changed or deleted
are lost unless you've enabled features that will store changes for you.

BSBITU306 – Design and produce business documents
Learning guide V2.1 © AAMC Training Group 41
Printing documents
To print a document, your computer needs to be connected to a printer.
Small desktop printers are usually connected directly to a computer's
USB port. Older printers are connected to a parallel or “printer” port.
Some printers are directly connected to a network, making it easy for
multiple computers to share them. A few printers use a rare serial port
connection.
Print your file
1. Click File > Print.
2. Under Print, enter the number of copies to print in Copies of print job
box.
3. Make sure the correct printer is selected.
NOTE: The properties for your default printer are automatically
entered for you.
4. Under Settings, do the following:
Make sure the correct range of pages or sections is selected.
Select the layout format for printing.
Set the paper size.
Set whether to print on one side of the paper or on both sides.
If your printer is capable of colour printing, choose whether you
want to print colour or grayscale.
Click the Print button when you are ready to print.

BSBITU306 – Design and produce business documents
42 © AAMC Training Group Learning guide V2.1
Presenting your document
Objectives
The desired outcomes of any presentation should be discussed with the
audience prior to their attendance. It is important that they know and
understand why they are expected to attend the presentation and so
that they can determine what is in it for them.
You can do this by providing a set of outcomes that they are expected to
achieve from attending the session, or an outline of what they will walk
away with after they attend.
Some ways in which you can do this include:
Via telephone
Via email
Via postal mail
You will also need to let the participants know the outcomes of the
session at the beginning of the session.
During this time, you should talk to them about the following:
Your expectations
The ground rules
Their expectations
Timing – e.g. breakfast times, finish times etc.
Rules for questions etc.
Your expectations
You as a presenter should let them know what you expect from them
during the session. This minimises the chances for anything going wrong
as the participants are advised in advance of your expectations.
Their expectations
The participants should also have an opportunity to let the presenter
know what their expectations are, if time permits. This gives them an
opportunity to provide ownership and support for the presentation also.
Rules for questions
Some presenters are happy to take questions during the presentation,
and others prefer to keep them all to the end. You need to set the
boundaries from the beginning regarding questions.
BSBITU306 – Design and produce business documents
Learning guide V2.1 © AAMC Training Group 43
Presentation aids
Presentation aids and materials should be used to support the
understanding of the participants. The learning styles of the participants
can directly relate to the type of material used, and ideally you should
use a combination of material that can enhance and adapt to each of the
learning styles.
Some of the material that you can use includes:
Visual aids such as posters, graphs etc.
PowerPoint slides
Flip charts
Handouts
Workbooks
Notes
DVD’s
Audio material
Actual samples of the material you are presenting
Consider how available these resources and materials are, how effective
they will be and how relevant they are to the presentation.
Sales resources will be a big help if you are trying to sell the participants
something, i.e. the actual product if possible. These include:
Photographs of the product
Printed material
Brochures
Models
Drawings
Data projector
A laptop
Demonstration models
You should ask yourself the following questions
Are the resources, aids and materials easy to transport?
Can they be set up in advance?
Will I need assistance in setting them up? If so, how available is the
assistance?
Will they create the impact I am trying to create or deter from the
presentation?
Note – as mentioned earlier, a resource or material is simply something
to help you with the delivery of the presentation. It should not be solely
relied on.

BSBITU306 – Design and produce business documents
44 © AAMC Training Group Learning guide V2.1
Ensure you have back up at all times too, as often technology can break
or something can inevitably go wrong. Don’t rely on just a PowerPoint
presentation for example, in case the laptop or data projector decide not
to work on the day of your presentation.
Anything that can go wrong usually does. Be prepared for
anything and you can tackle everything.
Persuasive communication techniques
“All the world's a stage and all the men and women merely players they
have their exits and their entrances and one man in his time plays many
parts his acts being seven ages" - William Shakespeare
You are a presenter. You are acting out a character. Whether that is a
sales person, a technical expert, a teacher, a trainer or any combination
of the above, you are now officially on stage.
You need to be an excellent and persuasive communicator to be able to
get the point across to the participants, clients or prospects.
Communication techniques are made up of:
Non-verbal communication
This is made up of how we portray ourselves to others, the posture we
use when walking or talking, the gestures we use, our tone of voice and
our facial expressions. The combination of these is what gives others an
overall sense of who we are as presenters and whether or not they can
feel we can be trusted.
People will always believe what they see rather than what they hear.
55% of our message is delivered via body language
38% is in the tone of voice we use
7% is in the actual words
Non-verbal communication includes:
Eye contact – maintain good eye contact with the participants at all
times. Ensure you look at each of them equally and don’t stare too much
at one person. Sweep the room with your gaze.
Posture and the way you hold yourself – even if you don’t feel it,
act confidently, walk confidently, and stand confidently. Your posture
will say a lot about you. Don’t pace or sway, stand tall and be proud.
Facial expressions – some people cannot hide their feelings in their
facial expressions. Facial expressions should always be positive. You
should have a warm and sincere smile to draw the participants in and
show them you are genuine.

BSBITU306 – Design and produce business documents
Learning guide V2.1 © AAMC Training Group 45
Dress – always dress like a professional. Your clothing should be clean,
comfortable and business like. Ladies should avoid heavy make-up or
too much jewellery and be conservative in their dress. Men should be
clean shaven / have trimmed beards and dress in business attire.
Good listening skills
Listening is the key to being able to present someone with a solution to
their problem. When you really listen to what the issue is, you will
understand how to present them with a solution based on the sales
techniques you will learn.
When you actively listen, you are building a genuine interest in the other
person. You pay attention and use appropriate body language to show
you are listening. People feel valued and understood.
You should then check for your own understanding by reflecting back on
what the person has said to you. Ensure you summarise what they are
saying to give them a sense that you hear them and understand them.
Building rapport with the audience
When you build rapport with the audience you are effectively showing
them trust and respect. This helps participants or prospects to openly
communicate with you. When you show a genuine interest in them, they
will see your intent to build rapport with them.
Knowing which questions to ask
A great sales person will always know the right questions to ask
someone. They will be conversant in using open questioning techniques
and also know when it is valid to use closed questioning.
Examples of good questions:
“What are your thoughts on…?”
“What has to happen for you to achieve…?”
“What goals do you have relating to…?”
“How will you feel when you know you get there?”
Summarise key concepts and ideas
During your opener, you would have told the participants ‘what you
are going to tell them’.
During the body and context of the presentation, ‘you told them’.
Now it’s time to tell them ‘what you have told them’.

BSBITU306 – Design and produce business documents
46 © AAMC Training Group Learning guide V2.1
Some ways in which you can do this include:
Summarise as you finish each chunk or segment of the presentation
Re-cap or revise half way through the presentation
When the presentation is finished
During the review or question / answer session
Look for and identify areas within your presentation where you can re-
cap or do some revision with the participants or prospects.
You want them to walk away feeling as though they got something out of
your presentation. If you rush through it, or they don’t understand what
you have presented, then you have wasted both your time and theirs.
Make the presentation memorable, interesting and informative. Check for
understanding by stopping every now and then and testing their knowledge
with short questions to ensure they are keeping up with your pace.
Finish strong. Show the participants that you had something valuable to
say and what they will achieve or how they will benefit now that they
have attended your session.
Continuous improvement
How can you improve your style and structure?
It is important that the information in your document is easy to read.
Documents that do not flow naturally, or contain awkward expressions
and phrases, are tiresome and confusing. The following information
provides you with some techniques you can use to make your document
easy to read.
Keeping it simple
You should always try to express yourself in the most simple and direct
way you can. Often, writers who are unsure of their subject matter will
try to disguise this by using flashy words or phrases such as
‘commenced operation’ or ‘optimum performance.’ Do not fall into this
trap because it is obvious to the reader, and can confuse your message.
Longwinded words or phrases should never be used if there is a simpler
alternative. Some common examples are listed below:
Longwinded phrase A more simple replacement
In regard to About
In the vicinity At
I must express my thanks Thank you
Due to the fact that Because
At the present writing Now

BSBITU306 – Design and produce business documents
Learning guide V2.1 © AAMC Training Group 47
Keep your sentences simple and easy to understand.
The most common problem with sentences is that they can get long and
jumbled. For example:
In the workplace it is important that all safety procedures are adhered
to such as wearing protective clothing, walking only in marked areas so
that no accidents occur and no one is injured or productivity lost.
This sentence is difficult to read and even more difficult to understand.
If your sentences start getting long and clumsy, stop writing and read
them aloud to yourself. This will help you to see where you can break
them up into two or three shorter ones.
The clumsy sentence above for example can be re-written as three,
much clearer sentences:
In the workplace, it is important to follow all safety procedures. Some of
these procedures include wearing protective clothing and walking only in
marked areas. By following these procedures, you can reduce accidents,
and improve productivity.
What sort of language should you use?
When you speak, your tone of voice and body language has an effect on
the message you communicate. In the same way, the words you choose
when writing have a big effect on your reader. You need to be aware of
this and make sure that this effect is positive.
You should choose words that are positive and polite, and avoid
language that is tactless, discriminatory, or offensive.
In particular, you should try to avoid using sexist or gender-biased
language in your documents. You do not want to offend women in your
workplace by using language that ignores or insults them. Below are
some examples of gender-biased language and suggested words you
might use instead.
Gender biased word or phrase Replacement
Chairman Chairperson
Spokesman Spokesperson
Foreman Supervisor
Jargon is another thing you should avoid in your document. Jargon is a
word or expression that is developed and used within a particular group.
Jargon is usually not understood by anyone outside of this group.
You should also avoid using technical words if you are not sure that your
audience will understand them. The overuse of jargon and technical
terms will make your document difficult to read, and can be annoying
for your reader.

BSBITU306 – Design and produce business documents
48 © AAMC Training Group Learning guide V2.1
Sticking to the rules
There are common rules of grammar and punctuation you should use to
make your writing easier to read and understand. Some common
punctuation rules are described below:
Capitalisation
Always capitalise proper nouns. These include:
People’s names and titles e.g. Mel Gibson, the Prime Minister
Street names: e.g. Bakers St., Sunset Boulevard
Names of countries, states, regions, localities etc: e.g. Australia, India
Names of religious groups e.g. Catholics, Hindus, Muslims
Names of schools and colleges e.g. Mooroopna Secondary College,
Brisbane University
Trade names e.g. Coca Cola, Macintosh, Apple
Names of days and months (but not seasons) e.g. Saturday,
September, spring, winter.
Full stops
Full stops are used to signify the end of a sentence. Example: Work
team meetings will be held tomorrow.
They can also be used for abbreviations, for example: e.g. i.e. etc.
Question marks
Question marks should come at the end of a direct question.
Example: What time do you finish work?
Exclamation marks
Exclamation marks are used at the end of a statement expressing strong
feeling.
Example: Watch out for the hot water!
Commas
Commas are used to separate two or more ideas in the one sentence.
Example: There are a lot of applications to get through tomorrow, but
there will still be time for our sales team meeting.
A good way to determine where a comma should go is to read the
sentence aloud to yourself. Where you find yourself making a short
pause is probably where you should put a comma.
Commas are also used to separate a series of elements in a sentence.
Example: The colours for the new company logo are blue, green, and
white.

BSBITU306 – Design and produce business documents
Learning guide V2.1 © AAMC Training Group 49
Assessment
Now you have finished this module we advise you to access the
BSBITU306 Short answers assessment. This can be found in the
Online Content and Assessments section of the AAMC Training Member
Area. Once you have completed this assessment, you will be immediately
advised of your competence via an automated email.
Once you are successful, we advise you to download and complete
written assessment BSBITU306 Assessment and ensure your
BSBITU306 Skills Signoff has been uploaded.

BSBITU306 – Design and produce business documents
50 © AAMC Training Group Learning guide V2.1
Recommended