Z:\Mikes\Year 2018\Tarka 2018\Dagger1\The Dagger board instructions 3a final docx.docx.17/08/18 1
Replacement Macgregor 26M dagger board fabrication: by Mike Clarke 19/08/18 Fabricating a new hollow section dagger board requires three main processes:
1) Lay up two side sections in a mould (2 days) 2) Bond the two sides together with a stiffening rib (1 day) 3) Seal the edges and make good the gel coat (2 days)
Assuming you already have a mould. We broke the dagger-board on Tarka our Macgregor 26M three weeks ago – a new dagger-board from the USA costs $550 plus $280 package and then UK VAT and import duty so it’s expensive at just over £1,000 and several weeks delivery time. I posted a note on the website to see if anyone had a spare dagger board and was pleasantly surprised to find that Simon Armitage not only had a spare but it was only an hour’s drive away at Bradwell Marina. So off we went to collect it. It turned out to have had a repair at some time that Simon was not aware of but after a day grinding off the surface coatings and rubbing it down back to the original gelcoat and making good the repaired section it looked OK. I checked inside it with an endoscope to see if there was any structural damage and it looked OK so it got a coat of two pack Hempel epoxy gel coat protect paint and was installed as at least a temporary fix to get us sailing again. I then decided to attempt to make a new dagger-board by taking a mould from the old damaged one. It should only need a single mould of one side as the board is symmetrical end to end. Making this turned out to be a bigger job than first anticipated mostly due to the amount of time it took to repair and make good the damage to the old dagger board ready to take a mould from. I first made good the damage by cutting out a section from the worst damaged side and laying up some fibre glass matt against the inside of the less damaged side. This gave me a surface to fill against and make the shape right using polyester filler (plastic padding in the first instance, although I later found there are better and cheaper gel coat putty fillers available on-line). I used the shape of the undamaged surrounding area to ensure the repaired part had the same profile. This entailed multiple filling and rubbing down sessions but eventually it was about right. I then used two coats of Durabuild surface primer which is a two part high build polymer specifically for mould formers. This allowed me to rub the surface down to a uniform finish suitable to take the mould release agent. I then made up a wooden frame round the entire board set it at little over half way down the thickness of the board. I hot melt glued this to the edge of the board to fill in the inevitable small gaps to prevent the gel coat dripping through. This frame gave a flange that could later be cut off with the rough edges. I put masking tape round the outside edge of the frame to create a slight stand up edge so that the gel coat and glass resin didn’t run off onto the floor when laying up. It turns out that the dagger board is almost exactly one square meter per side so a 1m2 mould making Kit from East Coast Fibreglass Supplies was used to make the mould. The process for making the mould was:
1. Polish the former that the mould is going to be taken from i.e. the old half repaired dagger-board. 2. Rub in twelve, yes twelve, layers of mould release wax polish allowing to dry for at least 20 min
between coats. This is necessary to ensure the moulding gel coat can release; you really don’t want it to stick!
3. Paint on a thin layer of PVA mould release and allow to dry immediately before applying the gel-coat. 4. Paint on a thick layer – pour and spread more than paint – a layer of the thixotropic special mould
gel coat. A thick green gunge that starts to gel very quickly in the warm weather we were having – don’t overwork it!
5. Once the gel coat had set after about 2 hours, I added a thin layer of 300gm-2 chopped strand mat (csm) wetted on with a vinyl ester moulding resin (part of the kit).
6. When this had set overnight I added four layers of 450gm-2 chopped strand glass mat using Optimould moulding resin. This is a special resin for making moulds that doesn’t shrink or distort as it sets – but it does get very hot as it must get above 40°C to properly cure and turn it an off white colour.
7. After this had set overnight I glassed in a wooden batten along the leading (thick) edge and cut out and glassed in four pieces of wood to stiffen and support the mould. This was then left for two days to cure.
Z:\Mikes\Year 2018\Tarka 2018\Dagger1\The Dagger board instructions 3a final docx.docx.17/08/18 2
After two days I thought it must have cured in the warm weather we had as it was up in the 30’s both days, so I trimmed the rough edges through to the wooden battens with a cutting disc and gently eased the mould off the core, which once started came away quite easily. At this point I took the opportunity to cut some more sections out of the unrepaired side of the original dagger board to better see its internal structure and how it had been built. It appears that the board was built by moulding the two sides in vinyl ester resin with a gel coat, a thin chopped glass mat and a heavy glass mat followed by two layers of woven glass cloth for the main surface of the sides. This gave about a 3mm thick skin which was thicker in the reinforced longitudinal section and at the edges. There is a moulded in, structural hollow section down the centre that was laid up on a foam core so that when it was still wet it could be deformed and bond to the other side of the moulding when the two sides were pushed together. The edges and ends appear to have been flooded with resin that was allowed to set to give a thick section to all the edges. This is what I tried to replicate using the new mould. I used a vinyl ester resin (Crystic VE 679pa supplied by East Coast Fibreglass Supplies) rather than a polyester resin as the US web site claims that the new boards are made with this. This makes sense as the cheaper polyester resins are not as strong and are not as resistant to continues water immersion. East Coast Fibreglass Supplies also has a website with useful articles on how to use their products. I considered using epoxy resin but it is much harder to work with to make a good strong section, is more likely to delaminate under flexing and only marginally stronger than vinyl ester whilst being considerably more expensive. The lower end of the dagger-board is continually immersed for the first 200mm if the boat is kept in the water with the board up as ours is. The internal space is always wet as it is flooded in use and unlikely to ever completely dry out especially with foam core in the stiffened section absorbing water when it’s used. The assembly of the two halves was always going to be something of a challenge as not only do the two sides have to match up but they have to be assembled with the centre reinforced rib still wet enough to be deformed into place against the upper side. But first the two side sections need to be moulded. Laying up sections in mould: First some Elf’ and safety: Acetone, catalyst and resin fumes and liquids are flammable – don’t have any flames in area. The fumes of these materials are not good for you so use a respirator fitted with a carbon filter when laying up the resin. DO NOT SMOKE in the area at any time as any fumes sucked through a cigarettes are especially toxic and you may well start a fire or explosion with any vapours present. Glass fibre dust is a severe eye and respiratory irritant so use a dust mask and eye protection when cutting, grinding or sanding. Wear eye protection especially when using resin catalyst as it is a strong oxidising agent and splashes can damage eyes. (Have an eyewash bottle or water available for emergencies) Wear disposable nitrile gloves as resin doesn’t wash off with soap and water and is a skin irritant. Each side was fabricated by laying up the glass fibre and resin in the mould in the same way:
1) Make good and damage to the masking tape wrapped over the edge of the mould. The top surface must then be re-waxed to prevent the gel coat sticking but keep the side free of wax allow a second stand up edge of tape to be applied in step 4 below.
2) The Four coats of release wax applied at 20 min intervals – it’s not a polish - the intention is to ensure all the surface is covered with a good layer of wax and all the pores, small holes and imperfections are filled with the wax; so it’s important that at least four layers are applied, no shortcuts here or you can destroy both the mould and the moulded part. It’s a lot easier to apply wax than repair the mould!
3) When the last coat of release wax had dried a thin coat of PVA release agent was applied using a foam pad brush or sponge to give a thin but continuous film. This was allowed to dry.
4) The edges of the mould were built up with masking tape to stop the gel coat dripping off. Six hundred and fifty grams of gel coat was weighed out (kitchen scales in a clear plastic bag to protect it) into a polyethylene paint pot and catalysed with 2% (13g) of MEKP. This needs to be very well mixed with
Z:\Mikes\Year 2018\Tarka 2018\Dagger1\The Dagger board instructions 3a final docx.docx.17/08/18 3
a wooden stirrer but as it goes off in about 15 minutes at 20°C so you can’t hang about. It can then be poured into the mould and spread with a short hair roller and a 1” brush making sure the whole area is covered with a good thick even layer. Don’t over work it as once it starts to gel you have to stop or it will tear up. This is allowed to cure for at least an hour or two until firm and touch dry.
5) The first layer of 300gm-2 chopped strand mat (csm) can then be added with 650 grams of resin catalysed with 13g (2%) MEKP. This will remain manageable for about 20 -25 minutes or so at 20°C. The surface of the gel coat is first completely wetted with the resin using a roller and brush before adding the mat, then the rest of the resin is used to completely wet and give an even coat of resin in the mat. Don’t allow the resin to form puddles without being spread out or it will start to prematurely gel. Pay particular attention to the edges of the mould and use a hard roller to remove any air bubbles under the mat layer. This layer must be allowed to cure completely to prevent excessive heat build-up with the later layers.
6) Once cured two pots of 1000g resin were weighed out. The first 1000g was made up with 20g (2%) catalyst and well stirred. This was used to wet the previous 300g layer then a layer of 450gm-2 csm was wetted into place followed by a layer of 300g woven cloth. Then the second 1000g of resin was catalysed, stirred and used to add a further layer of 450gm-2 csm mat and a final layer of 300gm-2 woven cloth. The 2% catalyst will induce a few degrees exotherm in the resin but it should not get above about 30°C. It can be checked and monitored with a non-contacting IR thermometer if you have one. This was then all allowed cure at least overnight.
The final layup consists of a 650g gel coat, 300gm-2 csm, 450gm-2 csm, 300gm-2 woven glass cloth, 450gm-2 csm, 300gm-2 woven cloth bonded with a total of 2650g resin which as the total mould surface area is one square meter the total weight of material is 5.1 kg per side and about a 4 mm thickness. Once the part has cured for at least 12 hours at 20°C. It can be released from the mould by carefully lifting at the corners or using a plastic wedge or similar so as not to damage the part or the mould. Once started it should come out relatively easily and will be covered with the PVA release agent which can be washed off with water and a sponge. The side can be left in the mould or supported carefully to prevent distortion whilst it fully cures over the next 48 hours or more. The two sides now need to be bonded together and a stiffening beam in the form of a hollow tube running down the inside of the board fabricated in place. The two mouldings were cut to size with a cutting disk in a hand grinder. It’s important to get this right as it determines the final thickness of the board which needs to be close to 50mm thick at the thickest point. The mould produces two sections that are a bit too thick so the two half mouldings need to be trimmed off at the flange then the edges machine sanded to give a reasonable close fit along the two long edges and the right thickness 50 – 54mm seems OK. The two ends don’t fit to perfectly, probably due to old damage to the original dagger board ends but the sides are a reasonable good fit after machine sanding with 60 grit paper. The parts were aligned as close as possible after the sanding was finished and two 5mm holes drilled through both sections close to the trailing edge corners to allow the two halves to be readily realigned using 5mm bolts when bonding together. The stiffening beam was fabricated round a 35 x 35mm square section of medium density foam that was 1550mm long leaving it 200mm short of the full length of the interior. This seems to be to allow for the fast flooding and draining of the hollow interior necessary during use. Some care needs to be taken in planning and measuring the thickness of this stiffening tube as it is fabricated in one half of the moulding but needs to be thick enough to be bonded to both sides when the two halves are put together – hence the foam and the need to assemble whilst the resin and mat is still wet and pliable. This requires dry assembly and measurement of the depth of the moulded sections. The first one I made required the beam height to be a bit more than the 35mm of the foam so I added a layer of 4 mm thick cardboard on top of the foam to get the right height when about 4-5mm from the five layers of 450gm-2 csm is added. The foam core and cardboard are only there to support the fibreglass whilst it sets. I also added two layers of 450 gm-2 csm 1550mm long by about 120mm wide bonded to each sides of the two mouldings centred 150 mm in from the leading edge where the foam cored beam is going to be to add
Z:\Mikes\Year 2018\Tarka 2018\Dagger1\The Dagger board instructions 3a final docx.docx.17/08/18 4
strength and longitudinal rigidity (same as original board). Each layer was slightly wider than the one below it to ensure the edges overlapped. The process was:
1) Blow off any dust left from the sanding of the edges. Wipe the area to be bonded with acetone just before starting and allow to evaporate. This will slightly wet up the surface and make it sticky.
2) Lay up two layers of 450gm-2 csm about 120mm wide into both sides of the mould centred 150mm in from leading edge with 600g of 2% catalysed resin and allow to cure for several hours to allow the heat to dissipate.
3) Mark the foam position line before you lay in the resin as the marker pen will show through the wet resin and mat – use a wooden batten to make sure it’s straight as this is the main stiffener for the dagger board. Place the foam core into one side, centred 150 mm inform the leading edge and allow it to stick to the wet resin.
4) Allow this to cure for several hours to allow the heat to dissipate to prevent excessive heat when the next layers are layer up or it will all get too hot.
5) Weigh out two by 500 g resin but don’t add the catalyst yet. 6) Cut out five lengths of 450g-2 csm the same length as the foam. Each one slightly wider than the
previous one starting with the first wide enough to cover the foam and bond in at least 20mm each side onto the previous laid layers to form a hat shaped beam over the foam.
7) Catalyse the first 500g of resin with 1.5 to 2% MEKP - no more, to prevent excessive heat and lay the first two to three layers of the csm over the foam making sure it is well wetted.
8) Catalyse the second 500g of resin with slightly less MEKP and lay up layer 4 and 5 and use the remaining resin to wet the inside of the upper half of the moulding ready to be placed onto the lower half. The two halves may need to be clamped or held with line into place to ensure the two halves are aligned (using the two previously drilled holes with bolts or pegs in place) and the leading and trailing edges are close together. Do not attempt to bond the edges at this point as you need this to see when the liquid resin has filled the edges later.
9) Because the resin is curing in a closed space it will get quite warm circa. 40°C, which is why slightly less catalyst was used for the second pot of resin and why the previous lay-up was allowed to cure and cool. Leave at least overnight to cure.
Don’t worry too much about the ends being slightly uneven as these will be ground flat and made up with gel coat or filler later. It’s much more important that the leading and trailing edges fit closely and are straight (or you will have a bent dagger board!). The edges and ends need to be sealed with liquid resin in the interior of the section. Some care needs to be taken with the amount of catalyst because if 2% catalyst is used in bulk resin it will get very hot (150°C plus) and may distort. The resin is added through holes drilled in each corner of one side of the hollow section and liquid resin poured in to run along and flood each edge in turn. The edge is sealed with tape until the resin sets to prevent it just running out.
1) Drill a 16mm diameter in each corner on one side of the section with a hole saw. Centre at 50 mm in from end, 50 mm from front leading and trailing edge = 4 holes. (I always wondered what those holes were for!)
2) The edge was sealed with clear tape so the resin can be seen as it leaks through any gaps. Make sure the ends and all possible leak points are taped over or you will get a real mess.
3) The section was set up with the edge to be sealed downwards and at an angle between the holes at each end then 500g of resin was catalysed with 1.5% MEKP and poured into one of the holes. The progress was monitored as the resin ran down the inside of the edge and leaked out of the hole at the other end of the edge. As soon as the resin appeared at the other end hole it was sealed with masking tape. When all the resin was the poured into the board it was stood on the filled edge and levelled to allow the resin to settle back to straight and run evenly along the edge then left until it had cured. The temperature was monitored with an i.r. thermometer. Temperatures up to 70°C can occur but higher temps should be avoided if possible. My advice would be to not attempt to pour more than about 500g of resin at a time or the heat will build up excessively.
4) A further 500g was added to the leading edge when the first 500g had cooled but before it was completely cured. This gave about a 35 mm thick front edge section. This process was repeated with
Z:\Mikes\Year 2018\Tarka 2018\Dagger1\The Dagger board instructions 3a final docx.docx.17/08/18 5
500g into the other trailing edge and about 450g into each end to give similar 35mm thicknesses of resin.
5) The ends were straightened up by light sanding then made good with gel coat filler (mostly for cosmetic effect).
6) Once the resin has cured on each edge the excess resin was sanded off after removing the masking / clear tape (if the tape is removed before the resin has completely cured it can be trimmed with a craft knife which saves some sanding).
7) Two 20mm diameter holes were bored through both side sections 75mm in from the edge and 65mm up from the lower end in each corner with a hole saw to allow the board to readily flood and drain in use.
8) Two 11 mm diameter holes were drilled through the top end, 150mm and 200mm in from the trailing edge along the centre line to allow the up-haul and restrictor rope to be fitted. A 25 diameter hole was also bored through one side* 200mm in and 60 mm down from end to allow these ropes to be tied off with a thumb knot or figure of eight, depending on the rope used. (* the hole needs to be bored in the side that was not used to build the stiffening beam in, as there is a chance it may impact the strength as it will be close to the base of the beam side wall.)
9) I finish of with cream coloured Blakes SFE200 Gel Protect two pack epoxy to seal the edges of the holes and any marks on the edges as well as making the whole unit a uniform colour. It can be applied with a roller to give a thick uniform coat and the lower 300mm or so was then painted with antifouling as it is continuously immersed.
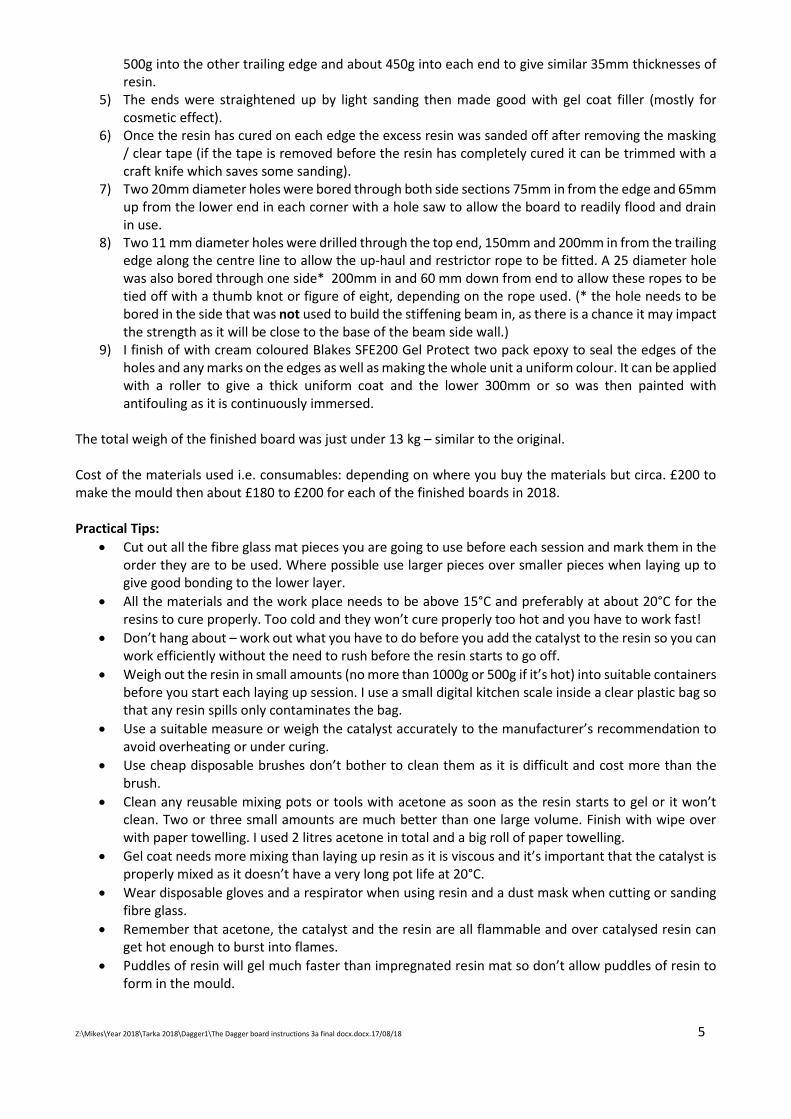
The total weigh of the finished board was just under 13 kg – similar to the original. Cost of the materials used i.e. consumables: depending on where you buy the materials but circa. £200 to make the mould then about £180 to £200 for each of the finished boards in 2018. Practical Tips:
Cut out all the fibre glass mat pieces you are going to use before each session and mark them in the order they are to be used. Where possible use larger pieces over smaller pieces when laying up to give good bonding to the lower layer.
All the materials and the work place needs to be above 15°C and preferably at about 20°C for the resins to cure properly. Too cold and they won’t cure properly too hot and you have to work fast!
Don’t hang about – work out what you have to do before you add the catalyst to the resin so you can work efficiently without the need to rush before the resin starts to go off.
Weigh out the resin in small amounts (no more than 1000g or 500g if it’s hot) into suitable containers before you start each laying up session. I use a small digital kitchen scale inside a clear plastic bag so that any resin spills only contaminates the bag.
Use a suitable measure or weigh the catalyst accurately to the manufacturer’s recommendation to avoid overheating or under curing.
Use cheap disposable brushes don’t bother to clean them as it is difficult and cost more than the brush.
Clean any reusable mixing pots or tools with acetone as soon as the resin starts to gel or it won’t clean. Two or three small amounts are much better than one large volume. Finish with wipe over with paper towelling. I used 2 litres acetone in total and a big roll of paper towelling.
Gel coat needs more mixing than laying up resin as it is viscous and it’s important that the catalyst is properly mixed as it doesn’t have a very long pot life at 20°C.
Wear disposable gloves and a respirator when using resin and a dust mask when cutting or sanding fibre glass.
Remember that acetone, the catalyst and the resin are all flammable and over catalysed resin can get hot enough to burst into flames.
Puddles of resin will gel much faster than impregnated resin mat so don’t allow puddles of resin to form in the mould.
Z:\Mikes\Year 2018\Tarka 2018\Dagger1\The Dagger board instructions 3a final docx.docx.17/08/18 6
To examine old set fibreglass sections make up, cut out a small square section of the old fibre glass, measure and weigh it then burn it (outside as the fumes are toxic and nasty). The resin burns off fiercely and leaves the glass fibre mat so you can then re weigh and see how it was constructed and how much resin was used.
Resin amounts are usually 2 x weight for chopped strand mat (csm) and 1 x weight of woven mat - i.e. 450gm-2 csm will need about 900 g of resin to lay it up. Catalyst is MEKP used at 1.5 to 2% w/w.
Tools required:
Disk cutter – any cheap 4” angle grinder with cutting disks is fine
Sander for edges – a half sheet sander with 60 grit is ideal (hand sanding block works but slower)
Mixing pots – must be polyethylene or polypropylene as resin doesn’t stick to these.
Mixing sticks – cheapest way is a box of tongue depressors
Calibrated 50ml measuring cylinder for catalyst
Small kitchen weighing scales - (placed in clear plastic bag to weigh out resin)
Box of Nitrile disposable gloves (always put on before starting to handle resin or you will get sticky!)
Respirator with carbon filters to avoid styrene fumes.
Dust mask (for when using disk cutter as dust is nasty - I did cutting outside)
A Tape measure (or two as I find one always goes missing!)
Masking tape
Marker pen and straight edge to mark mat out (a long wooden batten)
Stout pair of scissors to cut fibre glass mat
Riggers gloves or similar to handle glass mat (avoids fingers getting cut and stabbed)
Flat table or trestles with flat level top board to work on
Floor coverings so inevitable resin splash or spills don’t damage floor – I use cardboard. Photo list:
A. Cross section diagram B. Original repaired dagger board used as former. C. Former preparation with first gel coat layer. D. Former laid up with first coat chopped strand mat. E. Finished mould ready for use. F. Mould underside. G. Finished section in mould. H. Moulded parts ready for stiffening strut fabrication I. Top section ready for assembly J. Two sides clamped together (ends) K. Two sides clamped together L. Set up ready to seal edge M. Edge set horizontal to cure
Consumables: Vinyl ester resin 12 to 15kg, Gel coat 1.5kg, 450gm-2 chopped strand mat 4kg, 300gm-2 chopped strand mat 1kg, 300gm-2 woven glass cloth 2kg

Z:\Mikes\Year 2018\Tarka 2018\Dagger1\The Dagger board instructions photos.docx.17/08/18 2
A) Cross section of dagger-board
B) Former ready to take mould off C) Former with gel coat D) Former with gel coat and first csm in place
Solid resin
Solid resin
Box section
stiffening
Hollow flooded section Hollow flooded section
Cross section of dagger board
Z:\Mikes\Year 2018\Tarka 2018\Dagger1\The Dagger board instructions photos.docx.17/08/18 3
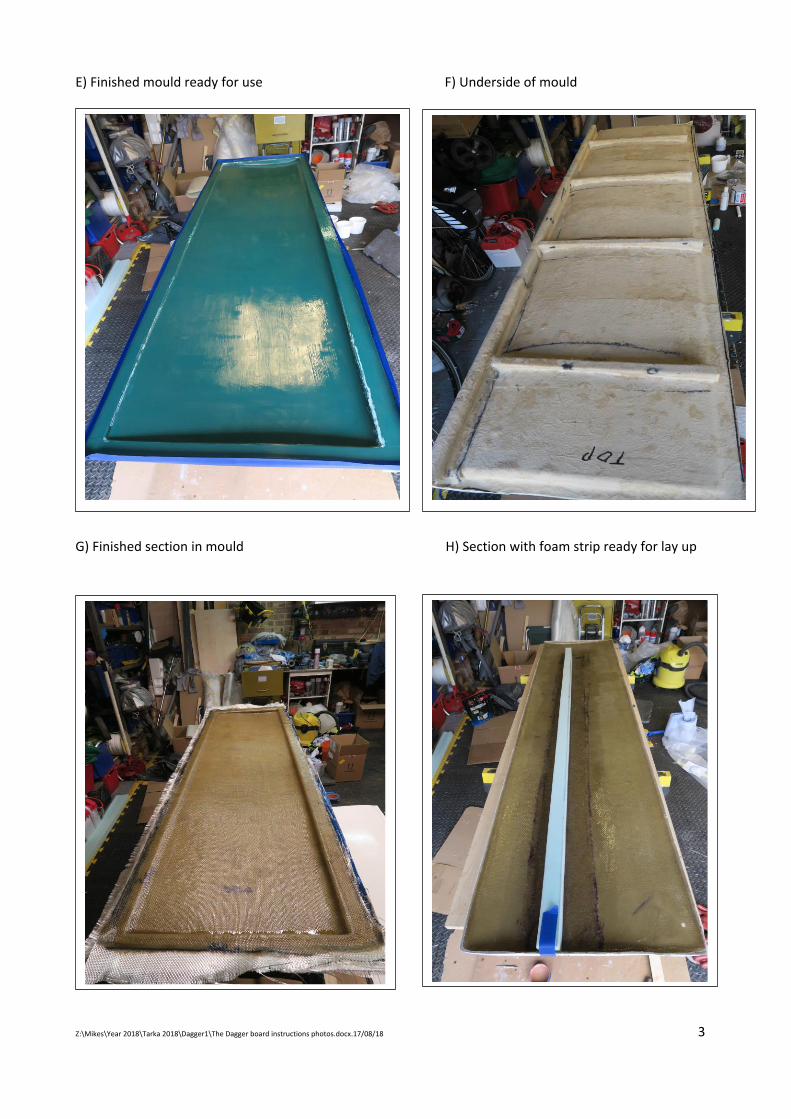
E) Finished mould ready for use F) Underside of mould
G) Finished section in mould H) Section with foam strip ready for lay up
Z:\Mikes\Year 2018\Tarka 2018\Dagger1\The Dagger board instructions photos.docx.17/08/18 4
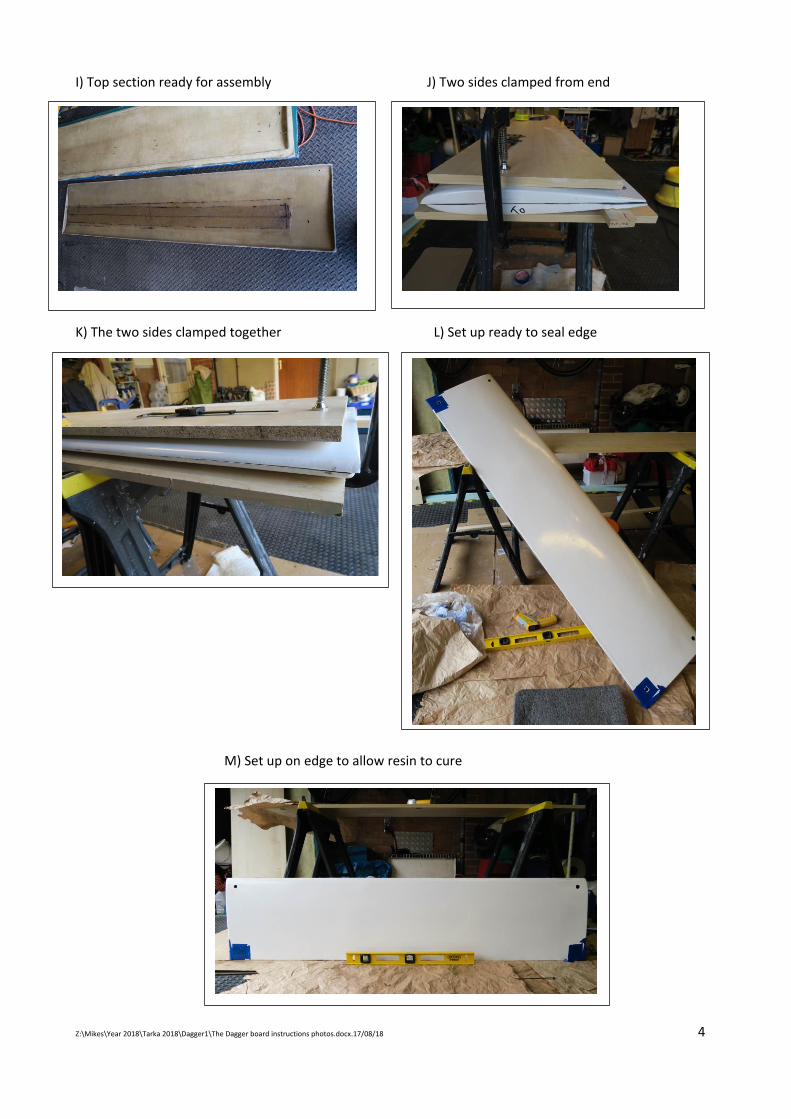
I) Top section ready for assembly J) Two sides clamped from end K) The two sides clamped together L) Set up ready to seal edge M) Set up on edge to allow resin to cure
Recommended