Pulmonary Function Test Health ABC Operations Manual Vol. VII Chapter 2K, page 1
PFT.OM5
Version 1.0 9/14/01
PULMONARY FUNCTION TEST
TABLE OF CONTENTS 1. Background, Reading Center, data collection, training, and certification............ 3 1.1 Background and rationale........................................................................................... 3 1.2 Pulmonary Reading Center - LDS Hospital, Salt Lake City, UT ........................... 3 1.3 Data collection ............................................................................................................. 4 1.4 Training and certification........................................................................................... 4 1.4.1 Training course: ........................................................................................................... 4 1.4.2 Spirometry certification after formal training course ............................................. 5 1.4.3 Spirometry certification after apprenticeship.......................................................... 6 1.4.4 Spirometry quality....................................................................................................... 7 2. Pulmonary function equipment and supplies .......................................................... 7 2.1 Equipment and supplies ............................................................................................. 7 2.1.1 Maximum inspiratory pressure equipment and supplies....................................... 7 2.1.2 Spirometer equipment and supplies include: .......................................................... 7 2.2 Maintenance/cleaning................................................................................................. 8 2.2.1 MIP equipment ............................................................................................................ 8 2.2.2 Spirometer .................................................................................................................... 8 2.2.3 Hoses and mouth piece adapters............................................................................... 9 2.2.4 Nose clips ..................................................................................................................... 9 3. Safety issues and exclusions .................................................................................... 10 4. Participant and exam room preparation.................................................................. 12 4.1 Participant preparation ............................................................................................. 13 4.1.1 Clothing and dentures............................................................................................... 13 4.1.2 Bronchodilator administration ................................................................................. 13 4.2 Equipment set-up....................................................................................................... 13 4.2.1 Counter height ........................................................................................................... 13 4.2.2 Environmental conditions ......................................................................................... 14 4.2.3 Electrical requirements............................................................................................. 14 4.2.4 Calibration syringe .................................................................................................... 14 4.2.5 Spirometer set-up ...................................................................................................... 14 5. Detailed measurement procedure summary.......................................................... 15 5.1 MAXIMUM INSPIRATORY PRESSURE............................................................... 16 5.1.1 Introduction................................................................................................................ 16 5.1.2 Starting the MIP program......................................................................................... 16 5.1.3 Calibration.................................................................................................................. 16 5.1.4 Participant testing program operation..................................................................... 17 5.1.5 MIP test procedure .................................................................................................... 18 5.2 SPIROMETRY............................................................................................................ 19 5.2.1 Power-up system........................................................................................................ 19 5.2.2 Start HF6 program ..................................................................................................... 19 5.2.3 Computer inquiries ................................................................................................... 20 5.2.4 Data storage and transmission................................................................................. 22
Pulmonary Function Test Health ABC Operations Manual Vol. VII Chapter 2K, page 2
PFT.OM5
Version 1.0 9/14/01
5.2.4.2 Log sheets. .................................................................................................................. 23 5.2.4.3 Transfer of copies of data to the Pulmonary Reading Center. ............................. 23 5.2.4.3.1 Keep the original disks and Participant Logs in a secure, cool, dry place......... 24 5.2.5 Syringe calibration check ......................................................................................... 24 5.2.6 Choose from the menu selection:............................................................................. 26 5.2.7 Patient information.................................................................................................... 28 5.2.8 Spirometry testing ..................................................................................................... 30 6. Alert values/follow-up/report................................................................................... 34 6.1 Spirometry.................................................................................................................. 34 6.2 Maximum inspiratory pressures.............................................................................. 34 7. Quality assurance...................................................................................................... 34 7.1 MIP.............................................................................................................................. 34 7.2 Spirometry.................................................................................................................. 34 7.3 Biological standards .................................................................................................. 35 7.4 Reading Center review ............................................................................................. 35 7.5 Quality control checklist........................................................................................... 36 8. Instructions for completing forms ........................................................................... 37 9. Appendices................................................................................................................. 38 9.1 Definitions ................................................................................................................. 38 9.2 Equations .................................................................................................................... 40 9.3 Forms........................................................................................................................... 41 Health ABC Study Pulmonary Function Report.................................................................... 42 Health ABC Pulmonary Function Q.C. Log ........................................................................... 43 Reviewed: Participant Log....................................................................................................... 44 Pulmonary Function Test Tracking Form............................................................................... 45 Health ABC Spirometry QC Reading Center Log ................................................................ 48 Memphis Field Center ............................................................................................................. 48 Health ABC Spirometry Checklist ......................................................................................... 49
Pulmonary Function Test Health ABC Operations Manual Vol. VII Chapter 2K, page 3
PFT.OM5
Version 1.0 9/14/01
1. Background, Reading Center, data collection, training, and certification
1.1 Background and rationale Population based studies have shown an association between reduced measures of lung function such as vital capacity and FEV1 and increased mortality. The increase in mortality includes deaths from respiratory disease, cardiovascular disease and “all cause” mortality. Respiratory measures are also associated with respiratory muscle strength. Some of the questions we will be evaluating are (a) whether lean body mass or isometric or isokinetic measurements of muscle strength are associated with spirometric measures and respiratory muscle strength independent of smoking status and (b) whether changes in lean body mass are associated with spirometric measures such as FVC and FEV1 and respiratory muscle strength measured as maximum inspiratory pressure. Maximum inspiratory pressure has been shown to decline with age in several but not all cross sectional studies and longitudinal studies evaluating change in maximum inspiratory pressure with age are not available.
1.2 Pulmonary Reading Center - LDS Hospital, Salt Lake City, UT Robert Crapo, M.D., Robert Jensen, Ph.D. and the Pulmonary Lab at LDS Hospital will provide centralized evaluation and analysis of all spirometry and maximum inspiratory pressure measurements obtained for the Health ABC protocol. The Pulmonary Reading Center will
• Collect, analyze and store pulmonary function data • Provide quality assurance and quality control of pulmonary function data
collection — Provide technical and logistical support for issues pertaining to pulmonary
function tests — Transmit data to Data Coordinating Center (DCC) at specified intervals • Participate in protocol development and publication of results
The information and methods used to acquire data must be consistent to allow uniform analysis. A standard technique for acquiring and collecting pulmonary function data will allow comparison of serial measurements of pulmonary function.

Pulmonary Function Test Health ABC Operations Manual Vol. VII Chapter 2K, page 4
PFT.OM5
Version 1.0 9/14/01
1.3 Data collection
Pulmonary function tests will be done at the Memphis and Pittsburgh Field Centers. Tests on each participant will include:
• Maximum inspiratory pressure (MIP) • Forced expiratory spirometry • Slow vital capacity (only if a participant cannot perform the forced maneuver)
1.4 Training and certification
1.4.1 Training course: A 1-1/2 day training session for pulmonary function technicians will be held. Technicians will be certified based on a practical examination. The outline of the training course follows:
1. Introduction
Description of course
2. Lecture: Brief review of spirometry testing
3. Practicum: Spirometry demonstration Demonstration of set up and calibration of equipment Test one trainee: (FVC maneuver, slow vital capacity maneuver, MIP)
4. Lecture: Spirometry procedures Spirometry standards - instrument and procedural Spirometer accuracy testing Acceptability and reproducibility criteria Health ABC measurement procedures 5. Practicum: Spirometry and MIP testing
Guide each trainee through complete testing 1-2 people 6. Lecture: Practical issues Calibration of equipment
BTPS corrections Temperature and barometric pressure issues
Pulmonary Function Test Health ABC Operations Manual Vol. VII Chapter 2K, page 5
PFT.OM5
Version 1.0 9/14/01
Other environmental issues Participant body positioning for spirometry testing Quality control logs
7. Practicum: Spirometry and MIP testing Guide each trainee through complete testing 1-2 people 8. Lecture: Safety & Hygiene Issues: Robert Crapo Exclusion criteria for participants Universal precautions Gloves and eye protection Cleaning Spirometer and MIP equipment 9. Practicum: Cleaning & more spirometry testing Spirometer disassembly Cleaning the spirometer and spirometer Calibration of spirometer and MIP equipment by each trainee 10. Lecture: Record keeping and data transfer Logs Labeling and storing floppy disks Sending floppy disks to Pulmonary Reading Center Evaluation of Q.C. reports 11. Practicum: Practice Testing Calibration of equipment Testing participants (spirometry and MIP) Storing data to floppy disks Copying floppy disks
1.4.2 Spirometry certification after formal training course There are two formal spirometry training courses: Health ABC and NIOSH approved courses. Spirometry certification requirements for individuals who have attended a formal training course in spirometry are as follows: 1) Final certification for trainees who attended the initial Health ABC training session will be given when they have submitted 10 sequential participant studies to the
Pulmonary Function Test Health ABC Operations Manual Vol. VII Chapter 2K, page 6
PFT.OM5
Version 1.0 9/14/01
pulmonary Reading Center with an average quality score of 3.5 for both flow and volume. (Scoring is graded like academic grades, A = 4.0, etc.) 2) Trainees who have attended a NIOSH certified spirometry training course must serve a brief apprenticeship with certified Health ABC technicians until they understand:
1. The mechanics of operating the Health ABC spirometry system 2. The measurement of MIP 3. The quality control requirements
They must be observed to successfully perform 5 tests. Once their supervisor has certified that they successfully completed this apprenticeship, they may independently submit spirograms to the Pulmonary Reading Center for evaluation. They will be formally certified when they have submitted 10 sequential participant studies to the Pulmonary Reading Center and have an average quality score of 3.5 for both flow and volume. (Scoring is graded like academic grades, A = 4.0, etc.)
1.4.3 Spirometry certification after apprenticeship Candidates for spirometry certification who have not attended a formal training course must serve an apprenticeship with certified Health ABC technicians until they understand:
1. The mechanics of operating the Health ABC spirometry system 2. The procedural elements of performing spirometry 3. The measurement of MIP 4. The quality control requirements
They also must be observed by their supervisor to have performed 10 sequential tests with average scores of 3.5 or greater. Once their supervisor has certified that they have completed this apprenticeship, they may independently submit spirograms to the Pulmonary Reading Center for evaluation. They will be formally certified when they have submitted 10 sequential participant studies to the Pulmonary Reading Center and have an average quality score of 3.5 for both flow and volume.
Pulmonary Function Test Health ABC Operations Manual Vol. VII Chapter 2K, page 7
PFT.OM5
Version 1.0 9/14/01
1.4.4 Spirometry quality Spirometry quality will be monitored by the Pulmonary Reading Center. Grades for spirometry quality will be returned to the Field Centers within one week of receipt at the Reading Center.
2. Pulmonary function equipment and supplies We will be using an HF6 Spirometer, featuring a SensorMedics rolling seal spirometer, computer with Industry Standard Architecture (IBM compatible), and the optional use of a Hewlett Packard Laserjet II compatible, or dot matrix printer. The system utilizes automated calibration and operation, computerized assessments of the participant's performance of spirometric curves, and a real-time display of flow volume curves. The HF6 spirometer measures volume by means of an optical encoder used to accurately measure the displacement of the piston, which moves when air is exhaled into the spirometer. This signal is then used to calculate other values. The HF6 system is easy to transport and has been found to be very accurate and reliable. Maximum inspiratory pressures will be measured with the MRP-1 instrument and software from S & M Instruments, Inc.
2.1 Equipment and supplies
2.1.1 Maximum inspiratory pressure equipment and supplies
• A/D Board from S & M Instruments • MRP-1 Pressure Gauge • S & M Software for MIP measurement • 60 cc plastic syringe • Plastic tubing to connect the syringe to the pressure transducer • Disposable or washable mouthpieces or filters
2.1.2 Spirometer equipment and supplies include: • Rolling seal spirometer (SensorMedics Corporation) • Maximum inspiratory pressure system (S & M Instruments) • Computer with monitor • Printer • 3 1/2 inch diskettes (labeled) • 3 liter calibration syringe
Pulmonary Function Test Health ABC Operations Manual Vol. VII Chapter 2K, page 8
PFT.OM5
Version 1.0 9/14/01
• Silicone based lubricant • 3 Spirometry hoses with mouthpiece adapters • Filter/Mouthpieces for performing spirometry • Disposable nose clips • Thermometer to measure room temperature (preferably in degrees C) • Isopropyl Alcohol • Standard bleach (5.25% Sodium Hypochlorite) • Disposable latex gloves • General cleaning supplies • Separate, clearly labeled, containers for storing clean and dirty equipment
(preferably different colors) • Power strip with surge protection • Gauze Pads • Facial Tissue • HF6 manual • MRP-1 Manual • SensorMedics 922 Operator’s Manual
2.2 Maintenance/cleaning Cleaning and disinfection of the spirometer and breathing tubes should be done in accordance with the established procedures in your institution. One satisfactory method is given below. Other methods are likely to be acceptable. If your institution uses another method, clear it with the Pulmonary Reading Center before use.
2.2.1 MIP equipment
a. Between participants, wipe the mouthpiece holder with an alcohol swab and air dry.
b. At the end of each day, wash mouthpiece holder with warm soapy water to remove surface dirt. Rinse with clear water, soak in the 1:10 bleach solution for 10 minutes, rinse with clear water and air dry.
c. To make sure the port for the pressure measurements is not blocked, place a gauze 4x4 on one side and gently tap the mouthpiece holders to remove any water that may be blocking the port.
2.2.2 Spirometer Clean the spirometer at the end of each month in which participants are tested, working from the front of the spirometer only. Disposable gloves should be worn when cleaning. Eye protection should also be worn when handling the dilute bleach solution.
Pulmonary Function Test Health ABC Operations Manual Vol. VII Chapter 2K, page 9
PFT.OM5
Version 1.0 9/14/01
The disinfectant used will be standard commercial liquid bleach (5.25% sodium hypochlorite) diluted 1:10 with water (1 part bleach to 9 parts water).
a. Unplug the power cord before cleaning or servicing the spirometer. Remove any electrical connections to external devices.
b. Clean the external surface with a solution of mild detergent and warm water; rinse and wipe dry with a soft cloth.
c. Disconnect the auto-return negator (See section 4.2 in the SensorMedics 922 Spirometer Operator’s Manual). Loosen the three thumb screws on the front of the spirometer and remove the face plate and lift the snout plate free of the housing. Carefully reach inside the spirometer and push the piston back to its maximum volume position.
d. Wipe the inside of the snout plate and the inside of the spirometer with 1:10 bleach solution (use a light touch inside of the spirometer). Warning: do not clean or touch the joint of the rolling seal. Thoroughly wipe the spirometer using a moistened cloth to remove the bleach solution and dry with a soft cloth.
e. To reattach face plate to front of the spirometer, put the "O" ring back in the face plate groove and grease "O" ring with a very small amount of silicone-based lubricant. If too much lubricant is applied to the "O" ring, the ring can create a leak. Mount face plate with "O" ring to front of spirometer and tighten screws uniformly (Section 4-6 in the spirometer manual). Screws should be tightened gradually, one turn (each) at a time so that the plate is secured evenly to the spirometer housing. The screws should be only finger tight--this is the most common place where a leak occurs.
2.2.3 Hoses and mouth piece adapters
a. Dirty equipment should be stored in separate, clearly labeled containers such as plastic bags or plastic-lined containers.
b. Flush the hoses and mouth piece adapters with warm soapy water (dishwashing soap) for 1 to 2 minutes or soak hoses in lukewarm soapy water for about 3 minutes.
c. Thoroughly rinse soap from hoses and reducers. d. Soak hoses and reducers for 10 minutes in a 1:10 bleach solution. Use rubber
gloves to protect hands. Ventilate the area. e. Thoroughly rinse hoses and mouth piece adapters in clear water to remove
bleach odor. f. Dry hoses and mouth piece adapters thoroughly before use. g. Store clean equipment in a separate, labeled container
2.2.4 Nose clips
Pulmonary Function Test Health ABC Operations Manual Vol. VII Chapter 2K, page 10
PFT.OM5
Version 1.0 9/14/01
Change nose clips after each person. If nondisposable nose clips are used, clean them as follows:
a. Wash nose clip pads with cloth or brush and warm soapy water (dishwashing
soap) to remove surface dirt. b. Thoroughly rinse soap from noseclips. c. Soak noseclips for 10 minutes in a 1:10 bleach solution, rinse in clear water and
dry. Careful rinsing is necessary to remove bleach odor. e. Dry noseclips before use.
3. Safety issues and exclusions Participants should be excluded from performing the pulmonary function test if they have a systolic blood pressure greater than 199 mm Hg or a diastolic blood pressure greater than 109 mm Hg. Before administering the pulmonary function test, check the seated blood pressure measurement that has been recorded in the Year 5 Clinic Visit Workbook. If the systolic blood pressure exceeds 199 mm Hg or the diastolic blood pressure exceeds 109 mm Hg, do not administer the pulmonary function test. Go to the Year 5 Clinic Visit Workbook, Pulmonary Function Test Tracking form, Question #8, “Was the MIP test completed?” mark “No” and choose “Participant medically excluded” as the reason, answering the question “Why wasn’t the MIP test completed?;” then go to Question #9 and ask: “Was the spirometry test completed?” mark “No” and choose “Participant medically excluded” as the reason, answering the question “Why wasn’t the spirometry test completed?.” Other exclusion criteria and criteria that should be noted on the form titled: Pulmonary Function Test Tracking (page 26 in the Year 5 Clinic Visit Workbook), are as follows:
• Thoracic, intra-abdominal, eye or heart surgery within two months • Myocardial infarction within 2 months • Presence of any heart problem or condition for which the participant was
hospitalized within the past month • Presence of a detached retina at the time of testing. (If a participant has a
detached retina at the time of testing or has had a detached retina in the past and is unsure whether or not they have recovered, do not test them.)
To determine whether or not any of the above exclusions exist, read the questions that are on the Pulmonary Function Test Tracking form.
1. Have you had any surgery on your chest or abdomen in the past 2 months?
Pulmonary Function Test Health ABC Operations Manual Vol. VII Chapter 2K, page 11
PFT.OM5
Version 1.0 9/14/01
2. Have you had a heart attack in the past 2 months? 3. Have you been hospitalized for any other heart problem in the past month? 4. Do you have a detached retina or have you had eye surgery in the past 2 months?
If participants are regularly using short acting beta-agonist bronchodilators for treatment of lung disease, they should use their bronchodilators before testing. To determine whether or not they use beta-agonist inhalers, refer to the Medication Inventory Form if it has been completed, look in the sack of medications that the participant is carrying, or, if you need to, ask the participant if they use an inhaler, and what it is called. A list of common beta agonist inhalers is on the Pulmonary Function Tracking form and section 4.1.2 of the operations manual. Refer to section 4.1.2 for detailed instructions. If participants answer yes to the question on the Pulmonary Function Test Tracking form concerning an upper respiratory tract infection, make sure the appropriate box is marked and proceed with testing.
Have you had symptoms of a cold or respiratory infection within the past 2 weeks?
Infection control. While there have been no well-documented cases of infection from pulmonary function testing equipment, the procedures do involve potential contact with saliva and respiratory secretions. Pulmonary function instruments, tubing, and mouthpieces are, therefore, a potential source of infection for both technicians and participants. The following guidelines are therefore recommended. 3.1 Clean, disinfected spirometry tubing and mouthpiece connectors should be used to start each testing day. They should be replaced with new disinfected tubing and mouthpiece connectors halfway through each day’s testing. Use sterile disposable filters and clean disposable nose clips for each participant. 3.2 The instrument cleaning instructions in this manual will help guard against cross- patient infection. 3.3 Our procedures call for the participant to only exhale into the spirometer. 3.4 Universal precautions should be followed whenever there is a potential contact with blood, body fluids, or tissues. Universal precautions should be used during every test. You may encounter a situation where a participant voluntarily tells you they have an infectious illness that you consider to be dangerous. Universal precautions should be sufficient to protect study participants. If you are concerned that
Pulmonary Function Test Health ABC Operations Manual Vol. VII Chapter 2K, page 12
PFT.OM5
Version 1.0 9/14/01
universal precautions are not adequate, discuss the situation with your medical advisor in private. 3.4.1 Take extra care to avoid accidental injury when handling instruments or other potentially contaminated items. 3.4.2 Containers should be available for proper disposal of contaminated materials such as used mouthpieces/filters and nose clips 3.4.3 A special, clearly labeled, container should be available to store used breathing tubes that need to be cleaned. A separate, labeled area or container should be used for cleaned, disinfected breathing tubes. 3.4.4 Gloves should be used when there is potential for hand contact with saliva or other respiratory secretions. If the hands are contaminated, they should be washed immediately. Hands should be washed immediately when gloves are removed and before leaving the testing area. In pulmonary function testing that means that gloves should be worn when the spirometer and breathing tubes are cleaned. Mouthpieces or filters can be handled and discarded by the participant. 3.4.5 Wash your hands before and after each participant. 3.4.6 Facial and eye protection are only necessary if there is a risk of being splashed or sprayed with contaminated material or disinfectant solution. In pulmonary function testing this risk is small; however, take care to direct the flow of air away from you when the spirometer is emptying. 3.5 The National Committee for Clinical Laboratory Standards (NCCLS) has produced several documents that address issues of protection from infectious disease risks. If your field center does not already have biohazard guidelines in place, we recommend you obtain copies of these statements from the NCCLS at 940 West Valley Road, Suite 1400, Wayne, PA 19087. 3.5.1 M29-T2. Protection of laboratory workers from infectious disease transmitted by blood, body fluids, and tissue. Second edition; tentative guideline (1991). 3.5.2 I17-P. Protection of laboratory workers from instrument biohazards; proposed guideline (1991)
4. Participant and exam room preparation

Pulmonary Function Test Health ABC Operations Manual Vol. VII Chapter 2K, page 13
PFT.OM5
Version 1.0 9/14/01
4.1 Participant preparation
4.1.1 Clothing and dentures Participants should loosen tight clothing. Dentures should remain in place unless they are observed to interfere with testing. If they are removed, place them in a clean container.
4.1.2 Bronchodilator administration If participants are regularly using short-acting beta agonist bronchodilators for treatment of lung disease and have not used the medication within 4 hours, they should take two puffs of their own bronchodilator, using their own technique, 15 minutes prior to testing. The dose is two puffs to be taken using a spacer. Record the use of the bronchodilator on the Pulmonary Function Test Tracking form. The use of bronchodilators for future testing cycles should be done in the same manner as in the first testing cycle. For reference, some of the names of short-acting beta agonist bronchodilators are: albuterol (generic name), Alupent, Brethaire, Maxair, Proventil, Tornalate, or Ventolin. Serevent is a long acting bronchodilator. If the participant has used Serevent within 10 hours, do not administer a short acting bronchodilator. Atrovent is an anticholinergic medication. Do not have a participant use this medication as part of the spirometry test.
4.2 Equipment Set up
4.2.1 Counter height The spirometer and MIP equipment should be on a table or counter top that is at a height of about 29 to 30 inches. If at all possible, participants should not have to bend to reach the spirometer hose. The spirometer should also not be positioned so that it is above the participant’s head.
Pulmonary Function Test Health ABC Operations Manual Vol. VII Chapter 2K, page 14
PFT.OM5
Version 1.0 9/14/01
4.2.2 Environmental conditions The spirometry testing area should be relatively dust free and private with a stable electrical supply and a stable temperature, which should be between 17° and 30° C (63° and 86° F). Spirometry should not be performed if room temperature is greater than or equal to 40° (104° F) because significant errors in the BTPS correction factor will occur. The thermometer should be located so that it will not be exposed to heat from a device such as a computer. The spirometer should be located away from direct exposure to heat such as heating vents.
4.2.3 Electrical requirements The instruments require conventional electrical power (110 - 120 volts AC). Plug the power cord into a properly grounded electrical wall receptacle (3 prong outlet).
4.2.4 Calibration syringe The 3.00 liter calibration syringe should be stored next to the spirometer so that it remains at the same temperature as the spirometer. Store the syringe with the plunger pushed all the way in. Take care not to drop the syringe. DO NOT make any adjustments to the syringe. Do not loosen the metal rings on the shafts. This will spoil the factory calibration. If any evidence of physical damage is noticed, the Pulmonary Reading Center will check the accuracy of the syringe. You should periodically check each syringe for leaks (every three months or if a problem is suspected). Fill the syringe with air, hold your palm against the outlet snout and try to empty it. If you can expel any air with the outlet plugged, the syringe has a leak and must be repaired.
4.2.5 Spirometer set-up NOTE: Both the spirometer and the computer must be turned off when connecting or disconnecting the spirometer cable.
1. Spirometer 9 pin connector a. Attach the 9 pin spirometer cable to serial/com port #1 in the rear of the
computer and secure cable using locking screws on cable connector. It is important to make sure it is attached to com #1.
Pulmonary Function Test Health ABC Operations Manual Vol. VII Chapter 2K, page 15
PFT.OM5
Version 1.0 9/14/01
b. In the same manner attach the printer to the parallel port, if using printer. 2. The computer: The computer must be turned off during setup. Plug the
pronged connector of the AC power cord into a properly-grounded AC outlet. Use the power cord adapter only when necessary.
3. No special set up is required for the MIP equipment.
5. Detailed measurement procedure summary
Testing methods summary
Daily procedures 1. Prepare the instruments Power-up the computer Run calibration and leak checks on the spirometer Calibrate MIP equipment 2. Identify the participant(s) Check for the presence of exclusion criteria Enter identification information 3. Measure MIP Obtain three acceptable efforts Evaluate for reproducibility and retest if necessary Discard the disposable mouthpiece and clean the mouthpiece adapter with
isopropyl alcohol 4. Measure FVC (SVC if participant cannot do FVC maneuver) Attach a clean tube and mouthpiece adapter Use a clean disposable filter for each participant Obtain three acceptable quality FVC maneuvers Review acceptability and reproducibility and retest if necessary 5. Clean equipment at the end of the day Spirometer hoses, mouthpiece adapters, and nose clips MIP mouth piece adapter Air dry overnight
Weekly procedures 1. Create two floppy disk backups. Store one on site and one off site. 2. Send one of the disks as an e-mail attachment to the Reading Center. 3. Clean Spirometer
Pulmonary Function Test Health ABC Operations Manual Vol. VII Chapter 2K, page 16
PFT.OM5
Version 1.0 9/14/01
5.1 MAXIMUM INSPIRATORY PRESSURE
5.1.1 Introduction
Measuring maximal respiratory pressures is a simple way to measure respiratory muscle strength. In this study we will be measuring maximal inspiratory pressure (MIP) at residual volume. The average normal maximal inspiratory pressure measured from residual volume is about –100 cm H2O for men and about –70 cm H2O for women. The lower limits of normal are –70 (men) and –50 cm H2O (women). Maximal respiratory pressures are not well established for elderly persons.
5.1.2 Starting the MIP program At the DOS prompt (C:>) type “MIP” and press ENTER. A menu will be displayed with three options across the top of the screen. F1-Post Test, F2-Utilities, and F3-Exit. You will use only the F1 and F3 options. Do not go into the F2 Utilities option without guidance from the Pulmonary Reading Center.
5.1.3 Calibration Weekly calibration checks are recommended for the MIP measurements. We will check MIP calibration daily on participant test days for the first month of testing to confirm the calibration stability. After a review of the first month’s data we will move to weekly calibration checks if it is deemed appropriate. Use the following stops to calibrate the pressure transducer.
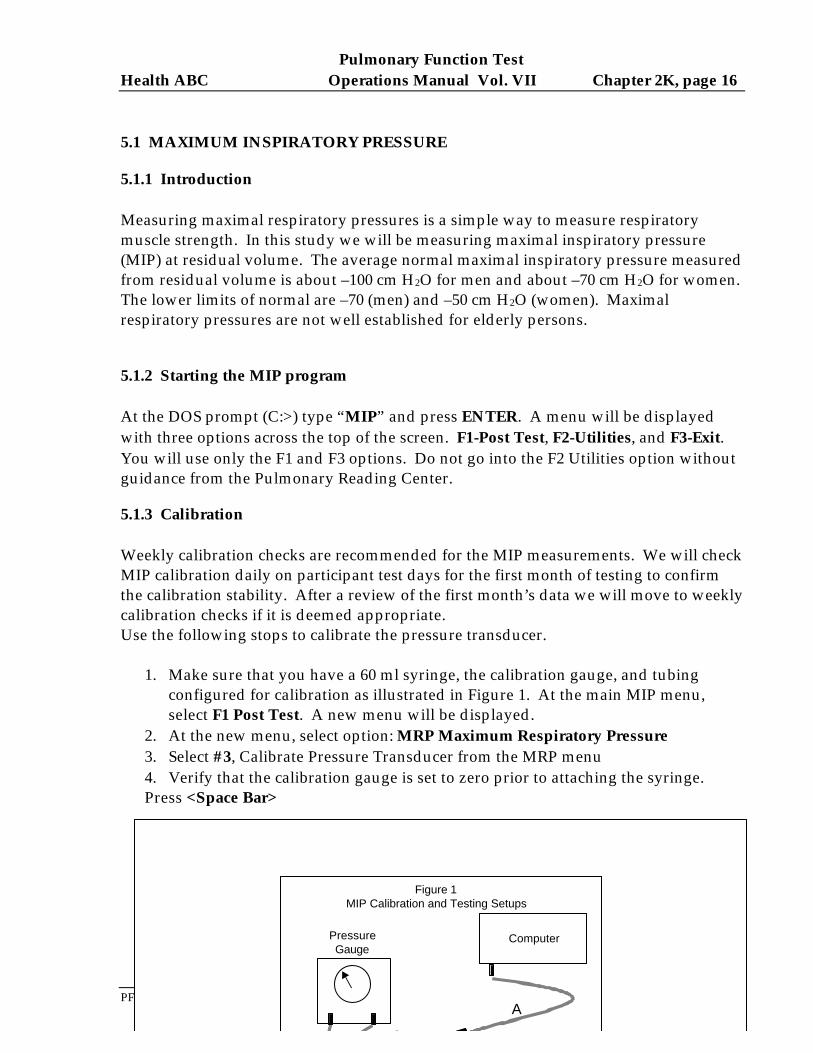
1. Make sure that you have a 60 ml syringe, the calibration gauge, and tubing
configured for calibration as illustrated in Figure 1. At the main MIP menu, select F1 Post Test. A new menu will be displayed.
2. At the new menu, select option: MRP Maximum Respiratory Pressure 3. Select #3, Calibrate Pressure Transducer from the MRP menu
4. Verify that the calibration gauge is set to zero prior to attaching the syringe. Press <Space Bar>
Figure 1MIP Calibration and Testing Setups
ComputerPressureGauge
A
C
Pulmonary Function Test Health ABC Operations Manual Vol. VII Chapter 2K, page 17
PFT.OM5
Version 1.0 9/14/01
5. Fill the 60 ml syringe with about 30 ml of air. Attach the syringe to the tubing
coming from the pressure gauge as illustrated in Figure 1). Push in on the syringe plunger until the pressure gauge reads +160 cm H2O. Hold the syringe plunger steady to keep the reading at +160 and press <Space Bar>.
6. Pull the syringe plunger out until the gauge reads –160 cm H2O. Keep the pressure steady with the syringe plunger and press <Space Bar>.
7. The screen will now display the calibration information. The positive and negative pressure errors should both be within 5% of 160 cm H2O (between 152 and 168 cm H2O).
8. Press <Space Bar> to return to the MRP menu. 9. The calibration can be checked at any time by selecting #1, Maximal Inspiratory
Pressure, from the MRP menu. Connect the pressure gauge to the computer connector (tubing A and C should be connected). Push on the syringe plunger until the pressure gauge reads 100 cm H2O. The MIP reading on the computer screen to the right of the graph should be between 95 and 105 H2O.
5.1.4 Participant testing program operation
1. Configure the tubing and patient mouthpiece for patient testing as illustrated in Figure 1. Tubing B from the mouthpiece adapter should be connected to tubing A which leads to the pressure transducer at the back of the computer.
2. Select MRP (Maximal Respiratory Pressure) from the F1 Post Test menu. 3. Press the <1> key to select the MIP test. The MIP incentive display will appear
on the computer screen.
Pulmonary Function Test Health ABC Operations Manual Vol. VII Chapter 2K, page 18
PFT.OM5
Version 1.0 9/14/01
5.1.5 MIP test procedure
1. The participant should be sitting. 2. Explain that the test is just like trying to suck a thick chocolate milk shake
through a narrow straw only they will be sucking with their lungs and not with their mouth. Demonstrate the MIP test using a spare mouthpiece.
3. Attach a mouthpiece to the pressure gauge mouthpiece adaptor. 4. Press the <1> key from the MRP Menu to select the MIP test. The MIP
incentive display will appear on the computer screen. 5. Place the nose clips on the participant just prior to beginning the maneuver.
Instruct the participant to exhale completely, connect them to the mouthpiece and instruct them to inhale with as much force as possible. Encourage them vigorously to try to inhale harder while watching the computer incentive display for feedback. Say, “That’s enough” after 4 seconds, or earlier if the pressure on the incentive display starts to fall.
6. Coach and encourage the participant to try again, this time for better results. There is considerable learning effect so participants need vigorous encouragement.
7. Analyze the displayed MIP curve for acceptability, then repeat step 4 two more times.
Acceptable Test Criteria: At least three tries with the two highest pressures within 10% of each other. If acceptable test criteria are not met after a participant has made 5 tries, no further testing should be performed.
MIP reproducibility is calculated as follows: Divide the second largest MIP (MIP2) from the largest MIP (MIP1) and
multiply by 100. The number should be 90 or greater: [100(MIP2/MIP1] > 90
This calculation is made for you on the MIP testing screen. A small box appears near the top of the screen on the right side after the first
test is completed. It contains the results for each trial ordered from highest to lowest. It contains three columns. The first labeled “#” contains the trial number. The second, labeled “MIP” contains the measured MIP. The third, labeled “%Best” contains the measured MIP for that trial expressed as a percent of the highest measured MIP. If the %Best for the MIP in the second position from the top is 90 or greater, the reproducibility criteria are met.
8. Record the three largest MIP values on the HABC Spirometry Checklist. (See Section 9.3: Forms). You will enter the three MIP values at the beginning of the
Pulmonary Function Test Health ABC Operations Manual Vol. VII Chapter 2K, page 19
PFT.OM5
Version 1.0 9/14/01
spirometry testing as part of the New Subject Information screen (see section 5.1.7). Do not attempt to print the results.
9. Press <ESC> to return to the main MRP menu. The results of the MIP maneuvers will be stored to a data file. Press <ESC> again to return to the main menu. At this menu select F3-Exit to return to the DOS prompt.
10. At this point you can move to the spirometry testing program by typing PFT followed by ENTER or you can turn off the computer.
5.2 SPIROMETRY
5.2.1 Power-up system
1. Turn ON the spirometer power. The switch is located inside the back of the spirometer.
2. Turn ON the computer. Wait for the computer to "boot." 3. If a new 31/2 inch diskette is to be used, fill out a label as indicated below and
attach it to the diskette. Label Information: HABC Study DATE: from: to: LOCATION: DISK #:
4. Insert labeled diskette into the A drive. 5. Log Sheet: A log sheet (Health ABC Pulmonary Function Q.C. Log) is to be
kept as a cross reference to double check the information asked for on the computer. Start a new set of log sheets for each disk. (See Section 9.3: Forms)
5.2.2 Start HF6 program NOTE: 'CR' stands for Carriage Return key or the Enter key. For example, CR,Y means pressing the Enter key is the same as typing Y for Yes; or CR,N means the Enter key is the same as typing N for No.
1. After the system boots, and the DOS prompt is on the screen, type “DATE” and press “ENTER.” The current date will be displayed on the screen. If the displayed date is correct, press Enter key. If incorrect, enter correct date and then press the Enter key.
Pulmonary Function Test Health ABC Operations Manual Vol. VII Chapter 2K, page 20
PFT.OM5
Version 1.0 9/14/01
2. Now type “TIME” and press “ENTER”; current time will be displayed. If displayed time is correct, press Enter key. If incorrect, enter correct time and then press the Enter key.
3. Type “PFT” and press Enter key at the prompt. 4. The computer screen will then ask, Does this line appear in YELLOW? (CR,N or
Y): Answer "No" if you do not have a color computer. Answer "Yes" if your screen is in color.
5. The next screen prints spirometer unit information. No evaluation of the information is required. Press any key to continue.
6. The next screen contains computer inquiries. Answer them as instructed in the next section.
5.2.3 Computer inquiries To move from one question to another, use UP or Down arrows or Enter or Tab keys.
1. "Spirometer number xx temperature xxC. Please verify spirometer number and make note if not correct. Check the
number on the front lower left of the spirometer. If the number does not match the number displayed on the screen, make a note of this on the log sheet and call the Pulmonary Reading Center (801-321-1620) after the testing session.
2. "Study Name (8 chars max):" Enter the participant’s full Health ABC identification number, characters and all.
For example, the number HA1234 might be entered for a participant at the Memphis Field Center. HB5321 might be entered for a Pittsburgh Field Center participant.
3. "Technician ID Number:" Enter your ID number. If you were not assigned a number, use 999 until you can
be issued an ID. The general format is 100 where 1 indicates Memphis and 200 where 2 indicates Pittsburgh.
4. "Barometric Pressure (mm Hg or inches of Hg):" Enter the barometric pressure. If you enter the pressure in inches, it will
automatically convert to millimeters. 5. "Room temperature (ie: 25.1): C." The computer will display temperature in degrees centigrade obtained from a
thermistor in the spirometer. At the beginning of each testing day (and only at the beginning of each day), compare the displayed temperature with a measurement of room temperature obtained with a high quality thermometer. Enter the temperature displayed on the computer screen if the room temperature is within 4 degrees of the internal spirometer temperature (displayed temperature). If it is not, either wait an additional 10 minutes for the
Pulmonary Function Test Health ABC Operations Manual Vol. VII Chapter 2K, page 21
PFT.OM5
Version 1.0 9/14/01
temperature of the spirometer to acclimate to room temperature or move syringe air through the device several times (as if calibrating the system). If there is still a greater than 4 degree difference, enter the room temperature at the appropriate prompt. The program will convert Fahrenheit to Centigrade. This process recalibrates the thermistor measuring the internal temperature of the spirometer and should be performed only if you are sure the spirometer and the room are at the same temperature. Entering the room temperature at this point in the program also means you are sure that the room temperature is the correct temperature.
The spirometer will warm during the day as tests are performed. As a result of
this warming, you will note differences between room temperature and spirometer temperature as you reenter the spirometry system with each new participant. Since the spirometer and the room are no longer at the same temperature, you should accept the internal spirometer temperature on all tests after the initial test of a day.
6. Printer attached and turned on: Make sure the statement is correct and answer
“Y.” 7. Press “N” for a No response to the next two queries concerning Bronchodilator
Study and Methacholine Study or step past them with down arrows. 8. Press the ESC key when all entries are correct.

Pulmonary Function Test Health ABC Operations Manual Vol. VII Chapter 2K, page 22
PFT.OM5
Version 1.0 9/14/01
Example of how this screen should look (responses are bolded) Spirometry HF6 ABC3/10/1997 Version 1.10NB National Institutes for Occupational Safety and Health Spirometer number 38 temperature 20°C Please verify spirometer number and make note if not correct Study Name (8 chars max): HB5021 Technician ID Number: 201 Barometric Pressure: 752 Room Temperature (ie:25.1): 20.0 Printer attached and turned on:Y Bronchodilator Study during session:N Methacholine Study during session:N Enter value followed by ENTER key. Press TAB or arrow keys to go to next field Press ESC key when all values have been entered correctly
5.2.4 Data storage and transmission 5.2.4.1 As each participant is tested, the program will check the hard disk drive for space available for spirometry curves. Test data will be stored on the hard disk and on a floppy disk.
"xxxxxxxx bytes free, out of xxxxxxxx total bytes on disk drive C: Room for xxxxxx curves on disk drive C:"
"Continue? (CR, Y or N):" Press the Enter key if there is enough room on the hard disk to complete the testing session for that participant. Allow 10 curves per participant. If there is not enough space to complete the session, call the Pulmonary Reading Center.
Pulmonary Function Test Health ABC Operations Manual Vol. VII Chapter 2K, page 23
PFT.OM5
Version 1.0 9/14/01
"Data will be saved on floppy drive a: "Is this OK? (CR,Y or N)"
Always store a copy of the data on a 31/2" floppy disk as a backup in case the hard drive fails. Begin a new floppy disk each week. If a floppy disk is to be used, respond by pressing the ENTER key. The program will then check the floppy disk for space available for spirometry curves. If you answer N or no, then the program will ask you two times if you are sure that you do not want the data saved to a floppy.
xxxxxxx bytes free, out of xxxxxxx total bytes on disk drive a: Room for xxx curves on disk drive a:
"You may change the floppy disk in drive a: at this time and type N to try again or CR, Y to continue."
"Do you wish to continue? (CR, Y or N) :" Press the Enter key if there is enough room on the floppy disk to complete the session. Allow at least 10 curves per participant. If there is not enough space to store 10 curves for the participant you are testing, insert a new formatted disk in Drive A and begin a new log sheet. Typically, only about 50% of the space on a floppy disk will be used.
5.2.4.2 Log sheets.
Record the date, participant Health ABC identification number, name and the technician identification code on the Participant Log (see Section 9.3, Forms).
5.2.4.3 Transfer of copies of data to the Pulmonary Reading Center. At the end of each week, send a copy of the week's testing data, via e-mail to the Reading Center as an e-mail attachment. e-mail address: [email protected] Mail copies of the Participant Logs and Q.C. Logs to the Reading Center.
Dr. Robert Jensen Pulmonary Function Reading Center LDS Hospital Pulmonary Division
Pulmonary Function Test Health ABC Operations Manual Vol. VII Chapter 2K, page 24
PFT.OM5
Version 1.0 9/14/01
Eighth Ave. and C Street Salt Lake City, UT 84143
Use the program DUPFLOP to make the copies. With the original floppy disk in the A:drive, simply type “DUPFLOP” at the C> prompt. The program will copy the floppy disk to the hard drive and ask you to place a formatted floppy disk in the A:drive. Replace the original disk with the new floppy and press ENTER. Wait until the light on the floppy drive goes out; then remove and label the floppy disk copy.
5.2.4.3.1 Keep the original disks and Participant Logs in a secure, cool, dry place. 5.2.4.3.2 The Participant Logs will be returned with an evaluation of test quality for each participant.
5.2.5 Syringe calibration check Although the computer prompts suggest that calibrations are occurring, the process actually only checks the calibration. If the system is out of calibration and no simple explanation is found (such as the presence of a leak in the hose or calibration syringe), the system will have to be returned to the Reading Center to be recalibrated. We do not expect any of the spirometers to require recalibration during the Health ABC study.
"Do you wish to perform a syringe calibration? (CR,Y or N):" Respond by pressing Enter. Syringe calibration checks must be done at the start of each testing day. They do not need to be performed more than once a day. Therefore, after the initial calibration checks, you should answer “N” to this question for all participants tested on that day unless you suspect a calibration problem. "Enter syringe volume (i.e. 3000):" The program will accept either 3 liters or 3000 milliliters. "Empty syringe into spirometer at beep. Wait for beep, then disconnect syringe. Perform syringe calibration check 3 times. Syringe calibration check number: 1 Attach full syringe, type any key when ready: Attach a full syringe, then follow computer instructions. Type any key to start calibration. Wait for the beep to push a full syringe volume of air
Pulmonary Function Test Health ABC Operations Manual Vol. VII Chapter 2K, page 25
PFT.OM5
Version 1.0 9/14/01
into the spirometer. The computer will signal you with another beep when calibration is complete. Disconnect the syringe. "Save current calibration? (CR,Y or N):" If the maneuvers were done without any problem that could cause incorrect calibration, respond CR,Y to this question. Save all calibrations, even if results are out of range. If a problem occurred during this procedure (e.g., syringe not full at start or syringe accidentally disconnected before syringe volume was completely delivered to the spirometer), press N and repeat the calibration. "Perform another syringe calibration check? (CR,Y or N):" Three syringe checks must be done. Each push should be done at a different rate (one fast, one medium, and one slow). When three calibration checks have been performed, review the data and record the volumes on the Health ABC Pulmonary Function Q.C. Log. The calculated differences should not be greater than ± 3% (± 0.09 liters) between actual syringe volume and volume calculated by the spirometer. When you have three acceptable calibration checks answer No to the question: Perform another syringe calibration check? Typically, your system will have an error rate much less than 3%. Keep track of the calibration errors and call the Pulmonary Reading Center if errors are greater than 3% and are not readily explained by a problem such as a leak in the connecting tubing. After the syringe calibration: "Perform a leak calibration check? (CR,Y or N):" Respond by pressing ENTER. In the center of the screen there is a space bordered by two lines. Fill the 3 liter calibration syringe with air and hold the hose ready to attach to the full syringe (they cannot be connected at this time). Pull back the spirometer piston shaft in the back of the spirometer until the line that appears is inside the space bordered by two lines. Connect the hose to the syringe (this will get easier with practice). Then type any key when you are ready to go to the next screen.
Pulmonary Function Test Health ABC Operations Manual Vol. VII Chapter 2K, page 26
PFT.OM5
Version 1.0 9/14/01
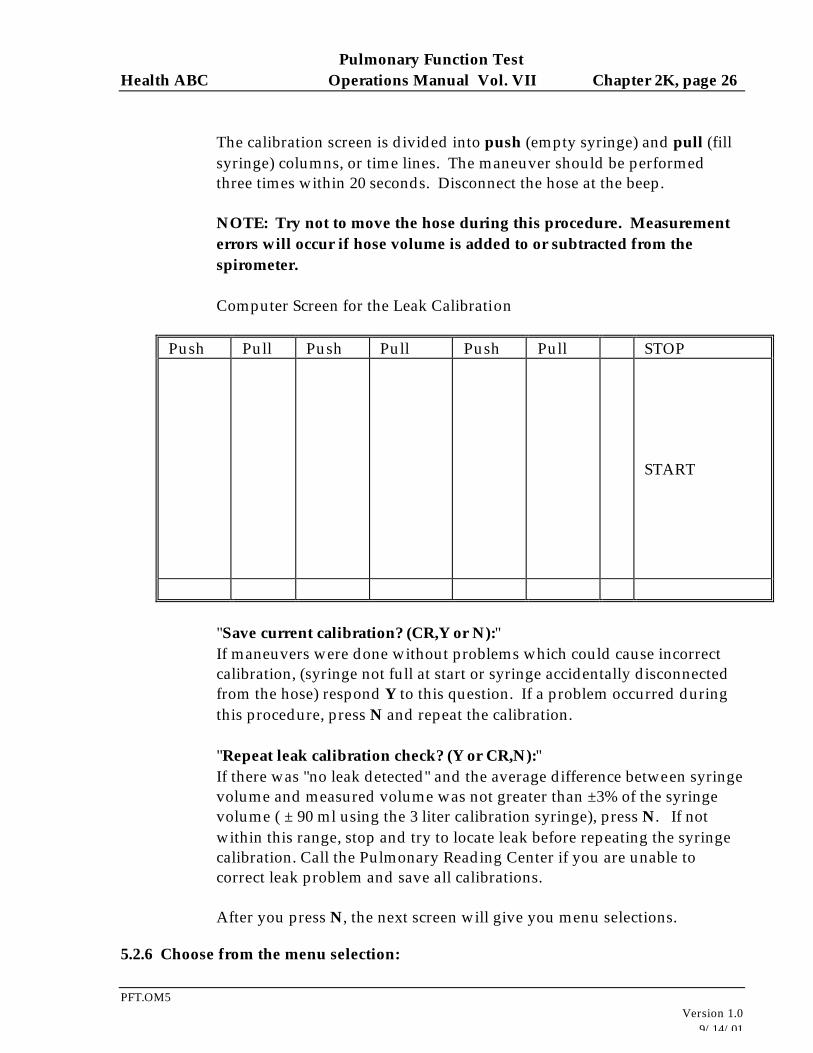
The calibration screen is divided into push (empty syringe) and pull (fill syringe) columns, or time lines. The maneuver should be performed three times within 20 seconds. Disconnect the hose at the beep. NOTE: Try not to move the hose during this procedure. Measurement errors will occur if hose volume is added to or subtracted from the spirometer. Computer Screen for the Leak Calibration
Push Pull Push Pull Push Pull STOP
START
"Save current calibration? (CR,Y or N):"
If maneuvers were done without problems which could cause incorrect calibration, (syringe not full at start or syringe accidentally disconnected from the hose) respond Y to this question. If a problem occurred during this procedure, press N and repeat the calibration.
"Repeat leak calibration check? (Y or CR,N):"
If there was "no leak detected" and the average difference between syringe volume and measured volume was not greater than ±3% of the syringe volume ( ± 90 ml using the 3 liter calibration syringe), press N. If not within this range, stop and try to locate leak before repeating the syringe calibration. Call the Pulmonary Reading Center if you are unable to correct leak problem and save all calibrations. After you press N, the next screen will give you menu selections.
5.2.6 Choose from the menu selection:
Pulmonary Function Test Health ABC Operations Manual Vol. VII Chapter 2K, page 27
PFT.OM5
Version 1.0 9/14/01
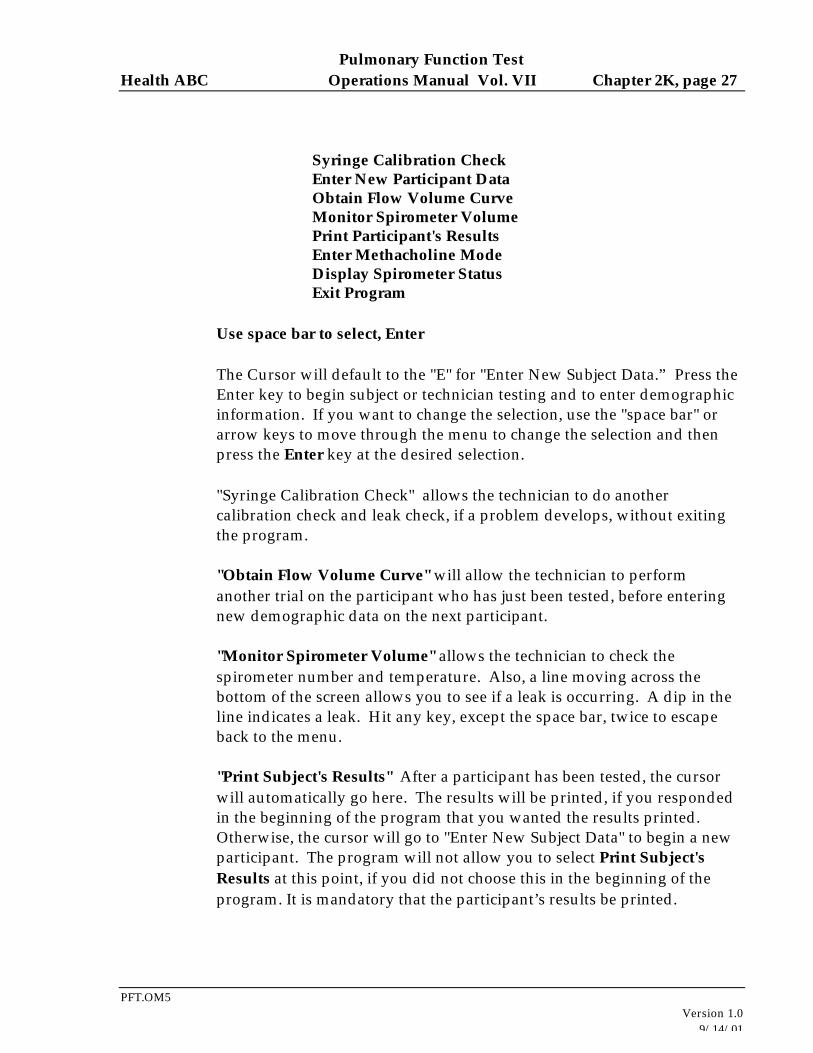
Syringe Calibration Check Enter New Participant Data Obtain Flow Volume Curve Monitor Spirometer Volume Print Participant's Results Enter Methacholine Mode Display Spirometer Status Exit Program Use space bar to select, Enter
The Cursor will default to the "E" for "Enter New Subject Data.” Press the Enter key to begin subject or technician testing and to enter demographic information. If you want to change the selection, use the "space bar" or arrow keys to move through the menu to change the selection and then press the Enter key at the desired selection.
"Syringe Calibration Check" allows the technician to do another calibration check and leak check, if a problem develops, without exiting the program.
"Obtain Flow Volume Curve" will allow the technician to perform another trial on the participant who has just been tested, before entering new demographic data on the next participant.
"Monitor Spirometer Volume" allows the technician to check the spirometer number and temperature. Also, a line moving across the bottom of the screen allows you to see if a leak is occurring. A dip in the line indicates a leak. Hit any key, except the space bar, twice to escape back to the menu.
"Print Subject's Results" After a participant has been tested, the cursor will automatically go here. The results will be printed, if you responded in the beginning of the program that you wanted the results printed. Otherwise, the cursor will go to "Enter New Subject Data" to begin a new participant. The program will not allow you to select Print Subject's Results at this point, if you did not choose this in the beginning of the program. It is mandatory that the participant’s results be printed.
Pulmonary Function Test Health ABC Operations Manual Vol. VII Chapter 2K, page 28
PFT.OM5
Version 1.0 9/14/01
“Exit Program” terminates the program, stores the participant files to the floppy disk, and returns you to the C> prompt. To perform spirometry, select “Enter New Subject Data.” You should have the MIP data in hand before you reach this point.
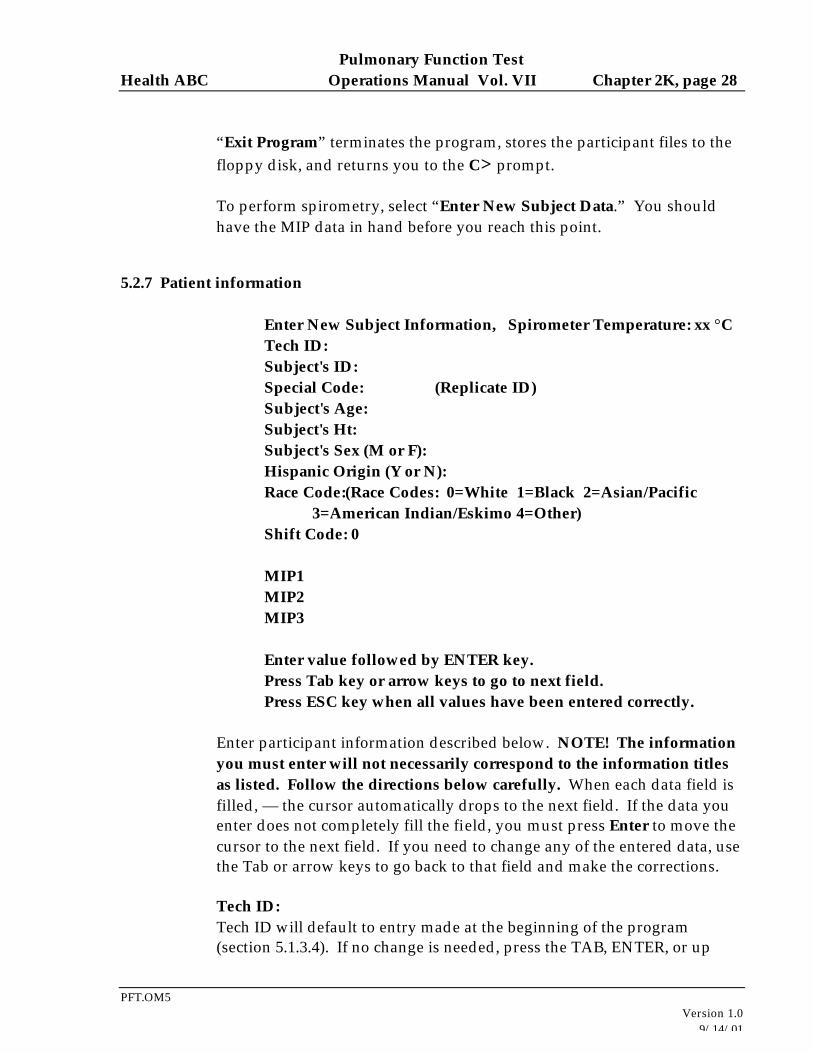
5.2.7 Patient information Enter New Subject Information, Spirometer Temperature: xx °C Tech ID: Subject's ID: Special Code: (Replicate ID) Subject's Age: Subject's Ht: Subject's Sex (M or F): Hispanic Origin (Y or N): Race Code:(Race Codes: 0=White 1=Black 2=Asian/Pacific 3=American Indian/Eskimo 4=Other) Shift Code: 0 MIP1 MIP2 MIP3 Enter value followed by ENTER key. Press Tab key or arrow keys to go to next field. Press ESC key when all values have been entered correctly.
Enter participant information described below. NOTE! The information you must enter will not necessarily correspond to the information titles as listed. Follow the directions below carefully. When each data field is filled, — the cursor automatically drops to the next field. If the data you enter does not completely fill the field, you must press Enter to move the cursor to the next field. If you need to change any of the entered data, use the Tab or arrow keys to go back to that field and make the corrections.
Tech ID:
Tech ID will default to entry made at the beginning of the program (section 5.1.3.4). If no change is needed, press the TAB, ENTER, or up
Pulmonary Function Test Health ABC Operations Manual Vol. VII Chapter 2K, page 29
PFT.OM5
Version 1.0 9/14/01
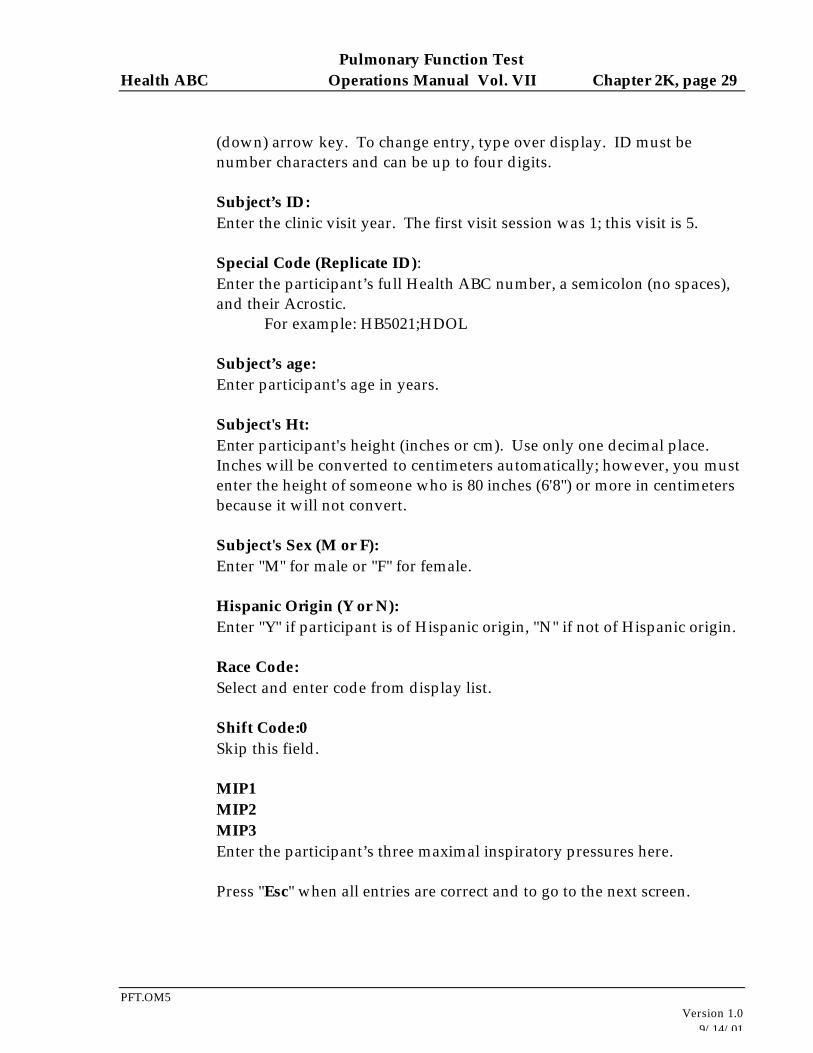
(down) arrow key. To change entry, type over display. ID must be number characters and can be up to four digits.
Subject’s ID:
Enter the clinic visit year. The first visit session was 1; this visit is 5. Special Code (Replicate ID):
Enter the participant’s full Health ABC number, a semicolon (no spaces), and their Acrostic. For example: HB5021;HDOL
Subject’s age: Enter participant's age in years. Subject's Ht:
Enter participant's height (inches or cm). Use only one decimal place. Inches will be converted to centimeters automatically; however, you must enter the height of someone who is 80 inches (6'8") or more in centimeters because it will not convert.
Subject's Sex (M or F): Enter "M" for male or "F" for female. Hispanic Origin (Y or N):
Enter "Y" if participant is of Hispanic origin, "N" if not of Hispanic origin. Race Code: Select and enter code from display list. Shift Code:0
Skip this field. MIP1 MIP2 MIP3 Enter the participant’s three maximal inspiratory pressures here.
Press "Esc" when all entries are correct and to go to the next screen.
Pulmonary Function Test Health ABC Operations Manual Vol. VII Chapter 2K, page 30
PFT.OM5
Version 1.0 9/14/01
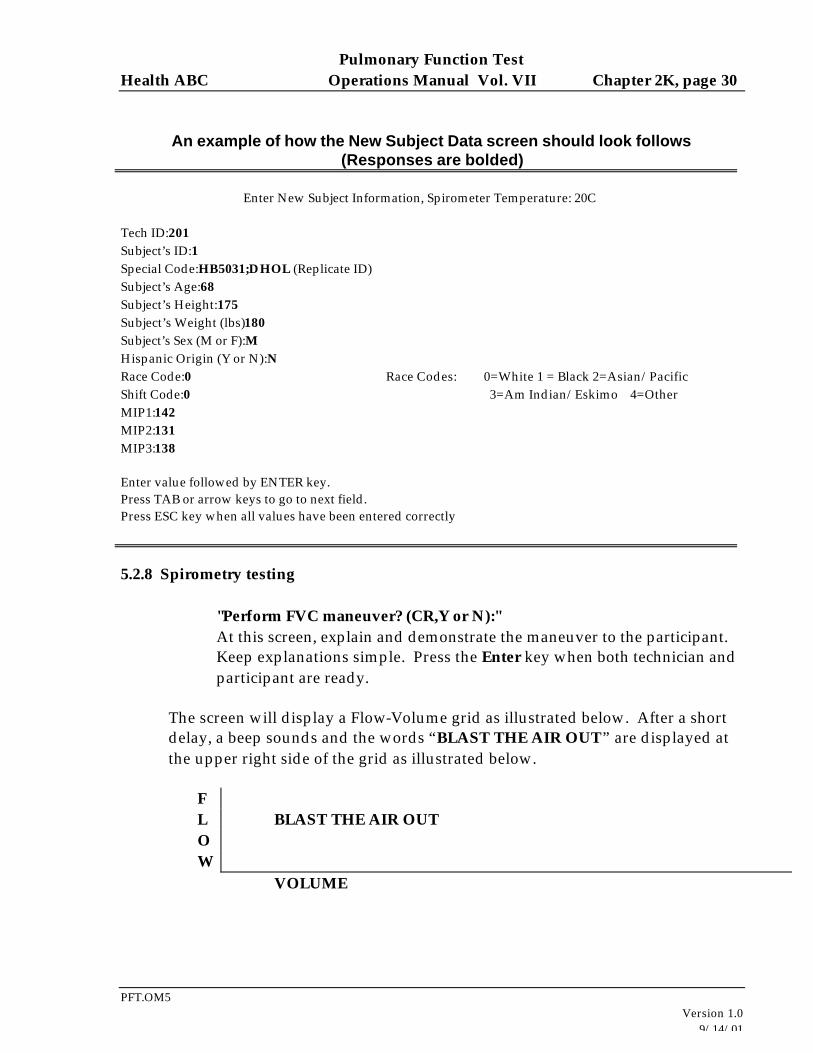
An example of how the New Subject Data screen should look follows (Responses are bolded)
Enter New Subject Information, Spirometer Temperature: 20C Tech ID:201 Subject’s ID:1 Special Code:HB5031;DHOL (Replicate ID) Subject’s Age:68 Subject’s Height:175 Subject’s Weight (lbs)180 Subject’s Sex (M or F):M Hispanic Origin (Y or N):N Race Code:0 Race Codes: 0=White 1 = Black 2=Asian/Pacific Shift Code:0 3=Am Indian/Eskimo 4=Other MIP1:142 MIP2:131 MIP3:138 Enter value followed by ENTER key. Press TAB or arrow keys to go to next field. Press ESC key when all values have been entered correctly
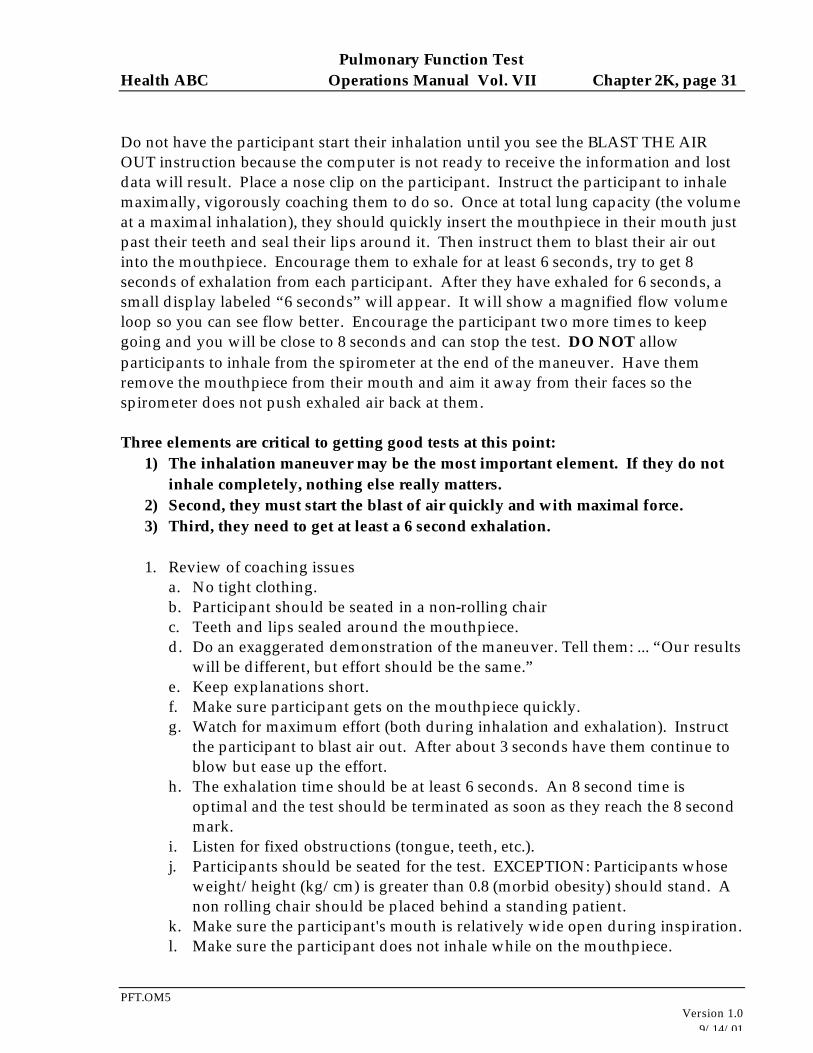
5.2.8 Spirometry testing "Perform FVC maneuver? (CR,Y or N):" At this screen, explain and demonstrate the maneuver to the participant. Keep explanations simple. Press the Enter key when both technician and participant are ready.
The screen will display a Flow-Volume grid as illustrated below. After a short delay, a beep sounds and the words “BLAST THE AIR OUT” are displayed at the upper right side of the grid as illustrated below.
F L BLAST THE AIR OUT O W
VOLUME
Pulmonary Function Test Health ABC Operations Manual Vol. VII Chapter 2K, page 31
PFT.OM5
Version 1.0 9/14/01
Do not have the participant start their inhalation until you see the BLAST THE AIR OUT instruction because the computer is not ready to receive the information and lost data will result. Place a nose clip on the participant. Instruct the participant to inhale maximally, vigorously coaching them to do so. Once at total lung capacity (the volume at a maximal inhalation), they should quickly insert the mouthpiece in their mouth just past their teeth and seal their lips around it. Then instruct them to blast their air out into the mouthpiece. Encourage them to exhale for at least 6 seconds, try to get 8 seconds of exhalation from each participant. After they have exhaled for 6 seconds, a small display labeled “6 seconds” will appear. It will show a magnified flow volume loop so you can see flow better. Encourage the participant two more times to keep going and you will be close to 8 seconds and can stop the test. DO NOT allow participants to inhale from the spirometer at the end of the maneuver. Have them remove the mouthpiece from their mouth and aim it away from their faces so the spirometer does not push exhaled air back at them. Three elements are critical to getting good tests at this point:
1) The inhalation maneuver may be the most important element. If they do not inhale completely, nothing else really matters.
2) Second, they must start the blast of air quickly and with maximal force. 3) Third, they need to get at least a 6 second exhalation.
1. Review of coaching issues
a. No tight clothing. b. Participant should be seated in a non-rolling chair c. Teeth and lips sealed around the mouthpiece. d. Do an exaggerated demonstration of the maneuver. Tell them: ... “Our results
will be different, but effort should be the same.” e. Keep explanations short. f. Make sure participant gets on the mouthpiece quickly. g. Watch for maximum effort (both during inhalation and exhalation). Instruct
the participant to blast air out. After about 3 seconds have them continue to blow but ease up the effort.
h. The exhalation time should be at least 6 seconds. An 8 second time is optimal and the test should be terminated as soon as they reach the 8 second mark.
i. Listen for fixed obstructions (tongue, teeth, etc.). j. Participants should be seated for the test. EXCEPTION: Participants whose
weight/height (kg/cm) is greater than 0.8 (morbid obesity) should stand. A non rolling chair should be placed behind a standing patient.
k. Make sure the participant's mouth is relatively wide open during inspiration. l. Make sure the participant does not inhale while on the mouthpiece.
Pulmonary Function Test Health ABC Operations Manual Vol. VII Chapter 2K, page 32
PFT.OM5
Version 1.0 9/14/01
m. If participant is terminating early, tell him that even if he feels empty he is still getting out small amounts of air and should keep pushing and blowing. (You only feel air coming out of the large airways, not the small airways.)
n. Correcting technique should always be done in a positive manner, e.g., "You did a great job that time; next time do just the same, but blow a little harder at the start."
o. Prior to each test, check to make sure the piston has returned to the zero volume position. If necessary, manually return it to the zero position.
2. After each trial the message on the screen will read -- “Enter a Quality Code or
CR to proceed.” Curves should not be deleted unless there is a completely failed attempt (For example: the participant stops blowing or takes their mouth off the mouthpiece or inhales within the first second). We can deal with unacceptable curves at the Reading Center so if you are uncertain, keep the curve and repeat the test as needed.
The only quality code to be used in this study is 11. Enter the number 11 if you
see extra breaths at the end of the maneuver. Extra breaths at the end of the maneuver will falsely increase vital capacity. Entering the number 11 as a quality code will prevent that curve from being processed further.
The next screen shows the calculated results of the trial. "More trials on this participant? (CR,Y or N or V):" If you want to see the participant's curve as a volume-time curve, enter V. Otherwise, enter Y or N, depending upon the technician's decision whether more trials are needed. If you enter N, you will be returned to the menu screen. The following is a review of test factors which assist the technician in this decision about whether to continue testing an individual participant.
PERCENT DIFFERENCES After the first trial the percent differences will be calculated between the best and second best FVC, FEV1, and Peak Flow on each of the trials. Differences will not be calculated on trials with coughs or extrapolated volumes of greater than 5%. If an extra breath occurs at the end of the maneuver, enter the code 11 to keep the FVC from being falsely elevated. It would be very hard to meet the reproducibility criteria with this occurrence. A minimum of 3 and maximum of 5 trials should be done on each participant. If the first three curves are not acceptable, continue testing until you have three acceptable
Pulmonary Function Test Health ABC Operations Manual Vol. VII Chapter 2K, page 33
PFT.OM5
Version 1.0 9/14/01
trials or the participant has tried 5 times. Each of the three acceptable curves must meet all of the acceptability and reproducibility criteria.
a. To meet the acceptability criteria there must be 3 curves free of: (1) early coughs; (2) large extrapolated volume; or (3) early termination.
b. To meet the reproducibility criteria the largest and the second largest FVC's must be within 200 ml (0.2 liters); the largest and the second largest FEV1's must be within 200 ml.
3. Slow Vital Capacities will be performed only if a participant cannot perform the
forced vital capacity maneuver properly and, in the judgment of the technician, the participant will be able to adequately do an unforced vital capacity maneuver. The spirometer does not have a separate program for SVC; therefore, SVC testing will be done in the FVC maneuver mode. The SVC mode will be indicated by entering the number 20 when asked to enter a quality code. a. The “slow vital capacity is performed in exactly the same manner as the FVC
maneuver up to the point of the forced exhalation. At that point the participant (who has previously been instructed in the unforced maneuver) will encourage the participant to exhale smoothly and completely. Slowness should not be emphasized. If the exhalation is too slow, vital capacity will be underestimated.
b. If a SVC maneuver is performed, the quality code #20 should always be entered (see Section 2).
c. FVC acceptability do not apply to SVC maneuvers. However, the reproducibility criteria for the FVC maneuver apply: The largest SVC and the second largest SVC should be within 200 ml. No more than 5 attempts should be made.
4. End of Session At this point you should be looking at the main menu.
a. Select Print results to print a hard copy of the participant’s results. b. Return to the main menu. c. Select Exit program after you are through testing each individual participant.
This assures that data will be properly stored. "Exit program, Are you sure? (CR, Y or N):" Press Enter, if you are ready to exit program. The program will then write
the participant’s data to the floppy disk and terminate the program returning you to the C> prompt. Be sure you DO NOT remove the floppy disk until the disk drive light shuts off. Early removal of the floppy disk can results in improper storage of a participant’s data on the floppy disk.

Pulmonary Function Test Health ABC Operations Manual Vol. VII Chapter 2K, page 34
PFT.OM5
Version 1.0 9/14/01
Remove the disk from the drive and turn the computer off.
6. Alert values/follow-up/report
6.1 Spirometry For tests of acceptable quality (See section 5.2.8), make the judgment about alert values using the largest FEV1 regardless of the test from which it comes. The alert value is an FEV1 < 1.0 liter or < 40% of predicted (whichever is the smaller number [see report form]).
6.2 Maximum inspiratory pressures No alerts are necessary
7. Quality assurance
7.1 MIP
For every participant the following criteria should be met:
1. At least three attempts should be made. 2. The two largest pressures should be within 10% of each other. 3. No more than five attempts should be made.
7.2 Spirometry On every test you will be looking for these elements:
1. 6 seconds duration (The computer will put a T in QF column, if blow is less than 6 seconds.)
2. Acceptability (3 good trials--free of coughs, early termination, or extrapolated volume)
3. Free of coughs (The computer will put a C in the QF column if someone coughs and flags [*] the results of the trial, indicating this trial will not be used in the calculations.)
Pulmonary Function Test Health ABC Operations Manual Vol. VII Chapter 2K, page 35
PFT.OM5
Version 1.0 9/14/01
4. Free of early termination (The computer will put a T in the QF column if the participant is exhaling more than 20 ml of air during the last second of the maneuver.)
5. Free of extrapolated volume. (The computer will put an E in QF column and flags [*] the results of the trial, if the extrapolated volume is more than 5% of FVC. This trial will not be used in the calculations.)
6. Reproducible Tests (Largest 2 FVCs and FEV1s are within 200 ml of each other.) a. 2 FVCs within .2 liters b. 2 FEV1s within .2 liters c. 2 Peak Flows within 10%
7. A minimum of 3 trials must be done. 8. No more than 8 trials should be done. Note: The two best tests for FVC may be on different curves than the two best tests for FEV1.
7.3 Biological standards Two pulmonary function technicians will act as biologic controls. They will perform three acceptable spirometric and MIP maneuvers each week in which they test participants. The curves will be submitted to the Reading Center. Tests should be coded by entering the technician’s formal ID code exactly where you would enter the participant’s Health ABC number (see item 5.2.3 and item 5.2.7, Special Code) so that they can be identified by the Reading Center. Biologic control testing need not be performed on technicians who, in their judgment, have active respiratory tract infections.
7.4 Reading Center review The Pulmonary Reading Center will assess quality on the tests submitted and return those assessments to the test centers and the testing technicians. A report of the Reading Center review of field center spirograms should be returned to the field centers within 7 working days of receipt by the Reading Center. There will be infrequent occasions where this deadline is not met because of travel or illness. Each field center will maintain a Spirometry Review Log to document receipt of each review and to verify that each technician involved in any of the tests for a given report has reviewed their quality scores (see section 9.3 Forms).

Pulmonary Function Test Health ABC Operations Manual Vol. VII Chapter 2K, page 36
PFT.OM5
Version 1.0 9/14/01
7.5 Quality control checklist Before participant arrival:
¨ Turns on the spirometer power
¨ Inserts diskette into the A drive or makes sure that the diskette is already in the A drive and properly labeled
¨ Starts HF6 program and submits data (study name, technician ID, barometric pressure, etc.
¨ Makes sure that the printer is attached and turned on
¨ Runs calibration and leak checks on the spirometer
¨ Calibrates the MIP equipment
After participant arrival:
¨ Explains procedure to participant
¨ Asks exclusion questions
¨ Asks participant if they use a beta-agonist inhaler and follows procedure if the answer is “yes.”
¨ Asks participant to loosen tight clothing
¨ Follows universal precautions
¨ Properly enters ID information on computer
¨ Positions participant properly (sitting position and head position)
¨ Measures MIP (obtains three acceptable efforts)
¨ Enthusiastically coaches
¨ Properly records data
¨ Evaluates for reproducibility and retests if necessary
¨ Discards disposable mouthpiece and cleans mouthpiece adapter with isopropyl alcohol
¨ Attaches clean filter and uses new nose clip for each participant.
¨ Obtains three acceptable quality FVC maneuvers (SVC if participant cannot do FVC maneuver)
¨ Enthusiastically coaches
¨ Does exaggerated demonstration of the maneuver
¨ Watches for maximum effort
¨ Makes sure piston has returned to the zero volume position
Pulmonary Function Test Health ABC Operations Manual Vol. VII Chapter 2K, page 37
PFT.OM5
Version 1.0 9/14/01
¨ Enters Quality Code or CR
¨ Evaluates for reproducibility and retests if necessary
¨ Prints results
¨ Exits program properly
¨ Reviews forms for completeness
¨ Correctly completes forms
8. Instructions for completing forms 8.1 Data will be copied to a computer disk and will be e-mailed to the Pulmonary Reading Center in Salt Lake City, UT. 8.2 The data will be accompanied by a log of the patients on each disk. 8.3 Participants will be given a “report” of their results at the completion of their clinic visit. 8.4 Daily and weekly maintenance and calibration logs will be kept.
Pulmonary Function Test Health ABC Operations Manual Vol. VII Chapter 2K, page 38
PFT.OM5
Version 1.0 9/14/01
9. Appendices
9.1 Definitions ATPS is the condition of air inside the spirometer - Ambient Temperature and Pressure, and Saturated with water vapor. The ambient temperature of the spirometer is usually lower than body temperature; this has the effect of cooling and contracting the volume of air exhaled into the spirometer. ATS is short for American Thoracic Society, the scientific branch of the American Lung Association. The ATS promotes accurate spirometers by recommending spirometer standards. BACK EXTRAPOLATION is the standard method used to determine "time zero" when measuring FEV1. The amount of exhaled volume at the start of the maneuver excluded from the FEV1 by this technique is called the back extrapolated volume (BEV). The BEV should be less than 5% of the vital capacity. BTPS stands for Body Temperature (usually 37 degrees C) and Pressure, Saturated with water vapor (100% humidity). It is the condition of air inside the lungs before it is exhaled into a spirometer. ATS standards require that volumes and flows be reported at these conditions. CALIBRATION SYRINGE is a large (usually 3.00 liters) extremely accurate syringe used to check the volume accuracy of spirometers and, if necessary, to re-calibrate them. COPD stands for Chronic Obstructive Pulmonary Disease, a general term for lung disease caused by cigarette smoking - a mixture of emphysema and bronchitis. FET is short for Forced Exhalation Time. The FET should be at least six seconds for the FVC maneuver to be considered acceptable, otherwise the FVC may be underestimated. An eight second FET is optimal for this study. FEV1 is the most important spirometry variable, short for Forced Expiratory Volume in one second. It is convenient to think of it as the average flow rate during the first second of the FVC maneuver. It is reduced with airflow obstruction.
Pulmonary Function Test Health ABC Operations Manual Vol. VII Chapter 2K, page 39
PFT.OM5
Version 1.0 9/14/01
FEV1/FVC RATIO is the most sensitive and specific index of airways obstruction measured by a spirometer. FLOW-VOLUME CURVE is the graph obtained from a forced exhalation maneuver plotted with flow on the vertical axis and volume on the horizontal axis. When compared with the traditional spirogram, it has the advantage of allowing easy recognition of unacceptable or poorly reproducible maneuvers and disease patterns. FVC is the Forced Vital Capacity, the volume of air exhaled during the maneuver named after it. The participant takes as deep a breath as possible and then quickly exhales as much air as possible. The FVC is reduced with restrictive disorders. MAILER FLOPPY DISK is the diskette sent from the Field Center to the Pulmonary Function Reading Center with the current week's results. OBSTRUCTION is a decrease in maximal airflow rates caused by airway narrowing. The FEV1/FVC ratio is decreased. PEFR stands for Peak Expiratory Flow Rate, the highest flow measured during the FVC maneuver. It is a good index of effort used at the onset of the maneuver. It can be seen on a flow-volume display but not on a volume-time display. PF is short for Pulmonary Function. PRED is short for the predicted value of a PF parameter. It is determined from a regression equation from a large population study of healthy people. RESTRICTION is a decrease in lung volumes. Scarring of lung tissue (fibrosis), heart failure, pneumonia, and simple obesity are some of many causes. The FVC is reduced while the FEV1/FVC ratio is normal or increased.
Pulmonary Function Test Health ABC Operations Manual Vol. VII Chapter 2K, page 40
PFT.OM5
Version 1.0 9/14/01
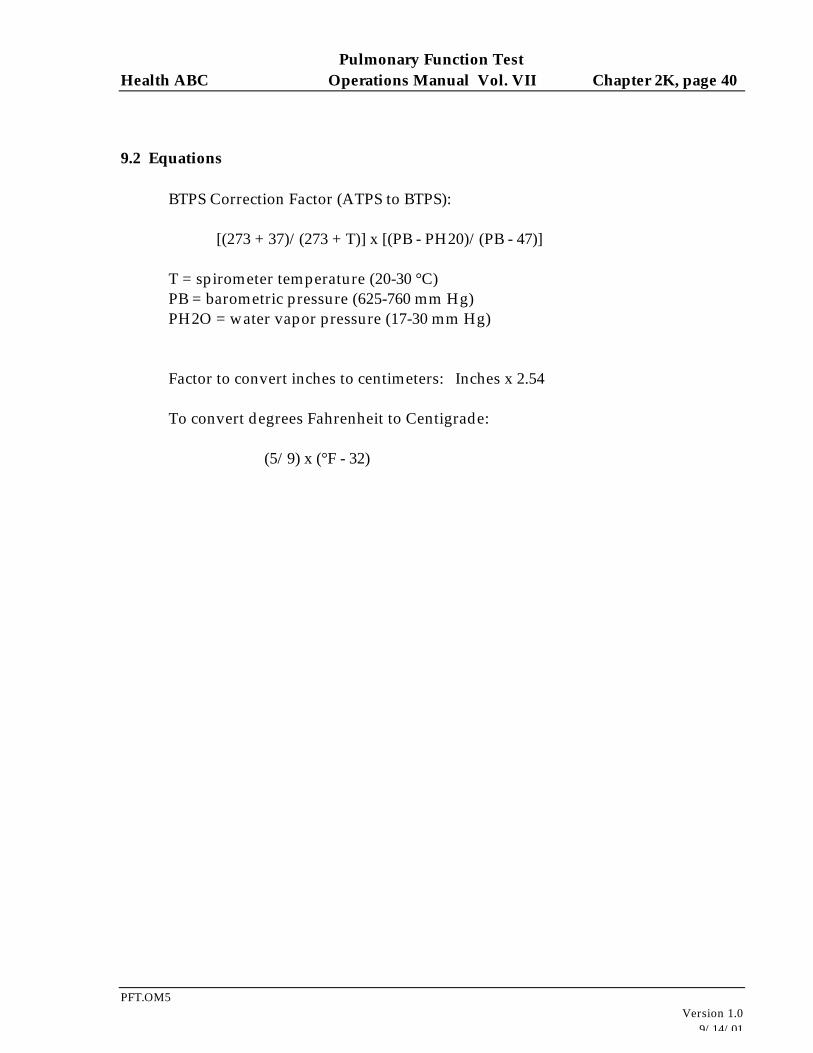
9.2 Equations BTPS Correction Factor (ATPS to BTPS): [(273 + 37)/(273 + T)] x [(PB - PH20)/(PB - 47)] T = spirometer temperature (20-30 °C) PB = barometric pressure (625-760 mm Hg) PH2O = water vapor pressure (17-30 mm Hg) Factor to convert inches to centimeters: Inches x 2.54 To convert degrees Fahrenheit to Centigrade: (5/9) x (°F - 32)
Pulmonary Function Test Health ABC Operations Manual Vol. VII Chapter 2K, page 41
PFT.OM5
Version 1.0 9/14/01
9.3 Forms Health ABC Study Pulmonary Function Report Health ABC Pulmonary Function QC Log Health ABC Participant Log Pulmonary Function Test Tracking Form Health ABC Spirometry QC Reading Center Log Health ABC Spirometry Checklist
Pulmonary Function Test Health ABC Operations Manual Vol. VII Chapter 2K, page 42
PFT.OM5
Version 1.0 9/14/01
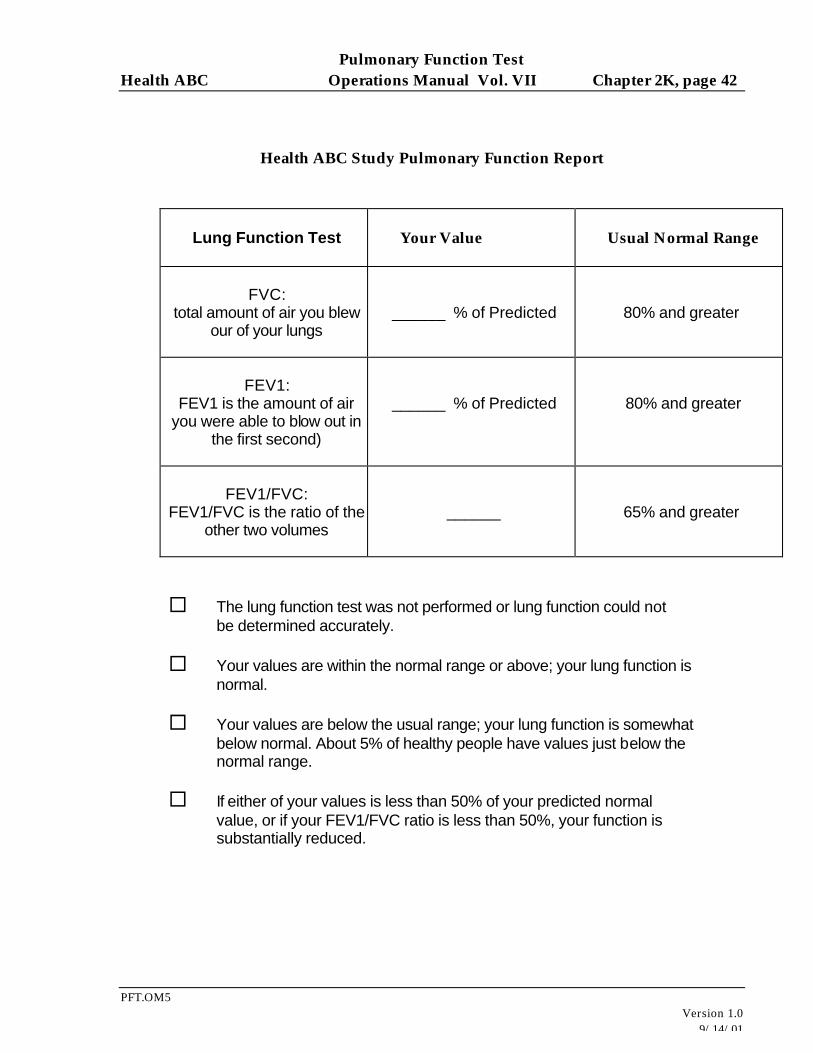
Health ABC Study Pulmonary Function Report
Lung Function Test
Your Value
Usual Normal Range
FVC:
total amount of air you blew our of your lungs
______ % of Predicted
80% and greater
FEV1:
FEV1 is the amount of air you were able to blow out in
the first second)
______ % of Predicted
80% and greater
FEV1/FVC:
FEV1/FVC is the ratio of the other two volumes
______
65% and greater
¨ The lung function test was not performed or lung function could not be determined accurately. ¨ Your values are within the normal range or above; your lung function is normal. ¨ Your values are below the usual range; your lung function is somewhat below normal. About 5% of healthy people have values just below the normal range. ¨ If either of your values is less than 50% of your predicted normal value, or if your FEV1/FVC ratio is less than 50%, your function is substantially reduced.
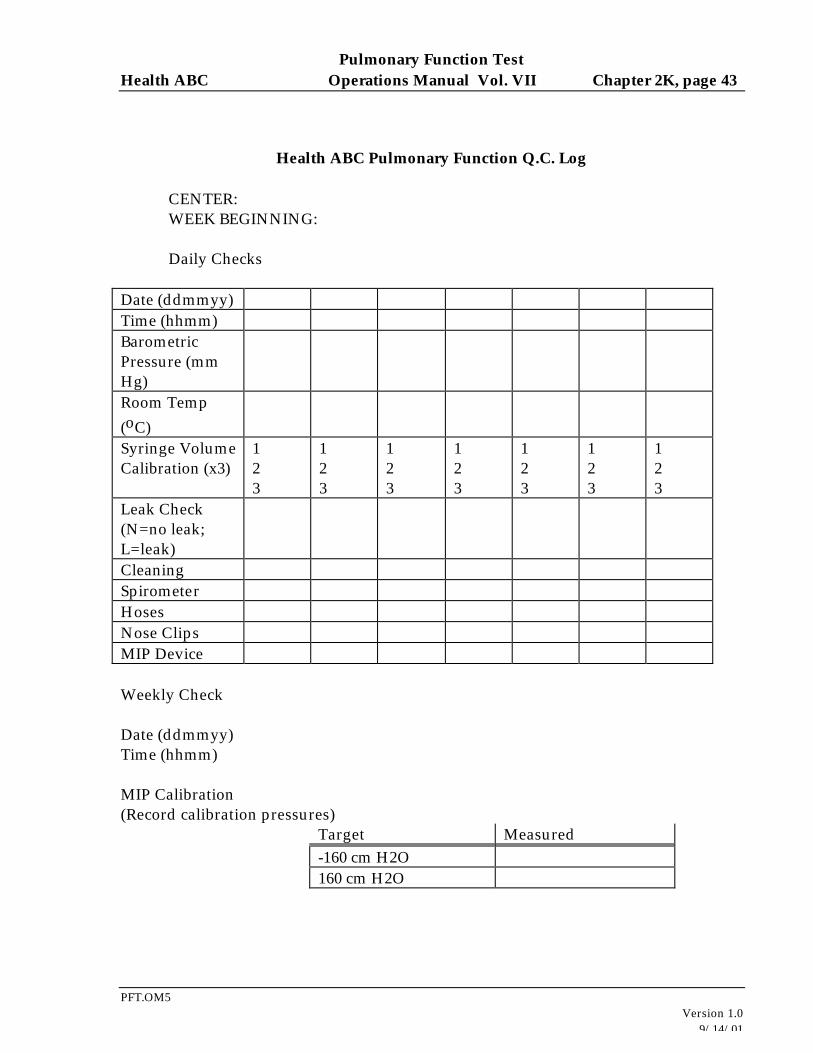
Pulmonary Function Test Health ABC Operations Manual Vol. VII Chapter 2K, page 43
PFT.OM5
Version 1.0 9/14/01
Health ABC Pulmonary Function Q.C. Log CENTER: WEEK BEGINNING: Daily Checks
Date (ddmmyy) Time (hhmm) Barometric Pressure (mm Hg)
Room Temp (oC)
Syringe Volume Calibration (x3)
1 2 3
1 2 3
1 2 3
1 2 3
1 2 3
1 2 3
1 2 3
Leak Check (N=no leak; L=leak)
Cleaning Spirometer Hoses Nose Clips MIP Device Weekly Check Date (ddmmyy) Time (hhmm) MIP Calibration (Record calibration pressures)
Target Measured -160 cm H2O 160 cm H2O
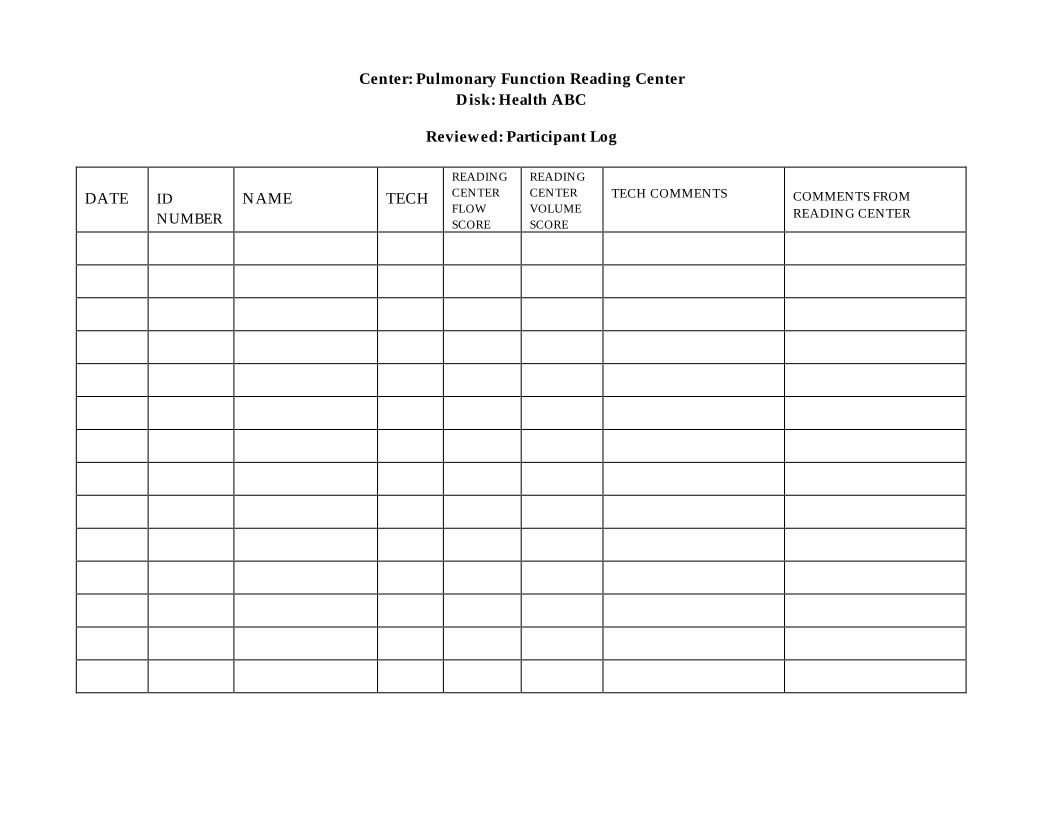
Center: Pulmonary Function Reading Center Disk: Health ABC
Reviewed: Participant Log
DATE
ID NUMBER
NAME
TECH
READING CENTER FLOW SCORE
READING CENTER VOLUME SCORE
TECH COMMENTS
COMMENTS FROM READING CENTER
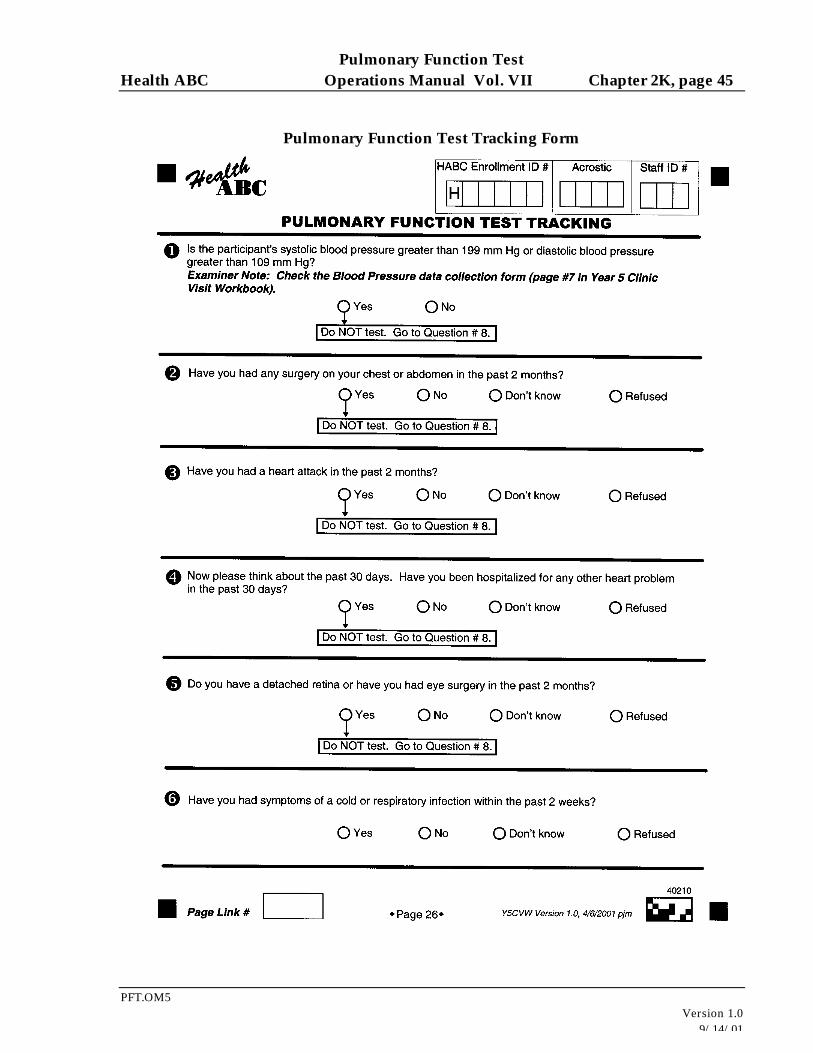
Pulmonary Function Test Health ABC Operations Manual Vol. VII Chapter 2K, page 45
PFT.OM5
Version 1.0 9/14/01
Pulmonary Function Test Tracking Form
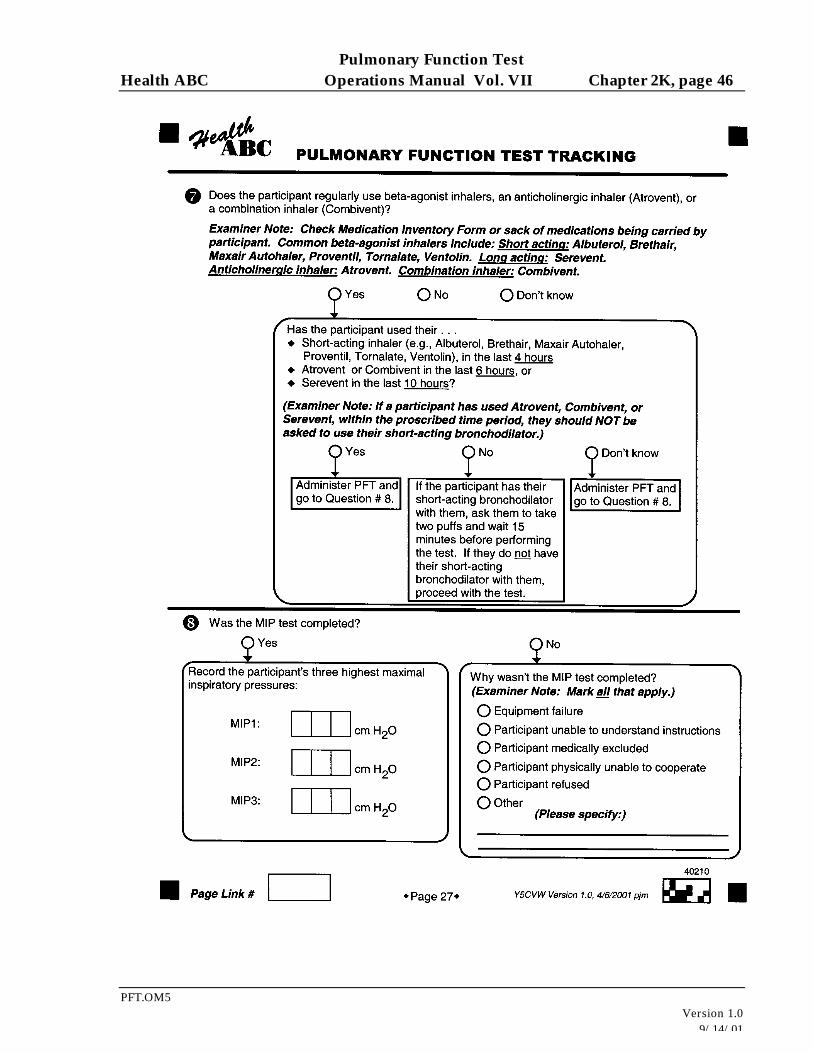
Pulmonary Function Test Health ABC Operations Manual Vol. VII Chapter 2K, page 46
PFT.OM5
Version 1.0 9/14/01
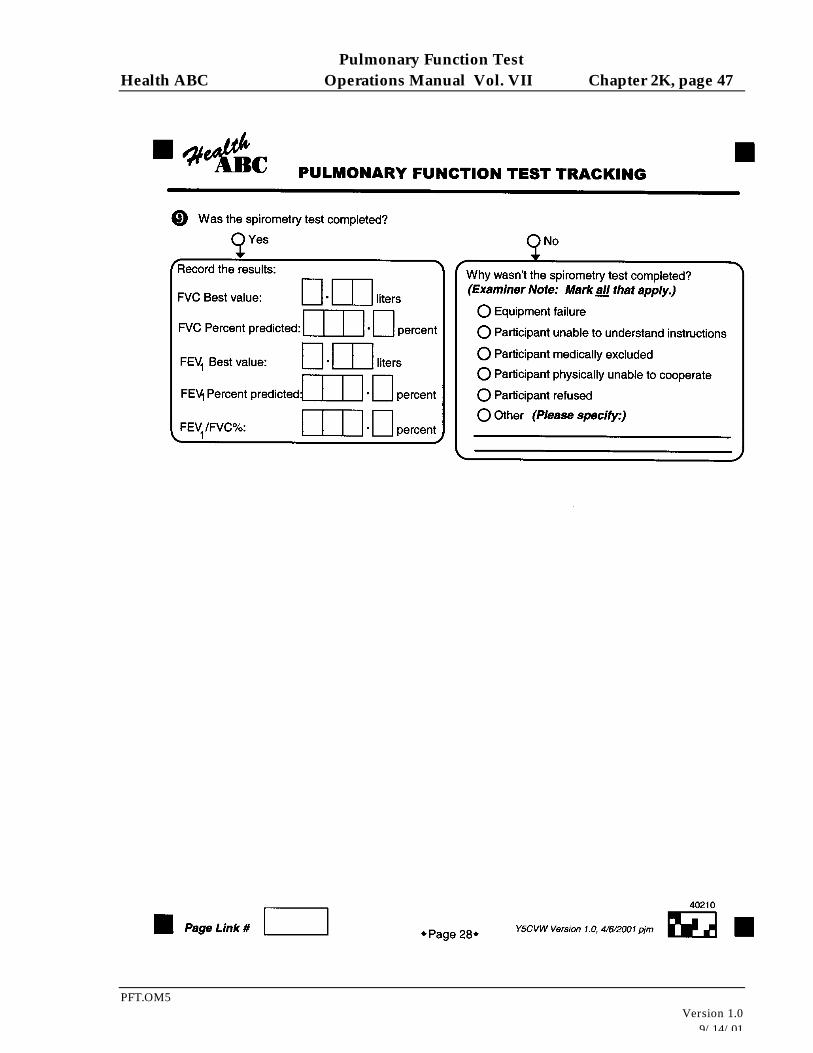
Pulmonary Function Test Health ABC Operations Manual Vol. VII Chapter 2K, page 47
PFT.OM5
Version 1.0 9/14/01
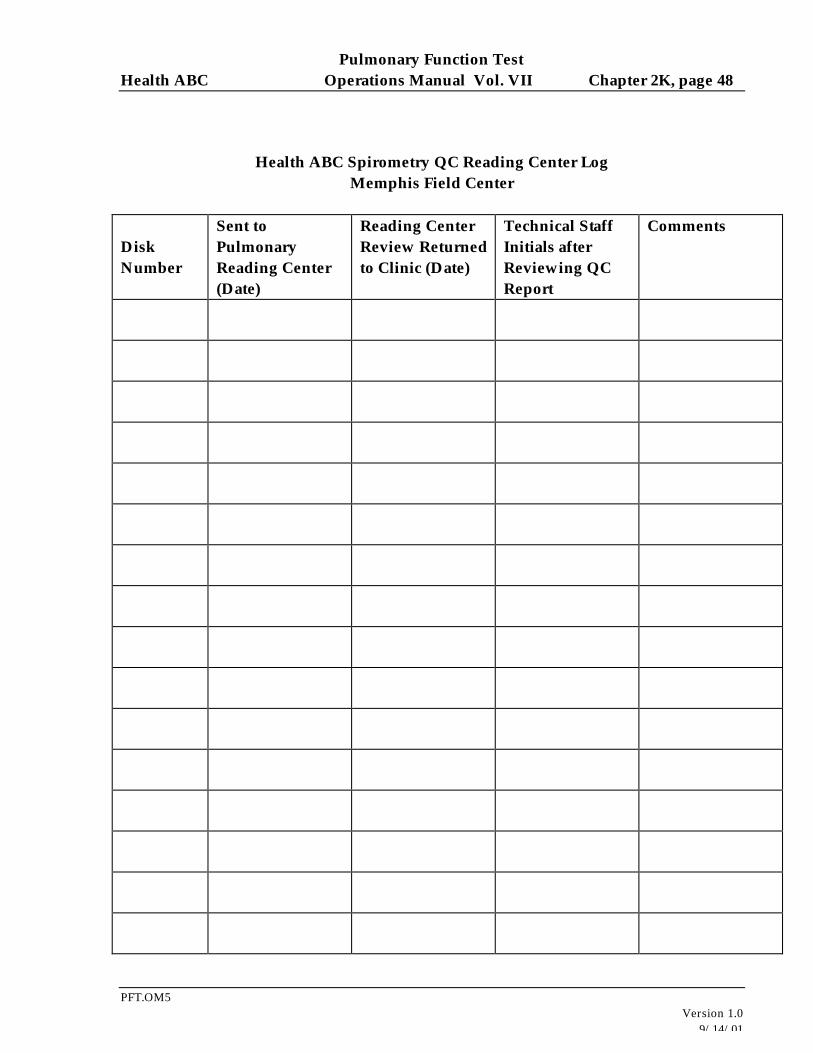
Pulmonary Function Test Health ABC Operations Manual Vol. VII Chapter 2K, page 48
PFT.OM5
Version 1.0 9/14/01
Health ABC Spirometry QC Reading Center Log
Memphis Field Center
Disk Number
Sent to Pulmonary Reading Center (Date)
Reading Center Review Returned to Clinic (Date)
Technical Staff Initials after Reviewing QC Report
Comments
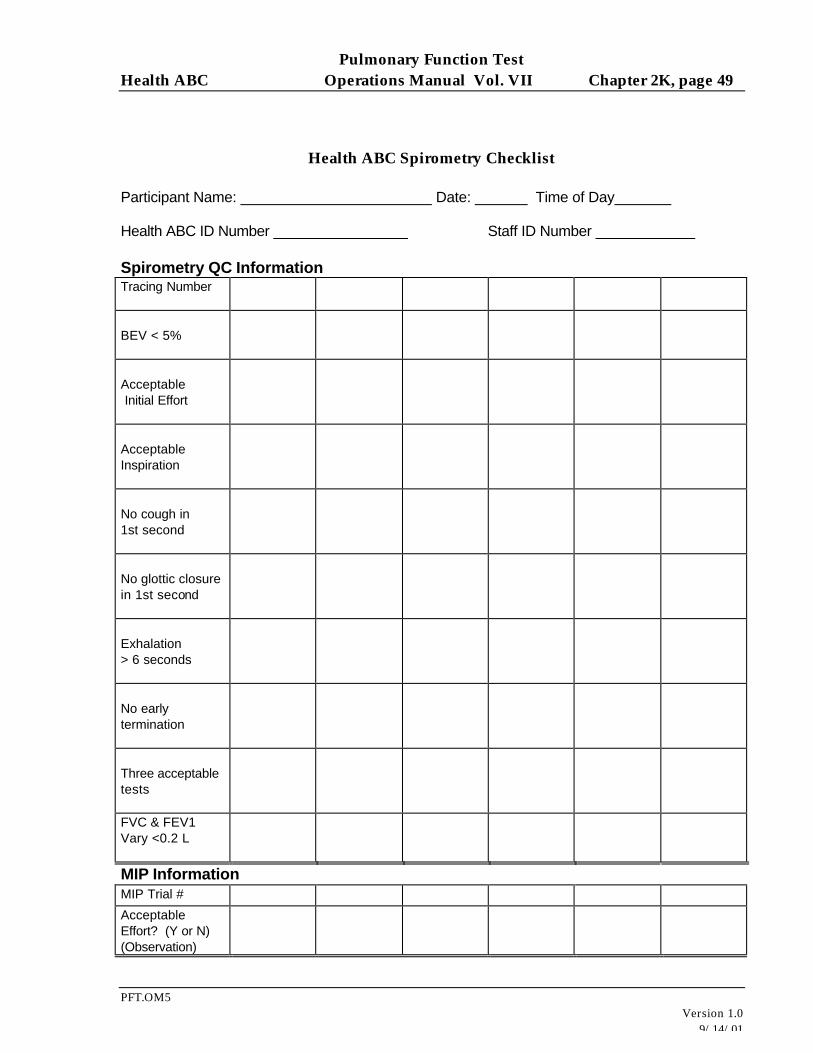
Pulmonary Function Test Health ABC Operations Manual Vol. VII Chapter 2K, page 49
PFT.OM5
Version 1.0 9/14/01
Health ABC Spirometry Checklist
Participant Name: Date: Time of Day
Health ABC ID Number Staff ID Number Spirometry QC Information
Tracing Number
BEV < 5%
Acceptable Initial Effort
Acceptable Inspiration
No cough in 1st second
No glottic closure in 1st second
Exhalation > 6 seconds
No early termination
Three acceptable tests
FVC & FEV1 Vary <0.2 L
MIP Information MIP Trial # Acceptable Effort? (Y or N) (Observation)
Pulmonary Function Test Health ABC Operations Manual Vol. VII Chapter 2K, page 50
PFT.OM5
Version 1.0 9/14/01
MIP
Recommended
![Shrinking Lung Syndrome: A Pulmonary Manifestation of ... · scan]) and pulmonary function tests (PFTs). Pulmonary function tests were carried out in our pulmonary function laboratory,](https://img.pdfslide.us/doc/110x75/5f03189c7e708231d40783f1/shrinking-lung-syndrome-a-pulmonary-manifestation-of-scan-and-pulmonary-function.jpg)