Photographing Artwork You will need to photograph your artwork in order to share it with other individual who are participating in this course. Taking good photographs of your artwork is important so other people can understand what you have made. This guide is intended to help you identify and fix some of the most common problems with photographing your artwork. It is not difficult to take good pictures of your artwork if you are careful and attentive to what you are doing. Most common problems are the same for photographing both two and three-‐dimensional work.
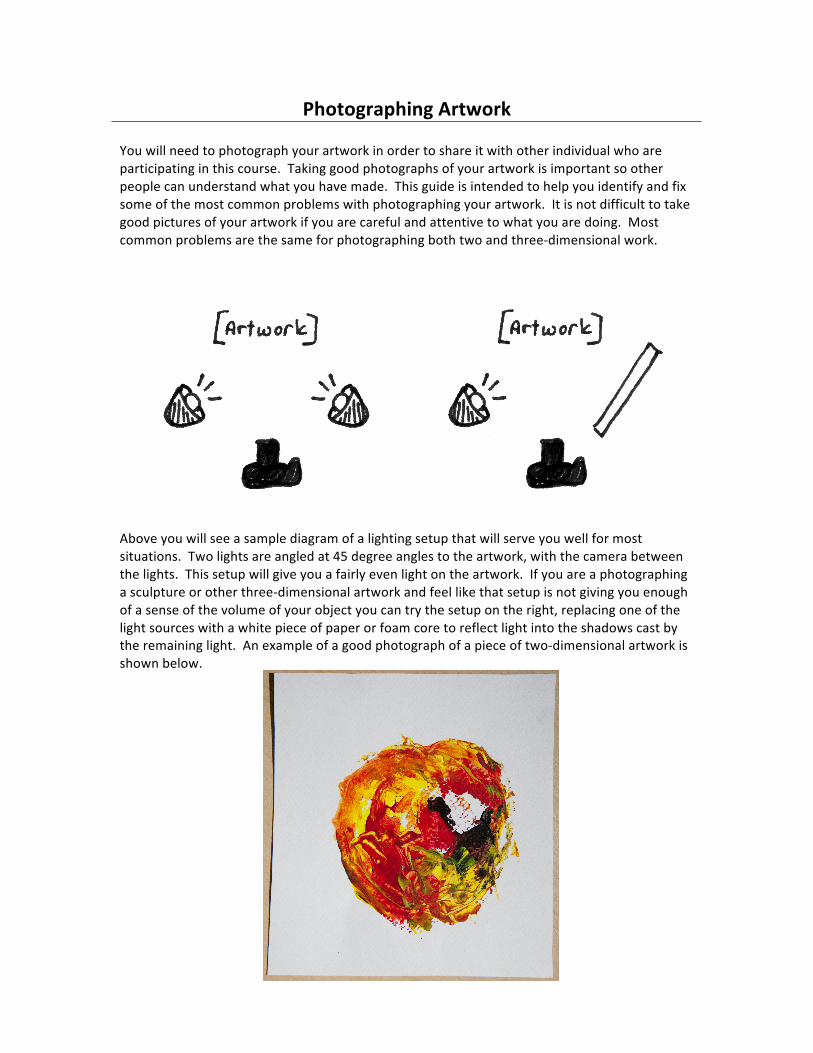
Above you will see a sample diagram of a lighting setup that will serve you well for most situations. Two lights are angled at 45 degree angles to the artwork, with the camera between the lights. This setup will give you a fairly even light on the artwork. If you are a photographing a sculpture or other three-‐dimensional artwork and feel like that setup is not giving you enough of a sense of the volume of your object you can try the setup on the right, replacing one of the light sources with a white piece of paper or foam core to reflect light into the shadows cast by the remaining light. An example of a good photograph of a piece of two-‐dimensional artwork is shown below.
Troubleshooting photographs of art
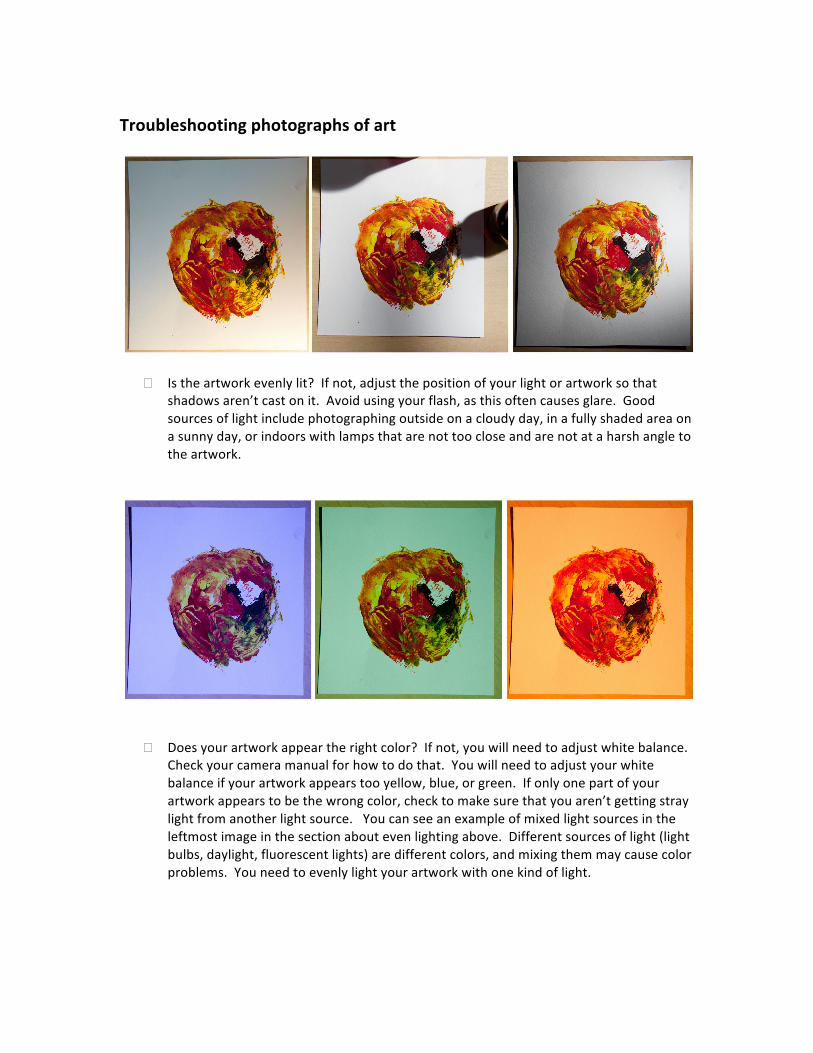
� Is the artwork evenly lit? If not, adjust the position of your light or artwork so that
shadows aren’t cast on it. Avoid using your flash, as this often causes glare. Good sources of light include photographing outside on a cloudy day, in a fully shaded area on a sunny day, or indoors with lamps that are not too close and are not at a harsh angle to the artwork.
� Does your artwork appear the right color? If not, you will need to adjust white balance. Check your camera manual for how to do that. You will need to adjust your white balance if your artwork appears too yellow, blue, or green. If only one part of your artwork appears to be the wrong color, check to make sure that you aren’t getting stray light from another light source. You can see an example of mixed light sources in the leftmost image in the section about even lighting above. Different sources of light (light bulbs, daylight, fluorescent lights) are different colors, and mixing them may cause color problems. You need to evenly light your artwork with one kind of light.
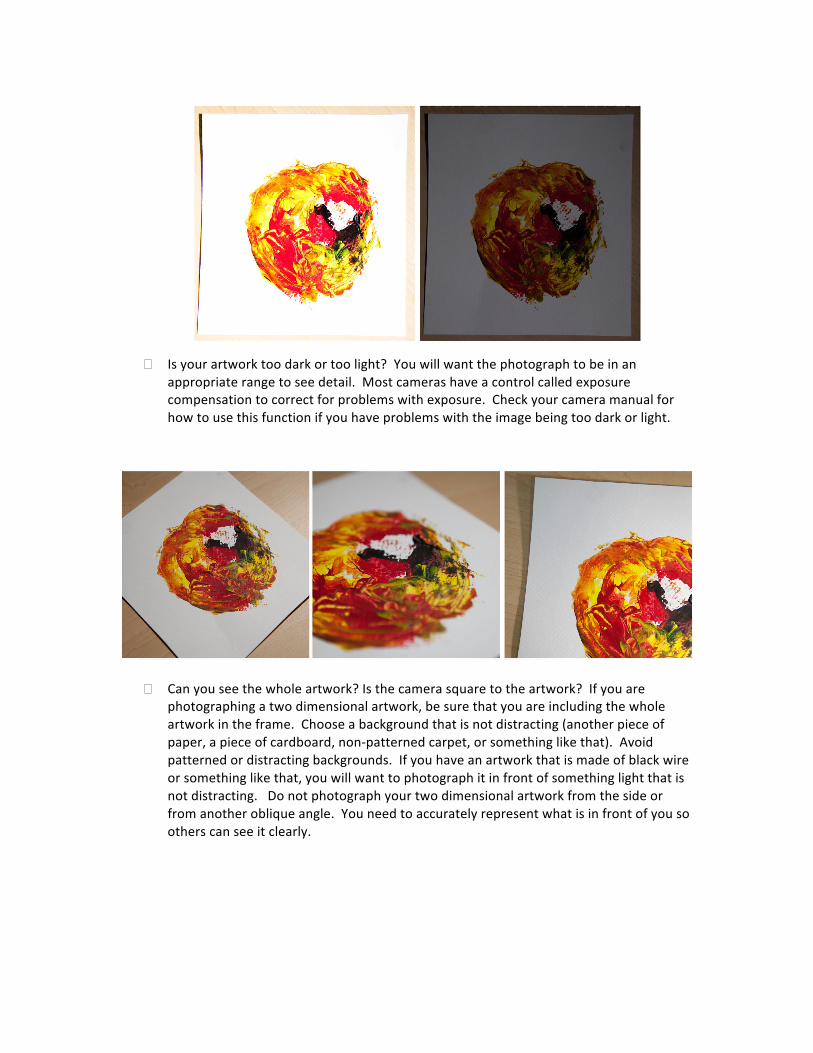
� Is your artwork too dark or too light? You will want the photograph to be in an appropriate range to see detail. Most cameras have a control called exposure compensation to correct for problems with exposure. Check your camera manual for how to use this function if you have problems with the image being too dark or light.
� Can you see the whole artwork? Is the camera square to the artwork? If you are
photographing a two dimensional artwork, be sure that you are including the whole artwork in the frame. Choose a background that is not distracting (another piece of paper, a piece of cardboard, non-‐patterned carpet, or something like that). Avoid patterned or distracting backgrounds. If you have an artwork that is made of black wire or something like that, you will want to photograph it in front of something light that is not distracting. Do not photograph your two dimensional artwork from the side or from another oblique angle. You need to accurately represent what is in front of you so others can see it clearly.
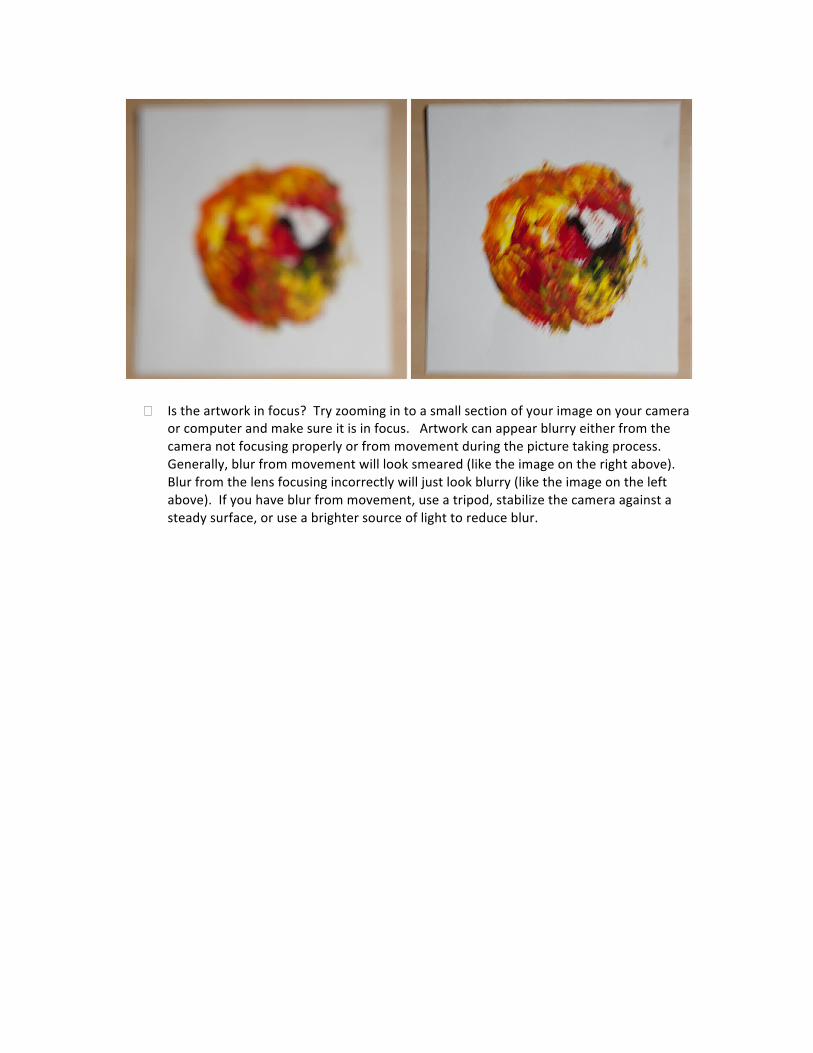
� Is the artwork in focus? Try zooming in to a small section of your image on your camera or computer and make sure it is in focus. Artwork can appear blurry either from the camera not focusing properly or from movement during the picture taking process. Generally, blur from movement will look smeared (like the image on the right above). Blur from the lens focusing incorrectly will just look blurry (like the image on the left above). If you have blur from movement, use a tripod, stabilize the camera against a steady surface, or use a brighter source of light to reduce blur.
Recommended