1
FILE SHARINGOVER A “LOCAL AREA NETWORK”
IN “WINDOWS..”
by Francis Chao
(520)331-5465
3
SUMMARY• For "Windows 7" and "Windows 8", the use of
"homegroups" makes file sharing easy but
there is a 15 percent reduction in performance.
• For file sharing between "Windows 7" and
earlier versions of "Windows..", you have to
use "classic file sharing"
• If you cannot get file sharing started between
two "Windows.." computers or between a
"Windows.." computer and a “Linux” computer,
you can use the IP address of the target
computer to "jump start" the process
4
BASIC INFORMATION.. (continued)
“WINDOWS XP HOME”
• “Simple File Sharing” only:
cannot designate which username
to share with
• Defaults to workgroup of "MSHOME"
which prevents file sharing with
“Windows Vista” and higher
Usually have to switch workgroup
from "MSHOME" to "WORKGROUP”
5
BASIC INFORMATION.. (continued)“WINDOWS XP PROFESSIONAL” (AND HIGHER)
• “Simple File Sharing”
See the "Windows XP" section at
http://www.my-quickbooks-expert.com/file-
sharing.html
• “Advanced Sharing”
Can set the username of who you share with
• Defaults to workgroup of "MSHOME" which
prevents file sharing with “Windows Vista” and
higher:
Usually have to switch workgroup from
"MSHOME" to "WORKGROUP".

6
BASIC INFORMATION.. (continued)
“WINDOWS VISTA”
• “Network File and Folder Sharing” = “File Sharing”
See the "Windows Vista" section at
http://www.my-quickbooks-expert.com/file-
sharing.html
• “Advanced Sharing”
See
http://windows.microsoft.com/en-US/windows-
vista/Share-files-and-folders-over-the-network-
from-Windows-Vista-Inside-Out
• Defaults to workgroup of “WORKGROUP”
7
BASIC INFORMATION.. (continued)
"WINDOWS 7 HOME BASIC" &
"WINDOWS 7 STARTER"
• ”Network File and Folder Sharing”
= “File Sharing”
• “Homegroups”: Can join an existing
homegroup but cannot create one
• Defaults to workgroup of
“WORKGROUP”
8
BASIC INFORMATION.. (continued)
“WINDOWS 7 HOME PREMIUM” (AND
HIGHER) AND “WINDOWS 8”
• “Network File and Folder Sharing”
=File Sharing
See
http://www.home-network-help.com/file-
sharing-in-windows-7.html

9
BASIC INFORMATION.. (continued)
“WINDOWS 7 HOME PREMIUM” (AND
HIGHER) AND “WINDOWS 8” (continued)
• In “Windows 7 Home Premium” (and
higher) and “Windows 8”, you determine
whether a username/password is
required:
o Go to “Advanced sharing settings” in
the “Network and Sharing Center” in
the “Control Panel.

10
BASIC INFORMATION.. (continued)“WINDOWS 7 HOME PREMIUM” (AND
HIGHER) AND “WINDOWS 8” (continued)
o Select “Turn off password protected
sharing to let anyone on the local area
network access a "File Sharing" folder:

11
BASIC INFORMATION.. (continued)
“WINDOWS 7 HOME PREMIUM” (AND
HIGHER) AND “WINDOWS 8” (continued)
• Full functionality with “homegroups”:
Can join an existing “homegroup”
and can create one.
See
http://sourcedaddy.com/windows-
7/advanced-sharing.html
12
MORE ABOUT “HOMEGROUPS”
• A “homegroup” no longer exists when
all "Windows 7" computers leave the
homegroup.
• By default, you share entire "libraries"
with the “homegroup”.
13
MORE ABOUT “HOMEGROUPS”
(continued)
• “Homegroups” do not show up in the
"Network and Sharing Center" (in
"Windows 7" and "Windows 8").
• "Homegroups" are part of a trend to
virtualize networks using software.
• "You can think of homegroups as
invisible, stealth networks.
14
“HOMEGROUPS” VERSUS
“CLASSIC FILE SHARING”
• “Classic file sharing” uses IPv4.
• “Homegroups” use IPv6
If you are using a router that is more
than 3 years old, it might not support
IPv6
15
“HOMEGROUPS” VERSUS
“CLASSIC FILE SHARING” (continued)
• In "Windows 7", "classic networking"
(= "classic file sharing") is faster by
about 15 percent relative to
“homegroups“See
The HomeGroup vs. classic-networking
faceoff
by Fred Langa
16
“HOMEGROUPS” VERSUS
“CLASSIC FILE SHARING” (continued)
• When you share a folder with
"classic file sharing" a higher level of
"Windows..“, sometimes other
computers can access your entire
"Users" folder (Ouch!).

17
“HOMEGROUPS” VERSUS
“CLASSIC FILE SHARING” (continued)
See
http://social.answers.microsoft.com/Forum
s/en-US/w7security/thread/6f912ddb-
139e-445a-89fe-863c6aebb510
and
http://windows7news.com/forum/windows-
7-troubleshooting/windows-7-security-
flaw-or-expected-behaviour-when-
sharing-folders/
18
“HOMEGROUPS” VERSUS
“CLASSIC FILE SHARING” (continued)
• A workaround fix can be found at
http://scottiestech.info/2009/09/25/wi
ndows-7-file-sharing-fixing-the-entire-
user-directory-shared-problem/
19
“IP ADDRESS TRICK”
TO MAKE A “WINDOWS..” COMPUTER “SEE”
ANOTHER COMPUTERStep 1:
Go to the target computer (the computer
that your “Windows..” computer cannot
see),
and run
ipconfig
from a command prompt.
Write down the IP address of the target
computer.
20
“IP ADDRESS TRICK” (continued)
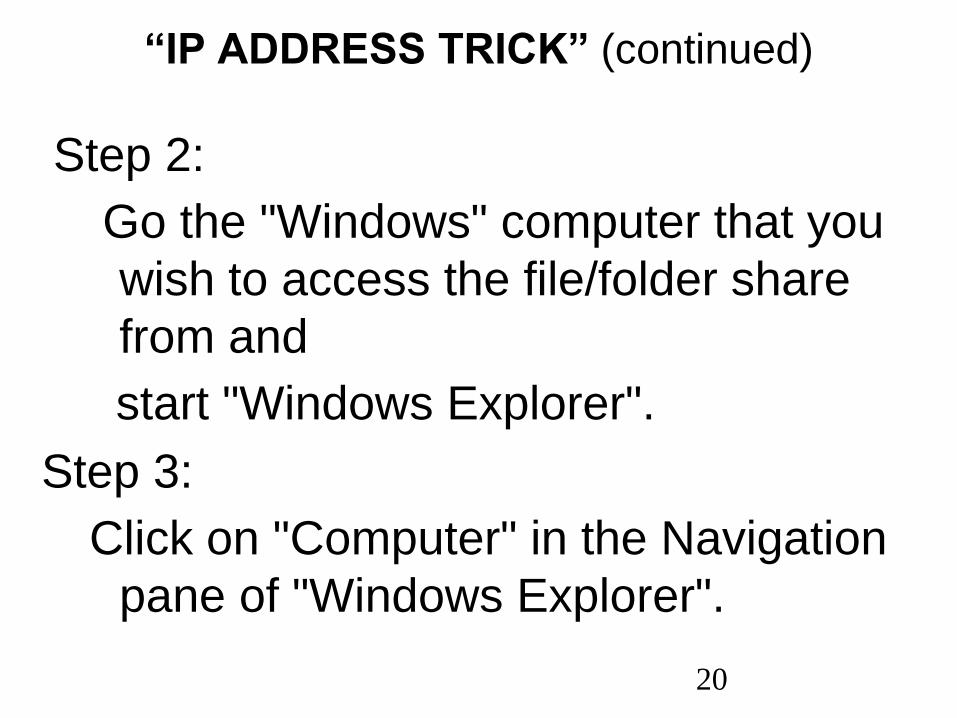
Step 2:
Go the "Windows" computer that you
wish to access the file/folder share
from and
start "Windows Explorer".
Step 3:
Click on "Computer" in the Navigation
pane of "Windows Explorer".
21
“IP ADDRESS TRICK” (continued)
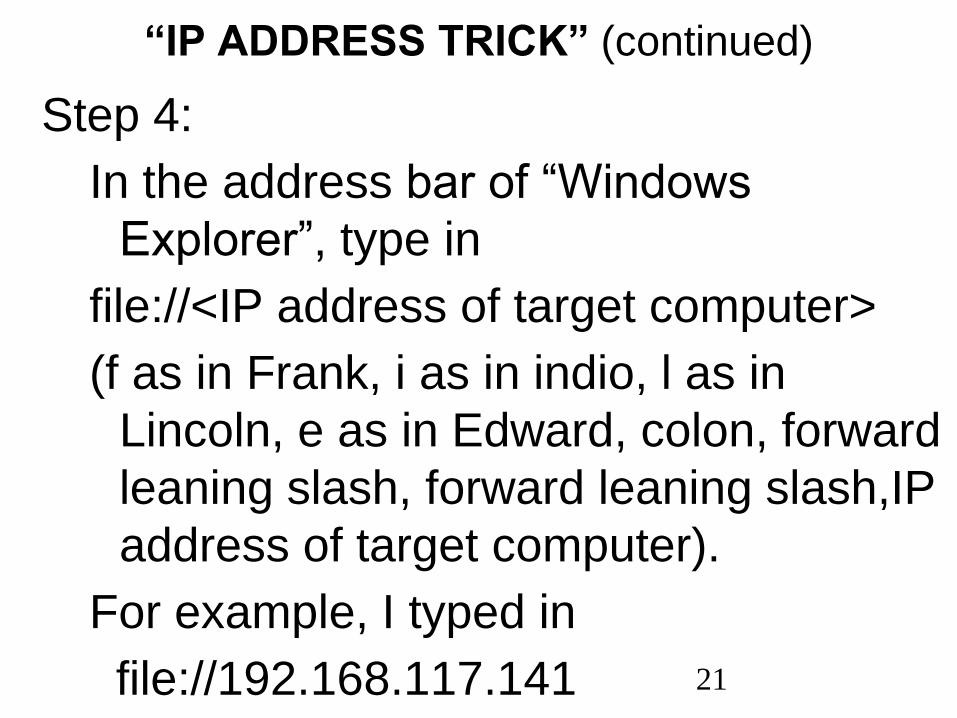
Step 4:
In the address bar of “Windows
Explorer”, type in
file://<IP address of target computer>
(f as in Frank, i as in indio, l as in
Lincoln, e as in Edward, colon, forward
leaning slash, forward leaning slash,IP
address of target computer).
For example, I typed in
file://192.168.117.141
22
“IP ADDRESS TRICK” (continued)
Step 5:
Press the Enter key of your keyboard.
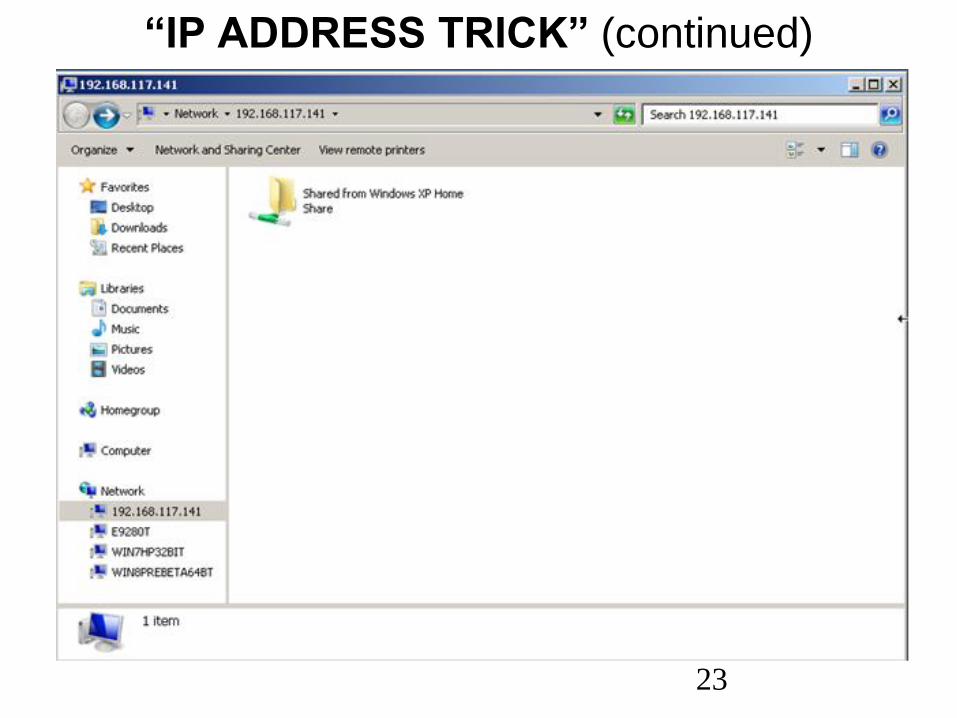
Step 6:
The shared folders in the target
computer will be displayed:
23
“IP ADDRESS TRICK” (continued)

24
“IP ADDRESS TRICK” (continued)
Step 7:
Double-click on any shared folders that
you wish to access.

25
“IP ADDRESS TRICK” (continued)
You can use the "IP Address Trick" to
speed up the opening of a shared folder
using in a batch file.
In this example, we show a line in a .BAT
batch file in which we invoke "File
Explorer" in "Windows 8" to access and
"mount" a .VHD virtual hard drive (file) in a
shared folder located on a server that is
on the same local network as the
"Windows 8" end-user computer:

26
27
APPENDIX 1
"WINDOWS 7" SOMETIMES ATTEMPTS
TO TRICK YOU INTO CREATING A
“HOMEGROUP”
When you connect to a new WiFi
network or a wired Ethernet network,
"Windows 7" sometimes attempts to
trick you into starting a “HomeGroup”,
even when you do not need or want
one:

28
APPENDIX 1 (continued)

29
APPENDIX 1 (continued)
30
APPENDIX 1 (continued)
31
APPENDIX 1 (continued)
"WINDOWS 7" SOMETIMES ATTEMPTS
TO TRICK YOU INTO CREATING A
“HOMEGROUP”
At this point, click on “Cancel”:
You will cancel the creation of a
“homegroup”.
You are not cancelling the creation of
a network connection:
32
APPENDIX 1 (continued)

33
APPENDIX 1 (continued)If you have IPv6 turned off for the upstream network
adapter of your computer, you will never make a
homegroup by mistake:

34
APPENDIX 2 :USING A “LINUX” COMPUTER TO ACCESS
FILES/FOLDERS THAT ARE SHARED FROM A
"WINDOWS.." COMPUTER (BY MEANS OF
"CLASSIC FILE SHARING“)
You cannot access a “homegroup”
from a “Linux” computer but you can
usually access a folder that is shared
by “Windows” by means of “classic file
sharing”.
35
APPENDIX 2 (continued):USING A “LINUX COMPUTER TO ACCESS
SHARED FILES/FOLDERS"
Step 1:
Go to the “Windows” computer where
the files or folders are being shared
from.
Step 2:
Open a terminal window:
36
APPENDIX 2 (continued):USING A “LINUX” COMPUTER TO ACCESS
SHARED FILES/FOLDERS
Step 3:
Type
ipconfig /all
and press the Enter key.

37
APPENDIX 2 (continued):
USING A “LINUX” COMPUTER TO ACCESS
SHARED FILES/FOLDERS"

38
APPENDIX 2 (continued):USING A “LINUX” COMPUTER TO ACCESS
SHARED FILES/FOLDERS
Step 4:
Locate the IP address of the real
network adapter and write it down.
In our example, the IP address is
10.0.0.43

39
APPENDIX 2 (continued):USING A “LINUX” COMPUTER TO ACCESS
SHARED FILES/FOLDERS"
Step 5:
Go to the Linux computer and open any
“Nautilus” file management Window
(such as “Home” or “Network”)

40
APPENDIX 2 (continued):USING A “LINUX” COMPUTER TO ACCESS SHARED FILES/FOLDERS"
41
APPENDIX 2 (continued):USING A “LINUX” COMPUTER TO ACCESS
SHARED FILES/FOLDERS"
Step 6:
Hover the mouse cursor over the top of
the desktop and click on “Go”.

42
APPENDIX 2 (continued):USING A “LINUX” COMPUTER TO ACCESS SHARED FILES/FOLDERS

43
APPENDIX 2 (continued):USING A “LINUX” COMPUTER TO ACCESS
SHARED FILES/FOLDERS
Step 7:
Click on “Location” on the drop down
menu:

44
APPENDIX 2 (continued):USING A “LINUX” COMPUTER TO ACCESS
SHARED FILES/FOLDERS"
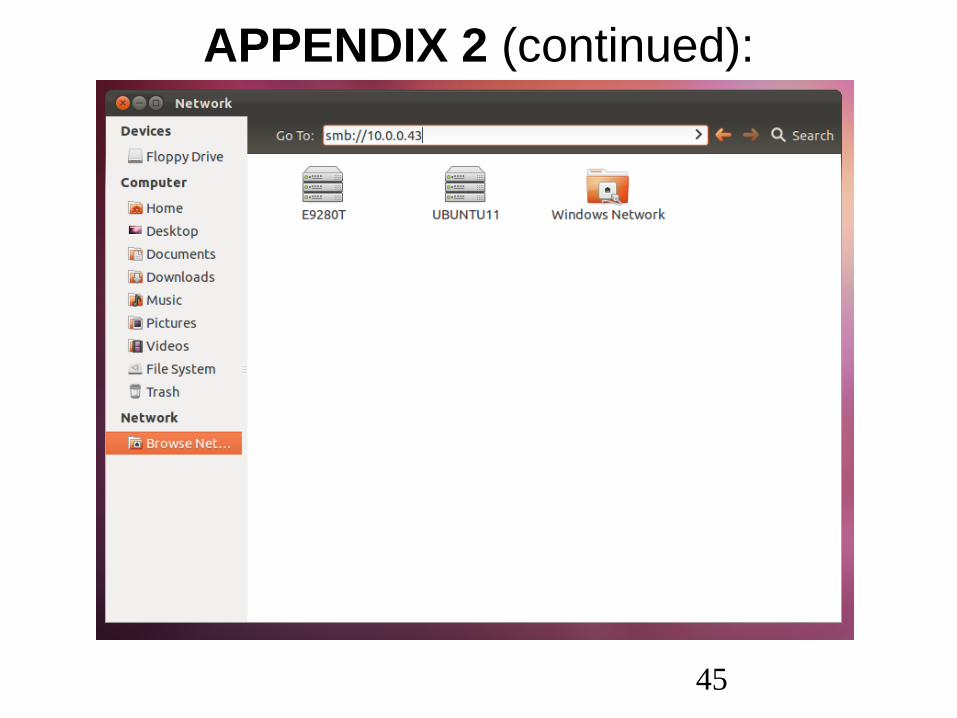
Step 8:
In the address box of the Nautilus window,
type in
smb://<ip address of destination>
and then press the enter key of the keyboard.
In our example, we typed in
smb://10.0.0.43
and then we pressed the enter key:
45
APPENDIX 2 (continued):
46
APPENDIX 2 (continued):USING A “LINUX” COMPUTER TO ACCESS
SHARED FILES/FOLDERS"
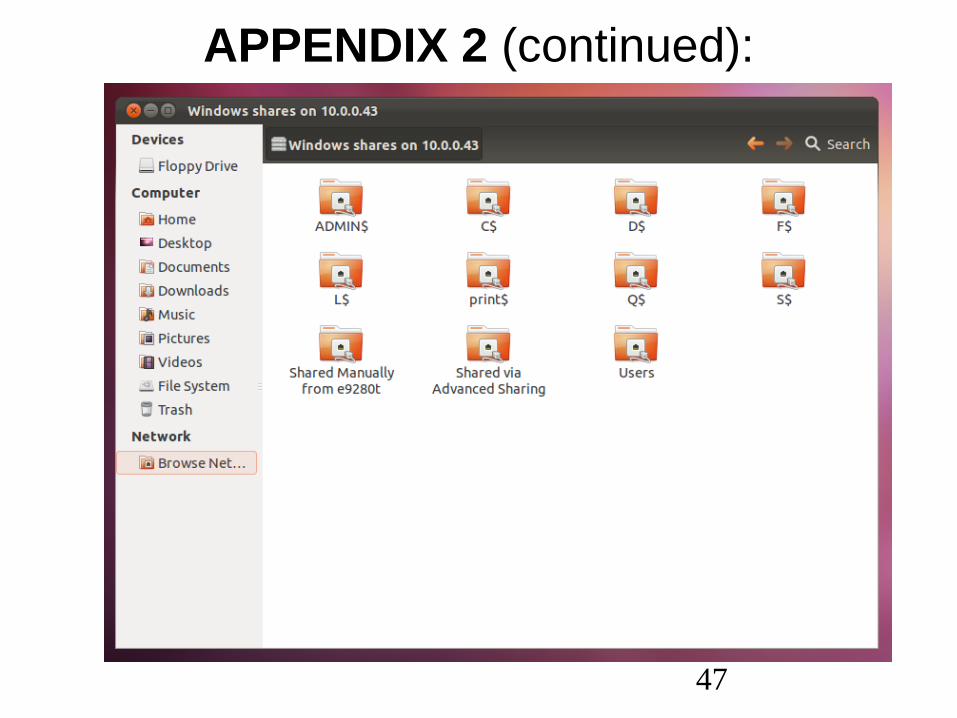
Step 9:
All of the shared folders on the target
computer will be displayed:
47
APPENDIX 2 (continued):

48
APPENDIX 2 (continued):USING A “LINUX” COMPUTER TO ACCESS
SHARED FILES/FOLDERS
Note that in “Ubuntu” Linux the remote
files and folders that are shared by a
“Windows..” computer via
“Samba”(“SMB”) are called “Windows
shares”.

49
APPENDIX 2 (continued):

50
APPENDIX 2 (continued):USING A “LINUX” COMPUTER TO ACCESS
SHARED FILES/FOLDERS
Do not modify any of the shared folders
that have a name that ends in $ since
these folders belong to the “Windows”
operating system.
If you double-click on a shared folder, you
will see it's contents:

51
APPENDIX 2 (continued):
52
APPENDIX 3 :TROUBLESHOOTING "WINDOWS FIREWALL"
ISSUES IN CONVENTIONAL "SERVER
MESSAGE BLOCK"-BASED FILE SHARING
An incorrectly-configured "Windows
Firewall" or third-party software firewall
can block file sharing in one or both
directions so here are the steps for
resolving this issue from Jon Griebel of
"ProAct Software Consulting":
53
APPENDIX 3 (continued)
TROUBLESHOOTING "WINDOWS FIREWALL"..(continued)
Diagnostic steps: acquire the local IP addresses of both machines
(IPCONFIG command) then attempt to ping (PING command)
from machine 1 to machine 2,
then from machine 2 to machine 1
For example
ping 192.168.0.1 /t
If the PING fails in one direction only, then check the firewall
settings on the target machine. AVAST firewall and AVG Pro
firewall are notorious for setup issues
If the PING works both ways then check the workgroup names
and sharing permissions on the failing target
Recommended


![USTA TrafficAnalysisBriefing V7 0 20150530 FINAL[1] · PDF file1."Executive"Summary" ... In2014thethreemajorGulfcarriers" –"Emirates,"Qatar"Airways"and"Etihad" Airways"–"carried"some"4.3"million"passengers"intoandout"of"the](https://img.pdfslide.us/doc/110x75/5aa125967f8b9a46238b5bf2/usta-trafficanalysisbriefing-v7-0-20150530-final1-in2014thethreemajorgulfcarriers.jpg)