
/161
Oculus Story Studio's Dear Angelica: Inventing, Integrating, and Rendering Quill
Ian Wakelin - Coder
Chris Horne - CG Supervisor
Martin Mittring - [email protected] @mittringmartin
[email protected] @distastee
Hey Everyone - I'm Chris Horne - CG Supervisor on Dear Angelica. This is Ian Wakelin - our Quill integration Lead - and Martin Mittring - our core graphics architect.

/1612
• Story Behind DA/Quill
• Pipeline & Benefits
• Detail Draw-ins • New Techniques and
Technology
Chris• Rendering Quill Geometry
• Unreal Integration Details
• Performance Graph Tool
Ian• Render Optimizations
• Algorithms for Increasing Image Quality
Martin
We all work at Story Studio - which is Oculus' first party film studio. We're here to talk about some of the technical and creative aspects of Dear Angelica and Quill. Mine is more of a medium level overview of a bunch of topics - whereas Ian and Martin will do a deep dive into the technical underpinnings of the rendering technology and it's implementation in Unreal.
But first - who here has seen Dear Angelica? Great! Who here has used Quill? For those of you who didn't raise your hands - I should explain that Dear Angelica is a 13 minute short film available for free on the Oculus store. The entire thing was drawn in Quill, a standalone OpenGL illustration app we created to help make this film. So here's a quick trailer of Dear Angelica:

/1613
[intro video]
/1614
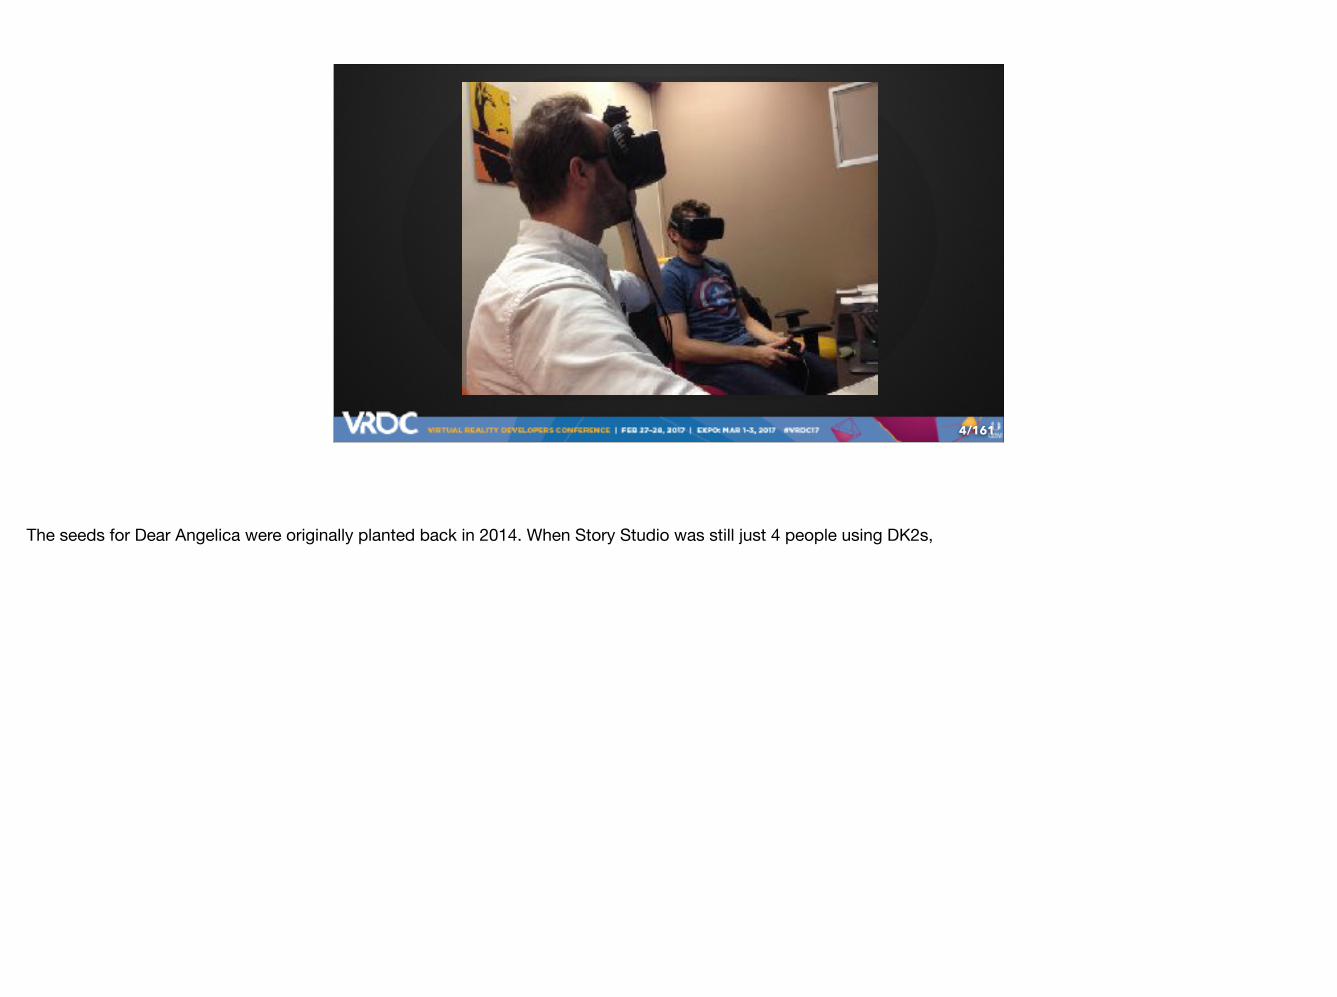
The seeds for Dear Angelica were originally planted back in 2014. When Story Studio was still just 4 people using DK2s,
/1615
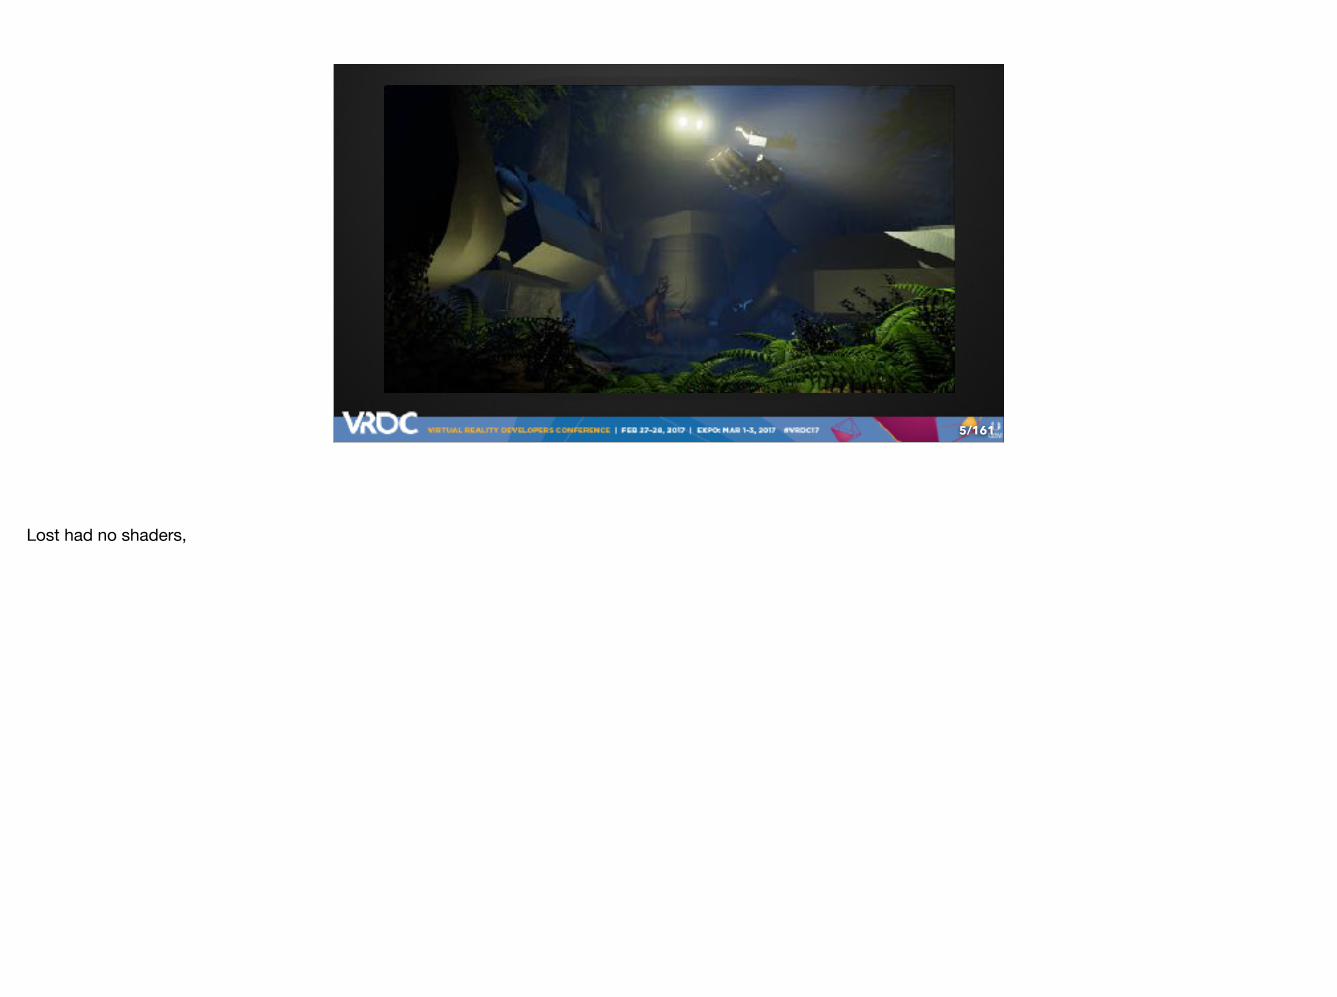
Lost had no shaders,

/1616
and Henry was still a porcupine that loved balloons. We had the big idea of bringing comic books into VR - but weren’t quite sure how to do it or what it would look like.
/1617
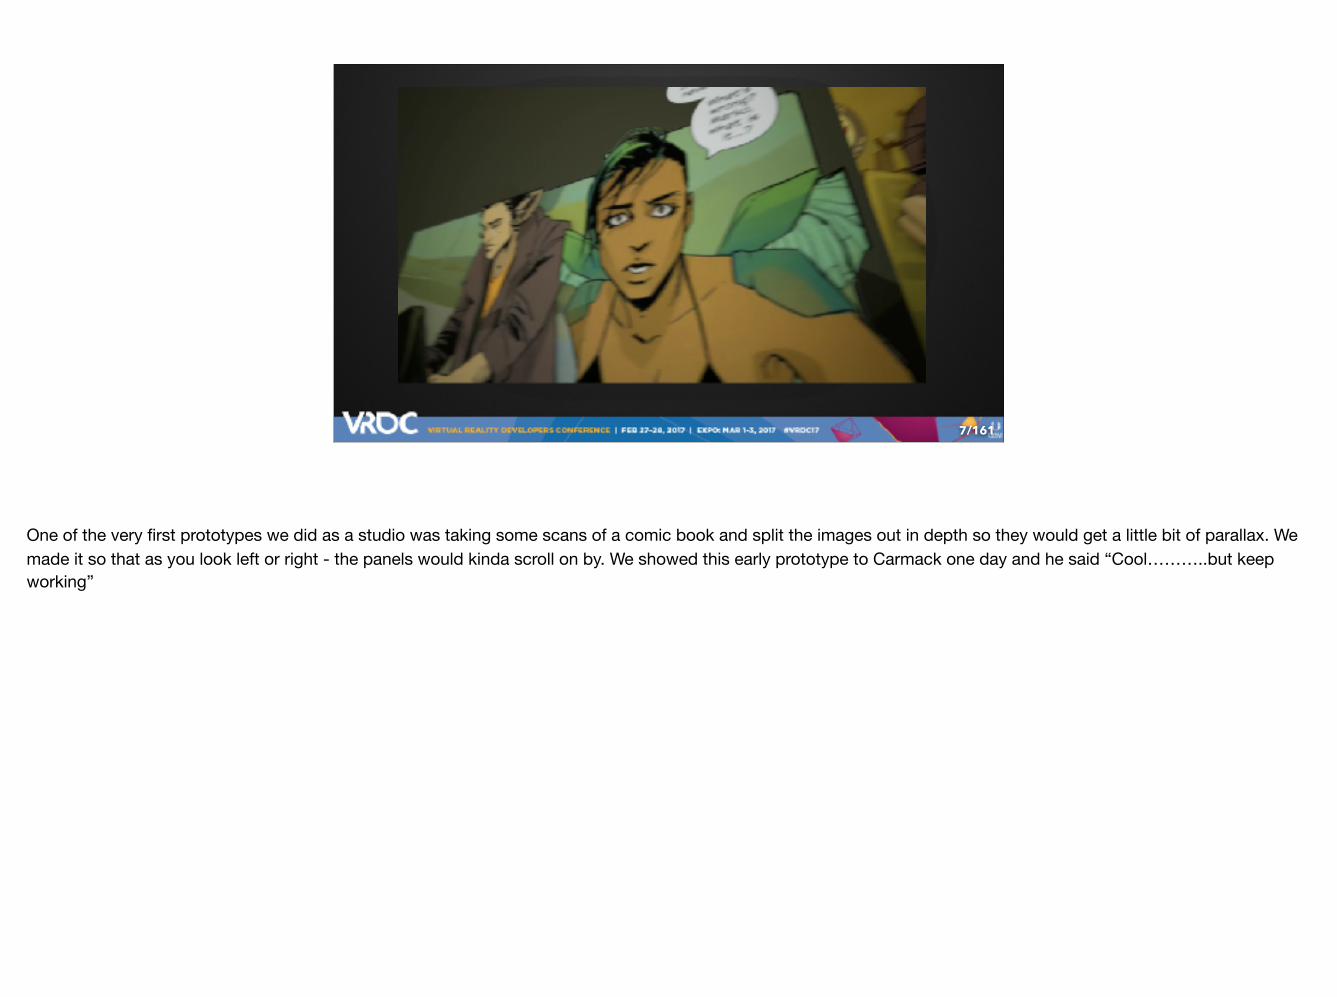
One of the very first prototypes we did as a studio was taking some scans of a comic book and split the images out in depth so they would get a little bit of parallax. We made it so that as you look left or right - the panels would kinda scroll on by. We showed this early prototype to Carmack one day and he said “Cool………..but keep working”

/1618
He was right. Over the next year and a half while we worked on our more immediate problems of story in VR and characters in VR,

/1619
we subconsciously cranked on this problem of comics and illustration in VR. By the time Henry was done - Dear Angelica was a rough script and a giant pile of fun visual ideas to try.

/161
They only had one thing in common:
10
This pile of ideas had only one thing in common:
/161
They only had one thing in common:
11
They all sucked.
They all sucked.

/16112
We tried modeling the scenes and then painting on it.

/16113
We tried painting the sketches first and projecting it.
/16114
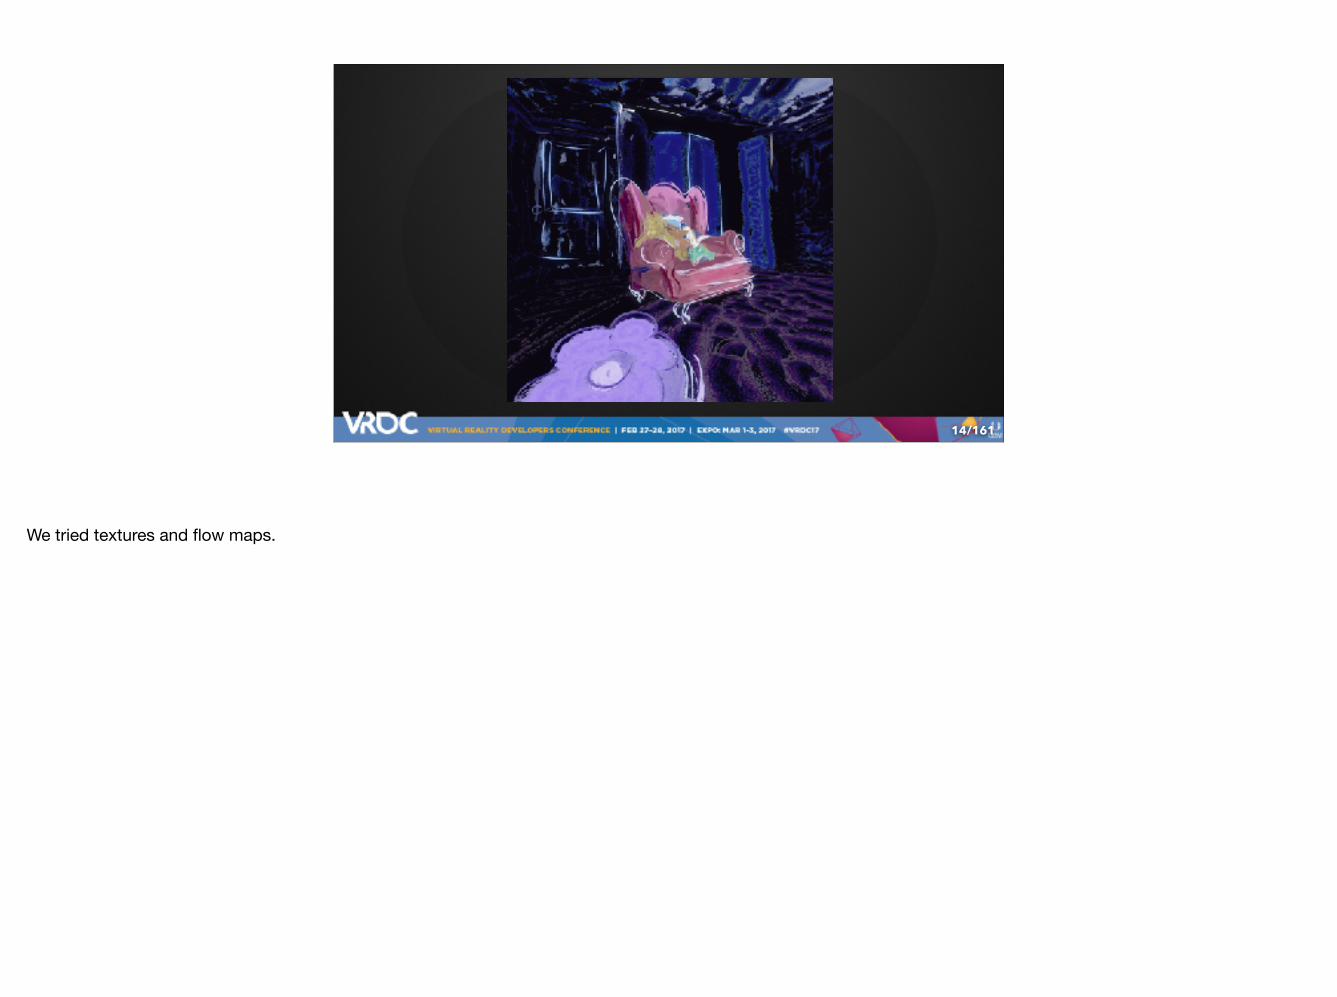
We tried textures and flow maps.

/16115
We tried lighting.

/16116
We tried high-fidelity animation.

/16117
None of it was working.
/16118
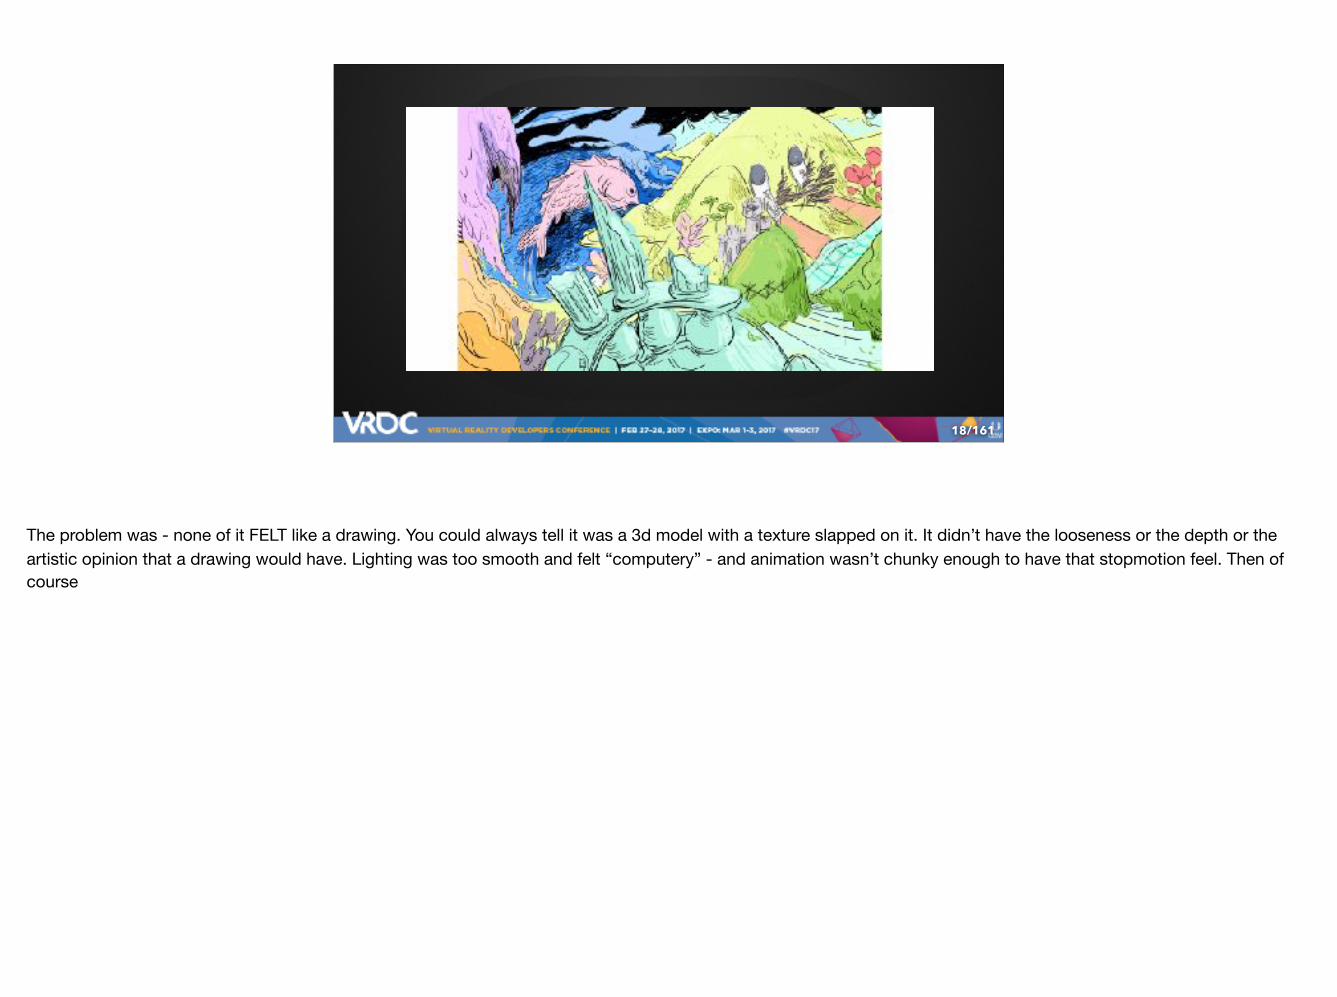
The problem was - none of it FELT like a drawing. You could always tell it was a 3d model with a texture slapped on it. It didn’t have the looseness or the depth or the artistic opinion that a drawing would have. Lighting was too smooth and felt “computery” - and animation wasn’t chunky enough to have that stopmotion feel. Then of course

/16119
we got one of the first prototypes of Oculus Touch. Until that point I had never tried out a tracked controller - so admittedly I was just trying out weird ideas. For some reason I had made a pepper shaker in Unreal that would spit particles all over the place. It was oddly fun so people crowded around to try it out.

/16120
That's about when our FX lead, Robert, asked “what if we turned off gravity?!”

/16121
so we turned off gravity

/16122
Then he asked “What if we connected the particles together like ribbons?!”

/16123
so we connected the particles together like ribbons. And instantly, accidentally, we were drawing in VR. We started goofing around and thats when

/16124
Inigo took one look at this, said “AH HA! I HAVE AN IDEA!” and scurried off. Now - if you ever get to work with Inigo and he says that - you just stay out of the way. Don’t disturb him. Because what he had realized was that the solution to illustration in VR was to actually *illustrate in VR*. And 2 days later

/16125
he proved that to us with the first version of Quill. From this we eventually built, from the ground up, a standalone OpenGL application that had all the advanced features we would need to make a film - like layers, file exports, rich color controls, and a very precise feel to the brushes. After trying it out - everyone on the team was immediately convinced that this was the answer we had been looking for.

/161
What happens when you suddenly, accidentally, create the solution to
all of your problems?
26

/161
What happens when you suddenly, accidentally, create the solution to
all of your problems?
27
You create a whole lot of new problems.

/16128
?
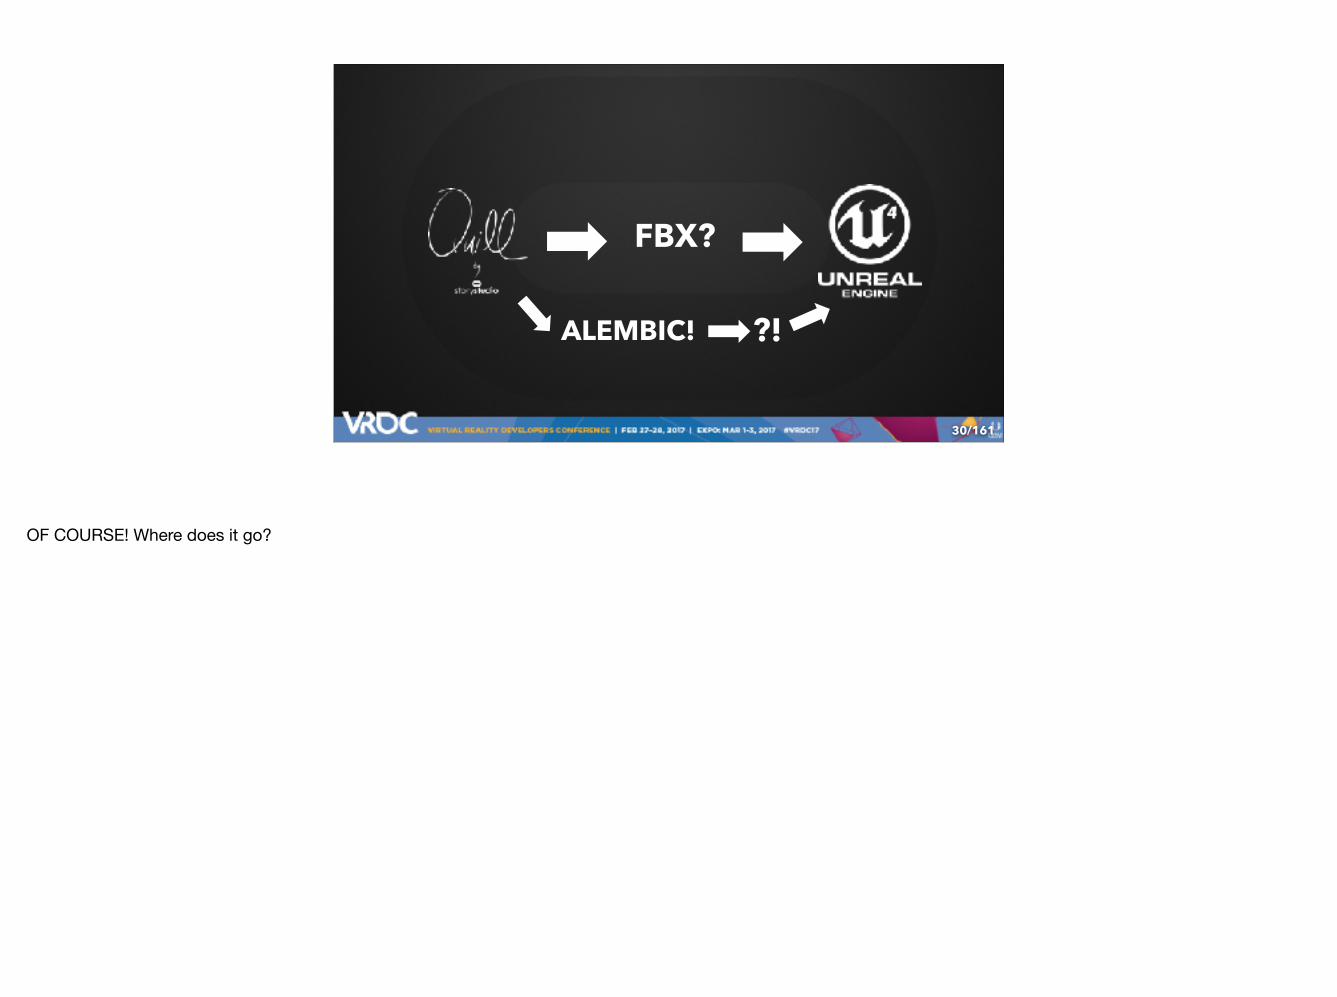
Namely - we’ve got Quill with a new data format and all sorts of different performance characteristics from traditional geometry. We're not quite sure how to package it up. We're not sure what kind of pipeline we need. We're not sure how to best render this either. We only knew two things: that we need to eventually put it into Unreal so we can piece this whole thing together....and that we were already behind schedule. So do you use FBX?

/16129
FBX!
Sure! What about Alembic?
/16130
FBX?
ALEMBIC! ?!
OF COURSE! Where does it go?
/16131
FBX?
ALEMBIC!?
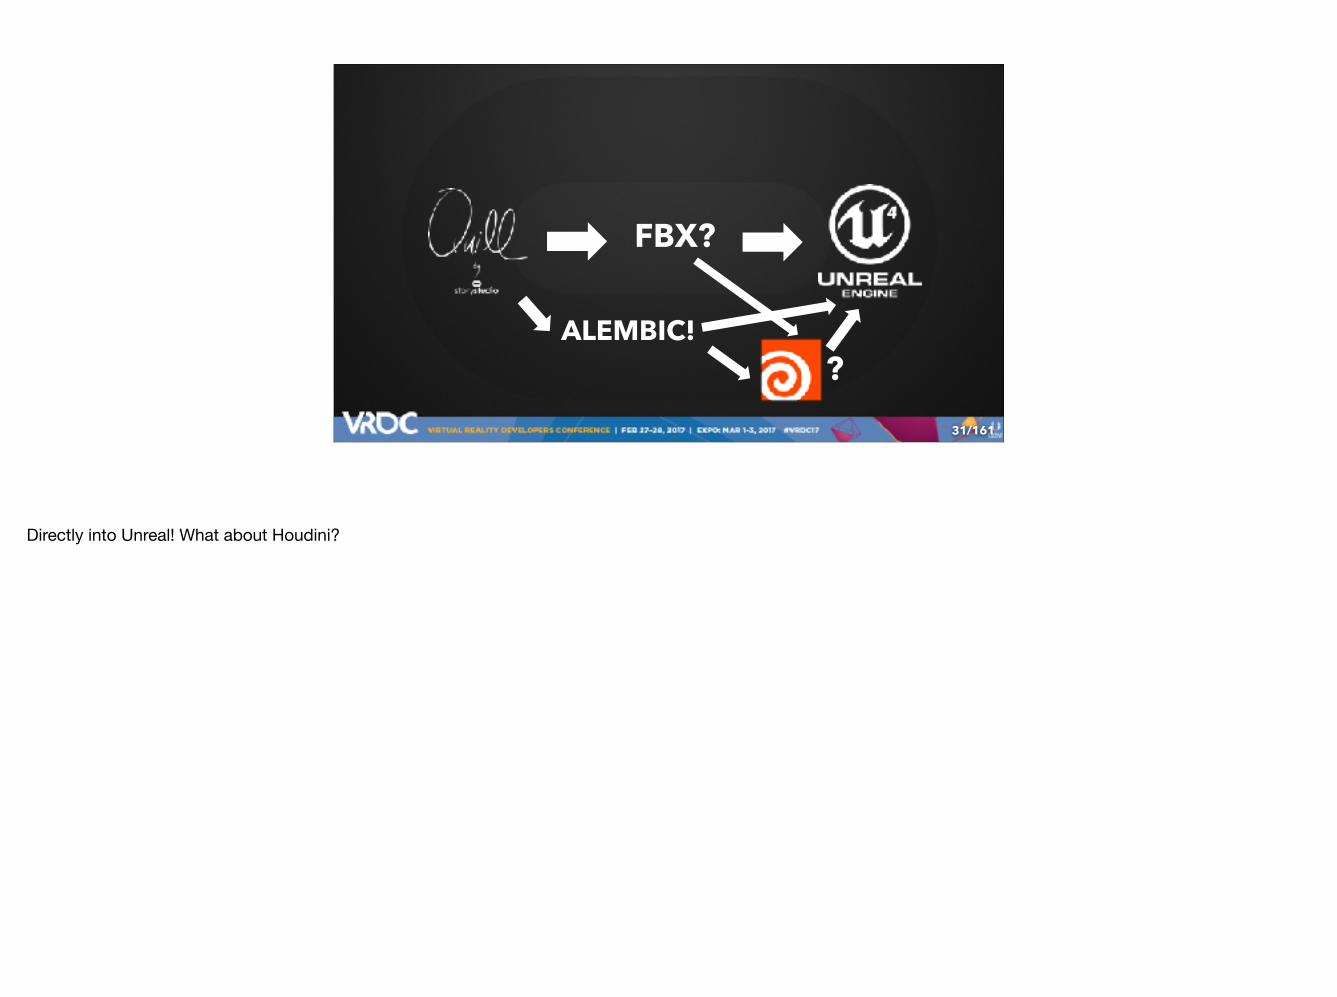
Directly into Unreal! What about Houdini?
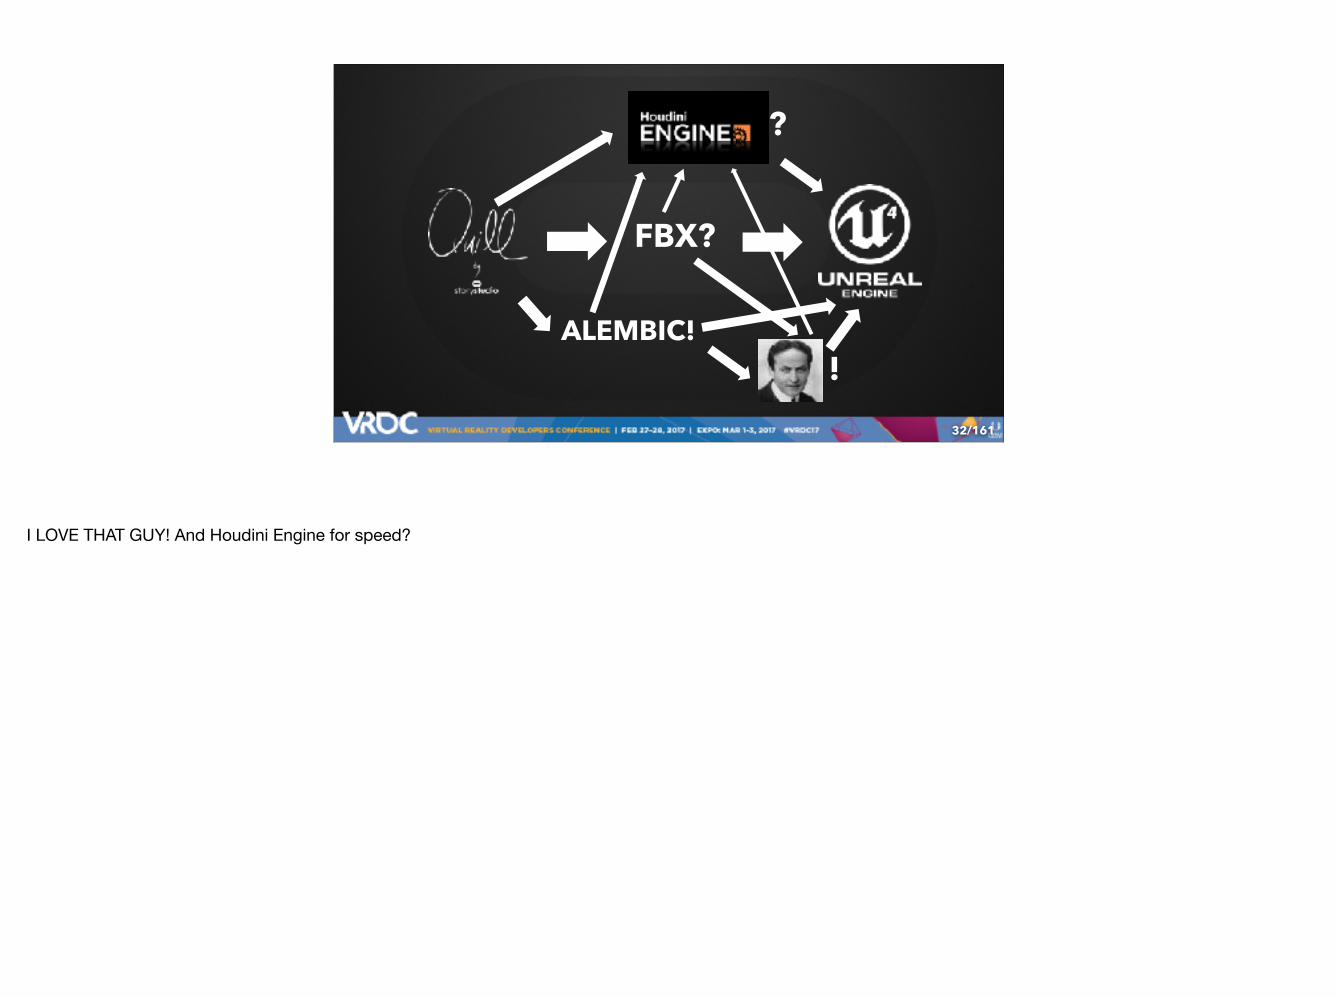
/16132
FBX?
ALEMBIC!!
?
I LOVE THAT GUY! And Houdini Engine for speed?
/16133
FBX?
ALEMBIC!!
!!!!!!!
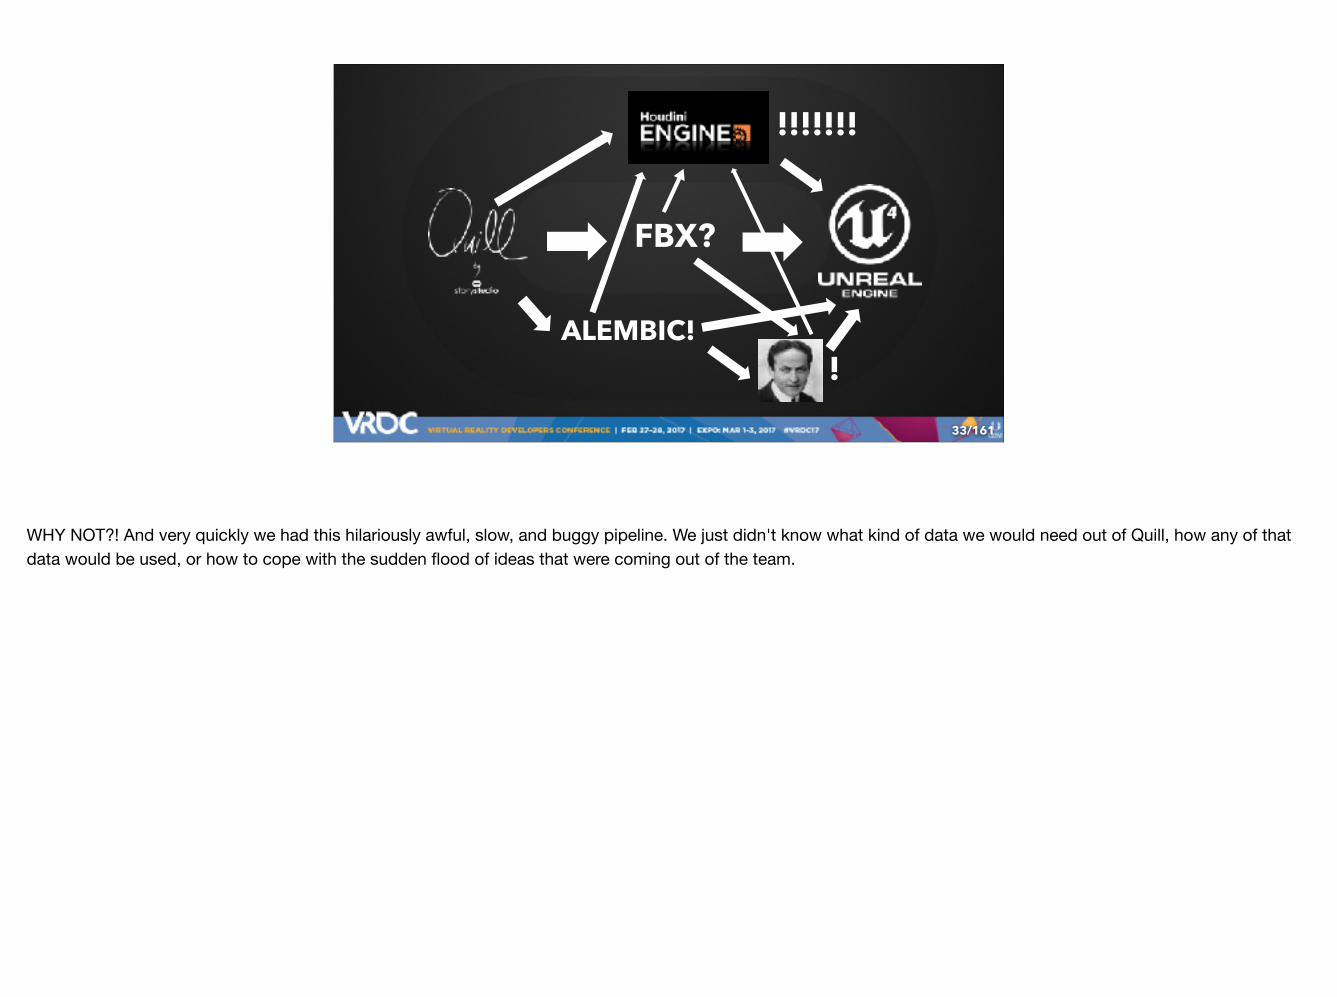
WHY NOT?! And very quickly we had this hilariously awful, slow, and buggy pipeline. We just didn't know what kind of data we would need out of Quill, how any of that data would be used, or how to cope with the sudden flood of ideas that were coming out of the team.

/161
‣ Shockingly powerful ‣Build Houdini logic that
runs live in Unreal ‣Not flexible enough for
final work
34
But eventually we figured it out. At the studio - we love Houdini as it's super powerful for creating simulations and procedurally generating content. There's a reason that almost everyone in film uses it. The ability to run custom Houdini logic live in Unreal using Houdini Engine was too good to pass up. Houdini Engine turned out to be great for the more generic draw-in draw-out work during previz - but our shot work ended up being so specific that we ended up not using it once production started.
/161
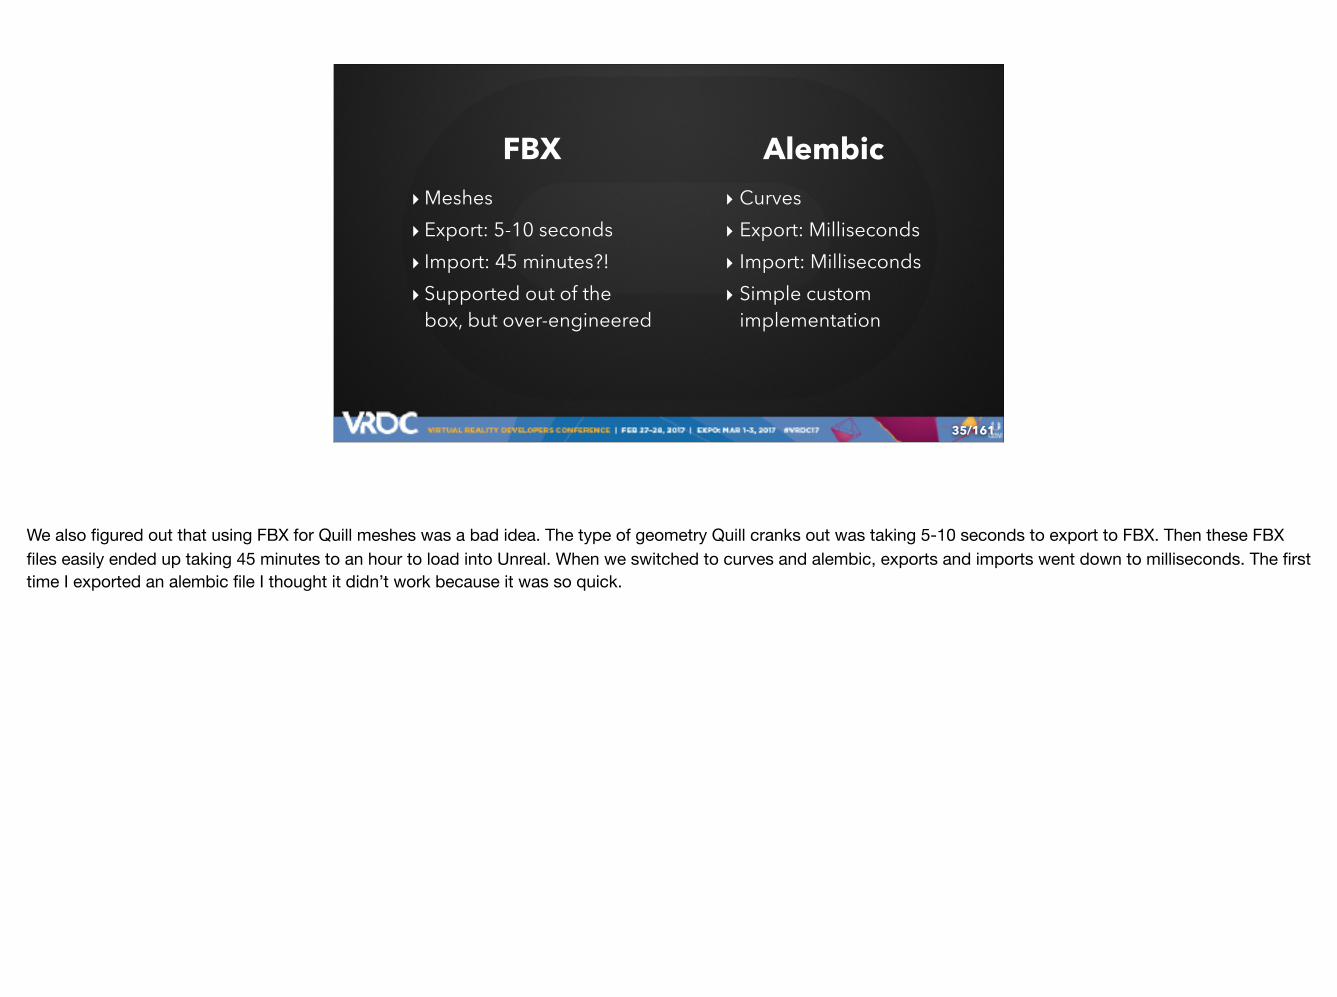
‣ Curves ‣ Export: Milliseconds ‣ Import: Milliseconds ‣ Simple custom
implementation
35
‣Meshes ‣ Export: 5-10 seconds ‣ Import: 45 minutes?! ‣ Supported out of the
box, but over-engineered
FBX Alembic
We also figured out that using FBX for Quill meshes was a bad idea. The type of geometry Quill cranks out was taking 5-10 seconds to export to FBX. Then these FBX files easily ended up taking 45 minutes to an hour to load into Unreal. When we switched to curves and alembic, exports and imports went down to milliseconds. The first time I exported an alembic file I thought it didn’t work because it was so quick.
/16136
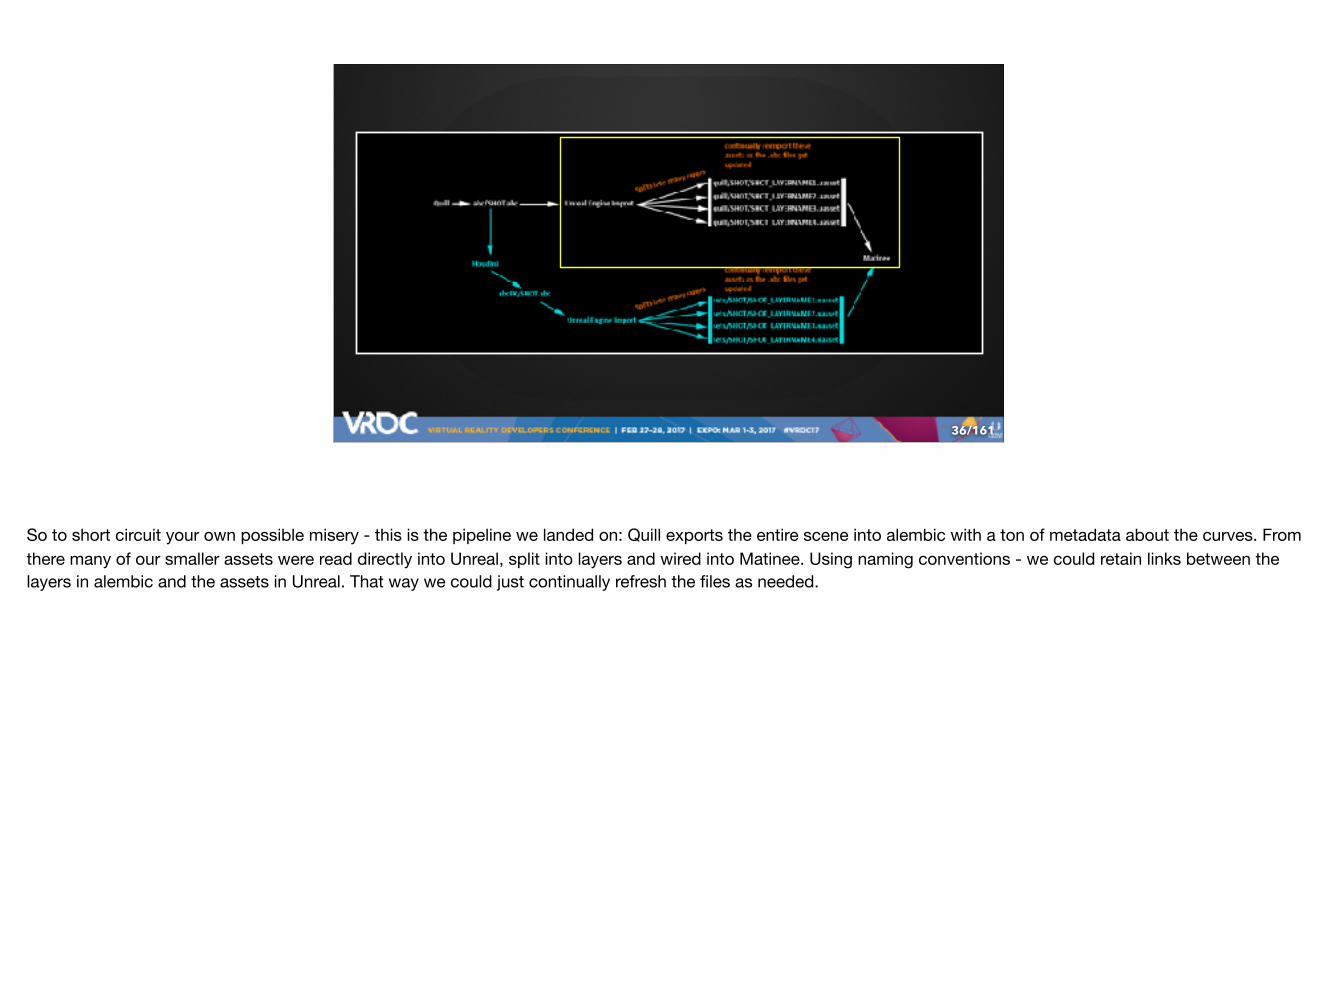
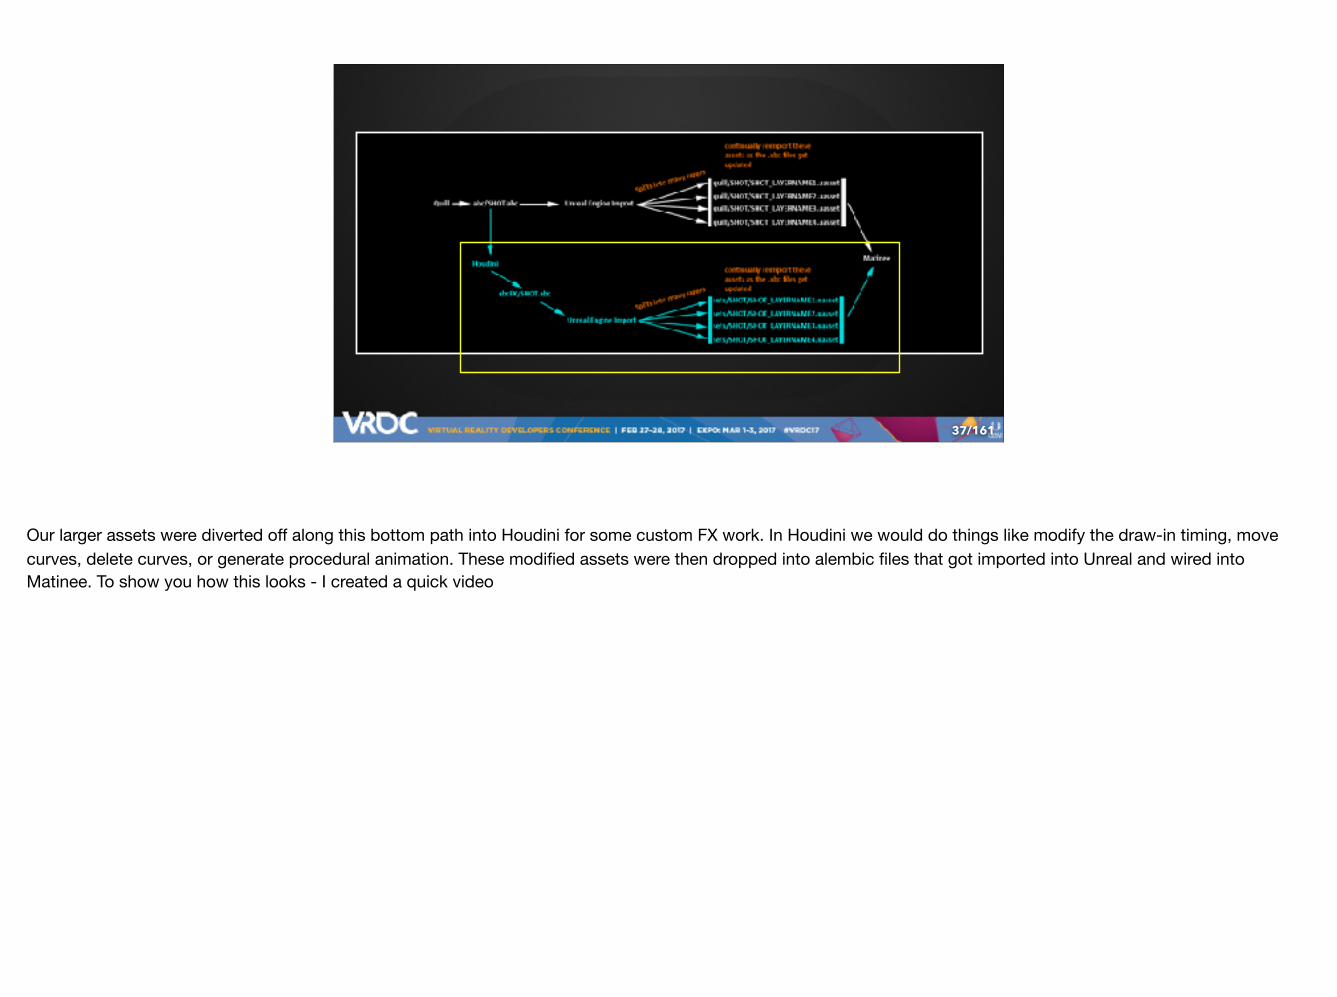
So to short circuit your own possible misery - this is the pipeline we landed on: Quill exports the entire scene into alembic with a ton of metadata about the curves. From there many of our smaller assets were read directly into Unreal, split into layers and wired into Matinee. Using naming conventions - we could retain links between the layers in alembic and the assets in Unreal. That way we could just continually refresh the files as needed.
/16137
Our larger assets were diverted off along this bottom path into Houdini for some custom FX work. In Houdini we would do things like modify the draw-in timing, move curves, delete curves, or generate procedural animation. These modified assets were then dropped into alembic files that got imported into Unreal and wired into Matinee. To show you how this looks - I created a quick video
/16138
This is all real time - no editing. [video of pipeline]

/16139
Philipp (intern)Matt (sets) Robert (FX)
The joy here is manyfold: 1.: We’ve created a very tight iteration loop so that people can quickly try out their ideas in 360. Normally on a production you would have to get a sets team, an FX team, or our intern Philipp - whom we ended up calling

/16140
Quillipp (intern)Matt (sets) Robert (FX)
Quillipp - involved to try out an idea. Thats a lot of people for something that might not pan out.

/16141
Wesley(Art Director)
With Quill - Wesley completely by herself could paint, recompose, and generally workshop on an idea live with the director during a working session. It’s similar to having Maya, Substance Painter, and Unreal Engine all in the same piece of software.

/16142
Plus these decisions were being made in context - in VR - rather than trying to make a decision by looking at it on the monitor. We ended up rarely moving things around in Unreal Engine because it was faster, easier, and correcterer(?!) in Quill.
/16143
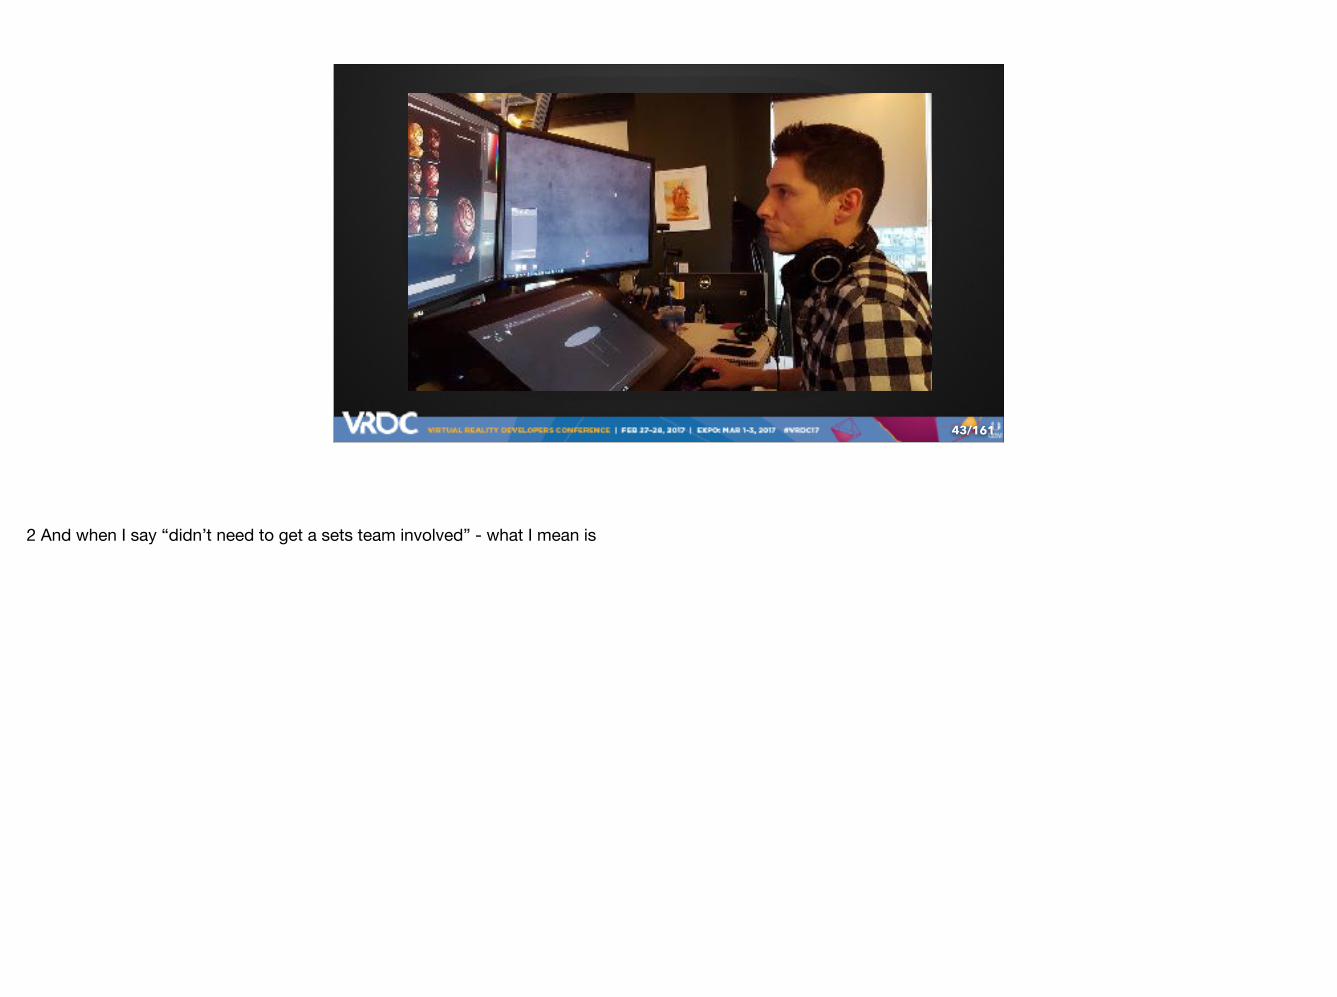
2 And when I say “didn’t need to get a sets team involved” - what I mean is
/16144
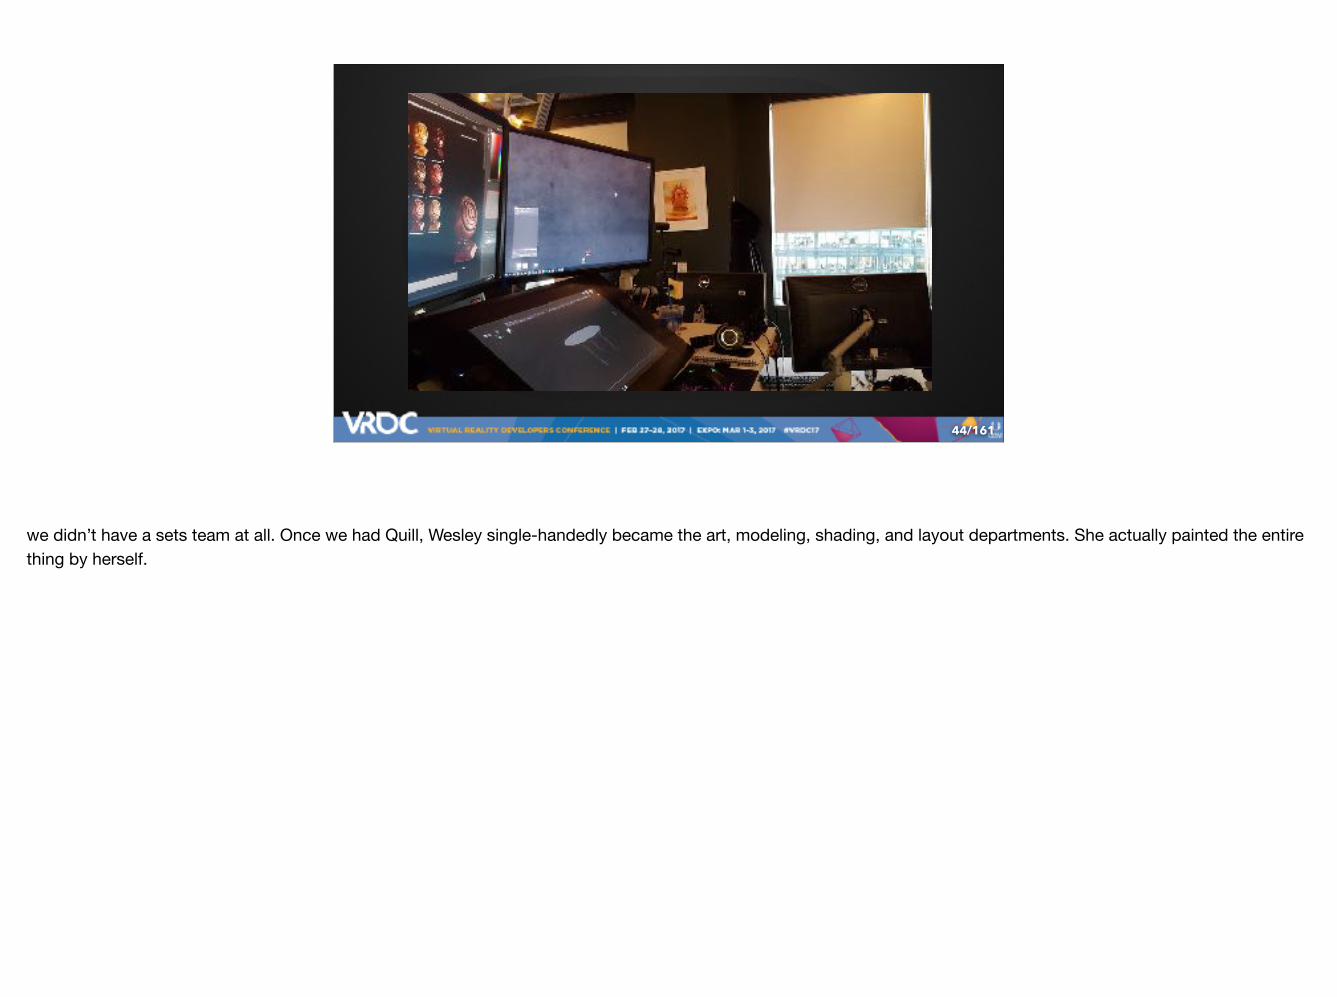
we didn’t have a sets team at all. Once we had Quill, Wesley single-handedly became the art, modeling, shading, and layout departments. She actually painted the entire thing by herself.

/16145
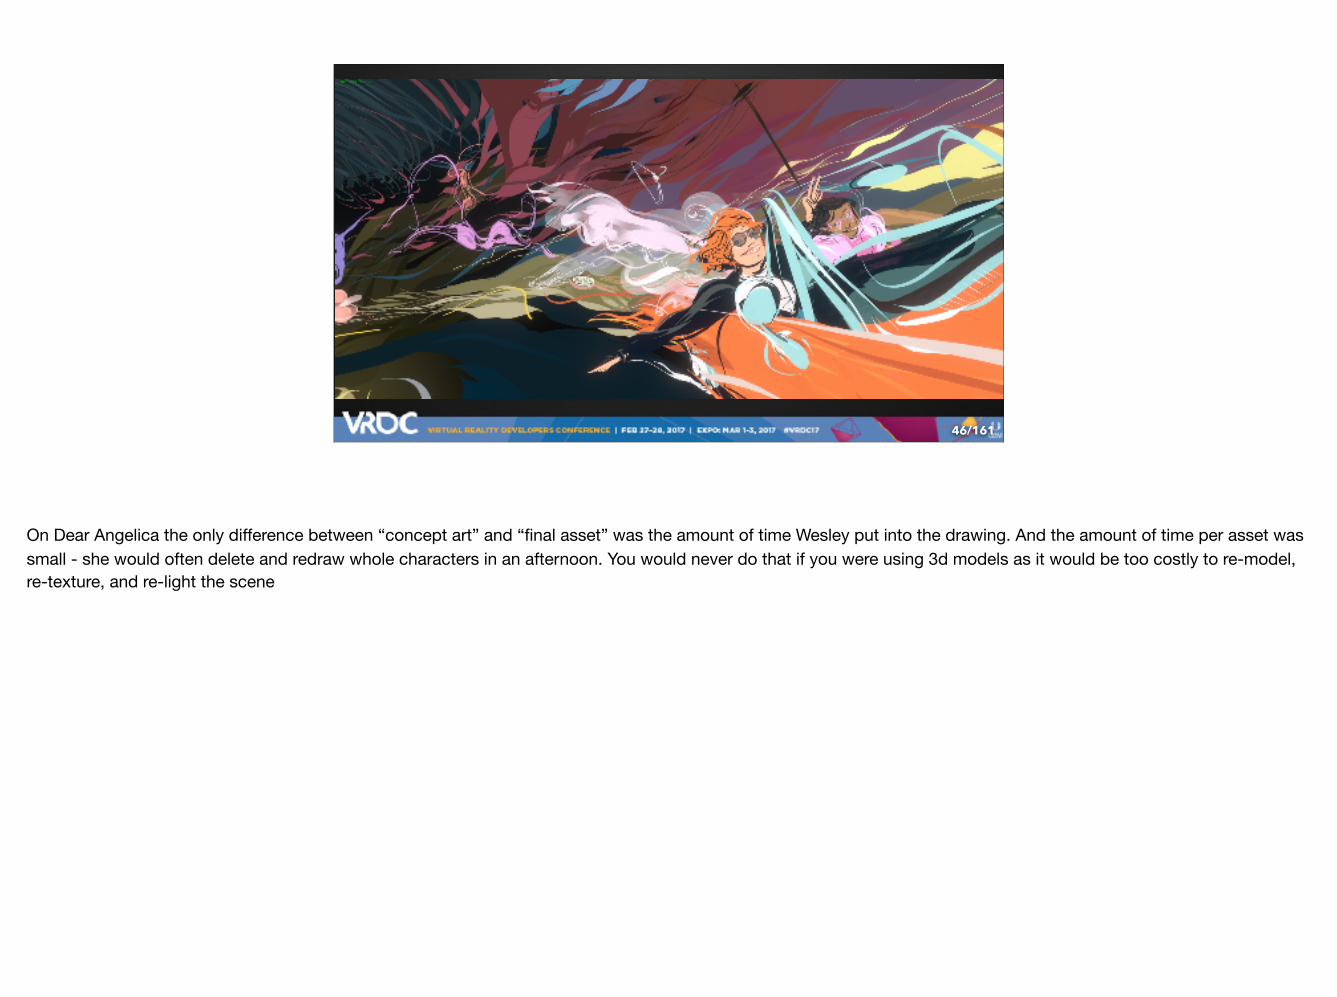
On Dear Angelica the only difference between “concept art” and “final asset” was the amount of time Wesley put into the drawing. And the amount of time per asset was small - she would often delete and redraw whole characters in an afternoon. You would never do that if you were using 3d models as it would be too costly to re-model, re-texture, and re-light the scene
/16146
On Dear Angelica the only difference between “concept art” and “final asset” was the amount of time Wesley put into the drawing. And the amount of time per asset was small - she would often delete and redraw whole characters in an afternoon. You would never do that if you were using 3d models as it would be too costly to re-model, re-texture, and re-light the scene

/16147
Saschka (Director)
Wesley(Art Director)
3: We’ve also created a pipeline that’s easy enough for a director and art director to use...completely unsupervised. Which was a scary prospect that gave me a bunch of nightmares which actually came true one weekend. I left work on Friday with one version of the film, and on Monday I walked into a completely different edit of the film with entirely new dialogue and a ton of new assets. And I realized that this nightmare was actually the dream - that VR could actually be a place for creative expression and exploration without all the frustration that had bogged us down previously.

/16148
High throughput of large amounts of content
4. It allowed us to pump out a huge amount of content in a short amount of time. A little more on this later.

/16149
1. Tight iteration loop to make decisions in context 2. No modeling, texturing, layout departments necessary 3. Pipeline is easy to teach and use 4. Extremely fast throughput of large amounts of content
Wait can you summarize that?
So here's the quick summary. I figure you can read. I'm going to talk about that last part though - as it allowed us to do something we called Detail Draw-Ins, or DDI for short.

/16150
So what’s DDI? They’re these hidden drawings placed in our scenes that are activated through a combination of proximity and gaze direction. They're ALL OVER the place. This is what one of our scenes looks like normally without any DDI active.

/16151
And everything in gold here is DDI available to be activated. The reason we created these is because when we first started showing off Dear Angelica - many people reported that the loved being able to paint in the scenery as they looked around. This wasn’t actually true - but whatever I wasn't going to correct them. About 80% of the time people were looking exactly where we wanted them to - due to a combination of visual and audio cues. However - we wanted to reward people during that other 20% - so we created a bunch of Detail Draw In’s. As you can see we use it for different purposes - sometimes it's to add additional lines and detail to the image - sometimes its for narrative purposes - and sometimes

/16152
its for Easter Eggs. This is a self-portrait Wesley snuck into the film. The first time I saw it was a few weeks ago while working on this part of the presentation.
/16153
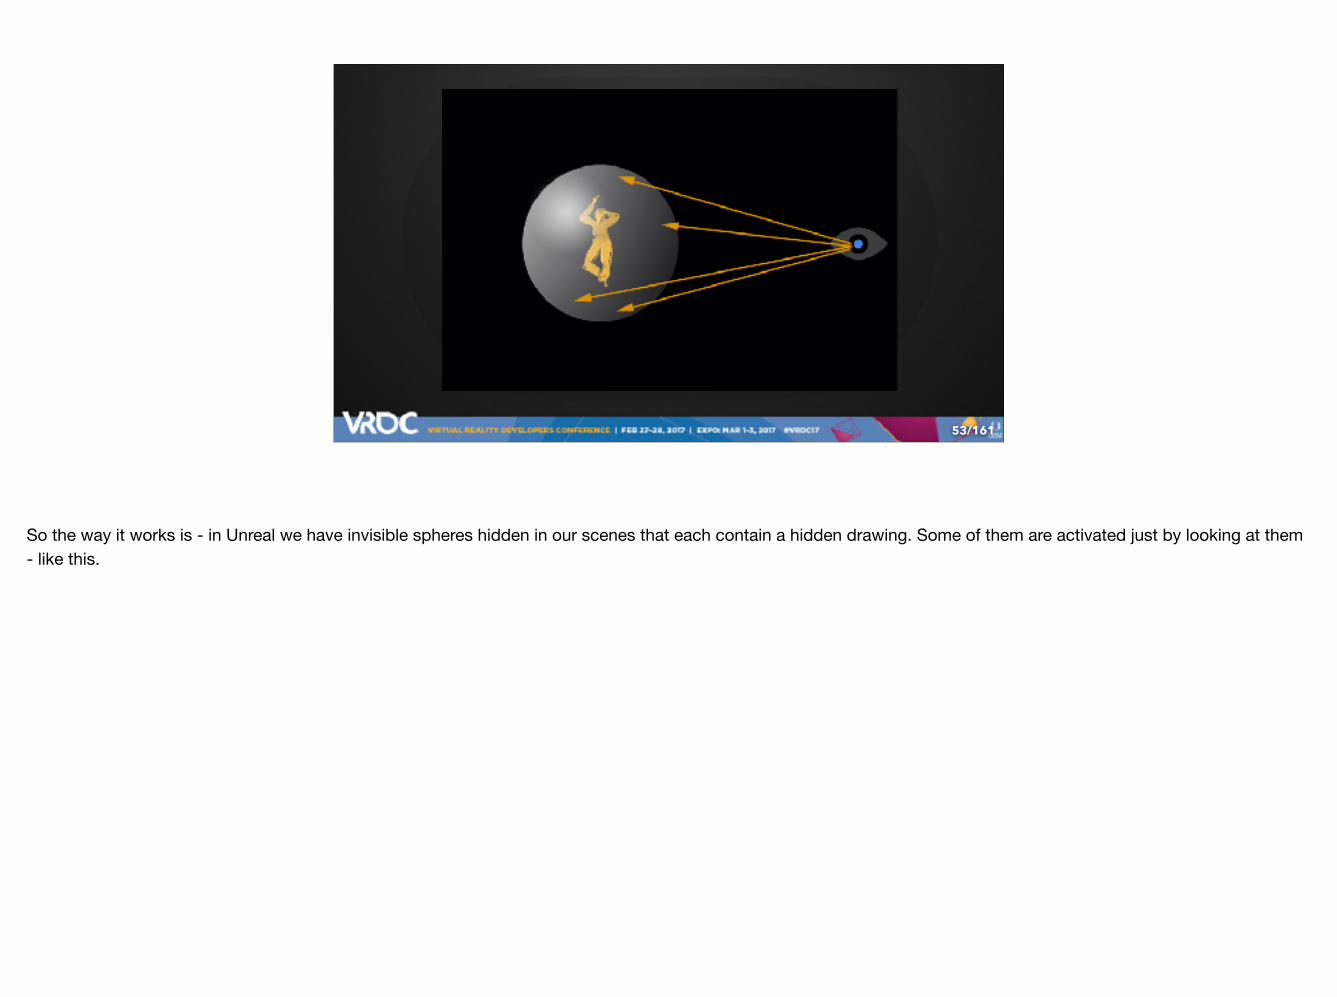
So the way it works is - in Unreal we have invisible spheres hidden in our scenes that each contain a hidden drawing. Some of them are activated just by looking at them - like this.
/16154
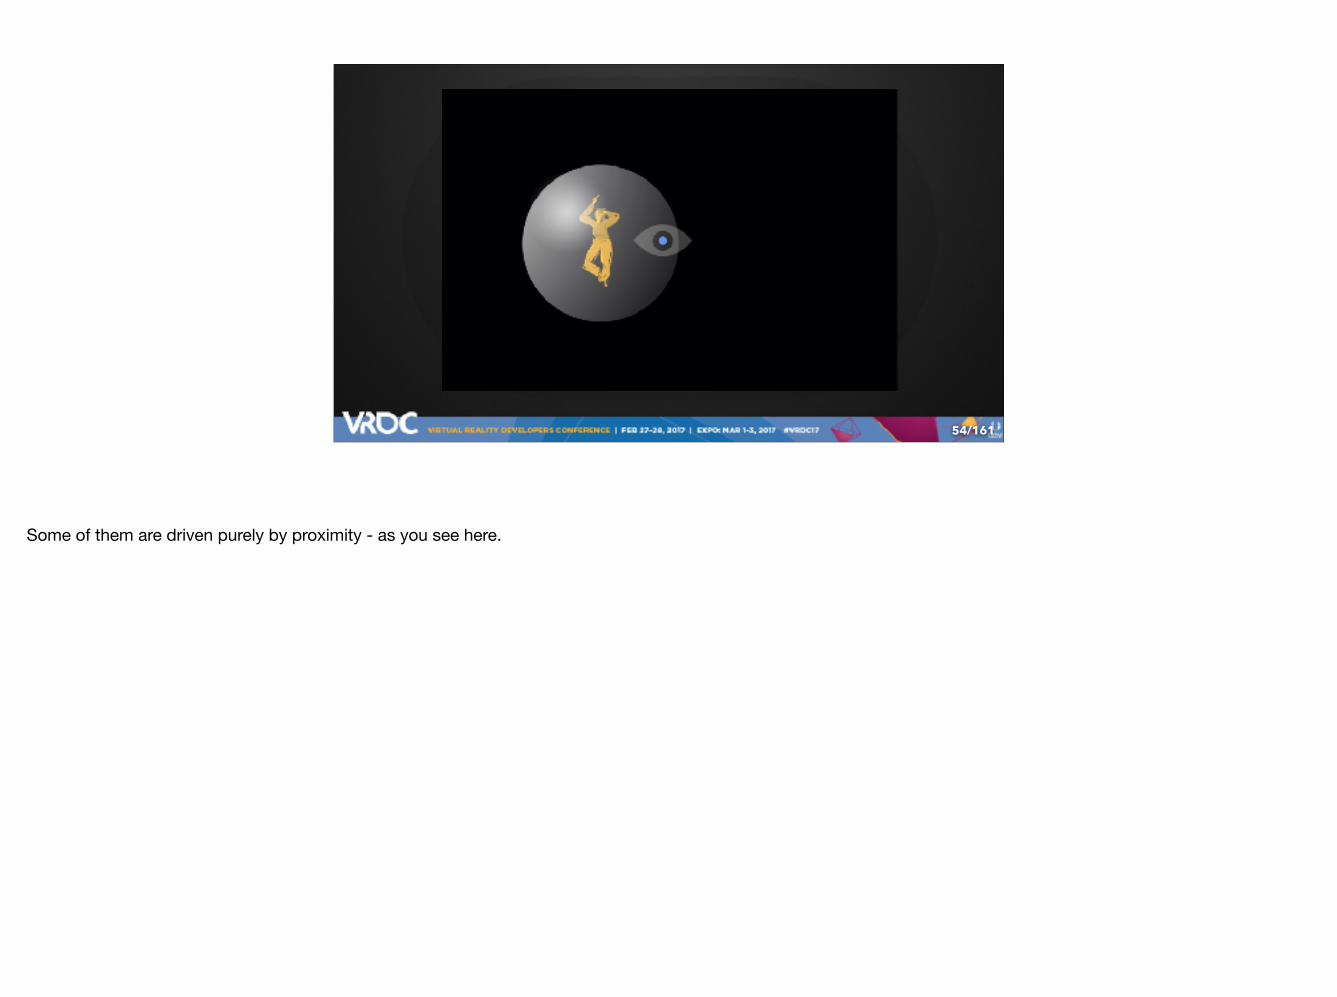
Some of them are driven purely by proximity - as you see here.

/16155
Lastly - some require you to be within a certain proximity AND looking at them to be activated. The decision to use which type was based on the size of the content and whether the content was aesthetic, narrative, or an easter egg. The type you see here tended to be used for easter eggs and narrative DDI.

/16156
It's not really important that you notice it exists - what's important is that the project and the environment feels richer and more alive because of it. Personally I call this “reactivity” - having the environment subtly reacting to the user in a way that validates their presence. I LOVE LOVE LOVE when things are reactive.
/16157
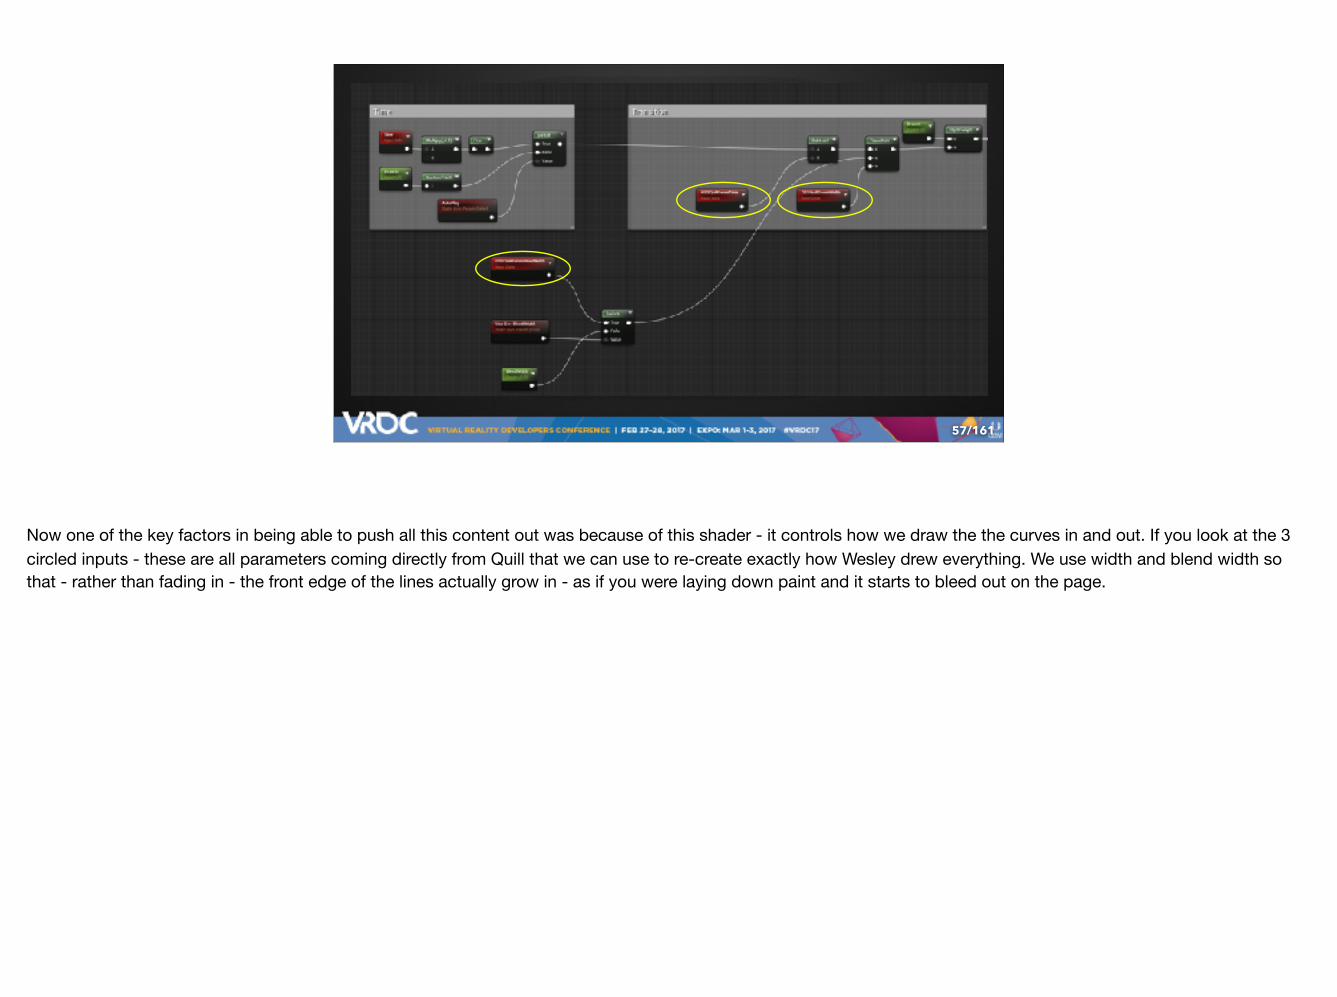
Now one of the key factors in being able to push all this content out was because of this shader - it controls how we draw the the curves in and out. If you look at the 3 circled inputs - these are all parameters coming directly from Quill that we can use to re-create exactly how Wesley drew everything. We use width and blend width so that - rather than fading in - the front edge of the lines actually grow in - as if you were laying down paint and it starts to bleed out on the page.

/16158
[video] We use the time parameter to draw the lines in the order and speed that Wesley did in Quill. I'm visualizing the parameter here - and as you can see the brightest areas draw in first and get progressively darker. For bigger assets we would modify these values in Houdini and bake them back into the curves - but for smaller assets and DDI we draw the pieces in exactly as Wesley drew them.
/16159
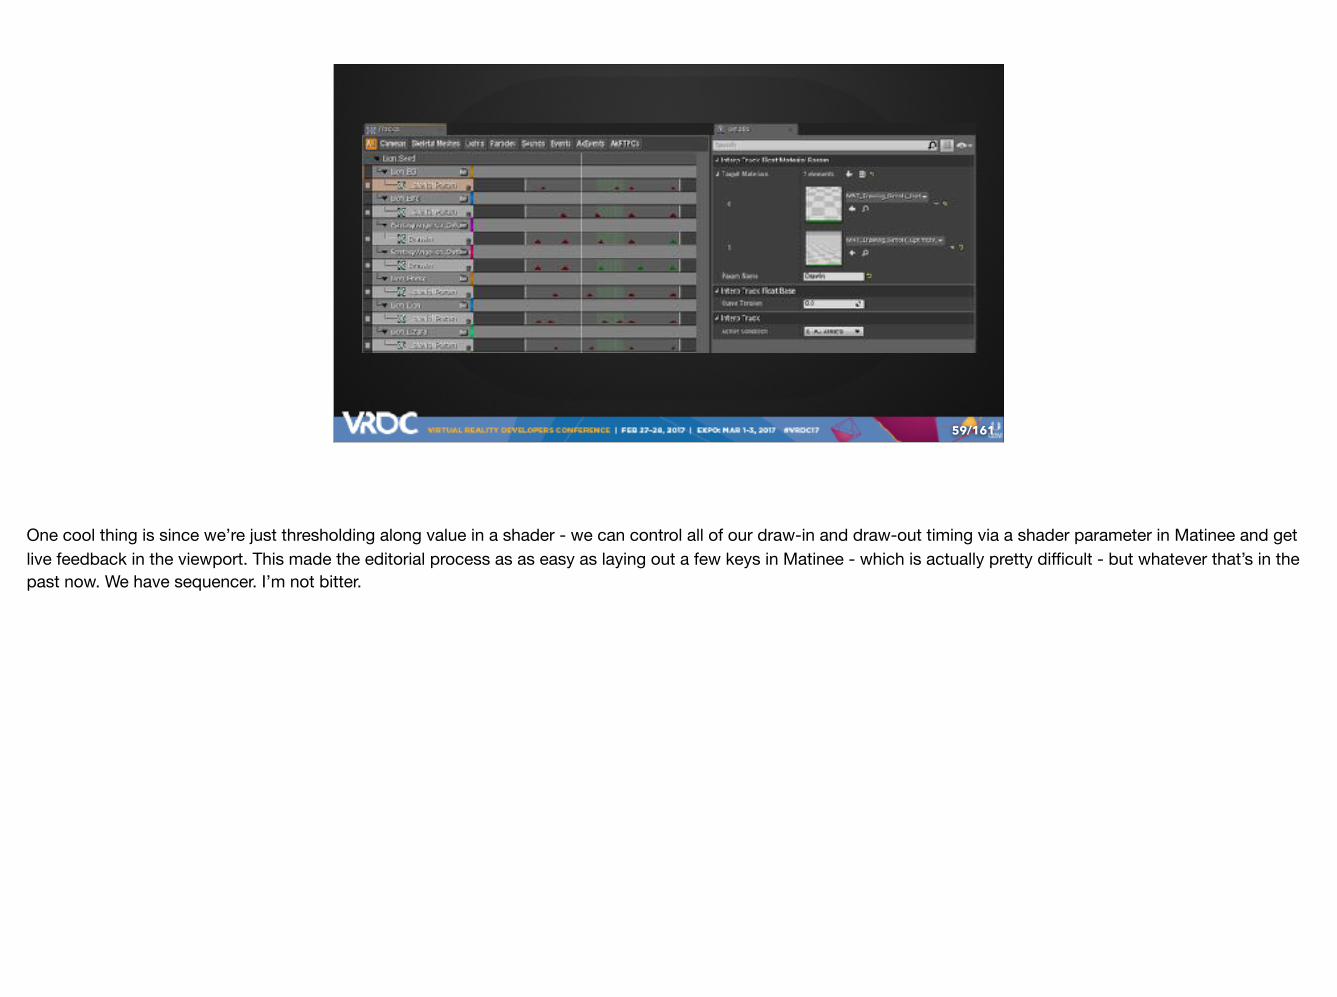
One cool thing is since we’re just thresholding along value in a shader - we can control all of our draw-in and draw-out timing via a shader parameter in Matinee and get live feedback in the viewport. This made the editorial process as as easy as laying out a few keys in Matinee - which is actually pretty difficult - but whatever that’s in the past now. We have sequencer. I’m not bitter.
/16160
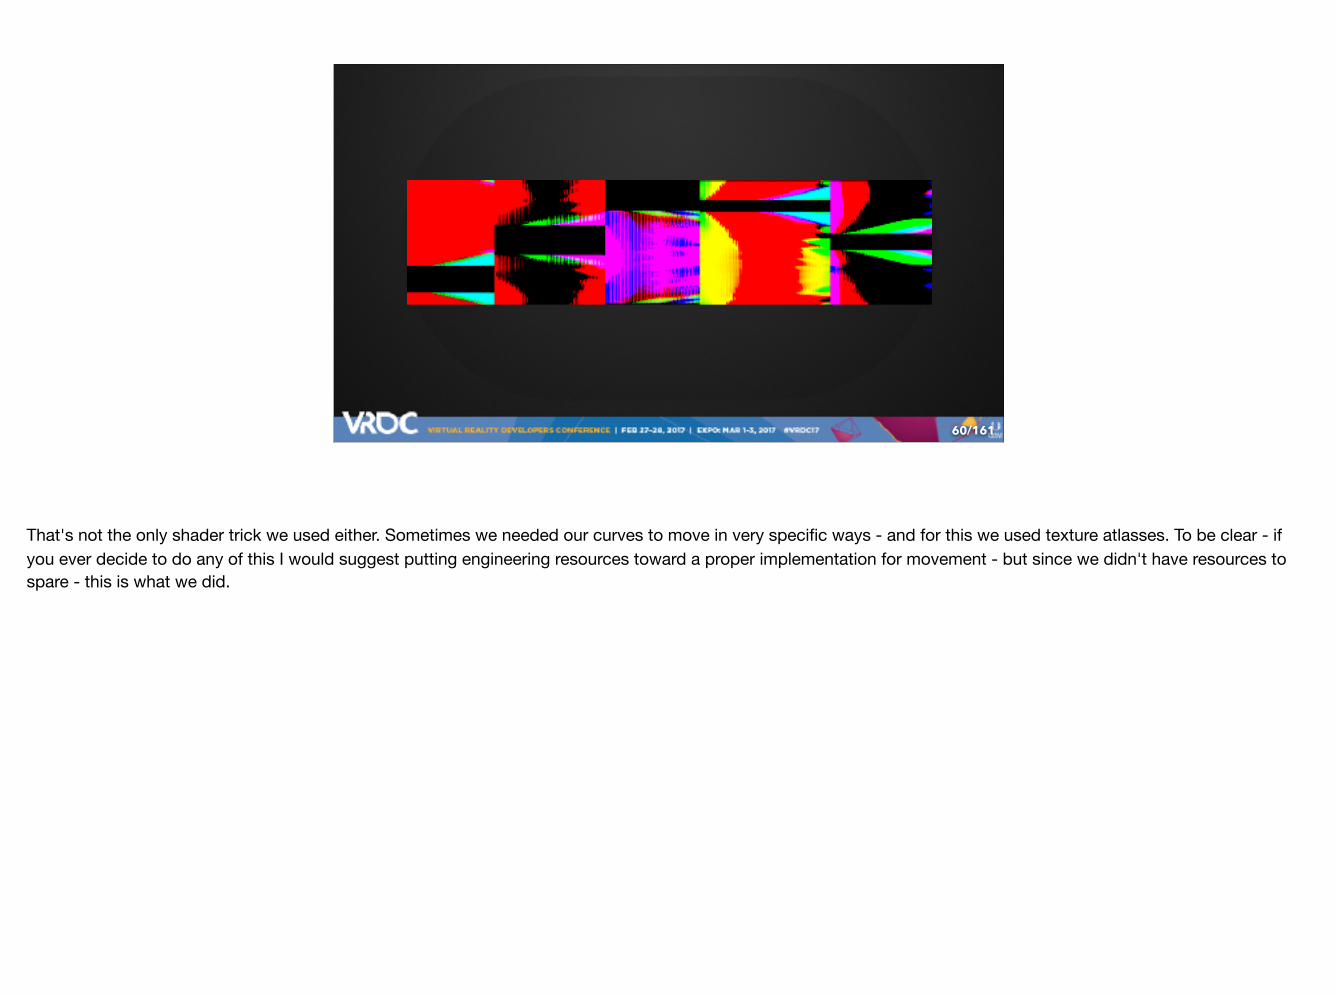
That's not the only shader trick we used either. Sometimes we needed our curves to move in very specific ways - and for this we used texture atlasses. To be clear - if you ever decide to do any of this I would suggest putting engineering resources toward a proper implementation for movement - but since we didn't have resources to spare - this is what we did.
/16161
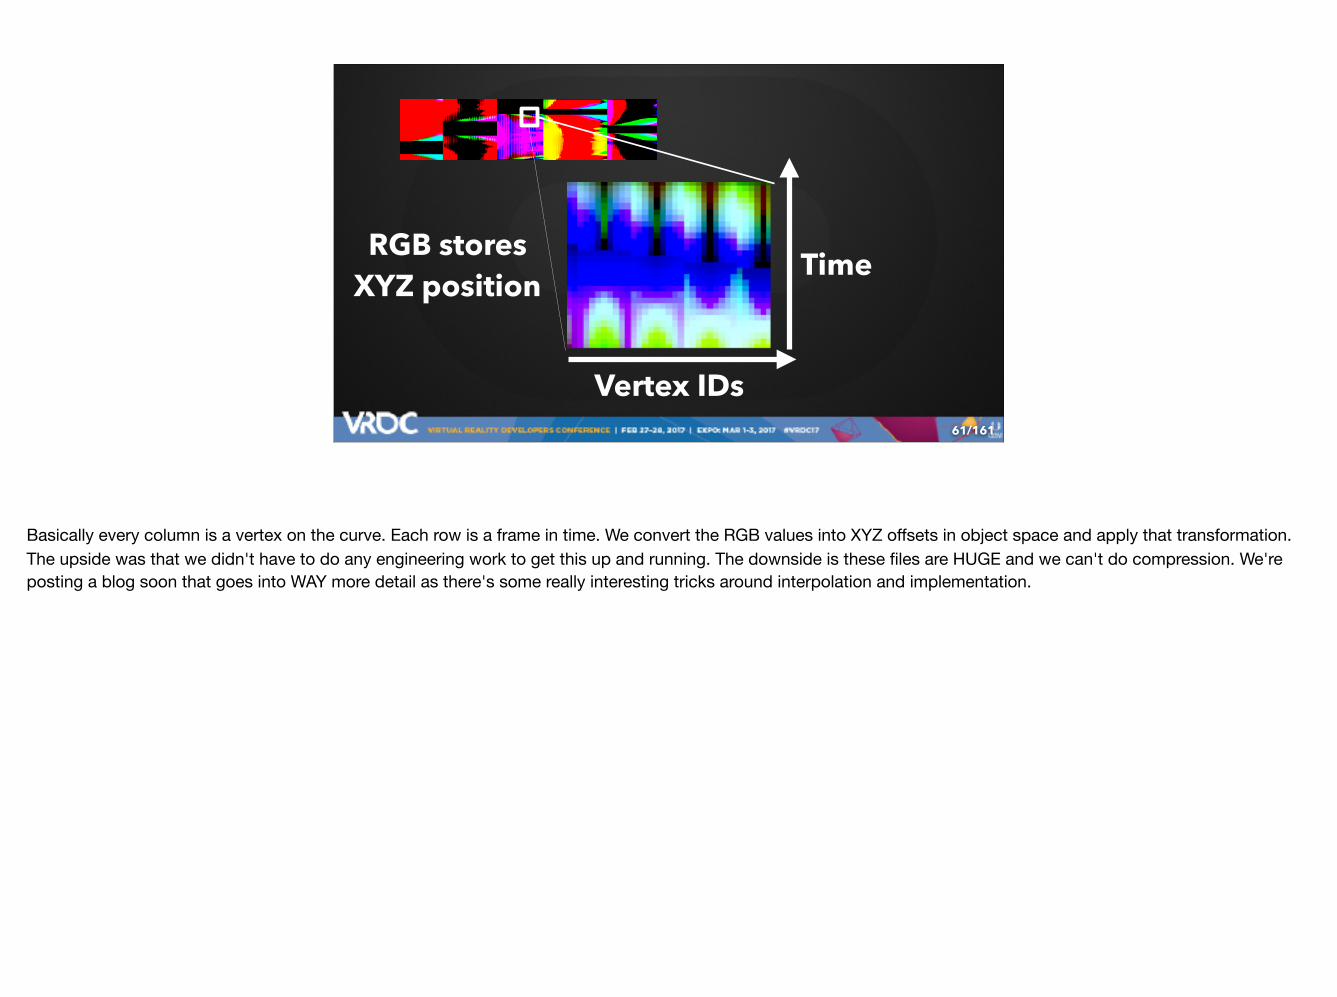
Vertex IDs
TimeRGB storesXYZ position
Basically every column is a vertex on the curve. Each row is a frame in time. We convert the RGB values into XYZ offsets in object space and apply that transformation. The upside was that we didn't have to do any engineering work to get this up and running. The downside is these files are HUGE and we can't do compression. We're posting a blog soon that goes into WAY more detail as there's some really interesting tricks around interpolation and implementation.

/161
Performance Plots
62
This method is also how we got our creepy outer space dance video. Space Angelica was rigged and animated in Maya. Key poses were baked out texture maps as vertex offsets that we would linearly interpolate between. It's worth noting that this stuff is uncanny valley to the max in VR - so we toned the movement WAY down.

/16163
[video] One last thing we found EXTREMELY useful during production is shown in this review session. Previously - we would have to re-launch the application every time we wanted to watch a sequence. Then we added what we call “power of time” We took a rift controller and hooked up the thumbstick to fast-forward and rewind the experience. We also hooked up little laser pointers to the controllers so Saschka could point at what he was talking about. It allowed us to efficiently review our FX, editorial, as well as compose in 360. Saschka would often watch through a sequence in a cardinal direction giving notes, then rotate 90 degrees and go through the whole sequence again - making sure that there was always something interesting to look at.
/16164
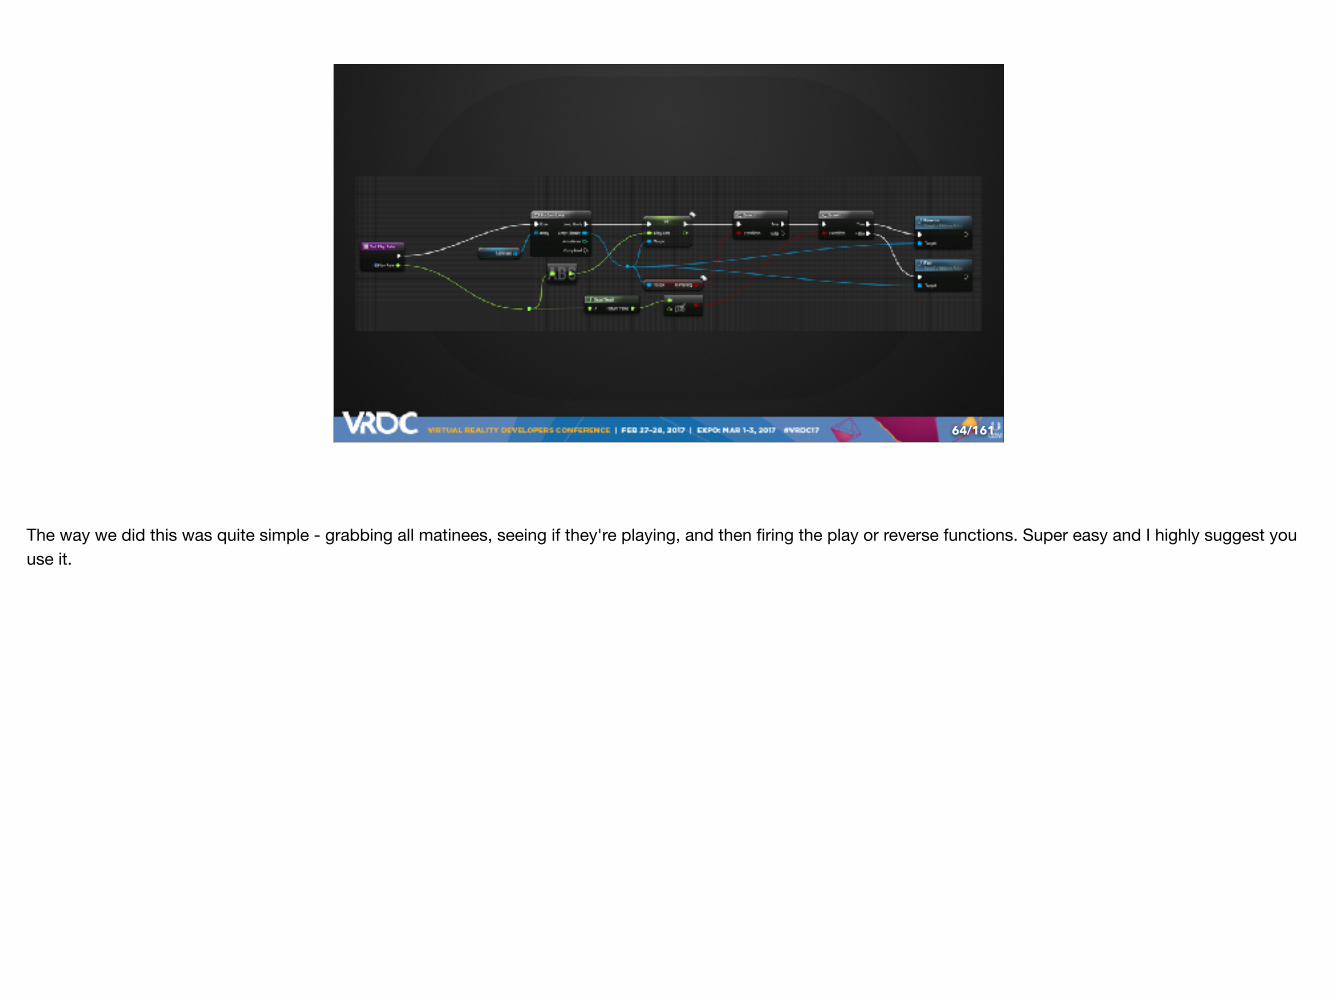
The way we did this was quite simple - grabbing all matinees, seeing if they're playing, and then firing the play or reverse functions. Super easy and I highly suggest you use it.

/16165
So that's the end of my song and dance - a kind of birds eye view of some of the interesting bits in Dear Angelica.
/16166
Now we'll have Ian, our Quill integration lead, hop in and tell you some of the nitty gritty details of our quill graphics pipeline and unreal integration.

/16167
Thank you Chris.
Good morning, I’m Ian Wakelin, I worked on the Quill to Unreal integration for Dear Angelica.
For this portion of the presentation, we’re going to start diving more into the technical details of the integration of Quill into Unreal Editor. I’ll provide some more detail on the Quill file format, and briefly touch on how we added a new custom geometry type into the Unreal Editor workflow. I’ll also describe the performance graphs we created to help make sure all our scenes were performing at or above 90fps.
After this portion, Martin will present several techniques that he applied in DA to keep us fast and graphically beautiful.

/161
Quill Geometry: What’s in a Quill File
68
So first off, let’s look at what makes up a Quill file.

/161
Quill Geometry: What’s in a Quill File
69
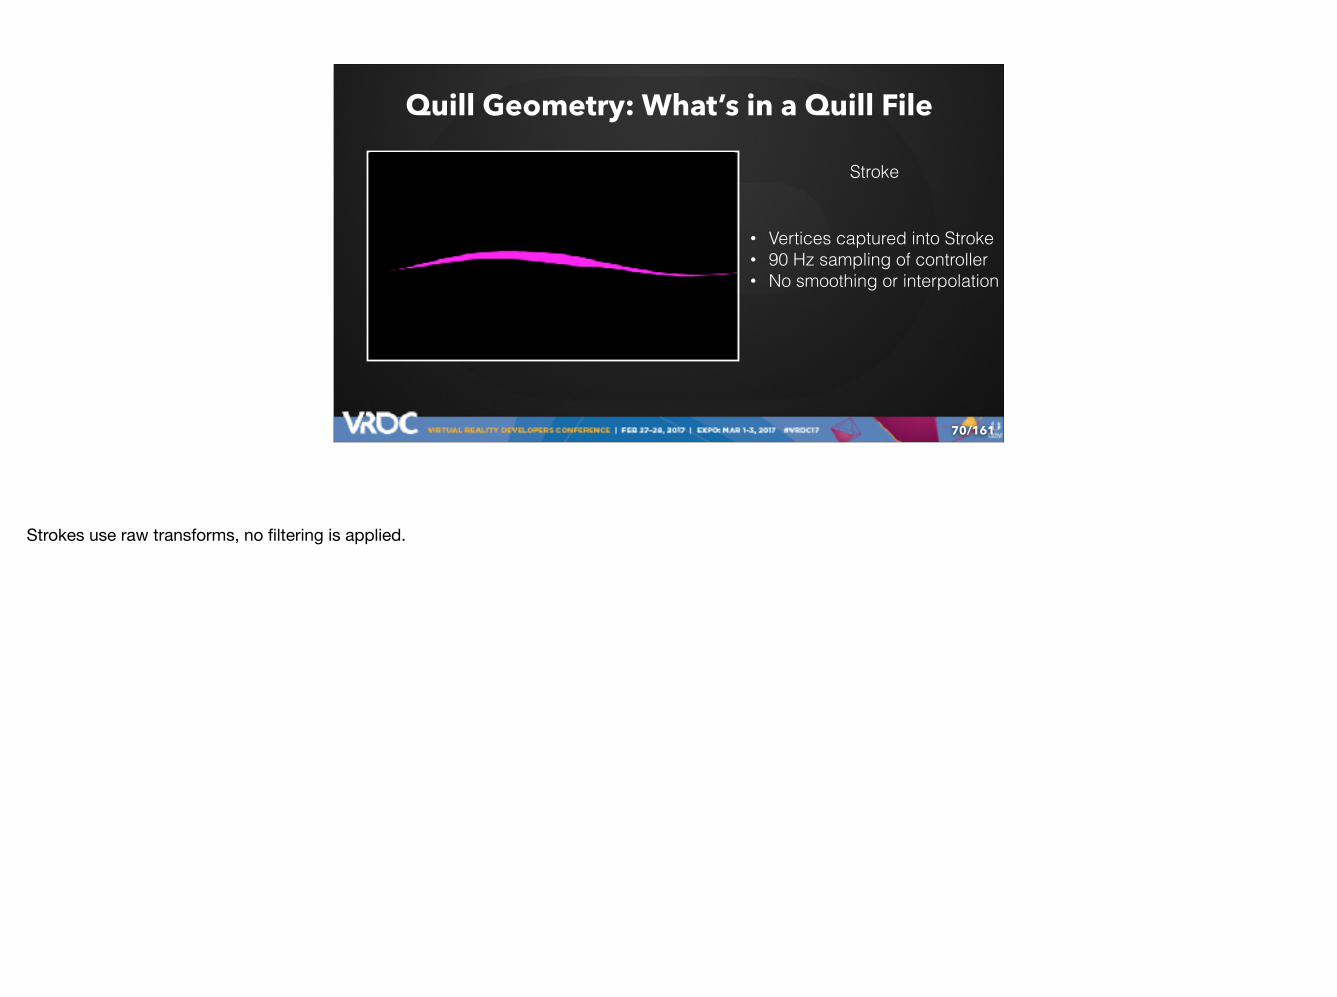
Stroke
• Vertices captured into Stroke
In the Quill app, as someone uses the paint tool, we continuously capture controller transforms at 90hz and mix in tool properties like color, width and transparency to make a stroke.
/161
Quill Geometry: What’s in a Quill File
70
• Vertices captured into Stroke • 90 Hz sampling of controller • No smoothing or interpolation
Stroke
Strokes use raw transforms, no filtering is applied.
/161
Quill Geometry: What’s in a Quill File
71
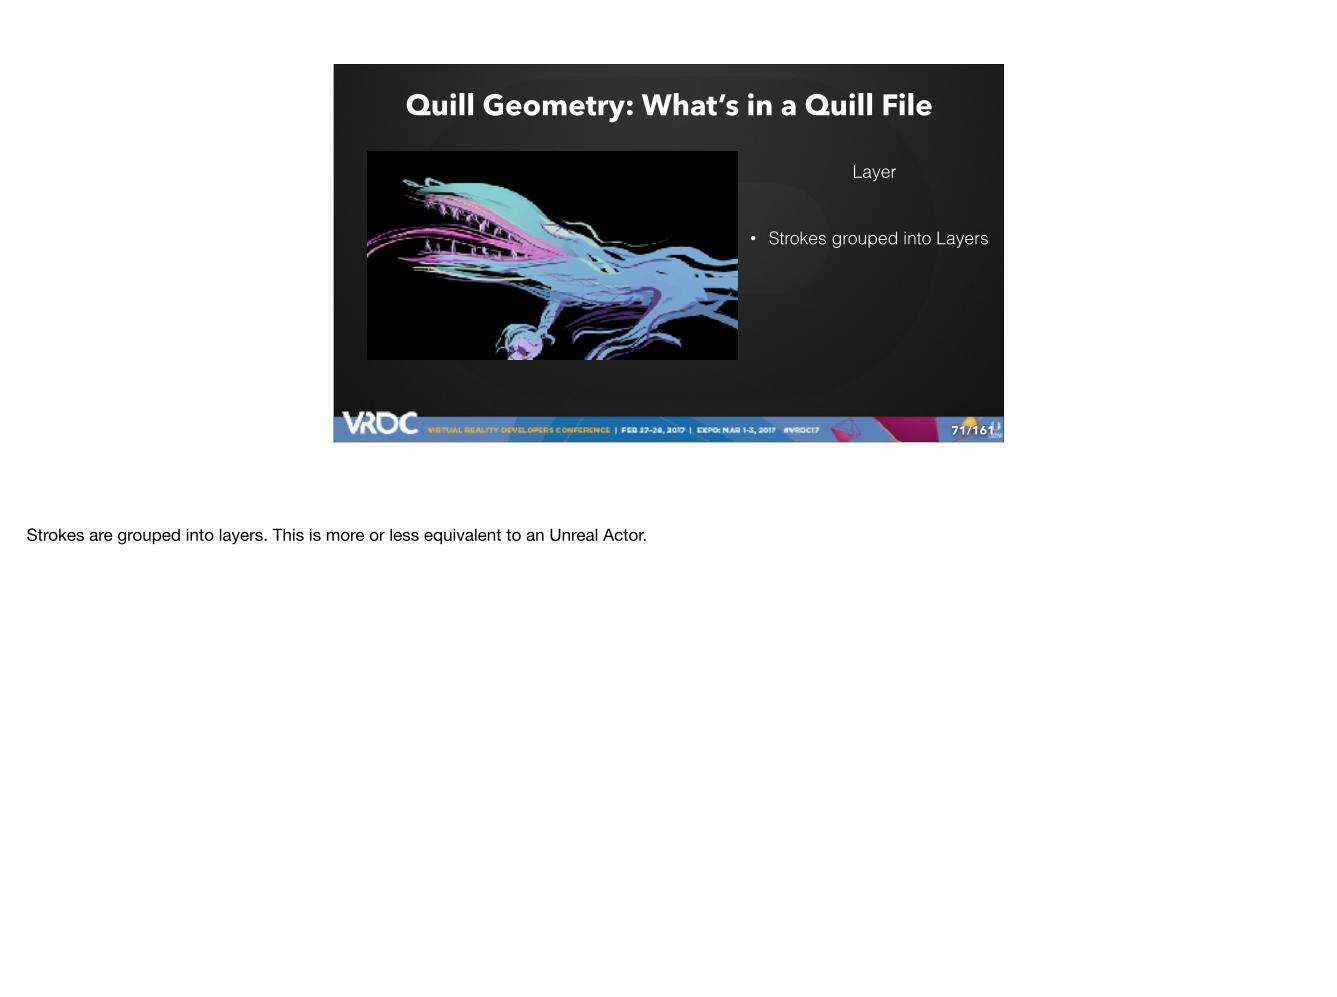
Layer
• Strokes grouped into Layers
Strokes are grouped into layers. This is more or less equivalent to an Unreal Actor.

/161
Quill Geometry: What’s in a Quill File
72
• Strokes grouped into Layers • Independent transform
Layer
A layer can be independently transformed in the scene, but otherwise is strictly organizational.

/161
Quill Geometry: What’s in a Quill File
73
Scene
• Layers hierarchy forms Scene
And a scene is just a hierarchy of layers.

/161
Quill Geometry: What’s in a Quill File
74
• Layers hierarchy forms Scene • 1 File = 1 Scene
Scene
Each Quill file contains a single scene.

/161
Quill Geometry: What’s in a Quill File
75
• Layers hierarchy forms Scene • 1 File = 1 Scene
Scene
This is a wireframe of the same scene, just to give a sense of the density.

/161
Quill Geometry: What’s in a Quill File
76
• Scenes • Layers • Strokes • Vertices
That’s actually it for the core types of things used for drawing: Scenes, Layers, Strokes, and Vertices. Let’s look at strokes in more detail.
/161
Quill Geometry: What’s in a Quill File
77
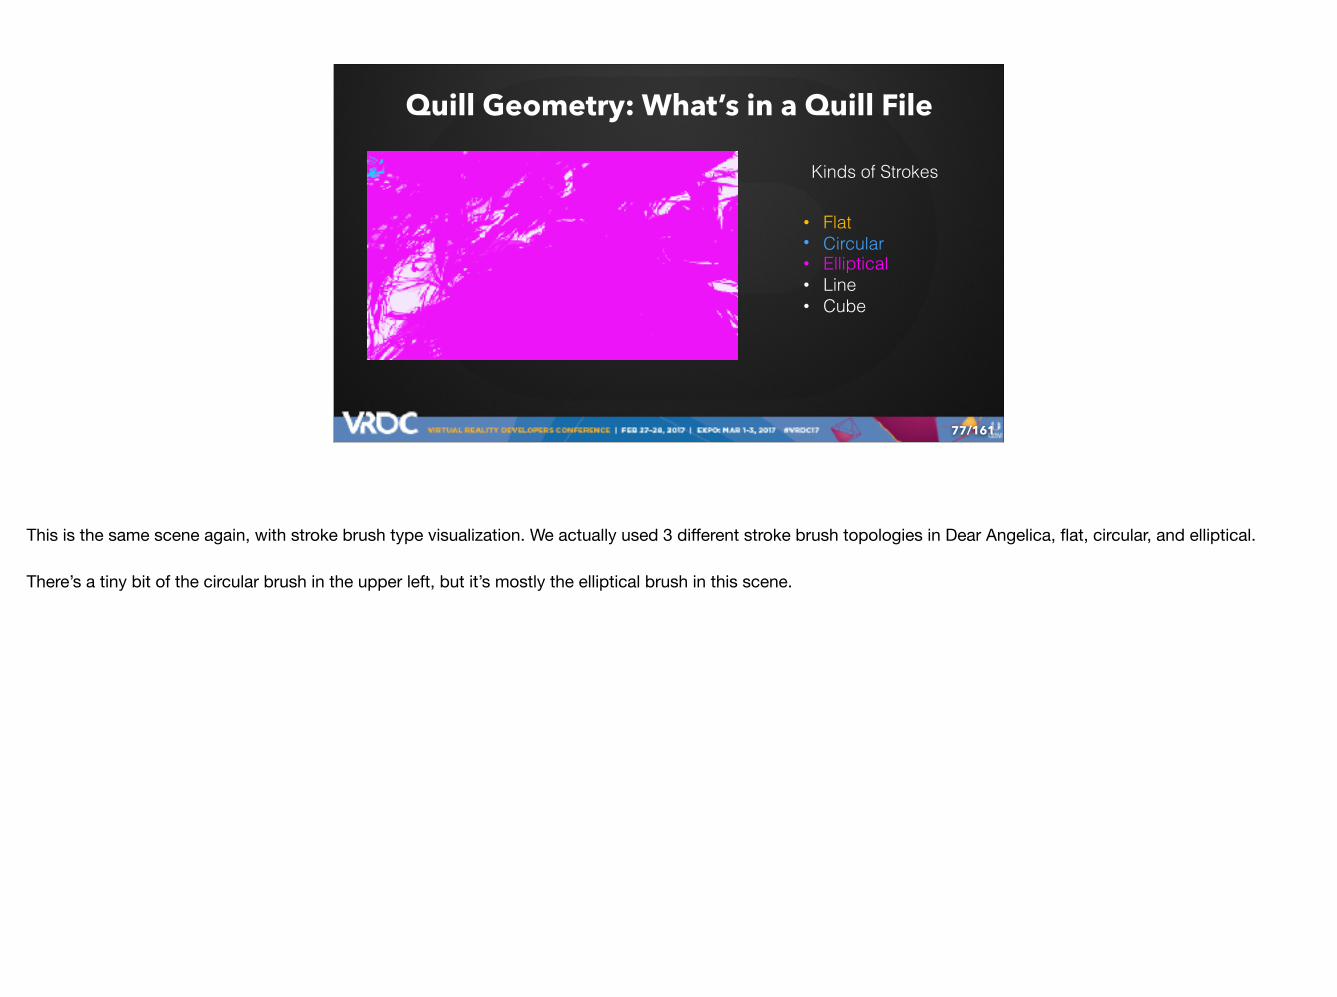
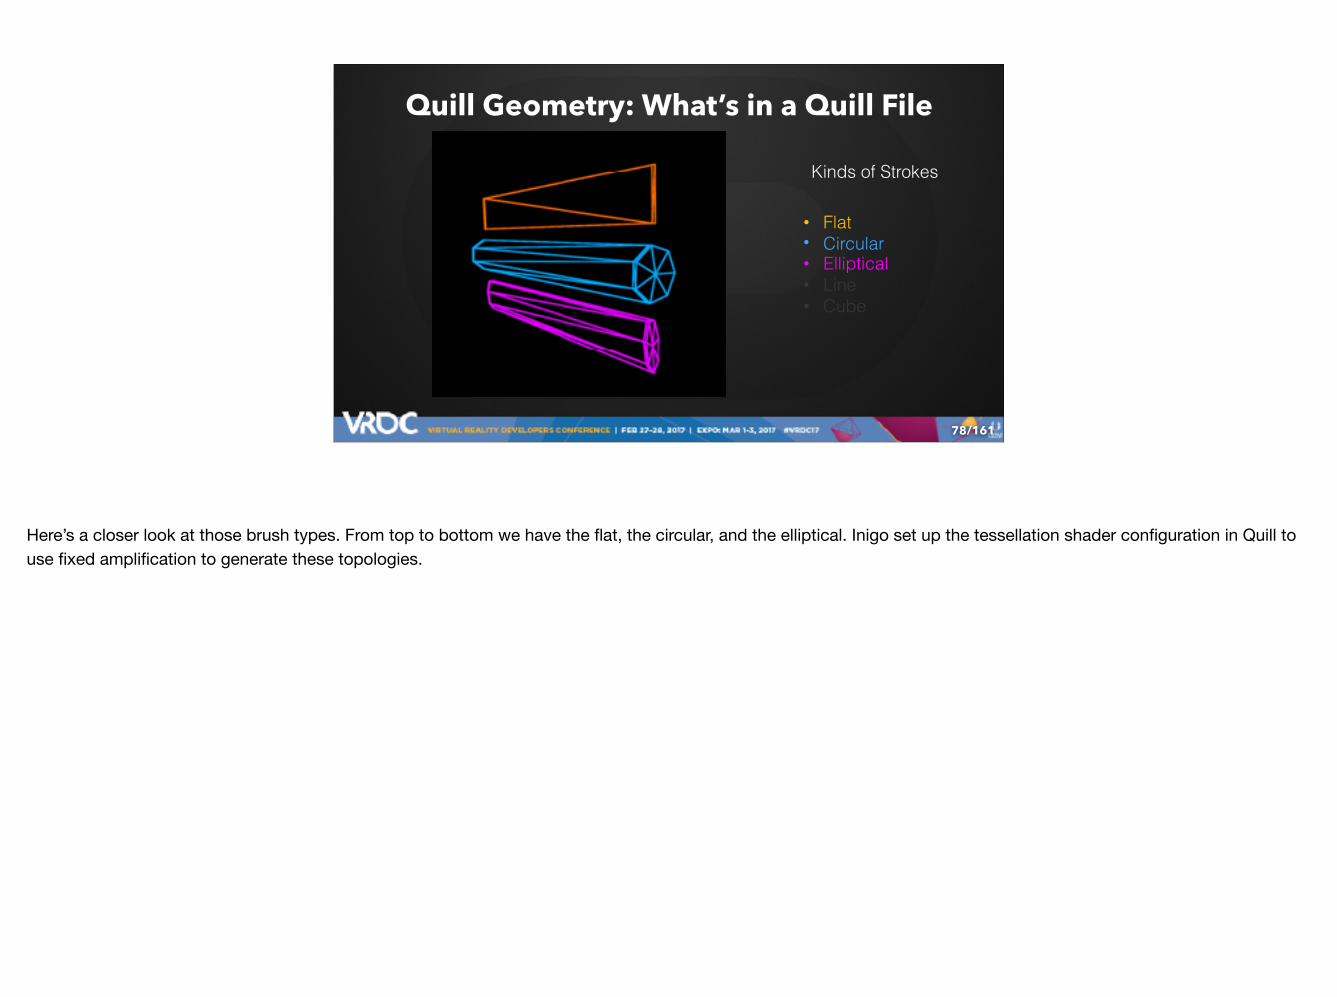
• Flat • Circular • Elliptical • Line • Cube
Kinds of Strokes
This is the same scene again, with stroke brush type visualization. We actually used 3 different stroke brush topologies in Dear Angelica, flat, circular, and elliptical.
There’s a tiny bit of the circular brush in the upper left, but it’s mostly the elliptical brush in this scene.
/161
Quill Geometry: What’s in a Quill File
78
• Flat • Circular • Elliptical • Line • Cube
Kinds of Strokes
Here’s a closer look at those brush types. From top to bottom we have the flat, the circular, and the elliptical. Inigo set up the tessellation shader configuration in Quill to use fixed amplification to generate these topologies.

/161
Quill Geometry: What’s in a Quill File
79
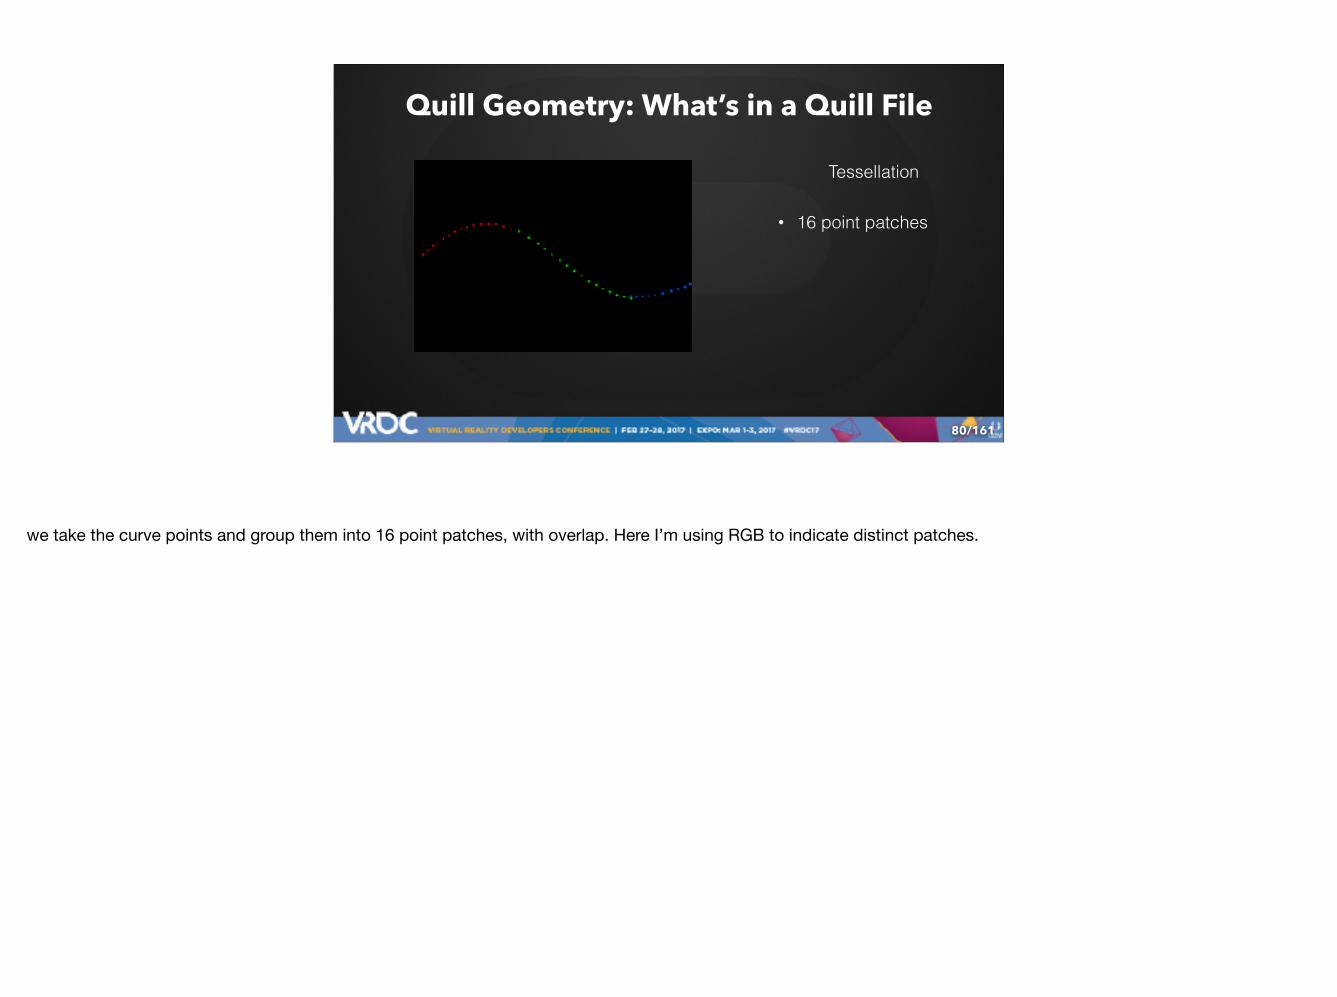
Tessellation
• 16 point patches
We use 16 point patch primitives. For the elliptical brush, for example, to produce a stroke like this one
/161
Quill Geometry: What’s in a Quill File
80
• 16 point patches
Tessellation
we take the curve points and group them into 16 point patches, with overlap. Here I’m using RGB to indicate distinct patches.
/161
Quill Geometry: What’s in a Quill File
81
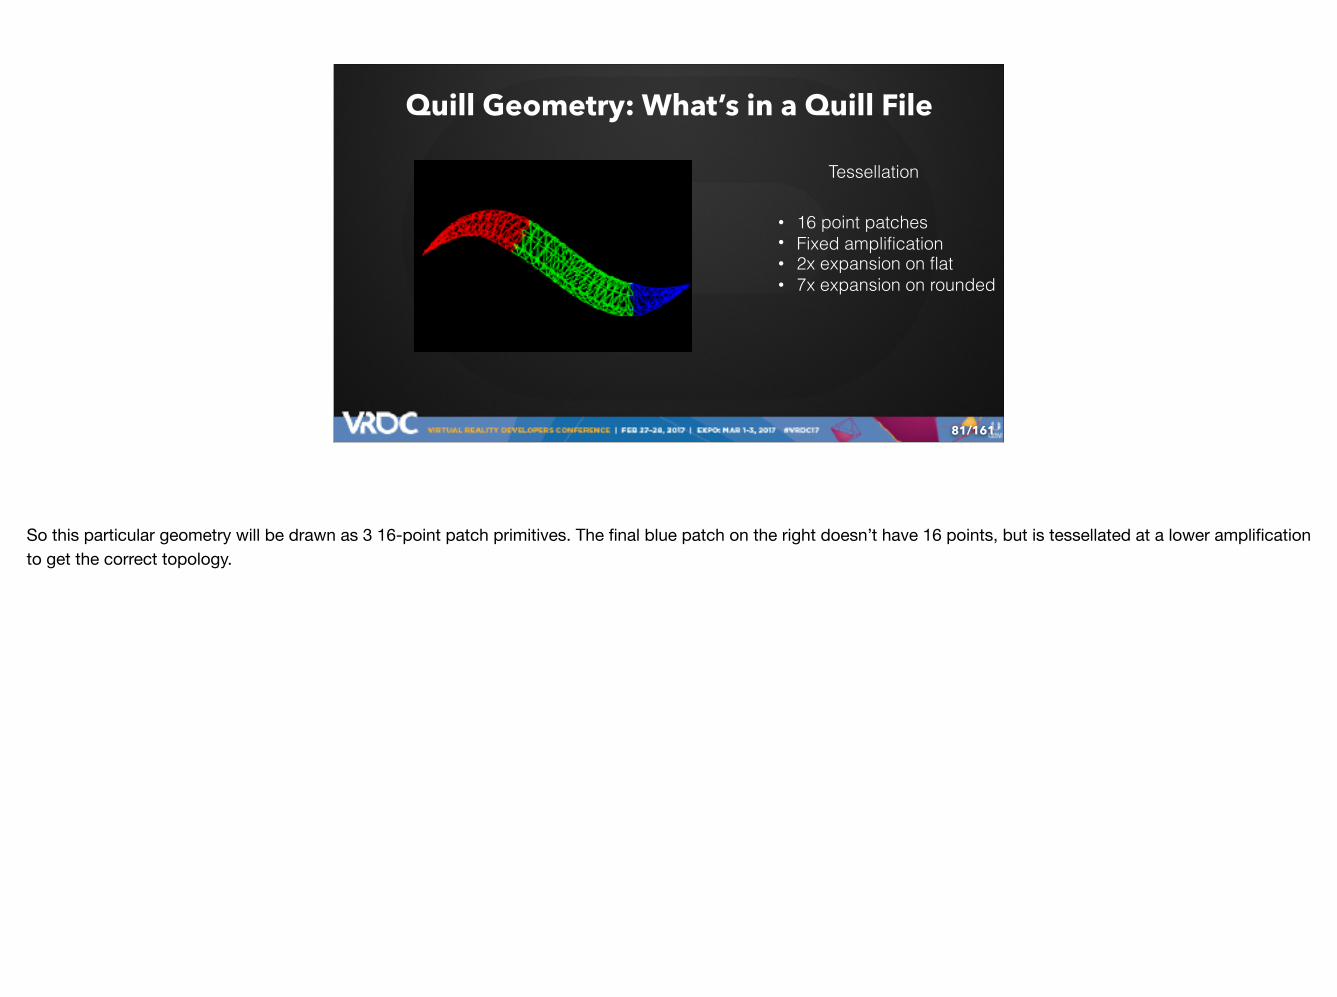
• 16 point patches • Fixed amplification • 2x expansion on flat • 7x expansion on rounded
Tessellation
So this particular geometry will be drawn as 3 16-point patch primitives. The final blue patch on the right doesn’t have 16 points, but is tessellated at a lower amplification to get the correct topology.
/161
Quill Geometry: What’s in a Quill File
82
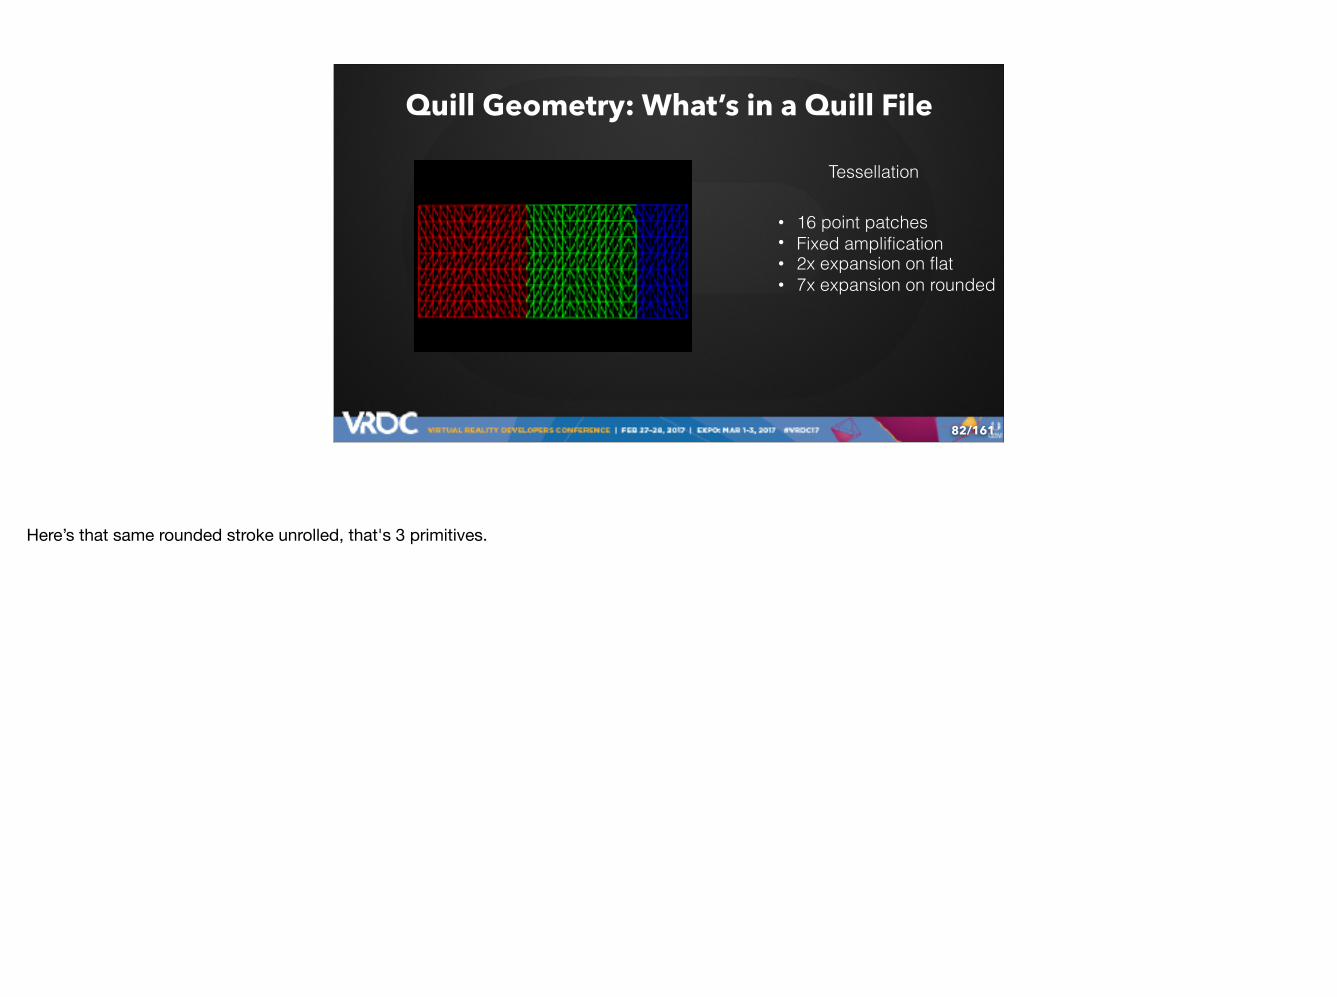
• 16 point patches • Fixed amplification • 2x expansion on flat • 7x expansion on rounded
Tessellation
Here’s that same rounded stroke unrolled, that's 3 primitives.

/161
Quill Geometry: What’s in a Quill File
83
Vertex Attributes
We’ll finish the Quill file description with a look at the vertex attributes.

/161
Quill Geometry: What’s in a Quill File
84
• Position • Normal
Vertex Attributes
Position and normal are both sampled from the controller and stored in layer space.

/161
Quill Geometry: What’s in a Quill File
85
• Position • Normal
Vertex Attributes
Normal provides a directionality to our strokes, in this case it’s a major axis for the elliptical brush.

/161
Quill Geometry: What’s in a Quill File
86
• Position • Normal • Tangent
Vertex Attributes
Tangent indicates an averaged direction to the next vertex – a tangent to the overall curve at this vertex.
/161
Quill Geometry: What’s in a Quill File
87
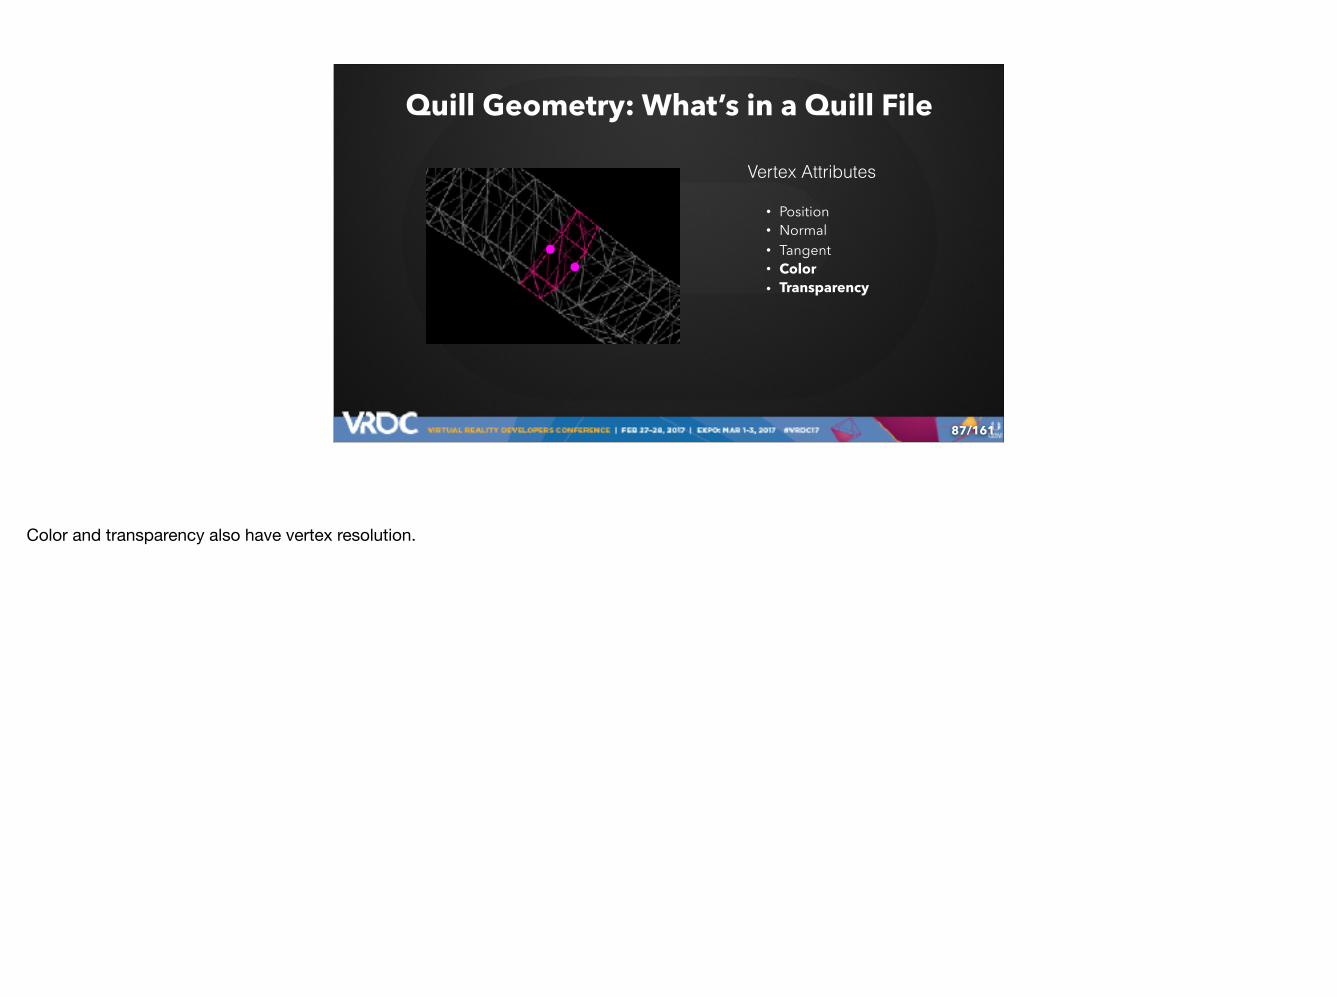
• Position • Normal • Tangent • Color • Transparency
Vertex Attributes
Color and transparency also have vertex resolution.
/161
Quill Geometry: What’s in a Quill File
88
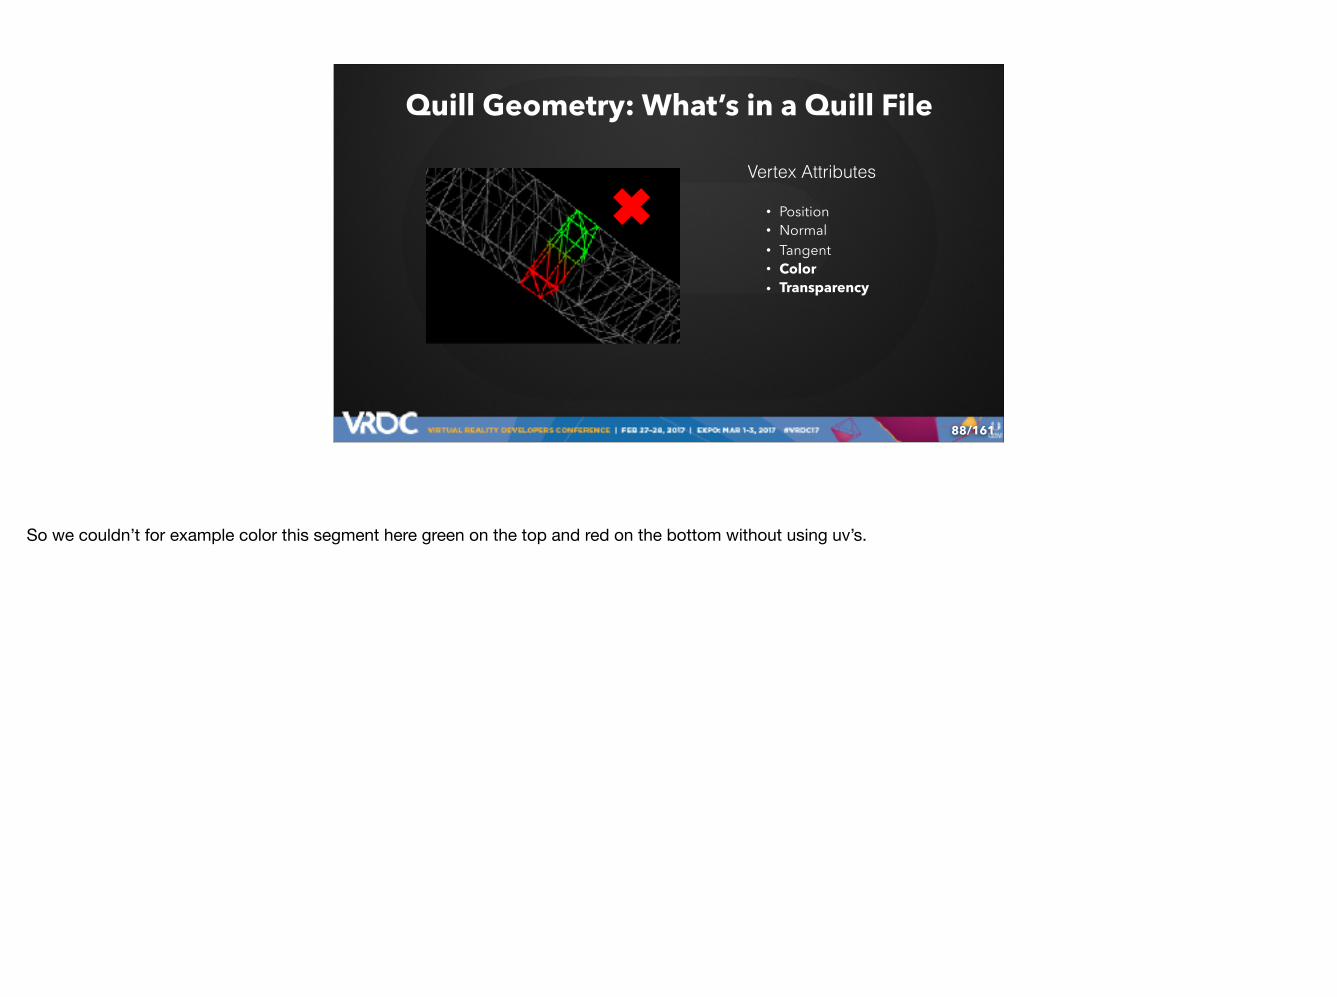
• Position • Normal • Tangent • Color • Transparency
Vertex Attributes
So we couldn’t for example color this segment here green on the top and red on the bottom without using uv’s.

/161
Quill Geometry: What’s in a Quill File
89
• Position • Normal • Tangent • Color • Transparency • Width
Vertex Attributes
Width defines the radius of the stroke’s major axis, and also has per vertex resolution.
/161
Quill Geometry: What’s in a Quill File
90
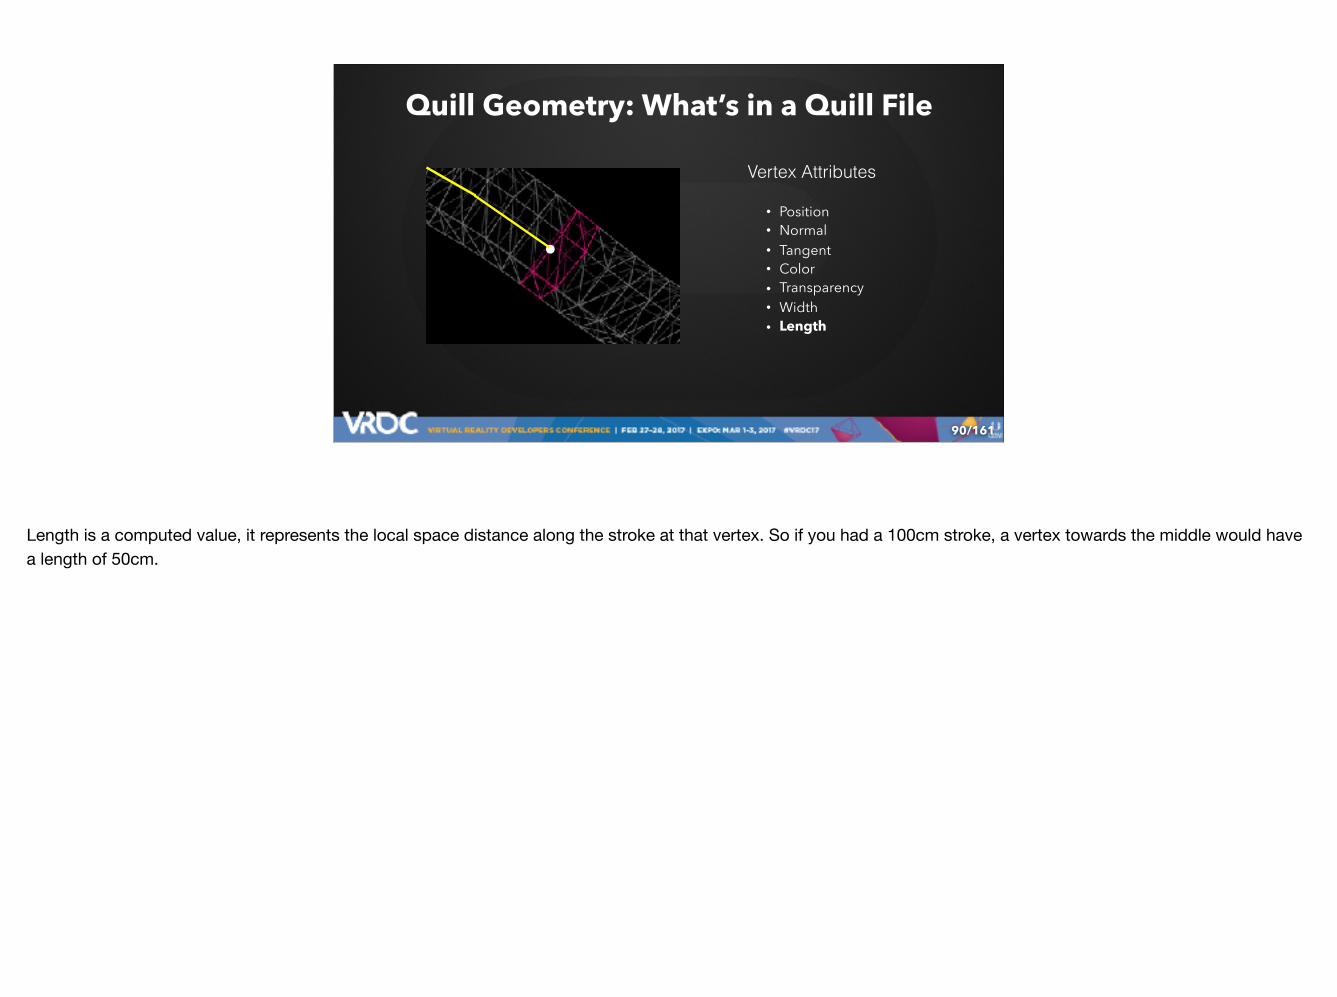
• Position • Normal • Tangent • Color • Transparency • Width • Length
Vertex Attributes
Length is a computed value, it represents the local space distance along the stroke at that vertex. So if you had a 100cm stroke, a vertex towards the middle would have a length of 50cm.
/161
Quill Geometry: What’s in a Quill File
91
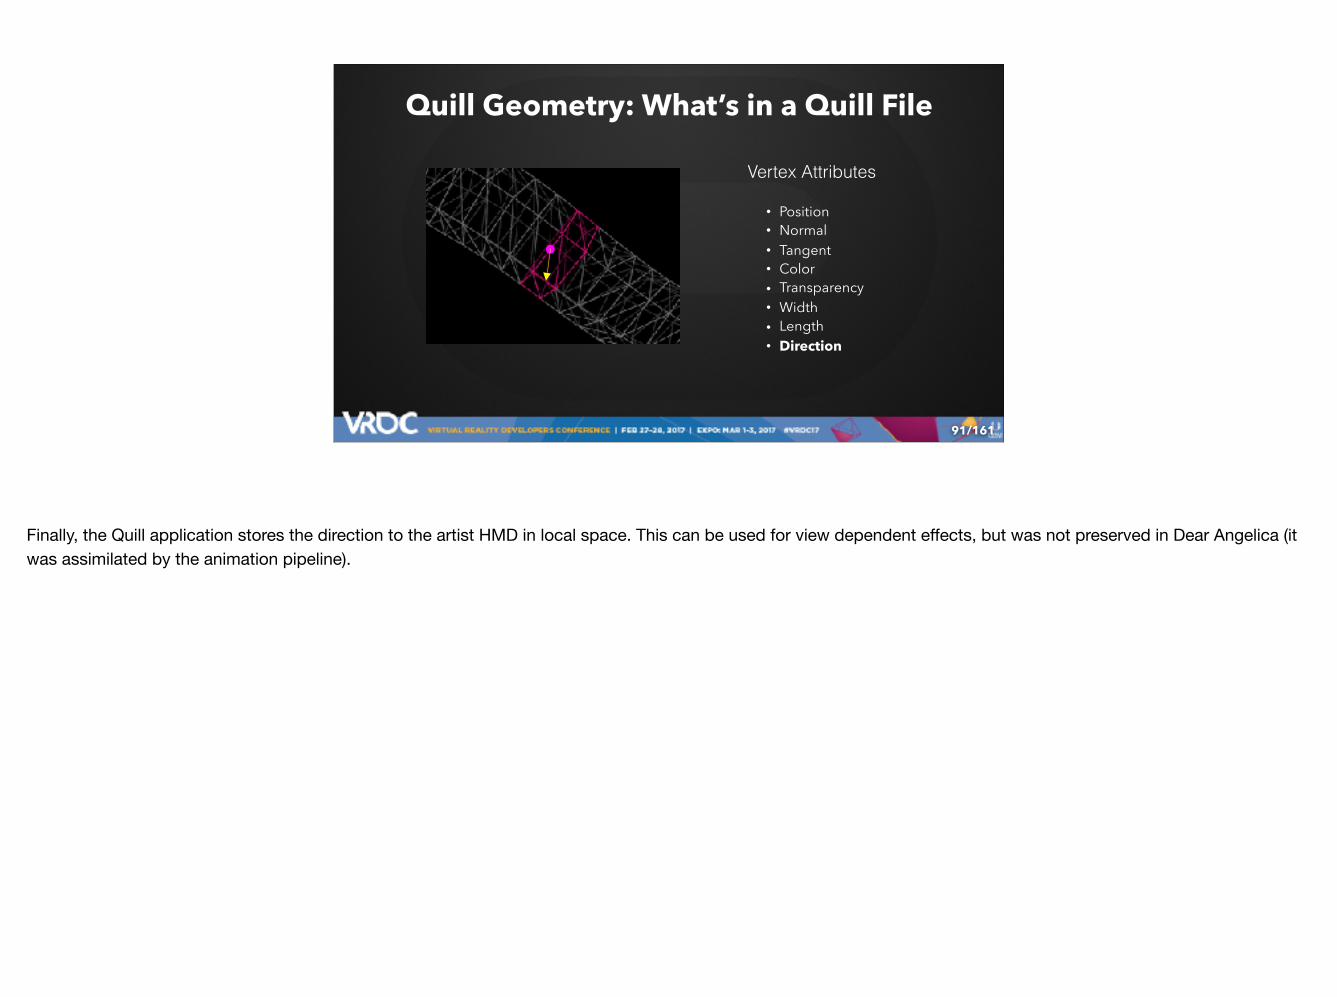
• Position • Normal • Tangent • Color • Transparency • Width • Length • Direction
Vertex Attributes
Finally, the Quill application stores the direction to the artist HMD in local space. This can be used for view dependent effects, but was not preserved in Dear Angelica (it was assimilated by the animation pipeline).
/161
Quill Geometry: Curve Geometry
92
I have just a couple remarks regarding using curve geometry on Dear Angelica.
/161
Quill Geometry: Curve Geometry
93
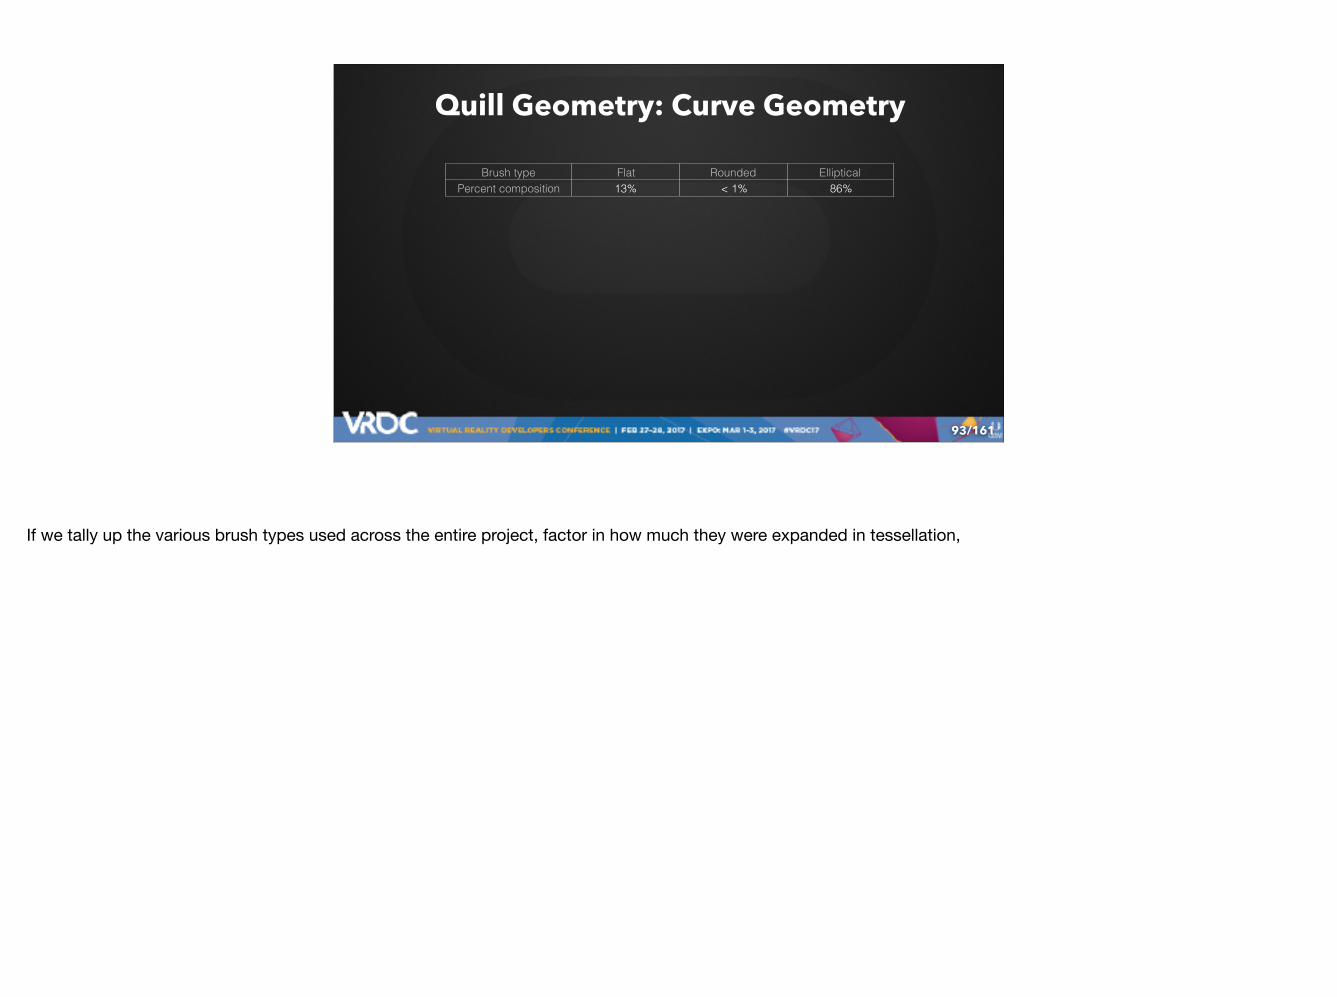
Brush type Flat Rounded EllipticalPercent composition 13% < 1% 86%
If we tally up the various brush types used across the entire project, factor in how much they were expanded in tessellation,

/161
Quill Geometry: Curve Geometry
94
Brush type Flat Rounded EllipticalPercent composition 13% < 1% 86%
Curve Geom Static MeshVertex Size 68 bytes 36 bytes
and taking into account our larger vertex size compared to what we would have needed on static meshes, we cut our memory requirements by a factor of almost 3. And that’s just for geometry memory, not including textures.
/161
Quill Geometry: Curve Geometry
95
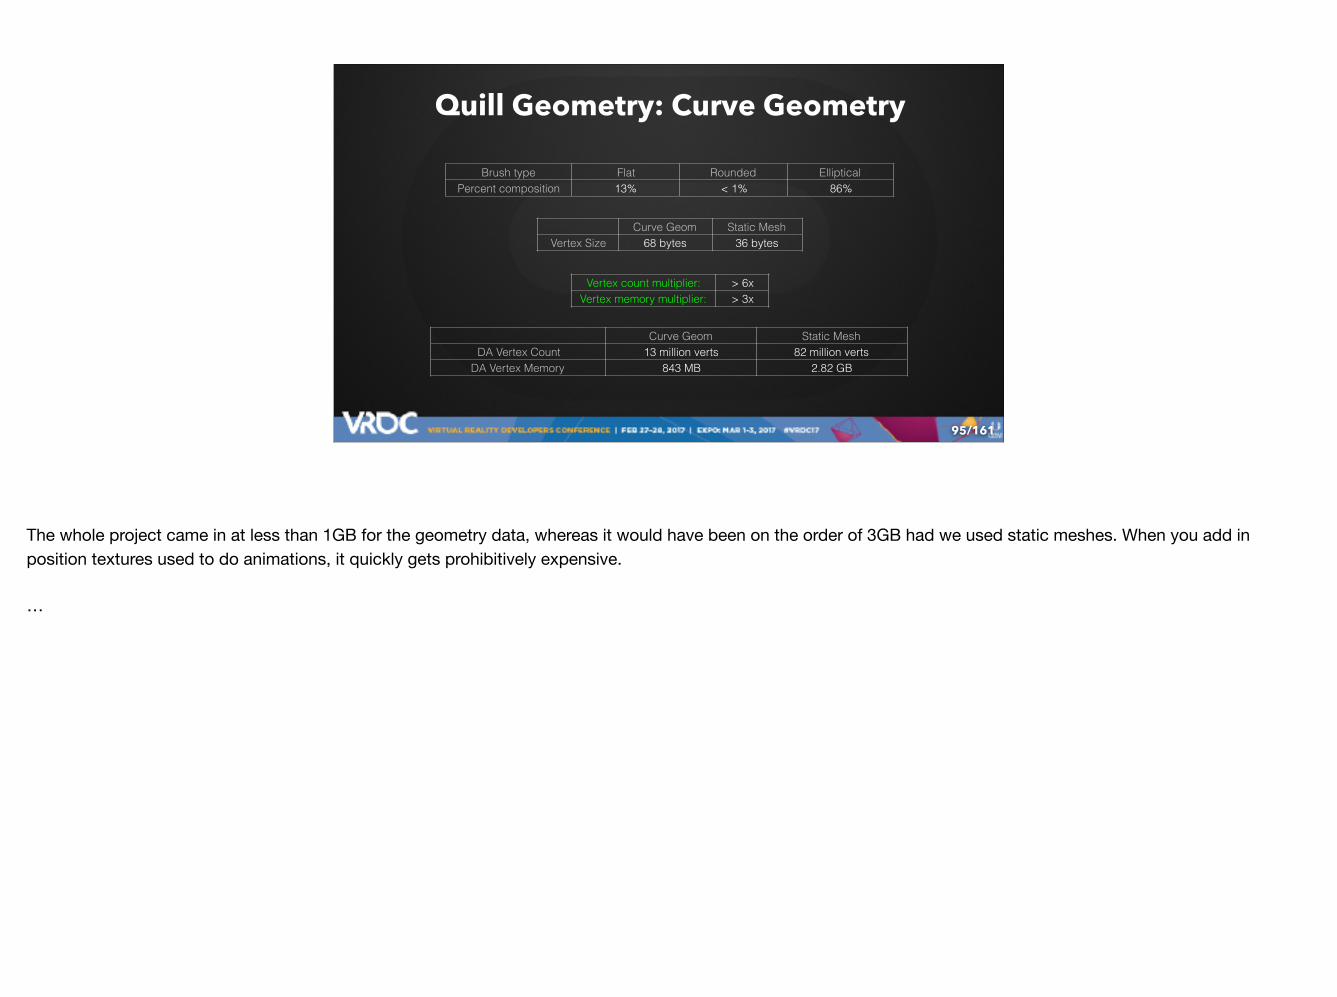
Brush type Flat Rounded EllipticalPercent composition 13% < 1% 86%
Vertex count multiplier: > 6xVertex memory multiplier: > 3x
Curve Geom Static MeshDA Vertex Count 13 million verts 82 million verts
DA Vertex Memory 843 MB 2.82 GB
Curve Geom Static MeshVertex Size 68 bytes 36 bytes
The whole project came in at less than 1GB for the geometry data, whereas it would have been on the order of 3GB had we used static meshes. When you add in position textures used to do animations, it quickly gets prohibitively expensive.
…
/161
Quill Geometry: Curve Geometry
96
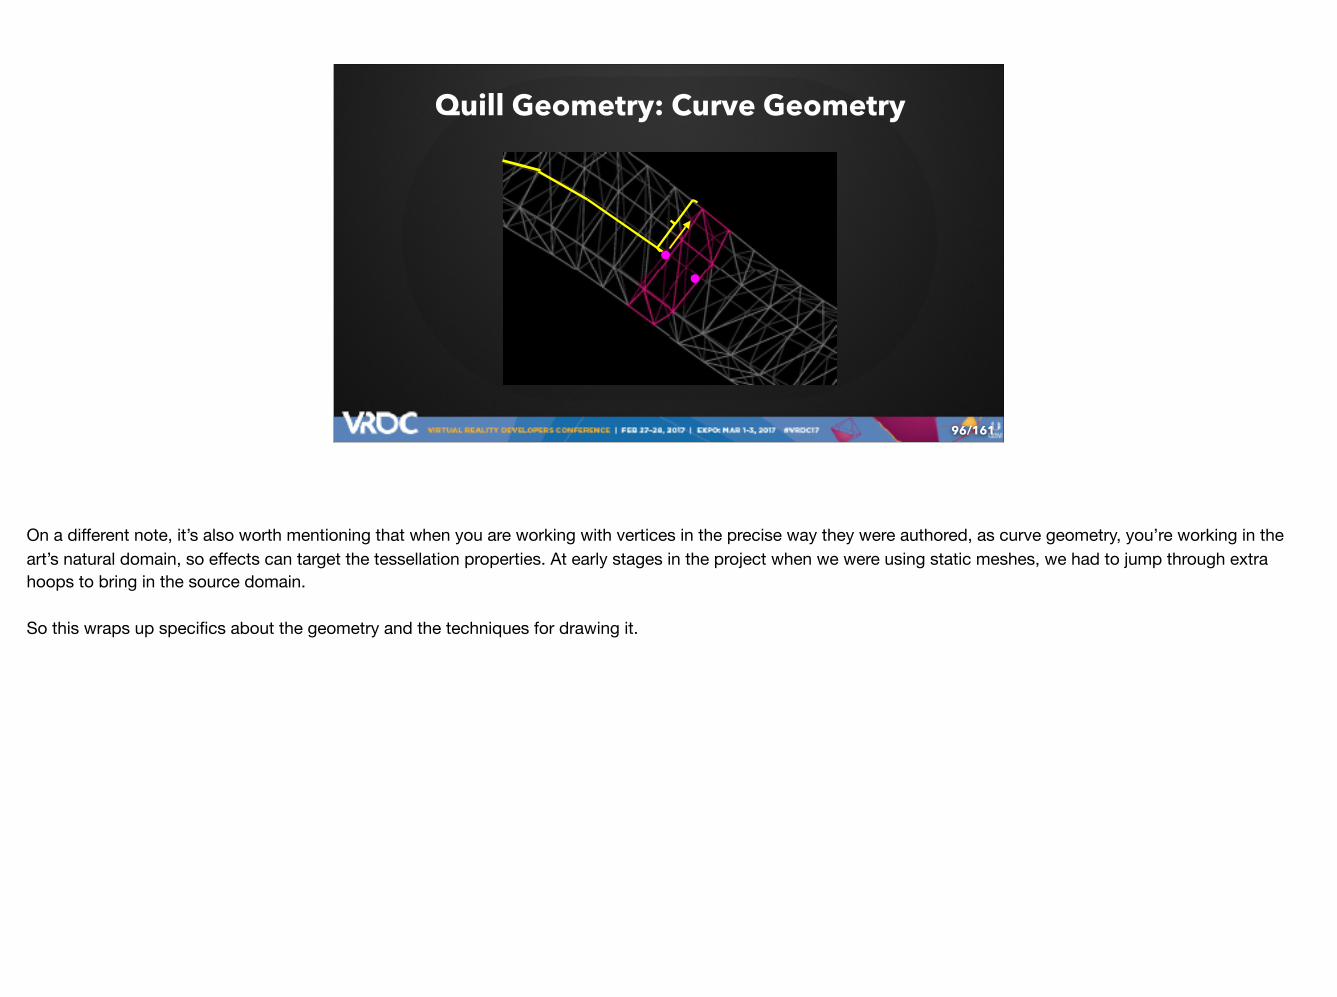
On a different note, it’s also worth mentioning that when you are working with vertices in the precise way they were authored, as curve geometry, you’re working in the art’s natural domain, so effects can target the tessellation properties. At early stages in the project when we were using static meshes, we had to jump through extra hoops to bring in the source domain.
So this wraps up specifics about the geometry and the techniques for drawing it.

/161
From Quill to Dear Angelica in Unreal Engine
97
Here I just wanted to quickly compare and contrast drawing Dear Angelica geometry in the native application vs using it in Unreal Engine. This was an interesting port in that we were taking geometry out of its ideal environment, so it’s helpful to take inventory of where we might expect things to perform differently.

/161
From Quill to Dear Angelica in Unreal Engine
98
Quill Dear AngelicaCurve Geometry Curve Geometry
They both used curve geometry.

/161
From Quill to Dear Angelica in Unreal Engine
99
Quill Dear AngelicaCurve Geometry Curve Geometry
No Lighting No Lighting
They both were unlit.

/161
From Quill to Dear Angelica in Unreal Engine
100
Quill Dear AngelicaCurve Geometry Curve Geometry
No Lighting No LightingOpenGL DirectX 11
They used different API’s, no problem, especially since we weren’t relying on using any of the relatively new stereo extensions.

/161
From Quill to Dear Angelica in Unreal Engine
101
Quill Dear AngelicaCurve Geometry Curve Geometry
No Lighting No LightingOpenGL DirectX 11Layer UI
Quill allowed turning on and off individual layers, generally used for isolating just a few things to work on at a time, or having a few different versions to flip between, but it also meant you might be looking at just a part of the whole scene.

/161
From Quill to Dear Angelica in Unreal Engine
102
Quill Dear AngelicaCurve Geometry Curve Geometry
No Lighting No LightingOpenGL DirectX 11Layer UI Scenes and Transitions
In Dear Angelica on the other hand, we would be drawing in entire scenes. In addition, we might have some cases of temporary heavy geometry use as the old scene transitioned out and the new one came in. But actually that wasn’t a big issue, since in DA scenes typically used the more sparse bedroom area as a hub.

/161
From Quill to Dear Angelica in Unreal Engine
103
Quill Dear AngelicaCurve Geometry Curve Geometry
No Lighting No LightingOpenGL DirectX 11Layer UI Scenes and Transitions
Fixed Shaders
Quill used very constant techniques for producing strokes, with very few effects.

/161
From Quill to Dear Angelica in Unreal Engine
104
Quill Dear AngelicaCurve Geometry Curve Geometry
No Lighting No LightingOpenGL DirectX 11Layer UI Scenes and Transitions
Fixed Shaders Custom Materials
In DA we were expecting complex material expressions, so that would be something to keep an eye on.

/161
From Quill to Dear Angelica in Unreal Engine
105
Quill Dear AngelicaCurve Geometry Curve Geometry
No Lighting No LightingOpenGL DirectX 11Layer UI Scenes and Transitions
Fixed Shaders Custom MaterialsStatic
Again, very few effects in Quill…

/161
From Quill to Dear Angelica in Unreal Engine
106
Quill Dear AngelicaCurve Geometry Curve Geometry
No Lighting No LightingOpenGL DirectX 11Layer UI Scenes and Transitions
Fixed Shaders Custom MaterialsStatic Animated
But in DA we’d be dealing with animated geometry, generally accomplished via the position textures coming out of Houdini, as Chris described earlier. So lots of large textures.

/161
From Quill to Dear Angelica in Unreal Engine
107
Quill Dear AngelicaCurve Geometry Curve Geometry
No Lighting No LightingOpenGL DirectX 11Layer UI Scenes and Transitions
Fixed Shaders Custom MaterialsStatic Animated
Editor Assets
One area we might hope to get some performance back would be in Quill’s support for an editing paradigm

/161
From Quill to Dear Angelica in Unreal Engine
108
Quill Dear AngelicaCurve Geometry Curve Geometry
No Lighting No LightingOpenGL DirectX 11Layer UI Scenes and Transitions
Fixed Shaders Custom MaterialsStatic Animated
Editor Assets Baked Assets
whereas we could do offline processing on our GPU layouts to get for example nice culling. Martin will talk more about this shortly.

/161
From Quill to Dear Angelica in Unreal Engine
109
Quill Dear AngelicaCurve Geometry Curve Geometry
No Lighting No LightingOpenGL DirectX 11Layer UI Scenes and Transitions
Fixed Shaders Custom MaterialsStatic Animated
Editor Assets Baked Assets90 FPS 90 FPS
All in all though, one thing that was fairly surprising to me, is that by the end of production and before we went into finalling, we weren’t that far off base in terms of performance. Especially considering these scenes were created on a more powerful machine than even rec spec. And I think a lot of this is owing to the fact that Wesley was creating this environment in the HMD at 90Hz, so scene complexity perhaps had a tendency to self-select.

/161
Unreal Engine Integration:Adding Custom Vertex Types
110
Ok so switching into Unreal Engine land now.
At the time of starting DA, it was hard to find good examples of adding custom geometry pipelines to Unreal. Stock Unreal of course supports a few different vertex types, but it supports many pathways and options for those types, making it tough to isolate what is essential for just getting something up and running.
So, the main purpose of this next slide is to itemize in 1 place all the files and classes you would need to add or modify to support custom geometry types in Unreal.

/161
Unreal Engine Integration:Adding Custom Vertex Types
‣ ImportFactory: Converts from on-disk asset to UAsset ‣ Asset: Available in asset browser, holds Source geometry (and RenderData) ‣ RenderData: Holds GPU layout geometry and GPU resources (not required) ‣ Component: References asset and material, creates SceneProxy ‣ SceneProxy: Maintained by renderer, routes draw calls to custom code ‣ ActorFactory: Adds drag and drop behavior to assets ‣ Actor: Created by ActorFactory, holds one or more Components ‣ *Material*.*: Material graph support for custom attributes ‣ VertexFactory: CPU/GPU abstract interface for vertices incoming to the GPU ‣ HLSLTranslator.h/MaterialTemplate.usf: CPU/GPU material graph plumbing ‣ BasePassVS/PS: output from VS to TS, alpha in PS ‣ Custom Tessellation Shader: Replaces stock UE tessellation shaders
111
Inherited Modified
This slide is just a reference slide, I’m not going into line by line detail here.
…
The organization here, from top to bottom, we’re moving from files on disk to pixels on screen.The lines in yellow indicate that we implemented or extended an interface, so these were systems which were intended to be extended.The lines in white indicate direct modifications to engine code. For the most part these changes were in the material system.
Don’t worry about the details listed on this slide, it’s just for reference.

/161
Unreal Engine Integration:Adding Custom Vertex Types
‣ ImportFactory: Converts from on-disk asset to UAsset ‣ Asset: Available in asset browser, holds Source geometry (and RenderData) ‣ RenderData: Holds GPU layout geometry and GPU resources (not required) ‣ Component: References asset and material, creates SceneProxy ‣ SceneProxy: Maintained by renderer, routes draw calls to custom code ‣ ActorFactory: Adds drag and drop behavior to assets ‣ Actor: Created by ActorFactory, holds one or more Components ‣ *Material*.*: Material graph support for custom attributes ‣ VertexFactory: CPU/GPU abstract interface for vertices incoming to the GPU ‣ HLSLTranslator.h/MaterialTemplate.usf: CPU/GPU material graph plumbing ‣ BasePassVS/PS: output from VS to TS, alpha in PS ‣ Custom Tessellation Shader: Replaces stock UE tessellation shaders
112
Inherited Modified
This slide is also a high level documentation for the integration which we’re working on making available in github. We continue to use the integration internally, so all the work is done, we just need to finalize a few details. More info on that at the end.

/161
Unreal Engine Integration: Adding Custom Vertex Types
113
Before moving on to the final section, I wanted to outline a few things we did (or didn’t do) during the integration which might be helpful:

/161
Unreal Engine Integration: Adding Custom Vertex Types
1. Start in a standalone/sandbox application
114
One thing I wish we had done right from the start was set up a standalone application for quick iteration. We did have a working reference implementation in the Quill app itself, but it was in OpenGL and was managing data a little differently on account of the very detailed editing paradigm.
If we had spent the time to get a DirectX implementation working in a tiny application, and then just dropped that into UE, we could have isolated technique problems from plumbing problems.
Especially if you’re modifying MaterialTemplate.usf, VertexFactory.usf, or the BasePass shaders, it’s helpful to minimize the attempts there.
And especially with VR, understanding how vertex size and GPU pipeline and stereo rendering techniques intersect, it’s handy to be able to iterate on those combinations quickly. Of course when you bring those techniques back into UE you may still get different results, but it will help you isolate the differences.

/161
Unreal Engine Integration: Adding Custom Vertex Types
1. Start in a standalone/sandbox application 2. Separate Source and GPU data
115
Separate source and GPU data. This is a pattern implemented in StaticMesh, which keeps the source vertices around, which we adopted as well. Again, as we were experimenting with different shader stages and vertex sizes, having a different representation for a source vertex and a gpu vertex built in was super helpful. We were able to switch from geometry shaders to tessellation shaders to hardware instancing and back in a pretty safe manner because we had a clear separation of our data structures here.

/161
Unreal Engine Integration: Adding Custom Vertex Types
1. Start in a standalone/sandbox application 2. Separate Source and GPU data 3. ConsoleVariables.ini : r.ShaderDevelopmentMode=1
116
And lastly, ConsoleVariables.ini shader debugging mode is incredibly helpful to make sure the right values are getting connected to the correct spots. This option is probably common knowledge, but imagine trying to diagnose material problems BEFORE knowing about it, and then finding it, and being so grateful. That’s why it’s #3.

/161
Performance Graphs
117
Dear Angelica was an ambitious project on a short schedule, and when you add to that a new geometry type that needs to draw at 90FPS or better, you want to be confident about shipping.
We put together a simple system that really gave us some peace of mind in identifying issues clearly and quickly. The key parts were:

/161
Performance Graphs
118
• Pilot Performance
Pilot performance, correct simulation of an actual person in the headset.

/161
Performance Graphs
119
• Pilot Performance • Measurement
Measuring not just FPS but actionable values.
/161
Performance Graphs
120
• Pilot Performance • Measurement • Automation
And being able to do the above very easily.

/161
Performance Graphs: Pilot Performance
121
When we first had Quill assets drawing in Unreal,
/161
Performance Graphs: Pilot Performance
122
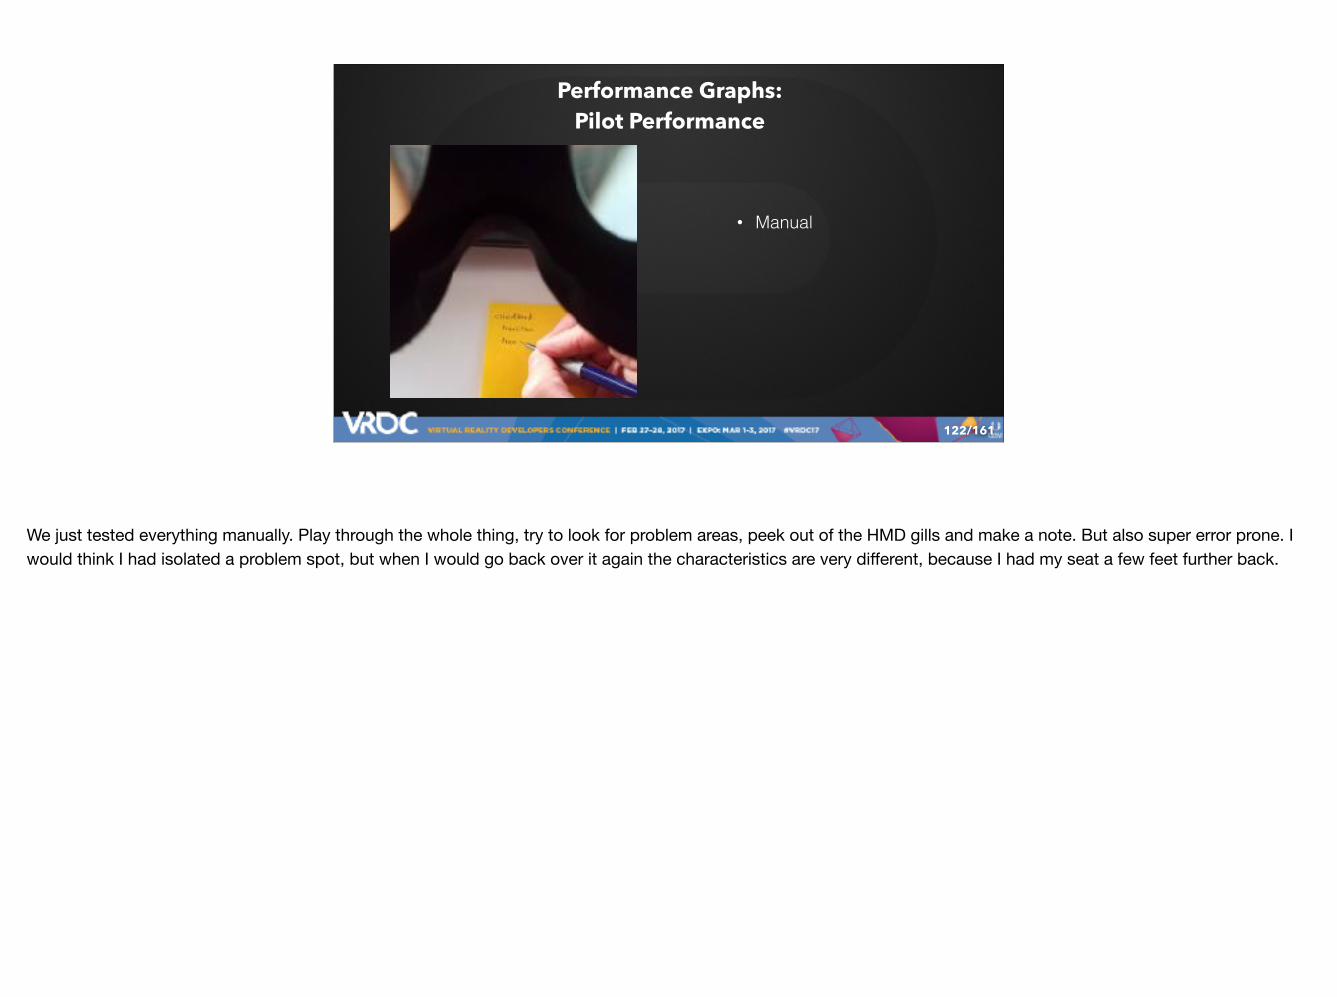
• Manual
We just tested everything manually. Play through the whole thing, try to look for problem areas, peek out of the HMD gills and make a note. But also super error prone. I would think I had isolated a problem spot, but when I would go back over it again the characteristics are very different, because I had my seat a few feet further back.
/161
Performance Graphs: Pilot Performance
123
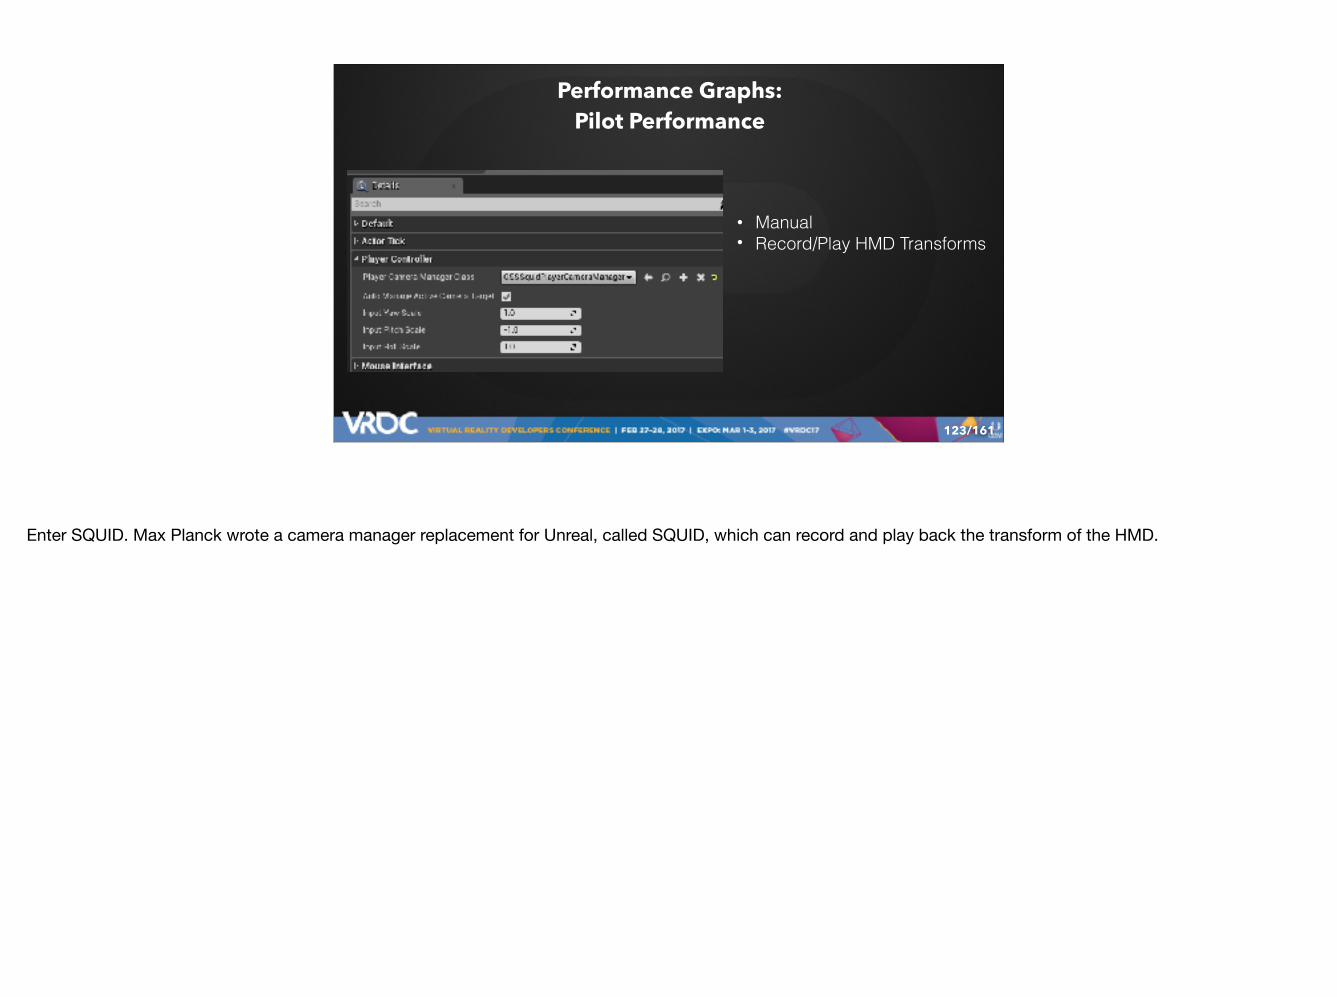
• Manual • Record/Play HMD Transforms
Enter SQUID. Max Planck wrote a camera manager replacement for Unreal, called SQUID, which can record and play back the transform of the HMD.
/161
Performance Graphs: Pilot Performance
124
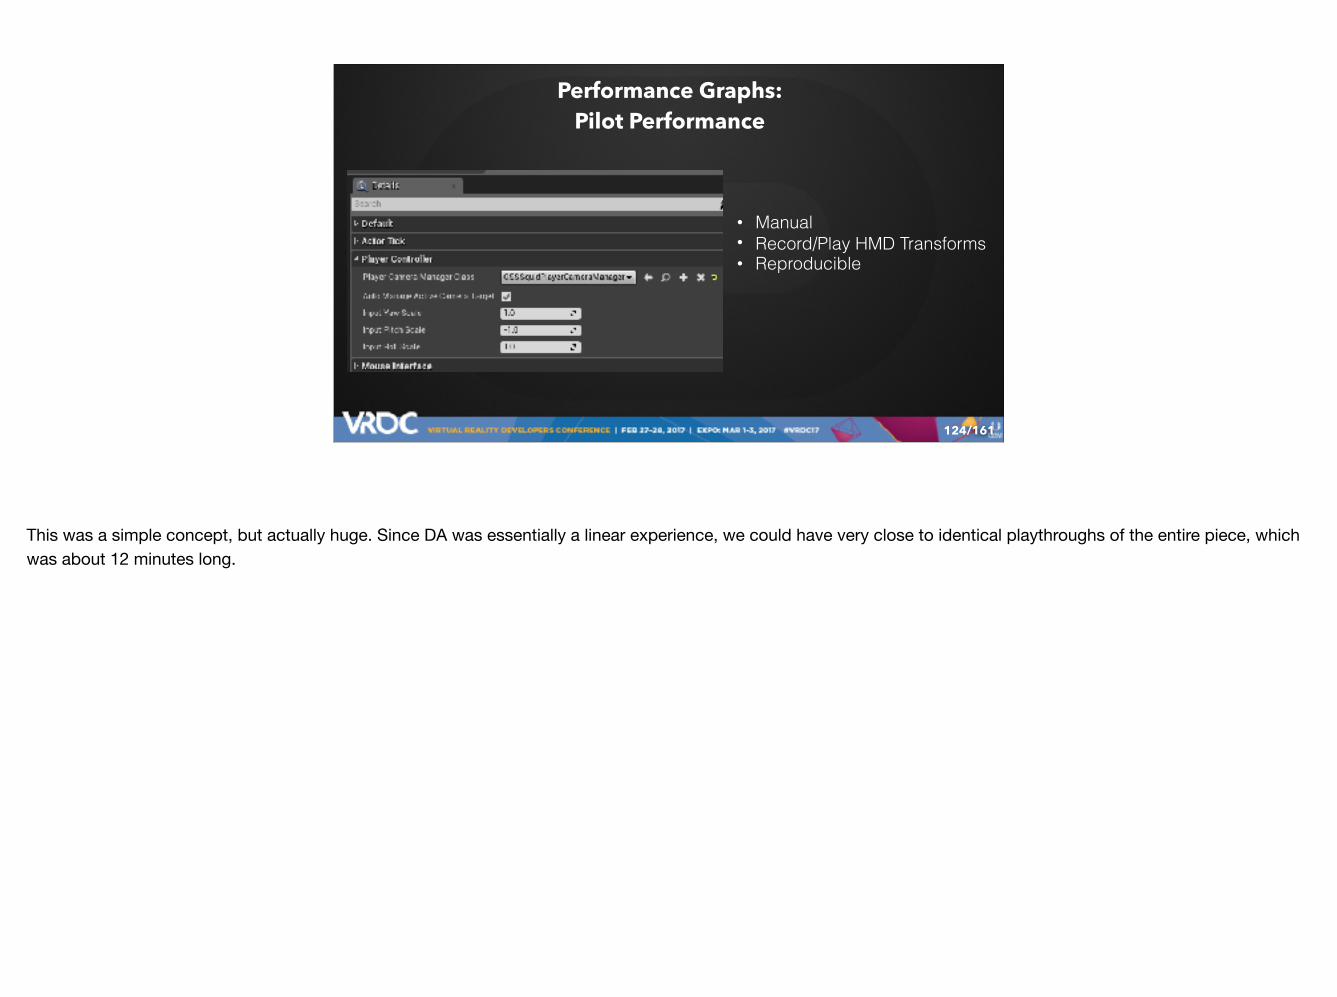
• Manual • Record/Play HMD Transforms • Reproducible
This was a simple concept, but actually huge. Since DA was essentially a linear experience, we could have very close to identical playthroughs of the entire piece, which was about 12 minutes long.
/161
Performance Graphs: Pilot Performance
125
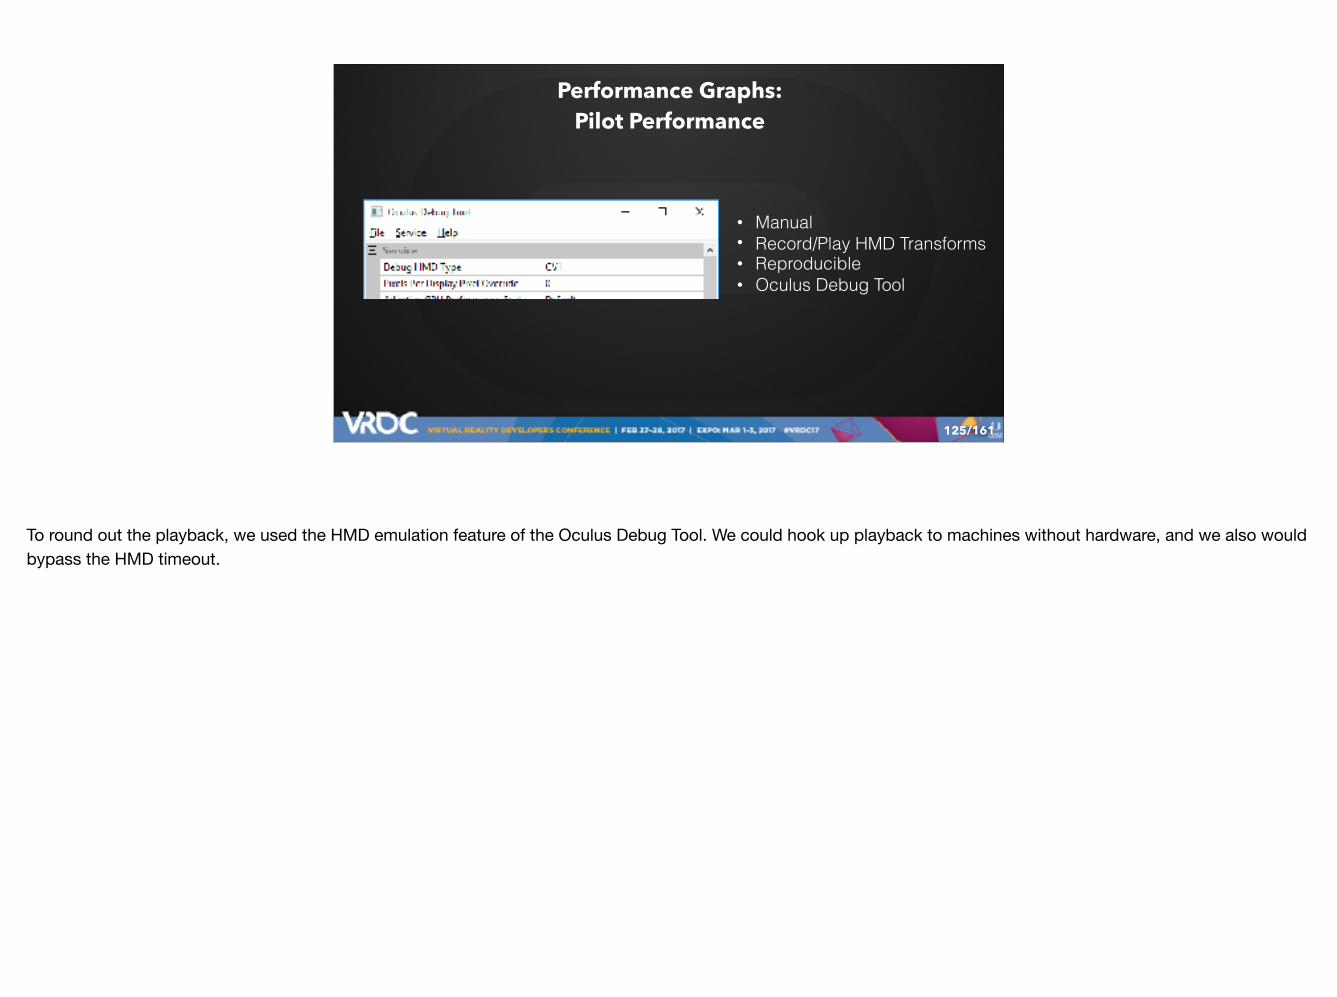
• Manual • Record/Play HMD Transforms • Reproducible • Oculus Debug Tool
To round out the playback, we used the HMD emulation feature of the Oculus Debug Tool. We could hook up playback to machines without hardware, and we also would bypass the HMD timeout.
/161
Performance Graphs: Measurement
126
Correct measurement of judder actually proved tricky for us.
/161
Performance Graphs: Measurement
127
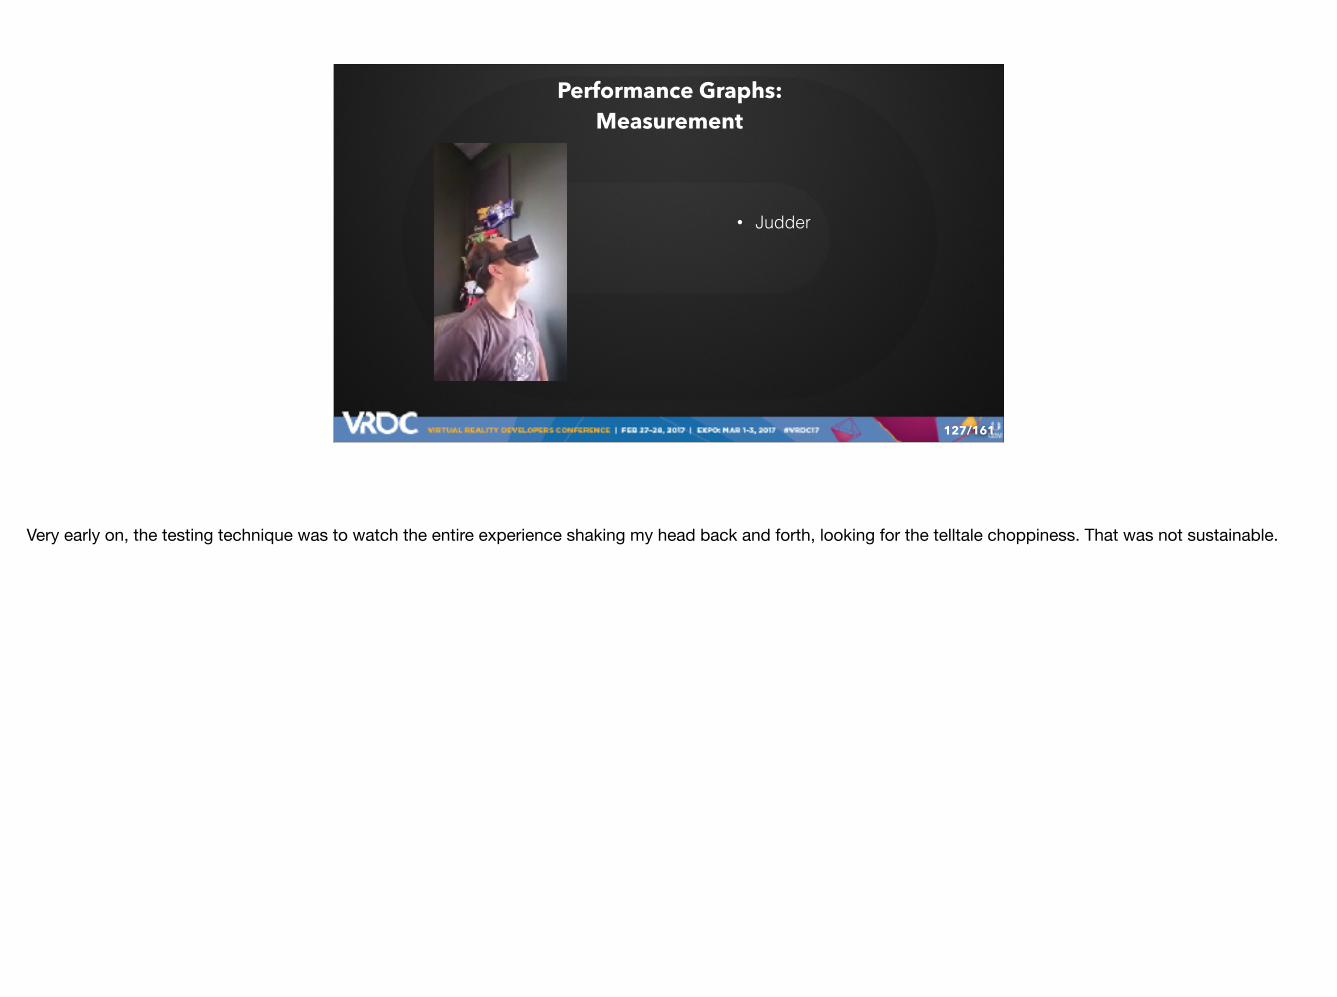
• Judder
Very early on, the testing technique was to watch the entire experience shaking my head back and forth, looking for the telltale choppiness. That was not sustainable.
/161
Performance Graphs: Measurement
128
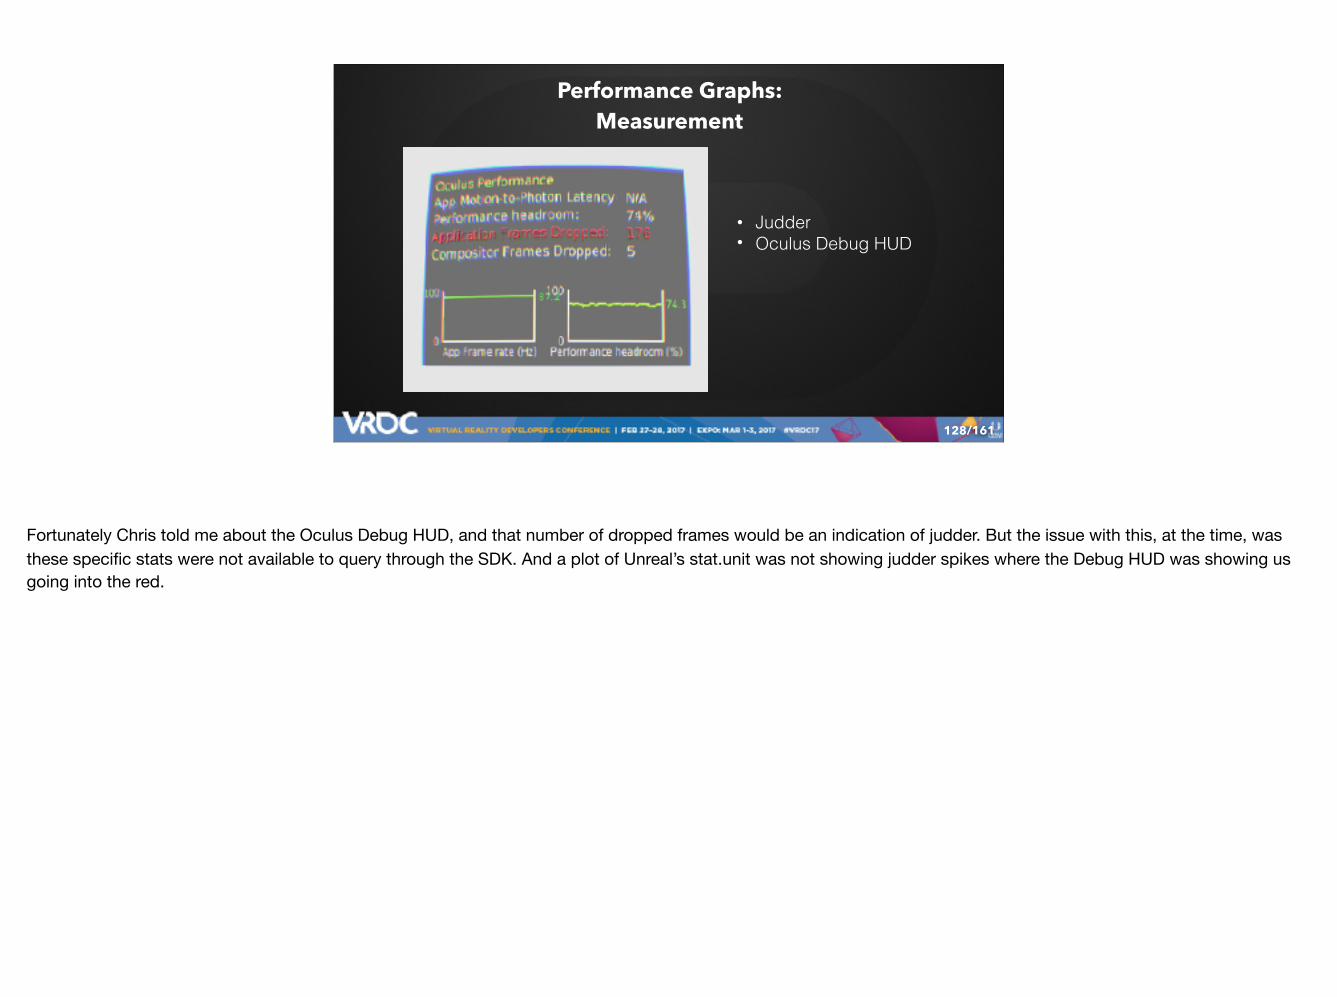
• Judder • Oculus Debug HUD
Fortunately Chris told me about the Oculus Debug HUD, and that number of dropped frames would be an indication of judder. But the issue with this, at the time, was these specific stats were not available to query through the SDK. And a plot of Unreal’s stat.unit was not showing judder spikes where the Debug HUD was showing us going into the red.
/161
Performance Graphs: Measurement
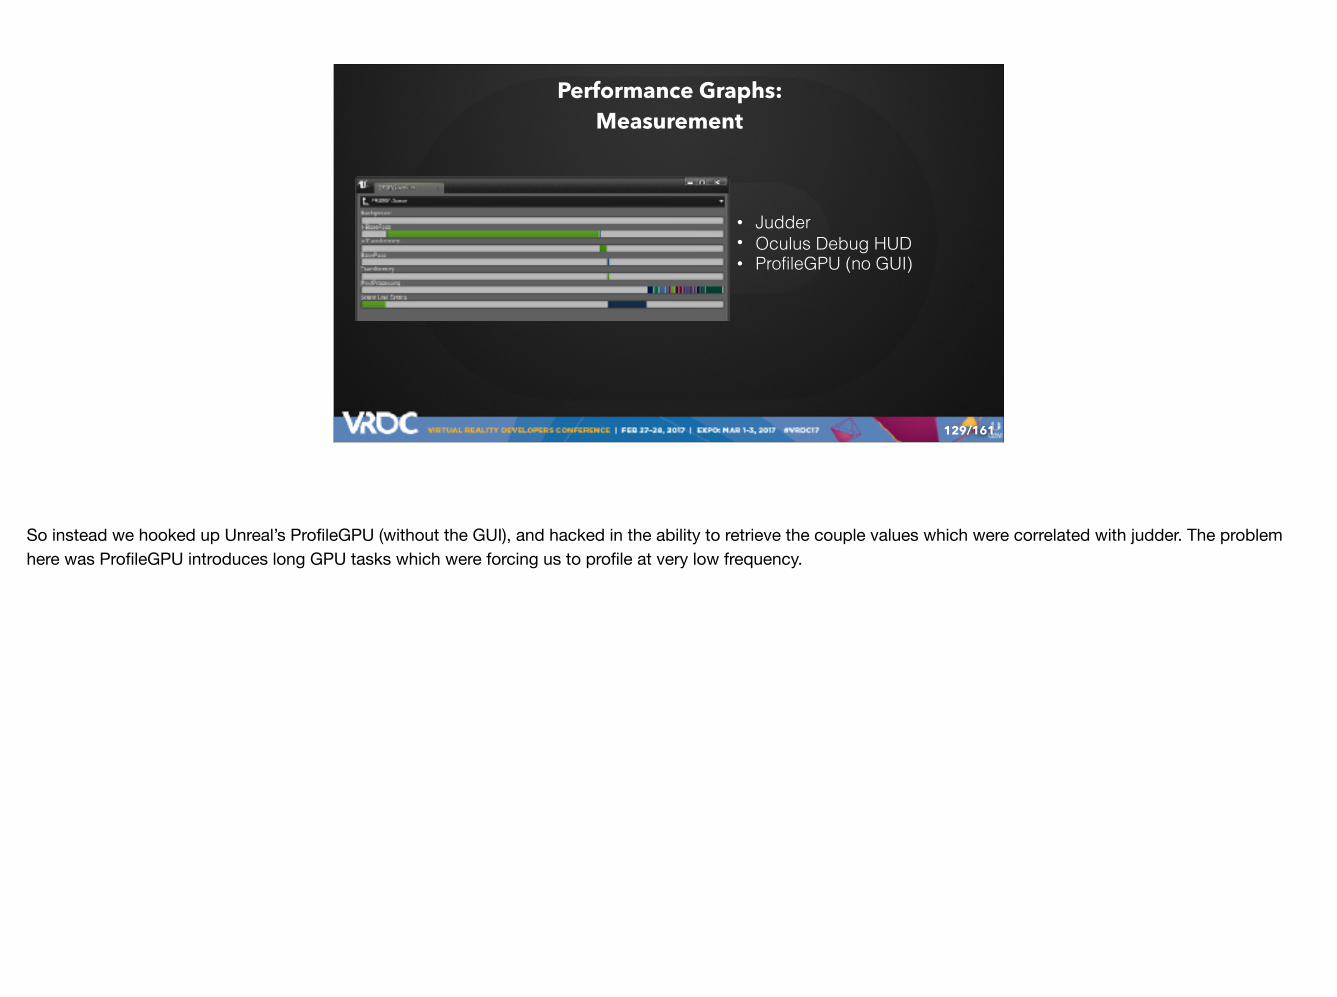
129
• Judder • Oculus Debug HUD • ProfileGPU (no GUI)
So instead we hooked up Unreal’s ProfileGPU (without the GUI), and hacked in the ability to retrieve the couple values which were correlated with judder. The problem here was ProfileGPU introduces long GPU tasks which were forcing us to profile at very low frequency.
/161
Performance Graphs: Measurement
130
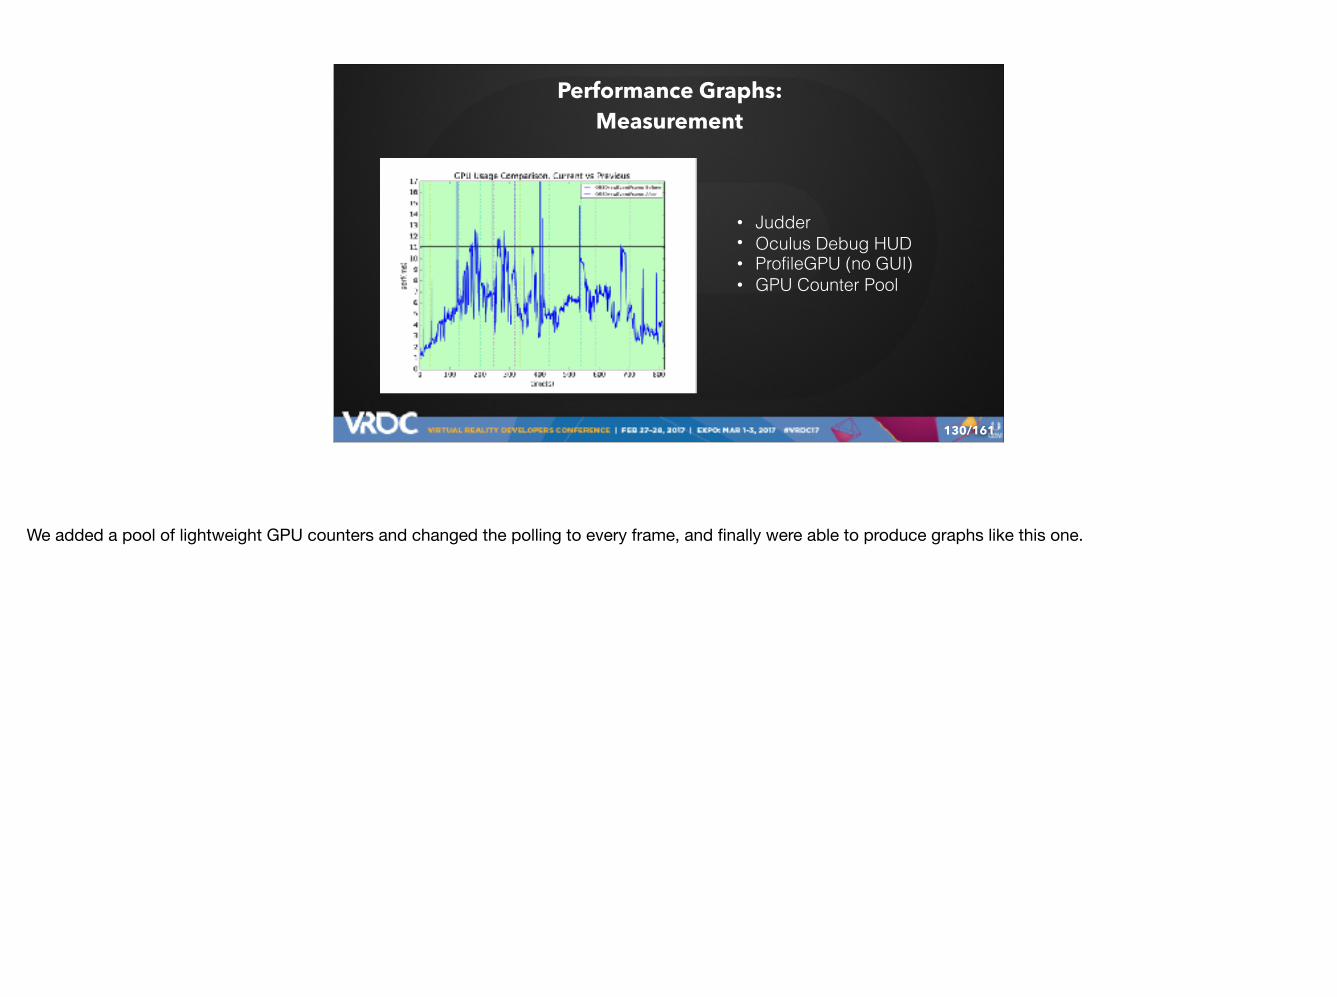
• Judder • Oculus Debug HUD • ProfileGPU (no GUI) • GPU Counter Pool
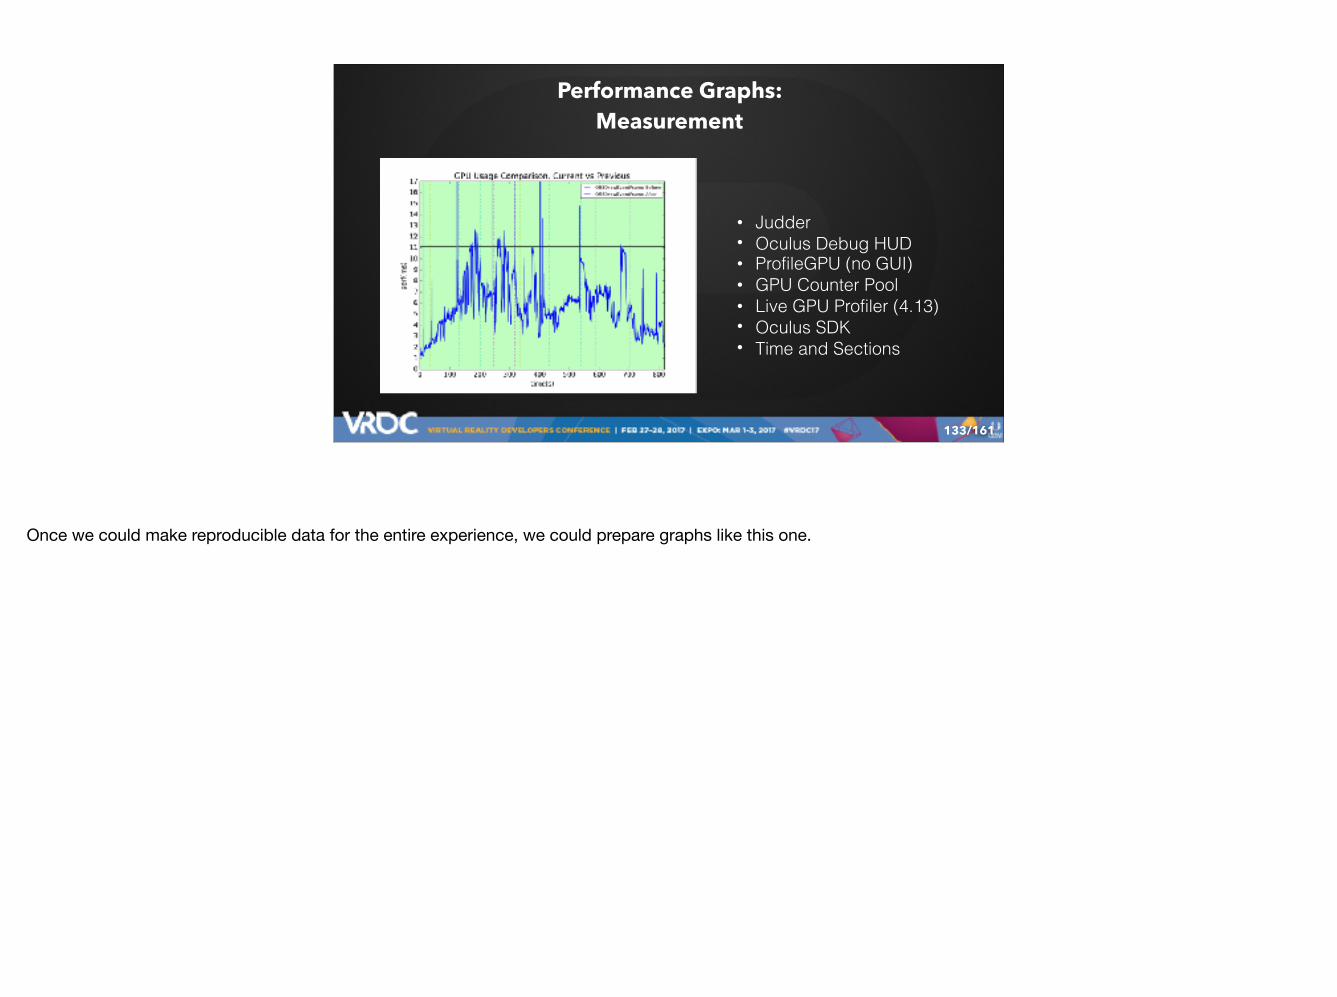
We added a pool of lightweight GPU counters and changed the polling to every frame, and finally were able to produce graphs like this one.
/161
Performance Graphs: Measurement
131
• Judder • Oculus Debug HUD • ProfileGPU (no GUI) • GPU Counter Pool • Live GPU Profiler (4.13)
As an aside, if we were to do this again today, we’d probably look at the Live GPU Profiler first which was added in UE4.13.
/161
Performance Graphs: Measurement
132
• Judder • Oculus Debug HUD • ProfileGPU (no GUI) • GPU Counter Pool • Live GPU Profiler (4.13) • Oculus SDK
Or better yet, the Oculus SDK now supports querying the exact performance stats we wanted.
/161
Performance Graphs: Measurement
133
• Judder • Oculus Debug HUD • ProfileGPU (no GUI) • GPU Counter Pool • Live GPU Profiler (4.13) • Oculus SDK • Time and Sections
Once we could make reproducible data for the entire experience, we could prepare graphs like this one.
/161
Performance Graphs: Measurement
134
• Judder • Oculus Debug HUD • ProfileGPU (no GUI) • GPU Counter Pool • Live GPU Profiler (4.13) • Oculus SDK • Time and Sections
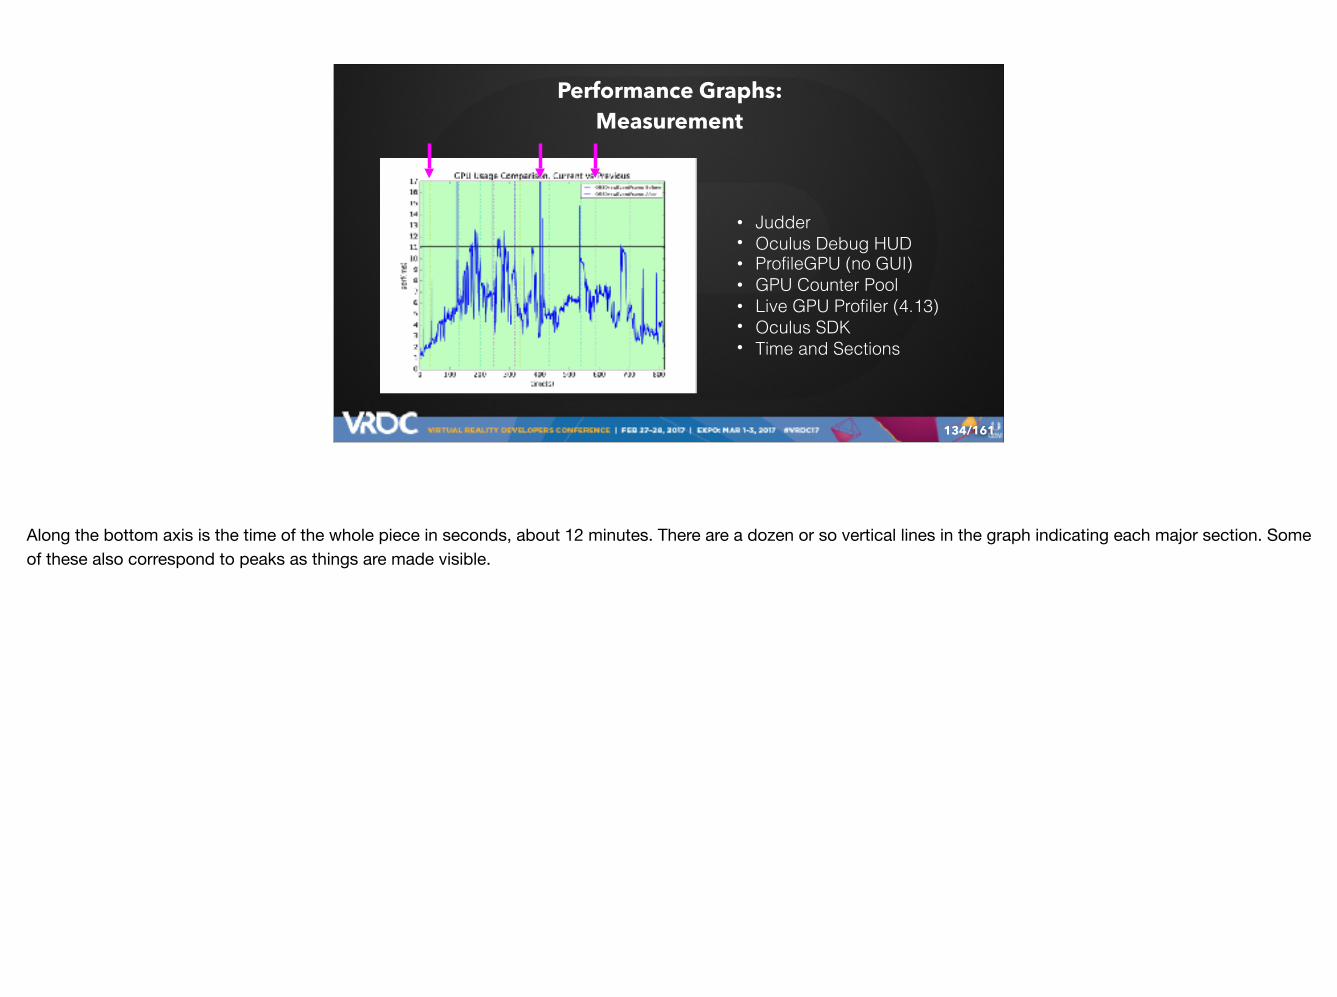
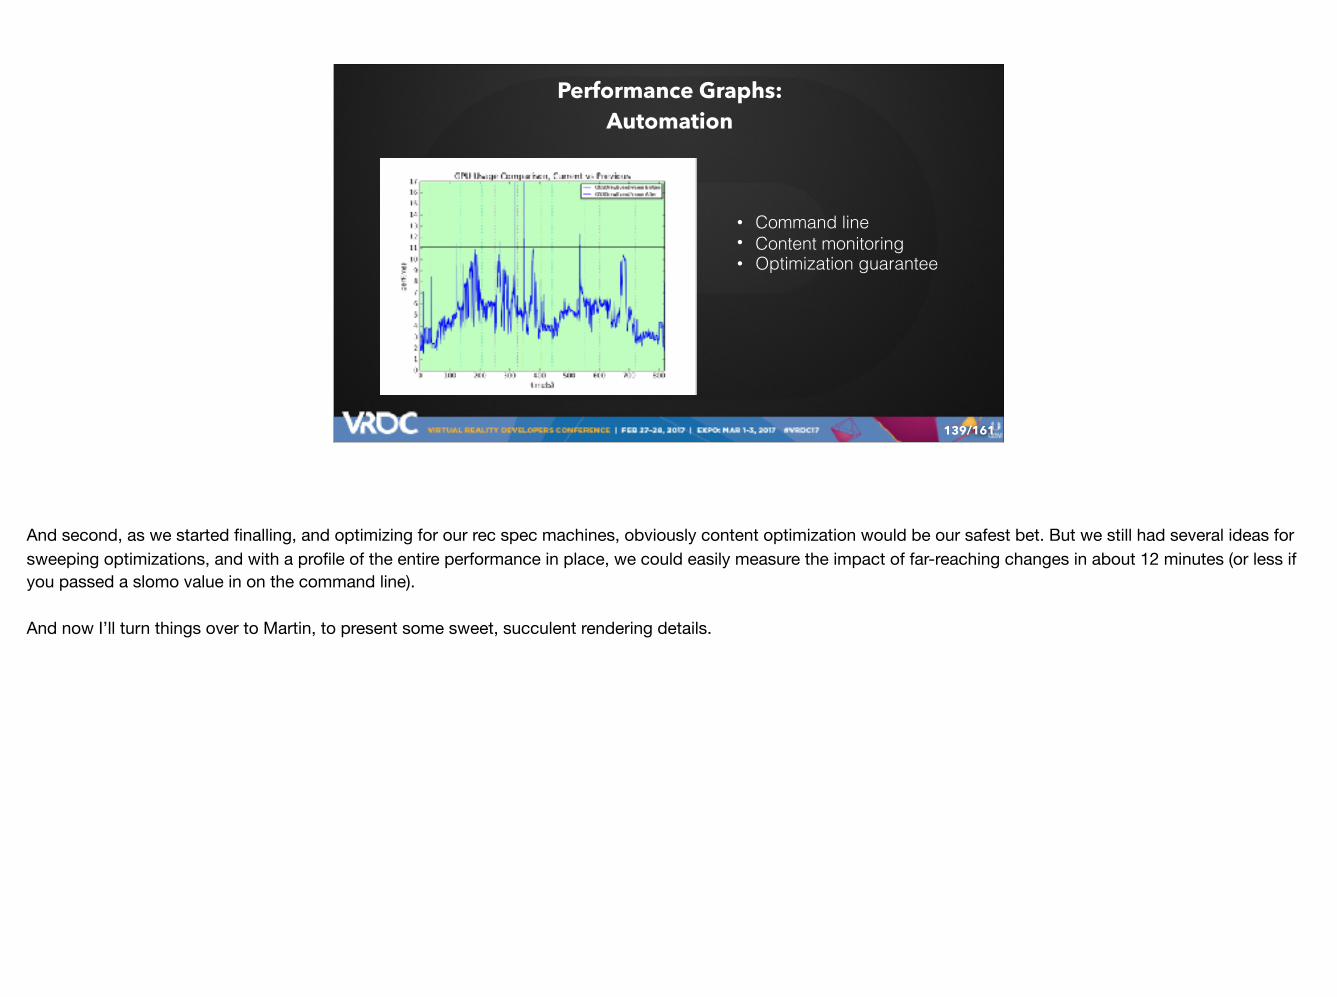
Along the bottom axis is the time of the whole piece in seconds, about 12 minutes. There are a dozen or so vertical lines in the graph indicating each major section. Some of these also correspond to peaks as things are made visible.

/161
Performance Graphs: Measurement
135
• Judder • Oculus Debug HUD • ProfileGPU (no GUI) • GPU Counter Pool • Live GPU Profiler (4.13) • Oculus SDK • Time and Sections • The 11.1ms Line
Note the line marking 11.1ms. You can see in this graph we were having some problems in the first main scene, just before 200 seconds, and again before 300.

/161
Performance Graphs: Automation
136
Finally, the finishing touch of automation.
/161
Performance Graphs: Automation
137
• Command line
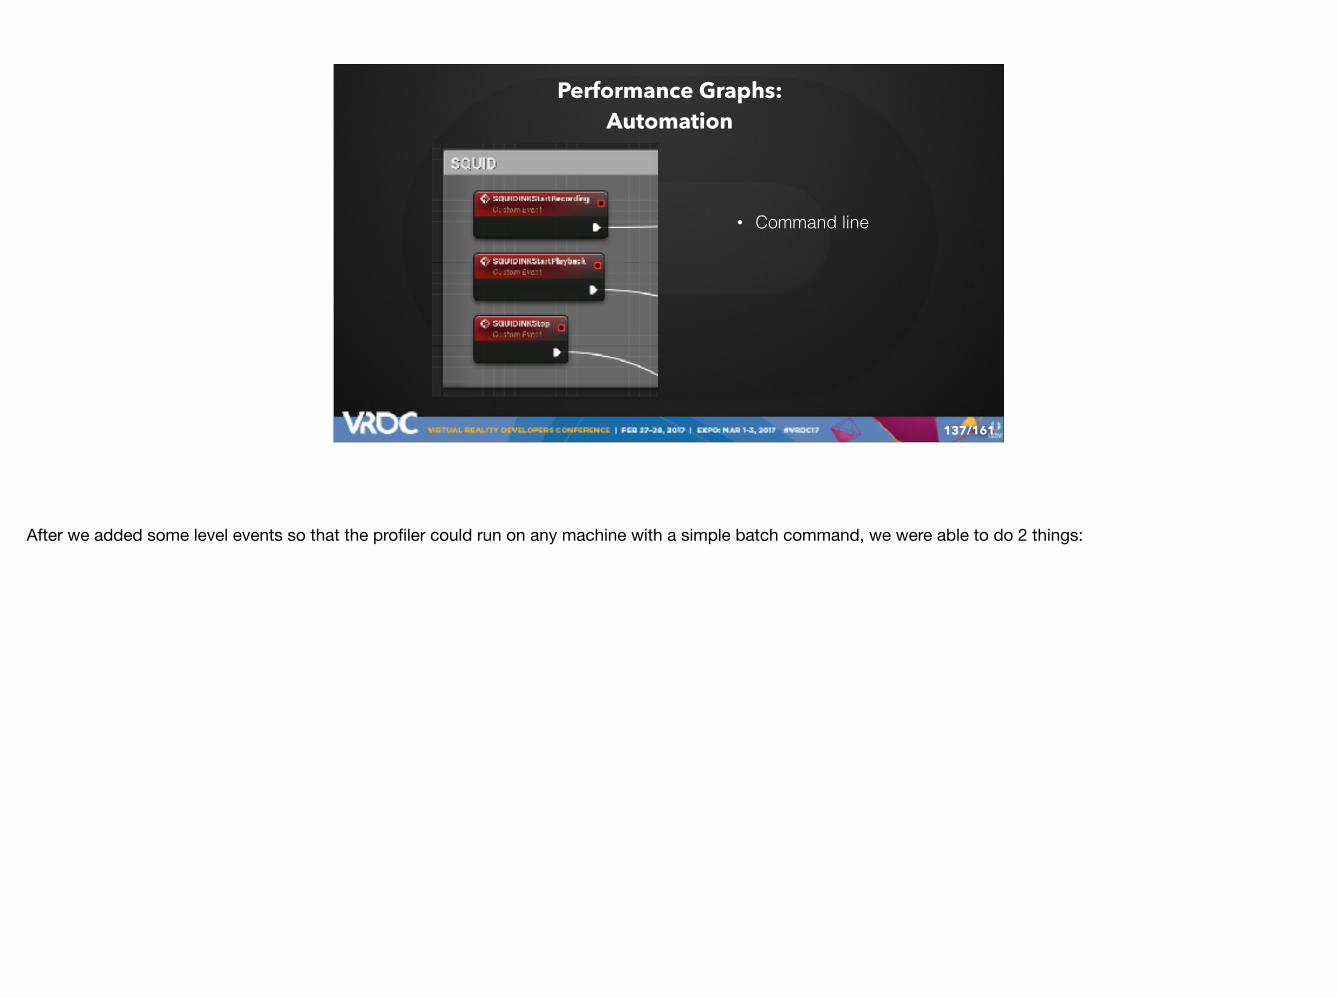
After we added some level events so that the profiler could run on any machine with a simple batch command, we were able to do 2 things:
/161
Performance Graphs: Automation
138
• Command line • Content monitoring
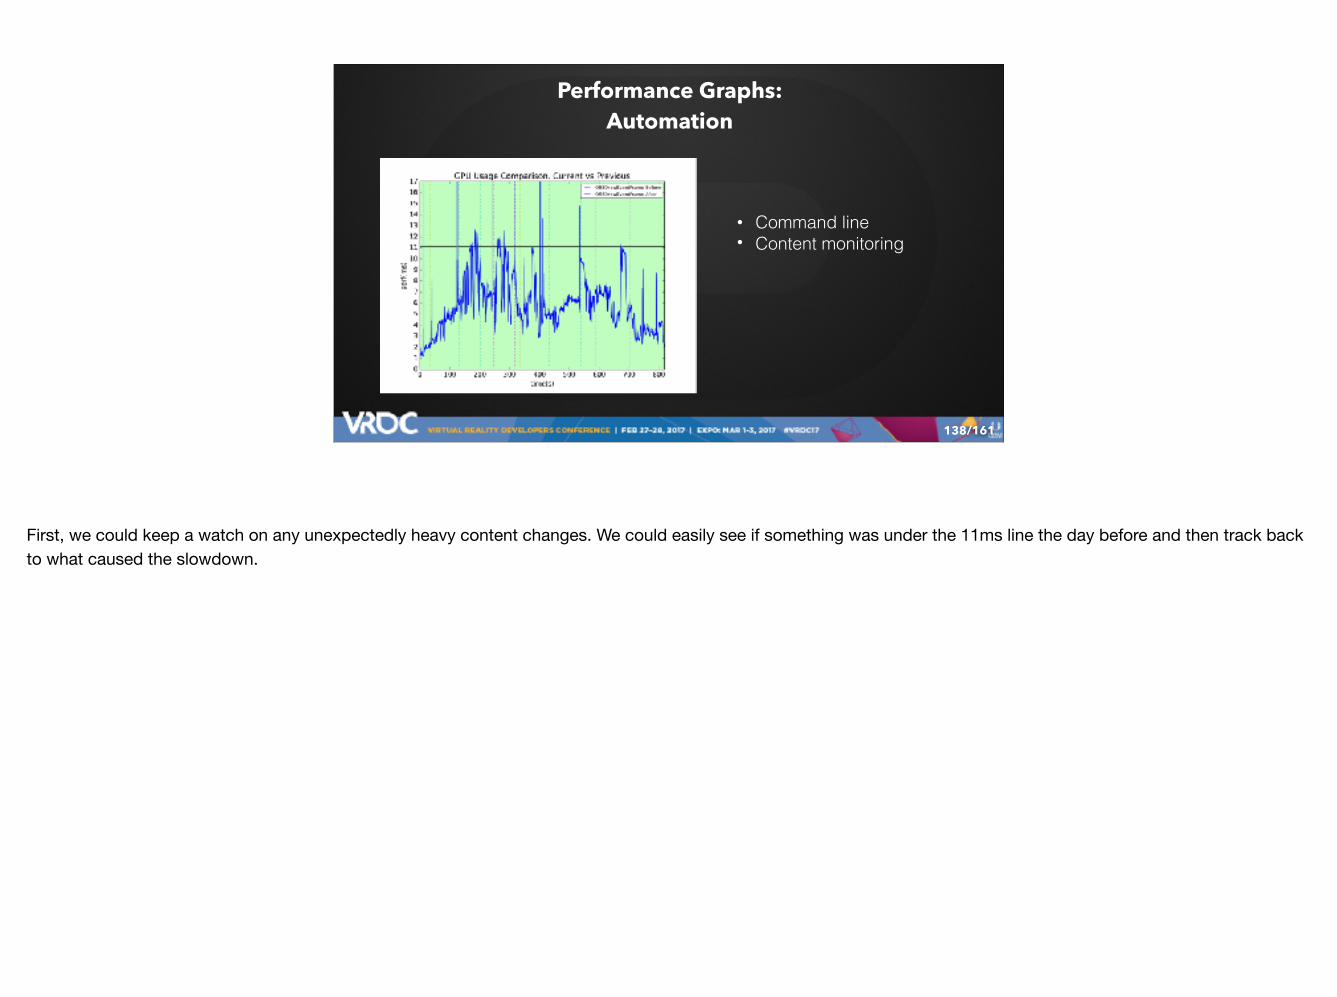
First, we could keep a watch on any unexpectedly heavy content changes. We could easily see if something was under the 11ms line the day before and then track back to what caused the slowdown.
/161
Performance Graphs: Automation
139
• Command line • Content monitoring • Optimization guarantee
And second, as we started finalling, and optimizing for our rec spec machines, obviously content optimization would be our safest bet. But we still had several ideas for sweeping optimizations, and with a profile of the entire performance in place, we could easily measure the impact of far-reaching changes in about 12 minutes (or less if you passed a slomo value in on the command line).
And now I’ll turn things over to Martin, to present some sweet, succulent rendering details.

/161140

/161
Why using hardware tessellation?
‣ Quill stroke / vertex data is not yet geometry ‣Options:
- Static geometry: Too much memory - Geometry Shader: Convenient but slow on some hardware - Hardware Instancing:
- Tessellation:
141
One Instance(more vertices
would be better)
Only fast for simpler materials
(VS runs per stroke vertex, patch is 16 stroke vertices)
(VS runs per output vertex, artist used textures for animation)Hull shader allows fine grained culling

/161
Draw Calls
‣ Batch geometry to reduce draw calls and state changes [Wloka14] ‣ Limit batching to avoid long/slow draw calls
- Asynchronous time warp needs to interrupt rendering - On some hardware we've seen judder (irregular image stream)
‣ Limiting constant is needed in preprocessing step: - Binary search on DA content with Oculus min spec [Oculus16]
‣ Batch based on locality for better culling
142
References are written in this notation: [xx] and you can find the long version in the end of the presentation
/161143
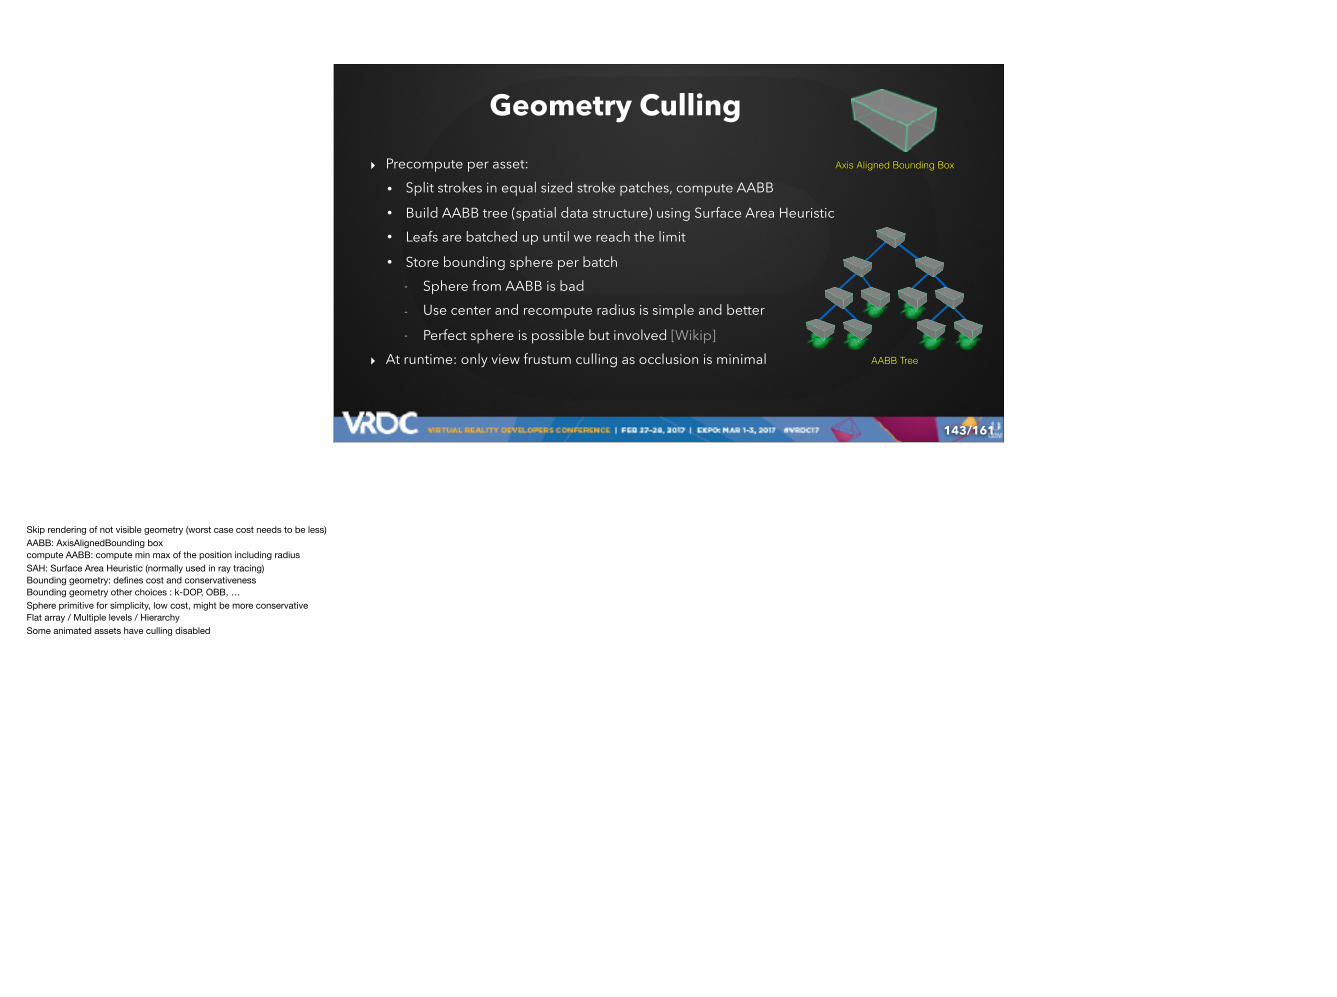
‣ Precompute per asset: • Split strokes in equal sized stroke patches, compute AABB • Build AABB tree (spatial data structure) using Surface Area Heuristic • Leafs are batched up until we reach the limit • Store bounding sphere per batch
- Sphere from AABB is bad - Use center and recompute radius is simple and better - Perfect sphere is possible but involved [Wikip]
‣ At runtime: only view frustum culling as occlusion is minimal
Geometry Culling
Axis Aligned Bounding Box
AABB Tree
Skip rendering of not visible geometry (worst case cost needs to be less) AABB: AxisAlignedBounding boxcompute AABB: compute min max of the position including radiusSAH: Surface Area Heuristic (normally used in ray tracing)Bounding geometry: defines cost and conservativenessBounding geometry other choices : k-DOP, OBB, …Sphere primitive for simplicity, low cost, might be more conservativeFlat array / Multiple levels / HierarchySome animated assets have culling disabled
/161144
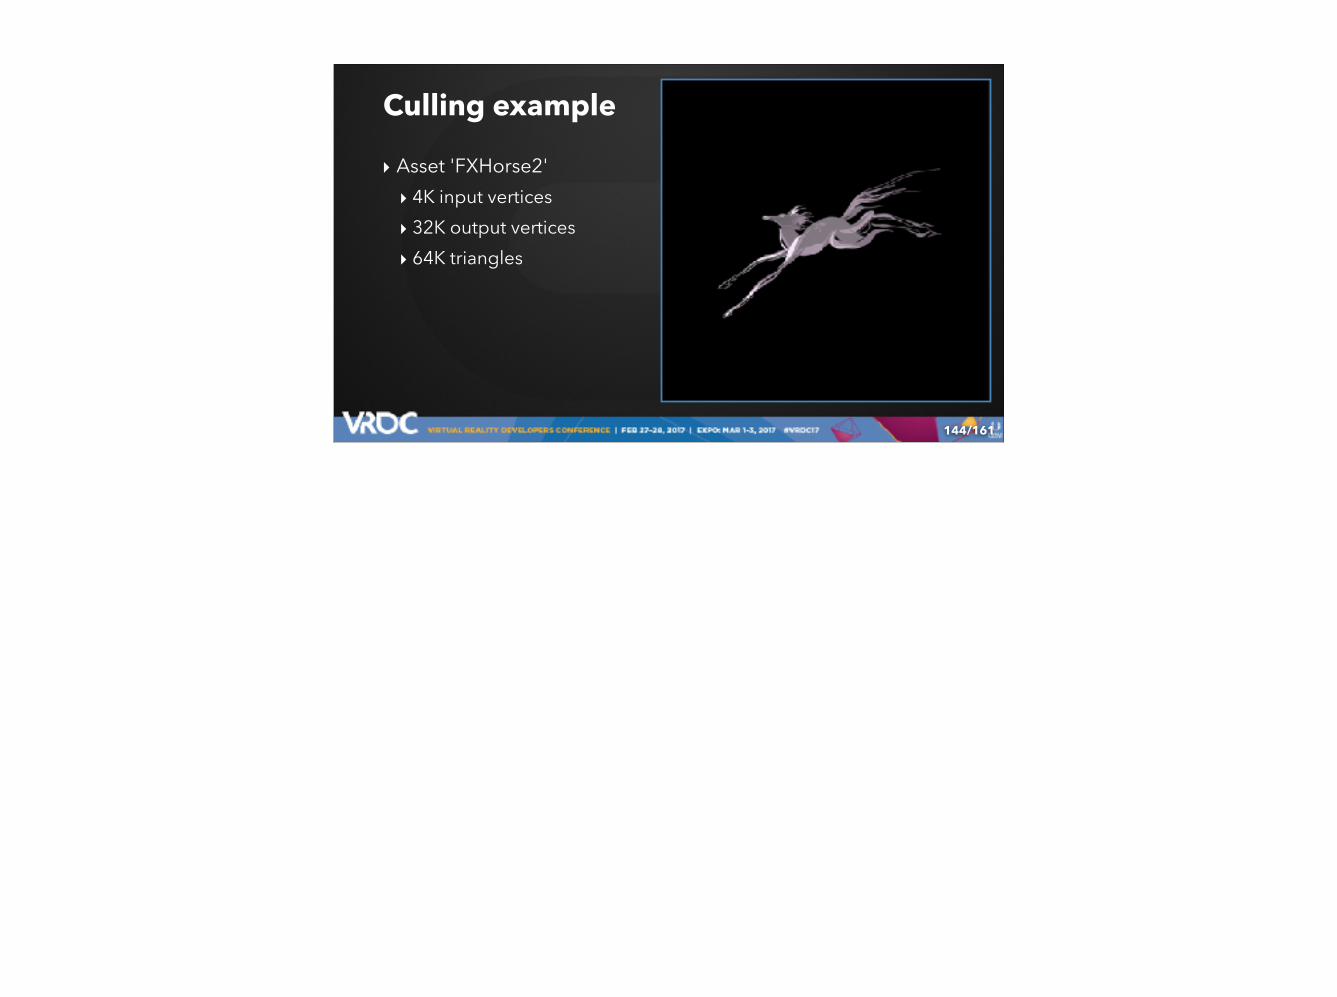
‣ Asset 'FXHorse2' ‣ 4K input vertices ‣ 32K output vertices ‣ 64K triangles
Culling example
/161
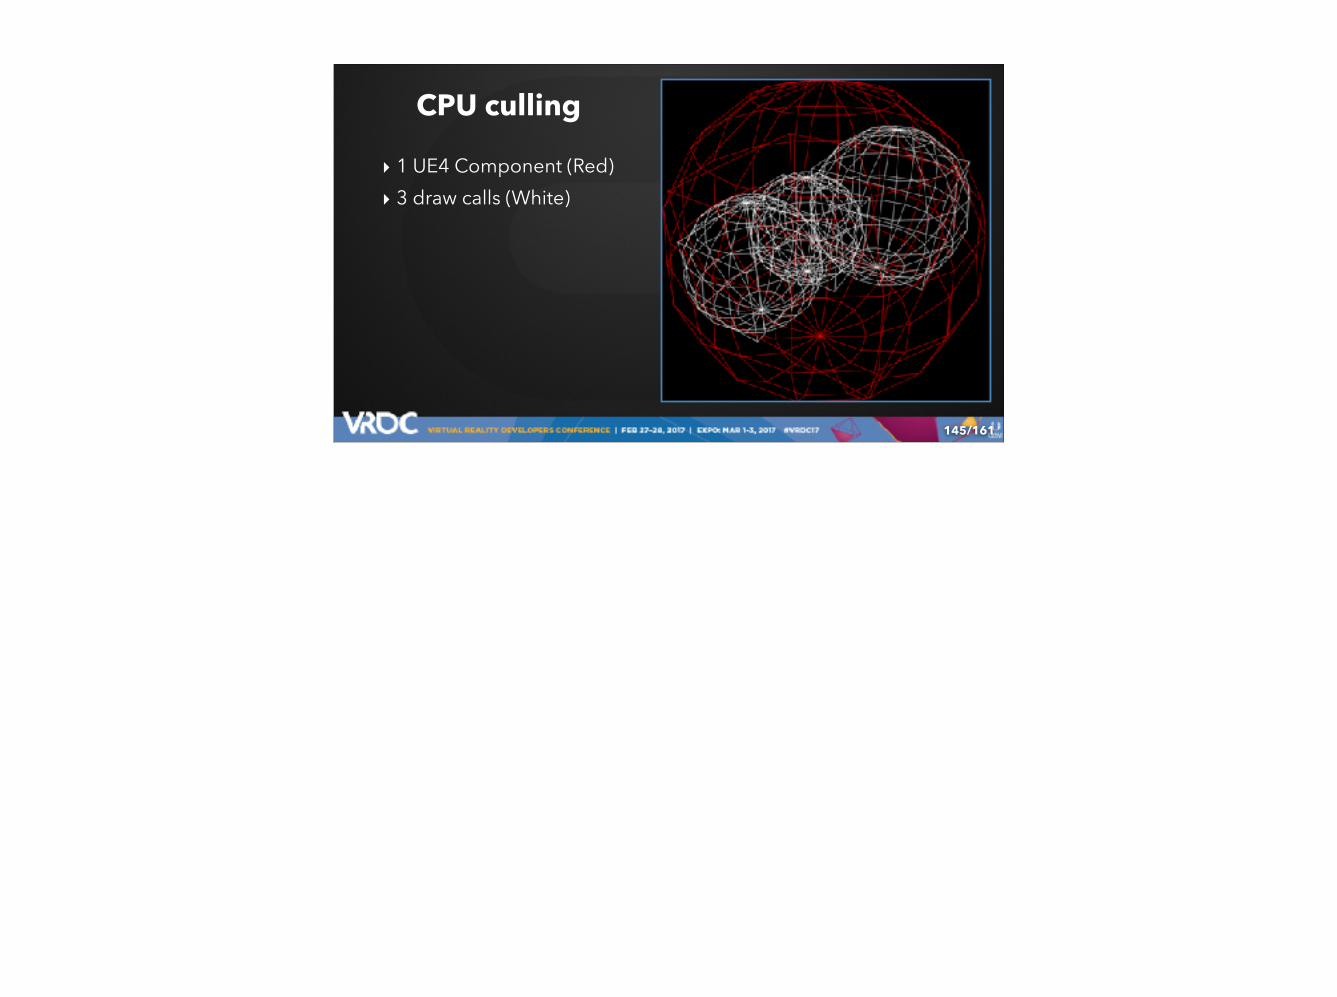
CPU culling
‣ 1 UE4 Component (Red) ‣ 3 draw calls (White)
145
/161
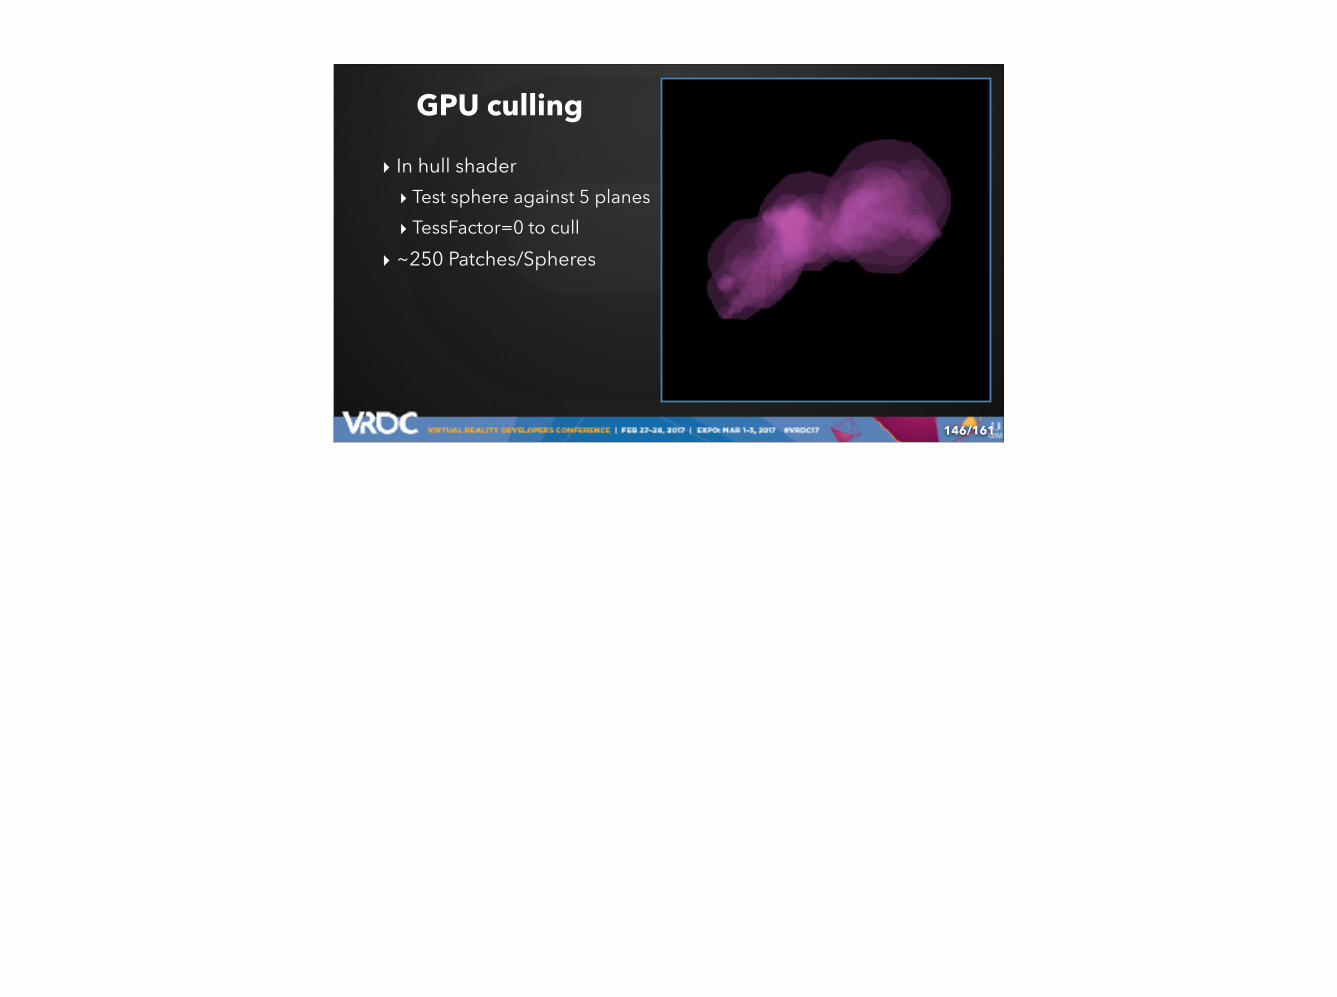
GPU culling
‣ In hull shader ‣ Test sphere against 5 planes ‣ TessFactor=0 to cull
‣ ~250 Patches/Spheres
146
/161
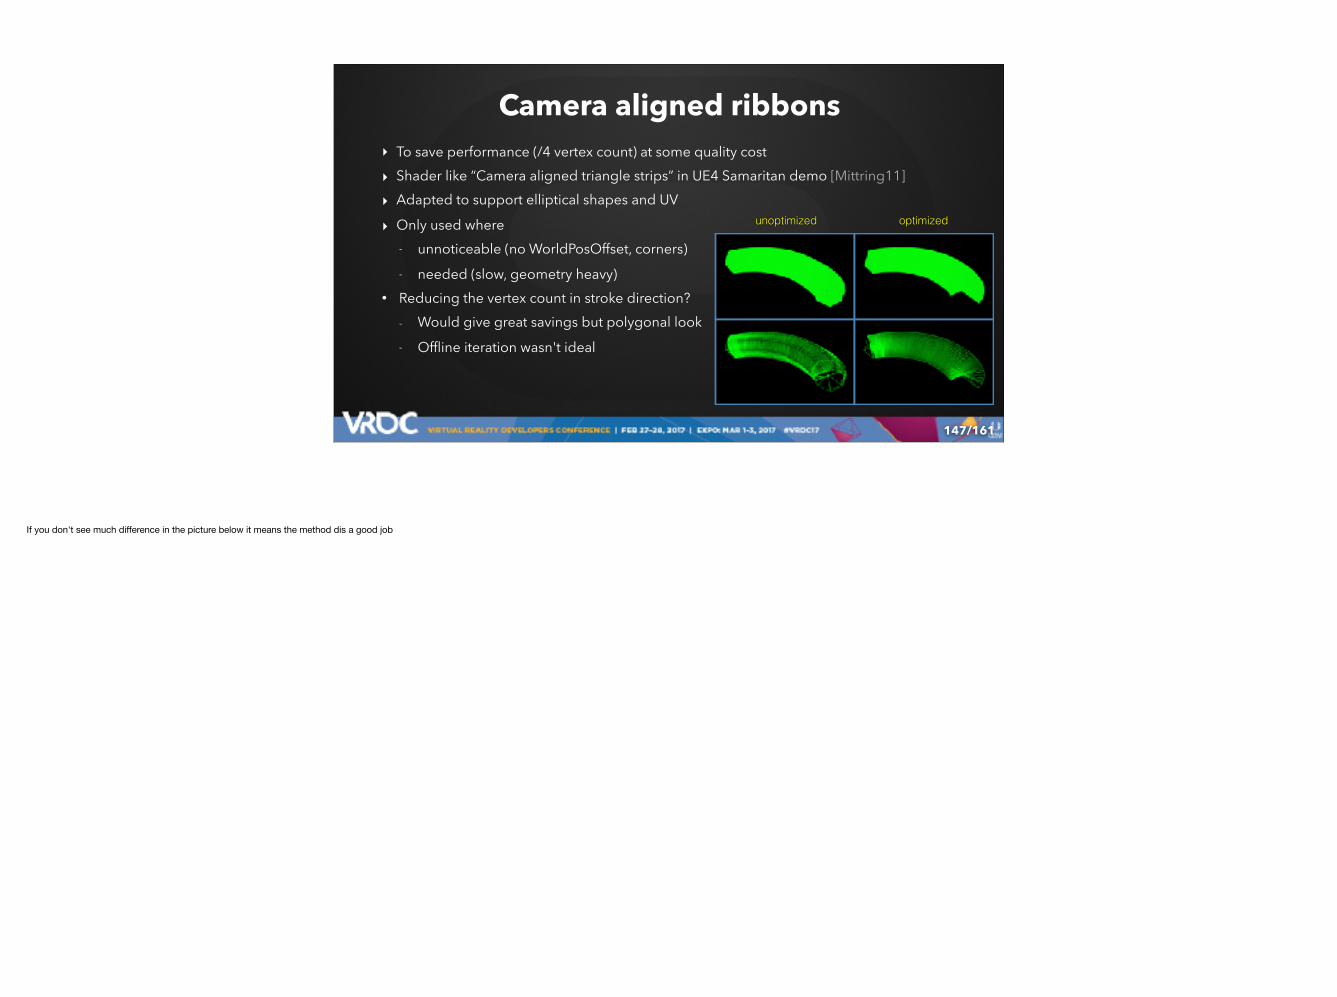
Camera aligned ribbons‣ To save performance (/4 vertex count) at some quality cost
‣ Shader like “Camera aligned triangle strips” in UE4 Samaritan demo [Mittring11]
‣ Adapted to support elliptical shapes and UV
‣ Only used where - unnoticeable (no WorldPosOffset, corners) - needed (slow, geometry heavy)
• Reducing the vertex count in stroke direction? - Would give great savings but polygonal look - Offline iteration wasn't ideal
147
unoptimized optimized
If you don't see much difference in the picture below it means the method dis a good job
/161
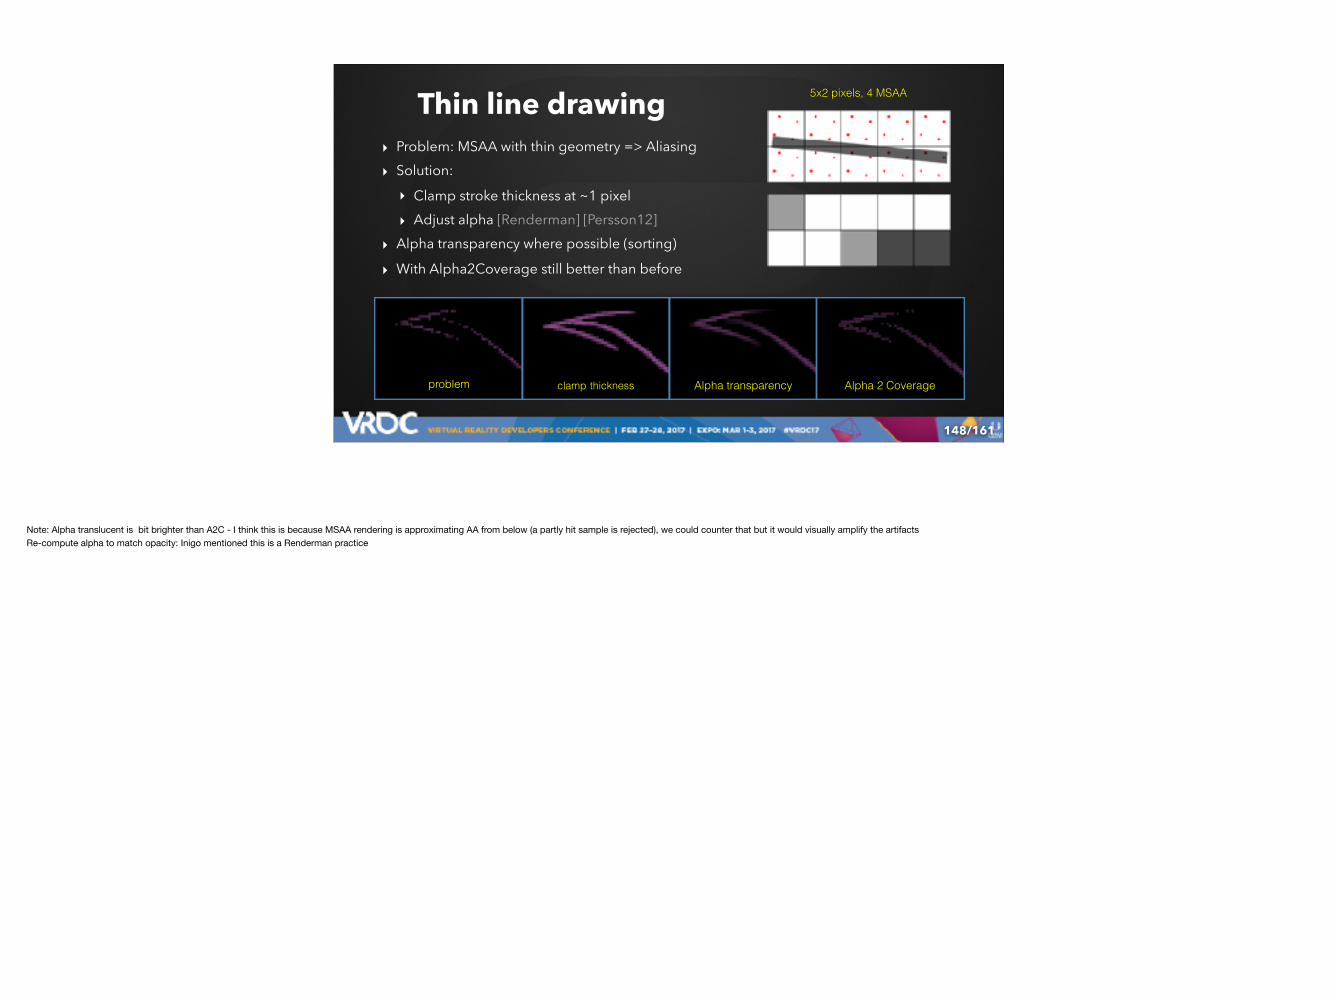
Thin line drawing‣ Problem: MSAA with thin geometry => Aliasing
‣ Solution:
‣ Clamp stroke thickness at ~1 pixel
‣ Adjust alpha [Renderman] [Persson12]
‣ Alpha transparency where possible (sorting)
‣ With Alpha2Coverage still better than before
148
problem clamp thickness Alpha transparency Alpha 2 Coverage
5x2 pixels, 4 MSAA
Note: Alpha translucent is bit brighter than A2C - I think this is because MSAA rendering is approximating AA from below (a partly hit sample is rejected), we could counter that but it would visually amplify the artifactsRe-compute alpha to match opacity: Inigo mentioned this is a Renderman practice
/161149
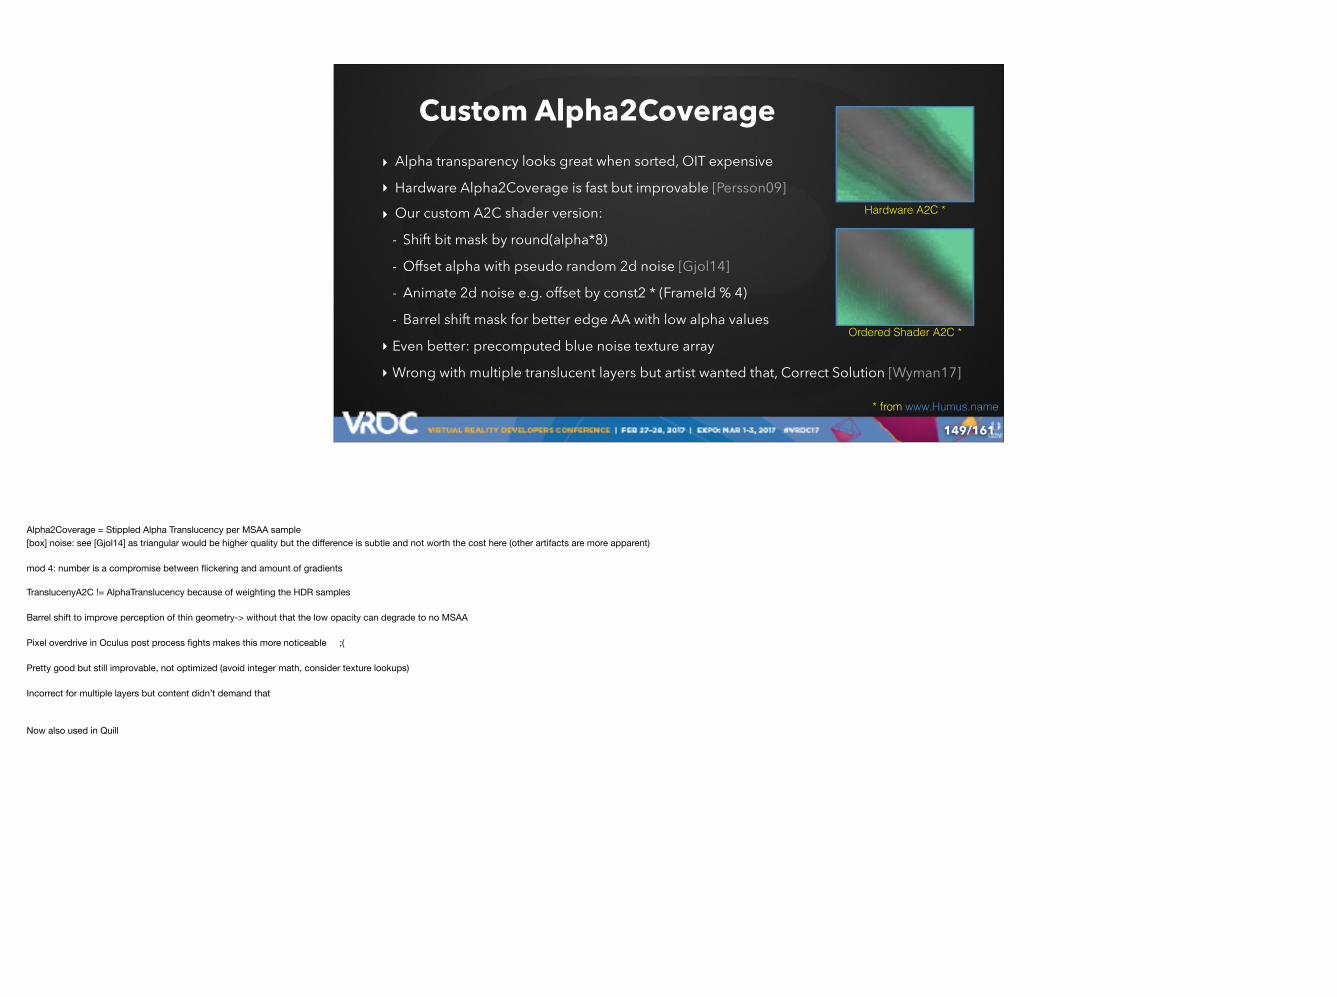
‣ Alpha transparency looks great when sorted, OIT expensive
‣ Hardware Alpha2Coverage is fast but improvable [Persson09]
‣ Our custom A2C shader version:
- Shift bit mask by round(alpha*8)
- Offset alpha with pseudo random 2d noise [Gjol14]
- Animate 2d noise e.g. offset by const2 * (FrameId % 4)
- Barrel shift mask for better edge AA with low alpha values
‣ Even better: precomputed blue noise texture array
‣ Wrong with multiple translucent layers but artist wanted that, Correct Solution [Wyman17]
Custom Alpha2Coverage
Hardware A2C *
Ordered Shader A2C *
* from www.Humus.name
Alpha2Coverage = Stippled Alpha Translucency per MSAA sample[box] noise: see [Gjol14] as triangular would be higher quality but the difference is subtle and not worth the cost here (other artifacts are more apparent)
mod 4: number is a compromise between flickering and amount of gradients
TranslucenyA2C != AlphaTranslucency because of weighting the HDR samples
Barrel shift to improve perception of thin geometry-> without that the low opacity can degrade to no MSAA
Pixel overdrive in Oculus post process fights makes this more noticeable ;(
Pretty good but still improvable, not optimized (avoid integer math, consider texture lookups)
Incorrect for multiple layers but content didn’t demand that
Now also used in Quill

/161150
Alpha translucency reference
Bit shift (8 shades for 8xMSAA)
Ordered
Pseudo Random [Jimenez14]
+Animated (simulated by avg. of 4 frames)
How does that look like in practice?
/161
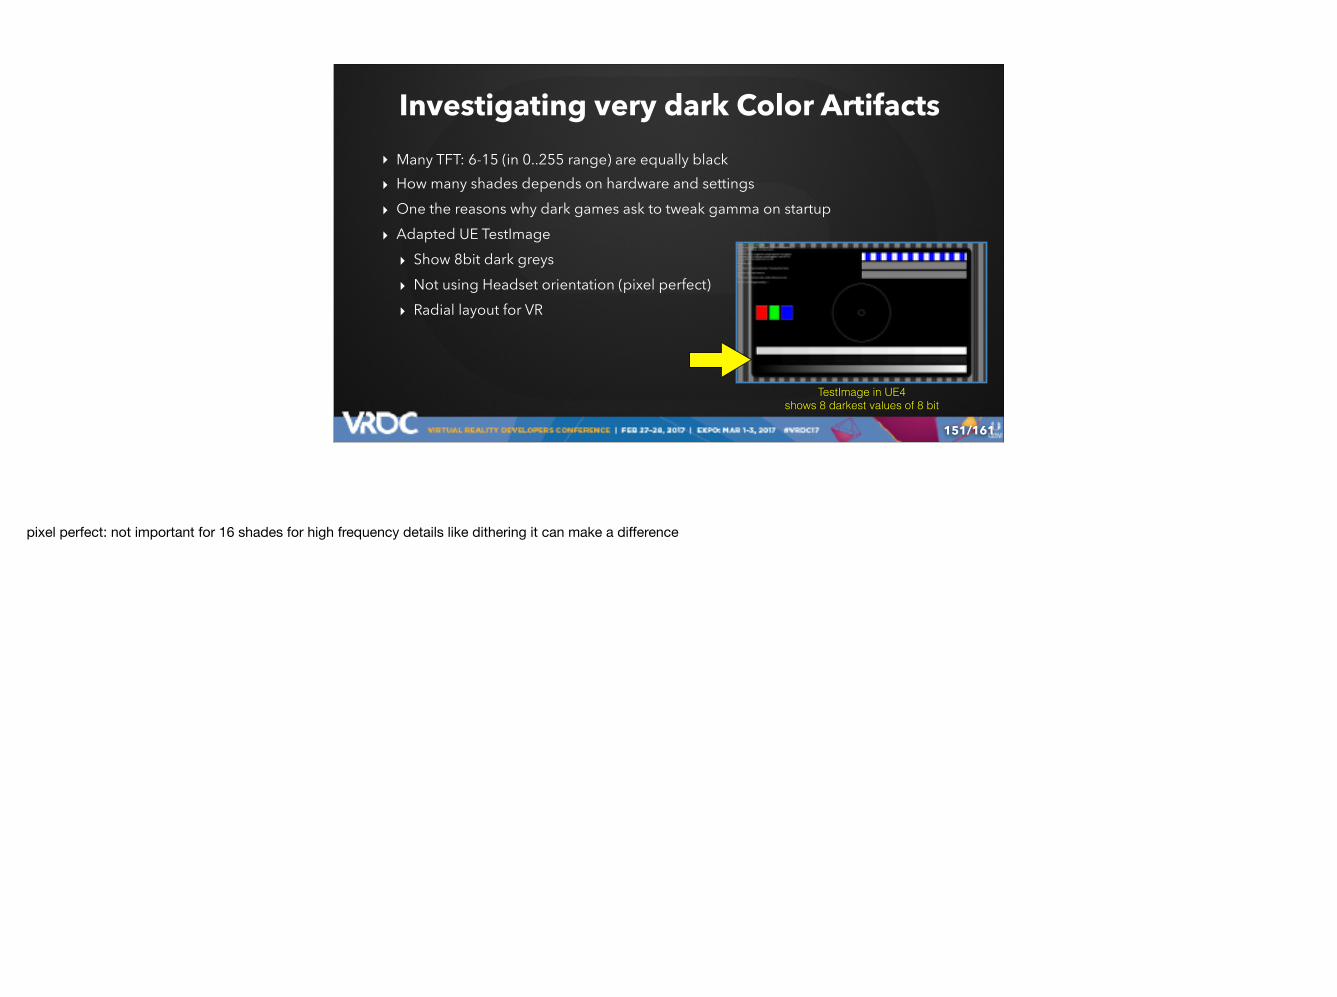
Investigating very dark Color Artifacts‣ Many TFT: 6-15 (in 0..255 range) are equally black ‣ How many shades depends on hardware and settings
‣ One the reasons why dark games ask to tweak gamma on startup
‣ Adapted UE TestImage
‣ Show 8bit dark greys
‣ Not using Headset orientation (pixel perfect)
‣ Radial layout for VR
151
TestImage in UE4shows 8 darkest values of 8 bit
pixel perfect: not important for 16 shades for high frequency details like dithering it can make a difference
/161
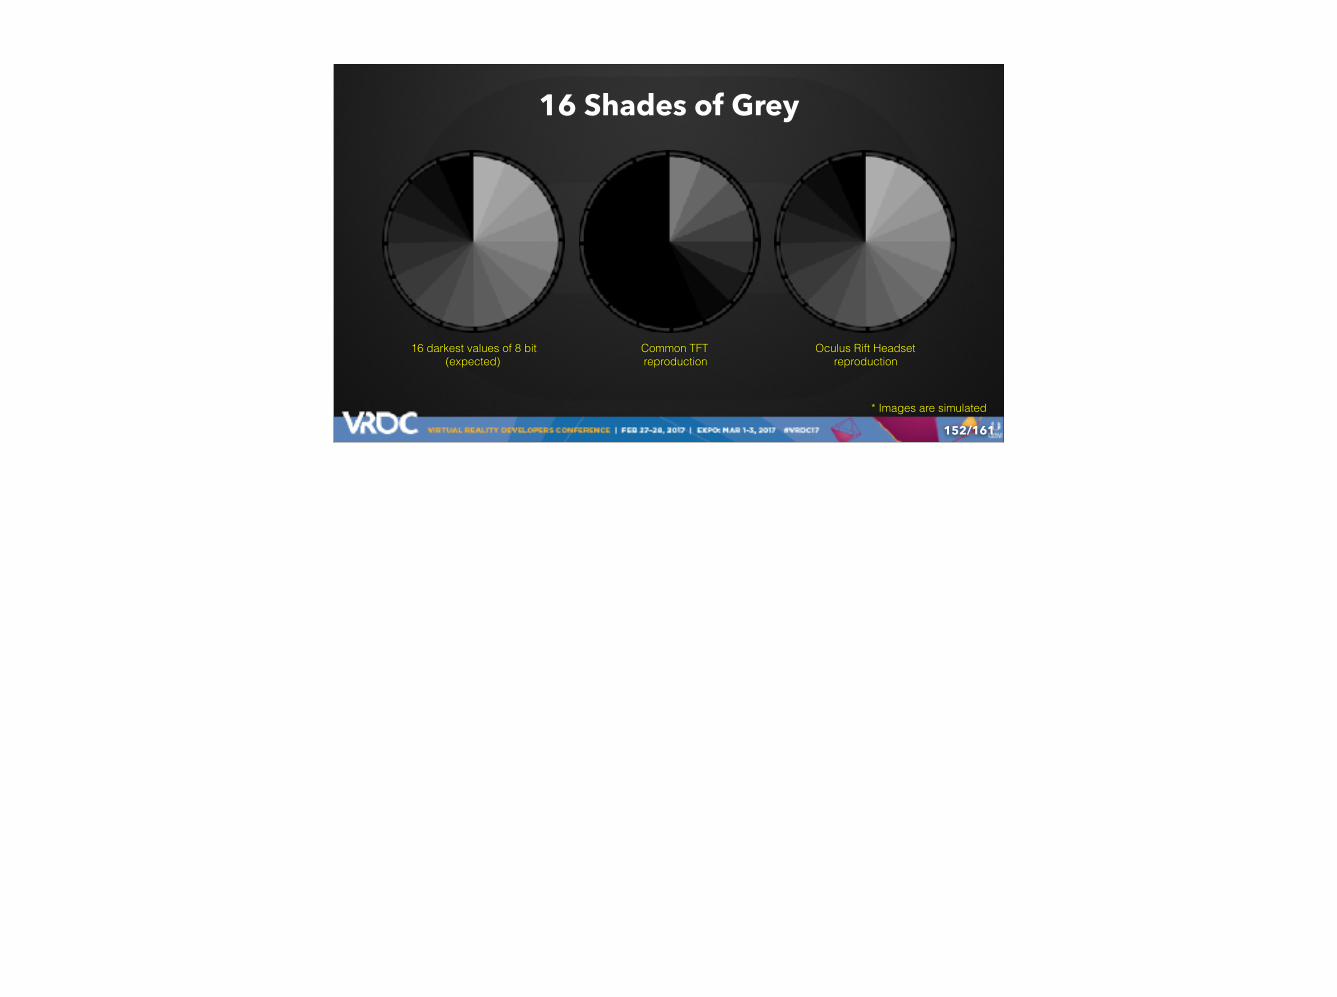
16 Shades of Grey
152
16 darkest values of 8 bit (expected)
Common TFTreproduction
Oculus Rift Headsetreproduction
* Images are simulated
/161
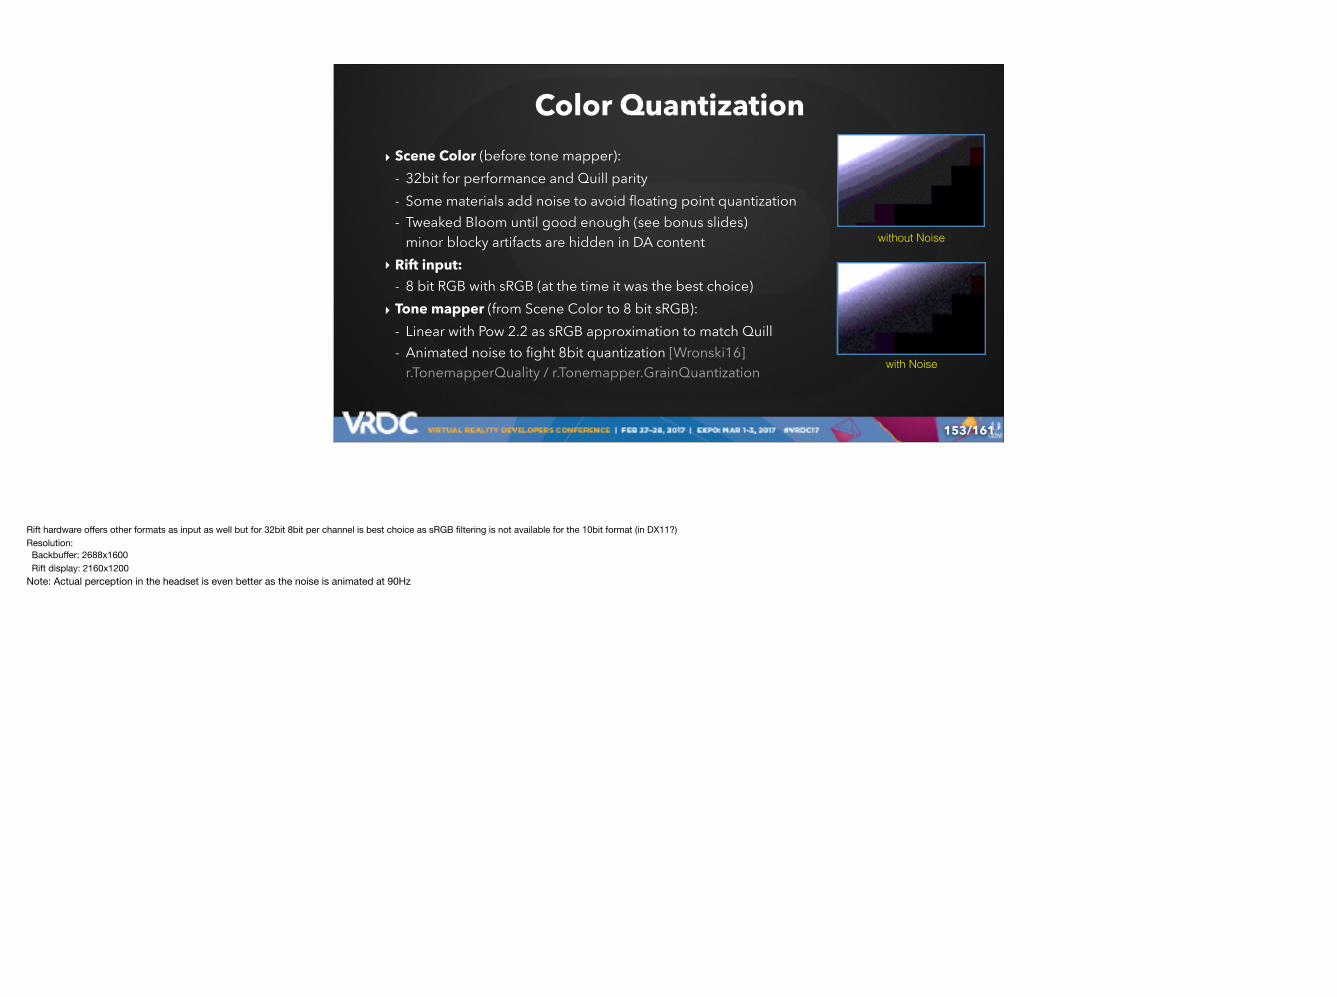
Color Quantization‣ Scene Color (before tone mapper):
- 32bit for performance and Quill parity - Some materials add noise to avoid floating point quantization - Tweaked Bloom until good enough (see bonus slides)
minor blocky artifacts are hidden in DA content ‣ Rift input:
- 8 bit RGB with sRGB (at the time it was the best choice) ‣ Tone mapper (from Scene Color to 8 bit sRGB):
- Linear with Pow 2.2 as sRGB approximation to match Quill - Animated noise to fight 8bit quantization [Wronski16]
r.TonemapperQuality / r.Tonemapper.GrainQuantization
153
without Noise
with Noise
Rift hardware offers other formats as input as well but for 32bit 8bit per channel is best choice as sRGB filtering is not available for the 10bit format (in DX11?)Resolution: Backbuffer: 2688x1600 Rift display: 2160x1200Note: Actual perception in the headset is even better as the noise is animated at 90Hz
/161
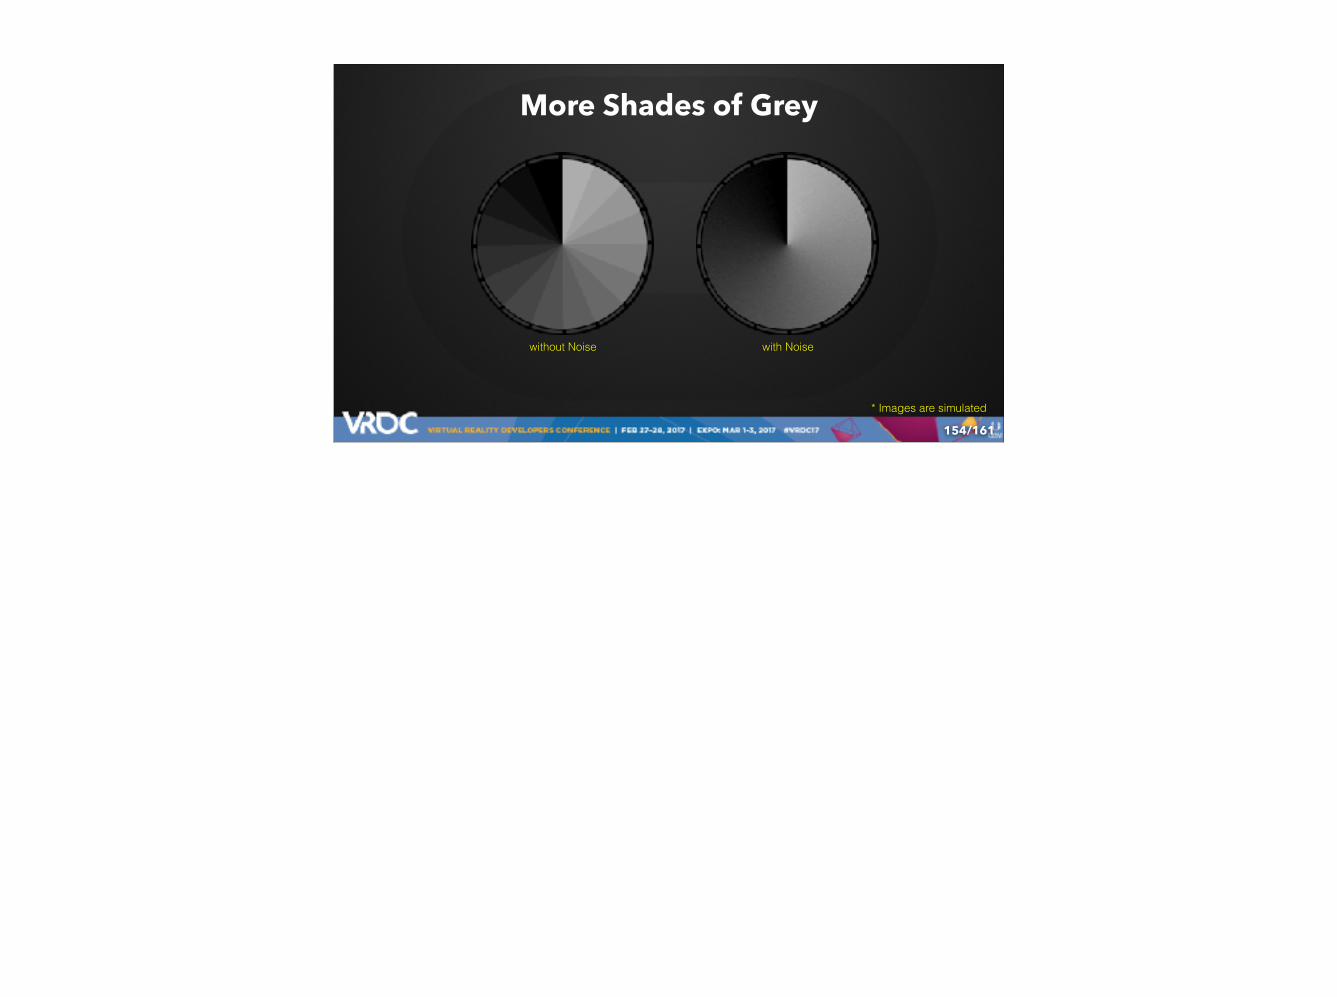
More Shades of Grey
154
without Noise with Noise
* Images are simulated
/161155
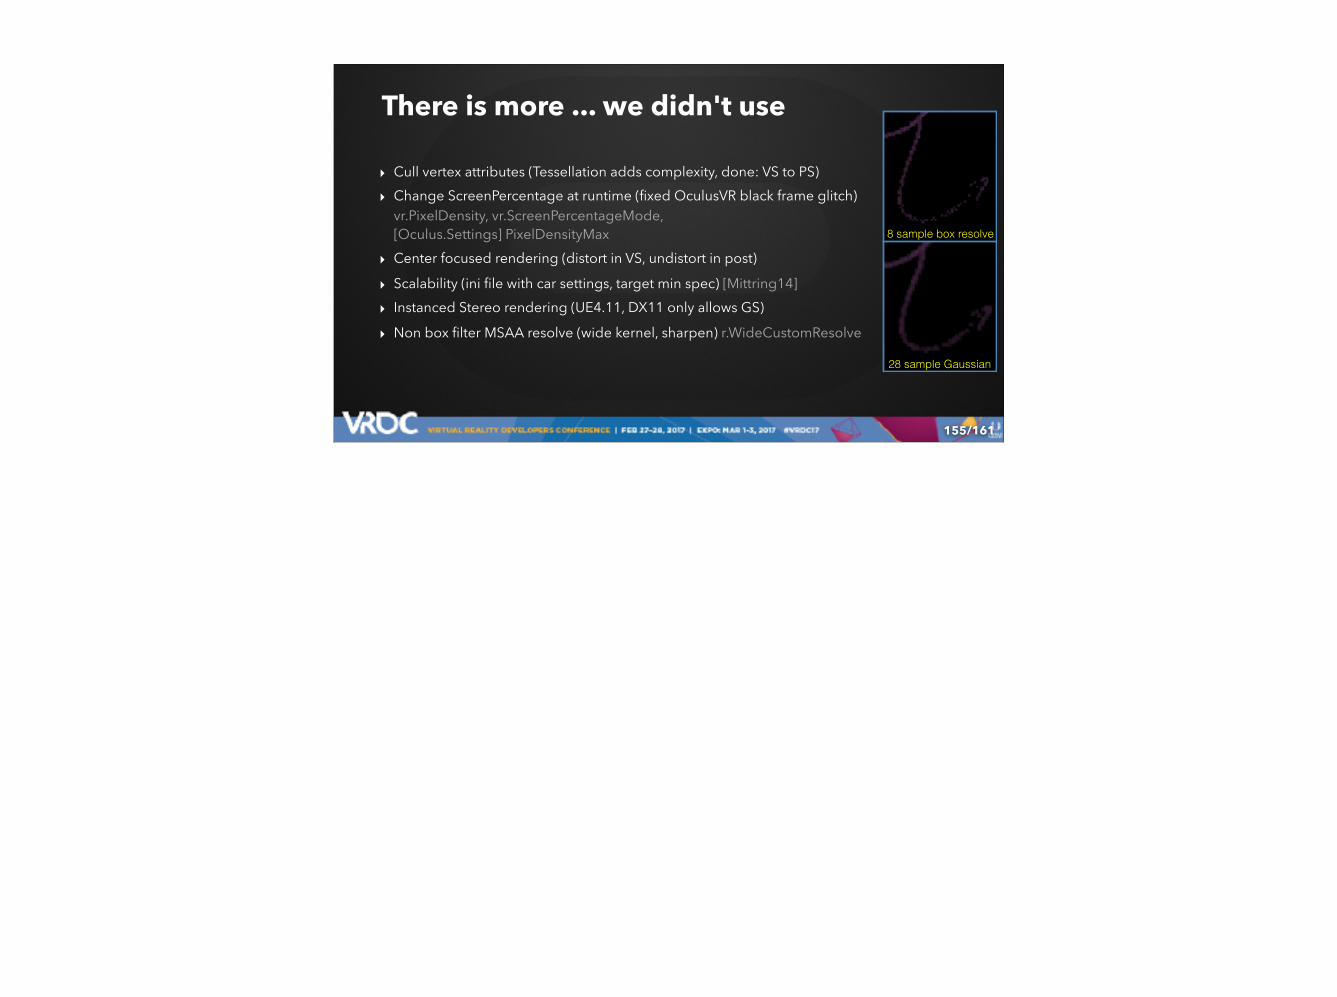
‣ Cull vertex attributes (Tessellation adds complexity, done: VS to PS)
‣ Change ScreenPercentage at runtime (fixed OculusVR black frame glitch)vr.PixelDensity, vr.ScreenPercentageMode, [Oculus.Settings] PixelDensityMax
‣ Center focused rendering (distort in VS, undistort in post)
‣ Scalability (ini file with car settings, target min spec) [Mittring14]
‣ Instanced Stereo rendering (UE4.11, DX11 only allows GS)
‣ Non box filter MSAA resolve (wide kernel, sharpen) r.WideCustomResolve
There is more ... we didn't use
8 sample box resolve
28 sample Gaussian
/161
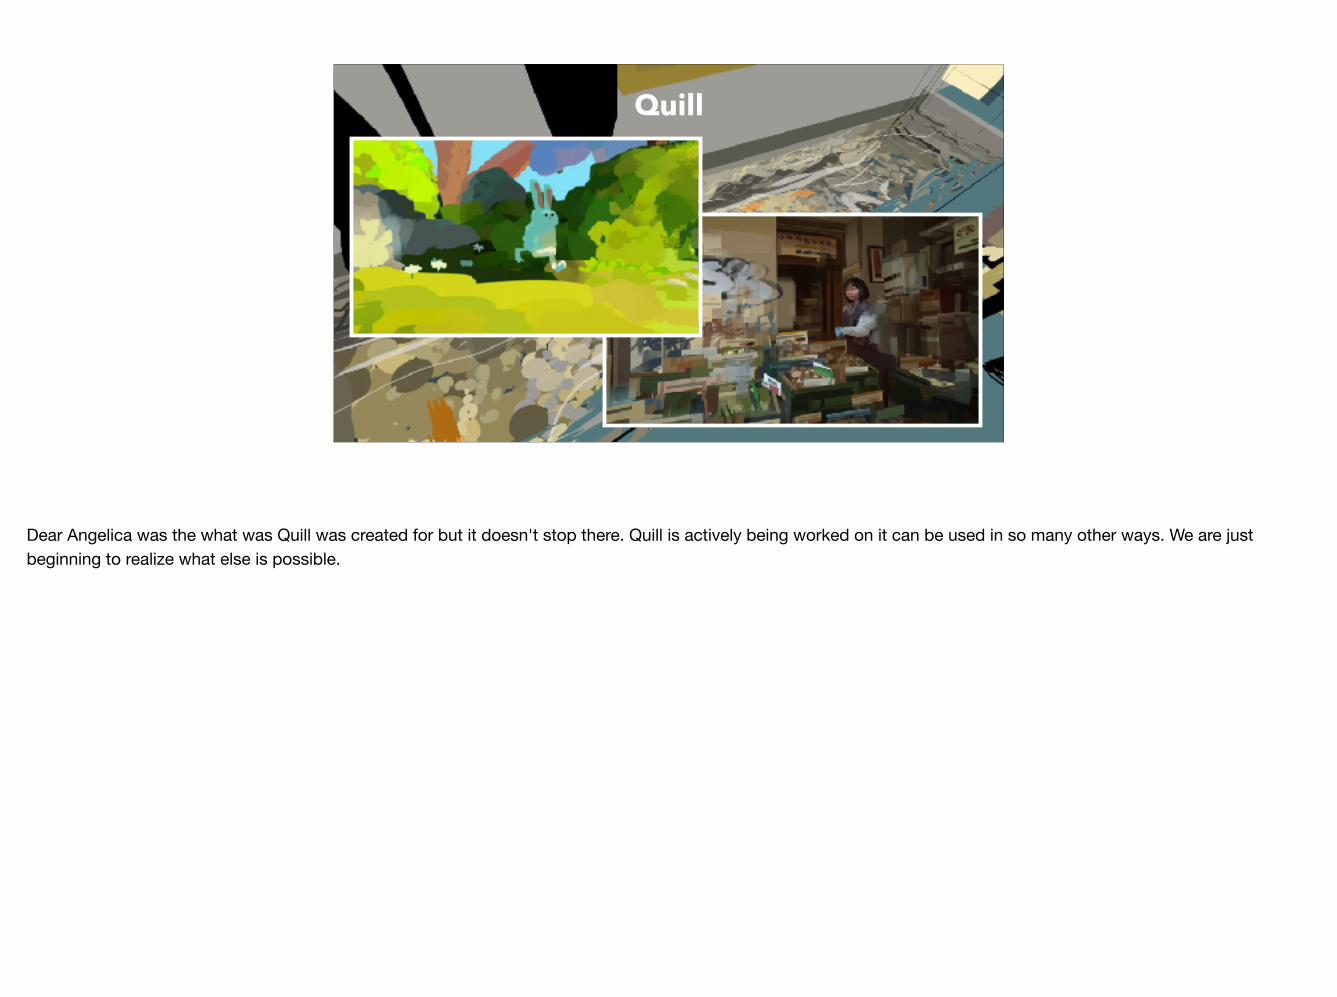
Quill
Dear Angelica was the what was Quill was created for but it doesn't stop there. Quill is actively being worked on it can be used in so many other ways. We are just beginning to realize what else is possible.

/161
Quill and You‣Quill is free and available for Oculus Rift with Touch ‣Quill can export to FBX and Alembic
- as curves with per vertex data (color, width, orientation) - or baked pre-tesselated polygons for quick visualization
‣Dear Angelica is using UE4.10 + forward + Quill asset support ‣ Source code:
- Quill is using Inigos code base (C++, OpenGL)piLibs http://www.iquilezles.org/code/piLibs/piLibs.htm
- UE4.14 + Quill asset support (C++, D3D11)we are working on the release
157
AO with Quill content
NPR of Quill content
follow @OVRStoryStudio
NPR: Non Photorealistic RenderingAO: Ambient Occlusion
/161
References 1/2‣ [Mittring11] The Technology Behind the DirectX 11 Unreal Engine "Samaritan" Demo
https://docs.unrealengine.com/udk/Three/rsrc/Three/DirectX11Rendering/MartinM_GDC11_DX11_presentation.pdf
‣ [Mittring14] How to scale down and not get caught - The Unreal Engine 4 "Rivalry" Demo https://www.youtube.com/watch?v=HY62PAsM7eg (video) http://epic.gm/rvlry (slides)
‣ [Persson12] Phone-wire AA http://www.humus.name/index.php?page=3D&ID=89
‣ [Persson09] Custom alpha to coveragehttp://www.humus.name/index.php?page=News&ID=230
‣ [Gjol14] Banding in Gameswww.loopit.dk/banding_in_games.pdf
‣ [Wronski16] Dithering part three – real world 2D quantization ditheringhttps://bartwronski.com/2016/10/30/dithering-part-three-real-world-2d-quantization-dithering
‣ [Jimenez14] Next Generation Post Processing in Call of Duty: Advanced Warfarehttp://advances.realtimerendering.com/s2014/index.html
158
No need to read this, here you can find the references for you to be used later.
/161
References 2/2‣ [Oculus16] Building a PC for the Oculus Rift
https://www3.oculus.com/en-us/blog/powering-the-rift ‣ [Karis13] Tone mapping
http://graphicrants.blogspot.com/2013/12/tone-mapping.html ‣ [Demoreuille16] Optimizing the Unreal Engine 4 Renderer for VR
https://developer.oculus.com/blog/introducing-the-oculus-unreal-renderer ‣ [Wyman17] Hashed Alpha Testing
http://graphics.cs.williams.edu/papers/HashedAlphaI3D17 ‣ [Wloka] “Batch, Batch, Batch:” What Does It Really Mean?
https://www.nvidia.com/docs/IO/8228/BatchBatchBatch.pdf ‣ [Wikip] Wikipedia "Bounding Sphere"
https://en.wikipedia.org/wiki/Bounding_sphere
159
No need to read this, here you can find the references for you to be used later.

/161160
Íñigo Quílez for Quill and more Wesley Allsbrook Saschka Unseld
Pete Demoreuille Oculus Story Studio Team
Oculus, Facebook, Nvidia, AMD, Epic Games
Special Thanks
We are presenting the work of many and this project wouldn't be possible without many others. Here are some special thanks.Hopefully we have time for some questions.

/161161
Questions?
This is Henry - from the VR experience the studio made before Dear Angelica.

/161
Bonus Slides
162
/161
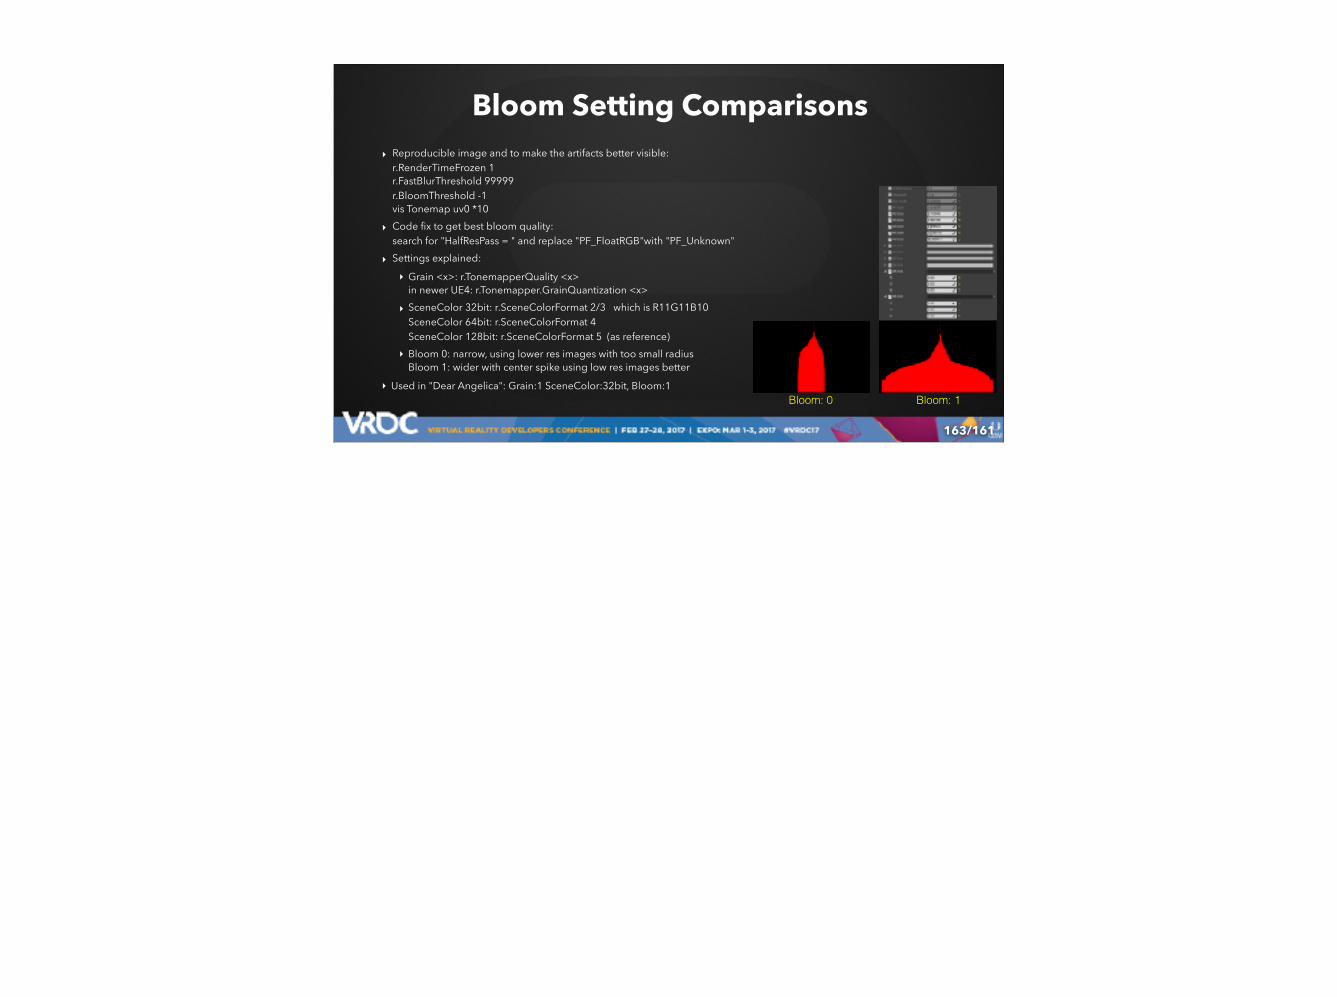
Bloom Setting Comparisons‣ Reproducible image and to make the artifacts better visible:
r.RenderTimeFrozen 1r.FastBlurThreshold 99999 r.BloomThreshold -1vis Tonemap uv0 *10
‣ Code fix to get best bloom quality: search for "HalfResPass = " and replace "PF_FloatRGB"with "PF_Unknown"
‣ Settings explained:
‣ Grain <x>: r.TonemapperQuality <x>in newer UE4: r.Tonemapper.GrainQuantization <x>
‣ SceneColor 32bit: r.SceneColorFormat 2/3 which is R11G11B10SceneColor 64bit: r.SceneColorFormat 4SceneColor 128bit: r.SceneColorFormat 5 (as reference)
‣ Bloom 0: narrow, using lower res images with too small radiusBloom 1: wider with center spike using low res images better
‣ Used in "Dear Angelica": Grain:1 SceneColor:32bit, Bloom:1
163
Bloom: 1Bloom: 0

/161
Grain:1, SceneColor: 128bit, Bloom 1 (Reference)
164
/161
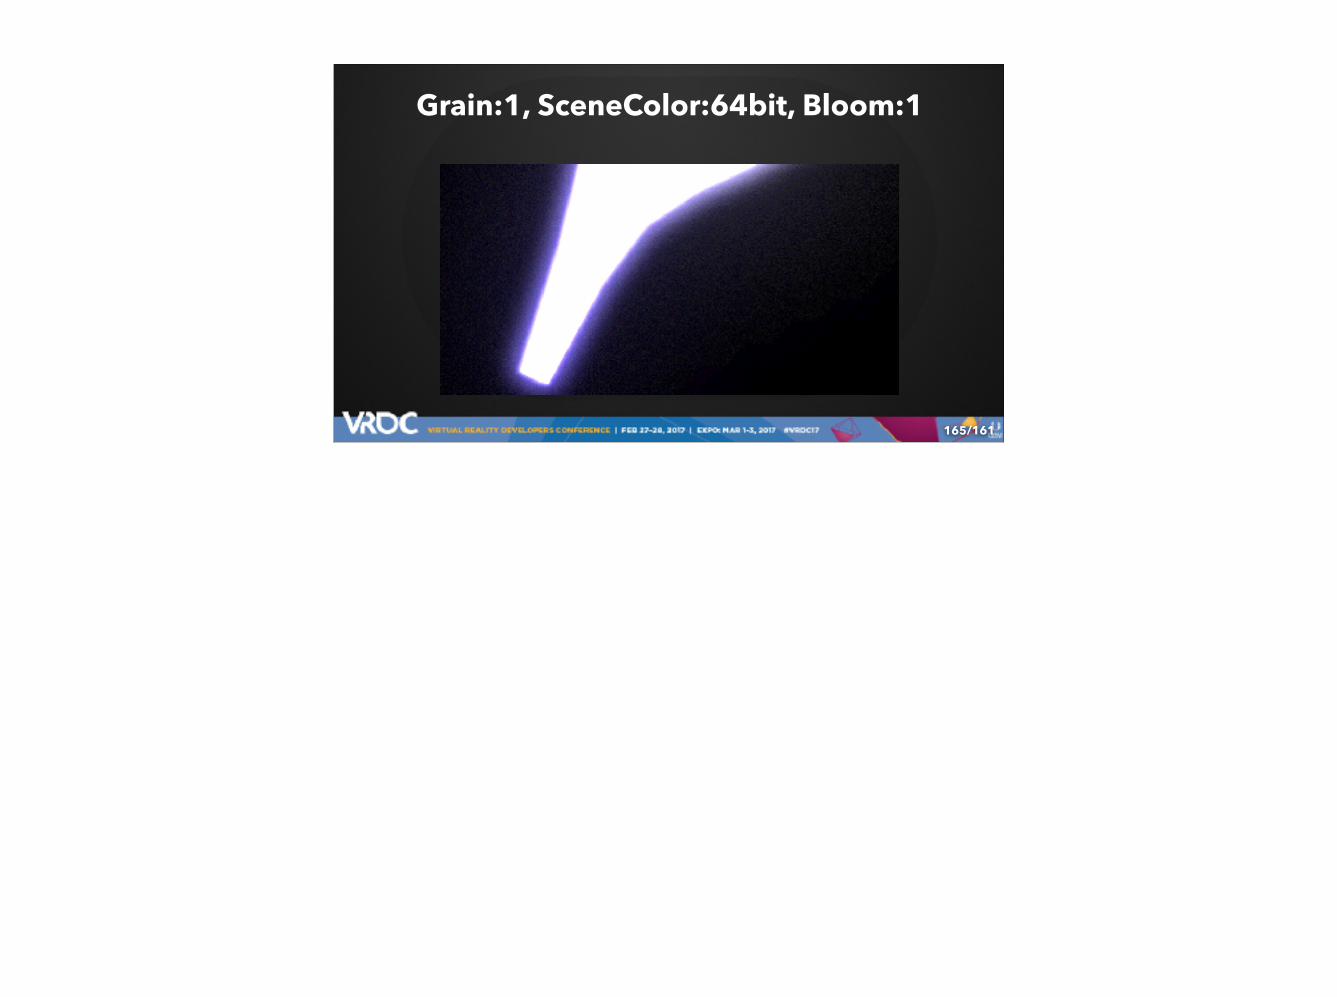
Grain:1, SceneColor:64bit, Bloom:1
165
/161
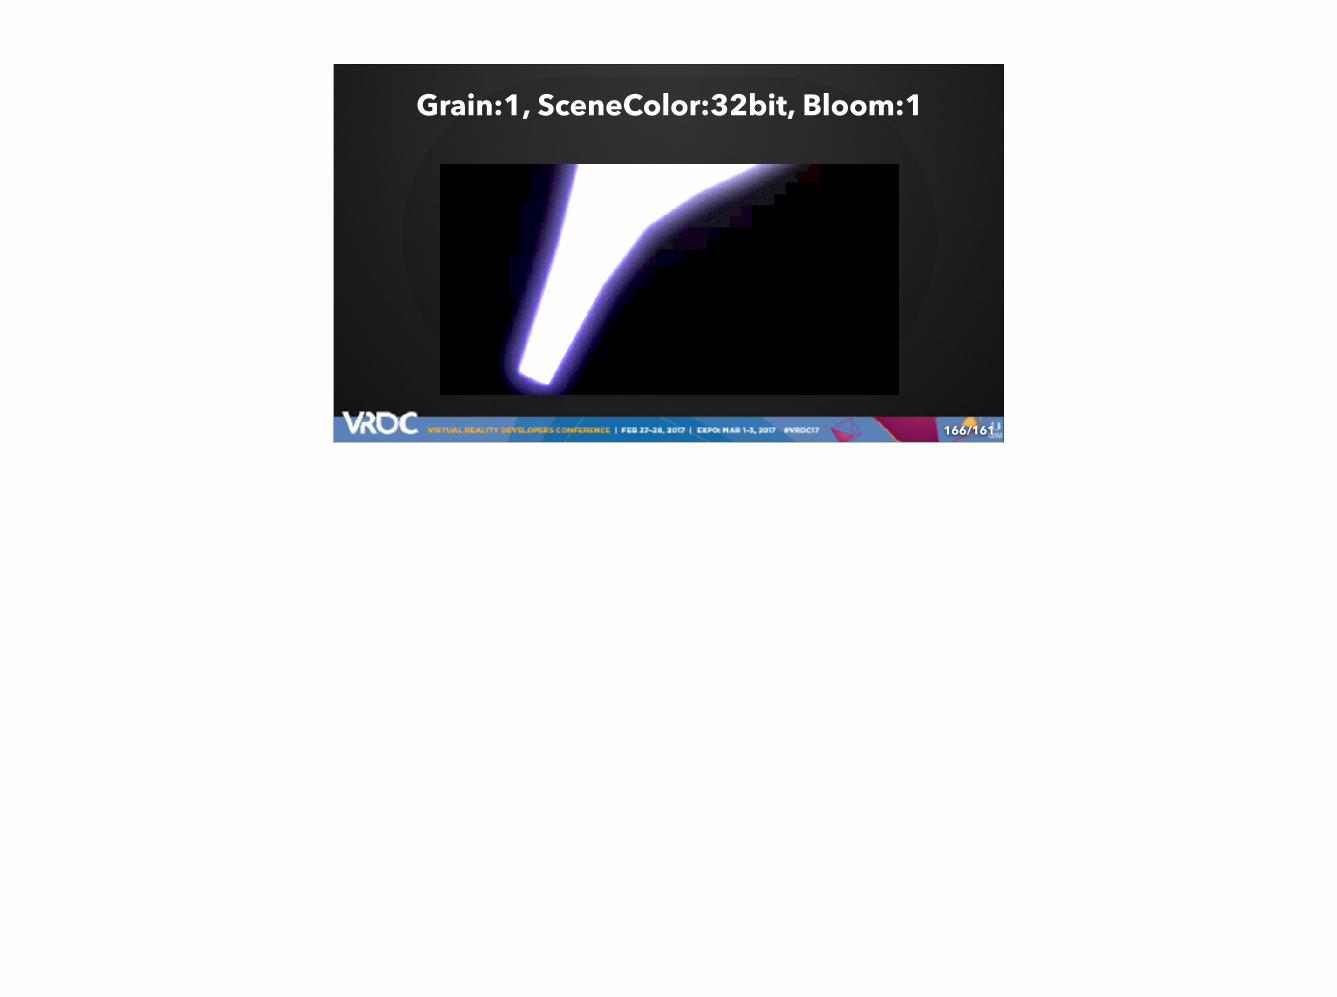
Grain:1, SceneColor:32bit, Bloom:1
166

/161
Grain:1, SceneColor:64bit, Bloom:0
167

/161
Grain:1, SceneColor:32bit, Bloom:0
168

/161
Grain:0, SceneColor:64bit, Bloom:1
169

/161
Grain:0, SceneColor:32bit, Bloom:1
170

/161
Grain:0, SceneColor:64bit, Bloom:0
171

/161
Grain:0, SceneColor:32bit, Bloom:0
172
Recommended