LINUX SYSTEM AND NETWORK ADMINISTRATION
Navpreet Singh
Computer CentreIndian Institute of Technology Kanpur
Kanpur INDIA

Module I
Course Content
Lecture/Lab 1 – Introduction to UNIX
- UNIX Operating System Architecture – Linux Operating System – Users, Groups and Permissions
- Examining Permissions
Lecture/Lab 2 – Linux Installation – Hard Disk Partition Details – Linux File System
- ext2 / ext3 – Dual Boot Installation
Lecture/Lab 3 – Desktop Familiarization
- Text and GUI Mode - Virtual Terminals - GNOME and KDE Desktop

Module I
Course Content
Lecture/Lab 4 & 5 – UNIX Shell
– UNIX Commands
– Shell Commands - File System Management - File Management and Viewing - Help, Job and Process Management - Network Management - System Management - User Management - Printing and Programming - Document Preparation - Miscellaneous
Lecture/Lab 6
– System Initialization and Services - Boot Sequence, Runlevels & Daemon Processes
– User Administration - User Creation/ Suspension & Deletion - Group Administration

Module ICourse Content
Lecture/Lab 7 – Network Configuration
- Configuration Utilities - Multiple NICs
– Task Schedulers - cron daemons
– Disk quota management – Backup and Restore
Lecture/Lab 8 – Adding and Removing Software Packages
• RPM Package Management – Setting Printer – System Monitoring
- File System Analysis - System Log Files & Analysis
– System Troubleshooting - Filesystem Corruption and Recovery - Things to check: The X Window System - Service, Networking & Booting - The Rescue Environment - Recovery Runlevels, Boot Floppies

Module II
Course Content
Lecture/Lab 9 – DHCP
- Server setup - Client setup
– NIS - NIS Server setup - NIS Clinet setup
Lecture/Lab 10 – NFS
- NFS Serever & Client configuration - autofs implementation
– Samba Server - File & Print Service
Lecture/Lab 11 – Basic Concept of DNS
- Implementation of BIND - forward & reverse lookup - DNS Directives

Module II
Course Content
• Lecture/Lab 12 – Apache Web Server
- Basic Configuration - Name based Virtual Hosting - Restriction through htaccess
• Lecture/Lab 13 – Sendmail - Mail Server
- Configuring mail service - SMTP Server
• POP3 / IMAP Server
• Lecture/Lab 14 – Proxy Server - Squid
- ACL for restricting access
• Lecture/Lab 15 – Linux System as a Router
- Setup and configuration - Static Routing
– SELinux Configuration – Firewall Using IPTables
- Filter and NAT rules

Course Schedule
Schedule
The complete course, including Lectures and Labs, will be covered in 60 Hours.
The total duration of the course will be 3.5 - 4 months.
Lectures : Every Tuesday, 6:30 – 8:30 P.M
Labs : Thursday or Friday or Monday (One batch per day), 6:30 – 8:30 P.M

Grading Guidelines
Grading
Two Exams: 40% + 40%
Lab: 20%
Minimum 80% attendance and minimum 60% marks are necessary to clear the course.

References
Course References
Online on the Web
The Linux Documentation Project (LDP), http://www.tldp.org/
Mirror: http://www.iitk.ac.in/LDP
Red Hat Linux, O'Reilly
The course slides swill be available at http://home.iitk.ac.in/~navi/sidbilinuxcourse

UNIX/LINUX OPERATING SYSTEM
Introduction to Linux
Introduction to Unix
History of UNIX
What is LINUX
LINUX Distributions
Unix OS Structure
Unix File System
Unix Directories, Files and Inodes
Users, Groups and Permissions

UNIX
Introduction to Linux
Unix is a multi-user, multi-tasking operating system.
You can have many users logged into a system simultaneously, each running many programs.
It's the kernel's job to keep each process and user separate and to regulate access to system hardware, including cpu, memory, disk and other I/O devices.

History of UNIX
Introduction to Linux
First Version was created in Bell Labs in 1969.
Some of the Bell Labs programmers who had worked on this project, Ken Thompson, Dennis Ritchie, Rudd Canaday, and Doug McIlroy designed and implemented the first version of the Unix File System on a PDP-7 along with a few utilities. It was given the name UNIX by Brian Kernighan.
00:00:00 Hours, Jan 1, 1970 is time zero for UNIX. It is also called as epoch.

History of UNIX
Introduction to Linux
1973 Unix is re-written mostly in C, a new language developed by Dennis Ritchie.
Being written in this high-level language greatly decreased the effort needed to port it to new machines.

History of UNIX
Introduction to Linux
1977 There were about 500 Unix sites world-wide.
1980 BSD 4.1 (Berkeley Software Development)
1983 SunOS, BSD 4.2, System V
1988 AT&T and Sun Microsystems jointly develop System V Release 4 (SVR4). This later developed into UnixWare and Solaris 2.
1991 Linux was originated.

What is LINUX
Introduction to Linux
Linux is a free Unix-type operating system originally created by Linus Torvalds with the assistance of developers around the world.
It originated in 1991 as a personal project of Linus Torvalds, a Finnish graduate student.
The Kernel version 1.0 was released in 1994 and today the most recent stable version is 2.6.9
Developed under the GNU General Public License , the source code for Linux is freely available to everyone.

LINUX Distributions
Introduction to Linux
Mandrake: http://www.mandrakesoft.com/
RedHat: http://www.redhat.com/
Fedora: http://fedora.redhat.com/
SuSE/Novell: http://www.suse.com/
Debian: http://www.debian.org/
Red Hat Enterprise Linux is a Enterprise targeted Operating System. It based on mature Open Source technology and available at a cost with one year Red Hat Network subscription for upgrade and support contract.

UNIX Structure
Introduction to Linux

UNIX File System
Introduction to Linux

File System
Introduction to Linux
The Unix file system looks like an inverted tree structure.
You start with the root directory, denoted by /, at the top and work down through sub-directories underneath it.

File System
Introduction to Linux
Each node is either a file or a directory of files, where the latter can contain other files and directories.
You specify a file or directory by its path name, either the full, or absolute, path name or the one relative to a location.
The full path name starts with the root, /, and follows the branches of the file system, each separated by /, until you reach the desired file, e.g.:
/home/condron/source/xntp

File System
Introduction to Linux
A relative path name specifies the path relative to another, usually the current working directory that you are at. Two special directories :
. the current directory
.. the parent of the current directory
So if I'm at /home/frank and wish to specify the path above in a relative fashion I could use:
../condron/source/xntp
This indicates that I should first go up one directory level, then come down through the condron directory, followed by the source directory and then to xntp.

Structure of Standard Directories in Unix/Linux
Introduction to Linux
/ The ancestor of all directories on the system; all other directories are subdirectories of this directory, either directly or through other subdirectories.
/bin Essential tools and other programs (or binaries).
/dev Files representing the system's various hardware devices. For example, you use the file `/dev/cdrom' to access the CD−ROM drive.
/etc Miscellaneous system configuration files, startup files, etc.

Structure of Standard Directories in Unix/Linux
Introduction to Linux
/home The home directories for all of the system's users.
/lib Essential system library files used by tools in `/bin'.
/proc Files that give information about current system processes.
/root The superuser's home directory, whose username is root. (In the past, the home directory for the superuser was simply `/'; later, `/root' was adopted for this purpose to reduce clutter in `/'.)

Structure of Standard Directories in Unix/Linux
Introduction to Linux
/sbin Essential system administrator tools, or system binaries.
/tmp Temporary files.
/usr Subdirectories with files related to user tools and applications.

Directories, Files and InodesIntroduction to Linux
Every directory and file is listed in its parent directory.
In the case of the root directory, that parent is itself.
A directory is a file that contains a table listing the files contained within it, giving file names to the inode numbers in the list.
The information about all the files and directories is maintained in INODE TABLE
An Inode (Index Nodes) is an entry in the table containing information about a file (metadata) including file permissions, UID, GID, size, time stamp, pointers to files data blocks on the disk etc.

Users, Groups and Access Permissions
Introduction to Linux
In UNIX/LINUX, there is a concept of user and an associated group
The system determines whether or not a user or group can access a file or program based on the permissions assigned to them.
Apart from all the users, there is a special user called Super User or the root which has permission to access any file and directory

Access Permissions
Introduction to Linux
There are three permissions for any file, directory or application program.
The following lists the symbols used to denote each, along with a brief description:
r — Indicates that a given category of user can read a file.
w — Indicates that a given category of user can write to a file.
x — Indicates that a given category of user can execute the file.

Access Permissions
Introduction to Linux
Each of the three permissions are assigned to three defined categories of users.
The categories are:
owner — The owner of the file or application. group — The group that owns the file or
application. others — All users with access to the system.

Access Permissions
Introduction to Linux
One can easily view the permissions for a file by invoking a long format listing using the command ls -l.
For instance, if the user juan creates an executable file named test, the output of the command ls -l test would look like this:
-rwxrwxr-x 1 juan student 0 Sep 26 12:25 test

Access Permissions
Introduction to Linux
The permissions for this file are listed are listed at the start of the line, starting with rwx.
This first set of symbols define owner access.
The next set of rwx symbols define group access
The last set of symbols defining access permitted for all other users.
Access Permissions
Introduction to Linux
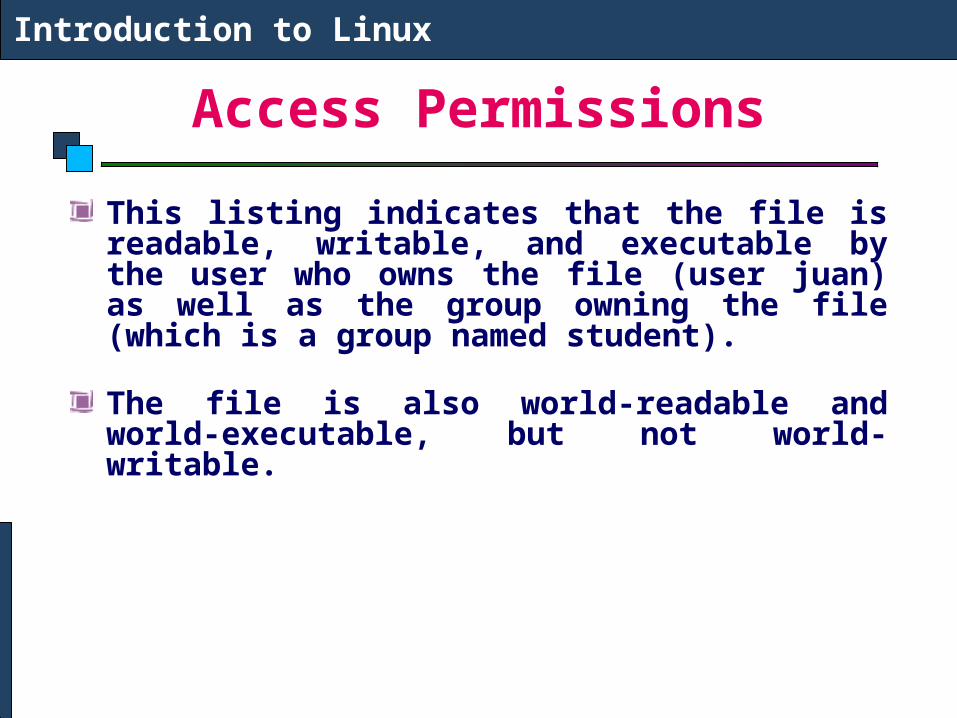
This listing indicates that the file is readable, writable, and executable by the user who owns the file (user juan) as well as the group owning the file (which is a group named student).
The file is also world-readable and world-executable, but not world-writable.

Listing the Content of a DirectoryIntroduction to Linux
ls is used to list the contents of a directory.
If the command ls is written with parameter –l then the command lists contents of the working directory with details. Example:
$ ls –l
Moving in DirectoriesIntroduction to Linux
cd try_it Changes the directory to try_it pwd Prints present working directory (e.g. /home/smith/try_it) cd .. Move to superior directory pwd : Prints /home/smith cd /home The absolute path pwd : Prints /home cd The system is returned to the user home directory pwd : Print /home/smith

Make DirectoryIntroduction to Linux
The command mkdir my_dir
makes new directory my_dir (the path is given relative) as a subdirectory of the current directory.

Remove DirectoryIntroduction to Linux
The command rmdir your_dir
removes directory your_dir if it is empty.

Copy FileIntroduction to Linux
The command cp file_1 file_2
copies file_1 to file_2. The both files must be in the same working directory. If they are in various directories, the path must be given.

Rename and/or Move the FileIntroduction to Linux
The command mv file_1 file_2
moves file_1 to file_2
The both files must be in the same working directory.
If they are in different directories, the path must be given.
The file_1 is removed from the disk.

Remove FileIntroduction to Linux
The command rm file_a
removes the file_a from the system
If you use wildcard. For example
rm h*c
you will remove all files beginning with h and ending with c which are in working directory.
If you write
rm *
you will erase all files from your working directory.

Access Permission of File/Directory
Introduction to Linux
The ownership of the file or directory can be changed using the command
chown <owner> <file/directory name>
The group of the file or directory can be changed using the command
chgrp <group> <file/directory name>
The permissions of the file can be changed using chmod command
chmod -R ### <filename or directory>
-R is optional and when used with directories will traverse all the sub-directories of the target directory changing ALL the permissions to ###.

Access Permission of File/Directory
Introduction to Linux
The #'s can be: 0 = Nothing
1 = Execute2 = Write3 = Execute & Write (2 + 1)4 = Read5 = Execute & Read (4 + 1)6 = Read & Write (4 + 2)7 = Execute & Read & Write (4 + 2 + 1)

AssignmentIntroduction to Linux
Login as guest (password is guest)
Find the present Directory
Write the root directory structure
Write a few commands available in /bin and /sbin directory
Find the guest directory
Write the permissions of guest directory
Create a new Directory test in guest directory
Copy the file /etc/resolv.conf in test directory
Rename the test directory to testing
Delete the testing directory
Change the permissions of guest directory to 700
Change the permissions of /tmp directory to 700
Recommended