Install JetPhoto Server Pro
with MAMP on Mac OS X
This is a quick start guide to install JetPhoto Server Pro on a Mac OS X step-by-step.
Prepared by Robin Zhang April 18, 2010
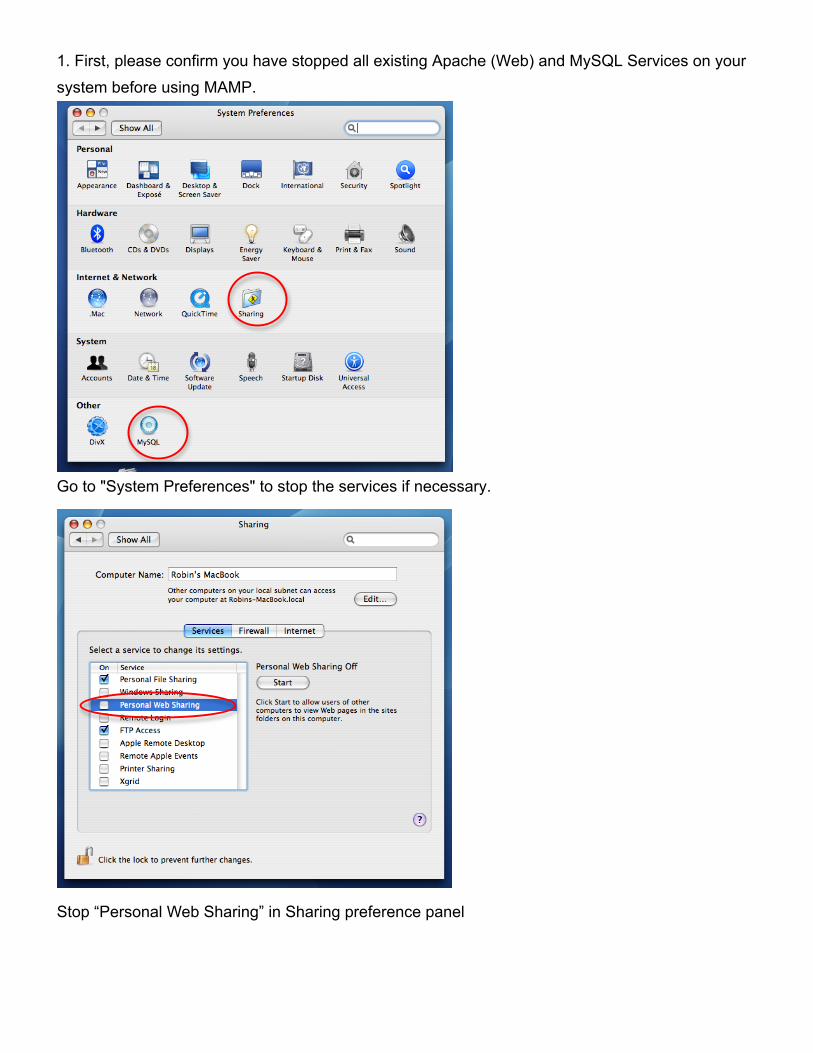
1. First, please confirm you have stopped all existing Apache (Web) and MySQL Services on your system before using MAMP.
Go to "System Preferences" to stop the services if necessary.
Stop “Personal Web Sharing” in Sharing preference panel
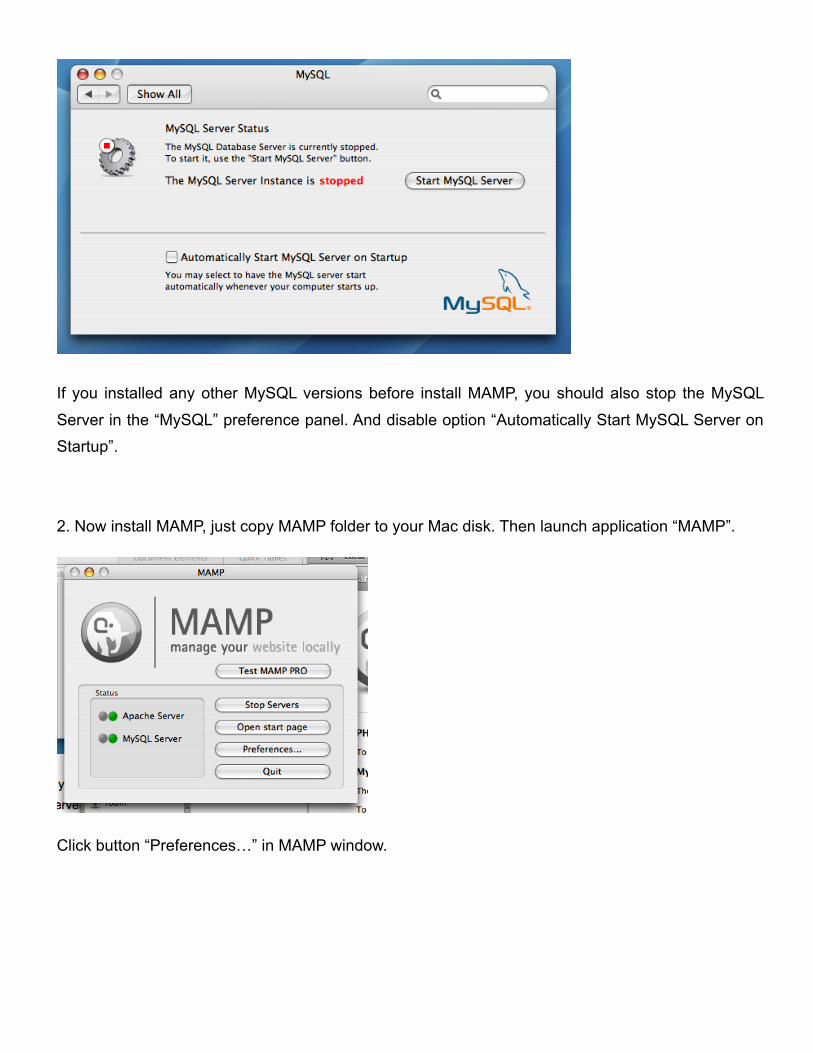
If you installed any other MySQL versions before install MAMP, you should also stop the MySQL
Server in the “MySQL” preference panel. And disable option “Automatically Start MySQL Server on Startup”.
2. Now install MAMP, just copy MAMP folder to your Mac disk. Then launch application “MAMP”.
Click button “Preferences…” in MAMP window.
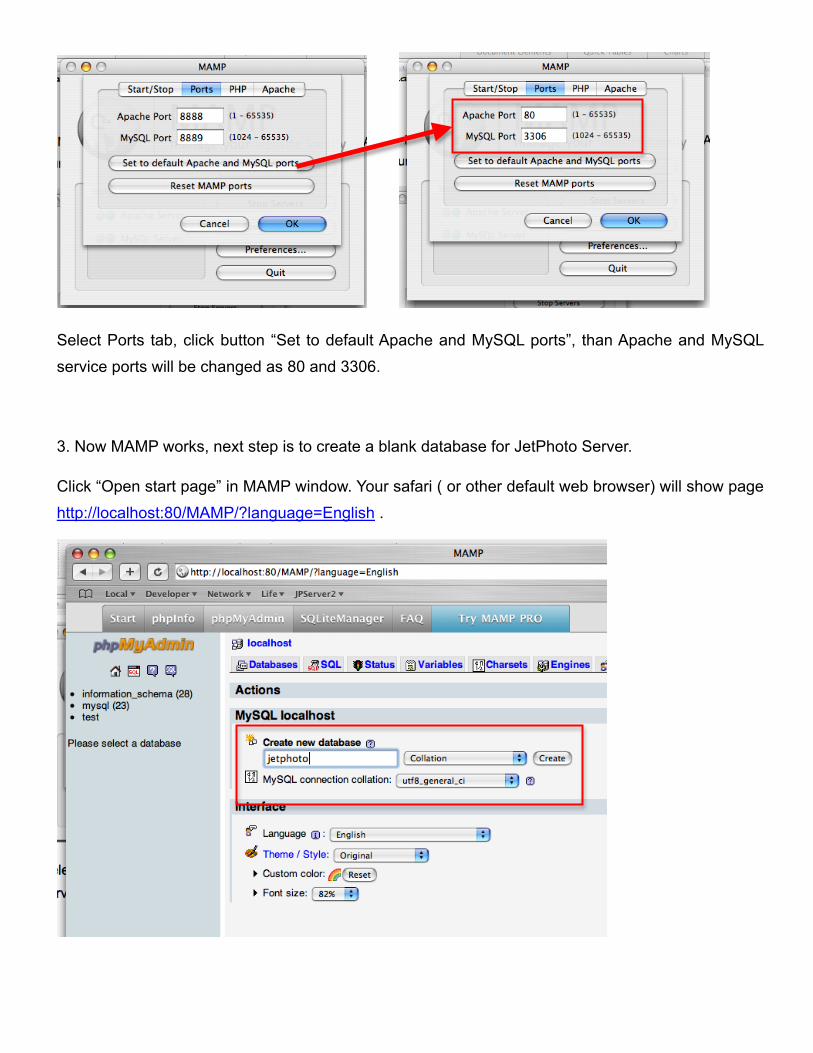
Select Ports tab, click button “Set to default Apache and MySQL ports”, than Apache and MySQL service ports will be changed as 80 and 3306.
3. Now MAMP works, next step is to create a blank database for JetPhoto Server.
Click “Open start page” in MAMP window. Your safari ( or other default web browser) will show page http://localhost:80/MAMP/?language=English .
Select tab “phpMyAdmin” in the MAMP start page.
Type a new database name “jetphoto” in the text field, and click button “Create”.
Once MAMP is installed, the MAMP has created a database user named “root” in your MySQL, and its password is also “root”. Please notice this “root” account is only available for the connections from localhost. In other words, the “root” account is secure enough for working with our JetPhoto
Server. So, normally you needn’t create a new user account in the database for your JetPhoto Server at this moment.
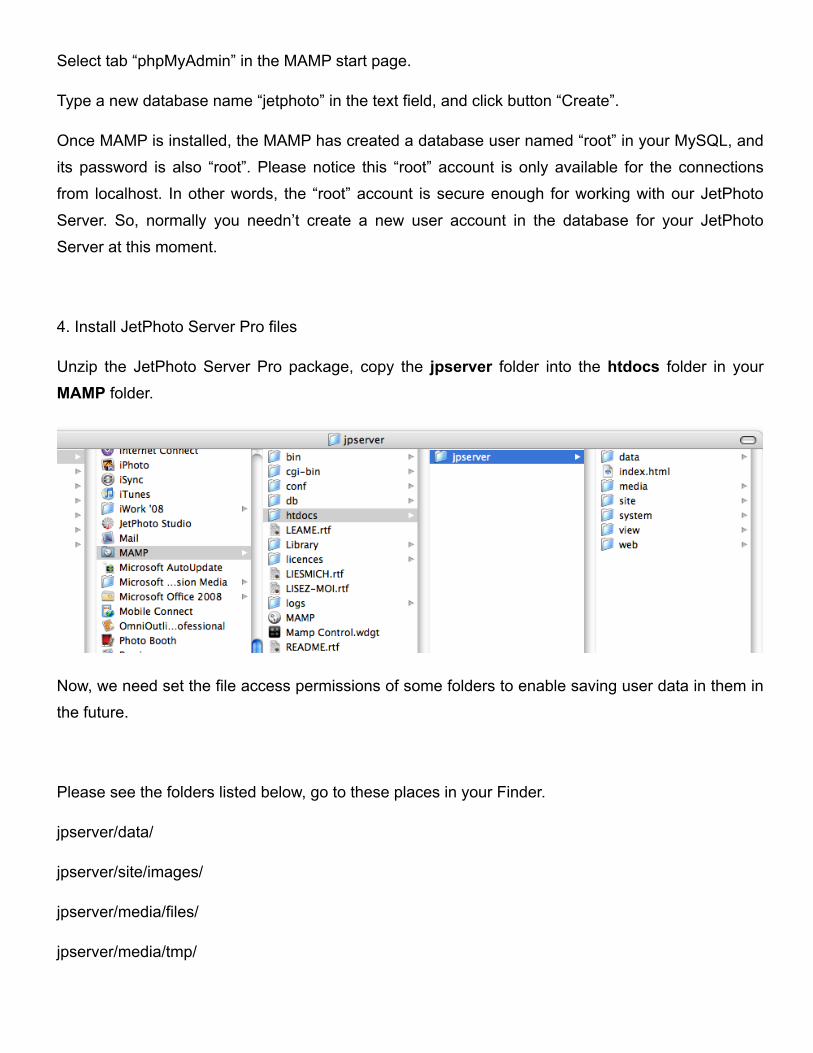
4. Install JetPhoto Server Pro files
Unzip the JetPhoto Server Pro package, copy the jpserver folder into the htdocs folder in your MAMP folder.
Now, we need set the file access permissions of some folders to enable saving user data in them in the future.
Please see the folders listed below, go to these places in your Finder.
jpserver/data/
jpserver/site/images/
jpserver/media/files/
jpserver/media/tmp/
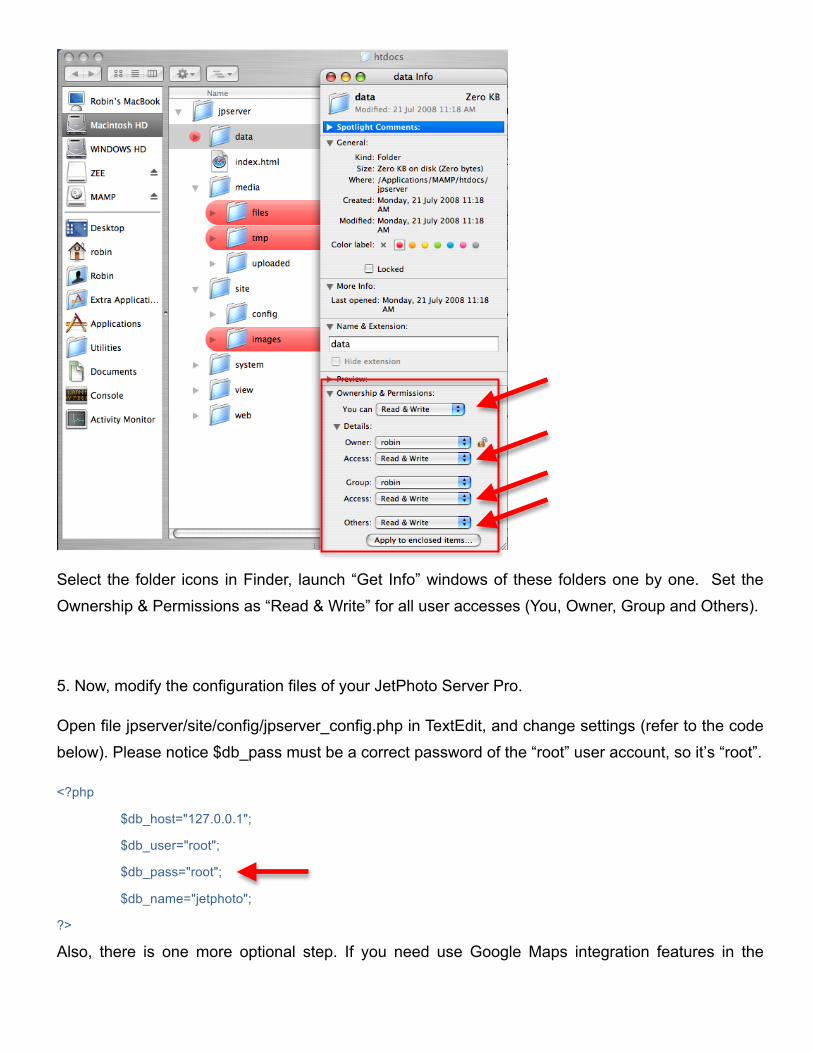
Select the folder icons in Finder, launch “Get Info” windows of these folders one by one. Set the Ownership & Permissions as “Read & Write” for all user accesses (You, Owner, Group and Others).
5. Now, modify the configuration files of your JetPhoto Server Pro.
Open file jpserver/site/config/jpserver_config.php in TextEdit, and change settings (refer to the code below). Please notice $db_pass must be a correct password of the “root” user account, so it’s “root”.
<?php
$db_host="127.0.0.1";
$db_user="root";
$db_pass="root";
$db_name="jetphoto";
?>
Also, there is one more optional step. If you need use Google Maps integration features in the
JetPhoto Server Pro, you must edit file jpserver/site/config/gmap_config.php , too. Change the GoogleMapsAPIKey setting for your JetPhoto Server pro website.
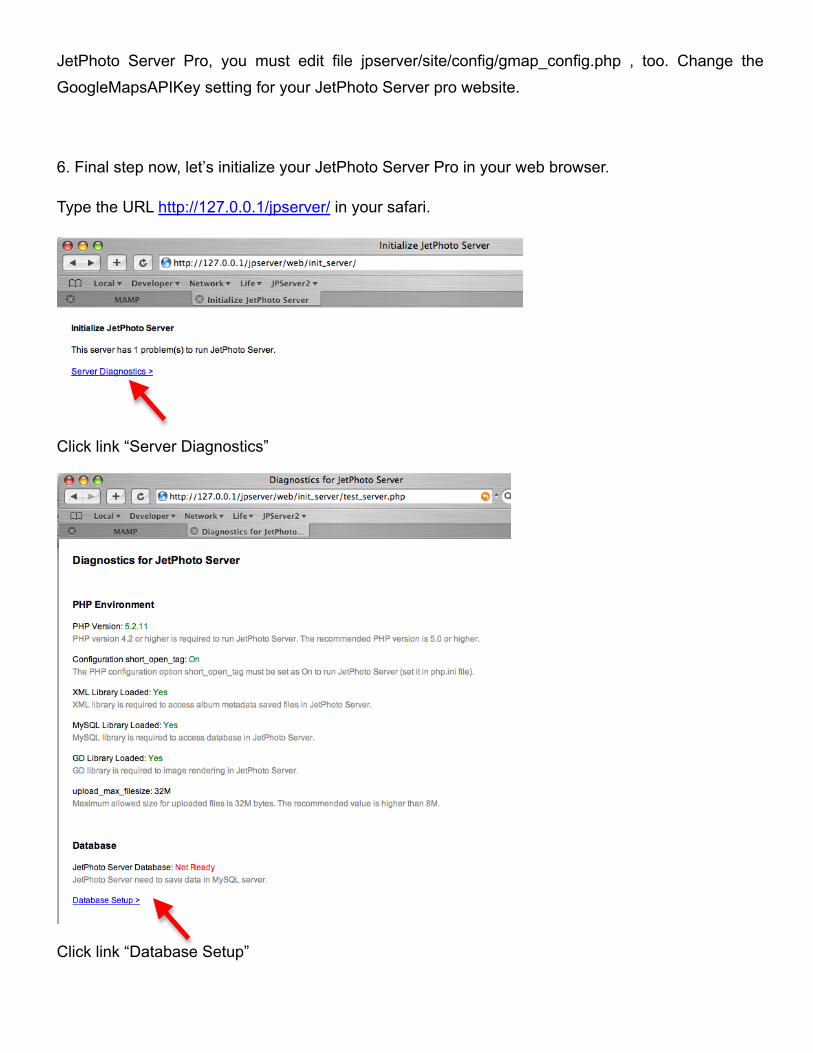
6. Final step now, let’s initialize your JetPhoto Server Pro in your web browser.
Type the URL http://127.0.0.1/jpserver/ in your safari.
Click link “Server Diagnostics”
Click link “Database Setup”
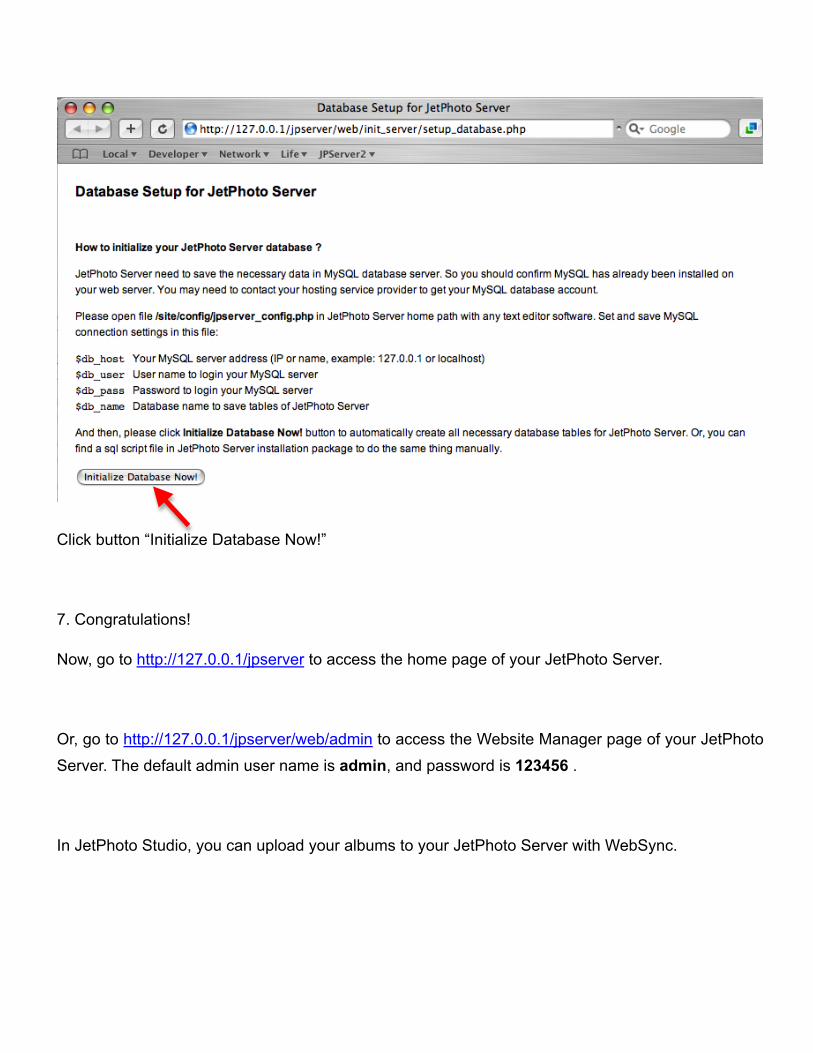
Click button “Initialize Database Now!”
7. Congratulations!
Now, go to http://127.0.0.1/jpserver to access the home page of your JetPhoto Server.
Or, go to http://127.0.0.1/jpserver/web/admin to access the Website Manager page of your JetPhoto Server. The default admin user name is admin, and password is 123456 .
In JetPhoto Studio, you can upload your albums to your JetPhoto Server with WebSync.
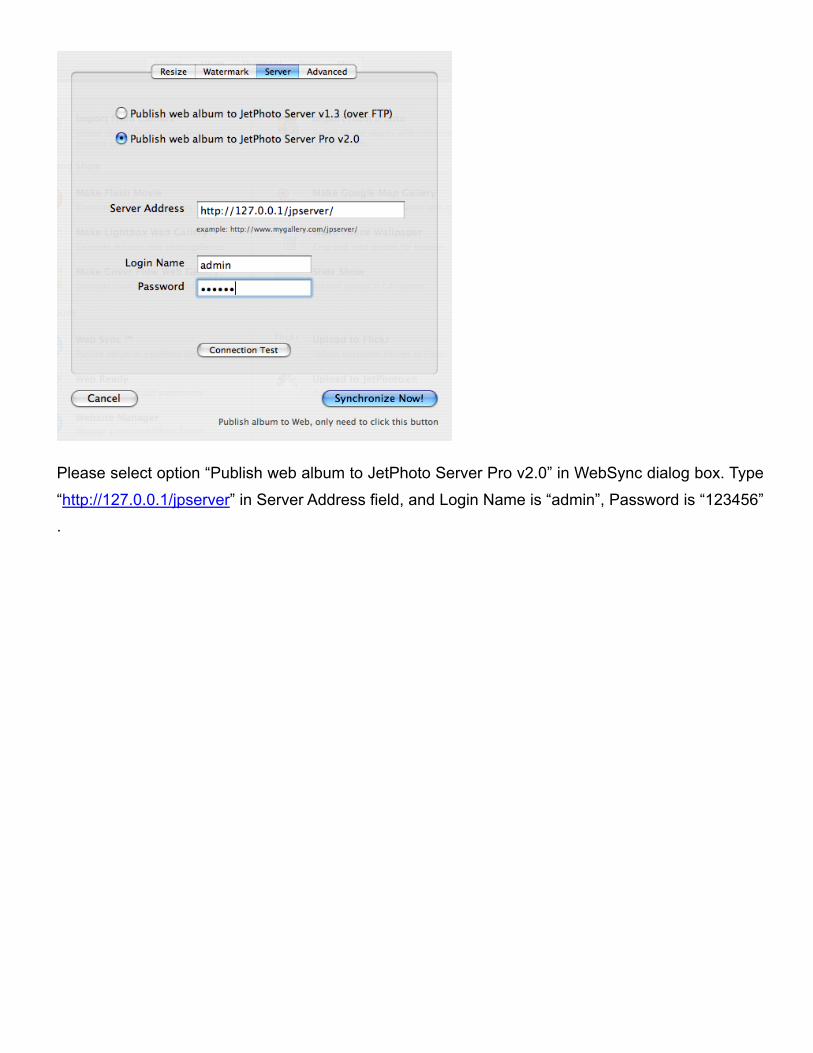
Please select option “Publish web album to JetPhoto Server Pro v2.0” in WebSync dialog box. Type
“http://127.0.0.1/jpserver” in Server Address field, and Login Name is “admin”, Password is “123456” .
Recommended