How to Meridian SDK (For Android Studio)
I recently found myself in the need to download the Meridian SDK for a demo I am working on. I am
currently taking on the feat of developing an app using the Meridian SDK in order to show to end users
at an event.
I thought I’d share the trials and tribulations I encountered when trying to demystify the README
document that, while straightforward, can be confusing for someone who has very little experience with
app development.
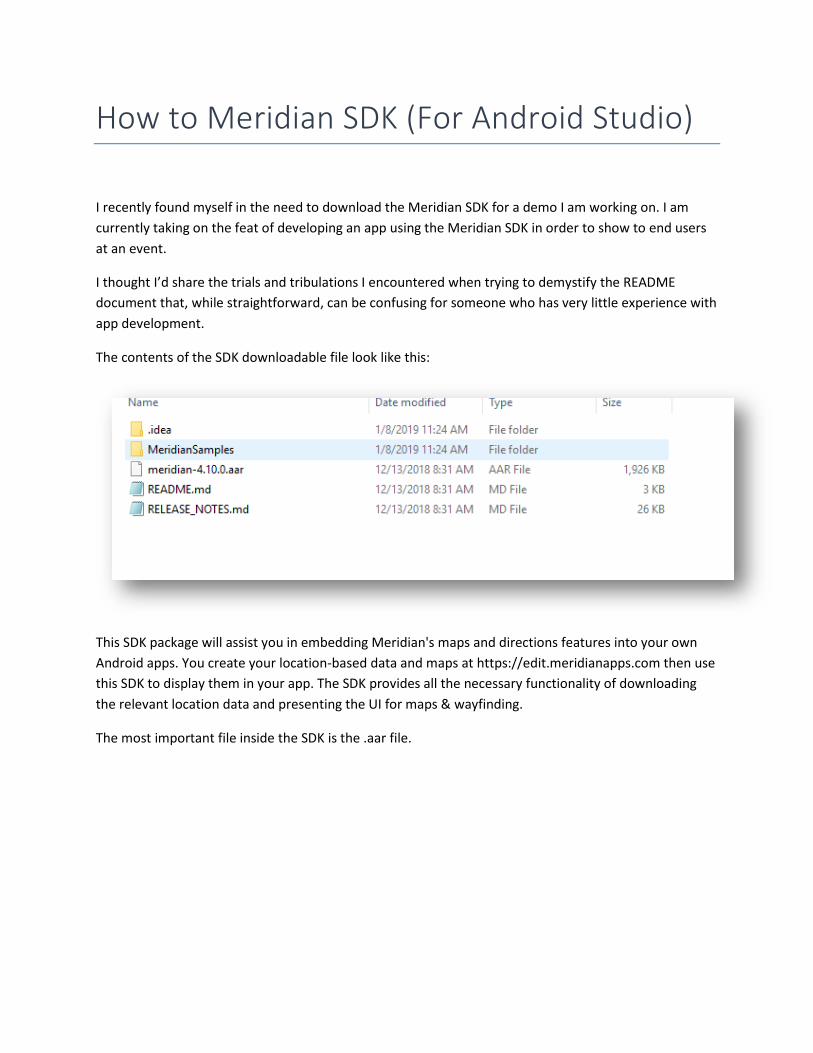
The contents of the SDK downloadable file look like this:
This SDK package will assist you in embedding Meridian's maps and directions features into your own
Android apps. You create your location-based data and maps at https://edit.meridianapps.com then use
this SDK to display them in your app. The SDK provides all the necessary functionality of downloading
the relevant location data and presenting the UI for maps & wayfinding.
The most important file inside the SDK is the .aar file.
Follow these Steps
Step 1: Extract this file onto your PC. I recommend extracting the file in the same folder where your Android projects will be stored.
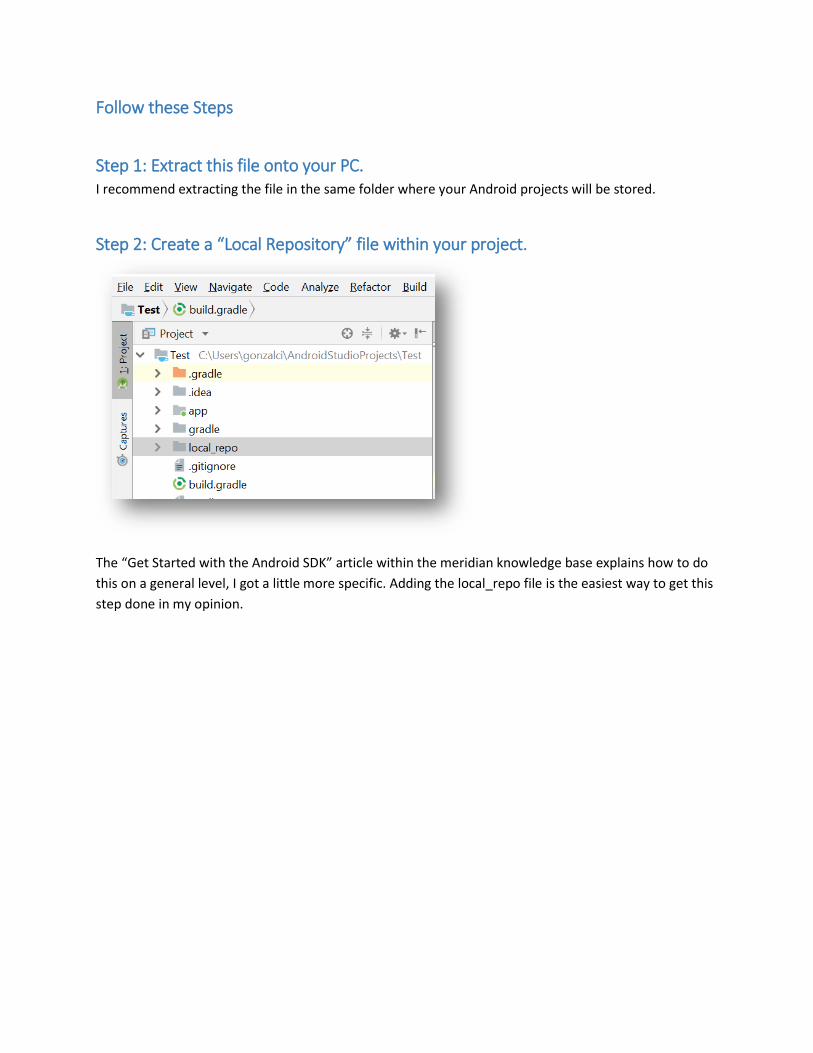
Step 2: Create a “Local Repository” file within your project.
The “Get Started with the Android SDK” article within the meridian knowledge base explains how to do
this on a general level, I got a little more specific. Adding the local_repo file is the easiest way to get this
step done in my opinion.
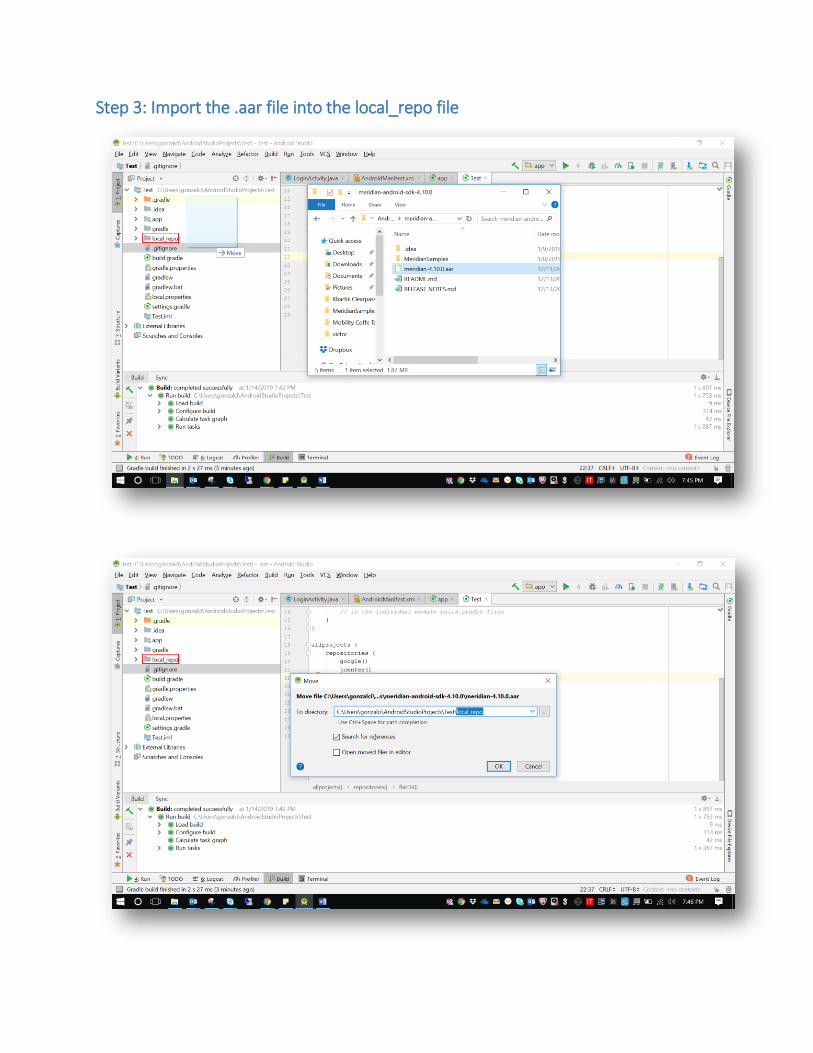
Step 3: Import the .aar file into the local_repo file
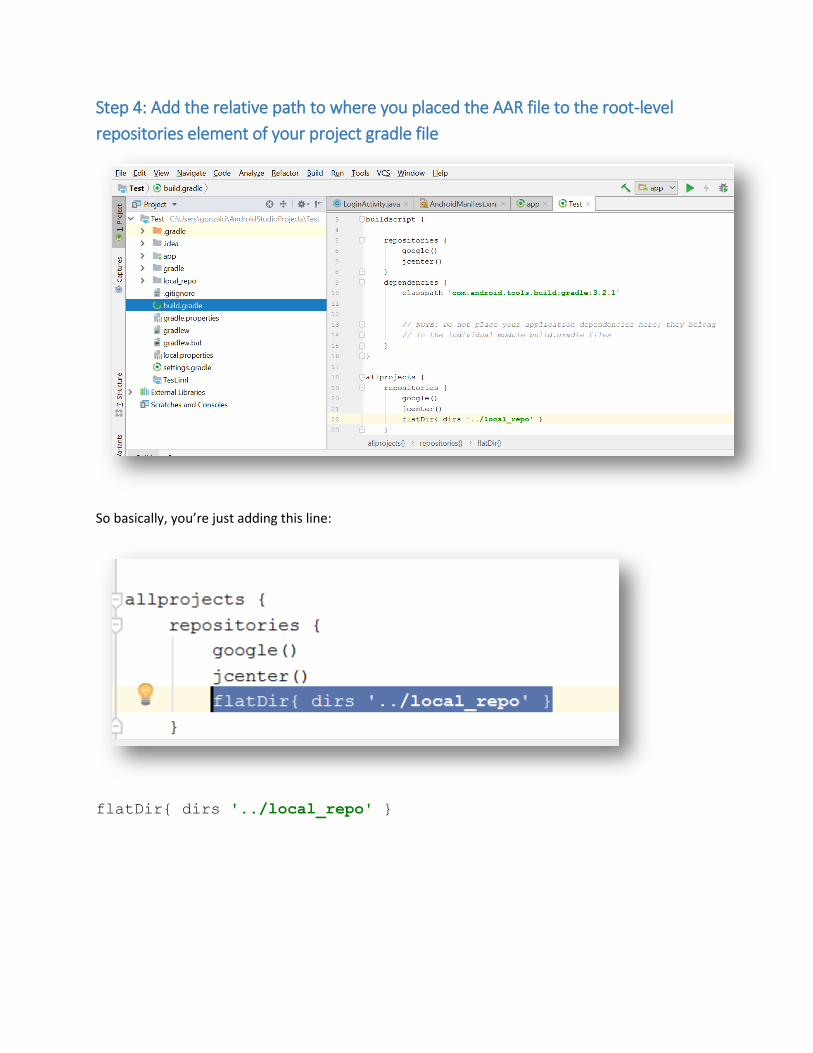
Step 4: Add the relative path to where you placed the AAR file to the root-level
repositories element of your project gradle file
So basically, you’re just adding this line:
flatDir{ dirs '../local_repo' }
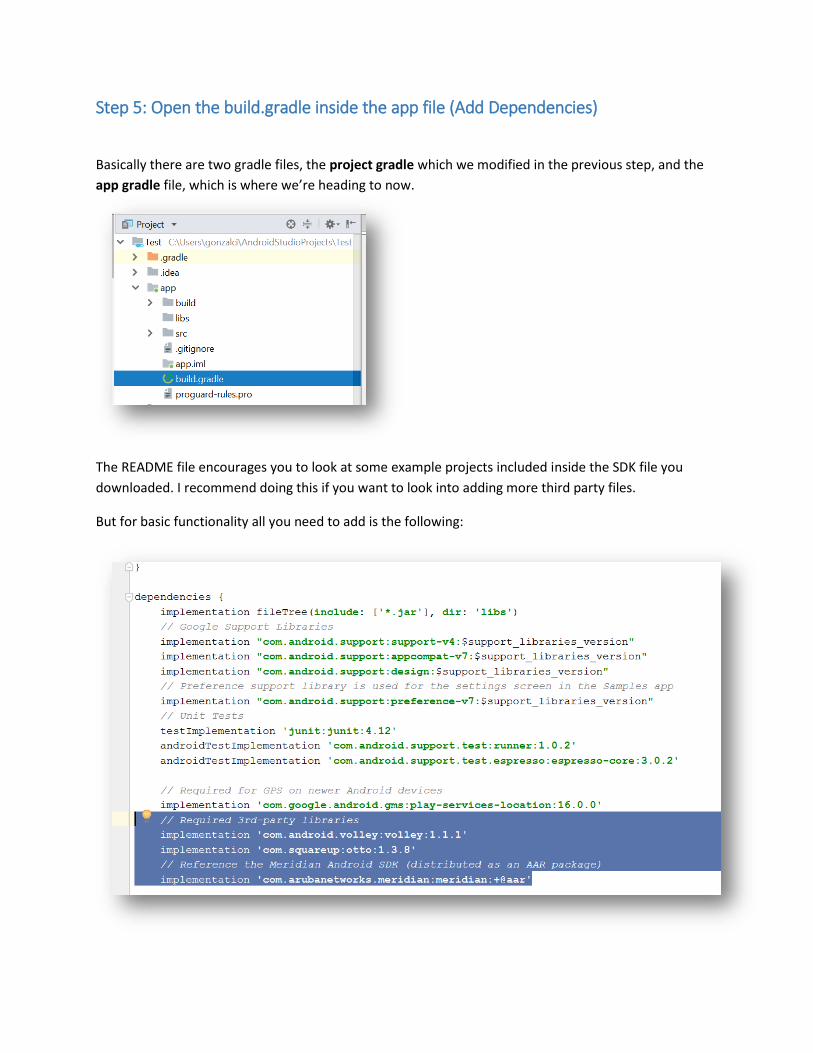
Step 5: Open the build.gradle inside the app file (Add Dependencies)
Basically there are two gradle files, the project gradle which we modified in the previous step, and the
app gradle file, which is where we’re heading to now.
The README file encourages you to look at some example projects included inside the SDK file you
downloaded. I recommend doing this if you want to look into adding more third party files.
But for basic functionality all you need to add is the following:
You can copy and paste this text into the dependencies section:
// Required 3rd-party libraries
implementation 'com.android.volley:volley:1.1.1'
implementation 'com.squareup:otto:1.3.8'
// Reference the Meridian Android SDK (distributed as an AAR
package)
implementation 'com.arubanetworks.meridian:meridian:+@aar'
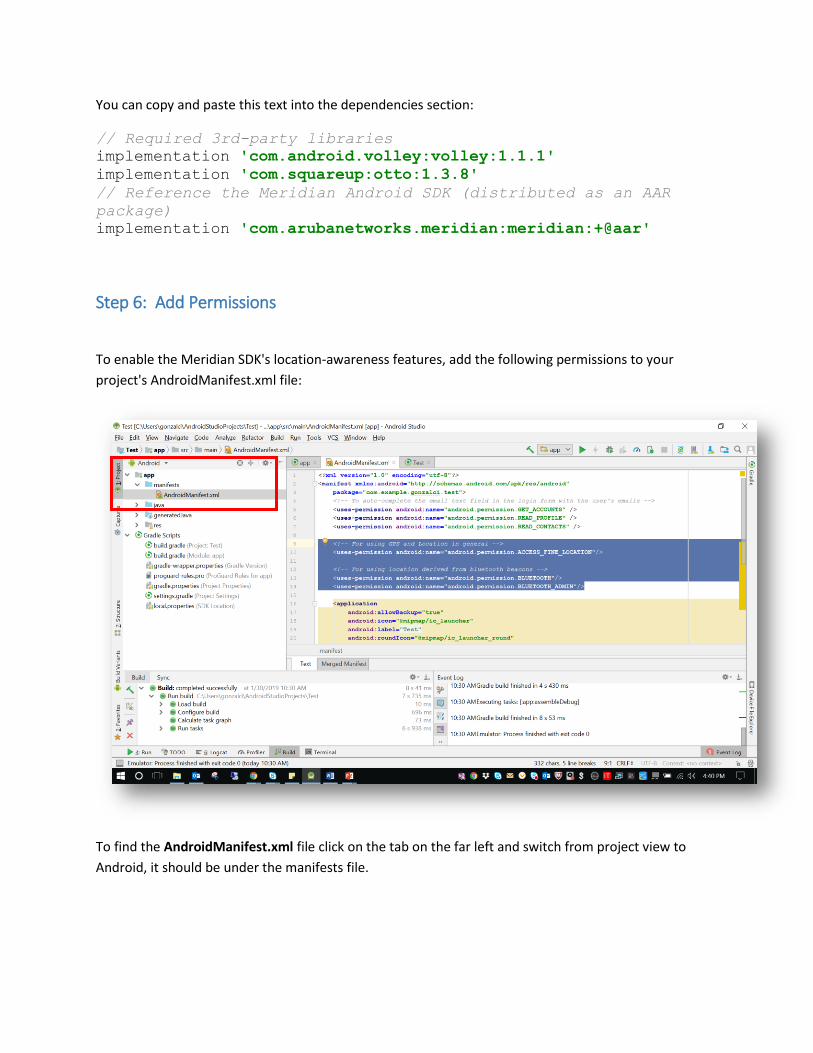
Step 6: Add Permissions
To enable the Meridian SDK's location-awareness features, add the following permissions to your
project's AndroidManifest.xml file:
To find the AndroidManifest.xml file click on the tab on the far left and switch from project view to
Android, it should be under the manifests file.
You can copy and paste the following text:
<!-- For using GPS and Location in general -->
<uses-permission
android:name="android.permission.ACCESS_FINE_LOCATION"/>
<!-- For using location derived from bluetooth beacons -->
<uses-permission android:name="android.permission.BLUETOOTH"/>
<uses-permission
android:name="android.permission.BLUETOOTH_ADMIN"/>
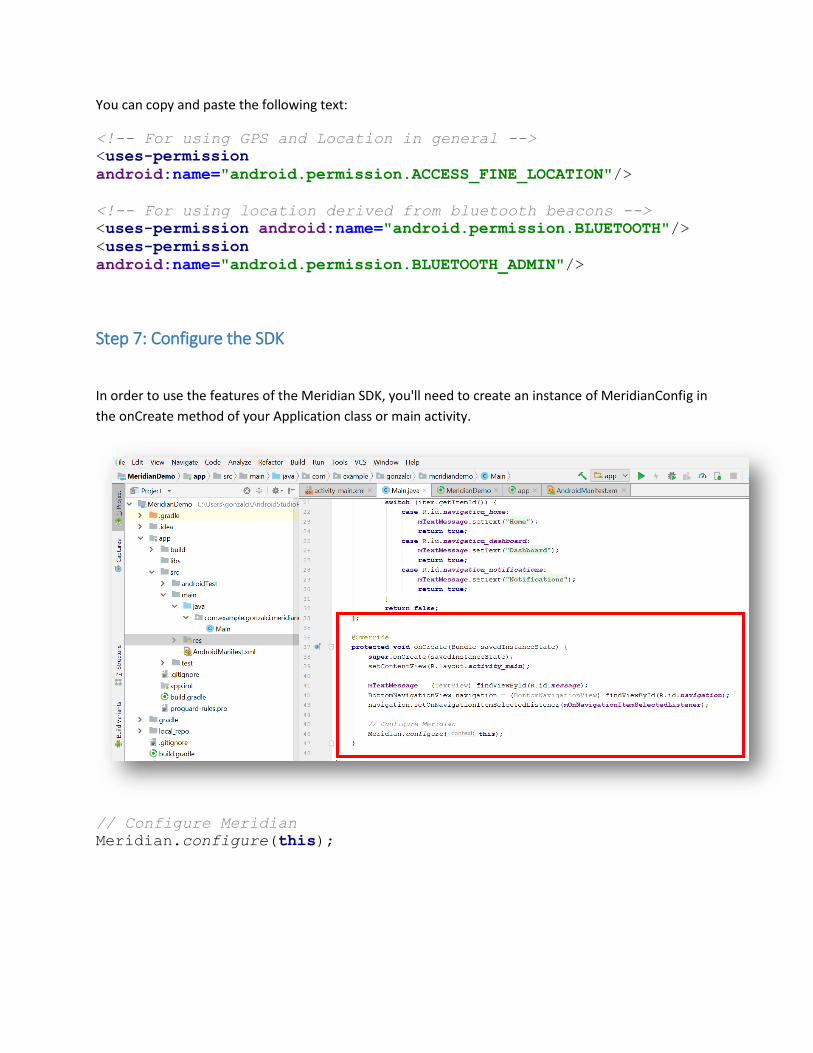
Step 7: Configure the SDK
In order to use the features of the Meridian SDK, you'll need to create an instance of MeridianConfig in
the onCreate method of your Application class or main activity.
// Configure Meridian
Meridian.configure(this);
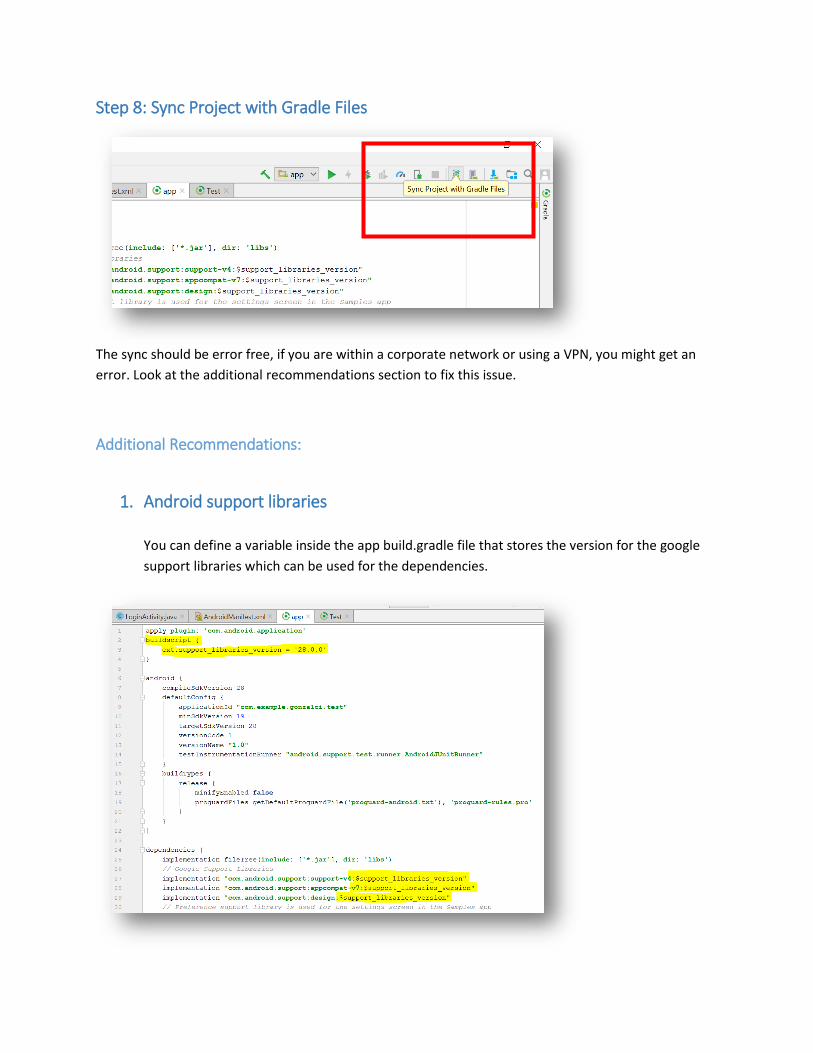
Step 8: Sync Project with Gradle Files
The sync should be error free, if you are within a corporate network or using a VPN, you might get an
error. Look at the additional recommendations section to fix this issue.
Additional Recommendations:
1. Android support libraries
You can define a variable inside the app build.gradle file that stores the version for the google
support libraries which can be used for the dependencies.
Note: You might need to exchange the simple inverted commas for double inverted commas within the
dependencies section.
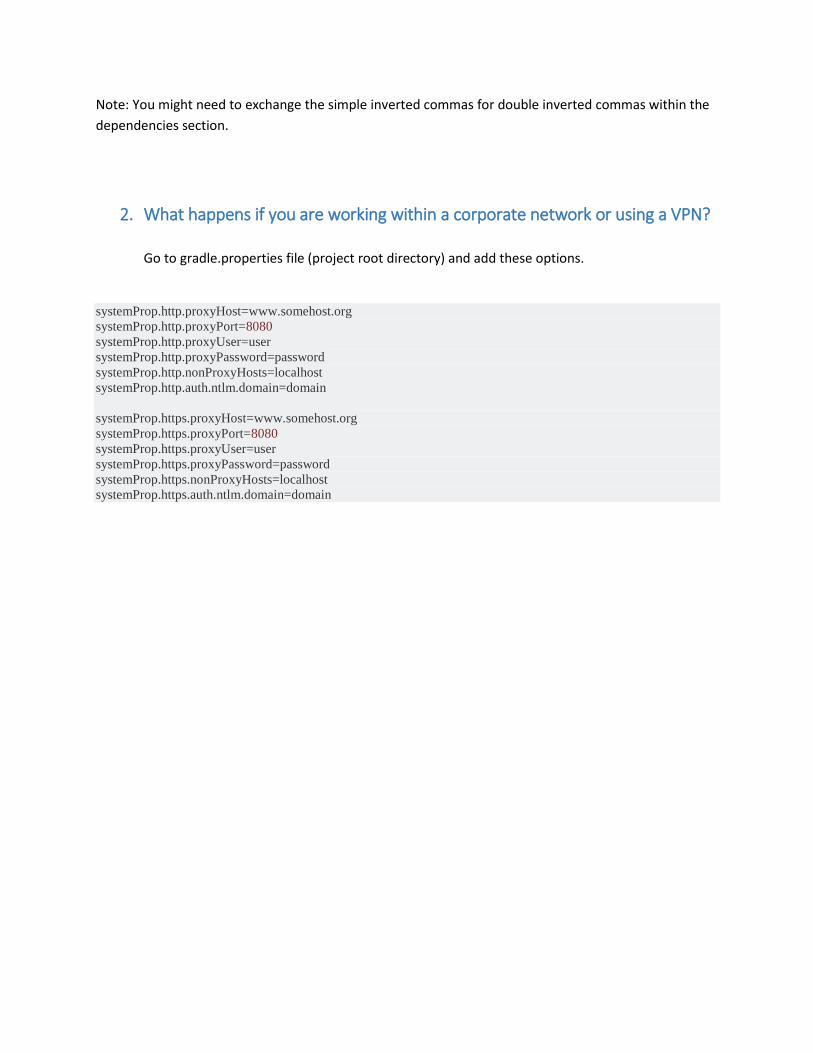
2. What happens if you are working within a corporate network or using a VPN?
Go to gradle.properties file (project root directory) and add these options.
systemProp.http.proxyHost=www.somehost.org
systemProp.http.proxyPort=8080
systemProp.http.proxyUser=user
systemProp.http.proxyPassword=password
systemProp.http.nonProxyHosts=localhost
systemProp.http.auth.ntlm.domain=domain
systemProp.https.proxyHost=www.somehost.org
systemProp.https.proxyPort=8080
systemProp.https.proxyUser=user
systemProp.https.proxyPassword=password
systemProp.https.nonProxyHosts=localhost
systemProp.https.auth.ntlm.domain=domain
Recommended